
La Specialista Pro EC9255.M - Coffee machine DELONGHI - Free user manual and instructions
Find the device manual for free La Specialista Pro EC9255.M DELONGHI in PDF.
| Product type | Espresso coffee machine with built-in grinder |
| Brand | De'Longhi |
| Model | La Specialista Pro EC9255.M |
| Dimensions (W x D x H) | 33,5 x 37,5 x 38,5 cm |
| Weight | 12 kg |
| Electrical power supply | 220-240 V ~ 50/60 Hz, 1450 W |
| Pump pressure | 15 bars |
| Water tank capacity | 1,8 L |
| Bean hopper capacity | 250 g |
| Beverage types | Espresso, Americano, Cold Brew, steam, hot water |
| Grinder | Conical burrs with 15 adjustable grind settings |
| Programming functions | Ground coffee amount, temperature, beverage volume |
| Included accessories | Portafilter, 1 and 2 cup filters, dosing funnel, tamping cup, milk jug, cleaning brush, cleaning needle, water hardness test strip, descaler, softballs (depending on model) |
| Maintenance | Automatic descaling, grinder cleaning, steam wand cleaning |
| Safety | Adjustable auto shut-off, main switch |
| Repairability | Replaceable burrs at service center, regular descaling recommended |
| Warranty | 2 years (manufacturer's standard) |
Frequently Asked Questions - La Specialista Pro EC9255.M DELONGHI
User questions about La Specialista Pro EC9255.M DELONGHI
0 question about this device. Answer the ones you know or ask your own.
Ask a new question about this device
Download the instructions for your Coffee machine in PDF format for free! Find your manual La Specialista Pro EC9255.M - DELONGHI and take your electronic device back in hand. On this page are published all the documents necessary for the use of your device. La Specialista Pro EC9255.M by DELONGHI.
USER MANUAL La Specialista Pro EC9255.M DELONGHI
natural_image
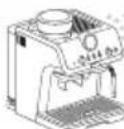
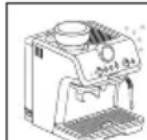
Exterior view of a Delonghi self-service coffee maker with glass and coffee cups (no visible text or symbols)DēLonghi
text_image
IT EN FR DE NL ES PT EL pag. 6 page 18 pag.29 S. 41 pag. 54 pág. 66 pág. 78 σελ 90 NO SV DA FI RU KZ HU CS sid. 102 sid. 114 sid. 126 siv. 138 ctp.150 162 -6ετ old. 176 str. 188 SK PL RO AR str. 199 str. 210 pag. 222 2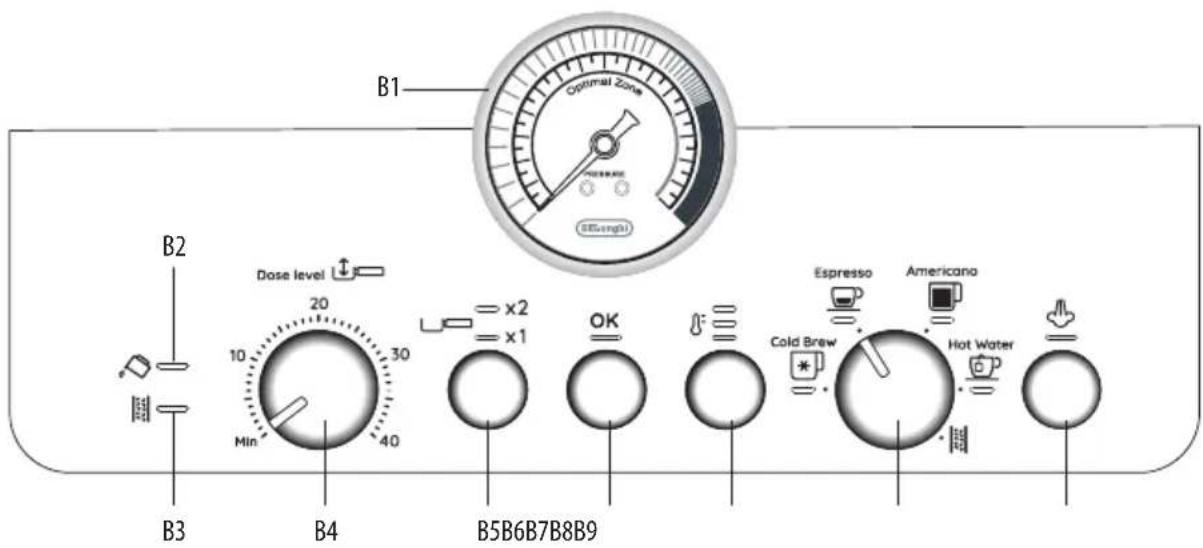
text_image
B1 Optimal Zone (0.5mm) B2 Dose level 20 10 30 Min 40 x2 x1 OK Espresso Americano Cold Brew Hot Water B3 B4 B5B6B7B8B9
text_image
C2 C1 C3 ×1 ×2 C4 C5 C6 C7* SoftBalls C8 C9 C10 C11 C12*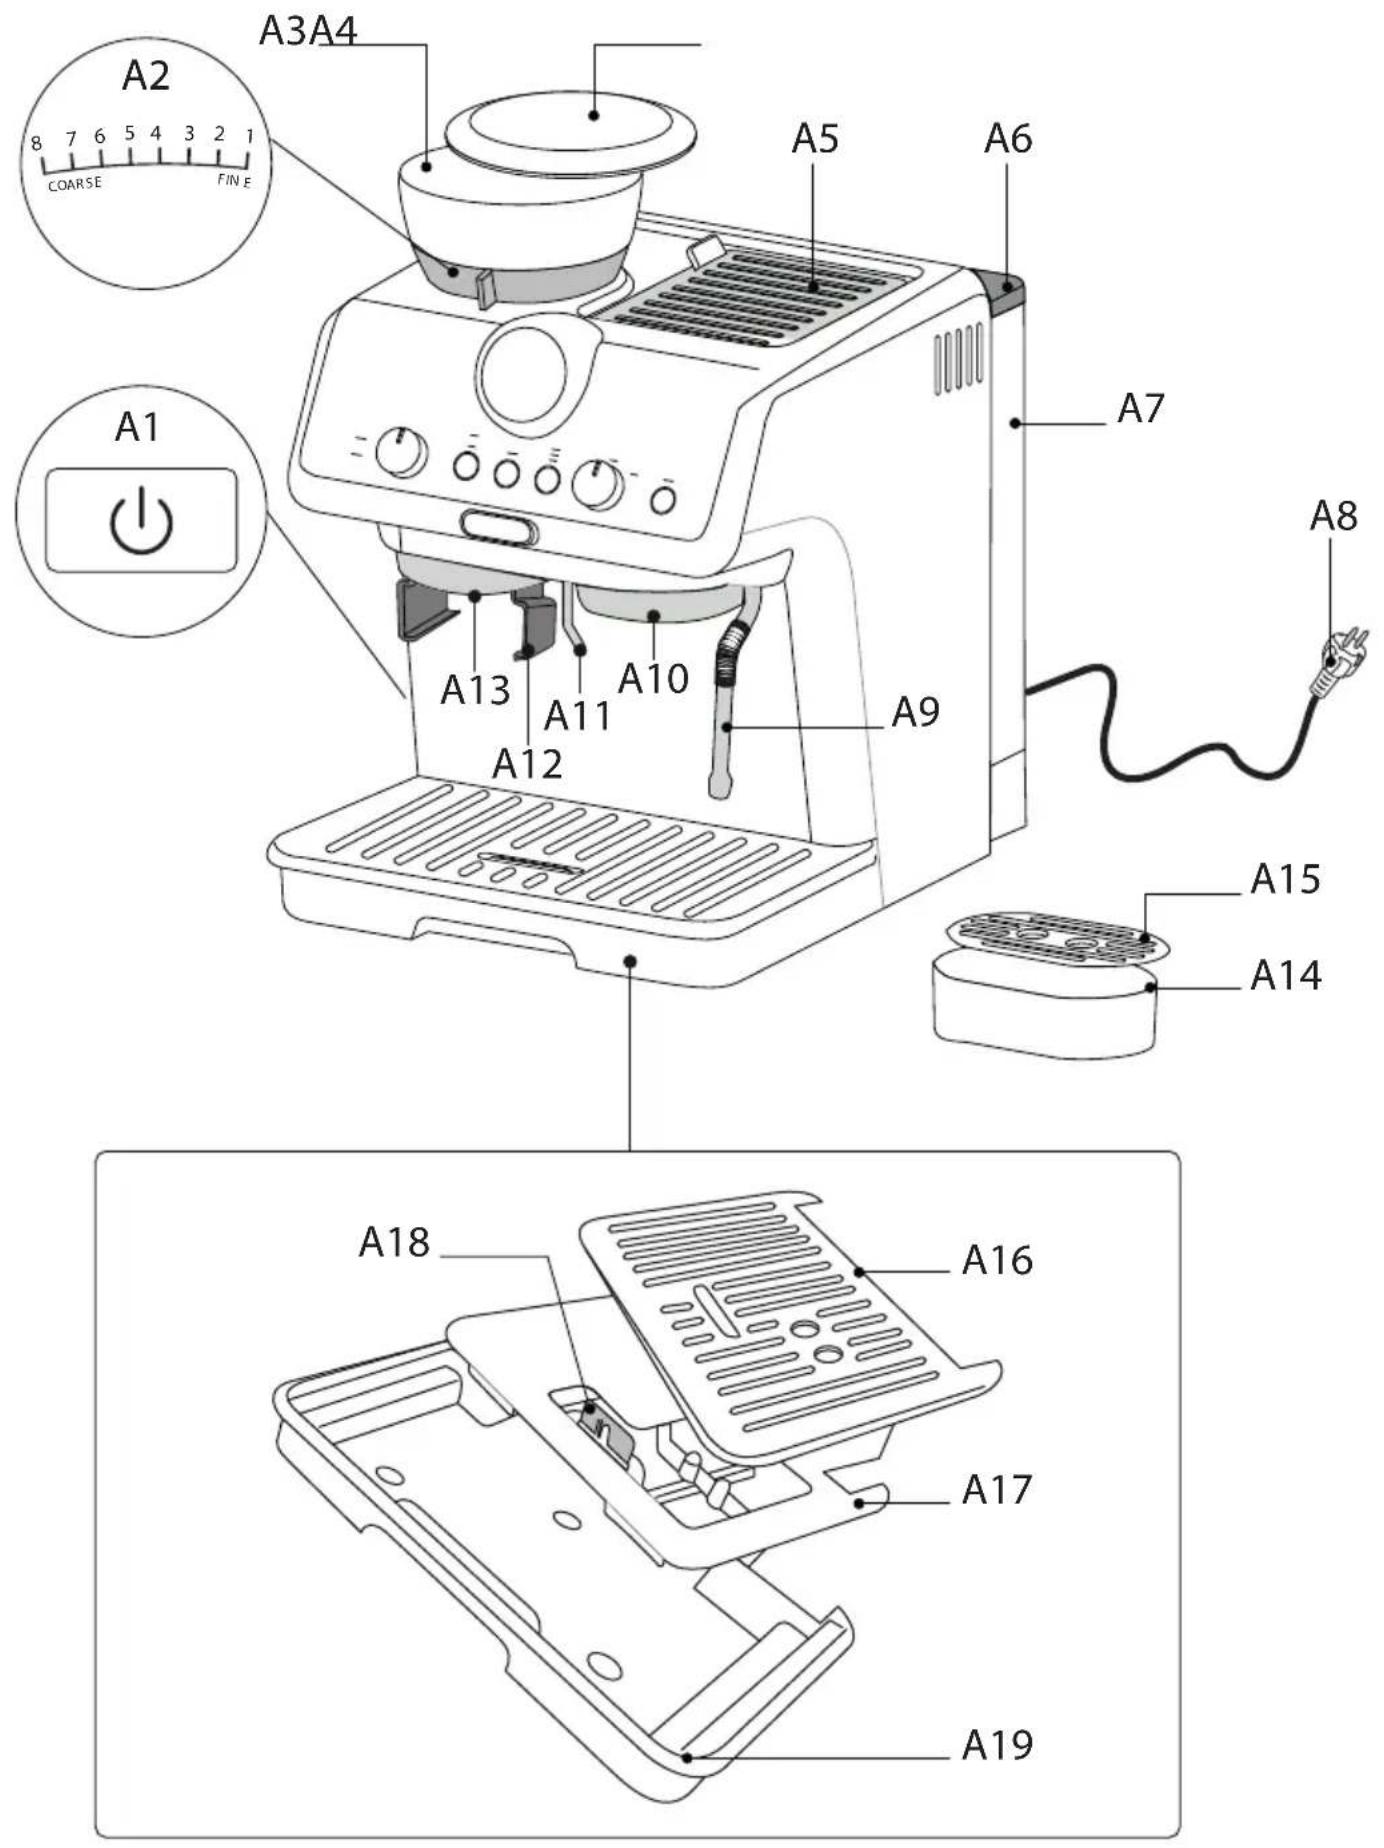
text_image
A2 8 7 6 5 4 3 2 1 COARSE FIN E A3A4 A5 A6 A1 A1 A13 A11 A10 A12 A9 A7 A8 A15 A14 A18 A16 A17 A19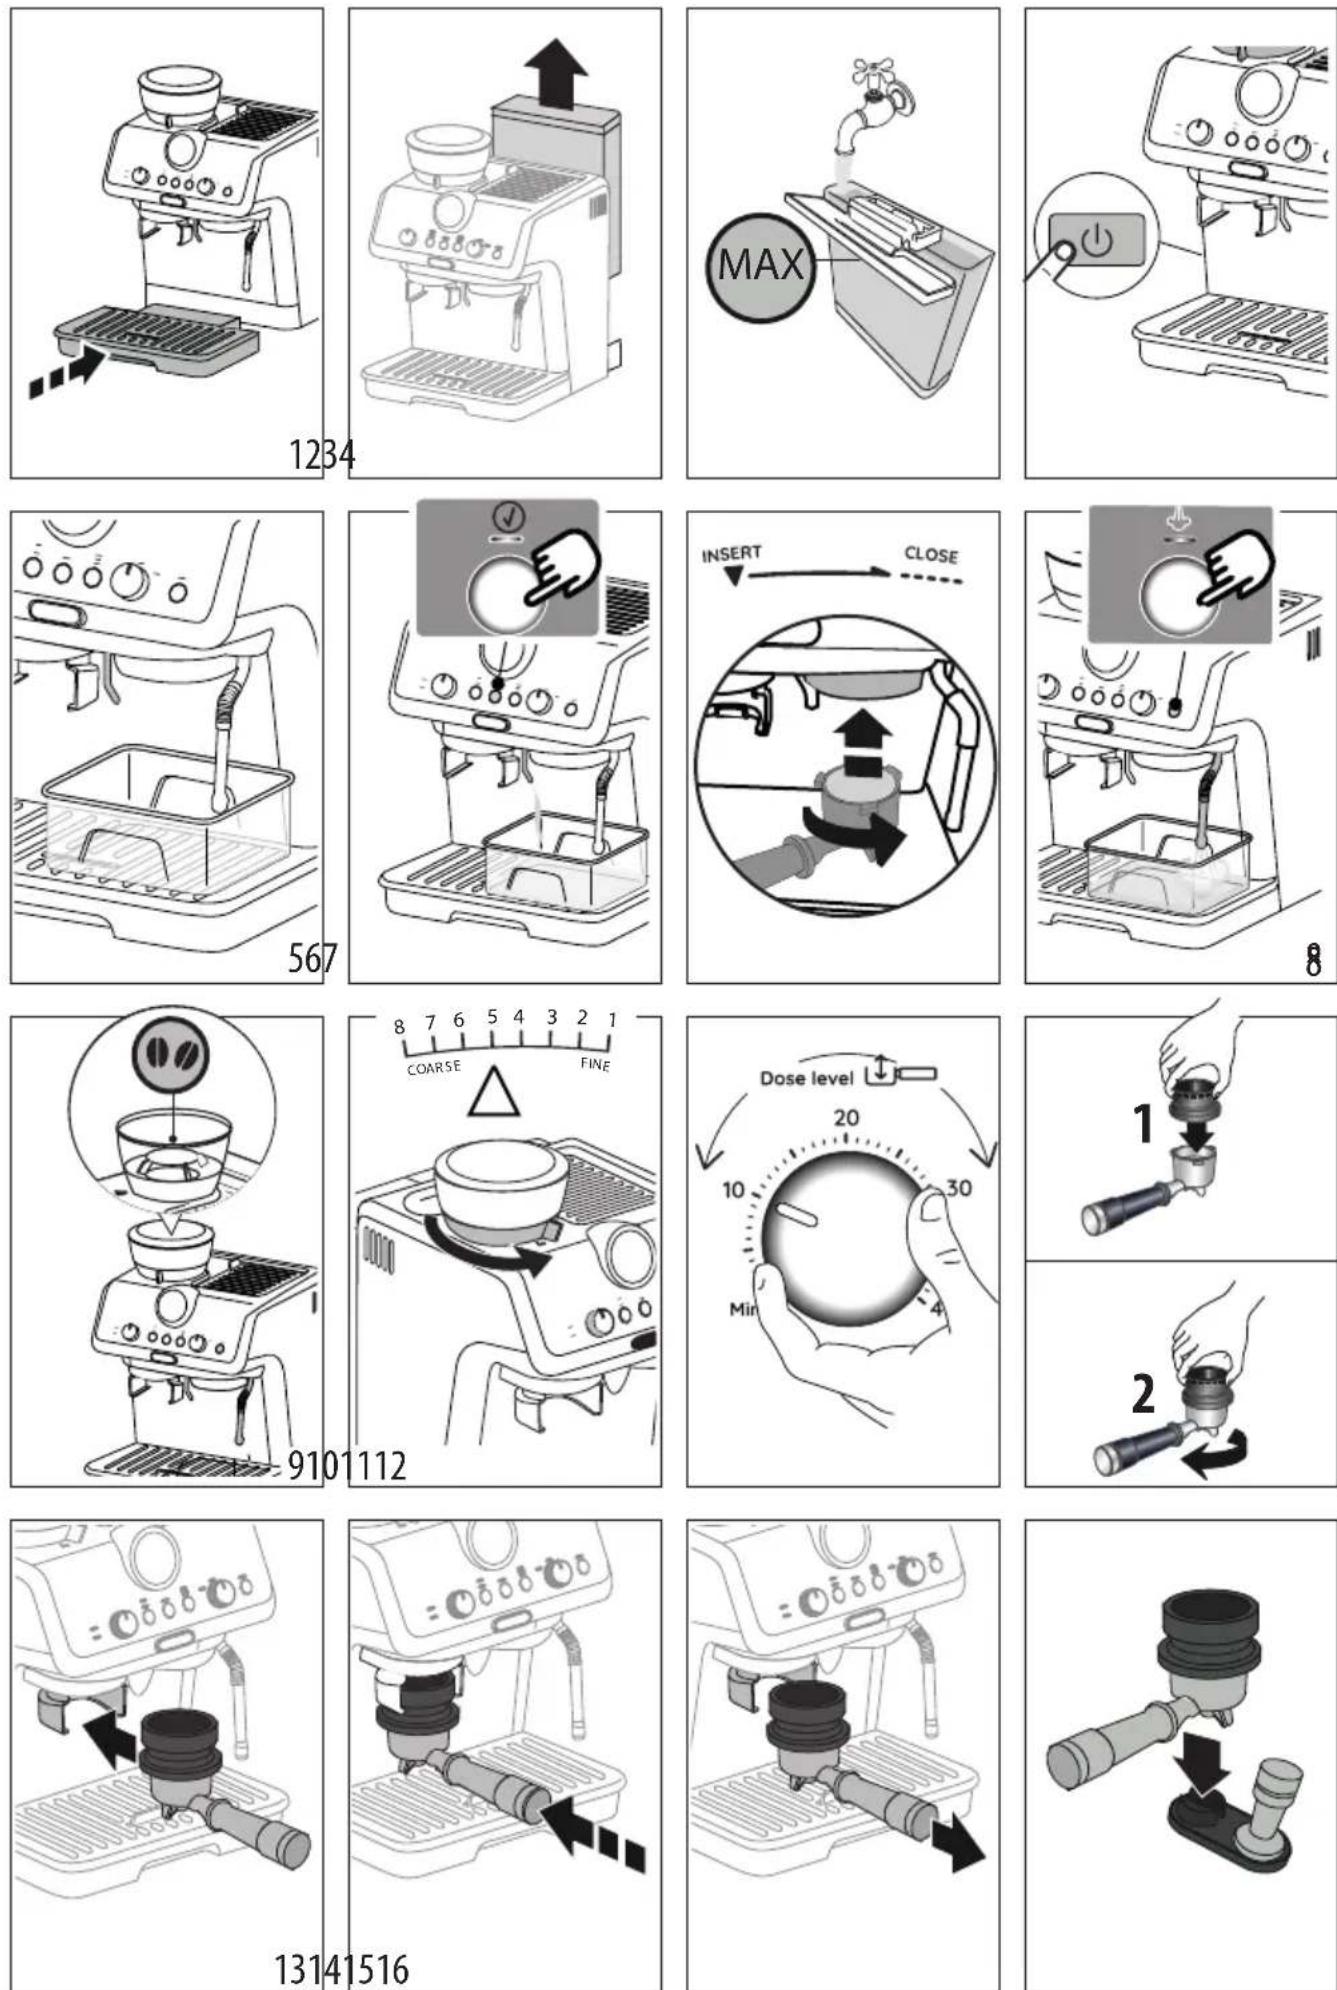
text_image
Dose perfettaflowchart
graph LR
    A["Step 1: Initial material"] --> B["Step 2: Process step"]
    B --> C["Step 3: Final product with wavy arrow"]
    C --> D["Feedback loop"]
 |  |  | [TW22] | [TXKG] | |
| × | √ | √ | × | × | |
| √ | × | × | √ | √ | |
| × | √√ | √√ | |||
| × | × | × | √ | √ | |
| × | × | √ | × | × | |
| × | × | × | √ | √ |
10. PULIZIA DEL MACINACAFFÈ
natural_image
Hand holding a textured rectangular object with an arrow pointing upward, labeled '333' at bottom (no text or symbols on the object itself)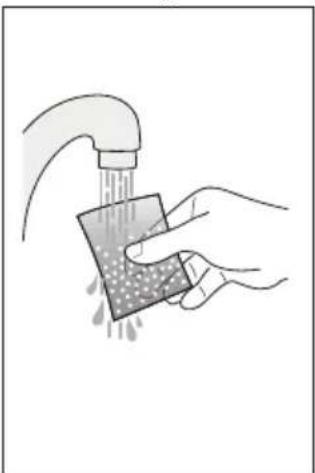
natural_image
Illustration of a hand cleaning a square surface with a faucet (no text or symbols)natural_image
Illustration of a hand inserting a card into a device (no text or symbols visible)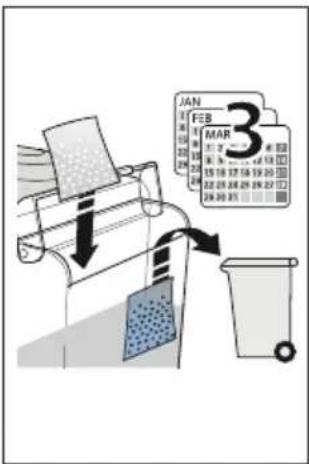
text_image
JAN FEB MAR 3text_image
Reprimal American Cathode Number 39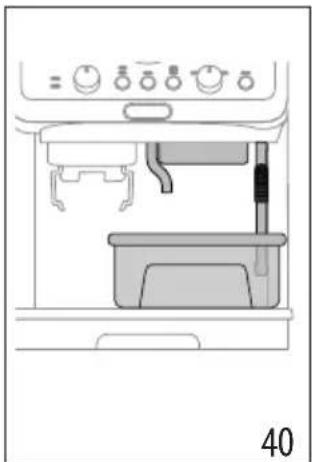
natural_image
Line drawing of an oven with control panel and sink (no text or symbols)Before using the appliance, always read the safety warnings.
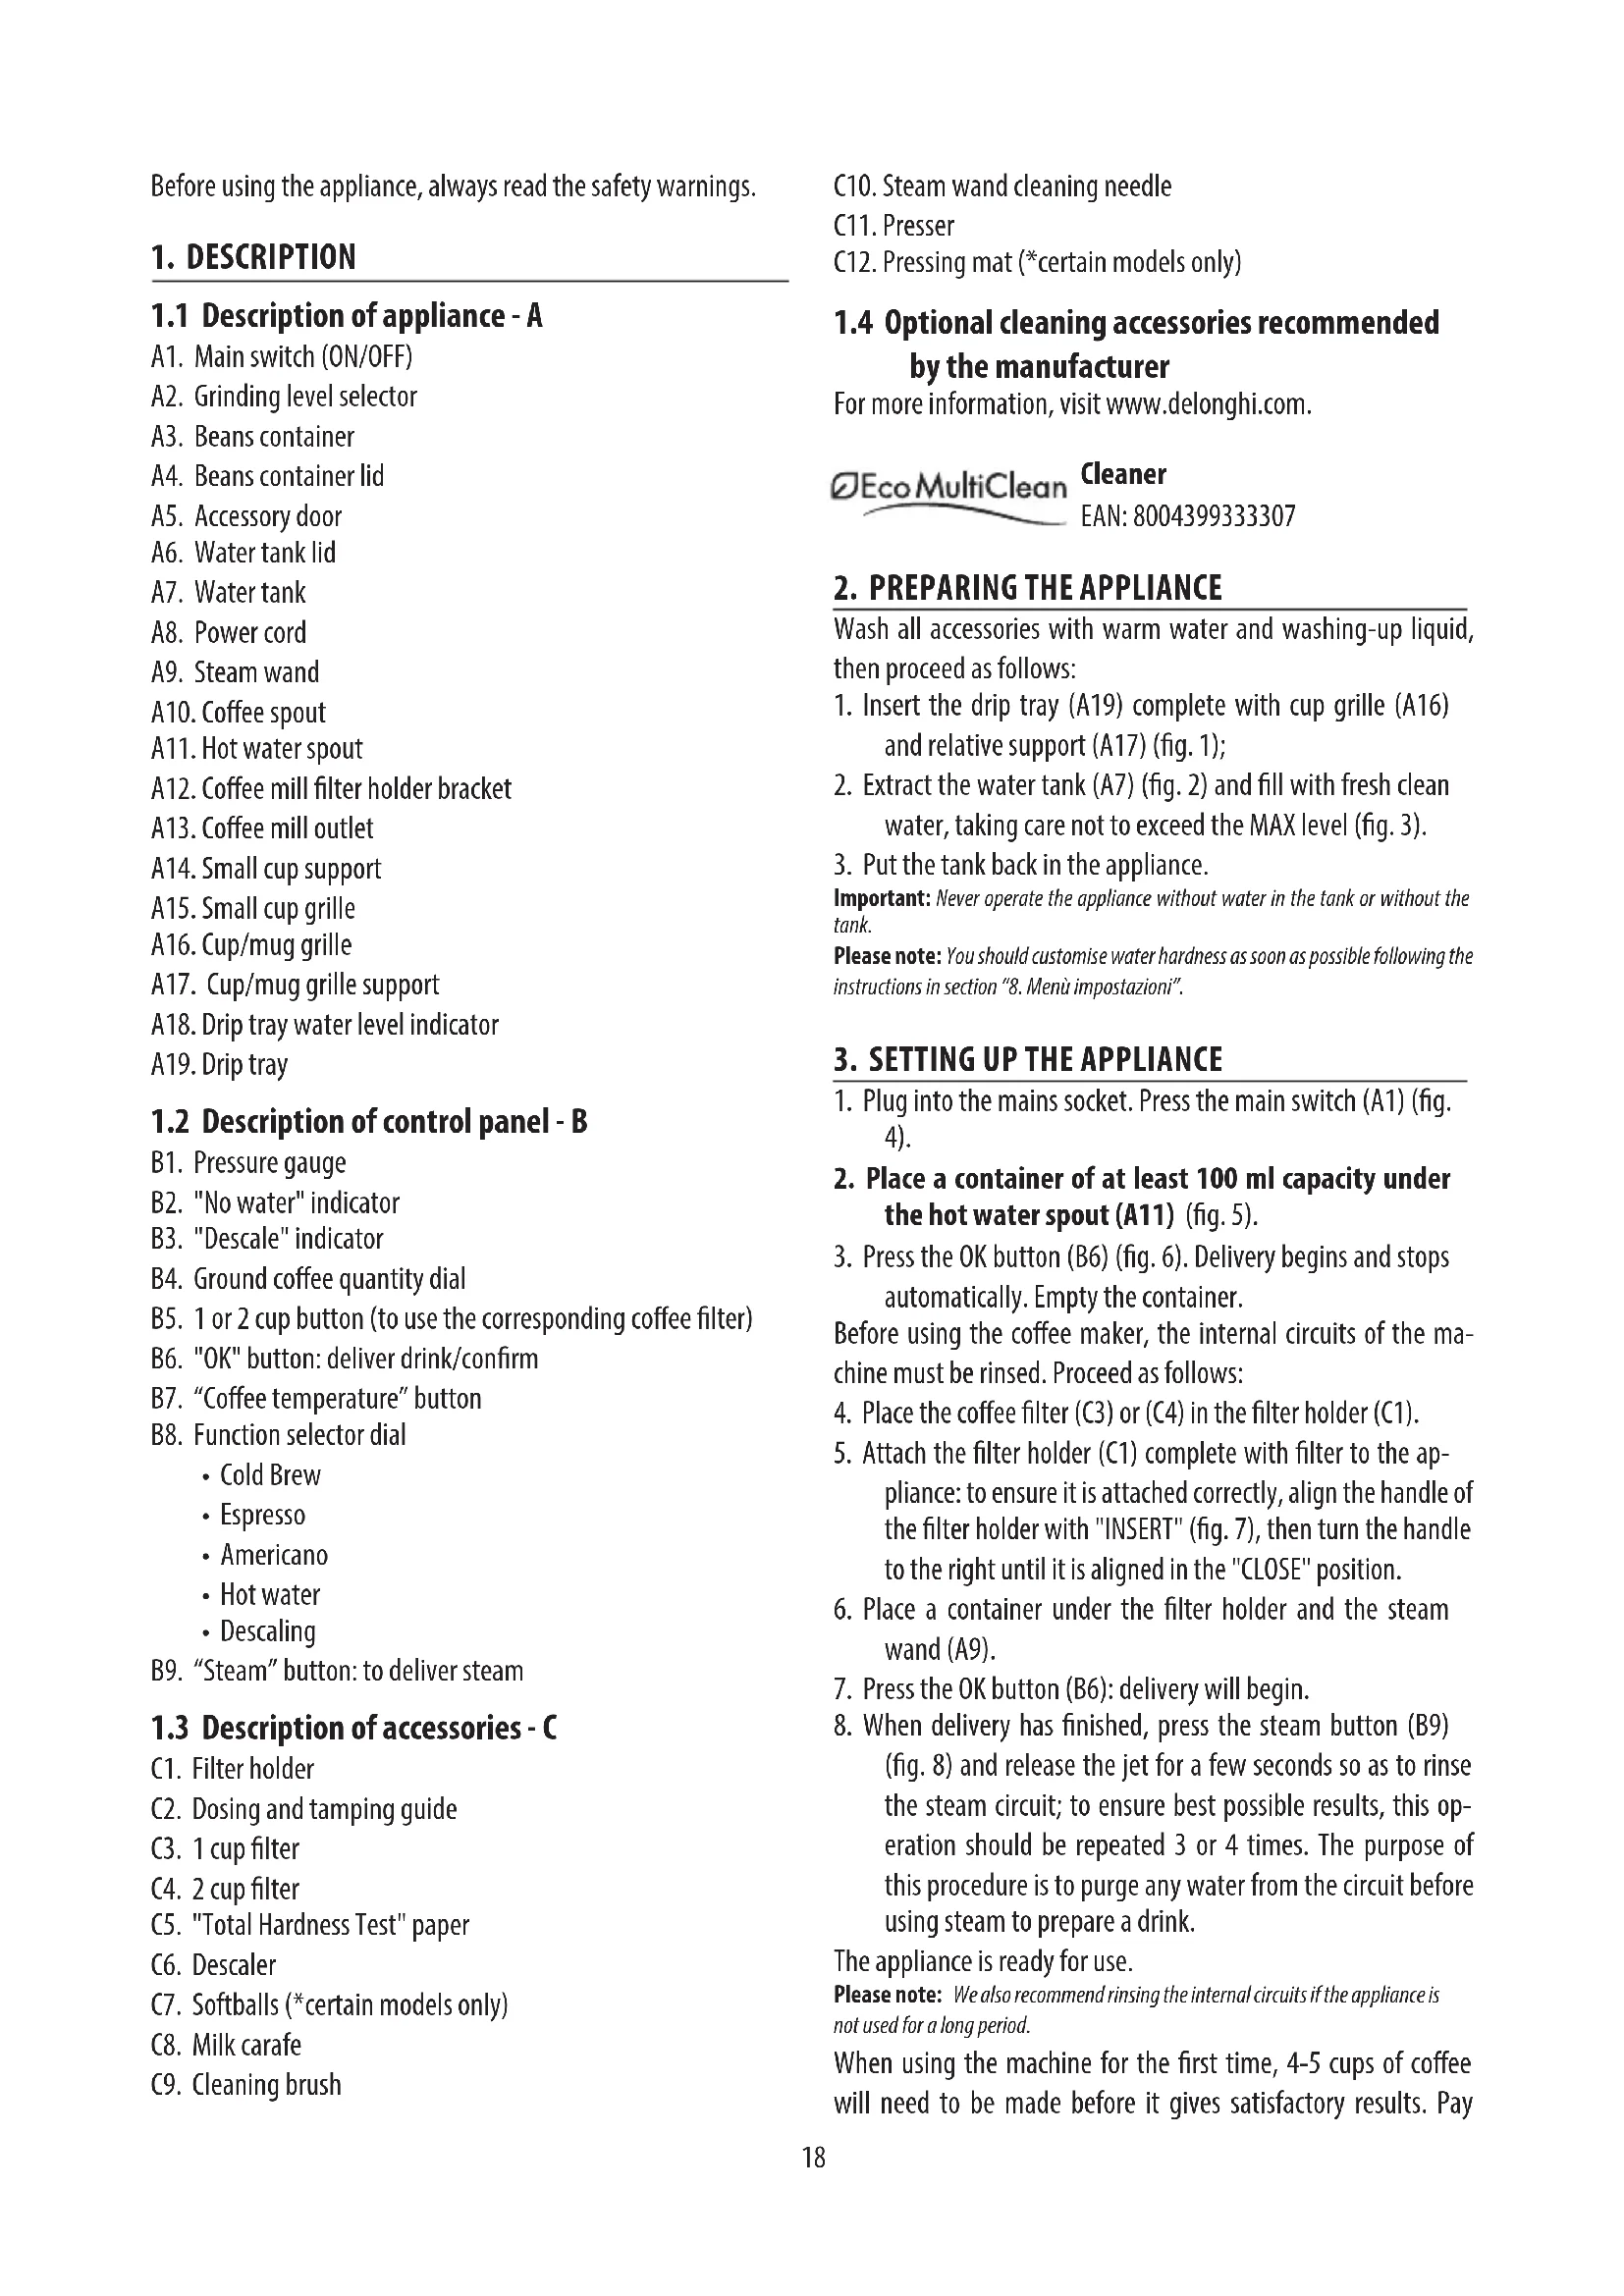
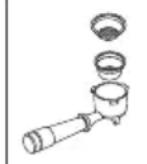
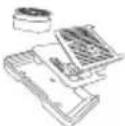
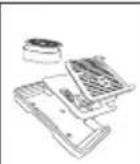
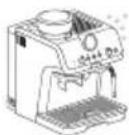
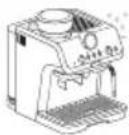
1. DESCRIPTION
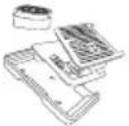
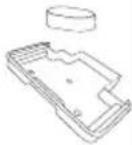
1.1 Description of appliance - A
A1. Main switch (ON/OFF)
A2. Grinding level selector
A3. Beans container
A4. Beans container lid
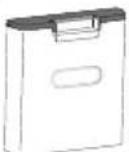
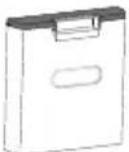
A5. Accessory door
A6. Water tank lid
A7. Water tank
A8. Power cord
A9. Steam wand
A10. Coffee spout
A11. Hot water spout
A12. Coffee mill filter holder bracket
A13. Coffee mill outlet
A14. Small cup support
A15. Small cup grille
A16. Cup/mug grille
A17. Cup/mug grille support
A18. Drip tray water level indicator
A19. Drip tray
1.2 Description of control panel - B
B1. Pressure gauge
B2. "No water" indicator
B3. "Descale" indicator
B4. Ground coffee quantity dial
B5. 1 or 2 cup button (to use the corresponding coffee filter)
B6. "OK" button: deliver drink/confirm
B7. "Coffee temperature" button
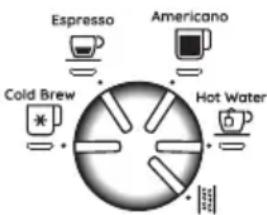
B8. Function selector dial
- Cold Brew
- Espresso
- Americano
- Hot water
- Descaling
B9. "Steam" button: to deliver steam
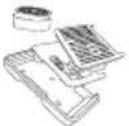
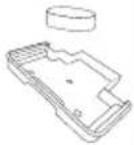
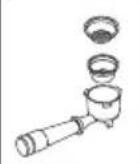
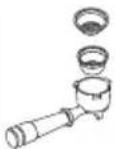
1.3 Description of accessories - C
C1. Filter holder
C2. Dosing and tamping guide
C3. 1 cup filter
C4. 2 cup filter
C5. "Total Hardness Test" paper
C6. Descaler
C7. Softballs (*certain models only)
C8. Milk carafe
C9. Cleaning brush
C10. Steam wand cleaning needle
C11. Presser
C12. Pressing mat (*certain models only)
1.4 Optional cleaning accessories recommended by the manufacturer
For more information, visit www.delonghi.com.

Cleaner
EAN: 8004399333307
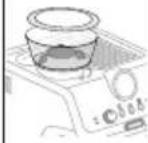
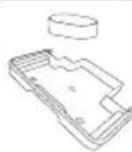
2. PREPARING THE APPLIANCE
Wash all accessories with warm water and washing-up liquid, then proceed as follows:
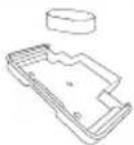
- Insert the drip tray (A19) complete with cup grille (A16) and relative support (A17) (fig. 1);
-
Extract the water tank (A7) (fig. 2) and fill with fresh clean water, taking care not to exceed the MAX level (fig. 3).
-
Put the tank back in the appliance.
Important: Never operate the appliance without water in the tank or without the tank.
Please note: You should customise water hardness as soon as possible following the instructions in section "8. Menù impostazioni".
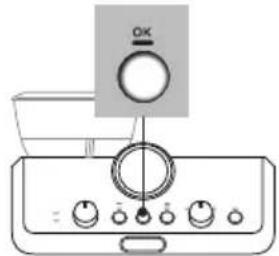
3. SETTING UP THE APPLIANCE
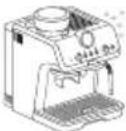
- Plug into the mains socket. Press the main switch (A1) (fig. 4).
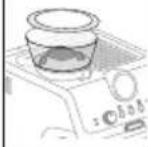
- Place a container of at least 100 ml capacity under the hot water spout (A11) (fig. 5).
- Press the OK button (B6) (fig. 6). Delivery begins and stops automatically. Empty the container.
Before using the coffee maker, the internal circuits of the machine must be rinsed. Proceed as follows: - Place the coffee filter (C3) or (C4) in the filter holder (C1).
- Attach the filter holder (C1) complete with filter to the appliance: to ensure it is attached correctly, align the handle of the filter holder with "INSERT" (fig. 7), then turn the handle to the right until it is aligned in the "CLOSE" position.
-
Place a container under the filter holder and the steam wand (A9).
-
Press the OK button (B6): delivery will begin.
-
When delivery has finished, press the steam button (B9) (fig. 8) and release the jet for a few seconds so as to rinse the steam circuit; to ensure best possible results, this operation should be repeated 3 or 4 times. The purpose of this procedure is to purge any water from the circuit before using steam to prepare a drink.
The appliance is ready for use.
Please note: We also recommend rinsing the internal circuits if the appliance is not used for a long period.
When using the machine for the first time, 4-5 cups of coffee will need to be made before it gives satisfactory results. Pay
particular attention to the quantity of ground coffee in the filter ((C3) or (C4)) (see instructions in section "4.1 Fase 1 - Macinatura (grinding)").
Proceed as described in section "La "dose perfetta"".
4. MAKING COFFEE
4.1 Step 1 - Grinding
- Put coffee beans in the container (A3) (fig. 9). It is best to grind only a quantity of beans sufficient for immediate use, so that the coffee will always be fresh.
- The default grinding setting is 5 (medium ground). If this is too fine or too coarse, adjust the level according to personal taste and the type of coffee used (adjust only when the coffee mill is in operation (fig. 10).
Please note: A grinding level between 3 and 6 is recommended for most coffees. Selecting level 1 or 2, the beans will be ground very fine. This kind of setting is suitable only for very special coffee (light roast) or when the quality of the ground coffee is less than ideal, and attributable to worn burrs (grinding too coarse).
-
Place one of the coffee filters (C3) or (C4) in the filter holder (C1). Press (B5) to select preparation of 1 or 2 cups. This also doubles the quantity of espresso delivered.
-
Set the quantity by adjusting the dial (B4), starting from the minimum position (fig. 11).
The first time you use it, leave the dial in the Min. position. In the beginning, it is normal to make a few attempts before finding the optimal setting. We suggest you start with the default values, then modify them if necessary following the suggestions in section "Regolare la quantità di caffè macinato nel filtro".
-
Attach the dosing and tamping guide (C2) to the filter holder: 1 press; 2 rotate to lock (fig. 12).
-
Insert the filter holder in the coffee mill outlet (A13) (fig. 13).
-
Press the filter holder until you hear a "click" (fig. 14), then release. Grinding starts and stops automatically.
Please note: To manually stop grinding, just press the filter holder again (until you hear a click).
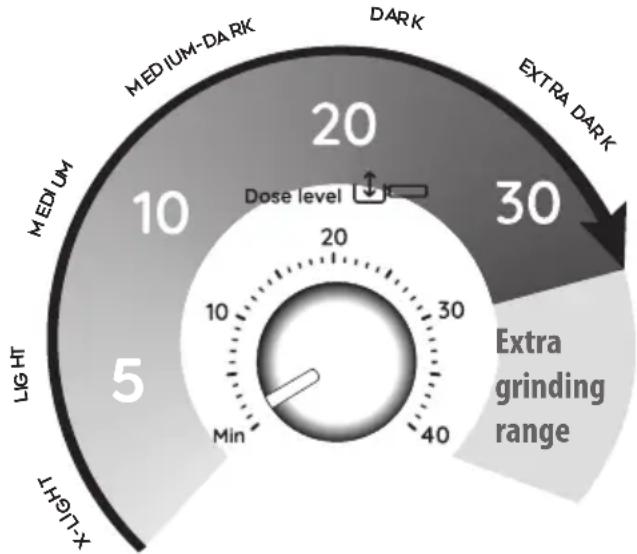
Adjusting the quantity of ground coffee in the filter
gauge
| Category | Value | | ---------------- | ----- | | Dose level | 10 | | Dose level | 20 | | Dose level | 30 | | Light | 5 | | X-let | 40 |Different varieties of coffee bean give different results when ground: consequently, the initial adjustment of the dosage requires special care.
This illustration shows how to regulate the dosage, based on the roast colour: this should be taken as a general guide, given that in practice, the final adjustment can vary according to the composition of the beans.
-
Set the quantity (to the raised mark inside the coffee filter), starting from the minimum position. The numbers on the dial are a handy reference to note down once the quantity in the filter is ideal. The numbers do not correspond to the coffee mill settings, measurement units (g/oz) or grinding time.
-
Looking at the roast colour of your particular beans, turn the dial slowly to find the right adjustment.
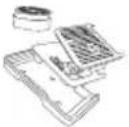
4.2 Step 2 - Tamping
- After grinding, remove the filter holder (fig. 15).
- Tap the dosing and tamping guide (C2) to level the ground coffee.
- (Certain models only): rest the filter holder in the housing on the pressing mat (C12) (fig. 16).
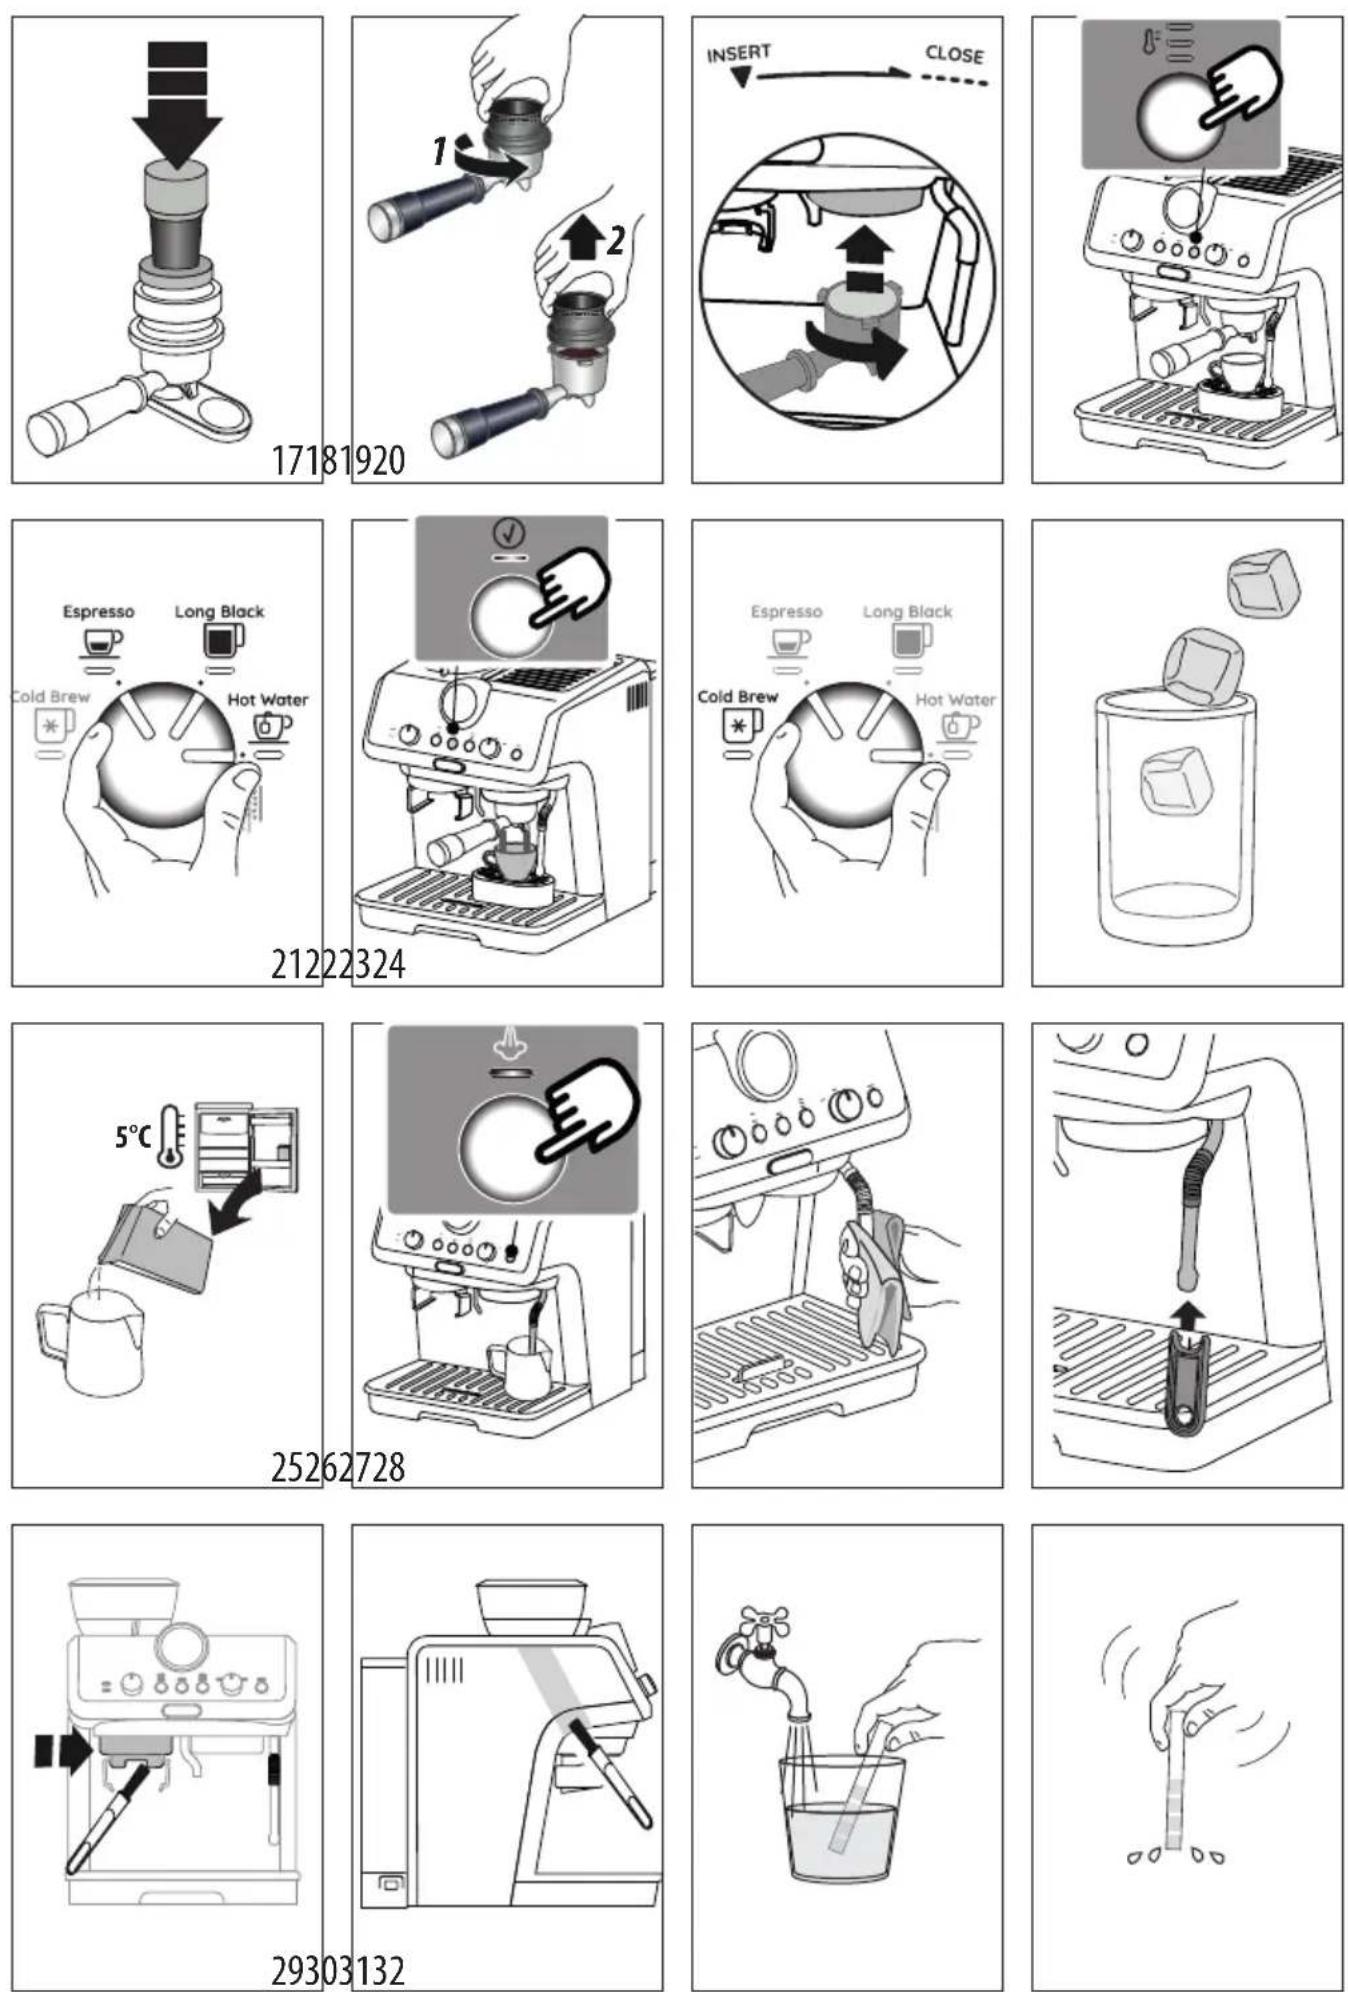
- Press the coffee using the presser (C11) (fig. 17).
- Remove the dosing and tamping guide by turning it anticlockwise and pulling upwards (fig. 18), and check that the quantity is correct (see "La "dose perfetta"").
- Attach the filter holder to the coffee outlet (A10) (fig. 19).
Please note: Coffee left on the edges of the filter after pressing does not in any way compromise the quality of the brewing and therefore the end result.
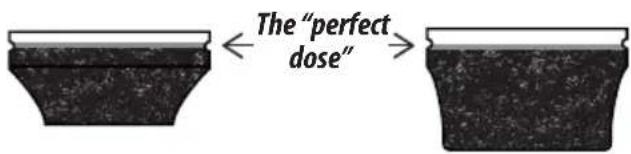
The "perfect dose"
- The perfect quantity corresponds to the raised line inside the coffee filters;
text_image
The "perfect dose"- Make sure the coffee is at the right level after tamping. It might be necessary to adjust the level a few times using the dial (B4) before the ideal dosage is achieved.
- If the coffee is extracted too strongly or too weakly even at the ideal dosage, this can be corrected by grinding the beans more finely or more coarsely (see "4.1 Fase 1 - Macinatura (grinding)"). To correct over-extraction (coffee released too slowly), select a coarser setting. To correct under-extraction (coffee released too quickly), select a finer setting.
4.3 Step 3 - Brewing
- Select the temperature (fig. 20) (see "La temperatura per preparare il caffè").
- Select the desired drink (fig. 21). If the drink has been programmed (see section "7. Programmare la lunghezza delle bevande"), the drink light blinks briefly.
- Press OK (B6) to start brewing (fig. 22) (pre-infusion and infusion). Delivery of the coffee will stop automatically.
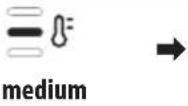
Coffee preparation temperature
The water temperature is controlled during the entire preparation process to ensure its stability during the extraction step. The Specialista Arte has 3 infusion temperatures* in a range between 92 and 96 °C.
The temperature effectively utilized will depend typically on the variety of been and the roast: Robusta beans require a lower temperature, and Arabica beans a higher temperature. The same applies for dark roasted beans or for light roasted beans, respectively.
| Temperature level | Corresponding indicator light | Roast colour |
| MIN Dark | ||
| MED Medium-dark | ||
| MAX Light - medium |
* This is the temperature of the water in the thermoblock. It is therefore different to the temperature of the drink in
the cup or the temperature of the drink at the moment of release from the outlets of the filter holder.
5. PREPARATION OF COLD BREW BEVERAGES

COLD EXTRACTION TECHNOLOGY
Cold Extraction Technology provides a method of preparing coffee that uses cold water, or water at room temperature. Instead of heat, a longer period of infusion is used to extract the properties of the coffee beans.
Proceed as follows:
- Select Cold Brew (fig. 23). The indicator light of the OK button turns blue.
- To ensure the coffee circuit is cold, it will be advisable to run a trial delivery first: accordingly, place a container under the coffee spout (A10) and press OK: press OK again after a few seconds to stop the delivery;
- Remove and empty the container, then attach the filter holder, with the appropriate dose, to the coffee spout;
- Prepare a glass with 2-3 ice-cubes and position it under the coffee spouts (fig. 24);
- Press OK (indicator light blue): delivery will begin.
- Delivery stops automatically.
Please note:
- Cold Extraction is a pressureless technology: consequently, the pressure gauge does not move during delivery.
- The recommended coffee mill setting for Cold Brew beverages is between 4 and 6.
- Make certain that the water in the tank is fresh. If the water is one or two days old, empty the tank and rinse thoroughly. Keep the water tank clean at all times.
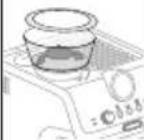
6. MAKING MILK DRINKS
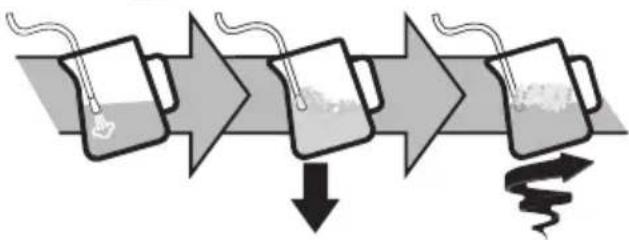
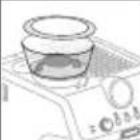
6.1 Frothing the milk
- Fill the jug (C8) with the amount of milk to be warmed/frothed, bearing in mind that the volume of the milk will increase 2- or 3-fold (fig. 25). For a denser and more evenly distributed froth, best results will be achieved using whole cow's milk at refrigerator temperature (about 5 °C).
My Latte Art
flowchart
graph LR
    A["Step 1: Initial material"] --> B["Step 2: Process"]
    B --> C["Step 3: Final product"]
    C --> D["Downward arrow"]
- Place the jug under the steam wand and press the steam button (B9) (fig. 26).
- To froth the milk, rest the steam wand (A9) on the surface of the liquid. This mixes air with the milk and steam.
- Keep the steam wand in contact with the surface, taking care not to let in too much air and create excessively large bubbles.
- Immerse the steam wand below the surface of the milk, this creates a vortex in the liquid. Once the milk is heated to the desired temperature, press the steam button again and wait for the flow of steam to stop completely before removing the milk carafe from the machine.
Barista tips:
- Fresh milk is best. Always use fresh milk straight from the fridge.
- For best results, always replace the milk carafe in the fridge when not in use.
- Whole milk ensures optimum results. The appearance and texture of froth depending on the nature of the dairy milk or vegetable drinks utilized.
• After frothing the milk, eliminate unwanted bubbles by swirling the jug gently.
Cleaning the steam wand
- Following use, always wipe the steam wand (fig. 27) with a cloth to remove residual deposits of milk. The recommended procedure for in-depth cleaning is to use Eco MultiClean: this product ensures maximum hygiene by removing milk proteins and fats, and can be used for cleaning the entire machine.
- Release steam for a few seconds to clean the wand (fig. 8).
- Wait until the steam wand has cooled down. To ensure the wand works efficiently over time, use the special cleaning tool (C10) to free the holes (fig. 28) of any obstruction.
7. PROGRAMMING DRINK QUANTITIES
- Prepare the appliance to deliver 1 or 2 cups of the drink you want to make, as far as attaching the filter holder (C1) complete with the (C3) or (C4) filter and ground coffee.
- Turn the dial (B8) to select the drink being programmed.
- Press the OK button (B6) and hold for a least 3 seconds, until the indicator relative to the selected drink starts to blink, indicating that the machine is in programming mode.
- When the desired quantity has been reached, press the OK button again: the quantity is programmed.
Please note:
- You can programme drinks, but not steam delivery.
-
Programming changes the quantity of drink delivered, but not the quantity of ground coffee
-
When a programmed drink is selected, the corresponding light blinks briefly.
- "2x" drinks can be programmed separately.
| Coffee recipe | Default quantity | Programmable quantity |
 w w | ≈ 110 ml ≈ 90 to ≈130 ml | |
 | ≈ 180 ml ≈ 160 to ≈220 ml | |
 | ≈ 35 ml ≈15 to ≈90 ml | |
E | ≈ 70 ml ≈30 to ≈180 ml | |
Ar | ≈ 120 ml | • espresso: ≈20 to ≈90 ml• water: ≈25 to ≈150 ml |
Am 2x 2x | ≈ 240 ml • espresso: ≈30 to ≈180 ml• water: ≈50 to ≈240 ml | |
H | ≈ 250 ml from ≈65 to ≈300ml | |
8. SETTINGS MENU
| 1. Access the menu: | |||
| Press together and hold for 3 seconds | 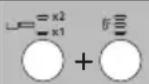 | ||
| 2. Select the setting to be adjusted | |||
 | |||
| Corresponding setting | 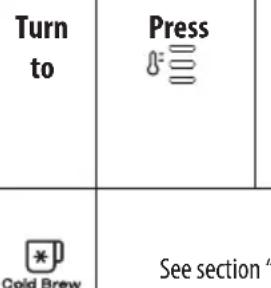 | Press  again to change the setting again to change the setting | |
| Statistics (info useful for assistance purposes) | '15.1 Statistica" | ||
 | |||
| Pre-infusion pause | Espresso  | The indicator light corresponding to the setting currently selected comes on |  |
 | |||
 | |||
| Extra grinding adjustment |  | The indicator light corresponding to the setting currently selected comes on | 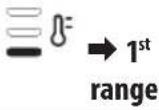 |
 | |||
| Auto-off | Hc  | The indicator light corresponding to the setting currently selected comes on |  |
 | |||
 | |||
| Water hardness | twarad | The indicator light corresponding to the setting currently selected comes on |  |
 | |||
 | |||
text_image
OK3. Save the new settings by pressing OK (B6)
Please note: The appliance exits the settings menu automatically if there is no activity for 30 seconds.
8.1 Reset default settings
| 1. Access the menu: | |
| Press together and hold for 3 seconds |  |
| 2. Reset to default values | |
| Press and hold the steam button (B9) for 3 seconds. |  |
The OK light (B6) blinks briefly to confirm the reset.
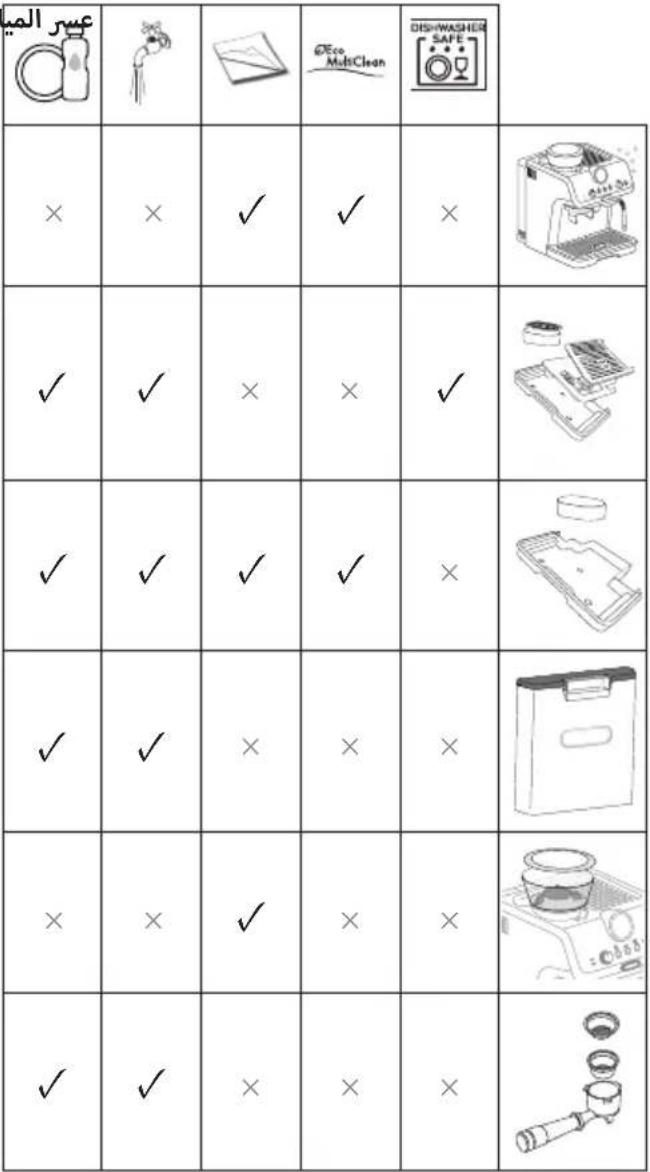
9. CLEANING THE APPLIANCE
Important!
- Do not use solvents, abrasive detergents or alcohol to clean the coffee machine.
- Do not use metal objects to remove encrustations or coffee deposits as they could scratch metal or plastic surfaces.
- Should the machine remain idle for more than a week, it is advisable to carry out a rinse cycle before preparing any drinks.
Danger!
- Never immerse the coffee maker in water when cleaning: it is an electrical appliance.
- Before commencing any cleaning operation on the outside of the machine, turn it off, unplug it from the mains socket and wait for it to cool down.
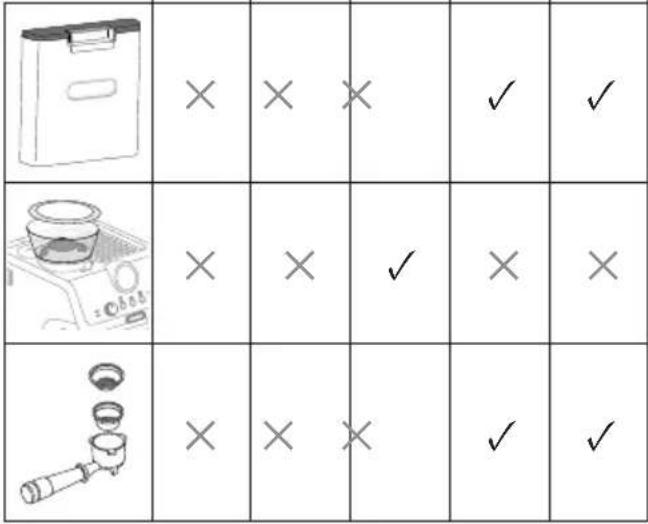
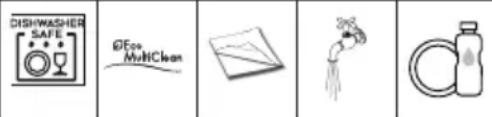
| DIS-WASHER SAFE | DEco MultClean | ||||
 | × | √ | √ | × | × |
 | √ | × | × | √ | √ |
 | × | √√ | √√ | ||
 | × | × | × | √ | √ |
 | × | × | √ | × | × |
| → | |||||
 |  |  |  |  | |
| × | × | × | √ | √ | |
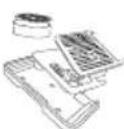
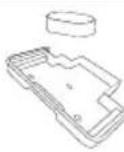
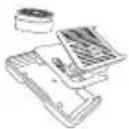
10. CLEANING THE COFFEE MILL
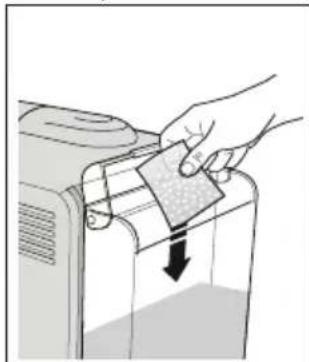
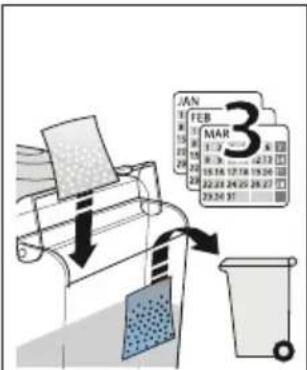
- Clean the attachment area with the brush (C9) (fig. 29).
- Use the brush to clean the coffee guide (fig. 30).
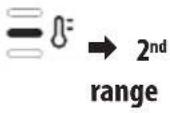
Efficient grinding
The burrs are subject to wear over time. As time goes by, to achieve the perfect quantity, you need to turn the dial (B4) towards the highest numbers. When you reach a setting of between 30 and 40, you need to set the extra grinding range (see section "8. Menù impostazioni" - "Range di macinatura extra"). When the quantity of ground coffee becomes less than expected, contact a service centre to have the burrs replaced. With the new burrs fitted, adjust the coffee mill by accessing the settings menu and selecting the first range of the "extra grinding adjustment" setting. Next, turn the ground coffee quantity dial (B4) to the Min position and set the quantity as for first-time use (see "La "dose perfetta").
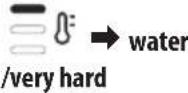
11. WATER HARDNESS
The descale indicator (B3) lights up following a predetermined period of operation that depends on the hardness of the water. The machine can also be programmed according to the actual hardness of the local water supply, in which case descaling may be required less frequently (see section "8. Menù impostazioni").
- Remove the "TOTAL HARDNESS TEST" indicator strip (C5) from its pack.
- Immerse the strip completely in a glass of water for about one second (fig. 31).
- Remove the strip from the water and shake lightly (fig. 32).
| Water Hardness Test Result (B7) | button | Level |
| 1soft water | ||
| 2mediumwater | ||
| 3hard orvery hardwater | ||
- Set the machine accordingly, as indicated in the section "8. Menù impostazioni".
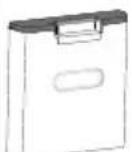
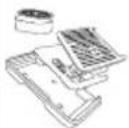
12. HOW TO USE SOFTBALLS (CERTAIN MODELS ONLY)
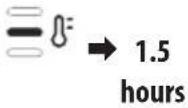
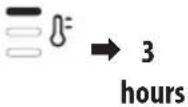
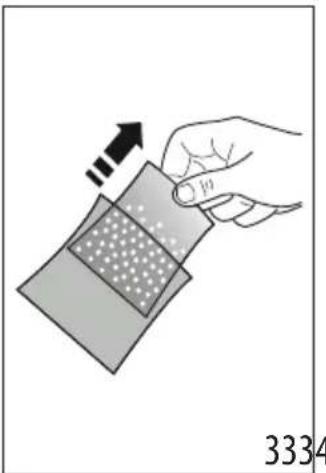
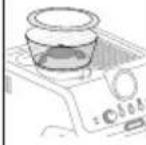
Softballs (C7) are an innovative treatment system able to prolong the life of the machine, without altering the properties of the water, while ensuring consistently creamy and aromatic coffee. To optimize the effectiveness of the treatment, leave Softballs in water overnight before use.
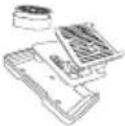
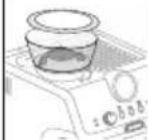
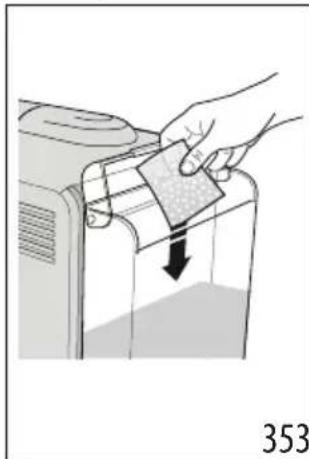
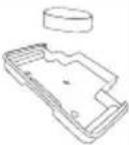
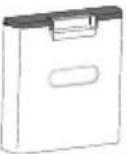
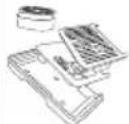
- Take the sachet of Softballs from the wrapper (fig. 33).
natural_image
Hand holding a sample pad with a magnified view showing internal structure (no text or symbols)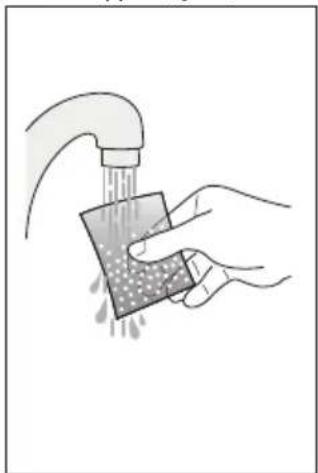
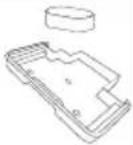
natural_image
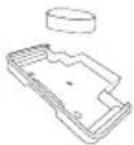
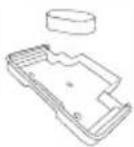
Illustration of a hand cleaning a square surface with a faucet (no text or symbols)- Rinse the sachet of Softballs under running water (fig. 34).
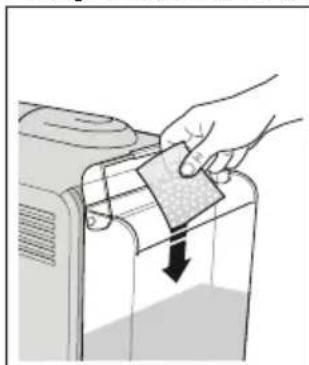
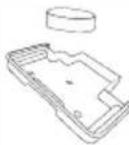
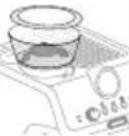
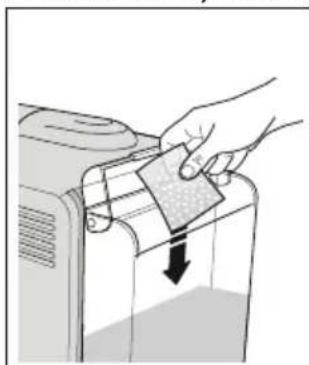
- Immerse the sachet in the water tank (A7) (fig. 35).
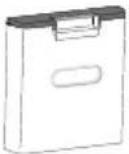
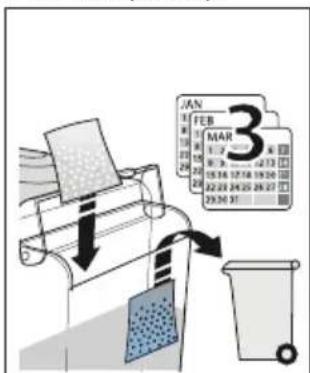
- Change the sachet of Softballs every 3 months (fig. 36).
natural_image
Illustration of a hand placing a card into a machine with a downward arrow (no text or symbols)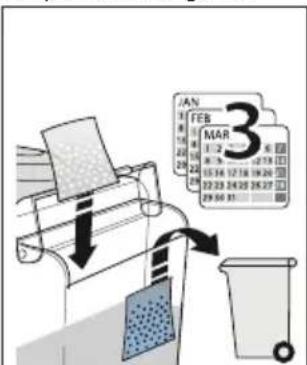
text_image
JAN FEB MAR 3 1 2 3 4 5 6 7 8 9 10 11 12 13 14 15 16 17 18 19 20 21 22 23 24 25 26 27 28 29 30 31 32 33 34 35 36 37 38 39 40 41 42 43 44 45 46 47 48 49 50 51 52 53 54 55 56 57 58 59 60 61 62 63 64 65 66 67 68 69 70 71 72 73 74 75 76 77 78 79 80 81 82 83 84 85 86 87 88 89 90 91 92 93 94 95 96 97 98 99 1003536
13. DESCALING
Important!
- Before using the descaler, (C6)read the instructions and the labelling on the pack.
- Use De'Longhi descaler only. Using unsuitable descaler and/or performing descaling incorrectly may result in faults not covered by the manufacturer's guarantee.
- Descaler can cause damage to delicate surfaces. If the product is accidentally spilt, dry immediately.
| To descale | |
| Descaler De’Longhi descaler | |
| Container Capacity 2 litres | |
| Time ~40min | |
- When the indicator light (B) comes on, you need to descale the appliance. You can start descaling at any time.
- Remove and empty the drip tray (A19), then reposition it in the machine.
- Empty the water tank (A7). (If present, remove the softballs and place in a glass of water until they can be re-inserted at the end of the descaling process.)
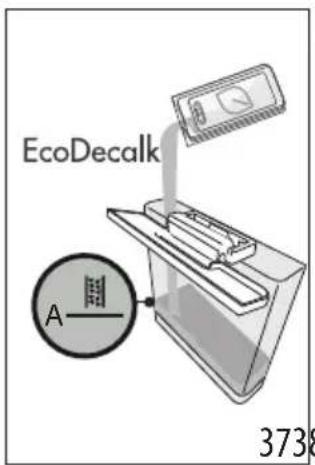
- Pour the descaler into the water tank (C6) up to the level A ____ marked on the inside of the tank (corresponding to the contents of one 100ml pack) (fig. 37).
- Add water (1 litre) up to level B (fig. 38). Now reposition the water tank in the machine.
text_image
EcoDecalk A 3738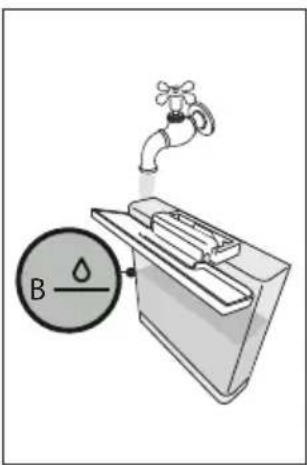
text_image
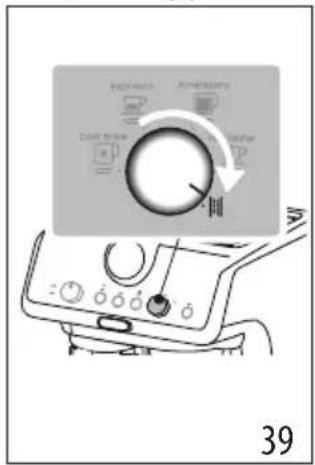
B- Turn the knob (B8) to | (fig. 39): the OK indicator lights up and the | indicator blinks.
text_image
Highness Amperator Cold menu Weather 39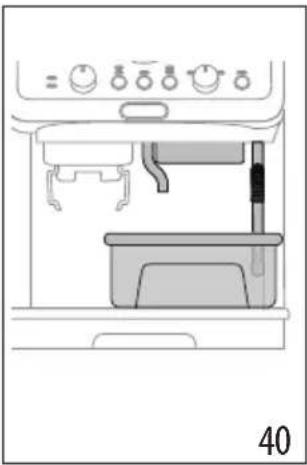
natural_image
Line drawing of an open kitchen oven with control panel and side sink (no text or symbols)-
Make sure the filter holder (C1) is not attached. Position a container under the coffee spouts (A10) and hot water spout (A11) and another under the steam wand (A9) (fig. 40).
-
Press the hold the OK button (B6) for at least 3 seconds. The OK light blinks.
- The descaling programme starts and the descaler liquid comes out of the spouts. The descale programme removes limescale deposits from inside the appliance by automatically performing a series of rinses and pauses until the tank is empty.
Descaling ceases and the OK light turns blue. This means that a rinse cycle must be carried out:
- Empty the containers used to collect the descaler solution and reposition them under the spouts.
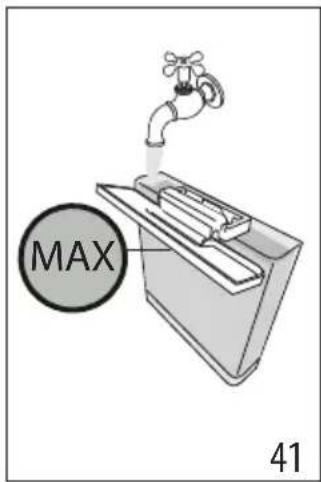
- Remove the water tank, empty out any residual descaler solution, rinse under running water and fill with fresh water up to the MAX level (fig. 41). Put the tank back in its housing.
text_image
MAX 41- Press the OK button: the rinse cycle will start.
- When rinsing is complete, delivery stops: the indicator blinks and the OK indicator extinguishes.
- Empty the recipient used to collect the rinse water.
- Remove and empty the drip tray (A19), then reposition it in the machine.
- Remove the tank, fill with fresh water and reposition in the machine. (If present, rinse the softballs with running water and put back in the tank).
- Turn the function selection dial (B8) to one of the drinks.
The machine is now ready for use.
Please note:
- The descaling cycle can be started up at any time (even if the relative light has not yet come on).
-
Should descaling be started up by mistake, it can be stopped by pressing the OK button and holding for 10 seconds; the rinse cycle cannot be stopped.
-
EXPLANATION OF INDICATOR LIGHTS
| LIGHTS EXPLANATION OF INDICATORLIGHTS | OPERATION | |
| All lights blink briefly Turning the appliance on Self-diagnosis | ||
 Permanently alight Permanently alight | The machine has been turned on for the first time and the water circuit must be filled | Proceed as indicated in section “3. Prima messa in funzione dell’apparecchio” |
 Blinking Blinking | The machine is warming up | Wait until the ideal delivery temperature has been reached |
 Permanently alight Permanently alight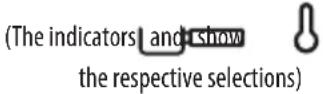 | The machine is ready for delivery Set up | the machine and proceed with preparation of the drink |
 Permanently alight(The indicator shows the selection in progress) Permanently alight(The indicator shows the selection in progress) | The machine is ready for delivery Set up | the machine and proceed with preparation of the drink |
 Permanently alight Permanently alight | There is not enough water in the tank (A7) or the tank is not correctly in place | Fill the tank with water, or remove the tank and reposition it correctly |
 Blinking Blinking | An attempt is being made to deliver a beverage, but with water tank (A7) empty | Fill the tank with water |
| Because the beans are too finely ground, the coffee is delivered too slowly or not at all | Remove the filter holder (C1) and repeat the coffee-making steps, bearing in mind the indications given in sections “4.1 Fase 1 - Macinatura (grinding)” and “4.2 Fase 2 - Pressatura (tamping)” | |
| The coffee filter (C3) or (C4) is obstructed | Rinse the filters under running water | |
| The tank (A7) is not properly in place and the relative valves are not open | Press down lightly on the tank to open the valves | |
| Limescale in the water circuit Descale as described in section “13. Decalcificazione” | ||
 | 1 cup preparation is selected The entire | preparation procedure (from grinding to delivery) is set to make 1 cup |
| → | ||
 | 2 cup preparation is selected The entire | preparation procedure (from grinding to delivery) is set to make 2 cups |
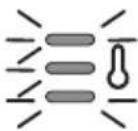
 MIN MED MAXPermanently alight MIN MED MAXPermanently alight | Select one of the available temperatures | See “La temperatura per preparare il caffè” |
 Blinking Blinking | General alarm Turn the machine off and | wait 10 minutes before turning on again. If the problem continues, contact customer services. |
 Blinking Blinking | The steam function is selected and in use | After a few seconds, the machine starts delivering steam |
 Permanently alight - red Permanently alight - red | Descaling is required Carry out descaling as described in section“13. Decalcificazione” | |
 | Descaling is selected Press OK to start descaling or turn the dial to a drink | |
 | Descaling proceeds. The machine delivers descaling solution | Proceed by completing the descaling cycle (see “13. Decalcificazione”) |
 | The first step of the descaling cycle is complete: the next step required is a rinse. | Press OK to start rinsing. |
 | The machine proceeds with the rinse to complete the descaling process | Proceed by completing the descaling cycle (see “13. Decalcificazione”) |
- TROUBLESHOOTING
| PROBLEM CAUSE SOLUTION | ||
| There is water in the drip tray (A19) | This water comes from the internal circuits of the machine and is a normal consequence of their operation | Empty and clean the drip tray on a regular basis |
| The machine fails to produce espresso coffee | No water in the tank (A7) Fill the tank | |
| The OK indicator (B6) is alight, meaning that the coffee circuit or the steam circuit is empty | Press the button associated with the OK indicator to fill the circuit | |
| Blockage in the coffee filter (C3) or (C4) Rinse the filters under running water | ||
| Coffee ground too finely Adjust the quantity and grinding level | ||
| The tank (A7)is not properly in place and the valves at the bottom are not open | Press down lightly on the tank to open the valves at the bottom | |
| Limescale in the water circuit Descale as described in section “13.Decalcificazione” | ||
| The filter holder (C1) cannot be attached to the appliance | The ground coffee has not been tamped or the quantity is excessive | Repeat phase 1 (section “4. Preparare il caffè”) using less coffee. If you are using the 1 cup filter, make sure the 1X light (B5) is on. |
| The espresso coffee drips from the edges of the filter holder (C1) instead of from the holes | The filter holder is not correctly in place Attach the filter holder correctly (fig. 19) | |
| The coffee spout gasket has lost flexibility or is dirty | Contact a customer services centre to have it replaced | |
| Blockage in the coffee filter (C3) or (C4) · Rinse the filters under running water· Adjust the grinding settings | ||
| The espresso cream is too light (delivered from the spout too fast) | The machine settings need to be reappraised | See instructions in section “La “dose perfetta”” |
| The espresso cream is too dark (delivered from the spout too slowly) | The machine settings need to be reappraised | See instructions in section “La “dose perfetta”” |
| The coffee is cold A Cold Brew drink has been made | When the OK indicator is blue, Cold Brew Technology is selected | |
| The Cold Brew drink is warm A hot drink was delivered shortly before the Cold Brew | Before preparing the beverage, it is advisable to cool the coffee circuit by running a trial Cold Brew delivery for a few seconds | |
| Empty the water tank, rinse and fill with fresh water | ||
| Put 3-4 ice-cubes in the glass as described for the preparation of Cold Brew drinks | ||
| On completion of the descale cycle, the machine calls for a further rinse | During the rinse cycle, the water tank (A7) has not been filled to the MAX level | Repeat the rinse cycle (see section “13.Decalcificazione”) |
| The machine does not grind the coffee Foreign matter has found its way into the coffee mill | Turn the selector (A2) to 8 and remove all beans with a vacuum cleaner until the beans container (A3) is empty and clean. If the problem continues, contact customer services | |
| → | ||
| Changing to a different type of coffee • You are recommended to pour only the | amount of beans to be used into the beans container (A3)To empty the container, vacuum out the contents with a vacuum cleaner or grind all the beans in the container until completely empty.Add new type of coffee beansIf the amount of ground coffee does not give the perfect dose, proceed to set up the machine as for first-time use | |
| After grinding, the coffee filter (C3) or (C4) is empty | The funnel of the coffee mill is clogged | Clean as described in section “10. Pulizia del macinacaffè”. |
| After grinding, the amount of coffee in the filter (C3) or (C4) does not give the “perfect dose” | The quantity of ground coffee needs adjusting | Adjust the quantity with the relative dial (B4), following the indications given in section “La “dose perfetta”. If the dial is already in the max. position, proceed as described in section “8. Menù impostazi- oni” - “Regolazione extra della macinatura” |
| You are using the 2 cup filter (C4) Make sure the 2X light is on | ||
| Over time the burrs wear down | Contact Customer Services | |
15.1 Statistics
Machine statistics are useful in the event of service being needed. Proceed as follows:
- Access the menu by pressing buttons (B5) and (B7) simultaneously and holding for 3 seconds;
- Turn the dial (B8) to select "Cold Brew";
- Press the temperature button (B7);
- Once inside the settings menu, bring up the required statistical information by positioning the selector dial as illustrated in the following table:
| Positioning of dial | Counter |
| Total count of cold drinks | |
| Total count of hot drinks | |
| Total count of steam deliveries | |
| Total count of descale cycles |
- The numbers are shown alongside the relative indicators

| Control panel indicators Drinks | count | Descale count | ||
 | Doral | Doral | up to 100 up | to 1 |
| Doral | Doral | Doral | between 100 and 1000 | between 2 and 10 |
| Doral | Doral | Doral | between 1000 and 3000 | between 10 and 30 |
| Doral | Doral | Doral | between 3000 and 6000 | between 30 and 60 |
| Doral | Doral | Doral | between 6000 and 11000 | between 60 and 110 |
| Doral | Doral | Doral | more than 11000 | more than 110 |
- The machine comes out of the settings menu automatically if 30 seconds elapse without any activity.
• Hot water (Eau chaude)
• Détartrage
4.3 Phase 3 - Distribution (brewing)
flowchart
graph LR
    A["Step 1: Initial material"] --> B["Step 2: Process flow"]
    B --> C["Step 3: Final product with wavy arrow"]
    C --> D["Step 4: Final product with wavy arrow"]
Cold Brew
Cold Brew
X2
8. MENU PARAMÈTRES
 |  |  |  | [SYZC] | |
 | × | √ | √ | × | × |
 | √ | × | × | √ | √ |
 | × | √√ | √√ | ||
| [AKKZ] | |||||
| GEcoMoHClean | ||||
 | ||||
10. NETTOYAGE DU MOULIN À CAFÉ
text_image
3536 JAN FEB NAR 3 12 10 8 6 4 2 0 0 0 0 0 0 0 0 0 0 0 0 0 0 0 0 0 0 0 0 0 0 0 0 0 0 0 0 0 0 0 0 0 0 0 0 0 0 0 0 0 0 0 0 0 0 0 0 0 0 12.18 19.20 22.23 24.25 26.27 29.34 3113. DÉTARTRAGE
Attention!
text_image
Temperature Air Condition Cool Air Air Condition 39
natural_image
Line drawing of an open kitchen appliance with control knobs and a sink (no text or symbols)| DISHWASHER SAFE | ∅Foo MuHClean | ||||
 | × | √ | √ | × | × |
 | √ | × | × | √ | √ |
 | × | √√ | √√ | ||
 | × | × × | √ | √ | |
 | × | × | √ | × | × |
 | × | × × | √ | √ |
 | ||||
| × | √ | √ | × | × |
| √ | × | × | √ | √ |
| × | √√√√ | |||
| × | × × | √ | √ | |
| × | × | √ | × | × |
| × | × × | √ | √ | |
text_image
Electric American Cold-Treat Air Condition 39
natural_image
Line drawing of an open oven with control panel and sink (no text or symbols)A16. Rooster kopjesblad/mug
A17. Kopjesblad/mug
- Hot water (Heet water)
- Ontkalken
flowchart
graph LR
    A["Step 1: Initial material"] --> B["Step 2: Process"]
    B --> C["Step 3: Final product with wavy arrow"]
|  |  | [G3DS] |  | |
| × | √ | √ | × | × | |
| √ | × | × | √ | √ | |
| × | √√ | √√ | |||
| × | × | × | √ | √ | |
| × | × | √ | × | × | |
| × | × | × | √ | √ |
10. REINIGING VAN DE KOFFIEMOLEN
natural_image
Hand holding a textured rectangular object with an arrow pointing upward, labeled '333' at bottom (no text or symbols on the object itself)
natural_image
Illustration of a hand cleaning a surface with a faucet and sponge (no text or symbols)natural_image
Illustration of a hand inserting a card into a device (no text or symbols visible)
text_image
JAN FEB MAR 313. ONTKALKING
Opgelet!
text_image
Reversible American Cathode Air Condition 39
natural_image
Line drawing of an open kitchen oven with control panel and sink (no text or symbols)flowchart
graph LR
    A["Step 1: Initial material"] --> B["Step 2: Process"]
    B --> C["Step 3: Final product with wavy arrow"]
Cold Brew
Cold Brew
X2
| DIS=WASHERSAFE | DEcoMultClean | ||||
 | × | √ | √ | × | × |
 | √ | × | × | √ | √ |
 | × | √√ | √√ | ||
| → | |||||
 |  |  | [22WZ] |  | |
| × | × | × | √ | √ | |
| × | × | √ | × | × | |
| × | × | × | √ | √ | |
| × | × | × | √ | √ | |
| × | × | √ | × | × | |
| × | × | × | √ | √ |
10. LIMPIEZA DEL MOLINILLO
text_image
Treatment Air Condition Control Air Condition 39
natural_image
Line drawing of an open kitchen appliance with control knobs and a sink (no text or symbols)text_image
Dose perfeita →flowchart
graph LR
    A["Step 1: Initial material"] --> B["Step 2: Process"]
    B --> C["Step 3: Final product or release"]
Cold Brew
Cold Brew
X2
8. MENU DE CONFIGURAÇÕES
 |  |  |  |  | |
 | × | √ | √ | × | × |
 | √ | × | × | √ | √ |
 | × | √√ | √√ | ||
 | |||||
| |  | [3cza] | [cwt8] | |
| × | × | × | √ | √ | |
| × | × | √ | × | × | |
| × | × | × | √ | √ | |
| × | × | × | √ | √ | |
| × | × | √ | × | × | |
| × | × | × | √ | √ |
10. LIMPEZA DO MOINHO DE CAFÉ
- Limpe a zona de engate com o pincel (C9) (fig. 29).
- Utilizando o pincel, limpe a rampa de café (fig. 30).
Moagem eficiente
text_image
Treatment Air Condition Control Air Condition 39
natural_image
Line drawing of an open kitchen appliance with control knobs and a sink (no text or symbols)flowchart
graph LR
    A["Step 1: Initial material"] --> B["Step 2: Process step"]
    B --> C["Step 3: Final product with wavy feedback loop"]
Cold Brew
Cold Brew
Americano
- MENOY PYOMIZEΩN
| DISHWASHER SAFE | ∅Eco MuHClean | ||||
| × | √ | √ | × | × | |
| √ | × | × | √ | √ | |
| × | √√ | √√ | |||
| × | × | × | √ | √ | |
| × | × | √ | × | × | |
| × | × | × | √ | √ |
4.1 Fase 1 - Maling (grinding)
4.3 Fase 3 - Brygging (brewing)
natural_image
Diagram of a kitchen appliance with a control panel and indicator lights (no text or symbols)| DIS=WASHER SAFE | DEco MultClean | ||||
 | × | √ | √ | × | × |
 | √ | × | × | √ | √ |
 | × | √√ | √√ | ||
 | × | × | × | √ | √ |
 | × | × | √ | × | × |
| → | |||||
 | | |  |  | |
| × | × | × | √ | √ | |
10. RENGJ∅RING AV KAFFEKVERN
natural_image
Hand holding a textured surface with an arrow indicating direction, labeled '3334' at bottom (no text or symbols on the diagram itself)
natural_image
Illustration of a hand cleaning a surface with a drain, showing liquid droplets and a sponge (no text or symbols)- Skyll pakken med Softballs i rennende vann (fig. 34).
- Legg posen ned i vannbeholderen (A7) (fig. 35).
- Skift ut pakken med Softballs hver 3. måned (fig. 36).
natural_image
Illustration of a hand inserting a card into a device (no text or symbols visible)3536

text_image
JAN FEB MAR 3 15 16 17 18 19 20 21 22 23 24 25 26 27 28 29 30 31 32 33 34 35 36 15:25:26:27:28:29:30:31:32:33:34:35:36:37:38:39:40:41:42:43:44:45:46:47:48:49:50:51:52:53:54:55:56:57:58:59:60:61:62:63:64:65:66:67:68:69:70:71:72:73:74:75:76:77:78:79:80:81:82:83:84:85:86:87:88:89:90:91:92:93:94:95:96:97:98:99:10013. AVKALKING
OBS!
natural_image
Line drawing of an open kitchen oven with control panel and side shelf (no text or symbols)4.3 Fas 3 - Dispensering (brewing)
5. BEREDNING AV COLD BREW
COLD EXTRACTION TECHNOLOGY
| DISHWASHER SAFE | DEco MultClean | ||||
 | × | √ | √ | × | × |
 | √ | × | × | √ | √ |
 | × | √√ | √√ | ||
 | × | × | × | √ | √ |
 | × | × | √ | × | × |
| → | |||||
 |  |  |  |  | |
| × | × × | √ | √ | ||
10. RENGÖRING AV KAFFEKVARNEN
natural_image
Illustration of a hand inserting a card into a device (no text or symbols visible)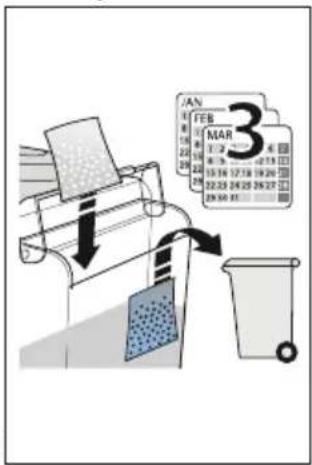
text_image
FEB MAR 3 12/24/2023 15:16 12:18 19:26 22:23 24:25 26:22 29:30 3113. AVKALKNING
Varning!
text_image
Yasimono Airflowico Cond. blow Airwater Pd 39
natural_image
Line drawing of an open oven with control panel and side sink (no text or symbols)flowchart
graph LR
    A["Step 1: Initial material"] --> B["Step 2: Process step"]
    B --> C["Step 3: Final product with wavy arrow"]
Cold Brew
Cold Brew
X2
8. MENU INDSTILLINGER
natural_image
Diagram of a kitchen appliance with a control knob and indicator lights (no text or symbols) |  |  |  |  | |
 | × | √ | √ | × | × |
 | √ | × | × | √ | √ |
 | × | √√ | √√ | ||
 | × | × | × | √ | √ |
 | × | × | √ | × | × |
 | |||||
| × | × | × | √ | √ | |
10. RENG∅RING AF KAFFEKVÄRN
natural_image
Hand holding a textured rectangular object with an arrow indicating upward motion (no text or symbols)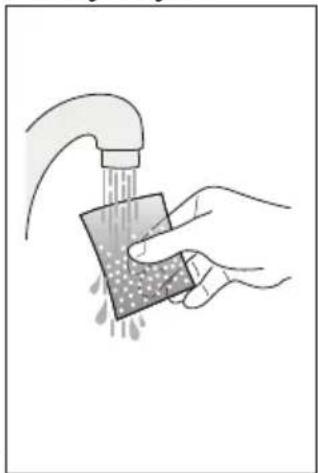
natural_image
Illustration of a hand cleaning a square surface with a faucet (no text or symbols)- Skyl Softballpakken under rindende vand (fig. 34).
- Sænk posen ned i vandtanken (A7) (fig. 35).
- Udskift posen med Softballs hver 3. måned (fig. 36).
natural_image
Illustration of a hand inserting a card into a device (no text or symbols visible)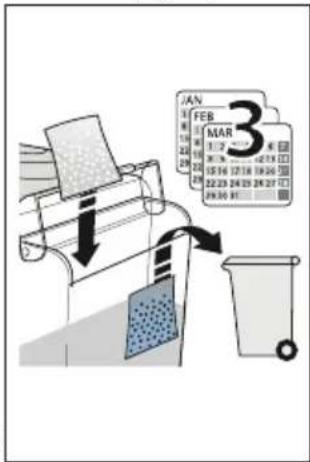
text_image
JAN FEB MAR 3 1/2 31.76 15:16 12:18 19:30 22:23 24:25 26:27 29:30 3113. AFKALKNING
Advarsel!
natural_image
Line drawing of an open kitchen appliance with control knobs and a sink (no text or symbols) |  |  |  |  | |
 | × | √ | √ | × | × |
 | √ | × | × | √ | √ |
 | × | √√ | √√ | ||
 | × | × | × | √ | √ |
 | × | × | √ | × | × |
| [KCT7] | |||||
| × | × | × | √ | √ | |
10. KAHVIMYLLYN PUHDISTUS
natural_image
Illustration of a hand inserting a card into a device (no text or symbols visible)3536
text_image
JAN 1 FEB 2 MAR 3 3 1/2 1/2 1/2 1/2 4 15.16 17.58 19.26 5 22.23 24.25 26.27 6 29.24 3113. KALKINPOISTO
Varoitus!
text_image
Exposure Airflow Cloud Bracket Airflow 39
natural_image
Line drawing of an open kitchen appliance with control knobs and a sink (no text or symbols)flowchart
graph LR
    A["Step 1: Initial material"] --> B["Step 2: Process"]
    B --> C["Step 3: Final product with wavy arrow"]
 |  |  |  |  | |
| × | √ | √ | × | × | |
| √ | × | × | √ | √ | |
| × | √√ | √√ | |||
| × | × | × | √ | √ | |
| × | × | √ | × | × | |
| × | × | × | √ | √ |
natural_image
Hand holding a textured surface with an arrow indicating upward motion (no text or symbols)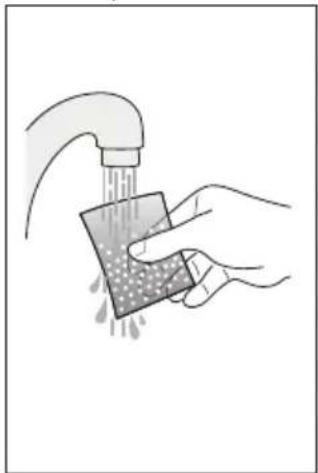
natural_image
Illustration of a hand cleaning a square surface with a faucet (no text or symbols)natural_image
Illustration of a hand inserting a card into a device (no text or symbols visible)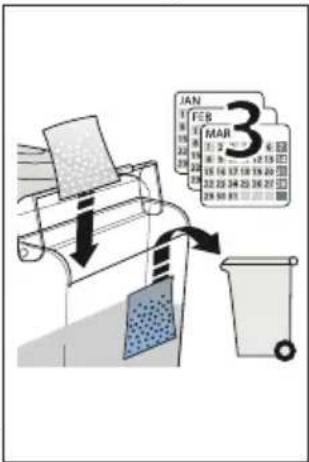
text_image
JAN FEB MAR 313. УДАЛЕНИЕ НАКИПИ
Внимание!
natural_image
Line drawing of an open kitchen appliance with control knobs and a sink (no text or symbols) |  |  |  |  | |
 | [0TC7] |  |  | [07ZK] | [KT5S] |
| [0YST] | |||||
| GEcoMoHClean | |||||
 | √ | × | × | √ | √ |
 | × | √√√√ | |||
 | × | × | × | √ | √ |
 | × | × | √ | × | × |
 | × | × | × | √ | √ |
10. КОФЕ ТАРТКЫШТЫ ТАЗАЛАУ
text_image
Improve Amplify Cath-Drive Air Condition 39
natural_image
Line drawing of an open kitchen oven with control panel and sink (no text or symbols)flowchart
graph LR
    A["Container with liquid"] --> B["Step 1"]
    B --> C["Step 2"]
    C --> D["Step 3"]
    D --> E["Final Product with swirling flow"]
| DIS=WASHER SAFE | DEco MultClean | ||||
 | × | √ | √ | × | × |
| → | |||||
 |  |  |  |  | |
| √ | × | × | √ | √ | |
| × | √√ | √√ | |||
| × | × | × | √ | √ | |
| × | × | √ | × | × | |
| × | × | × | √ | √ | |
natural_image
Hand holding a textured surface with an arrow indicating upward motion (no text or symbols)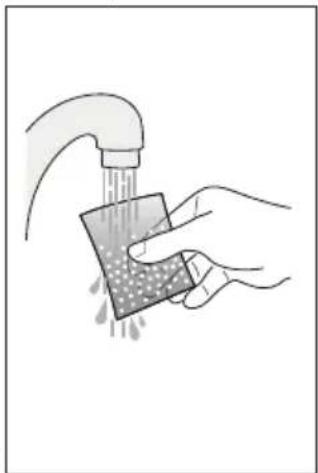
natural_image
Illustration of a hand cleaning a sponge with a drain, showing liquid droplets and a sponge (no text or symbols)flowchart
graph LR
    A["Step 1: Initial material"] --> B["Step 2: Process"]
    B --> C["Step 3: Final product with wavy arrow"]
| DISH-WASHERSAFE | DEcoMultiClean | ||||
 | × | √ | √ | × | × |
 | √ | × | × | √ | √ |
 | × | √√ | √√ | ||
 | × | × | × | √ | √ |
 | × | × | √ | × | × |
 | × | × | × | √ | √ |
10. ČIŠTĚNÍ MLÝNKU
natural_image
Hand holding a textured rectangular object with a directional arrow, no visible text or symbols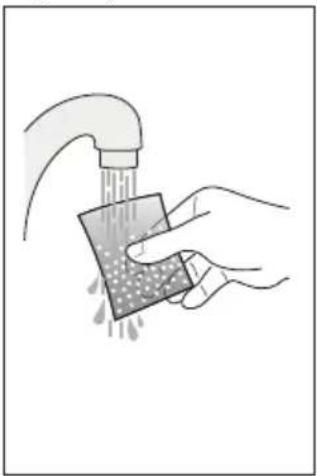
natural_image
Illustration of a hand cleaning a surface with a faucet (no text or symbols)natural_image
Illustration of a hand placing a textured object onto a device, with a downward arrow indicating motion (no text or symbols)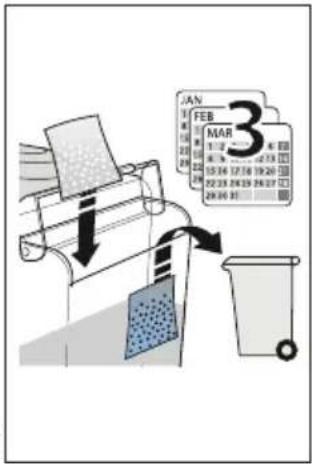
text_image
JAN FEB MAR 3 12 13 14 15 16 17 18 19 20 21 22 23 24 25 26 27 28 29 30 31 32 33 34 35 36 37 38 39 40 41 42 43 44 45 46 47 48 49 50 51 52 53 54 55 56 57 58 59 60 61 62 63 64 65 66 67 68 69 70 71 72 73 74 75 76 77 78 79 80 81 82 83 84 85 86 87 88 89 90 91 92 93 94 95 96 97 98 99 10013. ODVÁPNĚNÍ
Pozor!
text_image
Pension Amperifier Clock to the laser 39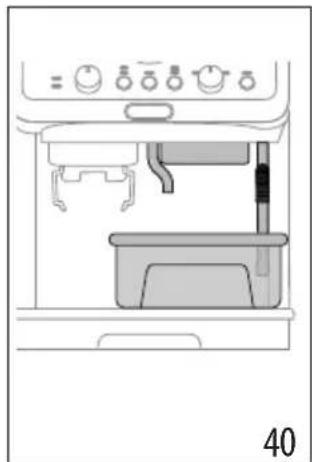
natural_image
Line drawing of an open kitchen oven with control panel and sink (no text or symbols)text_image
My LatteArtnatural_image
Diagram of a kitchen appliance with control knob and tray (no text or symbols)Poznámka: Spotrebič automaticky vstúpi z menu nastavení po 30 sekundách nečinnosti.
 |  |  |  |  | |
 | × | √ | √ | × | × |
 | √ | × | × | √ | √ |
 | × | √√ | √√ | ||
 | × | × | × | √ | √ |
 | × | × | √ | × | × |
| → | |||||
| GEceMoHClean | |||||
| × | × × | √ | √ | ||
10. ČISTENIE KÁVOVÉHO MLYNČEKA
- Pripevňovaciu zónu vyčistite štetcom (C9) (obr. 29).
- Pomocou štetca vyčistite žl'ab kávy (obr. 30).
Účinné mletie
natural_image
Hand holding a textured surface with an arrow indicating direction, labeled '3334' at bottom (no other text or symbols)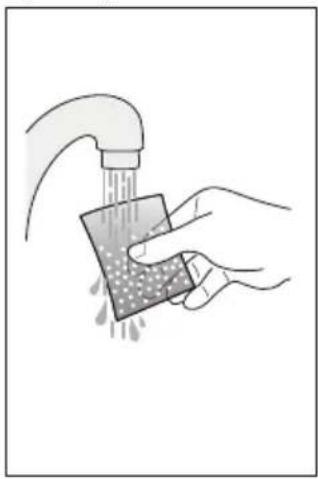
natural_image
Illustration of a hand cleaning a surface with a drain, showing liquid droplets and a sponge (no text or symbols)- Balík Softballs prepláchnite pod tečúcou vodou (obr. 34).
- Vrecko ponorte do nádržky na vodu (A7) (obr. 35).
- Vrecko Softballs vymeňte každé 3 mesiace (obr. 36).
natural_image
Illustration of a hand inserting a card into a machine (no text or symbols visible)3536
text_image
JAN FEB MAR 3 1 2 3 4 5 6 7 8 9 10 11 12 13 14 15 16 17 18 19 20 21 22 23 24 25 26 27 28 29 30 31 32 33 34 35 36 37 38 39 40 41 42 43 44 45 46 47 48 49 50 51 52 53 54 55 56 57 58 59 60 61 62 63 64 65 66 67 68 69 70 71 72 73 74 75 76 77 78 79 80 81 82 83 84 85 86 87 88 89 90 91 92 93 94 95 96 97 98 99 10013. ODVÁPŇOVANIE
Pozor!
text_image
Ampkins Ampkins Cock Bracket Cock Bracket 39
natural_image
Line drawing of an open oven with control panel and side sink (no text or symbols)text_image
Idealna dawkanatural_image
Line drawing of a kitchen appliance with a control knob and indicator lights (no text or symbols)| DISHWASHER SAFE | DEco MuHClean | ||||
 | × | √ | √ | × | × |
 | √ | × | × | √ | √ |
 | × | √√ | √√ | ||
 | × | × | × | √ | √ |
 | × | × | √ | × | × |
| → | |||||
 |  |  |  | | |
| × | × | × | √ | √ | |
10. CZYSZCZENIE MŁYNKA DO KAWY
natural_image
Hand holding a textured surface with an arrow indicating direction, labeled '3334' at bottom (no other text or symbols)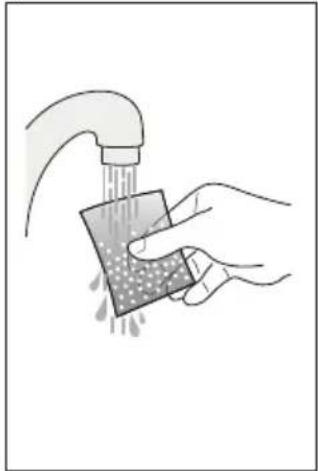
natural_image
Illustration of a hand cleaning a square surface with a faucet (no text or symbols)natural_image
Illustration of a hand inserting a card into a device (no text or symbols visible)
text_image
JAN FEB MAR 3 12 13 14 15 16 17 18 19 20 21 22 23 24 25 26 27 28 29 30 31 32 33 34 35 36 37 38 39 40 41 42 43 44 45 46 47 48 49 50 51 52 53 54 55 56 57 58 59 60 61 62 63 64 65 66 67 68 69 70 71 72 73 74 75 76 77 78 79 80 81 82 83 84 85 86 87 88 89 90 91 92 93 94 95 96 97 98 99 10013. ODKAMIENIANIE
Uwaga!
text_image
Treatment Air Condition Control Air Condition 39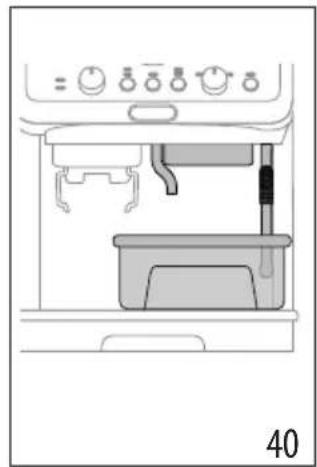
natural_image
Line drawing of an open kitchen appliance with control knobs and a sink (no text or symbols)A4. Capac recipient boabe
Cold Brew
Cold Brew
X2
8. MENIU SETĂRI
| DISWASHER SAFE | Dioo MultClean | ||||
 | × | √ | √ | × | × |
 | √ | × | × | √ | √ |
 | × | √√ | √√ | ||
| → | |||||
 |  |  |  |  | |
| × | × | × | √ | √ | |
| × | × | √ | × | × | |
| × | × | × | √ | √ | |
10. CURĂȚAREA RÂȘNIȚEI
natural_image
Hand holding a textured surface with an arrow indicating upward motion (no text or symbols)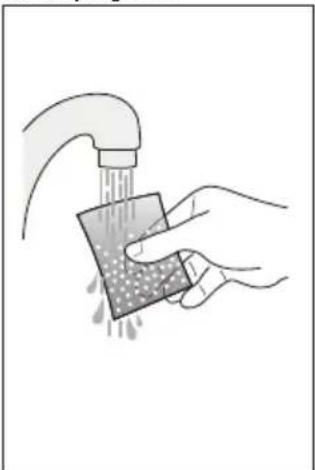
natural_image
Illustration of a hand cleaning a square surface with a faucet (no text or symbols)natural_image
Illustration of a hand inserting a card into a device (no text or symbols visible)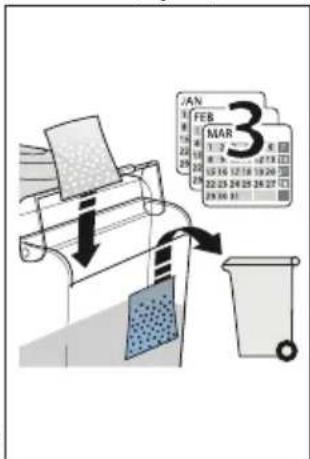
text_image
JAN FEB 3 MAR 1:2 2:2 3:2 4:2 5:2 6:2 7:2 8:2 9:2 10:2 11:2 12:2 13:2 14:2 15:2 16:2 17:2 18:2 19:2 20:2 21:2 22:2 23:2 24:2 25:2 26:2 27:2 28:2 29:2 30:2 31:2 32:2 33:2 34:2 35:2 36:2 37:2 38:2 39:2 40:2 41:2 42:2 43:2 44:2 45:2 46:2 47:2 48:2 49:2 50:2 51:2 52:2 53:2 54:2 55:2 56:2 57:2 58:2 59:2 60:2 61:2 62:2 63:2 64:2 65:2 66:2 67:2 68:2 69:2 70:2 71:2 72:2 73:2 74:2 75:2 76:2 77:2 78:2 79:2 80:2 81:2 82:2 83:2 84:2 85:2 86:2 87:2 88:2 89:2 90:2 91:2 92:2 93:2 94:2 95:2 96:2 97:2 98:2 99:2 100:213. DECALCIFIERE
Atentie!
text_image
Treatment Air Condition Control Air Condition 39
natural_image
Line drawing of an open kitchen appliance with control knobs and a sink (no text or symbols)text_image
Appraiser Airflowset Cable Drive Airflowset 39
natural_image
Line drawing of an open oven with control panel and side panel, no text or symbols presentnatural_image
Illustration of a hand inserting a card into a device (no text or symbols visible)
text_image
JAN FEB 3 MAR 2 12 2 15 16 17 18 19 20 22 23 24 25 26 27 29 30 31 12 2 15 16 17 18 19 20 22 23 24 25 26 27 29 30 31natural_image
Hand holding a textured rectangular object with an arrow indicating upward motion, labeled '33' at bottom (no text or symbols on the object itself)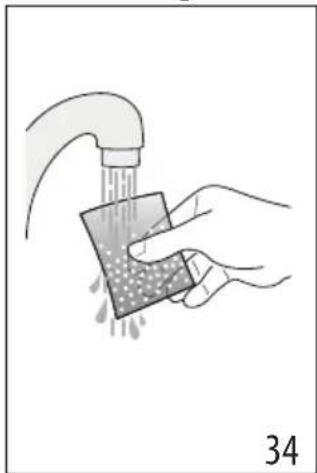
natural_image
Illustration of a hand cleaning a sponge with liquid, no text or symbols present| . |
| . |
| . |
| . |
 |
- القهوة.
1 ..(29) 2 ..(30)
طن فعال