IPL 7800 Cool Pro - IPL hair remover BEURER - Free user manual and instructions
Find the device manual for free IPL 7800 Cool Pro BEURER in PDF.

| Product type | IPL pulsed light epilator |
| Brand | Beurer |
| Model | IPL 7800 Cool Pro |
| Dimensions (L x W x H) | 16.4 x 6.1 x 3.9 cm |
| Weight | Approx. 280 g |
| Power supply | Power adapter model FX48E-120400C, input 100-240 V~, output 12.0 V |
| Technology | IPL (Intense Pulse Light) for home use |
| Wavelength | 530 – 1,100 nm |
| Maximum energy | > 5 Joules/cm² |
| Intensity levels | 5 adjustable levels |
| Treatment area | 3.8 cm² |
| Maximum number of pulses | Up to 1,000,000 |
| Main functions | Auto-Flash mode, skin contact sensor, cooling function |
| Maintenance and cleaning | Clean the light surface and sensor with a slightly damp, lint-free cloth; do not immerse |
| Safety | Skin contact sensor preventing empty pulses, integrated UV filter, double protective insulation (class II) |
| Spare parts and repairability | Detachable power adapter; no user-serviceable parts; do not open the device |
| Warranty | See supplied warranty card |
| Operating temperature | 5 °C to +40 °C |
| Storage temperature | -20 °C to +55 °C |
| Operating relative humidity | ≤ 80% |
Frequently Asked Questions - IPL 7800 Cool Pro BEURER
User questions about IPL 7800 Cool Pro BEURER
0 question about this device. Answer the ones you know or ask your own.
Ask a new question about this device
Download the instructions for your IPL hair remover in PDF format for free! Find your manual IPL 7800 Cool Pro - BEURER and take your electronic device back in hand. On this page are published all the documents necessary for the use of your device. IPL 7800 Cool Pro by BEURER.
USER MANUAL IPL 7800 Cool Pro BEURER
natural_image
Black cylindrical device with textured surface and visible internal structure, no text or symbols on bodyEN IPL hair removal device Instructions for use......24
natural_image
Illustration of an open book with a geometric arrow pointing to it, showing text lines and page layout (no readable text or symbols)EN Unfold page 3 before reading the instructions for use.
natural_image
Simple line drawing of an open book with no text or symbols visibletext_image
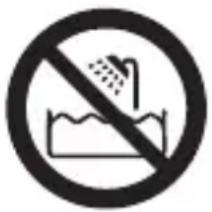
Prohibition sign showing a showerhead spraying water, with no text or symbols beyond the prohibition symbol.natural_image
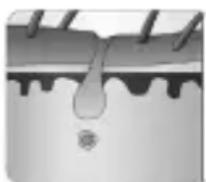
Simple line drawing of a hand holding a small object above a curved surface (no text or symbols)
natural_image
Three cosmetic bottles crossed out by a diagonal line (no text or symbols)WARNING
natural_image
Illustration of a hand holding a sheet of paper over a curved object (no text or symbols visible)natural_image
Diagram showing two electrical connections: one with a plug and cable, the other with a bulb and plug inserted (no text or symbols)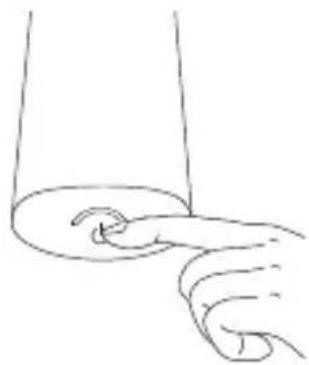
natural_image
Line drawing of a hand pressing down on a curved object (no text or symbols)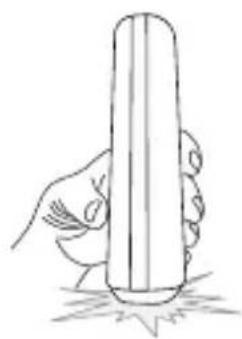
natural_image
Hand holding a cylindrical object with a vertical line, resting on a star-shaped base (no text or symbols)natural_image
Simple line drawing of a human face with eyes, nose, and mouth (no text or symbols)
natural_image
Line drawing of a person wearing a head covering and turgnose (no text or symbols)natural_image
Side profile illustration of a person wearing a head covering and turtleneck (no text or symbols)natural_image
Illustration of a hand holding a piece of paper, partially covered by a curved object (no text or symbols visible)9. WAS TUN BEI PROBLEMEN?
natural_image
Simple line drawing of an open book with no text or symbols visibleRead these instructions for use carefully. Follow the warnings and safety notes. Keep these instructions for use for future reference. Make the instructions for use accessible to other users. If the device is passed on, provide the instructions for use to the next user as well.
TABLE OF CONTENTS
- Included in delivery 26
- Signs and symbols 27
- Intended use 29
- Warnings and safety notes....30
- Device description....34
- First steps.... 34
6.1 Preparing for use....34
6.2 Skin sensitivity test....35 - Usage....36
7.1 Application methods ...... 37
7.2 Special instructions for facial treatments....38
7.3 Application cycle 39
7.4 After treatment 40 - Cleaning and maintenance....40
- What if there are problems? 40
- Disposal......41
- Technical specifications .... 41
- Warranty 42
WARNING
- The device and adapter are only intended for use in the home/private use and are not intended for commercial use.
- The device is only suitable for adults over the age of 18.
- Children must not play with the device.
- The device and adapter must not get wet.
- Check that the device and the mains cable are in perfect working order before each usage. In the event of damage, the device must not be used.
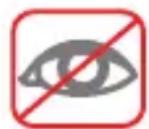
- Never look directly into the light emitted from the IPL lamp.
- Do not insert any objects into the device.
- Make sure that the device’s vents are not covered.
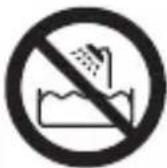
- Do not use the device near to damp environments, such as bathtubs, wash basins, showers or other containers with water or other liquids – risk of electric shock!
- In order to avoid an electric shock, do not touch any internal components if the device is damaged.
- If the mains connection cable of this device is damaged, it must be disposed of. If it cannot be removed, the device must be disposed of.
- Never operate the device unsupervised. Supervise children around the device to ensure they do not play with it.
- Under no circumstances should you open or repair the device yourself, otherwise proper functionality can no longer be guaranteed. Failure to comply will invalidate the warranty.
- This device may be used by persons with limited physical, sensory or mental capabilities, provided they are supervised by a responsible person or they receive detailed instructions on how to use the device.
1. INCLUDED IN DELIVERY
Check that the exterior of the cardboard delivery packaging is intact and make sure that all contents are present. Before use, ensure that there is no visible damage to the device or accessories and that all packaging material has been removed. If you have any doubts, do not use the device and contact your retailer or the specified Customer Services address.
• 1 IPL hair removal device
- 1 mains adapter
• 1 these instructions for use
2. SIGNS AND SYMBOLS
The following symbols are used on the device, in these instructions for use, on the packaging and on the type plate for the device:
| !DANGIndicates an imminent danger. If it is not avoided, it will result in death or serious injury. |
| !WARNINGIndicates a potentially impending danger. If it is not avoided, there is a risk of death or serious injury. |
| !CAUTIONIndicates a potentially impending danger. If it is not avoided, slight or minor injuries may result. |
| NOTICEIndicates a potentially harmful situation. If it is not avoided, the system or something in its vicinity may be damaged. |
 | DangerThis device must not be used near to water or in water itself (e.g. in a wash basin, or in the shower or bathtub) – risk of electric shock! |  | CE labellingThis product satisfies the requirements of the applicable European and national directives. |
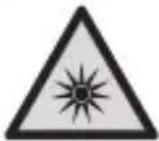 | Warning;Optical radiation |  | Polarity of DC power connection |
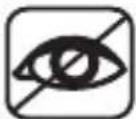 | Keep away from eyes! |  | Do not use on tanned skin or after exposure to the sun |
 | Product informationNote on important information |  | Read the instructions |
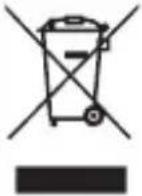 | Disposal in accordance with the Waste Electrical and Electronic Equipment EC Directive (WEEE) |  | Separate the packaging elements and dispose of them in accordance with local regulations. |
 | Manufacturer For indoor use |  | |
 | The products demonstrably meet the requirements of the Technical Regulations of the EAEU |  | Separate the product and packaging elements and dispose of them in accordance with local regulations. |
 | Marking to identify the packaging material.A = material abbreviation,B = material number:1-7 = plastics,20-22 = paper and cardboard |  | Protection class II deviceThe device is double-insulated and, therefore, meets protection class 2 |
 | Conformity assessed marking for the United Kingdom |  | Nominal ambient temperatureMaximum operating temperature |
 | Alternating current |  | Direct currentThe device is suitable for use with direct current only |
 | Protected against solid foreign objects, 12.5 mm in diameter and larger | 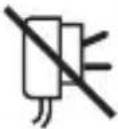 | Do not use the mains adapter if the plug is damaged. |
 | Switching mains adapter |  | Safety isolating transformer, short-circuit proof |
 | Energy efficiency level 6 Imp |  mbol mbol |
3. INTENDED USE
The device is intended for the removal of unwanted body hair in both women and men. The device must only be used on the legs, armpits, bikini line, chest, stomach, back and face (only women may use it on the face, below the cheek line).
The device may only be used for the purpose for which it is designed and in the manner specified in the instructions for use. Any form of improper use can be dangerous. The manufacturer is not liable for damage resulting from improper or incorrect use.
IPL technology – how it works
The IPL 7800 Cool Pro is a light-based device for long-lasting hair removal for private use. The light-based hair removal process is a well-known and proven method. In over 15 years of clinical applications around the world, it has proven to be a safe and effective method for achieving long-lasting hair reduction. The additional cooling function can make usage more pleasant.
How does the light remove the hair?
Light-based hair removal is founded on the principle of selective photothermolysis, which uses optical energy to deactivate hair growth. To achieve such a thermal effect, the hair root must selectively absorb the light energy and convert it into heat.
This selectivity is achieved when the optical energy that is released into the tissue is mainly absorbed by the melanin pigment in the hair. The high-energy light is converted into thermal energy (heat), which ultimately deactivates hair growth.
What effect does the hair growth cycle have on light-based hair removal?
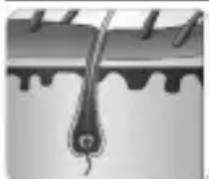
Anagen – growth phase
Every hair on our body goes through the three phases of the hair growth cycle: Anagen, catagen and telogen. Only hairs that are in the anagen phase, or growth phase, respond to treatments with IPL.
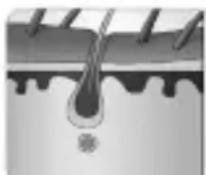
Catagen – transitional phase
Although the duration of a complete hair growth cycle differs from person to person and depends on the area of the body the hair is growing on, the cycle generally lasts 18–24 months.
Please note that at least one complete hair growth cycle is required in order to achieve long-lasting hair removal using the device.

flowchart
graph TD
    A["Anagen"] --> B["Catagen"]
    B --> C["Telogen"]
    C --> A
    style A fill:#f9f,stroke:#333
    style B fill:#f9f,stroke:#333
    style C fill:#f9f,stroke:#333
    note right of A "18–24 months"
Telogen – resting phase
4. WARNINGS AND SAFETY NOTES
! DANO
Keep the device and adapter away from water! The IPL 7800 Cool Pro is an electrical device. Do not place it in water or allow it to fall into water or any other liquid.
text_image
Prohibition sign showing a showerhead spraying water, indicating no pollution or leakageThis can lead to severe electric shock!
- Do not use the device when taking a bath.
- Do not use the device when it is damp or wet.
- Do not reach for the device if it has fallen into water.
- Immediately unplug the mains adapter if it has fallen into water.
- Never touch the mains adapter or the device with wet hands!
WARNING
- Do not use the device when pregnant or breastfeeding.
- If you discover extreme reddening, blistering or burns on the skin, stop using the device immediately!
- Never attempt to release a light pulse into the air!
- On the basis of the “Hair and skin colour chart” on the back page of these instructions for use, determine which light intensities are best suited to the colour of your skin and your body hair and whether this method is suitable for you to use at all (if not, this is marked by an “x” in the chart).
- Do not use the device on naturally dark skin.
- Do not use the device with a contact gel – this may damage the device.

The device works best on dark hair types or on hair with a high melanin content. Black and dark brown hair shows the best response and, although brown and light brown hair will also respond to the treatment, it usually requires more hair removal sessions. Red hair could produce a reaction. White, grey or blond hair does not usually respond to the device, although some users have noticed results after multiple hair removal sessions.
WARNING
Do not use the device under any circumstances if you suffer from one of the following ailments:
- If you suffer from skin cancer or have done in the past, or if you have had potential malignancies on the skin areas to be treated.
-
If you suffer from epilepsy with flash sensitivity.
-
If you suffer from collagen disorders, including the formation of keloids or poor tissue repair.
- If you suffer from herpes or psoriasis in the treatment area, unless you have consulted a doctor and received preventative treatment.
- If you are photosensitive or suffer from another form of light sensitivity, such as porphyria, polymorphic photodermatosis, solar urticaria, lupus, etc.
- If you suffer from a metabolic disorder, such as diabetes.
- If you suffer from a blood clotting disorder.
Do not use the device under any circumstances if you are taking any of the following medication:
- If you are taking medication that makes the skin more sensitive to light, including non-steroidal anti-inflammatory drugs (for example, aspirin, ibuprofen, paracetamol), tetracyclines, phenothiazines, thiazide diuretics, sulphonylurea, sulfonamide, DTIC, fluorouracil, vinblastine, griseofulvin, alpha hydroxy acids (AHAs), beta hydroxy acids (BHAs), Retin-A®, Accutane® and/or topical retinoids.
- If you are undergoing or recently underwent treatment with azelaic acid.
- If you have been on a course of steroids in the past 3 months.
- If you have had a skin exfoliation treatment or other skin smoothing procedure in the last 6–8 weeks.
- If you have undergone radiation or chemotherapy in the past 3 months.
Do not use the device under any circumstances in the following areas:
- On mucous membranes in the ear or nose area.
- On or next to an active implant, such as a pacemaker or a device for incontinence, insulin pump, etc.
- On the face above the cheek line, around the eyes, eyebrows or eyelashes, as this could result in severe damage to the eyes.
- On nipples, areolae, inner labia, vagina, anus, nose and ears.
- Men must never use the device on the scrotum or face.
- On piercings or other metal objects, such as earrings or jewellery.
- On tattoos or permanent make-up in the area to be treated.
- On dark brown or black patches, such as large freckles, birthmarks, moles, blisters or warts.
- On eczema, psoriasis, lesions, open wounds or acute infections. Wait until the affected area has healed before using the device.
- On damaged or cracked skin or in areas at risk of malignancy.
- On an area of your body where you may like to have hair in the future.
This list is not exhaustive.
If you take prescription medicine, are monitored regularly due to an illness and/or are unsure whether the device is safe for you to use, consult your doctor or dermatologist before using the device.
Possible side effects:
If the device is used in accordance with these instructions for use, side effects and complications rarely occur in relation to the use of the device.
- After usage, it is possible that the skin will be slightly red, itchy or warm to the touch. These reactions are harmless and will quickly wear off.
- For a short time, you may experience a skin reaction similar to sunburn on the treated area. If this reaction does not wear off within three days, consult a doctor.
- Dry or irritated skin may occur as a result of shaving or a combination of shaving and light therapy. This reaction is harmless and will wear off within a few days. If you wish, you can cool the affected area with some ice or a damp cloth.
- If the skin continues to be too dry, you can apply an unscented moisturising cream 24 hours after using the device.
- In rare cases, the treated skin can become very red and swollen. This is usually because the intensity level you selected was too high and is more likely to occur in sensitive parts of the body. Reddening and swelling should subside within 2 to 7 days and should be treated by frequent application of ice. Gentle cleaning is OK, but you should avoid exposure to the sun.
- Discolouration of the skin is very rare and appears as darker or lighter patches on the affected skin area. It can be caused by using an intensity level that is too high for your skin tone. If the discolouration does not subside within two weeks, consult a doctor. Do not treat the discoloured areas again until the discolouration has fully disappeared.
- In very rare cases, burns or lesions to the skin can occur after using the device. The burn or lesion may take a few weeks to heal and, in extremely rare cases, you may be left with a visible scar.
- In very rare cases, skin infections and inflammations may occur. These may be caused through use of the device on wounds or cuts caused by shaving, or existing wounds or ingrown hairs.
- Severe pain may occur during or after use of the device in the following cases: If you use the device on unshaven skin; if you select an intensity level that is too high for your skin tone; if you treat the same skin area several times with light pulses; if you use the device on open wounds, inflammations, tattoos, burns, etc.
- In very rare cases, permanent scarring may occur. Scarring usually occurs in the form of a flat, white lesion on the skin. Subsequent aesthetic treatment may be required to improve the appearance of the scar.
- In very rare cases, using the device can result in a blue/violet haematoma that may last 5 to 10 days. Once the haematoma fades, rusty brown discolouration of the skin (hyperpigmentation) can occur, which may be permanent.
Warning to sunbathers before and after using the device!
Sunbathing before using the device

- After sunbathing, wait at least 2 weeks before using the device.
- Before using the device, check the skin for signs of sunburn. If you have sunburn that has not healed, wait until it has completely healed to use the device.
- Then carry out a skin sensitivity test on the tanned skin to determine which intensity level is right for you.
Sunbathing after using the device
- After using the device, wait at least 48 hours before sunbathing. Skin that is still reddened must be kept out of the sun!
- For the first two weeks after using the device, the treated skin must be covered with clothing or sunscreen (at least SPF 30) when you are out in the sun.
Tanning with artificial light
The instructions for “Sunbathing before using the device” and “Sunbathing after using the device” also apply to tanning using artificial light and tanning lotions.
Do not use the device for 24 hours before or after using a sauna/swimming pool, as the chlorine may lead to skin irritation.
NOTICE
- Do not use the device with attachments or accessories that are not recommended by Beurer GmbH.
- During use, do not expose the device to temperatures below 5°C or above 40°C.
- Do not use the device if you see or smell smoke during use.
- Do not use the device if the fan opening on the device is cracked, is becoming detached or is missing entirely.
• After use, store the device in its original box. - Do not expose the device to several hours of direct sunlight or UV light.
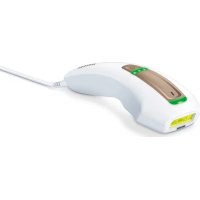
5. DEVICE DESCRIPTION
The associated drawings are shown on page 3.
1 Light area
6 Trigger button
2 Skin contact sensor
7 Intensity display (5 levels)
3 Cooling indicator lamp
8 ON/OFF/intensity button
4 "Auto flash" indicator lamp
9 USB-C connection
5 Skin contact indicator lamp
Safety features
The device also has a built-in UV filter that blocks harmful UV rays.
The device has a built-in skin contact sensor 2 to protect the eyes. It was developed so that no light pulses can be emitted when the device is held in the air. A light pulse is only emitted when the skin contact sensor 2 is in sufficient contact with the skin.
6. FIRST STEPS
6.1 Preparing for use
Before you begin using the device, you must first make appropriate preparations and then carry out a skin sensitivity test:
-
Using the hair and skin colour chart (on the back page of these instructions for use), check which intensity level is suitable for you. An "x" in the table indicates that the device is not suitable for you to use.
-
Before each application, shave the body parts that you wish to treat. Do not use a hair removal cream instead of a razor.
-
Ensure that the skin areas to be treated are shaved, dry and clean (free from any residue such as powder, cream, make-up or deodorant).

natural_image
Illustration of a hand holding a pen, poised to write on a curved line (no text or symbols)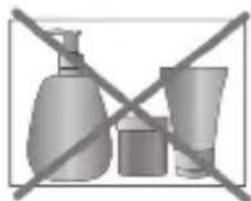
natural_image
Three cosmetic bottles crossed out by a diagonal line (no text or symbols)WARNING
Do not clean the skin with flammable liquids such as alcohol or acetone shortly before using the device.
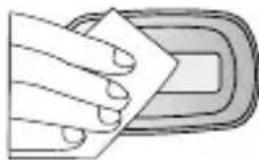
- Clean the light area 1 and skin contact sensor 2 using a dry, lint-free cloth.
natural_image
Illustration of a hand holding a white sheet over a rounded rectangular object (no text or symbols)- Perform a skin sensitivity test on every body part that you would like to treat 48 hours before using the device fully (see chapter "6.2 Skin sensitivity test").
6.2 Skin sensitivity test
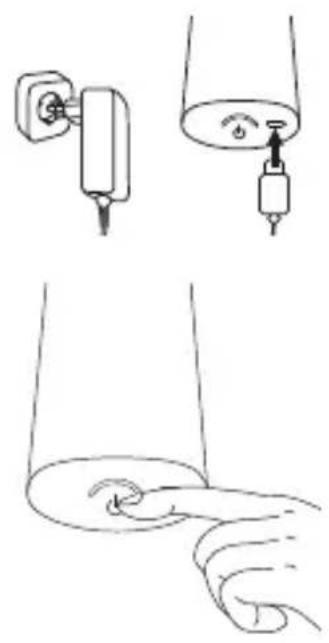
- Connect the mains adapter to the USB-C connection 9 on the bottom of the device.
- Insert the mains adapter into a suitable socket. The ON/OFF/intensity button 8 lights up white continuously. The device is now in standby mode.
- Briefly hold down the ON/OFF/intensity button 8 to switch on the device. On the intensity display 7, a small light (level 1) begins to illuminate continuously in white. The cooling indicator lamp 3 also begins to light up white continuously and the ventilation starts.

In the case of facial treatment, the skin sensitivity test should be performed on an area without hair, for example below the ear or on the side of the neck.
- Place the light area 1 on the skin. Ensure that the light area 1 and skin contact sensor 2 come into full contact with the skin. The skin contact indicator lamp 5 lights up as soon as there is sufficient contact with the skin.
- If the skin contact indicator lamp 5 is illuminated, press the trigger button 6 to trigger a light pulse at level 1. You will see a bright flash and hear a popping sound.
- Position the skin contact sensor 2 on another treatment area. Increase the intensity level by pressing the ON/OFF/intensity button 8 again and release a light pulse using the trigger button 6. Do not exceed the maximum permitted/recommended intensity for your skin tone (see the hair and skin colour chart on the back page of these instructions for use).

Only increase the intensity level if the previous level is not uncomfortable for you. If intensity level 1 is uncomfortable for you, do not increase the intensity level.
- If you experience an uncomfortable feeling after the flash, reduce the intensity.
- To end the skin sensitivity test, switch off the device. To do so, press and hold the ON/OFF/intensity button ⑧ for 2 seconds. The intensity display ⑦ goes out and only the ON/OFF/intensity button ⑧ remains illuminated. The ventilation switches off automatically a few seconds after switching off the device. Wait 48 hours and examine the treated skin area. If the treated skin surface appears normal (no reaction or only slight reddening), you can treat the tested skin areas at the intensity level set for the skin sensitivity test.

If your treated skin surface produces a reaction (e.g. reddening or swelling), wait until the symptoms have fully subsided and then carry out another skin sensitivity test at a lower intensity. If the treated skin surface reacts again, consult your doctor.
7. USAGE
- Connect the mains adapter to the USB-C connection 9 on the bottom of the device. Insert the mains adapter into a suitable socket.
The ON/OFF/intensity button 8 lights up continuously. The device is now in standby mode.
-
Briefly hold down the ON/OFF/intensity button 8 to switch on the device. On the intensity display 7, a small light (level 1) begins to illuminate continuously in white. The cooling indicator lamp 3 also begins to light up white continuously and the ventilation starts.
-
If you wish to carry out an application at a higher intensity level, increase the intensity by repeatedly pressing the ON/OFF/intensity button 8 until you have reached the desired intensity.
-
Position the light area 1 on the skin and press the trigger button 6 in order to release a light pulse. Make sure that the light area 1 is in full contact with the skin and that the skin contact indicator lamp 5 is showing that there is sufficient contact. You will see a bright flash and hear a popping sound. The device will be ready for the next pulse within 1-3 seconds (depending on the intensity level).
natural_image
Illustration showing three different electrical or mechanical components: a plug, a bulb with a dial indicator, and a hand pointing to a button (no text or symbols present)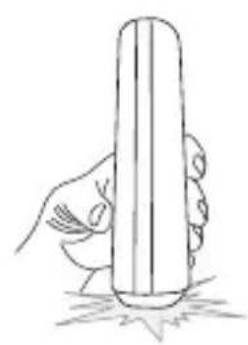
natural_image
Hand holding a cylindrical object with a pointed tip, resting on a surface (no text or symbols)7.1 Application methods
WARNING
Do not treat the same area twice within one treatment. The risk of side effects is increased if an area is treated more than once.

The pulses from the device should be applied in rows – beginning at one end of each row, continuing to the other end. This technique allows better monitoring of the areas of skin that have already been treated and helps you to avoid treating the same area more than once or treating overlapping areas of skin.
Application method 1: "Auto Flash" mode
Ensure that the skin contact sensor 2 is making sufficient contact with the skin. Press and hold the trigger button 6 for two seconds. The device automatically emits light pulses at regular intervals and the “Auto Flash” indicator lamp 4 lights up permanently. This mode does not require the trigger button 6 to be pressed manually. The “Auto Flash” mode can be ended by briefly pressing the trigger button 6. The “Auto Flash” mode is suitable for treating large areas in particular, for example the legs.
Application method 2: Triggering individual flashes
Release the trigger button 6 after each light pulse. For the next light pulse, position the device on the area directly next to the area that has just been treated. Ensure that the light area 1 and skin contact sensor 2 come into full contact with the skin. This mode guarantees precise treatment, e.g. for knees or ankles.

If the device does not emit any light pulses and the skin contact indicator lamp 5 does not light up, this means that the skin contact sensor 2 is not making sufficient contact with the skin.

Allow the device to cool for a few minutes if it seems too hot for you. You can continue your treatment as normal after a short cooling period.
7.2 Special instructions for facial treatments
WARNING
- If the distance to the eye is less than 20cm, we recommend using safety glasses. We recommend using safety glasses approved in accordance with Regulation (EU) 2016/425 and tested in accordance with EN 166:2001 and ISO:12609-1:2021 standards.
- Men must not use this device on the face.
- Do not use the device on the face at an intensity level higher than 2.
- Do not use the device on the face above the cheek line or on the eyes, eyebrows or eyelashes, as this could result in severe damage to the eyes. Do not use the device on mucous membranes in the ear or nose area.
-
The skin on your face is very sensitive and requires special care. It is essential to observe all warnings and safety notes in these instructions for use to prevent adverse consequences. We recommend that you first perform a treatment on your body and get to know the device before performing facial treatment. The device can be used to treat all areas of the face below the cheek line, such as the upper lip, cheeks, jaw, chin and neck.
-
It is essential to carry out a selective skin sensitivity test 48 hours before treatment (see chapter "6.2 Skin sensitivity test"). The skin sensitivity test should be performed on an area without hair, such as below the ear or on the side of the neck, to determine the suitable intensity level.
WARNING
Do not treat the tested area until at least 1 week after performing the skin sensitivity test.
-
Mark the treated area with a white eyeliner pencil. Use the marking as a reference line for issuing the pulses. This way you can prevent overlapping the treatment areas or treating other areas of the face by mistake.
-
Use a mirror to position the device correctly on the treatment area.
-
Follow the instructions for use and observe the following specific instructions in particular.
Treating the upper lip
Position the light area 1 of the device as shown in the figure. Trigger a pulse in every marked zone.
Avoid applying the treatment to the nostrils and lips, as these areas are more sensitive.

natural_image
Simple line drawing of a human face with eyes, nose, and mouth (no text or symbols)
You can “fold in” your lips or press them together to make the treatment area more taut, or apply a thick layer of white eyeliner to the lips and around the edge of the lips. The white line ensures that the energy of the flash is reflected and does not reach your lips, should you accidentally apply a pulse to your lip.
Treating the cheeks and jaw
Position the light area 1 of the device as shown in the figure. At each point, trigger a pulse and move from one side of the cheek or jaw to the other.
Treating the neck and chin
Position the light area 1 of the device as shown in the figure. At each point, trigger a pulse and move from one side of the neck or chin to the other.

natural_image
Side profile sketch of a person wearing a head covering and turgally (no text or symbols)
natural_image
Side profile illustration of a person wearing a head covering and turtleneck (no text or symbols)Care after facial treatment
- Apply a soothing lotion such as aloe vera.
- Do not use exfoliators, whitening lotions or similar products for at least 24 hours, as this could irritate the treated skin.
- For at least 48 hours after the treatment, avoid more than 15 minutes of direct exposure to the sun. If the treated skin is exposed to sunlight during this period, it is essential to apply sun protection with SPF 30 or higher.
- Do not remove hair on the treated areas using wax or tweezers.
Remember that it may take a complete hair growth cycle to achieve long-lasting hair removal.
7.3 Application cycle
For body treatment:
| Week 1 to 2: Use three times a week | |
| Week 3 to 5: Use twice a week | |
| From week 6: Use once or twice a month (repeat as necessary) |
For facial treatment:
- The first 6 hair removal sessions using the device should be performed around two weeks apart.
- The 7th to 12th hair removal sessions using the device should be performed around four weeks apart. Afterwards, you may use the device from time to time as necessary, until long-lasting results are achieved. This corresponds to the recommended treatment plan that has proven to achieve the best results. You can, however, create a different personal treatment plan and still achieve satisfactory results.
7.4 After treatment
- When you have completed the hair removal session, press and hold the ON/OFF/intensity button 8 for 2 seconds. The device switches to standby mode. Standby mode is indicated by the ON/OFF/intensity button 8 permanently lighting up.
- In standby mode, the fan will continue to run for a few seconds until the device has cooled down.
- Once the fan has switched off, remove the mains adapter from the mains socket.
CAUTION
After treatments, do not use any antiperspirants/deodorants as these may cause skin irritation.
8. CLEANING AND MAINTENANCE
We recommend cleaning your device and especially the light area 1 after each hair removal session.
When cleaning, do not use any solvents or other aggressive or abrasive cleaning agents, as the surface may become damaged.
Never immerse the device or parts of the device in water!
- Before cleaning, remove the mains adapter of the device from the socket.
- Clean the housing of the device with a dry, clean cloth.
- Gently clean the light area 1 and skin contact sensor 2 using a slightly damp lint-free cloth.

natural_image
Illustration of a hand holding a white sheet over a rounded rectangular object (no text or symbols)9. WHAT IF THERE ARE PROBLEMS?
"The device will not switch on"
- Ensure that the mains cable is correctly connected to the device.
- Ensure that the mains adapter is inserted into a wall socket.
"No light pulse is emitted when I press the trigger button 6"
- Ensure that the device is in full contact with the skin and that the light area 1 and skin contact sensor 2 are pressed onto the skin evenly and firmly. For your safety, the trigger button only activates a pulse if the skin contact sensor 2 has sufficient contact with the skin.
- If the skin contact indicator lamp 5 on the device is not illuminated, this indicates that the contact with the skin, as measured by the skin contact sensor 2, is insufficient. Increase the level of contact with the skin or contact Customer Services.
10. DISPOSAL
For environmental reasons, do not dispose of the device in household waste at the end of its service life. Dispose of the device at a suitable local collection or recycling point in your
country. Observe the local regulations for material disposal. Dispose of the device in accordance with EC Directive Waste Electrical and Electronic Equipment (WEEE). If you have any questions, please contact the local authorities responsible for waste disposal. You can obtain the location of collection points for old devices from the local or municipal authorities, local waste disposal companies or your retailer, for example.
- TECHNICAL SPECIFICATIONS
| Type IPL 7800 Cool Pro | ||
| Treatment surface 3.8 cm | 2 | |
| Technology IPL (Intense Pulsed Light for use in the home) | ||
| Wavelength 530 – 1100 nm | ||
| Max. energy level max. 5 joules/cm | 2 | |
| Intensity levels provided 5 | ||
| Time between pulses Level 1: 1.5 s | Level 2: 1.8 sLevel 3: 2.1 sLevel 4: 2.5 sLevel 5: 2.8 s | |
| Maximum number of light pulses up to 1,000,000 | ||
| Dimensions 16.4 x 6.1 x 3.9 cm | ||
| Weight Approx. 280 g | ||
| Temperature | Operation 5°C to 40°C | |
| Storage -20°C to 55°C | ||
| Relative humidity | Operation ≤ 80% relative humidity | |
| Storage 5 – 95% (non-condensing) | ||
Mains adapter
| Model number FX48B-120400C | |
| Input 100 – 240 V~ 50 / 60 Hz, 1.0 A | |
| Output 12.0 V |  |
| Protection class | This device is double-insulated (protection class II) ☐ |
| Polarity |  |
| Average efficiency during operation | ≥ 89.38% |
| No-load power consumption | ≤ 0.08 W |
Subject to technical changes
12. WARRANTY
Further information on the warranty and warranty conditions can be found in the warranty leaflet supplied.
FRANÇAIS

natural_image
Simple line drawing of an open book with no text or symbols visibletext_image
Prohibition sign showing a showerhead spraying water, indicating no pollution or leakagenatural_image
Simple line drawing of a hand holding a small object over a curved surface (no text or symbols)
natural_image
Three grayscale product containers crossed out by a diagonal line (no text or symbols)AVERTISSEMENT
natural_image
Illustration of a hand holding a sheet of paper over a curved object (no text or symbols visible)natural_image
Simple line drawing of a human face with eyes, nose, and mouth (no text or symbols)
natural_image
Side profile illustration of a person wearing a head covering and turtleneck (no text or symbols)
natural_image
Side profile illustration of a person wearing a head covering and turtleneck (no text or symbols)natural_image
Illustration of a hand holding a sheet of paper, partially covered by a rounded rectangular object (no text or symbols visible)9. QUE FAIRE EN CAS DE PROBLÈMES ?
natural_image
Simple line drawing of an open book with no text or symbols visibletext_image
Prohibition sign showing a showerhead falling from a surface, crossed out by a diagonal lineADVERTENCIA
natural_image
Simple line drawing of a hand reaching toward a curved surface (no text or symbols)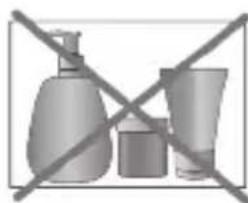
natural_image
Three cosmetic bottles crossed out by a diagonal line (no text or symbols)ADVERTENCIA
natural_image
Illustration of a hand holding a sheet of paper over a rounded rectangular object (no text or symbols visible)natural_image
Two technical diagrams showing a plug inserted into a socket and a bulb with a dial indicator (no text or symbols present)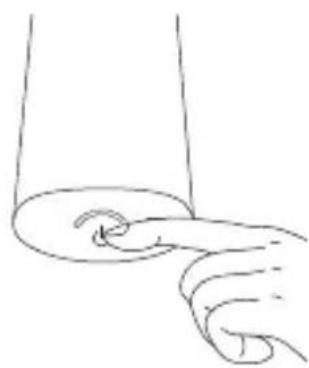
natural_image
Line drawing of a hand pointing at a circular object on a curved surface (no text or symbols)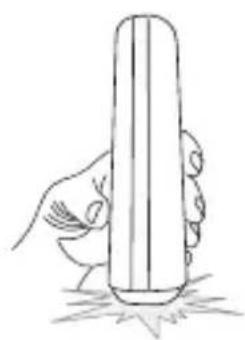
natural_image
Hand holding a cylindrical object with a pointed tip, resting on a surface (no text or symbols visible)natural_image
Simple line drawing of a human face with eyes, nose, and mouth (no text or symbols)
natural_image
Line drawing of a person wearing a beanie and turtleneck (no text or symbols)natural_image
Side profile illustration of a person wearing a head covering and turtleneck (no text or symbols)natural_image
Illustration of a hand holding a sheet of paper, partially covered by a rounded rectangular object (no text or symbols visible)natural_image
Simple line drawing of an open book with no text or symbols visibletext_image
Prohibition sign showing a showerhead spraying water, with no text or symbols beyond the prohibition symbol.natural_image
Abstract illustration of a hand holding a small object above a curved line (no text or symbols)natural_image
Three cosmetic bottles crossed out by a diagonal line (no text or symbols)AVVERTENZA
natural_image
Illustration of a hand holding a white sheet over a rounded rectangular object (no text or symbols)natural_image
Two diagrams showing a plug-in socket connected to a hanging lamp, with no text or symbols present.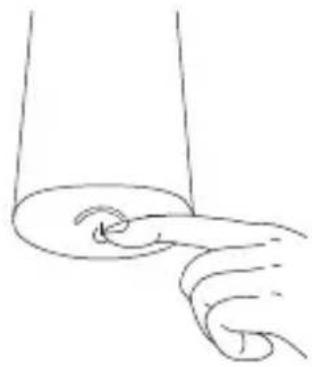
natural_image
Line drawing of a hand pointing at a circular object (no text or symbols)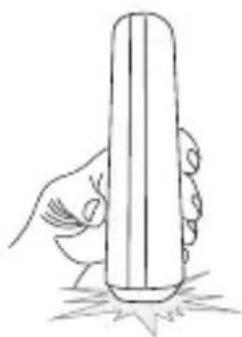
natural_image
Line drawing of a hand holding a cylindrical object with a vertical bar, resting on ground (no text or symbols)natural_image
Simple line drawing of a human face with eyes, nose, and mouth (no text or symbols)
natural_image
Side profile sketch of a person wearing a striped hat (no text or symbols)natural_image
Side profile illustration of a person wearing a headband and bun (no text or symbols)natural_image
Illustration of a hand holding a sheet of paper, partially covered by a rounded rectangular object (no text or symbols visible)9. CHE COSA FARE IN CASO DI PROBLEMI?
natural_image
Simple line drawing of an open book with no text or symbols visibletext_image
Prohibition sign showing a showerhead spraying water, indicating no pollution or leakage! UYARI
natural_image
Illustration of a hand holding a pen or stylus over a curved surface (no text or symbols)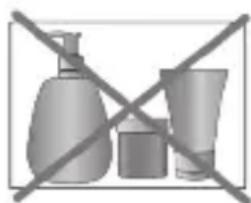
natural_image
Three cosmetic bottles and a tube crossed out by a diagonal line (no text or symbols)natural_image
Illustration of a hand cleaning a rectangular object with a paper sheet (no text or symbols)natural_image
Simple line drawing of a human face with eyes, nose, and mouth (no text or symbols)
natural_image
Side profile sketch of a person wearing a beanie and headband (no text or symbols)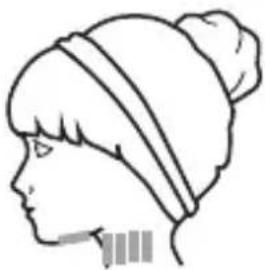
natural_image
Side profile illustration of a person wearing a head covering and turtleneck (no text or symbols)natural_image
Illustration of a hand holding a piece of paper over a rounded rectangular object (no text or symbols visible)natural_image
Simple line drawing of an open book with no text or symbols visibletext_image
Prohibition sign showing a showerhead falling from a surface, crossed out by a diagonal linenatural_image
Illustration of a hand holding a pen, poised to write on a curved line (no text or symbols)natural_image
Three cosmetic bottles crossed out by a diagonal line (no text or symbols)ПРЕДУПРЕЖДЕНИЕ
natural_image
Illustration of a hand holding a white sheet over a rounded rectangular object (no text or symbols visible)natural_image
Two technical diagrams showing a plug inserted into a socket and a hanging device with a weight, no text or symbols present.
natural_image
Line drawing of a hand pointing at a rolled-up object (no text or symbols)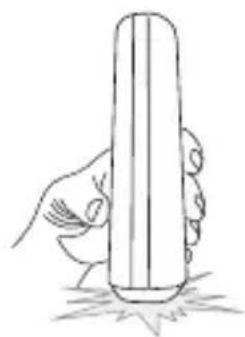
natural_image
Line drawing of a hand holding a cylindrical object with a pointed tip, resting on ground (no text or symbols)natural_image
Simple line drawing of a human face with eyes, nose, and mouth (no text or symbols)
natural_image
Side profile illustration of a person wearing a bunnet (no text or symbols)natural_image
Side profile illustration of a person wearing a head covering and turgally (no text or symbols)natural_image
Illustration of a hand holding a sheet of paper, partially covered by a curved object (no text or symbols visible)natural_image
Simple line drawing of an open book with no text or symbols visibletext_image
Prohibition sign showing a showerhead spraying water, no text presentnatural_image
Illustration of a hand holding a pen above a curved line (no text or symbols)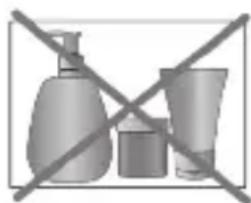
natural_image
Three cosmetic bottles crossed out by a diagonal line (no text or symbols)OSTRZEŻENIE
natural_image
Illustration of a hand holding a white sheet over a rounded rectangular object (no text or symbols)natural_image
Two technical diagrams showing a plug and a bulb with a sensor or indicator (no text or symbols present)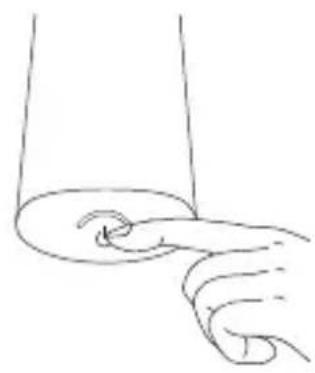
natural_image
Line drawing of a hand pointing at a circular object (no text or symbols)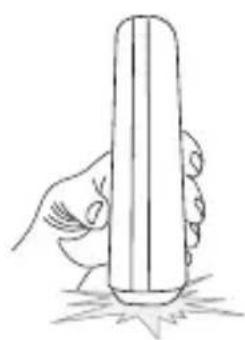
natural_image
Hand holding a cylindrical object with a pointed tip, resting on a surface (no text or symbols visible)natural_image
Simple line drawing of a human face with eyes, nose, and mouth (no text or symbols)
natural_image
Side profile sketch of a person wearing a beanie and headband (no text or symbols)natural_image
Side profile illustration of a person wearing a headband and turtleneck (no text or symbols)natural_image
Illustration of a hand holding a sheet of paper over a rounded rectangular object (no text or symbols visible)9. ROZWIAZYWANIE PROBLEMÓW
natural_image
Simple line drawing of an open book with no text or symbols visibletext_image
Prohibition sign showing a showerhead spraying water, indicating no pollution or leakage5. BESCHRIJVING VAN HET APPARAAT
natural_image
Illustration of a hand holding a pen above a curved line (no text or symbols)natural_image
Three containers crossed out by a diagonal line (no text or symbols)WAARSCHUWING
natural_image
Illustration of a hand holding a sheet of paper, partially covered by a rounded rectangular object (no text or symbols visible)natural_image
Two technical diagrams showing a plug and a hanging device with a power outlet, no text or symbols present.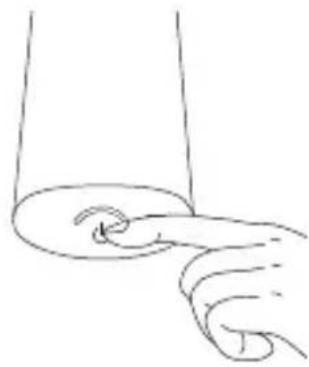
natural_image
Line drawing of a hand pointing at a circular object (no text or symbols)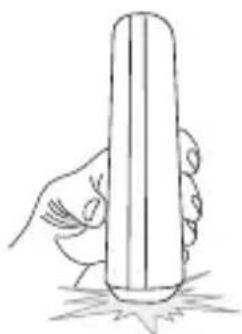
natural_image
Hand holding a cylindrical object with a vertical bar, resting on a star (no text or symbols)7.1 Gebruik – Methoden
WAARSCHUWING
natural_image
Simple line drawing of a human face with eyes, nose, and mouth (no text or symbols)
natural_image
Side profile illustration of a person wearing a knitted hat and applying a bandage (no text or symbols)natural_image
Side profile illustration of a person wearing a head covering and turtleneck (no text or symbols)natural_image
Illustration of a hand holding a piece of paper, partially covered by a rounded rectangular object (no text or symbols visible)9. WAT TE DOEN BIJ PROBLEMEN
natural_image
Simple line drawing of an open book with no text or symbols visibletext_image
Prohibition sign showing a showerhead spraying water, indicating no pollution or leakagenatural_image
Silhouette of a hand reaching toward a curved surface (no text or symbols)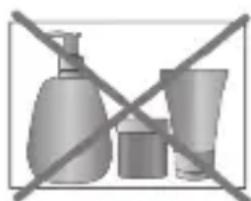
natural_image
Three cosmetic bottles crossed out by a diagonal line (no text or symbols)ADVARSEL
natural_image
Illustration of a hand cleaning a rectangular object with a paper sheet (no text or symbols)natural_image
Illustration showing three different hand positions: one with a plug, one with a droplet on top, and one with a pen touching the surface (no text or symbols present)7.1 Anvendelsesmetoder
ADVARSEL
natural_image
Simple line drawing of a human face with eyes, nose, and mouth (no text or symbols)
natural_image
Side profile illustration of a person wearing a bunnet (no text or symbols)natural_image
Side profile illustration of a person wearing a head covering and holding a hair clip (no text or symbols)natural_image
Illustration of a hand holding a piece of paper over a curved object (no text or symbols visible)9. AFHJÆLPNING AF PROBLEMER
natural_image
Simple line drawing of an open book with no text or symbols visibletext_image
Prohibition sign showing a showerhead spraying water, indicating no pollution or leakagenatural_image
Abstract grayscale illustration of a hand holding a small object, no text or symbols present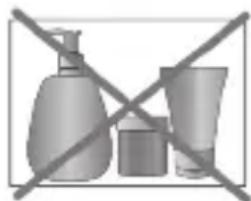
natural_image
Three cosmetic bottles crossed out by a diagonal line (no text or symbols)WARNING
natural_image
Illustration of a hand holding a white sheet over a rounded rectangular object (no text or symbols visible)natural_image
Illustration showing three different hand positions: one with a plug, one with a bulb, and one with a cylindrical object (no text or symbols present)natural_image
Simple line drawing of a human face with eyes, nose, and mouth (no text or symbols)
natural_image
Side profile illustration of a person wearing a head covering and turgally (no text or symbols)natural_image
Side profile illustration of a person wearing a head covering and bun (no text or symbols)natural_image
Illustration of a hand holding a piece of paper over a curved object (no text or symbols visible)9. VAD GÖR MAN OM PROBLEM UPPSTÅR?
"Apparaten startar inte"
natural_image
Simple line drawing of an open book with no text or symbols visibletext_image
Prohibition sign showing a showerhead spraying water, indicating no pollution or leakagenatural_image
Simple line drawing of a hand holding a small object above a curved surface (no text or symbols)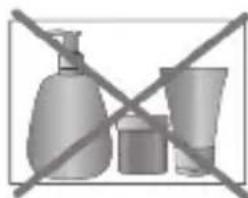
natural_image
Three cosmetic bottles crossed out by a diagonal line (no text or symbols)ADVARSEL
natural_image
Illustration of a hand holding a sheet of paper over a rounded rectangular object (no text or symbols visible)- For hver kroppsd del du ønsker å behandle, utfører du en hudtoleransetest 48 timer før den fullstendige bruken (se kapittel."6.2 Hudtoleransetest").
6.2 Hudtoleransetest
natural_image
Simple line drawing of a human face with eyes, mouth, and lips (no text or symbols)
natural_image
Line drawing of a person wearing a beanie and headband (no text or symbols)natural_image
Side profile illustration of a person wearing a headband and turtleneck (no text or symbols)natural_image
Illustration of a hand holding a sheet of paper over a rounded rectangular object (no text or symbols visible)9. FREMGANGSMÅTE VED PROBLEMER
natural_image
Simple line drawing of an open book with no text or symbols visibletext_image
Prohibition sign showing a showerhead spraying water, indicating no pollution or leakageVAROITUS
natural_image
Silhouette of a hand holding a small object above a curved surface (no text or symbols)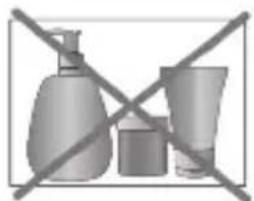
natural_image
Three cosmetic bottles crossed out by a diagonal line (no text or symbols)VAROITUS
natural_image
Illustration of a hand holding a sheet of paper, partially covered by a rounded rectangular object (no text or symbols visible)natural_image
Line drawing of a person wearing a bunnet and head covering (no text or symbols)natural_image
Side profile illustration of a person wearing a head covering and turtleneck (no text or symbols)natural_image
Illustration of a hand holding a piece of paper over a rounded rectangular object (no text or symbols visible)9. ONGELMIEN RATKAISU
other
| Hair colour | White | Light Brown | Beige | Pale Brown | Brown | Dark Brown | |-------------|-------|-------------|-------|------------|-------|------------| | White | X | | | | | | | ✓ | X | ✓ | ✓ | X | X | X | | ✓ | ✓ | ✓ | ✓ | X | X | X | | ✓ | ✓ | ✓ | ✓ | ✓ | X | X | | ✓ | ✓ | ✓ | ✓ | ✓ | ✓ | X | | ✓ | ✓ | ✓ | ✓ | ✓ | ✓ | X | | ✓ | ✓ | ✓ | ✓ | ✓ | ✓ | X |EN Your choice of intensity level should be based primarily on what feels comfortable for you.
BEURER UK Ltd., Suite 16, Stonecross Place
Yew Tree Way, WA32SH Golborne, United Kingdom