SportTac - Camera Peltor - Free user manual and instructions
Find the device manual for free SportTac Peltor in PDF.

User questions about SportTac Peltor
0 question about this device. Answer the ones you know or ask your own.
Ask a new question about this device
Download the instructions for your Camera in PDF format for free! Find your manual SportTac - Peltor and take your electronic device back in hand. On this page are published all the documents necessary for the use of your device. SportTac by Peltor.
USER MANUAL SportTac Peltor
natural_image
Two men in winter coats and hats sitting in a grassy field, engaged in conversation (no visible text or symbols)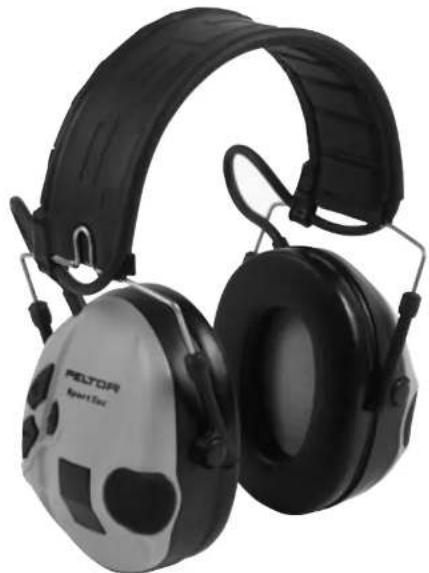
natural_image
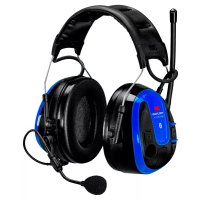
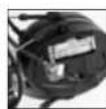
Pair of Peltor Smart Eye headphones with black and silver casing (no visible text or symbols)CE

natural_image
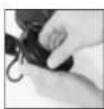
Person aiming a rifle during a shooting exercise (no visible text or symbols)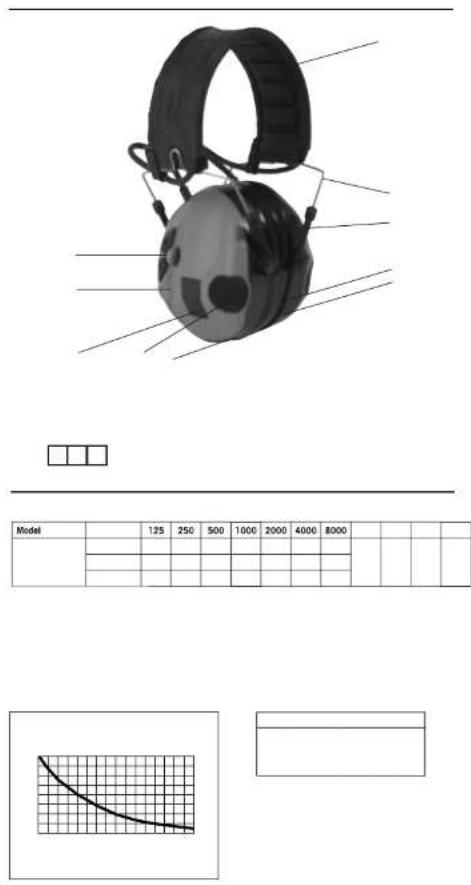
| Model | 125 | 250 | 500 | 1000 | 2000 | 4000 | 8000 | |||||

line
| x | y (solid line) | y (dashed line) | | ---- | -------------- | --------------- | | 0 | -15 | -15 | | 1 | -10 | -10 | | 2 | -5 | -5 | | 3 | 0 | 0 | | 4 | 5 | 5 | | 5 | 10 | 10 | | 6 | 15 | 15 | | 7 | 20 | 20 | | 8 | 25 | 25 | | 9 | 30 | 30 | | 10 | 35 | 35 | | 11 | 40 | 40 | | 12 | 45 | 45 |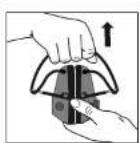
natural_image
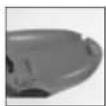
Close-up of a gray electronic device with black components and mounting bracket (no visible text or symbols)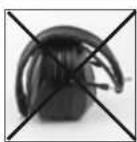


EN 2
BG 5
CS 8
DA 11
DE 14
ES 17
ET 21
FI 24
FR 27
EL 30
HU 33
IS 36
IT 39
LT 42
LV 45
NL 48
NO 51
PL 54
PT 57
RO 60
RU 63
SK 67
SL 70
SV 73
TR 76
SportTac
Peltor SportTac has an audio input for connecting an external radio, and a level dependent function that amplifies weak sounds and attenuates loud ones. The external communication and level dependent functions are independent of each other, which ensures extra good reliability and better safety. The hearing protector has been tested and approved according to PPE directive 89/686/EEC and EMC directive 89/336/EEC, which means that it meets the demands for CE labelling.
Read these instructions carefully to ensure the best possible benefit from your new Peltor product.
FUNCTIONS (A)
• The latest settings are stored at shut-off.
- Automatic shut-off after two hours of no active functions. Two warning signals are emitted every ten seconds for one minute after 1:59 hours of use, to indicate that the unit will switch off.
- Low battery power is indicated with three warning signals ten hours before the headset will switch off. The interval between the warning signals will then decrease as the power of the battery weakens.
Always switch off the headset before replacing batteries
WARNING! Performance may deteriorate with battery usage.
The typical period of continuous use that can be expected from this product is 600 hours. Continuous use is defined as 20% use in silent noise 45-50dB(A), 60% use in medium noise 70-75dB(A) and 20% use in high noise 95-100dB(A). The expected battery life time can vary with battery brand and the temperature in which the product is being used.
- Polarity protection prevents damage to circuits if the batteries are inserted incorrectly.
- Equipped with an audio input via a chassis jack for connecting an external radio.
- When the level dependent function is on, the amplification is toned down when an external signal comes in through the audio input.
- A summary stage ensures that the combined sound level of all incoming audio signals inside the cup never exceeds 82 dB.
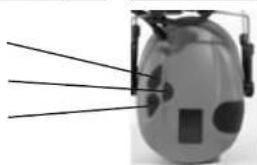
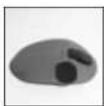
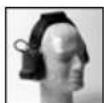
(A) WHAT IS WHAT
- Headband wire, (stainless steel)
- Two-point fastener (guide wire)
- Ear cushion (PVC foil and PUR foam)
- Microphone for level dependent
- Attenuation cushion (PUR foam)
- Inner Cup
- Outer shell
- Clip
- Headband (metal sheet)
- Headpad (SEBS-based TPE)
- Audio input
- On/off and volume controls
With fixed cord.
Note that the audio input is used to connect the microphone.
For maximum ambient-noise compensation, position the speech microphone on the headset 3 mm from the lips.
IMPORTANT USER INFORMATION
The hearing protector must be put on, adjusted, cleaned and maintained in accordance with the instructions in this manual.
- This ear-muff is provided with level-dependent attenuation. The wearer should check correct operation before use. If distortion or failure is detected, the wearer should refer to the manufacturers advice for maintenance and replacement of the battery
- Wear the headset 100% of the time you spend in noisy environments for full protection.
- This product may be adversely affected by certain chimerical substances. Further information should be sought from the manufacturer.
- This ear-muff is provided with electrical audio input. The wearer should check correct operation before use. If distortion or failure is detected, the wearer should refer to the manufacturers advice.
- When interference increases or the volume becomes too weak, it is time to replace the batteries. Never replace or install batteries with the unit switched on. Ensure that the battery is positioned correctly before using. See the figure in the CARE section.
- Do not store with the batteries installed.
• In extremely cold conditions, warm up the hearing protector before use. - Ear-muffs, and in particular cushions, may deteriorate with use and should be examined at frequent intervals for cracking and leakage, for example.
- The fitting of hygiene covers to the cushions may affect the acoustic performance of the earmuffs.
Note: If these recommendations are not followed, attenuation and other functions can be impaired.
WARNING!
The output of the level-dependent circuit of this hearing protection may exceed the external sound level.
Warning! The output of the electrical audio circuit of this hearing protector may exceed the dalily limit sound level.
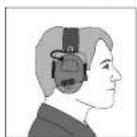
IMPORTANT! For the best protection, brush aside hair around the ears so the ear cushions fit snugly against the head. Spectacle frames should be as thin as possible and fit close to the head.
TECHNICAL DATA (B)
(B:1) Attenuation values, SNR
The attenuation values and noise levels for the hearing protector have been tested and approved according to EN 352-4 2001, EN 352-6 2002 and applicable parts of EN 352-1 2002. Certificate issued by INSPEC (Registered Number 0194), Upper Wingsbury Courtyard, Wingrave, Aylesbury, Buckinghamshire, HP22 4LW, United Kingdom.
Explanation of the attenuation value table
-
Weight
-
Frequency
-
Average attenuation
-
Standard deviation
-
Expected attenuation
(B:2) Input signal level/usage time
Maximum permitted audio signal in relation to usage time.
To prevent harmful levels, the input signal must not exceed the stated values (average speech signal level). The earphone level for long-term average value of music and speech is measured at max 82 dB (A) equivalent noise level according to the PPE directive.
-
Hrs/day
-
Average level/electrical signal X=140,2 mV
(B:3) Sound exposure when using the auxiliary input
-
Level under the ear-muff [dB(A)]
-
Input voltage [mVrms]
(B:4) Criterion level
The criterion level is the noise (mesured as A-weighted sound pressure level) outside the hearing protector that gives 85 dB(A) inside. The outside level depends on the type of noise: H is high – frequency dominated noise, M is noise that is not dominated by any given frequency and L is low – frequencydominated noise.
USE (C)
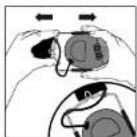
(C:1) Open the headband.
(C:2) Slide out the cups. Tilt the top of the cup out, as the wire must be placed on the outside of the headband.
(C:3) Adjust the height of the cups by pulling the cup up or down while pressing the headband down.
(C:4) The headband should lie across the top of the head.
(C:5) Press the cups in before collapsing. Leave about 4 mm (1/8") of the headband wire visible.
(C:6) Collapse the headband. Check that the ear cushions are not creased and that they lie flat against one another. NOTE! When the headband is to be collapsed, make sure to unplug the audio input jack (A:11)
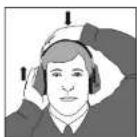
(C:7) On and off Press the centre button and hold for at least 2 seconds.
(C:8) Increase volume Press the upper (+) button.
(C:9) Decrease volume Press the lower (-) button.
STORAGE (D)
Do not store this hearing protection in temperatures exceeding +55°C, for example inside a windscreen or a window.
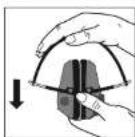
ATTENTION: When the headband is to be collapsed, make sure to unplug the audio input jack (A: 9)
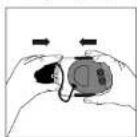
(D:1) WRONG All guide wires must be pushed in correctly before the headband is collapsed.
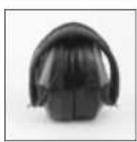
(D:2) RIGHT The ear cushions should lie flat against each other.
(D:3) WHEN DAMP Turn the cups outwards. Remove the ear cushions to allow the attenuation cushions and electronics to dry. Reassemble. See the CARE section.
CARE (E)
CLEANING
Clean/disinfect the cups, headband and ear cushions regularly with soap and warm water.
Note: Do not immerse the cups in water!
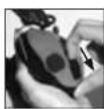
REMOVING/REPLACING OUTER SHELLS
To remove outer shells:
(E:1) Insert tool or your fingers under the edge of the clip and pull it out 3-4 mm
(E:2) Press/slide the clip downward. Remove the shell
To put outer shells back into position:
(E:3) Make sure the clip is fully pressed back
Put the shell in place from top to bottom making sure the hook on the top of the shell (E:4) fit into the hole on inner cup (E:5).
(E:6) When the shell is in place, press/slide the clip upwards
REPLACING THE BATTERIES
Remove the right hand outer shell, for instruction please see Removing/Replacing outer shells. Replace the batteries and then put the outer shell back into position, for instructions please see Removing/Replacing outer shells.
Remove the batteries when storing the hearing protector for a long time. Check the function of the unit after replacing the batteries.
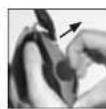
REMOVING/REPLACING THE EAR CUSHIONS
(E:7) Insert your fingers under the edge of the ear cushion and pull straight out
(E:8) Insert the new ear cushion by pressing it in until it snaps in place
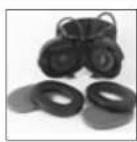
SPARE PARTS/ACCESSORIES (F)
HY68 Hygiene kit
Easy to replace hygiene kit consisting of two attenuation cushions and snap-in ear cushions. Replace at least twice a year to ensure constant attenuation, hygiene and comfort, or if any of the parts of the hygiene kit are defective. The headset and particularly the ear cushions can degenerate over time and should be inspected regularly to ensure that there are no cracks and sound leakage. If an ear cushion is damaged, it must be replaced; see the CARE section.
HY100A Clean single-use protectors
A single-use protector that is easy to apply to the ear cushions. Packages of 100 pairs. Installing single-use protectors can affect the hearing protector's acoustic properties.
Receive-Only Audio Input cables
FL6H 3.5-mm mono plug
FL6M 2.5-mm mono plug
FL6N 3.5-mm stereo plug for Micman com radio
Two-way communication audio cable
TAMT06 Cable with PTT and microphone, J22 plug
Y-cables
FL6AC Wired as fig. F:1
FL6AF Wired as fig. F:2
MT7-FL6AB Headset kit (F:3)
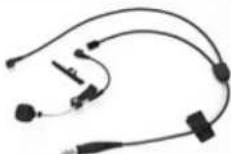
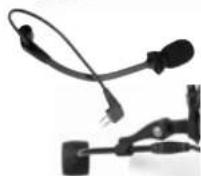
Product models with no microphones can be converted into headsets by the addition of a boom microphone on one of the guide wires or a throat microphone (MT9). The microphone connects to the audio input via a Y cord and then to an external radio. Wired as fig. G:1
FL5000 Peltor FL5000 adapter series (F:4)
Adapters that give optimum adaptation of Peltor headsets to most communication radio models on the market. Only available for headsets wired as (G:1).
The adapter has a functional, watertight, sturdy casing with no protruding parts. The size is designed to fit easily in the hand, but it is also easy to attach to the clothing so that it isn't in the way and doesn't risk snagging on anything.
* Some models have an external switch between the headset and the radio.
Boom microphones
MT70-05 fig. (F:5)
MT21 fig. (F:6)
HY400 Head pad
For optimal fitting on smaller head sizes, use head pad HY400. The head pad is easily attached to the standard head pad, please see fitting instruction (F:7)
Outer shells (including Wind protector for level dependent microphones and clip). The outer shells are replaceable. Shells are available in a number of different colours and easy changeable. For instruction on how to replace shells, please see CARE section.
SportTac
REPLACEMENT DES PILES
(B:1) Slopinimo lygis, SNR
Para desmontar as conchas externas:
MT7-FL6AB Kulaklık seti (F:3)