
Carbonator 3 - Water dispenser AARKE - Free user manual and instructions
Find the device manual for free Carbonator 3 AARKE in PDF.

| Product type | Carbonated water machine |
| Brand | Aarke |
| Model | Carbonator 3 |
| Machine dimensions | 510 x 170 x 290 mm |
| Machine weight | 3.74 kg |
| Bottle dimensions | 230 x 90 mm |
| Bottle weight | 690 g |
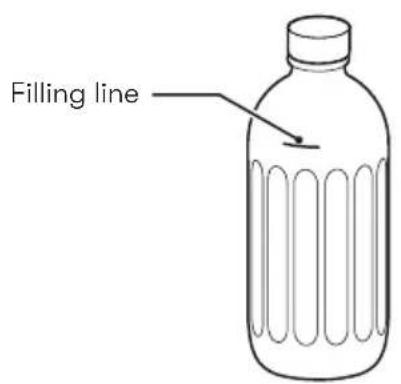
| Bottle capacity | 800 ml (700 ml up to the fill line) |
| Materials | Stainless steel, glass |
| Finish | Matte or stainless steel |
| Carbonation type | Manual via button |
| CO₂ cylinder compatibility | Standard cylinders (60 mm, 425 g) |
| Safety | Use only with provided bottle, carbonate only water, temperature 1-40 °C |
| Ambient temperature range | 1 to 40 °C |
| Machine maintenance | Cleaning with soft microfiber cloth |
| Bottle maintenance | Dishwasher or hand washing recommended |
| Included accessories | Glass bottle, cleaning cloth |
| Power source | Manual (unplugged) |
| Recycling | Recyclable materials separable according to legislation |
| Drip tray | Yes, to collect excess water |
Frequently Asked Questions - Carbonator 3 AARKE
User questions about Carbonator 3 AARKE
0 question about this device. Answer the ones you know or ask your own.
Ask a new question about this device
Download the instructions for your Water dispenser in PDF format for free! Find your manual Carbonator 3 - AARKE and take your electronic device back in hand. On this page are published all the documents necessary for the use of your device. Carbonator 3 by AARKE.
USER MANUAL Carbonator 3 AARKE
Next level home carbonation.
At Aarke we are always looking for ways to refine your everyday routine.
With your new Carbonator Pro you will experience uniquely smooth and simple home carbonation thanks to masterful engineering and our passion for detail. You have chosen an environmentally-friendly alternative to store-bought sparkling water – a wise decision!
Your Carbonator has been crafted in the highest quality materials, designed and tested from the inside out for optimum safety and performance. Please keep in mind however, that any product involving the use of gas and pressure systems should be handled with care and used only as intended. Be sure to read the safety section of this guide carefully before use.
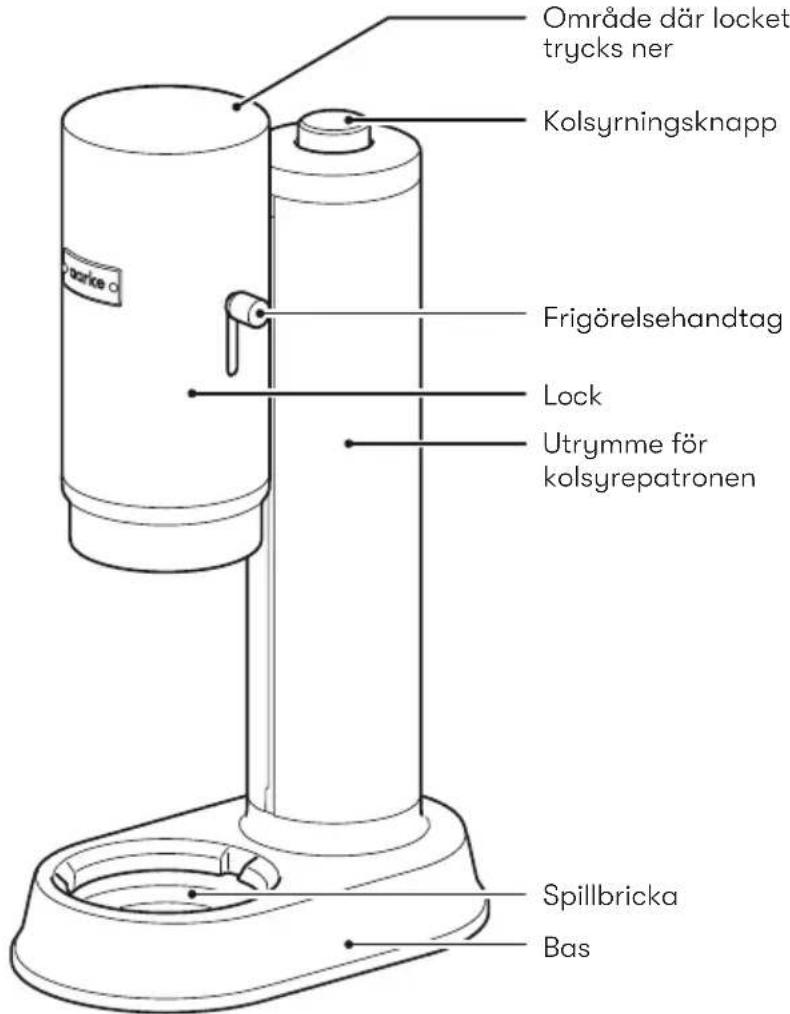
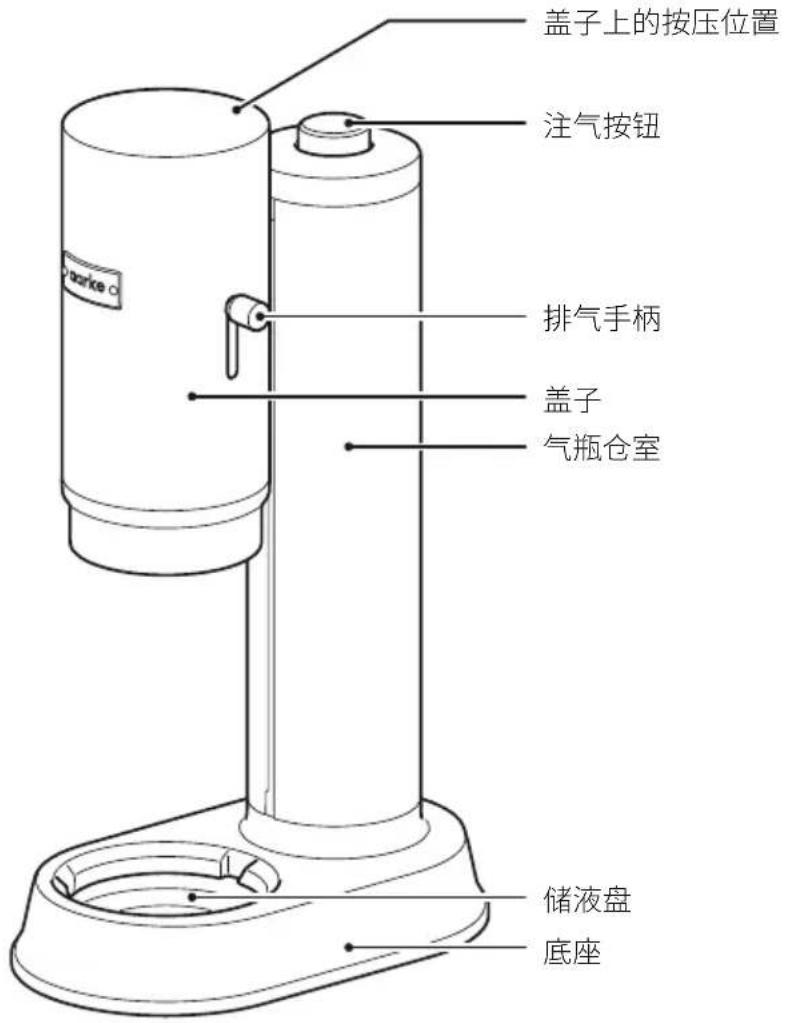
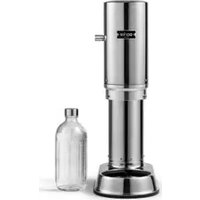
Items and components
Items included
Glass bottle
natural_image
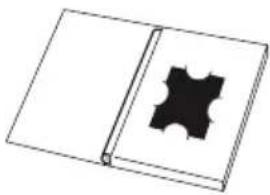
Simple line drawing of a closed book with a black star-shaped cover on the front page (no text or symbols)Welcome folder with cleaning cloth
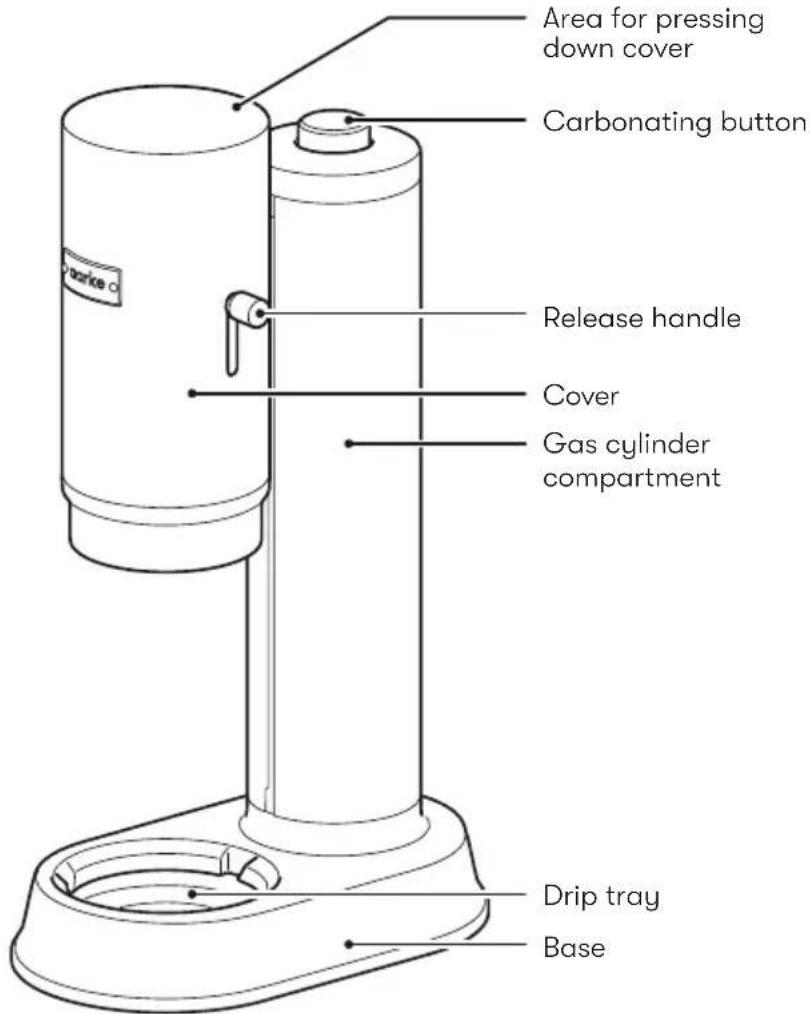
Carbonator Pro
Technical specifications
Glass bottle
| Height | 230 mm |
| Diameter | 90 mm |
| Weight | 690 g |
| Volume | 800 ml(700 up |
Carbonator Pro
| Height 510 mm |
| Width 170 mm |
| Depth 290 mm |
| Weight 3740 g |

The bottle is
dishwasher safe
General safety
Only carbonate water, don't carbonate other beverages

1-40°C
34-104°F
natural_image
Simple line drawing of a bottle with a cross mark, no text or symbols present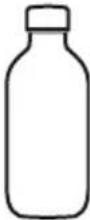
Only use the Carbonator Pro glass water bottle when carbonating
Keep your Carbonator at a temperature of 1-40°C
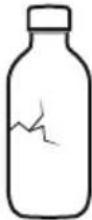
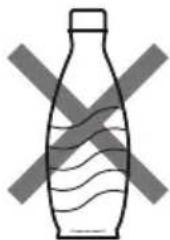
Never carbonate with a damaged bottle
• Always use the Carbonator in an upright position.
- Keep the Carbonator away from children.
- Never attempt to carbonate an empty bottle.
- Never put the glass bottle in the freezer.
- Only use the Carbonator Pro glass water bottle when carbonating. Other bottles can damage the machine and lead to safety risks.
- Transport the Carbonator without the gas cylinder installed.
- See "Approved gas cylinders" on page 10 section for "Other advice".
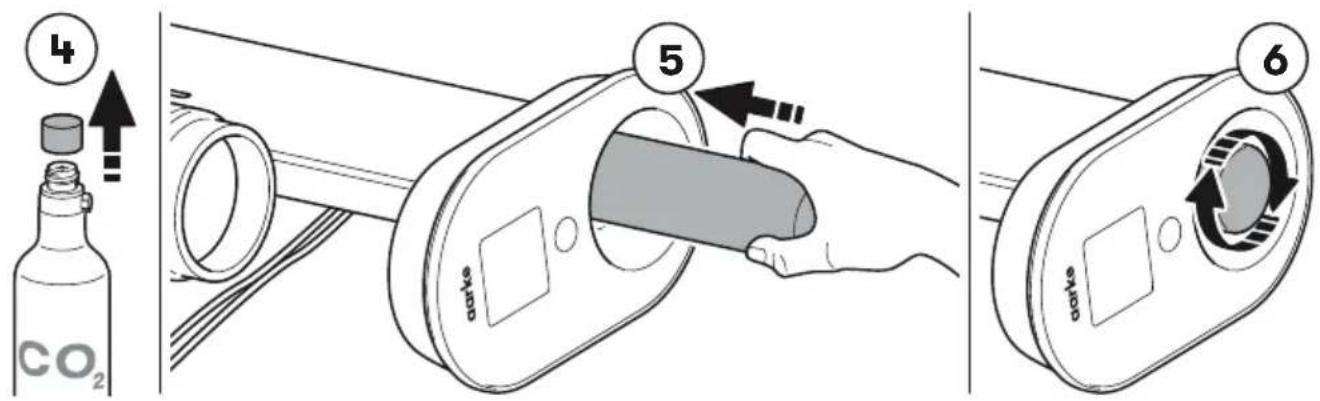
Gas cylinder replacement
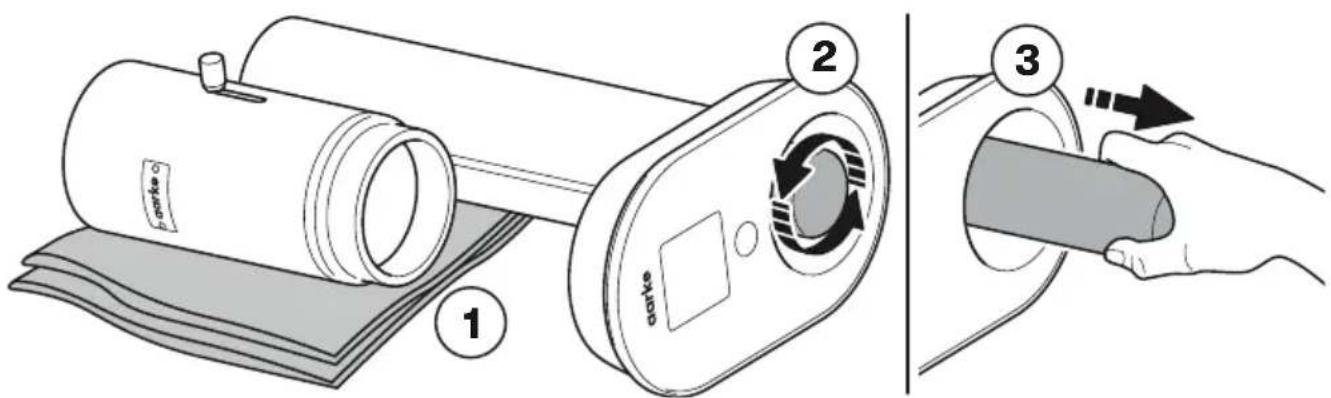
- Use a soft cloth to protect your Carbonator when you lay it on its side. If there is no gas cylinder in the Carbonator, go to step 4.
- Unscrew the gas cylinder counterclockwise.
- Remove the gas cylinder.

- Remove the plastic cover and stopper of the new gas cylinder.
- Insert the gas cylinder into the bottom of the Carbonator.
- When you feel it reach the top, screw the cylinder clockwise until it attaches.
The carbonation process
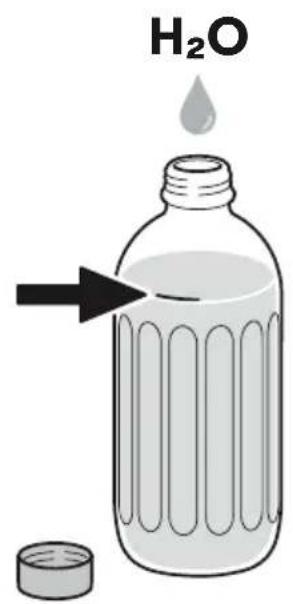
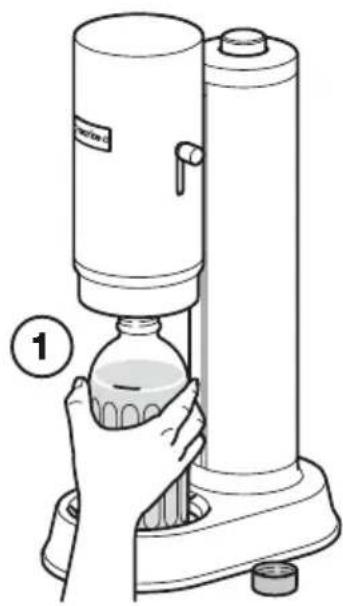
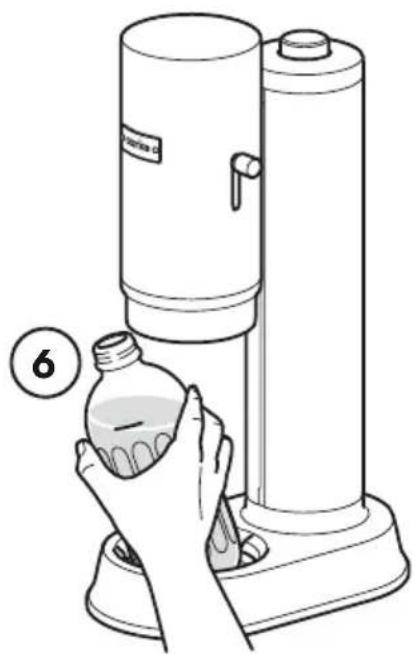
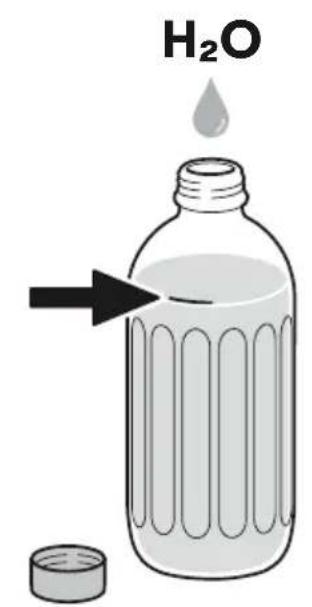
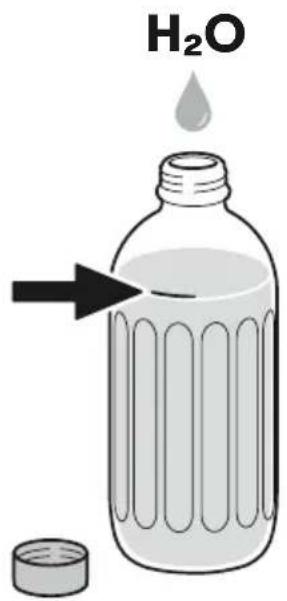
Fill the bottle up to the filling line.
natural_image
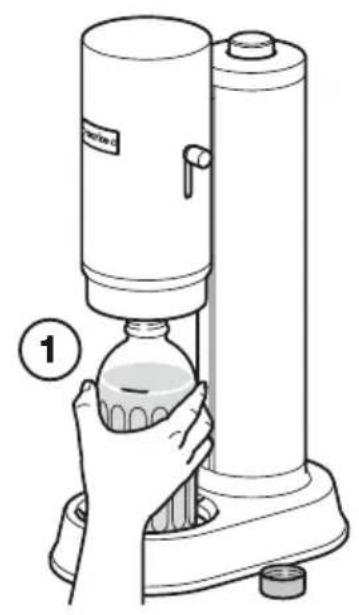
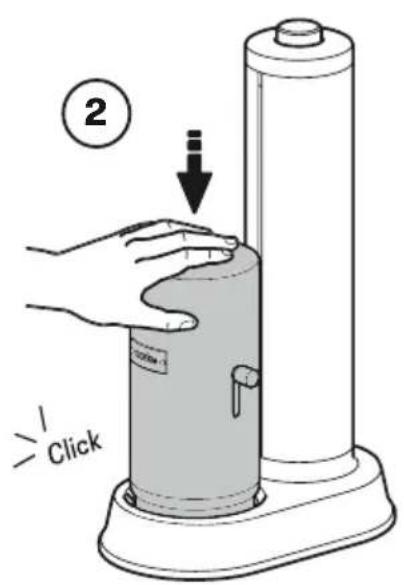
Illustration of a hand operating a laboratory distillation or gas collection machine with a labeled component (no text or symbols on the device itself)- Place the bottle in the base.
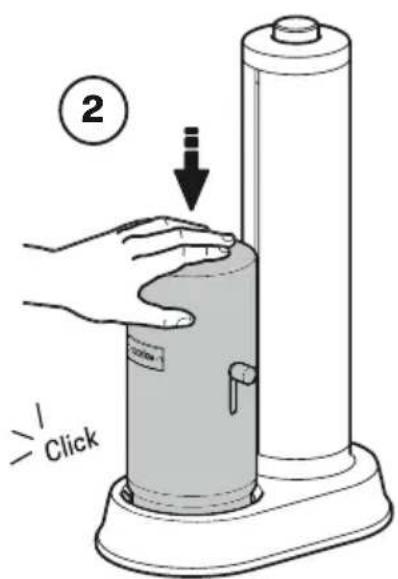
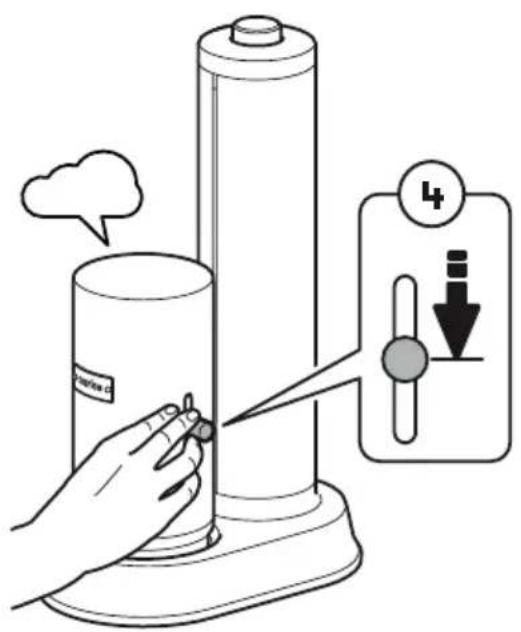
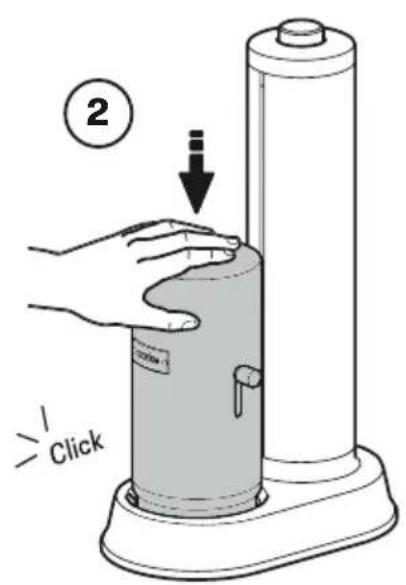
- Press down the cover until it clicks.
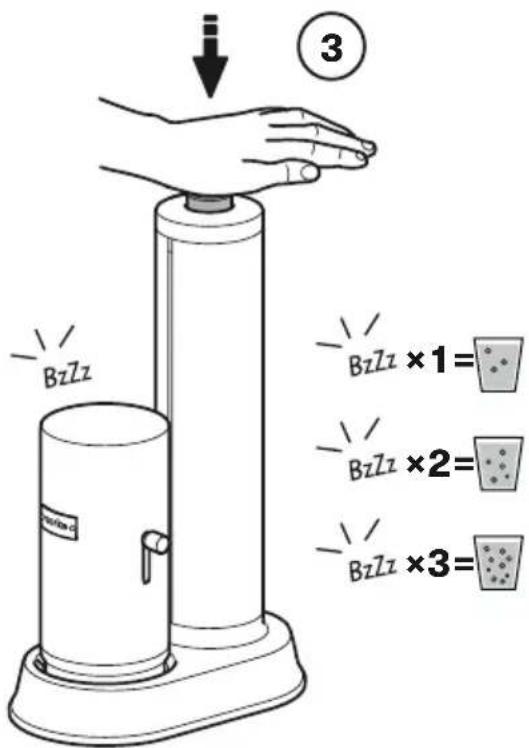
- Carbonate the water by pressing the Carbonator button until you hear a buzzing sound.
- Press down the handle halfway to release the remaining pressure.
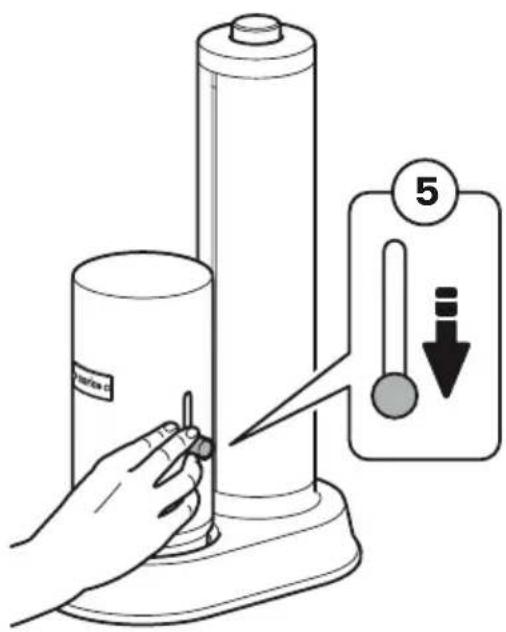
- Continue to press the handle all the way down to raise the cover.
natural_image
Illustration of a hand holding a small bottle next to a tall stand mixer (no text or symbols present)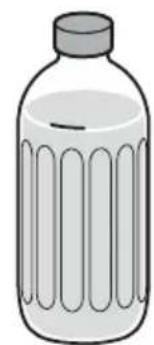
natural_image
Simple line drawing of a plastic bottle with a cap and side stripes (no text or symbols)- Enjoy your sparkling water!
Other advice
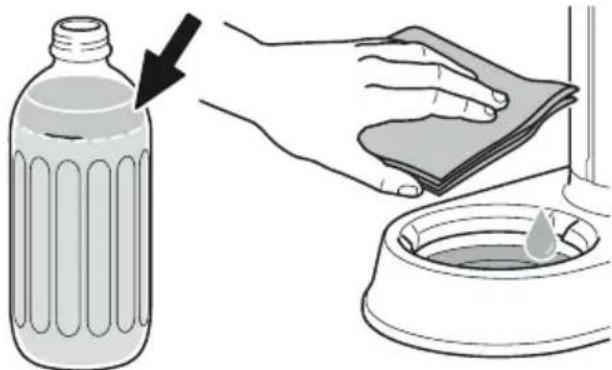
Water in the drip tray
If the bottle is overfilled, excess water will be collected in the drip tray. This is not wrong, but to avoid this, be sure to only fill up the bottle to the filling line. To empty the drip tray use a clean dishcloth.
natural_image
Illustration showing a hand cleaning a plastic bottle with a cloth, next to a water droplet on a sink (no text or symbols)Clean the bottle
The bottle is durable enough to be washed in the dishwasher, but we recommend washing it by hand to prolong its look. Before first time use, make sure to wash the bottle with lukewarm water and mild detergent.
Clean the Carbonator
To prolong the look and performance of your Carbonator, use the included cloth or a clean microfiber cloth to clean the Carbonator.
For Carbonators with a matte finish, we recommend a soft cloth and clean water. For Carbonators in stainless steel, we recommend a microfiber cloth moisturized with clean water and mild soap if needed. Avoid strong detergents and abrasive household cleaners, this applies to all Carbonators.
Avoid bacteria and odor by keeping the bottle clean and storing it with the cap off.
Use cold water
For more efficient use of the CO_2 it's recommended to carbonate refrigerator cold water
Protect your countertop
In some conditions water from condensation can arise on the CO_2 canister. Make sure to regularly wipe your countertop under your Carbonator Pro, to protect the surface.
Recycling
The Carbonator and its associated items are designed and manufactured with high quality materials and components which can be recycled and reused. Seperate and recycle the parts according to local regulations.
Approved gas cylinders
The Carbonator is compatible with standard gas cylinders approved for use with sparkling water machines from all major brands. Other gas cylinders may seem to work, but could damage the machine or cause a safety risk. Make sure to use gas cylinders with the following measure and weight:
CO _2 gas cylinder
∅ 60 mm
Weight 425 g
Troubleshooting guide
| Problem Solutions | |
| 1. When I push the Carbonator button, very little or no gas comes out. | Make sure you're pushing the Carbonator button all the way down (without forcing it).Try screwing the gas cylinder in a bit tighter and try again (some older cylinders need a little extra tightening).Listen for a leaking sound when you push the Carbonator button – if you hear one, refer to problem #3.Check to see if the gas cylinder is empty. |
| 2. Gas is flowing into the bottle when I push the Carbonator button, but the water isn't carbonated. | Make sure you're pressing the Carbonator button until you hear a buzzing sound, then release. Be sure to not release until you hear the buzzing sound! |
| 3. I hear a leaking sound when I push the Carbonator button and very little gas is flowing into the bottle. | Try screwing the cylinder in a bit tighter.There may be an issue with the cylinder gasket. See “Cylinder gasket troubleshooting”. |
| 4. The cover is hard to push down. | Try to press further back on the cover. |
| 5. The gas cylinder is freezing inside the machine during use. | There may be a leak between the cylinder and the machine.Try screwing the gas cylinder in a bit tighter. If it doesn't work, see “Cylinder gasket troubleshooting”. |
| 6. Water appears in the drip tray after carbonating with a new gas cylinder. | Water in the drip tray is normal. However be sure to not fill the bottle over the filling line. Wipe away excess water with a sponge. |
| 7. The cover doesn't fasten in the base when I press it. | Try pressing harder on the cover. |
If the suggested solutions above is not working
contact us at support@aarke.com
Cylinder gasket troubleshooting
The rubber gasket inside the Carbonator's cylinder compartment is an important seal between the cylinder and the machine. If the gasket is missing, damaged, or misplaced, the machine will not work as intended. Symptoms of this could be:
- A leaking sound from the cylinder compartment when pressing the Carbonator button.
• Water droplets in the cylinder compartment or a frozen cylinder.
• The cylinder quickly runs out of gas. - The cylinder is leaking gas when screwed into the machine, even when the button isn't being pushed.
Checking the gasket
- Lay the Carbonator on its side and unscrew the cylinder.
- Look into the cylinder compartment. Check if there is a black ring around the brass pin. If not, continue to "Replacing the gasket".
- If there is a black ring that is damaged or placed incorrectly, remove it and continue to "Replacing the gasket".
Replacing the gasket
There is an extra gasket stored under the base of the machine, underneath a sticker labeled "Extra Gasket." Remove the sticker and take out the extra gasket.

- Place the new gasket on the gas cylinder.
- Drag the Carbonator over the side of the table.
- Insert the cylinder and screw it in place. When the cylinder is removed the gasket will remain in place.
Customer support
If you experience a problem with your machine, please do the following:
1. Check the "Troubleshooting guide"
Please read through the troubleshooting guide and attempt the suggested solutions.
2. Contact us at support@aarke.com
If the troubleshooting guide doesn't help, please contact us at support@aarke.com. We'll answer within two business days. Our customer service department is based in Sweden, and can communicate in English and Nordic languages. For support in other languages, your request will be forwarded to your local distributor.
Scan the QR-code for more information and Frequently asked questions

natural_image
Two simple line drawings of plastic bottles with crossed-out cross symbols (no text or labels)natural_image
Illustration of a hand operating a laboratory filtration device with a labeled component (no text or symbols on the device itself)natural_image
Illustration of a hand holding a small bottle next to a tall stand mixer (no text or symbols present)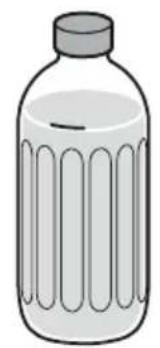
natural_image
Simple line drawing of a plastic bottle with liquid and cap (no text or symbols)natural_image
Illustration of a hand cleaning a plastic bottle with a cloth, next to a water droplet on a basin (no text or symbols)natural_image
Two simple line drawings of water bottles with crossed X marks, no text or symbols present.natural_image
Illustration of a hand operating a chemical reaction generator with a labeled component (no text or symbols on the diagram itself)natural_image
Illustration of a hand holding a small bottle next to a tall cylindrical device labeled 'Paprika C', with no visible text or symbols on the device itself.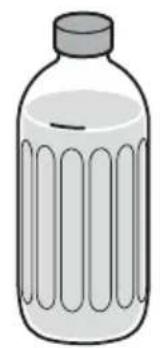
natural_image
Simple line drawing of a plastic bottle with liquid and cap (no text or symbols)natural_image
Illustration showing a hand cleaning a plastic bottle with a cloth, next to a water droplet on a basin (no text or symbols)natural_image
Simple line drawing of a bottle with crossed X marks, no text or symbols presentnatural_image
Illustration of a hand operating a small bottle under a cylindrical device, labeled with number 1 (no text or symbols on the device itself)natural_image
Illustration of a hand holding a small bottle next to a tall industrial machine (no text or symbols visible)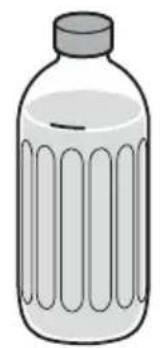
natural_image
Simple line drawing of a bottle with liquid and cap (no text or symbols)natural_image
Illustration showing a hand cleaning a plastic bottle with a cloth, next to a water droplet on a container (no text or symbols)natural_image
Two simple line drawings of water bottles with crossed-out fragments, no text or symbols present.natural_image
Illustration of a hand operating a laboratory glassware machine with a labeled component (no text or symbols on the device itself)natural_image
Illustration of a hand holding a small bottle next to a tall cylindrical device labeled 'Paprika C', with no visible text or symbols on the device itself.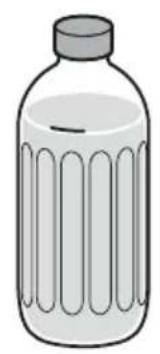
natural_image
Simple line drawing of a plastic bottle with a cap and side ridges (no text or symbols)natural_image
Illustration showing a hand cleaning a plastic bottle with a cloth, next to a water droplet on a container (no text or symbols)
natural_image
Simple line drawing of a closed book with a black star-shaped cover on the front page (no text or symbols)Välkomstmapp med rengöringsduk
natural_image
Two simple line drawings of water bottles with crossed-out X marks, one plain and one plain (no text or symbols)
natural_image
Illustration of a hand operating a laboratory glassware machine with a bottle inside (no text or symbols)natural_image
Illustration of a hand holding a small bottle next to a tall industrial machine (no text or symbols visible)
natural_image
Simple line drawing of a bottle with liquid and a cap (no text or symbols)natural_image
Illustration showing a hand cleaning a plastic bottle with a cloth, next to a water droplet on a basin (no text or symbols)Rengör flaskan

natural_image
Simple line drawing of a closed book with a black star-shaped cover on the front page (no text or symbols)natural_image
Two plastic bottles with cross-shaped markings, one open and one closed, both without any text or symbols.- Bruk en myk klut til å beskytte kullsyremaskinen din när du legger den på siden. Hvis det ikke er kullsyrepatron i kullsyremaskinen går du til steg 4.
- Skru løs kullsyrepatronen i retning mot urviseren.
- Fjern kullsyrepatronen.
- Fjern plastlokket og korken på den nye kullsyrepatronen.
- Før kullsyrepatronen inn i bunnen på kullsyremaskinen.
- Når du føler at den når toppen, skru sylinderen med urviseren til den festes.
Kullsyreprosessen
natural_image
Illustration of a hand operating a round-bottom flask next to a cylindrical device (no text or symbols visible)Fyll flasken opp fyllelinjen. 1. Plasser flasken i basen.
natural_image
Illustration of a hand holding a small bottle next to a tall stand mixer (no text or symbols present)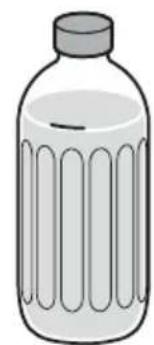
natural_image
Simple line drawing of a plastic bottle with a cap and side grooves (no text or symbols)- Nyt ditt sprudlende vann!
Andre råd
Vann i dryppskålen
natural_image
Illustration showing a hand cleaning a plastic bottle with a cloth, next to a water-filled container (no text or symbols)natural_image
Simple line drawing of a closed book with a black star-shaped cover on the front page (no text or symbols)natural_image
Two simple line drawings of water bottles with crossed X marks, no text or symbols present.natural_image
Line drawing of a hand operating a round-bottom flask under a cylindrical device (no text or symbols)Fyld flasken op til påfyldningslinjen. 1. Anbring flasken i bunden.
natural_image
Illustration of a hand holding a small bottle next to a tall stand mixer (no text or symbols present)
natural_image
Simple line drawing of a bottle with liquid and a cap (no text or symbols)- Nyd din mineralvand med bobler!
Andre gode råd
Vand i dryppebakken
natural_image
Illustration showing a hand cleaning a plastic bottle with a cloth, next to a water droplet on a basin (no text or symbols)Rengør flasken
natural_image
Two simple line drawings of water bottles with crossed X marks, one plain and one plain (no text or symbols)natural_image
Illustration of a hand operating a laboratory distillation or gas collection machine with a labeled component (no text or symbols on the device itself)natural_image
Illustration of a hand holding a small bottle next to a tall stand mixer (no text or symbols present)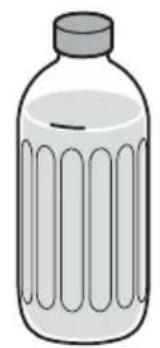
natural_image
Simple line drawing of a bottle with liquid and cap (no text or symbols)natural_image
Illustration showing a hand cleaning a plastic bottle with a cloth, next to a bowl with a droplet (no text or symbols)natural_image
Simple line drawing of a bottle with crossed X marks, no text or symbols presentnatural_image
Illustration of a hand operating a laboratory distillation or gas collection machine with a labeled component (no text or symbols on the device itself)natural_image
Illustration of a hand holding a small bottle next to a tall industrial machine (no text or symbols visible)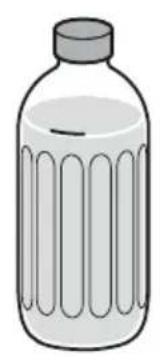
natural_image
Simple line drawing of a plastic bottle with a cap and side ridges (no text or symbols)natural_image
Illustration showing a hand cleaning a plastic bottle with a cloth, next to a water droplet on a basin (no text or symbols)Prífið flöskuna
natural_image
Two simple line drawings of water bottles with crossed X marks, no text or symbols present.natural_image
Illustration of a hand operating a laboratory distillation machine with a labeled component (no text or symbols on the device itself)natural_image
Illustration of a hand holding a small bottle next to a tall stand mixer (no text or symbols present)
natural_image
Simple line drawing of a plastic bottle with liquid and a cap (no text or symbols)natural_image
Illustration showing a hand cleaning a plastic bottle with a cloth, next to a water droplet on a container (no text or symbols)Мытье бутылки
natural_image
Simple line drawing of a closed book with a black star-shaped cover on the front page (no text or symbols)natural_image
Simple line drawing of a bottle with two crossed X marks, no text or symbols present.natural_image
Illustration of a hand operating a laboratory filtration device with a labeled component (no text or symbols on the device itself)natural_image
Illustration of a hand holding a small bottle next to a tall stand mixer (no text or symbols present)
natural_image
Simple line drawing of a plastic bottle with liquid and a cap (no text or symbols)natural_image
Illustration showing a hand cleaning a plastic bottle with a cloth, next to a water droplet on a container (no text or symbols)Czyszczenie butelki
natural_image
Simple line drawing of a bottle with crossed X marks, no text or symbols presentnatural_image
Illustration of a hand operating a laboratory distillation or gas collection machine with a labeled component (no text or symbols on the device itself)natural_image
Illustration of a hand holding a small bottle next to a tall stand mixer (no text or symbols present)
natural_image
Simple line drawing of a bottle with liquid and a cap (no text or symbols)natural_image
Illustration showing a hand cleaning a plastic bottle with a cloth, next to a bowl with a droplet (no text or symbols)Pudeli puhastamine
natural_image
Two plastic bottles with cross-shaped markings, one open and one closed, both without any text or symbols.Pagatavojot gāzēto ūdeni, izmantojiet tikai Carbonator Pro stikla pudeli
virzienam.
natural_image
Line drawing of a laboratory setup with a glass jar and a cylindrical device (no text or symbols)- Nospiediet rokturi lidz pusei, lai izlaistu atlikušo spiedienu.

- Nospiediet rokturi pilnigi uz leju, lai paceltu pârsegu.

natural_image
Illustration of a hand holding a small bottle next to a tall industrial machine (no text or symbols visible)
natural_image
Simple line drawing of a plastic bottle with a cap and side ridges (no text or symbols)natural_image
Illustration showing a hand cleaning a plastic bottle with a cloth, next to a water droplet on a basin (no text or symbols)natural_image
Simple line drawing of a closed book with a black star-shaped cover on the front page (no text or symbols)natural_image
Two simple line drawings of plastic bottles with crossed-out cross symbols (no text or labels)Gazuodami naudokite tik stiklinj van- dens butelj „Carbonator Pro“
natural_image
Line drawing of a laboratory setup with a glass jar and a cylindrical device (no text or symbols)- Toliau spauskite rankenq iki pat galo ir pakelkite dangtj.

natural_image
Illustration of a hand holding a small bottle next to a tall stand mixer (no text or symbols present)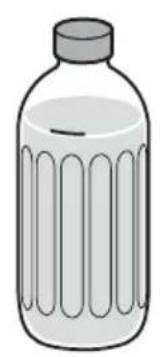
natural_image
Simple line drawing of a plastic bottle with a cap and side stripes (no text or symbols)natural_image
Illustration showing a hand cleaning a water bottle with a cloth, next to a container with a droplet (no text or symbols)Išvalykite butelj
natural_image
Simple line drawing of a bottle with two crossed X marks, no text or symbols present.natural_image
Line drawing of a hand operating a round-bottom flask under a cylindrical device (no text or symbols)natural_image
Illustration of a hand holding a small bottle next to a tall industrial machine (no text or symbols visible)
natural_image
Simple line drawing of a bottle with liquid and a cap (no text or symbols)natural_image
Illustration showing a hand cleaning a plastic bottle with a cloth, next to a water droplet on a container (no text or symbols)De fles reinigen
natural_image
Simple line drawing of a plastic bottle with internal compartments and a label pointing to the side (no text or symbols on the bottle itself)ガラスボトル

natural_image
Simple line drawing of a closed book with a black star-shaped cover on the front page (no text or symbols)natural_image
Two simple line drawings of water bottles with crossed X and Y axes, one empty and one outlined (no text or symbols)natural_image
Illustration of a hand operating a laboratory distillation or gas collection machine with a labeled component (no text or symbols on the device itself)natural_image
Illustration of a hand holding a small bottle next to a tall stand mixer (no text or symbols present)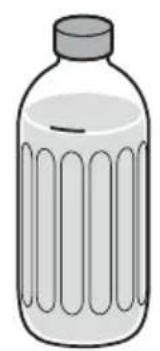
natural_image
Simple line drawing of a plastic bottle with liquid and cap (no text or symbols)6.炭酸水をお楽しみください!
JP
その他 のアドバイス
ドリップトレイの 水
natural_image
Illustration showing a hand cleaning a water bottle with a cloth, next to a small container with a droplet (no text or symbols)ボトル の 洗浄
natural_image
Two plastic bottles with cross symbols indicating prohibition or exclusion (no text or labels)natural_image
Line drawing of a laboratory setup with a hand holding a round-bottom flask, no text or symbols present
natural_image
Illustration of a hand holding a small bottle next to a tall stand mixer (no text or symbols present)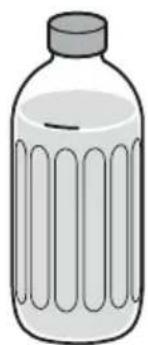
natural_image
Simple line drawing of a bottle with a cap and side stripes (no text or symbols)6.탄산수를 즐겨보세요!
기타 조언
드립 트레이의 물
natural_image
Illustration showing a hand cleaning a water bottle with a cloth, next to a small container with a droplet (no text or symbols)병 청소
下一代家用气泡水机。
natural_image
Simple line drawing of a plastic bottle with internal ridges and a cap, no text or symbols present.玻璃水瓶

natural_image
Simple line drawing of a closed book with a black star-shaped cover on the front page (no text or symbols)说明书信封
包含清洁布
natural_image
Two plastic bottles with cross-shaped markings, one open and one closed, both without any text or symbols.Pro 玻璃水瓶
natural_image
Line drawing of a hand operating a laboratory filtration device with a labeled component (no text or symbols on the device itself)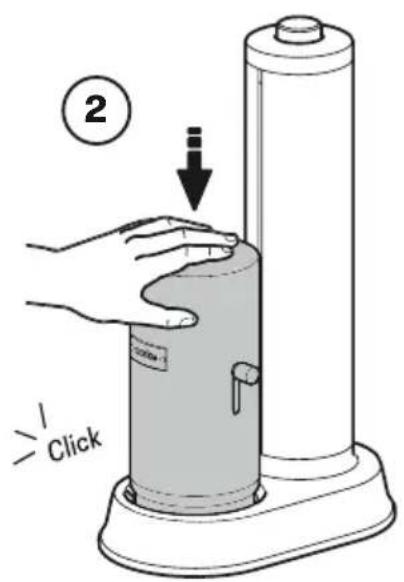
- 按下盖子,直至听到“咔哒”声。


- 将手柄拉下一半,排出剩余的压力。
5.继续将手柄完全拉下,抬起盖子。

natural_image
Illustration of a hand holding a small bottle next to a tall stand mixer (no text or symbols present)
natural_image
Simple line drawing of a bottle with liquid and cap (no text or symbols)- 畅饮新鲜气泡水!
其他建议
储液盘中的液体
natural_image
Illustration showing a hand cleaning a water bottle with a cloth, next to a bowl with a droplet (no text or symbols)دعم العملاء
جانب الطاولة.
natural_image
Illustration showing a hand cleaning a plastic bottle with a cloth, next to a water dispenser (no text or symbols)تنظيف الزجaje
natural_image
Illustration of a hand holding a small bottle next to a tall industrial machine (no text or symbols visible)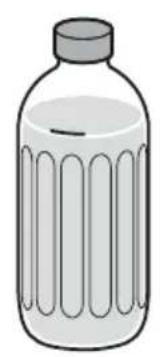
natural_image
Simple line drawing of a plastic bottle with liquid and cap (no text or symbols)natural_image
Line drawing of a hand operating a small bottle under a cylindrical device (no text or symbols)عملية الكربنة
- بازية
3 . .الغاز
4 . يدة.
- بات
الغازية.
natural_image
Two plastic bottles with cross symbols, one with wavy lines and another empty, no text or labels present.


- Next level home carbonation.
- Items and components
- Technical specifications
- General safety
- Gas cylinder replacement
- The carbonation process
- Other advice
- Water in the drip tray
- Clean the bottle
- Clean the Carbonator
- Use cold water
- Protect your countertop
- Recycling
- Approved gas cylinders
- Cylinder gasket troubleshooting
- Checking the gasket
- Replacing the gasket
- Customer support
- Check the "Troubleshooting guide"
- Contact us at support@aarke.com
- Rengör flaskan
- Kullsyreprosessen
- Andre råd
- Vann i dryppskålen
- Andre gode råd
- Vand i dryppebakken
- Rengør flasken
- Prífið flöskuna
- Мытье бутылки
- Czyszczenie butelki
- Pudeli puhastamine
- Išvalykite butelj
- De fles reinigen
- その他 のアドバイス
- ドリップトレイの 水
- ボトル の 洗浄
- 기타 조언
- 드립 트레이의 물
- 병 청소
- 下一代家用气泡水机。
- 其他建议
- 储液盘中的液体
- دعم العملاء
- تنظيف الزجaje
Brand : AARKE
Model : Carbonator 3
Category : Water dispenser