
ROCAM 4 Plus - Video camera ROTHENBERGER - Free user manual and instructions
Find the device manual for free ROCAM 4 Plus ROTHENBERGER in PDF.
| Product type | Video pipe inspection camera |
| Brand | Rothenberger |
| Model | ROCAM 4 Plus |
| Dimensions (L × W × H) | 560 × 400 × 340 mm |
| Weight (with 30 m cable) | 18.6 kg |
| Weight (with 65 m cable) | 22.4 kg |
| Power supply | Li-Ion battery 18 V DC, 2.0 Ah / 4.0 Ah |
| Screen | 10.4 inch touch screen |
| Photo / video resolution | 720 × 600 px (JPG / AVI) |
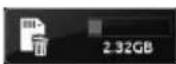
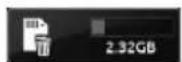
| Memory | 4 GB SD card included, expandable up to 32 GB |
| Camera type | PAL color CMOS |
| Camera head diameter | 30 mm or 40 mm (optional 25 mm mini module) |
| Push cable length | 30 m or 65 m (optional 8 m mini module) |
| Push cable diameter | 7.0 mm (30 m) / 8.0 mm (65 m) |
| Working range | 40 – 100 mm (mini module), 70 – 150 mm (30 mm head), 100 – 300 mm (40 mm head) |
| Location transmitter | 33 kHz (optional screw mounting) |
| Protection rating (camera head) | IP68 |
| Working temperature | -10 °C to +50 °C |
| Connectivity | Wi-Fi, Micro-HDMI, Mini-USB, ROCAM 4 Plus mobile app |
| Main functions | Visual inspection, photo/video recording, location, damage catalog, data transfer |
| Included accessories | Camera head ø30 mm or ø40 mm, guiding ball, 33 kHz transmitter, USB cable, probe adapter, 4 GB SD card, battery, charger |
Frequently Asked Questions - ROCAM 4 Plus ROTHENBERGER
User questions about ROCAM 4 Plus ROTHENBERGER
0 question about this device. Answer the ones you know or ask your own.
Ask a new question about this device
Download the instructions for your Video camera in PDF format for free! Find your manual ROCAM 4 Plus - ROTHENBERGER and take your electronic device back in hand. On this page are published all the documents necessary for the use of your device. ROCAM 4 Plus by ROTHENBERGER.
USER MANUAL ROCAM 4 Plus ROTHENBERGER
ROCAM 4 Plus Charger / Battery
ROCAM 4 Plus
EN Instructions for use
fig. charger and battery similar
Intro
EU-DECLARATION OF CONFORMITY
We declare on our sole accountability that this product conforms to the standards and guidelines stated.
DECLARATION EU DE CONFORMITE
Manufacturer/ authorized representative signature

ppa.Thorsten Buhl Kelkheim,09.03.2017
Director Corporate Technology
Technische Unterlagen bei/ Technical file at:
D-65779 Kelkheim/Germany

Charger:
2014/35/EU, 2014/30/EU, 2011/65/EU, EN 55014-1,
EN 55014-2, EN 61000-3-2, EN 61000-3-3,
EN 60335-1, EN 60335-2-29, EN 50581
Manufacturer/ authorized representative signature

ppa. Thorsten Buhl Kelkheim, 05.09.2016
Director Corporate Technology
Technische Unterlagen bei/ Technical file at:
D-65779 Kelkheim/Germany
Intro
| DEUTSCH - Originalbetriebsanleitung!Bedienungsanleitungitte lessen und aufbewahren! Nicht wegwerfen! Bei Schäden durchBedienungsfehler erlischt die Garantie! Technische Änderungen vorbehalten! | Seite 2 |
| ENGLISHPlease read and retain these instructions for use. Do not throw them away! The warranty does notcover damage caused by incorrect use of the equipment! Subject to technical modifications! | page 20 |
| FRANÇAISLire attentivement le mode d'emploi et le ranger à un endroit sûr! Ne pas le jeter! La garantie estannulée lors de dommages dûs à une manipulation erronée! Sous réserve de modificationstechniques! | page 38 |
| ESPANOLjPor favor, lea y conserve el manual de instrucciones! ;No lo tire! ;En caso de daños por erreodes manejo, la garantía queda sin validez! Modificaciones技术水平as reservadas! | páginal6 |
| ITALIANOPer favore leggere e conservare le istruzioni per l'uso! Non gettarle via! In caso di danni dovuti aderrori nell'uso, la garanzia si estingue! Ci si riservano modifiche tecniche! | Pagina 74 |
| NEDERLANDSLees de handleiding zorgvuldig door en bewaarhaar goed! Niet weggooien! Bij schade doorbedieningsfouten komt de garantieverlening te verrallen! Technische wijzigingen voorbehonden! | bladzijde 92 |
| DANSKLeaes betjeningsvejledningen, og gem den til senere brug! Smid den ikke ud! Skader, som@måtteopstà som følgé af betjeningsfejl, medforer, at garantien mister sin gyldighed! Ret til tekniskeændringer forbeholds! | side 110 |
| SVENSKALas genom bra克斯anvisningen och Förvara den väll! Kasta inte bort den! Garantin upphör omapparaten har anvænts eller betjänats på att felaktigt sätt! Med reservation För tekniskaändringar! | sida 127 |
| SUOMILeue ja säilytã tãmã käytöohje! Älä heita pois! Takuu ei mata käytövirheistã aiheutuvia vahinkoja!Oikeudet teknisin muutoksin pidätetään! | sivulta 144 |
| POLSKInstrukcjé oblugi prosze przechyac! Nie wyrzucac! Przy uszkodzeniachwynikajacych z blédów obslugi wygasa gwarancja! Zmiany technicnz zastrzezone! | strony 161 |
| MAGYARKérjuk, olvassa el és orizze meg a kezelési utasítást! Ne dobja el! A helytelen kezelésból szármasókárosodások esétén megszünik a jóttálas! Múszaki valtoztatások fenntartva! | oldaltöl 179 |
| 日本語日本語操作說明書は日を通過たと、保管くださいます!捨てはんだけます!操作を誤ったたに生け的損害か対ては、保証は行不开かん!本装置針對技術上的変更による説明書的内容に一致ologies场合のはります! | cape-197 |
Art. No: Description
1500002613 ROCAM 4 Plus - 30m cable, 30mm camera head EU
1500002614 ROCAM 4 Plus - 30m cable, 40mm camera head EU
1500002615 ROCAM 4 Plus - 65m cable, 030mm camera head EU
1500002616 ROCAM 4 Plus - 65m cable, 40 mm camera head EU
1500002617 ROCAM 4 Plus - 30m cable, Ø 30mm camera head AUS
1500002618 ROCAM 4 Plus - 30m cable, 40mm camera head AUS
1500002619 ROCAM 4 Plus - 65m cable, Ø 30mm camera head AUS
1500002620 ROCAM 4 Plus - 65m cable, 40mm camera head AUS
Inhalt
Seite
Monitor . Touchscreen 10.4"
t = Ladedauer (90% voll)
Lodespannung. 20,75 V DC
Ladetemperatur. 0^ - 50^ C
Max. Entladetemperatur. ....5° - 50°C
FW (Firmware Version)
IP (IP Adresse)
Wi-Fi (SSID/ Hot Spot)

Einstellungen

Uhrzeit

Datum
Email: service@rothenberger.com
www. rothenberger.com
8 Entsorgung
1.1 Intended use 21
1.2 General Power Tool SafetyWarnings 22
1.3 Special safety instructions 23
2 Technical data ROCAM 4 Plus 25
3 Technical Data charger and battery (C) 25
4 Function of the Unit 26
4.1 Overview (A) 26
4.2 Working notes 26
4.3 Changing the battery 26
4.4 Working with the device 26
4.5 ROCAM positioning 27
4.6 Monitor unit with touchscreen 27
4.7 User interface start up screen 28
4.8 Picture/Video mode 29
4.9 User interface operating elements 30
4.9.1 Using the ROCAM 4 Plus app 33
4.9.2 Data transmission to a PC 34
4.10 Replace the reel (B) 34
4.11 Charger and battery (C) 35
5 Care and Maintenance 36
6 Accessories 36
7 Customer service 36
8 Disposal 37
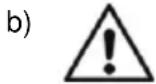
Markings in this document:

Danger!
This sign warns against the danger of personal injuries.

Caution!
This sign warns against the danger of property damage and damage to the environment.

Call for action
FCC-Statement (Class A, Group 1)

This device complies with Part 15 of the FCC Rules. Operation is subject to the following two conditions: (1) This device may not cause interference, and 2) this device must accept any interference received, including interference that may cause undesired operation.
Federal Communications Commission Statement
NOTE - This equipment has been tested and found to comply with the limits for a Class A, Group 1 digital device, pursuant to Part 15 of the FCC Rules. These limit values were designed to provide adequate protection against faults occurring during operation in industrial areas. This equipment generates uses and can radiate radio frequency energy and, if not installed and used in accordance with the instructions, may cause harmful interference to radio communications. However, there is no guarantee that interference will not occur in a particular installation. If this equipment does cause harmful interference to radio or television reception, which can be determined by tuning the equipment off and on, the user is encouraged to try to correct the interference by one or more of the following measures:
Reorient or relocate the receiving antenna.
Increase the separation between the equipment and receiver.
Connect the equipment into an outlet on a circuit different from that to which the receiver is connected.
Consult the dealer or an experienced radio/television technicians for help.
Class A, Group 1 Note
Warning - This is a Class A, Group 1 product. In a domestic environment this product may cause radio interference in which case the user may be required to take adequate measures.
1.1 Intended use
ROCAM 4 Plus:
The ROCAM 4 Plus TV inspection system is solely for inspecting empty, clean pipes, hollow cavities and hollow spaces, as indicated under Technical data. Other uses are discouraged.
Do not leave camera heads in the sun for extended periods. This can damage the camera module! All applicable standards and regulations must be observed.

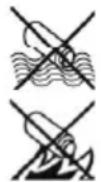
This tool is only suitable for indoor use. Never expose tool to rain!
Among others, these particularly include:
- Laws on technical equipment (Equipment Safety Act) and associated regulations
- Low Voltage Directive
- UVV VBG 1 „General regulations"
- UVV VBG 4 „Electrical systems and equipment“
Guidelines for work in containers and confined spaces (BG rule 77), Guideline for workstations.
Charger and battery:
The chargers are only suitable for charging ROTHENBERGER battery packs.
This tool is not designed for use by persons with physical, sensory or mental disabilities, or with insufficient experience and/or knowledge, unless they are supervised by a person responsible for their safety, or have received instructions on how to use the tool by this person.
Never attempt to charge batteries that are not rechargeable. Danger of explosion!
The battery packs are designed for use in corresponding ROTHENBERGER battery-operated power tools. They must only be charged using ROTHENBERGER chargers. To select the appropriate device, please contact your ROTHENBERGER dealer. Read the relevant instructions for the devices used.
1.2 General Power Tool SafetyWarnings

WARNING!
Read all safety warnings and all instructions.
Failure to follow the warnings and instructions may result in electric shock, fire and/or serious injury.
Save all warnings and instructions for future reference.
The term "power tool" in the warnings refers to your electrically-operated (corded) power tool or battery-operated (cordless) power tool.
1) Work area safety
a) Keep work area clean and well lit. Cluttered and dark areas invite accidents.
b) Do not operate power tools in explosive atmospheres, such as in the presence of flammable liquids, gases or dust. Power tools create sparks which may ignite the dust or fumes.
c) Keep children and bystanders away while operating a power tool. Distractions can cause you to lose control.
2) Electrical safety
a) Power tool plugs must match the outlet. Never modify the plug in any way. Do not use any adapter plugs with (grounded) power tools. Unmodified plugs and matching outlets will reduce risk of electric shock.
b) Avoid body contact with grounded surfaces such as pipes, radiators, ranges and refrigerators. There is an increased risk of electric shock if your body is grounded.
c) Do not expose power tools to rain or wet conditions. Water entering a power tool will increase the risk of electric shock.
d) Do not abuse the cord. Never use the cord for carrying, pulling or unplugging the power tool. Keep cord away from heat, oil, sharp edges or moving parts. Damaged or entangled cords increase the risk of electric shock.
e) When operating a power tool outdoors only, use an extension cords suitable for outdoor use. Use of a cord suitable for outdoor use reduces the risk of electric shock.
f) If operating a power tool in a damp location is unavoidable, use a residual current device (RCD) protected supply. Use of an RCD reduces the risk of electric shock.
3) Personal safety
a) Stay alert, watch what you are doing and use common sense when operating a power tool. Do not use a power tool while you are tired or under the influence of drugs, alcohol or medication. A momentary lack of attention while operating power tools may result in serious personal injury.
b) Use personal protective equipment. Always wear eye protection. Protective equipment such as dust mask, non-skid safety shoes, hard hat, or hearing protection used for appropriate conditions will reduce personal injuries.
c) Prevent unintentional starting. Ensure the switch is in the off-position before connecting to power source and/or battery pack, picking up or carrying the tool. Carrying power tools with your finger on the switch or energising power tools that have the switch on invites accidents.
d) Remove any adjusting key or wrench before turning the power tool on. A wrench or a key left attached to a rotating part of the power tool may result in personal injury.
e) Do not overreach. Keep proper footing and balance at all times. This enables better control of the power tool in unexpected situations.
f) Dress properly. Do not wear loose clothing or jewellery. Keep your hair, clothing and gloves away from moving parts. Loose clothes, jewellery or long hair can be caught in moving parts.
g) If devices are provided for the connection of dust extraction and collection facilities, ensure these are connected and properly used. Use of these devices can reduce dust related hazards.
4) Power tool use and care
a) Do not force the power tool. Use the correct power tool for your application. The correct power tool will do the job better and safer at the rate for which it was designed.
b) Do not use the power tool if the switch does not turn it on and off. Any power tool that cannot be controlled with the switch is dangerous and must be repaired.
c) Disconnect the plug from the power source and/or the battery pack from the power tool before making any adjustments, changing accessories, or storing power tools. Such preventive safety measures reduce the risk of starting the power tool accidentally.
d) Store idle power tools out of the reach of children and do not allow persons unfamiliar with the power tool or these instructions to operate the power tool. Power tools are dangerous in the hands of untrained users.
e) Maintain power tools. Check for misalignment or binding of moving parts, breakage of parts and any other condition that may affect the power tools operation. If damaged, have the power tool repaired before use. Many accidents are caused by poorly maintained power tools.
f) Keep cutting tools sharp and clean. Properly maintained cutting tools with sharp cutting edges are less likely to bind and are easier to control.
g) Use the power tool, accessories and tool bits etc., in accordance with these instructions, taking into account the working conditions and the work to be performed. Use of the power tool for operations different from those intended could result in a hazardous situation.
5) Battery tool use and care
a) Recharge only with the charger specified by the manufacturer. A charger that is suitable for one type of battery pack may create a risk of fire when used with another battery pack.
WARNING! Use power tools only with specifically designated battery packs and respectively battery types. Use of any other battery packs may create a risk of explosions, injury and fire.
c) When battery pack is not in use, keep it away from other metal objects like paper clips, coins, keys, nails, screws, or other small metal objects that can make a connection from one terminal to another. Shorting the battery terminals together may cause burns or a fire.
d) Under abusive conditions, liquid may be ejected from the battery; avoid contact. If contact accidentally occurs, flush with water. If liquid contacts eyes, additionally seek medical help. Liquid ejected from the battery may cause irritation or burns.
6) Service
Have your power tool serviced by a qualified repair person using only identical replacement parts. This will ensure that the safety of the power tool is maintained.
1.3 Special safety instructions
ROCAM 4 Plus:
Wear proper work clothes, work gloves, safety glasses and safety shoes.
Do not perform any work inside the device! Only trained technical personnel (customer service) are allowed to work in this area!
It is prohibited to use the TV inspection system for medical uses of any sort!
Do not use force to pull the camera head and reel cable out of the pipe!
Always set the pipe cable next to the "axis"; otherwise there is a risk of injury!
The reel cable is rigid and is therefore under mechanical stress! Hold firmly when unwinding from the reel!
Keep a firm footing.
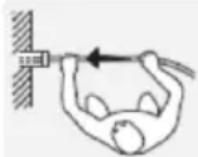
According to UVV, the minimum distance must be 50~cm (average 64~cm )

Before each use, check the reel cables for damage. Damaged reel cable must be replaced! Contact with electrically charged live parts can be fatal!
Charger and battery:
This charger is not intended for use by children and persons with physical, sensory or mental limitations or a lack of experience or knowledge. This charger can be used by children aged 8 and above and by persons who have physical, sensory or mental limitations or a lack of experience or knowledge if a person responsible for their safety supervises them or has instructed them in the safe operation of the charger and they understand the associated dangers. Otherwise, there is a danger of operating errors and injuries.
Supervise children during use, cleaning and maintenance. This will ensure that children do not play with the charger.
Do not charge non-rechargeable batteries.
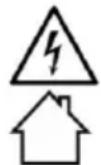
Danger - electrical voltage!!
Only use the charger indoors!
Protect the charger from moisture!
Never allow children to use the machine. Children should be supervised to ensure that they do not play with the tool.
Keep children away from the battery charger and the working area!
Keep your battery charger out of reach of children!
Pull out the mains plug immediately if the battery charger starts to smoke or flames emerge!
Do not insert objects into the ventilation slots on the battery charger - there is a danger of electric shocks and short circuits!
Do not recharge a fully charged battery pack!
Protect battery packs from water and moisture!
Do not expose battery packs to naked flame!
Do not use faulty or deformed battery packs!
In areas with high metal dust exposure do not load any battery packs with AIR COOLED chargers.
Do not open battery packs!
Do not touch or short-circuit battery packs!

Slightly acidic, flammable fluid may leak from defective Li-ion battery packs!

If battery fluid leaks out and comes into contact with your skin, rinse immediately with plenty of water. If battery fluid leaks out and comes into contact with your eyes, wash them with clean water and seek medical attention immediately!
Transporting li-ion battery packs: The shipping of li-ion battery packs is subject to laws relating to the carriage of hazardous goods (UN 3480 and UN 3481). Inform yourself of the currently valid specifications when shipping li-ion battery packs. If necessary, consult your freight forwarder. Certified packaging is available from ROTHENBERGER.
2 Technical data ROCAM 4 Plus
Battery voltage 18 V DC
Battery capacity. 2,0 Ah / 4,0 Ah
Rated power consumption.16 W
Working temperature. .10 +50 °C
Storage temperature. 30 +50 °C
Dimensions (L × W × H, mm) ..... 560 × 400 × 340
Weight (with battery). 18,6 kg / 22,4 kg (30m/ 65m slide cable length)
Monitor . Touchscreen 10.4"
Picture/Video format.JPG / AVI (resolution 720px. x 600px.)
Video Out . Micro HDMI
Memory capacity 4 GB SD-card (max. 32 GB)
Camera module... CMOS colour PAL
Camera head diameter. 30 mm, 40 mm (optional 25 mm Mini Modul)
Slide cable length. 30 m / 65 m (optional 8 m Mini Modul)
Slide cable diameter. 7.0 mm / 8.0 mm (optional 5,5 mm Mini Modul)
Working range. 40 - 100 mm (optional Mini Modul)
070-150mm(30mm camera head)
0 100 - 300 mm (40 mm camera head)
Positioning transmitter. 33 kHz (bolt-on optional)
Protection class camera head.....IP 68
Included in delivery: ROCAM 4 Plus TV- inspection system with Camera head 30mm or 40 mm, guide ball, positioning transmitter 33kHz , USB cable, test adaptor, manual, 4 GB SD card, battery and charger.
3 Technical Data charger and battery (C)
Battery: Charger:
U = Voltage U1
C = Capacity f1 = Input frequency
W = Weight P1
Ic = Charge current
t = Approx. charging time (90% full)
Charging voltage 20,75 V DC
Charging temperature. 0^ - 50^
Max. discharging temperature. ....5° - 50° C
Recharge battery pack before first use!
= Input voltage
= Input power
U2 = Charging voltage
12 = Max. charge current
Nc = No of battery cells
W = Weight
Pay attention to the electrical outlet voltage! Check the label on the bottom of the charger!
4 Function of the Unit
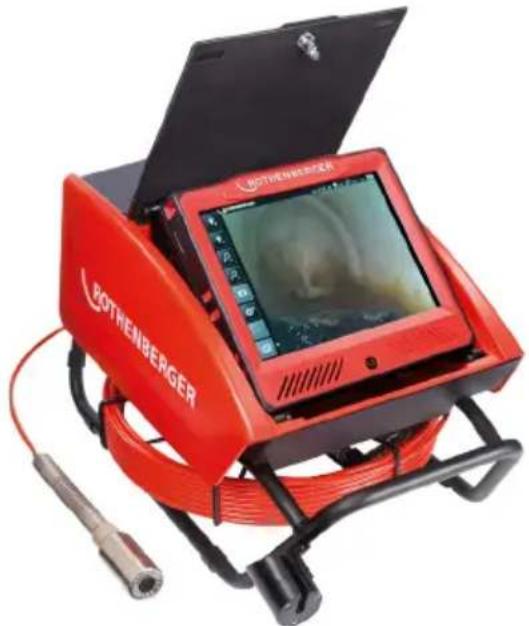
4.1 Overview (A)
1 Camera head
7 Monitor unit
2 Positioning probe
8 Reel
3 Bending spring
9 Frame
4 Reel cable
10 Holder / Bracket
5 Rear flap
11 Guide hook
6 Front flap
12 ROCAM 4 Plus - AC - adapter
4.2 Working notes
- Do not bend the reel cable! The cable may break!
- Do not pull the reel cable over sharp edges! The cable may become damaged!

ATTENTION! Always protect ROCAM 4 Plus against water, and use only recommended indoors. Only the camera head (1) and reel cable (4) may come into contact with water!
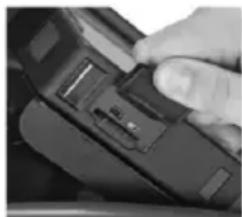
4.3 Changing the battery
Open the rear cover (5).
Insert the battery into the compartment on the right side of the accessory compartment until it clicks. To remove, press the locks and pull the battery out.
4.4 Working with the device

Wear protective clothing! Always stand next to the reel cable!
Push reel cable (4) with bending spring (3) from the holder (10) / reel (8) take and remove cap.
Remove the cap from the camera head (1) and screw on the bending spring (3).
Caution: Check for cleanliness and damage!
If necessary, additional accessories can be attached to camera. When using pipe diameters greater than 70~mm , always use guide body!
Clean the pipe system before inspection.
Press button on the bottom cover (6), open the cover. Hold the door during opening.
Turn the device on with the Power-button, located bottom front center of the monitor (7). The monitor unit (7) can be removed from the basic device for optimal viewing angle.
Excessive pressure on the touch screen may damage the monitor unit!
Remove the camera head (1) from the holder (10) and pull the cable (4) from the reel (8). The cable is rigid and is under mechanical stress. Therefore, hold it firmly when unwinding from the reel. By pressing in the holder / bracket (10), it can be clamped!
Guide the camera head (1) into the pipe system and carefully push it with the cable (4). Caution: Unwinding the reel too quickly may cause it to continue to spin.
For optimal results, a camera head (SL40) with a stronger light yield up to DN300 can be screwed on. Camera heads are interchangeable.
Do not pull the cable (4) over sharp edges, and do not bend it!! Check the camera cable before each use for damage!
While it is being pushed, the cable (4) may loop: Breakage may result!!
During advancement through several pipe bends, the camera image is always upright.
After work is finished, pull the cable (4) out of the pipe and push it directly onto the reel (8). Remove coarse dirt and water with a rag while winding cable on reel.
Clean thoroughly (see section 5.).
Dismantle camera head (1) and accessories, plug cap and insert bending spring (3) with reel cable (4) into the reel (8).
Camera head (1) and accessories should be cleaned and safely stored.
Close the flap.

Camera head and accessories must be cleaned after each use, dismantled and stored safely. Abnormal transport of the camera head can cause damage!
Check the camera head regularly the camera head (1) for leaks. For this purpose, screw the test adaptor on the camera head, applying a maximum pressure of 1 bar by an air pump with pressure indicator. If this test indicates a drop in pressure, replace camera head.
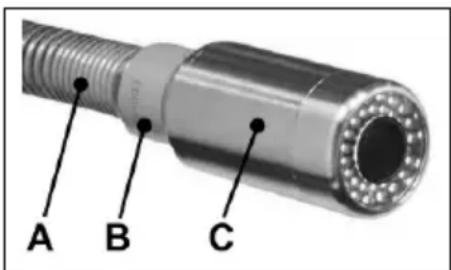
4.5 ROCAM positioning
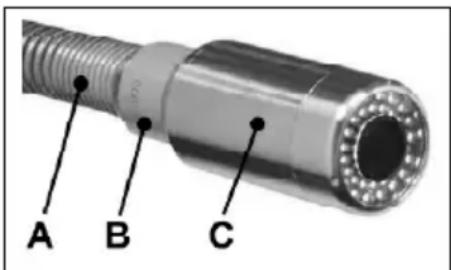
The grey, cylinder-shaped positioning probe (B) can be screwed by hand between the camera head (C) and the bending spring (A). Only finger tight, to avoid damaging threads!
The positioning probe emits magnetic fields that are received by the positioning receiver and are transformed visually and audibly.
The 33 kHz measuring system can penetrate masonry, stone, wood and plastic.
The intensity of the signal changes depending on the position and distance from the receiver.
4.6 Monitor unit with touchscreen
The ROCAM 4 Plus comes with a 4GB SD card to save photo's and video's. This can be removed for data transfer.
Connections Micro-HDMI, mini USB and SD card are on the side of the monitor unit.
Only use a screened USB cable to make a connection between ROCAM 4 Plus and a computer!
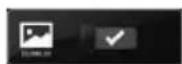
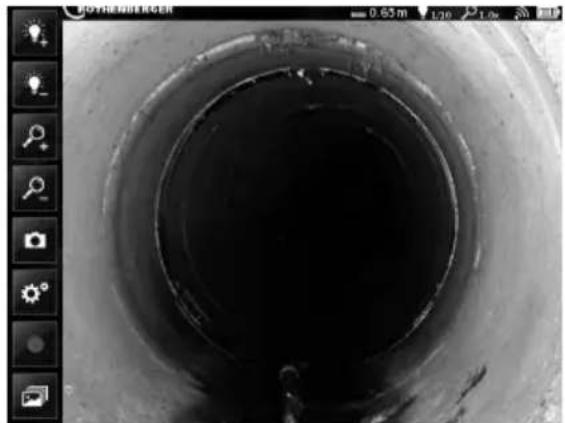
4.7 User interface start up screen
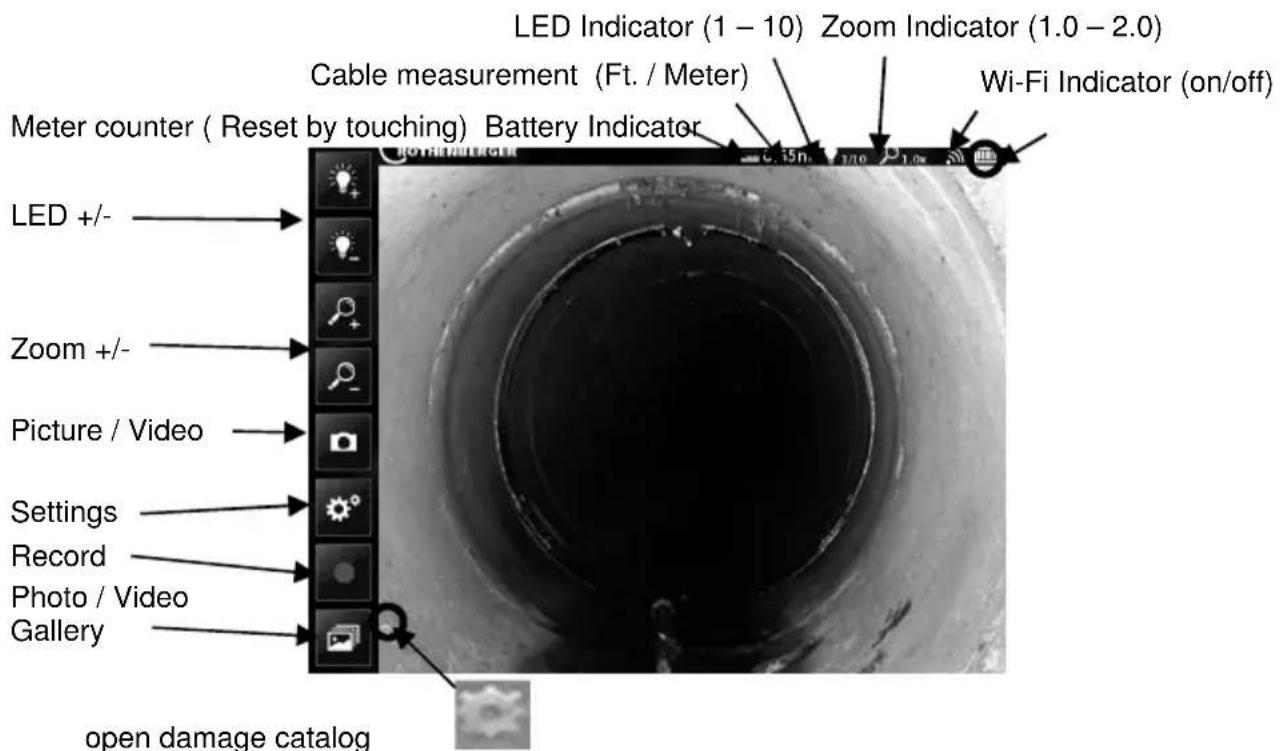
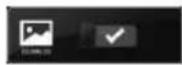
Choose the type of damage in the damage catalog and confirm This will be shown in the left bottom of the screen, and also by saving images/videos:
Setting up damage catalog:
Foreign body, free
- Blockage
- Pool of water
- Leaking pipe or collar connector
- Crack in longitudinal direction
- Crack in transverse direction
- Broken fragments
- In-feed not installed correctly
Laid incorrectly
- Wear, mechanical
- Wear, corrosive
- Encrustation
- Deformation
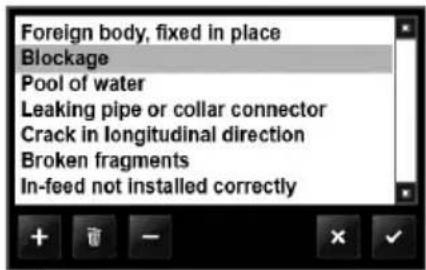
- Add a new damage
Delete damage
switch off damage
back
confirm
Battery Indicator:
Colour white:
to up to 100%, up to 20% battery capacity, mains network operation
Colour red:
Battery empty, battery temperature exceeds the operating temperature (-10° to 50°C)

If the ROCAM 4 Plus is used outside the specified operating temperature range, faults can occur on the screen! The ROCAM 4 Plus may switch itself off autonomously!
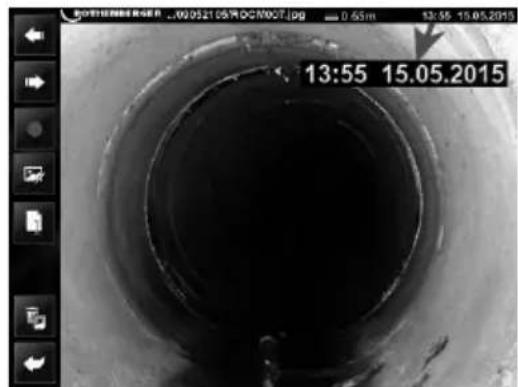
4.8 Picture / Video mode
Select picture mode or video mode.

Touch the record picture / video button. Touch the stop video button. Date is automatically saved as a jpg,avi,or wav files.
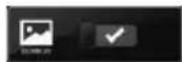
Open photo / video gallery and select required photo / video (only if SD-card is installed in monitor).
Scroll left or right, to select saved pictures or Videos.
Video mode:

Play saved video

Pause. Video stops and the current view can be edited and then saved (s. photo mode)

File naming

Delete video's. Confirm with or no back
Photo mode:

Audio annotation for selected photo.

Stop audio Annotation

Play saved audio annotation

Pause

Marking Mode / Drawing on Saved Images

Drawing arrows (touch button / then draw arrow with stylist / drag to relocate)

Drawing circles (touch button / then draw circles with stylist / drag to alter size and/or relocate)

Add text to saved pictures from the damage catalog

Choose color of the text/drawing

Save photo (photo is automatically renamed, original remains)

Touch arrow (or) circle / touch delete button to remove arrow (or) circle

File Naming / Text Annotation

Delete pictures. Confirm eyes or not black

Delete audio file from saved pictures. Confirm eyes or not black

Return to photo / video gallery

Return to live screen
4.9 User interface operating elements
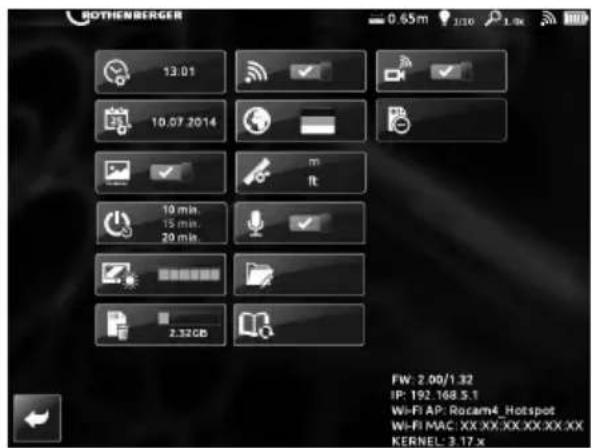

Tools menu
FW (Firm Ware Version)
IP (IP Address)
Wi-Fi (SSID / Hot Spot)
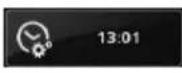
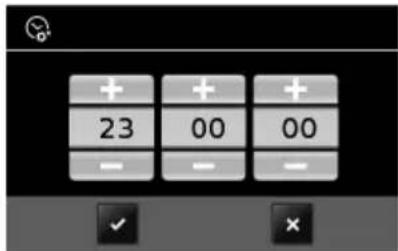
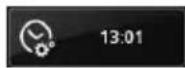
Set time

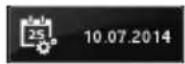
Set date

Time / Date Stamp (On / Off)
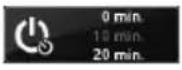
Auto Shut Off (0/10/20/30)
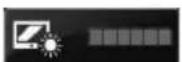
LCD Brightness
Format/Wipe SD Card

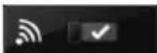
Wi-Fi (on / off)

Language
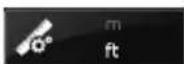
Unit of measure (feet / meter)

Voice recording for Video (on / off)

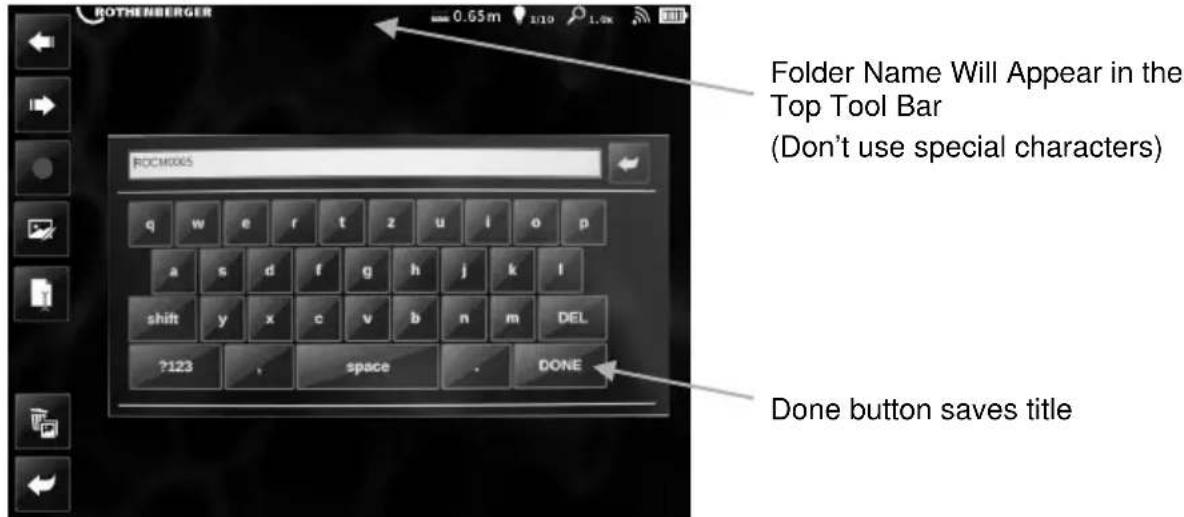
Folder Options

Reset damage Catalog to presetting
Set Time:

Set hour / minute / second by using +/ - buttons. Saving with or cancel
hour / minute / second
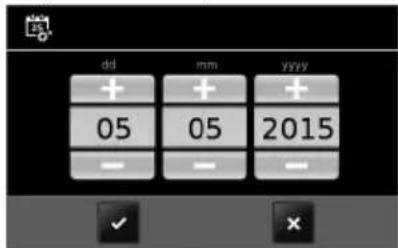
Set date:
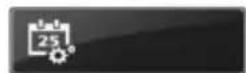
Set month / day / year by using + / - buttons. Saving with or cancel
day / month / year
Time / date stamp:
Optional time / date stamp when saving photo's/video's

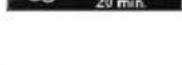
Auto shut off:
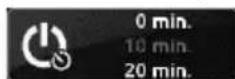
Set the unit to automatically turn off after 0, 10, 20, or 30 minutes
LCD Brightness:
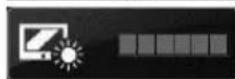
Select from 5 different brightness levels for optimum viewing
Format/Wipe(4G)SD Card:

Formatting will erase all saved images and/or video only in folder ROCAM 4 Plus on SD card.
Not other Saved Data! Confirm with yes or no/ back
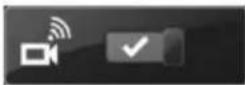
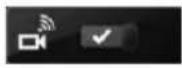
Wi-Fi on/off:
Wireless Hot Spot with ROCAM 4 Plus Device on/off

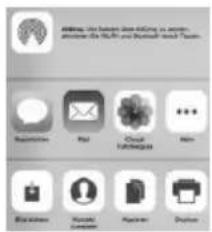
- Download to transmit data to a smartphone/tablet App in iOS/App Sore or Android/Play Store (for use of the app see 4.9.1).
Language Selection:

Following languages are available:
DE, EN, ES, FR, IT, NL, PT, DA, SV, FI, PL, CS, TR, HU, SLO, RU, BG, GRI, RU, CHI, JA, AR, HI
Unit of Measure:
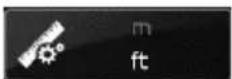
Choose between ,meter ” or “feet”:
m = meter, ft. = feet
Voice recording:
Optional recording of audio with video / photo.

on

Folder Options:


add folder, rename,

confirm, - back to operating elements
Folders and sub folders can now be renamed or added, based on the time and date.
Add folder:

Touch add button to open key board. Type in name in text box. Done button saves title.
(Don't use special characters)
Re-Name existing folders:

Touch existing folder or sub folder and touch
re-naming button. Existing folder name appears in the text box and can be renamed. (Don't use special characters). Done button saves title.
Note: Pictures and videos are saved in a folder created daily. To look at older recordings, select the appropriate folder.

Back to operating elements
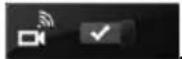
Live image streaming:
on

Reset damage catalog to presetting:
Note: Only the selected language will be restored

Back to live screen
Remove SD card safely:

Push button before removing SD card. Otherwise already stored data on
the SD card could be lost.
4.9.1 Using the ROCAM 4 Plus app
Switch on both wifi functions over the system settings of ROCAM 4 Plus

Using the settings of the Android/iOS device, connect with the network "rocam4 hotspot". The password for this is: "letrocam4in".
After making the configuration, leave the system settings of ROCAM 4 Plus and switch to Livebild.
Open the app on the Android/ iOS device. This image appears
Here one can select between the live picture transmission and viewing the recordings which have been made over the app (pictures/videos).
Create the desired pictures/videos over live picture transmission

Under Recordings there appears the list of all of the photos and videos taken. Tap on the desired file and it will open and can therefore be viewed or processed.
The selected picture is displayed in close-up. One can select from 3 options:
Android device
- Microphone (audio commentary)
- Image processing
- Split
iOS device

Microphone (audio commentary)

Image processing

Split
The processing menu appears after "Image processing" was selected.
Android device iOS device

Retrogressive

Retrogressive

Restore

Restore

Colour palette

Colour palette

Save

Save

Select the stylus for processing:

Stylus

Stylus

Eraser

Eraser

Text

Text

Styles

Styles
To transmit this one returns to the previous menu and selects the "Share" option (dependent on the installed programs).

Android device iOS device
4.9.2 Data transmission to a PC
Switch on the wifi function over the system settings of ROCAM 4 Plus

The SD card of the ROCAM 4 Plus must be inserted!!
Switch on the wifi function on the PC and connect with the wireless network "roc-am4 hotspot". The network security key required to make the connection is: "letrocam4in".
Open the respective browser on the PC and enter the IP address of the ROCAM 4 Plus http://192.168.5.1.
One is now automatically connected with the existing ROCAM 4 Plus directories and can view the desired pictures and videos.
Proceed as one would normally to save the one or the other on the PC.
4.10 Replace the reel (B)

Switch off ROCAM 4 Plus before replacing the reel!
Installing ROCAM 4 Plus vertically. Front flap (6) must be closed here!
Remove camera head (1) from the holder (10) and take the reel cable (4) carefully out of the guide hook (11) (Only SL40: remove camera head).
Position camera head (1) with cable (4) into the reel (8).
Bayonet connection operated by a half turn, and pulling gently (hold counterpart).
Use caution not to damage the connector!
Loosen locking bolts by pulling gently from the lock and Turning it 90^ . Restrain reel (8) to prevent from slipping.
Push reel (8) toward T-slot and remove the side. Use caution not to damage the connector.
Mount in reverse order, paying attention when inserting the reel (8) on mark.
The software automatically detects the connected camera head.
4.11 Charger and battery (C)
Overview:
1 Battery pack
4 Warning display
2 Sliding seat
5 Capacity indicator button
3 Operation display
6 Capacity and signal indicator
Start of operation

Before plugging in, check to see that the rated mains voltage and mains frequency, as specified on the rating label, match your power supply.
Devices such as this one, which generate direct current, may have an effect on basic residual-current circuit breakers. Use type F or better, with a release current of max. 30mA

Before commissioning the charger, ensure that the air slots are free. Minimum distance to other objects is 5 cm.
Self-test:
Insert mains supply plug.
The warning display (4) and the operating indicator (3) light up one after the other for approx. 1 second and the installed fan runs for approx. 5 seconds.
Battery pack:
Charge the battery pack before use (1).
If performance diminishes, recharge the battery pack.
The ideal storage temperature is between 10^ and 30^ . The permissible storage temperature is between 0^ and 50^ .
"Li-Power" li-ion battery packs have a capacity and signal indicator: (6)
Press the button (5), the LEDs indicate the charge level.
If one LED is flashing, the battery pack is almost flat and must be recharged.
Handling
Charging battery pack:
Push the battery pack completely to the stop on the sliding seat (2).

The operating indicator (3) flashes.
Conservation charge:
Once the charging process has finished, the battery charger automatically switches to conservation mode.
The battery pack can remain in the battery charger and is therefore always ready for use.

The operating display (3) lights up continuously.
Fault:
- Warning display (4) lights up continuously.

Battery pack is not charged. Temperature too high/ too low. When the temperature of the battery pack is between 0^ and 50^ , the charging process begins automatically.
- Warning display (4) flashes.

Battery pack is defective. Remove the battery pack immediately from the charger.
The battery pack was not pushed correctly onto the sliding seat (2).
5 Care and Maintenance

Always clean the device after every pipe inspection!
Turn the device off with the power button on the monitor (7) and remove the battery, and pull the electrical plug.
Close the cover and press until it clicks.
Take off the reel (8) from the ROCAM 4 Plus (see section 4.10) and clean under running water.
Only clean the reel when removed from device.

The device must be protected against water and must only be cleaned with a damp cloth!
Insert dried reel (8) back into the device (see section 4.10).
Charger:
Repairs to the charger must only be carried out by qualified electricians.
If the mains connection cable of this tool is damaged, in order to prevent endangering personnel and property it must be replaced by the manufacturer, or the Customer Service of the manufacturer, or a similarly qualified person.
6 Accessories
| Accessory Name ROTHENBERGER- Part Number | |
| Mini-Modul 1500001472 | |
| Camera head 30 mm 1500000123 | |
| Camera head 40 mm 1500000122 | |
| Guide ball for brush tool 30 mm 1500000817 | |
| Guide ball for brush tool 40 mm 69112 | |
| Brush tool Ø 100 mm 69113 | |
| Brush tool Ø 150 mm 69117 | |
| Roll carriage for 40 mm Ø 150 mm 69118 | |
| Roll carriage for 40 mm Ø 200 mm 69119 | |
| ROCAM 4 Plus - AC - adapter EU 1000002085 | |
| ROCAM 4 Plus - AC - adapter AUS 1000002087 | |
| ROCAM 4 Plus - AC - adapter US/JP 1000002088 | |
| ROCAM 4 Plus - AC - adapter UK 1000002089 | |
| ROCAM 4 Plus - AC - adapter CH 1000002090 | |
| ROCAM transmitter 33 kHz 1500000686 |
7 Customer service
The ROTHENBERGER service locations are available to help you (see listing in catalog or online) and replacement parts and service are also available through these same service locations. Order your accessories and spare parts from your specialist retailer or using RoService+ online:
Phone: +49(0)6195/800-8200
Fax: +49(0)6195/800-7491
Email: service@rothenberger.com
www. rothenberger.com
8 Disposal
Components of the unit are recyclable material and should be put to recycling. For this purpose registered and certified recycling companies are available. For an environmental friendly disposal of the non-recyclable parts (e.g. electronic waste) please contact your local waste disposal authority.
Old batteries can be taken to your specialist dealer who will dispose of them in conformity with environmental regulations.
For EU countries only:
Do not dispose of electric tools with domestic waste. In accordance with European Directive 2012/19/EU on waste electrical and electronic equipment and its implementation as national law, electric tools that are no longer serviceable must be collected separately and utilised for environmentally compatible recycling.
Table des matieres
Ic = Courant de charge U2
= Tension de charge
Email: service@rothenberger.com
www.rothenberger.com
Dimensiones (long. x anch. x alt, mm) 560 x 400 x 340
Peso con bateria (kg) 18,6 / 22,4 (30 / 65m longitudinal del cable insertion)
Monitor Touchscreen 10.4"
Formato video/foto .JPG/AVI (Resolucion 720px.x600px.)
Video out Micro HDMI
Memoria 4 GB de tarjeta SD (max. 32 GB)
Modulo de-camera CMOS colour PAL
Diametro del cabezal de la camarra 30 mm, 40 mm (optional 25 mm mini modul)
Longitud del cable de insertion 30 m / 65 m (optional 8 m mini modul)
Diámetro del cable de insertión . 7.0 / 8.0 mm (optional 5,5 mm mini modul)
Campo de trabajo . 40 - 100 mm (optional mini modul)
0 70 - 150 mm (30 mm cuestion de la camarata)
0 100 - 300 mm (40 mm c眩zal de la camarata)
Transmisor de localizacion 33 kHz (optional atornillable)
4.5 Localization ROCAM
m = metro, ft. = pie
Micrófono:
Email: service@rothenberger.com
www.rothenberger.com
8 Eliminación
Dimensiones (long. x anch. x alt, mm)......560 x 400 x 340
Monitor Touchscreen 10.4"
Formato video/foto.JPG/AVI (Resolución 720px. x 600px.)
Video out Micro HDMI
Memoria 4 GB SD card (max. 32 GB)
Modulo de camera CMOS colour PAL
Diámetro del CZezeal de la cama... 30 mm, 40 mm (optional 25 mm Mini Modul)
Transmission imagine live:
On

Email: service@rothenberger.com
www. rothenberger.com
8 Smaltimento
Monitor Touchscreen 10.4"
Format video/foto.JPG/AVI (Resolutie 720px.x600px.)
Video out . Micro HDMI
Geheugen 4 GB SD- kaart (max. 32 GB)
Cameramodule... CMOS colour PAL
Camerakop - diameter. 30 mm, 40 mm (optional 25 mm Mini Modul)
Schuifkalbellengte 30 m / 65 m (optional 8 m Mini Modul)
Schuifkabeldiameter. 7.0 mm / 8.0 mm (optional 5,5 mm Mini Modul)
Werkbereik 40 - 100 mm (optional Mini Modul)
070-150mm(30mmCamerakop)
0 100 - 300 mm (40 mm Camerakop)
Laadspanning. 20,75 V DC
Nc = Aantal accucellen
Laadtemperatuur. 0^ - 50^
W = Gewicht
Email: service@rothenberger.com
www. rothenberger.com
8 Afvalverwijdering
Sorg for sikker tilstand.
Monitor Touchscreen 10.4"
Format, video/foto......JPG / AVI (Opløsning 720px. x 600px.)
Video out . Micro HDMI
Hukommelse 4 GB SD-kort (max. 32 GB)
Kameramodul CMOS colour PAL
Kamerahoved, diameter 30 mm, 40 mm (optional 25 mm Mini Modul)
Skydekabel, laengde. 30 m/ 65 m (optional 8 m Mini Modul)
Skydekabel, diameter. 7.0 mm/ 8.0 mm (optional 5,5 mm Mini Modul)
Nc = Antal akkuceller
Opladningstemperatur. 0^ - 50^
W = Vægt
Maks. Afladningsspaending.... 5^ - 50^ C
FW (Firmware version)
IP (IP adress)
Wi-Fi (SSID / Hot Spot)

Indstillinger
klokkeslaet
dat0
m = meter, ft. = fod
Mikrofon:
Email: service@rothenberger.com
www. rothenberger.com
8 Affaldsbehandling
Varning for livsfarlig elspanning!!
U = Spanning U1 = Inspanning
FW (Firmware Version)
IP (IP-adress)
Wi-Fi (SSID / Hot Spot)

13:01

10.07.2014
0min
10min
解得 m 1 ;
Tid
Datum
Tid/datumvisning (pa/av)
Email: service@rothenberger.com
www. rothenberger.com
8 Avfallschantering
Email: service@rothenberger.com
www. rothenberger.com
8 Kierratys
Ladowarki i Akumulator:
Ladowarki Akumulator:
Monitor Touchscreen 10.4"
Akumulator: Ladowarki:
m = metr, ft. = stopa
Mikrofon:
4.11 Ladowarki Akumulator (C)
Przeglad:
1 Akumulator
Email: service@rothenberger.com
www. rothenberger.com
8 Utylizacja
Monitor . Touchscreen 10.4"
FW (Firmware verzio)
IP (IP-cim)
Wi-fi (SSID / hotspot)


Pontos idó
Datum

Wi-fi (be/ki)

Nyelv
Elokep atvitel
Email: service@rothenberger.com
www. rothenberger.com
8 Arthalmatlanitás
ROTHENBERGER Worldwide
Australia ROTHENBERGER Australia Pty. Ltd.
Unit 6 - 13 Hoyle Avenue - Castle Hill - N.S.W. 2154
Tel. +61 2/98 89 75 77 Fax +61 2/98 89 76 77
rothenberger@rothenberger.com.au
www. rothenberger.com.au
office@rothenberger.at·www.rothenberger.at
Belgium ROTHENBERGER Benelux byba
Brazil ROTHENBERGER do Brasil LTDA
Av. Fagundes de Oliveira, 538 - Galpao A4
09950-300-Diadema/SP-B
Tel+5511//4044-4748-Fax+5511//4044-5061
D-4, No.195 Qianpu Road East New Area of Songjiang
Industrial Zone, Shanghai 201811, China
Ta. + 86 21 / 67 60 20 61 + 86 21 / 67 60 20 67
Fax +86 21/67 60 20 63 - office@rothenberger.cn
Czech ROTHENBERGER CZ
Republic Prumyslova 1306/7 - 102 00 Praha 10
Tel. +420 271 730 188 Fax +420 267 310 187
prodej@rothenberger.cz · www.rothenberger.cz
Denmark ROTHENBERGER Scandinavia A/S
Smedevaenget 8 · DK-9560 Hadsund
Tel. +45 98/157566-Fax +45 98/156823
roscan@rohenberger.dk
France ROTHENBERGER France S.A.
24, rue des Draplers, BP 45033 - F-57071 Metz Cedex 3
Tel+333/87749292-Fax+333/87749403
Info-fr@rothenberger.com·www.rothenberger.com
Hungary ROTHENBERGER Hungary Kft
Gubacslut 26-H-1097 Budapest
Tel. +361/347-5040 Fax+361/347-5059
Plot No 17, Sector - 37, Pace city-4
Gurgaon, Haryana - 122 001, India
Tel.91124-4618800-Fax91124-40018471
contactus@rothenbergerIndia.com
www.rohenberger.com
Italy ROTHENBERGER Italiana s.r.l.
Via G. Reiss Romoli 17-19 - 20019 Setimo Milanese
Tel. +89 02/3850601-Fax+39027/38500151
Info@rothenberger.it·www.rothenbergerdt
Nether ROTHENBERGER Nederland by
lands Postbus 45·NL-5120 AA Rijen
Tel. +31 161 / 29 85 79 - Fax +81 161 / 29 89 08
Info@rohenberger.cn·www.rohenberger.cn
Poland ROTHENBERGER Polska Sp.Z.o.o.
Russia ROTHENBERGER Russia
Avlosavodskaya str. 25
115280 MoscgoW, Russia
- +7495/7825944-Fax+7495/7825946
info@rothenberger.tu www.rothenberger.tu
South ROTHENBERGER-TOOLS SA (PTY) Ltd
P.O.Box 4360-Edenwale 1610
165Vanderdill Street, Meadowdale Gemlston
Gaureng (Johannesburg), South Africa
T+2711/3729631-Fax+2711/3729632
Info@rothenberger.co.za·www.rothenberger.co.za
Spain ROTHENBERGER S.A.
Ctra. Durango-Elomo. Km 2·E-48220 Abadiano
(Vizcaya)
(P.O.Box)117-E48200Durango(Vizcaya)
- +34.94 / 6210100 - 18x + 34.94 / 6210101
export@rothenberger.es · www.rothenberger.es
Sweden ROTHENBERGER Sweden AB
Turkey ROTHENBERGERTURKYE
ROTHENBERGER Center, Barbaros Bulwan No28
TR-34775 Serial / Umranhy-eIstanbul
Tel. +80/ 2164492485 Fax+90/ 2164492487
rothenberger@rothenberger.com.tr
www.rohenberger.com.tr
UAE ROTHENBERGER Middle East FZCO
PO Box 261190 • Jebel Ali Free Zone
Dubal, United Arab Emirates
Tel. +971 / 48839777 - Fax +971 / 48839757
office@rohenberger.ac
ROTHENBERGER EQUIPMENT TRADING &
SERVICESLLC
PO Box 91208 - Mussafah Industrial Area
Abu Dhabi, United Arab Emirates
- +971 / 25500154 + + 971 / 25500158
uaesales@rothenberger. are
UK ROTHENBERGER UK Limited
- Kingsthome Park, Henson Way
Kettering - GB-Northants NN16 8PX
- +44 1536/310800-Fax +44 1536/310600
Info@rothenberger.co.uk
USA ROTHENBERGER USA LLC
7130 Clinton Road • Loves Park, IL 61111, USA
Tel+1/8005457698-Fax+1//8156330879
pipetools@rothenberger-usa.com
www.rotherberger-usa.com
D-65779 Kelkheim / Germany
Telefon + 49 (0) 61 95 / 800 - 0
Fax + 49 (0) 6195 / 800 - 3500
info@rothenberger.com
