HD90A3939R - Tumble drier HAIER - Free user manual and instructions
Find the device manual for free HD90A3939R HAIER in PDF.

| Product type | Condenser dryer with heat pump |
| Brand | Haier |
| Model | HD90A3939R |
| Maximum load capacity | 9 kg |
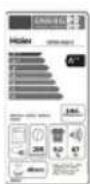
| Energy efficiency class | A+++ |
| Weighted annual energy consumption | 200 kWh/year (standard cotton cycle) |
| Dimensions (H × W × D) | 850 × 595 × 665 mm |
| Depth with door open | 1135 mm |
| Power supply | 220-240 V ~ 50 Hz, 2.4 A, 550 W |
| Number of programmes | 15 programmes (Cotton, Synthetics, Delicates, Wool, etc.) |
| Drying levels | Ready to store, Ready to wear, Ready to iron |
| Special functions | Delayed start, Child lock, Anti-crease, i-Refresh, Timer, Temperature control |
| Condenser type | Heat pump |
| Water tank | Removable, manual or automatic draining via supplied hose |
| Recommended maintenance | Clean lint filter and condenser filter after each cycle; drain water tank |
| Ambient operating temperature | 5 °C to 35 °C |
| Refrigerant gas | HFC-134a (GWP 1430, 0.28 kg) |
| Weighted sound level | 65 dB(A) (standard cotton programme) |
| Child lock | Yes, simultaneous press of Drying level and Temperature buttons |
| Customer service | Haier, accessible via www.haier.com or local addresses (France: Haier France SAS, 53 Boulevard Ornano-Pleyad 3, 93200 Saint-Denis) |
Frequently Asked Questions - HD90A3939R HAIER
User questions about HD90A3939R HAIER
0 question about this device. Answer the ones you know or ask your own.
Ask a new question about this device
Download the instructions for your Tumble drier in PDF format for free! Find your manual HD90A3939R - HAIER and take your electronic device back in hand. On this page are published all the documents necessary for the use of your device. HD90A3939R by HAIER.
USER MANUAL HD90A3939R HAIER
User manual Heat-Pump-Dryer
HD80-A2939
HD80-A2939S
HD90-A2939
HD90-A2939S
HD100-A2939
HD100-A2939S
HD90-A3939
HD90-A3939S
Thank you for purchasing a Haier Product.
Please read this instruction carefully before using the appliance. The instruction contains important information which will guide you in order to have a safe and proper installation as well as daily use and maintenance.
Keep this manual in a convenient place so you can always refer to it for the safe and proper use of the appliance.
Safety notice

Warning! – Important safety information

General information and tips

Environmental information
natural_image
Symbol of a trash bin crossed with a diagonal line, no text or numbers presentDisposal
This marking on the product, accessories or literature indicates that the product and its electronic accessories e.g. charger, e.g. charger, headset, USB cable should not be disposed of with other household waste at the end of their working life. To prevent possible harm to the environment or human health from uncontrolled waste disposal, please separate these items from other types of waste and recycle them responsibly to promote the sustainable reuse of material resources. Household users should contact either the retailer where they purchased this product, or their local government office, for details of where and how they can take these items for environmentally safe recycling. Business users should contact their supplier and check the terms and conditions of the purchase contract. This product and its electronic accessories should not be mixed with other commercial wastes for disposal.
WARNING!
Risk of injury or suffocation!
Disconnect the appliance from the power supply. To ensure safety when disposing of an old tumble dryer disconnect the mains plug from the socket, cut the mains power cable and destroy this together with the plug. To prevent children shutting themselves in the machine break the door hinges or the door lock.
WARNING!
The appliance must not be powered through an external switching device, such as a timer, or connected to a circuit that is regularly switched on and off by a utility.
EN
Content
Safety information....4
Installation pictures 7
Intended use....8
Product description....9
Control panel....10
Programs....13
Consumption 14
Suggestions and tips....15
Daily use....17
Care and cleaning....21
Troubleshooting....23
Installation....25
Technical data 28
Customer Service 30
1-Safety information

WARNING!
Before first use
▶Make sure there is no transportation damage.
▶Remove all package and keep it out of childrens reach.
▶ Iways move the appliance with two people at least because it is heavy.
Daily use
This appliance can be used by children aged from 8 years and above and persons with reduced physical, sensory or mental capabilities or lack of experience and knowledge if they have been given supervision or instruction concerning use of the appliance in a safe way and understand the hazards involved.
- Keep away children under 3 years of age from the appliance unless they are constantly supervised.
▶Children shall not play with the appliance.
▶Do make sure the room is dry and well ventilated. The ambient temperature should be between 5 °C and 35 °C.
▶ Do not cover any ventilation openings in the base by a carpet or similar object.
▶Keep the area around the tumble dryer free of dust and lint.
▶ Do make sure that there is only laundry inside the appliance and no pets or children before you use it.
▶Only touch the mains plug with dry hands and do not touch or use the appliance if you are barefoot or with wet hands or feet
▶Do not dry unwashed items in the tumble dryer.
▶Do make sure not to load more than nominal load.
▶Remove all items such as lighters and matches from pockets.
▶Fabric softeners, or similar products, should be used as specified by the fabric softener instructions.
▶Do not use ore store any flammable sprays or flammable gas in close vicinity to the appliance.
▶ Do not place heavy objects or sources of heat or damp on top of the appliance.
▶Hold the plug, not the cable, when unplugging the appliance.
▶Do not touch the rear and the drum during operation, they are hot.

WARNING!
Daily use
▶Do not use the appliance to dry following items
▶Items which are not washed.
▶Items which have been contaminated with inflammable substances such as cooking oil, acetone, alcohol, benzine, petrol, kerosene, spot removers, turpentine, waxes, wax removers or other chemicals. The fumes can cause a fire or explosion. Items that have been soiled with substances such as cooking oil, acetone, alcohol, petrol, kerosene, spot removers, turpentine, waxes and wax removers should be washed in hot water with an extra amount of detergent before being dried in the tumble dryer.
▶Items which contain padding or fillings (e.g. pillows, jackets), as the filling can get out with the risk of causing ignition.
Items such as foam rubber latex foam, shower caps, waterproof textiles, rubber backed articles and clothes or pillows pillows fitted with foam rubber pads should not be dried in the tumble dryer.
▶Do not drink the condensed water.
▶ Do not use the appliance without the lint filter or condenser filter in place or with damaged filter.
▶ Notice that the last part of the drying cycle occurs without heat (cool down cycle) to ensure remaining garments are under a temperature which does not damage them.
▶ Do not leave the appliance unattended during run time for a long time. If a long absence is needed, the drying cycle have to be interrupted by switching off and unplugging the mains.
▶Do not switch off the appliance until drying cycle is finished, Never stop a tumble dryer before the end of the drying cycle unless all items are quickly removed and spread out so that the heat is dissipated.
▶Switch off the appliance after each drying programme to save electricity and for safety.
Maintenance / cleaning
▶ Make sure children are supervised if they carry out cleaning and maintenance.
▶Disconnect the appliance from the electrical supply before undertaking any routine maintenance.

WARNING!
Maintenance / cleaning
- Clean the lint filter and the condenser filter after each programme (see CARE AND CLEANING).
▶Do not use water spray or steam to clean the appliance.
▶Do not use industrial chemicals to clean the appliance.
If the supply cord is damaged, it must be replaced by the manufacturer, its service agent or similarly qualified persons in order to avoid a hazard.
▶Do not try to repair the appliance by yourself. If a repair is needed, please contact our customer service.
Installation
▶ Ensure put the machine in a place which allows opening the door fully. Do not install the tumble dryer behind a lockable door, a sliding door or a door with hinges on the opposite side of the tumble dryer door as this limits the full opening of the door.
▶Install the appliance in a well-ventilated, dry place.
▶Never install the appliance in a damp outdoor, or in an area which has the risk of water leakage such as under or near a sink unit. Once a water leakage happened, cut power supply and allow the machine to dry naturally.
▶ Install or use the appliance only in a place where the temperature is above 5^ C.
- Do not place the appliance directly on a carpet, or close to a wall or furniture.
▶ Do not expose the appliance to any frost, heat or direct sunlight or around any heat sources(e.g. stoves, heaters).
▶Make sure that the electrical information on the rating plate aligns with the power supply. If it does not, contact an electrician.
▶Do not use multi-plug adapters and extension cables.
▶ Make sure not to damage the electric cable and the plug. if it is damaged, have it replaced by an electrician.
▶ Use a separate earthed socket for the power supply which is easy access to after installation. The appliance must be earthed.
Only for UK: The appliance's power cable is fitted with 3-cord (grounding) plug that fi ts a standard 3-cord (grounded) socket. Never cut off or dismount the third pin (grounding). After the appliance is installed, the plug should be accessible.
2-Installation pictures
natural_image
Close-up of a mechanical component with directional arrows indicating motion (no text or symbols)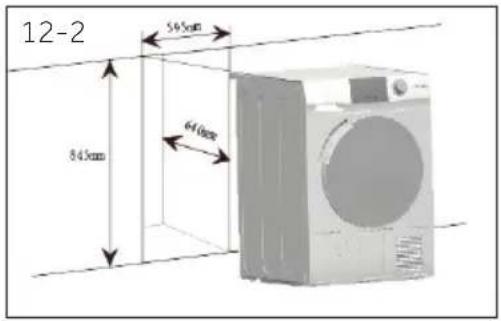
text_image
12-2 545mm 640mm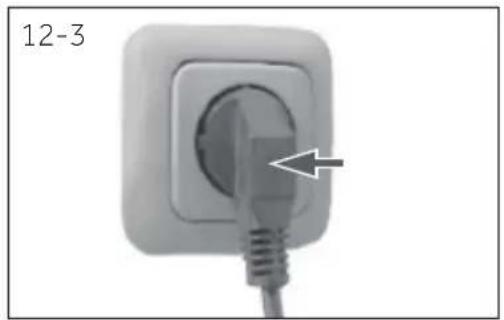
natural_image
Close-up of a white electrical outlet plug with a cable, labeled '12-3' (no other text or symbols)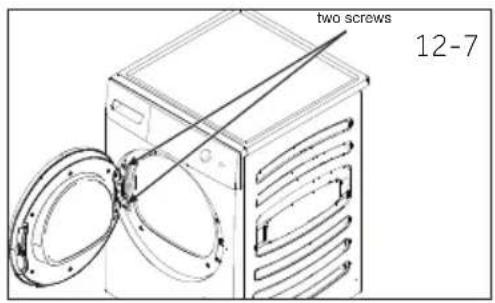
text_image
two screws 12-7
natural_image
Illustration of a washing machine with front-mounted door, front-mounted sink, and side-mounted toilet (no text or symbols)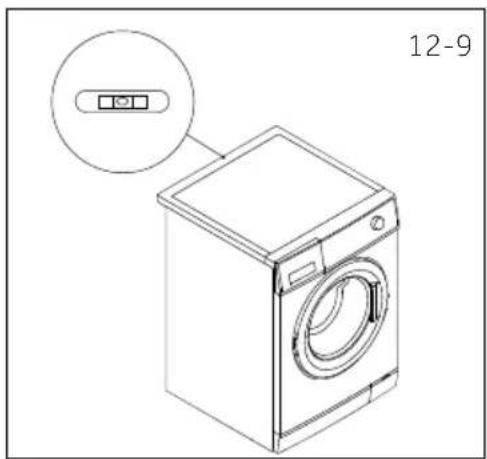
natural_image
Line drawing of a washing machine with a circular inset showing a control panel (no text or symbols on the device itself)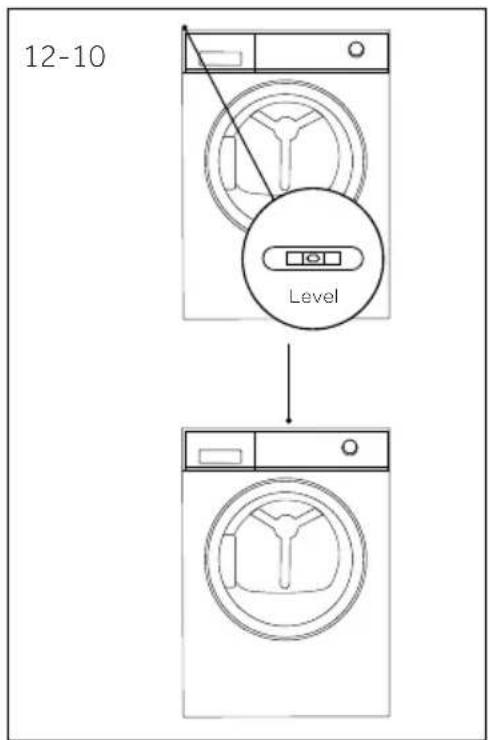
text_image
12-10 Level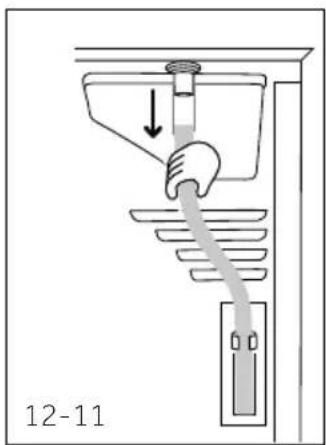
text_image
12-11
text_image
12-12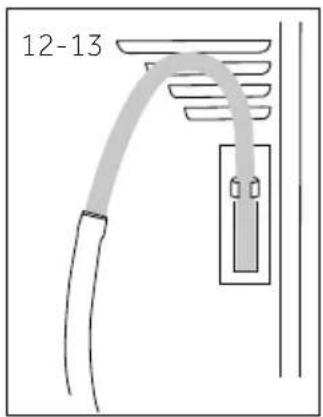
text_image
12-13Intended use
This appliance is intended for drying items which have been washed in a water solution and are marked on the manufacturer's care label as being suitable for tumble drying.
It is designed exclusively for domestic use inside the house. It is not intended for commercial or industrial use. Changes or modifications to the device are not allowed. Unintended use may cause hazards and loss of all warranty and liability claims.
Standards and directives

This product meets the requirements of all applicable EC directives with the corresponding harmonised standards, which provide for CE marking.

otice
The appliance contains the fluorinated greenhouse gas R134a (GWP:1430). This gas is hermetically sealed.

onmentally responsible use
▶ Completely spin: Spin the laundry with the maximum spin speed.
▶ Maximum load: Use the maximum filling amount according to the programme table, but do not overload the dryer. To take advantage of the maximum load, the laundry which should be dried "READY to wear", can be first dried easily with "Ironing". When program ends, remove the laundry which should be ironed and dry the remaining laundry then to end.
▶ Loosen up the laundry: Shake out the laundry before putting them into the dryer.
- Avoid excess drying: An excessive drying should be avoided. Select the right programme and the appropriate dry level.
▶ Softener unnecessary: Do not use softener when washing, because the laundry will become fl uff y and soft in the dryer.
▶ Cleaning of the lint filters: Clean the lint filters after each cycle.
▶ Ventilation: Make sure the appliance is properly ventilated (see INSTALLATION).
Condensed water reuse: The collected condensed water can be used for the steam iron. Before that, it should be poured through a fine sieve or coffee filter paper, Smallest parts will be retained by the filter.

Note:
Due to technical changes and different models, the illustrations in the following chapters may differ from your model.
4.1 Picture of appliance
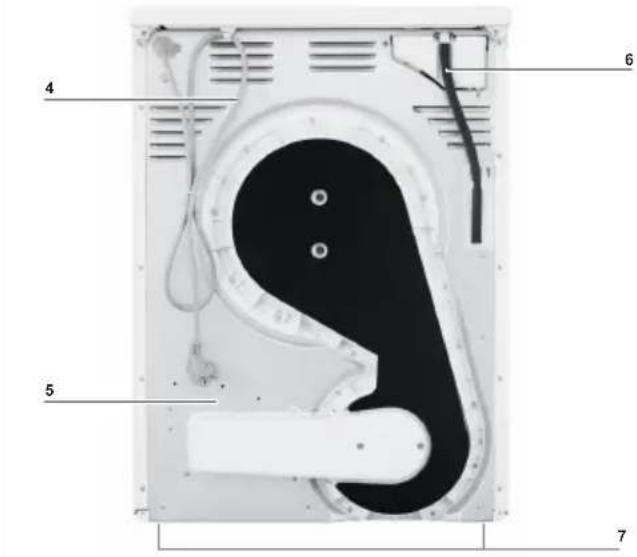
Front (Fig. 4-1): Rear side (Fig. 4-2):
4-1

text_image
1 2 34-2
text_image
4 5 6 71 Water tank
2 Tumble dryer door
3 Control panel
4 Power supply cord
5 Back plate
6 Drainage outlet
7 Adjustable feet
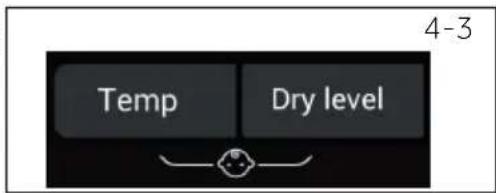
4.2 Accessories
Check the accessories and literature in accordance with this list (Fig.4-3):
4-3
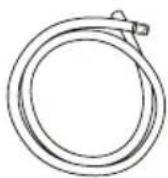
Drain hose
Energy label
Warranty card

User manual
text_image
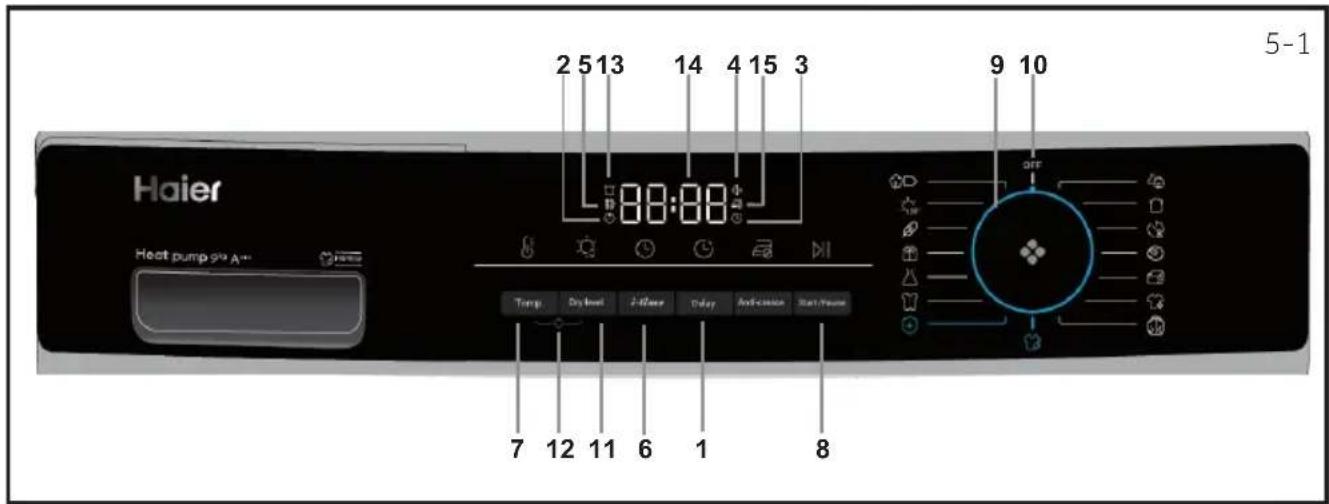
Haier Heat pump 91⁄2 A-- 2 5 13 14 4 15 3 88:88 Temp Dry level 2-Water Color Anti-crease Reset/Power 7 12 11 6 1 8 5-1 9 10 OFF1 Delay button 7 Temp. button 13 Empty tank indicator
2 Child-lock indicator 8 Start/Pause button 14 Display
3 Delay indicator 9 Program knob 15 Anti-crease indicator
4 Buzzer indicator 10 Power
5 Clean filter indicator 11 Dry level button
6 Time button 12 Childlock button
text_image
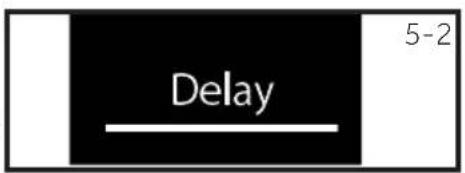
Delay 5-25.1 Delay button
Delay function allows users to delay the start time of the cycle. Press the button(Fig.5-2) to set the desired starting time (From 0 up to 12 hours). When activating, the indicator icon (Fig.5-4) will light up.

Notice
This function should be set after you have finished all the options, otherwise when you turn the knob or press the button, the function will be cancelled automatically.
5.2 Child lock indicator
Child lock is designed to prevent children from adjusting the program setting. To activate this function, after a cycle has been started, press the Dry level and Temp. button (Fig.5-3) at the same time for 3 seconds until

text_image
Temp Dry level 5-3the indicator icon lights up. To deactivate it, press these 2 buttons for 3 seconds again.

Notice
When the power supply is interrupted or turn the knob to off position, the function will not be cancelled automatically.
5.3 Delay indicator
When choosing the delay function (Fig.5-4), the icon will light up.
5.4 Buzzer indicator
The buzzer is design to alert users with a sound like beep. It is deactivated by default. To activate the buzzer function, Press Delay and i-time buttons at the same time for 3 seconds or until you hear a beep sound.
To deactivate it, press the same 2 buttons for 3 seconds again.

text_image
5-4
flowchart
graph LR
    A["i-time"] --> B["+"]
    B --> C["Delay"]
    style A fill:#000,stroke:#000
    style C fill:#000,stroke:#000
    note right of C 5-5
text_image
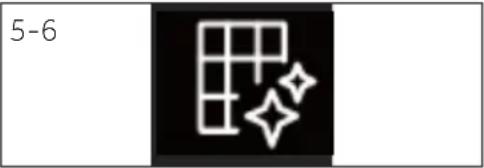
5-65.5 Clean filter indicator
This indicator is designed to remind users to clean filter before using. When this icon (See fig. 5-6) lights up users should clean the filter before use. For the cleaning steps, see Lint filter cleaning or Condenser filter cleaning section of this manual.
Notice
After each cycle, indicator will twinkle to remind cleaning the filters.
text_image
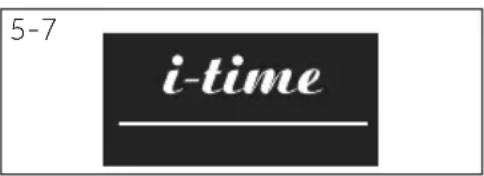
5-7 i-time5.6 i-time button
This function is designed to allow users to adjust cycle duration based on personal needs. Only under Timer, ool, arm up, Duvet, and i-Refresh programs, users can use this function to adjust time.
text_image
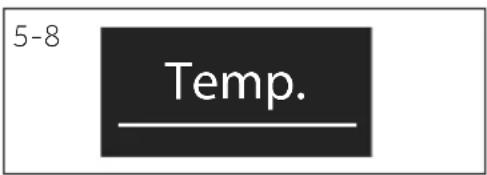
5-8 Temp.5.7 Temp. button
This button is set to adjust drying temperature based on personal needs or requirements.
There are 4 levels and matching display is shown below:
High temperature.
Middle temperature.
Low temperature.
Cópíalr.

text_image
5-9 —5.8 Start/Pause button
Press Start/Pause (Fig. 5-9) to Start a drying cycle. Press button again to pause the drying cycle. Press button again to continue.
text_image
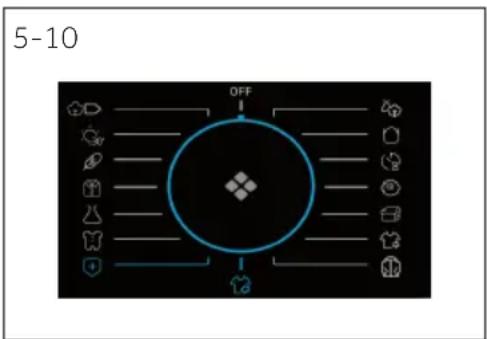
5-10 OFF5.9 Program knob
Select one of the 15 programs by turning the knob (the O is not included ig. 5-10. See Program Modes section of the manual for further information.
text_image
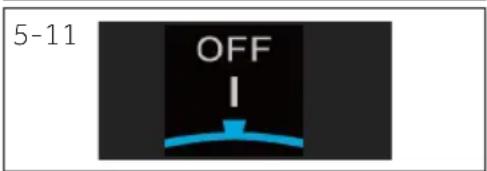
5-11 OFF I5.10 Power
Turn the knob to any position (except OFF) to start the machine. Turn knob the OFF position to shut down the machine(Fig. 5-11).
text_image
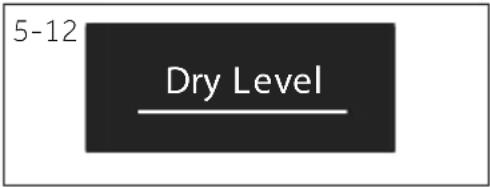
5-12 Dry Level5.11 Dry Level button
Press the button (Fig. 5-12) to set the final moisture content of the laundry at the end of cycle.
The display is shown below:

5-Control pannel
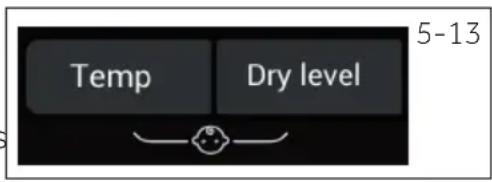
5.12 Childlock button activation
To activate the Child-lock function after a cycle has been started, press the 2 buttons (Fig. 5-13) for 3 sec. until the indicator icon lights up. To deactivate press the 2 buttons for 3 sec. again.
5.13 Empty tank indicator
This indicator is designed to remind users the water tank should be emptied (Fig. 5-14).
Important: Empty the water tank after each drying cycle. See Empty the water tank section of the manual.
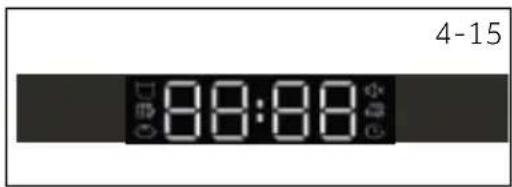
5.14 Display
The display shows the remaining time, the delay time and other related information.
text_image
Temp Dry level 5-13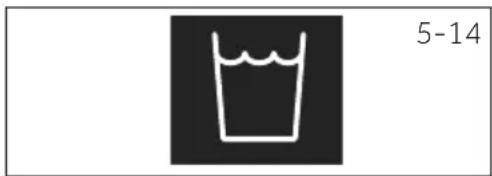
natural_image
Simple line drawing of a cup with liquid, no text or symbols present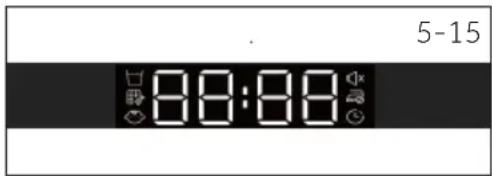
text_image
5-15 88:88
otice
The remaining time is a default value, this time will be re-calculated depending on additional program settings and the moisture content of the laundry.
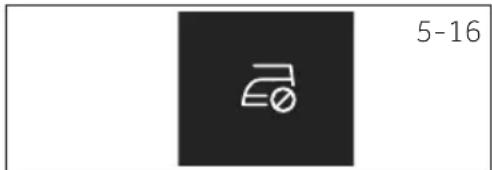
5.15 Anti-crease indicator
Anti-crease function is designed to help remove wrinkles of clothes. The drum will rotate after the drying cycle to stretch clothes so there is no need to worry about
forgetting to take out clothes. anti-crease is deactivated by default ig.5-16 .after selecting the program,the icon lights up,when the drying cycle ends,the drum will keep rotation for another 1-12 hours with cold wind in.Users can stop it anytime by opening the door or turning off the machine.
text_image
5-16| Programme | Default drying degree | Laundry | Max. Load kg | Default Time | Temper- ature | |||
| 8 | 9 | 10 | ||||||
| [BKA2] | Cotton ready to wear | or cotton clothes or coats | 8 | 9 | 10 | 2:30 | 60-65°C | |
 | Mix | Cupboard | or mixed dry with more than one fabrics | 5 | 6 | 6.6 | 2:30 | 60-65°C |
 | Synthetic ready to wear | or those synthetics | 4 4.5 | 5 | 1:30 | 50-55°C | ||
 | Quick 30 | Nonselectable | fixed 30 minutes dry | 0.5 0.5 | 0.5 | 0:30 | 50-55°C | |
| [684C] | Timer | Nonselectable | or mixed fabrics and users can decide drying time by themselves | - | - | - | 0:40 | 50-55°C |
 | Definitely ready to wear | or those delicate fabrics like silk, underwear etc. | 2 | 2 | 2 | 1:00 | 50-55°C | |
 | Baby Care | Cupboard | For baby clothes and underwear that needs high temperature sterilization | 3 | 4 | 4.4 | 1:20 | 60-65°C |
 | Wool | Nonselectable | For wool clothes | 3 | 3 | 3 | 0:30 | 50-55°C |
| [Y2YC] | Warm Up | Nonselectable | quick drying cycle to dehumidify clothes and make it warm and comfortable to wear | 4 | 5 | 5.5 | 0:30 | 50-55°C |
| [7CZ6] | Duvet | Nonselectable | For feather -filling clothes | 1 | 1 | 1 | 1:30 | 60-65°C |
 | Sports Ready to wear | or sports wear clothes | 4 4.5 | 5 | 1:30 | 60-65°C | ||
 | i-Refresh** | Nonselectable | timer drying cycle for refresh clothes | - | - | - | 0:30 | 50-55°C |
 | Bulky | Cupboard | For heavy and large items like bed sheets or towel etc. | 4 | 4.5 | 5 | 2:00 | 60-65°C |
 | Shire ready to wear | Special for Shirts with 1 hour anti-crease default setting | 4 | 4.5 | 5 | 0:40 | 60-65°C | |
| [0ZKT] | Hygienic | Cupboard | For fabrics like cotton, mix, sports and so on. Fabrics like wool, silk, shirts, duvet are not suggested to use | - | - | - | 3:30 | 60-65°C |
* EN 61121 test program setting, we recommend that you drain the condensed water externally through the drain hose when drying a full load using the Cotton program. This will avoid to empty the water tank during the cycle.
** I-Refresh is a Haier patent-owned function that aims to remover odors and wrinkles, as well as refresh clothes in a short time. By rotate and shake, wind blows in to fresh and stretch clothes, even delicate clothes and unwashed fabrics can be taken good care.
Heat pump technology
The condensation dryer with heat exchanger is outstanding in terms of efficient energy consumption. These are guide values determined under standard conditions. The values may differ from those given, depending on overvoltage and undervoltage, the type of fabric, composition of the laundry to be dried, the residual moisture and the actual loading.
| Program Cotton / Linen (10kg A++) | Spin speed in rpm | Restidual moisture in % | Time in h:min | Energy consumption in kWh |
| Cupboard | 1000 | approx. 60 | 4:40 | 2.34 |
| Ready to wear | 1000 | approx. 60 | 4:29 | 1.98 |
| Ironing | 1000 | approx. 60 | 3:18 | 1.62 |

Environmentally responsible use
▶ Spin the laundry as dry as possible before putting it into the tumble dryer.
- Avoid overloading the tumble dryer.
▶ Shake the laundry loose before putting it into the tumble dryer.
▶ Choose a proper drying program. Make sure the laundry is not dried longer than needed.
▶ Make sure to use the tumble dryer with cleaned filters.
8.1 Starched laundry
Starched laundry leaves a film of starch in the drum and is not suitable for the dryer.
8.2 Softener
Do not use softener when washing, because the laundry will become soft and fl uff y in the dryer.
8.3 Soft care cloths
The use of "soft care cloths" can lead to a coating at the lint filters. This can cause a blockage of the filters. In such cases, we recommend either to abstain from adding soft care cloths or to choose a different brand. In any case note the manufacturer's instructions.
8.4 Small amounts of filling
In a quantity of less than 1.0 kg, the "Timer"-programme should be selected because the dry level of clothes cannot be sensored sometimes due to the small load.
8.5 Open door
The door should be left ajar when not in use, so that the door seal can remain effective for a long time.
8.6 Service flap
Make sure that the service flap is always closed during operation.
8.7 Anti crease protection
t the end of the cycle, if the laundry is not taken out, the drum moves time to time to prevent creases.
8.8 Laundry which should be ironed
For those clothes that needs to be ironed, users should select dry level at "Ironing". Thus, it can help to iron quickly.
8.9 Remaining time
The program duration is influenced by the following factors: the type of fabric, the loading quantity, moisture content, the desired dry level, as well as the spin speed during washing. These factors are registered by the electronics during the program and the remaining time will be corrected accordingly.
8-Suggestions and tips
EN
8.10 Extra large pieces
hen cycle ends, if the desired dry level is not achieved, loosen up the laundry and dry again with the time program (TIMER).
8.11 Especially delicate fabrics
Textiles which can easily shrink or lose their shape, as well as silk stockings, lingerie should not be put in the dryer directly. Put delicate garments inside a laundry bag and avoid over drying them.
8.12 Jersey and knitwear
Clothes like jersey and knitwear, we recommend to use Delicate program to dry to avoid over-drying.
8.13 Acoustic signal
An acoustic signal can be activated:
▶when the water tank is full
▶ailures happen
Additionally the acoustic signal can also be selected for following cases:
▶at the end of program
▶when pressing a button
▶when turning the program selector
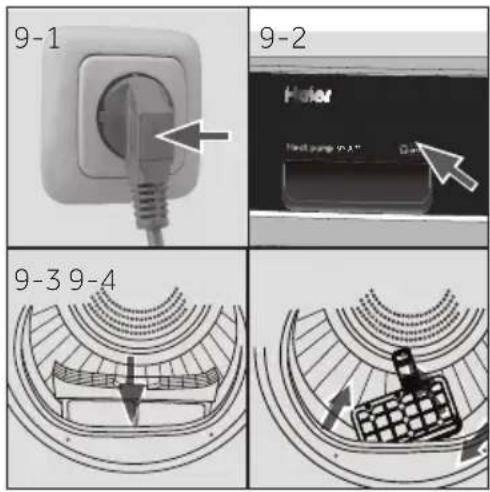
9.1 Prepare the appliance
-
Connect the appliance to a power supply (220V to 240V\~/50Hz) (Fig. 9-1) Please also refer to section INSTALLATION.
-
Make sure:
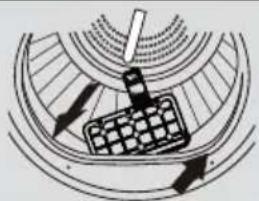
▶the water tank is empty and properly installed. (Fig. 9-2).
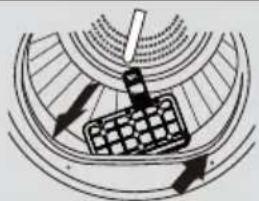
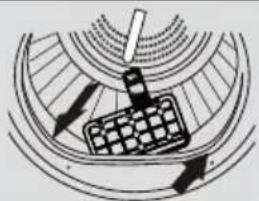
▶the lint filter is clean and properly installed. (Fig. 9-3).
▶the condenser filter is clean and properly installed (Fig. 9-4).
text_image
9-5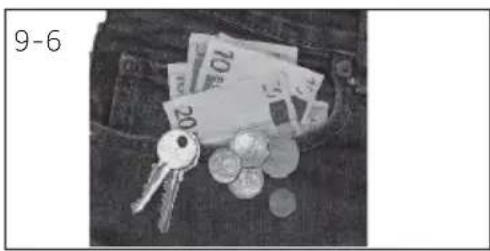
natural_image
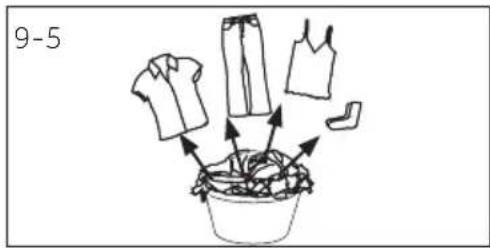
Black-and-white photo of a pocket with scattered coins, keys, and banknotes (no visible text or symbols)9.2 Prepare the laundry
▶Sort clothes according to fabric (cotton, synthetics, wool etc.). Only dry clothes that has been spun.
▶ Empty pockets of all sharp or flammable objects such as keys, lighters and matches. Remove hard decorative objects such as brooches.
▶Zippers up and make sure the buttons are sewn on tightly and place small items uch as socks, bras etc. in a wash bag.
▶Unfold bulky items of fabric such as bed sheets, table cloth etc.
▶Follow the instructions on the laundry label and dry those garments that can be dried by machine.
i Tips:
▶Separate white clothes from coloured ones.
▶ Bed linen and pillowcases should be buttoned, so that small parts cannot stuck inside.
- Close zippers and hooks, and tie loose belts without metal parts, apron strings etc. together.
Remove loose metal parts of clothes before putting into dryer such as metal buttons.
▶ Do not over-dry easy-care linen. Risk of creases. Allow final drying in open air.
Clothes like knitwear can be over-drying sometimes. "Ironing" dry level are always recommended to choose.
▶For pre-dried, multi-layered garments or for final drying the time-programme (TIMER) should be chosen.
| Load Reference | Composition | Average weight per item |
| Bed sheet (single) Cotton Approx. 800 g | ||
| Blended fabric clothes / Approx. 800 g | ||
| Jackets Cotton Approx. 800 g | ||
| Jeans / Approx. 800 g | ||
| Overalls Cotton Approx. 950 g | ||
| Pyjamas | / Approx. 200 g | |
| Shirts | / Approx. 300 g | |
| Socks | Blended fabrics | Approx. 50 g |
| T-Shirts | Cotton Approx. 300 g | |
| Underwear | Blended fabrics | Approx. 70 g |
9.3 Load clothes the appliance
▶Loosen up and insert presorted laundry.
▶Don't overload.
▶Close the door carefully. Make sure that clothes are not pinched.
9.4 Take out and add clothes
To remove or add clothes, the program can be interrupted at any time:
▶ The cycle will be interrupted if opening the door. Be careful when taking out or adding clothes! The Interior of the drum or the clothes itself may be hot, so that there is danger of burns.
▶ To continue the program, press the "Start/Pause" button after closing the door.

UTION!
Non-textile, as well as small, loose or sharp-edged items may cause malfunctions and damage of clothes and appliance.

WARNING!
Never turn the dryer off before the end of the drying cycle unless all items are quickly removed and spread out so that the heat can be released.
9.5 Loading the dryer
- Place the laundry evenly in the drum making sure not to overload the dryer.
- Turn the knob to any position (except OFF) to start the machine.(Fig. 9-7).

text_image
OFF I 9-7
otice
Fabric softeners or similar products should be used as specified in the manufacturer's instructions.
9.6 Set program and start
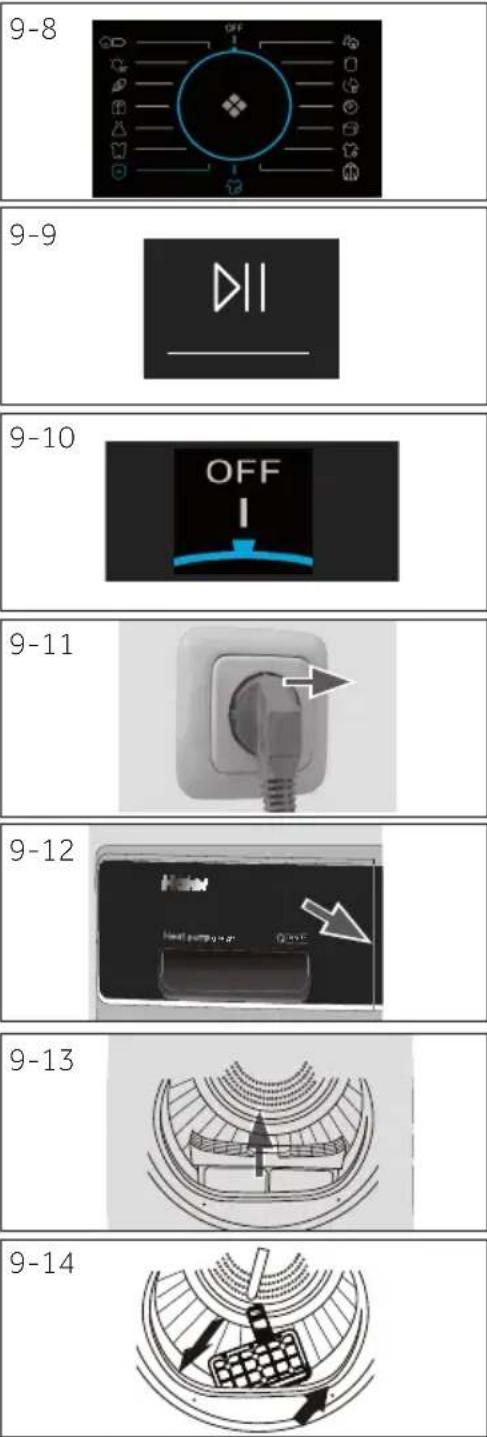
- Select one of the 15 programs by turning the knob (the OFF is not included) (Fig. 9-8), and its default settings will be displayed.
- Set functions such as Temperature, Dry level, Delay. Afterwards press the Start/Pause button (Fig. 9-9) to start the dry cycle.
9.7 End of dry cycle
The tumble dryer stops operation automatically when a dry cycle is complete. The display shows END about 5S. Open the tumble dryer door and take out clothes. If clothes are not taken out, the wrinkle free function will start automatically and the screen shows 0:00 This function is only available for some programs
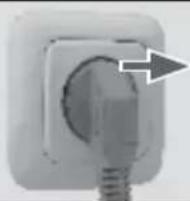
- Turn the knob to the OFF position to shut down the machine(Fig. 9-10).
- Unplug the tumble dryer from the power socket (Fig. 9-11).
- Empty the water tank after each dry cycle (Fig. 9-12).
- Clean the lint filter after each dry cycle (Fig. 9-13).
- Clean the condenser filter after each dry cycle (Fig. 9-14).
Care chart
| Washing | |||||
 | Washable up to 95°C normal process |  | Washable up to 60°C normal process |  | Washable up to 60°C mild process |
 | Washable up to 40°C normal process |  | Washable up to 40°C mild process |  | Washable up to 40°C very mild process |
 | Washable up to 30°C normal process |  | Washable up to 30°C mild process |  | Washable up to 30°C very mild process |
 | Wash by hand max. 40°C |  | Do not wash | ||
| Bleaching | |||||
 | Any bleaching allowed Or |  | | [24A8] | Do not bleach |
| Drying | |||||
 | Tumble drying possible normal temperature |  | Tumble drying possible lower temperature |  | Do not tumble dryr |
 | Line drying Flat drying |  | |||
| Ironing | |||||
 | Iron at a maximum temperature up to 200 °C |  | Iron at a medial temperature up to 150°C |  | Iron at a low temper-ature up to 110 °C; without steam (steam ironing may cause irreversible damage) |
 | Do not iron | ||||
Drying
Ironing
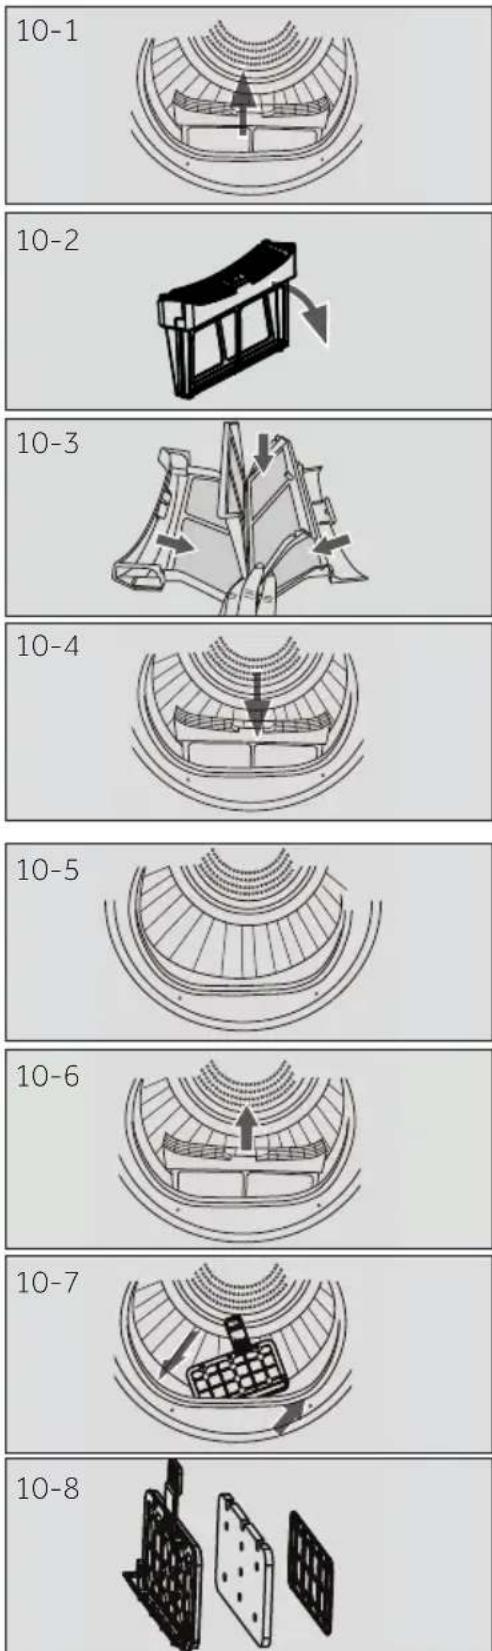
10.1 Lint fi Iter cleaning
Clean the lint filter after each dry cycle.
- Remove the lint filter from the drum (Fig. 10-1).
-
Open up the lint filter (Fig. 10-2).
-
Remove the lint residuals from lint filter (Fig. 10-3).
-
Reinstall the cleaned lint filter in the tumble dryer (Fig. 10-4).
10.2 Condenser filter cleaning
Clean the filter after each dry cycle.
- Open the door.
- Pull out the lint filter from front duct (Fig. 10-6).
-
Pull out the condenser filter from the air duct (Fig. 10-7).
-
Separate the sponge and clean the filter the sponge and clean the filter screen form any residuals (Fig. 10-8).
-
Reinstall the sponge to the condenser filter and put it back into the duct.

otice
If the lint / the condenser filter is very dirty, it can be cleaned under running water. Let it dry completely before use.
10-Care and cleaning
EN
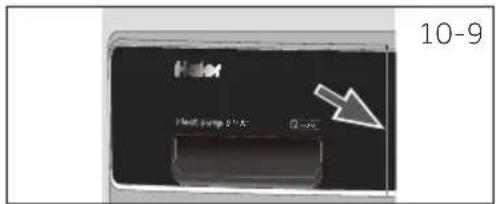
10.3 Empty the water tank
During operation, steam is condensed into water and collected in the water tank. Empty the water tank after each drying cycle.
-
Pull out the water tank from its housing (Fig. 10-9).
-
Empty the water tank (Fig. 10-10).
-
Reinstall the water tank to the tumble dryer (Fig. 10-11).
text_image
Haler Heat pump 2.5A 10-9
natural_image
Close-up of a stainless steel faucet with water flowing from it, next to a small sink (no text or symbols visible)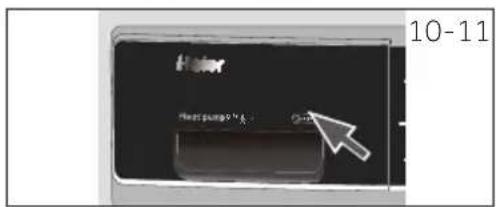
text_image
Haier Haier's pump 9.5% 10-11
otice
Do not use the water for any kind of drinking or food processing.
10.4 Tumble dryer
Wipe the outside of the tumble dryer and the control panel with a damp cloth. Do not use any organic solvent or corrosive agent to avoid damage to the device.
10.5 Drum
After running for a while, micro elements like calcium and mineral substances contained in the water will result in an invisible film formed inside the drum. Use a damp cloth and some detergent to remove it. Do not use any organic solvent or corrosive agent to avoid damage to the device.
10.6 Evaporator
If the evaporator behind the condenser filter is dirty, it can be cleaned by using a vacuum cleaner. Make sure not to damage the evaporator while cleaning it.
Many problems can be solved by yourself without specific expertise. please check all shown possibilities and follow below instructions before you contact an after sales service. See CUSTOMER SERVICE.

WARNING!
Before maintenance, turn off the appliance and disconnect the mains plug from the socket.
Electrical equipment should be serviced only by qualified electrical experts, because improper repairs can cause considerable consequential damages.
▶ A damaged power cable should only be replaced by the manufacturer, its service agent or similarly qualified workers in order to avoid a hazard.
Troubleshooting with display code
| Code Cause Solution | ||
| F2 | Drain pump error. Contact the customer service. | |
| F32 | The condenser thermal sensor is open-circuited or short-circuited. | Contact the customer service. |
| F33 | ||
| F4 | Temperature of the laundry in the drum does not change. Contact the customer service. | |
| FC2 | Communication failure between PCB and display. Contact the customer service. | |
| L0 | Temperature is too low. | Use the dryer when air temperature is higher than 5 °C. |
if the error codes appear again after taking measures, switch off the appliance, disconnect the power supply and contact the customer service.
11 - Troubleshooting
EN
Troubleshooting without display-codes
| Problem Possible cause Possible solution | ||
| Tumble dryer fails to operate. | ·Poor connection to the power supply.·Power failure.·No drying program is set.·Device has not been switched on.·The water tank is full.·The door is not closed properly. | ·Check connection to the power supply.·Check the power supply.·Set a drying program.·Switch on the device.·Empty the water tank.·Close the door properly. |
| Tumble dryer fails to operate and the display shows End. | ·The laundry has reached the dry level defined by the programme. | ·Check the program setting is appropriate or not. |
| Drying time is too long and the results are not satisfactory | ·The programme setting is not correct.·The filter is clogged.·The evaporator is blocked.·The tumble dryer is overloaded.·The laundry is too wet.·The vent duct is blocked. | ·Make sure the program is set correctly.·Clean the filter screen.·Clean the evaporator.·Reduce the amount of laundry.·Spin the laundry completely before drying.·Check and clean the vent duct. |
| Remaining time-on the display-stops or skips. | The remaining time will be adjusted continuously based upon the following factors:·fabric of laundry.·loading weight.·Moisture degree of the laundry.·Ambient temperature. | The automatic adjustment is a normal operation. |
Notice: all installation relevant pictures can be found at the beginning of this manual.
12.1 Preparation
Remove all packages including the polystyrene base firstly. While removing the package, water drops may be observed. This is normal phenomenon results from water test the factory.

Notice
Dispose of the package in an environmental friendly manner. For information referring to current disposal sites, consult your retailer or the local authorities.

WARNING!
After transportation and installation, you MUST leave the dryer to stand for two hours before use.
12.2 Transport and waiting time
Transport the appliance in horizontal position only. To the maintenance-free lubrication oil is located in the capsule of the compressor. This oil can get through the closed pipe system during slanting transport. Before connecting the appliance to the power supply you have to wait 2 hours so that the oil runs back into the capsule.
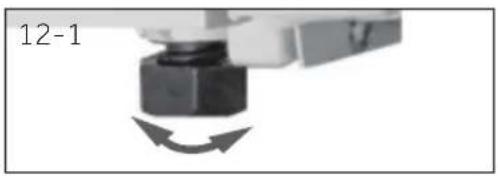
12.3 Place the appliance
The appliance should be placed on a flat and solid surface. Set the feet to the desired level(Fig.12-1).
12.4 Installation under worktop
The dimensions of the recess should at least match with the dimensions fig.12-2.
- Put the appliance adjacent to the slot. Make sure that all connections are easily accessible and functional.
- Adjust accurately all feet to get a firm level position.
- Install the appliance prudently into the recess.
- Make sure a sufficient ventilation.
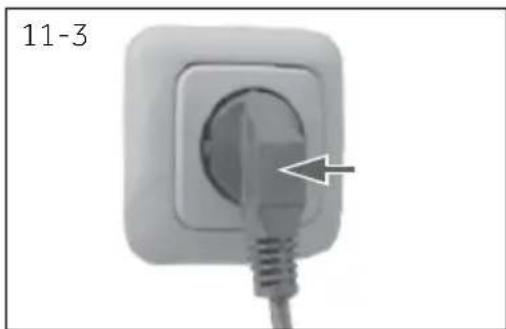
12.5 Electrical connection
Before each connection check if:
▶ power supply, socket and fusing are appropriate to the rating plate.
▶ the power socket is earthed and no multi-plug or extension.
▶ the power plug and socket are strictly match.
▶ Only UK: The UK plug meets BS1363A standard
Put the plug into the socket(Fig.12-3).

WARNING!
If the supply cord is damaged, it must be replaced by the service agent (see warranty card) in order to avoid a hazard!
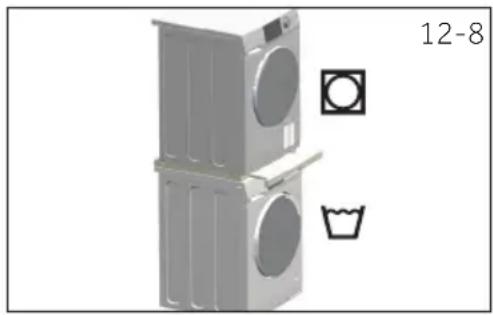
12.6 Wash-dryer stack
It is possible to achieve a washer-dryer stack. is possible (Fig. 12-8). Not every washing machine is suitable for this purpose. Stacking information, as well as the corresponding mounting kit are available via your local dealer.
The mounting instructions are supplied with the kit which thoroughly inform the installation steps.
natural_image
Illustration of a multi-tiered washing machine with front panel and side door, accompanied by icons for washing machine (circle) and laundry (hbar), no text or symbols present.12.7 level the dryer
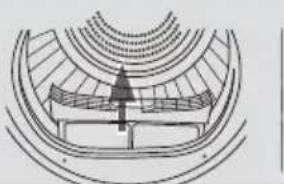
It is IMPORTANT to level the dryer to ensure the machine runs efficiently with minimal noise. The dryer should be levelled in as close to its final position as possible so it stands balanced evenly on all four feet. Ensure the dryer does not rock in any direction.
Level the dryer side to side(Fig.12-9):
- Place the gradienter at the centre back of the dryer.
- Adjust the rear feet until the dryer is level side to side.
- Never fully screw the feet completely from their housings.
Level the dryer front to back(Fig.12-10):
- Place the gradienter on the left side.
- Adjust the front left foot (wind down).
- Repeat the above for the right foot.
Double check the dryer is balanced(Fig.12-10):
- Place the gradienter at the centre front of the dryer.
- Ensure the dryer does not rock in any direction.
• If dryer is not balanced repeat the above steps.
After levelling, the corners of the dryer cabinet should be clear of the floor and the dryer must not rock in any direction.
12.8 Draining
The dryer is equipped with a condenser unit which accumulates water during the drying cycle. This water is collected in the removable water tank located at the top left of the dryer. The accumulated water must be emptied after each drying cycle or you can setup your dryer to drain automatically using the drain hose provided.
We recommend the dryer is set up to drain automatically where possible especially when drying full loads, this will avoid having to empty the water tank during a drying cycle.
Connecting the drain hose
- Remove the black hose from the connection at the back of the dryer(Fig.12-11).
- Uncoil the drain hose (included with your dryer) and connect it to the black hose(Fig.12-12).
- Place the other end of the drain hose into a tub or standpipe(Fig.12-13).
13-Technical data
EN
| Trade mark | Haier | |||
| Model identifier | HD80-A2939 HD80-A2939S | HD90-A2939 HD90-A2939S | HD100-A2939 HD100-A2939S | HD90-A3939 HD90-A3939S |
| Rated capacity (kg) | 8 | 9 | 10 | 9 |
| Kind of tumble drier | Condenser | |||
| Energy efficiency class | A++ | A++ | A++ | A+++ |
| Weighted Annual Energy Consumption (AEc in kWh/year)1 | 235 | 265 | 286 | 200 |
| Tumble dryer with or without automatic | with automatic | |||
| Energy consumption of the standard cotton programme3 at full load (kWh/cycle) | 1.88 | 2.10 | 2.40 | 1.58 |
| Energy consumption of the standard cotton programme3 at partial load (kWh/cycle) | 1.02 | 1.20 | 1.29 | 0.89 |
| Power consumption of the off -mode (W) | 0.70 | 0.70 | 0.70 | 0.48 |
| Power consumption of the left-on mode (W) | 0.75 | 0.75 | 0.75 | 0.62 |
| Duration of the „left-on mode" (min)2 | 40 | |||
| Standard drying programme3 | Cotton | |||
| Weighted programme time of the standard drying programme3 at full and partial load (min) | 155 | 180 | 190 | 150 |
| Programme time of the standard cotton programme3 at full load (min) | 215 | 245 | 260 | 200 |
| Programme time of the standard cotton programme3 at partial load (min) | 120 | 140 | 145 | 118 |
| Condensation efficiency class4 | B | B | B | B |
| Weighted condensation efficiency for the standard cotton programme3 at full and partial load (%) | 83 | 80.8 | 80.3 | 85 |
| Average condensation efficiency of the standard cotton programme3 at full load | 81 | 80 | 80 | 85.5 |
| Average condensation efficiency of the standard cotton programme3 at partial load | 85 | 81.5 | 80.6 | 84.5 |
| Weighted sound power level of the standard cotton programme3 at full load (dB) | 65 | |||
| Built-in or freestanding | Freestanding/ built under | |||
1) Based on 160 drying cycles of the standard cotton program at full and partial load, and the consumption of the low-power modes. Actual energy consumption per cycle will depend on how the appliance is used.
2) In case there is a power management system.
3) This program used at full and partial load is the standard drying program to which the information in the label and the fi che relates to. This is the program suitable for drying normal wet cotton laundry and it is the most effi cient program in terms of energy consumption for cotton.
4) Class G is the least efficient and Class A is the most efficient.
Additional data
| Power supply (refer to rating plate) - voltage / current / input | 220-240 V~50 Hz/ 2.4 A/ 550 W(A+++)/630W(A++) |
| Permissible ambient temperature 5°C to 35°C | |
| Fluorinated greenhouse gas | HFC-134a |
| Volume | 0.26 kg (A++) |
| 0.28 kg (A+++ ) | |
| GWP | 1430 |
| Tonne(s) of CO2equivalent | 0.4 |
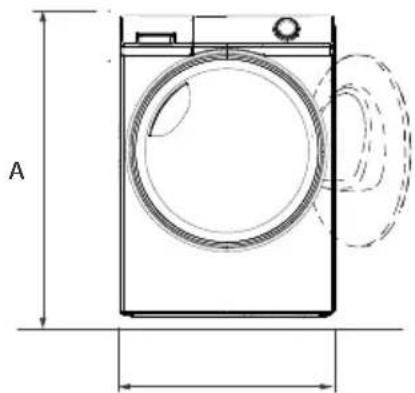
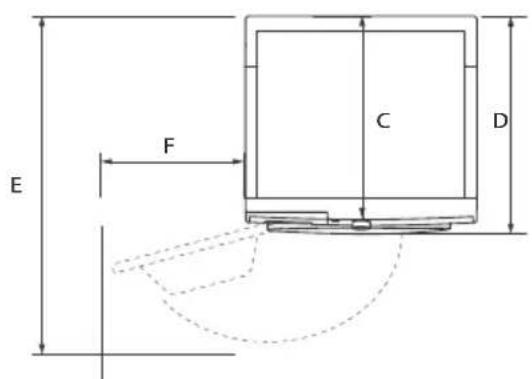
Product dimensions
natural_image
Technical line drawing of a front-loading washing machine with labeled dimensions (no text or symbols beyond 'A' and measurement lines)FRONT VIEW
text_image
E F C DWA
TOP VIEWL
| PRODUCT DIMENSIONS | HD90 80 |
| A Overall height of product mm | 850 |
| B Overall width of product mm | 595 |
| C Overall depth of product (To main control board size) mm | 600 |
| D Overall depth of product mm | 665 |
| E Depth of door open mm | 1135 |
| F Minimum door clearance to adjacent wall mm | 250 |
Note: The exact height of your dryer is dependent on how far the feet are extended from the base of the machine. The space where you install your dryer needs to be at least 40mm wider and 20mm deeper than its dimensions.
14-Customer service
EN
We recommend our Haier Customer Service and the use of original spare parts.
If you have a problem with your appliance, please first check section TROUBLESHOOTING.
If you cannot find a solution there, please contact
▶your local dealer or
the Service & Support area at www.haier.com where you can find telephone numbers and FAQs and where you can activate the service claim.
To contact our Service, ensure that you have the following data available.
The information can be found on the rating plate.
Model ____
Serial No.
Also check the Warranty Card supplied with the product in case of warranty.
For general business enquiries please find below our addresses in Europe:
| European Haier addresses | |||
| Country* | Postal address | Country* Postal address | |
| Italy | Haier Europe Trading SRLVia De Cristoforis, 1221100 VereseITALY | France | Haier France SAS53 Boulevard Ornano – Pleyad 393200 Saint Denis FRANCE |
| Spain Portugal | Haier Iberia SLPg. Garcia Faria, 49-5108019 BarcelonaSPAIN | Belgium-FRBelgium-NLNetherlandsLuxembourg | Haier Benelux SAAnderlechtRoute de Lennik 451BELGIUM |
| Germany Austria | Haier Deutschland GmbHKonrad-Zuse-Platz 681829 MünchenGERMANY | PolandHungaryGreeceRomaniaRussia | Haier Poland Sp. zo.o. I.Jerozolimskie 181B02-222 Warszawa POLAND |
| United Kingdom | Haier Appliances UK Co.Ltd.302 Bridgewater PlaceBirchwood ParkWarringtonWA3 6x | Czech Republic and Slovakia | Haier Europe ČR s.r.o.Sokolovská 651/136a,186 00 Praha 8Karlin Czech Republic |
*For more information please refer to www.haier.com
pie
| Category | Value | |---|---| | HD80-A2939S/HD90-A2939/HD100-A2939/S/HD90-A3939/HD90-A3939S | 1 | | HD80-A2939S/HD90-A2939/HD90-A2939S/HD100-A2939/HD100-A2939S/HD90-A3939/HD90-A3939S | 1 |Haier
natural_image
Symbol of a trash bin crossed with two crossed lines and a solid black rectangle below (no text or labels)text_image
2 5 13 14 4 15 3 Haier Heat pump 9µ A~ Temp Dry Level Air Level Delay Anti-crease Stand/Place 7 12 11 6 1 8 OFF 4-1text_image
Delay 4-2
ъобщение
text_image
4-3 Temp Dry level
ъобщение
text_image
Dry Level4-12

text_image
Temp Dry level4-13
4-14
text_image
4-15 8:00:00iСъобщение
text_image
17 8-1 8-2 Haier Heat pump x: X - G 8-38-4
text_image
8-5
natural_image
Black-and-white photo of scattered coins and keys on a bag (no text or symbols visible)8.1 Подготовка на уреда
text_image
Haier Heat pump 9.0 A. Airflow8-13

natural_image
Diagram of a circular mechanical or architectural component with concentric layers and a central arrow indicating direction (no text or symbols)8-14
natural_image
Diagram of a mechanical or electrical component with directional arrows indicating motion (no text or symbols)text_image
Haier Heat pump in A" Q - 2 9-9 9-10 Haier Heat pump in A" Q - 2 9-11
ъобщение
natural_image
Close-up of a mechanical component with directional arrows indicating motion (no text or symbols)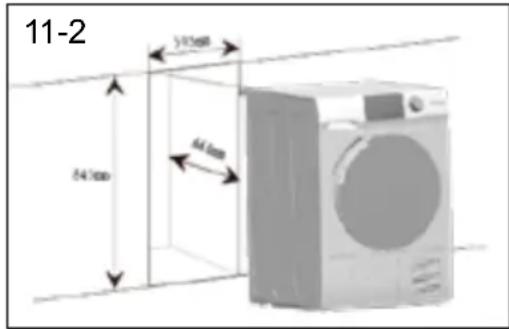
text_image
11-2 54.7mm 64.6mm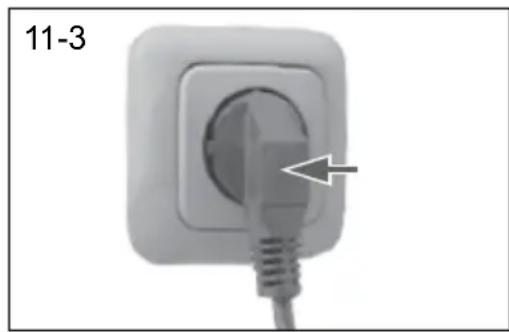
natural_image
Close-up of a white electrical plug with a cable inserted, labeled '11-3' (no other text or symbols)natural_image
Exterior view of a two-tier refrigerator with front-mounted fans and front-mounted sink (no signage or text)natural_image
Line drawing of a washing machine with a magnified inset showing a button labeled '11-5' (no text or symbols on the device itself)text_image
11-6 11-7natural_image
Symbol of a trash bin crossed with two crossed lines and a solid black rectangle below (no text or labels)Likvidace
text_image
2 5 13 14 4 15 3 00:00 Haier Heat pump 9= A* Temp Dry level J-Kmax Delay Anti-dryase Start Force 7 12 11 6 1 8 OFF 4-1text_image
Delay 4-2
známka
text_image
4-3 Temp Dry level
známka
text_image
4-13 Temp Dry levelnatural_image
Simple line drawing of a cup with liquid, no text or symbols present4.14. Displej
text_image
4-15 8:00:88
známka
text_image
8-1 8-2 Haier Heat pump x: A 8-38-4natural_image
Black-and-white photo of a wallet with scattered coins, keys, and banknotes (no visible text or symbols)
Tipy:
text_image
8-10 OFF Inatural_image
Close-up of a white electrical socket with a black arrow pointing to the socket (no text or symbols visible)
text_image
8-12 Haier Next pump 50 A Q HALLnatural_image
Technical diagram of a mechanical component with concentric layers and a central arrow indicating direction (no text or symbols)natural_image
Diagram of a mechanical or electrical component with directional arrows and grid pattern, no readable text or symbolsTabulka péče
text_image
Haier Heat pump in A" 9-9 9-10 Haier Heat pump in A" 9-11
známka
natural_image
Close-up of a mechanical component with a circular arrow indicating rotation or motion (no text or symbols)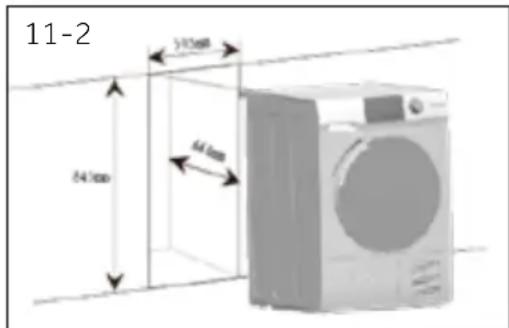
text_image
11-2 24.7mm 51.3mm 64mm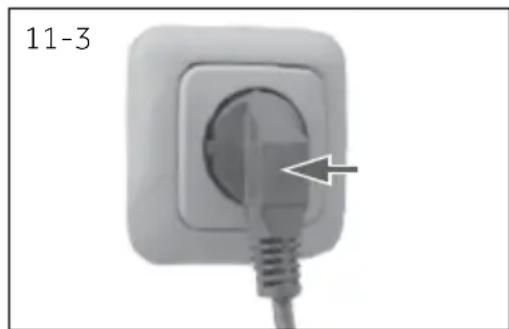
natural_image
Close-up of a white electrical plug with a cable inserted, showing a pointed tip and a numbered label '11-3' (no other text or symbols)natural_image
Illustration of a washing machine with two icons (circle and bucket) beside it, labeled '11-4' (no text or symbols on the machine itself)natural_image
Line drawing of a washing machine with a magnified inset showing a button labeled '11-5' (no text or symbols on the device itself)text_image
11-6 11-7natural_image
Symbol of a trash bin crossed with a diagonal line and a horizontal bar below (no text or labels)Bortskaffelse
text_image
Delay 4-2
mærk
text_image
4-3 Temp Dry level
mærk
text_image
Temp Dry level 4-134.13 Tom tankindikator
natural_image
Simple line drawing of a cup with liquid, no text or symbols present4.14 Skærm
Displayet viser den resterende tid, forsinkelsestid og anden relateret information (Fig. 4-15)..
text_image
4-15 8:00:00
mærk
text_image
8-1 8-2 Haier Heat pump x 0 - 0.5 8-3 8-4natural_image
Black-and-white photo of a wallet with scattered coins, keys, and banknotes (no visible text or symbols)
Tips:
text_image
Haier Heal soup pan Q 5.0 9-9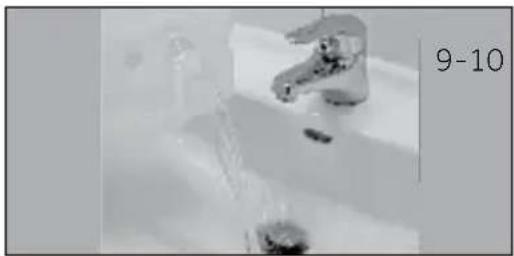
natural_image
Close-up of a faucet in a bathroom with water and sink (no visible text or symbols)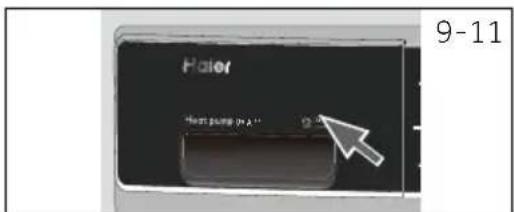
text_image
Haier Next pump in A" 9-11
mærk
natural_image
Close-up of a mechanical component with a circular arrow indicating rotation or motion (no text or symbols)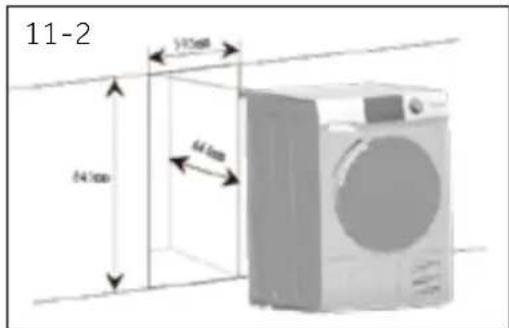
text_image
11-2 54.1mm 64.4mm 74.0mm
natural_image
Close-up of a white electrical plug with a cable inserted, showing a pointed tip and a numbered label '11-3' (no other text or symbols)natural_image
Illustration of a washing machine with two icons (circle and bucket) beside it, no text or symbols present.natural_image
Line drawing of a washing machine with a circular inset showing a button labeled '11-5' (no text or symbols on the device itself)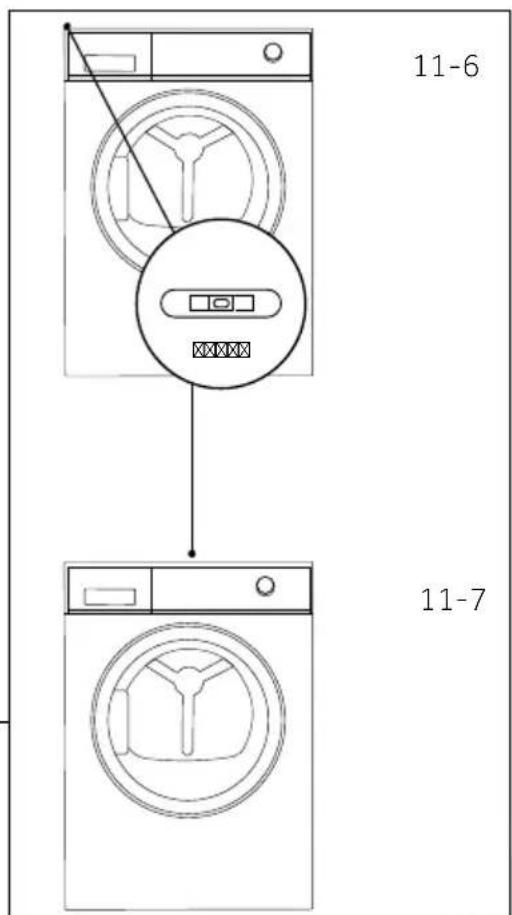
text_image
11-6 11-711-Installation
11.9 Udtømning
natural_image
Symbol of a trash bin crossed with two crossed lines and a solid black rectangle below (no text or labels)Entsorgung
text_image
Delay 4-24.1 Zeitvorwahl-Taste
text_image
4-3 Temp Dry level
nweis
text_image
4-13 Temp Dry level
natural_image
Simple line drawing of a cup with liquid, no text or symbols present
text_image
4-15 00:00 88:88
nweis
text_image
8-1 8-2 Haier Heat pump x: X - G 8-3 8-4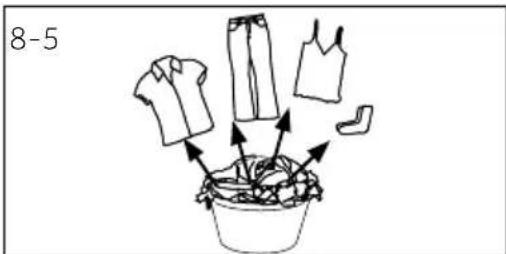
text_image
8-5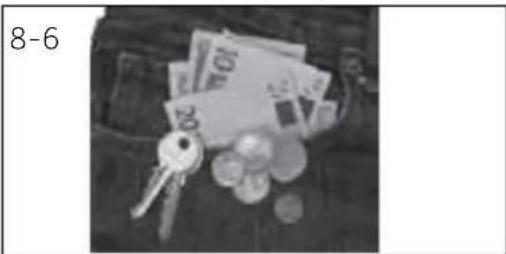
natural_image
Black-and-white photo of scattered coins and keys on a surface, no visible text or symbolsnatural_image
Close-up of a wall socket with a screw and a circular opening, labeled '8-11' (no other text or symbols)text_image
8-12 Haier Next jump to A Checknatural_image
Diagram of a circular structure with concentric layers and a central arrow, labeled '8-13' (no text or symbols within the diagram itself)natural_image
Diagram of a mechanical or electrical component with directional arrows and a grid-patterned component (no text or symbols)Pflegediagramm
Waschen
text_image
Haier Heat pump P/A Q-50 9-9
natural_image
Close-up of a stainless steel faucet in a bathroom with water and a small bowl nearby (no visible text or symbols)
text_image
Haier Next pump in A" Q-11 9-11
nweis
natural_image
Close-up of a mechanical component with a circular arrow indicating rotation or motion (no text or symbols)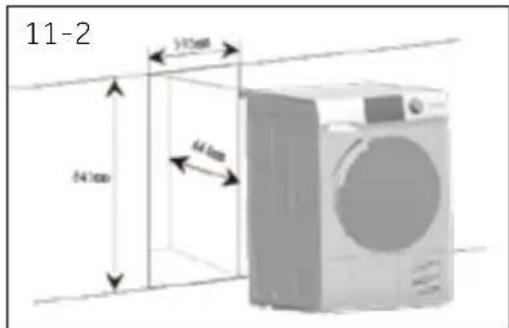
text_image
11-2 54.7mm 64.8mm 31.5mm
natural_image
Close-up of a white electrical plug with a cable inserted, showing a pointed tip and a label '11-3' (no other text or symbols)natural_image
Illustration of a washing machine with two icons (circle and bucket) beside it, no text or symbols present.natural_image
Line drawing of a washing machine with a magnified inset showing a button labeled '11-5' (no text or symbols on the device itself)text_image
11-6 11-711.9 Entleeren
natural_image
Symbol of a trash bin crossed out by two diagonal lines (no text or numbers present)
Desecho
medioambiental responsible
text_image
2 5 13 14 4 15 3 Haier Heat pump 9# A~ 88:88 Temp Dry heat Lifetime Delay Anti-creased HotPhone 7 12 11 6 1 8 4-1text_image
Delay 4-2
text_image
4-3 Temp Dry level
text_image
Temp Dry level 4-13
natural_image
Simple line drawing of a cup with liquid, no text or symbols present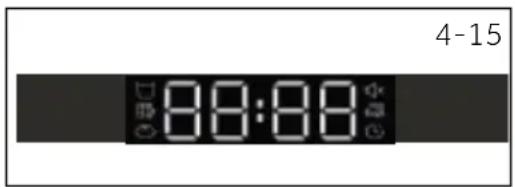
text_image
4-15 8:00:88
natural_image
Black-and-white photo of a pocket with scattered coins, keys, and banknotes (no visible text or symbols)text_image
8-10 OFF I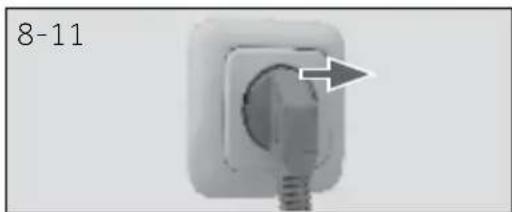
natural_image
Close-up of a white electrical socket with a circular button and a plug, labeled '8-11' (no other text or symbols)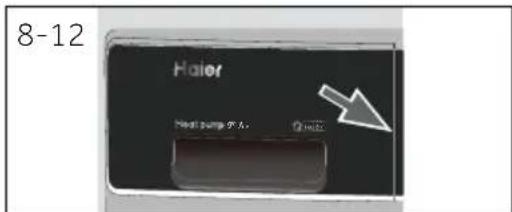
text_image
8-12 Haier Next jump to A Click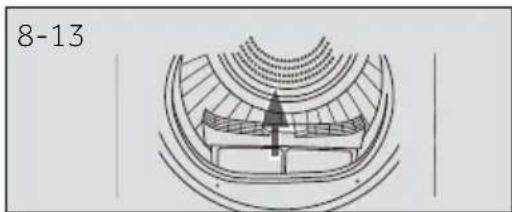
natural_image
Technical line drawing of a mechanical component or assembly (no text or symbols)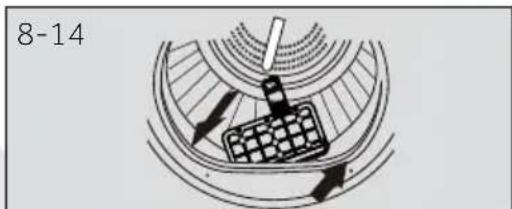
natural_image
Diagram of a mechanical or electrical component with directional arrows and a grid-patterned component (no text or symbols)text_image
Haier Heat pump in A" Q - 2 9-9 9-10 Haier Heat pump in A" Q - 2 9-11
iso
natural_image
Close-up of a mechanical component with a circular arrow indicating rotation or motion (no text or symbols)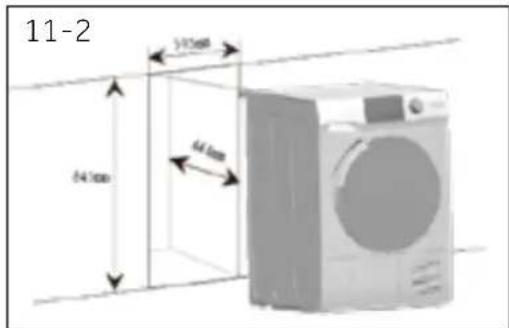
text_image
11-2 54.1mm 64.4mm
natural_image
Close-up of a white electrical plug with a cable inserted, showing a pointed tip and arrow indicating the pin (no text or symbols on the plug itself)natural_image
Illustration of a washing machine with two side-mounted buckets and circular symbols (no text or labels)natural_image
Line drawing of a washing machine with a magnified inset showing a small component (no text or symbols)text_image
11-6 11-711-Instalación
11.9 Desagüe
natural_image
Symbol of a trash bin crossed with two crossed lines, no text or labels presentΤελική διάθεση
text_image
2 5 13 14 4 15 3 Haier Heat pump 94 A~ Temp Dry level & Noise Delay Anti-Drain Shift/Pass 7 12 11 6 1 8 4-1 9 10 OFFtext_image
Delay 4-2Εδοποίηση
text_image
4-3 Temp Dry levelΕιδοποίηση
text_image
Temp Dry level4-13
4-14

text_image
4-15 8:00:00Ειδοποίηση
text_image
17 8-1 8-2 Haier Heat pump x: X - G 8-3 8-4natural_image
Black-and-white photo of a wallet with scattered coins and keys, no visible text or symbolsnatural_image
Diagram of a circular structure with concentric layers and a central arrow indicating direction (no text or symbols)8-14

natural_image
Diagram of a mechanical or electrical component with directional arrows indicating motion (no text or symbols)text_image
Haier Heat pump in A" 9-9 9-10 Haier Heat pump in A" 9-11
δοποίηση
natural_image
Close-up of a mechanical component with a curved arrow indicating rotation or motion (no text or symbols)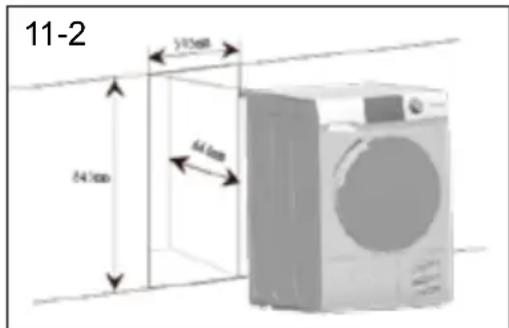
text_image
11-2 24.7mm 3.15mm 64mm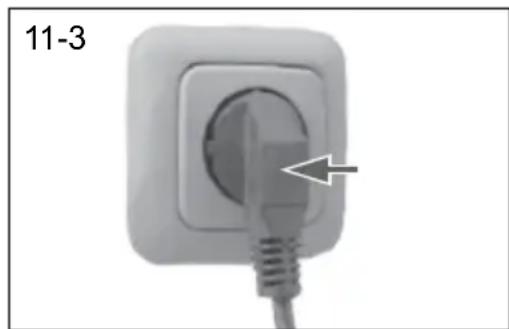
natural_image
Close-up of a white electrical plug with a cable inserted, labeled '11-3' (no other text or symbols)natural_image
Illustration of a washing machine with two side-mounted buckets and circular symbols (no text or labels)natural_image
Line drawing of a washing machine with a circular inset showing a button labeled '11-5' (no text or symbols on the device itself)text_image
11-6 11-711-Εγκατάσταση
11.9 Αποστράγγιση
natural_image
Symbol of a trash bin crossed with two crossed lines and a solid black rectangle below (no text or labels)Hävittäminen
text_image
2 5 13 14 4 15 3 Haier Heat pump 9% A~ 88:88 Temp Drawn Reduce Delay Anti-create Start Force 7 12 11 6 1 8 4-1 OFFtext_image
Delay 4-24.1 Viivepainike
text_image
4-3 Temp Dry level
uomautus
4.12 Lapsilukkopainike
text_image
4-13 Temp Dry level
natural_image
Simple line drawing of a cup with liquid, no text or symbols present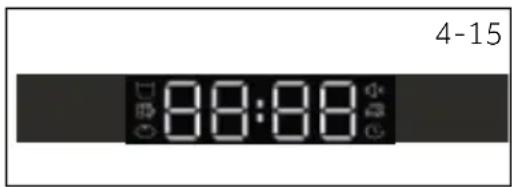
text_image
4-15 8:00:88
uomautus
text_image
8-1 8-2 Haier Heat pump or 0.5 8-3 8-4natural_image
Black-and-white photo of a wallet with scattered coins, keys, and banknotes (no visible text or symbols)
Vihje:
text_image
Haier Heat pump 9.1A Quick8-13

natural_image
Diagram of a circular structure with concentric rings and a central arrow, no text or symbols present.8-14
natural_image
Diagram of a mechanical or electrical component with directional arrows indicating motion (no text or symbols)text_image
9-1 9-2 9-3 9-4text_image
9-5 9-6 9-7 9-8text_image
Haier Heat pump 9.4 9-9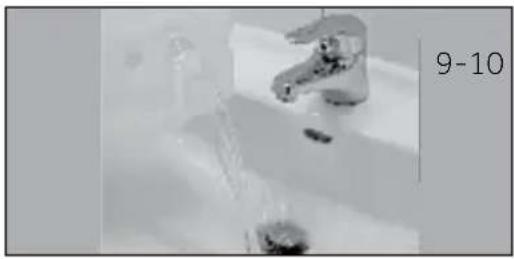
natural_image
Close-up of a faucet with water flowing through it, no visible text or symbols
text_image
Haier Next pump in A" 9-11
iomautus
natural_image
Close-up of a mechanical component with a circular arrow indicating rotation or motion (no text or symbols)
text_image
11-2 54.1mm 64.4mm 34.8mm
natural_image
Close-up of a white electrical plug with a cable inserted, labeled '11-3' (no other text or symbols)11.3 Koneen tasapainotus
natural_image
Illustration of a washing machine with two icons (circle and bucket) beside it, no text or symbols present.natural_image
Line drawing of a washing machine with a magnified inset showing a small component (no text or symbols)text_image
11-6 11-7natural_image
Pure diagram of a cable or connector with no text, numbers, or symbolsnatural_image
Symbol of a trash bin with crossed lines indicating no waste or restriction, and a solid black rectangle below (no text or labels)Mise au rebut
text_image
Delay 4-2
emarque
text_image
4-3 Temp Dry level
emarque
text_image
4-13 Temp Dry level
natural_image
Simple line drawing of a cup with liquid, no text or symbols present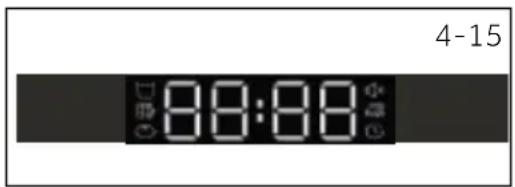
text_image
4-15 00:00
emarque
text_image
8-1 8-2 Haier Heat pump x 0 - 0.5 8-3 8-4natural_image
Black-and-white photo of scattered coins and keys on a surface, no visible text or symbolsi Conseils :
text_image
Diagram with a central circle containing four quadrants and surrounding icons, likely representing a system or control interface.8-9

8-10

text_image
OFF !8-11
8-12
text_image
Haier Heat pump 90A Check8-13
natural_image
Diagram of a circular structure with concentric rings and a central arrow, no text or symbols present.8-14
natural_image
Diagram of a mechanical or electrical component with directional arrows indicating motion (no text or symbols)text_image
9-1 9-2 9-3 9-4text_image
9-5 9-6 9-7 9-8text_image
Haier Heat pump in A" 9-9 9-10 Haier Heat pump in A" 9-11
marque
natural_image
Close-up of a mechanical component with a circular base and directional arrow, labeled '11-1' (no readable text or symbols beyond label)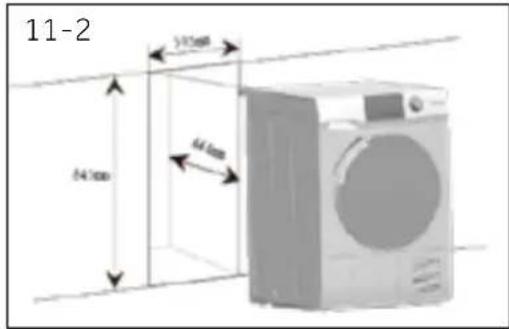
text_image
11-2 5.015mm 4.6mm 2.4mm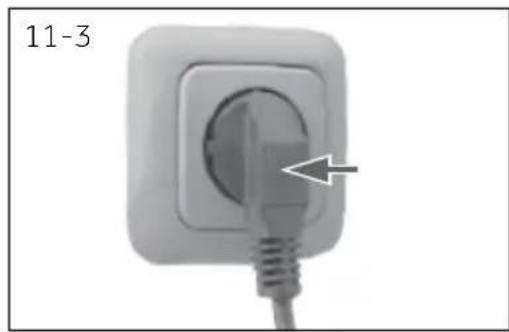
natural_image
Close-up of a white electrical plug with a cable inserted, labeled '11-3' (no other text or symbols)natural_image
Illustration of a washing machine with two icons (circle and bucket) beside it, no text or symbols present.natural_image
Line drawing of a washing machine with a close-up inset showing a button labeled '11-5' (no text or symbols on the device itself)text_image
11-6 11-7natural_image
Simple line drawing of a trash bin with two crossed lines indicating no waste or prohibition (no text or symbols)
Smaltimento
text_image
Delay 4-2
text_image
4-3 Temp Dry level
text_image
4-13 Temp Dry level
natural_image
Simple line drawing of a cup with liquid, no text or symbols present
text_image
4-15 8:8:88
text_image
8-1 8-2 Haler Next jump p: X - 0.2 8-3 8-4natural_image
Black-and-white photo of a pocket with scattered coins, keys, and banknotes (no visible text or symbols)
Consigli:
natural_image
Close-up of a white electrical socket with a black screw and a circular socket, labeled '8-11' (no other text or symbols)
text_image
8-12 Haier Next jump 7 A Click
natural_image
Diagram of a circular structure with concentric layers and a central arrow, labeled '8-13' (no text or symbols within the diagram itself)
natural_image
Diagram of a mechanical or electrical component with directional arrows and a grid-patterned component (no text or symbols)text_image
9-1 9-2 9-3 9-4text_image
9-5 9-6 9-7 9-8text_image
Haier Heat pump in A" Q - Q 9-9 9-10 Haier Heat pump in A" Q - Q 9-11
ota
natural_image
Close-up of a mechanical component with a circular arrow indicating rotation or motion (no text or symbols)
text_image
11-2 54.1mm 64.4mm 70.3mm
natural_image
Close-up of a white electrical plug with a cable inserted, showing a circular socket and an arrow pointing to the plug (no text or symbols on the plug itself)natural_image
Illustration of a washing machine with two side dishes and icons (circle and bucket) on the front panel, labeled '11-4' in top right corner.natural_image
Line drawing of a washing machine with a magnified inset showing a button labeled '11-5' (no text or symbols on the device itself)text_image
11-6 11-7text_image
E F C D DABETTE 1/2"STA. DABETTE TOPARETE
VISTA DALL'ALTO
natural_image
Symbol of a trash bin crossed with two crossed lines, no text or numbers presentVerwijdering
text_image
2 5 13 14 4 15 3 9 10 4-1 Haier Heat pump 94 A~ Temp Dry water E-Lime Delay Anti-crease StartPhone 7 12 11 6 1 8text_image
Delay 4-2
pgelet
text_image
4-3 Temp Dry level
ogelet
text_image
4-13 Temp Dry level
natural_image
Simple line drawing of a cup with liquid, no text or symbols present
text_image
4-15 8:00:88
ogelet
text_image
8-1 8-2 Haier Heat pump x 0 - 0.5 8-3 8-4natural_image
Black-and-white photo of a wallet with scattered coins, keys, and banknotes (no visible text or symbols)
Tips:
text_image
8-10 OFF I
natural_image
Close-up of a white electrical socket with a screw and a circular button, labeled '8-11' (no other text or symbols)text_image
8-12 Haier Next jump法兰 Closenatural_image
Diagram of a circular structure with concentric rings and a central arrow, labeled '8-13' (no text or symbols within the diagram itself)text_image
Haier Heat pump in A" 9-9 9-10 Haier Heat pump in A" 9-11
ogelet
natural_image
Close-up of a mechanical component with a curved arrow indicating rotation or motion (no text or symbols visible)
text_image
11-2 24.7mm 5.13mm 64mm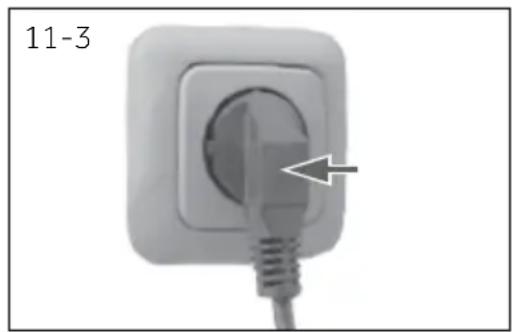
natural_image
Close-up of a white electrical socket with a cable inserted, showing a pointed tip and an arrow pointing to the socket (no text or symbols)natural_image
Illustration of a washing machine with two icons (circle and bucket) beside it, labeled '11-4' (no text or symbols on the main image)11.8 De droger nivelleren
natural_image
Line drawing of a washing machine with a magnified inset showing a button labeled '11-5' (no text or symbols on the device itself)text_image
11-6 11-711-Installatie
11.9 Afvoer
natural_image
Symbol of a trash bin crossed with two crossed lines and a solid black rectangle below (no text or labels)Avhending
text_image
2 5 13 14 4 15 3 Haier Heat pump 9µA™ 8:00:00 Temp On next Off next Delay Anti-Off next Start Post 7 12 11 6 1 8 4-1 OFF1 Utsettelse-knapp
2 Barnesikring
3 Utsettelsesindikator
4 Summerindikator
5 Rengjør filterindikatoren
6 Tid-knapp
7 Temp.-knapp
8 Start/pause-knapp
9 Programknapp
10 Power-knapp
11 Tørkenivå-knapp
12 Barnesikringsknapp
13 Tom tank-indikator
14 Vise
15 Antikrølling-indikator
4.1 Forsinkelse-knapp
text_image
Delay 4-2
text_image
4-3 Temp Dry level
flowchart
graph LR
    A["i-time"] --> B["+"]
    B --> C["Delay"]
    style A fill:#000,stroke:#000
    style C fill:#fff,stroke:#000
    note right of C 4-5
4-Kontrollpanel
4-6

text_image
4-13 Temp Dry level
natural_image
Simple line drawing of a cup with liquid, no text or symbols present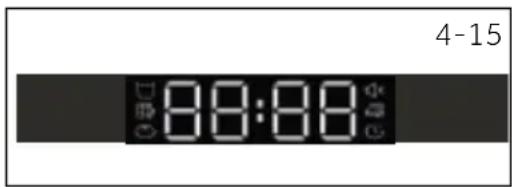
text_image
4-15 8:00:00
erk
text_image
8-1 8-2 Haier Heat pump x 0 - 0.5 8-3 8-4natural_image
Black-and-white photo of a pocket with scattered coins, keys, and banknotes (no visible text or symbols)text_image
Haier Heat pump 4A 20 MHz8-13

natural_image
Diagram of a circular structure with concentric layers and a central arrow, no text or symbols present.8-14
natural_image
Diagram of a mechanical or electrical component with directional arrows indicating motion (no text or symbols)text_image
Haier Price range 9.5% 9-9
natural_image
Close-up of a stainless steel faucet in a bathroom sink, with no visible text or symbols on the faucet itself.
text_image
Haier Next pump in A1 9-11
erk
natural_image
Close-up of a mechanical component with a circular arrow indicating rotation or motion (no text or symbols)
text_image
11-2 54.1mm 64.4mm 70.3mm
natural_image
Close-up of a white electrical plug with a cable inserted, showing a circular socket and an arrow pointing to the plug (no text or symbols on the plug itself)natural_image
Illustration of a washing machine with two icons (circle and bucket) beside it, no text or symbols present.natural_image
Line drawing of a washing machine with a magnified inset showing a button labeled '11-5' (no text or symbols on the device itself)text_image
11-6 11-7natural_image
Simple line drawing of a trash bin with no text or symbols
Utylizacja
text_image
2 5 13 14 4 15 3 Haier Heat pump 94 A~ 88:88 Temp Drives Lifters Delay Anti-DRAM Start Phase 7 12 11 6 1 8 4-1 OFFtext_image
Delay 4-2
waga
text_image
4-3 Temp Dry level
vaga
text_image
4-13 Temp Dry levelnatural_image
Simple line drawing of a cup with liquid, no text or symbols present4.14 Wyświetlacz
text_image
4-15 8:00:00
vaga
natural_image
Black-and-white photo of a wallet with scattered coins, keys, and banknotes (no visible text or symbols)text_image
Haier Heat pump fan. Air8-13

natural_image
Diagram of a circular structure with concentric layers and a central arrow, no text or symbols present.8-14

natural_image
Diagram of a mechanical or electrical component with directional arrows indicating motion (no text or symbols)text_image
9-1 9-2 9-3 9-4text_image
9-5 9-6 9-7 9-8text_image
Haier Price range 9.5% 9-9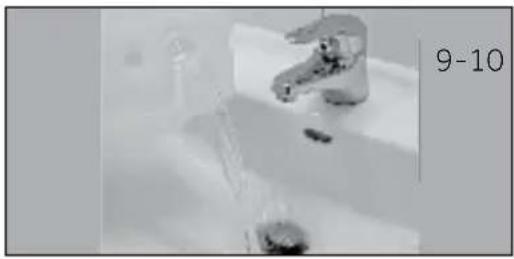
natural_image
Close-up of a stainless steel faucet in a bathroom sink, with no visible text or symbols on the faucet itself.
text_image
Haier Next pump in A" 9-11
vaga
natural_image
Close-up of a mechanical component with a circular arrow indicating rotation or motion (no text or symbols)
text_image
11-2 54.0mm 64.0mm
natural_image
Close-up of a white electrical outlet plug with a cable inserted, showing a pointed tip and a white arrow pointing to the socket (no text or symbols)natural_image
Illustration of a washing machine with two icons (circle and bucket) beside it, no text or symbols present.natural_image
Line drawing of a washing machine with a circular inset showing a button labeled '11-5' (no text or symbols on the device itself)text_image
11-6 11-7natural_image
Symbol of a trash bin crossed with no text or numbers, representing waste sorting or disposal (no text present)Eliminação
text_image
2 5 13 14 4 15 3 Haier Heat pump 9W A~ 88:88 Temp Dry heat Follow Delay Anti-crease Heat Peak 7 12 11 6 1 8 4-1 9 10 OFFtext_image
Delay 4-2
servação
text_image
4-3 Temp Dry level
servação
text_image
4-13 Temp Dry levelnatural_image
Simple line drawing of a cup with liquid, no text or symbols present4.14 Visor
text_image
4-15 8:00:88
servação
text_image
8-1 8-2 Haier Heat pump or - G 8-3 8-48.1 Preparar a máquina
natural_image
Black-and-white photo of a pocket with scattered coins, keys, and banknotes (no visible text or symbols)
Dicas:
text_image
8-10 OFF I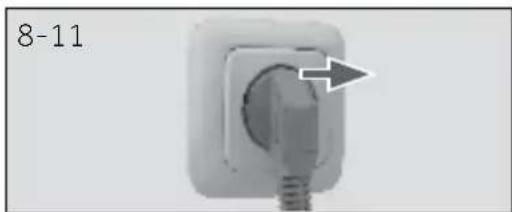
natural_image
Close-up of a wall socket with a circular vent and a screw, labeled '8-11' (no other text or symbols)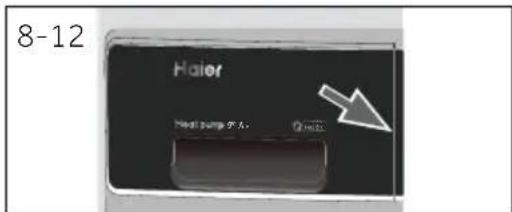
text_image
8-12 Haier Next surge 0.5A Q1423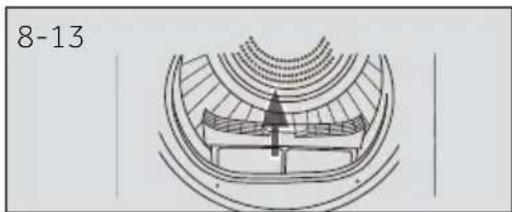
natural_image
Diagram of a circular structure with concentric rings and a central arrow, labeled '8-13' (no text or symbols within the diagram itself)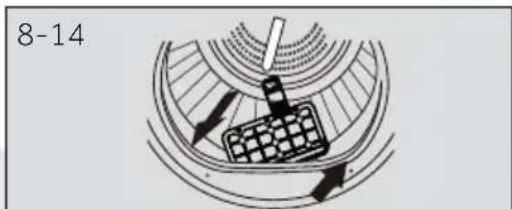
natural_image
Diagram of a mechanical or electrical component with directional arrows and a grid-patterned component (no text or symbols)natural_image
Close-up of a mechanical component with a circular arrow indicating rotation or motion (no text or symbols)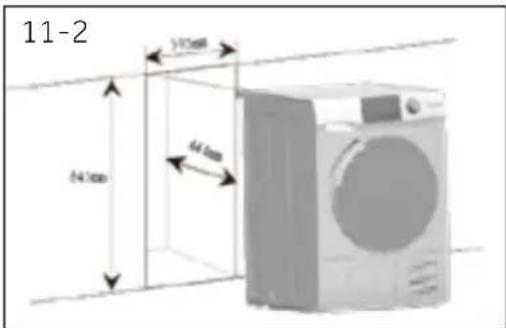
text_image
11-2 54.1mm 64.4mm 70.5mm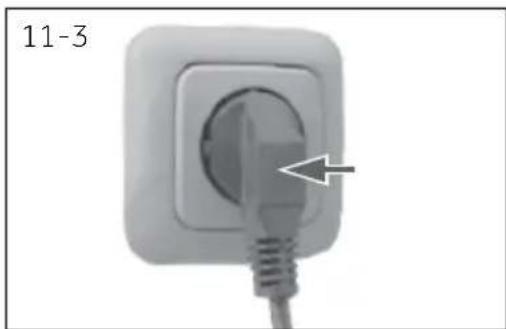
natural_image
Close-up of a white electrical socket with a plug inserted, showing a black arrow pointing to the socket (no text or symbols on the socket itself)11.3 Nivelar o aparelho
natural_image
Illustration of a washing machine with two icons (circle and bucket) beside it, no text or symbols present.natural_image
Line drawing of a washing machine with a magnified inset showing a button labeled '11-5' (no text or symbols on the device itself)text_image
11-6 11-7natural_image
Pure diagram of a cable or connector with no text, numbers, or symbolsnatural_image
Symbol of a trash bin with crossed lines indicating no waste or restriction, and a solid black rectangle below (no text or labels)Likvidácia
text_image
OFF 30° 25° 15° 10°text_image
4-13 Temp Dry levelnatural_image
Simple line drawing of a glass with water inside, labeled '4-14' (no text or symbols on the diagram itself)4,14. Displej
text_image
4-15 8:00:88
známka
natural_image
Black-and-white photo of a wallet with scattered coins, keys, and banknotes (no visible text or symbols)text_image
8-10 OFF Inatural_image
Close-up of a white electrical socket with a black arrow pointing to the socket (no text or symbols visible)text_image
8-12 Haier Heat pump of air Qinnatural_image
Diagram of a circular mechanical or architectural component with concentric layers and a central arrow, labeled '8-13' (no readable text or symbols beyond label)text_image
Haier Heat pump (pA) 9-9 9-10 Haier Heat pump (pA) 9-11
známka
natural_image
Close-up of a mechanical component with a circular arrow indicating rotation or motion (no text or symbols)
text_image
11-2 54.1mm 64.6mm 70.5mm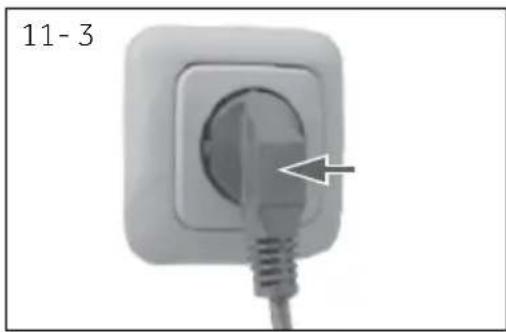
natural_image
Close-up of a white electrical socket with a plug inserted, showing a pointed tip and wire (no text or symbols visible)11.3 Umiestnenie spotrebiča
natural_image
Illustration of a washing machine with two icons (circle and bucket) beside it, no text or symbols present.text_image
11-6 11-73. Opätovne skontrolujte, či je sušička vyrovnaná (obr. 11-7):
natural_image
Simple line drawing of a trash bin with two crossed lines indicating no waste or prohibition (no text or symbols)
Odlaganje
Pomozite u zaštiti okoline i ljudskog zdravlja. Ambalažu stavite u odgovarajuće kontejnere da biste je reciklirali. Pomozite u recikliranju otpada električnih i elektronskih uređaja. Uređaje obeležene ovim simbolom ne odlažite u kućni otpad. Proizvod vratite u lokalni centar za reciklažu ili kontaktirajte svoju gradsku kancelariju.
UROZORENJE!
text_image
2 5 13 14 4 15 3 Haier Heat pump 90 A+ 88:88 Temp Dry Heat 2.4 Hours Delay Anti-crease Start Phone 7 12 11 6 1 8 4-1 OFF1 Dugme za vreme odlaganja
2 Indikator blokade za decu
3 Indikator odloženog pranja
4 Indikator zujalice
5 Indikator za čišćenje filtera
6 Dugme za vreme
7 Dugme za temperaturu
8 Dugme za pokretanje/pauziranje
9 Okretno dugme za izbor programa
10 Dugme za napajanje
11 Dugme za nivo sušenja
12 Dugme za blokadu za decu
13 Indikator za pražnjenje rezer voara
14 Displej
15 Indikator opcije za sprečavanje gužvanja
text_image
Delay 4-2
apomena
Ovu funkciju treba podesiti nakon što završite sve opcije, u suprotnom kada okrenete dugme ili pritisnete dugme, funkcija će se automatski poništiti.
4.2 Indikator blokade za decu
Blokada za decu je dizajnirana da spreči decu da diraju postavke programa. Da biste aktivirali ovu funkciju, nakon što je ciklus pokrenut, pritisnite dugme za nivo sušenja i temp. (Sl. 4-3) u isto vreme na 3 sekunde dok ikona indikatora ne zasvetli. Da biste je deaktivirali pritisnite dva dugmeta ponovo 3 sekunde.
text_image
4-3 Temp Dry level
apomena
text_image
4-13 Temp Dry level4.13 Indikator za pražnjenje rezervoara
Ovaj indikator je dizajniran da podseti korisnike da rezervoar za vodu treba da se isprazni (Slika 4-14). Važno: Ispraznite rezervoar za vodu nakon svakog ciklusa sušenja. Pogledajte odeljak Uputstva "Ispraznite rezervoar za vodu".
4.14 Displej
Na displeju se vidi preostalo vreme, odlođeno vreme i ostale srodne informacije (Sl. 4-15).
natural_image
Simple line drawing of a cup with liquid, no text or symbols present
text_image
4-15 8:00:88Napomena
natural_image
Black-and-white photo of a wallet with scattered coins and keys, no visible text or symbols▶razvrstajte odeću prema vrsti tkanine (pamuk, sintetika, vuna itd.).
Sušite samo odeću koja je centrifugirana.
- Iz džepova izvadite sve oštre ili zapaljive predmete kao što su ključevi, upaljači i šibice. Uklonite čvršće ukrasne predmete kao što su broševi.
Zatvorite patentne zatvarače i kopče, vodite računa da dugmad budu čvrsto prišivena i stavite male stvari kao što su čarape, grudnjaci itd. u kesu za pranje.
text_image
Haier Heat pump 90A Q18258-13

natural_image
Diagram of a circular structure with concentric rings and a central arrow, no text or symbols present.8-14

natural_image
Diagram of a mechanical or electrical component with directional arrows indicating motion (no text or symbols)8.6 Podesite program i pokrenite mašinu
- Izaberite jedan od 15 programa okretanjem dugmeta (osim Isključeno) (Slika 8-8) i biće prikazane njegove podrazumevane postavke.
- Podesite funkcije kao što su temperatura, nivo suvoće, odloženo vreme početka. Nakon toga pritisnite dugme za „Pokretanje/Pauziranje" (Sl. 8-9) da započnete ciklus sušenja.
8.7 Završetak ciklusa sušenja
text_image
Haier Heat pump in A" Q - X 9-9 9-10 Haier Heat pump in A" Q - X 9-11
pomena
Ne koristite vodu za bilo koju vrstu pića ili pripremu hrane.
9.4 Mašina za sušenje veša
natural_image
Close-up of a mechanical component with a circular arrow indicating rotation or motion (no text or symbols)
text_image
11-2 54.1mm 64.4mm 70.3mm
natural_image
Close-up of a white electrical plug with a cable inserted, showing a circular socket and an arrow pointing to the plug tip (no text or symbols)natural_image
Illustration of a washing machine with two icons (circle and bucket) beside it, no text or symbols present.11.8 Nivelisanje mašine za sušenje
natural_image
Line drawing of a washing machine with a magnified inset showing a button labeled '11-5' (no text or symbols on the device itself)2. Poravnajte prednju i zadnju stranu mašine za sušenje (Slika 11-6):
▶Postavite nivelu sa leve strane.
▶Podesite prednju levu nogu (odvidajte nadole).
▶Ponovite isto za desnu nogu.
▶ Trebalo bi da jednaka težina bude na obe prednje noge.

text_image
11-6 11-73. Ponovo proverite da li je mašina za sušenje ravna (Slika 11-7):
▶Stavite nivelu na sredinu prednje strane mašine za sušenje.
▶Obezbedite da se mašina za sušenje ne ljulja u bilo kom smeru.
Ako mašina za sušenje nije ravna, ponovite prethodno navedene korake.
Nakon poravnanja, uglovi kućišta mašine za sušenje ne smeju dodirivati pod i zid.
Ne sme se ljuljati ni u jednom pravcu.
11-Instalacija
11.9 Ceđenje
Mašina za sušenje je opremljena kondenzatorskom jedinicom koja akumulira vodu tokom ciklusa sušenja. Ova voda se sakuplja u uklonjivom rezervoaru za vodu koji se nalazi u gornjem levom delu mašine za sušenje. Akumulirana voda se mora isprazniti nakon svakog ciklusa sušenja ili možete podesiti mašinu za sušenje da se automatski ispušta pomoću priloženog odvodnog creva.
natural_image
Symbol of a trash bin crossed with two crossed lines, no text or labels presentAvfall
text_image
2 5 13 14 4 15 3 8:0:8:0 Heat pump 90 A~ Temp Dry Water 2 Minutes Delay Anti-Condition Start Phase 7 12 11 6 1 8 4-1 Haier OFFtext_image
Delay 4-2
text_image
4-3 Temp Dry level
text_image
Temp Dry level 4-13
natural_image
Simple line drawing of a cup with liquid, no text or symbols present
text_image
4-15 8:00:88
text_image
8-1 8-2 Haier Heat pump x 0 - 0.5 8-3 8-4natural_image
Black-and-white photo of a wallet with scattered coins, keys, and banknotes (no visible text or symbols)
Tips:
text_image
8-8 OFF 8-9natural_image
Close-up of a white electrical socket with a black arrow pointing to the socket (no text or symbols visible)text_image
8-12 Haier Heat pump 5°C Circuitnatural_image
Technical diagram of a mechanical component with concentric layers and a central arrow indicating direction (no text or symbols)natural_image
Diagram of a mechanical or electrical component with directional arrows and grid pattern (no readable text or symbols)text_image
9-1 9-2 9-3 9-4text_image
9-5 9-6 9-7 9-89.2 Rengöring av kondensfilter
text_image
Haier Heat pump 90A 9-9
natural_image
Close-up of a faucet with water flowing through it, no visible text or symbols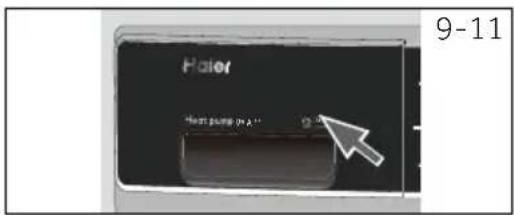
text_image
Haier Next pump in A 11 9-11
otis
natural_image
Close-up of a mechanical component with a circular arrow indicating rotation or motion (no text or symbols)
text_image
11-2 54.1mm 64.4mm 70.5mm