ClimaPilot - Measuring equipment Laserliner - Free user manual and instructions
Find the device manual for free ClimaPilot Laserliner in PDF.
| Brand | Laserliner |
| Model | ClimaPilot |
| Product Type | Digital thermometer and hygrometer |
| Dimensions (L x H x D) | 138 x 27 x 19 mm |
| Weight (battery included) | 38 g |
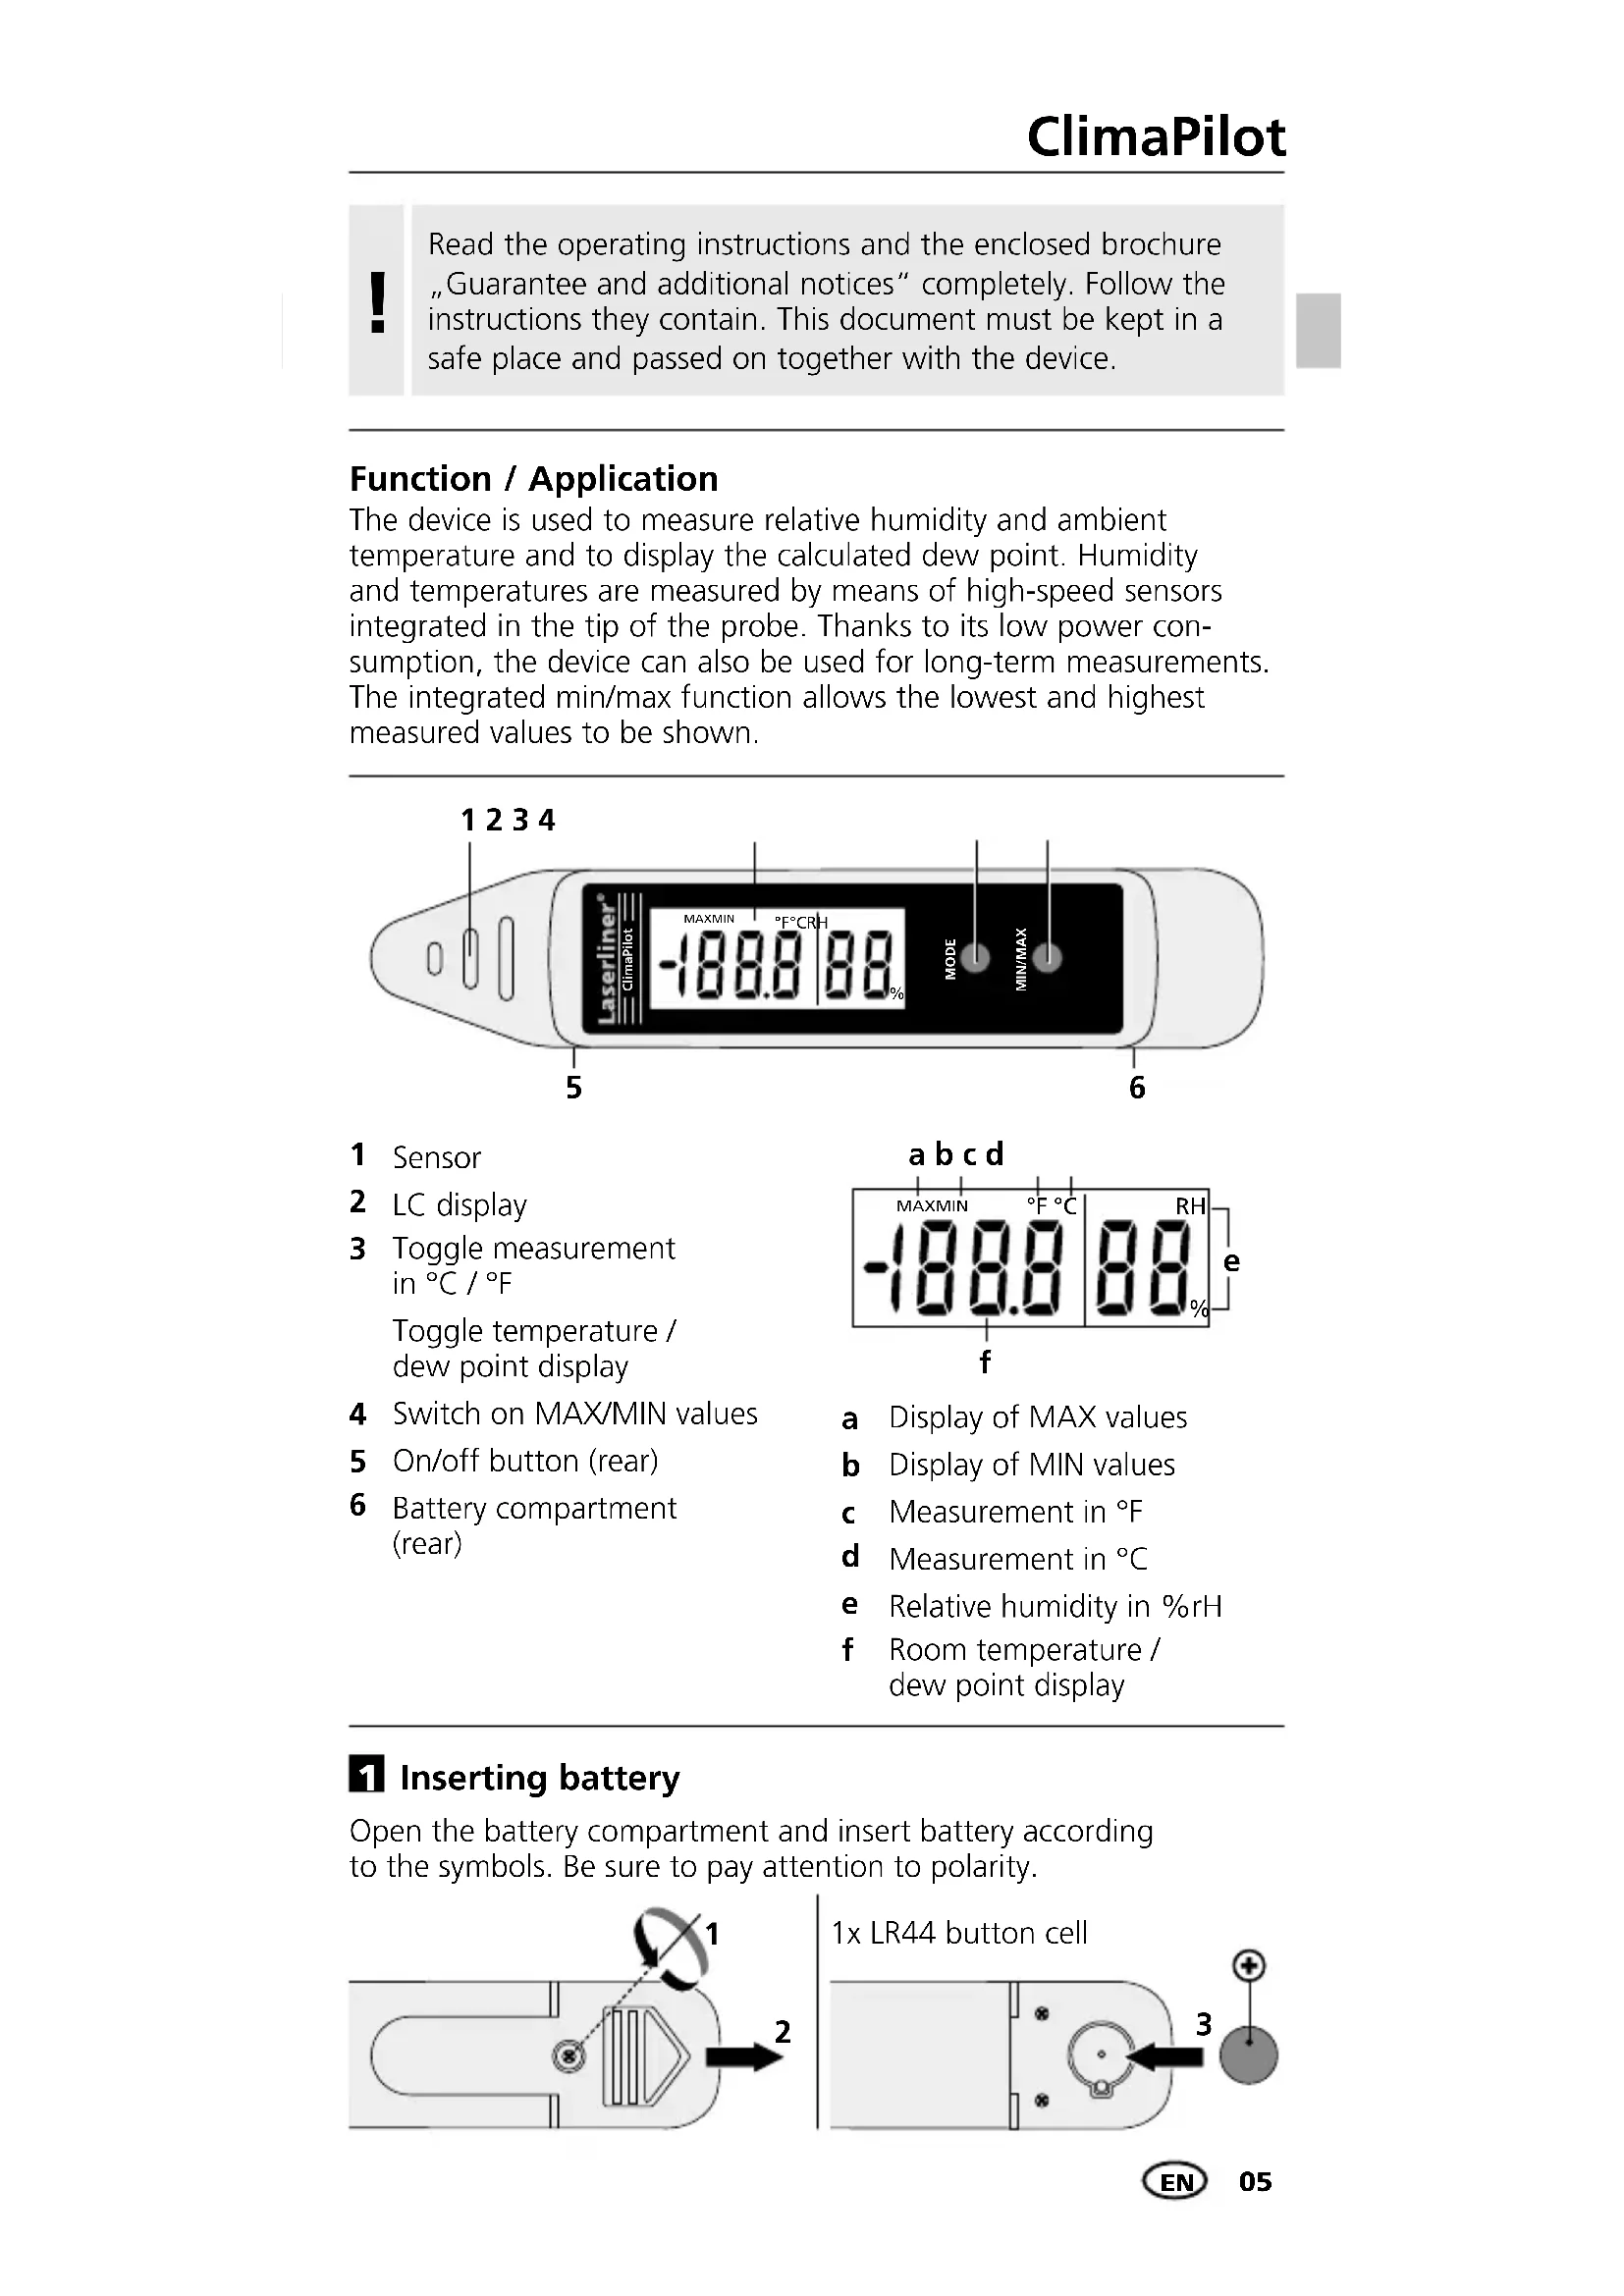
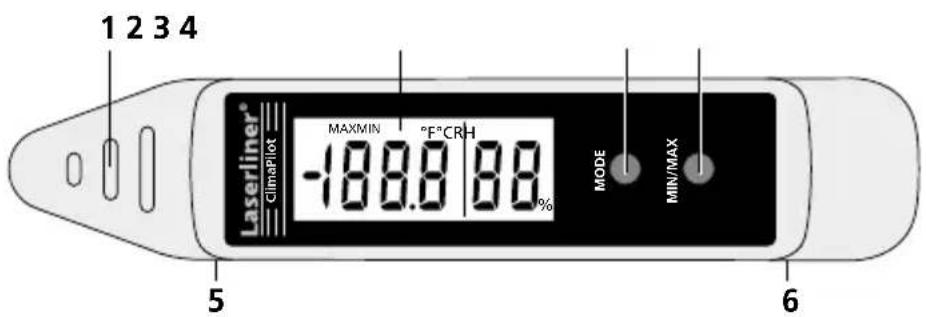
| Power Supply | 1 LR44 button cell (included) |
| Temperature measurement range | -10 °C to 50 °C (±1 °C) |
| Relative Humidity measurement range | 20 % rH to 90 % rH (±5 % rH between 25 % and 85 %) |
| Dew point measurement range | -28.6 °C to 47.9 °C (±2 °C) |
| Operating temperature | -10 °C to 50 °C |
| Storage temperature | -10 °C to 60 °C |
| Main functions | Measurement of relative humidity, ambient temperature, dew point calculation, MIN/MAX function, °C/°F switching |
| Display | LCD screen with MAX, MIN, °C, °F, % RH and dew point indicators |
| Care and cleaning | Clean with a slightly damp cloth; avoid shocks and direct contact with liquids |
| Safety and standards | Compliant with EU regulations; disposal according to WEEE directive |
| Repairability and spare parts | Replacement LR44 battery available; built-in sensor not replaceable by user; contact Laserliner customer service for repairs |
Frequently Asked Questions - ClimaPilot Laserliner
User questions about ClimaPilot Laserliner
0 question about this device. Answer the ones you know or ask your own.
Ask a new question about this device
Download the instructions for your Measuring equipment in PDF format for free! Find your manual ClimaPilot - Laserliner and take your electronic device back in hand. On this page are published all the documents necessary for the use of your device. ClimaPilot by Laserliner.
USER MANUAL ClimaPilot Laserliner
text_image
Technical diagram showing a mechanical component with labeled parts and directional arrows1x LR44 Knopfzelle
natural_image
Pure diagram of a mechanical component with no text, numbers, or symbols visible2 ON / OFF
natural_image
Simple diagram of a device with a button and arrow, no text or symbols present
Read the operating instructions and the enclosed brochure „Guarantee and additional notices“ completely. Follow the instructions they contain. This document must be kept in a safe place and passed on together with the device.
Function / Application
The device is used to measure relative humidity and ambient temperature and to display the calculated dew point. Humidity and temperatures are measured by means of high-speed sensors integrated in the tip of the probe. Thanks to its low power consumption, the device can also be used for long-term measurements. The integrated min/max function allows the lowest and highest measured values to be shown.
text_image
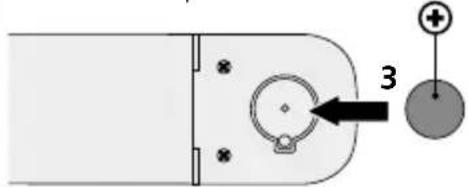
1 2 3 4 Laserliner® ClimaPlot MAXMIN °F°C RH -188.0 88% MODE MIN/MAX 5 61 Sensor
2 LC display
3 Toggle measurement in °C / °F
Toggle temperature / dew point display
4 Switch on MAX/MIN values
5 On/off button (rear)
6 Battery compartment (rear)

text_image
a b c d MAXMIN °F °C RH -188.8 88 f % ea Display of MAX values
b Display of MIN values
c Measurement in °F
d Measurement in °C
e Relative humidity in %rH
f Room temperature / dew point display
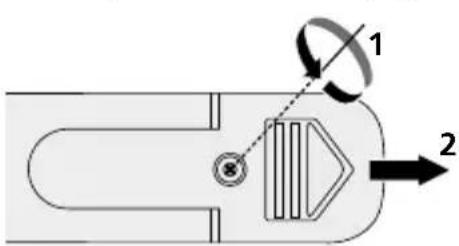
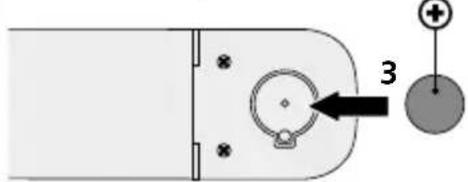
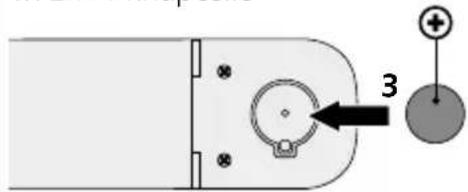
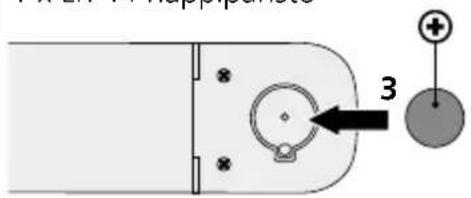
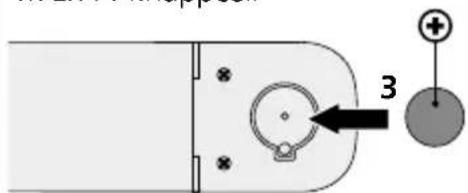
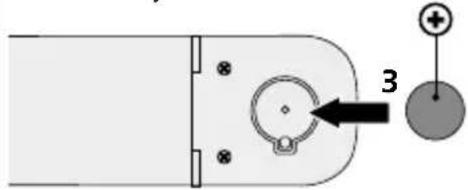
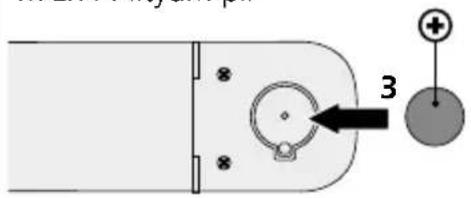
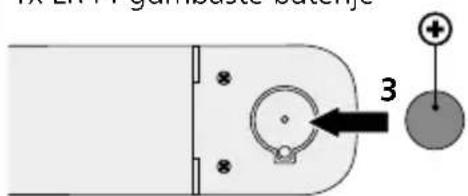
1 Inserting battery
Open the battery compartment and insert battery according to the symbols. Be sure to pay attention to polarity.
text_image
Technical diagram showing a mechanical component with labeled parts and directional arrows1x LR44 button cell

natural_image
Pure diagram of a mechanical component with no text, numbers, or symbols visibleLaserliner®
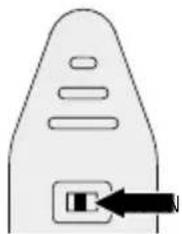
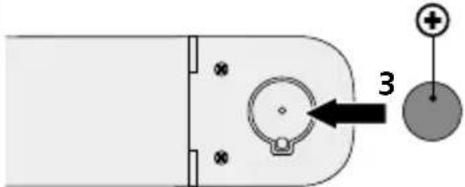
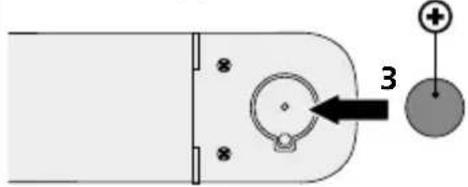
2 ON / OFF
To turn on, set the switch (5) to ON. The device displays the ambient temperature and relative humidity.
natural_image
Simple line drawing of a device with a button and arrow pointing to it (no text or symbols)
When switching to a measuring location with significantly different temperature and humidity levels, allow the device time to adapt!

For measurements outside of the measuring range, the device displays „HI“ or „LO“.
3 Dew point display
By briefly pressing the „MODE“ button, the measured dew point is displayed.
4 MAX / MIN
To determine the maximum or minimum measured values during a measurement, press and hold the „MAX / MIN“ button until either „MAX“ or „MIN“ appear on the display. The normal measuring mode is set when no function flashes on the display.

Switching off the device deletes the min/max values.
5 °C / °F
To set the desired temperature unit, press and hold the „MODE” button for 2 seconds until the corresponding symbol appears on the display.
Notes
- This product is a precision instrument which must be handled with care. Avoid impact and vibration as well as exposure to extreme heat or cold.
- Avoid direct contact with liquids.
- Clean with a soft, damp cloth.
Technical data
| Ambient temperatureMeasuring range / Precision | -10 °C ... 50 °C / ± 1 °C |
| Relative humidityMeasuring range / Precision | 20%rH ... 90%rH /± 5%rH (25%rH ... 85%rH) |
| Dew point temperatureMeasuring range / Precision | -28,6 °C ... 47,9 °C / ± 2 °C |
| Operating temperature -10 °C ... 50 °C | |
| Storage temperature | -10 °C ... 60 °C |
| Power supply 1x LR44 button cell | |
| Dimensions (W x H x D) 138 x 27 x 19 mm | |
| Weight (incl. battery) | 38 g |
Subject to technical changes without notice. 11.16
EU directives and disposal
This device complies with all necessary standards for the free movement of goods within the EU.
This product is an electric device and must be collected separately for disposal according to the European Directive on waste electrical and electronic equipment.
Further safety and supplementary notices at:
www.laserliner.com/info

Laserliner®
!
text_image
Technical diagram showing a mechanical component with labeled parts and directional arrows1x LR44 knoopcel
natural_image
Pure diagram of a mechanical component with no text, numbers, or symbols visible2 ON / OFF
natural_image
Simple diagram of a device with a button labeled 'T' and an arrow pointing to it (no text or symbols present)
text_image
Technical diagram showing a mechanical component with labeled parts and directional arrows1x LR44 knapcelle
natural_image
Pure diagram of a mechanical component with no text, numbers, or symbols visibleLaserliner®
2 ON / OFF
natural_image
Simple diagram of a device with a black arrow pointing to a button (no text or symbols)
text_image
Technical diagram showing a mechanical component with labeled parts and directional arrows1 x pile ronde LR44

natural_image
Pure diagram of a mechanical component with no text, numbers, or symbols visible2 ON / OFF
natural_image
Simple diagram of a device with a button labeled 'T' and an arrow pointing to it (no text or symbols present)
text_image
Technical diagram showing a mechanical component with labeled parts 1 and 2, including a circular motion indicator.natural_image
Pure diagram of a mechanical component with no text, numbers, or symbols visibleLaserliner®
2 ON / OFF
natural_image
Simple diagram of a device with a button and arrow, no text or symbols present
natural_image
Simple diagram of a device with a button labeled 'T' and an arrow pointing to it (no text or symbols present)!
text_image
Technical diagram showing a mechanical component with labeled parts and directional arrowsnatural_image
Pure diagram of a mechanical component with no text, numbers, or symbols visibleLaserliner®
2 ON / OFF
natural_image
Simple line drawing of a device with a button and arrow pointing to it (no text or symbols)
text_image
Technical diagram showing a mechanical component with labeled parts and directional arrows1 x LR 44 nappiparisto
text_image
32 ON / OFF
natural_image
Simple diagram of a device with a button labeled 'T' and an arrow pointing to it (no text or symbols present)
text_image
Technical diagram showing a mechanical component with labeled parts 1 and 2, including a circular motion indicator.natural_image
Pure diagram of a mechanical component with no text, numbers, or symbols visibleLaserliner®
2 ON / OFF
natural_image
Simple diagram of a device with a button and arrow pointing to it (no text or symbols)
text_image
Technical diagram showing a mechanical component with labeled parts and directional arrows1x LR44 knappcell
text_image
Diagram showing a device with labeled components and a numbered arrow pointing to a circular component with plus and minus signs.2 ON / OFF
natural_image
Simple diagram of a device with a button labeled 'T' and an arrow pointing to it (no text or symbols present)
text_image
Technical diagram showing a mechanical component with labeled parts and directional arrows1x LR44 myntcelle
natural_image
Pure electrical circuit lines without any symbolsLaserliner®
2 ON / OFF
natural_image
Simple diagram of a device with a button and arrow pointing to it (no text or symbols)
text_image
Technical diagram showing a mechanical component with labeled parts and directional arrows1x LR44 lityum pil
text_image
32 ON / OFF
natural_image
Simple diagram of a device with a button labeled 'T' and an arrow pointing to it (no text or symbols present)text_image
Technical diagram showing a mechanical component with labeled parts and directional arrows
natural_image
Simple line drawing of a device with a button and arrow, no text or symbols present
text_image
Technical diagram showing a mechanical component with labeled parts and directional arrowsnatural_image
Pure mechanical component diagram without any text, numbers, or symbols2 ON / OFF
natural_image
Simple diagram of a device with a button labeled 'T' and an arrow pointing to it (no text or symbols present)text_image
Technical diagram showing a mechanical component with labeled parts and directional arrows1x LR44 knoflíková baterie
natural_image
Pure diagram of a mechanical component with no text, numbers, or symbols visibleLaserliner®
2 ON / OFF
natural_image
Simple line drawing of a device with a button and arrow pointing to it (no text or symbols)text_image
Technical diagram showing a mechanical component with labeled parts and directional arrows1x LR44 nööppatarei
natural_image
Pure mechanical component diagram without any text, numbers, or symbols2 ON / OFF
natural_image
Simple diagram of a device with a button labeled 'T' and an arrow pointing to it (no text or symbols present)
natural_image
Simple line drawing of a device with a button and arrow pointing to it (no text or symbols)text_image
Technical diagram showing a mechanical component with labeled parts and directional arrows1x LR44 maža baterija

natural_image
Pure diagram of a mechanical component with no text, numbers, or symbols visible2 ON / OFF
natural_image
Simple diagram of a device with a button labeled 'T' and an arrow pointing to it (no text or symbols present)text_image
Technical diagram showing a mechanical component with labeled parts and directional arrowsnatural_image
Pure diagram of a mechanical component with no text, numbers, or symbols visibleLaserliner®
2 ON / OFF
natural_image
Simple line drawing of a door with a button and arrow pointing to the right side (no text or symbols)
text_image
Diagram showing a mechanical or electrical component with labeled parts and directional arrows, including numbered annotations 1 and 2.text_image
Diagram showing a device with labeled components and a numbered arrow pointing to a circular component with plus and minus signs.2 ON / OFF
natural_image
Simple diagram of a device with a button labeled 'T' and an arrow pointing to it (no text or symbols present)
text_image
Technical diagram showing a mechanical component with labeled parts and directional arrowsnatural_image
Pure diagram of a mechanical component with no text, numbers, or symbols visibleLaserliner®
2 ON / OFF
natural_image
Simple diagram of a device with a button and arrow, no text or symbols present
text_image
Technical diagram showing a mechanical component with labeled parts and directional arrows1x LR44 gumbaste baterije
text_image
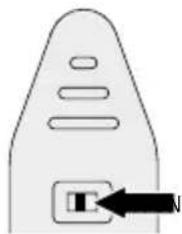
32 VKLOP / IZKLOP
Za vklop pritisnite stikalo (5) na položaj za vklop (ON). Naprava bo prikazala okoljsko temperaturo in relativno zračno vlago.
natural_image
Simple diagram of a device with a button labeled 'T' and an arrow pointing to it (no text or symbols present)text_image
Technical diagram showing a mechanical component with labeled parts and directional arrows1x LR44 gombelem

natural_image
Pure diagram of a mechanical component with no text, numbers, or symbols visibleLaserliner®
2 BE / KI
natural_image
Simple diagram of a device with a button and arrow, no text or symbols present!
text_image
Technical diagram showing a mechanical or electrical component with labeled parts and directional arrows1x LR44 gombíková batéria