
MSM1039 - Saw Ferm - Free user manual and instructions
Find the device manual for free MSM1039 Ferm in PDF.

| Brand | Ferm |
| Model | MSM1039 |
| Product type | Radial miter saw |
| Supply voltage | 220-240 V ~ 50 Hz |
| Power | 1500 W |
| No-load speed | 4500 rpm |
| Blade diameter | 210 mm |
| Blade bore | 30 mm |
| Blade thickness | 2.8 mm |
| Cutting capacity (miter 0°, bevel 0°) | 70 x 305 mm |
| Cutting capacity (miter 45°, bevel 0°) | 70 x 210 mm |
| Cutting capacity (miter 0°, bevel 45°) | 35 x 305 mm |
| Cutting capacity (miter 45°, bevel 45°) | 35 x 210 mm |
| Miter angle | -45° to +45° |
| Bevel angle | 0° to 45° (left) |
| Weight | 12 kg |
| Sound pressure level (Lpa) | 93.6 dB(A) |
| Sound power level (Lwa) | 106.6 dB(A) |
| Protection class | II (double insulation) |
| Laser | Yes, class 2 according to EN 60825-1 |
| Sliding function | Yes |
| Dust bag | Included |
| Maintenance | Cleaning of slides, replacement of brushes |
| Safety | Protection guard, blade lock, locking pin |
Frequently Asked Questions - MSM1039 Ferm
User questions about MSM1039 Ferm
0 question about this device. Answer the ones you know or ask your own.
Ask a new question about this device
Download the instructions for your Saw in PDF format for free! Find your manual MSM1039 - Ferm and take your electronic device back in hand. On this page are published all the documents necessary for the use of your device. MSM1039 by Ferm.
USER MANUAL MSM1039 Ferm
Thank you for buying this Ferm product.
By doing so you now have an excellent product, delivered by one of Europe's leading suppliers. All products delivered to you by Ferm are manufactured according to the highest standards of performance and safety. As part of our philosophy we also provide an excellent customer service, backed by our comprehensive warranty. We hope you will enjoy using this product for many years to come.
The numbers in the following text refer to the pictures on page 2-3

Read the operating instructions carefully before using this device. Familiarise yourself with its functions and basic operation. Service the device as per the instructions to ensure that it always functions properly. The operating instructions and the accompanying documentation must be kept in the vicinity of the device.
Intended use
The electro tool is intended as a stationary machine for making straight lengthways and crossways cuts in wood. Horizontal metre angles of -45^ to +45^ as well as vertical bevel angles of -45^ are possible.

This saw is intended for sawing wood only. Do not use the saw to cut materials other than wood.
1. MACHINE INFORMATION
Technical specifications
Mains voltage 220-240V\~,50Hz
Capacity 1500 W
Machine class II (double insulated)
No load speed 4.500/min
Saw blade measurement 210x30x2.8mm
Angle for mitring 45^ (left and right)
Angle for bevelling 45^ (left only)
Mitre saw maximum sawing capacity:
Mitre 0^ ,Bevel 0^ 70x305mm
Mitre 0^ , Bevel 45^ 35x305mm
Lpa (sound pressure) 93.6+3 dB(A)
Lwa (acoustic capacity) 106.6+3 dB(A)
Vibration level
The vibration emission level stated in this instruction manual has been measured in accordance with a standardised test given in EN62841-1; it may be used to compare one tool with another and as a preliminary assessment of exposure to vibration when using the tool for the applications mentioned.
using the tool for different applications, or with different or poorly maintained accessories, may significantly increase the exposure level
- the times when the tool is switched off or when it is running but not actually doing the job, may significantly reduce the exposure level
Protect yourself against the effects of vibration by maintaining the tool and its accessories, keeping your hands warm, and organizing your work patterns.
Features
Figs. 1, 2, 3, 4 and 5
- On/off switch
- On/off switch for laser
- Lock-off button
- Carbon brush cover
- Lock-pin
- Blade protective cover
- Workpiece clamp
- Guide fence
- Knob adjusting saw angle
- Locking knob
- Locking paddle
- Knob over sliding support
- Connection dust bag
- Bevel angle
- Cover
- Saw blade bolt
- Flange
- Screw
- Screw retraction arm
- Extension pieces (left and right)
- Lock-button saw blade
- Angle indicator
2. SAFETY INSTRUCTIONS
By using electric tools basic safety precautions should always be followed to reduce the risk of fire. Electrical shock and personal injury.
Always read the specific product instruction manual and the safety instructions before attempting to operate the power tool and store these instructions.
Install of a stationary machine.
Fig. 6
This machine is a stationary machine and for safety reasons must always be firmly installed and not used for mobile applications.
You can install the machine in two ways:
a) As a stationary machine on a workbench. In case the machine must be secured to the workbench with 4 bolts
b) As a stationary machine on a sub frame. In this case the machine must be secured to the sub frame with 4 bolts and the sub frame anchored with 4 bolts to the floor plate with dimensions of at least 1 square meter
Symbols
The following symbols are important for the operations of your power tool. The correct interpretations of the symbols helps you operate the power tool more save

Denotes risk of personal injury, loss of life or damage to the tool in case of nonobservance of the instruction in this manual

Caution, risk of electric shock
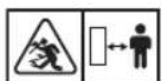
Keep bystanders away

Wear eye protection

Wear ear protectors. Exposure to noise can cause hearing loss.

Wear a dust mask

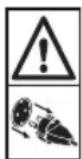
Danger Area! Keep hands far away (10cm) from the cutting area while the machine is running. Danger of injury when coming in conatct with the saw blade

Do not direct the laser beam at persons or animals and do not stare into the laser beam yourself, not even from a distance. This power tool produced laser class 2 laser radiation according to EN 60825-1. This lead can lead to person being blinded

Disc dimensions. Observe the dimensions of the saw blade. The hole diameter must match the tool spindle without play. *Use only a fill ring which is specified by supplier, filling ring may not have any play

Transport the machine only when the machine is in inward transport position
1. Work area safety
a) Keep work area clean and well lit. Cluttered or dark areas invite accidents
b) Do not operate power tools in explosive atmospheres, such as in the presence of flammable liquids, gases or dust. Power tools create sparks which may ignite the dust or fumes
c) Keep children and bystanders far away while operation a power tool. Distractions can cause you to lose control, or material can shut away
d) Never leave the machine unattended without first disconnecting it from the mains voltage.
2.Personalsafety
a) If you are not familiar with using such machine. You would be better to be informed first by a professional, an instructor or by a technician
b) Store idle power tools out of the reach of children. Power tools are dangerous in the hands of untrained users
c) Keep power tools dry, clean and free from oil and grease. Properly maintained power tools are safer and easier to control. Grease oil handles are slippery causing loss of control
d) Make sure you always have a clean and tidy working environment. You could slip or trip
e) Stay alert, watch what you are doing and use common sense when operating a power tool
f) Do not overreach. Keep proper footing and balanced at all the time. This enables better control of the power tool in unexpected situations
g) Do not work with a machine while you under the influence of alcohol, drugs or medication. Inattention while operating power tools may result in very dangerous injury
h) Use always protective equipment. Always wear eye protection, dust mask, hearing protectors and safety shoes. By service on machine or raw materials use gloves. Keep your hair back. Reduce changes on personal injury
i) Be careful when sawing double miter joints. Saw blade, Work piece and your hands must be always visible during sawing
j) Never saw more than one piece of work at the same time
k) Make sure that the piece of work not have any nails/ staples or other foreign objects in it
I) Never process metal or stone with this machine m) Do not work with material containing asbestos
3. Power tool safety
The first time that the machine is used and then every subsequent time that it is used:
Before carrying out any work on the machine, disconnect the mains plug from the power supply.
General: Check the entire saw machine. If any part of the machine is missing, bent, damaged or is dysfunctional in any other way, or if any mechanical and/or electrical faults occur or are visible, or if the machine makes any extremely loud noises, refer to the user manual.
If any defects are detected on the machine, they must all be rectified before the machine is used. Only original parts should be used!
If you have any outstanding concerns which could affect your own safety or the safety of the machine, please consult the machine supplier.
Electrical
a) Always use an Original power plug which matches the outlet, do not use an adapter plug with earthed (grounded) power tools. Unmodified plugs and matching outlets will reduce risk of electrical shock
b) Do not use the machine with a damaged power cable. Do not touch the damaged cable and pull the mains plug when the cable is damaged while working. Damaged cables increase the risk of an electrical shock
c) Check the cable regularly and have a damaged cable repaired. Replacing cables or plugs. Immediately throw away old cables or plugs when they have been replaced by new ones. It is dangerous to insert the plug of a loose cable in the wall outlet. Use original power cord and plugs, repairing only through an authorized person, this will ensure that the safety of the power tool is maintained!
d) To prevent electrical shocks. When plugging the plug into the socket the metal pins must not be touched in any way whatsoever
e) Do not expose power tools to rain or wet conditions. Water entering a power tool will increase the risk of electrical shock
f) Never use the cord to pull the plug out of the socket. Keep the cord and plug away from oil, heat and sharp objects
g) When operating a power tool outdoors, use an extension cord suitable for outdoor use. Use a cord for outdoor use reduces the risk of electric shock
h) When machine is equipped with laser. Do not direct the laser beam at persons or animals and do not stare into the laser beam yourself. Not even in distance. Laser must be according to EN 60825-1 Class 2.
i) Repairs of a laser may only be carried out by the laser manufacture or a specialist
j) If operating a power tool in a damp location is unavoidable, use a residual current device (RCD) protected supply. Use of an RCD reduces the risk of electric shock
Mechanical
a) Before you start the machine, check if the saw blade is allowed to rotate freely. Check in every different position of the saw machine if the saw blade revolves freely, if the saw blade touches anything the machine must be adjusted or repaired.
b) Do not use the power tool if the switch does not turn on and off. A power tool that cannot be controlled with the switch is dangerous and must be repaired.
c) Always use saw blades with the correct size and shape. Use saw blades recommended by the manufacture (EN-847-1). Saw blades that do not match the mounting hardware of the saw will run eccentrically, causing loss of control.
d) Never use too small or too big saw blades. This is very dangerous
e) Never remove marking on saw blade. Technical information must always visible to make the right choices by exchanging the saw blade
f) Secure the work piece. Always clamp work piece with clamping devices, this is much safer than by hand
g) Never leave the machine before the complete stopped
h) Do not use High speed steel saw blades (HSS). Saw blade can easily break
i) Do never use dull, cracked, bent or damaged saw blades. Before use pull the mains plug and check the saw blade. Damaged or unsharpened saw blades produce narrow kerf, excessive friction, blade binding and kickback. Exchange damaged saw blades immediately, always use original flenses, nut and/or bolts.
j) Remove any adjusting key or wrench before turning the power tool. A wrench or a key left attached to a rotating part of the power tool may result in a personal injury and very dangerous situation
k) The arrow marked on the saw blade, which indicates the direction of rotation. Must point in the same direction as the arrow marked on the machine, the saw blade teeth must point downwards on the front of the saw
1) Do not touch the saw blade after work before it has cooled. The saw blade becomes very hot while working
m) Protect the saw blade from strikes and shocks. Do not apply side pressure to the saw blade
n) Do not force the power tool. Use the correct power tool for your application. The correct power tool will do the job better and safer at the rate which it was signed
o) Never stand on the power tool. Serious injury can occur when the power tool tips over. Always use extra support for more stability of the machine
p) Machine is provided with devices for the connection of dust extraction, ensure these
are connected and properly used. Dust collection reduce dust-related hazard's
q) Maintain the air outlets at the machine. Dust must be removed.
r) Make sure that the guard operates properly and that it can move freely. Never lock the guard in place when opened
s) Never remove cutting remainders from the sawing area while the machine is running. Always guide the tool arm back to the neutral position first and then switch the machine off
t) Guide the saw blade against the work piece only when the machine is switched on. Otherwise there is a risk of a kickback, when the saw blade becomes wedged in the work piece
u) If the saw blade should become jammed. Switch the machine off and hold the work piece until the saw blade comes to a complete stop
v) To prevent a kick back. The work piece may not be moved until after the machine has complete stopped. Correct the cause for the jamming of the saw blade before restarting the machine
w) When sawing profile sections, round pieces or other pieces, always press the piece of work against the stop and can't move, so it cannot till or turn or move while sawing.
x) Never use the machine to saw pieces of work that are to small that they cannot be secured safely. Small pieces of wood or other objects that come in contact with the rotating saw blade can strike the operator or out standers with high speed
y) When sawing always use the additional supports
z) For sawing of large piece work that not supported. Use extra supports
aa) Never make warning signs on the machine unrecognizable. Technical information or machine type information must be always visible on machine.
At the end of the sawing process, keep the saw head downstairs, switch off the machine and wait until the all moving parts has come to a stop before you take your hands off the machine.
3. ASSEMBLY AND ACCESSORIES
Installation of the litre saw
-
Place one sidebar (21) on the right-hand side of the machine and the other sidebar on the left-hand side of the machine.
-
Place the work piece clamp (7) on the left or right side of the machine.
- Hold the handgrip and move the saw slightly downwards and then pull the pin (5) out slightly so that saw moves upwards.
Note: Never use the litre saw without the extension pieces supplied. Make sure that they are correctly mounted.
Sliding fence
Fig.2
For safety reasons, this machine is equipped with a moveable guide fence to used in normal and bevel cutting.
- For normal straight cross-cuts and metre cuts, always adjust the sliding fence (8) to the end and fix well to provide safety support for work piece.
- For bevel cuts, adjust the sliding fence (8) to a suitable position as close as to the saw blade surface but avoid interfere the saw blade movement and ensure to fix well.
Changing the saw blades
Fig. 4 and 5

Only use saw blades that are sharp and undamaged. You must immediately replace chipped or bent saw blades.
DANGER: Do not use any blade larger than the stated capacity of the saw. It may come into contact with the blade guard and cause harm.
Do not use a blade too thick to allow the outer blade washer to engage with the flats on the spindle. This will prevent the blade screw from securing the blade on the spindle.
Do not use this saw to cut metal or masonry.
- Disconnect the machine from the power supply.
- Remove the screw (20) that holds the retraction arm to the blade cover.
- Remove the screw (19) in order to remove the bolt-cover by lifting the blade cover (6) upwards.
- Both saw blade bolt (17) and Flange (18) should be visible now like shown in fig. 5.
- Press the saw blade lock button (22) Rotate the saw blade carefully by hand until the blade locks.
- Use hex key to remove the saw blade bolt (17) by loosening in a clockwise direction.
-
Remove the Flange (18) and the saw blade
-
Replace the saw blade making sure that the arrow marked on the saw blade must point in the same direction as the arrow shown marked on the machine. The saw blade teeth must point downwards.
Fix the saw blade bolt (17) use the saw blade lock button (22) in order to secure tightly - Lower the blade cover (6) in order for the boltcover to fall back into place and tighten the screw (19)
- Attach the retraction arm back onto the blade cover (6) by tightening the screw (20)
- Rotate the saw blade and check if the guard operates freely
Adjusting the cutting angle
Fig. 1-2.
Adjusting Mitre Angles
The litre angle can be set between 45^ left side and 45^ right side
- Loosen the locking knob (10)
- Press the locking paddle (11) and turn the saw table left or right by the locking knob (10) until the angle indicator (23) indicates the required angle.
- Release the locking paddle (11) and tighten the locking knob (10)
Pre-settings (quick settings) on the following degrees: -45^ , -30^ , -22.5^ , -15^ , 0^ , 15^ , 22.5^ , 30^ , 45^ .
- Press the locking paddle (11) when turning the baseplate, release the paddle before reaching the requested degrees and the plate with "click" into the pre-setting itself.
Adjusting Bevel Angles
Fig. 1 and 3
The bevel angle can be set between 0^ and 45^ .
Loosen the adjusting knob (9)
- Tilt the saw by using the handle until the angle indicator (14) indicates the required angle.
- Tighten the adjusting knob (9)
Changing the carbon brushes
Fig. 2
- Disconnect the machine from the power supply
- Unscrew the cover (4).
- Replace the carbon brushes with the exact type of brushes
- Tighten the cover (4) again.
Note: Always replace both carbon brushes at the same time, never use a mixture of old and new brushes.
Mounting the dust bag
Fig. 1
Press in the clamp of the dust bag (13) and slide it onto the opening on the back of the machine. The dust bag stays in place when you release the clamp.
4. OPERATION
Using the litre saw
Fig. 1

Before use, always check for faults or defects!
- Set the desired sawing angle of the machine.
- Put the plug into the socket.
Fix the piece of work in place using the clamp (7): make sure that the material is well clamped in place! - Hold the material tightly on the left side while making sure that you keep a safe distance from the blade of the saw.
- To start the machine, press and hold the Lock-off button (3) and press the on/off switch (1).
- Make sure that the saw blade has reached full speed before allowing it to touch the piece of work to be sawn.
- Now bring the saw slowly downwards so that the saw blade saws through the piece of work and passes through the slot in the table. Do not put any pressure on the saw. Give the machine time to saw through the piece of work.
- Bring the machine gently up again and switch it off by letting go of the switch (1).
Using the slide-function
Fig. 1

The machine must be firmly bolted to a workbench.
Use the slide-function for sawing wide workpieces:
Fix the piece of work in place using the clamp
Loosen the knob (12)
- Slide the machine completely towards yourself
- Turn on the machine using the switch
- Bring the saw slowly downwards so the saw blade saws through the piece of work
- Push the machine slowly backwards
- Bring the machine gently up again and switch it off by letting go of the switch
Using the laser
Fig. 2
- To switch on the laser, press the on/off switch 2.
- To switch off the laser, release the on/off switch 2.
Transport position
When moving the saw, make sure the saw is in inward position. Check that all locks and tensioning devices are secure:
Make sure the mitre angle is set to 0^
- Make sure the bevel angle is set to 0^
- Lock the Knob adjusting saw angle (9) by turning it clockwise
- Slide the machine completely towards yourself
- Lock the sliding function by turning Kob over sliding support (12) clockwise
- Unlock the Lock pin (5) on the right hand side of the machine
- Push the machine completely downwards
- Lock the Lock pin (5) on the right hand side of the machine
Only lift the machine by the solid underside of the machine. Do not lift the saw by the switch handle.
5. SERVICE AND MAINTENANCE

Always make sure that the machine is not connected to the mains electricity when you carry out any maintenance of the mechanism.
Slide rails
-
Dirt can damage the slide rails and thereupon the operating of the machine.
-
Clean the slide rails regularly with a soft cloth.
- Drip some lubricating oil on the slide rails
- Move the litre saw forwards and backwards so the oil spreads over the complete rails
These machines are designed to function for a long time without any problems with a minimum
of maintenance. By cleaning the machine regularly and using it in the correct way you can contribute to a long life of your machine.
Cleaning
Clean the machine housing regularly with a soft cloth, preferably after each time you use the machine. Make sure that the ventilation slots are free of dust and dirt. For stubborn dirt use a soft cloth dampened with soapy water. Never use solvents such as benzene, alcohol, ammonia, etc. These types of solvents can damage the plastic parts.
Problem solving
1. The motor does not start
- The plug is not in the socket
- The power cord is broken
- The switch is defective. Take the machine to your dealer for repair.
2. The saw cut is not even (jagged)
- The saw blade must be sharpened
- The saw blade is mounted back to front
- The saw blade is clogged with resin or sawdust
- The saw blade is not suitable for the piece of work being used
3. The height and/or litre lever is obstructed
- Chips and/or dust must be removed
4. The motor has difficulty in reaching full speed
- The extension cord is too thin and/or too long
The mains voltage is less than 230V
5. The machine vibrates excessively
- The saw blade is damaged
6. The machine becomes excessively hot
- The ventilation slots are blocked. Clean them out with a dry cloth.
7. The electromotor runs unevenly
- The carbon brushes are worn out. Replace the carbon brushes or consult your dealer.
Lubrication
The machine does not need any extra lubrication.
Faults
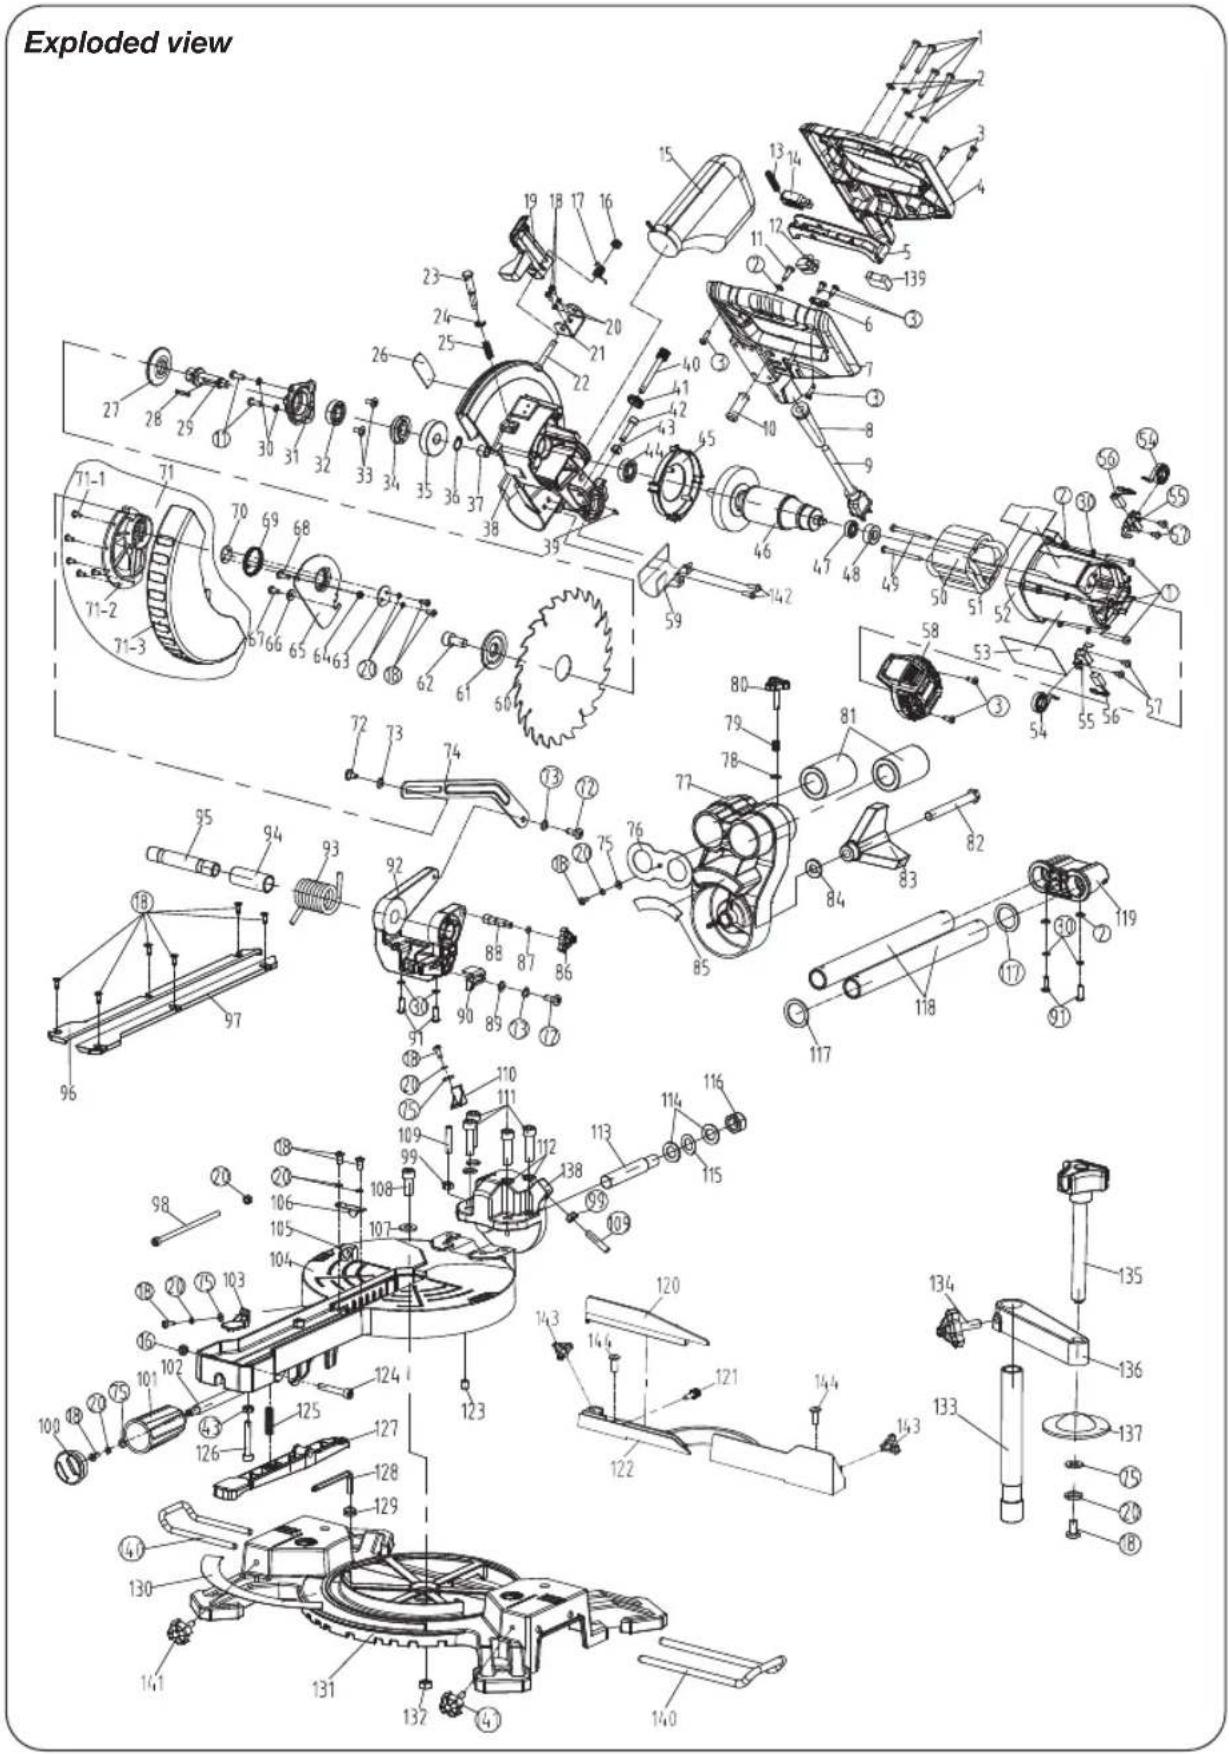
Should a fault occur, e.g. after wear of a part, please contact the service address on the warranty card. In the back of this manual you find an exploded view showing the parts that can be ordered.
ENVIRONMENT
To prevent damage during transport the machine is delivered in sturdy packaging. The packaging is made of recyclable material wherever possible, so make use of the possibility of recycling the packaging. When you replace a machine, take the old one to your local dealer. Here it will be dealt with in an environmentally friendly way.

Damaged and/or disposed of electrical or electronic devices must be dropped off at recycling stations intended for that purpose.
Only for EC countries
Do not dispose of power tools into domestic waste. According to the European Guideline 2012/19/EU for Waste Electrical and Electronic Equipment and its implementation into national right, power tools that are no longer usable must be collected separately and disposed of in an environmentally friendly way.
WARRANTY
Read the warranty conditions on the separately supplied warranty card.
The product and the user manual are subject to change. Specifications can be changed without further notice.
Gering 0^ Fas 45^ 35x305mm
Gering 45^ Fas 0^70× 210mm
Gering 45^ ,Fas 45^ 35× 210mm
Vikt 12 kg
Lpa (bullemiva) 93.6+3 dB(A)
Lwa (bullereffekt) 106.6+3 dB(A)
Vibrationsnivå
Vymena pilovych kotouc
Obr. 4 a 5

2. IceyokOT He e paAMHomepeH (panaB)
-ПистOT мopa да ce haoctpn.
- NICTOT e NOCTaBeH OJ Ha3aД KOH HAppeI.
- JnctTo e HaJIeNeH co CMOJa NJIIn cTpyuKa.
JnCTOT He e HameHET 3a 06abOToYBaHOTo naphe.
3. PaKaTa 3a noIraHe n/IIIn 3a KocO ceYeBe Ima npeUKN
- OtnapoHTe n/nn npaunHaTa Mopa da ce otctpaHAT.
4. Motopot UMa nOteuKOTn Da oCTbapn noJHa 6p3nHa
- PpOdoJxHnOt Ka6e n e MHOr TeHOK n/nn DoJIr.
- HanoiT BOMpekata e noman od 230 V.
5. MaunHaTa npTepaHo Bn6pnpa
JNCTOT eOwTeTeH.
6. Maunhata cTaHyBa npetepaHO tonna
- OТьорптЕ 3a BeHTnIaциja ce 6лokиран. ИсчicTeгсоувкрпа.
7. EJektpomotop pa60tn hepamhomepHo
JaIeHnTe YeTknUKN Ce NcTpoUSeHn.3aMeHete n jaIeHnTe YeTknUKN nn KOHCyItnpajTe ce npOdaBaHT.
IpaKbAbe
MaunHaTa He Tpe6a DOnoJHnTeJHo Da ce noMaayyBa.
OTka3N
Ako ce cnyu OTka3, Hnp. nopadn TpoWeHe Ha den, o6paTeCe Ha aDpecaTa Ha cepBncOT od rapaHTHaTakapTuKa.
Ha no3aHnHaTa Ha yNaTCTBOBo Ke HajTe ekCNo3nCuHOHe npeIe Co npKacKaHn DeIOBn KOm MoKat Da ce HapayaaT.
OKOJIINHA
Ja ce cnpeyu OwTeYBaHbe npu TpaHCnOpT, MaunHaTa ce nCnpaCyBa BO uBpCTo naKyBaHe. Konky To e MOxHO naKyBaHTo e HAnpaBeHo od peuknpanuHa MATEpnjaN, 3aToa npeB3emTe YeKOp 3a peuknpanaHe Ha naKyBaHTo. Kora Ke ja MeHyBaTe MaunHaTa, CTapa Ta oDHeceTe ja Kaj NOKaHnOt npoDaAch. Tamy Ke 6nde ekOnoShk DeNoHnpaHa.

Owmemenu u/unnu uckopucmehu ekempuHu u ekempoHcu ypeDu mopa da ce denohupaam 80 cmaHcu 3a peuknupahe.
Cama 3a 3emjnoEY
He ng dnoHnpajte anatne Bo doMaJhen OTnad. CnopeE BpOncKOTo YnataCTBO 2012/19/EU 3a OTnadHa eNekTpnuHa n eNekTPOHcKa Onpema H erOBaTa NMJIeMeHTaunja BO HaUNOHJHOT npabo, eNekTpnuHnTe aanTu KOn BeKe He ce yNoTpeBnBuM opaat Da ce coBpaat OndenHO n da ce otCTpaHyBaAT Ha ekONOWKn HauHn.
TAPAHUNJA
Ipoountajte rnapaHTnTe ycIOBn BO npINOxKeHaTa rapaTHa KapTuKa.
Ipon3BODOT ynaTcTBOTO ce npedMeT ha npomeHa. KapakTePncTKte MoKaT da ce npomeHaT 6e3 HataMoUHO N3BeCTyBaHe.
Spare parts list
MSM1039
| Article no. Description | Position no. | |
| 410722 Moveable Fence | 120 | |
| 410723 Switch 14 | ||
| 410724 Stator 50 | ||
| 410725 Rotor 46 | ||
| 410726 Fence base 122 | ||
| 410727 Dustbag 15 | ||
| 410728 Table insert 97 | ||
| 410729 Moveable guard | 71-3 | |
| 410730 Workpiece clamp | 133...137|75|20|18 | |
| 410731 Motor housing end cap 58 | ||
| 410732 Carbon brush set 56 | ||
| 410733 Carbon brush holder set (2pcs) 54|55 | ||
| 410734 Saw blade nut + flanges | 27|61|62 |
CE
DECLARATION OF CONFORMITY MSM1039 - RADIAL MITRE SAW
(EN) We declare under our sole responsibility that this product is in conformity with directive 2011/65/EU of the European parliament and of the council of 8 June on the restriction of the use of certain hazardous substances in electrical and electronic equipment is in conformity and accordance with the following standards and regulations:
(DE) Der Hersteller erklärt eigenervertontlich, dass这点 Produkt der Direktive 2011/65/EU des Europäischen Parlaments und des Rats vom 8. Juni 2011 über die Einschränkung der Anwendung von bestimmten gefährlichen Stoffen in elektrischen und elektronischen Geräten entspricht. den folgenden Standards und Vorschriften entspricht:
(NL) Wij verwklaren onder once volledige verantwoordelijkheid dat ditproduct voldoet aan de conform Richtlijn 2011/65/EU van het Europees Parlement en de Raad van 8 Juni 2011 betreffende beperking van het gebruik van bepaalde gevaarlijke stoffen in elektrische en elektronische apparatuur en in overeenstem ming is met de volgende standaarden en reguleringen:
(FR) Nous déclarons sous notre seule responsabilité que ce produit est conforme aux standards et directives suivants: est conforme à la Directive 2011/65/EU du Parlement Européen et du Conseil du 8 juin 2011 concernant la limitation d'usage de certaines substances dangereuses dans l'emploi électrique et électronique.
(ES) Declaramos bajo esta exclusiva responsabilidad que este producto cumple con las asignétes normas y estandares de configuracion: se enquirytra conforme con la Directiva 2011/65/UE del Parlamento Europeo y del Consejo de 8 de junio de 2011 sobre la restricción del uso de determinadas sustancias peligrosas en los equipos electricos y electrónicos.
(PT) Declaramos por esta total responsabiá- de que este produits está em conformidade e cumpre as normas e regulamento- que se seguem: está em conformidade com a Directa 2011/65/EU do Parlamento Europeu e com o Conselho de 8 de Junho de 2011 no que respeita a restricoe de utilização de determinadas substancias perigosas existentes em equipamento eletrico e电子rico.
(II) Dichiariamo, sulla la nostra responsabilità, che questo prodotto è conforme alle normativè e ai regolamenti segunti: è conforme alla Direttiva 2011/65/UE del Parliamento Europeo e del Consiglio dell'8 giugnlo 2011 sulla limitazione dell'uso di determinate sostanze pericolose nelle apperecchiatte elettriche ed elettroniche.
(SV) Vi garanterar pa eget ansvar attenna produit upppyllor och foljer fllande standarder och bestammelser: upppyller direktiv 2011/65/EU fran Europeiska parliamentet et OG-radet fran den 8 Juni 2011 om begransningen av anvandning av fariga substaner i elektrisk och elektronisk utrusting.
(FI) Vakuutamme yksinomaan omalla vastuallamme, etta tama tuote tayttta seuraavat standardit ja saadokset: tayttta Euroopan parliamentin ja neuvoston 8. kesakuuta 2011 paivatyn direktivin 2011/65/EU vaatumukset koskien vaarallisten aineiden kalyton rajaolusta sahko- ja elektronisissa laiteissa.
(NO) Vi erkräuter under vart eget ansvar at ditte produitet er i samsvar med falgende standarder og regler: er i samsvar med EU-direktivet 2011/65/EU fra Europa-parliamentenet og Europa-rådet, pr. 8 Juni 2011, om begrensning i brumen av visse farige stoffer i elektrisk og elektronikn slutyr.
(DA) Vierklaer under eget ansvar, at dette produit i overensstammelse med folgende standarder og bestemmelser: er i overensstammelse med direktiv 2011/65/EU fra Europa-Parliamentet og Rådet af 8. Juni 2011 om begraesning af anvendelsen af visse farlige stoffer i elektrisk og elektronikud dystur.
(HU) Felelosssegung teljes tutadaban kijelentjuk, hogy ez a termek teljes mertekben megfeol az alabbi szabvanyoknak es eliorasoknak: je v souladu se smernici 2011/65/EU Evropskeho parlamentu a Rady EU ze dne 8. cervna 2011, ktera se tykə omezeni pouziti urcitych nebezpechnich latek v elektrickhach a elektronickch zalizenich.
(CS) Na nasi vlastni zodpovednost prohlaujeme, ze je tento vyrobek v souladu s naslésdujírmi standardá y normami: Ve sūlade s normou 2011/65/EU Europskeho parlementu a Rady z 8. juna 2011 týkajucej sa obmedzenia použivania určitych nebezepečnéh látok v elektrikcom a elektronikcom vyabveni.
(SK) Vyhelasujeme na nasu vyhradnú zodpovednost, ze tento vyrobokje v zhode a sulade s nasledujuciimi normami a predisipimi: Ye v sulade s normou 2011/65/EU Europske ho parlementu a Rady z 8. juna 2011 týkajüčej sa obmedzenia použivania určitych nebepečnéch látok v elektrikkom a elektronikkom nyvabeni.
(SL) S polno odgovomostjo izjavljamo, da je ta izdelek v sklado in da odgovarja naslednjin standardom terpredispom: je v sklado z direktvo 2011/65/EU Evropsega parlementa in Sveta z de 8. junji 2011 o omjevanju uporabe dolocenih nevamih snovi v elektrinci in elektronski opremi.
(PL) Deklarujemy na wlasn odpwiedzialnosc, ze ten produkt spehnia wymogi zawartew nestepuiacych nomach i przypesachat; jest zgodny z Dyrektwyq 2011/65/UE Paria mentu Europejskiego i Rady z dnia 8 czerwca 2011 r. w sprawie ograniczenia stosowania niedtorychie niebepezcznych substancji w sprzecie elektrycznym i elektronicznym.
(LT) Prisiimdami visa alsakomybe deklaruojame, kad sis gaminys atlininka zemiau paminetus standartus arba nuostatus: atitinka 2011 m. birzeli 8 d. Europos Parliamento ir Tarybos direktlyva 2011/65/EB del tam tikru pavojingu medziag u naudojoimo elektros ir elektronineje irangoje apribojo.
(LV) Ir atblistósa Eiropas Parliamenta un Padomes 2011, gada 8. jüninja Direktivai 2011/65/ES par dazu bistamu vielu izmantoşanas ierobezoşaru elektriskas un elektroniskas ekjartás.
(ET) Apgalvojam ar visu atibildbu, ka isis produits ir saskaanà un abistl sekojsiem standa-riami un nolikumemi: ir abistola Sia Eropas Parimenta un Padomes 2011. gada 8. junja Direktivai 2011/65/ES par da zu bistamu viel izmantoisanas ierobezošanu elektriskas un elektroniskas iekartás.
(RO) Declarãm prin aceasta cu raspunderea deplina că produsul acesta este in conformitate cu urmatoarele standarde sau directive: este in conformitate cu Directa 2011/65/UE a Parliamentului Europeano si a Consiliului din 8 unie 2011 cu privire la interzicerca'utilizari anumitor substante periculoase la echipamentele electrifice si electronec.
(HR) Izjavljumeno pod vlastitom odgovornol, su da je strojem ukladan sa slijeedesim standardima ill standardiziranim dokumentima i u skladu sa odredbama: uskladeno s. Direktivom 2011/65/EU europskog parliamenta i vije za donam 8. lipna 2011. oograničeniu koristenia odrešenih opasnih vari u elektrćnoi i elektronickovi premi.
(SRL)Pod punom odgovronscu izjavljume da je usaglasen sa sledecim standardima li normama: usaglasen sa direktivom 2011/65/EU Evropskog parlamenta i Saveta od 8.juna.2011. godine za restrkciju upotrebe odredenih opasnih materija u elektricnoj i elektronskoj opremi.
(RU) NIO CBOIO OTBETCTBEHNOCTb 3aABNNREM, YTO DAHNHOE IN3DENIe COOTBETCTBYe CnDEYIOUM CTANAPTAM HOPMAM: COOTBETCTBYe TPE6OBAHIM IINPEKTIbBI 2011/65/EU EBponeiCKoro napameHTa IN cOBTeAOT 8 INOHRA 2011. no ORpaHHNcIO MIONoB3OBAHNI ONPeDEnHBx OAnChbX BEOECTB 8 3NEKTPHHECKOM INAEKTPHOHOM 06OpDyOBAHIN
(UK) Ha cboo BnacHy BiNobJaIbIcIbIcIbIcIbIcIbIcIbIcIbIcIbIcIbIcIbIcIbIcIbIcIbIcIbIcIbIcIbIcIbIcIbIcIbIcIbIcIbIcIbIcIbIcIbIcIbIcIbIbcIIaHApMHTBAM:3a0BOBHLBeBIMOnr DInpeKTHBN 2011/65/ CC Cbponebcko NaplanemTy Ta PaDin B 8 YepBra 2011 pOky Ho a6MeKeHH HBNOPCTAHN DEeHX N He63neHnx peoBH B ENEKTPNHOMy Ta ENEKTPHOHMy 06nabHHI.
(EL) Anwoue utcBua on to Tpoiv auto uupwe kai tpei touc napakotu Kavoviaouc ka TpOttua. ouuopewetra m Eyn Oyana 2011/6E/EE Tou Eupaiaoukou KvoBouiaoukau KoiBouiaouk ta Bg Louviou 2011 yvTepipioqtnx pHnOpiapeuiv Etikivuvou auoiue ae qekpiokKa nkekpovika eoftiamqiu.
(AR)
(TR) Tek scoruumlus zu oblarak bu irunun asagidaki standart ve yonergelere uygun olduqunbayan edizeriz.
(MK) NjabyBaMe co haua zenocna OndOBpOcHc Deka npn3Bodot e Bo cornaCHOCT CO CmePHuata 2011/65/EU HA EbpONCkOT napnAmET n e Bo cornaCHOCT cnopeD CobetOT od 9 jyHa 3 orpaHnyBaHe Ha KopncTeHe Ha odpeheno OnacnH cyntaHnIO BO eNEKtpNCHATA n eNEKtpPOHCKATA onpema I Deka e cnopeI cneHNITE CTannapd n peryunatb.
EN62841-1, EN62841-2-9, EN55014-1, EN55014-2, EN61000-3-2, EN61000-3-3, EN60825-1
2006/42/EC, 2014/30/EU, 2011/65/EU, 2012/19/EU
Zwolle, 01-03-2021

FERM - Lingenstraat 6 - 8028 PM - Zwolle - The Netherlands