
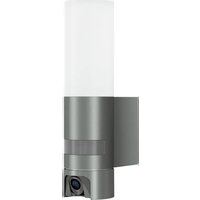
RS 200 SC - Lamp STEINEL - Free user manual and instructions
Find the device manual for free RS 200 SC STEINEL in PDF.
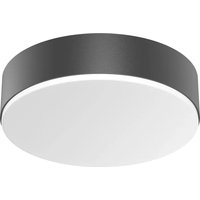
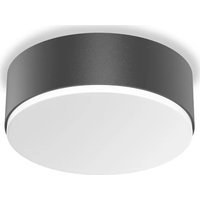
| Product type | LED motion sensor light (5.8 GHz HF radar) |
| Brand | Steinel |
| Model | RS 200 SC |
| Category | Lamp |
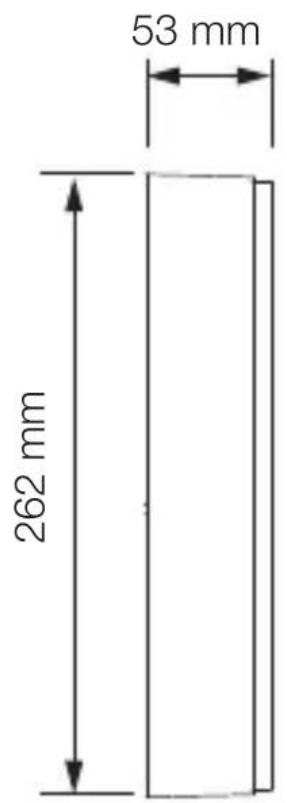
| Dimensions (L × W) | 262 × 53 mm |
| Supply voltage | 220-240 V, 50/60 Hz |
| Power consumption | 17.1 W |
| Luminous flux | 1165 lm |
| Color temperature | 3000 K (warm white) |
| Color rendering index (Ra) | 80 |
| Average lifespan | L70B50 > 36,000 h at 25 °C |
| Protection rating | IP54 |
| Protection class | II (double insulation) |
| Detection range | 1 to 4 m (adjustable) |
| Detection angle | 360° with angle aperture |
| Time delay | 5 s to 60 min (adjustable) |
| Trigger threshold | 2 to 2000 lx (adjustable) |
| Smart functions | Marking light, main light, Bluetooth grouping via STEINEL Connect app |
| Compatibility | Bluetooth smartphone/tablet (iOS/Android) |
| Mounting | Wall or ceiling (indoor/outdoor) |
| Manufacturer warranty | 36 months |
| Maintenance | Clean with dry cloth, no detergent |
| Light source replacement | Not replaceable, replace the entire unit |
Frequently Asked Questions - RS 200 SC STEINEL
User questions about RS 200 SC STEINEL
0 question about this device. Answer the ones you know or ask your own.
Ask a new question about this device
Download the instructions for your Lamp in PDF format for free! Find your manual RS 200 SC - STEINEL and take your electronic device back in hand. On this page are published all the documents necessary for the use of your device. RS 200 SC by STEINEL.
USER MANUAL RS 200 SC STEINEL
- About this document 3
- General safety precautions 3
- System description 4
- Electrical connection 9
- Installation 10
- Function 20
- Maintenance and care 24
- Disposal 25
- Declaration of Conformity 25
- Manufacturer's warranty 26
- Technical specifications 27
- Troubleshooting 28
1. About this document
- Under copyright. Reproduction either in whole or in part only with our consent.
- Subject to change in the interest of technical progress.
Hazard warning!
Warning of hazards from electricity!
Warning of hazards from water!
2. General safety precautions

Failure to observe these operating instructions presents hazards!
These instructions contain important information on the safe use of this product. Particular attention is drawn to potential hazards. Failure to observe this information may lead to death or serious injuries.
- Read instructions carefully.
- Follow safety advice.
-
Keep instructions within easy reach.
-
Working with electrical current may produce hazardous situations. Touching live parts can result in electrical shock, burns or death.
- Work on mains voltage must only be performed by qualified, skilled personnel.
- National wiring regulations and electrical operating conditions must be observed (e.g. DE: VDE 0100, AT: ÖVE-ÖNORM E8001-1, CH: SEV 1000).
- Only use genuine replacement parts.
3. System description
Proper use - RS 200 SC
- Sensor-switched LED light with active motion detector.
- Wall and ceiling mounting.
- Indoors and outdoors. Limited suitability for outdoor use as a result of detection sensitivity
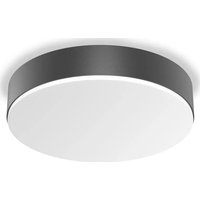
Proper use - RS 200 C
- LED light.
- Wall and ceiling mounting.
- Indoors and outdoors.
RS 200 SC operating principle
- The HF/radar motion detector emits high-frequency electromagnetic waves (5.8 GHz) and detects the echo reflected by objects.
- The echo changed by movement of the body is converted electronically and switches the LED light ON automatically.
- Movement can also be detected through thin walls, doors and panes of glass.
- Even the tiniest of movements can be detected.
- No inadvertent triggering by heat sources or temperature fluctuations.
- The sensor's detection zone can be precisely limited by using the reach setting capability on the web interface and via app.
Note:
The high-frequency output of the HF sensor is approx. 1 mW – that's 1000 times less than the transmission power of a mobile phone or the output of a microwave.
RS 200 C operating principle
The C versions can be interconnected with other sensors via Bluetooth to extend the detection zone. They pass on the detected signals (presence and light level) via Bluetooth. This is controlled in the sensor interconnected with other interface.
Package contents
3.1


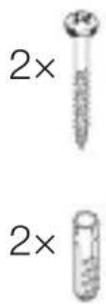
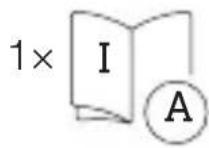
1×
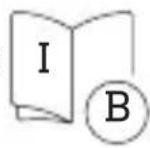
- 1 LED light
- 1 outer cover
-2 screws - 2 wall plugs
- 1 safety data sheet (A)
- 1 Quick start guide (B)
Product dimensions
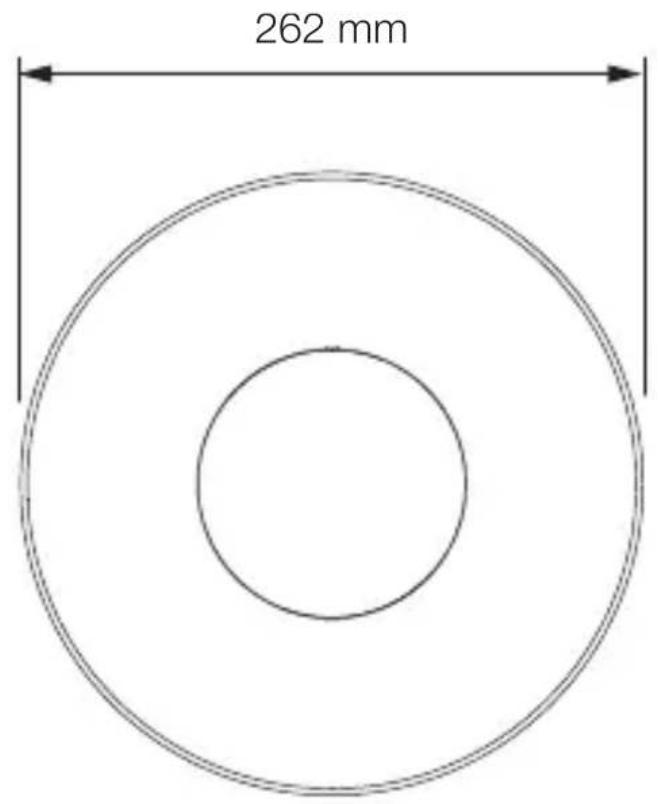
3.2
Product components
3.3
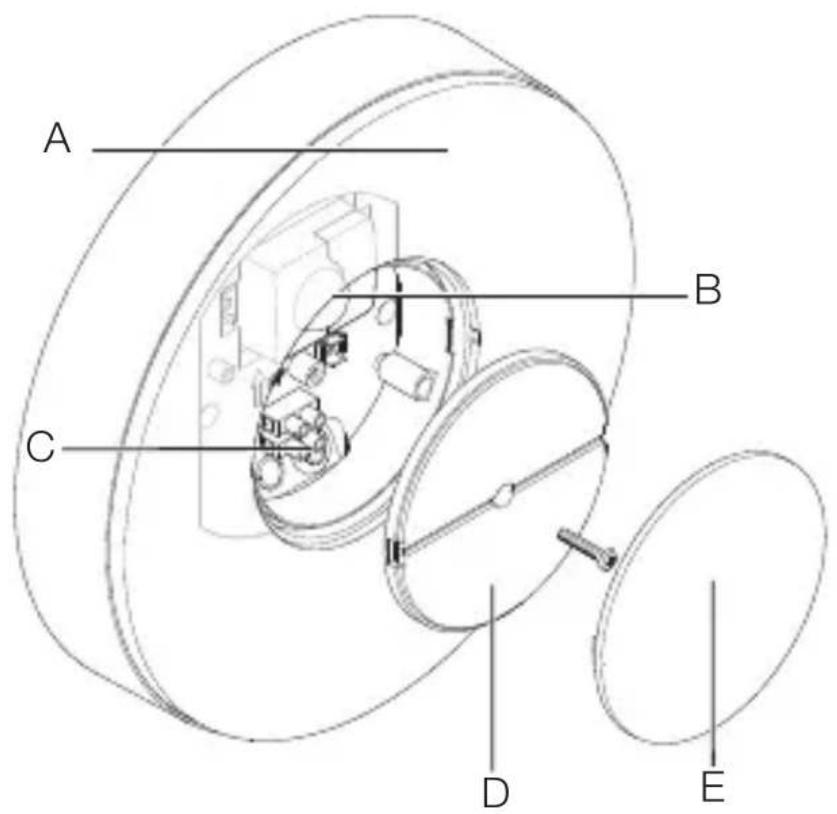
A LED light
B Sensor (SC version only)
C Connecting terminal
D Cover
E Outer cover
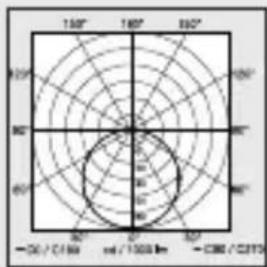
Light distribution curve
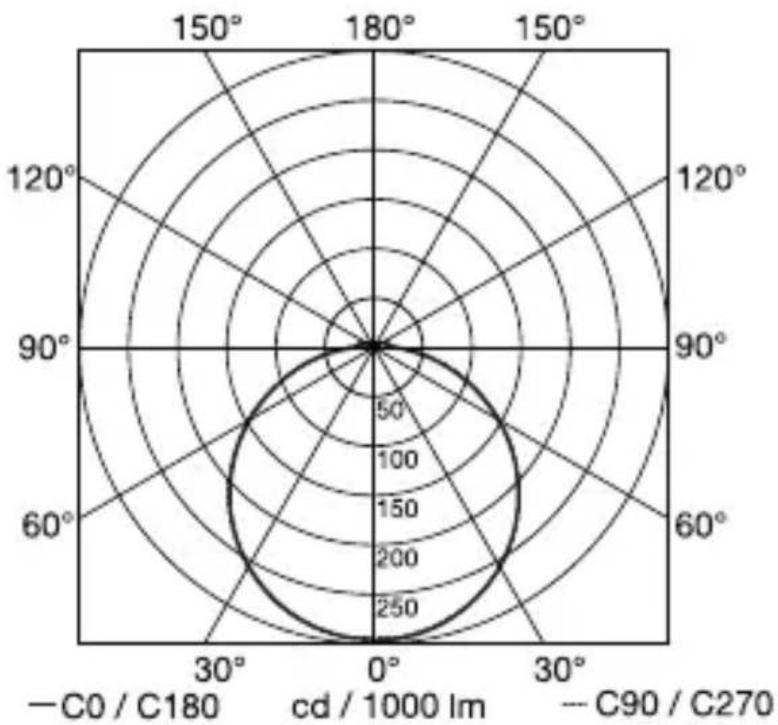
3.4
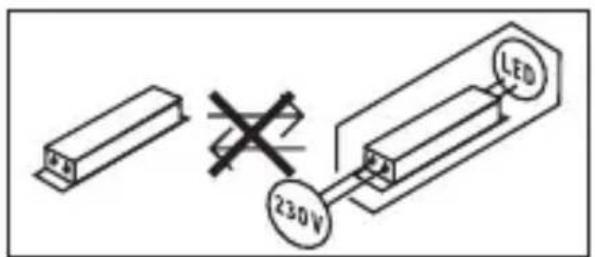
4. Electrical connection
Circuit diagram
4.1
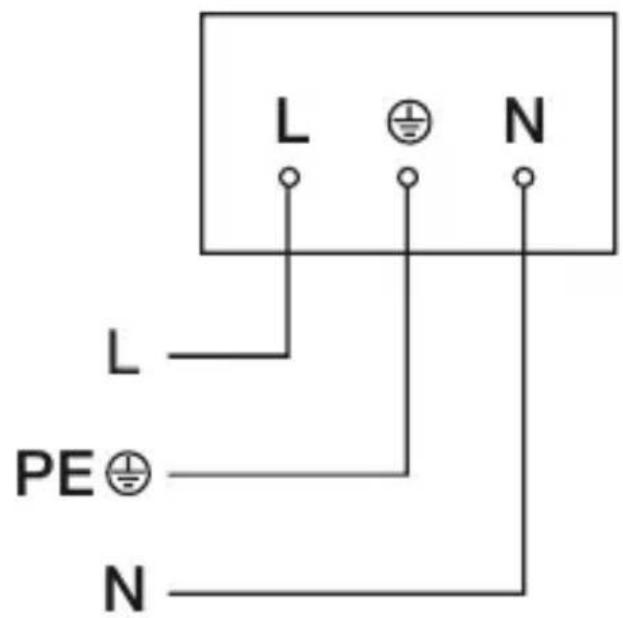
The mains supply lead is a 2 to 3-core cable:
L = phase conductor (usually black, brown or grey)
N = neutral conductor (usually blue)
PE = protective-earth conductor (green/yellow)
The floodlight can also be connected to the power supply downstream of a mains switch if it is ensured that the mains switch is left ON all the time.
The light source of this light cannot be replaced. If the light source needs to be replaced (e.g. at the end of its service life), the complete light must be replaced.
5. Installation
Hazard from electrical power.
Touching live parts can result in electrical shock, burns or death.
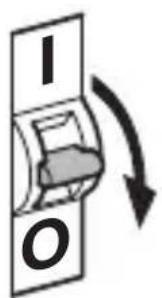
- Switch OFF power and interrupt power supply.
- Using a voltage tester, check to make sure that the power supply is disconnected.
- Make sure power supply remains interrupted.
Risk of damage to property!
Mixing up connection leads may produce a short circuit.
- Identify connection leads.
- Connect the leads correctly.
Preparing for installation
- Check all components for damage. Do not use the product if it is damaged.
- Select an appropriate site to install the product.
Take reach into consideration.
- Take reach and motion detection into consideration.
-Vibration-free.
- No obstacles in detection zone.
-Not in explosive atmospheres.
-Not on normally flammable surfaces.
- Do not look into the light source from a short distance (< 30 cm).
- Spaced at a distance of at least 50 cm from other LED lights.
Reach, wall mounting
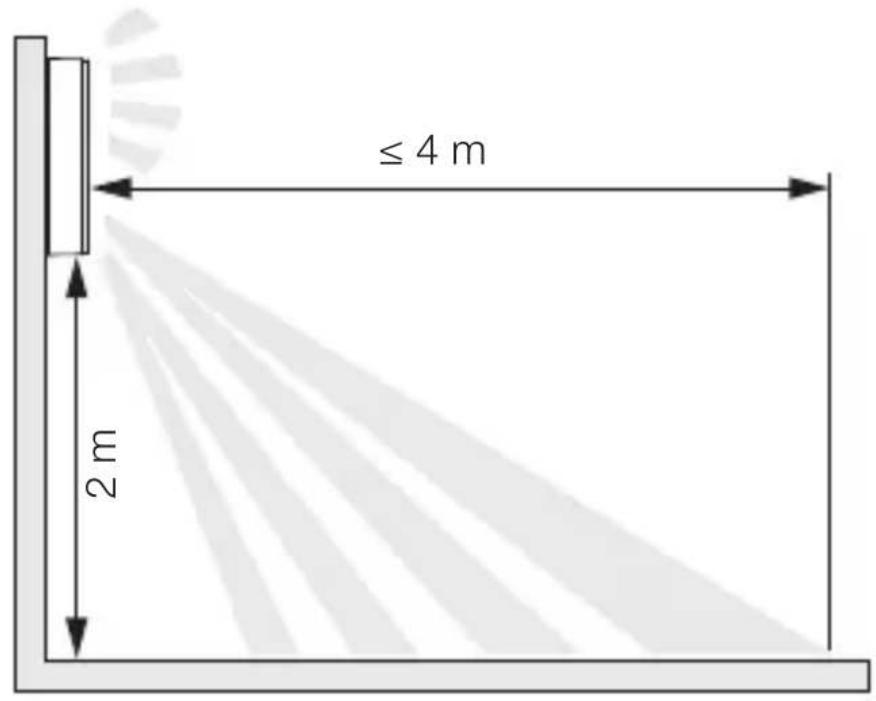
5.1
Reach, ceiling mounting
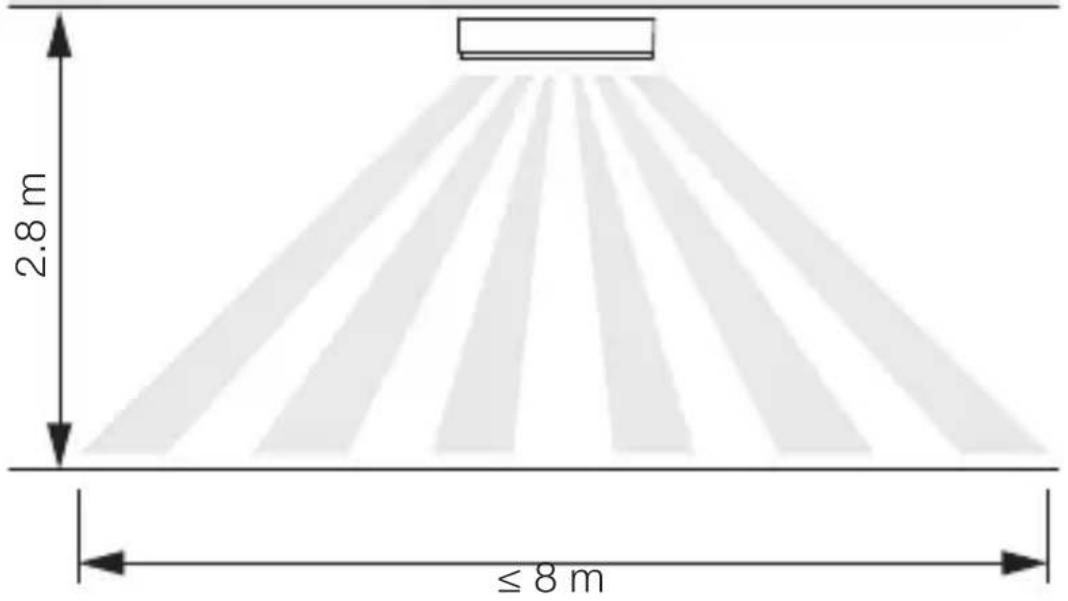
5.2
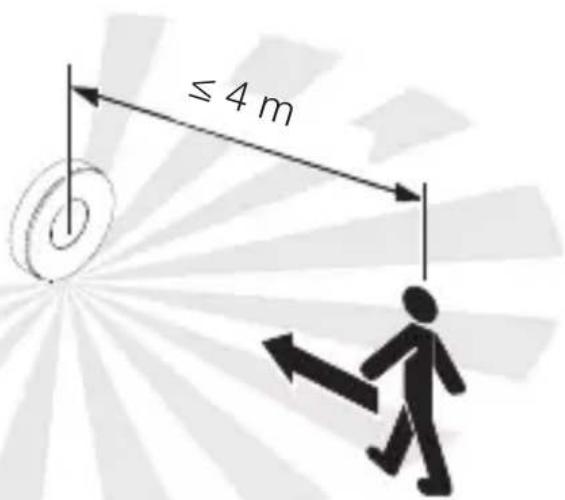
Detecting motion across the direction in which a person walks -wall mounting
5.3
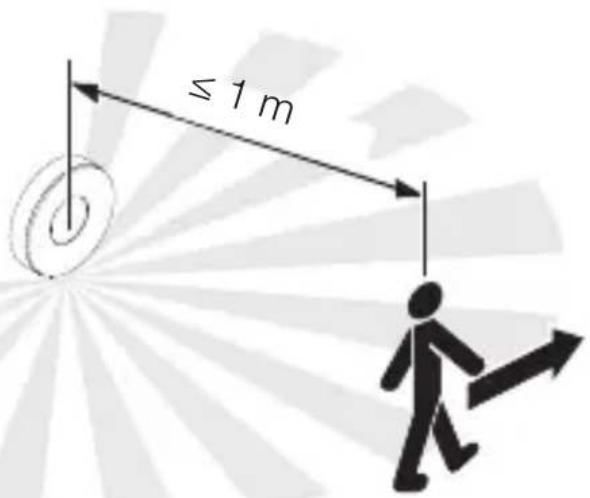
Detecting motion in the direction in which a person walks -wall mounting
5.4
Detecting motion across the direction in which a person walks - ceiling mounting
5.5
Detecting motion in the direction in which a person walks - ceiling mounting
5.6

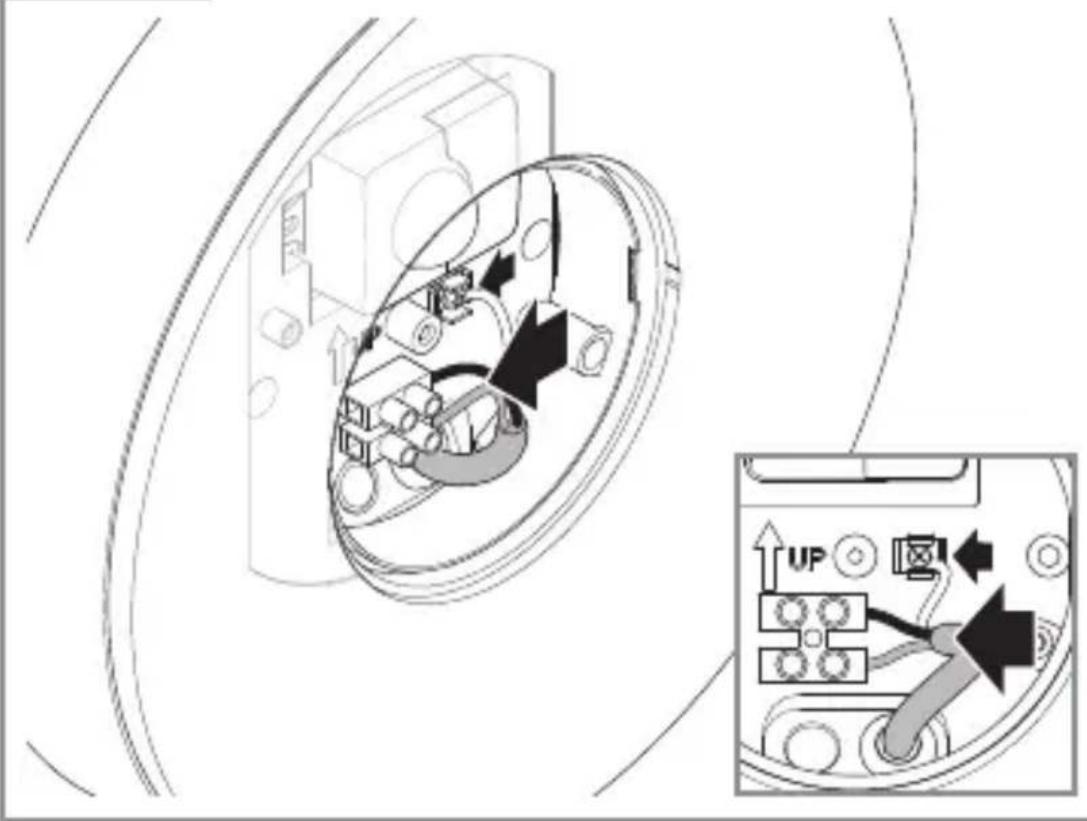
Mounting procedure
5.7
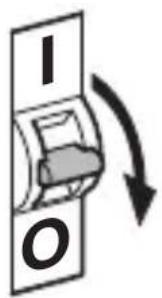
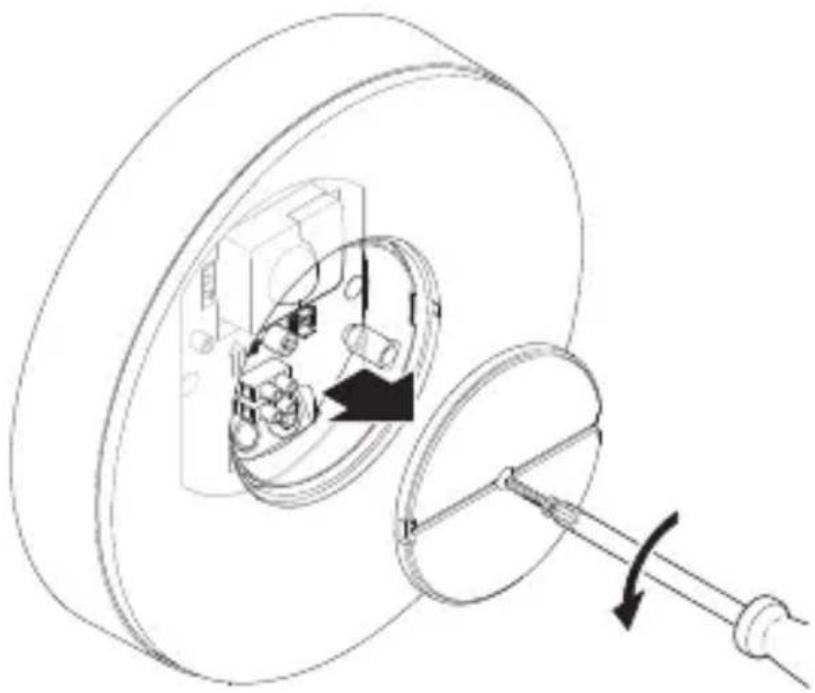
- Check to make sure the power supply is switched OFF.
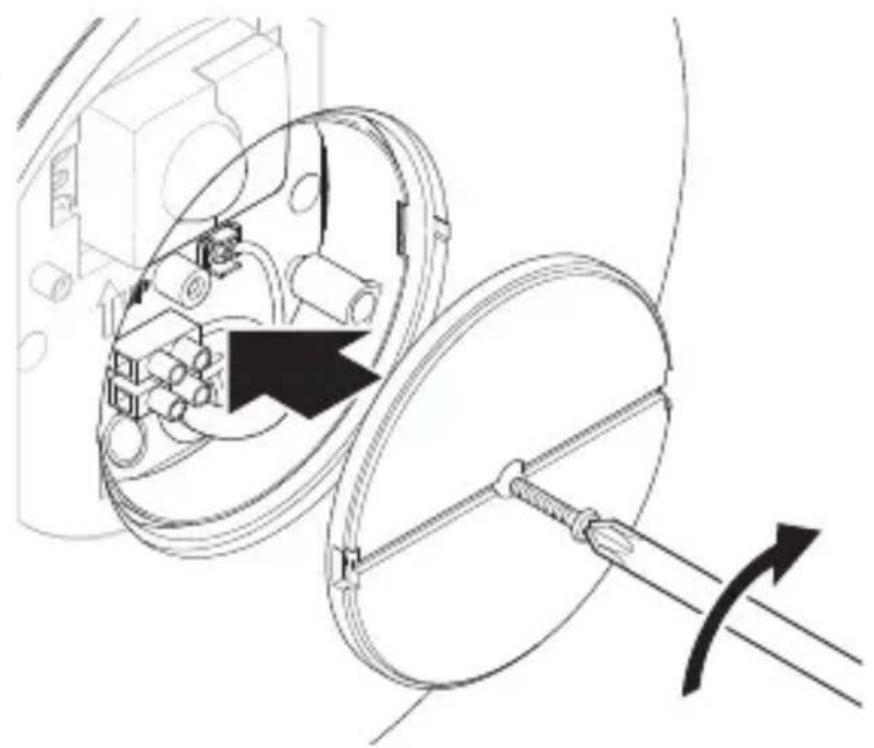
- Unscrew retaining screw.
- Unscrew cover.
5.8
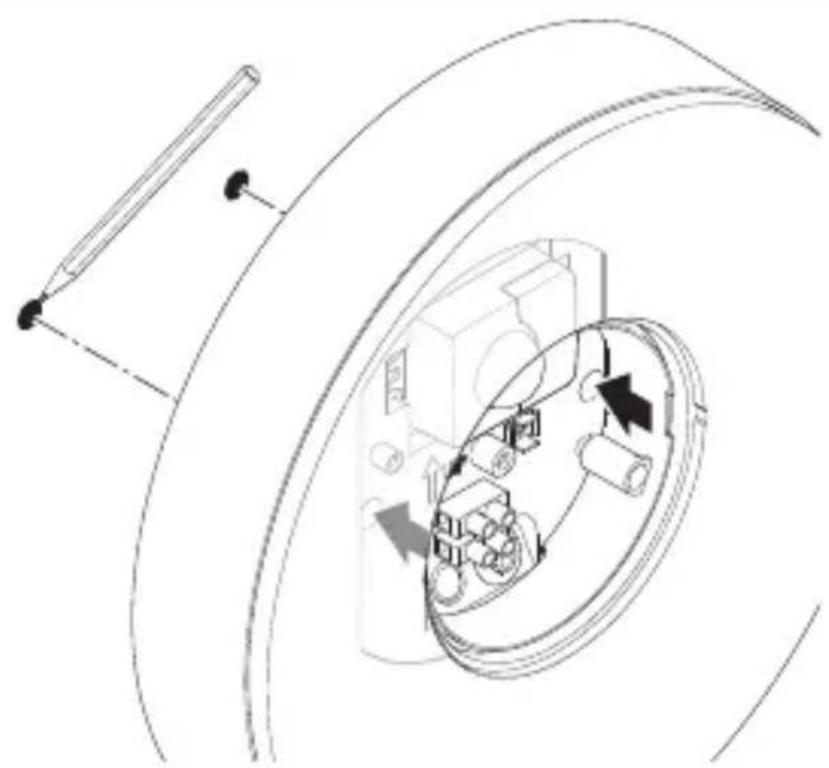
Mark drill holes.
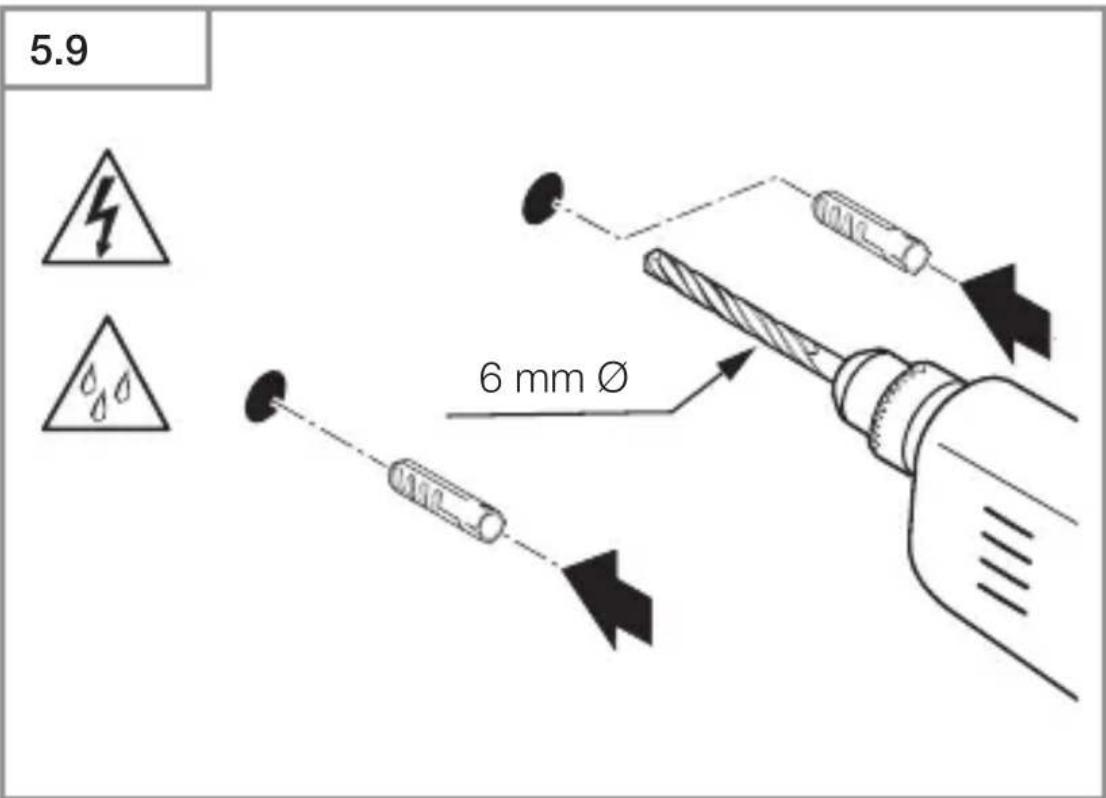
- Drill holes (ø 6 mm) and fit wall plugs.
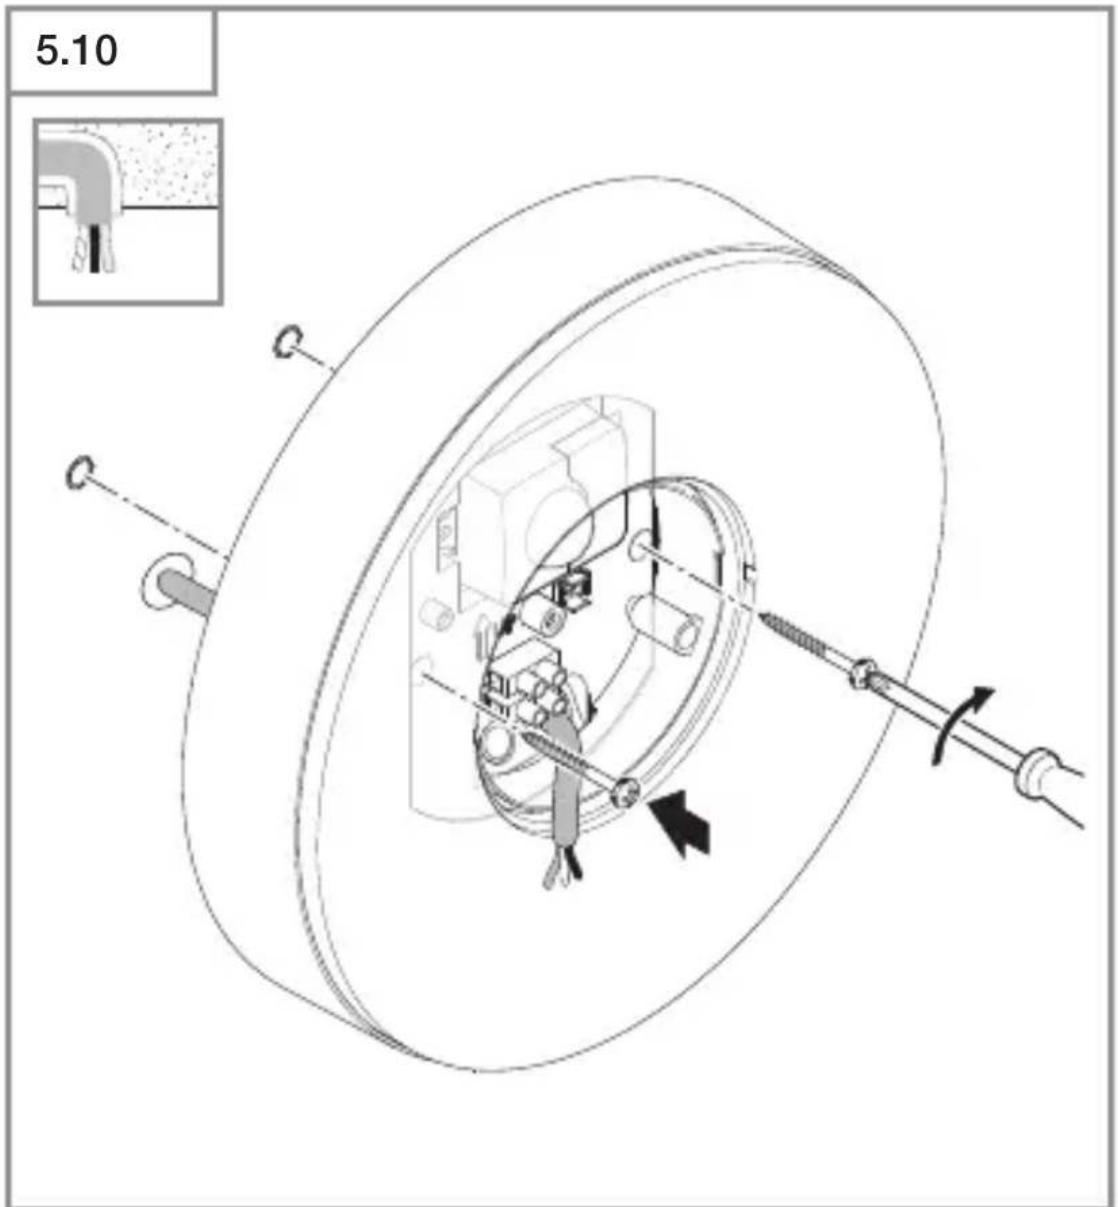
- Screwing on LED light with concealed power supply lead.
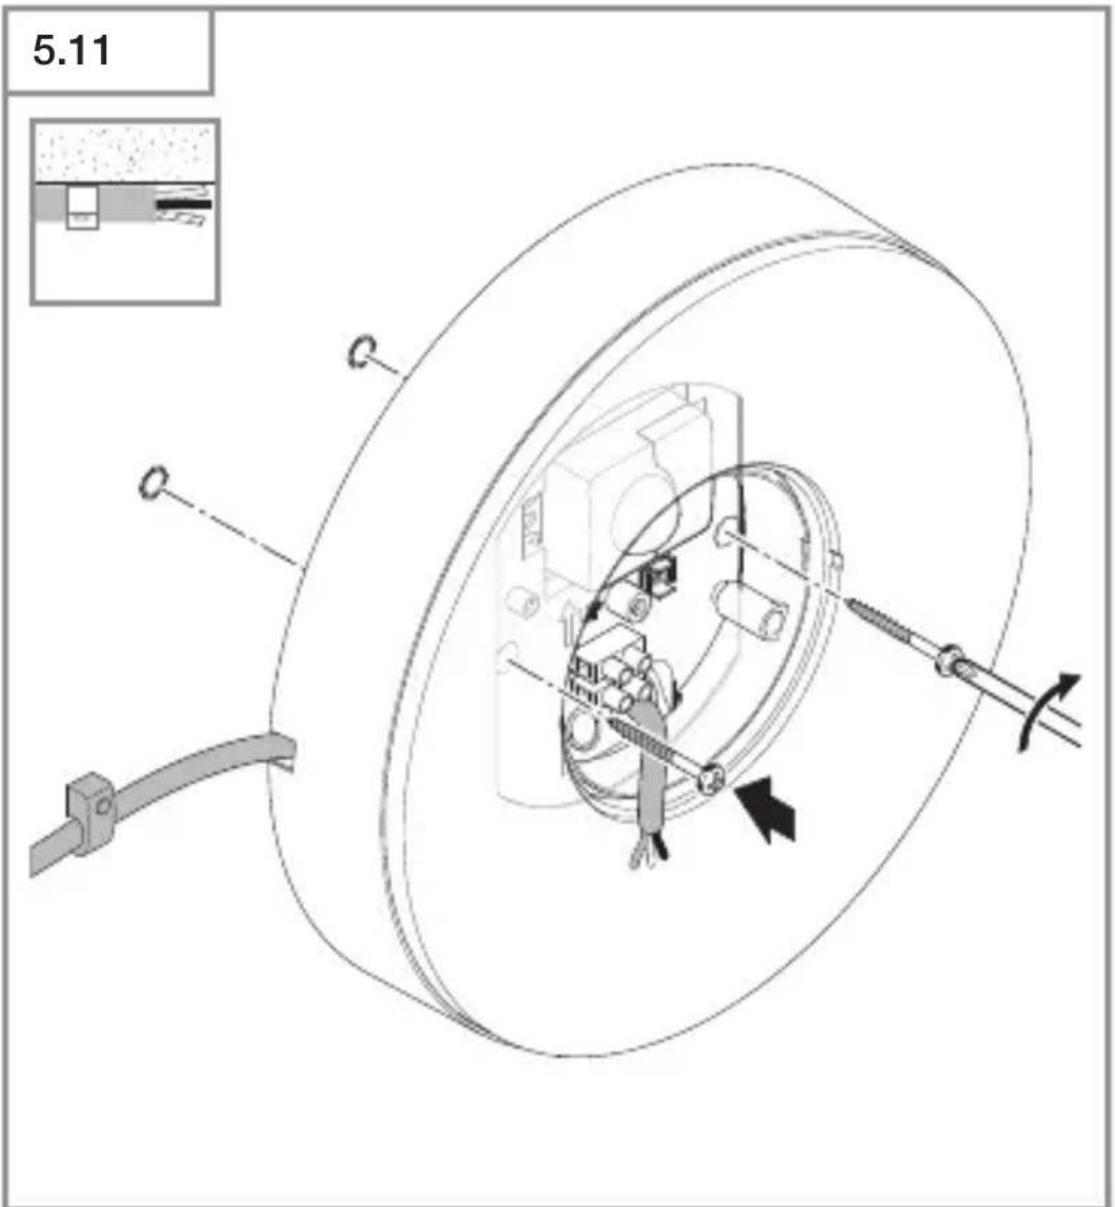
- Screwing on LED light with surface-mounted power supply lead.
5.12
- Connect mains power supply lead as shown in the wiring diagram.
,4. Electrical connection"
5.13
- Screw on cover.
5.14
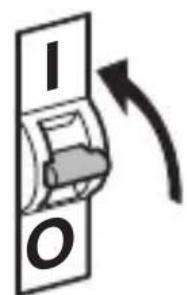
- Switch ON power supply.
5.15
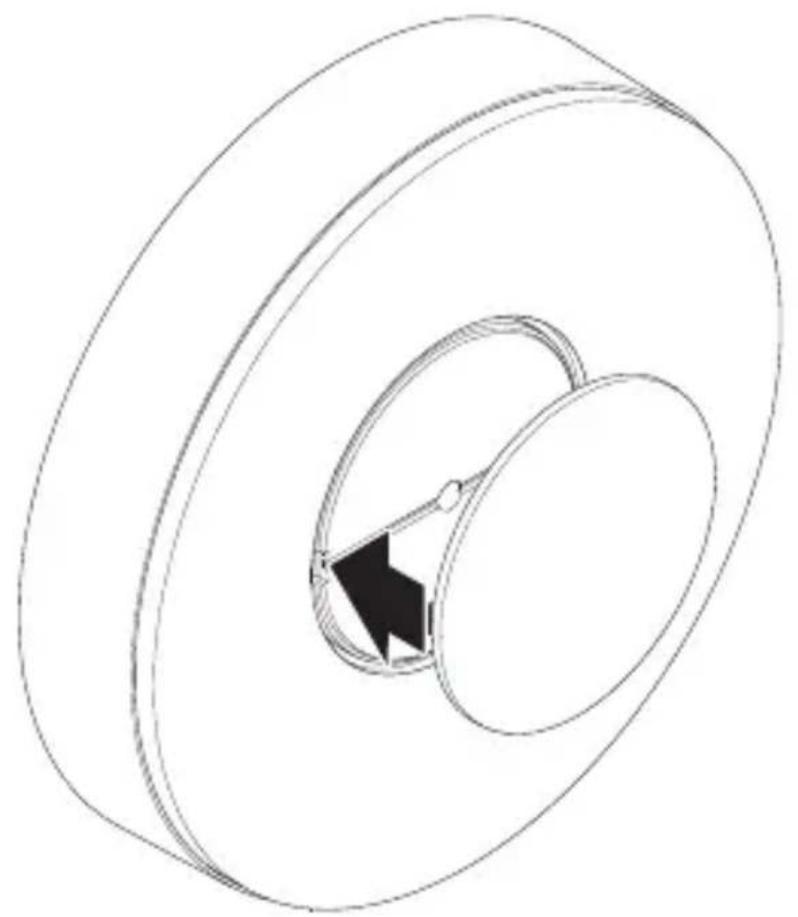
- Fit outer cover.
- Make settings via app (SC version only).
,6. Function
6. Function
The functions can be set for the SC types.
C version functions only work in combination with a Bluetooth sensor-switched product.
Functions are set via the Steinel Connect app.
Steinel Connect app
To configure the light via smartphone or tablet, you must download the STEINEL Connect app from your app store. You will need a Bluetooth-capable smartphone or tablet.

Android iOS

Functions that can be set via the Steinel Connect app:
- Time setting.
- Reach setting.
Twilight setting. - Basic light level function.
- Main light / basic light level adjustable.
- Extended reach adjustment.
- Group interconnection.
Twilight setting by teach-in.
Note:
To rule out malfunctioning, a minimum distance of 3 m must be allowed from the Wi-Fi router and the access points.
Factory settings (state on leaving the factory)
Reach:max.
Main light time setting: 10 sec.
Basic light time setting: 1 min.
Twilight level: 2,000 lux
Basic light dimming level: 50%
Commissioning/power interruption
The settings and current operating status of the LED light are saved automatically in the event of power failure or disconnection from the power supply. Settings are reactivated as soon as the mains power supply is restored.
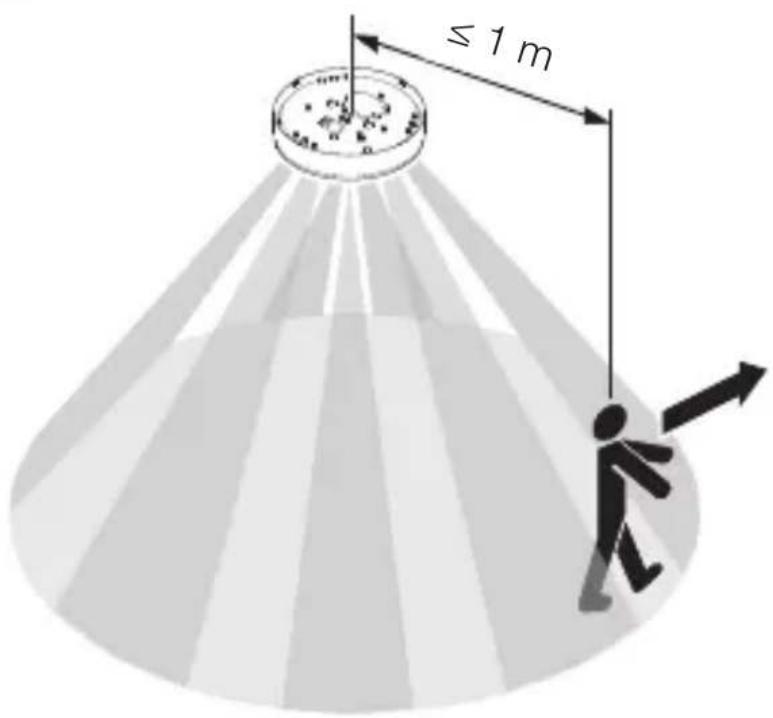
Reach setting (sensitivity)
Reach is the term used to describe the diameter of the more or less circular detection zone produced on the ground after mounting the SensorLight at a height of 2m .
-
Set to maximum = max. reach (4 m)
-
Set to minimum = min. reach (1 m)
Time setting
The time (stay-ON time) can be set to any period from approx. 5 seconds to a maximum of 60 minutes. Every movement detected re-activates the light.
Note:
Note: after the unit switches OFF, it takes approx.
1 second before it is able to start detecting movement again. The unit can then switch ON again in response to movement.
The shortest time setting is recommended when adjusting the detection zone and performing the functional test.
Twilight setting
The response threshold (twilight) can be infinitely varied from approx. 2 to 2,000 lux.

= daylight mode (depending on ambient light level)

= night-time operation (approx. 2 lux)
The control dial must be turned to when adjusting the detection zone and performing the functional test in daylight.
Basic light level
The brightness of the basic light level setting can be varied between 1% and 50% .
The period for which the basic light level stays ON for can be infinitely varied between 10 minutes and 30 minutes, or set to remain ON all night.
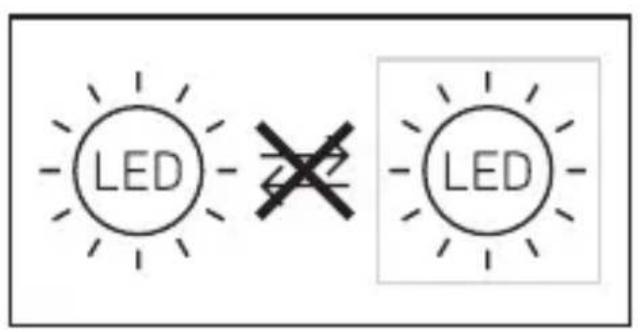
Main light level
The brightness of the main light level setting can be varied between 50% and 100% .
Grouping
The unit can be operated as a separate light or several lights can be interconnected in groups via wireless communication. All lights belonging to a group operate in line with the group parameters set in the Steinel Connect app. Reach can be set individually for all lights in the lighting group.
Fade time
Fade Time can be used to set the rate of dimming on switching the light ON and OFF (1 s - 3 s).
Neighbouring-light function
The neighbouring-light function can be activated and deactivated via the Steinel Connect app.
This function assigns the neighbouring groups to the active lighting group. The active group responds to activation signals from the neighbouring group assigned to it and switches to main light or basic light as defined in the settings.
7. Maintenance and care
The tool requires no maintenance.
Hazard from electrical power.
Contact between water and live parts can result in electric shock, burns or death.
- Only clean tool in a dry state.
Risk of damage to property!
Using the wrong cleaning product can damage the light.
- Clean tool with a moist cloth without detergent.
Important note: the control gear cannot be replaced.
8. Disposal
Electrical and electronic equipment, accessories and packaging must be recycled in an environmentally compatible manner.
Do not dispose of electrical and electronic equipment as domestic waste.
EU countries only:
Under the current European Directive on Waste Electrical and Electronic Equipment and its implementation in national law, electrical and electronic equipment no longer suitable for use must be collected separately and recycled in an environmentally compatible manner.
9. Declaration of Conformity
STEINEL Vertrieb GmbH hereby declares that the RS 200 SC/C radio equipment type conforms to Directive 2014/53/EU. The full wording of the EU Declaration of Conformity is available for downloading from the following Internet address: www.steinel.de
10. Manufacturer's warranty
This Steinel product has been manufactured with utmost care, tested for proper operation and safety and then subjected to random sample inspection. Steinel guarantees that it is in perfect condition and proper working order. The warranty period is 36 months and starts on the date of sale to the consumer. We will remedy defects caused by material flaws or manufacturing faults. The warranty will be met by repair or replacement of defective parts at our own discretion. The warranty shall not cover damage to wear parts, damage or defects caused by improper treatment or maintenance. Further consequential damage to other objects shall be excluded.
Claims under the warranty will only be accepted if the unit is sent fully assembled and well-packed with a brief description of the fault, a receipt or invoice ( date of purchase and dealer's stamp ) to the appropriate Service Centre.
Repair service:
If defects occur outside the warranty period or are not covered by the warranty, ask your nearest service station for the possibility of repair.

11. Technical specifications
- Dimensions ( × D) : 262 × 53 mm
- Power supply: 220 - 240 ~V, 50 / 60 ~Hz
- Power consumption (P): 17.1 W
- Standby (network) (P_net)^on 0.50 W
- Standby sensor RS 200 SC (P_sb): 0.50 W
- Luminous flux (360^) : 1,165 lm
- Efficiency: 68 ~lm / W
- Colour temperature: 3,000 ~K (warm white)
Colour rendering index: R_a = 80
Average rated life expectancy:
L70B50 at 25^ : >36,000 hours
- Colour consistency SDCM: starting value: 6
Luminous intensity distribution:
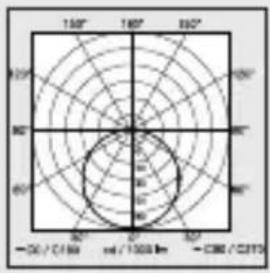
- RS 200 SC angle of coverage:
360^ with 160^ angle of aperture
- Transmission power: approx. 1 ~mW
- RS 200 SC reach: 1-4 m
- RS 200 SC time setting: 5 ~s - 60 ~min
- RS 200 SC twilight setting: 2-2,000 lux
- IP rating: IP54
- Protection class: /
- Ambient temperature: -10 to +40°C
- Energy efficiency class: this product contains an
energy efficiency class "E" light source
12. Troubleshooting
Unit without power.
-
Fuse not switched ON or faulty.
-
Switch ON fuse.
-
Change faulty fuse.
-
Break in wiring.
-
Check wiring with voltage tester.
- Short circuit in mains power supply lead.
- Check connections.
- Any mains switch OFF
- Switch ON mains switch.
Unit does not switch ON.
-
Wrong twilight setting selected.
-
Reset twilight setting.
- Mains switch OFF.
- Turn on mains switch.
- Fuse not switched ON or faulty.
- Switch ON fuse.
- Change faulty fuse.
- Rapid movements being suppressed to minimise malfunctioning, or detection zone too small or incorrectly defined.
- Check and adjust detection zone.
- Light source faulty.
- The light source cannot be changed. Completely replace unit.
Unit does not switch OFF.
-
Continued movement within the detection zone.
-
Check detection zone.
- If necessary, limit or change detection zone.
Unit switches ON when it should not.
- Floodlight not mounted for detecting movement reliably.
- Securely mount floodlight.
- Movement occurred but not identified by the observer (movement behind wall, small object moving in immediate proximity of lamp etc.).
- Check detection zone.
- If necessary, limit or change detection zone.
3° R S PRODUCENT GARANTI
11. Tekniske data
- Mål (Ø × D): 262 × 53 mm
- Netspænding: 220-240 V, 50/60 Hz
- Effektforbrug (Pon</sub}): 17,1 W
- Standby netværk (Pnet): 0,50 W
- Standby sensor RS 200 SC (P_sb) : 0,50 W
- Lysstrøm (360°): 1.165 lm
- Effektivitet: 68 lm/W
- Farvetemperatur: 3.000 K (varm hvid)
- Farvegengivelsesesindeks: R
- Gennemsnitlig beregnet levetid: L70B50 ved 25^ : >36.000 timer
Farvekonsistens SDCM:
Lysstyrkeforderding:
startværdi: 6
-
Overvågningsvinkel RS 200 SC: 360^ med 160^ abningsvinkel.
-
Sendeeffekt:
Rækkevidde RS 200 SC: - Tidsindstilling RS 200 SC:
- Skumringsindstilling RS 200 SC:
-Kapslingsklasse: - Beskyttelsesklasse:
- Omgivelsestemperatur:
- Energieeffektivitetskasse: Dette produit indeholder en lyskilde i energieffektivitetskasse "E".
ca. 1 ~mW
01-4m
5s-60min
2-2.000 lux
IP 54
-10til +40^
1
Start-Up/strømavbrudd
3 Å R S PRODUSENT GARANTI
Start-Up/δiakotn τáonç

- About this document
- General safety precautions
- System description
- Proper use - RS 200 SC
- Proper use - RS 200 C
- RS 200 SC operating principle
- Note:
- RS 200 C operating principle
- Package contents
- 3.1
- Product dimensions
- Product components
- Light distribution curve
- Electrical connection
- Circuit diagram
- Installation
- Hazard from electrical power.
- Risk of damage to property!
- Preparing for installation
- Mounting procedure
- Function
- Steinel Connect app
- Factory settings (state on leaving the factory)
- Reach:max.
- Commissioning/power interruption
- Reach setting (sensitivity)
- Time setting
- Twilight setting
- Basic light level
- Main light level
- Grouping
- Fade time
- Neighbouring-light function
- Maintenance and care
- Disposal
- Do not dispose of electrical and electronic equipment as domestic waste.
- EU countries only:
- Declaration of Conformity
- Manufacturer's warranty
- Repair service:
- Technical specifications
- Troubleshooting
- Unit without power.
- Unit does not switch ON.
- Unit does not switch OFF.
- Unit switches ON when it should not.
- Tekniske data
- Start-Up/strømavbrudd
- Start-Up/δiakotn τáonç
Brand : STEINEL
Model : RS 200 SC
Category : Lamp