USER MANUAL CV 1004 DOMETIC
natural_image
Line drawing of a mechanical device with attached components and wiring (no text or symbols)
CV1004
EN
Central vacuum cleaner
Installation and Operating Manual.....8
DE
Zentralstaubsauger


natural_image
Line drawing of a mechanical device with a tray and internal components (no text or symbols)

natural_image
Technical line drawing of an electronic device with cable and control panel (no text or symbols)
natural_image
Technical diagram of a mechanical device with a close-up inset showing internal components (no text or symbols)
natural_image
Line drawing of a door panel with a black arrow pointing to the side panel (no text or symbols)

natural_image
Completely blank white image with no visible content, text, or symbols.
natural_image
Technical illustration of a mechanical device with hoses and a magnified inset showing internal components (no text or symbols)
natural_image
Line drawing of a device with a plug and cable, no text or symbols present
natural_image
Technical line drawing of a mechanical device component with an arrow pointing to a button (no text or symbols present)
natural_image
Technical illustration of a printer's front panel showing internal components and a close-up of the door (no text or symbols)
natural_image
Technical line drawing of a mechanical device with a rotating knob and internal components (no text or symbols)

natural_image
Technical illustration of a device casing with an open door and a close-up view showing internal components (no text or symbols)
natural_image
Diagram of a device interior with a screen and tray, showing internal components and a black arrow indicating direction (no text or symbols)
Please read this instruction manual carefully before installation and first use, and store it in a safe place. If you pass on the product to another person, hand over this instruction manual along with it.
Table of contents
1 Explanation of symbols 8
2 Safety instructions 9
3 Scope of delivery 11
4 Accessories....11
5 Intended use....11
7 Installing the vacuum cleaner ....12
8 Using the vacuum cleaner....14
9 Maintaining and cleaning the vacuum cleaner . . . . . . . . . . . . . . . . . . . . . . . . . . . . . . . . . . . . . . . 16
10 Troubleshooting....16
11 Warranty....17
12 Disposal 17
13 Technical data ....18
1 Explanation of symbols

WARNING!
Safety instruction: Failure to observe this instruction can cause fatal or serious injury.

CAUTION!
Safety instruction: Failure to observe this instruction can lead to injury.

NOTICE!
Failure to observe this instruction can cause material damage and impair the function of the product.

NOTE
Supplementary information for operating the product.
2 Safety instructions
The manufacturer accepts no liability for damage in the following cases:
- Damage to the product resulting from mechanical influences and excess voltage
• Alterations to the product without express permission from the manufacturer
• Use for purposes other than those described in the operating manual
2.1 General safety

WARNING!
- Before you use the device for the first time, check that the operating voltage matches the mains voltage (see type plate).
- Do not operate the appliance if it is visibly damaged.
- This device may only be repaired by qualified personnel. Inadequate repairs may cause serious hazards.
Should your appliance need to be repaired, please contact customer service.
- This appliance can be used by children aged 8 years or over, as well as by persons with diminished physical, sensory or mental capacities or a lack of experience and knowledge, providing they are supervised, or have been taught how to use the appliance safely and are aware of the resulting risks.
- Cleaning and user maintenance must not carried out by unsupervised children.
• Children must not play with the device.
- Children must be supervised to ensure that they do not play with the device.
- Always keep and use the device out of the reach of children under 8 years of age.
• Never expose the device to moisture.
- Do not use accessories that have not been recommended by the manufacturer. This can lead to injury and material damage.
• Only use accessories recommended by the manufacturer.
• Do not lean any objects against the vacuum cleaner.
2.2 Operating the device safely

CAUTION!
- Never pull the plug out of the socket by the connection cable.
- Remove the power plug from the socket if you plan to carry out maintenance work.
- Never use the device in rooms where flammable materials are stored or flammable gases have built up. Sparks from the motor could ignite them.
- Keep the nozzles away from eyes, ears and face while operating. Ensure that hair, loose clothing and fingers do not get in the outlets or moving parts.
- Keep children and animals at a safe distance when operating the device.
• Do not use the device with wet hands.

NOTICE!
- Do not vacuum any
- w e t o b j e c t s
– solvents or caustic liquids
– hot, glowing, hard or sharp objects
- po is on o u s m a t e r i a l s
These could damage the device or the filter.
- Do not vacuum any large objects, such as waste paper or cloths. These could block the hose.
- If the motor filter is dirty, rinse it in warm water or insert a new filter. Only insert filters that are completely dry.
• Only use the device indoors, never outside.
- Make sure that none of the vents are blocked. If necessary, clean the vents before you use the device.
- Do not use the device without a filter or a dust bag.
- Do not tread on the hose and do not pull too tightly on it.
No. in
fig. 1, page 3
Quantity Designation
| 1 1 Central vacuum cleaner |
| 2 | 1 | F | l | o |
| 3 1 Attachment brush |
| 4 | 1 | D | u | s |
| 5 1 Crevice nozzle |
| 6 1 Telescopic tube |
| 7 1 Suction hose |
| 8 1 Hose socket |
| 9 2 Screw connector (black) |
| 10 2 Mounting connector (white) |
| 11 | 1 Connection hose (2 m) |
| 12 2 Dust bag |
4 Accessories
Available as accessories (not included in the scope of delivery):
| Designation | Ref. no. |
| New dust bag (pack of 5 incl a motor filter) | 9103501128 |
| VacPort automatic dust pan | 9103501127 |
5 Intended use
The CV1004 central vacuum cleaner (ref. no. 9103501126) is a vacuum cleaner for installation in a suitable cavity wall or in existing fixtures in caravans, motor-homes or boats. This device is not intended for commercial use. It may not be used outdoors.
6 T e c h n i c a
The central vacuum cleaner's suction hose can be connected directly to the device or to an external hose socket.
The suction hose must be turned on and off using the switch when using it while connected to the central vacuum cleaner. The device has automatic suction which is activated when the suction hose is inserted into the hose socket.
The vacuum cleaner system can be extended using the VacPort (not included in the scope of delivery). This automatic dust pan can be fitted, for example, in the entrance or kitchen area in order to suck away dirt which has been swept up there using the permanently installed nozzle.
6.1 Control elements
No. in
fig. 2, page 3 Description Explanation
| 1 I/O switch Switches the vacuum cleaner on or off whenever the suction hose is connected to the central vacuum cleaner. |
| 2 Sliding cover Closes up the hose connection on the device. Closing increases the suction when working from an external hose socket. |
| 3 Slider Opens the front of the device (e.g. for changing the dust bag) |
| 4 Motor filter | Protects the motor from contamination |
7 Installing the vacuum cleaner

WARNING! Danger of electrocution and serious injury.
Beware of electrical cables in the wall when drilling and sawing.

NOTICE!
• Mount the vacuum cleaner in a dry place.
- Do not mount the vacuum cleaner in an area which is subject to high temperatures.
- Do not bend the connection cable round sharp edges or corners. Keep the connection cable away from heated surfaces.
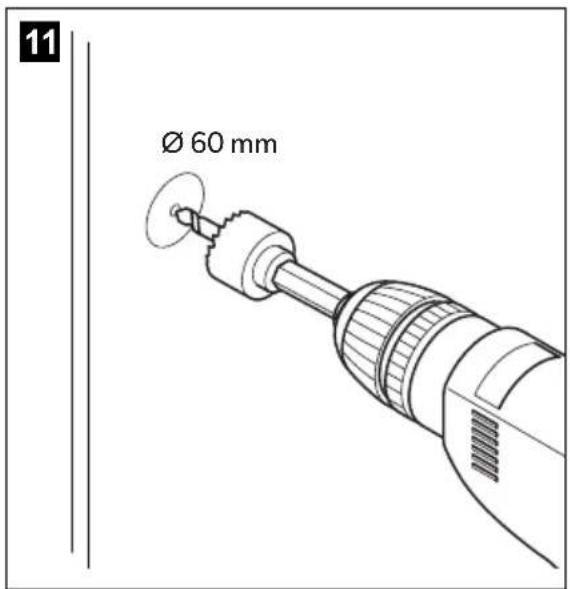
- To install the vacuum cleaner, the wall thickness must be a minimum of 10 mm and a maximum of 25 mm.
- Ensure there is a socket nearby which can be used to supply the vacuum cleaner with power. Do not use extension cables.
- If the vacuum cleaner is being installed in small spaces with poor ventilation (e.g. cabinet), then an air outlet and an air outlet grille with a cross-section of 70 mm must be installed in order to transport warm air generated by the device outside.
▶Ensure that the dust bag and the motor filter are in place.
▶Check the vacuum cleaner works prior to installation.

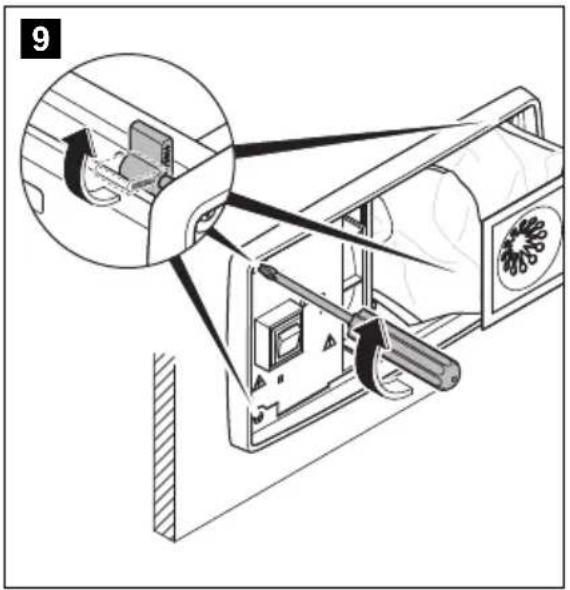
NOTICE!
The bolts on the housing must not be screwed out completely because they are fitted with a spring mechanism.
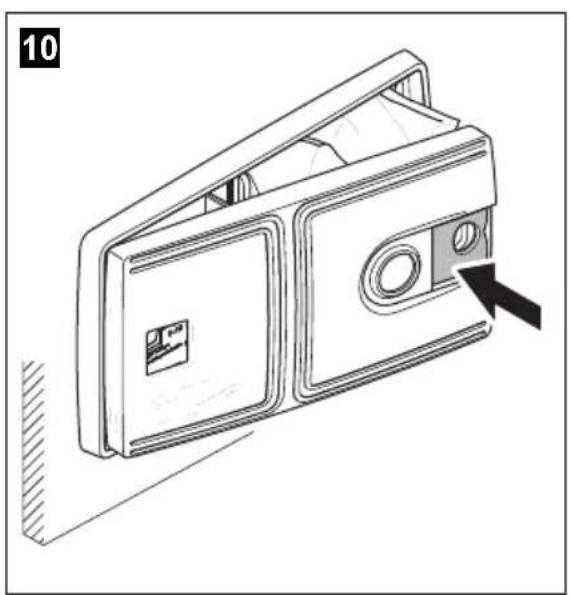
▶ Mount the vacuum cleaner (fig. 4, page 4 to fig. 10, page 5).

NOTE
The mounting connectors (fig. 3 1, page 4) need to be glued on the device-side using a standard adhesive. The screw connectors (fig. 3 2, page 4) are screwed into the connection hose and inserted into the mounting connectors.
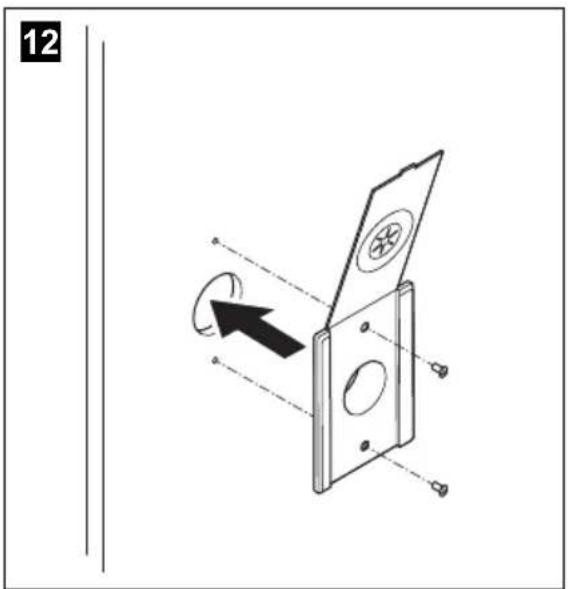
▶ Mount the hose socket and route the connection hose (fig. 11, page 5, and fig. 12, page 5).
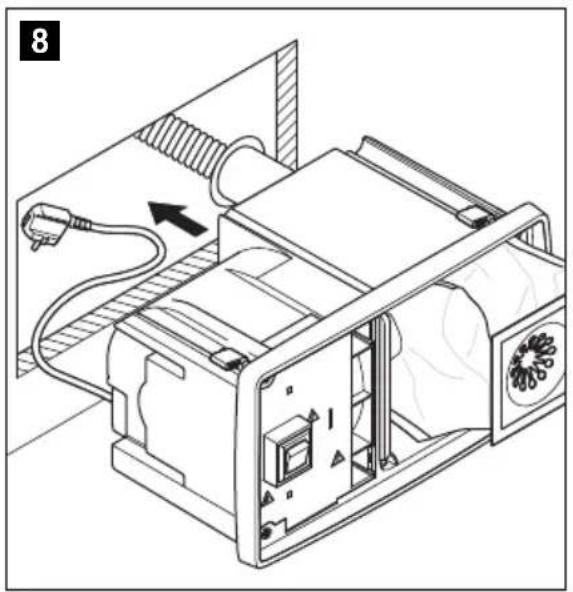
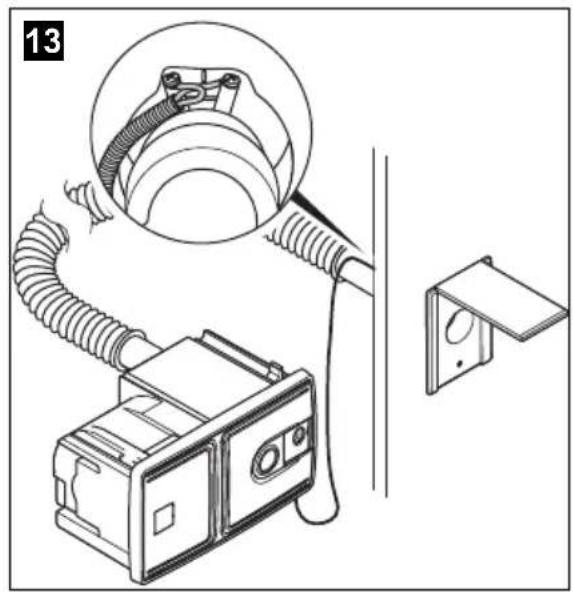
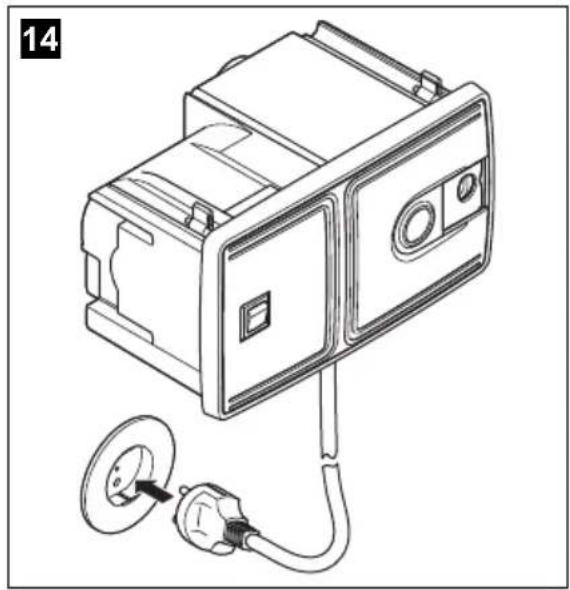
Connecting electrical power to the vacuum cleaner
▶ Connect the orange-coloured 24 V--- cables on the rear of the device to the contacts on the hose socket (fig. 13, page 6).

WARNING!
Danger of electrocution and serious injury.
Only use the 230 V connection cable supplied.
▶ Connect the 230 V connection cable to a suitable socket (fig. 14, page 6).
8 Using the vacuum cleaner

NOTICE!
- Do not use the vacuum cleaner without a dust bag or motor filter.
- Only use spare parts and accessories recommended by the manufacturer.
8.1 Vacuuming using the central vacuum cleaner
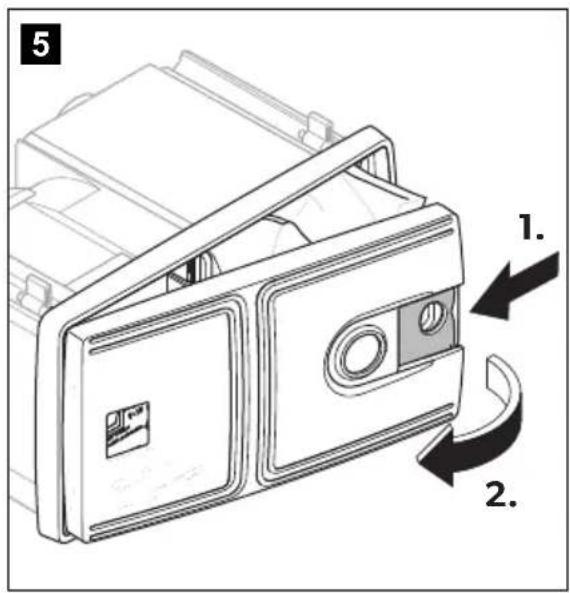
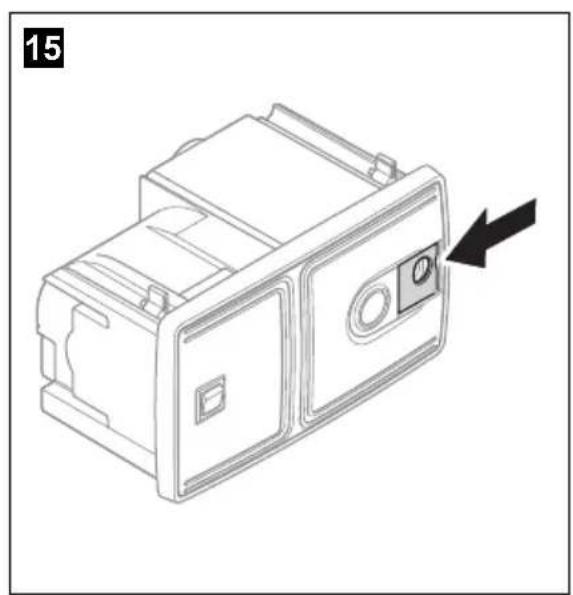
▶ Open the sliding cover (fig. 2 2, page 3) by sliding it to the right.
▶Insert the hose into the hose connection on the device.
▶ Set the switch to position "I" (fig. 2 1, page 3) to switch on the device.
√The vacuum cleaner switches on.
▶ Set the switch to position "O" (fig. 2 1, page 3) to switch off the device.
▶ Disconnect the hose from the hose connection on the device.
▶ Close the sliding cover (fig. 2 2, page 3) by sliding it to the left.
8.2 Vacuuming using the hose socket

NOTE
Use the sliding cover to close up the hose connection on the front of the device if you are vacuuming from the external hose socket. This increases the level of suction.
▶ To switch on, connect the hose to the external hose socket.
√The vacuum cleaner switches on automatically.
▶ To switch off, disconnect the hose from the external hose socket.
√The vacuum cleaner switches off automatically.
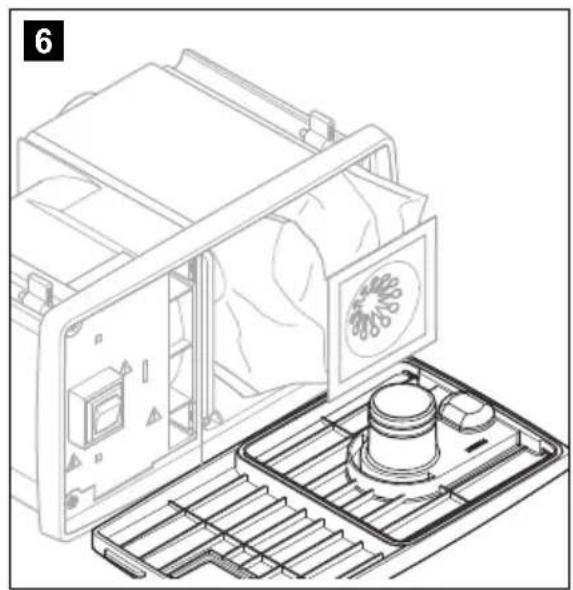
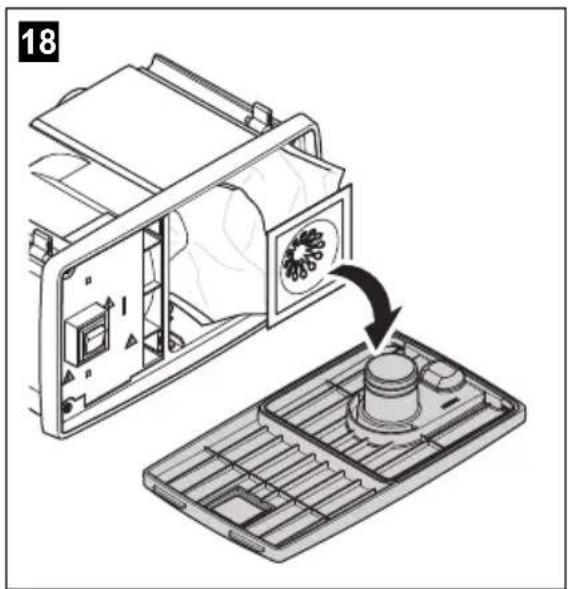
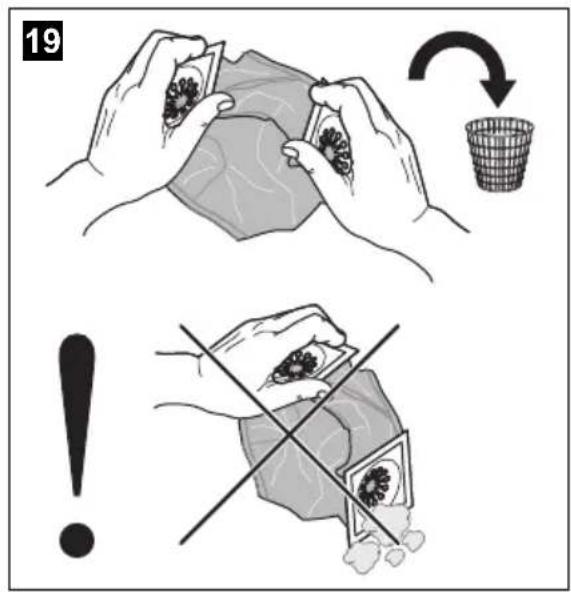
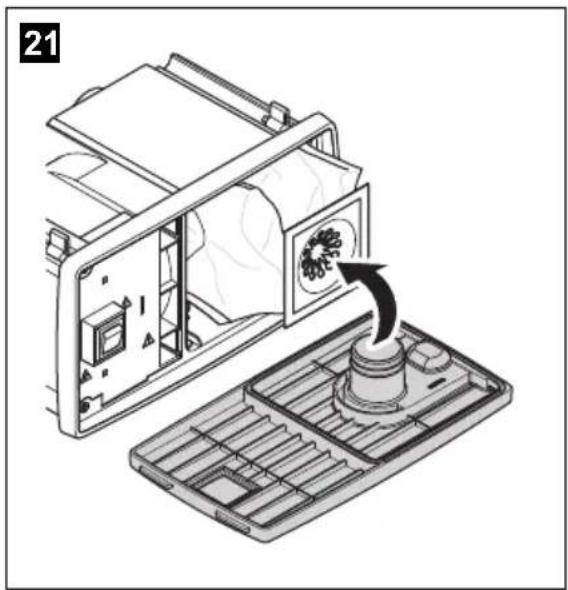
8.3 Changing the dust bag

NOTICE!
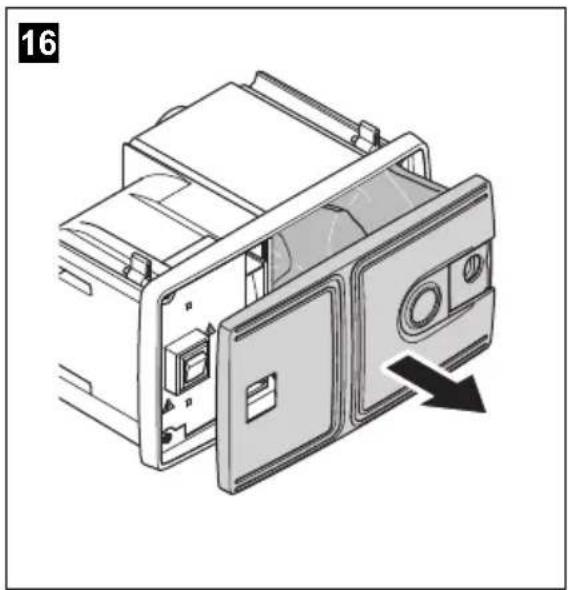
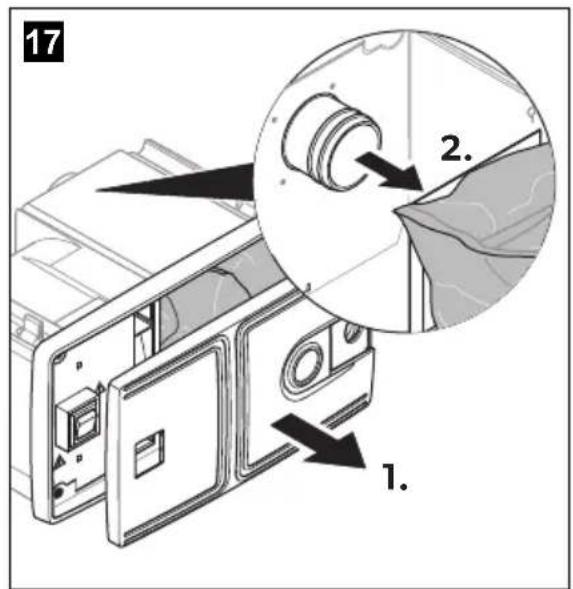
It is important for vacuum cleaner suction that the dust bag is fitted correctly. Please follow the instructions carefully, see fig. 15, page 6 to fig. 22, page 7.

NOTE
- The dust bag has two openings. One of the two ends has two arrows. This end must be attached on the device with the arrows pointing upwards (fig. 20, page 7). Make sure the dust bag is fitted in the correct position.
- Firstly remove the opening from the connecting nozzle in the device and then remove the other opening from the connecting nozzle on the front of the device. Hold the openings upwards to prevent any dust falling out.
- Replace or clean the motor filter after you have changed the dust bag five times.
▶ Change the dust bag (fig. 15, page 6, to fig. 22, page 7).
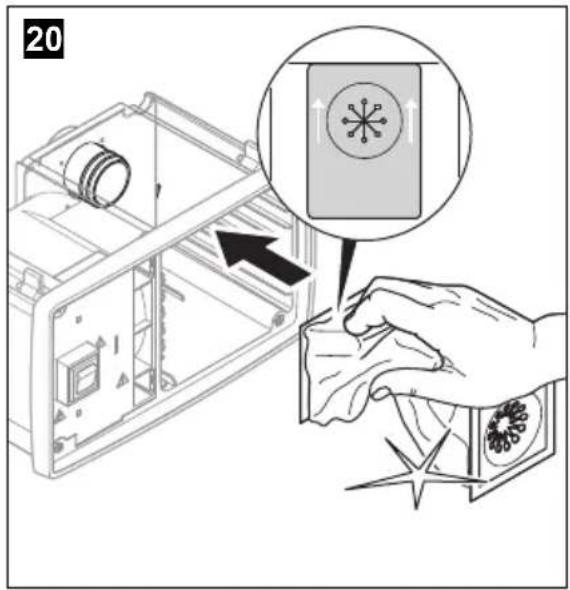
8.4 Replacing and cleaning the motor filter

NOTE
Replace or clean the motor filter after you have changed the dust bag five times or if it is heavily soiled.
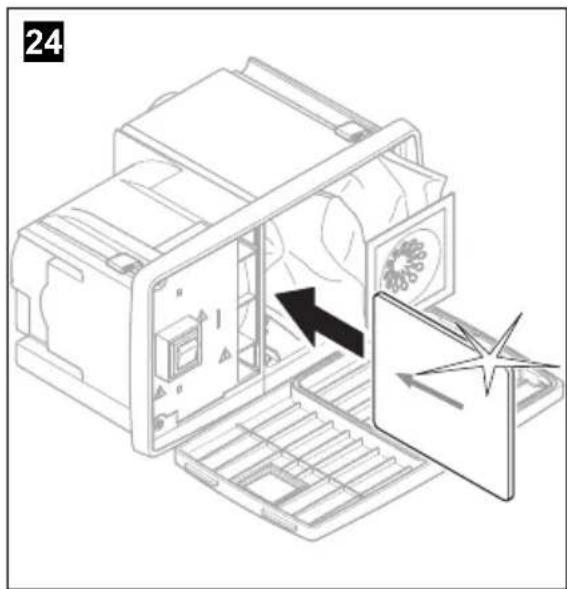
You can wash the motor filter by hand in mild soapy water. Do not wash it in a washing machine or with hard objects. Leave it to dry before fitting it in the vacuum cleaner in the direction of the arrows.
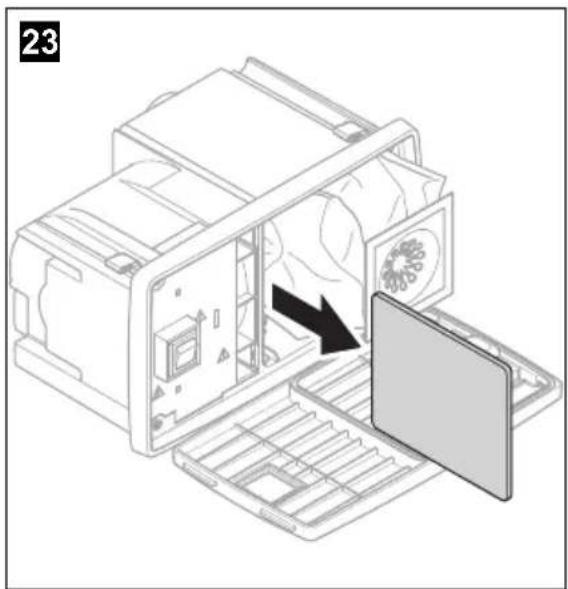
Remove the motor filter and insert a new one or reinsert the cleaned motor filter (fig. 23, page 7 and fig. 24, page 7).
9 Maintaining and cleaning the vacuum cleaner

NOTICE!
Do not use sharp or hard objects or cleaning agents for cleaning as these may damage the product.
▶Occasionally clean the product with a damp cloth.
10 Troubleshooting

NOTE
The vacuum cleaner is equipped with a thermal overload protection which prevents the motor from overheating.
If the motor stops, switch the device off by setting the switch to position "O" or disconnecting the suction hose from the external hose socket.
Let the device cool down for around 1 hour. If this fault still occurs following the troubleshooting measures described below, then please contact the manufacturer or your dealer.
If the motor stops, switch off the vacuum cleaner and proceed as follows:
▶Check whether the suction hose is blocked.
Hold the suction hose up and drop a small coin in from above. If the coin does not fall through the hose, it is blocked. Push the dirt ball through the hose using a long rod.
▶Check the dust bag.
If a large amount of dirt which is not household dust (plasterboard dust, fine sawdust etc.) is vacuumed up, the pores in the dust bag can get blocked.
Insert a new dust bag.
▶Clean the suction hose if it is heavily soiled.
– Hold the ends of the suction hose up high.
– Pour liquid detergent into both ends.
- Fill up with water while holding both ends up.
- Shake the suction hose to and fro to loosen the dirt.
– Pull the suction hose apart as far as possible.
- Rinse out the dirt.
- Repeat this procedure until the suction hose is clean.
– Hang the suction hose up from the middle and leave it to dry before using it again.
▶Check whether the floor nozzle is blocked.
Clean the floor nozzle.
▶Check the motor filter.
Clean or replace the motor filter.
11 Warranty
The statutory warranty period applies. If the product is defective, please contact the manufacturer's branch in your country (see the back of the instruction manual for the addresses) or your retailer.
For repair and guarantee processing, please include the following documents when you send in the device:
• A copy of the receipt with purchasing date
• A reason for the claim or description of the fault
12 Disposal
▶ Place the packaging material in the appropriate recycling waste bins wherever possible.
If you wish to finally dispose of the product, ask your local recycling centre or specialist dealer for details about how to do this in accordance with the applicable disposal regulations.
13 Technical data
| CV1004 |
| Ref. no.: 9103501126 | |
| Input voltage: 220 - 240 V~ | |
| Power consumption: 950 W | |
| Current: 4.5 A | |
| Suction power: 2500 mm water column | |
| Operating temperature: -15 °C to +40 °C | |
| Dimensions W x H x D: 298 x 171 x 175 mm | |
| Weight: 2.7 kg | |
| Certificate: | CE |
Dometic Australia Pty. Ltd.
1 John Duncan Court
Varsity Lakes QLD 4227
1800212121
+61755076001
Mail: sales@dometic.com.au
AUSTRIA
Dometic Austria GmbH
Neudorferstraße 108
A-2353 Guntramsdorf
+43 2236 908070
+43 2236 90807060
Mail: info@dometic.at
BENELUX
Dometic Branch Office Belgium
Lourdesstraat 84
B-8940 Geluwe
+32 2 3598040
+32 2 3598050
Mail: info@dometic.be
BRAZIL
Dometic DO Brasil LTDA
Avenida Paulista 1754, conj. 111
SP 01310-920 Sao Paulo
+551132513352
+551132513362
Dometic Group Asia Pacific
Suites 2207-11 · 22/F · Tower
The Gateway · 25 Canton Road,
Tsim Sha Tsui · Kowloon
+85224611386
+852 24665553
Mail: info@waeco.com.hk
HUNGARY
Dometic Zrt. Sales Office
Kerékgyártó u. 5.
H-1147 Budapest
+3614684400
+3614684401
Domettic Italy S.r.l.
Via Virgilio,
I-47122 Forlì (FC)
+390543754901
+39 0543 754983
Mail: vendite@dometic.it
JAPAN
Dometic KK
Maekawa-Shibaura, Bldg. 2
2-13-9 Shibaura Minato-ku
Tokyo 108-0023
+81354453333
+81354453339
Mail: info@dometic.jp
MEXICO
Circuito Médicos No. 6 Local 1
Colonia Ciudad Satélite
CP 53100 Naucalpan de Juárez
Estado de México
+52 55 5374 4108
+52 55 5393 4683
Mail: info@dometic.com.mx
NETHERLANDS
Dometic Benelux B.V.
Ecustraat 3
NL-4879 NP Etten-Leur
+31765029000
+31 76 5029019
Mail: info@dometic.nl
NEW ZEALAND
Dometic New Zealand Ltd.
PO Box 12011
Penrose
Auckland 1642
+6496221490
日 +6496221573
Mail: customerservices@dometic.co.nz
NORWAY
Dometic Norway AS
∅sterøyveien 46
N-3232 Sandefjord
+47 33428450
+47 33428459
Mail: firmapost@dometic.no
POLAND
Dometic Poland Sp. z o.o.
Ul. Puławska 435A
PL-02-801 Warszawa
+48 22 414 3200
+48 22 414 3201
Mail: info@dometic.pl
PORTUGAL
Dometic Spain, S.L.
Komsomolskaya square 6-1
RU-107140 Moscow
+7 495 780 79 39
+7 495 916 56 53
Mail: info@dometic.ru
SINGAPORE
Dometic Pte Ltd
18 Boon Lay Way
06-141 Trade Hub 21
Singapore 60
+65 6795 3177
+65 6862 6620
Mail: dometic@dometic.com.sg
SLOVAKIA
Dometic Slovakia s.r.o.
Sales Office Bratislava
Nádražná 34/A
900 28 Ivánka pri Dunaji
^① /吕 +421 2 45 529 680
Mail: bratislava@dometic.com
SOUTH AFRICA
Dometic (Pty) Ltd.
Regional Office
South Africa & Sub-Saharan Africa
2 Avalon Road
West Lake View Ext 11
Modderfontein 1645
Johannesburg
+27873530380
Mail: info@dometic.co.za
SPAIN
Dometic Spain S.L.
Avda. Sierra del Guadarrama, 16
E-28691 Villanueva de la Cañada
Madrid
+34918336089
+34 900 100 245
Mail: info@dometic.es
SWEDEN
Dometic Scandinavia AB
Gustaf Melins gata 7
Dometic Switzerland AG
Riedackerstrasse 7a
CH-8153 Rümlang
+41 44 8187171
E +41 44 8187191
Mail: info@dometic.ch
UNITED ARAB EMIRATES
Dometic Middle East FZCO
P.O. Box 17860
S-D 6, Jebel Ali Freezone
Dubai
+97148833858
+97148833868
Mail: info@dometic.ae
UNITED KINGDOM
Dometic UK Ltd.
Dometic House, The Brewery
Blandford St. Mary
Dorset DT119LS
+44 344 626 0133
+44 344 626 0143
Mail: customerservices@dometic.co.uk
USA
Dometic RV Division
1120 North Main Street
Elkhart, IN 46515
+1 574-264-2131