
CNS 1830 Battery - Saw Kärcher - Free user manual and instructions
Find the device manual for free CNS 1830 Battery Kärcher in PDF.


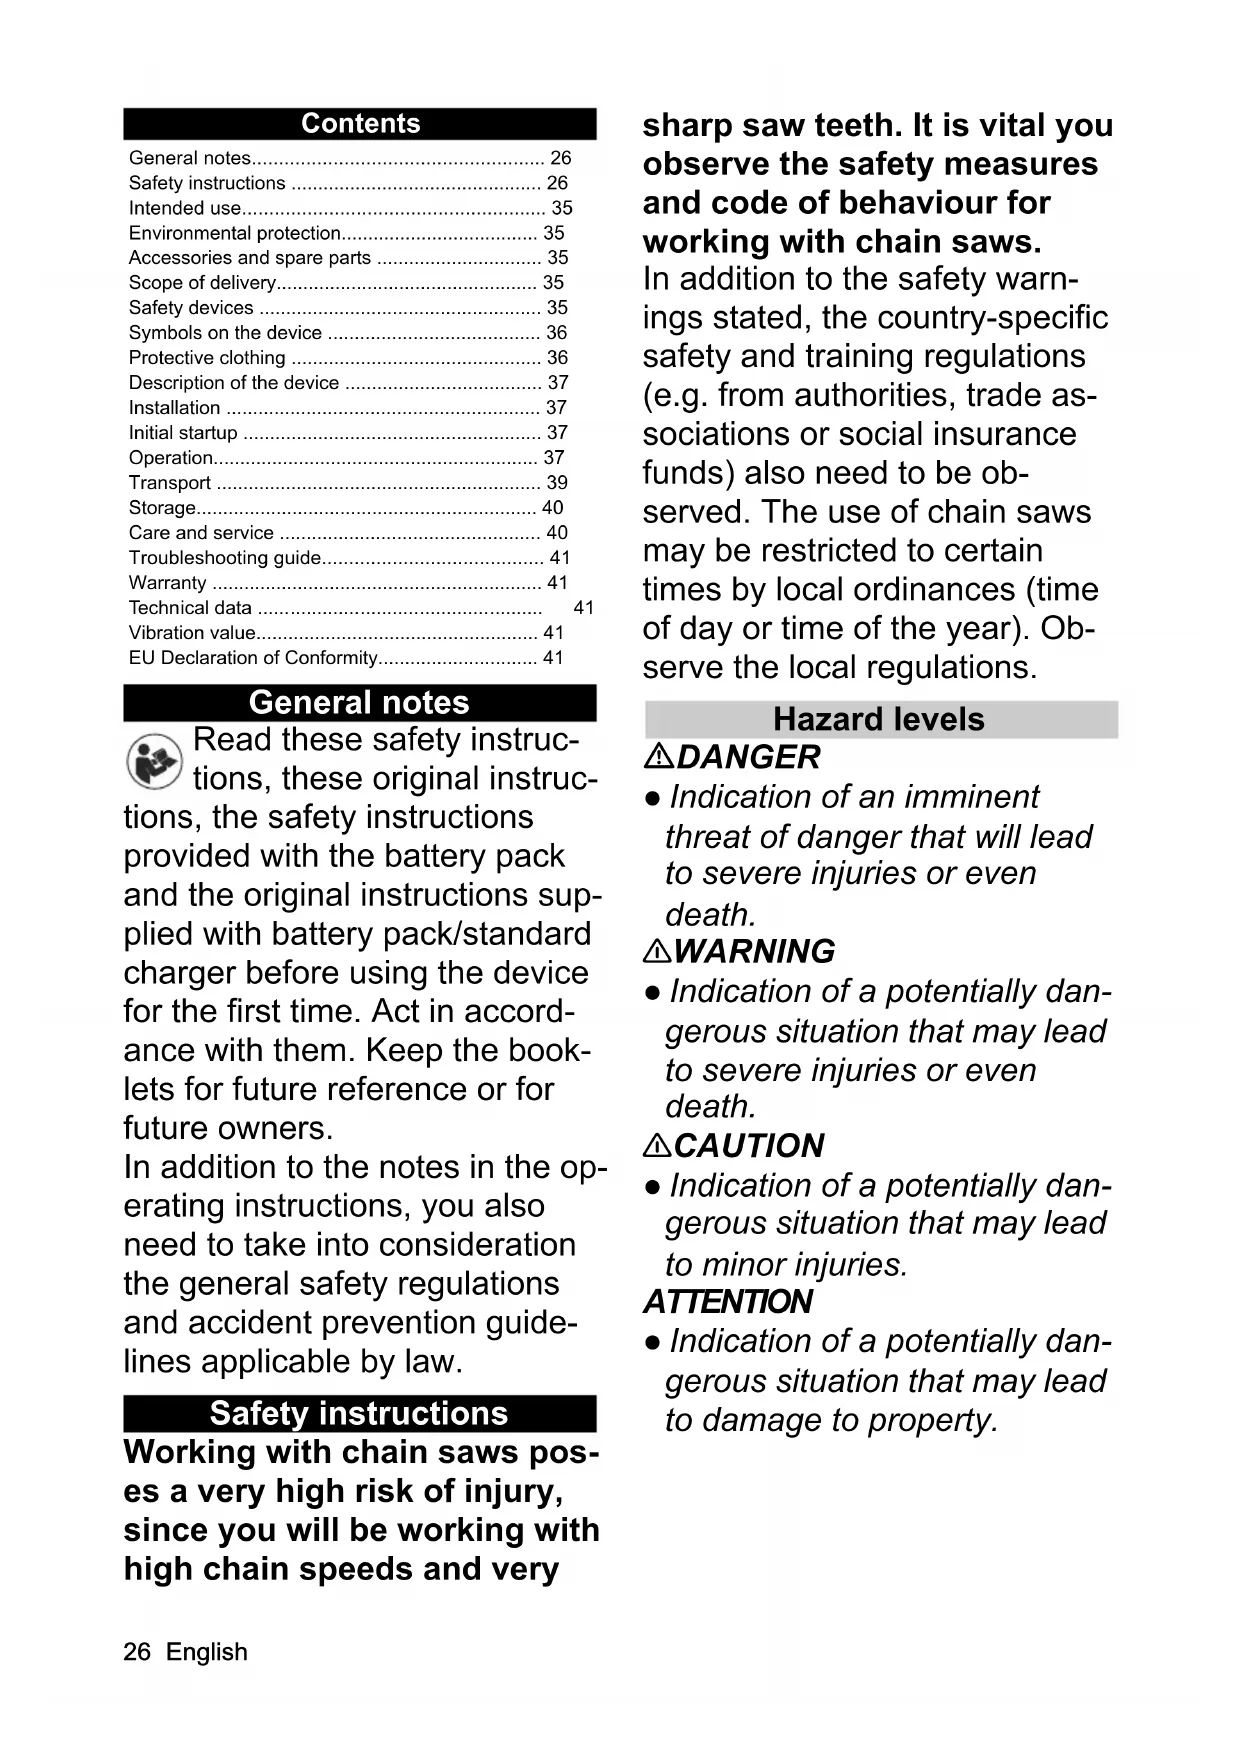


| Product type | Cordless chainsaw |
| Brand | Kärcher |
| Model | CNS 1830 Battery |
| Power supply | Kärcher Battery Power 18 V battery (not included) |
| Operating voltage | 18 V |
| Chain speed at no load | 10 m/s |
| Chain oil tank capacity | 200 ml |
| Guide bar length | 300 mm |
| Max. cutting length | 250 mm |
| Chain pitch | 0.375 inch (9.525 mm) |
| Weight (without battery) | 3.2 kg |
| Dimensions (L x W x H) | 735 x 230 x 247 mm |
| Sound pressure level (LpA) | 87.9 dB(A) |
| Sound power level (LwA) | 98.9 dB(A) |
| Vibration value - front handle | 3.5 m/s² |
| Vibration value - rear handle | 5.2 m/s² |
| Safety devices | Chain brake, claw stop, chain latch, low kickback chain |
| User protection | Helmet, hearing protection, safety glasses, gloves, leg protection, safety shoes (not included) |
| Intended use | Outdoor wood cutting, private use |
| Routine maintenance | Chain cleaning, checking tension and chain brake, oil refill |
| Spare parts | Chain, guide bar, battery, charger (original Kärcher recommended) |
| Repairability | Have it repaired by an authorized Kärcher after-sales service |
Frequently Asked Questions - CNS 1830 Battery Kärcher
User questions about CNS 1830 Battery Kärcher
0 question about this device. Answer the ones you know or ask your own.
Ask a new question about this device
Download the instructions for your Saw in PDF format for free! Find your manual CNS 1830 Battery - Kärcher and take your electronic device back in hand. On this page are published all the documents necessary for the use of your device. CNS 1830 Battery by Kärcher.
USER MANUAL CNS 1830 Battery Kärcher
Chairman of the Board of Management
S. Reiser
Director Regulatory Affairs & Certification
71364 Winnenden (Germany)
Tel.: +49 7195 14-0
Fax: +49 7195 14-2212
Winnenden, 2018/09/01
Contents
General notes. 26
Safety instructions 26
Intended use 35
Environmental protection. 35
Accessories and spare parts 35
Scope of delivery 35
Safety devices 35
Symbols on the device 36
Protective clothing 36
Description of the device 37
Installation 37
Initial startup 37
Operation 37
Transport 39
Storage 40
Care and service 40
Troubleshooting guide 41
Warranty 41
Technical data 41
Vibration value 41
EU Declaration of Conformity 41
General notes

Read these safety instructions, these original instructions, the safety instructions provided with the battery pack, and the original instructions supplied with the battery pack/standard charger before using the device for the first time.
Act in accordance with them. Keep the booklets for future reference or for future owners.
In addition to the notes in the operating instructions, you also need to take into consideration the general safety regulations and accident prevention guidelines applicable by law.
Safety instructions
Working with chain saws poses a very high risk of injury, since you will be working with high chain speeds and very sharp saw teeth.
It is vital you observe the safety measures and code of behaviour for working with chain saws.
In addition to the safety warnings stated, the country-specific safety and training regulations (e.g. from authorities, trade associations or social insurance funds) also need to be observed. The use of chain saws may be restricted to certain times by local ordinances (time of day or time of the year). Observe the local regulations.
Hazard levels
DANGER
- Indication of an imminent threat of danger that will lead to severe injuries or even death.
WARNING
- Indication of a potentially dangerous situation that may lead to severe injuries or even death.
CAUTION
- Indication of a potentially dangerous situation that may lead to minor injuries.
ATTENTION
- Indication of a potentially dangerous situation that may lead to damage to property.
General Power Tool Safety Instructions
WARNING
- Read all safety warnings and all instructions.
Failure to follow the warnings and instructions may result in electric shock, fire and/or serious injury. Save all warnings and instructions for future reference.
The term "power tool" in the warnings refers to your mains-operated (corded) power tool or battery-operated (cordless) power tool.
1 Work area safety
a Keep work area clean and well lit. Cluttered or dark work areas invite accidents. b Do not operate power tools in explosive atmospheres, such as in the presence of flammable liquids, gases or dust. Power tools create sparks which may ignite the dust or fumes. c Keep children and bystanders away while operating a power tool.
Distractions can cause you to lose control.
2 Electrical safety
a Power tool plugs must match the outlet. Never modify the plug in any way. Do not use any adapter plugs with earthed (grounded) power tools.
Unmodified plugs and matching outlets will reduce the risk of electric shock.
b Avoid body contact with earthed or grounded surfaces such as pipes, radiators, ranges and refrigerators. There is an increased risk of electric shock if your body is earthed or grounded. c Do not expose power tools to rain or wet conditions. Water entering a power tool will increase the risk of electric shock. d Do not abuse the cord. Never use the cord for carrying, pulling or unplugging the power tool. Keep cord away from heat, oil, sharp edges or moving parts. Damaged or entangled cords increase the risk of electric shock. e When operating a power tool outdoors, use an extension cord suitable for outdoor use. Use of a cord suitable for outdoor use reduces the risk of electric shock. If operating a power tool in a damp location is unavoidable, use a residual current device (RCD) protected supply. Use of an RCD reduces the risk of electric shock.
3 Personal safety
a Stay alert, watch what you are doing and use common sense when operating a power tool. Do not use a power tool while you are tired or under the influence of drugs, alcohol or medication. A moment of inattention while operating power tools may result in serious personal injury.
b Use personal protective equipment. Always wear eye protection. Protective equipment such as dust mask, non-skid safety shoes, hard hat, or hearing protection used for appropriate conditions will reduce personal injuries.
c Prevent unintentional starting. Ensure the switch is in the off-position before connecting to power source and/or battery pack, picking up or carrying the tool. Carrying power tools with your finger on the switch or energising power tools that have the switch on invites accidents.
d Remove any adjusting key or wrench before turning the power tool on. A wrench or a key left attached to a rotating part of the power tool may result in personal injury.
e Do not overreach. Keep proper footing and balance at all times. This enables better control of the power tool in unexpected situations.
f Dress properly. Do not wear loose clothing or jewellery. Keep your hair, clothing and gloves away from moving parts. Loose clothes, jewellery or long hair can be caught in moving parts.
g If devices are provided for the connection of dust extraction and collection facilities, ensure these are connected and properly used. Use of dust collection can reduce dust-related hazards.
4 Power tool use and care
a Do not force the power tool. Use the correct power tool for your application. The correct power tool will do the job better and safer at the rate for which it was designed.
b Do not use the power tool if the switch does not turn it on and off. Any power tool that cannot be controlled with the switch is dangerous and must be repaired.
c Disconnect the plug from the power source and/or the battery pack from the
power tool before making any adjustments, changing accessories, or storing power tools. Such preventive safety measures reduce the risk of starting the power tool accidentally.
d Store idle power tools out of the reach of children and do not allow persons unfamiliar with the power tool or these instructions to operate the power tool. Power tools are dangerous in the hands of untrained users. e Maintain power tools. Check for misalignment or binding of moving parts, breakage of parts and any other condition that may affect the power tool's operation. If damaged, have the power tool repaired before use. Many accidents are caused by poorly maintained power tools. f Keep cutting tools sharp and clean. Properly maintained cutting tools with sharp cutting edges are less likely to bind and are easier to control. g Use the power tool, accessories and tool bits etc. in accordance with these instructions, taking into account the working conditions and the work to
be performed. Use of the power tool for operations different from those intended could result in a hazardous situation.
5 Battery tool use and care
a) Recharge only with the chargers specified by the manufacturer. A charger that is suitable for one type of battery pack may create a risk of fire when used with another battery pack. b) Use power tools only with specifically designated battery packs. Use of any other battery packs may create a risk of injury and fire. c) When the battery pack is not in use, keep it away from other metallic objects, like paperclips, coins, keys, nails, screws or other small metallic objects that can make a connection from one terminal to another. Shorting the battery terminals together may cause burns or a fire. Under abusive conditions, liquid may be ejected from the battery; avoid contact. If contact accidentally occurs, flush with water. If liquid contacts eyes, additionally seek medical help. Liquid ejected from the battery may cause irritation or burns.
6 Service
a) Have your power tool serviced by a qualified repair person using only identical replacement parts. This will ensure that the safety of the power tool is maintained.
Additional General Safety Instructions
Note: Regulations may restrict the use of this device in some regions. Seek advice from your local authorities.
DANGER: Risk of fatal injury from cuts as a result of uncontrolled device movements. Keep body parts away from moving parts. Risk of injury from hurled or falling objects. Never use the device if there are persons, in particular children or animals, within a radius of 15 m. No changes may be made to the device.
WARNING: Children and persons unfamiliar with these instructions are not allowed to operate the device. The age of the operator may be limited by local restrictions. You need an unobstructed view of the work area in order to be able to recognise any potential dangers. Use the device only under good lighting conditions. Before operation, make sure that the device, all control elements including the chain brake and safety devices
are working properly. Check for loose locks, ensure that all protective devices and handles are correctly fitted and securely fastened. Only use the device when it is in a correct condition. Never use the device if the trigger on the handle does not switch on and off correctly. Replace any worn or damaged parts before operating the device. Risk of kickback due to loss of balance. Avoid an abnormal posture, keep a stable, safe footing and maintain your balance. Immediately stop the device and check for damage or identify the cause of the vibration if the device has been dropped, hit or vibrates abnormally. Have damage repaired by the authorised Customer Service or replace the device.
CAUTION: Wear full eye protection and hearing protection, strong and sturdy gloves and head protection when operating the device. Wear a face mask when the work is dusty.
- Wear long, heavy trousers, sturdy shoes, and well-fitting gloves when working with the device. Do not work barefoot. Do not wear any jewelry, sandals, or short trousers. Risk of injury when loose-fitting clothing, hair, or jewelry is caught by moving parts of the device. Keep clothing and jewelry
away from moving parts of the device. Tie long hair back.
- Hearing protection can impair your ability to hear warning sounds, so pay attention to hazards in your vicinity and in the work area. - Only use accessories and spare parts which are approved by the manufacturer. Only original accessories and original spare parts ensure that the appliance will run fault-free and safely.
Chain saw safety warnings
- Keep all parts of the body away from the saw chain when the chain saw is operating. Before you start the chain saw, make sure the saw chain is not contacting anything. A moment of inattention while operating chain saws may cause entanglement of your clothing or body with the saw chain. Always hold the chain saw with your right hand on the rear handle and your left hand on the front handle. Holding the chain saw with a reversed hand configuration increases the risk of personal injury and should never be done.
- Hold the power tool by insulated gripping surfaces only, because the saw chain may contact hidden wiring
or its own cord. Saw chains contacting a "live" wire may make exposed metal parts of the power tool "live" and could give the operator an electric shock.
- Wear safety glasses and hearing protection. Further protective equipment for head, hands, legs, and feet is recommended. Adequate protective clothing will reduce personal injury by flying debris or accidental contact with the saw chain.
- Do not operate a chain saw in a tree. Operation of a chain saw while up in a tree may result in personal injury. Always keep proper footing and operate the chain saw only when standing on fixed, secure, and level surface. Slippery or unstable surfaces such as ladders may cause a loss of balance or control of the chain saw.
- When cutting a limb that is under tension, be alert for spring back. When the tension in the wood fibres is released, the spring-loaded limb may strike the operator and/or throw the chain saw out of control. Use extreme caution when cutting brush and saplings. The slender material may catch the saw chain and be
whipped toward you or pull you off balance.
- Carry the chain saw by the front handle with the chain saw switched off and away from your body. When transporting or storing the chain saw, always fit the guide bar cover. Proper handling of the chain saw will reduce the likelihood of accidental contact with the moving saw chain.
- Follow instructions for lubricating, chain tensioning, and changing accessories. Improperly tensioned or lubricated chain may either break or increase the chance for kickback.
- Keep handles dry, clean, and free from oil and grease. Greasy, oily handles are slippery causing loss of control.
- Cut wood only. Do not use chain saw for purposes not intended. For example: do not use chain saw for cutting plastic, masonry or non-wood building materials. Use of the chain saw for operations different than intended could result in a hazardous situation.
Causes and operator prevention of kickback
Kickback may occur when the nose or tip of the guide rail touches an object, or when the wood closes in and pinches the saw chain in the cut.
Tip contact in some cases may cause a sudden reverse reaction, kicking the guide rail up and back towards the operator.
Pinching the saw chain along the top of the guide rail may push the guide rail rapidly back towards the operator.
Either of these reactions may cause you to lose control of the saw, which could result in serious personal injury. Do not rely exclusively upon the safety devices built into your saw. As a chain saw user, you should take several steps to keep your cutting jobs free from accident or injury.
Kickback is the result of tool misuse and/or incorrect operating procedures or conditions and can be avoided by taking proper precautions as given below:
- Maintain a firm grip, with thumbs and fingers encircling the chain saw handles, with both hands on the saw and position your body and arm to allow you to resist kickback forces. Kickback forces can be controlled by the operator, if proper precautions are taken. Do not let go of the chain saw.
Do not overreach and do not cut above shoulder height. This helps prevent unintended tip contact and enables better control of the chain saw in unexpected situations.
- Do not overreach and do not cut above shoulder height. This helps prevent unintended tip contact and enables better control of the chain saw in unexpected situations.
- Only use replacement bars and chains specified by the manufacturer. Incorrect replacement bars and chains may cause chain breakage and/or kickback.
- Follow the manufacturer's sharpening and maintenance instructions for the saw chain. Decreasing the depth gauge height can lead to increased kickback.
Additional safety instructions for chainsaws
Note: Karcher recommends sawing tree trunks on a sawhorse during first use. When using the chainsaw, keep a first aid kit for large wounds and a means of calling for help. A larger and more extensive first aid kit should be nearby.
Hold the chainsaw tightly with both hands. Hold the handles with your thumb on one side and your fingers on the other side. Hold the rear handle with your right hand and the front handle with your left hand. Risk of injury. Do not make any modifications to the device. Do not use the device to drive attachments or devices not recommended by the manufacturer.
- Before switching on the device, make sure that the saw chain does not touch any objects. Serious injuries or death can occur if a wrongly tensioned saw chain jumps out of the guide rail. Check the chain tension before each use. The length of the chain depends on the temperature. Ensure that all protective devices, handles, and bucking spikes are correctly fitted, securely fastened, and in good condition. Serious injuries can occur due to incorrect working methods:
- You need to be alert at all times and be in control of your workplace when working with the chainsaw. The size of the workspace depends on the task to be performed and the size of the tree or work piece. Felling a tree requires a larger workspace than, for example, trimming.
- Never saw with your body in line with the guide rail and chain. This reduces the danger
of being hit by the chain on the head or body during a kickback.
- Do not move the chainsaw back and forth but rather let the chain do the work. Keep the chain sharp and do not try to push the chain through the cut.
- Do not apply pressure to the saw at the end of the cut. Be prepared to relax the load on the saw when it has cut through the wood.
- Do not stop the chainsaw while sawing. Let the saw run until it has finished the saw cut.
- Familiarize yourself with your new chainsaw by making simple cuts in safely supported wood. Repeat this exercise if you have not used your chainsaw for a long time. - Do not saw vines and/or bushes with a diameter of less than 75 mm. - Switch the device off, lock the chain brake, remove the battery pack, and make sure that all moving parts have stopped moving:
- Before cleaning the device or removing a blockage.
- When leaving the device unattended.
- Before mounting or removing attachments. Before checking, maintaining, or working on the device.
CAUTION: The chainsaw is a heavy device. People who use the chainsaw should be physically fit and in good health. You should have good eyesight, agility, balance, and manual skills. In case of doubt, they should not use the chainsaw. When working with the device, always wear a safety helmet with a grille visor to reduce the danger of injury from a kickback into the face and head.
Residual risks
WARNING
- Certain residual risks remain present, even when the device is operated in the prescribed manner. The following dangers can be present when using the device: Vibration can cause injuries. Use the correct tools for the job, use the handles provided, and restrict the working time and hazard exposure time.
- Noise can cause hearing injuries. Wear hearing protection and limit the duration of exposure.
- Incision injuries on contact with exposed saw teeth of the saw chain.
- Incision injuries due to unforeseen, abrupt movements or kickback of the guide bar scabbard.
- Incision injuries / risk of injection by parts flying away from the saw chain. Injuries caused by hurled objects (wood shavings, splinters).
- Inhalation of dust and particles.
- Skin contact with the lubricant / oil.
Risk reduction
CAUTION
- Using the device for longer periods can cause poor circulation in the hands due to vibrations. A general period of use cannot be set, because this depends on several influencing factors:
- Personal tendency to suffer from poor circulation (frequently cold fingers, tingling sensation in the fingers)
- Low ambient temperature. Wear warm gloves to protect your hands.
- Holding the device too tightly hindering blood circulation.
- Continuous operation is more harmful than operation interrupted by work breaks. You should see a doctor if using the device regularly and for lengthy periods of time, and in the event of repeated occurrences of symptoms such as tingling in the fingers or cold fingers.
Intended use
△DANGER
Improper use
Danger of death from incision injuries
Only use the device for its proper use.
The chainsaw is only intended for private use. The chainsaw is intended for outdoor use. - For safety reasons, always hold the chainsaw firmly with both hands. - The chainsaw was developed for sawing small branches, large branches, trunks and beams. The cutting length of the guide rail determines the maximum possible diameter of the sawed material. The chainsaw may only be used for cutting wood. - Do not use the chainsaw in a wet environment or in the rain. - Use the chainsaw only in a well lit environment. - Modifications and changes to the device that are not authorised by the manufacturer are prohibited for safety reasons.
Any other use is prohibited. The user shall be liable for hazards arising as a result of improper use.
Environmental protection

The packing materials can be recycled. Please dispose of packaging in accordance with the environmental regulations.

Electrical and electronic appliances contain valuable, recyclable materials and often components such as batteries, rechargeable batteries or oil, which - if handled or disposed of incorrectly - can
pose a potential threat to human health and the environment. However, these components are required for the correct operation of the appliance. Appliances marked by this symbol are not allowed to be disposed of together with the household rubbish.
Notes on the content materials (REACH)
Current information on content materials can be found at: www.kaercher.com/REACH
Accessories and spare parts
Only use original accessories and original spare parts. They ensure that the appliance will run fault-free and safely.
Information on accessories and spare parts can be found at www.kaercher.com.
Scope of delivery
The scope of delivery for the appliance is shown on the packaging. Check the contents for completeness when unpacking. If any accessories are missing or in the event of any shipping damage, please notify your dealer.
Safety devices
CAUTION
Missing or modified safety devices
Safety devices are provided for your own protection.
Never modify or bypass safety devices.
Chain with a low risk of kickback
A chain with a low risk of kickback reduces the likelihood of kickback.
The raked teeth (engagement blades) in front of each saw tooth prevent the saw teeth from engaging too deeply in the kickback zone, thus reducing the amount of kickback.
When grinding the chain, there is a danger that this safety function will be overridden. If the saw performance deteriorates, the chain should be replaced for safety reasons. For spare parts, use only the combination of guide rail and chain recommended by the manufacturer.
Guide rails
Guide rails whose tips have a small radius usually carry a lower risk of kickback.
Therefore use a guide rail with matching chain for the task, which is just long enough. Longer guide rails increase the likelihood of loss of control during sawing. Check the chain tension before each use (see chapter Checking the chain tension). If the chain tension is not set correctly, sawing smaller branches (thinner than the full length of the guide rail) increases the danger of the chain being thrown off.
Chain catcher
If the chain loosens or tears, the chain catcher prevents the chain from being thrown in the direction of the user.
Bucking spikes
The integrated bucking spikes can be used as a fulcrum to give the chain saw stability during a cut.
When sawing, press the device forward until the metal spikes penetrate the edge of the wood. Subsequently moving the rear handle up or down in the direction of the cut reduces the physical strain when working with the chainsaw.
Chain brake
Chain brakes are used in case of danger to bring the chain quickly to a standstill.
The chain must come to a standstill immediately when the hand guard/chain brake lever is pressed in the direction of the guide rail.
The chain brake cannot prevent kickback, but reduces the risk of injury if the guide rail hits the user in the event of a kickback.
The proper function of the chain brake must be checked before each use of the device (see chapter Checking the functionality of the chain brake).
Symbols on the device
|  | General warning symbol |
|  | Read the operating instructions and all safety instructions before operating the device for the first time. |
|  | Always wear suitable head protection, eye protection and hearing protection when working with the device. |
|  | Wear non-slip safety shoes when work- ing with the device. |
|  | Wear non-slip, sturdy gloves when work- ing with the device. |
| Danger of death from kickback of the chainsaw. Never touch the objects to be sawn with the tip of the guide rail. | |
| Danger of death due to uncontrolled movements of the chainsaw. Always hold the chainsaw tightly with both hands. | |
| Danger of death due to uncontrolled movements of the chain saw. Never hold the device with just one hand. | |
| Do not subject the device to rain or moist conditions. | |
| 101 dB | The guaranteed sound level specified on the label is 101 dB. |
| The chain brake is released. | |
| The chain brake is locked and the saw chain is blocked. | |
| Turn to adjust the chain tension: = Tension the chain = Loosen chain | |
| Running direction of the chain (marking is under the bar cover) | |
| Lock the chain tensioner | |
| Unlock the chain tensioner |
Protective clothing
DANGER
Risk of fatal injury from cut injuries. Wear suitable protective clothing when working with the device. Observe the local regulations for accident prevention.
Head protection
When working with the device, wear a suitable safety helmet that complies with EN 397 and is CE marked. When working with the device, wear hearing protection that complies with EN 352-1 and is CE marked. For protection against flying splinters, wear suitable safety goggles that comply with EN 166 or are CE marked. Or wear a helmet visor that complies with EN 1731 and is CE marked.
Protective helmets with hearing protection and a safety visor are available in specialist shops.
Chainsawing jacket
Wear a chainsawing jacket satisfying the requirements of EN 381-11 and labelled with the CE marking when working with the device.
Protective gloves
Wear suitable protective gloves with cut protection equipment that comply with EN 381-7 and are CE marked when working with the device.
Leg protection
Wear suitable leg protectors with all-around protection that comply with EN 381-5 and are CE marked when working with the device.
Safety shoes
Wear non-slip safety shoes that comply with EN 20345 and are marked with a chainsaw symbol working with the device. This ensures that the safety shoes comply with EN 381-3.
If you only use the chainsaw occasionally, the ground is level and there is little danger of tripping or snagging in bushes, you can use safety shoes with steel front caps and protective leggings that comply with EN 381-9.
Description of the device
The maximum amount of equipment is described in these operating instructions. Depending on the model used, there are differences in the scope of delivery (see packaging).
See graphics page for illustrations. Illustration A
1 Chain, 2 Guide rail, 3 Bucking spikes, 4 Chain oil tank cap, 5 Hand guard/chain brake lever, 6 Handle, rear, 7 Trigger, 8 Trigger lockout button, 9 Battery pack unlocking button, 10 Bar cover, 11 Handle, front, 12 Ring for adjusting the chain tension, 13 Chain tensioner knob, 14 Chain catcher, 15 Type plate, 16 Chain oil, 17 Bar scabbard, 18* Battery Pack Battery Power 18V, 19* Quick Charger Battery Power 18V
- optional
Rechargeable battery pack
The device can be operated with a 18 V Kärcher Battery Power battery pack.
Installation
Mounting the chain and guide rail
CAUTION
Sharp chain
Incision injuries
Wear protective gloves when working on the chain.
- Release the chain tensioner knob and remove the bar cover.
Illustration B
- Fit the chain on the guide rail. Observe the direction of rotation of the chain.
Illustration C
- Place the chain around the sprocket and insert the guide rail.
Illustration D
- Fit the bar cover and tighten the chain tensioner knob.
Illustration E
- Adjust the chain tension (see Chapter Adjusting the chain tension).
- Install the bar scabbard.
Illustration F
Initial startup
Filling the chain oil tank
- If necessary, clean the area around the filling hole of sawdust and dirt.
- Remove the chain oil tank cap. Illustration G
- Slowly fill the chain oil into the tank. (Illustration H)
- Wipe up any spilled chain oil with a cloth.
- Close the chain oil tank cap.
Checking the chain tension
CAUTION
Sharp chain
Incision injuries
Wear protective gloves when working on the chain.
- Remove the bar scabbard.
(Illustration I)
- Carefully pull on the chain. (Illustration J) The distance between the guide rail and the chain must be 3–4 mm.
- If necessary, adjust the chain tension (see Chapter "Adjusting the chain tension").
Installing the battery pack
- Push the battery pack into the mounting in the device until it audibly latches into place.
(Illustration K)
Operation
Basic operation
- Examine the tree and branches for damage such as rot.
In the case of damaged or rotten branches, seek the advice of a professional arborist.
- Remove the bar scabbard.
- Hold the device firmly with both hands.
Switch on the device.
- Pull the hand guard/chain brake lever in the direction of the handle.
Illustration L
The chain brake is released.
- Press the trigger lockout button.
Illustration M
- Press the trigger.
The device starts up.
Interrupting operation
- Release the trigger.
The device stops.
- Push the hand guard/chain brake lever towards the guide rail.
Illustration N
The chain brake is locked and the saw chain is blocked.
- Remove the battery pack from the device (see Chapter "Removing the battery pack").
Working techniques
Working position
DANGER
Uncontrolled movements of the chainsaw
Danger of death from incision injuries
Plan the cut before cutting and identify any potential dangers.
Always hold the chain saw firmly with both hands.
- Do not guide the chainsaw in the body axis.
Illustration O
- Carry the chainsaw at your side so that parts of your body do not get in the range of movement of the chainsaw.
- Keep as far away as possible from the sawed material.
- Never work on a ladder or standing in a tree.
- Never work in unstable locations.
Pull in/recoil
△DANGER
Uncontrolled movements of the chainsaw
Danger of death from incision injuries
Plan the cut before cutting and identify any potential dangers.
Always hold the chain saw firmly with both hands.
Pull in/recoil is an effect that occurs in principle in the opposite direction to the chain running direction on the sawed material.
Illustration P
① Pull in
② Recoil
When sawing with the underside of the guide rail - forehand cut - the chainsaw can be pulled suddenly towards the sawn object if the saw chain jams or hits a solid object in the wood.
- To avoid pulling in, always set the bucking spikes securely onto the wood.
When sawing with the top side of the guide rail (backhand cut), the chainsaw can be propelled back towards the user if the saw chain jams or hits a solid object in the wood.
- To avoid a recoil:
- Do not pinch the top of the guide rail.
- Do not twist the guide rail in the cut.
Kickback
△DANGER
Uncontrolled movements of the chainsaw
Danger of death from incision injuries
Plan the cut before cutting and identify any potential dangers.
Always hold the chainsaw firmly with both hands.
When kickback occurs, the chainsaw is suddenly and uncontrollably flung in the direction of the user.
A kickback occurs when, e.g., the saw chain in the upper region of the blade guide tip unintentionally encounters an obstacle or is trapped.
Illustration Q
Always hold the chainsaw so that the kickback forces can be withstood. Do not let go of the chainsaw. Do not bend too far forward when sawing. Do not use the chainsaw above shoulder level. Always wait until the chain has reached full speed and saw at full throttle. Do not saw with the saw rail tip. Insert the guide rail into a started cut only with extreme care. Pay attention to the position of the trunk and to forces that can close the cut and jam the saw chain. Never saw off several branches at the same time when pruning. Only work with a sharp and properly tensioned chain. Use a chain with a low kickback risk and a guide rail with a small rail head.
Plan the fall direction and retreat path
DANGER
Falling tree
Danger of death
Tree felling work may only be carried out by trained persons.
When planning the fall direction, note the following:
The distance to the next workplace must be at least 2.5 tree lengths. Do not perform felling in strong wind. The tree can fall unchecked. Determine the direction of fall based on tree growth, terrain (slope) and weather conditions. Always drop the tree into a growth gap, never onto other trees.
A retreat path must be planned for every worker. Where:
The retreat path is to be positioned approx. 45° diagonally opposite the direction of fall.
Illustration R
Free the retreat path from obstacles. Do not place any tools and equipment on the retreat path. When working on a steep slope, plan the retreat path parallel to the slope. When using the retreat path, watch for falling branches and observe the crown space.
Preparing the work area at the trunk
- Clean the work area at the trunk of interfering branches, scrub and obstacles. Safe stance ensured.
- Thoroughly clean the root, e.g. with an axe. Sand, stones and other foreign matter make the chain blunt.
- Remove large roots.
a Cut the root vertically.
Illustration S
b Cut the root horizontally. c Remove the loose root piece from the work area.
Setting the felling cut
△DANGER
Falling tree
Danger of death
Tree felling work may only be carried out by trained persons.
- Make sure nobody will be endangered by the falling tree. Calls can be overhead due to engine noise. Only persons occupied with felling may be present in the felling area.
- Set the felling notch at right angles to the direction of fall.
a As close as possible to the ground, make a horizontal cut (sole cut) over approx. 1/3 of the trunk diameter.
Illustration T
b Make an oblique cut (roof cut) at an angle of approx. 45-60°.
- Set the felling cut.
a Make the felling cut parallel to the sole cut and at least 50 mm higher. b Only make the felling cut so far that a break-off strip at least 50 mm wide remains. The break-off strip prevents the tree from twisting and falling in the wrong direction. As the fell line approaches the break-off strip, the tree should begin to fall. 4. Stop the felling cut if there is a danger that the tree will not fall in the desired direction or sway back and jam the saw chain. Use wedges to extend the cut and fell the tree in the desired direction. 5. Pull the chainsaw out of the cut when the tree starts to fall. 6. Switch off the device. 7. Lock the chain brake. 8. Lower the chainsaw. 9. Follow the planned retreat route.
Cutting tensioned wood
△DANGER
Uncontrolled movements of chainsaw and sawing material
Life-threatening incision injuries, injuries caused by sawed material
Plan the cut before cutting and identify any potential dangers.
Always hold the chainsaw firmly with both hands.
Tensioned wood is created when a trunk, branch, rooted stump or sapling is tensioned by other wood.
- Watch out for tensioned wood, as there is a danger that it will snap back to its original position.
Illustration U
- Carefully saw the tensioned wood from the pressure side (see also Chapter Trimming a tensioned trunk). Illustration V
Pruning
DANGER
Kickback
Life-threatening incision injuries
When pruning, make sure that the guide rail/chain does not become jammed.
WARNING
Changing weight distribution when pruning
Risk of injury due to uncontrolled movement of the trunk. Select the work area so that no danger arises.
- Prune in the direction of growth.
Illustration W
- Prune from top to bottom.
- Leave larger branches below as supports to keep the tree above the ground. Support the chainsaw as much as possible.
- Do not prune while standing on the trunk.
- Do not saw with the tip of the guide rail.
- Watch out for branches that are under tension. Cut branches that are under tension from bottom to top.
- Never saw several branches at once.
- Regularly clear the work area from pruned branches.
Cutting a trunk to length
△DANGER
Uncontrolled movements of the chainsaw
Danger of death from incision injuries
Plan the cut before cutting and identify any potential dangers.
Always hold the chain saw firmly with both hands.
ATTENTION
Damage to the chain due to ground contact
Make sure that the chain does not touch the ground.
- Set the chainsaw onto the trunk with the bucking spikes.
- Evenly saw through the trunk.
Trimming a tensioned trunk
△DANGER
Uncontrolled movement of the chainsaw
Life-threatening incision injuries
When trimming tensioned trunks, be sure to follow the sequence of a relief cut at the pressure side and then a separating cut at the tension side.
- Trunk is supported on 2 sides:
a For the relief cut on the pressure side, saw in about 1/3 of the trunk diameter from above.
Illustration X
b Set the cut on the tension side from the bottom.
- Trunk is supported on 1 side:
a For the relief cut on the pressure side, saw in about 1/3 of the trunk diameter from below. Illustration Y
b Set the cut on the tension side from the top.
Removing the battery pack
Note
During longer work breaks, remove the battery pack from the device and secure it against unauthorised use.
- Pull the battery pack unlocking button in the direction of the battery pack.
Illustration Z
- Press the battery pack unlocking button to unlock the battery pack.
- Remove the battery pack from the device.
Finishing operation
- Remove the battery pack from the device (see Chapter Removing the battery pack).
- Clean the device (see Chapter Cleaning the device).
Transport
CAUTION
Failure to observe the weight
Risk of injury and damage
Be aware of the weight of the device during transportation.
CAUTION
Uncontrolled startup
Incision injuries
Remove the battery pack from the device before transport.
Transport the device only with the blade guard fitted.
- Remove the battery pack (see chapter Removing the battery pack).
- Push the hand guard/chain brake lever towards the guide rail.
Illustration N
The chain brake is locked.
- Install the bar scabbard.
Illustration F
- Only carry the device by the handle and with the guide rail facing to the rear.
- Empty the chain oil tank when transporting over longer distances.
a Remove the chain oil tank cap.
Illustration G
b Fill the chain lubricating oil into a suitable container.
c Tighten the chain oil tank cap.
- Secure the device against slipping and tipping over when transporting in vehicles.
Storage
CAUTION
Failure to observe the weight
Risk of injury and damage
Be aware of the weight of the device during storage.
CAUTION
Uncontrolled startup
Incision injuries
Remove the battery pack from the device before storage.
Store the device only with the blade guard fitted.
- Remove the battery pack (see chapter Removing the battery pack).
- Push the hand guard/chain brake lever towards the guide rail.
Illustration N
The chain brake is locked.
- Install the bar scabbard.
Illustration F
- Empty the chain oil tank.
a Remove the chain oil tank cap.
Illustration G
b Fill the chain lubricating oil into a suitable container.
c Tighten the chain oil tank cap.
- If the device is to be stored for more than one month, oil the chain to prevent rust.
- Store the device in a dry, well ventilated location. Keep away from corrosive substances such as garden chemicals and defrosting salt. Do not store the device outdoors.
Care and service
CAUTION
Uncontrolled startup
Incision injuries
Remove the battery from the device before all work on the device.
CAUTION
Sharp chain
Incision injuries
Wear protective gloves when working on the chain.
Cleaning the device
- Remove the battery pack (see Chapter Removing the battery pack).
- Use a brush to clean the chain of cutting residue and dirt.
Illustration AA
- Clean the housing and handles with a soft, dry cloth.
- Check the function of the chain brake after every cleaning (see Chapter Checking the functionality of the chain brake).
Maintenance intervals
Before every use
The following activities must be carried out before every use:
- Check the filling level of the chain oil, top up the chain oil if necessary (see Chapter Filling the chain oil tank).
- Check the chain tension (see Chapter Checking the chain tension).
- Check the chain for sufficient sharpness, if necessary replace the chain (see Chapter Replacing the chain and guide rail).
- Check the device for damage.
- Check all pins, nuts and screws for tightness.
- Check the function of the chain brake (see Chapter Checking the functionality of the chain brake).
Every 5 operating hours
- Check the function of the chain brake every 5 operating hours (see Chapter Checking the functionality of the chain brake).
Maintenance work
Checking the functionality of the chain brake
- Switch the device on.
- While the device is running, turn your hand on the front handle so that the hand guard/chain brake lever is pressed towards the guide rail with the back of your hand.
The chain brake is locked.
The chain must come to a standstill.
- Pull the hand guard/chain brake lever in the direction of the handle.
The chain must release.
Adjusting the chain tension
- Remove the battery pack (see chapter Removing the battery pack).
- Loosen the chain tensioner knob.
Illustration AB
- Adjust the chain tension with the ring.
Illustration AC
- Check the chain tension.
Illustration J
The distance between the guide rail and the chain must be 3-4 mm.
- Tighten the chain tensioner knob.
Replacing the chain and guide rail
CAUTION
Sharp chain
Incision injuries
Wear protective gloves when working on the chain.
- Remove the battery pack (see chapter Removing the battery pack).
- Release the chain tensioner knob and remove the bar cover.
Illustration AD
- Remove the guide rail with the chain tensioner.
Illustration AE
- Remove the chain tensioner if the guide rail is to be replaced.
Illustration AF
- Dispose of the old chain and, if necessary, the guide rail properly.
- If necessary, mount the chain tensioner on the new guide rail.
Illustration AG
- Fit the new chain on the guide rail. Observe the direction of rotation of the chain.
Illustration C
- Place the chain around the sprocket and insert the guide rail.
Illustration D
- Fit the bar cover and tighten the chain tensioner knob.
Illustration E
- Adjust the chain tension (see Chapter Adjusting the chain tension).
Troubleshooting guide
Malfunctions often have simple causes that you can remedy yourself using the following overview. When in doubt, or in the case of malfunctions not mentioned here, please contact your authorised Customer Service.
As the battery pack ages, even if it is looked after, its capacity reduces such that the full run time will no longer be reached when fully charged. This does not indicate a defect.
| Fault Cause Rectification | ||
| The device does not start up | Battery pack is empty ● Charge the battery pack. | |
| Battery pack is defective. ● Replace the battery pack. | ||
| Battery pack is not inserted correctly. | ● Push the battery pack into the mounting until it latches into place. | |
| The device stops during operation | The battery has overheated | ● Stop working and allow the battery to cool down to normal battery temperature. |
| Motor has overheated | ● Stop working and allow the motor to cool down. | |
Warranty
The warranty conditions issued by our relevant sales company apply in all countries. We shall remedy possible malfunctions on your appliance within the warranty period free of cost, provided that a material or manufacturing defect is the cause. In a warranty case, please contact your dealer (with the purchase receipt) or the next authorised customer service site.
(See overleaf for the address)
Technical data
| Device performance data | ||
| Working voltage of the battery | V | 18 |
| No-load chain speed | m/s | 10 |
| Chain oil tank volume | ml | 200 |
Determined values in acc. with EN 60745-1, EN 60745-2-13
| Sound pressure level LpA | dB(A) | 87,9 |
| Uncertainty KpA | dB(A) | 3,0 |
| Sound power level LwA | dB(A) | 98,9 |
| Uncertainty KwA | dB(A) | 1,4 |
| Front handle hand-arm vibration value | m/s2 | 3,5 |
| Rear handle hand-arm vibration value | m/s2 | 5,2 |
Uncertainty K m/s2 1.5 Dimensions and weights
| Length x width x height | mm | 735 x 230 x 247 |
| Guide rail length | mm | 300 |
| Cutting length | mm | 250 |
| Chain pitch | in (mm) | 0,375 (9,525) |
| Weight (without battery pack) | kg | 3,2 |
Subject to technical modifications.
Vibration value
WARNING
The specified vibration value was measured using a standard test procedure and may be used to compare devices.
The specified vibration value may be used in a provisional assessment of the load.
Depending on the way the device is used, the vibration emission can deviate from the specified overall value during the current use of the device.
Device with a hand-arm vibration value > 2.5 m/s² (see chapter Technical Data in the operating instructions)
CAUTION: Uninterrupted use of the device for several hours can lead to numbness.
- Wear warm gloves to protect your hands. - Take regular breaks from work.
EU Declaration of Conformity
We hereby declare that the machine described below complies with the relevant basic safety and health requirements in the EU Directives, both in its basic design and construction as well as in the version placed in circulation by us. This declaration is invalidated by any changes made to the machine that are not approved by us.
Product: Cordless chainsaw
Type: 1.444-00x.x
Currently applicable EU Directives
2014/30/EU
2006/42/EC (+2009/127/EC)
2011/65/EU
2000/14/EC (+2005/88/EC)
Harmonised standards used
EN 50581:2012
EN 55014-1:2017
EN 55014-2: 2015
EN 60745-1:2009+A11:2010
EN 60745-2-13:2009+A1:2010
Conformity evaluation procedure used
2000/14/EC and amended by 2005/88/EC: Appendix V
Sound power level dB(A)
Measured: 98.9
Guaranteed: 101
Notified body, 0197 TUV Rheinland LGA Products
GmbH; Tillystraße 2 D - 90431 Nürnberg, Germany has carried out EC type approval, certificate number: BM 50452503 0001
The signatories act on behalf of and with the authority of the company management.
H. Jenner Chairman of the Board of Management
S. Reiser Director Regulatory Affairs & Certification
Documentation supervisor: S. Reiser
Alfred Kärcher SE & Co. KG
Alfred-Karcher-Str. 28 - 40
71364 Winnenden (Germany)
Ph.: +49 7195 14-0
Fax: +49 7195 14-2212
Winnenden, 2018/09/01
Table of contents
General remarks 42
2006/42/EC (+2009/127/EC)
2011/65/EU
2000/14/EC (+2005/88/EC)
H.Jenner Chairman of the Board of Management
S. Reiser Director Regulatory Affairs & Certification
Responsible for documentation: S. Reiser
Alfred Kärcher SE & Co. KG
Alfred-Karcher-Str.28-40
71364 Winnenden (Germany)
Tel.: +49 7195 14-0
Fax: +49 7195 14-2212
Winnenden, 01/09/2018
Indices
Chairman of the Board of Management
S. Reiser
Director Regulatory Affairs & Certification
71364 Winnenden (Germany)
Tel.: +49 7195 14-0
Fax: +49 7195 14-2212
Winnenden, 01/09/2019
Contents
Reducing risks
△CAUTION
H. Jenner Chairman of the Board of Management
S. Reiser Director Regulatory Affairs & Certification
71364 Winnenden (Germany)
Tel.: +49 7195 14-0
Fax: +49 7195 14-2212
Winnenden, 2018/09/01
2006/42/CE (+2009/127/CE)
2011/65/UE
2000/14/CE (+2005/88/CE)
Chairman of the Board of Management
S. Reiser
Director Regulatory Affairs & Certification
Responsible for documentation: S. Reiser
Alfred Kärcher SE & Co. KG
Alfred-Karcher-Str.28-40
71364 Winnenden (Germany)
Tel.: +49 7195 14-0
Fax: +49 7195 14-2212
Winnenden, 01/09/2018
Indices
General instructions 117
Safety instructions 117
- Remove large roots.
a Cut the root vertically.
Figure S
2006/42/EC (+2009/127/EC)
2011/65/EU
2000/14/EC (+2005/88/EC)
Chairman of the Board of Management
S. Reiser
Director Regulatory Affairs & Certification
Winnenden, 2018/09/01
Contents
Relevant EU directives
2014/30/EU
2006/42/EC (+2009/127/EC)
2011/65/EU
2000/14/EC (+2005/88/EC)
Chairman of the Board of Management
S. Reiser
Director Regulatory Affairs & Certification
71364 Winnenden (Germany)
Tel.: +49 7195 14-0
Fax: +49 7195 14-2212
Winnenden, 2018/09/01
Contents
General remarks. 152
2006/42/EC (+2009/127/EC)
2011/65/EU
2000/14/EC (+2005/88/EC)
Harmonised standards applied
EN 50581:2012
EN 55014-1:2017
EN 55014-2:2015
EN 60745-1:2009+A11:2010
EN 60745-2-13:2009+A1:2010
Chairman of the Board of Management
S. Reiser
Director Regulatory Affairs & Certification
The chain brake is released.
To avoid casting:
H.Jenner Chairman of the Board of Management
S. Reiser Director Regulatory Affairs & Certification
Authorized for documentation: S. Reiser
Alfred Kärcher SE & Co. KG
Alfred-Karcher-Str. 28 - 40
D-71364 Winnenden (Germany)
Phone: +49 7195 14-0
Fax: +49 7195 14-2212
Winnenden, 2018-09-01
Contents
General instructions 184
Chairman of the Board of Management
S. Reiser
Director Regulatory Affairs & Certification
Documentation manager: S. Reiser
Alfred Kärcher SE & Co. KG
Alfred-Karcher-Str. 28 - 40
71364 Winnenden (Germany)
Tel.: +49 7195 14-0
Remove the cap from the oil container.
Fill the engine with the recommended engine oil.
Screw the cap back on the oil container.
Figure G
b Unscrew the oil filler cap.
c Close the oil filler cap.
- Tightening torques for fastening elements against loosening and rotation.
Storage
CAUTION
a Remove the cap from the oil container.
b. Read the instructions in the manual before use.
c. Keep the manual for future reference.
- If you need more than one manual, contact the manufacturer for additional copies.
6. Place the device on a dry and well-ventilated area. Keep it away from corrosive substances and explosive atmospheres. Do not store the device in humid conditions.
Care and maintenance
CAUTION
Electric shock hazard
Risk of injury
During all work on the device, always disconnect it from the power supply.
CAUTION
Sharp edges
Risk of injury
Chairman of the Board of Management
S. Reiser
Director Regulatory Affairs & Certification
71364 Winnenden (Germany)
Tel.: +49 7195 14-0
Fax: +49 7195 14-2212
Winnenden, 2018/09/01
Table of contents
General warnings. 220
2006/42/EC (+2009/127/EC)
2011/65/EU
2000/14/EC (+2005/88/EC)
H.Jenner Chairman of the Board of Management
S. Reiser Director Regulatory Affairs & Certification
Winnenden, 01/09/2018
Contents
General warnings 237
Safety instructions 238
Intended use 251
Environmental protection 251
Accessories and spare parts 252
Scope of delivery 252
Safety devices 252
Symbols on the device 252
Protective clothing 253
Description of the device 253
Installation 253
Commissioning 254
Operation 254
Transport 256
Storage 256
Maintenance and servicing 257
Troubleshooting 258
Warranty 258
Technical specifications 258
Vibration value 258
Declaration of Conformity with EU standards ... 259
General instructions

Before first use
Before using the device, you should familiarize yourself with these safety instructions, the operating instructions, the safety instructions attached to the battery block, as well as the original operating instructions for the battery block and the standard charging device. Act in accordance with them. Keep the documentation for future use or for the next owner. Violation of the instructions contained in the instructions
In addition to the operating instructions, you must also comply with the relevant legal regulations on safety and accident prevention.
Safety instructions
When using saws, there is a very high risk of injury due to the high speed of the saw teeth. Be sure to observe the precautions and rules of conduct when working with saws.
In addition to these safety instructions, you must also comply with the safety rules and instructions for preparation for work (developed, for example, by authorities, trade unions or social insurance funds). The use of saws may be limited in time (days or years) in accordance with local regulations.
Observe local regulations.
Degree of danger
DANGER
- Instruction regarding immediate danger, which
leads to severe injury or death.
WARNING
- Instruction regarding a potentially dangerous situation, which may lead to severe injury or death.
CAUTION
- Instruction regarding a potentially dangerous situation, which may lead to minor injury.
NOTICE
- Instruction regarding a potentially dangerous situation, which may result in material damage.
Do not place the plug
socket. Protect
the cable from high
temperatures, oil,
sharp edges, or
moving parts
of the tool.
Portable or
hand-held
connecting cables
raise the risk
of injury
from electric shock.
When working with
power tools
outdoors
use only
extension cords
for outdoor work
marked for outdoor use,
and avoid
drugs, alcohol, or medication.
Hazard during
use
of power tool
may lead to
serious injuries.
Use personal
protective
equipment and
always wear
safety goggles.
Use of protective
equipment,
such as
dust mask,
respirator,
anti-shock
headphones, dependence
on the type and use
of the power tool, reduces the risk of injury.
Do not allow uncontrolled switching on. Before connecting the power tool to the power source and/or battery pack, picking it up or carrying it, make sure it is switched off. If you carry the power tool with your finger on the switch or connect the switched-on tool to the power source, this can lead to accidents.
If it is not switched off,
it poses a danger
and must be
repaired.
With the adjustment
of the tool settings,
replacement of accessories
instrument
insert the plug into the socket
socket
battery. This measure
precaution
prevents
unintentional
switching on
of the power tool.
unused
power tools
store out of reach
of children.
Do not work with
the tool if you
are not familiar with
how to handle it or
have not read
the instructions.
Electric tools
represent
a danger if
used by
inexperienced
users.
Electric tools
require careful
maintenance. Check
Work performance
of all moving parts,
absence
of jamming, breakage
or damage
of parts that disrupt
the normal operation
of the electric tool.
Before using
the tool,
damaged parts
must be
repaired.
The cause of many
accidents
Maintenance
of power tools.
The cutting tools
must always be
sharpened and kept
clean. Carefully
maintained cutting
tools with sharp cutting edges are less likely to bind and are easier to control.
Power tools, accessories, working tools, etc. must be used in accordance with these instructions. In doing so, it is necessary to take into account the working conditions and the type of work to be performed. Using power tools for purposes other than those intended may lead to dangerous situations.
Use and maintenance of battery blocks. Charge battery blocks only with the chargers supplied by the manufacturer. Chargers that are not suitable for the corresponding battery block can lead to a fire.
Use the device only with the appropriate
battery. Using other battery blocks can lead to injury and the risk of fire.
Do not store unused battery packs near paper clips, coins, keys, nails, screws, or other small metal objects that can cause a short circuit. A short circuit can lead to fire or explosion.
Under certain conditions, liquid may leak from the battery. Avoid contact with it. If contact with liquid occurs, rinse thoroughly with water. If liquid gets into the eyes, consult a doctor. The electrolyte may cause skin irritation and burns.
6. Servicing of the power tool must be performed
only by qualified specialists and only using original spare parts. This ensures the safety of the tool.
Safety precautions listed below:
- Hold the saw with both hands, gripping the handles with all fingers. The body of the saw must be in a position that allows you to maintain balance during operation. Take appropriate measures to be able to handle the saw. Never let go of the saw.
- Avoid unnatural body positions during work and do not work above shoulder level. This will help prevent accidental contact with the guide rail and better control the saw in unexpected situations. Use only the guide rails and saw chains specified by the manufacturer. Using incorrect guide rails and saw chains may lead to chain breakage and/or kickback. Sharpening and maintenance of the saw
chain must be carried out according to the manufacturer's instructions. Too low positioned cutting guards increase the risk of kickback.
18* Battery Battery Power 18V
19* Fast charging device Battery Power 18V
- ONLIA
Battery block
The device is approved for operation with the 18 V battery block Karcher Battery Power.
Assembly
Assembly of the saw and chain
△CAUTION
During operation, always wear protective gloves.
1. Loosen the belt tension adjustment handle and remove the cover.
Figure B
2. Place the belt on the pulley. The direction of belt movement must be observed. Figure C
3. Wrap the belt around the pulley and insert the pin. Figure D
- Install the cover and tighten the belt tension adjustment handle.
Figure E
- Adjust the belt tension (see chapter Belt Tension Adjustment).
- Install the belt guard.
Figure F
Commissioning
Filling the oil tank
1. If necessary, clean the area around the filler neck from dirt and grass. 2. Remove the oil tank cap.
Figure G
- Slowly pour oil into the tank.
Figure H
- If necessary, drain the spilled oil with a rag. 5. Close the oil tank with the cap.
Checking the tension
CAUTION
Sharp edges
Cuts
During all work with the belt, wear protective gloves.
- Remove the cover.
Figure I
2. Carefully remove the belt.
Figure J
The gap should be 3-4 mm.
3. If necessary, adjust the tension of the chain (see chapter on chain tension adjustment).
Installation of the battery block
1. Insert the battery block into the device until it clicks.
Figure K
Operation
Basic operations
Work technique
Working position
DANGER
Uncontrolled movements of the saw chain
Danger of injury
Before starting to cut, plan the cuts and assess the dangers.
Always hold the saw chain firmly with both hands.
Do not work with the saw chain in the same plane as the body.
Position the saw body to the side so that no part of your body is in the path of the blade. Keep as far away as possible from the material being cut. Never work from a ladder or on a tree. Never work from an unstable position.
Kickback
DANGER
Uncontrolled movements of the saw blade
Danger of injury from kickback
Before starting to cut, plan the cut and be aware of the dangers.
Always hold the saw firmly with both hands.
Kickback effects can occur suddenly in the direction opposite to the movement of the blade in the material being cut.
Figure R
① KICKBACK
② SAW
If during cutting with the lower side of the blade (plunge cut) the saw gets stuck or hits a hard object in the wood, the saw may be suddenly thrown back in the direction of the material being cut.
- To prevent kickback, always securely fix the workpiece.
If during cutting with the upper side of the blade (reverse cut) the saw gets stuck or hits a hard object in the wood, the saw may be suddenly thrown back in the direction of the operator.
Do not grip the upper side of the blade. Do not twist the blade in the cut.
KICKBACK
DANGER
Uncontrolled movements of the saw blade can cause injury.
Before starting to cut, secure the workpiece and eliminate hazards.
Always hold the saw blade firmly with both hands.
In case of kickback, the saw blade can be thrown suddenly and uncontrollably towards the operator.
Kickback occurs, for example, when the saw blade accidentally hits an obstacle or gets pinched in the upper part of the saw cut.
Figure Q
Always hold the saw blade in such a way that you can counteract the forces of kickback. Do not let go of the saw blade. During cutting, do not lean too far forward. Do not raise the saw blade above shoulder height. Always wait until the blade has reached full speed before cutting at full revolutions. Do not use the saw blade with a dull chain. Insert the blade into the cut carefully. - Pay attention to the position of the bar and the chain, which can get caught or pinch the saw blade. - When cutting branches, never cut several branches at once. Work only with a sharp and properly tensioned saw chain. - Use a chain with low kickback risk and a blade with a small tip.
Planning the fall and escape path
DANGER
Felling a tree
Danger to life
When planning the felling direction, the following must be taken into account:
The distance to the nearest work site must be at least 2.5 times the height of the tree. Do not fell trees in strong wind. The tree may fall uncontrollably - determine the direction of fall based on the shape of the tree, the terrain (slope) and weather conditions. Fell the tree only in the gap between trees. Never fell a tree onto other trees.
Each worker must have a planned escape route. Considerations are as follows:
- The escape route should be at an angle of approximately 45 degrees in the direction opposite to the felling direction.
Figure R
Clear the escape route of obstacles. Do not leave tools or equipment on the escape route. When working on a steep slope, plan the escape route parallel to the slope. When retreating, watch for falling branches and remember the size of the crown.
Preparation of the work area around the trunk
- Clear the work area around the trunk of branches, undergrowth and obstacles that will hinder the work. Ensure a stable position.
- Carefully clear the trunk base and the felling notch with an axe.
Sand, stones and other foreign materials will dull the chain.
3. Cut the lateral roots.
a Cut the root vertically.
Figure S
b Cut the root horizontally. c Remove the cut root from the work area.
Making the main cut
DANGER
Felling tree
Danger to life
Felling of trees may only be carried out by trained personnel.
- Make sure that the falling tree does not endanger anyone. Calls may not be heard due to engine noise.
Only persons involved in the felling may be in the felling zone.
- Make the cuts at right angles to the felling direction.
As close to the ground as possible, make the horizontal cut (lower cut) at about 1/3 of the trunk diameter.
Figure T
Make the oblique cut (upper cut) at an angle of approx. 45-60°.
- Make the main cut.
Make the main cut parallel to the lower cut, at least 50 mm above. Make the main cut only to such a depth that at least 50 mm of hinge remains.
The hinge does not allow the tree to twist and fall in the wrong direction.
When the main cut approaches the hinge, the tree should begin to fall.
- This creates a risk that the tree will fall in the wrong direction or lean back, pinching the saw chain in the cut. Using wedges, widen the cut and fell the tree in the desired direction.
- When the tree starts to fall, pull the saw chain out of the cut.
- Turn off the device.
- Engage the chain brake.
- Lower the saw. 9. With a planned path.
Cutting tensioned wood
DANGER
Uncontrolled movements of the saw chain when cutting material
Dangerous cuts and injuries from the material being cut
Before starting to cut, plan the cuts and assess the dangers.
Always hold the saw firmly with both hands.
Tensioned wood can spring back when the trunk, branches, roots, or parts of another tree are under mechanical stress.
1. Watch out for tensioned wood, as there is a risk of it suddenly releasing.
Figures
- Carefully cut tensioned wood from the compression side (see also the section on cutting trunks under mechanical stress). Figure V
Cutting branches
DANGER
Risk of kickback
Dangerous cuts that can be life-threatening
When cutting branches, make sure that the chain and the bar do not get caught.
WARNING
Change in weight distribution when cutting branches
Risk of injury due to uncontrolled movement of the saw
Choose the work area in such a way as to eliminate danger.
- Cut branches in the direction of growth. Figure W
- Cut branches from the bottom up. Leave larger branches at the bottom as support, which will hold the trunk above the ground. Secure the saw as best as possible. Do not work standing on the trunk. Move the tip of the bar. Watch out for tensioned branches. Cut tensioned branches from the bottom up. Never cut several branches at the same time.
- Regularly clean the work area of cut branches.
Cutting the trunk into logs
DANGER
Uncontrolled movements of the saw blade Danger of cuts
Before starting work, read and follow the safety instructions.
Always hold the chain firmly with both hands.
WARNING
Every 5 hours of operation
Every 5 hours of operation, check the chain brake (see chapter Checking the chain brake).
Maintenance work: Checking the chain brake
1. Turn on the device. 2. When the device is running, turn the handle on the front handle so that the back of your hand presses against the hand guard and the chain brake lever. The chain brake will engage. The chain must stop. 3. Pull the hand guard of the chain brake lever towards the front handle. The chain must release.
Adjusting the chain tension
- Remove the battery pack (see chapter Removing the battery pack). 2. Loosen the chain tensioning knob. Figure AB
- Adjust the chain tension using the ring. Figure AC
- Turn the tensioner. Figure AD
The distance between the guide bar and the chain should be 3-4 mm.
- Tighten the chain tensioning knob.
Replacing the chain and guide bar
CAUTION
During heavy work with the saw, wear protective gloves.
- Remove the battery pack (see chapter Removing the battery pack).
- Loosen the belt tensioning knob and remove the cover. Figure AD
- Remove the belt with the tensioner. Figure AE
- If it is necessary to replace the belt, remove the belt tensioner. Figure AF
- Dispose of the belt and, if necessary, the belt properly. 6. If necessary, install the belt tensioner on the new belt. Figure AG
7. Install the new belt on the pulley. The direction of belt movement must be observed. Figure C 8. Turn the pulley by hand and insert the belt. Figure D 9. Install the cover and tighten the belt tensioning knob. Figure E 10. Adjust the belt tension (see chapter Adjusting the belt tension).
Troubleshooting
Most malfunctions have simple causes, so with the help of the following instructions they can be fixed independently. In case of doubt or if malfunctions not described here occur, contact an authorized service center.
With increasing service life, the capacity of the battery pack will decrease even with good maintenance, so that even when fully charged, the full operating time will no longer be provided. This is not a defect.
Sound pressure level dB(A)
Measured: 98.9
Guaranteed: 101
Type-tested component, 0197 TUV Rheinland LGA
Products GmbH; Tillystraße 2 D - 90431 Nürnberg,
Germany (Germany), EC type examination
of the sample, certificate number: BM 50452503 0001
The markings and labels confirm the
reliability of the inspection.
H. Jenner
Chairman of the Board of Management
S. Reiser
Director Regulatory Affairs & Certification
71364 Winnenden (Germany)
Tel.: +49 7195 14-0
Fax: +49 7195 14-2212
Winnenden, 01.09.2018
Winnenden, 2018/09/01
Contents
General instructions 277
2006/42/EC (+2009/127/EC)
2011/65/EU
2000/14/EC (+2005/88/EC)
Winnenden, 2018/09/01
Table of contents
General instructions 294
Safety instructions 295
Intended use 304
Environmental protection 304
Accessories and spare parts 304
Scope of delivery 304
Safety devices 304
Symbols on the device. 305
www.kaercher.com/REACH
Accessories and spare parts
Use only original accessories and original spare parts to ensure safe and trouble-free operation of the device.
Information about accessories and spare parts can be found at www.kaercher.com.
Scope of delivery
Applicable EU Directives
2014/30/EU
2006/42/EC (+2009/127/EC)
2011/65/EU
2000/14/EC (+2005/88/EC)
H. Jenner Chairman of the Board of Management
S. Reiser Director Regulatory Affairs & Certification
Authorized documentation representative: S. Reiser
Alfred Kärcher SE & Co. KG
Alfred-Karcher-Str. 28 - 40
2006/42/EC (+2009/127/EC)
2011/65/EU
2000/14/EC (+2005/88/EC)
Chairman of the Board of Management
S. Reiser
Director Regulatory Affairs & Certification
Documentation administrator: S. Reiser
Alfred Kärcher SE & Co. KG
Alfred-Karcher-Str. 28 - 40
71364 Winnenden (Germany)
Tel.: +49 7195 14-0
Relevant EU Directive
2014/30/EU
2006/42/EC (+2009/127/EC)
2011/65/EU
2000/14/EC (+2005/88/EC)
Harmonized standards applied
EN 50581:2012
EN 55014-1:2017
EN 55014-2:2015
EN 60745-1:2009+A11:2010
EN 60745-2-13:2009+A1:2010
Conformity assessment procedure applied
2000/14/EC as amended by 2005/88/EC: Annex V
Acoustic power level dB(A)
Measured: 98.9
Guaranteed: 101
Notified body, 0197 TÜV Rheinland LGA Products
GmbH; Tillystraße 2 D - 90431 Nuremberg, Germany
Chairman of the Board of Management
S. Reiser
Director Regulatory Affairs & Certification
Responsible for documentation: S. Reiser
Alfred Karcher SE & Co. KG
Alfred-Karcher-Str.28-40
71364 Winnenden (Germany)
Tel.: +49 7195 14-0
Fax: +49 7195 14-2212
Winnenden, 2018/09/01
Table of contents
Chairman of the Board of Management
S. Reiser
Director Regulatory Affairs & Certification
71364 Winnenden (Germany)
Tel.: +49 7195 14-0
Fax: +49 7195 14-2212
Winnenden, 01.09.2018
Contents
General notes 3 6 5
Safety instructions 366
2006/42/EC (+2009/127/EC)
2011/65/EU
2000/14/EC (+2005/88/EC)
Applied harmonized standards
EN 50581:2012
EN 55014-1:2017
EN 55014-2: 2015
EN 60745-1:2009+A11:2010
EN 60745-2-13:2009+A1:2010
Chairman of the Board of Management
S. Reiser
Director Regulatory Affairs & Certification
Authorized representative for documentation: S. Reiser
Alfred Kärcher SE & Co. KG
Alfred-Karcher-Str. 28 - 40
71364 Winnenden (Germany)
Tel.: +49 7195 14-0
Fax: +49 7195 14-2212
Winnenden, 1.9.2018.
Contents
General notes 381
Safety notes 382
Intended use 392
Environmental protection 392
2006/42/EC (+2009/127/EC)
2011/65/EU
2000/14/EC (+2005/88/EC)
Applied harmonized standards
EN 50581:2012
EN 55014-1:2017
EN 55014-2:2015
EN 60745-1:2009+A11:2010
EN 60745-2-13:2009+A1:2010
Chairman of the Board of Management
S. Reiser
Director Regulatory Affairs & Certification
71364 Winnenden (Germany)
Tel.: +49 7195 14-0
Winnenden, 2018/09/01
Safety instructions. 399
risk of injury, you
when working with high
speed cutting accessories and
many sharp edges.
Always wear
personal protective equipment (PPE).
professional users).
The cable must not be used for other purposes, e.g., for carrying or hanging the power tool.
Keep the cable away from heat, oil, sharp edges or moving parts. Damaged or entangled cables increase the risk of electric shock.
When working outdoors with a power tool, use only extension cords suitable for outdoor use. Use of a cord suitable for outdoor use reduces the risk of electric shock.
If operating the power tool in a damp environment cannot be avoided, use a residual current device (RCD) protected supply. Use of an RCD reduces the risk of electric shock.
Safety of people: be attentive and watch what you are doing; approach work with the power tool sensibly. Do not
Do not use the power tool if you are under the influence of drugs, alcohol, or medication. A moment of inattention while operating the power tool may result in serious personal injury.
Use personal protective equipment. Always wear eye protection. Protective equipment such as dust mask, non-skid safety shoes, hard hat, or hearing protection used for appropriate conditions will reduce personal injuries.
Prevent unintentional starting. Ensure the switch is in the off-position before connecting to power source and/or battery pack, picking up or carrying the tool. Carrying power tools with your finger on the switch or energising power tools that have the switch on invites accidents.
Remove any adjusting key or wrench before turning the power tool on. A wrench or a key left attached to a rotating part of the power tool may result in personal injury.
Do not overreach. Keep proper footing and balance at all times. This enables better control of the power tool in unexpected situations.
Dress properly. Do not wear loose clothing or jewellery. Keep your hair, clothing and gloves away from moving parts. Loose clothes, jewellery or long hair can be caught in moving parts.
If devices are provided for the connection of dust extraction and collection facilities, ensure these are connected and properly used. Use of dust collection can reduce dust-related hazards.
4 Power tool use and care
Do not force the power tool. Use the correct power tool for your application. The correct power tool will do the job better and safer at the rate for which it was designed.
Do not use the power tool if the switch does not turn it on and off. Any power tool that cannot be controlled with the switch is dangerous and must be repaired.
Disconnect the plug from the power source and/or the battery pack from the power tool before making any adjustments, changing accessories, or storing power tools. Such preventive safety measures reduce the risk of starting the power tool accidentally.
Store idle power tools out of the reach of children and do not allow persons unfamiliar with the power tool or these instructions to operate the power tool. Power tools are dangerous in the hands of untrained users.
Maintain power tools. Check for misalignment or binding of moving parts, breakage of parts and any other condition that may affect the power tool's operation. If damaged, have the power tool repaired before use. Many accidents are caused by poorly maintained power tools.
Keep cutting tools sharp and clean. Properly maintained cutting tools with sharp cutting edges are less likely to bind and are easier to control.
Use the power tool, accessories and tool bits etc. in accordance with these instructions, taking into account the working conditions and the work to be performed. Use of the power tool for operations different from those intended could result in a hazardous situation.
Repair the tool before using it. Many accidents are caused by poorly maintained power tools.
Keep cutting tools sharp and clean. Properly maintained cutting tools with sharp cutting edges are less likely to bind and are easier to control.
Properly maintained cutting tools with sharp cutting edges are less likely to bind and are easier to control.
Use the power tool, accessories and tool bits etc., in accordance with these instructions, taking into account the working conditions and the work to be performed. Use of the power tool for operations different from those intended could result in a hazardous situation.
5 Battery tool use and care
Recharge only with the charger specified by the manufacturer. A charger that is suitable for one type of battery pack may create a risk of fire when used with another battery pack.
Use power tools only with specifically designated battery packs. Use of any other battery packs may create a risk of injury and fire.
may create a risk of injury and fire.
When battery pack is not in use, keep it away from other metal objects, like paper clips, coins, keys, nails, screws or other small metal objects, that can make a connection from one terminal to another. Shorting the battery terminals together may cause burns or a fire.
Under abusive conditions, liquid may be ejected from the battery; avoid contact. If contact accidentally occurs, flush with water. If liquid contacts eyes, additionally seek medical help. Liquid ejected from the battery may cause irritation or burns.
6 Service
Have your power tool serviced by a qualified repair person using only identical replacement parts.
This will ensure that the safety of the power tool is maintained.
Risk reduction
- Longer operating time of the device may lead to damage. Damage to the surface of the workpiece, vibrations. The actual operating time cannot be set in advance; it depends on many factors that have an influence:
- People with problems with blood circulation (e.g., poor blood circulation in the hands, tingling in the fingers) should not use this device. Low ambient temperature. Wear gloves to protect the hands. Impaired blood circulation leads to unhealthy gripping.
- Continuous work is more harmful than work interrupted by breaks. If the device is used regularly and correctly, and if symptoms such as tingling and numbness in the fingers occur, you should consult a doctor.
Intended use
DANGER
Use other than intended use
Danger to the user from cuts and injuries if the device is not used as intended.
The vertical drill is intended only for use in private households. The vertical drill is intended only for outdoor work. The safety equipment of the vertical drill must be kept in good condition with both hands. The vertical drill is designed for drilling into wood, wood-like materials, and plastics. The cutting depth is determined by the maximum possible diameter of the material to be drilled. The vertical drill must be used only for drilling into wood material. Do not use the vertical drill in damp or wet environments or in the rain. - Use the vertical drill only in well-lit environments. The safety equipment and protective devices supplied by the manufacturer must be used.
Any other use is improper. The user is responsible for any dangers that arise from improper use.
Environmental protection

Packaging materials are recyclable. Please dispose of packaging in accordance with local environmental regulations.

Electrical and electronic devices contain materials that are subject to recycling. Batteries, rechargeable batteries, or oil must be disposed of separately.
If not disposed of properly or thrown away, they can pose a potential danger to human health and the environment. For proper functioning of the device, all these components are necessary. The symbol on the device indicates that it must not be disposed of with household waste.
Information on substances (REACH)
Current information on substances can be found at: www.kaercher.com/REACH
Accessories and spare parts
Use only original accessories and original spare parts. They ensure the safe and trouble-free operation of the device.
Information on accessories and spare parts can be found at: www.kaercher.com.
Scope of delivery
The scope of delivery of the device is shown on the packaging. When unpacking, check the contents for completeness. In case of missing accessories or transport damage, please contact your dealer.
Safety devices
CAUTION
Safety devices are provided for your protection.
Never bypass or disregard safety devices.
Belt with low risk of kickback
The belt with low risk of kickback reduces the risk of kickback.
The teeth of the saw (guide bar) must be sharpened before each use to prevent the saw teeth from being pulled into the kickback zone, thus reducing the risk of kickback. The saw chain must be replaced if the protective function is deactivated. If the chain is damaged, the saw must be replaced according to the safety instructions. For this, use only the recommended manufacturer's spare parts.
The teeth on the ratchet (locking pawl) must be placed against all teeth of the ratchet to prevent the ratchet teeth from engaging at the point of the catch, thus following the catch. The adjustment of the ratchet may pose a risk that this protective function could be deactivated. If the power of the ratchet is reduced, the ratchet must be replaced according to the safety regulations. For this, for the spare parts, use only the manufacturer's recommended parts. The company sends the ratchet and the ratchet.
When adjusting the guide rail, note that the upper end of the rail may be released due to the risk of tipping.
Then use the guide rail for work with a chain that is sufficiently long. Longer guide rails increase
the probability of losing control during cutting.
Before starting operation, check the chain tension (see chapter Checking the chain tension). If the chain tension is not set correctly, during cutting with a smaller chain (thinner than the guide rail's groove) there is a higher risk of the chain coming off.
Chain brake
If the chain comes off or breaks, the chain brake prevents the chain from being thrown at high speed towards the operator.
Limited cut
The built-in limited cut can be used as a tip stop to provide stability to the upper handle during cutting.
When cutting, press the handles until the metal parts enter the first cut. When the saw chain is then lifted up, respectively down in the direction of the cut, the load on the upper handle is reduced.
Chain catcher
The chain catchers are designed to quickly catch the chain in case of danger. If the chain catcher is pressed in the direction of the guide rail, the chain must stop immediately. The chain catcher cannot prevent a kickback, but it can reduce the risk of injury if the chain or guide rail hits the operator. Before each start-up in operation, the chain catcher must be checked for proper functioning (see chapter Checking the function of the chain catcher).
Symbols on the device
|  | Оьш преун_PREдиTeLEн 3нak |
|  | Преши рuscкане в Ezekлноатусяп\ Прочетe ръководството 3а\ Еклноатуся и BCчки указань 3a\ Бezорасост. |
|  | При работа с урEDA Нocete\ Юж徜яма 3ашита 3а павata, очITE И\ слуха. |
|  | При работа с урEDA Hocete\ УстончИВи на XXьзгане 3ашитнI\ обухи. |
|  | При работа с урEDA Hocete\ УстончИВи на XXьзгане И Идрьжлви\ ръ��ии. |
|  | Опасноct 3а жИВOTA поади OTКAT Ha\ ВеріЖнія Тріон. НікORA He ДOKOCBAіte\ oběektte, кOUNTO 㔲бдат рязани, с\ Бърха на habравливаца ташина. |
Mounting the battery pack
1. Push the battery pack into the device's slot until it clicks into place. Fig. K
Basic maintenance
- Check the tool and the switch for damage such as cracks. If the switch is damaged, contact the service agent.
- Always wear protective goggles. 3. Keep your hands away from the blade.
Switching on the tool
1. Press the lock-off lever and pull the switch trigger to release the upper guard. 2. Press the lock-off button to unlock the switch. 3. Press the switch trigger. The tool starts.
Switching off the tool
- Release the switch trigger. The tool stops.
- Press the lock-off lever and pull the switch trigger to release the upper guard. The upper guard is released and the blade is locked. 3. Remove the battery cartridge from the tool (see chapter "Removing the battery cartridge").
Operating techniques
Working position
DANGER
Uncontrolled kickback is dangerous for the operator and bystanders. Before cutting, plan the cuts and identify the hazards. Always hold the tool firmly with both hands.
Do not guide the upper guard along the material. Figure O - Guide the upper guard away from the material so that parts of the material do not enter the area of the upper guard. Keep the maximum possible distance from the materials to be cut. Never work while standing on a ladder or on an unstable surface. Never work on unstable surfaces.
Reactive force
HekohmpolupaHu duxhenHa cepuxnmuoH Onachocm 3a kueoma nopadu nope3Hu Hapaheahua
Ipedu p3ane nnaupaume cpea u pa3no3haume onachocmume.
BuHau du pBxme eepxHua mpuoh 3pa0u c deeme pue.
Pn yBnuaHeTo/peakntbHaTa Cnna ce Kacae 3a eΦeKTo, KOIT NO pInHcIn HAcTbNBA B IpOTNBONJIOXHaTa Ha
ДВИЖЕНЕТО на Веригата посока при матерпала за рязache.
Phirypa P
1BIMHae 2PeakTNBnCnla
Korato npn p3aHe c donHaTa yact Ha HanpaBnaBaUaTa 11Ha - p3aHe OTrope - Bepurata 6bJe 3axBaHATA nIc ce yApn B TBbpN ppeMET B DbpOTO, TmOKe Da 6bJe p3KO dpbHata KbMaTePnAra 3a p3aHe.
3a da n36erHete yBInuHaHe, BnHaTn nocTabraTe orpaHnHTeJHa naneca cTa6NJHo.
Korato npn p3aHe c ropHata qact Ha HanpaBnaBaauTa WHa - p3aHe OTdony - Bepurata 6bDe 3axBaHaTa Nn Ce yDapn B TBbpN ppeMET B DbpOTO, TAn MoKe Da 6bDe TNaChHa Ta Ha3aD KbM notpe6nteJ.
3a n36rahe Ha peakTINbHa cnla:
He 3axBaauTe ropHaTa YacT Ha HnpaBlaBaata uHa. He 3aBbptaIte HnpaBnaBaata Ta IInha B cpe3a.
OTkAT
ONACHOCT
WARNING: Risk of injury from kickback. Before cutting, inspect the saw and identify the hazards.
Hold the upper saw handle firmly with both hands.
During kickback, the saw is thrown back suddenly and uncontrollably toward the user.
Kickback occurs when the saw chain in the upper zone of the guide bar hits an obstacle or becomes pinched.
Figure Q
Hold the upper saw handle so that you can control the kickback. Do not let go of the upper handle. - Do not lean too far forward. Do not guide the upper handle above shoulder height. Hold the saw firmly until the chain reaches full speed before cutting with full force. Do not cut with the tip of the guide bar. Engage the guide bar only with extreme caution at the end of the cut. Watch the bar and be alert for forces that may close the cut and pinch the chain. - Never cut several branches at once. Work only with a sharp and properly tensioned chain. - Use a chain with a lower risk of kickback and a guide bar with a small tip.
Planning the felling direction and escape route
DANGER
Felling a tree
Danger to life
Felling work must only be carried out by trained personnel.
When planning the felling direction, observe the following:
The distance to the nearest work area must be at least 2.5 tree lengths. Do not perform felling work in strong wind. The tree may fall uncontrollably. - Determine the felling direction using the tree's lean, terrain characteristics (slope), and weather conditions. Position the tree to fall where there is vegetation, never onto other trees.
For every worker, an escape route must be planned. Important here:
Escape route at an angle of 45° to the felling direction.
Figure R
Clear the cutting area of obstacles. Do not leave any tools or debris in the cutting area. - When working on steep slopes, plan the cutting direction to accelerate the slope. When using the cutting attachment, follow the instructions for the blade guard zone.
Preparing the work area of the blade
1. Clean the work area of the blade from branches, twigs, and obstacles.
Assume a stable position.
2. Clean the base of the blade thoroughly, e.g., with a brush.
Rocks, stones, and other hard objects can damage the blade.
- Remove any root growth.
a. Cut the root growth vertically. Figure 5
b. Cut the root growth horizontally. c. Remove the freed part from the root from the work area.
Creating a cut for felling
DANGER
Felling a tree
Danger to life
Work on felling trees must only be carried out by persons trained for this work.
- Повере Te дди Нкои Нма да 6ьде з actpaшен ot падацото дьрв. Повьанятma мoke д He 6ьдат утп рпшуma Ha MOTopa.
B 30hata Ha NOBaIaHETO Tp6Ba Da mHa cAmO Xopa, KOTo pa6oTt No NOBaIaHeto.
- HactpoTe npope3a 3nOBaJIHETO noI npab bIbI cnPRAmo NocOKata Ha nobaJIaHe.
a Bb3MOxHO Hn-6n3o Do 3emra HnpaBeTe XOpu3OHTaHeN Cpe3 (DOneH Cpe3) No npu6I. 1/3 OT DnAmEtBpa Ha CTBOJa.
Фигра T
b HanpaBte Koc cpe3 (ropeH cpe3) noD bRbN ot npn6n. 45-60°.
- HanpaBete cpe3a 3a noBaJHne.
a HanpaBete cpe3a 3a noBaJnHe ycnpeIHO Ha doJIHna Cpe3 n HAI-MaJIko 50 mm no-BuCOKO. b IV3nblHraBaIte cpe3a 3a nobaIaHe cAmO DToToKOBA, Ye da ocTaHe Hecpra3aHa YacT OT CTBOJa OT HaM-MaIKO 50 mm.
Hecp3aHaT a qact OT CTBOJa npeDToBpaTaBa o6pbuHaTe Ha DpbTO I naDaHTo My B rpeuHaT a Nocoka.
Korato cpe3bT 3a noBaanHe do6nXn Hecp3aHaTa Yact OT CTBOna, DbpBOTo Tp6Ba Da 3anOHe da nada.
4.Ako mma onachoct bpboto da He naHe B JeHaHata Nocoka IIN Da ce 3aBbptn o6paTHO IN Bepirata da 6bde 3axBaHata, cnpTe C n3IbJhHeHneTo Ha cpe3a 3a NOBaJIaHe. N3nON3BaIte KInHOBe, 3a da pa3uHpITe cpe3a nDa OCTaBNTe DbPBOTo Da NaDHe B JeNaHaTa NOCOKa. 5. ΜΟ ΚύρΒΟΤΟ 3αούην Σα πάν, Ι3βαδετε. Bεριχήσι ΠρούH ΟτρούH Οτρεδελ.
6.ИЗкlioуete урда.
7.ФИКСИРАТЕВЕРИKHATAсИРаЧК. 8.OctaBeTe BepnKmTpnoH. 9. CneBae Te nlaHnpaHn 1bT 3a n3TeTJHe.
Prahe HaNbPBO noHa npexeHne
ONACHOCT
HekohmpolupaHu twoKeHua Ha eepxHua mpuu H u MamepuJra 3a p3aHe
Danger of cutting injuries when cutting.
Cutting from material for cutting
When cutting, plan the cuts and identify the hazards.
Check the top cut straight and with the rest
The load under tension is obtained when the trunk, branch, or rooted plant is placed under tension from another tree.
- When cutting the first cut, there is a danger of the trunk springing back to its original position.
Figure U
- Cut carefully the first cut on the pressure side (see figure showing the trunk under tension).
Figure V
Cutting
DANGER
Kickback
Danger of cutting injuries when cutting
When cutting, be careful that the guide bar and chain do not get caught.
Procedure for distributing the load when cutting
Danger from uncontrolled movement of the trunk
Keep the work area clear so that no danger arises.
- Cut in the direction of the fall. Figure aW
- Make the first cut. Leave a larger hinge as a support, so that the trunk stays on the ground.
- If possible, secure the top of the trunk. Do not cut while standing on the trunk. Do not cut with the tip of the saw. Be careful of branches under tension. Cut branches under tension from the bottom up. Never cut a branch that is overhead.
- Regularly clear the work area of cut branches.
Cutting the trunk to a specific length
DANGER
Uncontrolled movement of the saw chain is a danger to the operator due to cutting injuries. Plan the cuts in advance and identify the dangers.
Hold the saw firmly with both hands and with a firm grip.
WARNING
Measure the distance when the tip is in contact with the ground. Follow the measurement to not touch the ground.
1. Place the upper tripod on the limiting plate. 2. Cut evenly through the barrel.
Barrel retraction under tension to a defined length
DANGER
Uncontrolled movement of the upper part is dangerous for the operator and can cause injury when retracting to a defined length under tension. Always follow the sequence of the cut for release from the pressure side and the separating cut from the bending side.
The barrel is supported by 2 sides:
a for the release cut from the pressure side, cut the barrel at approx. 1/3 of its diameter.
Figure X
b in the direction of the separating cut from the bending side, cut off.
The barrel is supported by 1 side:
a for the release cut from the pressure side, cut the barrel at approx. 1/3 of its diameter.
Figure Y
b in the direction of the separating cut from the bending side, cut off.
Removal of the accumulated battery
Indication
Before performing any work on the device, remove the battery from the device and ensure the device cannot be switched on accidentally.
1. Press the battery release button on the battery pack.
Figure 2
- Press the battery release button to release the battery pack.
3. Remove the battery pack from the device.
Operation
1. Remove the battery pack from the device (see Chapter "Removing the battery pack").
2. Clean the device (see Chapter "Cleaning the device").
Transport
DANGER
Unintentional start
Risk of injury and damage. When transporting, secure the device against unintentional start.
DANGER
Uncontrolled movement
Injury hazard
Transport the device and the accumulator battery from the device.
Transport the device only with the cap installed on the battery.
1. Remove the accumulator battery (see Chapter N, Removing the accumulator battery).
- Press the cap for lifting/placing the top cover in the direction of the arrow.
Figure N
The top cover is locked.
- Place the cap on the battery. Figure F
- Carry the device only by the handle and with the battery installed.
- For long distances, drain the reserve oil from the reservoir.
a. Close the cap of the reservoir for top oil.
Figure G
b. Fill the top oil into the reservoir. c. Close the cap of the reservoir for top oil.
- Transportation of medical devices - ensure the device is not used before reading.
Storage
SHELF LIFE
Observe the expiration date
Danger of damage and injury
When storing, keep in mind the expiration date of the device.
SHELF LIFE
Uncontrolled activation
Danger of damage
Before using the device for storage, the battery must be charged.
Store the device only with the battery installed.
1. Remove the charged battery (see chapter on inserting the battery).
- Press the release button on the top of the device to release the battery.
Figure 1
The top cover is removed.
- Check the device regularly. Figure F
4. Drain the oil reservoir. Open the oil reservoir drain cock.
Figure G
Drain the oil into a suitable container. Close the oil reservoir drain cock.
5. If the device is to be stored for more than one month, remove the belt to prevent tension. 6. Store the device in a dry, well-ventilated place. Keep away from corrosive substances such as chemicals.
For household use and for de-icing salt. Do not store the device outdoors.
Risk of injury
DANGER
Uncontrolled starting
Sharp blades
Before any work, remove the battery from the device.
DANGER
Sharp blades
Sharp blades
When working on the device, wear
Cleaning the device
1. Remove the battery (see chapter Removing the battery). 2. Clean the saw chain, the guide bar, and the sprocket. Figure AA 3. Clean the housing and the handles with a damp, dry cloth. 4. Before every use, check the function of the chain brake (see chapter Checking the chain brake).
Maintenance interval
Before every use
Before every use, the following must be performed:
• Check the oil level of the chain oil, if necessary add chain oil (see chapter Filling the chain oil reservoir). • Check the chain tension (see chapter Checking the chain tension). • Check the chain for sharpness, if necessary replace the chain (see chapter Replacing the chain and guide bar). • Check the device for damage. • Check all bolts, nuts, and screws for tightness. • Check the function of the chain brake (see chapter Checking the chain brake).
Every 5 working hours
Every 5 working hours, check the function of the chain brake (see chapter Checking the chain brake).
Maintenance work
Checking the chain brake
1. Switch on the device. 2. While the device is running, press the front hand guard forward until the chain brake engages. The chain brake engages. The chain must stop immediately. 3. Pull the front hand guard back towards the handle. The chain must release.
Checking the chain tension
1. Remove the battery (see chapter Removing the battery).
- 2. Loosen the chain tensioning knob. Figure AB 3. Adjust the chain tension with the adjusting screw. Figure AC
- Remove the cover from the vertex.
Figure J
The distance between the guide rail and the vertex should be 3-4 mm.
- Tighten the cover for the vertex.
Removal of the vertex guide rail
TENSION
Sharp vertex
Cutting hazards
For any work on the vertex, wear protective gloves.
1. Remove the battery (see chapter "Removing the battery"). 2. Loosen the cover for the vertex and remove the cap. Figure AD 3. Remove the guide rail with the vertex tensioning device. Figure AE 4. If the guide rail needs to be replaced, remove the tensioning device. Figure AF 5. Pull out the old vertex and guide rail. 6. If necessary, mount the tensioning device on the new guide rail. Figure AG 7. Place the new vertex on the guide rail. When doing so, release the tension on the vertex. Figure C 8. Pull the vertex around the guide rail and install the guide rail. Figure D 9. Install the cap and tighten the cover for the vertex. Figure E 10. Adjust the vertex tension (see chapter "Adjusting the vertex tension").
Help with malfunctions
Many malfunctions can be fixed by yourself using the following instructions. If you are not sure or the malfunctions are not described here, contact an authorized service center. With increasing age, the capacity of the battery decreases, so even with a full charge, the full operating time is not achieved. This is not a defect.
| Грешик Прични Остразецявае | |
| Урешил не срабова | Актулараша ватерия e празна. ● 3араде akтулараша ватерия. |
| Актулараша ватерия e Deф ekтна. ● Смене akтулараша ватерия. | |
| Актулараша ватерия не воставену правлино. ● Пьхнete akтулараша ватерия в ГиздOTO, дOKATO с ФниксURA. | |
| Урешил спши р по в徕ем на paбotingа | Актулараша ватерия e пергая. ● П配电�ате павота и在其аимаite, дOKATO Tempepatурatura на akтулараша ватерия влесе OTHOBВ рамкитей на hopмални диапазон. |
| Моторы т пергай ● П配电�ате пбота и OCTавete моторая с ce охлadi. |
Warranty
For every device, the warranty conditions of the authorized distributor apply. Possible damage to your device will be repaired free of charge within the warranty period, if it is due to material or manufacturing defects. In case of warranty claims, contact your distributor or the nearest authorized service center, presenting the cash receipt.
(Address, see last page)
H. Jenner Chairman of the Board of Management
S. Reiser Director Regulatory Affairs & Certification
Authorized Documentation Representative: S. Reiser
Alfred Karcher SE & Co. KG
Alfred-Karcher-Str.28-40
71364 Winnenden (Germany)
Tel.: +49 7195 14-0
Fax: +49 7195 14-2212
Winnenden, 2018/09/01
Table of contents
General notes 420
Safety instructions 420
Intended use 429
Environmental protection 430
Accessories and spare parts. 430
Scope of delivery 430
Safety devices 430
Chairman of the Board of Management
S. Reiser
Director Regulatory Affairs & Certification
71364 Winnenden (Germany)
Tel: +49 7195 14-0
Winnenden, 2018/09/01
Satures
General notes 4
H. Jenner Chairman of the Board of Management
S. Reiser Director Regulatory Affairs & Certification
Authorized representative for documentation: S. Reiser
Alfred Karcher SE & Co. KG
Alfred-Karcher-Str. 28 - 40
71364 Winnenden (Germany)
Tel.: +49 7195 14-0
Fax: +49 7195 14-2212
Chairman of the Board of Management
S. Reiser
Director Regulatory Affairs & Certification
Documentation manager: S. Reiser
Alfred Karcher SE & Co. KG
Alfred-Karcher-Str. 28 - 40
Service and troubleshooting 489
Help in case of malfunctions 490
Warranty 490
Technical specifications 490
Meaning of symbols 490
Complies with EU standards. 490
General instructions

Foreword
Use of the manual
Before using the device, read the safety instructions, the original operating instructions, the safety instructions supplied with the battery block, as well as the original operating instructions for the battery block and the standard charger. Follow them. Keep the documents for
future use or for the next owner. Along with the instructions in this operating manual, take into account the general legal regulations and accident prevention regulations.
Safety instructions
Avoid accidents by taking the appropriate precautions listed below:
Hold the power tool by the insulated gripping surfaces, as the cutting tool may contact hidden wiring. The housing and handle must be in a position that allows you to maintain balance during operation. Take appropriate precautions when working in wet conditions. In any case, do not release the trigger.
- Avoid unnatural body posture while working. Do not work above shoulder height. This allows you to avoid accidental triggering of the saw and better control the power tool in unexpected situations.
Use only spare parts and accessories approved by the manufacturer. Using incorrect spare parts and accessories may cause the accessory to break or be ejected.
The technical maintenance of the saw chain must be carried out in accordance with
the manufacturer's instructions.
Sharp, properly tensioned saw chains reduce the risk of kickback.
The cutting depth determines the maximum possible cutting depth of the material.
- Use the pressure washer only for cutting wood. Do not use the pressure washer in wet conditions or in the presence of flammable liquids. Use the pressure washer only in well-lit conditions.
- Unauthorized modifications and changes to the device are not permitted for safety reasons.
Any other use is prohibited. The user is liable for risks arising from improper use.
Environmental protection

Packaging materials are recyclable. Please dispose of packaging in an environmentally friendly manner.

Electrical and electronic devices contain valuable materials that are recyclable and components such as batteries, accumulators, or oil, which if
improperly disposed of or
incorrectly recycled can pose a risk to human health and the environment. However, these components are necessary for the reliable operation of the device. Devices marked with this symbol must not be disposed of with household waste.
Information on components (REACH)
Current information on components is available at: www.kaercher.com/REACH
Trigger gun
If the trigger gun is weak or leaking, replace it immediately to prevent unintentional activation.
Nozzle
The built-in nozzle can be used as a quick-connect nozzle for the pressure washer.
When cutting, guide the device forward until the blade reaches the wood. To move the blade up or down in the cutting direction, operating the pressure washer will be easier.
JaHcIyOrObi ranbMa BnKOpNCToBcyIbCra IJIa WbNdkoi 3ynHKn NaHcIgRa B pa3i He6e3neKn.
KaHnchTy3axncT pyk i BaxKinb naHcIorOBoro raJbMa B HApRmKy uHHN, NaHcIg NOBHeH MTTEBO 3ynHHTNCr.
JaHIOROBe raIbMo He MoKe 3ano6iITn BiDcKoKy, aIe 3MeHJyE pN3IK TpaBMyBaHHra, KIO OuHa BdaPHTb onepaTopa B paazi BiDcKoKy.
Po60Tu IaHcIOrOBo ralbMa cIIe nepeBiprTn pepeKoXHM BkOpNCtAHHm PnCtPOU (INB. rnaBy PepeBipka po60Tu raIbMa).
CnmboJn Ha npncTpoi
3o6paXeHHaNb.Ha CToPiHKax 3 MaIIOHKAmu MaIIOHOK A
1]HaHcHOr ② 小明 ③ 3y67acntynynp (4)Kpnska6aka naHuzoroboro Macna 5BaxnCTpykIBaXinbnaHOrOBOrranBa 6Puyka,3aHn 7Bumka npctpo 8 KhoNka po36IokyBaHHa BmNKaHa npncTpOHO 9KhONka 3BilbHeHHa kAymyIaTOpHoro 6noka 10Kpnuoka ①Pучka,передна 12Kilbue dny perynioBaHHHahtary naHOra 3PyuKa peryIIOBaHHHaTary IaHIOra (14)YIOBNIIOBAHJIaHua 153aBOcBka Ta6nUka 16NaHcIOrOBeMacNo 17KoxyX nHaNOra 18* AkymyIaTOp Battery Power 18V 19* Pnpctpi Wbndko 3apdkaHn Battery Power 18V
- onzij
AkymyraTOpHn6Jok
Ппстей доЗвoleно ekсгуаТВАТИЗ AkмЛТОРнIM 6лOKOM 18 V Kärcher Battery Power.
MoHTax
MOHTAX JIaHcJOra IuHH
△OBEPEKHO
Focmpu IaHuo
The chain is lubricated with oil for the entire service life.
- Loosen the chain tension adjustment nut and remove the cover.
Figure B
2. Install the chain on the sprocket. The chain tension must be maintained.
Figure C
5. Adjust the chain tension (see the chapter on chain tension adjustment).
- Install each chain.
Figure F
Commissioning
Filling the chain oil
1. If necessary, clean the area around the oil filler hole.
2. Remove the cover of the chain oil tank.
Figure G
2. Carefully pour in the chain oil.
Figure J
The distance between the outer panels should be 3-4 mm.
- If necessary, adjust the fuel supply (see the chapter on fuel supply adjustment).
Installation of the battery block
- Install the battery block in the recess on the device and slide it until it clicks.
Figure K
Operation
Basic operations
- Check the tree and branches for damage or cracks. If there is damage or cracks, contact a professional arborist. 2. Remove the protective cover.
- Hold the device with both hands.
Device activation
- Press the protection for hands and the throttle trigger simultaneously.
Figure L
The throttle trigger is released.
- Press the unlock button to switch off the device.
- Set the ladder at the correct angle.
High risk, for example, when the ladder is unintentionally directed at the switchboard or the upper zones of the wedge.
Keep the ladder at the correct angle so that it can be easily climbed. Do not release the ladder. - When cutting, do not lean too far forward. Do not raise the ladder above the line of the shoulder. Ensure that the ladder has the correct inclination, and work on full steps. Do not work with the wedge. - Install the ladder in the opening of the protective cover. Pay attention to the position of the column on the back, which can bend and press the ladder. - When cutting, never cut several blades at once. - Work only with a sharp and properly tensioned ladder. Use a ladder with a low risk of slipping and with a small wedge.
Creating the main support
SAFETY
Falling tree
Tree safety
Felling trees may only be carried out by trained personnel.
- Make sure that the tree does not endanger anyone. The branches may fall through the wedge.
The upper wedges may only be located in the wedge.
- Make a cut at a right angle to the direction of the fall.
Tilt to the ground, make a horizontal cut (lower cut) approximately 1/3 of the diameter of the trunk.
Make a basic cut (top and bottom) at an angle of 45-60°.
- Make the basic cut.
a) Make the basic cut parallel to the required cut, at least 50 mm above it. b) Make the basic cut only to the depth, leaving at least 50 mm of uncut wood. This prevents the tree from falling in the wrong direction.
When the basic cut approaches the uncut wood, the tree should begin to fall.
4. If there is a risk that the tree will fall in the wrong direction or lean back and pinch the saw chain, stop cutting the basic cut. Use wedges to widen the cut and guide the tree in the desired direction. 5. When the tree starts to fall, remove the saw chain from the cut. 6. Turn off the saw. 7. Remove the wedges. 8. Lower the bar. 9. Proceed with the planned cut.
Cutting felled trees
DANGER
Uncontrolled movement of the saw chain and scattered material
Dangerous kickback of the saw due to scattered material
Before cutting, clear the area and ensure safety.
Always hold the saw firmly with both hands.
Felled trees can spring back when the trunk, branches, roots, or other parts of the tree are under tension.
1. Follow the tension of the tree, as there is a risk of sudden release.
Illustrations
- Carefully cut the tensioned tree from the compressed side (see also the chapter on cutting trunks under mechanical tension).
Biodsok
Dangerous for human health
During cutting of blocks, follow the instructions to avoid injury and accidents.
WARNING
Change in the layout of the block cutting area
Risk of injury due to uncontrolled movement of the column
Choose the work area in such a way that danger does not arise.
- Cut the blocks in the direction of growth.
Figure W
- Cut the blocks from bottom to top. Protect the blocks that are below, in the support structure, where you hold the column on the ground.
- Better to fix the panel saw. Do not work with the column standing. Do not cut with a wedge or chisel. Follow the tensioned blocks. Tensioned blocks cut from bottom to top. Never cut the top blocks first.
- Regularly clean the work area from cut blocks.
Hapi3aHHcTOb6pyHaKOJIoN
SAFETY
Uncontrolled movements of the tool or workpiece
Danger for the operator and bystanders
Before cutting, check the cutting depth and follow the safety instructions.
Always hold the tool with both hands.
WARNING
Possible kickback of the machine
Watch out that the tool does not touch the ground. 1. Set the cutting depth to the depth stop. 2. Cut the column evenly.
Cutting column with mechanical load
SAFETY
Uncontrolled movements of the tool or workpiece are dangerous for the operator and bystanders.
Under load, the column may bend. Always follow the sequence of the compensation cut with the compressed side and the relief cut with the expanded side.
The column rests on two sides: the compensation cut on the compressed side and the column on the depth of the cut. 1/3 of the column diameter from the top.
Figure X
Make a cutout hole on the extended side at the bottom.
The post rests on one side:
Make a compensation hole on the compressed side of the post to a depth of approx. 1/3 of the post diameter at the bottom.
Figure
Make a cutout hole on the extended side at the top.
Removal of the battery block
Instructions
Before carrying out work on the battery block, remove the device and protect it from unintended use.
- Press the battery block release button in the direction of the battery block. Figure Z
- Press the battery block release button to release the battery block. 3. Remove the battery block from the device.
Completion of work
- Remove the battery block from the device (see chapter Removal of the battery block).
- Clean the device (see chapter Cleaning and maintenance).
Transport
SURFACE
Remove the protective cover of the battery compartment.
This part of the instructions is for devices with a battery.
CAUTION
Uncontrolled start
Risk
Before transporting the device, remove the battery from the device.
Transport the device only with the protective cover installed.
- Remove the battery (see chapter "Removing the battery").
- Press the hand guard and the trigger guard of the device together.
Figure N
The trigger guard locks into place.
3. Install the protective cover.
4. Move the device back with your hand. 5. When transporting over long distances, drain the oil tank.
a. Remove the oil tank cap.
Figure 6
b. Pour the oil into a suitable container. c. Replace the oil tank cap.
6. During transportation by transport means, secure the device against rolling and tipping.
Storage
CAUTION
Unused device
Risk of damage due to improper handling
When storing, keep the device in a dry place.
CAUTION
Uncontrolled start
Hazard
Before storing, disconnect the battery from the device.
36epiaume naHouooy nuy minbku i3 ecmaHOBneHM 3axuchum KOKyXOM.
1.3HIMITb akymyIaTOPnH 6JIOK (INB. rIaBy DeMOHTax akymyJIaTOPHO 6JIOKA).
- HatncHb 3axnCT pyk i BaxinIb IaHIOROBOIraIbMa B HAprrMky uHHN.
MaJIHOHOK N
JaHIOROBe ralbmo 3aTNCHeBcra.
3.YctaHObITb KoxyX NaHcIora.
MaJIHOHOK F
4.3nIte 6ak naHcIorObero macna.
a 3HIMITb KpNkU 6aKa JAnuIorOBOr MaCna.
MaJIHOHOK G
b BnInTe NaHIOROBe MacNo B npuaTHN KOHTeHep.
c 3arBnHTt b kpiuKy 6aka naHIOROBO macna.
5.Ypa3i 36epiranHH npictpo 6nbwe Ondoro mica, 3MaTITb NaHcIg, 0o6 3ano6irtn Kopo3ii. 6. 36epiraTe npictpi y cyxomy my do6pe BeHTnIbOBAHOMy Micci. He niIaBaIte npictpi BnIbBy Kopo3iHnx peoBnH, Hanpknad caOBnx ximikatibipotno6niHIOBaIbHOi coi. 36epiraTe npictpi InIe B npmiuehHi.
Dorna i Texhiue He o6cnyroByBaHH
OBEPEXHO
HeKoHmpoIbOeAHu3anyck
Nopi3u
Before carrying out any work, disconnect the battery and the device.
△OBEPEXHO
Tocmpu naHuo
Nopi3u
During any work with the device, wear protective gloves.
OuHnEHH npncptpo
1. Remove the battery block (see chapter Dismantling the battery block). 2. Clean the panel from residues of spilled material and dirt with a cloth. Figure AA 3. Clean the housing and the switch with a dry cloth. 4. After each cleaning, check the operation of the chain mechanism (see chapter Checking the operation of the mechanism).
PepiouHicTb TexHiHoro 06cIyroByBaHHa
IpeepKOxHmBnKOpncTahHnM
IpeKoKHM BUKOpNCaHHM Heo6xIDHO BUKOHaTn Taki ii:
- Check the oil level, if necessary add oil (see chapter Filling with chain oil).
- Check the chain tension (see chapter Checking the chain tension).
- Check that the chain is sharp enough, if necessary replace the chain (see chapter Replacing the chain and guide bar).
- Check the device for leaks.
- Check and tighten all bolts, nuts, and screws.
- Check the operation of the pressure gauge (see chapter Checking the operation of the gauge).
Every 5 hours of operation
Every 5 hours of operation, check the operation of the pressure gauge (see chapter Checking the operation of the gauge).
Maintenance work
Checking the operation of the gauge
- Device shutdown.
- When the device is operating, turn the handle counterclockwise so that the handle and the pressure gauge lever are fully protected. The pressure gauge will be activated. The pressure must be released.
- Turn the handle and the pressure gauge lever clockwise. The pressure must be released.
Adjusting the pressure gauge
1. Remove the battery block (see chapter Removing the battery block). 2. Loosen the handle of the pressure gauge adjustment. Figure AB 3. Adjust the pressure gauge using the ring. Figure AC 4. Check the pressure gauge.
Figure J
The belt tension becomes 3-4 mm.
- Tighten the belt tension adjustment knob.
Replacing the lamp
CAUTION
Hazardous
Sharp edges
During any work with the lamp, protect your hands.
- Remove the battery block (see chapter "Removing the battery block").
- Loosen the belt tension adjustment knob and remove the cover.
Figure AD
- Remove the lamp with tension.
Figure AE
4. If necessary, replace the lamp, remove the tension.
Figure AF
- Properly dispose of the lamp and, if necessary, the lamp. 6. If necessary, install the lamp tension on the new lamp.
- Install a new tensioner on the chain. The tensioner handle must be turned.
2000/14/EC as amended by 2005/88/EC:
Measured
Sound power level, dB(A)
Measured: 98.9
Guaranteed: 101
Notified body, 0197 TUV Rheinland LGA
Products GmbH; Tillystrasse 2 D - 90431 Nurnberg,
Germany (name), EC type examination
of a representative sample, certificate number: BM 50452503
0001
Persons who use this device must be trained and follow the safety instructions.
H. Jenner Chairman of the Board of Management
S. Reiser Director Regulatory Affairs & Certification
Painep (S. Reiser)
Alfred Kärcher SE & Co. KG
Alfred-Karcher-Str. 28 - 40
71364 Winnenden (Germany)
Tel.: +49 7195 14-0
Fax: +49 7195 14-2212
Winnenden, 01.09.2018
Table of Contents
General notes 491
Safety notes 491
Intended use 500
Environmental protection 500
Accessories and spare parts 501
Same product. 501
Safety equipment. 501
Machine's sacred tree 501
Protective clothing. 502
Instructions for use on the machine. 502
Installation 502
Plug. 502
Operation. 503
Transport. 505
Storage. 505
Maintenance and cleaning. 505
Troubleshooting. 506
Warranty. 506
Technical data. 506
Vibration values. 507
General safety instructions

Before first use of the device,
read the safety instructions in this original instruction manual,
the safety instructions enclosed with the rechargeable battery pack,
and the original instruction manuals for the rechargeable battery pack and charger.
Follow the instructions.
Keep this instruction manual for future use.
In addition to the notes in this instruction manual,
observe the general safety and accident prevention regulations of the country of use.
Keep this instruction manual for future use.
In addition to the notes in this instruction manual,
observe the general safety and accident prevention regulations of the country of use.
Follow the instructions.
Safety instructions
When working with a chain saw,
the high-speed chain and very sharp
teeth make the work extremely
dangerous.
It is essential to comply with the safety
measures and operating rules when
working with a chain saw.
H. Jenner Chairman of the Board of Management
S. Reiser Director Regulatory Affairs & Certification
Document owner: S. Reiser
Alfred Karcher SE & Co. KG
Alfred-Karcher-Str. 28 - 40
71364 Winnenden (Germany)
Phone: +49719514-0
Fax: +49 7195 14-2212
Winnenden, September 1, 2018
Contents
Operating instructions 507
Safety instructions 508
Introduction 520
Organizational measures 520
Required tools and accessories 520
Maintenance schedule 526
Troubleshooting 527
Technical data 527
Spare parts 527
EU declaration of conformity
Declaration 528
Operating instructions

KypblfblbI aIfaW pet naJaIaH6ac 6ypblH,ocbl
Kayinci3dk XeHinDi eri
HvckaynapbIH,OCbl
TynHysckaIbIK naIdaIaHy
HvCKayIbIfbIH, aKKyMyJrTOP
XINHaFbIHa Koca 6epiNetiH
Kayinci3dkxehiHderi
HvckaynapbIn JxHe Kayinci3dk TypaIbI HvCKayIbIfbIH XHe Koca 6epineTIn TynHvCKaIbIK aKKymyIaTOp KINHaftbIH / 3apdTay KypblfbcIH PaindaIaHy HvCKaynapbIH OKbIbI3. OraH caikec apeket etiH3. BykneTTepdi KeinHipeK PaindaIaHy ywiH HeMece KeiHri neIepi ywiH YCTaHbI3. PiadalaHy BoBbHwa HvCKayIbIKTaftbIH VvCKaynapfa KocbIMwa Kypblfbl PaindaIaHbIaTbIH eJDiH Kayinci3dk TexNkacbl MeH Kaifblbl JkaFdaInapdbIH aJDbIH aNydbIH JxJIbI HvCKaynapbIH caKTay KepeK.
Kayinci3dk TexHnKacbl 6oBbIHwa HycKaynap
UbHxbIpbl apamEn KymbcI KacaFaHda JkapaKat any Kayni Xofapbl, eHTkeHi OJ Xofapbl XbIaMdbkTa JHe oTe eTKip apa TicTepimEn KymbcIc ictei. UbHxbIpbl apamEn Kymbc icTey Ke3iHne MindeTTi TypDe kayinci3dk upanapbln XHe 03iH-03i YCTay epexelepiH caKTaHbI3. OcbI kayinci3dk TexHnKaCbl 6oBbHwa HscKaynapfa KocbIMsa coHdaN-aK HaKTbl eJepeket etetIH (MbICaJIbI, 6nIK opraHdapbIHbIH, Kcci6n KaybIMdaCTbIKTapdbIH HeMece aJeumETIK KopnapdbIH) Kayinci3dk TexHnKaCbIHbIH KHe
OKbITydbIH epejEJIepi caKTaIybl KepeK. 1bHxkbIpIbI apAHbI NaIdaIaHy xeprilikTi epeJepMeH (KYN XHe Xbl yaKbITbIMeH) IeKTeIyIMyMkiH. XeprilikTi epeJepdi CaKaTah3.
Kayin Dehnreinlepi
KAYIN
- Aybip kapaKaMaHa hyra Hemece oImze anapbIn corambH mikeNeu kayin 6oubHwa HycKay.
△ECKEPTY
- Do not use the device if the power cord or plug is damaged.
WARNING
- To prevent the power cord from being pulled out, do not use the device if the cord is damaged.
CAUTION
- Do not use the device if the power cord is damaged.
ELECTRIC SHOCK HAZARD
- Read all safety instructions and warnings. Keep these instructions for future reference.
Do not immerse the device in water or other liquids.
Keep all safety instructions and warnings for future reference.
The term "electric shock" used in the safety instructions refers to electric shock from the mains (with voltage) and from battery-operated devices (without voltage).
1. Electrical safety
a) The plug must be clean and dry. Do not use the device in wet or damp areas.
b) Do not use the device in areas where there are flammable gases, vapors, or dust. The device may produce sparks that could ignite these substances.
c) When using the device, keep children and other people away. Do not leave the device unattended.
The device may be damaged if not handled properly.
The electrical plug must be connected to a socket. The plug must not be modified in any way. Do not touch the electrical plug with wet hands together with the electrical cord. Do not reduce the safety distance to water sources of electrical appliances.
Do not allow wet walls, floors, ladders and supports to come into contact with grounded parts. If the floor is wet, the safety distance to water sources of electrical appliances increases.
Protect electrical cords from kinking or twisting. Do not immerse the electrical cord in water, as this reduces the safety distance to water sources of electrical appliances.
To disconnect the electrical cord, do not pull on it; unplug it or
pull it out of the socket. Do not place the cord near heat sources, open flames, or sharp objects. Damaged or tangled cords reduce the safety distance to water sources of electrical appliances.
When working with electrical equipment in an open area, use only extension cords approved for outdoor use. Outdoor extension cords reduce the safety distance to water sources of electrical appliances.
If the electrical cord cannot be disconnected, disconnect the circuit breaker. Circuit breakers reduce the safety distance to water sources of electrical appliances.
Be careful and pay attention to what you are doing, and use common sense when working with electrical equipment. Do not use the electrical equipment if you are tired or
under the influence of drugs, alcohol, or medication. When using electrical equipment, it is possible to cause injury to others.
Wear protective gloves and safety glasses. Do not wear loose clothing or jewelry that could get caught in moving parts of the electrical equipment, and tie back long hair.
Do not overreach. Keep proper footing and balance at all times. Do not touch the electrical equipment with wet hands. If you are wet or standing in water, it is possible to get an electric shock.
Repair of electrical equipment
Remove the plug from the socket before cleaning or servicing. It is possible to damage the equipment if the plug is not removed.
Do not use the equipment if it is damaged. Have it repaired by a qualified technician. This will ensure that the electrical equipment is operated safely.
Install the device only with the accessories and components supplied by the manufacturer. It is possible to install devices, components, and accessories that are not supplied by the manufacturer only if they are suitable for the intended use.
If the device is installed with other devices and components, check their proper connection and proper installation. It is possible to reduce the risk of electric shock by disconnecting the device from the power supply.
4 Electrical connection and operation
Before connecting the device, check the electrical connection. For your safety, the electrical connection must be carried out by a qualified electrician. The electrical connection must be carried out in accordance with the applicable regulations and safety standards.
Do not connect the device to the electrical supply if the device or the power cord is damaged. If the device is damaged or malfunctions, it must be repaired by a qualified technician.
If the device is to be repaired, disconnect the device from the power supply and/or remove the battery. This safety measure prevents accidental starting of the device during repair.
Keep the electrical connections out of the reach of children. Do not allow persons who are not familiar with the device or who have not read these instructions to operate the device. Electrical
connections must be made by qualified personnel only.
Install the electrical connections correctly. If the device is used for work that requires qualified personnel, and if the device is not properly grounded or if the insulation is damaged, the device may be dangerous. Before connecting the device, ensure that the device is properly grounded. Qualified personnel must be aware of the dangers of electrical connections.
Install the connections neatly and cleanly. If there are sharp edges, install the cables carefully, they may be damaged and cause short circuits and fire hazards.
Follow these instructions for electrical connections, accessories, connection cables, etc. Pay attention to safety regulations and local regulations. Electrical
connections must be made by qualified personnel only.
5 Battery charging and maintenance
The battery must be charged with the charger specified by the manufacturer. It is possible to use a different battery charger only if it is suitable for the battery.
The device must only be used with the specified battery type. Using a different battery type may cause damage or be dangerous.
To avoid short circuits, install a fuse or circuit breaker with a capacity exceeding the total current of all consumers, such as lamps, sockets, and other electrical devices, before the electrical panel. The fuse or circuit breaker must be installed in the phase conductor.
In some cases, it is possible to disconnect the battery from the charger.
Keep away from contacts.
When working with the battery, be careful. If battery acid gets on your skin, rinse it off.
Inform others.
The battery may be charged and discharged.
6. Commissioning
a) The electrical installation may only be connected to the mains by a qualified electrician.
Improper installation can lead to dangerous situations.
Safety instructions for using the device
Instructions: Keep away
It is possible to check the device's parameters using the tools mentioned. Consult a specialist if necessary.
The device must not be operated without proper grounding. Install additional protective devices if needed. Use a residual current device (RCD) for protection.
Do not use the device within 15 m of people, especially children or pets. You must ensure that the device is not accessible to unauthorized persons.
WARNING: Unqualified persons and children must not use this device. It is necessary to check the device's parameters regularly. To clean the device, use a dry cloth.
Do not use the device if it is damaged. Before starting work, check the device, all its elements, especially the protective covers and safety devices, for proper operation. If any defects are found, do not use the device until they are eliminated. If the device is not used for a long time, it should be stored properly. If the device is dropped or damaged, it must be checked.
If the device is damaged, it must be repaired by a qualified specialist. Do not attempt to repair it yourself, as this may cause injury. If the device is not working properly, is damaged, or has been exposed to moisture or other adverse conditions, do not use it. Contact an authorized service center for repair or maintenance.
When using the device, wear protective gloves and safety glasses, as well as protective clothing and footwear. When working with chemicals, wear a mask. When working with the device, keep your hands away from moving parts and wear appropriate clothing. Do not work with the device if you are tired or under the influence of alcohol or drugs. There is a risk of injury if loose clothing, hair, or jewelry gets caught in moving parts.
Keep hair and clothing away from moving parts of the machine. Do not wear loose clothing. - Be aware of the risk of hearing damage from prolonged exposure to noise. Use only approved accessories and attachments. Using unapproved accessories and attachments may cause injury or damage.
Instructions according to the safety regulations for chainsaws
When working with the chain, keep all body parts away from the chain. Do not touch the chain if it is still moving. When the chain is working, be careful not to let your hands or other body parts come into contact with the chain. - Hold the chainsaw with both hands, with the right hand on the rear handle and the left hand on the front handle.
Hold the chainsaw with both hands, with the right hand on the rear handle and the left hand on the front handle. Do not operate the chainsaw with one hand, as this may cause injury.
The electric chain can only be used for cutting wood. It is possible that the chain may come into contact with hidden objects. If the chain touches a metal object, it may cause sparks and damage to the electric chain. Do not use the electric chain in explosive atmospheres.
Use protective gloves and safety goggles. When working with the chain, the necessary protective equipment must be used. The protective gloves must be made of durable material and provide reliable protection against mechanical damage.
- Chain saw Use protective gloves. Use safety goggles when working.
- Always keep your hands away from the cutting area and keep the chain tight, safe and on stable ground. It is possible to lose control of the tool if it is used on uneven or slippery surfaces.
When cutting branches, be careful of their springback. During sawing operations, the branch may spring back or the chain may be pulled out of the cut, which can cause injury.
Branches and similar parts must be removed before cutting. They may be under tension and could cause injury or damage when cut.
- On the day the chain is sharpened, first loosen the chain tensioner. When transporting or storing the chain, always
Wear protective gloves. When working with the chain, use protective gloves that provide reliable protection against mechanical damage.
Do not operate the saw chain and do not perform maintenance work. A damaged or worn chain may break or cause kickback. Keep the handles dry, clean and free of oil and grease. Follow the maintenance and adjustment instructions. Only use the chain for its intended purpose. Do not use the chain for work it is not designed for. For example, do not use the chain for cutting plastic, brick or building materials made of wood. It is possible to use the chain for work it is not designed for, which may lead to accidents.
Causes of kickback and how to avoid it
If the guide bar tip accidentally touches an object or the wood bends and the chain gets pinched in the cut, kickback may occur.
In some cases, the tip of the guide bar may suddenly come into contact with an object, causing a sudden reaction, which can lead to loss of control and possible injury.
The reaction of the guide bar tip can cause the chain to be thrown back towards the operator, which can be dangerous.
These reactions can cause loss of control of the chain and lead to serious injury. Only use the chain with the protective devices installed. You must use all safety devices and take precautions to avoid accidents when working with the chain.
Kickback - a sudden reaction of the guide bar, which can occur when the tip touches an object or when the chain is pinched.
Always keep the chain sharp and properly tensioned.
apKbIbI OJapDbIH aIdbIH aIyFa 6oJaBl:
- Install the device only with two hands, and do not touch the sharp parts or the hot surfaces. Keep your hands and feet away from the rotating parts. If the device is damaged, do not use it and contact the service center. Do not repair the device yourself.
- Do not use the device in wet conditions or in the presence of flammable gases. This will prevent electric shock and ensure proper operation of the device in various conditions.
- Always disconnect the device from the power supply before cleaning or maintenance. If the device is not working properly, disconnect it from the power supply or take it to a service center.
Follow the instructions for care and maintenance of the device. Use only recommended accessories and spare parts.
Instructions for safe use of the device
Instructions: • Before first use, clean the device with a damp cloth. • When using the device, install it on a flat, stable surface and ensure proper ventilation. The device should be placed in a well-ventilated area.
Do not place the device on soft surfaces such as carpets, and do not cover the ventilation openings with your hands or objects.
Be careful when using the device. If any malfunction occurs, turn off the device and unplug it.
- Install the device with two hands. First, attach the base with the left hand,
then attach the top with the right hand. Then insert the plug into the socket. • Do not use the device if it is damaged. Do not attempt to repair it yourself.
Do not use the device without the manufacturer's instructions or for purposes other than intended.
- The curved knife is sharp, and you should be careful when using it.
- If you are not experienced in using the knife, you should practice with a blunt knife first. Do not use it for cutting or other purposes. Always keep the knife clean. All protective covers, gloves and direct supervision are necessary for safe use. If you are not experienced, be careful: you should be attentive to the instructions and when using the knife, you should be careful with the knife. The knife should be stored in a safe place.
Or use the knife only for its intended purpose. Do not use it for cutting wood, metal, or other hard materials. - When using the knife with a blunt blade, be careful. If the knife is dull, do not use it with excessive force. In some cases, you may need to sharpen the knife, but do not overdo it. When sharpening, be careful not to damage the blade. After use, clean the knife. If the knife is stuck, do not force it. During the process, do not touch the blade with your hands. If the knife is stuck, do not use it. - You should use the knife carefully and with caution. If you are not familiar with the knife, do not use it. - Do not use the knife for cutting materials thicker than 75 mm.
Use the knife carefully.
When using the knife, keep the blade away from your body, do not use excessive force, and be careful not to damage the protective cover: do not use the knife if it is damaged or broken. Keep the knife out of reach of children. - Do not use the knife if the protective cover is damaged or missing. Do not use the knife if it is damaged, broken, or if the knife is not working properly.
WARNING
- The knife is a sharp tool. The knife should be used only by adults who are physically and mentally capable. They should have good vision, hearing, and the ability to work with their hands. If you are not confident, you should not use the knife. To use the knife safely, you should wear protective gloves and use a cutting board.
Safety instructions
WARNING
The device is intended for use in accordance with the manufacturer's instructions. During operation, the following are possible: - Vibration may occur. For safe operation, use the device correctly, follow the instructions provided, and observe the operating and exposure limits. - Noise may be generated. Use hearing protection and observe the limits. - Persons with pacemakers or other implanted medical devices should consult a physician before using this device. - Persons with a history of seizures or sensitivity to flashing lights should avoid using this device. - Do not use near water or wet surfaces. - Keep away from flammable materials and gases.
Removing the device
WARNING
Prolonged use of the device may lead to health issues. It is necessary to organize the work schedule properly, as this depends on factors such as: the user's individual sensitivity (including the user's health status and physical condition). The ambient temperature. The use of protective equipment for the eyes. - Monitoring the user's health status. - Taking breaks as needed, and avoiding overuse. When the device is used frequently and for extended periods, and when the user's physical condition or health status shows signs of deterioration, it is necessary to consult a doctor.
Intended use
CAUTION
Proper use
Do not use the device for purposes other than those specified. - Do not use the device in a way that could cause injury. - Do not use the device in a manner that could cause damage.
For safe use, the device must be held with both hands. - It is designed for use with batteries, accumulators, and power adapters. To cut the cable, the cable diameter must be determined. - To cut the cable, it is necessary to use the appropriate attachment. - Do not use the device in a wet or damp environment. - Use the device in a well-lit area. - Do not use the device in the presence of flammable gases or vapors.
Do not use the device for purposes other than those specified. Improper use may lead to hazards.
Protecting the environment

The device contains materials that can be recycled. Do not dispose of the device in household waste.

Electrical and electronic equipment must not be disposed of with household waste. Dispose of the device at a designated collection point.
The device contains batteries, accumulators, or other electrical components. Do not dispose of the device with household waste. This symbol indicates that the device must be disposed of separately.
Complies with the requirements of the REACH regulation.
Product registration: www.kaercher.com/REACH
Required and included accessories
The required and included accessories are listed on the packaging. If they are missing, please contact our customer service.
Required and included accessories for the device are listed on the website www.kaercher.com.
Safety instructions
Read and follow the safety instructions before first use. Only use the device as intended. If you have any questions or problems, contact our customer service.
Safety devices
CAUTION
Safety devices are provided for your protection.
The safety devices protect you from injury.
Do not modify or bypass the safety devices.
Backflow prevention
Backflow prevention: install a backflow preventer.
Do not allow the backflow preventer to be blocked by dirt or debris; this would reduce its effectiveness.
If the backflow preventer is not working properly, it must be replaced. If you are unsure, contact our customer service. This also applies to the included accessories and the backflow preventer.
To perform the required work, you must have the appropriate register of the device. The necessary conditions for completing the task are determined by the register settings. After setting the register, the required actions are performed.
Before starting any work, check your safety (see safety instructions 3). If the safety instructions are not followed, additional hazards may arise during operation (only from the device itself).
Safety instructions
If the device is not used or is used incorrectly, the safety instructions may not be followed.
Test run
During the test run, the device must be operated in accordance with the instructions for use and the test run must be carried out.
During operation, the operator must be careful and follow the instructions. Additional hazards may arise from the device itself or from the environment during operation.
Safety devices
Safety devices must be checked regularly to ensure they function properly.
If the safety device is triggered or the device is operated beyond its limits, the device must be stopped.
If the safety device is triggered and the device is operated beyond its limits, the device must be stopped.
The safety device must be checked before starting any work (see safety instructions 5).
Safety signs

Warning sign
Read the instructions carefully before using the product.
| Kурьлгимен жуmbic icteу ke3iende тиICTI бас, кe3жэHe ectу корfvыштарын пайдананынbɪЗ. |
| Курьлгимен жуmbic icterenн Ke3de ТайдананынКорfvышс ояк КIMiH пайдананынbɪЗ. |
| Курьлгимен жуmbic icteу ke3iHnde сырfvмайнынжэHe seprk konfam киiH3. |
| Шынжырны apанын керсokьicbl өмір re kayinti.Ешkaшан 6afblTayшы рěльстɪн ушьимен kecisnetɪн 3aTTapды устамныз. |
| Шынжырны apанын бakьлayсbl3 ko3raftысbl emire kayin.Шынжырны .apаны ордаыm eki колынbl3бeн устамныз. |
| Шынжырны apанын bokьлayсbl3 ko3raftысbl emire kayin ТэндipeDI. Курьлгын bokkaшan bip колынbl3бeн устамныз. |
| Курьлгимьх karнбip hemecse bɪnfal жагдайаргα ушьрatпаныз. |
| Жалсырмада кэрсетингдыбIC Кысынынн KeniДд DeHreNi 101 dB. |
| ШынжырTekerisiо 6ocatbldBi. |
| ШынжырTekerisiо opnaTblnadbiжэne .apa Шынжырын 6yfaTaNDbI. |
| Шынжырдын керіnyiH petrey ушiH бурьнbl3: =Шынжырды кер =Шынжырды 6ocaty |
| Шынжырдын жуmbic 6aftbltBu (taH6aJay kaNTama actbHda opHaJackaH) |
| Шынжырды керу ТүмeciH bekiiTiH3 |
| Шынжырды керу ТүмeciH KүblntaH шырынbl3 |
Safety helmet
Helmet
When using with a visor, use a helmet. When using with a face shield, use a helmet. Do not exceed the expiration dates indicated on the helmet.
Head protection
When using with a face shield, use a helmet that meets EN 397 and has the CE mark.
When using with ear muffs, use ear muffs that meet EN 352-1 and have the CE mark. For protection against impacts, use protective glasses that meet EN 166 or have the CE mark. Or use a visor that meets EN 1731 and has the CE mark.
The helmet and protective equipment should be purchased from authorized dealers.
Chainsaw protective trousers
When using with a chainsaw, use protective trousers that meet EN 381-11 and have the CE mark.
Protective gloves
When using with a chainsaw, use protective gloves that meet EN 381-7 and have the CE mark.
Protective footwear
When using with a chainsaw, use protective footwear that meets EN 381-5 and has the CE mark.
The chainsaw is operated with a Karcher battery pack.
OphaTy
Installation and assembly instructions
WARNING
Safety instructions
Kesikmer
Before installation, check the completeness of the kit.
Check the integrity of the parts after unpacking.
When cutting, use protective gloves and goggles.
Install the device on a flat, stable surface.
During operation, the device must not be covered or blocked. If the device is placed near a wall or other objects, ensure sufficient clearance for ventilation.
Figure Q
- Install the device at a distance from walls. Ensure proper ventilation.
- Do not place the device on soft surfaces.
- Do not operate the device without proper grounding.
- Use the device only for its intended purpose and in accordance with the instructions.
- Before using the device, read the instructions carefully. Follow all safety warnings. Pay attention to the warnings to avoid injury or damage to property.
- In some cases, you may need to cut the cable once. Only use the tool with the appropriate attachments. Keep the tool away from children and unauthorized persons.
Connecting the battery and charging the battery
BATTERY
Removing the battery
Charging the battery
Only use the recommended chargers for charging the battery.
When connecting the battery, observe the following:
The battery voltage must not be less than 2.5 volts. Do not use the battery if it is damaged. The battery can be connected. Check the battery's polarity (positive and negative) before connecting. Do not touch the battery with metal objects, and do not short-circuit the terminals.
For operation, the battery must be charged. Procedure:
Place the battery in the charger at an angle of 45 degrees. Refer to Figure R. Do not force the battery into the charger. When the battery is fully charged, remove it from the charger. When the battery is fully charged, the indicator light will turn on.
Direct current (DC) power supply
- Clean the DC power supply from dust and dirt. Use a dry cloth. Do not use any cleaning agents. 2. Clean the DC power supply with a soft, dry cloth. Dust and other particles can cause malfunctions.
- Removing large metal objects. Cut the metal objects with pliers.
Figure S
Install the device in a place with minimal vibration. Do not place it near magnetic fields.
Installing the ear pads
CAUTION
Do not install the ear pads on the device.
Do not install
People who have undergone surgery should consult a doctor before using the device.
- Do not insert the ear pads too deeply into the ear canal. The eardrum may be damaged if inserted too deeply. Do not allow children to use the device without adult supervision.
- Install the ear pads correctly according to the instructions.
Cut a piece (the ear pad) with a diameter of 1/3 of the ear canal opening.
Figure T
Cut a piece (the ear pad) at a 45-degree angle.
- Install the ear pads correctly.
a) Install the ear pad parallel to the ear canal and at a depth of 50 mm. b) Install the ear pad at a 50 mm depth using the provided tool.
If the cutting blade becomes blunt or damaged, replace it with a new one. Use only genuine spare parts.
- If you do not need to cut or if you want to stop cutting, stop the machine. To continue cutting and to remove the cut material, use the controls.
- If you need to cut, turn the switch to the ON position.
- Close the guard.
- Replace the switch.
- Remove the blade guard.
- Use the handle to lift the machine.
Remove the blade.
BLADE
Before replacing or cleaning the blade, stop the engine and remove the spark plug connector. When handling the blade, wear protective gloves and be careful not to damage the blade.
Install the blade with both hands, making sure it is secure.
Do not use the blade if it is bent, cracked, or has broken teeth.
- There is a risk of injury if the blade is not properly installed. See Figure U.
- Do not use the blade if it is worn or damaged (see the maintenance section for more details). See Figure V.
WARNING
KAYIN
Kepicokkbl
Ömpse Kayin mÖhöipemih Kecikmep
Beny Ke3iHde barbimmayuub penbcmiH / wbiHKbpObIH KbcBnBn KaImaraHbHa Ke3 Xemki3iH3.
△ECKEPTY
Bany ke3iHde canMaK ynecmpimn 032epmiH3
IiHeKmin 6aKbIaycbI 3 K03raJIbcI candaPbIHah Kaapaam any Kayni
EwkaHdauKayinmydbipMaumbIHxMbcacMaarfbih maHaDbI3.
- Θcy 6aftbIbIHa 6eJIiH3.
Cyper W
KofapbIaH TEmeHre KapaB 6eniH3. ArauTbI KepDen KOrapbI yCTan Typy yuiH tipeyiu peIHHe yKeH TeMeHi 6yTaKTapbI KaNDbipbHb3. - LbHkbipnbapahb MyMkiHirHwe TipeH3. - DihrektiYcTiHe TpybIn 6aIMeH3. - PenbctiH yuBImeH apanaMaHbI3. - Kepheyni 6yTaKTapra Ha3ap ayDapbIHy3. Kepheyni 6yTaKTapdbI TeMeHHHeH XOFapbHa Kaapan apaJHaHy3. - Ewkaaah 6ipdeh 6iphewe 6yTaKtby apanaamaHb3. Kymbc aMafbH yHemi keciireh 6yTaKaTapdaH Ta3apTbIN OTbIPbIbI3.
DInReKti y3bHdbIka kecihi3
KAYIN
UbHxbipnbapahbih6aKbinaH6aumbH K03raJIbICmapbl
Kecin kemyihi candaapbHaH emipze Kayin
Remove the protective cap from the cable connector.
Check the cable for damage before installation.
ATTENTION
Always close the cable entry after each use.
Do not kink the cable when routing it.
- Route the cable through the opening. 2. Directly at the connector.
Do not bend the cable directly at the connector.
CABLE
Movement of the cable entry
When connecting the cable to the connector, ensure that the cable is not bent sharply at the entry point.
- For direct connection, proceed as follows:
a) For the bending protection, the cable diameter must be at least 1/3 of the connector diameter.
Figure X
b) Insert the cable into the opening and secure it.
- For connection via a cable gland, proceed as follows:
The battery charge indicator lamp lights up when the battery is being charged. 1/3 of the indicator segments are lit.
Figure Y
The battery charge indicator is in the format shown.
Battery charging
Instructions
For long-term storage, charge the battery before storing it and protect it from unauthorized use.
1. To charge the battery, connect the charger to the battery's charging port.
Figure Z
2. To charge the battery, press the battery charging button.
- Remove the battery from the charger.
Battery maintenance
- Before installing the battery, check the battery charge level (see Battery charge level).
- Clean the battery (see Cleaning the battery).
During operation, do not close the protective cover while the device is running.
Disconnect the power cord
Accessories
Before use, remove the protective cover from the battery.
Install the protective cover correctly before use.
1. Remove the battery cover (unscrew the battery cover).
- Check the protective cover / installation instructions, and the safety instructions.
Figure N
Install the cover correctly.
- Install the protective cover.
Figure F
- Install the cover only with the handle and safety devices properly attached.
- Before using the device, read the instructions carefully.
And follow them.
Figure G
When using the device, place it in the container. Before using, check the device for damage.
- During operation, protect the device from impacts and falls.
Maintenance
Warning
Lubrication
Before opening or closing the cover, check the seal.
Warning
Replacement of parts
Tools
Remove the battery from the device before maintenance.
The device is intended for use with a battery.
1. Insert the battery (remove the battery cover).
- The lever for opening/closing the device is located on the rear side.
Figure N
Open the device.
- The device is closed.
Figure F
- To open, press the button. To close, press the button again.
Figure G
Do not open the device in a microwave oven. To open, press the button and pull.
5. If the device is not used for a long time, remove the battery.
- Keep the device away from heat and direct sunlight. Do not expose it to moisture or dust. Store the device in a dry place.
Care and technical service
Correction
WARNING
Remove the battery from the device before cleaning.
CLEANING
Air filter
Parts
Clean the protective grille and the housing with a soft cloth.
Cleaning
1. Turn off the device and unplug it (remove the battery if applicable). 2. Use a brush to remove dust and dirt. 3. Clean the housing and handles with a damp cloth. 4. After cleaning, dry the device thoroughly before using it again.
Maintenance
Before first use
Before first use, perform the following steps:
If necessary, check the device for damage and fill it with oil (see the section on filling with oil). - Check the device for leaks (see the section on checking for leaks). - Check the device for proper operation, and if any faults are found, have them repaired (see the section on troubleshooting). - Check that all bolts, screws, and nuts are tightened. - Check the device for proper operation (see the section on checking the device).
Every 5 hours of operation
- Check the device for proper operation every 5 hours of operation (see the section on checking the device).
Technical characteristics of the device
Device operation and maintenance
- Safety precautions.
- When the device is in operation, the protective cover / device operation manual must be kept attached to the device. The device must be operated in accordance with the manual. The device must be checked periodically.
- Remove the protective cover / device operation manual before use.
The device must be disconnected from the power supply.
Device maintenance
1. Disconnect the battery (see battery disconnection). 2. Remove the device cover. Figure AB 3. Clean the device with a dry cloth. Figure AC 4. Reinstall the device cover.
Figure J
The gap between the device and the cover should be 3-4 mm.
- Reinstall the device cover.
Disconnect the device and the cover
WARNING
Open the device
Parts
Remove the battery from the device.
1. Remove the battery (remove the battery from the device). 2. Do not touch the exhaust pipe until it has cooled down.
Figure AD
- Remove the exhaust pipe with the wrench.
Figure AE
- Remove the exhaust pipe to access the filter.
Figure AF
5. If the exhaust pipe is old or damaged, replace it with a new one. 6. If it is damaged, replace the exhaust pipe with a new one.
Figure AG
- Remove the filter cover. This cover protects the exhaust pipe from damage. Figure C
- Remove the exhaust pipe cover by turning it counterclockwise. Figure D
- Remove the cover and pull out the exhaust pipe.
Figure E
- Replace the exhaust pipe (remove the exhaust pipe and replace it).
Remove the cover from the device.
If the device is not used for a long time, the battery may discharge completely. If the device is left unused for a long time, contact the service center.
The discharged battery should be charged at least once every three months to prevent damage from over-discharge. This is not a defect.
| Kate Ce6e6iЖою | ||
| Курьлгы жуmbic ictemейdi | АKKумлалтор жинавынг 3аряды жOK. | АKKумлалтор жинавын 3арядay. |
| АKKумлалтор жинавы akayлы. ● АKKу | Мулалтор жинавын aybICTbIPbIbI3. | |
| АKKумлалтор жинавы дурбс салынбаган. | ● АKKумлалторды орнын ТУСKEHше устышka салынб3. | |
| Kate Ce6e6i Xojo | ||
| Kурьлгы пайданану ke3iHde toktaiDby | АKKумларов рор кинагы Кызын кetti ● | СУMbICTb TOKТаын, AkКумларов ТЕмпературасы Калыntы 6олfаншa KUTiHiz3. |
| Ко3FaNTКыш Кызын кetti ● | TOKТаын, KO3FaNTКышТы cyblTbHbI3. |
Warranty
Warranty terms apply to defects in materials and workmanship. If the device has been damaged due to improper use or external impact, the warranty is void. If you have any questions regarding the warranty, contact the seller or the manufacturer's authorized service center. (See additional information in the appendix)
The following information is provided for your reference. The meaning of the symbols is as follows:
Model: 30190
3. Refer to the instructions. 0. Instructions for use. 1. Instructions for use. 9. Instructions for use. 0. Instructions for use. 0. Instructions for use.
Therefore, the code 30190 means 09/(2)013, refer to the instructions.
Technical specifications
| Курьлгынbing Тхимкалык сидаТамалары | ||
| Жуmbic керneyi V 18 | ||
| Шынжырдын жумбic | m/s 10 | |
| Жылданыгы | ||
| Шынжырва май кую багын | ml 200 | |
| Келемi | ||
| EN 60745-1, EN 60745-2-13 boйынша олшени Мэндер | ||
| Дыбic KBICIMын DeHrei LpA | dB(A) | 87,9 |
| БелRICIDIK KpA | dB(A) | 3,0 |
| ДыбICTBK Шын DeHrei Lынган Taratкышык | dB(A) | 98,9 |
| БелRICIDIK Kынган Taratкышык | dB(A) | 1,4 |
| Колдын діріл мәни бap аndынfy ТуTKa | m/s2 | 3,5 |
| Колдын діріл мәнибap aprыы | m/s2 | 5,2 |
| БелRICIDIK K | m/s2 | 1,5 |
| Θлшемеріmen canmaы | ||
| Чьндыгы x ehi x福建省 | mm | 735 x 230 x 247 |
| Барытayшы релBSTIN yзындыгы | mm | 300 |
| Жузінін keсу yзындыгы | mm | 250 |
| Шынжыр kaadamby | in (mm) | 0,375 (9,525) |
| Салмаы (аKKумлаятор Жинамынсыз) | kg 3,2 | |
Technical description.
First aid
DANGER
First aid can be started using standard methods. The given first aid can be started before medical help arrives. It is possible to provide first aid during the use of the device, but it is necessary to follow the instructions.
2.5 m/s² (according to technical specifications) is the maximum permissible value for the device.
WARNING:
This machine is intended for cutting grass and similar vegetation.
- Use the blades for cutting grass. The blade must be sharp.
EU Declaration of Conformity
We declare under our sole responsibility that this product conforms to the relevant EU Directives. Any unauthorized modification of the machine voids this declaration. Note: Battery type: 1.444-00x.x
Applicable EU Directives
2014/30/EU
2006/42/EG (+2009/127/EG)
2011/65/EU
2000/14/EG (+2005/88/EG)
Harmonized standards applied
EN 50581:2012
EN 55014-1:2017
EN 55014-2:2015
EN 60745-1:2009+A11:2010
EN 60745-2-13:2009+A1:2010
Complies with the essential requirements of the following directives: 2000/14/EC and 2005/88/EC, as amended.
Measured sound power level L(WA)
Measured: 98.9
Guaranteed: 101
Notified body, 0197 TUV Rheinland LGA Products GmbH; Tillystraße 2 D - 90431 Nürnberg, Germany. Certificate number: BM 50452503 0001
The declaration of conformity is valid for the serial numbers listed.
H. Jenner Chairman of the Board of Management
S. Reiser Director Regulatory Affairs & Certification
Authorized representative for documentation: S. Reiser
5.16.2.4acLw
a i > | a j - 1| ,a i < p j
a n > | a n| an = 1
a>la|o
△a
16 yjx
29.3 4.1
.1
a d = | a 1 + a 2| = | a 1 + a 2| = √5a 1a 2 = | a 1| + | a2|
a n > ( a n + 1) ⇒ a n < ( a n + 2)
a p la 2( a 2A 23)
.
.02
a 4 > a 5 > a 6 > a 7 > a8 > ...
J
a p a 1( a 2,a 3)
ol211 o.o.11 2021
∴ S ΔOBC = S ΔCOD + SΔBOC
AD,AE = 1
29.2011/11/11 12:45
Δ ,k2 = 1
1/3
1/3
(A)
.2
.
Therefore, m - 1 ≠ 0;
16 × 25
a4 > [a2] · a8 = S
Δj > 0
ab = 2√11, therefore c = (3/2)√11; b > 2
Therefore, a > 3
10
.
A
ja > 0
.
a>la|0g2
U.1uJU sag aoglao jcky hjLdJuslllcl 1 .Jauillc Jc 10 U g2i Jxu U jui ll 10 Ug uu Gg yjzjj Jauu Jpui U 10 uu g aacu uu uuuu
wul jwog logawll oai baxi
kB > 0
abglw/0
d < 1 , 12 < 1 + 2
R .>lJJI JU 10 .>JJI JU 10 .>JJI JU 10
|x - 1| = (1/|x|) * |r1^2 + r2^2 + r3^2| ≤ (3/4)|x|^2
y1(x1) = y2(x2) ⑦
x 1 = -b - 2 - 4ac2a,x 2 = -b + 2 - 4ac2a
#
a>gill aSwgrjzJl
4.9g
16 × 16
2021 4 16 1
yixll Jaeill xie 1g jlej
aJIg jzjJ .1
B a>la|o
100 2
C ä p > u 0g
.3
D a>la| o
JJI 1g.4
Ea|la|0g
(juxl Jauo Jauil jui)juiJauo .5
__SUPPIMER__


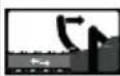
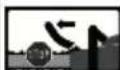

(ealll aolllg)
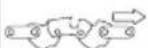
j
J 1
aJg wll
ja ②
ylo 1 / 12
aI11 1111110111111111111111111
∴ S ΔOBC = S ΔAOB + SΔBOC
WJILAA
go gglw awlio yla> ogs > xj1 jg2jll pIxwU Josll sic
EN 397 aollJ
gogjglgawajla> jjJjLpIaewJaoJIeEN 352-
gglwaaawlaagoljuljra jraaallll
go g|g> g> CE aolc J> g| EN 166 go
.CE aolc Jaoq EN 1731
CE marking according to EN 381-11 for chainsaw protective clothing
This product meets the requirements of the standard for protective clothing for chainsaw users.
CE marking according to EN 381-7 for chainsaw protective gloves
This product meets the requirements of the standard for protective clothing for chainsaw users.
CE marking according to EN 381-5 for chainsaw protective gaiters
EN 20345 ...
1. The product complies with the requirements of the standard for protective footwear.
EN 381-3 ...
EN 381-9
100
1/110
(1)
.
.
The device is designed to be used with the following accessories: a power adapter, a USB cable, and a user manual. To set up the device, connect the power adapter to a wall outlet and plug the USB cable into the device. Then, follow the instructions in the user manual to complete the setup process. The device has a built-in battery that can be charged using the power adapter. When the battery is fully charged, the device can be used for up to 10 hours. To turn on the device, press and hold the power button for 3 seconds. The device will automatically turn off after 30 minutes of inactivity. To reset the device, press and hold the reset button for 5 seconds. The device is compatible with Windows, Mac, and Linux operating systems. For more information, refer to the user manual.
ab f/ x dx = ab f/ y dy
0∞ f(x) dx
b \0, 1, ..., m\
∴ |S| = |a1'| = |r2| = |l2|
∴ x → 0 10 x20 2

Register your product and benefit from many advantages.
www.kaercher.com/welcome


Rate your product and tell us your opinion.
www.kaercher.com/dealersearch
Alfred Karcher SE & Co. KG
Alfred-Karcher-Str.28-40
71364 Winnenden (Germany)
Tel.: +49 7195 14-0
Fax: +49 7195 14-2212





- CONTENTS
- GENERAL NOTES
- SAFETY INSTRUCTIONS
- HAZARD LEVELS
- DANGER
- WARNING
- CAUTION
- ATTENTION
- GENERAL POWER TOOL SAFETY INSTRUCTIONS
- READ ALL SAFETY WARNINGS AND ALL INSTRUCTIONS
- ELECTRICAL SAFETY
- BATTERY TOOL USE AND CARE
- SERVICE
- ADDITIONAL GENERAL SAFETY INSTRUCTIONS
- CHAIN SAW SAFETY WARNINGS
- CAUSES AND OPERATOR PREVENTION OF KICKBACK
- ADDITIONAL SAFETY INSTRUCTIONS FOR CHAINSAWS
- RESIDUAL RISKS
- RISK REDUCTION
- INTENDED USE
- △DANGER
- IMPROPER USE
- ENVIRONMENTAL PROTECTION
- ACCESSORIES AND SPARE PARTS
- SCOPE OF DELIVERY
- SAFETY DEVICES
- MISSING OR MODIFIED SAFETY DEVICES
- CHAIN WITH A LOW RISK OF KICKBACK
- GUIDE RAILS
- CHAIN CATCHER
- BUCKING SPIKES
- CHAIN BRAKE
- SYMBOLS ON THE DEVICE
- PROTECTIVE CLOTHING
- HEAD PROTECTION
- CHAINSAWING JACKET
- PROTECTIVE GLOVES
- LEG PROTECTION
- SAFETY SHOES
- DESCRIPTION OF THE DEVICE
- SEE GRAPHICS PAGE FOR ILLUSTRATIONS. ILLUSTRATION A
- RECHARGEABLE BATTERY PACK
- INSTALLATION
- MOUNTING THE CHAIN AND GUIDE RAIL
- INITIAL STARTUP
- FILLING THE CHAIN OIL TANK
- CHECKING THE CHAIN TENSION
- INSTALLING THE BATTERY PACK
- OPERATION
- BASIC OPERATION
- SWITCH ON THE DEVICE
- INTERRUPTING OPERATION
- WORKING TECHNIQUES
- WORKING POSITION
- UNCONTROLLED MOVEMENTS OF THE CHAINSAW
- PULL IN/RECOIL
- ILLUSTRATION P
- KICKBACK
- ILLUSTRATION Q
- PLAN THE FALL DIRECTION AND RETREAT PATH
- FALLING TREE
- ILLUSTRATION R
- PREPARING THE WORK AREA AT THE TRUNK
- SETTING THE FELLING CUT
- ILLUSTRATION T
- CUTTING TENSIONED WOOD
- UNCONTROLLED MOVEMENTS OF CHAINSAW AND SAWING MATERIAL
- ILLUSTRATION U
- PRUNING
- CHANGING WEIGHT DISTRIBUTION WHEN PRUNING
- ILLUSTRATION W
- CUTTING A TRUNK TO LENGTH
- DAMAGE TO THE CHAIN DUE TO GROUND CONTACT
- TRIMMING A TENSIONED TRUNK
- UNCONTROLLED MOVEMENT OF THE CHAINSAW
- ILLUSTRATION X
- REMOVING THE BATTERY PACK
- NOTE
- ILLUSTRATION Z
- FINISHING OPERATION
- TRANSPORT
- FAILURE TO OBSERVE THE WEIGHT
- UNCONTROLLED STARTUP
- ILLUSTRATION N
- ILLUSTRATION F
- ILLUSTRATION G
- STORAGE
- CARE AND SERVICE
- CLEANING THE DEVICE
- ILLUSTRATION AA
- MAINTENANCE INTERVALS
- BEFORE EVERY USE
- EVERY 5 OPERATING HOURS
- MAINTENANCE WORK
- CHECKING THE FUNCTIONALITY OF THE CHAIN BRAKE
- ADJUSTING THE CHAIN TENSION
- ILLUSTRATION AB
- ILLUSTRATION AC
- ILLUSTRATION J
- REPLACING THE CHAIN AND GUIDE RAIL
- ILLUSTRATION AD
- ILLUSTRATION AE
- ILLUSTRATION AF
- ILLUSTRATION AG
- ILLUSTRATION D
- ILLUSTRATION E
- TROUBLESHOOTING GUIDE
- WARRANTY
- VIBRATION VALUE
- EU DECLARATION OF CONFORMITY
- TABLE OF CONTENTS
- INDICES
- REDUCING RISKS
- △CAUTION
- FIGURE S
- RELEVANT EU DIRECTIVES
- FIGURE G
- CARE AND MAINTENANCE
- GENERAL INSTRUCTIONS
- DEGREE OF DANGER
- NOTICE
- BATTERY BLOCK
- ASSEMBLY
- ASSEMBLY OF THE SAW AND CHAIN
- FIGURE E
- FIGURE F
- COMMISSIONING
- FILLING THE OIL TANK
- FIGURE H
- CHECKING THE TENSION
- SHARP EDGES
- FIGURE I
- FIGURE J
- INSTALLATION OF THE BATTERY BLOCK
- FIGURE K
- BASIC OPERATIONS
- WORK TECHNIQUE
- UNCONTROLLED MOVEMENTS OF THE SAW CHAIN
- UNCONTROLLED MOVEMENTS OF THE SAW BLADE
- FIGURE R
- FIGURE Q
- PLANNING THE FALL AND ESCAPE PATH
- FELLING A TREE
- PREPARATION OF THE WORK AREA AROUND THE TRUNK
- MAKING THE MAIN CUT
- FELLING TREE
- FIGURE T
- UNCONTROLLED MOVEMENTS OF THE SAW CHAIN WHEN CUTTING MATERIAL
- FIGURES
- CUTTING BRANCHES
- RISK OF KICKBACK
- CHANGE IN WEIGHT DISTRIBUTION WHEN CUTTING BRANCHES
- CUTTING THE TRUNK INTO LOGS
- EVERY 5 HOURS OF OPERATION
- MAINTENANCE WORK: CHECKING THE CHAIN BRAKE
- REPLACING THE CHAIN AND GUIDE BAR
- TROUBLESHOOTING
- SOUND PRESSURE LEVEL DB(A)
- APPLICABLE EU DIRECTIVES
- RELEVANT EU DIRECTIVE
- HARMONIZED STANDARDS APPLIED
- CONFORMITY ASSESSMENT PROCEDURE APPLIED
- ACOUSTIC POWER LEVEL DB(A)
- INFORMATION ON SUBSTANCES (REACH)
- THE BELT WITH LOW RISK OF KICKBACK REDUCES THE RISK OF KICKBACK
- LIMITED CUT
- MOUNTING THE BATTERY PACK
- BASIC MAINTENANCE
- SWITCHING ON THE TOOL
- SWITCHING OFF THE TOOL
- OPERATING TECHNIQUES
- REACTIVE FORCE
- PHIRYPA P
- OTKAT
- ONACHOCT
- PLANNING THE FELLING DIRECTION AND ESCAPE ROUTE
- PREPARING THE WORK AREA OF THE BLADE
- CREATING A CUT FOR FELLING
- ФИГРА T
- PRAHE HANBPBO NOHA NPEXEHNE
- HEKOHMPOLUPAHU TWOKEHUA HA EEPXHUA MPUU H U MAMEPUJRA 3A P3AHE
- FIGURE U
- FIGURE V
- CUTTING
- PROCEDURE FOR DISTRIBUTING THE LOAD WHEN CUTTING
- CUTTING THE TRUNK TO A SPECIFIC LENGTH
- BARREL RETRACTION UNDER TENSION TO A DEFINED LENGTH
- FIGURE X
- FIGURE Y
- REMOVAL OF THE ACCUMULATED BATTERY
- INDICATION
- FIGURE
- UNINTENTIONAL START
- UNCONTROLLED MOVEMENT
- FIGURE N
- SHELF LIFE
- OBSERVE THE EXPIRATION DATE
- UNCONTROLLED ACTIVATION
- RISK OF INJURY
- UNCONTROLLED STARTING
- SHARP BLADES
- MAINTENANCE INTERVAL
- EVERY 5 WORKING HOURS
- CHECKING THE CHAIN BRAKE
- REMOVAL OF THE VERTEX GUIDE RAIL
- TENSION
- SHARP VERTEX
- HELP WITH MALFUNCTIONS
- SATURES
- THE MANUFACTURER'S INSTRUCTIONS
- INFORMATION ON COMPONENTS (REACH)
- TRIGGER GUN
- NOZZLE
- CNMBOJN HA NPNCTPOI
- O6PAXEHHANB.HA CTOPIHKAX 3 MAIIOHKAMU MAIIOHOK A
- AKYMYRATOPHN6JOK
- MOHTAX
- MOHTAX JIAHCJORA IUHH
- △OBEPEKHO
- FIGURE B
- FIGURE C
- FILLING THE CHAIN OIL
- DEVICE ACTIVATION
- FIGURE L
- CREATING THE MAIN SUPPORT
- SAFETY
- CUTTING FELLED TREES
- ILLUSTRATIONS
- BIODSOK
- FIGURE W
- HAPI3AHHCTOB6PYHAKOJION
- CUTTING COLUMN WITH MECHANICAL LOAD
- REMOVAL OF THE BATTERY BLOCK
- INSTRUCTIONS
- COMPLETION OF WORK
- SURFACE
- MAJIHOHOK N
- MAJIHOHOK F
- MAJIHOHOK G
- DORNA I TEXHIUE HE O6CNYROBYBAHH
- OBEPEXHO
- △OBEPEXHO
- OUHNEHH NPNCPTPO
- PEPIOUHICTB TEXHIHORO 06CIYROBYBAHHA
- IPEEPKOXHMBNKOPNCTAHHNM
- CHECKING THE OPERATION OF THE GAUGE
- ADJUSTING THE PRESSURE GAUGE
- REPLACING THE LAMP
- FIGURE AD
- FIGURE AE
- FIGURE AF
- GENERAL SAFETY INSTRUCTIONS
- OPERATING INSTRUCTIONS
- KAYINCI3DK TEXHNKACBL 6OBBIHWA HYCKAYNAP
- KAYIN DEHNREINLEPI
- KAYIN
- △ECKEPTY
- ELECTRIC SHOCK HAZARD
- BATTERY CHARGING AND MAINTENANCE
- SAFETY INSTRUCTIONS FOR USING THE DEVICE
- INSTRUCTIONS ACCORDING TO THE SAFETY REGULATIONS FOR CHAINSAWS
- CAUSES OF KICKBACK AND HOW TO AVOID IT
- INSTRUCTIONS FOR SAFE USE OF THE DEVICE
- REMOVING THE DEVICE
- PROPER USE
- PROTECTING THE ENVIRONMENT
- REQUIRED AND INCLUDED ACCESSORIES
- BACKFLOW PREVENTION
- TEST RUN
- SAFETY SIGNS
- SAFETY HELMET
- HELMET
- CHAINSAW PROTECTIVE TROUSERS
- PROTECTIVE FOOTWEAR
- OPHATY
- INSTALLATION AND ASSEMBLY INSTRUCTIONS
- CHECK THE INTEGRITY OF THE PARTS AFTER UNPACKING
- CONNECTING THE BATTERY AND CHARGING THE BATTERY
- BATTERY
- REMOVING THE BATTERY
- DIRECT CURRENT (DC) POWER SUPPLY
- INSTALLING THE EAR PADS
- DO NOT INSTALL THE EAR PADS ON THE DEVICE
- REMOVE THE BLADE
- BLADE
- CYPER W
- DINREKTI Y3BHDBIKA KECIHI
- DO NOT BEND THE CABLE DIRECTLY AT THE CONNECTOR
- CABLE
- BATTERY CHARGING
- FIGURE Z
- BATTERY MAINTENANCE
- MAINTENANCE
- CARE AND TECHNICAL SERVICE
- CORRECTION
- CLEANING
- BEFORE FIRST USE
- TECHNICAL CHARACTERISTICS OF THE DEVICE
- DEVICE OPERATION AND MAINTENANCE
- DEVICE MAINTENANCE
- DISCONNECT THE DEVICE AND THE COVER
- OPEN THE DEVICE
- FIGURE AG
- REMOVE THE COVER FROM THE DEVICE
- FIRST AID
- MEASURED SOUND POWER LEVEL L(WA)
- AJG WLL
- WJILAA
- WWW.KAERCHER.COM/WELCOME
Brand : Kärcher
Model : CNS 1830 Battery
Category : Saw