Digital Bottle Warmer - Bottle warmer CHICCO - Free user manual and instructions
Find the device manual for free Digital Bottle Warmer CHICCO in PDF.
| Product Type | Bottle Warmer and Steam Sterilizer |
| Brand | Chicco |
| Model | Digital Bottle Warmer (Mod. 06867_M) |
| Power Supply | 220-240 V~, 50/60 Hz, 220 W |
| Main Functions | Heating breast milk, formula, baby food jars; steam sterilization; keep warm (max 60 min); delayed start (15 min to 2 h); memory function |
| Heating Capacity | Plastic/glass bottles wide/narrow neck, bottles with removable bottom, breast milk bags, baby food jars (approx. 80 g) |
| Sterilization Capacity | 1 bottle or small items, 8 min cycle (heating time included) |
| Water volume for heating | From 40 ml (level 1) to 200 ml (level 4) depending on type and size |
| Water volume for sterilization | 40 ml |
| Safety | Automatic shut-off after 3 min of inactivity; shut-off after 1 h of keep warm; overheat protection; descaling indicator |
| Maintenance and Cleaning | Descaling with white vinegar; wipe exterior with damp cloth; do not immerse; do not put in dishwasher |
| Accessories included | Sterilization cover, support basket, water level indicator, power cord |
| Dimensions (approx.) | Approx. 20 × 20 × 25 cm |
| Weight (approx.) | Approx. 1 kg |
| Warranty | According to applicable national laws |
| Country of manufacture | China |
Frequently Asked Questions - Digital Bottle Warmer CHICCO
User questions about Digital Bottle Warmer CHICCO
0 question about this device. Answer the ones you know or ask your own.
Ask a new question about this device
Download the instructions for your Bottle warmer in PDF format for free! Find your manual Digital Bottle Warmer - CHICCO and take your electronic device back in hand. On this page are published all the documents necessary for the use of your device. Digital Bottle Warmer by CHICCO.
USER MANUAL Digital Bottle Warmer CHICCO
natural_image
Technical line drawing of a mechanical component with concentric rings and a base (no text or symbols)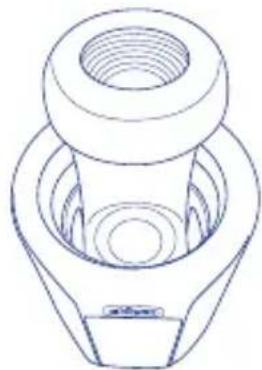
natural_image
Technical line drawing of a mechanical component with concentric grooves and a base (no text or symbols)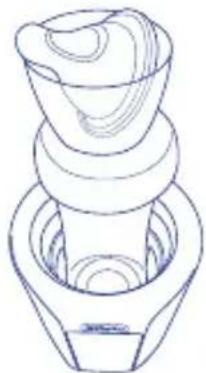
natural_image
Line drawing of a mechanical component with layered structure (no text or symbols)NATURALFEELING
Biberon a collo largo • Large neck feeding bottle • Biberon col large • Biberón de cuello ancho • Biberão com gargalo largo • Butelka z szeroką szyjką • Мпімперó με φαρδύ λαιμό • Geniş ağızlı biberon • Steklenička za hranjenje s širokim vratom • Széles nyakú cumisüveg • Biberon cu gât larg • Flašica za hranjenje sa većim grlićem • Шише с широко гърло • Пляшка з широким горлом • Бутылочка с широким горлышком • زجاجة رضاعة بعঝق کبیر

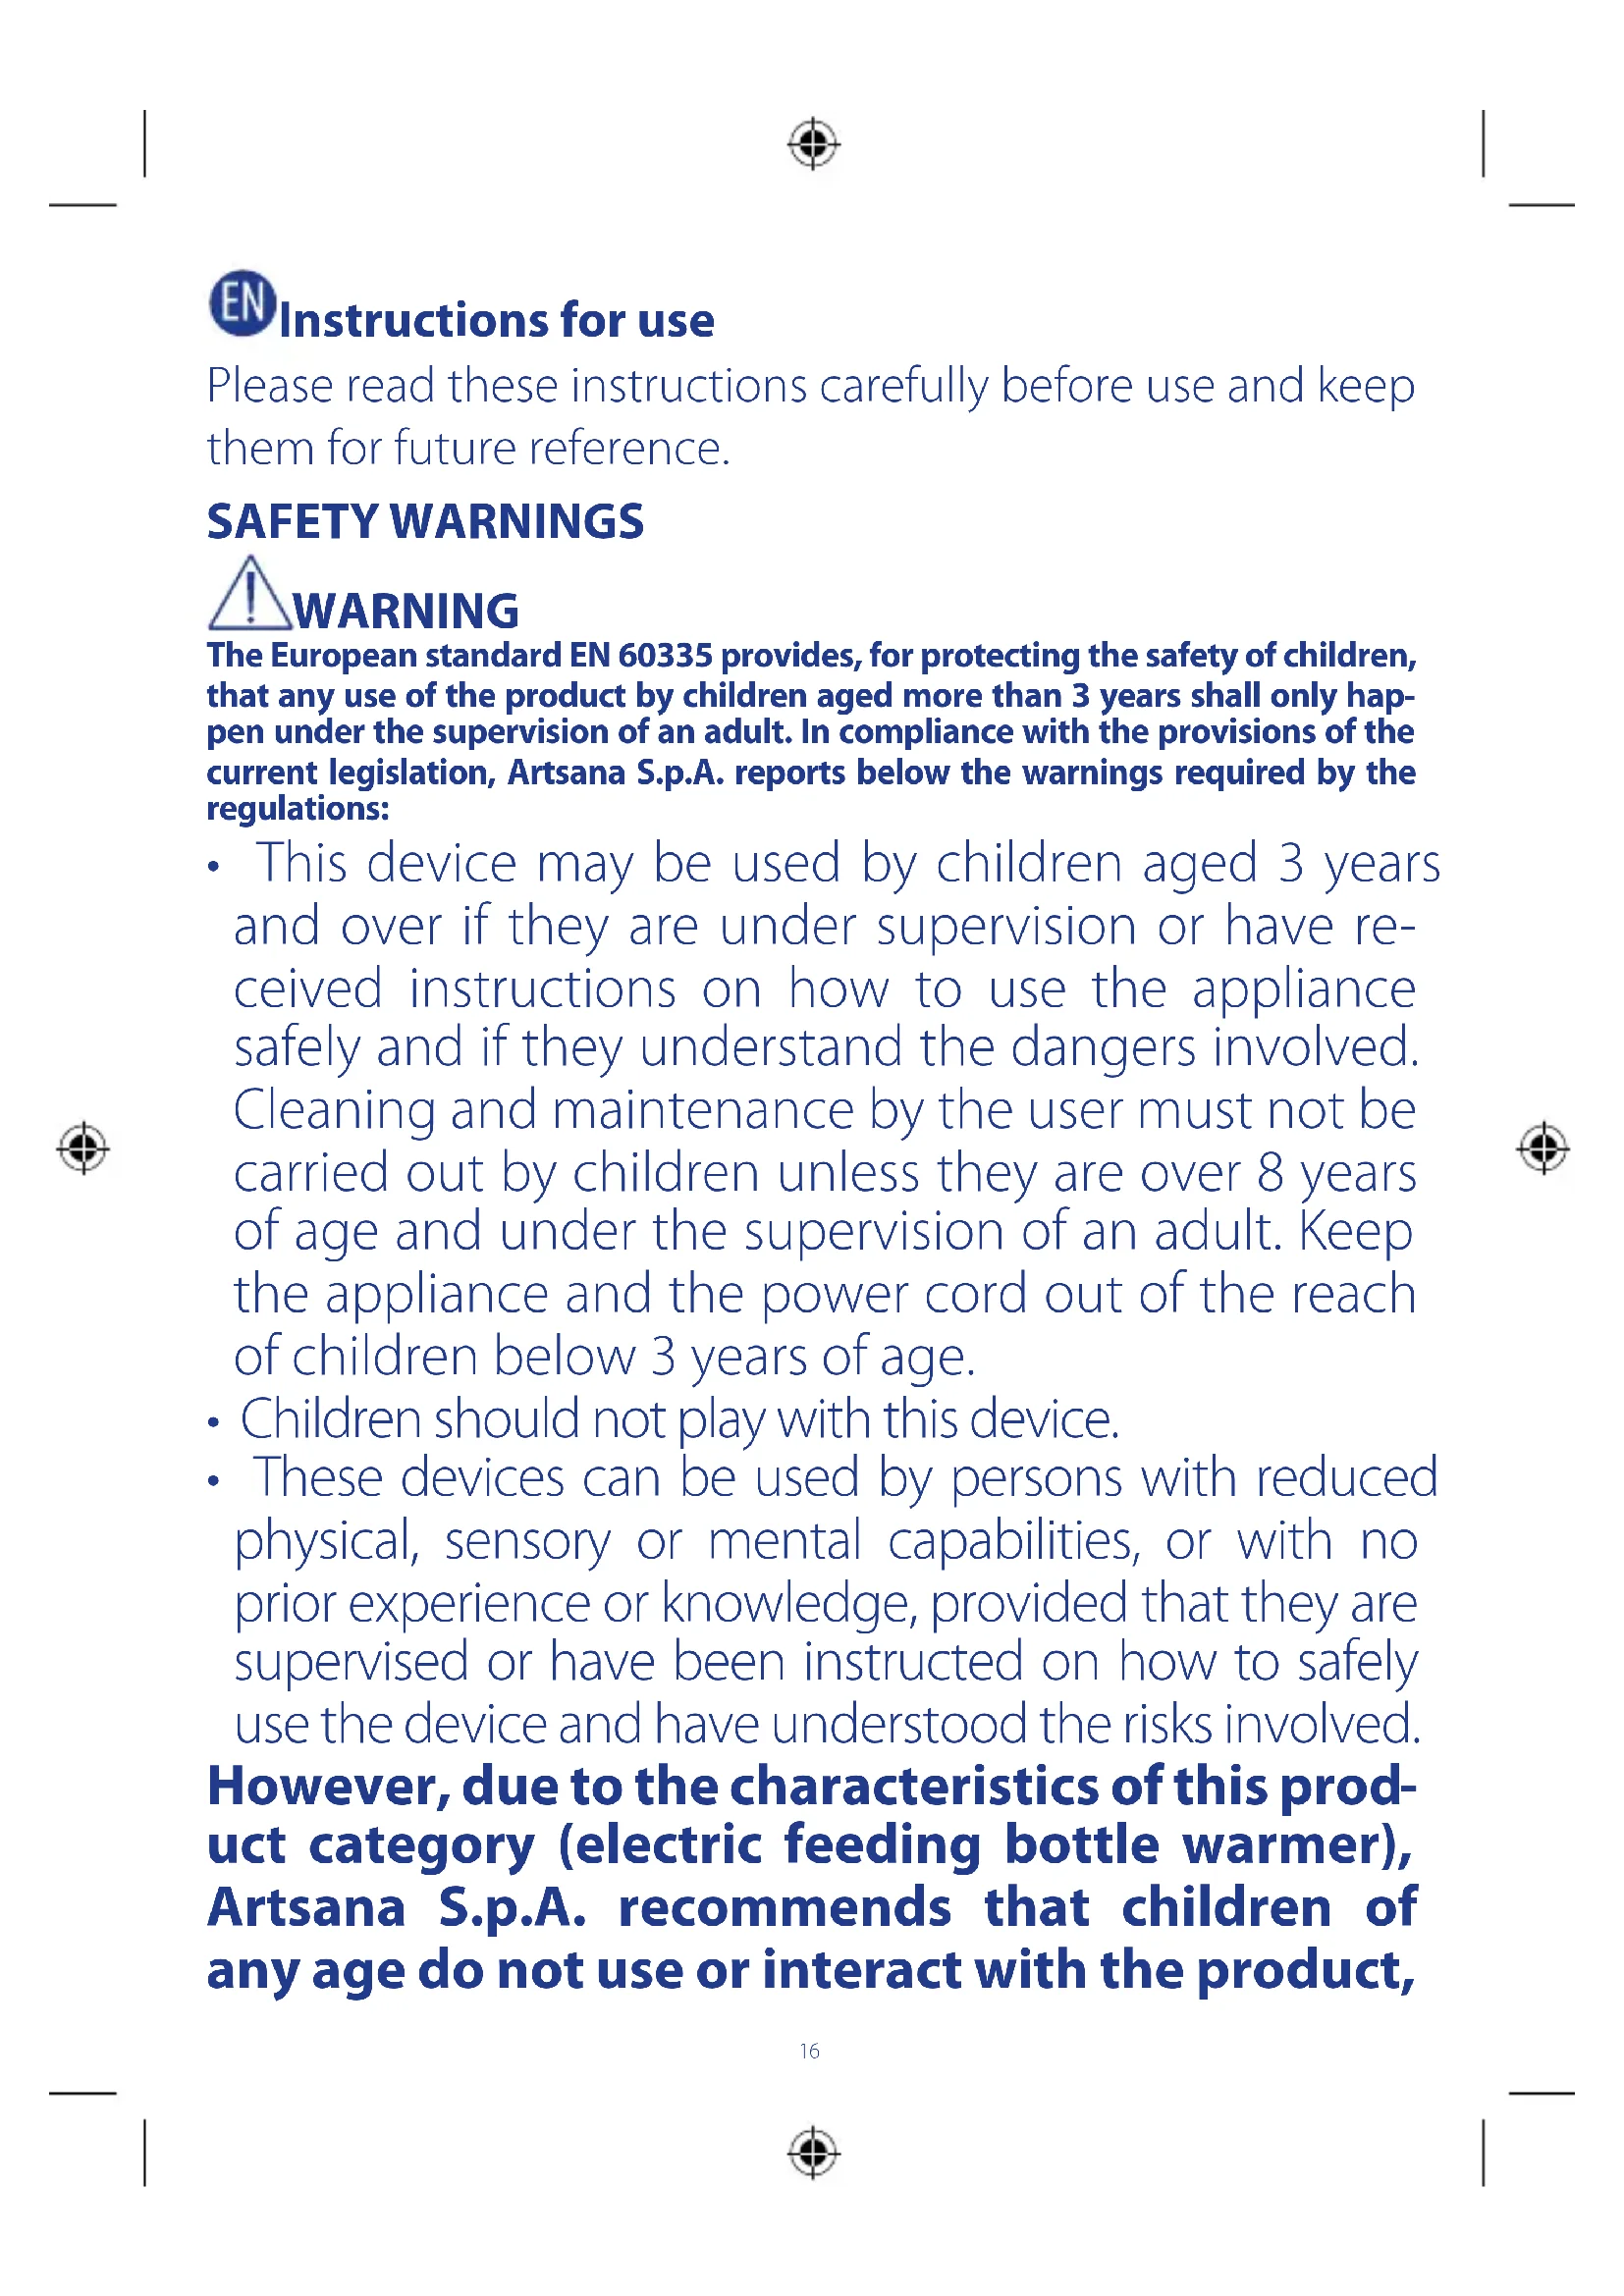
EN Instructions for use
Please read these instructions carefully before use and keep them for future reference.
SAFETY WARNINGS
! WARNING
The European standard EN 60335 provides, for protecting the safety of children, that any use of the product by children aged more than 3 years shall only happen under the supervision of an adult. In compliance with the provisions of the current legislation, Artsana S.p.A. reports below the warnings required by the regulations:
- This device may be used by children aged 3 years and over if they are under supervision or have received instructions on how to use the appliance safely and if they understand the dangers involved. Cleaning and maintenance by the user must not be carried out by children unless they are over 8 years of age and under the supervision of an adult. Keep the appliance and the power cord out of the reach of children below 3 years of age.
• Children should not play with this device.
• These devices can be used by persons with reduced physical, sensory or mental capabilities, or with no prior experience or knowledge, provided that they are supervised or have been instructed on how to safely use the device and have understood the risks involved.
However, due to the characteristics of this product category (electric feeding bottle warmer), Artsana S.p.A. recommends that children of any age do not use or interact with the product,
even under the supervision of an adult.
- This product is intended for domestic use only, and must be used in accordance with the instructions for use provided. Any other use is to be deemed improper and therefore dangerous.
- The appliance is intended for indoor use only; do not leave it exposed in the sun, rain and/or any other atmospheric conditions.
- In the event that the appliance is sold by the original owner or given to third party users, instructions for the safe use of the appliance must be handed over to them, and they must have understood the hazards involved, through reading the user manual and in particular the safety warnings contained in it, which should always accompany the appliance. This product can run automatically at a frequency of 50 Hz or 60 Hz.
- Only place the appliance on flat, level surfaces which are out of the reach of children, away from cribs and cots as the device and the water in it become very hot during use: always employ the utmost care and attention when using! Danger of burns.
- Pay attention to parts marked with the "hot surfaces" symbol as they may reach high temperatures during use.
- When in use, the appliance becomes extremely hot as it produces steam for sterilisation. Always be extremely careful. Do not remove the lid and/or keep the arms and face well away from the steam outlet
on the lid, as the steam released can cause burns.
• After completing the sterilising cycle, the water contained in the appliance and the upper surface may be very hot. Always take great care to prevent all risks of burns!
- Do not obstruct the steam outlet located on the upper part of the lid.
- Never use the bottle warmer without water in the heating tank.
- To avoid possible burns, during and at the end of the operating cycle, take care as: the water and the upper surface of the appliance may be very hot. Always carefully remove the bottle and/or baby food jar at the end of the operating and/or maintenance cycle as they may be hot.
- Before feeding the heated food to the child, always make sure that the temperature is not too high (not over 37°C).
- Never move the bottle warmer during use or when it still contains hot liquids.
- To disconnect the bottle warmer from the mains, switch off the product by pressing and holding the on/off touch button, then disconnect the power cable plug from the socket. Never pull on the power cable or the device to unplug the appliance from the mains socket.
- Check that the power cable plug is always unplugged from the mains socket and that the bottle warmer is cold before moving it, cleaning it, storing it, doing maintenance work or in between warming cycles.
- The cleaning and maintenance of the product must be carried out by the user and not by children and/or people with reduced mental capabilities or lacking experience or the required knowledge.
- Never immerse or wet the plug, bottle warmer or power cable in water or other liquids.
- Do not attempt to open or repair the device. The bottle warmer can only be opened with special tools. The power cable must only be replaced with another identical power cable to the one supplied with the appliance; this operation must only be performed by expert technicians or by Artsana S.p.A.
- The device is pre-set with the maximum bottle warming time. It is important not to repeat the cycle with the same bottle or jar and, in general, it is not advisable to heat food too long.
- At the end of the bottle heating cycle, before feeding the heated milk to the baby, check that the temperature is not too high by pouring a drop of milk on the back of your hand.
- At the end of the jar heating cycle, before feeding the heated food to the baby, check that the temperature is not too high by tasting it with a teaspoon.
- When filling the tank with water and when using and handling the product, be careful not to spill liquids or food on the connector.
- WARNING: at the end of each heating cycle, the surface of the heating element is still hot.
- WARNING: Wait for at least a few minutes at the end of the sterilisation cycle before removing the lid. Always remove the lid carefully to prevent boiling hot steam or drops of extremely hot water from exiting the appliance and causing burns.
- WARNING: When filling the tank before the cycle and when removing the lid at the end of the cycle be sure that no drops spill onto the connector or the power cable.
• These instructions are available on www.chicco.it

WARNING
- Do not leave the appliance, its accessories and any packaging materials (plastic bags, cardboard boxes, etc.) within the reach of children as they are not toys and can be hazardous.
- Before using the bottle warmer, always make sure that the product and its components are not damaged. If there is damage, do not use the bottle warmer and contact a qualified technician or your dealer.
• Make sure that the voltage and frequency match your mains power supply (see the data plate located on the bottom of the device). The electrical system where the appliance is used must conform to all safety regulations in force in the country of use of the device. - Connect the appliance to a mains socket that is easy to access.
- Never place the bottle warmer directly on or near hot surfaces, hobs or hotplates, or on delicate surfaces that may be sensitive to humidity and/or heat.
- Use only heat-resistant plastic or glass feeding bottles: do not use disposable bottles.
- During normal operation of the product, pay attention to hot vapour due to water heating to avoid possible burns
- For hygienic and biological reasons, bottle warmers should only be used to heat food that is already prepared and not for cooking food. The recommended temperature for heating food is about 37°C. Do not heat foods again more than once or for longer than an hour.
- The final temperature of the food and the heating time depend on the quantity to be heated, the initial temperature (room temperature, refrigerator or freezer), the consistency of the preparation, the heating mode selected, the type and size of the container used (plastic feeding bottle, glass feeding bottle, baby food jar, milk collection bag) and the amount of water in the heating tank.
- After one hour of continuous operation, from the end of the heating cycle, the device will switch off automatically. Allow the device to cool completely (removing the plug from the power socket) before using it again.
• After three minutes without being used and with no heating cycle set, the device will switch off automatically. - Do not touch the bottle warmer with wet or damp hands.
- Do not touch the bottle warmer if it is accidentally dropped into water; unplug it immediately and do not use it again. Contact trained, qualified technical personnel or Artsana S.p.A.
- At the end of the sterilisation cycle the objects inside the device are very hot. Always be extremely careful and allow the items to cool before handling them.
• In the event of a power blackout the disinfection cycle will be cut off and disinfection may therefore be insufficient. - Do not insert objects that are not suitable for hot disinfection.
• In the event of a fault and/or malfunction of the bottle warmer, switch it off and unplug it from the power socket, do not try to repair and/or service it, but contact only competent and qualified technical personnel or Artsana S.p.A. - Only contact a qualified technician or Artsana S.p.A. for repairs. Incorrect repairs by unqualified personnel may cause damage or injury to users.
- If you have any doubts on the explanations provided in this instruction manual, please contact your dealer or Artsana S.p.A.
- When disposing of the packaging, of accessories subject to wear, or of the device itself, sort the waste in accordance with the specific legislation in force in each country.
DEVICE CLEANING AND MAINTENANCE
At the end of each use, unplug the bottle warmer power cable (d) from the power socket. Leave the bottle warmer to cool down completely and after removing any residual water in the tank, dry it thoroughly before storing it in a clean and dry place.


DESCALING
During normal use, limescale deposits may form in the heating tank, which can reduce the performance of the device and damage it in the long term. The product will signal the presence of scales and the need for descaling by means of the Descaling icon.
When the icon lights up, the product requires descaling.
Observe the following instructions for descaling:
-
Switch off the device and allow it to cool completely.
-
Remove the insert with the water level indicator (f) from the tank by pulling upwards.
-
Pour a 200 ml solution of equal parts water and white vinegar into the tank and give it at least one night to act.

WARNING: Never switch the bottle warmer on while the water-white vinegar solution is in the tank.
-
The following day, use a glass of water to thoroughly rinse the inside of the tank. Then, clean and dry the internal and external parts with care.
-
Put the insert with the water level indicator (f) back into the tank pushing it until fits completely back in place.
-
Carry out a blank bottle warming cycle (without products) by adding 140 ml of water to the tank and setting: the plastic bottle programme (h1), the formula heating mode (k1), medium quantity (j) (250 ml) and refrigerator temperature (l2).
-
Switch off the device, allow it to cool completely, then remove the remaining water and dry the device completely. Use a cloth partially moistened with water to clean the external parts of the bottle warmer.
-
Before setting a new heating or sterilisation cycle, press and hold the descaling button/icon (o) for about 2 seconds until it switches off.

WARNING
- Descaling operations should be carried out every time the descaling icon (o) switches on. In the event of particularly hard water, descaling should be even more frequent.
- Do not use tools, abrasive sponges, detergents, alcohol or solvents to carry out cleaning operations, as they could irreparably damage the bottle warmer and/or its accessories.

CAUTION
- Never place the bottle warmer directly underneath the tap of running water or immerse the device, plug or power cable (d) in water or other liquids.
- Never place the bottle warmer in the dishwasher.
INDEX OF SYMBOLS

Double insulation

The appliance complies with the essential requirements of applicable EC Directives

WARNING!

Instructions for use

Read the instructions for use

For indoor use only

Device certified and approved by IMQ (Italian Quality Brand Institute)
The Bottle Warmer+Steriliser is a multi-purpose product that can be used to heat formula, breast milk and baby food, and can be completely programmed. It can also sterilise a feeding bottle or various small items naturally with steam.
Before using the bottle warmer, read this instruction manual carefully and keep it in a safe place.
Freephone number for calls from Italy 800 188 898.
DESCRIPTION (fig. 1)
a) Main body
b) Cover for sterilisation: b1) Steam escape hole, b2) Handle
c) Basket for baby food/feeding bottle
d) Power Cable
e) Power Connector
f) Insert indicating the water levels needed for the cycle
g) Interface on/off button
h) Icon buttons for selecting the container: h1) plastic bottle, h2) bottle with removable base, h3) glass bottle, h4) breast milk collection bag, h5) baby food jar.


i) Button for selecting the sterilisation function
j) Button for selecting the size
k) Warming mode buttons: k1) warming formula, k2) warming breast milk
1) Buttons for selecting the starting temperature of the food: 11) freezer temperature, 12) refrigerator temperature, 13) room temperature m) Timer and/or size
n) + and - buttons
o) Descaling icon button
p) Delayed start icon button
INSTRUCTIONS FOR USE

WARNING
- Please sanitise/disinfect the bottles carefully before inserting them in the bottle warmer.
- Never use the bottle warmer without water in the heating tank.
To pour the correct quantity of water into the tank, refer to this manual or to the label present on the product power cable and comply with the water level indicators present on the insert (f).
Before performing the following operations, make sure that the power cable plug (d) has been unplugged from the power outlet and that the cable (d) is connected to the power connector (e).
USING THE PRODUCT AS A BOTTLE WARMER
Placing the lid (b) over the central body (a) is not necessary for this function.
- Place the bottle warmer on a flat, stable surface.
- Pour water into the central body (a) as indicated on the table below:
TYPE OF FOOD TYPE OF FEEDING BOTTLE SIZE ADD WATER UP TO:  |  | ||
| FORMULA | - Large neck feeding bottle(Plastic / Glass) 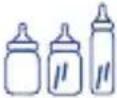 - Small neck feeding bottle (Glass) - Small neck feeding bottle (Glass) | 60-150 ml LEVEL 1 (40 ml) | |
| 250-330 ml LEVEL 3 (150 ml) | |||
- Small neck feeding bottle (Plastic)  | 60-150 ml LEVEL 2 (100 ml) | ||
| 250-330 ml LEVEL 4 (200 ml) | |||
| - Feeding bottle with removable base Any LEVEL 3 (Z26Y) | |||
| BREAST MILK | - Large neck feeding bottle(Plastic / Glass) 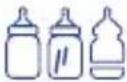 - Feeding bottle with removable base - Feeding bottle with removable base | Any LEVEL 3 (150 ml) | |
- Small neck feeding bottle(Plastic / Glass)  | Any LEVEL 2 (100 ml) | ||
- Breast milk collection bag Any LEVEL 4 (200 ml)  | |||
| BABY FOOD JAR | ≈80g | LEVEL 3 (150 ml) | |
NOTE: the water levels needed for warming refer to Chicco feeding bottles and 80 g baby food jars. For feeding bottles from
other brands and other jar sizes, using the same levels is advisable but the temperature of the food should be checked carefully at the end of the heating cycle (about 37°C).
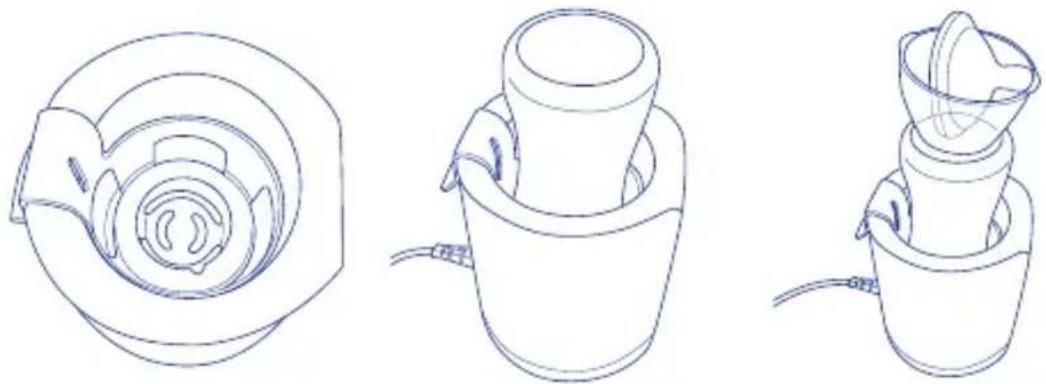
- Insert the feeding bottle, the jar or the breast milk bag in the basket (c):
- FEEDING BOTTLE with screw ring and teat assembled, but without the lid
- JAR without the lid or any labels
- BREAST MILK COLLECTION BAG closed
The support basket (c) must be used to heat small feeding bottles, glass feeding bottles, baby food jars and breast milk collection bags.
-
Put the basket (c) inside the central body (a). Should the water used for warming spill out of the central body (a) after insertion or in the event that it reaches the neck of the feeding bottle or baby food jar, dry immediately with a cloth and remove the excess water from the tank.
-
Insert the plug in the power socket: an audible signal will be heard.
-
Switch on the interface by touching button ⏻(g): an audible signal will be heard and button ⏻will blink blue.
7: Select the type of container to be warmed by touching one of the illuminated container selection icons (h):
h1) plastic bottles h4) breast milk collection bag
h2) bottle with removable base h5) baby food jar
h3) glass bottle
NB: To rapidly start the most recent warming cycle used: touch button (g) ⏻ when the audible signal is heard, the interface will light up showing the icons for the stored cycle, the timer (m) will indicate the duration of the cycle and button ⏻ will light up with a fixed white light indicating that the cycle is in progress.
NB: If the device is left unused with no cycle selected for three minutes it will emit an audible signal and switch off automatically.
8a. In the event that a milk container is selected:
- set the size by touching the + or - icons until the desired quantity is displayed (about 60, 150, 250 or 300/330 ml of milk) and touch the size selection button ⬆(j) to confirm the selection.
- select the heating mode by touching the blinking buttons (k):
warming formula (k1) warming breast milk (k2).
Gradual warming (k2) is recommended to preserve the vitamins and nutritional properties of breast milk.
8b. If heating baby food (h5) the options for selecting a size and a heating mode will be omitted.
- Set the starting temperature of the food by touching one of the starting temperature icons (I):
(I1) ☐ freezer temperature (about -18 °C) (deactivated when warming formula, or warming the content of glass bottles or bottles with a removable base)
(12) refrigerator temperature (about 5 °C)
(13) room temperature (about 20 °C) (deactivated when warming breast milk collection bags)
The timer (m) will indicate the duration of the cycle, which is pre-set by the manufacturer for Chicco feeding bottles and 80 g jars.
The duration of the cycle can be increased or decreased to suit personal preferences by using the + and - buttons (n).
NB: The duration was programmed for large neck feeding bottles, like the Chicco NaturalFeeling. For feeding bottles with narrow necks, like the Chicco Well-Being, the following manual adjustments may need to be made:
• For formula: up to an additional 2 minutes
- For breast milk at room temperature: up to an additional 2 minutes
- For breast milk from the refrigerator: up to an additional 5 minutes
• For breast milk from the freezer: up to an additional 15 minutes.
10a. IMMEDIATE START: Touch button ⏻. When the audible signal is heard, the timer (m) will indicate the remaining cycle time and button ⏻ will light up with a fixed white light indicating that the warming cycle is in progress. After 3 minutes with no cycle selected, the device will switch off automatically with an audible signal.
NB: To stop the cycle before completion and switch off the product, touch button ⏻ once more.
10b. DELAYED START: To set the cycle for a delayed start, touch button (p) and select the desired wait time by pressing the "+" and "-" icons (n) to choose between a 15 min, 30 min, 45 min, 1 h, 1:30 h, or a 2 h wait. Touch button When the audible signal is heard the button will blink and the timer (m) will indicate the remaining time for the selected cycle, which will begin automatically at the end of the delayed start.
NB: To interrupt the delay and start the cycle immediately, touch button once more. To force the bottle warmer to switch off during the wait period, touch button once more.

WARNING
When heating baby food, stir the contents of the jar often to ensure an even temperature.
- At the end of the cycle:
- if warming breast milk, the product will emit a long audible signal and switch off completely.
- if warming formula ☆ or a baby food jar: the product will emit a long audible signal and button Ⓤ Will light up with a blue light.


If the food is administered immediately, switch off the bottle warmer by touching button ⏻ until a long audible signal is emitted.
MAINTAINING THE TEMPERATURE
For the formula or baby food jar modes, if the device is not switched off the feeding bottle will be kept warm for up to 60 minutes, indicated by the countdown on the timer. Check the warmth at regular intervals, being careful not to scald yourself. Once 60 minutes have passed, the device will switch off automatically emitting an audible signal.

CAUTION
During the maintain temperature cycle, the milk temperature may exceed 37 °C. In this case, button ⏻ will begin to blink and the timer (m) will alternate between the text "HI" (High) and the countdown.
NOTE:
- It's best to consume milk and baby food immediately after heating.
- Milk and baby food should not be heated a second time outside of the single feeding/meal. If they have already been heated for a previous feeding/meal, they must be thrown away.
- Powdered milk that has been reconstituted in water at the right temperature 70^ , (as specified on the packaging for the powdered milk) and chilled rapidly, can later be heated using the bottle warmer and consumed immediately.
-
If the delayed start function is set, the maintain temperature cycle for formula will be disabled.
-
Disconnect the power cable plug (d) from the mains socket.
-
Remove the feeding bottle or baby food jar from the bottle warmer tank, and dry the bottle or jar thoroughly with a cloth to remove any residual water before administering the food to the baby.

CAUTION
- The final temperature of the food may vary significantly depending on: the type of container used, the quantity to be heated, the consistency of the food and the starting temperature. When starting from the freezer temperature, in the event that the food is not hot enough after the heating cycle, start a new cycle.
- Before administering the food to the baby, always make sure that the temperature is not excessive by pouring a few drops on the inner part of your wrist.
SPECIFICALLY
- For breast milk: do not shake feeding bottles with breast milk to avoid forming air bubbles inside. Immediate administration, after thawing and warming, is recommended.
- For formula: Shake the feeding bottle for a few seconds to bring the milk to a uniform temperature and then check again.
- For baby food jars: Stir the contents of the jar to even out the temperature and taste to be sure it isn't too hot.
MEMORY FUNCTION
In the event of consecutive heating cycles, including for twins, consecutive heating cycles can be carried out. At the end of the first cycle, replace the warmed water with new water at room temperature. Immediately after the device switches on press button ⏻ to start warming with the settings stored from the previous cycle. To guarantee the optimal temperature for administration, for some configurations the second cycle may end faster than the first. This is normal.
USING THE PRODUCT AS A STERILISER

CAUTION
Before you use the appliance for the first time, always perform an empty sterilising cycle without placing any objects inside.
- During the initial warming cycles the device may emit a mild odour. This is normal.
All items should be washed and rinsed carefully before sterilisation.
-
Place the bottle warmer on a flat, stable surface.
-
Pour 40 ml of water into the central body (a).
NB: The amount of water needed for sterilisation – indicated above – refers to Chicco feeding bottles and accessories.
- Put the basket (c) in the central body (a). Disassemble the feeding bottle as instructed in fig. 2 before placing it in the basket. Small objects that need to be sterilised may, alternatively, be placed in the basket. Make sure that the heating water does not spill from the top of the device. Should the water spill out, use a dry cloth to dry up the spilled water immediately and remove the excess water from the tank.
- Place the lid (b) over the central body (a) checking that the steam outlet (b1) is not obstructed and that the accessories held inside don't keep the lid (b) from closing properly.
- Connect the power cable (d) to the power connector (e) and insert the plug in the power socket: an audible signal will be heard.
-
Switch on the interface by touching button when the audible signal is heard, the buttons will switch on and the product will be ready to receive settings.
NB: If the device is left unused with no sterilisation cycle set for three minutes, it will emit an audible signal and switch off automatically. -
Set the sterilisation function by touching the Sterilisation button (i). The timer (m) will switch on and indicate the


remaining time for the sterilisation cycle, pre-set to 8 minutes (warming time included).
NB: The duration of the sterilisation cycle indicated above refers to the Chicco lines of feeding bottles and accessories.
8a. IMMEDIATE START
Touch button ⏻ when the audible signal is heard, the timer (m) will indicate the remaining cycle time and button ⏻ will light up indicating that the sterilisation cycle is in progress. After 3 minutes with no cycle selected, the device will switch off automatically with an audible signal.
NB: To stop the cycle before completion and switch off the product, touch button ⏻ once more.
8b. DELAYED START
To set the cycle for a delayed start, touch the Delayed Start Function button ⏻(p) and select the desired wait time by pressing the "+" and "-" icons (n) to choose between a 30 min, 1 h, 1:30 h, or a 2 h wait. Touch button ⏻ When the audible signal is heard, button ⏻ will blink and the timer (m) will indicate the remaining time before sterilisation begins. Sterilisation will begin automatically at the end of the delayed start period.
NB: To interrupt the delay and start the cycle immediately, touch button ⏻ once more. To switch the product off forcibly during the wait period, touch button ⏻ twice consecutively until the interface switches off and a long audible signal is heard.

WARNING
Do not remove the lid (b) when the sterilisation cycle is in progress.
- At the end of the cycle, the product will emit a long audible signal and switch off completely.
Always wash your hands thoroughly before touching the sterilised objects.
NB: So long as the lid (b) is not removed, the items inside the bottle warmer will remain sterile for about 24 hours.
For the warranty for product defects see the specific provisions of applicable national laws in the country where purchased, if required. The warranty does not cover components subject to normal wear and tear.
ARTSANA reserves the right to change information provided in this manual at any time and without notice.
The reproduction, transmission, copying, as well as the translation into another language, of any part of these instructions, are absolutely forbidden without the previous written authorization by ARTSANA S.p.A.
DECLARATION OF EC COMPLIANCE
Artsana S.p.A hereby declares that this appliance, brand Chicco mod. 06867_M, complies with all the essential requirements and other provisions set forth by the EU Directives 2014/30/EU (electromagnetic compatibility), 2014/35/EU (low voltage directive) and 2011/65/EU (RoHS). A full copy of the EC declaration can be requested from Artsana S.p.A. Via S. Catelli 1 – 22070 Grandate (Co) Italy.

THIS PRODUCT COMPLIES WITH DIRECTIVE 2012/19/EU.
The crossed bin symbol on the appliance indicates that the product, at the end of its life, must be disposed of separately from domestic waste, either by taking it to a separate waste disposal site for electric and electronic appliances or by returning it to your dealer when you buy another similar appliance. The user is responsible for taking the appliance to a special waste disposal site at the end of its life. If the unwanted appliance is collected correctly
as separate waste, it can be recycled, treated and disposed of ecologically; this avoids a negative impact on both the environment and health, and contributes towards the recycling of the product's materials. Illegal disposal of the product by the user will result in administrative sanctions provided by law. For further information regarding the waste disposal services available, contact your local waste disposal agency or the shop where you bought the appliance.

Mode d'emploi
DÉCLARATION CE DE CONFORMITÉ
Rev. 01-231246007390100000-01-2312

Made in China
Artsana S.p.A. - Via Saldarini Catelli 1 - 22070 Grandate (CO) Italy
www.chicco.com