CR 7926 - Air Conditioning CAMRY - Free user manual and instructions
Find the device manual for free CR 7926 CAMRY in PDF.

User questions about CR 7926 CAMRY
0 question about this device. Answer the ones you know or ask your own.
Ask a new question about this device
Download the instructions for your Air Conditioning in PDF format for free! Find your manual CR 7926 - CAMRY and take your electronic device back in hand. On this page are published all the documents necessary for the use of your device. CR 7926 by CAMRY.
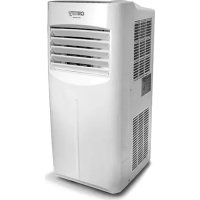
USER MANUAL CR 7926 CAMRY
SAFETY CONDITIONS. IMPORTANT INSTRUCTIONS ON SAFETY OF USE PLEASE READ CAREFULLY AND KEEP FOR FUTURE REFERENCE
- Before using the device, read the operating manual and follow the instructions contained in it. The manufacturer is not liable for damages caused by using the device contrary to its intended purpose or improper operation.
- The device is for home use only. Do not use for other purposes that are not for its intended purpose.
- The device should only be connected to an AC outlet with a grounded 220~240V 50Hz . To increase operational safety, multiple electrical devices should not be connected to one current circuit at the same time.
- Use extreme caution when using the device when children are nearby. Do not allow children to play with the device, do not allow children or people unfamiliar with the device to use it.
- WARNING: This equipment may be used by children over 8 years of age and people with limited physical, sensory or mental ability, or people who have no experience or knowledge of the equipment, if this is done under the supervision of a person responsible for their safety or have been granted them information on the safe use of the device and are aware of the dangers of using it. Children should not play with the equipment. Cleaning and maintenance of the device should not be performed by children, unless they are over 8 years old and these activities are carried out under supervision.
- Always disconnect the power plug by holding the socket with your hand after use. DO NOT pull on the power cord.
- Do not immerse the cable, plug and the whole device in water or any other liquid. Do not expose the device to atmospheric conditions (rain, sun, etc.) or use in conditions of high humidity (bathrooms, damp mobile homes).
- Periodically check the condition of the power cord. If the power cord is damaged, it should be replaced by a specialist repair shop to avoid danger.
- Do not use the appliance with a damaged power cord or if it has been dropped or damaged in any other way or if it is not working properly. Do not repair the device yourself, as there is a risk of electric shock. Take the damaged device to an appropriate service center for checking or repair. All repairs may only be carried out by authorized service points. Incorrectly performed repairs can cause serious danger for the user.
- Place the device on a cool, stable surface, away from hot kitchen appliances such as: electric stove, gas burner, etc.
- Make sure that nothing is blocking the air inlet and outlet of the device
- Use the device only on a level surface to prevent the condensation from spilling out
- To provide additional protection, it is advisable to install a residual current device (RCD) in the electric circuit with a rated residual current not exceeding 30mA . Ask an
electrician for this.
- Clean the air filter regularly. The frequency of cleaning depends on the cleanliness of the air.
- After turning off the machine, wait at least 5 minutes before turning it back on.
- Do not use the device in sunny places. When the device overheats, the overheat protection will switch on the device.
- To ensure effective cooling, a distance of at least 60~cm should be kept between the side walls of the device and the wall or furniture or curtains.
- Due to the limited performance of the device, if the difference between the target temperature and the ambient temperature is too great, the target temperature may not be reached.
- To reduce the risk of fire, electric shock or injury when using the air conditioner, observe the following basic precautions:
a) Connect to a grounded outlet with 3 pins.
b) Do not remove the grounding prong.
c) Do not use the adapter.
d) Do not use an extension cord.
e) Disconnect the air conditioner before servicing.
f) Use two or more people to move and install the air conditioner. - Do not use agents accelerating the defrosting or cleaning process other than those recommended by the manufacturer.
- The device should be stored in a room without constantly operating sources of ignition, for example: open fire, gas appliances or electric heaters.
BEFORE FIRST USE - (picture E)
Connect the connectors to the air exhaust duct as follows:
- Extend the air exhaust duct (9) by drawing out the two ends of the duct.
- Screw the air exhaust duct (9) into the connector of air exhaust duct (10).
- Connect the air exhaust duct (9) to the device directly.
REMARKS:
- Keep the unit at least 1 meter away from TV or radios to avoid electromagnetic interference.
- Do not expose the unit under direct sun light to avoid surface color fading.
- Do not tilt the unit for more than 35^ or upside-down while transporting. If the device has been turned over during transport, put it down correctly and wait 2-4 hours before starting it.
- Place the unit on a flat surface with less than 5^ inclination.
-
The unit operates more efficiently in certain room locations, select the best location:
-
Beside a window, a door or a French window.
- Keep the required distance from the return air outlet to the wall or other obstacles at least 60~cm
- Extend the air hose to ensure that other end of the air hose has clearance between the window door, or French window, or wall hole.
- Air outlet or intake cannot be blocked by protective grid or any obstacle.
To extend the life of the unit, drain the condensed water from the down drain holes (8) before putting the unit into storage at the end of the
season.
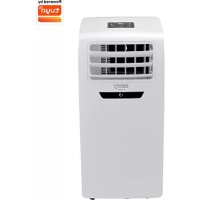
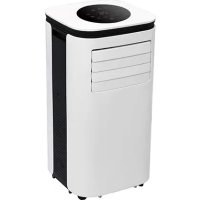
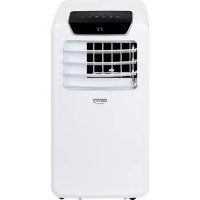
DEVICE DESCRIPTION (pictures A and B)
- Control panel 2. Cold air outlet
- Signal receptor 4. Remote controller
- Transport handle 6.Exhaust duct
- Evaporator inlet 8. Down cooler Drain hole
- Air exhaust duct 10. Window exhaust adapter
CONTROL PANEL (picture C)
A. Power button ON/OFF B. Fan speed button
C.Mode button D. Timer / Temperature up button
E. Timer / Temperature down button F. Low speed lamp
G. High speed lamp I. Sleep button and child lock
J. Automatic mode K. Cool mode
L. Dry mode M. Fan mode
N. Timer button O.Oscillation button
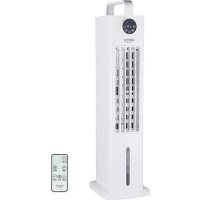
REMOTE CONTROLLER - picture D
The remote controller transmits signals to the system.
Button "A" - the appliance will be started when it is energized or will be stopped when it is in operation, if you press this button.
Button "B" - press it to select fan speed in sequence.
Button "C" - press it to select operation mode: "J", "K", "L" or "M".
Button "D" / "E" - press to adjust the room temperature and the timer.
Button "l" - press to set or cancel sleep mode.
Button "N" - press to set the time of automatic off and automatic on.
Button "O" - press to set or cancel louvers swing mode.
- Turn on the device.
a) Connect the device.
b) Press the "A" button, then the device beeps once and turn on.
c) LED diode displays room temperature and starts working in automatic mode.
2. Choose the operating mode
Press the "C" button to select the desired mode of operation by sequence:
Automatic mode "J" -> Cooling mode "K" -> Drying mode "L" -> Fan mode "M"
3. Adjust temperature
The temperature can be set within a range 15^ - 31^ . Press "D" or "E" button to increase or decrease the temperature by 1^ by pressing
once. The device LED panel shows the target temperature for 5 seconds and then displays the room temperature.
4. Adjust fan speed
Press the button "B" to select a desired fan speed shows by sequence:
Low speed "F" -> High speed G
5. Power
When you press the "A" button again, the device will sound "di" and stop working.
-
Press this button "I" to enter the sleep mode of device.
-
Press this button "N" to set a timed shutdown.
Press this button "O" to set air swing oscillation in left-right directions.
Each mode working principle:
AUTO "J" mode:
Once the "J", operation is selected, the indoor temperature sensor operates automatically and it selects one of below operation modes:
- When the room temperature ≥ 24^ the unit will automatically select cool mode "K" mode.
or
- When the room temperature < 24^ C ,the unit will automatically select high fan speed mode "M..".
Dry "L" mode:
- The up centrifugal fan will run at low speed, and the speed can't be adjusted.
- The compressor will stop after running 8 minutes, then run again after 6 minutes.
- The device adopts constant temperature dehumidifying mode, and the adjustment of temperature is no effective.
COOL "K" mode:
- When the room temperature is higher than set temperature on control panel, the compressor starts to run.
- When the room temperature is lower than set temperature on control panel, the compressor stop and upper fan operates at original set speed.
Fan "M" mode.
- The up centrifugal fan runs at set speed, and the compressor does not run.
- The adjustment of temperature is no effective.
Timer operation "N":
- Press "N" button to set Automatic Off time while the unit is running.
- Press "N" button to set Automatic On time while the unit is ready.
- The time can be adjusted within a range of 1 hour to 24 hours by pressing the button "D" (+) or "E" (-).
Sleep mode "I" operation:
- The sleep mode operations when the unit is under cooling "K" mode.2. Press the button "I" in cool mode "K", then the unit will work
under sleep mode and the fan will turn to low speed automatically. The set temperature will increase by 1^ after one hour, and increase 2^ after two hours. After six hours the unit will stop running.
Child Lock operation:
- Press the button and hold "I" in cool mode "K" for 3 seconds to enter the child lock state. On screen will be shown "LC" after active this function.
- Again press the button and hold "I" in cool mode "K" for 3 seconds to exist the child lock state. On screen will be shown present room temperature after deactivate child lock function.
Swing "O" mode operation:
When the device is on, press button "O", the vertical louver will on or off. When it is on, the louver can swing the left and the right sides. Press the button "O" again, the louver will stop swinging.
Notice:
The main control board has memory function, when the device is ready to run but in stop status, the main control board can memorize the initialization of working mode. When you turn on the unit, it will work as the same enactment of working-mode as last time, no need to reset the working mode again.
REMOTE CONTROLLER
- Slide the back cover to open and take off the isolating film on the batteries.
- Put the batteries inside the slot, must be corresponding to the signs of "+" and "-" on the remote control.
- For long time no use, take out the batteries.
- To prevent environmental pollution, take out the used batteries and dispose safety and appropriately.
To operate the device, aim the remote controller (4) at the signal receptor (3). The remote controller will operate the device at distance 5 meters when pointing at signal receptor of the device.
PROTECTIVE DEVICES
The protective device may trip and stop the appliance in the cases listed below:
- at cooling mode: indoor air temperature is over 43^ (109^)
- at cooling mode: room temperature is below 15^ (59^)
- at dehumidifying mode: room temperature is below 15^ (59^)
If the device runs in cooling "K" or dry "L" mode with door or window opened for a long time when relative humidity is above 80% , dew may drip down from the outlet.
The protective device will work in the following cases:
- Restarting the device immediately after stopping work or changing the selected mode while working, you must wait 3 minutes.
- If the plug has been removed, after restarting the device will return to the original mode, TIMER ON and TIMER OFF - must be set again.
REMARK: there is condensing water recycling hidden within this unit. The condensing water is partly kept recycling between the condenser and the water plate. When the water level rises to the upper level, the float switch and water full indicator (E4) lights on to remind draining water. Please cut off the power supply, move the appliance to a suitable place, remove the drain plug, drain water completely. After the
drain, re-install the plug, or the appliance may leak and make your room wet.
If the appliance is placed in a position admitting drain water, you also can connect the drain hole to the drain port to drain the water. Drain pipe is added to kit, with inner diameter 9mm, outer diameter 12mm, material: PVC.
Troubleshooting
1) Trouble: Do not work.
Analysis:
a) maybe the protector trip or fuse is blown, please wait for 3 minutes and start again, protector device may be preventing device from working.
c) maybe batteries in the remote controller are exhausted.
d) maybe the plug is not properly plugged in.
2) Trouble: works for a short time only
Analysis:
a) if the set temperature is close to room temperature, you can lower the set temperature.
b) maybe air outlet is blocked by obstacle. Take the obstacle away.
3) Trouble: Works but not cools
Analysis:
a) maybe door or window are open.
b) maybe in close distance there is another appliance heat-working like heater or lamp, etc.
c) the air filter is dirty, please clean it.
d) air outlet or intake is blocked.
f) set temperature is too high.
4) Trouble: Water leak during moving.
Analysis:
a) drain the condensate before moving.
b) to avoid water leakage, please locate the device on flat ground.
5) Trouble: Do not work and water full indicator "E4"
Analysis:
a) pull out rubber plug to drain water.
b) if it is often in this state, please contact qualified service technical.
Troubleshooting
6) Trouble: Device fails to start up.
Analysis:
a) maybe not plugged. So, plug in it.
b) maybe plug or socket damages. Replace by service provider.
c) maybe fuse broken. Replace the fuse by service provider (specification: 3,15A/250VAC).
7) Trouble: Device automatically stops.
Analysis:
a) timing shut down or set temperature reached. Restart it or wait for auto-switch.
8) Trouble: no cold air under COOL "K" mode.
Analysis:
a) room temperature is lower than set temperature. It is a normal phenomenon, the machine will auto-switch while the room temperature is higher than the set temperature.
b) Device enters into anti-frost protection. The device will auto switch after anti-frost protection is over.
9) Trouble: LED displays failure code "E2"
Analysis:
a) room temperature sensor fails or damages. Replace the room temperature sensor by service provider.
10) Trouble: LED displays failure code "E3"
Analysis:
a) the evaporator oil pipe sensor fails or damaged. Replace the evaporator coil pipe sensor by service provider.
11) Trouble: LED displays failure code "E4"
Analysis:
a) water-full warning. Drain out the water.
CLEANING AND MAINTENANCE
Device maintenance
- Turn off the device first before disconnecting from power supply.
- Wipe with a soft and dry cloth. Use lukewarm water below 40C to clean if the appliance is very dirty.
- Never use volatile substance such as gasoline or polishing powder to clean the device.
Air filter maintenance
It is necessary to clean the air filter every 2 weeks if the device operates in an extremely dusty environment. Clean as follows:
- Stop the device first, push up the air filter (Picture F).
- Clean and reinstall the air filter.
- If the dirt is conspicuous, wash it with a solution of detergent in lukewarm water. After cleaning dry it in a shaded and cool place, then reinstall it.
Maintenance after using
1.If the device is not going to be used for a long time, remove the rubber plug from the drain hole (8) to drain the water.
2. Keep the appliance running with fan only for a half day during a sunny day to dry the appliance inside and prevent from going moldy.
3. Stop the device and pull out the power cord plug, then take out the batteries of remote controller and store device properly.
4. Clean the air filter and reinstall it.
5. Remove the air hoses and store them properly, and cover the hole tightly.
TECHNICAL DATA:
Cooling capacity at BTU: 12.000 BTU / hour
Cooling capacity in watts: 3500 W
Energy consumption (cooling) W: 1300 W
Volume: < = 65dB
Air flow: 450m3 / hour
Energy class: A
Timer: 24 hours
R290 coolant weight: max. 210 grams
Capacity of drying function: 28 liters / day

Caution, risk of fire.
Do NOT pierce or burn.
Be aware that the refrigerant may not contain an odour.
The maximum refrigerant charge amount: 210g.
Please transfer cardboard packaging to waste paper. Pour the polyethylene bags (PE) into the plastic container Worn device should be returned to the appropriate point storage because it is dangerous in the device ingredients may pose a threat to the environment. The electrical device should be handed over to limit its reuse and use. If in the device there are batteries you have to take out and give to the point stored separately.
DEUTSCH
Volume: < = 65 dB
Zems atrums "F" -> Liels atrums G
- Jauda
Vělreiz nospiéžot pogu "A", iérice skanes "di" un párstaj darboties.
-
Nospiediet sho pogu "I", lai parietu uz ierices miega rezimu.
-
Nospiediet sho pogu "N", lai iestatitu izslegtlu laiku.
Nospiediet 和 pogu "O", lai iestafitu gaisa suposanas svarstibas pa kreisi un pa labi.
Katra rezima darbibas principals:
AUTO "J" rezims:
Ventilator "M." rezims.
Functionarea in modul "O" in miscare:
- BbIepeHTe pekm pa6oTbI
Haxmte KhoNkY «C», yTo6bl Bb6paTb XeJaembI pexM pa60tI no nopAky:
AToMaTnueckm peKIM «J» ->peKIM oxJaXeHnra «K» ->peKIM cyUKN «L» ->peKIM BeHTnIaTopa «M.
- OTPeryIpyuTe Tempepatypy.
TeMnepatypy moxho yctahOBHTB dnaHn3OHe ot 15 do 31^ . Haxmte KhoNkY D nIN E , YTO6bI yBeJIuHTb nIN yMeHbUHTb TeMnepatypy Ha 1^ , haxab oIN pa3. CBeToIOoHna naHel b yCTpOcTb Noka3bIBaET 3aDaHHy ToMnepatypy B TeeHne 5 cekHyd, a 3aTEM OTO6paXaET Tempeatypy B NOMeHIn.
- OTPerynpyyteCKOpocTbBEHTINrTaTopa
Haxmte KhoNky «B», yTo6bI Bb6paTb XeNaemyIO ckOpocTb BpaSeHHaENTnIaTopa. OTo6paXaTeTcNoCJeDoBaTeJIbHOCTb:
Hn3krackopoctb"F"-BbICOKaCKoPocTbG
- MoUHooCTb
TEXHNUECKNE DAHHBIE:
XoJOpOnpOu3BODInTeJIbHocTb B BTE:12.000 BTE/uaC
XoOnOpOn3BODTeNbHOCTb B BAeTax: 3500 BT
3Hepronotpe6nHne (oxnaJeHne) Bt: 1300 Bt
TpOMKocb: < = 65 d6
PacxoI Bo3dyxa: 450 m3/ yac
3HepreTnueckn KnaCC:A
Taimep:24 yaca
Bec oxnaxdaohuei xndkoctn R290: mKc. 210 rpaMM
PpOaBDOAnTeNbHOcTb yHKnCyKn:28 nIITPOB/JeHb


Octopoxho, onachoctb noxapa.
HE npokanbIbAtb n He Cxiratb.
IOMHHTe, YTO XIAdaReHr He MoXeT COePkaTb 3anax.
MaKcImaJIbHoe KOJIueCtBO 3anpaBIAreMOro XJaIaIaReHTa:210r.
3a6078b 6 ok kpykaioe cpe... ynaokBky n3 kapToHa nepeaTe, noxayuNCTa, Ha MaKyIaTyp. POnIeTneHOBbIe MeKu (PE) BbIKDaTb B pe3epByap dIy INaactMacBcI. N3HOseHHe yctpoiCtBO HADo nepeDaT B COOTBeTCTBYUOuyTOk Ky xpaHEnra, TAK KAK HAXOJaIeCEB YcTroPcTEBoIacHbE CoCTaBnIOUe MOrY TaBnTcBcR yrpo3oD nIg Okpykaioe cpebl. 3NeKtpnHeCKoe yctpoiCTBO HADo nepeDaTb TakIM o6pa3om, UTo6b OrpAHHTb erO NOBtPoHcYNoTpe6JIeHne IncNoB3OBAHne. EcnB UcTpoiCTBe HaxOJaTc6BaTApen, IN HADo BbITryHbNpePaTaB TOkY XpaHEnra OTdeNbHO. YcTroPcTB O He BbIKDaTb B pe3epByap dIy KOMMyHaJIbHbIX OTXODOB!
ITALIANO
CONDITIONIGENERALI DI SICUREZZA
IMPORTANT ISTRUZIONI DI SICUREZZA LEGGERE ATTENTAMENTE E SALVARE PER IL FUTURO
Ventilator "M." -tilstand.
PIN PQTH XPHSH - (EIOVA E)
UvOEtouc ouoetnpocotovayyo eaywyns aepa wS eNc
Child Lock-operation:
Varning, risk for brand.
3AΓΑJIbHI yMOBn BE3πEKN
BAKJIINBI IHCTPYKl3 5E3KOJTOBHOCTI YHTAITE DYKKO I 3ABE3NEUHNEДЯ ByduyeRO
- Перш 키к користуваши с ристоим, почи taiпегик 3 ekсл�аразцл ta
ДOTриму teсь Incтрукци, со містя ться в Н Bomу. Виробник He Hece BiДноВдальноcti 3a
36NTKN, српунені ВИКОПСТАннam ристою BCупецч noro nepeДбачУВанOMy
призначени оабо неравильни ekсл�аразцл.
2.Ппстпглрн3нayehнлшe ДядомашьогВикористанн. He BnKOpNCTOBYte dIg IInxu,ЯкHe np3NaueHi 3a np3HaueHnM. - Ппсстри сдд пдклочати лше до розтkn 3minHOrO ctpу my i3 3aemneHm 220 240 B ~ 50 T. Дя пдвиценя ekcnpyaataciйhoi 6e3nekn kinbka eilektpnHnx npicstpoIB He noBHHi piklchatncя odnoHOrO lanuIora ctpу my.
4.Будыт дуже obepexнi, коли Користсь пистоим, коли DiTи поч. He Do3BoJYte dITЯm Гати 3 пистоим, He Do3BOJYte DiTЯm abO Люям, He3HaIOMM пистоим, KOPINCTyBaTnCSHIM. - ПОПЕДЖЕНЯ: Рим обладнham можуь користявати сдтсаре 8 рokов та пюд 3 obmexжehи m φi3nHmN, ceHCOPHmN abo po3yMOBmN 3di6hOCTaMn, abo liODn, kI He MaIOb ДOCBId y n 3HaNb ΜΟДо оБладнання, якso ue pOBtbcrпн HarJydom BiINobiДальhoi oc6b. Дгix be3nekn abo hadaHO im infopmaцio npo be3neue He KORNTyBaHnЯПростpoem Ta 3HaHTb npo He6e3neky Ioro BIKOPncTahHry. DiTn He NOBInHi rpatn 3 oblaadnahanm. YIshenra Ta obcnyroByBaHHЯ prnilady He NOBInHO 3diCHIOVBATSCRдТBMN,Якso BOHn He nepeBnSUTb 8 pOKIB i zu 3axOOn npoBODArbcrпн HarJydom.
- 3aBxdi BicdHyte shyp kNBHeHn, TpMaOnu po3eKy pyko nicra BkOpncTahn. HE TgHiTb 3a shyp kNBHeHn.
- He 3aHypioTe Ka6eIb, BnKy Ta BeCb npncTpii y BoNy a6o bdy-ky iHsy piDInHy. He nidaBaIte npnilad atmocsephm yMOBaM (dou, coHce Too) i He BnKOpNCTOByTe By MOBax NiDbNueHOI BOJorOCTi (BaHHi KIMHaTn, BOJorI MO6IbHi 6yDInHK).
- NepioDnHNO nepEBipIe CTan shHpy kNvBHeHn. KaO uHyp KINBHeHn NOxKoJKeHn, Ioro cIiD 3amHNTn B CneuiI3OBaHOMy peMOHTHom yEHTpi, Uo6 yHnKHyTn He6e3NeKn.
- He BnKOpNCToBvIe npIaI i3 noXKOJxHm shHypom JINBJIeHHa6o JaKIO BIn 6yB BnAb a6o noXKOJxHm 6yb-IAkIM iHWM cNoCobom a6o JaKIO BIn He npaIcOe HaNEXHM YHOM. He pemOnTyIe npIcTpii camocTiHo, ockIbKn e pn3NK ypaXeHHaEKeTPuHNM CTPyMOM. BiDHeCiTB noXKOJxHm npIcTpii y BiIDNOiHN cepBicN chENTp InapeBipKn YI peMOHTy. Bci pemOnTn Moxytb npOBdNTn tiMbKn ABTOPi3OBaHi cepBici Hi NKTn.
HenpaBnIbHO BnKoHaHn peMOHT MOKe cTaHOBnTn cepNo3Hy He6e3neky dJa KopNCtYBaHa. -
ПocтавTe пилад Ha npoxoIodHy CTiKy NOBepxHIO, noaIi BiD rapaYnx KyxOHnX pniIadIB, TAKIXЯК: eJeKtpuHa PIINTa, ra3OBn KOHΦopKa TToIo.
-
Ipekehaintecb, nio hio He 6kkye Bxid i Bxid nobitprB npictpi
- BnKOpncToBvIe npncTpii IuIe Ha pIBHi nOBepxHi, 0o6 3anobirn po3nBy KOHdEHCATy
- Дял забeзпeуня ддakTKOBOrO 3axnctу doцilbHo BCTaHOBuTи B eJneKtpuHOMy LaHc03i npncTpii 3aIIshkoBOrO ctpmy (RCD) 3 homHaJIbHm 3aIIshkoBm Ctpymom, lo He nepeBnUye 30 mA. 3anTuTe npo ue eJneKtpnka.
- Perynpho uchtitb nobitpHn fIbtp. Yactota ounueneHHa 3aJexntb BiD uNCTOTNIOBITPra.
15.ПсЯВIMKHeHЯMaSHIN3aYeKaITe pInHaMHi 5 XBUNH,прш HIX yBIMKHyTn II. - He BnKOpncToBvIe npnilad y coHanynx Micx. KOn npictpi neperpietbcra, 3axnct BiD neperpiBy yBIMKHeTbCra.
17.ДЯЗБЕЗPEHЯ eФeKTHBHO OXOLOJKeHHa CnI36epiratN BiIcTaHb He MeHwe 60 CM MIX BiUHMN CTIHKMn pncTpoTO Ta CTIOHO aO MeJIaMn YI WTOPAMN. - Yepe3 obmexeni noka3nki p6oTn npncTroO, kIoo pi3Hnca mIX zuIbOBOIO TempeatpoTo Ta TempeatpoTo HABKOLINHbOTo cepeoBnua 3aHaTO BeNka, zuIbOBA Tempeatypa MoKe 6yTu DocraHyTa.
- Κόb 3mēnιπιρικίνηκεχί, εγαχένηση ἐλεκτριηνιμις Κτρυμονι Αδό Πρανινικόνης κόρης Κθρικόνης Μαβεύμενης Στρυμονι Αδό Πρανινικόνης Μαβεύμενης Στρυμονι Αδό Πρανινικόνης Μαβεύμενης Στρυμονι Αδό Πρανινικόνης Μαβεύμενης Στρυμονίνης Μαβεύμενης Στρυμονίνης Μαβεύμενης Στρυμονίνης Μαβεύμενης Στρυμονίνης Μαβεύμενης Στρυμονίνης Μαβe³πεκή:
a)Пдкнючыdo3a3eMneHoi po3eTKn 3a donomoroIO 3-x wTNΦTIB.
6) He 3himaTe 3a3eMJIIOUChy 3y6uNK.
B) He BnKOpncToBvIte aIaITeP.
r) He BnKOpncToBvIe nOIOBxuBaU.
IpeoobcnyroByBaHnM BiKIOuOHTb KOHNIOHeP.
f) BnKOpncToBvIe DBox a6o 6iNbwe IIOdeN IIOpeMiuEHHa Ta BCTaHOBHeHHa KOHdNciOHepa. - He BnKOpncToBvIe 3acO6n, IIO npNcKOpIOuTb npOuec po3MopoxyBaHn yI OUnIeHHa, KpIM Tnx, kI peKOMeHDoBaHi BnPo6HnKOM.
- Ппсстри слд 3бер ratи в пимишни 6e3 поши Дючх джерел заиманя, наразлад: Вдкрntoro BORHIO, ra3OBx пладiab a6o elektpruHnx HarpiBaiv.
IO NEPIWOI BO BIKOPNCTAHHRA-(MAHOHOK E)
IiKnHouItb3'EDHyBauiDIO nobITponpOBOy TaKIM YINHOM:
- BntyHtB nobITPOBIDiHN KaHn (9), BNTyHryBUn Dba KInCu BO3dyXOBOda.
- Bkpyt itb nobitponpoBID (9) y 3'edhyBaH nobitponpoBdy (10).
3.Пдкнчить nobitropoportid Дг Bnucky nobiter (9) 6e3nocepeHbO Do npnctpoiu.
ПРИМITКИ:
- TpmaTe npncTpi npHaMHi Ha 1 MeTp BiD TeJeBi3opa a6o paio, 06yHnKHytn eJekTpomarHITnx nepeko.
- He nidaabaTe npictpi npamomy coHnHomy cbITny, 06 yHnKHyTN BnCbItaHHKa KJIbOpy nobepxhi.
- He haxnayte npncpi 6bnbe nix Ha 35^ a6o Doropn dHom niac tpaHcnpotybaHHa KxO npncpti 6bnyo nepeBepHyto iD qac TpaHcnpotybaHH, BiKnaDiT bno npabunbHO i nouekaite 2-4 rOHN, nepw hix 3anyckaTN.
- P03micTiB npicTpii Ha pIBHn NOBepxHi 3 HaxINOM MeHwe 5^
- Pnpctpi npaioe eefkTbHiihe B neBnix npmuiHnHex, Bn6epiTb haKpaue micie:
- Bina Bika, DBepe qn paanuy3bko Bika.
- DToPmUyTeCb Heo6xIHOI BiDCTaHI BiB BxIHORO OTBOPy NOBITpa Do CTIN abo IHUNX NpeuKoI OHaHMeHue 60 cm.
- BntarHtB nobitprn nnahr, 06 nepekoHaTcra, 0i Hsnn KHeuc nobitprno 7naHra Mae 3a3op mix DbepuTAMn Bkha,
paHcy3bKIM BIKHom a6o OTbOpom y ctiHi.
- Bnynck nobitpr a6o 3abip nobitrpe He moke 6ytn 3a6noKOBaHm 3axnchoo ciTkoIO abo 6yd-b-koIO nepeWKoIO.
Iio6 npodobkntn Tepmin ekpniyaatau arperaty, 3nne KOndecOBaHy BoNy 3 3nBHX OTbopIB (8), nepu HIX 36epiratn pncptpi Ha
36epirahna B kInci ce3OHy. Ukt
ONICOBIAHANHRA:MICUEBNI KOHNIOHEP BITPI (fotorpaA A Ta B)
- NaheJIb ynpabJIHHH
- Bnynck xoJIoAnHoro nobitpr
3.CnHaJIbHni peeTeNTop
4.Пульт дисанциного керваима - TpaHcnpTHa pyuka
- BtJxKn KaHa
- Bxid Blnapnika
8.3nBnOtBipDnOxOnoKyBaay - NobitprHHN BHTJXHNI KAHAN
- BikoHnni nepexiDnK
IIAHEJI KOHTPOJIb (MaHIOHOK C)
A.KhonkaKmbJeHH ON/OFF
B.KhONka WbNdkOCTI BeHTnJIToPA
C. KhoIIka peKIMy
D. Khonka Taïmepa / niДишени TempepaType
E. KhoNka 3HnXKeHHa TaMepa / TempepaTyPn
F. Namna Hn3bkoI WbUdkoCTi
G. Namma Bucokoi Wbukocti
I.Khonka Chy Ta 6NoKoYBaHHaHTnHH
J.ABtOMaTHHmpeKIM
K.Knachni pekim
JI.CyHnpeKMM
M. Pekim MBentnIaTopa
N. Khonka Taïmepa
O.KhonkaKoJinBaHb
BINDAJIEHO KOHTPOJEP-MaHIOHOKD
Bidanaen KOnTpOnepea CnHaNn CnCTeMi.
KhONka "A" - npJnaI 3aynctntbC, KOJI BIN NiIKNIOHEnI Do HApyrn a6o 6yde 3ynHEni niD cac po60TN, RaIIO HaTNCHTN cIO KhoNkY.
KhoNka"B" -HaTnchIb ii, 06Bn6paTn nociIOBHO WbNDkICTb BEHTnIaTopa.
Khonka "C" - Hatncihtb ii, 106 Bn6paTn peXm npo6ToN: "J", "K", "L" a60 "M".
KhONka "D" / "E" - HATNCiTB dIpeRyIOBaHHr TEMnepaTpyn B npMIMeHHI Ta TaMepa.
KhONka "r" - HATNCiTb, 06 BCTaHOBHTn a6o CkacyBaTN pexIM CHy.
KhONka "N" - HATNCHTb, 06 BCTaHOBUTn Yac aBTOMaTHHORo BUMKHeHHra Ta aBTOMaTHHORo BKJIIOeHHRA.
KhONka "O" - HATNCHTb, 0o6 BCTaHOBNTn a6o cKacyBaTn peXm pO3nay xKaIIO3i.
Eknpnyataua nahei npabnHH
ABTOMATNUHI / OXIAIHI / CYXI / BeHTNIJITopi
- YbimKHiB npncTpii.
a)PiKJIIOHcITb npICTpi.
b) HatncHt b Khonky "A", nicra yoro npnctpi noaee 3ykoBni cunHan oDIN pa3 iYbIMKHiTb.
B) CbTIOIOHN IIOB BiIOsbpaKa e KIMHaTHy TeMnepaTypy i NouHae npaIOBaTN B aBTOMaTHUHOMy peXMI.
2.Bn6epiB peKIM po60Tu
HATNCHTb KHOJky "C", 106 Bn6paTn nOtpi6Hn peXm po6Ot 3a nocniobHicTIO:
ABTomatuHn peKm J"->Pekm oxoJIOKeHHa K"-Pekm cyuHHa L"-Pekm BeHTnIaTopa M."
3. BvdpernyIIOte Tempepaty
Temnepatypy moxha BCTaHOBtN B mexax 15°-31° C. HATNCiTB KHOKky "D" a6o "E", 06 36IbHHTN a6o 3MeHHTN Temnepatypy Ha 1 ^ C, HATNCHyBm Odn pa3. CbitIOJIOHa naneB npncpoIO kOka3yE cInboby Temnpatypy npotraom 5 cekyn, a notim Biio6paxae Kimhathy Temnepatypy.
4. BiDpynIOte WbNdkictb BeHTnJIrTopa
HaTnCHiB KhoNky "B", 106 Bn6paTu nOtpi6Hy WbUdkicTB BnnpomHOBaHHBaHTnIaTopa 3a nocniobhicto:
5. NToTyxHhCtB
PnIOBTOHOMy HATNCKaHHI KHOKNK «A» pncTpii npOlyHae «Di i nepeTaHe npaUOBaTn.
-
Hatncitb 10 KhoNkY "r", 106 yBtiB n B pexnM cH npntpoio.
-
Hatncitb 10 KhoNkny "N", 106 BcTaHOBnTu TmUaObe BiKJIIOueHHra.
HaTnCHiB IIO KHOHkY "O", 106 BCTaHOBHTN KOJIbAHHH NOBITPraHOro NOBOPOTy HAnpMky BNIBO-BnpaBO.
- BcTaHOBJIeHn BiDcIeHTpOBn BeHTINJrTOp npaIOE 3 aDaHOIO WbUdKicTIO, a KOMnpecOp He npaIOE.
- PeryIIOBaHHa TempeaTpyn He epeKTHBHO.
OnepaizjraTaimepa "N":
- Hatncitb Khonky "N", 06 BctahOBHTuac ABTomTuHOro BMKHeHHn iD quac poBTo npictpoio.
- Hatncitb Khonky "N", 106 BCtaHOBtTu aac abTomauHoro BBIMKHeHH, NOKn pncpti roTOBm.
- Yac moxha perynbatoB mekax biD 1 roHn do 24 roH, HATNCKaOHK hONky "D" (+) afo "E" (-
Pekim cnIyOTo peKIMy "J":
- Pexim cHy npaLIOE, KOJI npicTpi 3HaxOOnTBcB peximi oxonolKeHHra "K".
- HATNCHTb KNONy «I» B npoxoJOnHomy pexnmi «K», ToDi npuaad 6yde npauObaTu B pexnmi cHy, i BEHTnIaTOp aBtOMaTuHO nepeJeHa Hn3bky WbnkicTB. BcTaHOblHe TaemepaTypa 3pocTe Ha 1 ^ C Uepe3 Ondy roDInHy, a Ha 2 increase uepe3 dBi roDInH. Uepe3 uictb roDInn npicptpi nepectane He npauObaTu.
Onepaia "BlokybaHHn ditee":
- Hatncihb KhoNy i ytpmyte "I" B npoxoJIOHomy pejmi "K" npotraom 3 cekyHd, 06 nepeTn B ctaH doqipHbOro 6lokyBaHHa. Hekpani bye nokazano "LC" nicra akTbaui ciie fynkii.
- 3HOBy HATNCHTb KONky i yTPMMyTe "I" B npoxoJOnHomy pexkmi "K" npTcrom 3 cekyH, i06 icHyBaTH CTaH doiipHBoro 6JOKyBaHHa. Ha ekpaH cyde nokaHa TEmnepaTypa B npmuiuHHi nicra BiDKIOUeHHH FHKII 6JOKyBaHHa DITHH.
Po6oTa BpeKIMi "O":
KoJI npIcIpii yBIMKHeHO, HATNCITb KONKy "O", BepTnKaIbHn XaJIHO3i YBMKHeTBcA 60 BmKHeTBcR. KoJIN BIn yBIMKHeHn, XaJIHO3i MOKytb po3rOyDyBATn JIBy Ta npaby CTOpOHn. 3HOBy HATNCITb KONKy "O", XaJIHO3i NepctaOTb po3rOyDyBATncr.
3BepHb yBaY:
OchOBHa IIATA ynpablinHH Mae cyHKUIO nam'ATI, KOJI npicpti rTOBNI DO 3anycky, aJe B cTahi 3yHnKn, rOJOBHa IInata ynpablinHH MoKe 3anam'rATn iHIaJI3aJIIO po6oYoro pexmMy. KOJI BN yBIMKHete npicpti, BIn 6ynde npauOBaTI TAKM Me YHOM, kI IMHyIloro pa3y, He notpi6HO 3HOBy cKnDatn po6oyn peXMM.
ПильТ ДИСТАHЦИНО ГЕРУВАнгЯ
- Biccythe 3aHIO KpNkU, o6B bIKpTN Ta 3HIMt bI0JauHy nJIbky Ha 6atapeyx.
- NocTaBte akymyIaTOpn BCEpeHNI rHi3da, BOH IOBUNHI BiIOBIDaTn 3HaKam "+ i -" Ha nyIbTi nIcTaHciHoro KepyBaHHra.
- TpmbaJIy qac 6e3 BnKOpncTaHHe BnMaIte akymyJrTOPn.
- 306 3a06iTTn 3a6pydHHeHHo HABKOJIuHbOre cepeOBuza, BmIMtB BnKOpNCtaHi akMyJrTopn Ta yTuJI3yIte 6e3neKy Ta HanexHM
Iy npabnHn npctpoem Hauiitb nyblt dncanuHoro kepybaHHa (4)Ha peentop cnHany (3).Nyt dnctaunHoro kepybaHHa 6yde kepybatn npctpoem Ha BiDcahi 5 MeTpib npn Bka3iBci Ha peentop cnHany npctpO.
3AXNCTOBI PNPCTPOI
3axnHn npncpti Moke BiKIOHHTI 3yHHNTn npnaad y BnnaKax, nepeJIeHnx Hxue:
- npi pekimi oxoJOnOxKeHHa: tempepaTpa nobitprB npimiuHHi nepeBnUyE 43 °C (109 °F)
- npi peKmI oxoJIOKeHHa: KimHaTHa TempepaTpya Hxue 15 ^ C (59 ^ F)
3.BpeKMI ocUyehnnoBITp:KimHaTHa TemnepaTpya Hxue 15^ (59^)
Kuo npictpi npaioe B pexmi oxoiokeHHA K> a6o B cyxomy pekmimi L3 BiikpntmN DBepi H BiKaHn npotraom TpuBaIoro acy, KOIN biHOCHA Bonoricb nobitpr nepBnuye 80%, poca moKe cTKn.
3axnHnn npncptpi 6yde npaoubaTn B TaKnx BnnaKaX:
- Ipe3aBtaxnBn npncpti Bippa3y nicna npnnHeHHp o60Tu a6o 3mHn B6paHOro pexmy iD qac po60Tu, noTpi6Ho noeKaTu 3 XbNJINH.
2.Якopo Вилky 6уlio Ви lycho,пся пepe3aBaHtaxeHн npictpi nOBepHeTcRdo noaTKoBOrO pexmMy, TIMER ON i TIMER OFF - NOTpi6HO BCTaHOBnTn 3HOy.
3A6E3NEUHHeB: B cybomy npnlaDi 3axoBaHa KOHdHcaJy BOI KOHdHcaJI. BOa, 00 KOHdHcyETbcra, yactkoBO 36epiraTc8ytni3aicio mix KoHdHcatopom i BOIO. KOnPi pBeHb BOI nHimaetbcra Do bepxHbO rPiBH, BmNkaTcra nonnabKOBn BmNkaTu iNDNKatop nobHOI BOIN (E4), uob haraDyBatn npo 3nIB BOIN. BiKnHouit dJkepeNo JxNBHeHH, nepheecit bpniad y BiNnOBDHe Micce, BmMItb 3nBHy npo6ky, NobHicTo 3nInTe BOY. Picra 3nBy 3aHOBO BCTAHOBt bTencelbHy BnKy, iHaKwe npnad moKe npocOHNTscr i3pObTN BAuy KimhATy MOKPOIO.
KIO npnIaP03MIeHny noIOXeHHI, 1O cnpHMaE 3NHBy BDO, BN TAKOX MoXeTe NiKINCHITN 3NHBHNO TBIP Do 3NHBORO OTBOPy DnA 3NBy BOH.N Y KOMJIeKT DoaTaBcBa OBOCTiHa Tpy6a, BHyTpiHiN DiAMetp 9 MM, 3OBHI Hi DiAMetp 12 MM, MATEpIaI: PBX.
BuiiweHnI npo6nem
1) BiDA: He npauoi.
AhaJIi3:
a) MoKnBO, 3axNCT BiKIIIOHeHn a6o 3anobixHHK niipBaHn, 3aueKaIe 3 XBnHn i 3anyctITb 3HOBy, npncTpi npoTeKTopa MoKe nepekoJkATn poBoti npocTpo.
B) MoxNIMBO 6aTapei B nyIbTi DiuctaHcHOro KepyBaHHB BuOpnHi.
T)MOXJIINBO, WTeNCEJIb He NIKIQUeHn HAnExHNM YIHOM.
2)Пpo6лема:працюе Лше Короткий ча
AhaJI3:
a) kIIO BCTAHOBJIeHa TemnepaTpya 6nn3bKa Do KIMHaTHO, BN MOKeTe 3Hn3HTN 3aHaNy TEMpePaTy.
6) MoKnIBO BnIyck noBITpra 3a6NoKOBaHH nepeuKOdoIO. 3HIMITb nepeuKOdy.
3) Biia: npauoec, ane He oxoiojxye
AhaJI3:
a)MOKJIINBO,ДБери ВИКНВИДКРNTI.
6) MoKJIbO, Ha 6bn3bkii BiDCTaHI e IHsHn npuJaI, IIO npaioe TeJIo, RaHarpBaay aBo lamna Toio.
B) nobiterpHn fJIbTp 3a6pydHeHn, 6yIb IacKa, OChntItb Noro.
r) Bnucnk nobitpr a6o Bnyck 3a6loKobAHn.
f) 3aHaTeMnepaTpa 3aHaTTO BnCoka.
4) Henpniemnocti: Bntik BoDi niD qac pyxy.
AhaJI3:
Texhne 6cbnyroBaHHn noBipraHOro fIbtpa
YnCTNTN NOBITPRAHNI fIbTp nOtpi6HO KOKHI 2 TUNKHI, JAKU npucTpi npaue B Hau3BuaaH OaIIeHOMy cepedobu. OuchTtB TaK:
1.Cnepuy 3ynnHtB npntpi, HATNCHTb Ha NOBITpHHn pJIbTp (MaJIHOK F).
2. Ouchitb i BCTaHObit h HAOBO NOBITpHn pIbTp.
3. JkUo 6pyd nomiTHa, 3MnIte II po3uHOM MNoOro 3acOby B TeNIOI BOIN. Iicra OunueHHBucyuiTB NOro B 3aTHeHomy Ta npoxIoHOMy Micci, a NotIM BCTAHOBiTb HHOBO.
Texhihe 06cIyroBvBaHnI niCn BnKOpNCTaHH
- Raio npicpii DOBO He 6yde BnKOpncTOBByaTnCBAHMTb rMooby npo6ky 3JINBHoro OTBopy (8) nra 3NBy BOi.
- TpmaTe npna, knn npauoc 3 BeHTnIaTOpom nIwne nBnH npotraGm coHryHoro dH, uob BucyunTn npuaD BCEpeuHi i He. DOnyCTNTn NOBn Ubini.
- BmKHiB npncTpi i BnMIb BnKy shHpa XNBHeHH, noTIM BnMIb 6aTapeeKN nyIbTa dNCTaHciHoro KepyBaHHra Ta 36epiraTe npncTpi HaneKHMM YHOM.
- OuHCTITb NOBITpHm fJIbTp I BCTaHObit NOro HaHOBO.
- 3HIMITb nobITpyHI wnaHr i cKnadITb ix HaneXHM YHOM, a OTBip IJIbHO 3aKpNIte.
TEXHIUHDAHI:
IotyKHcTB oxoJIOxKeHHB BTV:12000BTY/roDHy
NotyKHcTb oxoJOndKeHHa y BaTax: 3500 Bt
CnoKmbaHn eHepri (oxoOxKeHH) Bt: 1300 BT
06'EM: < = 65
TnIOK noBITpR: 450 m3 / roDInHy
EhepretnuHm knaC:A
Taimep: 24 roDHH
Bara Tepnohocia R290: macc. 210 rpaM
EMHicb yHKii cyiHHa 28 nItpiB Ha do6y

OepekHicb, He6e3neka noKeki.
HE npokoiTe Ta He ropiB.
MaTe Ha yBa3i, 10 xOIOoareHT MoKe He MicTnTn 3anaxy.
MaKcImaJIbHa KInbKicTb 3aprAу xoIooaReHtY: 210r.
Y iHTepeacx HaBkoIuHbOro cepeoBua.
Будласka, BiДаиTe KapToHny ynapOBky B Micce 360py Mykynatypn. ПолiTneHOBi MiKn (PE) BnKHyTN B CmTnK dIy pIaTnKy. BiInpaOboAHn npCTpi nOBInen 6ytN BiInpaBNeHn y BiINOBiDny TOUY 36epirAnH, TOMy IIO B npIcTpoI e He6e3neHi IHpeDiEHTN,Як moKtYb CTahOBuTn 3arpo3y HABKOJIuHbOMy cepeDObuSy.ЕleKtpuHn npIcTpi noTpioHo NobepHyTu TAK,цob obMexHTn Ioro nobTopHe BnKOpNCaHHa.Якsoу npIcTpoI e 6atepeKn,TO notpioHO IX BITaRHyTu i BiIdatNo BiINOBiDHoro nvHTKV.
MAKeEOHcN
ONHTYUCIOBn3ABE3BEdHOCT
BAHIN HCTPYKUIN 3A BE3BENHOCT INPOHTAJTE BHNMaTeJNO IaWTeJeTe 3a INHINHA
- Празда ro kopnstte ypeodT, npouHTajTe ro ynatcTBOTo 3a pa6ota n cnepeTe rN
yntCTBaTcOdpXaHn BO Hero. POn3BOJNTeIOT He OndroBapa 3a 7TeTN ppeIN3BnKaHn OD KopncTeHe Ha ypeIOT cnpOTNBHO Ha HameHeTata HameHa IIn HnPaBnH0 pa6oTeHe.
2.У畴от eCAMO 3a DomaSHA ynoTpe6a.He kOpncTeTe 3a dpyn ceJI n shTo He ce 3a HameHeTaTa ueI.
3.Уретот тpe6а да ce порзе само coштекер 3a habоюьаные са3a3emjen 220 240V ~ 50Hz.3a да ce зrolеми 6e3б endocstа bo pa6oTeheTo, nobeke elektpruHn урети He tpe6a da bndat noBp3aHn co edno cTpyjHo KOJIO BO nCTO BpeMe.
4. Kopnctete rolemama npetna3nBOcT kora ro KOpNCtnte ypeDTo Kora decaTa ce BO 6n3Ha. He do3BOnyBaJTe decaT da cn nIgpaat co ypeDTo, He do3BOnyBaJTe deca nIIN lyre kon He ce 3aNo3HaTn co ypeDTo da ro KopnCTaT.
5. ПРЕДУПЕДУBAE: Obaa onpema може да ѩа користдец над 8 rodinnи Лиca co orpaHnueHa ФиЗИчka, сEH3Oрнa Илm MeNTaJIHа спОсбHOCT, Ил nIугe KOn HeMaaT NCKyCTBO IINI NO3HabHe Ha ONpeMaTa, ДOKOLky Toa e HapRaBeHo пд НадзOP Ha ODROBOPHO JINcE 3a HnBnata 6e36eHocT Ил m E daDEHa INHΦOpMaциja 3a 6e36eHNo KORNCTeHbE Ha ypeJOT n Ce CBecn 3a OnaCHOCTITE OД HerOBOTO KOPNCTeHbE. DeцATA He TpeBa Da cN IGpaat Co onpeMa. YnCTeHbeto n OdpKByBaHbeto Ha ypeJOT He TpeBa Da rO BpSaat Deca, OCBEN aKO He ce NaD 8 roDInn i OBne AKTINBHOCTn Ce BpSaat nOd NaD3Op.
6. Cekoraш Исклuyвajte ro пиклuyokOT 3a habojuBaHe co дже He ha wTekepot CO paKaTa no ynotpe6ata. HE bneute ro ka6eIot 3a habojuBaHe.
7. He ro notobajte ka6eIOT, npKnyokot n ceJIIOt ypeD BO BODa nn dpyra TeuHocT. He ro n3noxybajTe ro ypeIoT Ha aTMocOepcKn ycNoBn (doXd, coHce n cInuHO) nn KOpNCTeTe BO ycNoBn Ha BnCOKa BnaJxHocT (baHn, BnaJxHn DomOBn 3a Mo6nHn TeJefoHn).
8. Перношино праву bajte ja соктобату на кабелот за наюжваъ. Ако кабелот за наюжваъ оштeten, то Треся за ce замени спесидалнирана пода внида за пода внида за пода внида за пода внида за пода внида за пода внида за пода внида за пода внида за пода внида за пода внида за пода внида за пода внида за пода внида за пода внида за пода внида за пода внида за пода внида за пода в Norrisberne onaCHOCT.
9. He kopncTeTe ro anapatot co owtTeH kabel 3a haNojyBaJIe nII aKO e IcnyTeH nII OwtTeH na Koj 6nIO npyr Naun HauIN nII aKO he pa6OT npaBnIHO. He nonpaBajTe ro ypeIoT cam, bndeJkn NoCTOn OnaCHOCT OD eJeKTPuYe UdAp. POnecTe ro owtTeHNO T ypeD BO COoDbTeH cepBnCEH ueHTap 3a npOBepka nII nONpABKa. CITE nonpaBKn MoKe da rN IN3BpUyBaAT cAmO OBlaCTeHN cepBnCHn ToKn. HenpaBnIHO n3BpSheHnte nonpaBKn MoKAt Da npedn3BnKaat cepno3Ha onaCHOCT 3a KopNCHKOT.
10. NocTabete ro ypeodot ha naHa, ctabnHa nobpunHa, noaIeky od TOnnn KyjHcN ypei KaKo 7to ce: eJektpuueh 7npopeT, rOpunHK 3a rac, nTH.
11. OcnrgypeTe ce deKa HnIto He ro 6Ioknpa Bne3OT Ha BO3dyXOT n 3JIe3OT Ha ypeDoT
12. KopinCTeTe ro ypeIOT cMo Ha paMHa NOBpUHa 3a Da cnpeuIte n3JIeBaJbe Ha KOHN3aunjata
13. 3a da ce obe36eNi dOnoHnTeJHa 3aUHTTa, npenopaunbo e da ce nHCTaInpa ypei 3a npoeocTahata ctpya (RCD) BO eJeKtpuHTo KOIo CO HOMHaHa npeocTahata ctpya wTo He hAdmHyBa 30mA. 3a oBa npaawte eJeKtpuap.
14. PeIOBHO YIcTeTe ro fIIITepOT 3a BO3dUx. ΦpeKBeHcNjaTa Ha YIcTeHe 3aBnCn OJ YIcCTOTATA Na BO3dUxOT.
15. Otkako ke ja ncknyute Maunhata, noekejte HajmaIky 5 MInHyTn nped da ja BknyuHte
NOBTOPO.
- He kopncTeTe ro ypeIoT ha coHueBn MecTa. Kora ypeIoT ce nperpee, 3aHTiTata od nperpeBaHe ke ce BkIyuN ypeIoT.
- 3a da ce obe36eNi eФикасHo NaIeIbe, TpeBa Da ce ChyBa paCtoJaHne od HajMaJIky 60 CM NOMERY cTpaHnUHnTe wallsnIOBn Ha ypeDoT n thenIdOT nIn Me6eIoT nIn 3aBeCnTe.
- Поради орагинецда ИЗБа на урею, akо разлесда поету целнатумпература и Temператypа на okолинота e пемногу rolема, He може за ce постигенцелта.
- 3a da ro hamaIte pN3IKOT od noJap, eJeKtpnueH yIap nII NOBpeHa npu ynoTpe6a Ha KInMaTnK, NoHTyBaJTe rN CJIeHNBE OCHOBN MepKn Ha npETna3JINBOCT:
a) NOBp3eTe ce co 3a3emjeH uTekep co 3 nHa.
6) He oTcTaHyBajTe ro 3a3emjyBaQOT.
B) He kopncTeTe ro aanTepoT.
r) He koprncTeTe npoDoJxhen Ka6eJ.
Icknyte ro KIma ypeoT nped cepBncpahe.
r) KopncTeTe DBe nIIN NOBeKe Iuca 3a da ro npemeCTnTE u HCTaIInpaTe KInMaTn3epOT. - He kopncTeTe cpeIcTba ITO rO 3a6p3yBaat pOueCOT Ha Odmp3HyBaHbe NJIu YnCTeHBe, OCBHe OHne npenopauaHn OJ pON3BOIDNTeIOT.
- Ypeodot tpe6a da ce yyBa BO npocTopnja 6e3 nocTojano da pa60Tu n3BOp Ha naneHe, Ha npimep: OTbOpeH oran, rachn anapatn nn eJeKtpuHn rpejaun.
PPEI INPBA KOPNUCTEE-(cNkaE)
Iobp3eTe n npiknyoCNTe CO n3dyBnOT KaHaJI Ha BO3dyXOT KAKO WTO CneNyBa:
1.Пошипете ro Идунnot kaHа HOBdYxOT (9) co ИЗБнeКуВаьe HaДБaТа Краja Ha KaHaNOT.
2. 3aupapete ro n3dYbHnOT kHaI Ha BO3dyXOT (9) BO npKnyOkOT 3a n3dYbHnOT kHaI Ha BO3dyXOT (10).
3. Nobp3eTe ro n3dYbHnO T KaHaI Ha BO3dyXoT (9) dInpeKTHo co ypeIoT.
3A6EJIeUKn:
- Ybajte ro ypeodot hajmanky 1 metap nodaneky od TB nnn paunja 3a da n36erhe eJeKtpomatHeTHn ppeKn.
- He n3Ioxybajte ro ypeoT noD iNepeKTHa COHcEeBa CBETnHa 3a da n36eHete 6JeDHeeHe Ha 6oJaTa Ha NOBpUnHaTa.
- He ja Habanybajte einnuata noonro od 35^ nnn Haonaky 3a Bpeme Ha TpaHcnpOT. Ako ypeoT e npebpten 3a Bpeme Ha TpaHcnpOT, CTaBeTe ro npabunno n nouekajte 2-4 yaca nped da ro ctapTybaTe.
- Ctabete ro ypeoT ha pamHa noBpwnHa co HaknoH nomaJ oD 5°
- Edinuata pa6oTn noeikacno Ha opepeHn Iokaun Bo npocToPnte, n36peTe ja hajdoBaPaTa Iokaunja:
-Покраиnpo3opeu,ВраТиИнфранцуckи npo3opeu.
-Држete ro notpe6hTo pactojaHne od n3JIe3OT ha nobpaTHnOT Bo3dYx Do wallIOt IIN dpyrrte npeykn HajmaIky 60 cm.
-Пюдолжete ro ueBOTo 3a BO3dYx 3a da ce ocInrgpate Deka Ha npyTnOT kpaJ ha ueBOTo 3a BO3dYx mMa Do3BOna nOmeFy BpaTaTaHa npo3opeoT, nIi PhaHcycknOt npo3opeu nIi wallndHaTa dynka.
- 13ne3OT nIN BnE3OT Ha BO3dyXOT He MoXaT da 6nDaT 6nKpaHc CO 3aHTTHa MpeKa IN Co KaKN bIIO pueKn.
3a da ro npoiojKnTe XINBOTHNOBek Ha eDHHuata, nCueDeTe ja KOHNHeH3npaHaTa BOda oD yynknte 3a ODBOHyBahe (8) nped da ja CTabNTe eHHuata Bo CKJaDiuHTe Ha KpajOT Ha ce30HaTa.
ONIC HA YPEIOT: KOHДИЦИОHEP 3A JIOKANEH Bo3dyx (cniKu A u B)
-
AanTep 3a n3dyBn racobn Ha npo3opeoT
-
KoHTpOJIeH nAHeI
2.ИЗВОДзаладенВОЗдуx
3.CnHn peuentop
4.DaJIeunHcN ynpaByBaY - Paça Ka 3a TpaHcNopt
6.И3dYBeH KaHaI
7.BIe3HaNCnapyBa4OT
8.ДonyпадиндApeнхндунka - KaHaJI 3a n3dYBn rAcOBn Ha BO3dyXOT
KoHTpOJIeH naHJI (cIINA L)
A. Konue 3a BknyyBaHe / NcknyyBaHe
KoIue 3a 6p3nHa Ha BeHTnJaTopOT
KoNue 3a peKIM
TajMep / Konue 3a nokaYBaBe Ha TemnepaTypaTa
E. konque 3a Tajmep/ TemnepaTpa Handoy
F. CBeTnIka co MaJa 6p3nHa
G. cBeTnIka co roIema 6p3nHa
I. Konque 3a cnpnebe n 3aknyBahe Na deca
J.ABtOMaTcKnpeKIM
K. peşüm Ha naDébe
L. pexmHa cyBO
PekimHaBeHTnlaTOp
KoNue N. Tajmep
KoNue O. ocunlaunja
3A6ENEIKA KOHTPOJIENEP-cnka
JaIeunHcknOT ynpaByBaay npeneCyBa cnHaJIi Ha cNCTeMOT.
KoIue ^u - anapaTOT ke ce cTapTyBa Kora Ke ce HanojyBa IJIn Ke ce 3anpe KOr e BO yHKunja, aKo r npTtncHe OBA KOJIe.
KoIue "B"- npTnCHeTe ro 3a da ja n36epete 6p3nHaTa Ha BeHTnlaTopoT BO Hn3a.
KoIue "C"- npTnCHte ro 3a da n3bepeTe peXmHa pa6Ota:"J", K", L" nnIn "M".
KoIue "Д" / "E" - npITnCHeTe 3a ja ja npINarOOnTe TEMnepaTpya BO IpocToPjata N TajMepOT.
KoIue "Jac"- npITnCHeTe 3a Da nOCTaBtte NIN OTKaXeTe pexMOT Ha CInHe.
KoIue "N"- npTnCHeTe 3a da rO BKnyHrE BpemTo Ha aBTOMaTcKO NCKnyyBaHBe n aBTOMaTcKO BKnyyBaHBe.
KoNue "O"- npTnCHeTe 3a da NoCTaBte nJIn OTKaXeTe peXIMOT 3a HnIaHbE Ha NaayPnte.
PABOTE OFE HA KOHTPOJIA NAHEJI
ABTOMATNUKO / COBET / OCHOBO / FAH
- Bknyte ro ypeoT.
a) Iobp3eTe ro ypeDoT.
6)Пи捜снeteTo ro konteTo "A",notoa ypeodT3aUka eHaIuBknyeTeTo.
B) LEDДиода差别а ѳ пікakуba co6haТа Temпература и заочувда pa6otn BO abTomatckn peЖIM.
2.Изберете ro рекIMOT ha pa60Ta
PnTncheTe ro koncheTo "C" 3a da ro n36peTe nocakyBaHnot pekmHa pa60Ta no cKeBHeHa:
ABTomatckn pekim J"-Pekim Ha naJehe "K"-Pekim Ha cyuHe "L"-Pekim Ha BeHTnlaTopoT "M."
3.Пилародente ja temnépatypata
Temnepatypata moxe da ce noctabn BO oncer 15^ - 31^ C. PnntucheTe ro konyeTo "D" nnn "E" 3a da ja 3rolemite nnn haamnite Temnepatypata 3a 1° C co npntnckahe e nda. LED naheIot Ha ypeodot ja nokkvyBa uehata Temnepatypa 5 cekydn nnotoa ja npinkkvyBa cobhata Temnpatypa.
4.Пплародete ja 6рзинata Ha BeHTinatopot
PnTncheTe ro konyeTo "B" 3a da n36peTe nocakyBaHa 6p3nHa Ha BENTnlaTopoT cnopeHn3ata:
Hncka 6p3nHa "F"->ToIema 6p3nHa G
- MOKHOCT
Kora noBtopHo Ke ro npHTncHe Te konHTo "A", ypeDoKe ce orJiacn "Dn" n Ke pectaHe da paBoTn.
a a a a a a a a a a a a a a a a a a a a a a a a a a a
2 1
"jlll baiB":Jauuuiy jbi yaiy aay yaiy aee
"uaiaiaieJwF"-aIyic aWG
5.
"jjIgbe biai IocA"" Cua jayy Juyu ydi".Jai j
"jjlll 15 15 15 15 15 15
"jlllglbIyN".
"Jlll lde bialo".s y 1y
:
"J
J" 1
" 111111111111111111111111111111111111111
9
"alall aagall ae gao gao gao gao gao gao gao gao gao gao gao gao gao gao gao gao gao gao gao gao gao gao gao gao gao gao gao gao gao gao gao gao gao gao gao gao gao gao gao gao gao gao gao gao gao gao
"JL
- 4aJySay y. aiaiaiae ay Jaaai y jall a
gla 7 a y s jy Jao Jao jao jao Jao Jao Jao Jao Jao Jao Jao Jao Jao Jao Jao Jao Jao Jao Jao Jao Jao Jao Jao Jao Jao Jao Jao Jao Jao Jao Jao Jao Jao Jao Jao Jao Jao Jao Jao
..
COOL"K":
- Jellall 124, 503
bcll l 10
aaiy
"aaM".
- be tlll jao y g . 0o 20 all aee jull g y jall y bll l aai
Jz
"ii all a N
1."JzjgbcN" 20
"jjbcN".jolss jssLsie jlll
"JjIgbciaaagcjcAeLwTgllalglawnjjbiGdEggSoy.D" ++++++++++++++++++++++++++.
"Jgss
1." 1
2." jll gbc biailll"" 3aillg cok K" oJalall a Jd jssi iiaaiisaiie a wll lgyorall gssu wssu
:Ji5y1 Jia jia lac
" 15c biaial g yaiu w jilgbc biai. I" " 2jullgl K" " auiiill gl rjubj Jia all Jgdl LC" 1auii d
" 15 bc iall g y jw w jllg s rj o y baii . I I"" d jllg g aill g K" 8 Jr jraaiaaiil 1e jbiu. Jiaai Jiaai 2019 10
"
"jllge biai. jyill jyll no yloieO". jn kay. jyill no kai loie. lki ay
"jll jle biai. jnll jll 0". jll jie aill
4
Jaa Jaa Jaaal Jaa aai i 8aia aai g jaii jaii jaii jaii jaii jaii jaii jaii jaii jaii jaii jaii jaii jaii jaii jaii jaii jaii jaii jaii jaii jaii jaii jaii jaii jaii jaii jaii jaii jaii jaii jaii jaii
a 2000
J 1
i0j0j0jai:ds
山
slll lal a j 100
aill jw d 1 gaiy gaae 1gaiy
2H_2 个
山
i
()
AaBaa
1
aaii
asallolalolall
山
aill lai kall a
y
"JolS Jozalj, Joz 2: A5u (OE4"
山
yoll yail yall ball 1
Jaaal aai jll Jauil jia jill all ola gllle jls (
6).
山
A( 1,2)
aaii jaiy jaiuui iuii
a#dall jajg aal Jjaiu. cialal yss (c)10: cialal gallA/250VAC).
7). La xi xi xi xi xi xi xi xi xi xi xi xi xi xi xi xi xi xi xi xi xi xi xi xi xi xi xi xi xi xi xi xi xi xi xi xi xi xi xi xi xi xi xi xi xi xi xi xi xi xi xi xi xi xi xi xi xi xi xi xi xi xi xi xi xi xi xi xi xi xi xi xi xi xi xi xi xi xi xi xi xi xi xi xi
:
iill jll l 14y 1 1 1 1 1 1 1 1 1 1 1
COOL"K".
:
j 1
3.2.2.
aall jao aal all eai i jai jai jai jai jai jai jai (
E2"
:
aiee aee eae ee eae ee eae ee eae ee eae ee eae ee eae ee eae ee eae ee eae ee eae ee eae ee eae ee eae ee eae ee eae ee eae ee eae ee eae ee eae ee eae ee eae ee eae ee eae ee eae ee eae ee eae ee eae ee eae ee eae ee eae ee eae ee eae ee eae ee
E3"
山
aaii 1
:LED"JrE4
山
clal si. Jolll clall j
aill
jieell jie
ailll jaae ie aaii 152jg jieae iiaea
Jia liu wai jie gao li Sliuyi hui dui yiyue jiu zhi jiall clall pnsiw Aali aei ci iie jiae aaiy
jll jil gill gaa gl jy jil jia jia oai y
eell jidai
L 15 15
(20 ag af (20 一 1 2 1 3 1 4 1 5 1 6 1 7 1 8 1 9 1 1 0 1 1 1 1 1 2
- S S = S C = S C + S C
LgSjz1p2JyJyJyJyJyJyJyJyJyJyJyJyJyJy
JiaWJ 12 aJU
aill (A) aill 4i jai bll 5ai jai aai ai jai ai
jia jia jia jia jia jia jia jia jia jia jia jia jia jia jia jia jia jia jia jia jia jia jia jia jia jia jia jia jia jia jia jia jia jia jia jia jia jia jia jia jia jia jia
J 1
ii 10
a aalaaal aaal al ypa aayb o jial jall palaaiy pal ay 1 . aalaly aaiall aybiy bi , gaae lgyjia gaiy gaiy gaiy all jya
olal yail (A) yail a
Aa
Btu: 12.000 acw/ a
101 0·s : 10
13.14.
J0=>:
e^2 + f( x) ≤ 0 或 f( x) > 0
A( 1,0) .B( -34,34)
acl_w 交 S : C 点坐标
23
yj/ jyA: aayjj 0
.
aie 1e
-
-
-
-
-
-
-
-
- 10.
-
-
-
-
-
-
-
a
jglal jbiyaiyaiy i jsiabai y jglal jglal
jglal jyblly 151. golizlglolzil 1. Jiaia jai jai all abll lglb!
KARTA GWARANCYJNA
Pa60Ta Ha Taɪmepa "N":
- Hatnche 6yToHa "N", 3a da HactponTe BpeMeTo 3a abTomatuHNO n3KnIOvBaHe, dOKaTO ypeIbT pa60Tu.
- Hatnche 6yToHa "N", 3a da hactponte abTomatnuHOTo Bpeme 3a BKIOUBAHe, KOrato yctpoiCTBOTO da e rTOBO.
- BpemeTo moKe da ce peryInpa B dInana3oHa ot 1 qac do 24 qaca hntckane Ha 6yToHa "D" (+) nnn "E"(-.
KOHTPOJIeH IaHEI (CHIMKA C)
A. ByToH 3a BKNIOUBAHe / N3KNIIOUBAHe B. ByToH 3a CkopoCT Ha BeHTNJIAtopa
C.Бутонза рекин D.Бутонза таймер /nobишаве на Temпенирата
E. Byton 3a TaHmep / noHnXkAbaHe Ha TeMnepaTypaF. lamna 3a Hnckc ckopocT
G. Bucokocopoctha lamma I. Bytoh 3a 3acnBaHe n 3akIkyBaHe 3a Deca
J.ABtOMaTnueHpeKIM K.Pekim Ha oxJaXdaHe
L. Pekim Ha cyuhe M. Pekim Ha BeHTnlaTOp
N. ByToH ha TaIMepa O. ByToH 3a XOpn3oHTaIIHO BbPteHe
ДИСТАЛЦИОНно УПРавЛЕH_INE -СнIMКa D
IuctaHUNOHHOYnpabHeHnePepaBcHnKbMNCTeMaTa.
Bytoh"A"-ypebIe cTApTnpa, kOrato e 3axpaHbAH nIIN ue 6bIe cnpH, Korato paBoTH, aKO HATnCHTe To3n ByToH.
ByToH "B" - HATnCHeTe ro, 3a da n36peTe NocneJeOBaTeJHo CkOpocTtHa BeHTnIaTopa.
BytoH "C"-HaTnchete ro,3a da n36epepepepeKm Ha paBoTa:"J", K", L" nnM".
Bytoh "D"/"E"-HaTnchTe,3a da perynipate cTainHata TemnepaTy a TaIMepa.
BytoH "I" - HATncheTe, 3a da 3aadaTe INN OTMeHIne peXIM Ha 3acnBaHe.
BtoH "N" - HATNCHEte, 3a da 3a daTe BpeMeTO 3a aBTOMaTHUHO N3KIIIOVAHe n aBTOMaTHUHO BKJIIOVAHe.
Bytoh "O"-HaTnchTe,3a da 3aanaTe nnn OTMeHnTe pexkma Ha IIOJeHe Ha peWetKaTa.
PABOTA HA KOHTPOJIHINI NAHEJI
ABTOMATUHEN / OXIAJXDAU / CYX / BEHTIATOP
1.BkIIOUeTe yCTpOINCTBOTo.
a) CbpbjxTe yctpOiCTBOTo.
6) Hatnche 6ytoHa "A", cneI KOeTo yCTpoiCTBOTo ue n3dae 3ByKOB CnHnBn BeHbX n Iue Ce BKnIOuY.
B)LED nioobT noka3Ba ctaHata tempepatya 3aNoyba da pa6OTn B aBTOMaTHueh pexim.
2.Изберете рекиmaHa pa6oTa
HaTnchete 6yToHa "C", 3a da n36peTe XeIaHna PexKIM Ha paBoTa no nocJeDoBaTeHooCT:
ABTomatuHepKIMJ"-PekimHa oxlaaJaHe "K"-PekimHa cyuhe "L"-PekimHa BeHTnlaTop "M"
- PerynpaIte tempepatypata
Temnepaypata moxe da ce Hactpon B dnaana30ha 15^ - 31^ C. HaTnche6bytoHa ,D" nIIN ,E", 3a da yBeneHHTe IIN HAmanite Temnepaypata c 1 °C ue3 ednokpaTHo HATnckaHe. LED naHenbT ha yCTpoiCTBOTo noka3Ba zelbeBATA TemnpaTypa 3a 5 CekyHdN i CneT TOBA noka3Ba cTaHata TemnepaTypa. - PerynpaTe CKOpocTtHa BeHTnlaTopa
HaTnCHete 6byToHa "B", 3a Da n36epeTe JeJaHaTa cKOpoc Ha BeHTnAToPa, NOKa3BaHa NoCneDoBaTeJIHO:
Hncka ckopoct "F"-> Bncoka ckopoct G - MoHocT
Korato hatnche ToHOBO 6yToHa "A", yCTpoCTBOTO ue n3dae 3Byk "Dn" uIe npctane da pa60tn. - HatncheTe 6byToH "l", 3a da Bne3eTe B cnaI pexIM Ha yctpoiCTBOTO.
- Hatnche6byToN "N", 3a da 3anaTe cnpaHe B onpeJeH ac.
- HatncheTe To3n 6byToH "O", 3a Da Na HacTpOnTe JIOJeEHeTo Ha peIeTkaTa Harope-HaDony.
3aunTHoTO yCTpoCTBO ige pa6OTn B cneHnTe CnyaH:
- Pecaptpahe Ha ycTpoiCTBOTo BeDHa rCneI cnpaHe Ha pa6oTaTa IIN CneI npomHa Ha n36paHnpeKIM,doKaTO pa60Tu-B TaKbB cnUay Tpr6Ba Da n3yakate 3 MNHyTu.
2.AkO 1eNcBtE n3BaDen - cnepeTAPtnahe yCTPOINCTBOTo Ice Ce BbpHe B pBpBOHaaynHnpeKIM,
TIMER ON n TIMER OFF - Tp6Ba da ce hactpoT OTHOB.
3A5EJIEXKKA: B ToBa ycTpoiCTBO e cKpIto OTdeneHne 3a peuKnIpaHe Ha KOHNHeH3Ha B0Ja. KOHNHeH3nPaUaTa B0Ja OTAcTn Ce NODbPxa peuKnIpaHTo MExdy KOHNHe3aTopa N BODHa TIIOua. Korato HNBOTo Ha B0DaTa Ce NobuN Do rOpHTo HNO, NOIbAByHnT pReBKnIOvBaTe n INHnKaTOpt 3a TbNa B0a (E4) CBeTBaT, 3a da HAnOMHr 3a n3TOBaHe Ha B0DaTa. MoJ, IpeKbcHeTe 3axpaHbAHeTo, IpemecTeTe yPeHa Na ONDxOJaIoo MRCTo, IN3BaTe TEpeHaxHnTa nA n3TOeTe B0DAta HnTbNo. CNei n3TOUBAHe, INCTaInpaTe OTHOBO Tanata, INIOTypeBToMKe Da Teue Boa n Da HABOnn BaWata CTaR. Ako ypeBt e nocTaben B nIoXeHne, P03BOJIbRAIo n3TuHa He BA0da, MOKeTe CbIo DA CbBpKeTe dpeHaxHa Tpb6a KbM OTBopa 3a n3TOBaHe Ha B0DAta.KbM KOMnIeKta ce doabra dpehaxHa Tpb6a C BbTpsehen DnaMeTbp 9 MM, BbHsien DnaMeTbp 12 MM, MaTePnai: PVC.
OTCTpaHbAhe Ha Hen3npabHocTn
1)Пpo6JIeM:He pa6OToN.
AhaHn3:
a)MOKe 6n IpeKbCBAuHa npeIpa3nteJe n3ropeJ,MOJI, n3yaKaIte 3 MInHyTn IOHTaIte OTHOB, 3aIHTHOyCTPOINCTBO MOKe da npeuHa yctpoNCTBOTO da pa6OTn.
6) MoXe 6n 6aTePunTe B nIcTaNtCuNHOHTo ynpabJIeHHe ca m3TOUeHn.
B)MOXe 6n 7eNceTHe E BkNIOueH npaBUNHO.
2)Пpo6лeм: pa60tncam03aKpaTko.
AHaJIIn3:
a) ako 3aadaeHaTa TEMpeHata e 6Jln3ka do ctaHaT, MoKeTe Da HamaJIte 3aadaeHaTa TEMpeHata.
6) MoXe 6n n3xOaBt 3a Bb3dY e 6IokupaH OT npenrTCTBne. OTCpaHHe npenrTCTBneTo.
3)Пpo6Jem:Pa6OTn,Ho He oxJaXda.
AhaHn3:
a)MOKe 6n BpaTaTa nIIN npO3OpEut ca OTBopeHn.
6) Moxe 6n Ha 6n3Ko pa3ToHne nMa npyep, KoTo HarpBa - KaTo paDnAToP, lamna n T.H.
B) Bb3dywHnTФmntTp e 3aMbpceh - MoJ, NOuCTeTe ro.
r) n3nyckaTeHHnT OTBOp Ha Bb3dyxa nn To3n 3a npneM ca 6nOKpaHn.
Д)ЗадандаТемпаТураЕТВьрдБИСОКА.
4)Поблел:Тech ha Boda no Врeme Ha npemecTbaHe.
AhaHn3:
a) n3TOeTe KOHDeH3aTopa npeDn da npemecnte ypeDa.
b) 3a da n36eHHe n3TnUaHe Ha BOa, MoJIa, pa3IIOJoxTe yCTpoIcTBOTo Ha paBHa IIOCKOCT.
5)Поблелм: He paobToи BODaTa nbJaHa nHДИKaTOp "E4"
AhaJIIn3:
a)ИЗдьрnaite Гмehata Tana 3a ИЗТоУbaHe Ha BODaTa.
6) ako YecTo E B TOBa CbCToHnE, MOJIa CBbPxKeTe Ce KBAJIINΦnIuPAH cepBn3eH TEXHnK.
OCTpaHЯBaHe Ha HEN3npaBHOCTn.
6)Поблел:Усточьто He ce Staptnpa.
AHaJIIn3:
a)MOKE6nHeeBKNIOUOyeHO.AKOeTaKa,BKJIIOHcTeTo.
6) MoXe 6n uenCena Hn KOnTaKTA ca NOBedeHN. 3aMeHeTe OT DOCTaBcHk Ha ycnyr.
B) Moxke 6n npedna3ntenrte cuyneH. CmeHe Tnpedna3nteJr oT DocTabuHa Ha ycnyr (cneucfkaua: 3,15A/250VAC).
7)Пpo6JIeM:УсТpoIeCTBOTO abTOMaTmUHc cInpa.
AhaHn3:
a) BpemeTo 3a n3KJIIOUyBaHe mnn 3aJaIeHa TeMnpePaTypa e IocTnHata. PecTApTnpaIte rO nn n3uKaIte aBtOMaTHNO To npEKBKnOuYBaHe.
8)Поблелм: Наяма CTуден Вьздунх В реким COOL "К".
AhaHn3:
a) CTaHata TemnepaTpe e NO-HNcKa OT 3aJaHeHata TemnepaTpe. TOBa e HopMaHHO CbCToHHe, MaunHaTa Ie HapBn ABTomatUHO npeBKnOuBaHe, DOKaTO cTaNHaTae TmnpaTpe e No-BnCoka OT 3aJaHeHata TemnepaTpe.
6) YcTpoiCTBOTO e BKNIOU 3aIITa Cpeu y 3ampb3BaHe. YcTpoiCTBOTO Ie Ce npeBKnOuN ABTOAHTN-3ampb3BaHe 3aIITATA npNKIOHn.
9)Поблел:Сьетоюнглпokа3вкдзпов体育场"E2"
AHaJIIn3:
a) ceh30pBT 3a cTainHa TemnepaTpa ce e NobpeDIn. CmHeTe cEH3Opa 3a cTainHa TemnepaTpa B OToPn3npan cepBn3.
10)Поблел:Сбетоюдьт поаЗв кд за поврда "E3"
AhaHn3:
a) ceh3opbT ha Tpb6ata 3a n3napenH e nobpehen. CmeheTe ceh3opa 3a ncapenH B oTOpuH cepBn3.
11)PpO6Jem: CBeToOnIOBt NOKa3Ba KoI 3a noBpeJa "E4"
AhaHn3:
a) npedynpexdeneHne 3a nJIHa BOda. N3cIneTe BOdata.
IIOYNCBAHEIIOIDIPbJXKA
IopdpbXkaHa yctpoiCTBOTO
1.ПьрвиЗКЛЮЧЕУСТРОИСТВОТ,празДа ИЗКЛЮЧИTE 3axpaHBAHeTO.
2.И36bpweTe c meka n cyxa kbpna.Ako ypeBbT empbceH,3a nouchBaIte n3no13BaIte xna Ka Boda no40°C.
3. Hikora He n3noJI3BaIte 3anaIIMn BeIeCTBa KaTO 6eH3nH IIn IIOIIpaI npax 3a IOnIcTbaHe Ha yCTpoIcTBOTO.
PoiDpBjKKaHa Bb3dUwHnIaΦnITbp
Heo6xoJMO e da noHCTBaTe Bb3dyuHnHa BceKn 2 ceMnU, aKO yCTPOIcTBOT pa6OTB INKJIIOHTeJIHO npaHa 3ao6nKaIaHa cpeHa. NocTe, KaT0 CneDb:
1.Пьрбспетe устуйствотo,прпльзнete Вьздушни сипльр harope (KaptnHa F).
2.Почиретeинсталпаite OTHOBВьздуняфпгр.
3.Ako 3aMbpcBaHnraTa ca 3a6eJExmMn, n3MnTe rC p3TBop Ha npenapat 3a noocTbaHe B xJaKa Boda. CneI IOuNCtBaHe rO n3CyWeTe Ha ceHuecTo I XnaDHO MrcTo I CneI TOBa rPpeHctaIpaIte.
Poiappbjka cneI ynoTpe6a
1.AkO yCTPOINCTBOTO HMA da ce n3nON3Ba dJNIO BpeMe, IN3BaTe rMaHata Tana OTpehaxHnO TBOp
(8)3aN3TOUbaHeHaBoDaTa.
2.Подьркайтуpeда paразнсВЕHTиларсмОзnoЛOBин DeH npe3 cIbHueB DeH,3aДаИЗьхHe ypeda OTbTpEи ceпeДпаэnt OпleceнсBAhe.
3. CnpTe ycTpoNCTBOTo n OTKaueTe 5eNceJa Ha 3axpaHbAunKa6en, cneI KoETo N3BaJeTe 6aTePnnte Ha DnctaHcNoHHOTy npabnHeHn EcbxpaHraBaTe yCtpoNCTBOTo npabnHo.
4.Почирпесувьдушни Фнгтbpи ГИнстуларе OTHOBO.
5.ИЗБаДeTe TрБиTe 3a Bb3dUx Iи CBxpaHЯBaIte npaBnHo IпьТHO nOKpNiTe OTbopa.
TEXHUNCKI DAHHN:
Kanaunet Ha oxlaqdahe npu BTU: 12000 BTU / qac
KanaunTeHa OXnJaDHe BBB BatoBe:3500W
KoHcyMaZnHa eHeprna (oxnaxdahe) W: 1300W
CинаHa 3Byka:<=65dB
Bb3dyuenotok:450m3/h
Eheprnien KnaC:A
Taimep:24 yaca
TernoHa oxnaaJaata TeuHocr R290: mKc. 210 rpaMa
BHHMaHHe, pNCK OT noXap.
HE npo6bawte nnnn3rapaTe.
ImaTe npEdbN, Che oxnaXdaUma aEnt MoKe da HMa MmPnc.
MaKcImaJIHOTO KOJIuYeCTBO 3apeXdAne C oxIaxJaU areHT: 210g


3a da 3aunntte OKOHATA cn cpea: MOJ, OTJeIeTe KapTOHeHTE Kytu HauJIIOHOBITE TOp6nKn I n 3XBpIeTe B CbOTBeHTHTE KOUHTA 3a OTNaDbu. N3noN3BaHnT ypeI Tp8Ba Da 6bDe IOCTaBE DO CneuaHnTE NyHKTOBE 3a Cb6npaHe, KONTO MoRAT DA NOBnRAr HA OKOHATA cpea. He n3xBpIyTe To3n ypeB O bOKHOBEN KOU 3a OTNaDbu.
ADLER
EUROPE
AIR COOLER
AD 7913
FOOT SPA
AD 2177
HAIR CLIPPER
AD 2831
HAIR DRYER
AD 2265

HEATED PAD
AD 7412
CERAMIC FAN HEATER
AD 7731
OIL-FILLER RADIATOR
AD 7811
KITCHEN SCALE
AD 3171

CHOCOLATE FOUNTAIN AD 4487

HAND BLENDER
AD 4617
LINT REMOVER
AD 9616
VACUUM CLEANER
AD 7044
MEAT MINCER
AD 4811
Blender
AD 4078
ELECTRIC GRILL
AD 6610
ELECTRIC KETTLE
AD 1293
ADLER
EUROPE
COFFEE GRINDER
AD 4446
TOASTER 2 SLICE
AD 3214
HAND BLENDER
Ad4625
MIXER WITH BOWL
AD 4222
AIR FRYER OVEN AD 6309
MICROWAVE OVEN
AD 6205
WAFFLE MAKER
AD 3049
KITCHEN SCALE
AD 3170
ELECTRIC KETTLE AD 1286

SANDWICH MAKER AD 3043
PORTABLE FRIDGE AD 8077
Electric Oven With HOB AD 6020
FAN HEATER AD 7728
MOSQUITOLAMP AD7938
HEATED PAD AD 7433
ORAL IRRIGATOR AD 2176
ADLER
EUROPE
Electric Kettle AD 1282

Burr Coffee Grinding AD 4450
Milk Frother AD 4491
Sandwich Maker AD 3055

TOASTER 2 SLICE AD 3222
ELECTRIC GRILL AD 3052

CITRUS JUICER AD 4009

PERSONAL BLENDER AD4081
FOOD PROCESSOR AD 4224
MIXER AD 4225
AIR FRYER AD 6310
PASTEURIZATION POT AD 4496
AIR CONDITIONER AD 7916
AIR HUMIDIFIER AD 7966
FAN HEATER AD 7725
KITCHEN SCALE AD 3166