
My Chill PAC25EU2 - Fan HOMEDICS - Free user manual and instructions
Find the device manual for free My Chill PAC25EU2 HOMEDICS in PDF.
| Brand | Homedics |
| Model | My Chill PAC25EU2 |
| Product type | Personal air cooler (evaporative fan) |
| Power supply | 220-240 V AC, mains adapter |
| Fan speeds | 2 (Low and High) |
| Cooling effect | Up to 6.6 °C temperature drop |
| Airflow range | Up to 1.2 m in front of the unit |
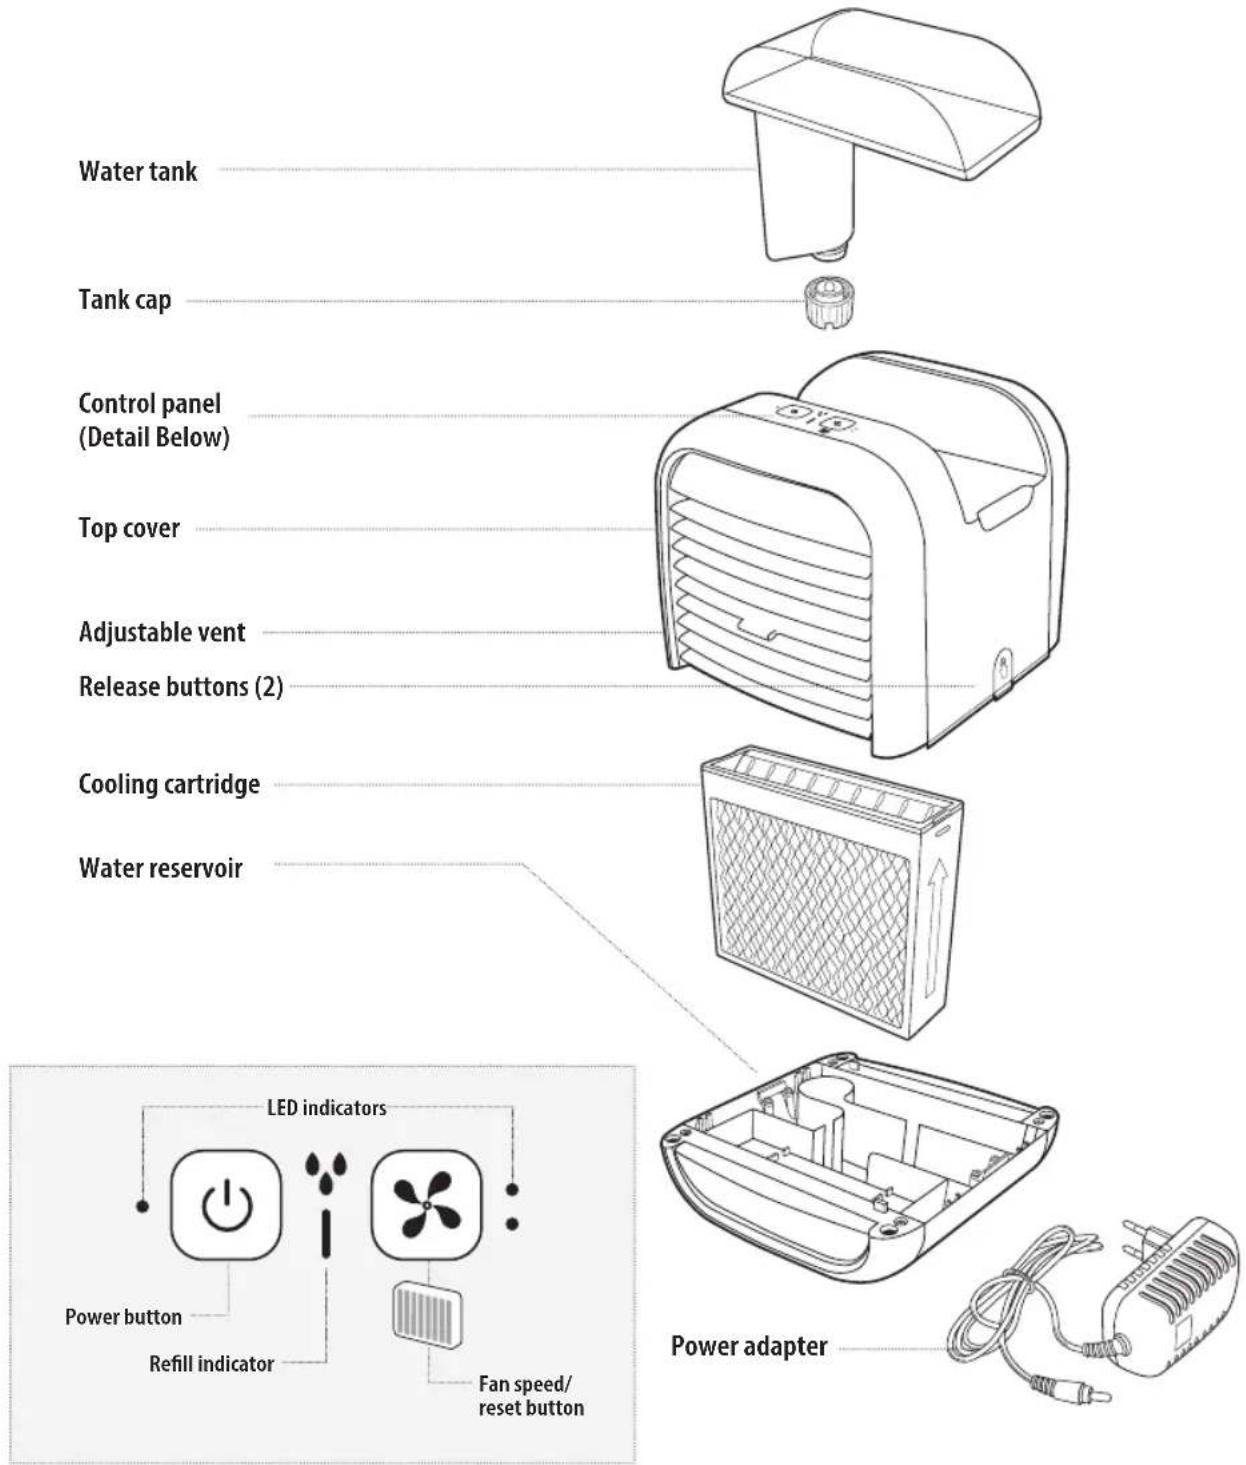
| Water tank | Removable, with cap |
| Low water level indicator | Yes, flashing red light |
| Cooling cartridge replacement indicator | Yes, lights up after 540 hours of use |
| Cooling cartridge | Replaceable, model PP-PAC25FLTR |
| Pump filter | Removable and cleanable |
| Maintenance and cleaning | Clean tank and reservoir with white vinegar; rinse cartridge with clear water; clean pump filter; wipe surface with a damp cloth |
| Safety | Do not use outdoors; do not immerse; do not use with an extension cord; unplug before cleaning; do not obstruct air outlets |
| Spare parts | Cooling cartridge (PP-PAC25FLTR) and pump filter available |
| Repairability | No user-serviceable parts; contact HoMedics service |
| Recommended use | Indoor, in a warm and low-humidity environment (humidity < 60%) |
| Warranty | Not specified |
Frequently Asked Questions - My Chill PAC25EU2 HOMEDICS
User questions about My Chill PAC25EU2 HOMEDICS
0 question about this device. Answer the ones you know or ask your own.
Ask a new question about this device
Download the instructions for your Fan in PDF format for free! Find your manual My Chill PAC25EU2 - HOMEDICS and take your electronic device back in hand. On this page are published all the documents necessary for the use of your device. My Chill PAC25EU2 by HOMEDICS.
USER MANUAL My Chill PAC25EU2 HOMEDICS
- ALWAYS unplug the appliance from the electrical outlet immediately after using and before cleaning. To disconnect, turn all controls to the 'OFF' position, then remove plug from outlet.
- NEVER leave an appliance unattended when plugged in. Unplug from the mains outlet when not in use and before putting on or taking off parts or attachments.
- This appliance can be used by children aged from 8 years and above and persons with reduced physical, sensory or mental capabilities or lack of experience and knowledge if they have been given supervision or instruction concerning use of the appliance in a safe way and understand the hazards involved. Children shall not play with the appliance. Cleaning and user maintenance shall not be made by children without supervision.
- DO NOT reach for an appliance that has fallen in water or other liquids. Switch off at the mains and unplug it immediately. Keep dry - DO NOT operate in wet or moist conditions.
- NEVER insert pins or other metallic fasteners into the appliance.
- Use this appliance for the intended use as described in this booklet. DO NOT use
attachments not recommended by HoMedics.
-
NEVER operate the appliance if it has a damaged cord or plug, if it is not working properly, if it has been dropped or damaged, or dropped into water. Return it to the HoMedics Service Centre for examination and repair.
-
Keep cord away from heated surfaces.
- Excessive use could lead to the product's excessive heating and shorter life. Should this occur, discontinue use and allow the unit to cool before operating.
- NEVER drop or insert any object into any opening.
- DO NOT operate where aerosol (spray) products are being used or where oxygen is being administered.
DO NOT operate under a blanket or pillow. Excessive heating can occur and cause fire, electrocution or injury to persons. - DO NOT carry this appliance by the cord or use cord as a handle.
DO NOT use outdoors.
This product requires a 220-240 V AC power. - DO NOT attempt to repair the appliance. There are no user serviceable parts. For service, send to a HoMedics Service Centre. All servicing of this appliance must be performed by authorised HoMedics service personnel only.
- Never block the air openings of the appliance. Keep air openings free of lint, hair etc.
- Do not place or store appliance where it can fall or be pulled into a bath or sink. Do not place in or drop into water or other liquid.
- Failure to follow the above may result in the risk of fire or injury.
SAFETY CAUTIONS:
PLEASE READ THIS SECTION CAREFULLY BEFORE USING THE APPLIANCE.
- If you have any concerns regarding your health, consult a doctor before using this appliance.
- This appliance should NEVER be used by any individual suffering from any physical ailment that would limit the user's capacity to operate the controls.
- If the product feels excessively hot, switch off at mains and contact the HoMedics Service Centre.
- This appliance is designed for personal, nonprofessional use only.
- Do not run cord under carpeting. Do not cover cord with throw rugs, runners or similar coverings. Do not route cord under furniture or appliances. Arrange cord away from traffic areas where it can be tripped over.
- Do not tilt or move the personal space cooler while it is in operation. Shut off and remove plug from outlet before moving.
- Always plug the personal space cooler directly into a wall outlet/receptacle. Never use with an extension cord.
MAINTENANCE:
Cleaning
Unplug from the mains and use a soft damp cloth to clean the fabric if required. Never saturate the mat or use harsh chemical cleaners. No other maintenance is required.
Storage
Place the appliance in its box or in a safe, dry, cool place. Avoid contact with sharp edges or pointed objects which might cut or puncture the fabric surface. To avoid breakage, DO NOT wrap the power cord around the appliance. DO NOT hang the unit by the cord.
WEEE explanation
This marking indicates that this product should not be disposed with other household wastes throughout the EU. To prevent possible harm to the environment or human health from uncontrolled waste disposal, recycle it responsibly to promote the sustainable reuse of material resources. To return your used device, please use the return and collection systems or contact the retailer where the product was purchased. They can take this product for environmental safe recycling.
PRODUCT FEATURES:
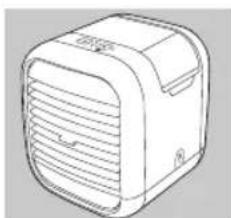
This HoMedics MyChill™ Indoor Personal Space cooler is designed to reduce the temperature by up to 12^ / 6.6^ and has a relaxing cooling effect up to 4 FT / 1.2 M from the front of the unit. The cooling effect increases as the relative humidity decreases. The dryer the air, the more cooling you get. The higher the relative humidity, the less cooling you get. The personal space cooler is most effective when used in warmer and less humid indoor conditions where the humidity is less than 60% .
It is designed for use in the office, dorm room, bedside, kitchen, or anywhere you want to cool your indoor personal space. HoMedics MyChill™ Indoor Personal Space cooler provides natural and efficient cooling, has low power consumption, no compressor, and does not use any ozone depleting refrigerants.
HOW TO FILL:
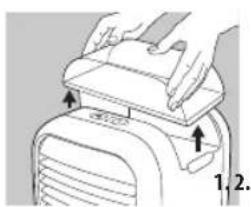
Caution: Before filling the unit with water, unplug the Power Adapter from the wall and from the unit. Note: Always use two hands to carry the unit.
Personal Space Cooler Location
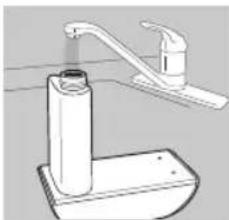
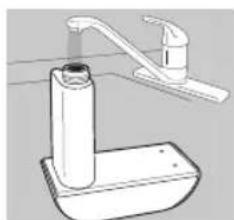
Place the Personal Space Cooler in the desired location prior to filling with water. The front of the unit should be located within 4 PT/1.2 M of the desired personal cooling zone. We recommend placing a waterproof pad under the unit.
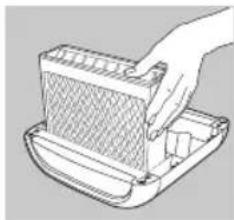
1. Be sure the cooling cartridge is positioned with the "V-shaped" vents facing upward. Never operate the unit without the cooling cartridge.
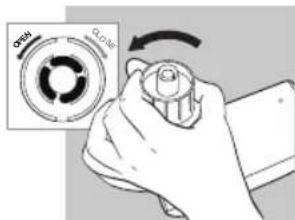
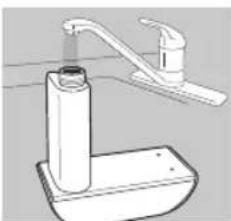
2. Remove the water tank and turn the tank upside down - remove the tank cap by turning it counterclockwise.
3. Fill the water tank with clean, cool (not cold) water. We recommend using distilled water if you live in a hard water area. Never use any additive or place essential oils into the water. Even a few drops will damage the unit.
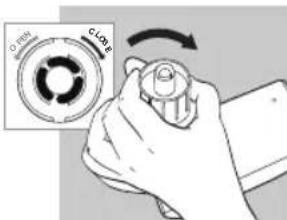
4. Replace the tank cap by turning clockwise until tight. Do not overtighten.
5. Place the tank into the MyChill cavity, making sure the tank is firmly seated. Water will begin to transfer into the water reservoir.
6. Once the water stops emptying into the water reservoir, remove the water tank and refill following steps 2-5 to fully fill the water tank and reservoir.
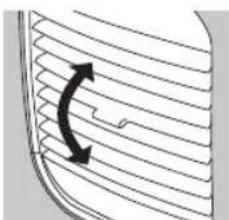
7. Adjust the front vents up or down to direct the airflow as desired.
8. Your personal space cooler is ready for use.
HOW TO USE:
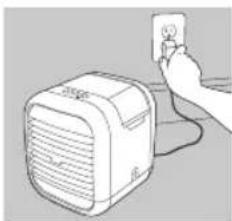
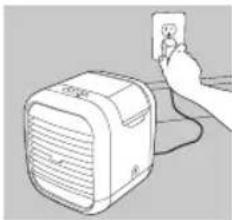
Plug the power adapter into the back of the unit and the other end into a household electrical outlet.
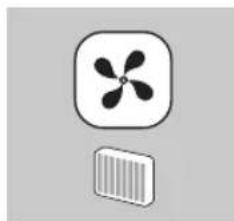
Speed Adjustment
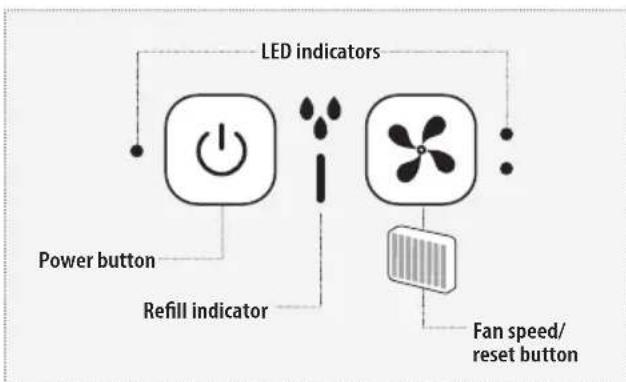
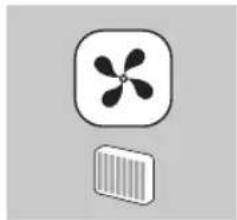
- Power button to control the on/off function. Press once. Fan motor to start at LOW speed, with LED lit.
- Press button once to adjust the fan speed to LOW, press twice for HIGH speed, pressing again to repeat the function.
Low Water Indicator
This unit is equipped with a low water Refill Indicator. It will flash Red indicating the water tank needs to be refilled. The pump will automatically turn off while the fan continues to run. At this time, please turn the unit off and unplug it to refill the tank. Once a full tank is placed in the unit and the unit is turned back on, the low water indicator is reset and the pump is turned on.
The Personal Space Cooler is equipped with a safety device that automatically shuts the unit off when the Top Cover is removed from the water reservoir.
REPLACING THE COOLING CARTRIDGES
Replace the Cooling Cartridge seasonally or after 540 hours of use for optimal performance. The MyChill Personal Space cooler is equipped with a Replace Cooling Cartridge LED that illuminates Red after 540 hours of use indicating the cooling cartridge needs to be replaced.
To purchase genuine HoMedics replacement cooling cartridge, Model PP-PAC25FLTR, go to your retailer where you purchased your MyChill Personal Space cooler, or visit www.homedics.co.uk.
NOTE: If you live in an area with hard water, it may need to be replaced more frequently. In these instances, you will notice mineral build-up on the cooling cartridge that over time may restrict air flow.
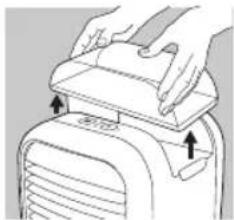
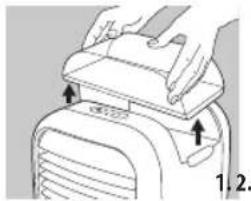
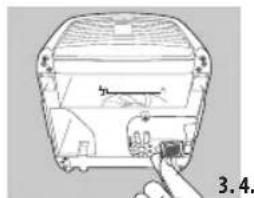
- Unplug the Power Adaptor from the wall and from the unit. Remove the water tank from the top housing.
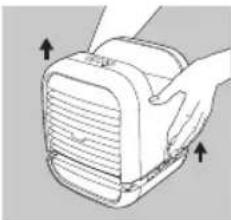
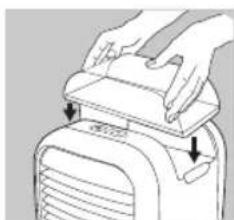
- Press the release buttons on both sides and slowly lift the top cover, allowing time for the water to drain.
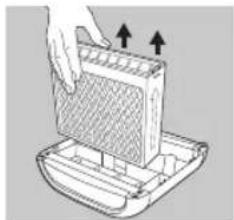
- Pour out any excess water remaining in the Water Reservoir, then remove the old Cooling Cartridge and discard.
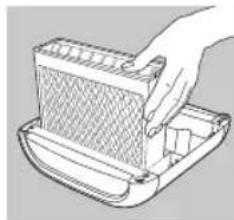
- Set the new Cooling Cartridge in place. Be sure the Cooling Cartridge is positioned with the "V-shaped" vents upward.
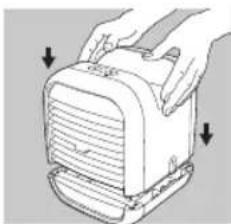
- Replace the Top Cover onto the water reservoir.
- Refill the Water Tank and Reservoir as described in the "How to Fill" section.
- Plug the Power Adaptor into the back of the unit and the other end into a household electrical outlet to resume operation.
- Turn the unit on, then press and hold the Cooling Cartridge Reset Button for 5 seconds. The LED will flash to indicate the Replace Cooling Cartridge Timer has been reset.
CLEANING AND CARE
CAUTION: Before cleaning the unit, turn power off and unplug the power adapter from the wall and the unit.
1. To Clean the Tank and Reservoir
Remove the water tank from the personal space cooler by lifting it from the main unit. Unscrew the tank cap and rinse inside the tank with clean water. Empty, rinse and dry the tank, tank cap and water reservoir before refilling. To remove any scale or build up, use a 50/50 mixture of white vinegar and lukewarm water to clean the inside of the tank and reservoir as needed
2. To Clean the Cooling Cartridge
Rinse with clean water
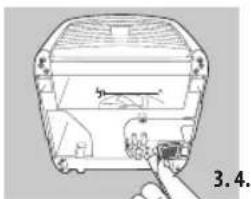
3. To Clean the Pump Filter
Check and clean the pump filter as needed. Remove the pump filter, brush clean with a soft bristle brush (not included) and rinse clean. Dry and re-install.
NOTE: Never run water over the pump filter while it is installed.
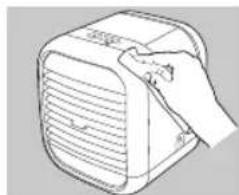
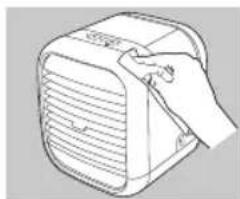
4. To Clean the Surface
Clean the surface of the unit with a clean damp soft cloth as often as needed. Never use detergents, excess water, treated cloths, harsh cleaning agents or sprays.

Storing your personal space cooler: Clean the Tank and Water Reservoir with a 50/50 mixture of white vinegar and water. Wipe the underside of the Top Cover with a soft, damp, cloth. Rinse the Cooling Cartridge with water and allow to air dry. Be sure to rinse thoroughly and let all parts dry completely before packing in the original carton and store in a cool, dry location.
TROUBLESHOOTING
| PROBLEM POSSIBLE CAUSE SOLUTION | ||
| No Power - Unit is not plugged in | • No power at unit • Top cover not seated properly | • Plug unit in • Press the Power Button to turn the unit on • Check circuits and fuses or try a different outlet • Remove top cover and re-seat |
| Peculiar Odor - Cooling cartridge | • new • Unit may have a dirty tank or water reservoir • Water in tank or reservoir may be old | • The cooling cartridge may emit a slight odor which will dissipate after a few days • Follow instructions described in the Cleaning and Care Section |
| Discoloration of water in the reservoir | • New cooling cartridge | • Discoloration will dissipate after a few days of operation |
| Mineral build-up on cooling cartridge | • Hard water used • Use distilled water | |
| Not cooling - Out of water | • Outside of recommended cooling zone • Cool ambient temperature and /or high humidity conditions • Pump filter clogged | • Refill water tank • Use within 4 FT / 1.2 M of the unit's front grill • Use in warmer and / or less humid conditions • Clean pump filter as instructed in the Cleaning and Care Section |
| Replace cooling cartridge LED is illuminated after cooling cartridge replacement | • Cooling cartridge reset button not activated | • Turn the unit on, then press and hold the cooling cartridge reset button for 5-seconds until the LED flashes |
LIRE TOUTES LES INSTRUCTIONS AVANT UTILISATION. LES CONSERVER POURPOUVOIR LES CONSULTER ULTÉRIEUREMENT.PRECAUTIONS IMPORTANTES:
LORS DE L'UTILISATION D'APPAREILS ÉLECTRIQUES, PARTICULIERÉMENT EN PRESENCE D'ENFANTS, IL EST CONSEILLÉ DE TOUJOURS PRENDRE DES PRECAUTIONS DE BASE, NOTAMMENT DE SUIVRE LA PROCEDURE SUIVANTE:
Laag water indicator
SKIFTE UT KJOLEPATRON
- Eavayepiote to doxieo kai th deaeve n vepou, onwc nepiypapetal otny evotnta Tporoc avannpwnc
- Suovdeote to tropoodotiko oTo Niow epcoc Tc ouakeunc kai to aaloo akpo Tou kalomega tou oe ia npica naektpikou, yia va enavaanpgei n aeitoupyia.
- Everpyonoinote n ouokeun kai
natnoe to koumu i ndevioou
puoyiya c uicn yia 5 deupeoentra.
H evdiqn LED 0a avaboepoi, ia
va emqaive oI eivie nuodvioc
tou xpvouetpoavikataotaoc tnc
puoyiya c uicn.
KAθAPIΣMOΣ KAI ΦPONTIΔA
IPOOXH: PIV KAgApiaTe T N OoKEuH, ANEVEpyOniHote T N V KAI anouuvseTo TpoPoiDotIKo Ano T NvPiCa Tou NkEKTPIKOU KAI ano T N oukeuH.
OuHnate NOBepxHOCTb Pn60pa No Mepe HAdo6HOCTu NCTO, BlaXHO MRAKoTKaHbIO. Hn B KOem Cnyae He NcnoNb3yIte MOUHX CPEDTB, BblMBuyocr Body, TkaHc C npOnNTKO, INTEHCNBbIX YNCTAUX CPEDTB IIN paCnblNTeJe.

XpAHHe NepcoHbHorO oxHaTnTeBa 03Dyxa: IpomOte 6ak
Ipe3epByap IIN BODI CMEcbIO paBbIX cacteN 6eNo yKcyca IN BODI.
IpotPte HmKHOIO NOBepxHOCTB BepXHe KpbUKN BnaKHO MRAKO
TKaHbIO. IpomOte OXnAaIOuIK KapTpND XBOo IN DOxKNTcE
ero BBcBxAHMA HA 03Dyxe. Y6eIDTECB TOM, YTO BCE qACTn Pnpbopa
TtatehBO BbIMbTI bNOHOCbIO BbCyuHeBI, 3aTEM yNaKyIe
npbOp Bero Kopo6ky uY6epTe B pOxnaHoe, Cyxo MeTo.
Downloaded from www.vandenbore.be
Downloaded from www.vandenbore.be
- SAFETY CAUTIONS:
- MAINTENANCE:
- Cleaning
- Storage
- WEEE explanation
- PRODUCT FEATURES:
- HOW TO FILL:
- Personal Space Cooler Location
- HOW TO USE:
- Speed Adjustment
- Low Water Indicator
- REPLACING THE COOLING CARTRIDGES
- CLEANING AND CARE
- To Clean the Tank and Reservoir
- To Clean the Cooling Cartridge
- To Clean the Pump Filter
- To Clean the Surface
- TROUBLESHOOTING
- Laag water indicator
- SKIFTE UT KJOLEPATRON
- KAθAPIΣMOΣ KAI ΦPONTIΔA
Brand : HOMEDICS
Model : My Chill PAC25EU2
Category : Fan