USER MANUAL NA540 PHILIPS
Important safety instruction 3
Danger 3
Warning 4
Caution 5
Electromagnetic fields (EMF) 6
Automatic shut-off 6
Recycling 7
Warranty and support 7
Introduction 7
General description 8
Product overview 8
Control panel overview 9
Before first use 13
Preparations before use 13
Using the appliance 13
Airfry mode 14
Steamfry mode 16
Steam mode 19
Cooking with preset programs 22
Cleaning 25
Routine cleaning 25
Steam cleaning 26
29
Storage 33
Troubleshooting 33
Important safety instruction
Read this important information carefully before you use the appliance and save it for future reference.
Danger
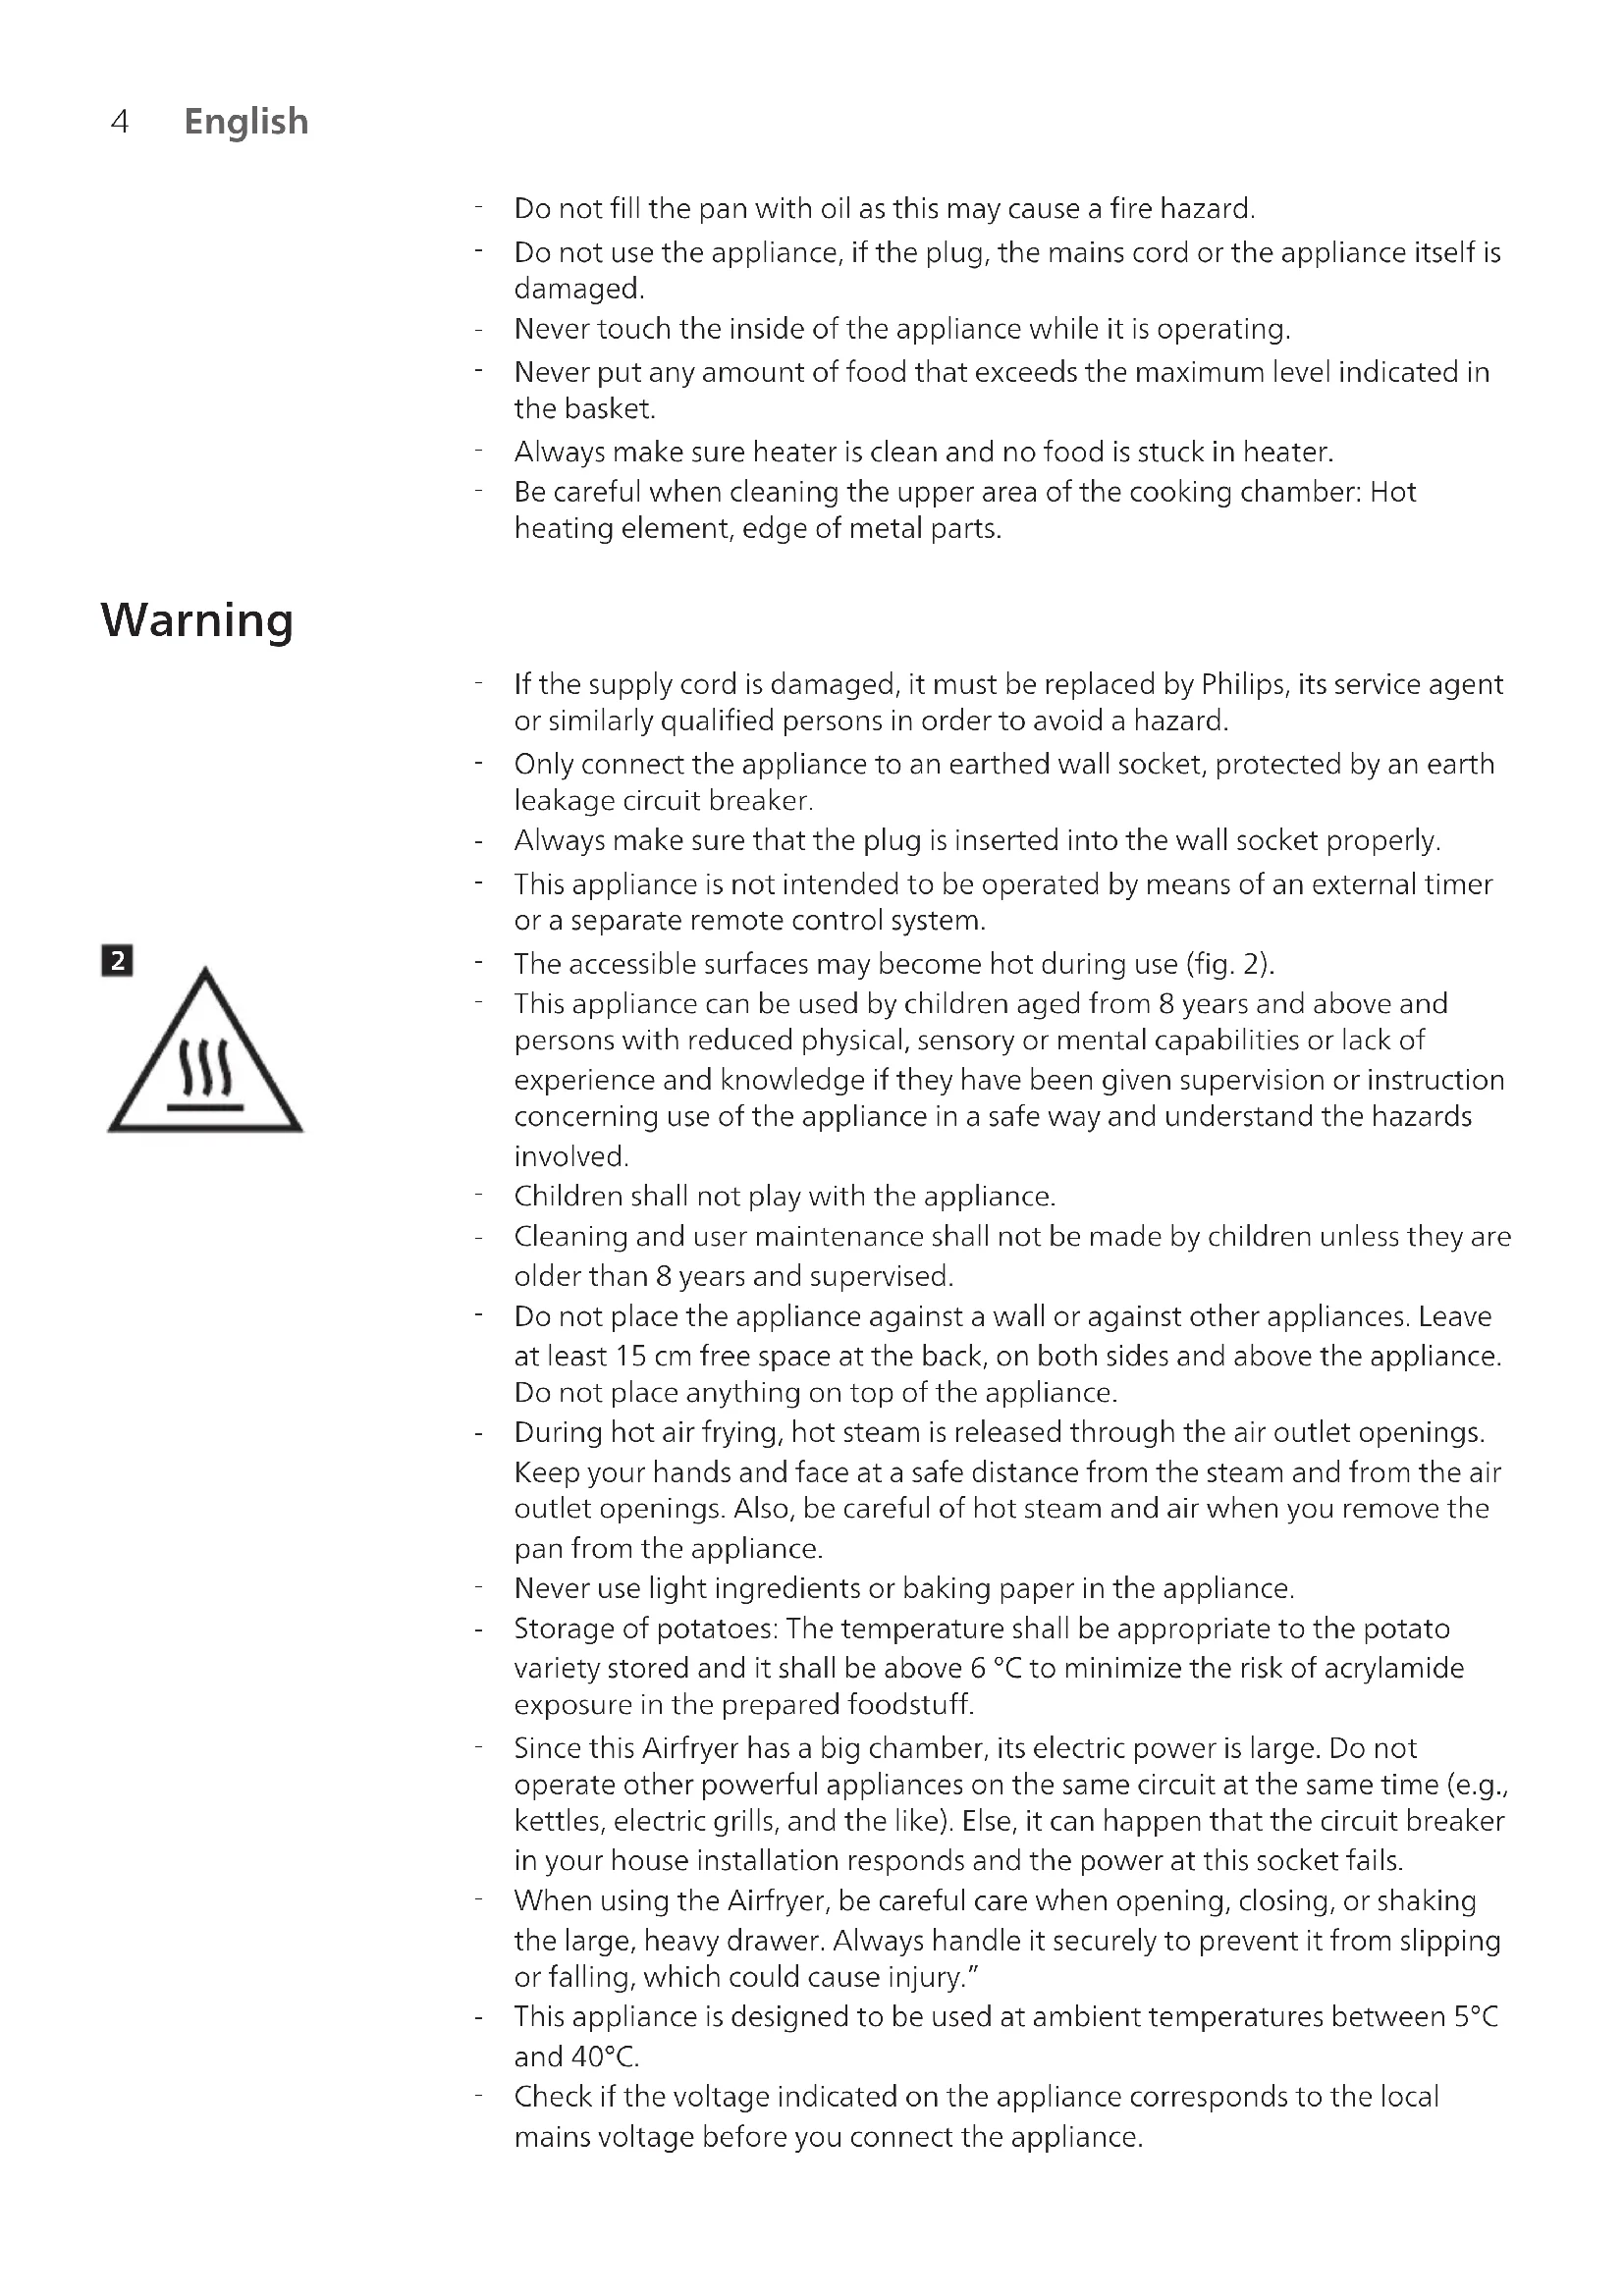
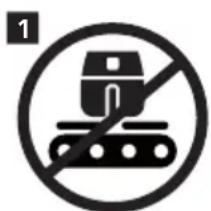
- Do not place the appliance on or near a hot gas stove or all kinds of electric stove and electric cooking plates, or in a heated oven (fig. 1).
- Never immerse the appliance in water nor rinse it under the tap.
- Do not let any water or other liquid enter the appliance to prevent electric shock.
- Always put the ingredients to be fried in the basket, to prevent them from coming into contact with the heating elements.
- Do not cover the air inlet and the air outlet openings while the appliance is operating.
Warning
- Do not fill the pan with oil as this may cause a fire hazard.
- Do not use the appliance, if the plug, the mains cord or the appliance itself is damaged.
- Never touch the inside of the appliance while it is operating.
- Never put any amount of food that exceeds the maximum level indicated in the basket.
Always make sure heater is clean and no food is stuck in heater.
-
Be careful when cleaning the upper area of the cooking chamber: Hot heating element, edge of metal parts.
-
If the supply cord is damaged, it must be replaced by Philips, its service agent or similarly qualified persons in order to avoid a hazard.
- Only connect the appliance to an earthed wall socket, protected by an earth leakage circuit breaker.
- Always make sure that the plug is inserted into the wall socket properly.
- This appliance is not intended to be operated by means of an external timer or a separate remote control system.
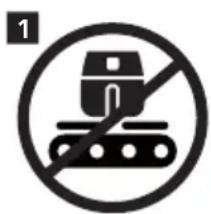
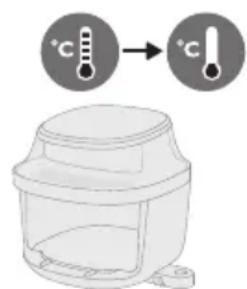
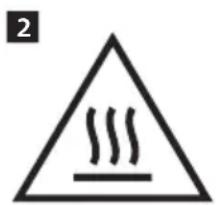
- The accessible surfaces may become hot during use (fig. 2).
- This appliance can be used by children aged from 8 years and above and persons with reduced physical, sensory or mental capabilities or lack of experience and knowledge if they have been given supervision or instruction concerning use of the appliance in a safe way and understand the hazards involved.
- Children shall not play with the appliance.
- Cleaning and user maintenance shall not be made by children unless they are older than 8 years and supervised.
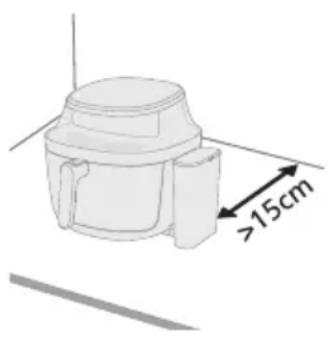
- Do not place the appliance against a wall or against other appliances. Leave at least 15cm free space at the back, on both sides and above the appliance. Do not place anything on top of the appliance.
- During hot air frying, hot steam is released through the air outlet openings. Keep your hands and face at a safe distance from the steam and from the air outlet openings. Also, be careful of hot steam and air when you remove the pan from the appliance.
- Never use light ingredients or baking paper in the appliance.
- Storage of potatoes: The temperature shall be appropriate to the potato variety stored and it shall be above 6^ to minimize the risk of acrylamide exposure in the prepared foodstuff.
- Since this Air fryer has a big chamber, its electric power is large. Do not operate other powerful appliances on the same circuit at the same time (e.g., kettles, electric grills, and the like). Else, it can happen that the circuit breaker in your house installation responds and the power at this socket fails.
- When using the Airfryer, be careful care when opening, closing, or shaking the large, heavy drawer. Always handle it securely to prevent it from slipping or falling, which could cause injury."
- This appliance is designed to be used at ambient temperatures between 5^ and 40^ .
-
Check if the voltage indicated on the appliance corresponds to the local mains voltage before you connect the appliance.
-
Keep the mains cord away from hot surfaces.
- Do not use the appliance for any other purpose than described in this manual to avoid potential injury and use only original Philips accessories.
- Do not let the appliance operate unattended.
- The pan, basket, and accessories placed inside the cooking chamber becomes hot during and after use of the appliance, always handle carefully.
- Thoroughly clean the parts that come into contact with food before you use the appliance for the first time. Refer to the instructions in the manual.
- Do not place the pan and basket on the UI panel, as they may fall and cause injury.
- When steaming food, be careful when pulling out the pan to prevent burns from the escaping steam.
- Do not position the appliance's steam outlet towards the socket.
Caution
- This appliance is intended for normal household use only. It is not intended for use in environments such as staff kitchens of shops, offices, farms or other work environments. Nor is it intended to be used by clients in hotels, motels, bed and breakfasts and other residential environments.
- Always disconnect the appliance from the supply if it is left unattended and before you assemble, disassemble, store or cleaning.
- Place the appliance on a horizontal, even and stable surface.
- If the appliance is used improperly or for professional or semi-professional purposes or if it is not used according to the instructions in the user manual, the guarantee becomes invalid and Philips refuses any liability for damage caused.
- Always return the appliance to a service center authorized by Philips for examination or repair. Do not attempt to repair the appliance yourself, otherwise the guarantee becomes invalid.
Always unplug the appliance after use.
- Let the appliance cool down for approximately 30 minutes before you handle or clean it.
- Make sure the ingredients prepared in this appliance come out golden yellow instead of dark or brown.
- Remove burnt remnants. Do not fry fresh potatoes at a temperature above 180^ (to minimize the production of acrylamide).
Always make sure that the food is fully cooked in the Airfryer.
Always make sure that you have the control over your Air fryer.
- When cooking fatty food, the Air fryer could emit smoke.
- Do not press the basket release button during shaking and moving the pan.
- When the descending icon lights up, please proceed with the descending process.
- Be careful when pouring out the cooked food and be careful not to let the accessories fall out.
-
Make sure the device is positioned with its back at least 15cm away from the wall and its front 2cm from the countertop edge. Also, make sure the air outlet is not facing any power socket.
-
Do not place the Air fryer next to another cooking appliance, close to the kitchen wall, or beneath a kitchen cupboard, as hot steam may condense and run down the surfaces.
- In normal use, good ventilation must be ensured around the product.
- If steam accumulates inside or around the surface of the steam outlet, wipe with a soft dry cloth.
- If there are condensation water on socket, it is recommended to adjust the position of the appliance or use a socket dust cover to avoid condensation accumulated in sockets.
- This appliance is provided with a short power supply cord to reduce the risk of entanglement or tripping which can occur with a longer power-supply cord.
-
Extension cords may be used if care is exercised in the use. If an extension cord is used:
-
The marked electrical rating of the cord must be as great as the rating of the appliance.
- The cord should be arranged so that it will not drape over the edge of the counter or table top where it could be pulled by children or tripped over unintentionally.
-
The extension cord should be a grounded type 3-wire cord.
-
This appliance has a polarized plug (one blade is wider than the other). To reduce the risk of electric shock, this plug is intended to fit into a polarized outlet only one way. If the plug does not fit fully in the outlet, reverse the plug. If it still does not fit, contact a qualified electrician. Do not attempt to modify the plug in any way.
- To avoid damaging the appliance, do not use alkaline cleaning agents. Instead, clean with a soft cloth and a mild detergent.
- To avoid damaging the appliance, do not use hard water. Instead, use purified water for steam, steamfry, and descaling.
- Do not direct the cold air from fans or air conditioners towards the air outlet of the Airfryer.
- Please use Philips descaler only. Under no circumstances should you use a descaler based on sulfuric acid, hydrochloric acid, sulfamic or acetic acid (vinegar) as this may damage the water circuit in your machine and not dissolve the limescale properly. Not using the Philips descaler will void your warranty. Failure to descale the appliance will also void your warranty.
Heating element surface is subject to residual heat after use.
Electromagnetic fields (EMF)
This appliance complies with the applicable standards and regulations regarding exposure to electromagnetic fields.
Automatic shut-off
- This appliance is equipped with an automatic shut-off function. If you do not press a button within 20 minutes, the appliance switches off automatically. To switch off the appliance manually, press the power On/off button.
Recycling
- This symbol means that electrical products shall not be disposed of with normal household waste.
- Follow your country's rules for the separate collection of electrical products.
Warranty and support
Versuni offers a two-year warranty after purchase on this product. This warranty is not valid if a defect is due to incorrect use or poor maintenance. Our warranty does not affect your rights under law as a consumer. For more information or for invoking the warranty, please visit our website www.home.id/warranty.
EcoDesign information for Model identifier(s): NA540, NA541, NA543, NA547
| Description Symbol Value Unit | |
| Off-mode power consumption P | off | 0.3 W | |
| Standby mode power consumption P | sb | / | W |
| Period before automatic switches into standby mode T | sb | 20 Min | |
| Measurement standard for service value EN 50564:2011 | |
| Contact details for obtaining more information DAP B.V.
Tussendiepen 4a,9206AD Drachten, The Netherlands | |
| The appliance complies with the ecodesign requirements of COMMISSION REGULATION (EU) 2023/826. | |
Introduction
Congratulations on your purchase and welcome to Philips!
To fully benefit from the support that we offer, register your product at www.home.id.
General description
Product overview
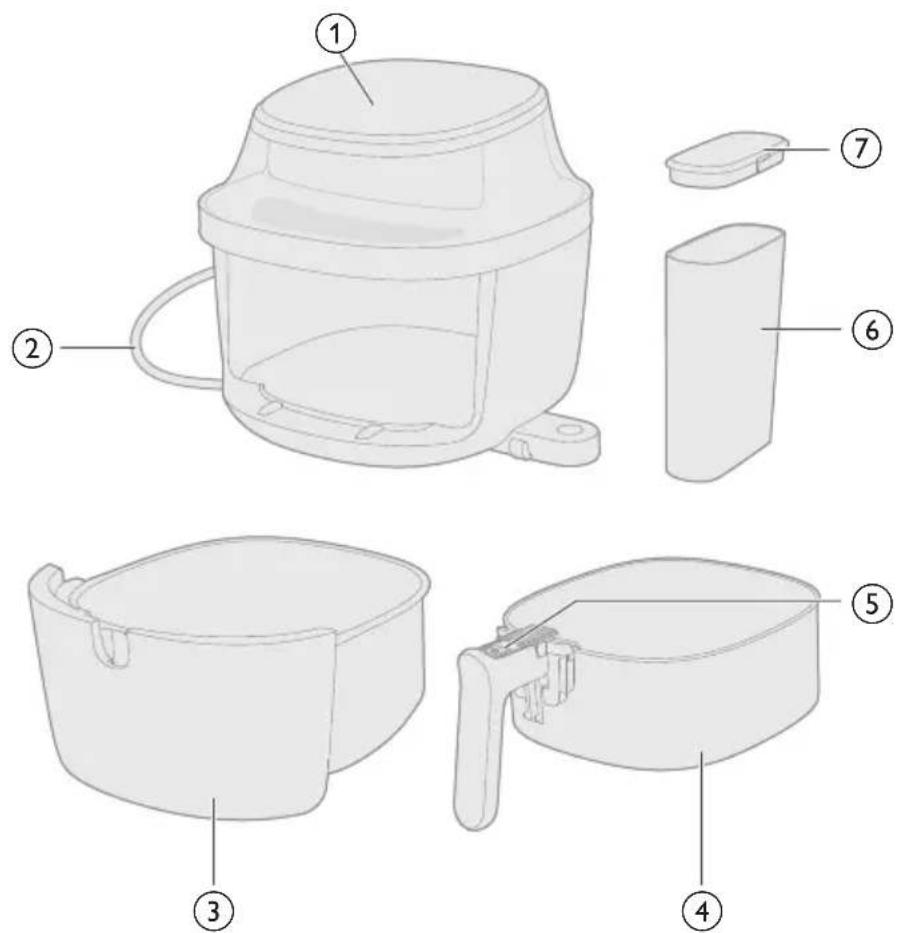
1 Control panel
2 Power cord
3 Pan
4 Basket
5 Basket release button
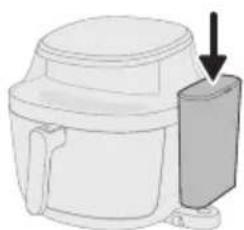
6 Water tank
7 Water tank lid
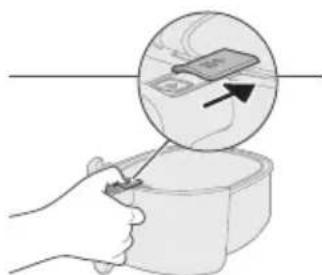
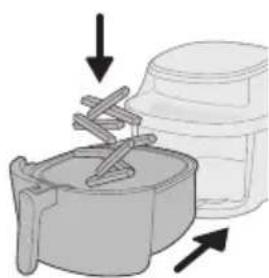
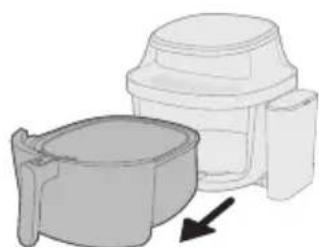
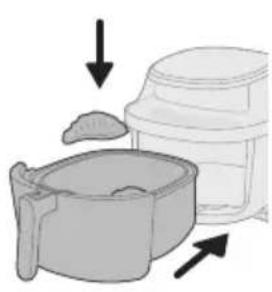
Slide the cap to access the basket release button.
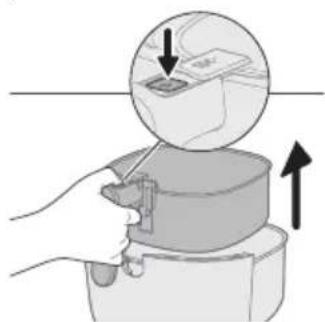
Press the basket release button and lift the basket to remove it from the pan.
Control panel overview
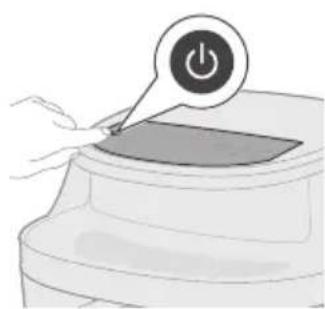
Power and basic operations


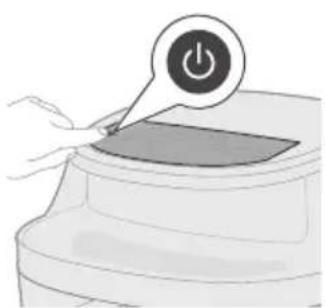
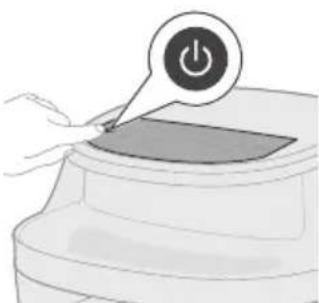
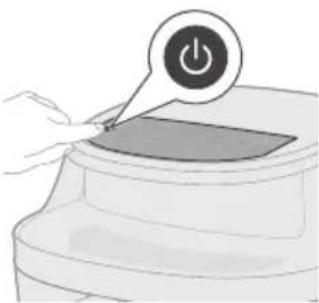
Tap to power the Airfryer on or off.

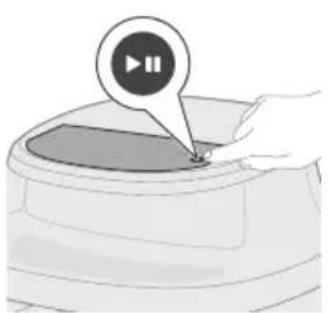
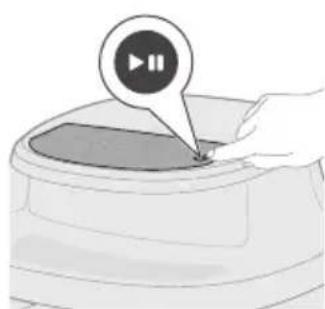
Tap to begin or pause the cooking process.

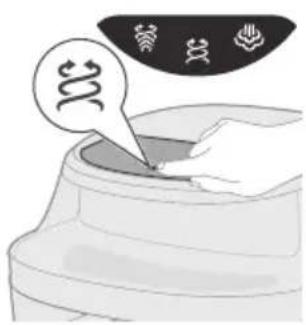
Tap to start airfrying with hot air circulation for crispy results.

Tap to start steam and airfrying for moist interiors and crispy exteriors.

Tap to cook food using steam for gentle and even heating.

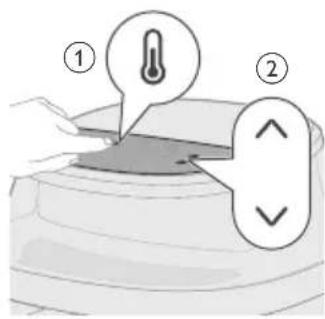
Tap to increase or decrease the cooking temperature and time.

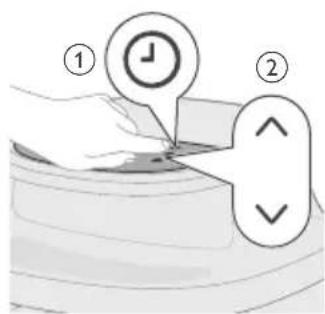
Tap to enter temperature adjusting mode.

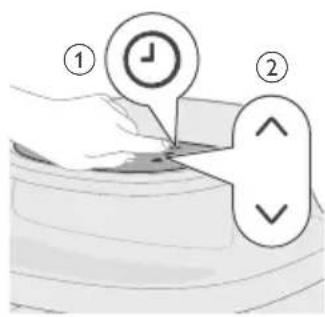
Tap to enter time adjusting mode.
Preset programs

Frozen fries

Use this preset to cook frozen fries, wedges, or hash browns to a crispy golden finish.

Fresh potatoes
Use this preset for crispy fries or wedges made from fresh-cut potatoes.

Meat chops
Use this preset to grill steak to your preferred doneness with a seared exterior.

Breakfast
Use this preset for a quick, balanced breakfast with golden toast and soft-cooked eggs.

Muffin
Use this preset to bake fluffy, evenly cooked muffins.

Chicken drumsticks
Use this preset to cook chicken drumsticks thoroughly with a crispy skin.

Mixed vegetables
Use this preset to roast or crisp vegetables evenly with minimal oil.

Fish
Use this preset to gently cook fish fillets or seafood while keeping them moist and flaky.

Dumplings
Use this preset to cook dumplings evenly with a crisp exterior and tender filling.
Additional functions


Keep warm
You can activate Keep-warm mode at any time—before or during cooking—by tapping the Keep warm button. When the Keep warm function is activated, the appliance will automatically switch to keep-warm mode once cooking is complete.

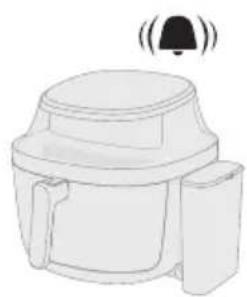
Shake reminder
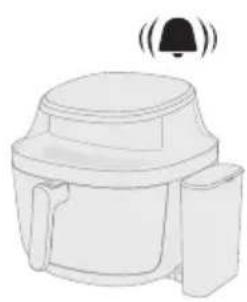
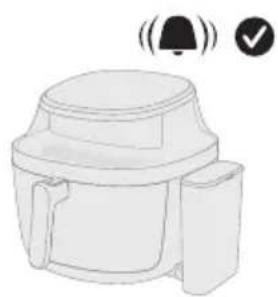
This model features a shake reminder. For optimal results, shake or turn the food promptly when the reminder alarm sounds.
Press the Shake Reminder button to turn alerts on or off. When enabled, you'll hear a beep and see the button flash—reminding you to shake or turn your food during cooking for more even results.

Light
Turn the light in the cooking chamber on or off.

Steam cleaning
Effectively dissolves greasy residue and provides a deep clean for both the basket and pan.

Favorite
Your Air fryer includes a save favorite feature for quick access to your preferred settings.
- Set your desired cooking temperature and time.
- Press and hold the Favorite button until you hear a beep—this confirms the setting is saved.
- To update your favorite, simply repeat the steps above with the new settings.
Display


Time/temperature display
The screen cycles between displaying the cooking time and temperature.

No water indication
Lights up when there is not enough water in the water tank.

Dscaling indication
Lights up when the steam enabled functions have been used for 20 hours.
Before first use
Important: During the first time use, the air fryer may produce some smoke and odor. This is normal and should dissipate in a few minutes.
Caution: This is an Air fryer that works on hot air. Do not fill the pan with oil, frying fat, or any other liquid.
Caution: Do not touch hot surfaces. Handle the hot pan with oven-safe gloves.
Caution: This appliance is for household use only.
Note: Preheating of the appliance is not necessary.
1 Remove all packing material.
2 Remove any stickers or labels (if applicable) from the appliance.
3 Thoroughly clean the appliance before first use.
Preparations before use
1 Place the appliance on a stable, level and heat-resistant surface. Make sure there is enough space on the table for the extended rail after the pan is pulled out.
2 Leave at least 15cm free space at the back of the appliance.
Note: During use, hot steam is released through the air outlets. Keep your hands and face safely away from the steam and outlets. Place the appliance at least 15 cm away from the wall, and do not position the air outlets directly in front of the socket.
Note: Do not put anything on top or on the sides of the appliance. This could disrupt the airflow and affect the frying result.
Note: Do not place the Air fryer next to another cooking appliance, close to the kitchen wall, or beneath a kitchen cupboard, as hot steam may condense and run down the surfaces.
Using the appliance
This appliance with steam function offers three versatile cooking modes designed to suit a wide range of cooking needs.
Airfry Mode delivers crispy results with minimal oil, perfect for snacks and fried favorites.
- Steamfry Mode combines hot air and steam to lock in moisture while achieving a golden finish—ideal for delicate foods like homemade bread and fish.
- Steam Mode uses pure steam to gently cook ingredients, preserving nutrients and texture, making it perfect for vegetables and seafood.
Airfry mode
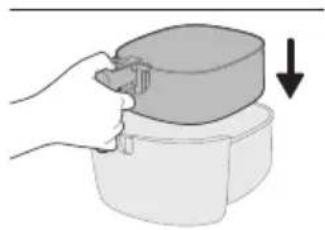
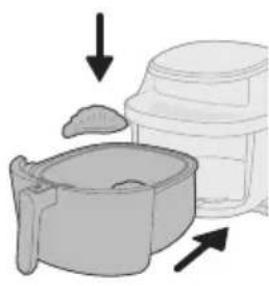
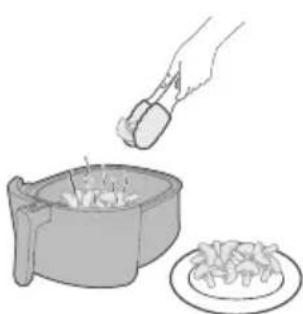
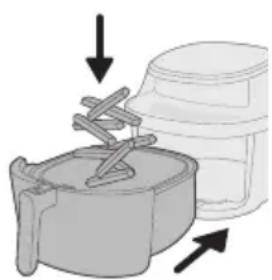
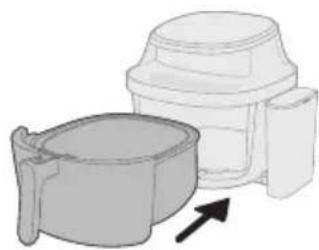
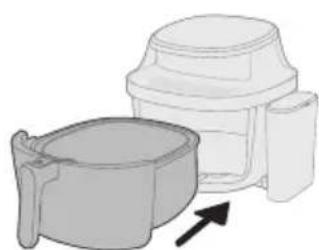
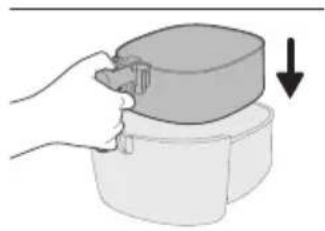
1 Place the basket in the pan.
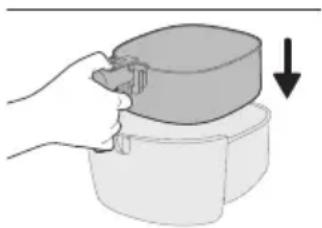
2 Add ingredients to the basket and place the pan back into the appliance.
Note: The Airfryer is suitable for preparing a wide variety of ingredients. For best results, refer to the "Food table" for recommended quantities and cooking times.
Note: Avoid exceeding the suggested amounts or filling the basket beyond the "MAX" line, as this may impact cooking performance.


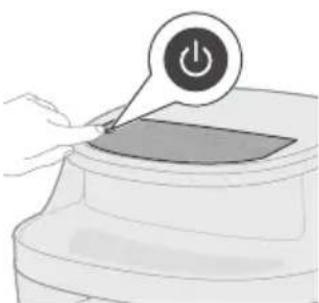
3 Tap the On/off button to switch on the appliance.
4 Tap the Airfry button to enter Airfry mode.

5 Tap the Temperature button and then use the Increase or Decrease button to select the desired cooking temperature.
6 Tap the Time button and then use the Increase or Decrease button to select the desired cooking time.
Note: In addition to manually selecting the cooking temperature and time, you can also choose from a variety of preset programs designed for convenience and optimal results.

7 Tap the Start/pause button to start cooking.
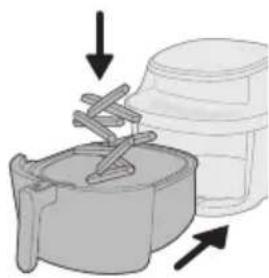
Note: Some ingredients require shaking or turning halfway through the cooking time (see "Food table"). To do this:
Gently pull out the pan.
- Shake or turn the ingredients over a heat-resistant surface.
- Place the pan back to continue cooking.
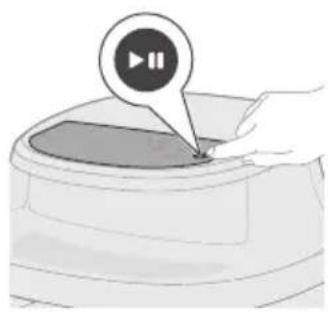
Note: To pause the cooking process, press the Start/pause button. Press the same button again to resume.
Note: The appliance will automatically pause when the pan is removed. Cooking will automatically resume once the pan is placed back into the appliance.
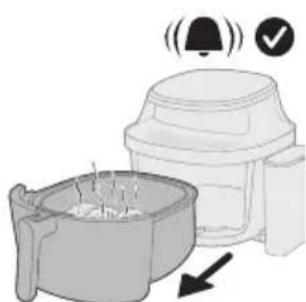
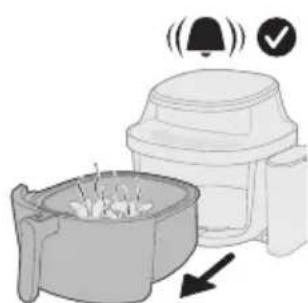
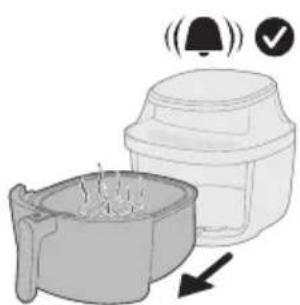
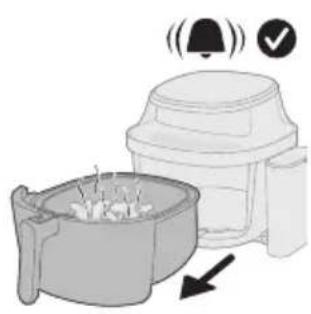
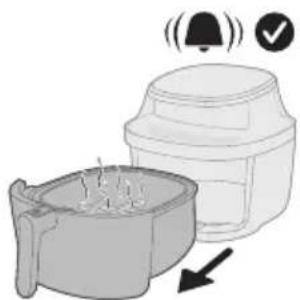
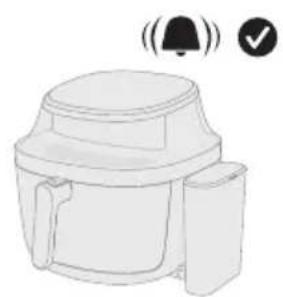
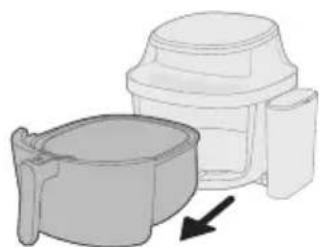
8 Once cooking is complete, a timer bell will sound. Carefully pull out the pan.

Caution: After the cooking process, the basket, pan, the interior housing and the ingredients will be hot. Always place the basket and pan on a heat resistant surface (e.g. trivet or silicone mat) when you remove them from the appliance. Depending on the type of food, hot steam may escape from the pan.

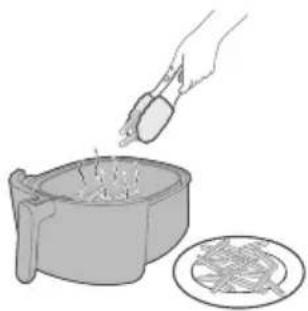
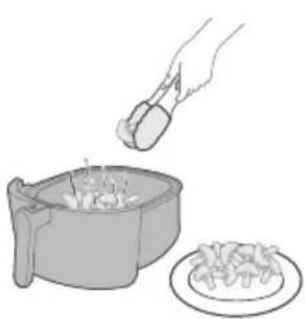
9 Remove the cooked food from the basket.
Note: Excess oil or rendered fat from the ingredients will collect at the bottom of the pan.
Note: Depending on the type of food being cooked, you may wish to pour off the excess oil or fat between batches or before shaking the contents. To do this safely, place the pan on a heat-resistant surface and wear oven-safe gloves. Carefully pour out the oil or fat.
Food table for Airfry mode
The table below provides recommended base settings for preparing various food types.
Note
- The settings listed are intended as guidelines. Due to variations in ingredient origin, size, shape, and brand, optimal results cannot be guaranteed for all ingredients.
- When cooking larger quantities (e.g., fries, prawns, drumsticks, frozen snacks), shake, turn, or stir the ingredients 2-3 times during the cooking process to ensure consistent texture and doneness.
Food items Food amount Tempera
Time Note
ture
| Frozen spring rolls 800 g 200 °C 15 min Shake, turn, or stir 1-2 times in |
| | | between |
| Hamburger (around 150 g/5 oz) | 6 patties 200 °C 16-25 | min | Shake, turn, or stir 1-2 times in between |
| Meat loaf 1400 g 150 °C 65-70 | | min | |
| Meat chops without bone (around 190 g/7 oz) | 4 chops 200 °C 16-25 | min | Shake, turn, or stir 1-2 times in between |
| Chicken breast (around 160 g/6 oz) | 5 pieces 180 °C 20-28 | min | Shake, turn, or stir 1-2 times in between |
| Whole chicken (1200 g/42 oz) | 1 piece 180 °C 50-60 | min | Shake, turn, or stir 1 time in between |
Steamfry mode
1 Place the basket in the pan.
2 Add ingredients to the basket and place the pan back into the appliance.
Note: The Airfryer is suitable for preparing a wide variety of ingredients. For best results, refer to the 'Food Table' for recommended quantities and cooking times.
Note: Avoid exceeding the suggested amounts or filling the basket beyond the "MAX" line, as this may impact cooking performance.
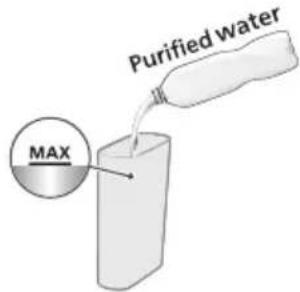
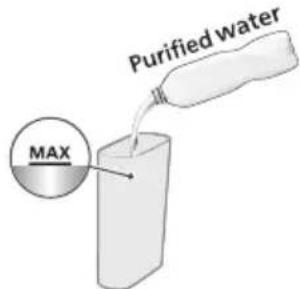
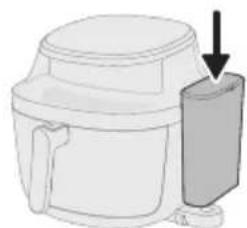
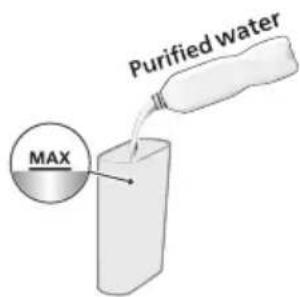
3 Fill the water tank with purified water up to the MAX water level.

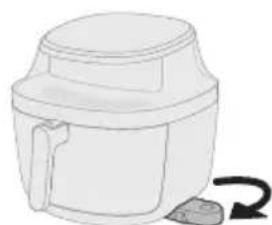
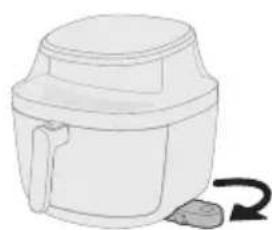
4 Pull out the water tank base from the bottom side of the appliance.
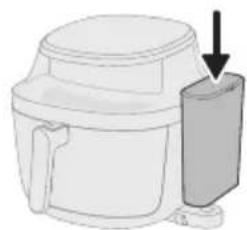
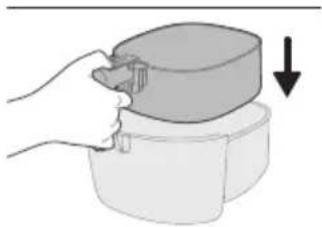
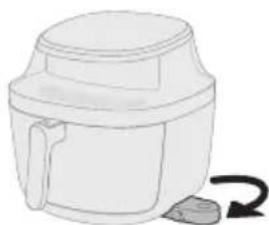
5 Secure the lid on the water tank and place the water tank onto the base.

6 Tap the On/off button to switch on the appliance.

7 Tap the Steamfry button to enter Steamfry mode.
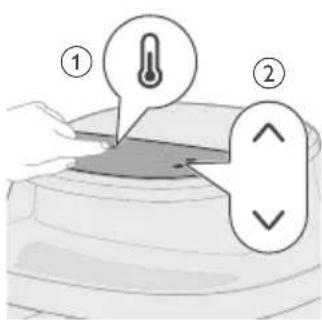
8 Tap the Temperature button and then use the Increase or Decrease button to select the desired cooking temperature.

9 Tap the Time button and then use the Increase or Decrease button to select the desired cooking time.
Note: In addition to manually selecting the cooking temperature and time, you can also choose from a variety of preset programs designed for convenience and optimal results.

10 Tap the Start/pause button to start cooking.
Note: Some ingredients require shaking or turning halfway through the cooking time (see "Food table"). To do this:
Gently pull out the pan.
- Shake or turn the contents over a heat-resistant surface.
- Place the pan back to continue cooking.
Note: To pause the cooking process, press the Start/pause button. Press the same button again to resume.
Note: The appliance will automatically pause when the basket is removed. Cooking will automatically resume once the basket is placed back into the appliance.
11 Once cooking is complete, a timer bell will sound. Carefully pull out the pan.
Caution: After the cooking process, the basket, pan, the interior housing and the ingredients will be hot. Always place the basket on a heat resistant surface (e.g. trivet or silicone mat) when you remove the basket. Depending on the type of food, hot steam may escape from the basket.

12 Remove the cooked food from the basket.
Note: Excess oil or rendered fat from the ingredients will collect at the bottom of the pan.
Note: Depending on the type of food being cooked, you may wish to pour off the excess oil or fat between batches or before shaking the contents. To do this safely, place the pan on a heat-resistant surface and wear oven-safe gloves. Carefully pour out the oil or fat.
Food table for Steamfry mode
The table below provides recommended base settings for preparing various food types.
Note
- The settings listed are intended as guidelines. Due to variations in ingredient origin, size, shape, and brand, optimal results cannot be guaranteed for all ingredients.
- When cooking larger quantities (e.g., fries, prawns, drumsticks, frozen snacks), shake, turn, or stir the ingredients 2-3 times during the cooking process to ensure consistent texture and doneness.
Food items Food amount Tempera
Time Note
ture
| Fresh potato cubes 1200 g/42 oz 180 °C 35 min Shake, turn, or stir 1-2 times in between |
| Chicken breast (around 160 g/6 oz) | 5 pieces 160 °C 29 min Shake, turn, or stir 1-2 times in between |
| Fish fillet (around 125 g/4 oz) | 6 pieces 160 °C 22 min Shake, turn, or stir 1-2 times in between |
| Homemade bread 500 g 180 °C 30 min Spread the dough into an even, flat layer to prevent it from rising and touching the heating element during cooking, which could burn the bread. |
| Whole chicken 1200 g/42 oz 180 °C 50 min Shake, turn, or stir once in between |
Steam mode
1 Place the basket in the pan.

2 Add ingredients to the basket and place the pan back into the appliance.
Note: The Airfryer is suitable for preparing a wide variety of ingredients. For best results, refer to the "Food Table" for recommended quantities and cooking times.
Note: Avoid exceeding the suggested amounts or filling the basket beyond the 'MAX' line, as this may impact cooking performance.
3 Fill the water tank with purified water up to the MAX water level.
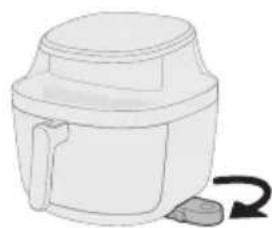
4 Pull out the water tank base from the bottom side of the appliance.
5 Secure the lid on the water tank and place the water tank onto the base.
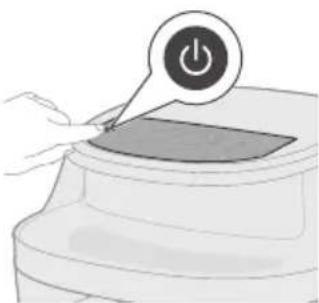
6 Tap the On/off button to switch on the appliance.
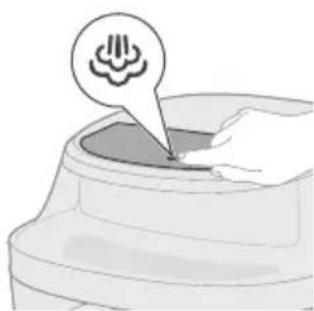


7 Tap the Steam button to enter Steam mode.
8 Tap the Time button and then use the Increase or Decrease button to select the desired cooking time.
Note: Temperature adjustment is disabled for Steaming.
Note: In addition to manually selecting the cooking temperature and time, you can also choose from a variety of preset programs designed for convenience and optimal results.
9 Tap the Start/pause button to start cooking.
Note: Some ingredients require shaking or turning halfway through the cooking time (see "Food table"). To do this:
Gently pull out the pan.
- Shake or turn the ingredients over a heat-resistant surface.
- Place the pan back to continue cooking.
Note: To pause the cooking process, press the Start/pause button. Press the same button again to resume.
Note: The appliance will automatically pause when the basket is removed. Cooking will automatically resume once the basket is placed back into the appliance.
10 Once cooking is complete, a timer bell will sound. Carefully pull out the pan.
Caution: After the cooking process, the basket, pan, the interior housing and the ingredients will be hot. Always place the basket and pan on a heat resistant surface (e.g. trivet or silicone mat) when you remove them from the appliance. Depending on the type of food, hot steam may escape from the basket.
11 Remove the cooked food from the basket.
Note: Excess oil or rendered fat from the ingredients will collect at the bottom of the pan.
Note: Depending on the type of food being cooked, you may wish to pour off the excess oil or fat between batches or before shaking the contents. To do this safely, place the pan on a heat-resistant surface and wear oven-safe gloves. Carefully pour out the oil or fat.
Food table for Steam mode
The table below provides recommended base settings for preparing various food types.
Note
- The settings listed are intended as guidelines. Due to variations in ingredient origin, size, shape, and brand, optimal results cannot be guaranteed for all ingredients.
- When cooking larger quantities (e.g., fries, prawns, drumsticks, frozen snacks), shake, turn, or stir the ingredients 2-3 times during the cooking process to ensure consistent texture and doneness.
| Food items Food amount Tempera-ture | Time Note | |
| Fresh potato cubes 800 g / 28 oz 100 °C 28-35 | min | |
| Whole potato (around 250-300 g/9-11 oz) | 4 pieces 100 °C 50-60 | min | |
| Pork ribs 300 g/11 oz 100 °C 25-35 | min | |
| Rice 320 g/11 oz 100 °C 35-40 | min | Using cooking pot, like baking pot, silicon tray etc. Add 320 ml of water to the pot, maintaining a rice-water ratio of 1:1.2. |
| Yam/Sweet Potato (around 100 g/3.5 oz) | 8 pieces 100 °C 50-75 | min | |
Cooking with preset programs
This appliance comes with a variety of preset cooking programs designed to simplify meal preparation. Each preset is optimized for a specific type of food, automatically setting the ideal temperature and cooking time to deliver delicious results with minimal effort.
1 Add ingredients to the basket and place the pan back into the appliance.
Note: Avoid exceeding the suggested amounts or filling the basket beyond the "MAX" line, as this may impact cooking performance.

2 Tap the On/off button to switch on the appliance.
3 Tap the Airfry, Steam, or Steamfry button to enter one of the cooking modes.
Note: Make sure to have the filled water tank in place when you are using the Steam or Steamfry cooking modes.
4 Choose one of the preset programs according to the food you are cooking.
5 Tap the Start/pause button to start cooking.
Note: Some ingredients require shaking or turning halfway through the cooking time (see 'Food table'). To do this:
Gently pull out the basket.
- Shake or turn the contents over a heat-resistant surface.
- Reinsert the basket to continue cooking.
Note: To pause the cooking process, press the Start/pause button. Press the same button again to resume.
Note: The appliance will automatically pause when the basket is removed. Cooking will automatically resume once the basket is placed back into the appliance.
6 Once cooking is complete, a timer bell will sound. Carefully pull out the pan.
Caution: After the cooking process, the basket, pan, the interior housing and the ingredients will be hot. Always place the basket and pan on a heat resistant surface (e.g. trivet or silicone mat) when you remove them from the appliance. Depending on the type of food, hot steam may escape from the pan.
7 Remove the cooked food from the basket.
Note: Excess oil or rendered fat from the ingredients will collect at the bottom of the pan.
Note: Depending on the type of food being cooked, you may wish to pour off the excess oil or fat between batches or before shaking the contents. To do this safely, place the pan on a heat-resistant surface and wear oven-safe gloves. Carefully pour out the oil or fat.
Preset table for Airfry
Preset Recommended amount Time Temperature Shake
Reminder
| Frozen fries 1000 g 27 min 180 °C 2 times |
| Homemade fries | 1000 g 29 min 180 °C 2 times | |
| Meat chop 4 pieces (190g/piece) 17 min 200 °C 1 time |
| Egg and breakfast | 3 toasts, 4 eggs 12 min | 160 °C / Add toast 6 min into cooking |
| Muffin 9 cups (around 30g per cup) 16 min 160 °C / |
| Chicken drumsticks | 10 pieces (125g/piece) 28 min 180 °C 2 times |
| Mixed vegetables | 1000 g (Air fry mode) 12 min 180 °C 2 times 600 g (Steam fry and Steam modes) |
| Whole fish 2 fish (300-400g per fish) 13 min 200 °C 1 time |
| Preset Weight | Preset table for Steam fry
Time Temperature Shake | Reminder |
| Chicken
drumsticks | 10 pieces (125 g/piece) 35 min 180 °C 2 times | |
| Cauliflower 600 g | 19 min 160 °C 2 times | |
| Whole fish 2 fish (300-400 g per fish) 18 min 200 °C 1 time |
| Dumplings 370 g 16 min 160 °C / |
| Preset table for Steam
Preset Weight Time Temperature |
| Chicken | 10 pieces (125 g/piece) 33 min 100 °C |
| drumsticks | |
| Broccoli 600 g 13 min 100 °C |
| Whole fish 2 fish (300-400 g per fish) 19 min 100 °C |
| Dumplings 370 g 13 min 100 °C |
Cleaning
Routine cleaning
Warning: Let the pan, basket, and inside of the appliance cool down completely before you start cleaning.
Warning: the basket has a non-stick coating. Do not use metal kitchen utensils or abrasive cleaning materials as this may damage the non-stick coating.
Clean the appliance after every use. Remove oil and fat from the bottom of the pan after every use.
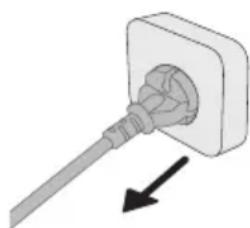
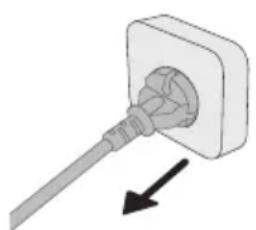
1 Press the power On/Off button to switch off the appliance, remove the plug from the wall outlet and let the appliance cool down.
2 Dispose of rendered fat or oil from the bottom of the pan.
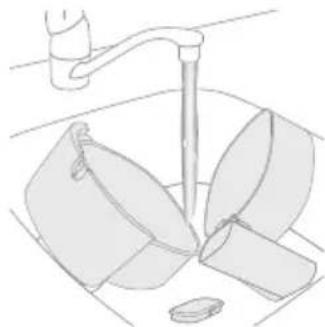
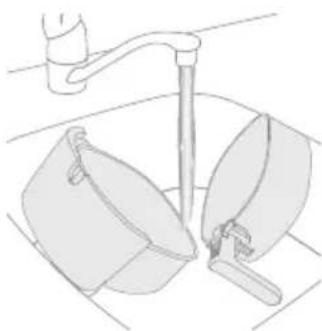
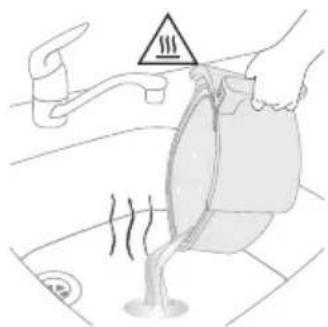
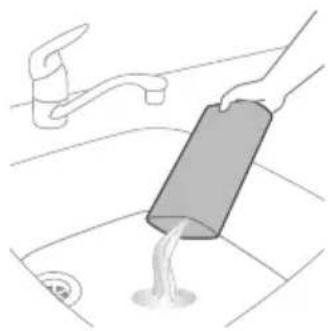
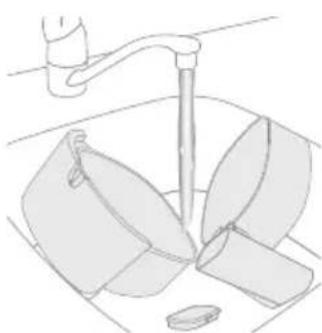
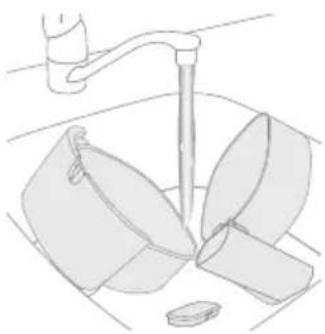
3 Clean the basket, pan, and water tank under the tap, if necessary with warm water, dishwashing liquid and a non-abrasive sponge (see "cleaning table").
Tip: If food residues stuck to the basket or pan, you can soak them in hot water and dishwashing liquid for 10-15 minutes. Soaking loosens the food residues and makes it easier to remove. Make sure you use a dishwashing liquid that can dissolve oil and grease. If there are grease stains on the basket or pan and you have not been able to remove them with hot water and dishwashing liquid, use a liquid degreaser.
Tip: If necessary, food residues stuck to the heating element can be removed with a soft to medium bristle brush. Do not use a steel wire brush or a hard bristle brush, as this might damage the coating on the heating element.
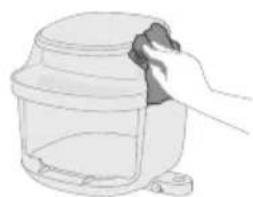
4 To prevent scratches, gently wipe the outside and inside of the appliance with an unwrinkled, clean, and soft cloth. Begin with a slightly moistened cloth and follow up with a dry one, if necessary.
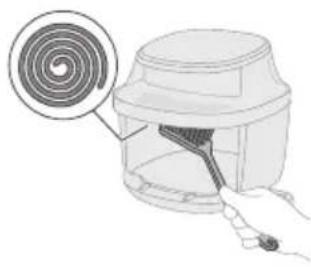
5 Clean the heating element with a cleaning brush to remove any food residues.
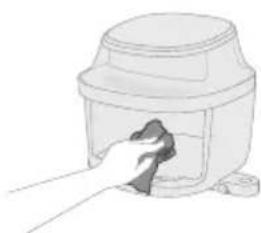
6 Clean the inside of the appliance with a slightly moistened soft cloth and follow up with a dry one, if necessary.
Steam cleaning
The steam cleaning function effectively dissolves greasy residue and provides a deep clean for both the basket and pan.
The program runs for 20 minutes, consisting of:
- 15 minutes of steam cleaning to dissolve buildup.
- 5 minutes of drying to ensure the pan is ready for use.
Note: When starting the steam cleaning program, the appliance may release more vapor from the back than during regular steam mode. This is normal and may result in increased condensation on nearby walls.
Before starting, please ensure the following:
Air outlet is not directly facing any power socket.
- Do not place other kitchen appliances next to the appliance.
- Keep at least 15cm of space between the appliance and the wall to minimize condensation buildup.
1 Fill the water tank with purified water up to the MAX water level.

2 Pull out the water tank base from the bottom side of the appliance.
3 Secure the lid on the water tank and place the water tank onto the base.

4 Tap the On/off button to switch on the appliance.
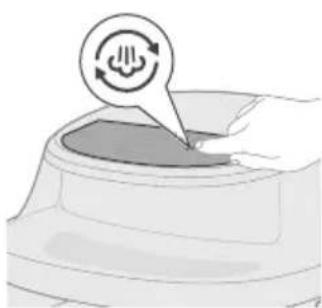
5 Tap the Steam Clean button.

6 Press the Start/pause button to start the steam cleaning process.
7 After 15 minutes, the appliance will beep continuously and the steam clean icon will start flashing.
8 Pull out and clean the pan and basket.
Caution: Always wear heat-resistant gloves to handle the hot pan.
Note: If grease remains in the pan and basket, clean them with soapy water or detergent using a sponge, then rinse again.
9 Place the basket and pan back into the appliance.


10 Tap the Start/pause button to start the drying process.
11 After 5 minutes, a beep sound indicates that drying is complete.
Tip: Before first use or if not used for a long time, we suggest using the "Steam cleaning" function to thoroughly clean the water circle and cooking chamber.
Descaling


Every 20 hours of using steam mode, a descending reminder will automatically appear and blink on the display—this means it is time to run the descending program. The descending program cleans limescale buildup from the air fryer's water system, helping to extend its lifespan.
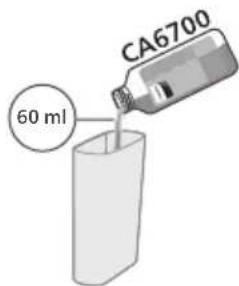
1 Pour 60~ml of Philips Descaler CA6700 (sold separately) to the water tank.
2 Fill the water tank with purified water up to the MAX level.
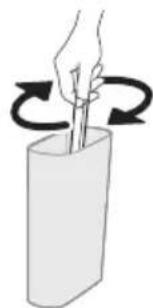
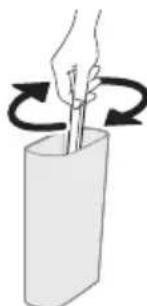
3 Mix the water and descaler evenly in the water tank.
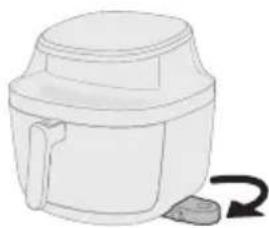
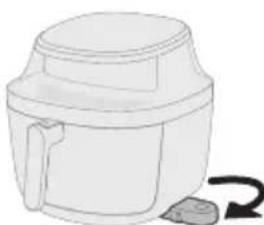
4 Pull out the water tank base from the bottom side of the appliance.
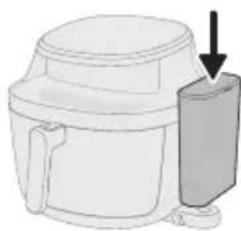
5 Secure the lid on the water tank and place the water tank onto the base.
6 Tap the On/off button to switch on the appliance
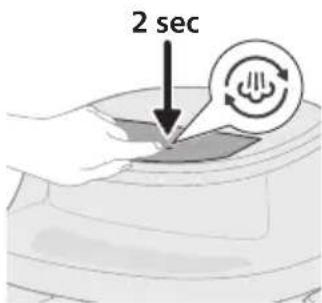
7 Tap and hold the Steam clean button for 2 seconds.

8 Tap the Start/pause button to start descending.
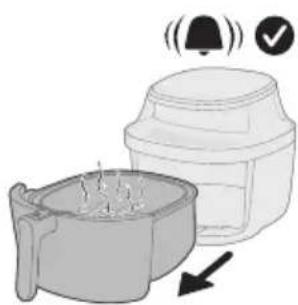
9 After 25 minutes of descending, the appliance will beep and remind you to pull out the pan.
10 Pull out the pan and pour off any remaining water in the pan.
Caution: Always wear heat-resistant gloves to handle the hot pan.
11 Pour off any remaining water in the water tank.

12 Refill the water tank with purified water.
13 Place the basket and pan back to the appliance.

14 Press the Start/pause button to continue descending.
15 The descending process ends when you hear the appliance beep again.
16 Pull out the basket and pan.
17 Rinse the basket, pan, and water tank under the tap.
Important: Under no circumstances should you use a descaling liquid based on sulfuric acid, hydrochloric acid, sulfamic or acetic acid (vinegar) as this may damage the water system in your appliance and not dissolve the limescale properly.
Note: If you often use hard water in your area, you may need to descale the device more frequently.
Storage
1 Unplug the appliance and let it cool down.
2 Make sure all parts are clean and dry before storing.
Note
- When carrying the Airfryer, hold it horizontally and support the pan at the front to prevent any accidental tilting and potential damage to the parts.
- Always make sure that the removable parts of the Air fryer are fixed before you carry and/or store it.
Troubleshooting
This chapter summarizes the most common problems you could encounter with the appliance. If you are unable to solve the problem with the information below, visit www.home.id/support for a list of frequently asked questions or contact the Consumer Care Center in your country.
Problem Possible cause Solution
| The outside of the appliance becomes hot during use. | The heat inside radiates to the outside walls. | This is normal. All areas that you need to touch during use stay cool enough to touch. |
| | The pan, the basket, and the inside of the appliance always become hot when the appliance is switched on to ensure the food is properly cooked. These parts are always too hot to touch. |
| | If you leave the appliance switched on for a longer time, some areas get too hot to touch. These areas are marked on the appliance with the following icon: |
| | As long as you are aware of the hot areas and avoid touching them, the appliance is safe to use. |
| My home-made fries do not turn out as I expected. | You did not use the right potato type. | To get the best results, use fresh floury potatoes. If you need to store the potatoes, do not store them in a cold environment like in a fridge. Choose potatoes whose package states that they are suitable for frying. |
Problem Possible cause Solution
| The amount of ingredients in the basket is too big. | Follow the instructions in this user manual to prepare home-made fries. |
| Certain types of ingredients need to be shaken halfway through the cooking time. | Follow the instructions in this user manual to prepare home-made fries. |
| The Air fryer does not switch on. The appliance is not plugged in. Check if the plug is inserted in the wall outlet properly. |
| Several appliances are connected to one outlet. | The Air fryer has a high wattage. Try a different outlet and check the fuses. |
| You did not tap the On/off button. | Tap the On/off button to switch on the appliance. |
| I see some peeling off spots inside my Air fryer. | Some small spots can appear inside the pan of the Air fryer due to the incidental touching or scratching of the coating (e.g. during cleaning with harsh cleaning tools and/or while inserting the basket). | You can prevent damage by lowering the basket into the pan properly. If you insert the basket at an angle, its side may knock against the wall of the pan, causing small pieces of coating to chip off. If this occurs, please be informed that this is not harmful as all materials used are food-safe. |
| White smoke comes out of the appliance. | You are cooking fatty ingredients. Carefully pour off any excess oil or fat from the pan and then continue cooking. |
| The pan still contains greasy residues from previous use. | White smoke is caused by greasy residues heating up in the pan. Always clean the pan and the basket thoroughly after every use. |
| Breading or coating did not adhere properly to the food. | Tiny pieces of airborne bread ing can cause white smoke. Firmly press bread ing or coating to food to ensure it sticks. |
| Marinade, liquid or meat juices are splattering in the rendered fat or grease. | Pat food dry before placing it in the basket. |
| The screen on the Air fryer shows "E1". | Your Air fryer might be stored in a place where it is too cold. | If your device was stored at a low ambient temperature, let it warm up to room temperature for at least 15 minutes before you plug it in again.
If your display still shows "E1", call the service hot line or contact the Consumer Care Center in your country. |
Problem Possible cause Solution
| The screen on the Air fryer shows "E4-E12". | The device might have a malfunction. | Try to unplug and plug in the device again.
If this does not help please call the service hot line or contact the Consumer Care Center in your country. |
| The screen on the Air fryer shows "E15". | The internal water tube is blocked. | Perform the descaling process.
If this does not help please call the service hot line or contact the Consumer Care Center in your country. |
| I hear some strange noise coming from the inside of the appliance. | This appliance is equipped with a fan to circulate heat and a water pump to enable the steaming function.
During operation, you may hear sounds from these components. | This is normal and expected.
If the noise becomes noticeably louder or changes in character, please contact the Consumer Care Center for further assistance. |
| There is water in the cooking chamber after use. | After cooking, you may notice water remaining in the cooking chamber.
This is due to the steam generated during operation, which condenses on the food and the inner walls of the chamber. | A small amount of condensation is normal.
Simply wipe it away using a soft, damp, non-abrasive cloth. |
| is flashing. No water in water tank. Add purified water to the water tank. |
| Water tank is not placed properly. Press the water tank to secure it in place. |
| The internal water tube is blocked. Perform the descaling process.
If this does not help please call the service hot line or contact the Consumer Care Center in your country. |
| is flashing. This is the descaling reminder. Perform the descaling process. See chapter "Descaling". |
Problem Possible cause Solution
| There is condensation on the wall during steaming, steam cleaning, or descending. | It is normal. The appliance may release increased vapor from the air outlet. This vapor can be pushed toward nearby surfaces by the internal fan, leading to visible condensation on walls. | To ensure safe and optimal use: - Place the appliance at least 15 cm away from the wall to reduce condensation buildup. - Ensure the air outlet is not directly facing any power socket to avoid electrical hazards. - Do not place other kitchen appliances close to the unit during operation. - Use a mop or soft cloth to dry any condensation that forms on surrounding surfaces. |
| There is water leakage from the Air fryer. | Internal Leakage (e.g., water tube or internal components). | Contact the Consumer Care Center in your country for further assistance. |
| Cracks or Damage from External Force. If the appliance has been dropped or deformed, it may cause structural damage leading to leaks. | |
| The water tank may not be properly installed or could be damaged. | Remove the water tank and reinstall it securely. Check for any visible cracks or damage. If damage is found, contact the Consumer Care Center for further assistance. |
| The Air fryer is not producing enough steam. | Insufficient water in the water tank. | Check the water tank to ensure there is enough water. |
| The water tank is not properly inserted. | Press the water tank to secure it in place. |
| The water inlet is dirty or clogged. | Clean and rinse thoroughly to remove any blockages. |
| There is steam generator clogging or pipeline leakage. | If the appliance has been used for an extended period, the steam generator may require maintenance. Run the descaling program to clean the steam system. If the issue persists after descaling, please contact the Consumer Care Center in your country for further assistance. |
Obsah
Nebezpeci 37
Varování 38
Poznámka 39
Elektromagneticka pole (EMP) 40
g /reducer-knapper
Tryk for at og else sienke tilberedningstemperatur og -tid.

Temperaturknap
Tryk for at aendre temperatur.

Tidsknap
Tryk for at aendre tid.
Forudindstillede programmer

Frosne pomfritter

Brug donne forudindstilling til at tilberede gyldne frosne pomfritter, kartoffelbade eller hashbrowns.

Friske kartofler
Ökodisaini teave 149
Tutvustus 149
Descalcification 208
Almacenamento 211
Solucn de problemas 212
Important
m = 311 ;
Matvaretabell for Airfry-modus
Tabell for forhåndsinnstillinger for Airfry
| Forhåndsinnstilling | AnbefaltAPEngde Tid Temperatur Pâminnelseom risting |
| Frosne pommes frites | 1000 g 27 min 180 °C 2 ganger |
| Hjemmelaget pommes frites | 1000 g 29 min 180 °C 2 ganger |
| Koteletter 4 stykker (190 g per stykke) 17 min 200 °C 1 gang |
| Egg og frokost 3 skiver ristet brød, 4 egg 12 min Legg tilbrødskiveneNR det hargatt 6 min |
| Muffins 9 kopper (rundt 30 g per kopp) 16 min 160 °C / |
| Kyllingklubber 10 stykker (125 g per stykke) 28 min 180 °C 2 ganger |
| Blandede grønnsaker | 1000 g (Airfry-modus) 12 min 180 °C 2 ganger |
| 600 g (Steam fry- og dampmodus) |
| Hel fisk 2 fisk (300-400 g per fisk) 13 min 200 °C 1 gang |
| Tabell for forhåndsinnstillinger for Steam fry |
| Forhåndsinnstilling | VektTid Temperatur Pâminnelseom risting |
| Kyllingklubber 10 stykker (125 g per stykke) 35 min 180 °C 2 ganger |
| Blomkål | 600 g 19 min 160 °C 2 ganger |
| Hel fisk 2 fisk (300–400 g per fisk) 18 min 200 °C 1 gang |
| Dumplings 370 g 16 min 160 °C / |
| Tabell for forhåndsinnstillinger for damp
Forhåndsinnsti- Vekt Tid Temperatur
Iling |
| Kyllingklubber 10 stykker (125 g per stykke) 33 min 100 °C |
| Brokkoli 600 g 13 min 100 °C |
| Hel fisk 2 fisk (300–400 g per fisk) 19 min 100 °C |
| Dumplings 370 g 13 min 100 °C |
Rengjøring
Rutinerengjøring
www.home.id/warranty.
ABTOMaTnUHO n3KJIIOuBaHe
To3n ypeJe cHa6dEn C cyHKuJra 3a cyHKUJra 3a aBTOMaTNUHO u3KJIIOUBAHe. Ako He haTNCHeTe 6yTOH B paMKITE Ha 20 MInHTN, ypeIbT ce u3KJIIOUBA abTOMaTNUHO. 3a Da u3KJIIOUHTe ypeJa pBcHOb, haTNCHeTe 6yTOHa 3a BKJ./u3KJ. Ha 3axpaHBaHeTo.
Peuzklnpahe

To3n cunboJ O3NaUaBa, ye eJeKtpnueecknte npOdykTn He Tpr6Ba da ce n3XbPJIaT 3aeJHo C o6uKHOBeHInTe 6HTOBu OTnaDbu.
- CneiBaIe npaBnIaTa Ha IbpxKaBaTa cn OTHoCHO pa3JeHTo cb6npaHe Ha eJekTpnuYeCKnte npOdyKTI.
TapaHcIy I IOdRpBxKka
Versuni npedocabra DberoOnHa rapaHcna 3a To3n npOyKT OT daTata My Ha
3akynBaHe. rapaHcnaTa He e BaIndHa, aKO deΦeKTBt Ce DbJxHa HnePpaBnHa
ynoTppe6a nIi Ha lo7a noDpBxxKa. Haata rapaHcna He 3acra BaUnTe
3akOHOBn npaba KaTo Notpe6ntel. 3a nobuee nHΦopMaunr nn 3a no3OBaBaHe
Ha rapaHcna Ta nocetete Haun yebcaNT www.home.id/warranty.
Hhopmaun 3a ekoN3aH
Bytoh 3a roTbeHe Ha napa
HaTnchete, 3a Da 3anOHTe roTBeHe Ha npa NbpxHe C ropeu Bb3dUx 3a COuHn BbTpEshOCTn IN XpyKnabN BbHN HuaCTn.

ByToH 3a napa
Iokochete,3a da npiroTbTe XpaHaTa Cnpa 3a HeXHo n paBHomepHo 3aRpaBaHe.

ByToHn 3a yBelenuBaHe/HaMaIraBaHe
ДOKОСHTe,За ДуУВЕЛЧИТЕ ИИН HAмAJINTe TEMпepaТураТи ВрЕмTo Ha rotBeHe.

Byron 3a TemnepaTypata
ДOKОСHETe,За ДА ВLEЗETeВ pEKIM Ha peRyInpaHe Ha TempepaTypaT.

ByToH 3a BpeMe
Iokochete,3a Ia Bne3eTe BpeKIM Ha HacTpoiKa Ha BpeMeTo.
PpeBapnteJno 3aadaeHn nporpaMn

3ampa3eHn KapToΦn 3a nbpjxHe

I3noJ3BaIte Ta3n IpeBapnteH0 3aJaTeHa HAcTpoNka, 3a Da npIroTBtE 3aMpa3eHn KapToHn, KapToHn yeJXnc nnxaw 6payHC c xpynKaBa 3naTnCTa KopnUka.

Ppechn KapToΦn
I3noJ3BaIte Ta3n HAcTpoNka 3a XpyNkABn KapTooH nn KApTooC KOxNtKa, npuroTBeHN OT npACHO HapraHn KapTooH.

PbpxkoJn
I3noJ3BaIte Ta3n npedBapnteH0 3aJaHa HAcTpoiKa, 3a da n3peTe PbXoJa Do XeHaHaTa CteHe N CpeneyeHa KOpuKa.

3akycka
I3noJ3BaIte Ta3n HacTpoiKa 3a 6bP3a n 6aJahCnpaHa 3akycka c npeneueH ToCT n poXKn JMyca.

MbΦnH
N3noJ3BaIte Ta3n HAcTpoIka, 3a Ja n3nepeTe nyXkABn, paBHOmePHo N3neeHm bΦHH.

NIIeewKn 6yTueta
N3noJ3BaIte Ta3n npedBapntelHo 3aJaDeHa HacTpoiKa, 3a Da npiroTBNTe NIIeUKN 6yTuTe a XpyNkaBA KOxa.

MnKcOT3eJehyun
N3noJ3BaIte Ta3n npedBapnteH0 3aJaDeHa HAcTpoiKa, 3a da neyeTe nn 3aIbpxBate 3eJeHcyu paBHOMepHO C MInHMajHO KOJIueCTBO Ma3HnHa.

Pn6a
I3noJI3BaIte Ta3n IpeBapNTeH0 3aJaTeHa HAcTpoNka, 3a Da npriTOBtE BHNMaTeHNO fHNeTa OT p6a nn MOpCKn daOBe, KaTo rN 3aNa3nte COHn N KpexKn.

KneJn
ИзплзВаиTe Ta3nnpeДВapNTeJHa NaCTpoIka,За ДсROТВИTe KHeДЛ paBHomepHc XpyPkAba NOBbpxHOCT N MEK Пьнж.
Доьнтелнункин


IopdbpkaHe Ha TOnnHaTa
Mожete Да akTNиВираTe peЖИма 3a NOДьрЖаHe Ha TOnПинота ПО BCЯКО ВpeMe -пpeДи ИЛNo BpeMe Ha TOTBeHETO - KaTO HaTINCHeTe 6yToHa 3a NOДьрЖaHe Ha TOnПинота.
KoratoФункцяТаЗЯпдьржанeHaToJIINHATAe aKTIBIpaHa,уpeДТ abTomatNHyОп pemMuHaВВpeKIM HaNoDbpJxAneHaToJIINHATA,CleД KaTO npnroTbHETOHa xpaHaTa npNKJIOUv.

Hanomnhahe 3a pa3KlaaHe
To3n moJe pa3noIarac HAnOMHHe 3a pa3KnaUaHe. 3a da NoCTnHete ONTImaIIH pe3yJIiTaN, pa3KNaTee nn O6bpHete XpaHaTa He3a6abHo, KOrato npO3Byu aJapMaTa 3a HAnOMHHe.
HaTnchHe 6byToHa 3a HAnOMHRe 3a pa3KlaUaHe, 3a da BkIIOHTe NIN N3KJIIOHTe npedynpexJeHHra. Korato e aKTHBnPaHa, Ie yyeTe 3ByKOB CnHaN Ie BnITe, Ye 6byTOhBT MInrA, HAnOMHnKN Bn Da pa3KlATnTe NIN O6bpHETe XpaHata No BpeMe Ha RotBeHeto, 3a da NOCTnHHeTe No-paBHomepHn pe3yNTaTn.

CbetlnHa
BkIIOUeTe NIN N3KIOUeTe CBeTINHaTa B KaMepaTa 3a TOTBeHe.

Почистван с napа
EfeKTHBHO pa3TbapMa3HnTe OCTaTbU IN OCnIpyBa Ib60KO NOuNCTBaHe KaKTo Ha KOuHNuTa, TaKa N Ha KoΦata.

JIIO6HMM
Baunr Airfryer BkIouBa cyHKnra 3a 3ana3BaHe Ha IIO6mN HAcTpoKn 3a 6bp3 DocTbN Do npednoHTaHnte OT BaC HAcTpoKn.
- 3aДаиTeЖeлаHaTa TemпepaТуpa И Врeme 3a rotBeHe.
- HATNCHETe 3aApbXte 6yToHa 3a JIO6Mn, DOKaTO He ChyeTe 3ByKOB CnHaN - TOBa NOTBbPxJaBa, Ye NaCTPOKaTa e 3ana3eHa.
- 3aДаakTyajn3napaTe JIO6MnTE CN HAcTpoKn, npocTo NOBTOpeTe ROpHnTe CTbKnC HOBnTe HaCTpoKn.
Dncnnne


Pexim Ha nbpjkeHe c Bb3dyx
1 CnoxkeTe KOuHnuaTa B KoΦaTa.
2I06aBeTe cBCTaBKnTe B KOWHnUcaTa H NOCTaBeTe KoΦaTa ObpaTHO BypeJa.
3a6eJexka: Airfryer e noDxOJa 3a npiroTBHe Ha roJMyo pa3Hoo6pa3ne ot npOyKtn. 3a Han-Do6pn pezIaTn BIXTe "Ta6nUcaTa Ha xpaHnTe" 3a npenOpbHTeHNHe KOJIueCTBa N BpeMe 3a npiroTBHe.
3a6eJexka:ИЗбягваiteда npeBuaBaTe npenOpbHTeJIHnTe KOJIueCTBa IINДа ПЛHInTe KОшицаТа Нд ЛИнЯТa "MAX",ТьКATO TOBa MOnxeД a NOBIIRe Ha pe3yIITaTITE OT rotBeHeto.
3 HanbJIHHe pe3epBoapa 3a BOa c npueHCteHa BOda DO HNBOTO MAX.
4 N3BaTe OCHOBaTa Ha pe3epBoapa 3a BOJa OT DoJHaTa CTpaHa Ha ypeJa.

2IobabeTe cbCTaBKeT B KOWHnUcaTa I NOCTaBeTe KoΦaTa ObpaTHO BypeJa.
3a6eJexka: Airfryer e noDxOJa 3a npnroTBHe Ha roJMyo pa3Hoo6pa3ne OT npOyKtn. 3a Han-dO6pn pe3yIaTbN BxKTe "Ta6nua Ha xpaHnte" 3a npenOpbUHTeHNITE KOJIuYeCTBa N BpeMe 3a npnroTBHe.
3a6eJexka:ИЗбЯВаiteДапревшавate npenopbHTeJIHnTe KOLIYeCTBa IINДа ПБЛHInTe KOISHucaTa NaД ЛIHnra "MAX",Ть KaTO TOBa MOneДа NOBInRe Ha pe3yIITaTte OTROTBeHETo.
3 HanbIhHepe3epBoapa 3a BOda c npeuHCTeHa BOda IO HNBOTo MAX.
4 N3BaTeOCHOBAta Ha pe3epBoapa 3a BOJa OT DOJHaTa CTpaHa Ha ypeJa.
5 Φικυραήτe KaṇaKa Na BODHnA pe3epBoap n oocTaBeTe BODHnA pe3epBoap Bbpxy OCHOBaTa.

6 HaTnCHHeTe 6yToHa 3a BKn./u3Kn., 3a Da BKnIOuHTe ypeJa.
7Дokochete6yToHa3anapa,3aJaBJIe3eTeBpeKIMHa rotBeHe Cnapa.

8Дokochete6yToHa3aBpeMeI CneTTOBaN3noJ3BaIte6yToHa 3a yBeJIuHaBaHe NnHaMaJIaBaHe,3aJaN36epeTe JKeJaHOTo BpeMe 3a rotBeHe.

3a6eIexka: PeryInpaHTo Ha TempepaTpaTa e ne3aKTHBnPaHO 3a rOTBeHe c npa.
3a6eJexKa: OcBeH pBHyHOTo n3bupaHe Ha TemnepaTypaTa n BpeMeTo 3a roTBeHe, MoKeTe Da n3bupaTe n OT pa3nUHN PpeBapuTeHNO 3aJaDeHn nporpaMn, Cb3dAdeHn 3a yDo6CTBO n ONTmAmHn pe3yJtATn.
9ДOKOCHTe 6yToHa 3a cTAPr/nay3a,3aДа 3anOuHTe Da rotBnTe.
3a6eJexKa: HЯко npOdyKtn n3nCKBaT pa3KlaUaHe nIи O6pbUaHe Ha
noIobHnHaTo ot BpeMeTo 3a rotBeHe (BnXte "Ta6JIuca Ha xpaHnTe"). 3a da
HaIpaBnTe TOBa:
BHHMaTeJHNO n3BaJeTe KoΦaTa.
- Pa3KlnteTe nIIN o6bPHeTe cBCTaBKnTe HaI TepMOyctOuHbA NOBbpxHOCT.
- NocTaBete KoΦaTa OTHOBo, 3a Ja npOdbJxKIne rOTBeHEno.
3a6eJexKa: 3a da noCTabNTe rTOBeHTo Ha nay3a, HATNCHeTe OTHOBo 6yToHa 3a cTapt/nay3a. HATNCHeTe OTHOBO cbuia 6yToH, 3a da Bb306HOBnTe rTOBeHTo.
3a6eJexka: YpeBbT aBTOMaTHUHO ige cnpe, KOraTO KoHnUcaTa 6bJe n3BaIeHa. FroBeHeTo ige npOblxN aBTOMaTHUHO, CLeE KaTO KoHnUcaTa 6bJe noctabeHa o6paTHo B ypea.
10 Cnei KaTo roTbeHeTo npKIOUH, Ie npO3Byu nCnHaI OT TaMepa. BnMaTeJHo n3DbpNa'Te KoΦata.
BHMaHne: Cnei npoeca Ha rotBeHe KOshncaTa, KoFaTa, BbTpewHnT KOpync HcBCTabKInTe ige ca ropeu. BuHaRn nocTabrae Te KOshncaTa n KoFata Bbpxy TOnIoyctOuHbNa NobbpxHOCT (HaNPmep nocTabka iN cnIKKOHOBa NODIOXKa), KOrato rN N3BaJdaTe OT ypeDa. B 3aBNCmOCT OT BnDa Ha XpaHaTa, OT KOshncaTa MoKe da N3Je3e ropeua napa.
11 N3BaTe crotBeHaTa xpaHa OT KOWHnUaTa.
3a6eJexka: N3nHOTO OINo INn pa3ToneHaTa Ma3HnHa OT cBCTaBKITE Ice c6bepe Ha DbHOTo Ha KoΦaTa.
3a6eJexka: B 3aBnCIMoCT OT BnDa Ha npnroTBHaTa XpaHa, MoKe Da IooKeIaTe Da n3JIeTe n3JIuHOTo MaCNo NnMa3HNHa MekDy napTnIte NnI npEi Da pa3KlAInTe cBbpxKaHneTo. 3a Da HApBaNTe TOBa 6e3OnacHo, NoctaBeTe KoΦaTa Bbpy TePmOyCToUHbNt NobbpxHOCT N HocTe pKaBnU, NOxOJaU 3a cypHa. BHImaTeJHo n3JIeNeTe MaCNo To NnMa3HNHaTata.
Ta6nuaHaXpaHnte3apeKIMcnapa
B Ta6ncaTa no-dolny ca nocouhen npenopbunteHnTe OCHOBn HacptpoKn 3a npiroTBAHe Ha pa3nUHN BINOBe XpaHn.
3a6eJekka
- Посочене Habpoikn ca camo opneHTnpOBbHyn. Iopa n pa3nnyra B npon3xoJa, pa3mepa, fOpMaTaN MapKaTa Ha cbCTabKNe, He MoKe Ja ce rapaHTnpaT ONTImaJIH pe3yJrTaN 3a BCuKn cbCTaBKn.
Korato rotbnte no-rolemn koliuectba (hanpimep kaptofni, ckapnni, nneuken 6yTueta, 3ampa3eHxpaH), pa3knaTeTe, o6bpHeTe nn pa36bkaiTe cbCTabKnTe 2-3 nbTn no BpeMe Ha rotBeHTo, 3a da ce noJyu npabHomepHa TeKctypa n CTeneH Ha n3nnuaHe.
XpaHnteJIHn npOdykTn
Ipechn KapToHnHa ky6yeta
KoJnueCTBo xpaHa
800r/28yHcnn100°C 28-35
Temnepa-typa
Bpeme 3a6eJekka
MNH
| Хра捜teлни
п探测укtn | Колиесъо
храза | Temпера-
тура | Вре'me 3абелжka |
| Цал картоф
(okoно 250 - 300 r/9 - 11
унizens) | 4 бpoя 100°C 50 - 60 | | |
| MINH | |
| Свинску peбра 300 r/11 унizens 100°C 25 - 35 | | |
| MINH | |
| Орizu 320 r/11 унizens 100°C 35 - 40 | | Изposлобaningе на сбд за rotbehende,
надсанер сбд за посени,
силиковоза Таба и Т.H.
Добавete 320 мл вoda в сбда,
като падьржate сьотношеньeto
орizu/вoda e 1:1,2. |
| MINH |
|
| Я'mc/cладьк karтоф
(okoно 100 r/3,5 унizens) | 8бpoя 100°C 50 - 75 | | |
| MINH | |
TOrBHeC npeBapntelNo 3aJaDeHn nporpaMn
To3n ypei pa3nojara c pa3niuHn npedBapnteHNo 3aadeneH nporpaMn 3a roTBeHe, npedHa3NaueHn da yIeChrT npiroTBHeTO Ha xpaHata. BcKa npedBapnteHNO 3aadJeHa npoRpMa e ONTUMN3npaHa 3a KOHKpeTeH BvD XpaHa, KaTO aBTOMaTuHNO 3aJaBA NdeaJHATA TempePaTyPA u BpeMe 3a roTBeHe, 3a da ce noluyat BKyHTaTN C MHNMaJIH YuJIInJ.
1 Do6aBeTe CbCTabKNTe B KOWHnUaTa I NOCTaBeTe KoΦaTa ObpaTHO BypeJa.
3a6eJexka:ИЗбЯВаTeДа npeBnшaBaTe npenOpbHnteKoJIueCTBa IINI DA ПБЛHNTe KOshNcTaHaД ЛиHЯТa "MAX",Ть KaTO TOBa MoKeД a NOBInre Ha pe3yIITaTte OT RotBeHeto.

2 Hatnche6yToHa 3a BKn./n3KKn., 3a Da BKNIOUHTe ypeJa.

3Дokochete 6yToHa 3a nbpXeHe c ropeu Bb3dyx,napa nnn npkxe He C Bb3dyx,3a da Bne3eTe Be dInH OT pexIMTE Ha rotBeHe.
3a6eJexka: YBepeTe ce, ye pe3epBoapbT 3a Boda e nbJeH, KOrato N3NoJI3BaTe pexmnte 3a roTBeHe c npapa nIIN nbpxKeH C Bb3dYx.

4 136epeTe eHa oT npEiBapuTeHnO 3aJaHeHnTe nporpaMn cnopei XpHaTa, KOrTO npuROTBaTe.

5ДOKOCHTe 6byToHa 3a cTapt/nay3a,3aДа 3aNoUHeTe Da RotBNTe.
3a6eJexKa: HЯkon npOdyKtn n3nCKBaT pa3KlaUaHe nIi o6pbUaHe Ha noIobHnHaTa OT BpeMeTo 3a rotBeHe (BnXte "TabuHa Ha xpaHnTe"). 3a da HapabNTe TOBa:
BHHMaTeJIHO n3BaJeTe KoUHnUcaTa.
Pa3KlataTe nIIN o6bPHeTe cBdPkaHneTo HaTepMOycTouNBA NOBbpxHOCT.
- NocTaBeTe KoUHnUaTa O6paTHO, 3a Da npOdbJxNte roTbeHeTo.
3a6eJexka: 3a da noCTaBnTe rotBeHTo Ha nay3a, HATNCHEte OTHOBo 6yToHa 3a cTAP/nay3a. HATNCHEte OTHOBO cbuia 6yTOH, 3a da Bb306HOBnTe OTBEHTo.
3a6eJexka: YpeIbT aBtOMaTHUHO ige cnpe, KOraTO KoHnUaTa 6bJe n3BaHeHa. TOTBeHTo ige npOdbJIxN aBtOMaTHUHO, CNeI KaTO KoHnUaTa 6bJe noCTaBeHa o6paTHo B ypeJa.
6 Cnei KaTo roTBeHeTo npKJIouN, Ie npO3Byu nCnHaI OT TaHMepa. BnMaTeJHo n3DbpNaIte KoΦata.
BHMaHHe: Cnei npoeca Ha rotBeHe KOuHncaTa, KoΦaTa, BbTpewHnT KOpync HcBCTaBknte ige ca ropeu. BuHaHn noctabYte KOuHncaTa n KoΦaTa Bbpxy TOnIOyctOuHbNobpXHOCT (HaNPmEp noCTaBka IIn cNIkoHOBa NOIIOKKa), Korato rN u3BaXdTe OT ypea. B 3aBncMocT OT BnDa Ha XpaHata, OT KoΦaTa MoKe da N3Je3e ropeua napa.

7 N3BaTe crotBeHaTa xpaHa OT KOWHnUaTa.
3a6eJexka:ИЗишOTOОлно Или pa3ToneHaTa Ma3HnHa OT cbCTaBknte Ie ce c6bepe HaDbHOToHa KoΦaTa.
3a6eJexka: B 3aBnCIMoCT OT BnDa Ha npnroTbHaTa XpaHa, MoKe Da nOxKeJaTe Da n3JeTe n3JiNshOTo MaCNo IInMa3HnHa MExdy NapTuDnTe IInI ppei Da pa3KlAte TcBbpxKaHneTo. 3a Da HApPabTe TOBa 6e3OpacHo, NOCTaBeTe KoΦaTa Bbpy TePmOyctOnuBa NOBbPxHOCT N HocTe PbKaBnU, NOxOJaU 3a φypHa. BHImaTeJHo n3JeNeTe MaCNo To IIn Ma3HnHaTa.
Tb6nua c npedBapntelno 3aadeneHn HacTroKn 3a nbpjKeHe c ropeu Bb3dyx
8 N3BaTeI NOUcTeTe KOaTaI KOLHnLaTa.
BHHMaHHe: BnHaHn HocTe TepMoYcToHbN pKbAaU, KOraTo pa6oHTe c ropeaTa KoFa.
3a6eJexka: Ako B KoΦaTa N KoUHnCaTa OCTaHe Ma3HnHa, NOuNCTeTe rN CbC canyHeHa BOda nI npenapat c NOMOuTa Ha r6Ba, CneI KoETo n3PnJaKHeTe OTHOB.
9 NocTaBete KoiHnUcaTa u KoΦaTa o6paTHo B ypeJa.
10 HaTnCHHe 6yToHa 3a cTAP/nay3a, 3a Da 3aNoUHe nPoUcBt Ha rotBeHe.
11 CneI 5 MInHyTn 3ByKOB cInrHaJI NOKa3Ba, Ye n3CyuBaHaHeTo e 3aBbPWeHO.
CbBET: Ppei nIbPbAta ynoTpe6a nn aKO He e n3NoJ3BaHa IblrO BpeMe, npenopbYBaMe Da n3NoJ3BaTe fynKcIyTa "NounCTBaHe cnapa", 3a da nouchnte do6pe cnCTeMaTa 3a cnpkyInpaHe Ha BoJaTa N KaMepaTa 3a rotBeHe.
Премaxван На Накп
Ha BCEKn 20 yaca pa6oTa B pexkIM Ha npa, Ha dinCpIe ABToMaTNoCe IIOYBA mIra HAnOMHHe 3a IpemaxBaHe Ha HAKnPa - TOBa O3Naaba, ye e BpeMe da cTAPtIpaTe nporpaMaTa 3a npemaxBaHe Ha HAKnPa. IporpaMaTa 3a npemaxBaHe Ha HAKnPa NOUcTBa HATpyPnHnBapOBnK OT BODHaTcCTema Ha Airfryer, Koeto cnomara 3a ydbJxKaBaHe Ha HeROBnE kCpIoatauOHeH XNBOT.
1 HaJIeTe 60 mI npenapat 3a npemaxBaHe Ha haknHa Philips CA6700 (npoJaBa ce otJeHNo) B pe3epBoapa 3a BOda.

2 HanbJIHeTe pe3epBoaapa 3a BOJa C npeuNCteHa BOJa Do HNBOTo MAX.
3 Pa36bpkaTe paBHomepHo BOdaTa N npenapata 3a npemaxBaHe Ha HAKIN B pe3epBOapa 3a BOda.
4 N3BaTe OCHOBaTa Ha pe3epBoapa 3a BOJa OT IOnHaTa CTpaHa Ha ypeJa.
IoproToBkn nped ynpotpe6a 956
KopncTeHe Ha anapaToT 956
PexnI M TOTBeHbe co BpeJ BO3nyx 957
Pexim PpxeHbe co napea 960
Pexim Papea 963
TOrBeHbe co OndHaIpeD NoCTaBeHn IporpaMn 966
YncteHe 969
PyTHHcKO YIcTeHe 969
YncTeHe co napea 971
OToTpaHbAbe 6nrop 973
CklaippaBe 977
PeeBaBHe npo6JIemn 977
BaXHo
BHHMaTeJH No npOHTajTe rN OBHe BaxHN HOpMaun nped da ro KopnCTnte anapaTOT n 3aUyBaJTe rN 3a BO NdnHa.
Onachoct
PpeDynppeDyBaHbe
Bo cnyaj ha oWTeTyBaHbe, Ka6eJOT 3a HanojyBaHbe Mopa da ro 3aMeHN KOMpaHnjaT a Philips, Hej3uH cepBucep uN dpyr Nlua co CnUHN KBaIINΦnKauzn 3a da ce n36erHe onaCHOCT.
AnapaTOT npKnyBajTe ro camo BO 3a3emjeH snden lTekep, 3aHTNTeH co 3emjocnojHo pene.
- Cekoraш поверувajte далл прикnyokuOT правино стг Вметhalе boшт ekopot.
- Oboj anapat He e Hamehet 3a ynoTpe6a co HaBopeweH TajMep nIi co 3ace6eH cncTeM 3a daJeunHcKo ynpaByBaHbe.
- ПовшинITE сTo ce ДОпираТ може дa ce Вжeштдодак paбOTn anapatot (cI. 2).
- Oboj anapaT moxe da ro kopnctaT deca noctapn od 8 roDHH n Iuca co orpaHueHN fni3nukn, ceh3OpHn nIi MeHTaJIHn CnOCo6HoCTn IJN Iuca co HeIOCTaTOK Ha NCKyCTBO n 3HaEHe, NOJ yCIOB Da ce nOJ HAD3Op nIi Da IIObJIe yNaTCTBa 3a 6e36eHNO KOpncTeHBe Ha anapaTOT n Da rN pa3bnpaat MOXHIne ONaCHOCTN.
- Deuata He Cmeat da cn irpaat co anapatot.
- YncTeHBe n KOpnsChnUcKO OndpKyBaHbe CmeaT da BpwaT deca noctapn oD 80rOHNn POn HaN3Op Ha BO3paCHO JInCe.
- HemojTe da ro notnnpaTe anapaTOT ha sUd nIIN Ha npytn anapatn. OctaBeTe HajmaIky 15 cm cNo6oJeH npocTOp od 3aHaTa CTpaHa, od DBeTe 6OuHn CTpaHn n HAD anapaTOT. He cTabajTe HnSto Bp3 anapaTOT.
3a BpeMe Ha npxeHbeto CO BpeI BO3dyx, OJ OTBOpIte 3a N3Je3 Ha BO3dyx Ce ocno6oNyBa BpeJa napea. IpxTe rpaTe H paTe H JnCeTo Ha 6e36eHnO pactoJahne OJ napeaTa H OJ OTBOpIte 3a N3Je3 Ha BO3dyx. IcTo Taka, BHIMaBajTe Ha BpeJaT apea H BO3dyXOT KOra Ro BaAnTe caIoT OJ anapaTOT.
- Hnkoraaw He KopncTeTe leechn coctojkn nn xapTuja 3a neuehe BO anapaTOT.
- CklaIpaHBe KOMnnpi: TempepaTypaTa Mopa Ja 6nide cooDbTeHa HaCKlaIpaHaTa copTa KOMnpi mopa Ja 6nide Haid 6^ 3a Ja ce MHNIM3npa pN3IKOT OJ n3IOXeHOCT Ha akpnilamID BO NOIroTBeHaTa XpaHa.
-Бидеви Oоь J Airfryer nma rolemakomopa, HeroBaTa eJekTpnuHa MOKHOCTe rolema. He KopncTeTe dpyrnn MOkHn anapatn Ha nCTO cTpyjHo KOJIO BO nCTO BpeMe (Ha np. anapatn 3a BapeHe BoDa, eJekTpnuHn cKapn i CInuHo).Bo CnpOTnBHO, MoKe Da Ce cnUyn cnrgpHocHNOT pKeHHyBauch BO nHCTaJaunjaTa Ha BaShaTa KyKa Da ce akTubnpa N da rno ppeKHe HanojyBaHbeto BO OBOJ StTEkep.
- Пи Корисье на anapatot Airfryer, Вимаьт e Kora ja OTbopate, 3aTbopate nI npOTpecyBaTe roIemata n TeIka φnoka. Cekoraш paKyBajTe 6e36eHNo 3a da cnpeuHte IIN3raHbe nIi naHaBe, wTO moXe da npEduN3BvKa noBpeDa.
- AnapaToT e npeBnIeH 3a yNoTppe6a npi am6neHTaJIHn TemnepaTyprn nOmeIy 5^ n 40^
- Праздя го вклунITE anapaTOT, повереTe дали наноНт habe徳н ha anapaTOT odroBapа Ha наноНТ ha lokaJIHaTa eJeKtpuHa Мржа.
Ka6eIOT3a HanojyBaHBe npJKeTe ro noJaIeKy oJ Kekn NobpunHn.
- AnapaTOT ynoTpe6yBajTe ro eHCTBeHO 3a HameHnte OnuaH N BO OBA yNaTCTBO 3a da n36erHeTe NoteHunJaHN NOBpeN i KopncTe CaMo opuHaHn DoaToCuO nd Philips.
He octabajTe anapaTOT da pa60Tu 6e3 Haizop.
- TaBaTa, KOpNaTa n IdoaToCuIte cTaBeHn BO KOMopaTa 3a rOtBeHbe cTaHyBaat BpeJI N Bo TeKOT Ha n I NO KOpIcTeHbETo Ha aIapaTOT, ceKOraW paKyBajTe co HNB BHIMaTeJIHO.
- Ппд пьото користе Ha anapatOT TeMeJHo nCunCTeTe rN DeJIOBNTe ITO doaaraT Bo DoOpnP co XpaHaTa. NOrJIeDHeTe rN yNaTcTBaTa BO npnpauHKnOT.
He cTabajte rnt TaBata n Kopnata Ha Ta6nata co Kopncnuknot nHTepcejc 6nndejkmoKe da naHaTn da npedn3BnkaaT nobpeda.
Kora rotBnTe xpaHa Ha napea, BnImaBajTe Kora ja n3BneKyBaTe TaBaTa 3a da cnpeuHte n3ropeHnci Ond napeata wTo n3JeYBa.
- Hemojte da ro hacouybaTe OTBOPOT 3a napea Ha anapaTOT KOH uTekepot.
BHMaHne
- Oboj anapa t e Hamehet cmo 3a ctaHapdHa ynoTpe6a BO domaKnHCTBa. He e Hamehet 3a ynoTpe6a BO onKpyXyBaHa KaKO uTo ce KyJn 3a nepcoHaB Bo npoDaBHnC, KaHcEJaPn, fApMn nnI npuPa6OTHn ONkpyXyBaHa. He e Hamehet HHTy 3a ynoTpe6a OD KJIneHTN BO XOTeJI, MOTeJI, yroCTnteJCKn Objekti Kon Hyaat HokeBaHe i NojaDOK n Dpyr BNIOBn CmeTyBaHe.
- Cekoraш Исклунува对接 go anapatot od haonojyBaHbeto ako ro octabaTe 6e3 NaДзор, Кади пeding склonyваы, packlonyBaHbe, cklaДиранe ИлиЧИСТЕНБ.
- NocTaBete ro anapaTOT Ha xOpu3OHTaJIHa, paMHa n Cta6nJHa NOBpUHa.
Ako anapaTOT ce Kopructn HennpaBnHIO, aKO ce Kopructn 3a npocecnoHaHn nnNoIynpocceCNOHaHNu celen nn aKO He ce Kopructn BO CoIaCHOCT CO yNaTCTBaTBO npapauHKOT 3a Kopruchu, rapaunjata Ke 6nde noHHTeHa n Philips Hema da npuΦaTN OndroBOPHOCT 3a HactaHaTaTa 7TeTa.
Ako e noTpe6Ha npOBepka nIi nonpaBka Ha anapaToT, cekoraHocTe ro BO OBnacte H cepBvceH ceHTap Ha Philips. He obuYbajte ce camn da ro nonpaBaTe anapaToT, BO cnpoTnBHO rapaHunjata Ke 6nne noHnWTeHa.
-
Cekoraш Иckлувajte ro anapaTOT onштЕр по користelveTo.
-
Octabete ro anapatot da ce olaadi npnbjxno 30 mnhytn ppei da pakybate co Hero nIa da ro ynctnte.
BnImabajTe coctojknte noIrotbeHn BO OBOj anapaT da 6uIaT 3naTHoxoJTN, a He TemHn nn KafoHn.
- OTCpaHete rN 3aOpeHnTe oCTaTOuN. He npXeTe CBexN KOMnIPn Ha TemnepaTpya nOrJema oD 180°C (co cI eN coZdaBaHeTo Ha akPnIaMnI da ce CBeJe Ha MInHmym).
- Cekoraш поверува对接дали xpaHaTa e цelocho Исторгеля BO anapatot Airfryer.
- NorpvnkeTe ce cekoraaДа nMaTe KOHTpOla NaI BaUnOT Airfryer.
Kora npknte mpcna xpaHa, anapaToT Airfryer Moxe da nCnyuSTa dIM.
- Hemojte da ro npntnckate konyeTo 3a otnyuTaHe Ha KopnaTa Dokeka ja Tpecete n NOMeCTyBaTe TaBAta.
- Kora ke 3acBeten nkoHaTa 3a oTCTpaHyBaHBe 6nrop, npoJOnjKeTe co npocot Ha oTCTpaHyBaHBe 6nrop.
BnImaBajTe kora ja nctypate 3rotBeHaTa xpaHa N BnImaBajTe da He nCpAnHaTdoaTouIte.
- Пoctabete ro ypeIoT taKa шTo 3aДнаТа CTpaHa Ke 6иDE oДале He Na HajmaIky 15 cm od snIoT, a npeДнaTа CTpaHa 2 cm od pa6OT Ha pa6OTHa naOBpUHnHa.ИСTO TaKa, nOprnKeTe ce OTBopoT 3a ИЗЛe3 Ha BO3dYx Дa He e HacOueH KOH wTeKep.
He noctabvajte ro anapatot Airfryer Bo 6n3nHa ha npyr anapat 3a roTBeHbe, KyjHcN sI nd nI npd KjHcN opMaHn 6nJeJn napeaTa moKe da KOHNHeH3npa n da ce cIee no nobpwnHnte.
- Приноюнуютpe6a, мора да Има добра вентидациja okoly npoIN3BODOT.
- Ako napeata ce akymylnpa BO nlln OKOly NOBpHnHaTa Ha oTbopOT 3a napea, n36pnIeTe ja co Meka n cyBa Kpna.
- Ako Ima KoHdEn3npaHa Boda Ha npKnyOKOT, Bn npenopayBaMe da ja npncnocobte noJox6ata Ha anapaTOT nIa Ro Kopnstte KaNaeTo 3a npab Ha npKnyOKOT 3a da n36erHeTe akymyInpaHBe Ha KOHdEn3aunja BO npNKlyOuNTe.
- Oboj anapaT ce nCnpaCyBa co KpaTOK Ka6eJ 3a HanojyBaHbe 3a da ce HaMaJI np3IKOT od 3anIeTKyBaHbe IJI IN CONHyBaHbe 7TO MOKe Ja ce CJIyUc co noJOnr Ka6eJ 3a HanojyBaHbe.
-
Прдлжntelни Кбл може да се корпстат ДOKOLКу CTe BнмATEHn 3a Врeme Ha ynoTppe6ata.ДOKOLky KOPNCTte ррдлжntelни Ka6eJ:
-
Oзначehа та щелктуна мokhoeст ha kaбелOT мора дa бидe ncta co mokhoeста ha anapaTOT.
- Ka6eJOT Tpe6a Da 6nIe NocTaBeH TaKa 7to HeMa Da BnCn OJ pa6ot Ha
ПОЛИСА ИЛМа Каде 7TO DeIaT MaOKe Дa Г NOBJIeYaT IINДa ce
CONHaT OJ Hero.
-
IpoIOnJxIeJIHHoT Ka6eI Tpe6a Da 6uJe 3a3emje Ka6eI co 3 XnIc.
-
Oboj anapaT mMa nOJapn3IpaH npKnyoK (eHNOT KOHTaKT e NOIupOK oD npyroT). 3a da ce HamaJI pN3IKOT od cTpyen ydap, oBOJ npKnyoK e HameHet 3a BMeTHyBaHe BO nOJapn3IpaH wTekep caMo Ha eJeH haun. Ako npKnyokOT He CE BMeTHyBa ueLoCHO BO wTekepOT, CBpteTe ro npKnyokOT o6paTHO. Ako ce yuTe He CE BMeTHyBa, KOHTaTnpajTe co KBaIIuΦnkyBaH eJeKtpuap. He obuNyBajTe ce da rO moIΦnucipate npKnyokOT Ha KaKOB 6nlo HaunH.
3a da n36eHHeTe OwTeTyBaHBe Ha anapaTOT, HemojTe Da KOpNCHTe aJkaJIHn cpeIcTbA 3a YncTeHbe. HameTo Toa, NcNcTeTe Co MeKa Kpna n 6laI neTeprHt.
- 3a Да ИЗБERHETE OWHTeYBaHBe Ha anapaTOT, HEmoJTe Дa KOpNCTHTe TВрДа ВОДa. HAmecTo Toa, KOpNCTeTe npeuNCTeHa BODa 3a napea, npxeHbe co napea и OTCTpaHyBaHBe 6nroP.
- HeMoJTe Da ro hAcOyBaTe CtydEnHnot Bo3DyX OJ BeHTnlaTOpNte nn KInMaTn3epNte KOH OTBOpOT 3a N3Je3 Ha Bo3DyX Ha anapaTOT Airfryer.
- Be moJIime KOpIcTeTe cAmo CpeIcTBo 3a OTCTpaHyBaHbe 6nroop od Philips. HnkOraSh HeMoJTe Da KOpIcTHe CpeIcTBO 3a OTCTpaHyBaHbe 6nroop Ha 6a3a Ha cyIphpHa KInCeJIiHa, XInDpoXIOpHa KInCeJIiHa, CyIΦamNHa IIn OuTeHa KInCeJIiHa (OueT) 6nJeKIMoKe Da ro OwTeTN CnCTeMOT 3a BODa Ha MaunHaTa I Da He Ro OTCTpaHb6nroPOT DOKpaj. Ako He ro KopIcTHe CpeIcTBOTO 3a OTCTpaHyBaHbe 6nroP op Philips, Ke ce noHHTn BaWata rapaHcUJa. Ako He ro OTCTpaHyBaTe 6nroPOT od anapatot, Ke ce noHHTn BaWata rapaHcUJa.
- Повшинота на ггейнот селемпглдяв ТОПЛИНА NO KOPINCTeHbTeO.
EleektpomarHeTHn noHb(a (EMF)
Oboj anapaT e ycorlaceH co BaxeKnte cTaHapn i npOnnci wTo ce odHeCyBaat Ha n3IoxKeHOCTa Ha eJeKTpOMarHeTHN NOINbA.
A B T O M a T C K O n c k l y u y b a h e
Oboj anapaT mma yHKcuija 3a aBTOMaTcKO nCKJyUbaHe. Ako He npITnCShe Te KOJIe BO pOK oD 20 MInHyTu, anapaTOT aBTOMaTcKN Ke ce nCKJyuN. 3a paHNo nCKJyUbaHe Ha aIAPAToT, npITnCSheTe ro KOnYeTo 3a BKJyUbaHe/INCKJyUbaHe.
PeuzklnpaHbe

- Oboj cIIM60J O3NaUyBa DeKa eJIeKTpNHTe IpnI3BOJn He Cmee Da ce p aT co 6bHnOT OTnO JOMaKnHCTBaTa.
- Пиджувajte ce до заковITE BO BaшаТа 3emja 3a odдeелно собире на щелктунITE поиЗВODи.
Tapaunja n nodpshka
Versuni Hyni DBe roDnHa rapaHunja no KynyBaHeTo Ha OBOJ npOn3BOD. Taa rapaHunja He e BaxeUka DoKoLky DeΦeKTOT ce DoJxN Ha HenpaBnHo KopncTeHbe Nn loOo OndjxuBaHe. HsaTa rapaHunja He r n OrpaHnuBa BaHnte 3aKOHKn Ppaba KaKo NotpoUBya. 3a NobeKe INΦopMaunn nn 3a
akTbBpaBe Ha rapaHcuiJaTa, nocTeTe ja HauaTa Be6-ctpaHnca www.home.id/warranty.
HdkaTop deKa Hema Boda
CBeTI Kora BO pe3epBOaPOT Hema IOBOJHO BOJa.

HnkaTOp 3a OTCpaHyBaHbe 6nroP
CBeTI KOra OBO3MOKeHnTe ΦyHKuN co napea ce KopncTeHN 20 yaca.
KopncTeHbe Ha anapaTOT
Oboj anapaT co cyHKunja 3a napea Hyn Tprn nobKeHameHcN peKIMn Ha roTBeHbe, dN3ajHnpaHn 3a shnpok cneKTap Ha noTppe6n 3a roTBeHbe.
PexnMOT TOrBeHe co BpeB03dyx OBO3MOxyBa KpKabN pe3yIaTn Co MInHmJIHa KOJIuHHa MaCNo, COBpuEn 3a 3aKyCKn 3a OMJIeHHTe npXeHN jaJeHa.
- PexnMOT PpXeBe co napea KOM6Hnpa BpeI Bo3dyx I napea 3a da ja 3aDpxN BnaRaTa, a npToa NOCTnHyBajKn 3NaTeH n3rJeI - nDeaJIeH 3a DeInKaTHa XpaHa KaKo DomaWeH Je6 n p6a.
PexnMOT Papea KopnCTn nCTa napea 3a HexHo roTBeHe Ha COctoJKeTe, 3aCyByBajKn rXpaHnBnTe MaTePNn N TeKcTypaTa, ITO rnpaBN CObpWeH 3a 3eJeHcyk N Mopcka XpHa.
PexnM TOTBeHbe co BpeJ BO3dYx
1 CtabeTe ja Kopnata BO TaBaTa.

2 DoaTe rncocTojKeTe BO KOpNaTa n BpaTe ja TaBaTa BO anapaTOT.
3a6eileka: AnapaTOT Airfryer Moke da rotbn rolem 6poj coctojkn. 3a Hajdo6pn pe3yIpaTn, norgJeHHe Bo „TabeJa 3a xpaHa" 3a npenopauHn KOJIuHHN I BpeMHbHa Ha rotBeHbe.
3a6eileka: He haMnHyBaJTe rI npEIOXeHnte KOINHHn He noNHeTe ja Kopnata HaI INHjata MAX" 6nJeKn Toa MoKe da BInJae Ha nepOpMaHCITE Ha rotBeHbeto.

3Допретe ro konчeto 3a BknyuBaHbe/NcknyuBaHbe 3a da ro BknyuHte anapaTOT.
4 DonpeTe ro KonyeTo 3a rotBeHe co BpeI BO3dyx 3a Da Bne3eTe BO peXIMOT RotBeHe co BpeI BO3dyx.
5 Donpete ro konyeTo TemnepaTypa, a noToa KopncTeTe ro konyeTo 3rolemn nn Hamaan 3a da ja n36epTe cakaHata tempeTpya Ha roTBeHe.
6Допетe ro konteTo BpeMe, a noToa KopncTeTe ro konteTo 3roJeMu HamaN 3a da ro n36epete cakaHOTo BpeMe Ha rotBeHbe.
3a6eileka: Nokpaj paHOTo n3bnpaHe Ha TemnepaTypaTa n BpeMeTo Ha rotBeHe, MoKe Da n36peTe n oD oHaPpeNocTaBeHtPe nporpaMn HameHeTn 3a npaKTuHcT n ONTMaJIHn pe3yJITaTn.

7 PnTtncHeTe ro konueTo 3anouHn/nay3npaj 3a da ro 3anoyHeTe npoecot Ha rotBeHbe.
3a6eileka: Hekon coctojkn Tpe6a da ce npotpecat nll ppeBpTaT ha noIOBnHa od BpeMeTo Ha roTBeHe (BnTe „Ta6ena 3a xpaHa"). 3a da ro Hapabnte Oba:
BHHMaTeJHNO n3BneYe taTabaTa.
- Прпсесе плпрьтete Г соctojknte Брз NOBpshHa OTnopHa Ha TOnПина.
BpaTeJe ja TaBaTa BO anapaTOT 3a da npoDoJnxTe co roTBeHe.
3a6eileka: 3a da ro nay3npate npoecot ha rotBeHe, npTnCHete ro KonHTO 3anouHn/nay3npaj. 3a da npoJokte co rotBeHbeto, npTnCHete ro NOBTOPOKONHTO.
3a6eileka: AnapaTOT aBtOMaTcKNe Ke ce nay3npa no OTCTpaHyBaHb e Ha TaBata. TOrBeHeTo aBtOMaTcKNe Ke npOIoJxN Kora Ke ja BpaTnte TaBata BO anapaTOT.
8 Otkako Ke 3aBpHn rOtBeHbeto, Ke ce yye sBOHcTo Ha TajmepoT. BHMaTeHNO n3BneYe ja TaBaTa.
BHMaHHe: Np npocot Ha rotBeHe, Kopnata, TaBaTa, BHaTpeHocTa n cocTojKHe ce Jeku. Cekoraaw CTabajTe rN Kopnata N TabaTa Bp3 NOBpHnHa OTnpHa Ha TOnJInHa (Ha np. NoIora nnCNIkoHcKa noIora) Kora rN OTCpaHyBaTe oD anapatOT. Bo 3aBnCHoCT od BnDoT Ha XpaHAt, OD TaBaTa MoKe da N3Je3e Napea.

9 N3BaJeTe ja 3roTbeHaTa xpaHa oJ Kopnata.
3a6eIeIka: BnOokot macno nIIM macta od coctojknte ke ce co6epe Ha dHOTo OD Tabata.
3a6eileka: Bp3 ochoba Ha TINOT Ha xpaHata wTO ce roTbn, moKe6n Ke cakate Da rO nCTypuTe BwOOKOT MacNo Nm MaCT MeIy pa3JnHHTe KOJIuHHN nn IpeD da ja npotpecTe coOpxHATA. 3a 6e36eHNO da rO HAnpaBNTe ToA, CTaBeTe ja Tabata Ha NOBpuHa OTnpHa Ha TOnJIHa n Hocete 3aWtTHn paKaBnU. BHMaTeHNO nCTypeTe rO macIoTO nn MaCTa.
Ta6eHa 3a xpaHa 3a peKIMOT IOTBeHbe co BpeI Bo3dyx
IOnyHabeHeHaTa Ta6ena 0e36eDyBa OCHOBn NOCTaBKn 3a NODROByBaHepa3nUHN BnOBN XpaHa.
3a6eileka
HabeHeHTe NoCTaBKe Ce HameHeTn Da 6nDaT HAcOKn. Iopadn pa3NkTe Bo nOTEKnTo, rOJIemHaTa, fOpMaTa N 6peHDoT Ha CoCtOjKNe, He MoKe Da ce rapaHTnpaat ONTmamHn pe3yIaTn 3a Cnte CoCtOjKn.
Kora roTBnTe nOroJIemn KOJIuHnHa XpaHa (Ha np., nompnt, wkamn, KOaHn, 3aMp3HaTn 3akcKn), npotpeceTe rN, 3aBpTeTe rN nn npomeaJTe rN coCTojknte 2-3 naTn 3a BpeMe Ha rotBeHeTo 3a da no6neTe DocJeHa TEKCTypa n CTenEn Ha 3ROTBeHOCT.
PpexpaH6eHn npOn3BODn
| Замрзати п的对象ы
pondички | 800 g 200 °C 15 min. Празеце, празеце я...
и змеша ще 1-2 ratи р...
�отve...)
6 песавици 200 °C 16-25 | МИH. | Празеце, празеце я...
и змеша ще 1-2 ratи р...
�отve...)
MIM. |
| Хамбуpresр
(приблжно 150 g/5 oz) |
| Ралат od месо 1400 g 150 °C 65-70 | |
| Месни котлети бez
КOST
(приблжно 190 g/7 oz) | 4 котлети 200 °C 16-25 | MIM. | Празеце, празеце я...
и змеша ще 1-2 ratи р...
�отve...)
MIM. |
| Палешки гади
(приблжно 160 g/6 oz) | 5 пароча 180 °C 20-28 | MIM. | Празеце, празеце я...
и змеша ще 1-2 ratи р...
�отve...)
MIM. |
| ЦILA кокшka
(1200 g/42 oz) | 1 паре 180 °C 50-60 | MIM. | Празеце, празеце я...
и змеша ще 1 ratи р...
�отve...)
MIM. |
Pexim Ppxehe co napea
9 BpaTeTe rN KOpNaTa u TaBaTa BO anapaTOT.
13 BpaTeTe rN KopNaTa u TaBaTa BO anapaTOT.
14 Питусhte Г кончето 3аочн/naузпaj 3a д пюджпс co OTСТРанУВаНБETO 6ИROP.
15 Ipouecot Ha otctpaHbBe Ha 6nrop 3aBpyBa Kora nobTopHo Ke cnuyhHeTe 3ByeH CNrHaI Od anapaTOT.
16 N3BneyeTe rN KOpnaTa n TaBaTa.
17 NcnpaKHeTe r KOpNaTa, TaBaTa n pe3epBoapOT 3a BOda NOd Mla3 BOda.
Baxho: HnkoraH hemoJte da Kopncntte TeuHocT 3a OTcTaHbBe 6nrop Ha 6a3a Ha cyIphpa Kncelina, XndpoXloPHa Kncelina, cyIphamNuHa nn OueTHa Kncelina (ouet) 6ndejK moKe da ro oUTeT a CNTeMOT 3a B0da Ha anapaTOT n da He ro OTcPaHAT 6nropot DOKpaj.
3a6eileka: Ako cheTo KopnCTnte TBpda Boda, Moxe da Tpe6a noyeTo da ro OTOCTpaHyBaTe 6nropot oJ ypeDoT.
Складиразье
1 Ncknyte ro anapatot od stkepe n octaBeTe ro da ce oJaN.
2 PpOBepeTe daIIN cIe DeIOBn ce YIcTn n cyBn npEa Ra CkJaInpaTe. 3a6eJewka
Kora ro hocnte anapatot Airfryer, dxkete ro xopn3oHTaJHo n dpkete ro caTOT od npedHaTa cTpaHa 3a da cnpeHte cIyajHo HabayBaHe i NOTeHuiJaHNO OwTeYBaHe Ha deIOBHe.
- Cekoraaw npobepybajte daJIOn OCTpaHnBnTe deJIOBN Ha Airfryer ce npuBpcTeHN nped da ro Hocnte n/nn cKJaadnpate.
PeeBaHbe npo6JIeMn
Bo Oba norgaBe ce onnshaHn HajyeCTne npo6Jemn Co KOn MoKe Da Ce COOHTe npn KopncTeHe Ha anapaTOT. Ako He moKeTe Da ro peWnte npo6Jemot Co NOMoU Ha INOpMaunTe HabeJeHn NOIoY, Nocetete ja Be6-ctpaHuaTa www.home.id/support 3a Da npohajTe JnCTa Ha HajyeCTn PpaHaHa nn KOHTaKTnpajTe CO ueHTapOT 3a KopncnUka NoDpUka BO BaHaTa 3eMja.
PpO6JIeM MoXHa IpruHnHa PeSeHne
HaBopeuHocTa Ha anapaTOT ce BxEHTyBa 3a BpeMe Ha ynotpe6ata.
ToPnHaTa OJ BHaTpeHocTa ce WnpKoH HAdBopeWHHTe SIOBON.
Toa e HopmaJHo. Cnte nobpunHn To Tpe6a da rN donpeTe 3a BpeMe Ha ynotpe6ata Hema da 6ndat TOnnHa dOnnp.
PpO6JIeM MoXHa pIpyHnHa PeSeHne
| TaBata, koprataи винатrostа
нада anapatot секогаше
Вжштувахт кога anapatot e
Вклунен 3a ду моче xpa haata
соordьетно ду се згови. Ови
деволи ce cekoraш врели на
дорир. |
| Ако anapatot e вклунен поюг
Вразе, Неко далови сда
Вразе на дорир. Ови далови на
уразот ce obelжени co
следна укова: |
| Ако Imate позддеса
Одраведи почимни ce
Вжштувахт и не Gren doportate,
anapatot e 6e3бдан 3a
уnotpe6a. |
| Домашиnotnomфprит He mii
излгува сокто оочував. | He ste ja koprastelen coodbetnhata
сорта на komпир. | За за doбиerte наюбри
pezutatiи, корstete с breast
брашег'tКOMпир. Ако тpe6а д
ги сддрате компріnte,
неможte ду Гуваху BO лади
сразина с好吗, на ример, BO
фриждер. Изberete компир
набе пakувае пшува.deka ce
погонни зд поже. |
| Колочинatable на состojkn BO
kopnatа e пergolem. | Следе Гу уразства в ова
уразстBO корstete Ду д
поготвite домашенnomфprit. |
| Одраведи вдови состojkn
trpe6а ду сротrecat на
паловиha od bveMeTo Na
rotbebe. | Следе Гу уразства в ова
уразстBO корstete Ду д
поготвite домашennomфprit. |
| Anapatot Airfryer He se BklnuyBa. Anapatot He e priokluyen. П探测е Дали priokluyokot e
coodbetno Bklnueyн BO smdnnoT
шт ekр. |
| Вошт ekроте с priokluyен
пoveke anapatи. | Anapatot Airfryer Ima rolema
мokhoe.T.Пробныго Вдуг
шт ekр и пrobepete Г
OCINGYBUHITE. |
| He ro doportve konqueto 3a
Вклухваыe/нckлухваыe. | Дорретe Го калутeto 3a
Вклухваыe/нckлухваыe 3a
ду Го Bklnyute anapatot. |
ПрбLEM Можна пчина Peшени
| 3a6eTeXvBam lypeHe ha
oJpeDeHn MeCTa BO
BHaTpeShnOCTa ha mojoT Airfryer. | Bo tabata Ha Airfryer моve за ce
nojabat мали дамки поади
слчajни дорирни гребе
на поршнATA (ha primeper, пу
чисье с огруби щалати за
чисье и/и пу вметнув;
на корпata). | Можete на спчepite
оштetyва;
слчstы;
Ако ja BMeTne;
Корпата по
агол, незин;
страч;
дел
може на удири BO smIDOT ha tabata
штоPrediЗВИКУВа(Lуpe;
намларч;
пл;
пс;
пс;
Би;
Би;
Би;
Би;
Би;
Би;
Би;
Би;
Би;
Би;
Би;
Би;
Би;
Би;
Би;
Би;
Би;
Би;
Би;
Би;
Би;
Би;
Би;
Би;
Би;
Би;
Би;
Би;
Би;
Би;
Би;
Би;
Би;
Би
Би;
Би;
Би;
Би;
Би;
Би;
Би;
Би;
Би;
Би;
Би;
Би;
Би;
Би;
Би;
Би;
Би;
Би;
Би;
Би;
Би;
Би;
Би;
Би;
Би;
Би;
Би;
Би;
Би;
Би;
Би;
Би;
Би;
B
Б;
Б;
Б;
Б;
Б;
Б;
Б;
Б;
Б;
Б;
Б;
Б;
Б;
Б;
Б;
Б;
Б;
Б;
Б;
Б;
Б;
Б;
Б;
Б;
Б;
Б;
Б;
Б;
Б;
Б;
Б;
Б;
Б;
Б;
Б;
Б;
Б;
Б;
Б;
Б;
Б;
Б;
Б;
Б;
Б;
Б;
Б;
Б;
Б;
Б;
Б
Б;
Б;
Б;
Б;
Б;
Б;
Б;
Б;
Б;
Б;
Б;
Б;
Б;
Б;
Б;
Б;
Б;
Б;
Б;
Б;
Б;
Б;
Б;
Б;
Б;
Б;
Б;
Б;
Б;
Б;
Б;
Б;
Б;
Б;
Б;
Б;
Б;
Б;
Б;
Б;
Б;
Б;
Б;
Б;
Б;
Б;
Б;
Б;
Б;
B
B
B
B
B
B
B
B
B
B
B
B
B
B
B
B
B
B
B
B
B
B
B
B
B
B
B
B
B
B
B
B
B
B
B
B
B
B
B
B
B
B
B
B
B
B
B
B
B
B
B | |
| Од anapatot ИЗлergув BAБел chad. ГотВITE Масни состоЖК. Вимателно Истype:
ВИЗОКOT МасLO Или МASTN OД.
Тава T и розлж;
Сл変:
Тава се ушte сordж;
OCTaToU OД,
уnotpe6a. | Белnot чад в_PREдзВИКан od
Mashinete OCTaToU OД
ЗагваAT BO tabata. Секогш
чисье ГИ tabata и корпata
temelino NO cekoja уnotpe6a. | | |
| ЛобнITE trpoшки илсмесата за
панIPAЯ;
пс;
хранata. | СпнITE чесч;
ODсмесата за
панIPAя;
пс;
пс;
BOZdYxOT Може DAPredi3ВИКаatt BO
BOZdYxOT Може DAPredi3ВИKаatt
бел чад. Zubrcsto рпитс;
п;
п;
п;
п;
п;
п;
п;
п;
п;
п;
п;
п;
п;
п;
п;
п;
п;
п;
п;
п;
п;
п;
п;
п;
п;
п;
п;
п;
п;
п;
п;
п;
п;
п;
п;
п;
п;
п;
п;
п;
п;
п;
п;
п;
п;
п;
п;
п;
п;
п;
Б;
Б;
B
B
B
B
B
B
B
B
B
B
B
B
B
B
B
B
B
B
B
B
B
B
B
B
B
B
B
B
B
B
B
B
B
B
B
B
B
B
B
B
B
B
B
B
B
B
B
C
B
B
B
B
B
B
B
B
B
B
B
B
B
B
B
B
B
B
B
B
B
B
B
B
B
B
B
B
B
B
B
B
B
B
B
B
B
B
B
B
B
B
B
B
B
B
B
B
B
C
B
B | Sotyte:
ВИЗОКOT МасLO Или МASTN OД.
Тава Т и розлж;
Сл変:
Тава се ушte сordж;
ОCTaToU OД,
уnotpe6a. |
| Марinasata, techoustite ил
сokobite OД месOT посkaatt BO
Hacobarite Machotni. | Соверete ro BИЗОКOT techousti
ODханata co тanka;
п;
Сы;
Б;
Сы; | |
| Ekpanot ha AirfryerПрikakzyba
,E1". | Можебугчувate Vaшиot
Airfryer Na symemhory stydeno
mecto. | Ако roЧувate Vaшиot уreed ha
ниска amб ueNTanHa
TempepaTypa, поЕа;
п;
Загquee Na co6ha TempepaTypa
нajмалку 15 minhytп р ded,
Повторно до рп;
Котaktrap;
Котaktrap;
Котaktrap;
Котaktrap;
Котaktrap;
Котaktrap;
Котaktrap;
Котaktrap;
Котaktrap; | |
IoproTOBka K nCnoJIb3OBAHnIO 994
IcnoJb3ObaHne npi6opa 995
Pexim aeporpnila 995
Pexim "Ha napy + A3porpnilb" 998
Pexim "IapOBapka" 1001
PnpuroToBLeHne c npeducTaHOBkAmn 1004
OuNTka 1008
PpoceDpya ouncTk 1008
Ouinstka napom 1009
YdaJIeHneHaKnPi 1012
XpaHHeHne 1015
HOpMaunnoKoJorNCHou nIa cJeNyUOx moJeIe: NA540,NA541,NA543, NA547
Onncahne CmB0J 3NaueHHe BloK
Khonka npuroTOBneHna napy
HaKmTe, TTo6bHaayatb 6Oba6Tky nHrpeJeHTOB napom Iy paBHomepHoro n 6epeXHO nprirotOBnHeHry.

KhONKn yBeJIuYeHn/ymeHbSeHn
HaKmnte, YTo6bI n3MeHnTb TeMnepaTypy n BpeMa nprirotOBJIeHn.

Khonka BbI6opa TeMnepeaTpybl
HaXmnte, yTo6bI OTKpbITb peXIM HacTpoiKN Tempepatpybl.

Khonka HactpoynBpeMeHH
HaKmTe, Yo6bl OTkpblbpeXIM HacTpoKn BpeMeHn.
PpeyctaHOBLeHHbI npoRpaMMbl

3amopoxeHHbI KapToΦeJIb φpI

IcnoJb3yIte 3Tu npedyctaHOBky IJIЯ npiroTOBJeHnI 3amOpOxeHHoro KapToΦeJIa Fpn, KapToΦeJIa aIdaxo IJIx xa6payHa Do 30JOTnCTOn KopoQKn.

CbeKn KapToΦeJIb
IcnoJb3yIte 3Ty npeducTaHOBky dny npnroTOBHeNkapToΦeJIΦpni nn anaxo n3 CBexero KapToΦeJI.

OT6NBHbIe
IcnoJb3ynte 3Ty npedyctaHOBky IJn npnroTOBneHnA CTeyKa Bbl6paHHoN npoxkapKn C nJealbHOK oPOO KoN.

3aBtpak
IcnoJb3yIte 3Ty npedyctaHOBky dJa 6bICTpOTo
IprnroTOBJIeHn c6aIahCnpoBaHHOrO 3aBtpaKa C TOCTAMN I
YIaMn BCMrTKy.

MaΦΦnHbI
IcnoJb3ynte 3Ty npedcytaHOBky Inna IneaJIbHOrOBbInekAHNn PbIHbIX MaΦΦnHOB.

KypNHbIE HOxKn
NcnoJb3yIte 3Ty npedcyTaHOBky IJI npnroTOBneHnKypnHbIX HOKe C xpyctaue KOpOyKo.

OBOUHnAcmecb
NcnoJb3yIte 3Ty npeducTaHOBky IJa paBHomepHOrO 6xapnBaHH OBOUe C MHNmMOM Macna.

Pb16a
IcnoJb3ynte 3Ty npeducTaHOBky dny 6epexHoro npnroTOBHeHn py6HOrO fHne CcoxpaHeHem BnaHn HekHO TeKCTypbl.

PnBmEnH
IcnoJb3yInTe 3Tu npeducTaHOBky IJa paBHomepHoro npiroTOBHeHnpeMbMeHc NdeaJIbHO TeKCTypoT TeCTa HauHHKn.
DOnoHnTeIbHbIe yHKcnn


PonepkaHne TempeaTpybI
BbMOKeTe BkIIOuHTb peXIM NOJIePkaHnA TeMpepaTpybl BJIIO6oe Bpem — Do n BO BpeMa rOTOBKn — HaxaB KHOJKy IOndepxahanE TempepaTpybl.
KordaФункцяподерханя TempepaTypbI aKTINbHa, npnbop abTomatueckn nepeiDeT B pexm noDorpeBa no OKOHuaHn npiroTOBJIeHn.

HanomnHaHne o Heo6xoDmOCTn BCTpXnBaHna
Ha 3ToM MoDJI N DOCTYHbI HAnOMnHaHnO BCTpXnBaHn.
IJa ONTmAlhBbIX pe3yJbTaTOB BCTpXnHTe IIN
IpeBepHnTe INHrpeJeHneHTbI cpa3y Je NOcNe TORo, KaK
Ipo3ByuHT CnHaN ONOBueHn.
Haxmte KhoNky HAnOMHaHnO BCTpaxBaHnn, yTo6bl BKIOHTb NIN BbIKIOHTb ONoBEuHn. EcNI BKIOHTb, Bbl YcIbIHTe 3ByKOBoCnHaJ, a KHOJa 6yJeT MraTb, ONOBeua O Heo6xOIMOCIn BCTpXHyTb NIN nepeBepHyTb eNy BO Bpem nprirotobHeHn dIg 6OJIe paBHomepHoro pe3yIbTaTata.

CBeTla
BkIoueHne/BbIKIOUeHne NOcCBETKn B KaMepe InpuROBHeHn.

OuicKa napom
300000000000000000000000000000000000000000000000000000000000000000000

Favorite (N36paHHoe)
Ha Baewem aOporpnlne ectb yHKuia CoxpaHnna 36paHHoro dIa 6bictporo doctyna KJIIOmbIM HAcTpoiKaM.
- 3aДaI Te BpeM n TempepaTy pnproToBJeHn.
- Haxmnte u ydepxkBaTe KHONky N36paHHoe, noka He ycblinte 3ByKOBoCnHaJ - 3TO O3Haayet, YTO HaCTpOJaCOxpaHeHa.
-утобии3MeHNTb n36paHHble napaMeTpbl, NOBTOpTe DeiCTBnB Bblse, 3aDaB HOBbl HaCTpoKN.
Диспел.


8 No 3aBepuHn npuroToBneHn cpa6oTaet 3BykoBoi CnHaJ TaMepa. AkkypaTHO BblBnHbTe npotNBeHb.
BHMMaHHe! NocIe npnroTOBLeHnKop3nHa, npOTnBeHb, BHyTpeHHne KOMNoHEtbl Kopnyca n HnRpeJeHTbI 6ydyT rOpaymM. Bcerda cTaBbTe KOp3nHy n IpOTnBeHb Ha TepMoCToKYIO NobepXHOcTB (HaNPIMep, Ha NOCTaBky nIi Ha CNJIKOHOBBI KOBPNK) NocIe nx n3BLeueHnA3 np6opa. B 3aBncmOCTn OT 3arpyKeHHbIX INrPeJeHToB n3 npOTnBHn MOKeT NoCTynatb rOpayn nap.
9 N3BNeKeNTe npIroTOBHeHHyO nIu cy I3 KOp3HbI.
PpimmeaHne. JnIiHee MacNo I XnIp OTo npOdyKToB co6npaetcB HnXHeu 7actn npOTNBHJ.
IpiMeaHne. B 3aBnCmOCTn OT INHrpEiNeHTOB MOKeT NOTpe6oBaTbcra CInVB IINShero Jxnpa nn MaCna Mexdy PnIroTOBJIeHNEm HeCKoJIbKnx Nopcni nn nepeB vCTpXuBaHnem INHrpEiNeHTOB. B ceJax 6e3OpacHOCTn NOMeCTnTe npOTnBeHb Ha TepMOCTOnKyIO NOBepXHOCTb NHaJeHbTe npNXBaTK. AkkypaTHo cIeTe MaCNo nn Jxnp.
TaNua c nHrpneHtAmn dIpeKIma "Aporpnilb"
B Ta6JInce HIXe npIBeDEHbI peKOMeHDoBaHHbIe 6a3ObIe npaMeTpbl IJn npuROToBLeHn pa3JIuHbIX INHpeDIneHTOB.
Ppimechne
- Праздавленипапаметрьявлгются pekomehdaцma.И3-3a pa3новстраны почcxoxжdeня,pa3Mepa,форми npOn3BODHTeJI ONTUMaJIbHbI pe3yltat He moKet 6bItb rapaHTnpOBaH ДЯ BCex INHrgpeDneHTOB.
- Пи пригOTOBlen 60ьшinx nopци (hanpimep, KapToфяфри, KpeBeTOK, Курных HOXeK И 3amOpOxeHHbIX 3aKycOK) BCTpaxHNTe, NepeBepHnTe ИлпnomeшаNTe INHrpeDneHtbl 2-3 pa3a 3a ceaHc
- пriŋrotOBlenДЯ paBHOMePHoTekCtypbl I RTOBHOCTN.
PpoodykTbI Osbem Temnepa
typa
BpemnmeHne