ProMax Garden Automatic Switch - Water pump OASE - Free user manual and instructions
Find the device manual for free ProMax Garden Automatic Switch OASE in PDF.
Download the instructions for your Water pump in PDF format for free! Find your manual ProMax Garden Automatic Switch - OASE and take your electronic device back in hand. On this page are published all the documents necessary for the use of your device. ProMax Garden Automatic Switch by OASE.
USER MANUAL ProMax Garden Automatic Switch OASE
Operating instructions
WARNING WARNING This unit can be used by children aged 8 and above and by persons with reduced physical, sensory or mental capabilities or lack of expe- rience and knowledge if they are supervised or have been instructed on how to use the unit in a safe way and they understand the hazards involved. Do not allow children to play with the unit. Only allow chil- dren to carry out cleaning and user maintenance under supervision. Safety information Electrical connection Special regulations apply for electrical installation in outdoor spaces. Only a qualified electri- cian may perform the electrical installation. – The qualified electrician has the necessary professional training, knowledge and experience to perform electrical installation in outdoor spaces. The electrician can detect potential dangers and knows how to adhere to regional and national standards, regulations and direc- tives. – For your own safety, please consult a qualified electrician. Only connect the unit if the electrical data of the unit and the power supply match. Only plug the unit into a correctly installed outlet. Ensure that the unit is fused for a rated fault current of max. 30 mA by means of a fault current protection device. Extension cables and power distributors (e.g. outlet strips) must be suitable for outdoor use (splash-proof). Protect open plugs and sockets from moisture.14 Safe operation Do not use the unit, if electrical lines or the housing are damaged. If a power connection cable is damaged, have it immediately replaced by OASE, an authorised customer service or a qualified electrician to prevent electric shock. Do not carry or pull the unit by its power cable. Route lines in such a way that they are protected from damage and do not present a tripping hazard. Never carry out technical changes to the unit. Only carry out work on the unit that is described in this manual. Only use original spare parts and accessories. Intended use Only use the product described in this manual as follows: Automatic cut-in and switch-off of a water pump (pressure pump) when water is taken from a connected appliance. While adhering to the technical specifications. (→ Technical data) The following restrictions apply to the unit: Not suitable for pumps with an integrated automatic control system. Do not connect to the drinking water supply. Not suitable for drinking water. Do not use for commercial or industrial purposes. Do not use in conjunction with chemicals, foodstuff, easily flammable or explosive substances.EN
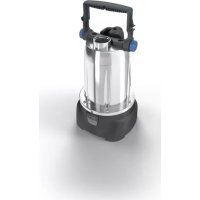
Product Description Overview POX0045 1 Power supply for the pump 2 Outlet AG 3 Power connection cable 4 Pressure gauge 5 Inlet (can be rotated) 6 Adapter 7 START button 8 Dry run indicator lamp, red 9 Operating indicator lamp, green Symbols on the unit The unit is protected against the ingress of splash water. Use the device indoors only. Do not dispose of the unit with normal household waste. Read the operating instructions.16 Installation and connection NOTE Excessive water pressure in the system will damage the unit. Ensure that the distance from the highest water withdrawal point does not exceed 15 m. Ensure that the system pressure does not exceed 10 bar. Adhere to the maximum permissible pump pressure. It may be less than 10 bar. The unit can be connected horizontally or vertically at any point between the pressure connec- tion of a garden pump, deep well pump or submersible pressure pump and the first water with- drawal point (e.g. washing machine). Recommendation: Fit directly to the pressure connection of the pump. Use an adapter. POX0048EN
1. Screw the adapter onto the pump.
– Ensure that the O-ring is correctly seated.
2. Screw the unit onto the adapter.
– When fitting, ensure that the arrow on the cover and the outlet of the unit point in the di- rection of the water flow.
3. Connect the unit to the downstream line.
NOTE Ensure that all connection lines are completely leak-tight, as leaking lines can impair the function of the system and lead to damage. Use a suitable sealant to seal the threads of the lines and the connection to the pump. Overtightening of plastic screw connections can lead to damage. Do not apply excessive force. POX004618 Operation Starting up the unit It is necessary to fill the pump and expel the air from the suction line before using. It can take several minutes to expel air from the suction line. How to proceed: Completely fill the pump and suction line. ( Pump operating manual)
1. Connect the power plug of the pump with the socket of the ProMax Garden Automatic Switch.
2. Plug the power plug of the ProMax Garden Automatic Switch into the socket.
– The indicator lamp ON lights up green. – The unit is now operational.
3. Switch on the pump and press the START PUMP button on the ProMax Garden Automatic
Switch. – The ProMax Garden Automatic Switch activates the pump for approx. 15 seconds.
4. After automatic shut-down of the pump, open the highest water withdrawal point.
– The ProMax Garden Automatic Switch switches the pump back on again.
5. Close the water withdrawal point when water flows out evenly.
– Start-up is complete. If no water is pumped: Let the pump run for longer than the time determined by ProMax Garden Automatic Switch. To do so, hold the START PUMP button until the pump priming process is com- plete and water is pumped. If no water is pumped even after approximately one minute: Disconnect ProMax Garden Automatic Switch from the power grid and repeat the start-up process. Interruption of operation and restarting If the pump runs dry or there is insufficient water, the ProMax Garden Automatic Switch will switch off the pump, the indicator lamp ERROR lights up red. automatic activation of the pump will be prevented. To restart operation: Eliminate the cause of the shut-down. Press the START PUMP button.EN
Taking the unit out of operation WARNING Risk of severe injuries or death by electric shock. Disconnect the pump and ProMax Garden Automatic Switch from the power supply before working on the unit. CAUTION The lines are pressurized. Risk of injury caused by the water jet spurting out. Damage to the unit due to leaking water. Prior to starting work: Open the water withdrawal point to depressurize the system. Measures after completing the work: How to proceed:
1. Pull the power plug of the ProMax Garden Automatic Switch.
2. Pull the power plug of the pump.
3. Depressurise the pressure line by opening a withdrawal point.
4. Also open any non-return valves fitted in the suction line.
– When the pump is switched off, residual water in the hose may flow back and out of the pump intake. If the pump is to be completely removed: Proceed according to the pump operating manual. Changing the cut-in pressure WARNING Risk of severe injuries or death by electric shock. This work may only be performed by a qualified electrician. Disconnect the pump and ProMax Garden Automatic Switch from the power supply before working on the unit. Measures after completing the work: How to proceed: Observe the characteristic curve when adjusting the cut-in pressure.
1. Unscrew the housing and remove the cover.
2. Change the pressure setting by turning the adjusting screw with a screwdriver Observe the
pressure characteristic curve.
3. Refit the housing cover and start up the unit again.
4. Read off the pressure at the pressure gauge and correct the pressure setting again if neces-
sary. The switch-off pressure is not adjustable and depends on the pump used in the system.20 POX0047 POX0049EN
Maintenance and cleaning NOTE Do not use aggressive cleaning agents or chemical solutions. These agents can damage the housing, impair the function of the device and harm animals, plants and the environment. Clean only the outside of the unit with a damp cloth. Storage/winter protection The unit is not frost-proof and has to be removed and put into storage if minus temperatures are expected. How to correctly store the unit: Drain the water remaining in the unit, in the hoses, pipes and connections as much as possi- ble. Thoroughly clean the unit. Check the unit for damage and replace damaged components. Store the unit in a dry and frost-free place. Protect open plug connections from moisture and dirt. Malfunction remedy Please note the instructions for malfunction repair in the operating manual of the pump used. Malfunction Cause Remedy Pump does not start. The unit is switched off. Switch on the unit. The pump is switched off. Switch on the pump. Power supply interrupted Check the electrical plug connec- tions. The fault current protection device has tripped. Switch off the unit and pump, and disconnect the power plug. Then contact the OASE service. The unit is defective. The unit has switched off the pump due to lack of water. The dry run indicator lamp is lit red. Remedy the cause of the lack of water (e.g. pump malfunction). Then press the START button on the unit to restart the pump. Permissible height difference of 15 m be- tween the unit and the water fixture/wa- ter withdrawal point is exceeded. Correct the height difference. The pump is not delivering, or the delivered quantity is insufficient. Incorrect pressure setting in the unit Correct the pressure setting in the unit. The unit is installed against the water flow direction. Carry out the installation correctly.22 Technical data ProMax Garden Automatic Switch Rated voltage V AC 230 Rated frequency Hz 50 Rated current Max. A 12 Protection type IPX4 Inlet connection, internal thread 1" Outlet connection, external thread 1" Operating pressure Max. bar 10 Cut-in pressure Pre-set bar 1.5 Cut-in pressure Setting range bar 1.0 … 3.5 Temperature of the pumped water Min. °C 2 Temperature of the pumped water Max. °C 35 Switching ON/switching OFF Button
Size of solid particles in the pumped water Max. mm 2 Power connection cable Length m 1.5 Pump connection cable Length m 0.3 Dimensions Length mm 100 Width mm 100 Height mm 195 Weight kg 0.75 Disposal NOTE Do not dispose of this unit with household waste. Dispose of the unit by using the return system provided for this purpose. Should you have questions, please contact your local disposal company. They will give you in- formation on how to correctly dispose of the unit. Render the unit unusable by cutting the cables.FR