
AD 7730 - Heating ADLER - Free user manual and instructions
Find the device manual for free AD 7730 ADLER in PDF.
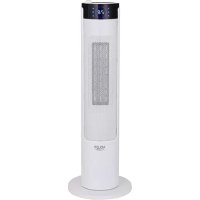



| Product type | Fan heater with humidifier |
| Brand | Adler |
| Model | AD 7730 |
| Power supply | 220-240 V ~ 50 Hz |
| Heating power | 2200 W (max) |
| Heating levels | Low (~1500 W) and High (2200 W) |
| Ventilation function | Yes (room temperature air) |
| Humidification function | Yes (built-in water tank) |
| Water tank capacity | Not specified |
| Timer | Programmable delayed shutdown from 1 to 12 hours (in 60-minute steps) |
| Oscillation | Yes (lateral movement to distribute air) |
| Temperature setting | From 10 to 35 °C (default 25 °C) |
| Remote control | Yes (included, button battery) |
| Display | Digital (ambient temperature and settings) |
| Safety features | Overheat protection (automatic shutdown), hot surfaces indicated, protected vents |
| Maintenance and cleaning | Clean the casing with a dry or damp cloth; vacuum the air vents regularly; drain the water tank if not used for a long time |
| Spare parts and repairability | Repairs only by an authorized service center; do not open yourself |
| Weight | Not specified |
| Dimensions | Not specified |
| Intended use | Household only |
| Color | Not specified |
Frequently Asked Questions - AD 7730 ADLER
User questions about AD 7730 ADLER
0 question about this device. Answer the ones you know or ask your own.
Ask a new question about this device
Download the instructions for your Heating in PDF format for free! Find your manual AD 7730 - ADLER and take your electronic device back in hand. On this page are published all the documents necessary for the use of your device. AD 7730 by ADLER.
USER MANUAL AD 7730 ADLER
GENERAL SAFETY CONDITIONS
IMPORTANT SAFETY INSTRUCTIONS. PLEASE READ CAREFULLY AND KEEP FOR FUTURE REFERENCE.
- Before using the device, read the operating instructions and follow the instructions contained therein. The manufacturer is not liable for any damage caused by using the device contrary to its intended use or improper operation.
- The appliance is for home use only. Do not use it for other purposes not in accordance with its intended use.
- The device should be connected to 220-240 V ~ 50/60 Hz. To increase safety of use, many electrical devices should not be connected to one electric circuit simultaneously.
- Be especially careful when using the device when children are in the vicinity. Do not allow children to play with the device and do not let children or people unfamiliar with the device use it.
- WARNING: This equipment may be used by children over 8 years of age and people with reduced physical, sensory or mental abilities, or people with no experience or knowledge of the equipment, if this is done under the supervision of a person responsible for their safety or has been provided with instructions on the safe use of the device and are aware of the dangers associated with its use. Children should not play with the equipment. Cleaning and user maintenance should not be performed by children, unless they are over 8 years old and these activities are performed under supervision.
- Always after use, remove the plug from the outlet by holding the outlet with your hand. DO NOT pull on the cord.
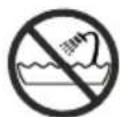
- Do not immerse the cable, plug, or the entire device in water or any other liquid. Do not expose the device to weather conditions (rain, sun, etc.) or use it in high humidity conditions (bathrooms, damp mobile homes).
- Periodically check the condition of the power cord. If the power cord is damaged, it should be replaced by a specialist repair shop to avoid a hazard.
- Do not use the appliance if the power cord is damaged or if it has been dropped or damaged in any way or if it is not working properly. Do not repair the device yourself as it may cause electric shock. Take the damaged device to an appropriate service center for inspection or repair. Any repairs may only be performed by authorized service points. Incorrectly performed repairs can pose a serious threat to the user.
- Place the device on a cool, stable, even surface, away from heating appliances such as electric stoves, gas burners, etc.
- Do not use the device near flammable materials.
- For additional protection, it is advisable to install a residual current device (RCD) in the electrical circuit with a rated residual current not exceeding 30 mA. In this regard, please consult a specialist electrician.
- When the device is used in the bathroom, remove the plug from the socket after use, as the proximity of water is a hazard even when the device is turned off.
- Do not put your fingers or any objects or metal foreign objects inside the product, through the ventilation grille and other slots, otherwise it may cause electric shock or malfunction.
- Do not put any objects on top of the device. Vents must not be
covered by a towel, curtain, etc. It may damage the device or cause a fire.
- The device heats up during operation, do not touch hot parts of the device. Do not touch the device with wet hands.
- If the convector gets wet or any object falls through
the convector ventilation grille, turn it off immediately and disconnect it from the mains. Before relaunching
using the convector, contact the service.
- Do not place the machine directly below an electrical socket.
- Always switch the device off using the buttons before disconnecting it from the mains.
- Do not use this device if it has been dropped.
- Do not use if there are visible signs of damage to the device.
- Use the heater on a level and stable surface or attach it to the wall, if provided for by the manufacturer.
- All items should be at least 1 meter from the front and sides of the device.
- Do not insert or allow foreign objects to enter the ventilation or exhaust vents as this may result in electric shock, fire or damage to the product.
- A common cause of overheating is dust or lint inside the device. Make sure these deposits are removed regularly by unplugging the unit and vacuuming the vents and grilles, filters, if available.
- Do not use this device in a window as rain may cause electric shock.
- Do not connect the appliance to a power source until it has been installed in its final position and placed in the position for use.
- It is not recommended to use an extension cord with this device.
- Do not place the cord under carpets, rugs, etc. Keep the cord away from places where it may trip over it.
- Do not use this device with a programmer, timer or any other device that automatically turns on the heater as there is a risk of fire if the device is covered or placed incorrectly.
- To avoid the danger of inadvertently resetting the thermal cutout, this appliance must not be powered by an external switching device, such as a clock, or connected to a circuit that is regularly turned on and off by the mains.
- Do not get the device wet. If the device falls into water, disconnect the plug from the socket immediately. Do not put your hands into the water when the device is plugged in. Before reuse, it must be checked by an authorized service center.
- The device should be switched off whenever you put it down.
- Never turn on the device when the tank is not filled with water.
- Use only clean, cool water.
- Do not pour water into the tank above the maximum level.
- Do not submerge the base of the device.
- Do not add any chemicals to the tank, base or steam outlet. Do not add aromatic oils, salt, descaling tablets, powders or cleaning agents to the water.
- The filler cap / water tank cover should always be screwed on / closed at all times.
- Take care that the humidifier's water mist outlet does not point directly towards walls, furniture, electrical outlets, electrical and electronic devices, and children. Too much humidity in the room can lead to a build-up of moisture, causing the growth of bacteria and fungi and damaging walls, furniture and wallpaper.
- Do not block ventilation of the device. Keep a distance of at least 100 cm from the device. Do not block the water mist outlet with the humidifier function.
- Do not use the device where there is a risk of condensation. Moisture can form on the inside and outside of the appliance when:
- the device is moved from a cold to a warm place,
- the heating system has just been turned on,
- the device is used in a room with high humidity,
- the device is cooled by the air conditioning cooling system.
When moisture condensation occurs in the device, it may not work properly or, in extreme cases, may be damaged. In this case, do not use the device and leave it to dry for several hours.
- Do not tilt, fall over or try to refill or pour water from the device while it is working.
- Do not remove the reservoir from the base of the device while the humidifier function is operating.
- A filled water tank is heavy. When carrying it, keep it underneath as well.
- Do not use the device if there is a water leak.
- Do not leave water in the tank when the machine is not in use.
- Clean the humidifier after each use cycle of the device. Follow the cleaning instructions in this manual.
- Never allow sediment, moisture or water to remain in the tank (this can cause contamination or even damage the ultrasonic atomizer).
- During long-term operation of the device, water mist emitted by the humidifier may fall to the floor and cause moisture.
WARNING: Do not use this heater in small rooms where there are people who are unable to leave them by themselves, unless constant supervision is ensured.
WARNING: To reduce the risk of fire, keep textiles, curtains, or other flammable materials at least 1 m away from the heater air outlet.
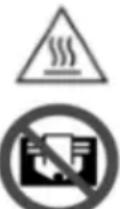
"Caution hot surface" - The temperature of the accessible surfaces may be higher during operation, which means that the housing elements get hot during operation. CAUTION!!!

NOTE: To avoid overheating - do not cover the heater. Do not cover the device with clothes, blankets or other textiles that may cause ignition.
ASSEMBLY
Base (10) assembly: Align the four fixing screw holes of the base (10) with the screw posts of the base (10), and screw with four self-tapping screws to put the product into use. See figure 2.
PRODUCT DESCRIPTION (Figure 1)
1. Humidified air outlet 2. Front display panel
3. Air outlet 4. Housing 5. Air inlet 6. Back cover 7. Drain cover 8. Top panels 9. Drain plug 10. The base 11. Remote control 12. Power switch
TOP PANEL & FRONT PANEL & REMOTE CONTROL MARKING - Figure 3
A. Standby button A1. Fan function indicator B. Timer button B1. Timer indicator C. Timer/ Temperature increase button E. Heating level regulation button E1. Low heating level indicator F. Oscillation button G. Humidifier function button H. Temperature unit indicator
B2. Timer / Temperature / Cooling down count down indicator D. Timer / Temperature decrease button E2. High heating level indicator G1. Humidifier indicator
USAGE
- Power on: Place the device on a stable floor and insert the plug into socket. Turn on the power switch (12) on the back of the product. "I" means switched on, "0" means off. At this time, the device is in standby mode, the display shows ambient temperature (B2), and the temperature unit indicator (H) will light on.
- Fan
Press the button (A), the indicator (A1) will light up and the fan is operating (flow the air in room temperature).
- Heating
Press the button (E) once for low-level heating ~1500W, the display lights up indicator (E1).
Press the button (E) twice for high-level heating 2200W, the display will light both indicators (E1 + E2).
Press the button (E) again to cancel the heating.
TIMER function: Press the button (B) repeatedly to set a period after which the device will turn itself off (between 1.0 hour - 12.0 hours, in steps of 60 minutes). At the same time timer indicator (B1) light display.
Oscillation function: Press button (F) to activate oscillation, the device will swing to the right and left to distribute the exhaust air evenly. Press again button (F) to cancel oscillation function.
TEMPERATURE ADJUSTMENT
Adjust room temperature by pressing button (D) or (C). The default setting temperature is 25°C . Temperature range from 10 - 35°C . Press the button (D) to increase the desired temperature and press the button (C) to decrease the desired temperature. The device is intelligently programmed, it selects the working level between low or high heat according to the desired temperature and present ambient temperature.
At first pour the water to water tank (13) according to instruction described below. To pour the water to water tank (13), unplug the device at first. Next press down and pull outside the protrude part on the back cover (6) - look at figure 4. Take out the water tank (13) from the housing, unscrew the plug of water tank (13) counterclockwise, pour clean water (no essential oils added) and screw the plug tightly. Put the water tank (13) inside the housing. Set the cover properly on two latches places well and push it to close.
The humidifying function can be used normally. Plug in the device.
Press the button (G), the product turns on the humidification function, the humidification indicator (G1) lights up. Press the button (G) again to turn off the humidification function, at the same time the humidification indicator (G1) will be off. The humidification function can also be used separately when fan / heating function is switch off but power is on.
To drain the water out open the drain cover (7) pull the drain plug (9) and drain the reminding water to suitable tank.
When the device is not used for a long time, the water in the tank should be drained.
Applicable environment conditions for the device operation:
- heating function use temperature in range from -20°C to 25°C .
- humidifier function use in temperature in range from 5°C to 40°C and the relative humidity less than 80% .
To turn off the device, press the button (A) again. Then, the fan will cool down the heating element inside the housing for 30 seconds, after which the fan will automatically turn off. If the device was not set to heating function before, it will go directly to standby.
Lighting off of the front display panel (2): After the device has been working for 10 minutes, it will automatically enter the light-off screen mode. Press
any key to light up the screen.
Remote control: Before using the remote control (11), remove the plastic foil piece on the right side of the remote control. Remote control operation is the same as manual operation of the top panel (8).
HOW TO CHANGE THE REMOTE CONTROL'S BATTERY:
- The battery cover can be opened with a coin or similar object.
- Install the button battery, paying attention to the battery polarity (+ face up and - face down).
- Replace the battery cover.
CLEANING AND MAINTENANCE
- Make sure the device is not hot.
- Before cleaning the device, remove the plug from the electrical socket.
- Keep the air inlet and outlet openings clean. Do not allow dust to collect on the openings.
- Clean the housing using only a dry or moist cloth.
- Do not immerse the device in water!
TECHNICAL DATA:
Power: 2200W
Power supply: 220-240V~50Hz
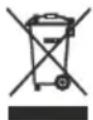
To protect your environment: please separate carton boxes and plastic bags and dispose them in corresponding waste bins. Used appliance should be delivered to the dedicated collecting points due to hazardous components, which may effect the environment. Do not dispose this appliance in the common waste bin.
GERMAN
PRODUCT DESCRIPTION (Figure 1)
CLEANING AND MAINTENANCE
PRODUCT DESCRIPTION (figure 1)
Press the button (E) and use the two indicators (E1 + E2) to set the desired temperature up to 2200W.
Press the button (E) to switch off the appliance.
TIMER FUNCTION: Press the button (B) repeatedly to set a period during which the appliance will operate (from 1.0 hour to 12.0 hours, in steps of 60 minutes). At the same time, the time indicator (B1) lights up.
OSCILLATION FUNCTION: Press the button (F) to activate the oscillation, the appliance will rotate to the right and left to distribute the air evenly. Press the button (F) again to deactivate the oscillation function.
TEMPERATURE REGULATION
HOW TO REPLACE THE REMOTE CONTROL BATTERY:
CLEANING AND MAINTENANCE
- Make sure the device is unplugged. 2. Before cleaning the device, unplug it from the socket.
- Clean the holes for air inlet and outlet. Do not allow dust to accumulate in the holes.
- Clean the housing only with a dry or damp cloth.
- Do not immerse the device in water!
TECHNICAL DATA:
Power: 2200 W
Electrical connection: 220-240 V ~ 50 Hz

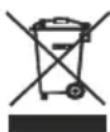
Care for the environment... Please hand over the cardboard packaging for recycling. Plastic bags (PE) should be disposed of in the plastic recycling container. At the end of its service life, the device must be handed over to an appropriate collection point, as its components may be hazardous to the environment. The electrical device must be handed over in such a way as to limit its reuse. If the device contains batteries, they must be removed and handed over separately. Do not dispose of the device in the household waste container!
SWEDISH
GENERAL SAFETY CONDITIONS
IMPORTANT SAFETY INSTRUCTIONS. PLEASE READ AND KEEP FOR FUTURE REFERENCE
during operation during operation. WARNING !!!
PRODUCT DESCRIPTION (Figure 1)
- moistened air outlet 2. Front display panel
- air outlet 4. housing
- air inlet 6. Back side 7. Drain cap 8. Top panels
- Drain plug 10. Base
- Remote control 12. Power switch
LABELING TOP PANEL & FRONT PANEL & REMOTE CONTROL - Figure 3
A. Standby button A1. Fan function indicator B. Timer button B1. Timer indicator B2. Timer / temperature / cooling indicator C. Button for timer / temperature increase D. Button for timer / temperature decrease E. Button for regulating heating level E1. Indicator for low heat level E2. Indicator for high heat level F. Oscillation button G. Humidifier function button G1. Humidifier indicator H. Temperature unit indicator
USAGE
PRODUCT PARTS (Figure 1)
1. Air inlet 2. Front panel 3. Air outlet 4. Control panel 5. Air outlet 6. Base 7. Drain screw 8. Handle 9. Remote control 10. Base 11. Remote control 12. Power switch
LABELING TOP PANEL & FRONT PANEL & REMOTE CONTROL - Figure 3
A. Standby button A1. Fan function indicator B. Timer button B1. Timer indicator B2. Timer / temperature / cooling indicator C. Timer / temperature increase button D. Timer / temperature decrease button E. Heating level regulation button E1. Low heat level indicator E2. High heat level indicator F. Oscillation button G. Humidifier function button G1. Humidifier indicator H. Temperature unit indicator
OPERATION
- Connection: Place the device on a stable surface and insert the plug into the socket. Turn on the power switch (12) on the back of the product. "I" means on, "0" means off. At that moment, the device is in standby mode, the ambient temperature is displayed on the screen (B2), and the temperature unit indicator (H) will light up.
- Fan
Press the button (A), the indicator (A1) will light up and the fan will start (air flow at room temperature). 3. Heating
Press the button (E) once for low heating level ~1500W, the indicator (E1) lights up on the screen.
Press the button (E) twice for high heating 2200W, the indicators (E1+E2) will light up on the display.
Press the button (E) again to turn on the device.
TIMER FUNCTION: Press the button (B) to set the time after which the device will automatically turn off (between 1.0 and 12.0 hours, in steps of 60 minutes). At the same time, the timer indicator (B1) will light up.
OSCILLATION: Press the button (F) to activate oscillation, which will make the air flow evenly distributed. Press the button (F) again to deactivate the oscillation function.
TEMPERATURE ADJUSTMENT
Set the desired temperature by pressing the buttons (D) and (L). The default temperature is 25 °C. The temperature range is 10-35 °C. Press the button (D) to increase the desired temperature and press the button (L) to decrease the desired temperature. The device is intelligently programmed; it will automatically adjust the heating level between low and high according to the desired temperature and the current ambient temperature.
HUMIDIFICATION FUNCTION
First, fill the water tank (13) according to the instructions described below. To fill the water tank (13), first turn off the device. Then, press and lift the handle on the back cover (6) - see figure 4. Remove the water tank (13) from the unit, turn the cap of the water tank (13) counterclockwise, fill with clean water (do not exceed the maximum level) and firmly close the cap. Place the water tank (13) back into the unit. Properly position the cover on both locking points and press it to close.
The humidification function is used for normal operation. Connect the device.
Press the button (G) to activate the humidification function; the humidification indicator (G1) will light up. Press the button (G) again to deactivate the function; the humidification indicator (G1) will turn off. The humidification function can also be used when the fan/heating function is activated, but it is recommended to use it separately.
To drain the water, open the drain cap (7) by pulling the drain hose (9) and let the water flow into a suitable container.
When the device is not used for a long time, the water in the tank should be emptied.
Important environmental conditions for the operation of the device:
- Use the heating temperature in the range from -20°C to 25°C.
- Use the humidification function at temperatures from 5°C to 40°C and with relative humidity below 80%.
To turn off the device, press the button (A) again. Then the fan will cool the heating element inside the unit for 30 seconds, and then it will automatically turn off. If the device was not previously set to the heating function, it will go directly to standby mode.
Press the button (2) to turn on the screen for 10 minutes; the screen will not turn off automatically. Press the button again to turn off the screen.
Remote control: Before using the remote control (11), insert the batteries into the compartment on the back of the remote control. The remote control works like a regular remote control with a laser pointer (8).
HOW TO REPLACE THE REMOTE CONTROL BATTERY:
- The battery compartment can be opened by pressing or sliding. 2. Install the battery correctly, observing the polarity of the battery ("+" on the top and "-" on the bottom). 3. Close the battery compartment.
CLEANING AND MAINTENANCE
- Make sure the device is turned off. 2. Unplug the device and remove the plug from the electrical outlet.
- Keep the air inlet and outlet openings clean. Do not allow dust to accumulate on the openings.
- Clean the housing only with a dry or slightly damp cloth.
- Do not immerse the device in water!
TECHNICAL DATA:
Power: 2200W
Voltage: 220-240V ~ 50Hz
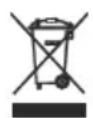
For environmental protection: Please dispose of the cardboard packaging and plastic bags in the appropriate recycling bins. The used device should be disposed of at the designated collection point for waste electrical and electronic equipment, as it may affect the environment. Do not dispose of this device in the household waste.
UKRAINIAN
GENERAL SAFETY CONDITIONS
INSTRUCTION MANUAL FOR HOUSEHOLD USE. READ CAREFULLY AND KEEP FOR FUTURE REFERENCE.
- Before using the appliance, read the operating instructions
and keep them for future reference. The manufacturer is not responsible for any damage caused by using the appliance for purposes other than its intended use or by improper operation. 2. The appliance is intended for household use only. Do not use it for purposes that do not correspond to its intended use. 3. Connect the appliance only to a power supply of 220-240 V ~ 50/60 Hz. To increase safety, it is not recommended to connect many electrical appliances to one electrical outlet. 4. Be especially careful when using the appliance near children. Do not allow children to play with the appliance and do not allow children or people unfamiliar with it to use it. 5. WARNING: This appliance can be used by children aged 8 years and above and by persons with reduced physical, sensory or mental capabilities, or by persons lacking experience and knowledge, provided they are supervised by a person responsible for their safety or have been given instructions on the safe use of the appliance and understand the dangers involved. Children must not play with the appliance. Cleaning and user maintenance must not be performed by children unless they are older than 8 years and these activities are carried out under supervision. 6. After each use, unplug the appliance by holding the plug. Do not pull on the cord. 7. Do not immerse the cord, plug, or the entire appliance in water or any other liquid. Do not expose the appliance to weather conditions (rain, sun, etc.) and do not use it in high humidity environments (bathrooms, damp rooms). 8. Periodically check the condition of the power cord. If the power cord is damaged, it must be replaced at a specialized service center to avoid danger. 9. Do not use the appliance if the power cord is damaged, if it has fallen or been damaged in any way, or if it operates incorrectly. Do not repair the appliance yourself, as this may lead to electric shock. Take a damaged appliance to a qualified service center for inspection or repair. Repairs should only be performed by authorized service centers. Improper repair may pose a serious danger to the user. 10. Place the appliance on a cool, stable, flat surface, away from heating appliances such as electric stoves, gas burners, etc. 11. Do not use the appliance near flammable materials. 12. For additional protection, it is advisable to install a residual current device (RCD) with a rated residual current not exceeding 30 mA. For this, contact a qualified electrician. 13. When using the appliance in a bathroom, unplug it after use, as proximity to water is dangerous even when the appliance is switched off.
- Do not place metal objects or foreign objects into the ventilation grille or other openings, as this may cause electric shock or malfunction.
- Do not place metal objects on the appliance. The appliance should not be covered with a cloth or curtain. This may damage the appliance or cause a fire.
- The heater becomes hot during operation; do not touch hot parts. Do not touch the heater with wet hands. 17. If the convection heater is blocked or foreign objects fall into the ventilation grille of the heater, immediately turn it off and unplug it from the mains. Before restarting the heater, contact a service center.
- Do not immerse the machine in water or an electrical outlet.
- Always turn the device on and off using the buttons, not by plugging or unplugging it from the mains.
- Do not use this device if it has fallen.
- Do not use if there are signs of damage to the device.
- Place the heater on a level and stable surface or attach it to the wall, as provided by the manufacturer. 23. All objects must be at a distance of at least 1 meter from the front and side parts of the device.
- Do not insert or allow foreign objects into the ventilation or exhaust openings, as this may cause electric shock, fire, or damage to the device.
- Dust or lint may accumulate inside the heater. Make sure that these are regularly removed. Unplug the heater from the mains and clean the ventilation grilles and openings with a vacuum cleaner.
- Do not use this device near water, as this may cause electric shock. 27. Do not connect the device to a power source unless it is fully assembled and placed in the correct position for use.
- It is not recommended to use an extension cord with this device. 29. Do not place the cord under a carpet, rug, or similar. Keep the cord away from areas where it may be tripped over. 30. Do not use this device with a programmer, timer, or any other device that automatically turns on the heater, as there is a risk of fire if the device is covered or placed incorrectly.
- Do not immerse the device. If the device gets into water, immediately unplug it from the outlet. Do not put your hands in the water while the device is connected to the mains. Before reusing it, have it checked at an authorized service center.
- Empty the water tank after each use.
- Never operate the device if the cord or plug is damaged.
- Use only cold water.
- Do not fill the tank above the maximum level.
- Do not immerse the base of the device.
- Do not add any chemical substances to the reservoir, base, or steam outlet. Do not add aromatic oils, salt, tablets for descaling, or cleaning agents to the water.
- The lid of the water tank / reservoir must be properly closed / covered at all times.
- Make sure that the steam outlet is not directed at walls, furniture, electrical outlets, electrical and electronic devices, or people. Excessive humidity in the room can cause condensation, leading to the growth of bacteria and fungi, and damage to walls, furniture, and appliances.
- Do not block the ventilation openings of the device. Keep a distance of at least 100 cm from the device. Do not obstruct the steam output with the humidifier function.
- Do not use the device where there is a risk of condensation. Moisture may form inside and outside the device, if:
- the device is moved from a cold to a warm place,
- the heating system is turned on,
- the device is used in a room with high humidity,
- the device is cooled by the air conditioning system. If condensation forms on the device, it may not work properly or, in the worst case, may be damaged. In this case, do not use the device and let it dry for a few hours.
- Do not use the device without a filter, do not use it in rooms with dust.
- Do not fill the reservoir with the base of the device while the air humidifier function is in operation.
- Filling the reservoir with water is important. Hold it, hold it also from below.
- Do not use the device if there is water leakage.
- Do not leave water in the tank when the machine is not in use.
- Empty the humidifier air after each use cycle of the device. Follow the instructions for care in your manual.
- Never allow anyone, he or she, to get caught in the reservoir (can cause
blockage or even damage the ultrasonic humidifier). 50. During operation of the water mist device, the humidifier may cause slipping and cause injury.
WARNING: Do not use this heater in small rooms where there are people who cannot leave them alone unless constant supervision is provided. WARNING: To reduce the risk of fire, keep textiles, curtains, or other flammable materials at a distance of at least 1 m from the air outlet of the heater.
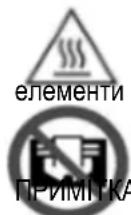
"Caution, hot surface" - The temperature of accessible surfaces may be high during operation, which means that the housing heats up during operation. CAUTION!!!
FABRIC: To prevent overheating - do not cover the heater. Do not cover the device with clothing or other fabrics, as this may cause fire.

INSTALLATION
Installation of the base (10): Unscrew the four holes for the base screws (10) with the base screw studs (10) and tighten the screws with self-tapping screws to provide a user-friendly gap. Refer to Figure 2.
DESCRIPTION OF THE DEVICE (Figure 1)
- Humidifier air inlet 2. Control panel 3. Air duct 4. Button

- a : 11 ⇒ 1b : 11
- points a1 , b2 ,
- 21 items
- Clll all jj
- Proof: + = 2
- remote
- a/b/c
- SΔCDE = 1/2 · PC · CD = 1/2 × PD × PD = 1/2 × PD × 5
A. 12 22 22
a. , , are the direction vectors of the plane magnetic field intensity, and their included angles are equal to 312°
ii j.4
B1.Timer
B2.Timer/ jjlll /
Oscillation: 1 (F) 2 3 (F)
a
j 35-10 25 y a jy 24
ybjill 1
13(olal jzgcll 13(olal jzgcll 13(olal jzgcll 13(olal jzgcll 13(olal jzgcll 13(olal jzgcll 13(olal jzgcll 13(olal jzgcll 13(olal jzgcll 13(olal jzgcll 2)
jLJIa aai,1i jJ Jai jau
jieall Jua jia pa. gai b Kui jiu jilil aai jai
Jl (G) 111111111111111111111111111111111111111111
(Min. 1.0 year - 12.0 years, depending on the model). During this time, the indicator follows the temperature (B1).
OSCILLATION function: Press button (F) to activate the oscillation, the device will start oscillating left and right, for even distribution of the air. Press button (F) again to cancel the oscillation function.
TEMPERATURE ADJUSTMENT
Adjust the desired temperature by pressing button (D) or (C). The default temperature is 25°C. The temperature range is from 10 to 35°C. Press button (D) to increase the desired temperature and press button (C) to decrease the desired temperature. The device is intelligent and programmed to select the working mode between low and high temperature according to the desired temperature and the current room temperature.
HUMIDIFICATION FUNCTION
Before use, read the instructions described below. To fill the water tank (13), disconnect the device from the power outlet. Then press the button and pull out the upper part of the lock (6) - see figure 4. Remove the water tank (13) from the body, unscrew the cap of the water tank (13) counterclockwise, pour clean water (do not add essential oils) and screw the cap back on. Place the water tank (13) back into the body. Press the two caps in two places on the locks until they close. The humidification function can be used normally. Turn on the device.
Press button (G), the product will activate the humidification function, the humidification indicator (G1) lights up. Press button (G) again to deactivate the humidification function, and the humidification indicator (G1) will turn off. The humidification function can also be used separately when the fan/heater function is off, but the power is on.
To drain the water, open the drain cap (7), pull out the drain plug (9) and drain the remaining water into a suitable container.
When the device is not used for a long time, the water in the tank must be drained.
KITCHEN SCALE AD 3171
CHOCOLATE FOUNTAIN AD 4487
HAND BLENDER AD 4617
LINT REMOVER AD 9616
VACUUM CLEANER AD 7044
MEAT MINCER AD 4811
Blender AD 4078
ELECTRIC GRILL AD 6610
ELECTRIC KETTLE AD 1293
ADLER
EUROPE
COFFEE GRINDER AD 4446
TOASTER 2 SLICE AD 3214
HAND BLENDER AD 4625
MIXER WITH BOWL AD 4222
AIR FRYER OVEN AD 6309
MICROWAVE OVEN AD 6205
WAFFLE MAKER AD 3049
KITCHEN SCALE AD 3170
ELECTRIC KETTLE AD 1286
AD 3043
SANDWICH MAKER
PORTABLE FRIDGE AD 8077
Electric Oven With HOB AD 6020
FAN HEATER AD 7728
MOSQUITOLAMP AD 7938
HEATED PAD AD 7433
ORAL IRRIGATOR AD 2176
ADLER
EUROPE
Electric Kettle AD 1282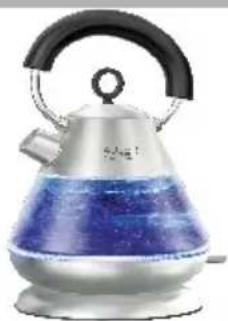
Burr Coffee Grinding AD 4450
Milk Frother AD 4491
Sandwich Maker AD 3055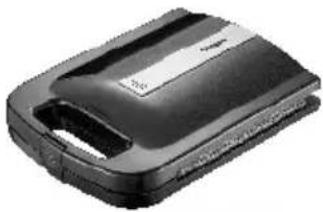
Toaster 2 Slice AD 3222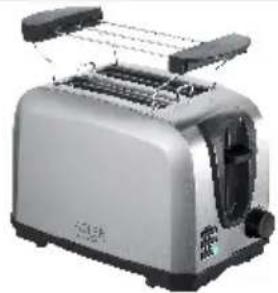
Electric Grill AD 3052
Citrus Juicer AD 4009
Personal Blender AD 4081
Food Processor AD 4224
Mixer AD 4225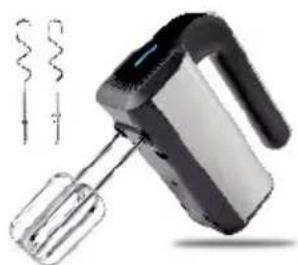
Air Fryer AD 6310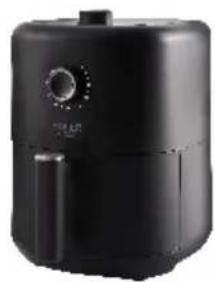
Pasteurization Pot AD 4496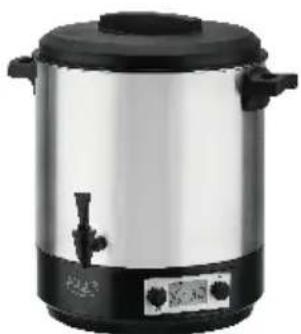
Air Conditioner AD 7916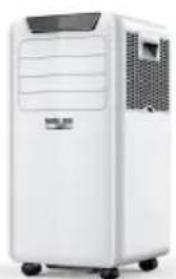
Air Humidifier AD 7966
Fan Heater AD 7725
KITCHEN SCALE AD 3166
| AFTER SALE SERVICE NOTICE | |
| GB | If you want to buy spare parts or make any complaints, please contact the seller who issued the receipt directly. |
| DE | Wenn Sie Ersatzteile kaufen oder reklamieren möchten, wenden Sie sichitte direkt an den Verkäuser, der die Quittung ausgestellt hat. |
| FR | Si vous souhaitez acheter des pièces de rechange ou faire des réclamations, veuillez contacter directement le vendeur qui a émis le reçu. |
| ES | Si desea comprar repuestos o presenterar alguna queja, comuniquesse directamente con el vendedor que emitié o recibo. |
| PT | Se você quiser comprar peças de reposicao ou fazer alguma reclamação, entre em contato diretamente com o vendedor que emitiou o recibo. |
| LT | Jei norite isigyit atsarginiu daliu ar pateiki nusiskundimu, susisiekite tiesigai su kvitá išdawsiu pardaveju. |
| LV | Ja vêlates iegadãtres rezerves dalas vai izteikt pretenzijas, ludzu, szainieties tiei ar pärdevējuru, kurz izniedza Čeku. |
| EST | Kui soovite osta varuosi voi esitada pretensioone, vôte otse ühendust kvitungi vãjalastanud muujaga. |
| HU | Ha potalkatrészeket szeretne vásárolni, vagy panasz szeretne tenni, forduljon kozvetlenul abizonylatot kiàllitó eladóhoz. |
| BS | Ako Želite kupiti rezerve dijelove il napravitre reklamaciju, obratite se direktno prodavaču koji je izdao račun. |
| RO | Ecnii bvi xotinte kynitb zanacthi iii nnipedbarytb kakne-lnb dopehen3nn, noxanycta, cbrjntecb hnaprymyo c npodabucom, bvdabumm chek. |
| CZ | Chcete-li zakoupit náhradni dily nebo uplatnit jakoukoli reklamaci,kontaktujte prímo prodejce, ktery učtenku vystavil. |
| RU | Dacà doriti sa cumparați piese de schimb sau sā faceti vreo reclamatie, vă rugam sā contactati direct vänzatorul care a emis chitança. |
| GR | Eáv θελeTE va ayopááTe e vatalakTiká nva káveTE OTTOBHTOTE TAPATTOVA,ETIKOIMVHOTe atneuθicag me tvov TLWNTI TOU Eξδωae Tny attóδiδη. |
| MK | Ako cakate da kynitte pezeberhni delobn iii nn da nophece TE kackb 6hno nonpakn, kontaktnpajte dinpekTHO co npodabayot koj ja i3dan cmetkata. |
| NL | Als u reserveonderdelen wilt kopen of een klacht wilt indienen, neem dan rechtsstreeks contact op met de verkoper die de bon heeft afgegeben. |
| SL | Če Želite kupiti nadomestne dele ali vložti reklamacije, se obnite neposredno na prodajalca,ki je izdal račun. |
| FI | Jos haluat ostaa varaosia tai tehdä valituksa,ota yhteyttä suoraan kuitin antaneeseen myjään. |
| PL | W przypadku checi zakupu czeci zamiennych lub zgloszenia eventualnych reklamacji nalezykontaktowac sie bezposrednio ze sprzedawca,ktory wystawil paragon. |
| IT | Se desideri acquistare pezzi di ricambio o presentare reclami, contatta direttamente il venditore che ha emesso la ricevuta. |
| HR | Se desideri acquistare pezzi di ricambio o presentare reclami, contatta direttamente il venditore che ha emesso la ricevuta. |
| SV | Om du vill kopa reservdelar ell ergora nágra reklamationer, vänligen kontakta saljaren som utfärdat kvitto direkt. |
| DK | His du onsker at kobe reservedele ell reklamere, bedes du kontakte saelgeren, som har udstedt kitteringen, direkte. |
| UA | Якшо вихоче рindbatni zaúctinhni abo podatn 6yd-яп петензii, зернithсьябэноpeperndbo do npodabucr, kajn buidavch. |
| SR | Ako jeniTE da kynITE pezeberne dénobe iii da ynojte pekmamaqujy, obpatnte ce dipekTHO npodabuy konj je i3doa pavyh. |
| SK | Ak si chcete kupit' náhradné diely alebo uplatnit akukofvek reklamáciu,kontaktujte priamo predajcu, ktorý učtenku vystavil. |
| AR | ### |
| BG | Ako nckate da zakynITE pezebern hi actn iii nn da hampabite onnkabanna, mona, cabpxete ce dipekTHO c npodabauva, kɔitTo e n3dan kacobata belezkca. |


- GENERAL SAFETY CONDITIONS
- IMPORTANT SAFETY INSTRUCTIONS. PLEASE READ CAREFULLY AND KEEP FOR FUTURE REFERENCE
- ASSEMBLY
- PRODUCT DESCRIPTION (FIGURE 1)
- TOP PANEL & FRONT PANEL & REMOTE CONTROL MARKING - FIGURE
- USAGE
- TEMPERATURE ADJUSTMENT
- HOW TO CHANGE THE REMOTE CONTROL'S BATTERY
- CLEANING AND MAINTENANCE
- TECHNICAL DATA
- GERMAN
- TEMPERATURE REGULATION
- HOW TO REPLACE THE REMOTE CONTROL BATTERY
- SWEDISH
- IMPORTANT SAFETY INSTRUCTIONS. PLEASE READ AND KEEP FOR FUTURE REFERENCE
- LABELING TOP PANEL & FRONT PANEL & REMOTE CONTROL - FIGURE
- PRODUCT PARTS (FIGURE 1)
- OPERATION
- HUMIDIFICATION FUNCTION
- UKRAINIAN
- INSTRUCTION MANUAL FOR HOUSEHOLD USE. READ CAREFULLY AND KEEP FOR FUTURE REFERENCE
- INSTALLATION
- DESCRIPTION OF THE DEVICE (FIGURE 1)
- ADLER
- EUROPE
Brand : ADLER
Model : AD 7730
Category : Heating