
SimpliGlide 360 - Lawn mower FLYMO - Free user manual and instructions
Find the device manual for free SimpliGlide 360 FLYMO in PDF.
| Product type | Electric Hover mower (air cushion) |
| Brand | Flymo |
| Model | SimpliGlide 360 |
| Cutting width | 36 cm |
| Cutting height adjustment | 10 - 30 mm (4 positions) |
| Rated power | 1800 W |
| Mains voltage | 230 V |
| Frequency | 50 Hz |
| Blade rotation speed | 4200 rpm |
| Weight | 6.9 kg |
| Sound pressure level | 80.3 dB(A) |
| Sound power level (measured/guaranteed) | 92 / 96 dB(A) |
| Hand-arm vibration | 1.9 m/s² |
| Safety device | Two-handed: start lever + safety lock |
| Cable protection | Integrated cable protection device |
| Safety stop | Overload protection (automatic stop) |
| Maintenance | Clean underside after mowing; replaceable blade with supplied key |
| Spare parts | Replacement blade FLYMO ref. FLY096 (36 cm) |
| Warranty | 2 years (private use) |
| Storage | Foldable, vertical or wall storage |
Frequently Asked Questions - SimpliGlide 360 FLYMO
User questions about SimpliGlide 360 FLYMO
0 question about this device. Answer the ones you know or ask your own.
Ask a new question about this device
Download the instructions for your Lawn mower in PDF format for free! Find your manual SimpliGlide 360 - FLYMO and take your electronic device back in hand. On this page are published all the documents necessary for the use of your device. SimpliGlide 360 by FLYMO.
USER MANUAL SimpliGlide 360 FLYMO
SimpliGlide 300 Art. 970482562
SimpliGlide 330 Art. 970482862
SimpliGlide 360 Art. 970482962
EN Operator's manual
Electric Hover Lawnmower
Original instructions.
This product may be used under supervision, or if instruction regarding the safe use of the product has been provided and the resulting dangers have been understood, by children aged 8 and above, as well as by persons with physical, sensory or mental disabilities or a lack of experience and knowledge. Children must not be allowed to play with the product. Cleaning and user maintenance must not be performed by children without supervision. The use of this product by young people under the age of 16 is not recommended.
Intended use:
The FLYMO Lawnmower is intended to mow lawn in private domestic gardens and allotments.
The product is not intended for long term use.

DANGER! Risk of injury!
Do not use the product to cut bushes, hedges, shrubs, to cut of climbers or grass on roofs or balcony boxes, to chop up branches, twigs and to level irregularities in the soil. Do not use the product on a slope steeper than 20^ maximum.
1. SAFETY
IMPORTANT!
Read the operator's manual carefully before use and keep for future reference.
Symbols on the product:
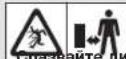
Beware of sharp blades. Blades continue to rotate after the motor is switched off. Remove plug from mains before maintenance or if cord is damaged.
Keep the mains cable away from the cutting blades.
General safety warnings
Electrical safety

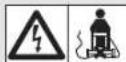
DANGER! Electric shock!
Risk of injury due to electric shock.
The product must be supplied through a residual current device (RCD) having a rated residual operating current not exceeding 30mA .

WARNING! Risk of physical injury!
Cut injury when the blade turns or the product starts accidentally.
Disconnect the product from the mains before you do maintenance or you replace parts. Thereby the disconnected socket must be in the visual range.
Cables
If extension cables are used, these must comply with the minimum cross-sections in the table below:
Voltage Cable length Cross section
220-240V/50HzUpto 40m1.0mm²
220-240V/50HzUp to 60m1.5mm²
220 - 240 V / 50 Hz Up to 100 m 2.5 mm²
Minimum rating: 1.0mm^2 size cable, 10 amps 250 volts AC.
Your product is supplied with cable wired directly into the product.
- If the supply cord is damaged, it must be replaced by your local Husqvarna UK Ltd. Approved Service Centre or similarly qualified persons in order to avoid a hazard.
- Do not wire an extension cable directly to your product yourself. Please contact your local Husqvarna UK Ltd. Approved Service Centre for further information on the connectors and kits available.
- Only use extension cables specifically designed for outdoor use and which conform to one of the following specifications: Ordinary rubber (60245 IEC 53), Ordinary PVC (60227 IEC 53) or Ordinary PCP (60245 IEC 57).
Training
a) Read the instructions carefully. Be familiar with the controls and the correct use of the machine.
b) Never allow children or people unfamiliar with these instructions to use the machine. Local regulations can restrict the age of the operator.
c) Never operate the machine while people, especially children, or pets are nearby.
d) Keep in mind that the operator or user is responsible for accidents or hazards occurring to other people or their property.
Preparation
a) While operating the machine always wear substantial footwear and long trousers. Do not operate the machine when barefoot or wearing open sandals. Avoid wearing clothing that is loose fitting or that hanging cords or ties.
b) Thoroughly inspect the area where the machine is to be used and remove all objects which can be thrown by the machine.
c) Before using, always visually inspect to see that the blade, blade bolt and the blade assembly are not worn or damaged. Replace worn or damaged components in set to preserve balance. Replace damaged or unreadable labels.
d) Before use check the supply and extension cord for signs of damage or aging. If the cord becomes damaged during use, disconnect the cord from the supply immediately. DO NOT TOUCH THE CORD BEFORE DISCONNECTING THE SUPPLY. Do not use the machine if the cord is damaged or worn.
Operation
a) Operate the machine only in daylight or in good artificial light.
b) Avoid operating the machine in wet grass.
c) Always be sure of your footing on slopes.
d) Walk, never run.
e) Mow across the face of slopes, never up and down.
f) Exercise extreme caution when changing direction on slopes.
g) Do not mow excessively steep slopes.
h) Use extreme caution when reversing or pulling the machine towards you.
i) Stop the blade(s) if the machine has to be tilted for transportation when crossing surfaces other than grass, and when transporting the machine to and from area to be used.
j) Never operate the machine with defective guards or shields, or without safety devices, for example deflectors and/or grass collector, in place.
k) Switch on the motor carefully according to instructions and with feet well away from the blade(s).
1) Do not tilt the machine when switching on the motor, except if the machine has to be tilted for starting. In this case, do not tilt it more than absolutely necessary and lift only the part, which is away from the operator.
m) Do not start the machine when standing in front of the discharge opening.
n) Do not put hands or feet near or under rotating parts. Keep clear of the discharge opening at all times.
c) Do not transport the machine while the power source is running.
p} Stop the machine, and remove plug from the socket. Make sure that all moving parts have come to a complete stop.
whenever you leave the machine,
before clearing blockages or unclogging chule,
before checking, cleaning or working on the machine,
- after striking a foreign object. Inspect the machine for damage and make repairs before restarting and operating the machine;
if the machine starts to vibrate abnormally (check immediately)
- inspect for damage,
- replace or repair any damaged parts,
- check for and tighten any loose parts.
Maintenance and storage
a) Keep all nuts, bolts, and screws tight to be sure the machine is in safe working condition.
b) Check the grass collector frequently for wear or deterioration.
c) Replace worn or damaged parts for safety
d) On machines with multi blade, take care as rotating one blade can cause other blades rotate.
e) Be careful during adjustment of the machine to prevent entrapment of the fingers between moving blades and fixed parts of the machine.
f) Always allow the machine to cool down before storing.
g) When servicing the blades be aware that, even though the power source is switched off, the blades can still be moved.
h) Use only genuine replacement parts and accessories.
Additional safety warnings
Electrical safety

DANGER! Cardiac arrest!
This product makes an electromagnetic field while it operates. This field may under some conditions interfere with active or passive medical implants. To decrease the risk of conditions that can possibly injure or kill, we recommend persons with medical implants to speak with their physician and the medical Implant manufacturer before you operate the product.
Before use, examine the cable for signs of damage or ageing. If the cable is found to be defective, take the product to an authorised Service Centre and have the cable replaced.
Do not use the product if the electric cables are damaged or worn.
Immediately disconnect from the mains if the cable is cut, or the insulation is damaged. Do not touch the electric cable until the cable has been disconnected. Do not repair a cut or damaged cable. Replace it with a new one.
The extension cable must be uncoiled. Coiled cables can overheat and reduce the efficiency of your mower.
Keep the extension cable away from product, always work away from the power point mowing up and down, never in circles.
Do not pull cable around sharp objects.
Always switch off at the mains before disconnecting any plug, cable connector or extension cable.
Stop the motor, disconnect the mains and examine the cable for damage or ageing before you wind the cable for storage. Do not repair a damaged cable, replace it with a new one. Use only genuine replacement cable.
Always wind the cable carefully, avoid kinking
Do not carry the product by the cable.
Do not pull on the cable to disconnect any of the plugs.
Use only on AC mains supply voltage shown on the product rating label.
Our products are double insulated to EN60335. Do not connect an earth to any part of the product.
Check the working area for hidden cables.
Do not use for pond care or close to water.
Personal safety

DANGER! Risk of suffocation!
Small parts can be easily swallowed. There is also a risk that the polybag can suffocate toddlers. Keep toddlers away when you assemble the product.
Let the hover mower to cool down for at least 30 minutes before storage or maintenance.
If blockage of cutting element stop product and check.
Do not tilt the machine into the direction of the user.
Do not move backwards.
Stay alert during operation.
Do not use in explosive atmosphere.
Do not operate the product when you are tired, ill or under the influence of alcohol, drugs or medicine or when you are exhausted.
Do not overload the mower.
Use gloves, wear slip resistant shoes and wear eye protection.
Do not use under wet conditions.
Do not use on wet grass.
Do not disassemble the product further than the delivery status
Only start the mower with an upright standing handle.
Do not use the start levers alternately.
Use the handles carefully.
Safety Cut-Out
The motor is protected by a Safety Cut-Out which is activated when the blade becomes jammed or if the motor is overloaded. When this occurs, stop and disconnect the product from the mains. The Safety Cut-Out will only reset when you release the start / stop lever. Clear any obstruction and wait for a few minutes for the Safety Cut-Out to reset before you continue to use the product.
2. ASSEMBLY

IGER! Risk of injury!
injury when the product starts accidentally.
Wait for the blade to stop, disconnect the product from themains and use gloves before you assemble the product.
To assemble the lower handle [Fig. A1]:
- Place the end of the lower handle ① into the slots on the deck ②.
- Secure the lower handles 1 to the deck 2 by firmly pushing fixing pin 3 through the holes in the deck 2 and handle 1.
- Repeat on the other side
NOTE: Should a problem occur when securing the handle to the deck with the fixing pin, carefully lever fixing pin out of location and repeat steps 1 to 3 above.
To assemble the upper handle [Fig. A2/A3]:
- Make sure that the upper handle (4) is located correctly with the safety lock-off button (5) on the switchbox facing upwards.
- Make sure that the upper handle (4) and the lower handle (1) are aligned correctly.
- Insert the nut into the handle knob (if necessary).
- Fit the bolts ⑧ , the washers ⑦ and the handle knobs ⑧ onto the handles ① / ④ in the correct positions.
- Attach the cable ⑨ to the handles ①/④ with the clips provided.
Make sure that the cable ③ is not trapped between the upper handle ④ and lower handle ①.
3. OPERATION

IGER! Risk of injury!
injury when the product starts accidentally.
Wait for the blade to stop, disconnect the product from the mains and use gloves before you adjust or transport theproduct.
To connect the mower [Fig. O1/O2]:
![FLYMO SimpliGlide 360 - To connect the mower [Fig. O1/O2]: - 1](/content/2026/03/516538/images/ca093fa9d01c511cd6376476b50782a24246f40b3e471c3d6084b2ddfa378a9f.jpg)
IGER! Electric shock!
avoid damage to the extension cable.
cable ① must be inserted into the cable lock
Before you operate insert the extension cable into the cable lock ①.
- Connect the female extension cable ① connector to the back of the switchbox ②
- Form a loop in the extension cable ① , insert the loop into the cable lock ① slot in the switchbox ② and pull tight.
- Connect the extension cable into a 230 V mains socket.
To adjust the cutting height [Fig. 03/04/05]:
![FLYMO SimpliGlide 360 - To adjust the cutting height [Fig. 03/04/05]: - 1](/content/2026/03/516538/images/f69307b55fa0c28d021d274dfca33437377b5ce38bcfa49eb07263298dab9462.jpg)
INTION! Do not use more than 3 cutting height.
spacers ③. The cutting height spacers ③ must only be fitted between the blade ④ and the fan ⑤. Do not fit the cutting height spacers ⑧ between the blade ④ and the blade bolt ⑥.
-
To remove the blade bolt, hold the fan firmly and loosen the blade bolt with the spanner provided.
-
Remove the blade bolt (16), the blade (24), the cutting height spacers (3) and the fan (15).
-
Inspect for damage and clean as necessary.
-
Put the fan on the product.
Make sure that the fan is fully in place and the hole of the fan is inline up with the threaded hole.
- Put the cutting height spacers (13) onto the fan (15).
Higher Cut - less cutting height spacers Lower Cut - more cutting height spacers
Make sure that the pegs have located into the holes.
-
Put the blade 4 on by aligning the D-shaped holes onto the cutting height spacers 13. Make sure that the pegs have located into the holes on the blade.
-
Put the blade bolt through the centre hole of the blade 14
- Tighten down the blade bolt 6 clockwise by hand.
- Hold the fan firmly and tighten the blade bolt with the spanner provided.
Operation position:
Adjustment is not required to move the handle to the operating position. Simply pull down from the forward position or lift up from the down position until the handle is in the most comfortable operating position.
To start the mower [Fig. 06 / 07]:
DANGER! Risk of injury! Risk of injury if the pro
release the start levers.
Do not bypass the safety devices or switches. For example do not attach the start levers to the handle.
To start:
The product is provided with a two-handed safety device (start lever ⑧ and safety lock-off button ⑨) to prevent the product from being turned on by accident.
There are two start levers fitted. Either one has to be used to start.
- Push the safety lock-off button 5 with one hand and pull the start lever 6 with the other hand. The mower starts.
- Release the safety lock-off button 5
To prevent a ring being cut in the lawn and to clear any residual grass, tilt the mower slightly. When the lawnmower has reached full speed gently lower it onto the lawn.
To stop:
Release the start lever. The mower stops.
Tips to use the mower [Fig. 08]:
Mow twice a week during the growing season. The lawn will suffer if more than a third of its length is cut at one time. For the best results mow the outside edge of the lawn in a clockwise direction first.
Start to mow the edge of the lawn nearest to the power point. So the cable is laid out on the lawn you have already cut.
For the best cutting results mow in straight lines with an overlap of approximately 8 - 10 cm on each pass with the mower.
Do not overload the mower. To mow long thick grass may cause the motor speed to drop and you will hear a change in the motor sound. If the motor speed drops you may overload the mower which may cause damage. When you mow in long thick grass a first cut with the cutting height set higher will help reduce the load. See To adjust the cutting height.
4. MAINTENANCE
DANGER! Risk of injury!
Injury when the product starts accidentally.
Wait for the blade to stop, disconnect the product from the mains and use gloves before you maintain the product.
To clean the mower:
DANGER! Risk of injury! Risk of injury and risk of
Do not clean the product with water or with a water jet (in particular high-pressure water jet).
Do not clean with chemicals including petrol or solvents. Some can destroy critical plastic parts.
The airflow slots must always be clean.
To clean the underside of the mower [Fig. M1]:
The underside is easiest to clean after you mowed.
- Lay the mower on its side carefully.
- Clean the underside by removing any grass build up with the spanner/scaper tool.
- Clean the blade ④ and the fan ⑤ with a soft brush (do not use sharp objects).
To clean the outside of the mower [Fig. M2]:
- Clean the outside with a dry cloth.
- Clean the airflow slots ② with a soft brush (do not use sharp objects).
5. STORAGE
To put into storage:
The product must be stored away from children.
- Disconnect the product from the mains.
- Clean the mower (see 4. MAINTENANCE).
- Store the mower in a dry, enclosed and frost-free place.
Storage positions [Fig. S1]:
- Push the lower handle ① inwards from both sides simultaneously.
- Rotate the handle ① to the desired position, either forward for the folding storage position or backward for the wall mounting storage position.
- Loosen the handle knobs ⑥ and fold the upper handle ④. Make sure that the cable is not locked between the lower and the upper handle.
Folding storage position [ Fig. S2 ]
Wall mounting storage position [Fig. S3]
NOTE: When wall-mounting storage, always hang the mower from the lower handle ① cross section.
Disposal:
(in accordance with RL2012/19/EC)

The product must not be disposed of to normal household waste. It must be disposed of in line with local environmental regulations.
IMPORTANT!
Dispose of the product through or via your municipal recycling collection centre.
6. TROUBLESHOOTING
DANGER! Risk of injury! Cut injury when the pro
Wait for the blade to stop, disconnect the product from the mains and use gloves before you troubleshoot the product.
To replace the blade:
DANGER! Risk of injury!
Injury when the blade turns and it is damaged, bent out of balance or has chipped edges.
Do not use the mower when the blade is damaged, bent, out of balance or has chipped edges.
Do not regrind the blade.
The FLYMO spare parts are available from your FLYMO dealer or from the FLYMO service.
Only use an original FLYMO blade:
FLYMO Replacement Blade for 30 cm:
Reference no. FLY094 Part no. 529370590
FLYMO Replacement Blade for 33 cm:
Reference no. FLY095 Part no. 529370790
FLYMO Replacement Blade for 36 cm:
Reference no. FLY096 Part no. 529370890
Replace the blade (see 3. OPERATION To adjust the cutting height).
Problem Possible Cause Remedy
| Mower does not start Mains cable is disconected → Connect the mains cable or if necessary replace it. | |
| Motor is blocked. → Remove the obstacle. | |
| Motor is jammed and makes a noise | Motor is blocked. → Remove the obstacle. |
| Cutting height is too low. → Raise the cutting height. | |
| Loud noises, the mower is rattling | Screws on motor, its fixing or on the mower chasing are loose. → Let the screws be tightened by an authorised specialist dealer. |
Problem Possible Cause Remedy
| Mower runs unevenly or vibrates strongly | Blade is damaged / worn or the blade mounting is released. | → Replace the blade. |
| Blade is very dirty. → Clean the mower (see 4. MAINTENANCE). If this does not rectify the problem, replace the blade. | ||
| Lawn is not cleanly mowed | Blade is blunt or damaged. → Replace the blade. | |
| Cutting height is too low. → Raise the cutting height. | ||
| Poor flotation Underside of the mower is dirty. | mower is → Clean the underside of the mower. | |
| Cutting height is too low. → Raise the cutting height. | ||
| Fan is damaged. → Check and replace the fan. | ||
| If poor flotation persists, contact the local approved Service Centre. | ||

NOTE: For any other malfunctions please contact the FLYMO service department. Repairs must only be done by FLYMO service departments or specialist dealers approved by FLYMO.
- TECHNICAL DATA
| Electric Hover Lawnpower | Unit Value | Value(30 cm) | Value(33 cm) | Value(36 cm) |
| Rated power W 1700 1700 1800 | ||||
| Mains voltage | V | 230 | 230 | 230 |
| Mains frequency | Hz | 50 | 50 | 50 |
| Speed of rotation cuttingblade | R/min 4200 4200 4200 | |||
| Cutting width | cm | 30 | 33 | 36 |
| Cutting height adjustment(4 positions) | mm | 10-30 | 10-30 | 10-30 |
| Weight | kg | 6.7 | 6.7 | 6.9 |
| Sound pressure level \( L_{pa} \)\( ^{1)} \)Uncertainty \( k_{wa} \) | dB (A) | 843 | 833 | 803 |
| Sound power level \( L_{wa} \)\( ^{2)} \):measured/guaranteedUncertainty \( k_{wa} \) | dB (A) | 92/963.9 | 92/963.2 | 92/963.2 |
| Hand/arm vibration \( a_{wet} \)\( ^{1)} \)Uncertainty \( k_{thm} \) | \( m/s^2 \) | 1.51.5 | 1.51.5 | 1.91.5 |
Measuring process complying with: EN 60335-2-77 RL 2000/14/EC

NOTE: The stated vibration emission value has been measured according to a standardised test procedure and can be used for comparison of one electric power tool with another. It can also be used for preliminary evaluation of exponents of vibration emission value can vary during actual use of the electric power tool.
Please consult the supply authority, if necessary, that the equipment is connected only to a supply of an impedance no more than 0.354 Ω. This maximum permissible system impedance at the interface point of the user's supply is according to the test value of SimpliGlide 360V.
- ACCESSORIES
| FLYMO Replacement Blade for 30 cm | As replacement for blunt blade. | Reference no. FLY094 Part no. 529370590 |
| FLYMO Replacement Blade for 33 cm | As replacement for blunt blade. | Reference no. FLY095 Part no. 529370790 |
| FLYMO Replacement Blade for 36 cm | As replacement for blunt blade. | Reference no. FLY096 Part no. 529370890 |
9. SERVICE/WARRANTY
Service:
Please contact the address on the back page.
Warranty statement:
In the event of a warranty claim, no charge is levied to you for the services provided.
FLYMO grants a warranty for all original FLYMO new products for two years from the date of original purchase from the retailer, provided that the devices have been for private use only. This manufacturer's warranty does not apply to products acquired second hand. This warranty includes
all significant defects of the product that can be proved to be material or manufacturing faults. This warranty is fulfilled by supplying a fully functional replacement product or by repairing the faulty product sent to us free of charge; we reserve the right to choose between these options. This service is subject to the following provisions:
The product has been used for its intended purpose as per the recommendations in the operating instructions.
- Neither the purchaser nor a third party has attempted to open or repair the product.
- Only Original FLYMO replacement parts and wear parts have been used for operation.
- Presentation of the receipt.
Normal wear and tear of parts and components (such as blades, blade fixing parts, turbines, light bulbs, V-belts/loothed belts, impellers, air filters, spark plugs), visual changes, wear parts and consumables are excluded from the warranty.
This manufacturer's warranty is limited to replacement and repair of products in accordance with the abovementioned conditions. The manufacturer's warranty does not constitute an entitlement to lodge other claims against us as a manufacturer, such as for damages. This manufacturer's warranty does not, of course, affect statutory and contractual warranty claims against the dealer/retailer.
The manufacturer's warranty is governed by the law of the Federal Republic of Germany.
In case of a warranty claim, please return the faulty product, together with a copy of the receipt and a description of the fault, with postage paid to the service address.
Consumables:
The blade is a consumable and is not included in the warranty.
WAARSCHUWING! Verondingsgevaar!
220-240V/50HzMax. 40m1,0mm
220-240V/50HzMax.60m1,5mm
220-240V/50HzMax.100m2,5mm²
Minimale classificering: 1,0 mm² kabelformulaat, 10 ampère 250 volt AC.
FARE! Fare for kvelning!
Mindre deler kan lett svelges. Plastposer utgjor fare for kvelning for smabarn. Hold smabarn pa avstand under monteringen.
La greissklipperen akvijoles i minst 30 minutter fur den settes bort for oppbevaring.
eller fer voedlikehold.
3NeKtpnuecka6e3onacHOCTb
OJACHO!OctaHOBka cepda!
3To HnEINe CoaIaB GoBpA BoBbTbNkETPMARHHTHOne.
BOnpeEnenHeix 6cbTcBctBax 30 NOLE NOE MoNT EONBHbH N aHyK
OuHNHOPOBaHHe AKTNBBH INN NACCNBHBx MEuHUNHCKNX MMNAHTOB.
Bo n36KeAHne OAnCHOCTHo B03NHKBOHBeH CYaJI, KOTOPBE MOrYT
PnNEBcK T KAAEBIM NNI CMEPTeBLhM TPABAM, NIIa, NIOyUOpNEcER
MeHNUHCKHM MMNAHTaTMH, Nepe HcNOJIb3OBaHm eTO rO hENIA
DOnIKbH pPOKOHCyblTPOBAhCBc CO BcOM BpAOM HrGTOBOTeEM
MMNJHATA.
Ipei nCIOB3OBAHnEM npOBepnTe Ka6JIb Ha npN3Hakn noBpeKdHn H CTapeHH, ECIN IMeOTcR pNnAHAKn NoBpEckHn HA6JIa, OTHEcTE KdJIeNE B CepTNfHnPOBaHHb CEpBnCHb CEHTP N 3AMEHr Ta6JIb. He nLbYTeCB MdJIaM, ECIN AnEeKTPHeCKHe Ka6JIu NoBpeKdHb IIM NHOChEHI.
HeMaHHOOTcoeHNHTeKaBcNOTaekTPOCETN,ecnHaKaBene3aMeTbHNope3blNIOpEepKdHHeNtOaONu. PpHKacaiTeCb K aekTpckBaIIO ToJIbKO NOcNE ETO OToeOeHHHnO TneAekTPOCETn. He pMoHTpyte KaBcN,IMIOUoNNIOpe3blNINN Hbte NopeKdHnH. 3aMeHNTe ERO Ha HOBo KaBcNs.
Ipeae IcnoIb3oBaHnEM yIINHInTeIbIy Ka6bI He06xOJIMo pa3MoTaTb. HAmOtAHbIe Ka6bI MoTy TepeRpeTbCn INCMnITb IpOn3BcOJtBe/HeNOCtB TaHOHOKOcIKn.
DepkneyduHHHnIbHuKaBbIbAaNcTnAaeHN. Bcerda pabotaiTe BdAnOnOTIOCHNYKINITAHNAH,pepeMeaKocmIKyBpAMOMOBaPHTAHnpaBnHNIHBNKoEMCHyaeNOKPryy
He npepaHbaine Kaebhepe3 octpbne npedMeTbI.
IepaOoaeHHeHmBnkiKa6eBnNyDnHHTbHoroKa6eBaSCgda BbKIOUYAIEAEKETPONNTHa.
PpEeHcMOTaKaeBnI DPAHEHNAOCTAHOBNTMOPTBbHTeCOTByIO BnIKN IPOBOpTe KaeBbN HeMaHNNIOBCPckDHN NpINHAKOBCTaEPHeN HbKoem Cytuae He pEmOHTrpyte NOpeBxHbKn Kaeb.3aMeHtE erHOHbN KaeBb,NCnONbByTe ToJIko opmHnHaBn 3anaacHOK aeBn
BcergdaakkypatHOcmTaibaiTeKaBEn,naBeraepenomOB.
HnBkoemcnyae He Hocne nea Ka6enb.
He TnHnTe 3a Ka6eB, Hr6bbl BnHyb BnNky n pOaETKn.
PouKIOIaOHyte H3eNtTe IbSO KcAeKTPocTe C ykaaAHHBM Ha pIpMHeHHo TaBnHKe INeDnepMOHBN HApRBeHKn
Hauin HINJENIHN HINOT JIJIIOYIO HINJIOHIO B COOTBETCN CN EN 60335. He NIOKIOHAIHTM MACGY K ACTRIM INHJENIHN.
IpoBepbpepaoykyo3ohyHaCKpbTbeKaBenn
He ncoonbayre nndene nn yxola 3 npyamnnnn noa
HnHn86e0nacHoctb
ONACHO!Onacnoctb 3aDOxHytbcR
MenKHe DetaniMOry 6bItb NerKo npornOHeH. H3-3a noNtOnHeHO Boro nakTe aI MaNEhBXkTe DeTe cyUcBTeY onAOChTb 3doXHytBCr. Bo Bprrm MOrTaKe hNoJnCkaTte 6bnKToMaNEhBXkTe dete.
Pereid ykakdoHxa HApaeHHnTexHHeCKHm 6cIyKABAHmE JdAeT EAOHOOKUKEOCTbH He MeHHe 30 MHT.
Pn6bnokpoanmpekyuero 3eMaHHeO octaONBte nponepe Haeene. He onpoklbaine MaunHy B Hanpaanenm noBaobatena.
HeBnuaTecb3aHIMXoDm.
EybTe BHHMaTeBbHbI BO BpempaOToB
HikorDa He NpIbEyIToB HzDEniH B McTeX, Ie CyuSeCTByET YrPo3a B3PbBa.
He noIbayuTcBnAaHmE,ccn BbyCtAn,6oBbHnHaxOaTeCb noD BoeMeCTBnEM aIKoRrA, HApKOTNKOB nN neKapcTBa.
H36eeraTe neperpysKraosokocnK.
IcnoiBayte nepuyk, Heckonbanyo 0byBn 8aunty dna3.
He noBbYntocb HdEINEM B yCNOBnX cbIOCTN.
He nnohnyte nndine Ha mokpontpae.
He pa36paIe naeene 6oIbe, yem on pa3o6paB B coctOHHN noCTaIK.
3aynyckaIte raoHokocnky TlboK C npaBnBHO mOnHTnpoBaHoi pykO.
He noIb3yIteB yNCKOBbIM pbHARAMn noOepeNo.
PonbayyIeBpyyKAMCocToPOXHOCTbIO.
3aunthoeOTKnIOUeHne
MOTOP 3auiuHcN TNOUIO 3auiHTOO OTKIOUYEHIN, KOTOpE AKTNIPyET Cnpy 3auiHtN NOHJ INNEpOpyKcMOPTOPA. B OTM CNYae OCTAHOBNT EHNDEJI NOTOCBdHIHTE OER OTOIeTOKPONITAHN. 3auiHTHOE OTCIOHNE BO3bpaauTaC8 I CXoHOHe COCTOHHE TOBJKO NOCIE TORO, KAK B0IOTYCTITE BpuHAR 3auiyCKoCTAOHOBKn. YdJIATE BCNE pENHITCTBNI NIOJOKJITTE HECKOBNI KMTN, NOKA 3auiHToE OTKIOHOHE BEHPHTC B CXoHOHe COCTOHHE, NOCE HEO MOXHO BYAT NPDOJIKHTB NCOJBOBAHHe HADJIN.
2. MOHTAK
OACHO!Onacocb noonyeHHaPbMbI! OCHOCbNope3OBnHnHepeHemH3anyCKe HNEJIN.
→Дохдгпсь OCTaHOBKN HOJA, OTOcoeINHTE N3dEInHE OT 3nEk- TpOITAHN HaDEhBte NepaTKn, PpeXeJc Yem Bbl HauHeTe MOHTNPOBATb N3dEInE.
MOHTAK HIXKHe WtAHr [Pnc.A1]:
1.CdBnBte KOHeu HxHHeu TaHn ① B KpEnIeHne WTaHn Ha Kopnyce ②
2.3akpenHHeHHHOIHTAHy ①HaKopnyce②,HaJabnBaHa KaKeHNHe BHTB③NpoDBeINxpeep3OTBepCTNA HA KOHcE IHTAHnI ①HOPcy②
3. Nobtoprte onepaunho na dpyroon cstopone.
YKA3AHHE: EcnH npn 3aKpePneHHuTaHn Ha KOpnyce Bo3HNKHeT CLOKHOCTb CKePENeHBMHTOM, OCToPOnHX BOBTHnTE KpEnKHBi BnHTN NOPTOPTEBbIpenPBBeHbIE WAnC n 1 no 3
MONTAX Bepxneu TAnr [Pnc.A2/A3]:
1.YeBnTeBc,TOBepxHnIHTAra ① paonnoJxHa npaBnHo n npenoXpAnHeTbHn CTOnop ⑤ Ha paccpeDenTeBHO Kopo6Ke HappanBnBEBpx.
2.ObecneYte,HTo6bBepxHARUtaHra4NHHXHARUtaHra①6bln npabunboHo BbipOBHeHdpyr OTHOCTeJbHO dpya.
3.Bctabte rayb KhoNky uTahn (6)ecnn Heo6xOIMO).
4.YCTAHOBNTBEINHTB ⑥ NOKNAHHeIe IaHbI ⑦IITaHROBBe KHOKNBnPABUNbHBeIO3NIMHaTtHaRax1/4
5.3akpeniTe Ka6enb ③PnnaeMaBmN KnHcAmn HaIaTHarax ①/④ CneInTe 3a Tem, Tc06bl Ka6enb ⑥ He 3aKaANC MEKdy BepxHn WtAHn ④ HnXHn WtAHn ①
3. 3KcPnIyATAUH
OACHO!Onachocb noyuhen TpaMbbl! Onchoctb nope3OB npn HnpedHaMepeHHOM 3anycke H3dennr.
→Дохдintecb octaHOBKn HOKA,OTcoeINHIne n3dene OT 3neK-TopoNTAHn HaNede Tne npaTKn, npxe Die Yem Bbl HaHTHe NaCTpOky nnepMeueHne M3denn.
IopKnHouHenra3oHOKocunKn [Pnc.01/02]:
ACHO! NopaxenHe 3neKtpoTOKOM! Bn36eHAnHe NopeXeHEny yDHHHTeBHO Ra6eB He06xOIMO 3aBeCTN yDHHHTeBHy Ka6eB ①BΦHKCa-Top Ka6eB ①.
→Peped3Kcnnyatauee 3abeNTe ydHnHtEnbHbN Ka6enbBΦHKcatopKa6eNa
- POncoeHnHTe HApyKHBn nepExoHNK ynnHnHTenbHorO Ka6eN K3aDHe Nactn pacnpedentelHoKopo6Kn 12
2.Ynoknte netyynHHTenbHoro KaBEn (1), 3abeNte netnIO BФнKcatopKaBENI 3aTHHNTe netnIO. - POKKIOHHTe ydHHHTeBbHb Ka6eBc K cTeBOI po3eTke 230 B
HactpoKa BaICOTb CTpNNKn [Pnc.03/O4/O5]:
BHIMAHHE! He nconlonbyte 6oonee 3 npoctabok 1BbICOTb cpe3a. IpocTABKn ③ BbICOTb cpe3a cnEyet BCTabnIbTO bKMeJdy HOXOM 4 H BEHTINrTOPM 8, He BCTABnIe IPOCTABKn ③ BbICOTb cpe3a MEKdy HOXOM 4 N 6OITOM HOXa 16
- DnBbHbHbHbHbHTa HOKa 8yepKbBaTe BEHTnIATOP 10 NTBHTTE BHT HOKa 10pNlraeMbIM RaHbIM KIOHOM
2.BbHbTe 60JTH HOXA 10HOX 4, npOCTaBKn 8 BblcOTb Cpe3a NBEHTNATOP 15.
3.OcmotpnteHaHannneNoBpeKdEHHnOCHNTeBCnyae Heo6xDnMOCTN.
4.HaHeHbTe BHTIATATOP Ha HsDnBHe.
YBeDNTEC,TOBENTNATOP NOHOCTbO YCTAHOBENH OTBEPCTNE
BEHTNATOPA HAXODNTCA HOdNIOHN Cpe3bOBBM OTBEPCTME.
5.YcTaHOBInTe npocTabKn 8BbICTo bpe3a Ha BEHTIN JIATOp5. BOnbuaar Bbcota cpe3a -MeHbue npocTabOK BbcOTb Cpe3a MeHbuaar Bbcota cpe3a -6oNbue npocTabOK BbcOTb Cpe3a YOBeTecB, yTO WntuTb BOuW B OTBepCTHa.
6.IIpaeyinpoBKn BICOTb Cpe3a pa3MeCTHTE HOK D-06pa3HbIMN 8OBETPnAMn HA pACNOPkAX 8OyBeNTcB,TO WHTKtB BOWmB OTBEOCTNA BHOHE.
7. PpOeHbTe 60nT HOKa 16 Ype3 OTBepCTne B UcHTpe HOKa 14
8. Ryko 3aTnHte 60nt HOka 16, Bpaan erno no acobon cTepeKe.
9.KpEIKO yDcPKNBAH BCHTINIATOP 53aTHNHTe 60NT HOKA npnla
Pa6o4a no3nua:
Hnnepebda pykBpa0ohyIO no3uio HactpoiKa He tpebyetc.
PpOTo TnHITe nIpeDHeN IO3uIN BHIM NIOI NOHMaTE I3 HIXK-
HEIO3mN BBePx,IOKA pyKa HE OKAKETCB HANBOOE ydoHOH
paOchno3uIN.
3anyckKocvnn[PsC.06/07]:
O ACHO! Onachocb nonyuhenra TpaBmbi! Cy eCTbyET onachocb TpaBMnpoBaHn, ecnn n3denn He octaHabnBaetc npn OTyckaHH nyckOBbx pbYarOB.
He 6xOdnte npdooxpAHNTbHbIe yctpoiCTBa HnnepeKIOuatenn. HanpHmep, He zakpennTe nyckobble pbuarr ha pykortke.
3anyck:
H3dennoe OchaueHO DbyxpyHbIM ppeoXpaHNTelbHbIM yctpoiCTBOM (nyckOBoi pbHAR 8 uazHTHnB 60KIOPOBA5), KOtopoE peoTDBPAaue CIyauHHe BKOJUOeHne H3dJIe.
VMeETCnDBA NyCKOBbIX pbHara Ⅲ.ДЯЗANyCKa Heo6xOIMBOcONb3OBaTcN OHNM HIX.
1.HaMHTe 3aunHyo 6nKpO8ky ⑤ OIOH pyKO, apyo pyKO
NOTHTHe IyCKOB pBHar ⑧.
KocNtke 3anyckaTeC.
2. OTnyCTIte 3aunTHyIO 6NoKNpoBky ⑤
YTObI npEoTbpaTbBpeaHHe KOJIbua B rA3OH n ydaNITb OCTaTKI TaBbI, cnerKa HAKIOHTe KocNkY. KorJa rA3OHOKOCNka pa3OBbET CBOK NOHky CKOPOt, PnABO ONyCTne ee Ha3OH.
OctaHOBKa:
IapaHTnHbIe 063aTeJIbCTBa:
Bcnyae rapaHTmHoi peKnaumn C Bac He B3Maetc npata 3a npedctabneHHy ycynr.
FLYMO rapaHTpyET HAdEeKaayu paOby Bcex HOBbX opnHnHaBbIX
HneJnn FLYMO B TceHeM2 JTe C daTb NepBOI NOKyKN y DnIepa
Pnp YCIOBN NCOJIb3OBAHN H3dJIIN NCKIOHOTENBHO DNIR JINHbIX
Uenie. FapTAHHN3rTOBUTeN
He pacnpoctpaHReTcHa H3dEINr, npnoBpTeHHbIe Ha ATOpnHOM pblHK. DaHnaR aapnTnA paNPocTpaHETcHa Bce CyueCTBEHNHe HeoCTATKn 3dEINr, KOtOpe Ioka3aTeNBO CAr3aN COnW6KAMn B MaTePnAnxnn PPOm3BODCTBe. TaHpaTH NoDpa3yMeBaET npdoCTabNEHne NOHOCbIO fYHKUHOHpyUoero H3dEINr HA 3aMeHy nn pEmOH THeCNpABHO 3dEINr, OTnpaJIeHHORo HAm DecnPnTHo; Mbl OCTaBnEM 3a CoBoPi PBOBbIbHpaTB ODN IN H 3DbX BApNAHTOB nCBOeMycMTopeHIO DaHna YcJyra npdeOCTaBnHETc Prn CoBIOKeHN CInDeyUOuX yCNOBm:
V3deneHcnoIb3ObaNocbNoHa3HaeHEnB CCOBTCTBnCpeKoHmHaCmBpyKOBOCTBE No 3KcnPnyataaMn.
HnIOkyntaeHbIptBeHeNbTaAICBCKpbBaTBnn peMOHTnpOBaTbMdEJIne.
-ПиЗКСЛУАТAUИN ИСОЛБЗОВАЛСТОЛБКО OPIRINHAJIБHALE 3aIACHbIe N I3HaSHUBAEМБte DeTANI FLYMO.
- PpeioctabIeHne ToBapHoro Yeka.
13 rapaHTM NCKIOHHe HOpMaIbHbN 13HOC DetaneN KOMHOHETOB (HaNPmep, HOKei, DetaneK KpeJIeHN HOKei, Typ6IN, OCETNTBb-HbIX pN6OBOP, KIOHObIX N 3y6QbTbIX peMHe, paOChX KOnc, CBeYe3aKIRAHn), I3MeHEN BHeUHrEo BNuA, a TaKKe I3HaWUNBaEMbIe n pacxODHbIe DetaII.
JaHHa rapaHTn HA3ROBtEnr ORpaHmHBaETc 3aMeHOH n pemOH TOM HeKoHNIOHOHOr TObApa Ha yKa3aHHbx BbIe ycNOBnX. rapaTHN3ROTOBtENr HE MOKet 6bIb CCHOBAHm Dn N BbDINKeHN HbIX npTeH3n, HanpIMep, Ha BO3MeueHe yUep6a. DaHHra pAPHTn HA3ROTOBtEnr, ECTeTBHeHo, He 3atPaHmBAET 3aKOHHe N DOROBOpHe rapaHTnHbIe Tpe6oBaHH B OTHOHeHH dInepa/npOdAua.
Iapantna n3rotoBntena perynnyetc npabom FedeepatNBHO PeCy-6nKn FepMaHn.
B rapaHTHINOM cIyueae, noKAnyIcTA, onNATne HeoOxOIMbIe noTOBc BcOpBn BblWNTNE deEeKTHOE n3JENNE BmCEte C KONIE NTOBAPHOr OKeA HOnCaHNEM HeCNpABHoCTe I No aDpeCy cepBCHOH cIyKbI.
N3haunbaebleetann:
HOH HINHTCA paXOHOI DetAIO HA HERO He paonooCTpaHETCRapaHTVA.
Hnctpykun npoan3bOaHTenAn Poccnckoepaun
HAROTOBNTen: Husqvama AB,
Drottninggatan,
561 82, Huskvarna, Sweden
CtpaHa n3rOToBneHn yka3aHa Ha TOBape.
OΦηaJIbHbI NmIopTeP Ha TeppTOpNIO PocCNo:
OOO "XyckBapha",
141400,MockOBckA O6JIacTb,F.XIMKn
e) CtpnkiBtpaby Bnonepek cxny, hikon He Bropy a6o BnHn no cxny.
f Bybte oocnoo obepehni nac 3mH HapnMky pyxHa cxnni.
g) He nDtpnraTe TpaBy Ha HAdMipHo KpyTix Cxlnax.
h) Bybte Bkpan o6epxH, po3eptaoH ra3oHokocapky a60 pyxaOHN y HapnMky do c66e.
3) 3yynnHnIe pkiyHnIHcTpymEnT (afo IHcTpymEnTH), kKIO rAOHOKOCAPKy nOITpHO HAXmHIN dI TPAHCIOPTyBAHH Npe3 NOBEXH, IIO HE BKPNI TPBOIO, a TAKOK NID cac NepemUeHHRAoHOKOCAPN Do HA M3 MICU II BVKNOPCTAHII.
Hikomn He bokopocbyte Taohokocapky 3yukodkeHHMM 3axchHMM PPncTPOMm Hx3axHHMpeWtKAMn, a0b6e B6yDcBAHX3axHHX MPncTPOB, harnpKaad, dedneKToPoa YraTNPcTOPO nIaBDOpy TpaB.
K)3aYckAte 60 aadioTc TAPTOBNI BIMNKH 3 oBepeXHCTO, BIIOBIDHO do bKsIbOK BPObOHNk.3eepHTb yBary HdoctaTHIO BIcTaHBiH DIO pIKyHOrO HCTpyMe-TH (60 aHCTpyMeHTIH).
I) Pnuc napty a50 3anycky MOTpy He MoNHa HaxnnrTa 3aohokocapky,
6xu 4nA 3anycky HEo6xIHIO TpOx INHHTY. Y TAKOMy BnnaKy HaxnniBt II p18HO HA CTINbKn, HACKINKIIue a6bcONHO HEo6xIHIO Ta NpHimaiTe TINbKn TY cTcPOHy, KHA 3hAnxoDInCB daI IBD KOPnctByaHa.
mHe 3yanckaTe MOTo, HIO Bn CTOIe nepa KaHAnOM DnBkUdHaNc KOuEHOJ TpBN.
n) Hikon He nomiuahe pykn a60 horn ha a60 nio oeptoi actnn. 3aekn Tpmaeocnoanl BID OTbpy Dn BkunadHn ckouenHt pabn
o) Hikon He niiHimaTe afo He nepeMiyTe raochokocapky a npauOIOHM MOTOPOM.
pBMMKHTB MOTor BA TIRHTB BANK 3 POZETKN. NpekoHaiTeC, uO yci PXYOMI CHNTIN NOBHCTIO 3yINHINAC;
-KONBn 3aHwaeTe raoHOKocapKy
-TO TOKI, HX BY CYHETE ZAKHIHOBAHHA a60 c3AMHEH B KAHANI JINBHKHNAH CCKOJEHOI TPO8AI;
-NepeHJHKnepeBipatn, YNCTTN a50 npboaHTN HUI pOBOIT 3 raoHOKOcAPKoo;
-ICNRAyDAP06CTOPOHINPepM.3HAnITbNOUKDKHNRAsoHOKOCapKN Ta BOKAHTe HeoBxHlpeMOHTI POBOTm DO TOTO,IK 3HOY II BMKATnTA IOHANHnE HEO pAIOBANT
KIIIO RAHOONKOcAPKa NOHNAC HESAHIO BbpyBn,NotpHbHa HerAHa NopeBpKa:
-3HaHdITb NOWKOJKeHHA;
-BAKOHaHTe Heo6xHn peMOHT yHKoJKeHX Detanien;
- nepekoHaTeC8, 0o BcI raiKu, 60NTu Ta RBUHTM MiHO 3aTHHyTI.
Dorndi36epirannn
a) NpeKoHaTeCn, 10c BcI Ta KI, 6OJIa Ta Tb HHTN MlIOH OaTHTyT Ta npiCTr h3xOJbHTb y 6aBHeHcyPo6OHyO CTah.
b) Perynno HPO nepesipriine pncptpr dna 60py tpaBn HA HABHCTb OSHAK hiooHcctn Hbtpn DnyKkHbHcHt.
c) 3mpkyBaHb 6e3neKn 3amHIOte 3HOwei afo nowkOxeni Detani.
d) 3eepHbIy syary Ha Te, IIO B MaunHax, RKI MaKToB KInka pxyuHx IHcTpyMENTIB, o6eptaHHN OJUHO pxyuHoro IHcTpyMENTy MOKE BIKNKATN o6eptaHHN IHxuN.
e) Nuaaunnaaunnaa Hauuunnnaa aeeepnny yarny na Ta, 106 He daumnnn nannui Mx pxyommm pkyhmm IHCTpymHTAM Ta Hopyxommm DeTANMMAHIN.
f)DaIteMOTOpO oxoIOHyTN nepeD Tm, NK cTaBn TMaunHy Ha 36epirAHH.
g)ⅡIaoc6bryoBAHnPikyHmIHCTpyMHTBMAHOHaBa3,HO38kaKIOHNHe,IOKepeRNOKNBHeHHBMKKHe,pkiyHcHcyMeHTN BceLIEMOKYTHpyXATNC.
h) BnKopncTObyIe BnKIOOHO oprrHAnbHI 3aHactHH Ta KOMnJIekTyIOU.
DqatKOBi Bk3iBKN 3TexHki 6e3neKn
EneKtpo6e3neKa

HE5E3NEKA! 3ynnka cepra!
LcE Bnpi6 nIac ecKnnyatauI cTBOpK e enekTpomarHtne noJe. Lc
Noe npn neBnxymOBax MOne CTbOPHTN eRatBNHMnBnHnBnHa pOBOy tAKNBHX a06 naCBNHmMeHNHUMnATIb. Uo6 BNKIOUHTn He6e3- neHi CHTyaI, kI MOkyTb PnHBeCTn Do TAKKx a06 CmePTeNBHX TpABM, Ooc6H 3 MeHNHIM IMNaHTaTOM nepei BNKOpHCaHnHm IboTo BnOBy NOBHHI pOKOHcyJbTuBaTNCr 3i CBoIM NkApem i BnpOBHKOM ImnAnHAty.
Perynnpiepeepieeapnna KaeBn npdpmei nKoHbI cTAPHH. B pasi BnHOHnDcOeKTy Ka6oIO DoCTABn BmIO do ABTO30-BOHOO CEPBCHO RENTpy DAMHI KAE6NIO
He 3acocobyte Bnip6, kpo eektpokabeni nowkdoheni afo houenI.
HeraHIO BIDKIOHITb KaBb BID OOKTKPOXNCHHA,AKUO BIN HAnCicHHI
abo nowkojeHa izonnui. DToPkaTecn do eektpokaben noiue, koi
BUKKIOHOO CNEKTOPOBIBNHH. Hc PcMOHTyTc HADCHHNN A50 NOLIKDKNK KABIEL, 3aMHIITI YFOHOBIM.
IIOOXBHyBbHn Ka6bIb Mac 6ytn po3MOTAHIN Dn EKcNpyaTJI.3MOtAHI Ka6eni MoKyTB nepepiTmCn I NOHN3NTn NotYHKCTb Ra3OHOKocAPKn.
TPMMAIe NIOOByaALHNNKaboNbNdoJIiBnPOby.PpAIOIe 3aABKnB HAnPmI BIDKepeJANKINHEHHN,NTCTPRAHOYTuDNI-CIOU,1HKONHe nepeCBAIETeC NOKJI.
He TnHtB KaebIb uepe3 rOcT pIpeMtn.
BzBkDn BILKIOHNOIe BIL BILNTOPOKIBNLHNI NEPEITIMK,AKBNTRHTBNIKY, KaEBiE 5IOIPOBKYBbHNH KABbI.
BIDKIOHITMOTOP,BINTHIHTBUNKY3pO8eTKI INpeepiTe Ka6enbHa npEET NOI KOKKHeB1 CTAPHHNEPDDMMHK 3MOATNIHOI 36EPIRAHNAHE pMOHTYNEHADCHENH ABO NIOKOKHeNkKa6enb.3aMIHTHO HOBN.MaBKDN BUKOPONCTOByTE Hnne OPORHAHNbIMHHNKA6EN
3aBxD peTeNbHO 3MoTyIe Ka6en, He nepeRnHaOuH Noro.
Hikon He nepeHoCte Bnp6, TpMaOnu NOro 3a Ka6eB.
He TnHtB 3a Ka6enb, 0o6 BNTARHyTN BNky 3 poaETK.
3AxBKJN BHKOPVCTOBYE BHPI 5B3KA3HOHO HA TNIIOBI Ta5JIHCUJI BHPOBO HAPYTOPO MEPOE 3MIHHO TCPMY.
Haihi BpO6Mo TaIOBIOHbIy HIOAIOJIIO BIOIOBIIOHO EN 60335. He iNkno- aHaTe MAc yO dyBa-NKOI cAHTINH BPO6y.
PepBipaipepo6oy3oHyHa npEmT npXOBAHKa6enib.
3a6bopohctcbBaBnKOpNCTOByBaTn BnPbD JnR DnHpy 3a CtBakmA a60 SInB BOID:
Oc6ncta6e3neka

HE6E3NEKA! He6e3neka 3aynx!
Dpi6hi NACTHNO MOXYb 6yTH NERKO pOKOBHTYr. Upees noniTeNNEHOHMI WIK ICHy He6e3NeKa 3aynx nIra MAneBKnX dIteR. HDoNYCKAte MAneBKnK XdTeo MIcA 36lpKn.
JaTae RaTOHOKOCAPDI OAOXOHUYMHIMY30 XENHINI DNEpTRIBAHIM 36epi- RAHHM A6O IPOBEdEHMR PO81 TEXIHNOOR O5CNYIyOBYBAHNI.
Pn 3aKTHIOBAHH DpyyHO eNEMHTA 3YINHHTBvipI INePBIPNTI.
He HaxnHte MaunHy B HanpMky Do onepatopa.
He pyxaine II Haa
3aHuaTea yBaKHMn nJd aac ekcnnyatauJi.
Hikon He BnKOpncToBpyTe Bnp6 y Micux, de icHy eHe63neKa B6yxy.
He BnKOpHCTOByte BnI6, kAIO BO TBMOnHe, XbOpi A60 nepe6yBaTe TnD, BNIMOB ANKoJIOLO, napKtOHAc 6o NkIa, A6o BnAChKei.
YHnKaTe NepeHaBaHTaKyBaTn RaOHOKocApKy.
KOpCytBcRpykABUAMnHADrAHTeByTITI,IOHe KOBaSe, Ta 3ac06N 3axKtY OeH.
He binkopncToBpyTe bpiD y Bonoromy cepenobu.
He BnKOpncToBnyTe BnpiHa MOKpi TpaBi.
He po36bpaTte Bnpi6 Ha 6iBny KInBkictb yactH, yM np noCTaHaHH.
3aynckaHTe raoHOKocky nIe 3 BepTKaJIbHO BCTAHOBHeHOIO
pyKoATko
He BnKOpNCToBMyTe nonepemHHo CTapTobI BaXeni.
KopncTyuTEc pyKoATKaMn o6epekHo.
AbapiHBe BMMKaHH
DbIyH 3aXiUHEH MxAHIMON BAMAPHHO BRMMKAHHN, JIKK AITbMyTecSsA 3a yMOB 3aJAAHn pKpy-IPO rnpCTPO kO 6pebaTAKHeHH DIBYTHa.
KIIIO CTaHTbHc, 2yHINH BIPIO TaBILNHO BID ENEeKPOJIENHE HMOxAHIm ABAPHIOR BVMINKAHHZyTNHIO BOKYBAHN TINIKB N Pasi BIDNYCKAHH BAKeIe SanyCKy/3yIMNHKN. IpeepTIM, IK PnODBOKH INBOKPCTIHIN BIP06y, BmAIJIbY cIe peiHKUIN aeaekHtme EJIbKa XBNHIN DOKI ABAPHIIE BIDKNIOHNEHNOBEPOTCYB YBXINDE NOLOKHHN
2. MOHTAK

3NEKA! He6e3neka OtpmaHnTpaMn!
e3neKa OTPMaHnHa npi3y npu BnnaKOBomy 3anycky Bnp6y.
→3aekaiTe DOKn 3ynnnHbCpiXyHn npnctpiB, BdkIOUHTb BnIP6 BID enEneTPOkINBLeHHa Ta oAnrHITb 3axNCHi pyKaBnui, nepu HIX 3bnpatn BnIP6.
BCTAHOBNEHNNHHKHOIpyKoRTKn[306p.A1]:
1.Посунбte KHeBиньBoi pyKoTKn ①у 3aTnck nIpyKoTkn Kopnycy ②.
2.3aikcyte HNKHO pykortky ① Ha Kopnyci ②, BCTabuBn KpinnbHriBHTN ③ i cno Opee3 OTbOpn HapnkiHui pykortkn ① i Kopnyc ②.
- NobTopitb 3 iHwOro60ky.
BKA3IBKA: Raio npn fikcaui pykortkn Ha Kopnyci BHNKHe npo-6nema i KpimnlbHM rHTOM, BTHrHtB opepeKHO Kpinnlbln HBNH I nobotpi nepenne Hei nuie kpoKn 1 no 3
YcTaHOBbA BepXHbOi pyKoRTKn [306p.A2/A3]:
- NepeKoHaeTcE, IIIO BEXPKIpyKOITKa ④ NEpB6yBaC B npabNtHoMy NOJKeEHHI, A KHONKA ZAXnCHORO 6nOKyBaHHHa nytnepe6yBaC y BepxHbMoY NOJKeEHHI.
- IpekeohaiTec, 0o BepxHpyKoRTka 4i HnXH pyKoRTka 1 npaBnIbHO nirihai OHa do OJHoI.
3.BCTaTBe raikyBcmyuKOByraiky 8(Ano ce Heo6xioHO).
4.BctaHObitbTBHHTN ⑥,Wai6n⑦iCMyIKOBIraIKN ⑥Ha pykoRTkax ①/④y npu3HaueHi dIra HIX MICA.
5.3aikcyteKaabeN ⑧Ha pykoTkX ①/4 3a donomoroIO KJInc ⑩, RKI Doaiobc. CTeKTe 3A TMM, Uo KaabeN ⑧ He 6yB 3aTHCHTM MID BEPxHbO KOYPOKTKO ④ HINKHbO POYKKTKO ①
3. OBCNYTOBYAHH
He6E3NEKA! He6e3neka OTPMaHnTpaBMn! He6e3neka OTPMaHn npi3y npn BnnaKobomy 3anycky Bnpo6y.
→3a4eKaIe DoKx 3ynmHtBcpiXyU npnctpi, BiDknOuItb Bnpi6 BiD eJeKTPOkXnBHeNHa Ta oJrHtB 3axnChi pykabuCi, nepH Xn HanaTbOByBatn a6o nepHoCnH TbnPi6.
IIiknoueHHra3oHokocapKn[306p.01/02]:
H5E3IeKA!YpaKeHHa ctpymom! 106 yHKHTn IOKKoJXeHb NOOBKyBaIbHOrO KaBeno IOOBKyBaIbHNKabEnIO NobHNen BCTaBHeHny fikcTOp KAbEnO C
→ BctaTe nepe ekcnnyataucio nooBkyBaHn Ka6enb① B φikcatop ka6enl ①.
1.ПИДКЛЮчтьгИДО NO.DOBKByBaHa ⑩do 3aJHbOi YactHnH 6NoKa nepEMNKaHa ⑫
2.3p06bIb netnHO 3 noOBkyBaIbHoro Ka6eIO BBeITb nO netnHO y fikcatop ka6eIO T a 3aTnHITb netnIO.
3.Пдснaite nOOBkyBaHn Ka6eIb 10do eNEKtpuHoi po3eTKn Ha 230B.
PeryIOBAHRA BCOTH CTPNKKN [306p. 03/04/05]:
YBA!He BnKOpNCTOByIe 6Inbwe 3 AnctaHuiHnx npoCTABOKIJIe3a13.ⅢnCTAHuHINIpOCTABKNBCTAHOBHOHTBCaTINbKnMIXNeOMTaBEHTnA TOPOM3.3a6pOHReTcBcR BCTAHOBHOBATNIChTahUHINpOCTABKNMIXNeOMTa3aTHCNKHMM60NTOM6
- Ⅲb BnKpyTn 3aTNCKnHbOJNT, TpIMaJIte MlHO KPNJIbTaKtY ⅠBjIKpyUHTe 3aTHCNHbOJNT 3a DOIonoMOrIO rAikBOBORI KIOVA 70, 50 BXoDINT do KOMPNEKTy NOCTABKNI.
2.3HIMITbATNCKHM 60JIT 16,JIe3O 14,INCTAHJHi IPOCTABKN 18 Ta BEHTNRTOP 15. - Npebipte Ha HnBHCtB noKOpKeHb i 3a Heo6xIDHOCTO uHcTBe.
4.HaHbTe BEHTNHTop Ha Bnpi.
IpeKoHaNTeC,IOBENTNHTOP NOBHCTIO BCTaBHeH, a OTBip
BEHTNHTOPA CINBnadae 3 p135OBHM OTBOPM.
5.HaHbIbeNtctahuHi npocTabKn 1Ha BENTnIATop 1Bucokn pi3-MeHwe nctahuiHHx npocTabOK HnbKn pi3-6bnwe nctahuiHHx npocTabOK TepekohAteC, uo wunbKn po3taWBOAH BOTbOax
6.YcTaHOBb pIKyHn npCTpi 3i 7aTAMnoBaHMn D-nOdiHMn OTBOPAM Ha nctAunHn npOKnaKn 10o6 3aDaTH BncoTy 3p3aHHTPaBN. IpekoHaTEcR, 0o WmN 3hXAOITBC R OTBOPaH Ha pIKyHOMy npCTpoI. - BCTaTe 3aTnCKHn 6oT 16 Kpi3b CEHTpaBnO TBip ne3a 9
8.3aTnHtbypyko3aTnckHb6013aRouHHNKOBOcCTpIKoIO - MiHcHo TpMaIte BeHTnIaTOp 5 Ta 3aTARHITb3aTmCKHm6oJI T KIOHcEM 3 KOMIeKTy.
Poboe noJoxeHH:
IyctAHOBKN pyKoRTKn BpoOoe NOJIOKeHHH HAIaWbAHHH He nortipHe. PpOTo noTARHtB Hn3 3nepeHbSO rno JNOJKeHHH A60 niHIMITB BROPy 3 NIOJKeHHH Bn3,DOKN pyKoRTKa HE bDe B HAIBINb 3pyOHMO pOcOHy moNIOJKeHHI.
3anyckra3oHOKocapKn[3o6p.06/07]:
He5E3NEKA! He6e3neKa OTPMaHnHa TpaBMn! 3aRpo3a OTPMaHnHa TpaBMn, AkoBip6 He 3ynnA- EcbnicnToro, AK 6ynn BiDnyueni NyckoBi Baxeni.
→He 06xOjBte 3axnChi npncToCyBaHH a6o BmNKa. HapnKnad, He 3akpinIOte nyckoi BaXeni 3a pyky.
3anyck:
BnpiO cchaueHN DbOpuyHM 3axNCHM pnpCTO cyBaHHM (nyckOB BaxInb Ta HONKa 3axCHORo 6NOKyBAHHa ⑤), RKn 3axn- aae Bd BNnADKOBO BRMaKHHa.
YHaBHocIeDbPyNcKOBHXBaKeJr8.OdHH3DBoxMaBVKOpNCToByBaTnCAIIN3AnCky.
1.Hanichitb HKHONK 3aXHCHORO bNOKYBaAHNHOdHIeKO pykoHO, aIHWOHO notARHITb CTAPTOBn BAKINb 8. TAOHOKOCAPKa 3aYCTNbCBA.
- BiDnyctitb KhoNkY 3axnCHOrO 6oKyBaHnn
U06 yHnKHyTN BIVI3aHNKa KOHa ra3oHi N IaBnDAneHHa 3aNNuKi8 TpaBn, 3neKHa haxiHTBaHOHKocapKy. KoN rAOHOKocapKa hAbpe NOBHy WbuiKICTb, AkypatthOOnycttB II HaTpaby.
3yHHKa:
→BiNycttB CTAPTOBn BaxJIb ⑥. Ra3OHOKocpKa 3yINHHTCBH.
Iopadn 3 eknnnyataui ra3ohokocapkn [306p.08]:
KocitbDba pa3n Ha TnXJNeH y BeretauJHH ce3OH.
TaoH noCTpaKaJaE, KaO 3a OIN pa3 cKocnB bInbWe TpeHH NOro DOBKMHN.
HnKaPawOpe3yIbTatyKocitcNoatky30BHIHNKpAra3ohy B HnpanKy 3a rOuHHNKOBIO CTPIKOIO.
HnueHHH HxKhboI YaactHNr Ra3oHOKocapKn [3o6p.M1]:
Jere 3a Bce nntn HxHIO yactHy bipaa ny ckiybaHH.
- 06epexno noknaTb ra3oHOKocapky Ha 6ik.
- OuHCTIb HIXKHO CTOPOHy 8BUNaIIIOHN DIN LbOro 3aNNIKU TpaBN 3aDIOIMOROIraIKOBOROKIOHA/UKpe6Ka ①
- Ouchitb pikynn npncptpi KpnNhaKy M'koO uTkoO (He BnKOpNCBOyTe roctpi npdeMetn).
OuHHeHHBepxHb0iYacTHnHa3OHOKocapKn[3o6p.M2]:
- OuNCTiB BepxHIO YACTINHY 3a DONOMOROIO CYXOI TKAHHN
- OHTBTE NOBITPO3a6ipHnKN @ M'HKOIO uTkoO (HE BHKOPCTOBYIte roctpi npedmet).
5.3BEPIAGHH
6. YCYHEHHH HECNPABHOCTE
He5E3NEKA! He6e3neKa OTpMaHnTpaBM! He6e3neKa OTpMaHnN pOj3y POM BnPAKOB
Je3neKa OTpMaHnHa npi3y npn BnnaKOBomy 3ayncky Bnpo6y.
→3aekaiTeoKyHnHtBcpiXpynnpctpi,BiDknOuHb Bp16 BiEneKtpoxKnHeHra TaOgnHb 3axncHi pykabNi, nepu Hx yCyBaTu HenonadKn Bpo6y.
3aima pixyoro npuctroo:
H6E3NEKA! He6e3neka OTPMaHHa TpaBMn!
Kkuo pixyun npncptpi oeptaetbca 3a hainBhocti nooiokjkeh, 3nHannH, o6baanycBaHH a0eepHN, Icye pn3Nk OTPumAHnPi 3aOH TpaMN.
→ He BnKOpNCTOBYIne Bnpi6, AKnO pixyyn npncptpi nnowkoJKeHm, 3irHytnm, po36a naHcobAHm a6o mac ue6pHm.
→3a6opohReTbCnOBTOpHO 3aTOuyBaNpiKyHnnPnCTPi.
3anachyactHHFLYMO BIMoKETe 3aMOBHTN y CBOFO nCTPNOIOTopa FLYMO a6oB cepbiciH cnky6i FLYMO.
BukopncToByte Ine opriHnJIe3a FLYMO:
3mHHe ne30 FLYMO 30 cm:
Pepl.NFLY094
Teanb Ng 529370590
3MInHe ne30 FLYMO 33 cm:
Peφ. Ne FLY095
TeTalb N529370790
3MInHe Ie30 FLYMO 36 cm:
Peφ. N2 FLY096
Teanb N529370890
→3amHnTneJeo(nVB.3.OBCNYTOBYBAHHR PeryIOBaHHBnCOTN CTPNKKN).
PpO6nMa MoKJbMa npMHa CToCic yCyHeHHa
Je3o BntpaTHM MATEpiaIOM I He OxONIOETbCR rapaHTieIO.
220-240V/50Hz 40m metreyekadar1.0mm
230.240V/50Hz60m-matroyknder1.5mm
220-240V/50Hz100mmetrovekadar2.5mm²
En dusuk kategori: 1,0 mm² boyutunda kablo, 10 amper 250 volt AC.
-
Elektrik kablosu hasarlya, olasbir tehliley onlemek icin bunun yerel Huscvarma UK Ltd. Onayil Servis: Markozi voya bozor nitolidere sahip kiskiler tarafindan degistirimisi征求意见.
-
Sadee agk havada kullanim icin dingtolen ve asadijklartgarnameerindinen brine uygun alan ozatma kablolanii kullan: Alsimslastik (60245 IEC 53), alsims PVC 60227 IEC 53) ya da alsims PCB (60245 IEC 57).
Egitim
1. TEXHnKA HA BE3ONACHOCT
BAKHO!
IpocheTete BHMMATEHIO HNCTpyKUHTA 3a ekCnPOaTua IN a 3anaTe 3a 6bdeu cnpAek.
CnmboN Bbpx npoykta:
TipoyateeMHctpyKunrTa3aeknnoatau.
BHHMaHHe-OcTpnepeKeuHnHOKObe-PeKeuHTe HOKOBeCe DnKnatNo HNEpUaN.3KnIOyTe 3axpaHbA uIeCen npEn TeKyuPemOHTH paOToH nPi NnOBepaHa CBp3aunua Ka6e.
Дьгтс CBp3auaи Ka6e danaeу ot pekeuHTe HOKOBe.
06u yka3aHnno TeXHnKa Ha 6e3oNaCHOCT
Besonacnoct Ha enektpnuecknte ypeu

ONACHOCT! TokoB yap!
OnachocOT HapaHbAhe OT TOKOB ydap.
→PpOdykTbTpr6Bba Da 5bE zae xapaHene c enekTpuecTBo pne3 ATOmatuHne npkecbau, deIeCTBaN pno nOBpea Hn HtTuHa He ToK (RCD) C homHAnae ToK Ha N3KnIOUbaA OTe MAKCmYM 30 mA.

PENPYPEXEHNIE! OnachocT or HapaHbahe!
ПИЕ ВОЛно 3abptane HAOHA MII BKNIOVABE Na pOduKTA cbuECTByBa ONaOHCT O nOPRABAe.
→NaknopeTe npOyKaT O enEeKtpHecKaT MPeHa, npEiHa H3BbP-TeXnHccko 6cbNyBaHe Na da TaHt eTahn. KOtAekTbT Tp8Ba Da 6bBe B 30HATA h 3pntHnOTo Bn none.
Kabenn
ПИЗИПОЛСЕАНБДКINETENHКaБELN.CBSLITe TPN6BA DA OTROBAPRTHA MINMAMHNTe CEGHNH BCEBDAIATA TBONLA
HanpeXeHne IbIaHa Ha Ka6ena CeeyHe
| 220-240B/50Фu | До 40M | 1,0MM² |
| 220-240B/50Фu | До 60M | 1,5MM² |
DOnbHHTeHHyKa3aHHNoTexHnKaHa6e3oNaCHOCT
BesonacHocHa eNeKtpnuecknte ypeDn

ONACHOCT! CbpneH apcet!
Tosni npdykzt obpasyba enektpomarHTHno ne Bpeme hpaOtta. Toba nohere mepn onpeidenenb ocortertnctba da okake bnnnna
BbPxy HAnHa HA dyHkUmoHApHe A kTbHMn IIN nAaBHNMe dMnHnCKn MMnHTeN.3a Da ce IaKIOuNH PNCbT OT CNTyaIHH, KOHO STaMOrnn da DoBeDat DO TeKKn INm CmbpTOHOCH HapaHbAHn, NluaC mMeHnCKn TpRbA npEa yNtOpeBa H aTo3 npOdyKT da Ce KcCytnpAT cBc CBON JekpN pNO3BDoJIeN Ha MNaHTa.
Pnpn yntp6a npoepeTe kaba 3a npnaHn Ha nOepda n ctaepene. Ako ce OkaKe,ue KaBbIe e dekeTcH, 3aHcEte npOdykTa B oToPn3paH cepnn 3aAmeHete KaEDA.
He nIOnaBaTe npOyKa, Ako KaBcIbT 3a eJeKtPocaxpAbaHene NOBpeHn IIN HAeOHce.
He3abHNO 3KIOHYe KabeNA OT enekTPOaXpaHbAHeto, Ako KaBbET e nppeRan Hm c NOpeBeda HcNauua. MoKeTe da KOcOcHete KaBena 3a enekTOxpaAHbaHbE Eua toraba, KaroTe a NkIOHOe HcNPOaXpaHbAHTo. He pemOHnPaHTe cprzah Hm NIOpeBden KaBef. 3aMeHete ro c HOy. YdybnHtneHHAT Ka6e TpBa 3a Bde pa3BHT, 3a Da bDa H3N03BaH. HABUT Na KaBEn MOrat Da nppePrt H da HAmaIr npOn3BOHNTENHOCTra Ha KOCAKATA.
DpBteYdIbKabaaHKaBeI daneOT npOyka. PaBcTe H aocTaHHO daeHnO pao3oHne OTE eEeKTPo3aXpaBaHuaN HIOTHNK, Kato KOCITE Happei Hasaed, IN B HnkAkbC LyAAH He Ce DbKkeT E Kpbf. He nterbnite KaabaHaon cptn npmedtn.
BHHAR NIKKHOHTE ENEKTPOOAAXPAHBAHTO PEPDA NAOKHOHTE UENCEBA, KABENA INI YNDKNTTEHNNA KABEA.
Maknohe eekpOBNrAe,naBpnae Ie enceena n npoepepeKa6e naOBpeDn CTapeEne,npEa da Ro HabeNeTe 3a cbxpaHHe. B HnkakBc cyuay He pemOHnpaTe NOBpeHKe Ka6e. 3aMeHete ro c HO. NnONsBaTc me OPOgHnHEn PeaepeHKn6e
HabBaIe KaBena BnHaBn BnMaTeNo Hn36BaeTpePpeyBaHm.
Hnkora He Hocete npodykta 3a Ka6ena.
HeIbpaHte3aKaBena,akoNcKATEaNkNIOHTeUenCena.
H3N0J3BAAIe NPODyKTA CAMO C POMONHIOHO HAPKe8HME6, KOToE 0E5JI3HO HA FPHMnATA TaEBY BByP NOPOyDKTA.
HaHTe npOdykTN Ca DBOH NO 130JIpaHc BcIaCHO EN 60335.
He cBp3BaIe Maca KbM HkOJ OT DeTaIIITe Ha npOdyKTA.
PpOBepTe pa60Thata 30Ha 3a ckpnK Ka6en.
He 3nontabte npdykta 3a nDpbyka Ha rpaHcKn Eepua Nn Ebnso do Boda.
MnHa6e3oNaCHOCT

ONACHOCT! OnachocT or 3aynwabahe!
DpebHnte Deaannn Morat necho Da bDaTn oBnHaTH. NOnHeTHneHOBata TOp6a npeCTaBnRa 03aayuaabe 3a MAnKHTe Dea. DpXte MaNkHTe Dea daney No Bpme Ha MONTska.
Octabete KocaykaIa de cOxiaIIOHe 30 MHyTN ppei TeHHeckoC6bJyKHeHn ONU octABHeHTo a3bXbPAHOHeN.
Pn6nKpAeHa peKeIeIeIeMENT cnpTe npOyKaI npOBepeTe.
He HauhnaHrTe MaunHata No nocoka Ha NotpeBnteA.
HeBnKeTeHa3a
BbTe 6dHtENn no BpeMe Ha paBota.
HINKORA HN3NOJBAIHTPODyKTAHBMACTA,KBDETO CbSCTByBA ONACHOCT OE KCNIO8A.
He 3nnon3Bai npdykTa, KOrato cTe yMOpEH, 60nHn nn oN B3- dEeCTBnTo HApKoxon, HApKOTn nn IekapCTBa nn KOrato cTe nTo- eHH.
M6nBaTe npetobapbaHe Ha KocaykaTa.
Hocete pkaBn,Hexb3raaCe o6yBkn 3aunTHOnuHa.
He nnonbaIte npdykTa BbB bnaKHa cpea.
He H3nonBaBnTo BbPxy MoKpa TpeBa.
He paarnoBaHTo npOyKaTc nOeDocTaBkata.
Bkiokte kocaykata cmo c nepTKaJIHO MOHTIPAHa Jpbkk.
He n3non3BaIte pBukTe 3a BkIOuBaHecpeDyBaHe.
H3no3BaTe pBkoXBaTKne BHHMaTeJIHO.
YcTPOINCTBO 3a aBapHNO H3KIOUBAHe
EeKtpoBnATenr Eaunntn Hpea yctpOCTHO aabapnHO
kIOHbAHO, KOTo 00 c3aDCCTBA, Ako HOXb5oKHPa Hm co nPoTobAp
EeKtpoBnATenr. BTOs CNYaH CPNE PNOyKTA Hro NIKHOHTe
OT eEeKtpo3aXpaHHeHO. YcTOPOCTBO TAO aABAPINHO NIKHOHBe CE
BpDa bN KNOHO CTObTHHO, EBaKO rTOYCHO TACPT/CTOTI-PKATA.
IPemaxHete BCNUPNIPTCBN INuayKaJIte HAKONKO MHyTH, DOKATO
ycTOPOCTBO To a ABAPINHO NIKHOHae Ce BpHE BNXOHO CTObTHHe,
PnpDn A npDOJFKeTO INNPOBHAToH NaPODyKTa.
2. MOHTAK

HOCT! KoHTy3nn!
Pnck OT npra3BaHe, aKo npOpykTbT Ce BKnIOu HEBONHO.
→ 34aKaJaTe dokato HOKtB cnpe, 3kKnOyete npOyKTa OT eEkeTpo3aXpaHbaHeto n CNOxete pbKaBnU, npEn da MOHTpatenpOyKTa.
MOHTaHKHaIOnHATAHaIbXKaIpXkA[phr.A1]:
- PbXHETe Kpa H aONHATA HnBkHa npBkKa ① BMOHTaXHHOTBOP3a HnBkHaTnpBkKa HaKOpNyc2
2.3akpenenteDnHATAHaNtBbKaHaDbpKka ① KUM Kopnyca ②,KATO BkapaTe 3akpenBaUHTe BVHTOBE ③ c HATNCKAhe ppe3 OTBOPNTe B kpar HAHaNtBbKaHa DpKpa ④ IN Kopnyca? - NOBTOPEOTpyrata ctpaHa.
3ABeJEXKKA:Ako npn 3aKpenBaHeTo HaHaIbXHata DpBka KbM Kopnyca ce noBn InpoBne Cbc 3aKpenBaBn BINT, BHIMATEHNO 13BaTe3aKpenBaun BINT n NOBTOpe OINCAHNT No-ROPE TOHK NT Do 3
MONTAK Ha rophata HaIbXhata dpXkA [phi. A2/A3]:
- YbEpTe C, Ye RopHata HaJbXHa DpBkKa 4 e NoctabHe npaBnHO H6yToHa 3a 3akIOuBaHe 3a 6e3oNaHcOCT 5Ha KyTmTa 3a BkIOuBaHe CoOHrOpe
- YBepete ce, rohpata HaIbIbXHa dpbXka 4NdoHata HAdIbXHa dpbXka ① ca npabnHO n3paBHeH enHa c dpyra.
- NocTabete TaiknBe B konHcTe 3a npbKkata (a o e Heo6xOIMO).
- Noctabete B npabHATA NO3Nua BnHTOBeTe 6, NOIIOXHNTE 7 N KOHTETATA 3a DpBKKITE 8 Bbpxy HADtBKHNTe 10pBKK 1/4.
5.3akpenete Kaebena 9c BKNIOeHnTE BDOCTaBkATA CKOB INKBM NaIbXHnTE DpBKKN 1/4.BHNIMABAte PnTOBa, KaEBNT He He bde npEunHaM Eky RopHaTaNbXHnDApBkka 4 NdoHaTnBAHnBxHaDpBkka 1.
3. OBCJNYKBAHE
ACHOCT! KoHTy3Hn! PnCK OT nopra3Ba
→ N34aKaIte DOKATo HOKbT Cnpe, N3KKnOyTe npOyKTA oT eNekTpOzaxpaHbAHeTo nCNOxKeTe pBkABuU, npeDn da HAcTpoBaTe HnnpMeCTBaTe npOyKTA.
Cbbp3BaHe Ha Kocaykata KbM eneKtpo3axpaHbaHeto [fur.01/02]:
OACHOCT! Tokov yap!
3a da 6bDatn 63eRHaTH NOBpeN no ybnjnaaun Kaen ① TpRaBaYybnjAauuN Kaen ① da bJe npkepaHnpEzKcAtopaa 3aKaena 已
→PpeH3anOuBaHeHa pa6oTa npekapaTe ydbJxntenHnKa6eB ① npesΦKcaTopa 3a Ka6eNa
1.CbpxteXeHCKnKoHEKTOPHa yIbJNKeTENHnKa6en ()KbM TbpaHa KOHTpOHaTc Kytn(
2. Hanpabete yxo CybljnteHnHn Ka6en ①, npekapaine yxoto npe3 fikcatopa 3a Ka6ena ① n cterHete yxoto.
3.CbpxkeTe yIbIaNTenHnKa6eN (1)KbM eNEKtpnueckn KOHTaKT c230-V.
Hactpoika Ha BncounHata Ha KocHe [fur. 03/O4/O5]:
BHIMAHNE! He n3noJ3BaIte NOBuee ot 3 dNCTaHIOHepa 3a BnCOUHa Ha pR3aHe. NCTaHIOHePnte 3a BnCOuHa Ha pR3aHe TpR6Ba Da 6bDat MOHTn paHN MeKdy HOKa 4 N BeHTnAtopa 15. He NoCTaBnE, NCTaHIOHePnte3a BnCOUHa Ha pR3aHe MEXy HOKa 4 N 60Tt Ha HOKa.
1.3a da pa3BnTe BnHTa Ha HOka 16, npbXte 3npaBO BEHTNaTopo 16
H pa3BnTE BnHTa HA HOka 16 C BKJIQUeHN B DOCTBaKbTa RaeeH
KNIOU 17
2.CBaneTe 0ntaHa HOXAHOXA 1,INCTAHNOHEpIte 3a BnCOHnHa HAp3aHe 1uBEHTmAtopA
3.Поберетеза nobpeи noocteTe npHHe6xOIMOCCT.
4. Ioctabete BeHTnIATopHa npOyKTA. YBepeTeCe, ye BeHTmIaTOpBt E HAnbHIO Ha MRCTOTcN M OTbOPb HA BHTnIATOpE hApBaNEH COTbPA hPe3Oata.
5. NoCTaBete nCTaHnOHePte 3a BnCOuHa Ha pR3aHeBbpxy BEHTNlAToPA 10No-BnCOKo KOCHe -NO-MANKo DnCTaHnOHep 3a BnCOUHa HA pR3aHe No-HnCKo KOCHe - NOBeue DnCTaHnOHep 3a BnCOUHa HA pR3aHe YBepTe ce, ye nIeTobete ca BkapAH B OTbOpTE.
- Nocatebe HOKa C D-06pa3HnATE OTBOPn Bbpyx DiCTAHNOHEpTe 3a BnCOHHATA Ha pHaHe. Yepete Ce, He xHPToBeTe Ca pa3NOLKeHN B OTBOpTe HA HOKa.
- NocTabete 60nta Ha HOXa 4 npes cHTpaHnO TBOP Ha OCTpneTO.
- 3aterHete6oTa Ha HOKa C pKa no nocoka Ha yacobnKOBaTa CTpeKa.
- DpBkTe BEHTINATOpa 3DpaBO H 3aterHete 60NTa Ha HOKa C BKNIOHnB D NOCTABKATA KIOH
Pa6oTHa nO3n4n:
He e Heo6xoDima Hactpoika, 3a da npmbedepe pbkoxbaTkata b pa60tha no3nua. IpcoTo nterneTe OT npdeHa no3nua HaOnly nnBnHReTe OT DoHa no3nua Harope,doKaTo pbkoxbaTkata 3ac7ae B Han-ydObHaTpa60tha no3nua.
BknHouBaHe Ha KocayKaTa [fmr.06/07]:
OACHOCT! KoHTy3mH!
CHOCT OT HapaHBAHe, aKo npOdyKTbT He cnpe npnnyckaHe Ha pBukte 3a BKIOUcBaHe.
→He n368raBte npedna3HnTe npncoc6bneHn Hn npkebcaaHTe. He zakpenBaTe pukite 3a BkIOUbaHe HanpImepKbM dpbkata.
BkIIOUbaHe:
PpOdyKtB e 6OpbyBaH c npEaNa3Ho pIpcNocO6bHe nhe 3a BToPA bka (pKa 3a BKNIOuBaHc 18 aBapArHa 6bOKn POBKa⑤), KoTe npEOTOBpaTBA HeOBIoHO TBNIOUBaHa H naPOnyKTa.
Vma Dbe pbyKn 3a BkIIOyBaHe ⑩. EHa O T DBeTe TpR6Ba Da 6bde n3non3BaHa 3a CTapTnpaHe.
1.HatncheTeaabapnHata6nKnpOBka 5c eHaTa pKa n c npyraTata pKa nBpnaTe pKhata 3a BkNIOBaHe 80. KocaykaTcE BKNIOHa.
2.Ocbo6oTeaabapnHaTa 6nokpo8aKa ⑤
3a da n36erHETe OKoCBAHETO Ha npbCTe H Mopabata N da NoHCTnTe OCTaTuHATA TpeBa, HAKIOHETE NEKO Kocaykata. Korato Kocaykata e OCTINHATA PbIHATA CNCKOPOCT, A CNYCHETE BHHMATEJIHO Bpxy Mopabata.
Cnnpane:
→IycheTe pBkata 3a BkIOuBaHe@ Kocaykata cnpa.
CbBETn 3a n3non3BaHe Ha Kocaukata [fHr.08]:
Kocete DbA nTn CEmuHOn npesBeTeaOnHHn Ce3OH.
TpEBaTtue nocpada, aKO OTBeHbK Ce OTepee nOBEe OT eHa TpeA OT HeHATA Dblkna.
3a haJ-do6pn pe3yIyTn PbPBO KOCTe BbHUNr p6Ha TpeBaTa no Nocoka Ha acOBHNKOBATA CTpeNkA.
3aONHETe da KOCHTe kpar Ha MOPabata, KOITo e Hau-5JIN3Odo 3axpaHbauin HOKTAKT.
Taka KaobenbIe nada bbypXy TpeBaTa, KOaTO BeYe CTe OKocnnn.
3a haai-do6pnpeyntnHa p8ahe,Kocete no npabm mHmncpnpokpmbane np6bnnteH0-10cm Ha Bcekn npoxoC kocaukata.
He npetobapbaite Kocaykata. KoceHTo Ha IbIra, IbCTa TpeBa MoKe da DObeDe Io cnaI Ha ckOpctTA Ha enEKTPOBnATerA H Iue YeTe nPOMHa B 3Byka Ha enEKTPOMOTpa. Ako CKopOCTTa Ha enEKTPOBnIRaTe rCaIAde, MOKe Da npetobapte Kocaykata, KOeTO MOKe da DObeDe Do nobEpa. Korato KOCITE B bIra, IbCTa TpeBA, PbBoto p3aHE C NO-BVCOKA BNCOHINHa HA KoCEe Ie NOMrHe DA CE HAMAN HATOBAPBaHeto. BInKte HAcTPOKA HA BNCOHNATA HA KOCeE.
4. TEXHnuecko OBCnykBAHE
OACHOCT! KOHTy3HH
PnCK OT npra3BaHe, aKo npOdykTbT Ce BKnIOu HEBoJHO.
→ NchukaiTe DOKATO HOKBJT CNPE, NAKHIOyete npodykTA OT eNekTPO3aXpaHbAteHo CNOKete pKaBUnz, npEdu na HnapabNTe TExNHuecko 06cbnyBaHe Ha npodykTA.
NouchBaHe Ha Kocaykata:
OACHOCT! KoHTy3mH!
CHOCCTOTHapaHbBaHe pCKOT nobpeHa npodykTa.
→He nouictBaIte npOdykTa c BOna nInn BoDHa cTpy (ocobenoBoDHa cTpy noi Hanrahe).
→ He nouchtaBae C xMMKaN, BKNIOHTENHO 6EH3HH Nn pa3TBOpH. HxKOn OT TReX MORaT da NOBpeRt BAxHN NnactMaCOBN DETAHN.
BENTINaIOHnTe OTBOPn Tp86Ba BnHaHn Da 6bDat nCTn.
NouchBahe Ha donHata cTpaHa Ha Kocaukata [m].
DOnHaTa CtpaHa MoKe Da Ce NocHcTn Hau-HeCHO BeHara CneKoCeHe.
Noctabete BHMMaTeHNO KocayKaTa Bbpye eHaTcPaHa.
2.ПОИСТBAIITEДONHATACTPаHA 18,ΚΑΤΟΝΕMαXBATEOCTaTbιNTEOT TpeBa C rαeHnN KJIIOU/CTbprAŋKATA 17
3.ПоИСТВаITE HOЖA 4NBEHTHnIaTOpa 5CMeKa YETKa (He nI3non3-BAITE OCTPNpEIMETN).
NoHCTBaHe Ha BbHnHaTa CtpaHa Ha KocauKaTata [m2]:
- NocntBaIte rohpata ctpaHc cyKa Kbpna.
2.ПОИСТЕВERTINILAQUHHHTEOTBOPN ②C MEKA YETKa(HeI3NOJIBAITEOCTPNIPeDMTeN).
5.CbXPAHEHNE
Cbaahe oeknoatau:
IpoNYkTB Tp8Ba Da 6bDe CbxpaHBAH Ha HeoocTbNHO 3a Deca MRCTO.
1.ИЗкючete npodykta ot eIeIeKtpo3axpaHbaHeto.
2. NocTeKocayKaTa(BN 4.TEXHueCKO OBCJyXBAHE).
3.CbXpaHABaBte KocaykataHa cyxo,3aTBopeHo n 3auuTeHOOT 3amp3BaHE MACTO.
No3nun 3a cBxpanenHe [nur. S1]:
- HataHcHete eHNOBpeMeHHO OT DBeTe CTPaHn DOJIHaT a HaIbXKaHdpbKka ① HABbTpE.
2.3aBpTeTe DoHATA HaUNbKHa dpbKKa ① B XeHAna HIO3mHn HApEeB C BrHato NOIOKeHHe 3a CbXpaHEHe Nn Hn HaaD B NOIOKeHHe 3a CbXpaHEHe HcTeHa. - PaBnIte konHcTata 3a npkKIne n CbHeTe rOpHaTa HauhkbKa Hpa Kaepetce, ye KaebIbI He e PpeuHnA Mekdy rOpHaTa n DOnHAt HauJIbXHHdPbXka.
CrbHato nnonoKeHne 3a cbxpaHHe [ΦnR.S2]
IIOIOXKeHHe 3a cbxpaHHeH He cTeHa [ΦmR. S3]
3AEBEJKKA: Pn CbXpaHHe Hc TcHa, BnHaN 3aKaaHte KocauKata 3a CeueHMeTo Ha dpBKKATA npn DonHaTHaHbKHa npbKa ①.
M3XBbPnHHe:
(cIbnacio DnpoekTuba 2012/19/EC)

IpoDyKTbT He TprBbA da bBde n3xBpJH 3aEHNc O6NHO BHeNTe 6tOBn OTnAa. ToT prBaDa bBde n3xBpJH CByLACHO DECTBAWITE MECTHN pa3nped6n 3a ONa3BaHe HA OKONHa cpeA.
BAKHO!
→N3XbPJIeTe npOyKta Ha HnI ype3 Baunr MeCTeH CbupateHe nyHKT 3a peUkInpaHe.
6. OTCTPAHRABAHE HA IOBPEI
OACHOCCT!KoHTy3nn! Puck on non3a
→ N34aKaIte DOKATo HOXBt Cnpe, N3KIOUoTe NpOdyKTa OT eNekTPO3axpaHbAHeto N CNOKeTe pKABuN, PpeN da OTCTpaHIne NOBpeDa no npOdyKTa.
CMRAHHOHO
OACHOCT! KoHTy3nn!
OnachocT OI npraBaHe, aKO HOKbp Ce BbPTN NOpeDen, n3kPmben, 6e3 da e 6aHcnpan HnC hapaHen p60be.
→ He n3non3baTe Kocaykata C nobpeH nn H3KpNBeH HOX, He6anahcnpaH HOX nn HOX C hapaHEn p6oBe.
→He3aTOuBaIeHOKaDOnbHNHTeJIHo.
Pe3epBnHte qactn FLYMO ce npednarat ot Baunn nnbp Ha FLYMO nIOT cepBn3 3a FLYMO.
N3NOJ3BaIe Camo OpRnHaeH HOK FLYMO:
FLYMO pe3epBEN HOX 3a 30 cm:
PepepeTeH No FLY094
ApT. N529370590
FLYMO pe3epBEN HOX 3a 33 cm:
ApT. No 529370790
PeppepTeH No FLY095
FLYMOpeepBeHHOx3a36cm:
ApT. Ng 529370890
Pepepenteh No FLY096
→CmeheTe Hoxa (BnK 3.06CJYKBAHE HacpOka Ha BnCOunHata Ha KocHe).
Ipo6nEMBb3MOKHa npMHHa OToCTpaHBAhe
| Kocaukata He ce Bkluva 3axpaHbauinat Kaeb e m3KnKouen HII NopBpeH. → CbpxeTe 3axpaHbauinat Kaeben IINI IINI IINI IINI IINI IINI IINI IINI IINI IINI IINI IINI IINI IINI IINI IINI IINI IINI IINI IINI IINI IINI IINI IINI IINI IINI IINI IINI IINI IINI IINI IINI IINI IINI EneKtpoBnHrAteHInT e 6bnKpapal → OTrpaHete npEnHCTBHeIO. EneKtpoBnHrAteHInT e 6bnKpapal → OTrpaHete npEnHCTBHeIO. Tbypde HNCKa BNCOuHnHa H KOCeHc. → HAcToPte No-rotMa BnCO- HnHa HNCKeHc. CtlnHm WymObe, Kocaukata Tpaka Kocaukata paBoTH HepaBnHemepHO nBbnpRa CnHlNo Kocaukata paBoTH HepaBnHemepHO nBbnpRa CnHlNo Kocaukata paBoTH HepaBnHemepHO nBbnpRa CnHlNo MocpaBata He e Okoceha YmCTO Kocaukata He e Okoceha YmCTO Kocaukata He e Okoceha YmCTO Kocaukata He e Okoceha YmCTO Kocaukata He e Okoceha YmCTO Kocaukata He e Okoceha YmCTO Kocaukata He e Okoceha YmCTO KOCeHc. → HAcToPte No-rotMa BnCO- HnHa HNCKaBHe. Ako ToBa He nOtomGhe 3a OTcPaHnBnHcTo HnPobLe- Ma, CmEhete HOKa. → CmEhete HOKa. → CmEhete HOKa. → HAcToPte No-rotMa BnCO- HnHa HNCKeHc. → HAcToPte No-rotMa BnCO- HnHa HNCKeHc. → PpOBePte BcHmLAtopa HTo CmHete. |
AOKI noataaFnoatlaaPnoDjNk, oBpHnete CkM MecTHRA otopnRapcCepb3cnzUeHp.

YKA3AHHE: Mo, np dpyr nobpeid ne 6opbaaite KbM BaHn cepB3eN ceHTbp Ha FLYMO. PEmoHTn Tp8Ba da 6bDat M3bJHBAHn cMoTo cEPTMHaTcETbp Ha FLYMO, KaKTo H ot CneuHaHnPAHIne TpRBoU, KOtTo ca OTOp3mpanOn for FLYMO.
- TEXHnueCKN DAHHN
| Еnétrоча Haver Kočaнka | Марka | Стойост (30 cm) | Стойост (33 cm) | Стойost (36 cm) |
| Hommaлиmaошост | Вт | 1700 | 1700 | 1800 |
| Hampexende Na Мржata | В (amH. ctPуM) | 230 | 230 | 230 |
| Чебта на мржata | ГИ | 50 | 50 | 50 |
| Оворота на Ножа | оборoting/MinH | 4200 | 4200 | 4200 |
| Шрина на Косе | сm | 30 | 33 | 36 |
| Настояка на Всocуната na Косе (4 поэци) | мM | 10-30 | 10-30 | 10-30 |
| Терно | КТ | 6,7 | 6,7 | 6,9 |
| Нимо на habаганeto Na шуma LpII | ДБ (A) | 84 | 83 | 80 |
| Погашност KpA | 3 | 3 | 3 | |
| Enektrechecka Hover Kocauka | Марka Stojnoct (30 cm) | Стойноct (33 cm) | Стойноct (36 cm) | |
| Инво на 38уковата мошист Lw2: иземени/тaramп期权 Поршоност Kw | ДБ (A) | 92/96 | 92/96 | 92/96 |
| 3,9 | 3,2 | 3,2 | ||
| Вибрацей на рьцета a10 Поршонrost Ksw | M/CEK2 | 1,5 | 1,5 | 1,9 |
| 1,5 | 1,5 | 1,5 | ||
MetadHaMamepBaHe cbrnacHO: EN60335-2-77 2RL 2000/14/EC
YKA3AHME:IOOcHHeA CTOnHOCT Ha BnBpaIIOHNHMe EMMNCHe M3MepBa CbIaCHO CTaNAdpTINHPA METo 3A NmITBnAE H M0Ke Da bJe KnIOBAHA 3a CpABHHaHE A hEeKTOPTCNTHPOMENTN NOXEMKJY MM. TaTe CTOHIOCT MOKE da BdE MaONOLBAAH a N3peBapWTEJHa OueHKa HA EKNOTNIHHTA. CTOnHOCTTA Ha BmPOaIOHNHtme EMCNMHMOke DA BaBnPa No BSpMe HA DeNCTBNTENHAt yNoTpeBa HA eNkToPNOHCTPymEHA.
MOna, aKe e Heo6xQdmo Ce CbPjKTe C DoCTabYnKa Ha eNekTpU-ectBO, 3auIOTo ypeJa TpRbBa Da bIe CbP3aH CAMO KbM 3axpaHBAHe CmNEAHOcT OMAKCMYM O,354Ω. Toa MAKCImAHIOyCTHM NMeDAHC H CNTEMATA HA MRCTOTO 3a CbP3aHa H 3axpaHBAHETO H NOTpeBnten OTROBAPHa TcTeTOBa CTOnHOct HA SimpliClide 300V.
- AKCECOAPN
| FLYMO peéperh hox 3a 30 cm | 3a zamra ha ha zatbneu HOKOBe. Pedepehenr No FLY094 ApT. No 529370590 |
| FLYMO peéperh hox 3a 33 cm | 3a zamra ha ha zatbneu HOKOBe. Pedepehenr No FLY095 ApT. No 529370790 |
| FLYMO peéperh hox 3a 36 cm | 3a zamra ha ha zatbneu HOKOBe. Pedepehenr No FLY096 ApT. No 529370890 |
9.CEPBn3/ΓAPAHUN
CepBn3:
Mon, cBbpxte ce ype3 aepca Ha o6paHata cTpaHa.
TapaHnOHa KaPa:
BcnyaHa rapaHnoHe nck Bne He dIbIXte 3aIIaune 3a oka3a HnTe ycnyu.
FLYMO npedocTaba 3a BCnKOpunHnHn HOBn npdykTN FLYMO 2roHNr rapanHn ot Datata Ha 3akyNbaHe np TpboeBa,ko npdykTne ca bnnnno3BnCa mo 3a nnHn HynKn. rapaHnrta Ha npnoBDIOHTNEH He Baxn 3a npdykTN, npDooBHn HbTOPOHn HApapuHa nasp. Ta a npapuaCce OTHAC 3a BCNKn Cepno3Hn DEpEkn Ha npOyKa, KONTO Ca cneCTBne OT dEeFKT B MATEPnAa Nnpo3BOCTBcH DepeKt. Ta a npapuaCce m3nBnHbA qpe3 npdeOCTABHe HA HApbHNO CyHKIOHOAnen npdykT 3a noMaHa n nppe3 pemOHn NaOBpeHn npdykT, nnpateHn DO Hac 6e3nnaHo; Hne cn 3ana3BaMe npaboto Ha n3bnpamE meKny TeaBb3MOXHOCTn. Ta3n yCyra ndoNe Ka HcIeHNTE paOnpope6b:
PpOdyKtB E mnoIaBaH No npEHa3HaueHne CbIaCHO npenopbkN-Te B HcTpyKunTe 3a paobota.
He ca npabaehn onntn 3a OTbapAne nnpemOH Ha npodykta ot KyuBaHa nHOTpeTo Nue.
3aekcnnoataaeta ca n3no3baHn cmo opunnaHn peepBn 6bp30n3HocBaHn ce detaiHn Ha FLYMO.
- PpeDCTaBHe Ha KacOBn 60H.
HopMaHOTo 3NHOcBAHe Ha Yactn N KOMNOHEHTn (HaNPmep No HOKOB, JTeaJIITNE 3a 3akpeBnBa He H OHOKBE, TyOHN, OCBeNTeJHIN Tena, KInHOBnHN H 3bOHTn PemBtu, paOToH N KOJENA, B3dUHN H qIITPn, 3aIaNTeN H CBeuN, BV3ayHNIte npOMEH, KAKTIO INHOC- BauN Ce AACTN N KOMNOHEHTn, Ca I3KNIOHEn OT rapaHHTTA.
Ta3n rapaHnHa npon3BODInTeH Ce orpaHnHa da DoocTabkata 3a
zAMnHa H pemOHTA CbIACHO TOPHNE yCJIOBN. Dpyr npTeHnN
cpeuH hac KATO npO3BnTeH, Kato HapImpeoBe6eTHeHne 3a
tETn, He ce OCHOBabat Ha rapaHnraTHa npO3BODInTeH. Ta3n
rapaHnHa Na npO3BODInTeH pa36Hpca Ce HE NOKPbA DeiCTBaunTe
3aKOHnHn I DOROBpHn RapaHnIOHHn npTeHnnc CNpMOnDnIb-
pa/TbproBEca.
FapauHHTaHaipon3BcDnTeJIIOJIeKHa3akHOaTeIcTBOTHa FeepalHa penybnka FepmaHn.
B cnuyaHa rapauHun, MoJn, 3nnpateTe DeEeKTHIN npOdyKT 3aeDHO C KONHe Ha KAcOBn 60H 3a KaYbVaHe nCmCAHHe Ha nobpeDAta, C nlaTAEHN NOUeHCKN TAKCN Do NocOeHn ADEC Ha cepBNHa.
Bp30nHOCBaun ce actn:
HOKbTe KOHCyMaTnB n He E BkNoeH B rapaHnTa.
SQ Korrese e barit elektrike Hover
1.SIGURIA. 99
2.MONTIMI 101
3.PERDORIMI 101
4.MIREMBAJTA. 101
5.MAGAZINIMI 102
6. NDREQJA E GABIMEVE 102
7.TDEDHENATTEKNIKE 102
8.AKSESORE 103
9.SERVISIGARANCIA 103
Perkthimi i menyres s e perdorimit nga originali.
Husqyarna Argentina S.A.
Ay.del Libertador 5954 -
Piso 11-Torre B
(C1428ARP) Buenos Aires
Phone: (+54) 11 5194 5000
info.gardena@ar.husqvarna.com
Armenia
Garden Land Ltd.
61 Tigran Mets
0005 Yerevan
Australia
Husqvarna Australia Pty. Ltd.
Locked Bag 5
Central Coast BC
NSW 2252
Phone: (+61) 0243527400
customer.service@
husqvarna.com.au
Brampton, Ontario L6T 4X3
Phone: (+1) 905 792 93 30
info@gardenacadana.com
Chile
Maquinarias Agroforestales
Ltda. (Maga Ltda.)
Santiago, Chile
Avda. Chesterton
8355 comuna Las Condes
Phone: (+56) 2 202 4417
Dalton@maga.cl
Zipcode: 7560330
China
Husqvarna (China) Machinery
Manufacturing Co., Ltd.
No.1355,Jia XIn Rd.
Ma Lu Zhen, Jia Ding Dist.,
Shanghai
201801
Phone: (+86) 21 59159629
Domestic Sales
www.gardena.com.cn
Colombla
Husqvarna Colombia S.A.
Calle 18 No.68 D-31, zona
Industrial de Montevid
Bogota, Cundinamarca
Tel. 571 2922700 ext. 105
jairosalazar@husqvarna.com.co
Costa Rica
Compania Exim
Eurolberoamericana S.A.
Aycliffe Industrial Park
Newton Aycliffe
County Durham
DL56JP
Phone:+44(0)3448444558
customer.service@
husqvama.co.uk
Greece
II.IIIAOIOYAOA EAEB
Aεωφ.Aθηνωv92
Aθηνα
TK.10442
EAAaa
Tnλ. (+30) 210 5193100
info@papadopoulos.com.gr
Hungary
Husqvarna Magyarorszag Kft.
Ezred u. 1-3
1044 Budapest
Telefon: (+36) 1251-4161
Aycliffe Industrial Park
Newton Aycliffe
County Durham
DL56UP
info.gardena@husqvarma.co.uk
Italy
Husqvarna Italia S.p.A.
Via Santa Vecchi
23868 VALMADRERA (LC)
Phone: (+39) 0341.2
assistenza.italia@
it.husqvarma.com
Japan KAKILIC
KAKUICHI Co. Ltd. Sumitake City, 8
Sumitomo Healy & Development Kojimachi
Development Rajinath BLDG 8E
5-1 Nibancnyo
Chiyoda-ku
Tokyo 102-0084
Phone: (+81) 33 264 4721
m_ishihara@kaku-ichi.co.jp
Kazakhstan
LAMED Ltd.
155/1, Tazibayevoi Str.
050060 Almaty
IP Schmidt
Abayavenue 3B
110 005 Kostanay
Korea
Kyung Jin Trading CO.,LTD.
107-4, SunDuk Bld.,
YangJae-dong,
Seecho-gu,
Seoul, (zipcode: 137-891)
Phone: (+82) (0)2 574-6300
Kyrgyzstan
Alye Maki
av. Moladayana Guardir J 3
720014
Bishkek
Latvia
Husqvarna Latvija SIA
Gardena Division
Ulbrokas 19A
LV-1021 Riga
info@gardena.lv
Lithuania
UAB Husqvarna Lietuva
Gardena Division
Ateities pl. 77C
LT-52104 Kaunas
info@gardena.it
Luxembourg
Magasins Julies Neuberg
Zapopan, Jalisco, Mexico
Phone: (+52) 33 3818-3434
Husqvarna New Zealand Ltd.
PO Box 76-437
Manukau City 2241
Phone: (+64) (0) 9 9202410
support.nz@husqvarna.co.nz
Norway
Husqvarna Norge AS
Gardena Division
Troskenvelen 36
1708 Sarpsborg
Tel: 69 10 47 00
www.gardena.no
Peru
Husqvama Peru S.A.
Jr. Ramón Cárcamo 710
Lima 1
Tel: (+51) 13320400 ext. 416
juan.remuzgo@husqvarna.com
Poland
Husqvarma
Poland Spolka z 0.o.
ul. Wysockiego 15 b
03-371 Warszawa
Phone: (+48) 22 330 96 00
gardena@husqvarna.com.pl
Portugal
Husqvarma Portugal, SA
Lagoa - Albarraque
02-08 Tat Ann Building
Singapore 57718
Phone: (+65) 6253 2277
shiying@hyray.com.sg
Slovak Republic
Husqvarna Cesko s.r.o.
Türkova 2319/5b
149 00 Praha 4-Chodov
Beplatnafinfolinka:
800154044
servis@sk.husqvarna.com
Slovenia
Husqvarna Austria GmbH
Industriezeile 36
4010 Linz
Tel.: (+43) 732 77 01 01-485
service.gardena@
husqvarnagroup.com
South Africa
Husqyarna
South Africa (Pty) Ltd
Postnet Suite 250
Private Bag X6
Cascades, 3202
South Africa
Phone: (+27) 33 846 9700
info@gardena.co.za
Spain
SG300EU-20.960.01/1020
Husqyarna AB
S-561 82 Iuskvarna
Sweden


- Original instructions.
- Intended use:
- DANGER! Risk of injury!
- SAFETY
- IMPORTANT!
- DANGER! Electric shock!
- WARNING! Risk of physical injury!
- Cables
- Voltage Cable length Cross section
- Training
- Preparation
- Operation
- Maintenance and storage
- Additional safety warnings
- Electrical safety
- DANGER! Cardiac arrest!
- Personal safety
- DANGER! Risk of suffocation!
- Safety Cut-Out
- ASSEMBLY
- IGER! Risk of injury!
- To assemble the lower handle [Fig. A1]:
- To assemble the upper handle [Fig. A2/A3]:
- OPERATION
- To connect the mower [Fig. O1/O2]:
- IGER! Electric shock!
- To adjust the cutting height [Fig. 03/04/05]:
- INTION! Do not use more than 3 cutting height.
- Operation position:
- To start the mower [Fig. 06 / 07]:
- DANGER! Risk of injury! Risk of injury if the pro
- To start:
- To stop:
- Tips to use the mower [Fig. 08]:
- MAINTENANCE
- To clean the mower:
- DANGER! Risk of injury! Risk of injury and risk of
- The airflow slots must always be clean.
- To clean the underside of the mower [Fig. M1]:
- To clean the outside of the mower [Fig. M2]:
- STORAGE
- To put into storage:
- The product must be stored away from children.
- Storage positions [Fig. S1]:
- Folding storage position [ Fig. S2 ]
- Wall mounting storage position [Fig. S3]
- Disposal:
- TROUBLESHOOTING
- DANGER! Risk of injury! Cut injury when the pro
- To replace the blade:
- SERVICE/WARRANTY
- Service:
- Warranty statement:
- Consumables:
- WAARSCHUWING! Verondingsgevaar!
- FARE! Fare for kvelning!
- 3NeKtpnuecka6e3onacHOCTb
- OJACHO!OctaHOBka cepda!
- HnHn86e0nacHoctb
- ONACHO!Onacnoctb 3aDOxHytbcR
- 3aunthoeOTKnIOUeHne
- MOHTAK
- OACHO!Onacocb noonyeHHaPbMbI! OCHOCbNope3OBnHnHepeHemH3anyCKe HNEJIN.
- MOHTAK HIXKHe WtAHr [Pnc.A1]:
- MONTAX Bepxneu TAnr [Pnc.A2/A3]:
- 3KcPnIyATAUH
- OACHO!Onachocb noyuhen TpaMbbl! Onchoctb nope3OB npn HnpedHaMepeHHOM 3anycke H3dennr.
- IopKnHouHenra3oHOKocunKn [Pnc.01/02]:
- ACHO! NopaxenHe 3neKtpoTOKOM! Bn36eHAnHe NopeXeHEny yDHHHTeBHO Ra6eB He06xOIMO 3aBeCTN yDHHHTeBHy Ka6eB ①BΦHKCa-Top Ka6eB ①.
- HactpoKa BaICOTb CTpNNKn [Pnc.03/O4/O5]:
- BHIMAHHE! He nconlonbyte 6oonee 3 npoctabok 1BbICOTb cpe3a. IpocTABKn ③ BbICOTb cpe3a cnEyet BCTabnIbTO bKMeJdy HOXOM 4 H BEHTINrTOPM 8, He BCTABnIe IPOCTABKn ③ BbICOTb cpe3a MEKdy HOXOM 4 N 6OITOM HOXa 16
- Pa6o4a no3nua:
- 3anyckKocvnn[PsC.06/07]:
- O ACHO! Onachocb nonyuhenra TpaBmbi! Cy eCTbyET onachocb TpaBMnpoBaHn, ecnn n3denn He octaHabnBaetc npn OTyckaHH nyckOBbx pbYarOB.
- 3anyck:
- OctaHOBKa:
- IapaHTnHbIe 063aTeJIbCTBa:
- N3haunbaebleetann:
- Hnctpykun npoan3bOaHTenAn Poccnckoepaun
- OΦηaJIbHbI NmIopTeP Ha TeppTOpNIO PocCNo:
- Dorndi36epirannn
- DqatKOBi Bk3iBKN 3TexHki 6e3neKn
- EneKtpo6e3neKa
- HE5E3NEKA! 3ynnka cepra!
- Oc6ncta6e3neka
- HE6E3NEKA! He6e3neka 3aynx!
- Dpi6hi NACTHNO MOXYb 6yTH NERKO pOKOBHTYr. Upees noniTeNNEHOHMI WIK ICHy He6e3NeKa 3aynx nIra MAneBKnX dIteR. HDoNYCKAte MAneBKnK XdTeo MIcA 36lpKn.
- AbapiHBe BMMKaHH
- 3NEKA! He6e3neka OtpmaHnTpaMn!
- e3neKa OTPMaHnHa npi3y npu BnnaKOBomy 3anycky Bnp6y.
- BCTAHOBNEHNNHHKHOIpyKoRTKn[306p.A1]:
- YcTaHOBbA BepXHbOi pyKoRTKn [306p.A2/A3]:
- OBCNYTOBYAHH
- IIiknoueHHra3oHokocapKn[306p.01/02]:
- PeryIOBAHRA BCOTH CTPNKKN [306p. 03/04/05]:
- Poboe noJoxeHH:
- 3anyckra3oHOKocapKn[3o6p.06/07]:
- 3yHHKa:
- Iopadn 3 eknnnyataui ra3ohokocapkn [306p.08]:
- HnueHHH HxKhboI YaactHNr Ra3oHOKocapKn [3o6p.M1]:
- OuHHeHHBepxHb0iYacTHnHa3OHOKocapKn[3o6p.M2]:
- 5.3BEPIAGHH
- YCYHEHHH HECNPABHOCTE
- He5E3NEKA! He6e3neKa OTpMaHnTpaBM! He6e3neKa OTpMaHnN pOj3y POM BnPAKOB
- 3aima pixyoro npuctroo:
- H6E3NEKA! He6e3neka OTPMaHHa TpaBMn!
- BukopncToByte Ine opriHnJIe3a FLYMO:
- Egitim
- TEXHnKA HA BE3ONACHOCT
- BAKHO!
- CnmboN Bbpx npoykta:
- 06u yka3aHnno TeXHnKa Ha 6e3oNaCHOCT
- ONACHOCT! TokoB yap!
- PENPYPEXEHNIE! OnachocT or HapaHbahe!
- Kabenn
- DOnbHHTeHHyKa3aHHNoTexHnKaHa6e3oNaCHOCT
- BesonacHocHa eNeKtpnuecknte ypeDn
- ONACHOCT! CbpneH apcet!
- BbPxy HAnHa HA dyHkUmoHApHe A kTbHMn IIN nAaBHNMe dMnHnCKn MMnHTeN.3a Da ce IaKIOuNH PNCbT OT CNTyaIHH, KOHO STaMOrnn da DoBeDat DO TeKKn INm CmbpTOHOCH HapaHbAHn, NluaC mMeHnCKn TpRbA npEa yNtOpeBa H aTo3 npOdyKT da Ce KcCytnpAT cBc CBON JekpN pNO3BDoJIeN Ha MNaHTa.
- MnHa6e3oNaCHOCT
- ONACHOCT! OnachocT or 3aynwabahe!
- DpebHnte Deaannn Morat necho Da bDaTn oBnHaTH. NOnHeTHneHOBata TOp6a npeCTaBnRa 03aayuaabe 3a MAnKHTe Dea. DpXte MaNkHTe Dea daney No Bpme Ha MONTska.
- YcTPOINCTBO 3a aBapHNO H3KIOUBAHe
- HOCT! KoHTy3nn!
- Pnck OT npra3BaHe, aKo npOpykTbT Ce BKnIOu HEBONHO.
- MOHTaHKHaIOnHATAHaIbXKaIpXkA[phr.A1]:
- MONTAK Ha rophata HaIbXhata dpXkA [phi. A2/A3]:
- OBCJNYKBAHE
- ACHOCT! KoHTy3Hn! PnCK OT nopra3Ba
- OACHOCT! Tokov yap!
- Pa6oTHa nO3n4n:
- BknHouBaHe Ha KocayKaTa [fmr.06/07]:
- OACHOCT! KoHTy3mH!
- BkIIOUbaHe:
- Cnnpane:
- CbBETn 3a n3non3BaHe Ha Kocaukata [fHr.08]:
- TEXHnuecko OBCnykBAHE
- OACHOCT! KOHTy3HH
- NouchBaHe Ha Kocaykata:
- NouchBahe Ha donHata cTpaHa Ha Kocaukata [m].
- NoHCTBaHe Ha BbHnHaTa CtpaHa Ha KocauKaTata [m2]:
- 5.CbXPAHEHNE
- Cbaahe oeknoatau:
- IpoNYkTB Tp8Ba Da 6bDe CbxpaHBAH Ha HeoocTbNHO 3a Deca MRCTO.
- No3nun 3a cBxpanenHe [nur. S1]:
- CrbHato nnonoKeHne 3a cbxpaHHe [ΦnR.S2]
- IIOIOXKeHHe 3a cbxpaHHeH He cTeHa [ΦmR. S3]
- 3AEBEJKKA: Pn CbXpaHHe Hc TcHa, BnHaN 3aKaaHte KocauKata 3a CeueHMeTo Ha dpBKKATA npn DonHaTHaHbKHa npbKa ①.
- M3XBbPnHHe:
- OTCTPAHRABAHE HA IOBPEI
- OACHOCCT!KoHTy3nn! Puck on non3a
- CMRAHHOHO
- OACHOCT! KoHTy3nn!
- N3NOJ3BaIe Camo OpRnHaeH HOK FLYMO:
- FLYMO pe3epBEN HOX 3a 30 cm:
- PepepeTeH No FLY094
- FLYMO pe3epBEN HOX 3a 33 cm:
- PeppepTeH No FLY095
- FLYMOpeepBeHHOx3a36cm:
- Pepepenteh No FLY096
- 9.CEPBn3/ΓAPAHUN
- CepBn3:
- TapaHnOHa KaPa:
- Bp30nHOCBaun ce actn:
- SQ Korrese e barit elektrike Hover
- Perkthimi i menyres s e perdorimit nga originali.
- Armenia
- Australia
- Chile
- China
- Colombla
- Costa Rica
- Greece
- Hungary
- Italy
- Japan KAKILIC
- Kazakhstan
- Korea
- Kyrgyzstan
- Latvia
- Lithuania
- Luxembourg
- Norway
- Peru
- Poland
- Portugal
- Slovak Republic
- Slovenia
- South Africa
- Spain
Brand : FLYMO
Model : SimpliGlide 360
Category : Lawn mower