
Hover Vac 250 - Lawn mower FLYMO - Free user manual and instructions
Find the device manual for free Hover Vac 250 FLYMO in PDF.
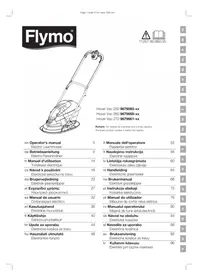


| Product type | Hover lawn mower on air cushion |
| Brand | Flymo |
| Model | Hover Vac 250 |
| Power supply | Electric (corded) |
| Motor power | 1200 W |
| Cutting width | 30 cm |
| Cutting height | 20-60 mm, adjustable |
| Grass catcher capacity | 25 L |
| Weight | 8 kg |
| Dimensions (L x W x H) | 45 x 35 x 25 cm |
| Cutting system | Rotary blade |
| Air cushion | Yes, for easy maneuvering |
| Collection system | Rear grass catcher |
| Sound level | 82 dB(A) |
| Safety | Emergency stop, double electrical insulation |
| Maintenance and cleaning | Clean the catcher and blade after use, check the cable |
| Spare parts available | Blades, grass catcher, guide wheels, cable |
| Warranty | 2 years |
| Usage | Medium-sized lawns, flat terrain |
Frequently Asked Questions - Hover Vac 250 FLYMO
User questions about Hover Vac 250 FLYMO
0 question about this device. Answer the ones you know or ask your own.
Ask a new question about this device
Download the instructions for your Lawn mower in PDF format for free! Find your manual Hover Vac 250 - FLYMO and take your electronic device back in hand. On this page are published all the documents necessary for the use of your device. Hover Vac 250 by FLYMO.
USER MANUAL Hover Vac 250 FLYMO
Hover Vac 250 9679093-xx
Hover Vac 260 9679659-xx
Hover Vac 270 9679661-xx
Remark: "xx" stands for customer and country variants.
The basic product number is before the hyphen.
| en Operator's manualElectric Lawnmower | 5 |
| de BetriebsanleitungElektro-Rasenmäher | 9 |
| fr Manuel d‘utilisationTondeuse électrique | 14 |
| cs Návod k používáníElektrická sekačka na trávu | 19 |
| da BrugervejledningElektrisk plæneklipper | 23 |
| el Eγχειρίδιο χρήσηςΗλεκτρικό χλοοκοπτικό | 27 |
| es Manual de usuarioCortacésped eléctrico | 32 |
| et KasutusjuhendElektriline muruniiduk | 36 |
| fi KäyttöohjeSähköruohonleikkuri | 40 |
| hr Upute za uporabuElektrična kosilica za travu | 44 |
| hu Használati útmutatóElektromos fünyíró | 48 |
| it Manuale dell'operatoreRasaerba elettrico | 52 |
| It Naudojimo instrukcijaElektrinė vejapjovė | 56 |
| Iv Lietotāja rokasgrāmataElektriskais zāles plāvējs | 60 |
| nl HandleidingElektrische grasmaaier | 64 |
| no BrukermanualElektrisk gressklipper | 68 |
| pl Instrukcja obsługiKosiarka elektryczna | 72 |
| pt Manual do utilizadorMáquina de cortar relva elétrica | 76 |
| ro Manualul operatoruluiMaṣinā de tuns iarbā electrică | 80 |
| sk Návod na obsluhuElektrická kosačka | 84 |
| sl Navodilo za uporaboElektrična kosilnica | 88 |
| sv BruksanvisningElektrična kosilica za travu | 92 |
| tr Kullanım kılavuzuElektrikli çim biçme makinesi | 96 |


1
CARTON CONTENTS:
① Upper handle ② Cable clip ③ Nut (if applicable) ④ Handle knob ⑤ Washer
⑥ Bolt ⑦ Lower handle ⑧ Fixing pin ⑨ Spanner / scraper tool
⑩ Cutting height spacers ⑪ Instruction manual ⑫ Warning label ⑬ Product rating label
⑭ Power cord (UK) ⑮ Switchbox ⑯ Start / stop lever ⑰ Grassbox
en Electric Rotary Lawnmower
Original instructions.
- SAFETY....5
- ASSEMBLY 6
- OPERATION....7
- MAINTENANCE....7
- STORAGE....7
- TROUBLESHOOTING 8
- TECHNICAL DATA 8
- SERVICE....8
- DISPOSAL....8
This product may be used under supervision, or if instruction regarding the safe use of the product has been provided and the resulting dangers have been understood, by children aged 8 and above, as
well as by persons with physical, sensory or mental disabilities or a lack of experience and knowledge. Children must not be allowed to play with the product. Cleaning and user maintenance must not be performed by children without supervision. The use of this product by young people under the age of 16 is not recommended.
1. SAFETY
1.1 Symbols on the product

→ Read operator's manual.

WARNING!
→ Be careful of parts being ejected – keep bystanders away.

WARNING!
→ Keep the mains cable away from the blades (not applicable to cordless mowers).

WARNING!
→ Keep hands and feet away from the blades.

WARNING!
→ Unplug the mains plug before maintenance or if the mains cable is damaged (not applicable to cordless mowers).

WARNING!
→ Disconnect the battery before maintenance. (not applicable to corded mowers).

WARNING!
→ Remove the locking device before maintenance (not applicable to cordless lawnmowers without locking device).
1.2 General safety instructions
1.2.1 General machine safety warnings

WARNING!
Read all safety warnings, instructions, illustrations and specifications provided with this machine.
Failure to follow all instructions listed below may result in electric shock, fire and/or serious injury.
Save all warnings and instructions for future reference.
The term "machine" in the warnings refers to your mains-operated (corded) machine or battery-operated (cordless) machine.
1) Work area safety
a) Keep work area clean and well lit. Cluttered or dark areas invite accidents. b) Do not operate machines in explosive atmospheres, such as in the presence of flammable liquids, gases or dust. Machines create sparks which may ignite the dust or fumes.
c) Keep children and bystanders away while operating a machine. Distractions can cause you to lose control.
2) Electrical safety
a) Machine plugs must match the outlet. Never modify the plug in any way. Do not use any adaptor plugs with earthed (grounded) machines. Unmodified plugs and matching outlets will reduce risk of electric shock.
b) Avoid body contact with earthed or grounded surfaces, such as pipes, radiators, ranges and refrigerators. There is an increased risk of electric shock if your body is earthed or grounded.
c) Do not expose machines to rain or wet conditions. Water entering a machine will increase the risk of electric shock.
d) Do not abuse the cord. Never use the cord for carrying, pulling or unplugging the machine. Keep cord away from heat, oil, sharp edges or moving parts. Damaged or entangled cords increase the risk of electric shock.
e) When operating a machine outdoors, use an extension cord suitable for outdoor use. Use of a cord suitable for outdoor use reduces the risk of electric shock. f) If operating a machine in a damp location is unavoidable, use a residual current device (RCD) protected supply. Use of an RCD reduces the risk of electric shock.
3) Personal safety
a) Stay alert, watch what you are doing and use common sense when operating a machine. Do not use a machine while you are tired or under the influence of drugs, alcohol or medication. A moment of inattention while operating machines may result in serious personal injury. b) Use personal protective equipment. Always wear eye protection. Protective equipment such as dust mask, non-skid safety shoes, hard hat, or hearing protection used for appropriate conditions will reduce personal injuries. c) Prevent unintentional starting. Ensure the switch is in the off-position before connecting to power source and/or battery pack, picking up or carrying the machine. Carrying machines with your finger on the switch or energising machines that have the switch on invites accidents. d) Remove any adjusting key or wrench before turning the machine on. A wrench or a key left attached to a rotating part of the machine may result in personal injury. e) Do not overreach. Keep proper footing and balance at all times. This enables better control of the machine in unexpected situations. f) Dress properly. Do not wear loose clothing or jewellery. Keep your hair and clothing away from moving parts. Loose clothes, jewellery or long hair can be caught in moving parts. g) If devices are provided for the connection of dust extraction and collection facilities, ensure these are connected and properly used. Use of dust collection can reduce dust-related hazards. h) Do not let familiarity gained from frequent use of machines allow you to become complacent and ignore tool safety principles. A careless action can cause severe injury within a fraction of a second.
4) Machine use and care
a) Do not force the machine. Use the correct machine for your application. The correct machine will do the job better and safer at the rate for which it was designed. b) Do not use the machine if the switch does not turn it on and off. Any machine that cannot be controlled with the switch is dangerous and must be repaired. c) Disconnect the plug from the power source and/or remove the battery pack, if detachable, from the machine before making any adjustments, changing accessories, or storing machines. Such preventive safety measures reduce the risk of starting the machine accidentally. d) Store idle machines out of the reach of children and do not allow persons unfamiliar with the machine or these instructions to operate the machine. Machines are dangerous in the hands of untrained users. e) Maintain machines and accessories. Check for misalignment or binding of moving parts, breakage of parts and any other condition that may affect the machine's operation. If damaged, have the machine repaired before use. Many accidents are caused by poorly maintained machines. f) Keep cutting tools sharp and clean. Properly maintained cutting tools with sharp cutting edges are less likely to bind and are easier to control. g) Use the machine, accessories and tool bits etc. in accordance with these instructions, taking into account the working conditions and the work to be performed. Use of the machine for operations different from those intended could result in a hazardous situation. h) Keep handles and grasping surfaces dry, clean and free from oil and grease. Slippery handles and grasping surfaces do not allow for safe handling and control of the machine in unexpected situations.
5) Service
a) Have your machine serviced by a qualified repair person using only identical replacement parts. This will ensure that the safety of the machine is maintained.
1.2.2 Lawnmower safety warnings
a) Do not use the lawnmower in bad weather conditions, especially when there is a risk of lightning. This decreases the risk of being struck by lightning. b) Thoroughly inspect the area for wildlife where the lawnmower is to be used. Wildlife may be injured by the lawnmower during operation. c) Thoroughly inspect the area where the lawnmower is to be used and remove all stones, sticks, wires, bones, and other foreign objects. Thrown objects can cause personal injury. d) Before using the lawnmower, always visually inspect to see that the blade and the blade assembly are not worn or damaged. Worn or damaged parts increase the risk of injury. e) Before use, check the supply cord and any extension cord for signs of damage or aging. Do not use the lawnmower if the cord is damaged or worn. If the cord is damaged or worn during use, switch off the lawnmower and do not touch the cord before disconnecting it from the supply. A damaged supply cord or extension cord may result in electric shock, fire and/or serious injury. f) Check the grass catcher frequently for wear or deterioration. A worn or damaged grass catcher may increase the risk of personal injury. g) Keep guards in place. Guards must be in working order and be properly mounted. A guard that is loose, damaged, or is not functioning correctly may result in personal injury. h) Keep all cooling air inlets clear of debris. Blocked air inlets and debris may result in overheating or risk of fire.
i) While operating the lawnmower, always wear non-slip and protective footwear. Do not operate the lawnmower when barefoot or wearing open sandals. This reduces the chance of injury to the feet from contact with the moving blade.
j) While operating the lawnmower, always wear long trousers. Exposed skin increases the likelihood of injury from thrown objects.
k) Do not operate the lawnmower in wet grass. Walk, never run. This reduces the risk of slipping and falling which may result in personal injury.
l) Do not operate the lawnmower on excessively steep slopes. This reduces the risk of loss of control, slipping and falling which may result in personal injury.
m) When working on slopes, always be sure of your footing, always work across the face of slopes, never up or down and exercise extreme caution when changing direction. This reduces the risk of loss of control, slipping and falling which may result in personal injury.
n) Use extreme caution when reversing or pulling the lawnmower towards you. Always be aware of your surroundings. This reduces the risk of tripping during operation.
o) Keep the supply cord away from the cutting blades. A damaged supply cord may result in electric shock, fire and/or serious injury.
p) Switch off and remove plug from mains if the cord is entangled or damaged. Entangled or damaged cords can increase the risk of electric shock.
q) Do not touch blades and other hazardous moving parts while they are still in motion. This reduces the risk of injury from moving parts.
When clearing jammed material or cleaning the lawnmower, make sure all power switches are off and the power cord is disconnected. Unexpected operation of the lawnmower may result in serious personal injury.
1.3 Additional safety instructions
1.3.1 Intended use
The FLYMO Lawnmower is intended to mow lawn in private domestic gardens and allotments. The product is not intended for long term use.

DANGER!
Risk of injury!
→Do not use the product to cut bushes, hedges, shrubs and perennials, to cut climbing plants or grass on roofs or on balconies, to crush branches and twigs, and to compensate for irregularities in the ground.
→Do not use the product on slopes with an inclination of more than 20°.
1.3.2 Additional electrical safety instructions

DANGER!
Risk of cardiac arrest!
This product generates an electromagnetic field during operation. This electromagnetic field may affect the functionality of active or passive medical implants (e.g. pacemakers), which may result in serious injury or death.
→Consult your doctor and the manufacturer of your implant before using this product.
→Remove the plug when you are not using the product.
1.3.3 Additional personal safety instructions

DANGER!
Risk of suffocation!
Small parts can be swallowed.
→Keep toddlers away when you assemble the product.
→ Stop the machine, remove the mains plug from the mains socket and wait for all moving parts to come to a complete stop. - If the machine hits a foreign object; → In this case, inspect the machine for damage and repair it before restarting and operating it again.
If the machine begins to vibrate abnormally:
→ In this case, immediately inspect the machine for damage, replace or repair damaged parts and inspect and tighten any loose parts. →Before mowing, check the area to be mowed for hidden objects such as branches and remove them. This will reduce the risk of the cutting tool becoming jammed. → Stop the cutting tool if the machine needs to be tilted for transport when crossing surfaces other than grass and when transporting the machine to and from the mowing area. →Do not tilt the machine when the motor is switched on. →Empty the grass catcher before storing. → Recommendation: Perform cleaning and maintenance work before storing. → Service the machine regularly. This increases the life span of the machine. → Use only FLYMO-approved spare parts. Inappropriate spare parts can cause injuries or damage the machine. → Do not modify any safety components. Modifying safety components increases the risk of injury. → Take care when adjusting the machine. This prevents fingers from being caught between the moving cutting tool and stationary parts of the machine. → Always allow the machine to cool before storing. → When performing maintenance on the cutting tool, be aware that the cutting tool can still move after it has been switched off.
→Recommendation: Wear hearing protection.
1.3.4 Safety Cut-Out
The motor is protected by a Safety Cut-Out which is activated when the blade becomes jammed or if the motor is overloaded. When this occurs, stop and disconnect the product from the mains. The Safety Cut-Out will only reset when you release the start / stop lever. Clear any obstruction and wait for a few minutes for the Safety Cut-Out to reset before you continue to use the product.
2. ASSEMBLY

DANGER!
Risk of cutting injury from the blade.
If the product starts unintentionally, people can be injured by the blades.
→Wait until the blade stops. →Disconnect the product from the power supply. →Wear protective gloves when assembling the product.
2.1 To fit the lower handles to the lawnmower [Fig. A]
- Place the end of the lower handle into the slots.
- Secure the lower handles to the hood by firmly pushing the fixing pin through the holes in the hood and handle.
- Repeat on the other side.
NOTE:
If a problem occurs when securing the handle to the hood with the fixing pin, carefully lever the fixing pin out of position and repeat steps 1 to 3 above.
fixing pin, carefully lever the fixing pin out of its location and repeat steps 1 to 3 above.
2.2 To fit the upper handles to the lower handles [Fig. B]
- Ensure the upper handle is located correctly with the lock-off button on the switchbox uppermost.
- Ensure the upper handle and the lower handle are aligned correctly.
- Insert the nut into the handle knob (if applicable).
- 2.3 To assemble the cable clips
Fit the cable to the handles using the clips provided.
- Fit the cable to the handles with the clips provided.
- Make sure the cable is not trapped between the upper and lower handles.
2.4 To assemble the grass box cover [Fig. E]
- Push the grass box cover onto the both bolts.
- To close the cover, push the grass box cover onto the grass box.
2.5 To adjust the cutting height

WARNING!
Risk of injury due to sharp edges.
→Always handle the blade with care. →Wear protective gloves. →Never use more than 3 cutting height spacers. →Spacers must only be fitted between the blade and the fan and
NEVER between the blade and the bolt.
- Remove the blade bolt, and blade as described in "Removing the Blade and Fan".
- For a Lower Cut - Add spacers.
- For a Higher Cut - Take spacers away.
- Refit the blade as described in "Fitting the Blade and Fan".
Always ensure the text 'THIS SIDE TO GRASS' will be facing the grass when the product is in the mowing position. [Fig. M]
2.6 To remove and fit the fan blade
2.6.1 To remove and fit the blade and fan
- To remove the blade bolt, hold the fan firmly and with the spanner provided loosen the blade bolt by turning it anti-clockwise. [Fig. M]
- Remove the blade bolt, blade, spacers and fan. [Fig. N]
- Inspect for damage and clean as necessary.
NOTE:
Renew your metal blade after 50 hours mowing or 2 years whichever is the sooner - regardless of condition.
ver is the sooner - regardless of condition.
2.6.2 To assemble and fit the blade and fan

WARNING!

Risk of injury due to damaged blade.
→If the blade is cracked or damaged replace it with a new one.

WARNING!
Risk of injury due to damaged blade bolt.
→Never use a blade bolt if the insulated head is damaged, cracked, or missing.
- Ensure the fan is located correctly.
- Place the spacers onto the fan ensuring the pegs have located into the holes.
- Place the blade onto the spacers, ensuring the pegs have located into the holes on the blade and that the blade is positioned as illustrated. [Fig. N]
- Place the blade bolt through the centre hole of the blade. [Fig. N]
- Tighten down clockwise by hand.
- Hold the fan firmly and tighten the blade bolt with the spanner provided.
3. OPERATION

DANGER!
Risk of cutting injury from the blade.
If the product starts unintentionally, people can be injured by the blades.
→Wait until the blade stops. →Disconnect the product from the power supply. →Wear protective gloves when adjusting or transporting the product.
3.1 To adjust the handle
NOTE: handle.
Removal of lower handle fixing pins is not required to adjust the
3.1.1 To move the handle to the forward position [Fig. C]
- Push the handle inwards from both sides.
- Move the handle forward until it stops.
3.1.2 To move the handle to the down position [Fig. C]
- Push the handle inwards from both sides.
- Move the handle downward until it stops.
NOTE:
The handle does not rest flat on the ground.
3.1.3 To move the handle to the operating position
Adjustment is not required to move the handle to the operating position.
Simply pull down from the forward position or lift up from the down position until the handle is in the most comfortable operating position.
3.2 To start the mower

DANGER!
Risk of injury
Risk of injury if the product does not stop when the start lever is released.
Do not bypass the safety device or switches. For example, do not attach the start lever to the handle. Do not make any changes to the product that are not described in this manual.
3.2.1 To start
- EU models: Connect female extension cable connector to the back of the switchbox.
- Form a loop in the mains cable and push the loop through the slot as illustrated. [Fig. E]
- To secure, position the loop over the hook and pull the cable back through the slot as illustrated. [Fig. F]
- Connect the plug to the mains and switch on.
- To prevent a ring being cut in your lawn and to clear any residual grass, tilt your lawnmower slightly. [Fig. G]
NOTE:
The switchbox is provided with a lock-off button to prevent accidental starting. [Fig. G1]
- Press and hold the lock-off button on the switchbox, then squeeze one of the start/stop levers towards the upper handle. [Fig. J]
- Continue to squeeze the start/stop lever towards the upper handle and release the lock-off button.
- When the lawnmower has reached full speed, gently lower it onto the lawn.
NOTE:
There are two start/stop levers fitted. Either one can be used for the lawnmower.
Important:
Do not use the start/stop levers intermittently.
3.2.2 To stop
- To prevent a ring being cut in your lawn and to clear any residual grass, tilt your lawnmower slightly. [Fig. J]
- Release the pressure on the start / stop lever.
3.3 To operate the mower
- Start mowing the edge of the lawn nearest to the power point so the cable is laid out on the lawn you have already cut. [Fig. K]
- Cut your grass twice a week during the growing season. Your lawn will suffer if more than a third of its length is cut at one time.

CAUTION!
Risk of damage to the product.
→Do not overload your mower
Mowing long thick grass may cause the motor speed to drop. You will hear a change in the motor sound. If the motor speed drops, you may overload your lawnmower which may cause damage. When mowing in long thick grass, a first cut with the cutting height set higher will help reduce the load. See "Adjusting the Cutting Height".
3.4 To use the mower with the grass box
For optimum performance your product is designed to be used with the grassbox fitted.
3.5 To empty the grass box [Fig. L]
Stop the product and wait until the cutting head has stopped rotating before emptying the grassbox.
- Lift the grassbox lid.
- Lift the grassbox off the product and empty.
- Replace grassbox and lid carefully.
Failure to fit the grassbox and lid correctly will cause poor collection of grass clippings.
4. MAINTENANCE

DANGER!
Risk of cutting injury from the blade.
If the product starts unintentionally, people can be injured by the blades.
→Wait until the blade stops. →Disconnect the product from the power supply. →Wear protective gloves when maintaining the product.
4.1 To clean the mower [Fig. P]
![FLYMO Hover Vac 250 - To clean the mower [Fig. P] - 1](/content/2026/06/1404614/images/768bb859a7c5de4b2d3c11a5f307404c4fa0a3e803d9ffb961cc43c0091f76a0.jpg)
DANGER!
Risk of injury!
Risk of injury and risk of damage to the product.
→ Do not use water or a water jet (especially a high-pressure water jet) to clean the product. This can damage the product or allow water to penetrate the electrical components and cause corrosion or short circuits. → Do not clean with chemicals, including petrol or solvents. Some can destroy critical plastic parts.
→The airflow slots must always be clean.
It is very important that you keep your lawnmower clean. Grass clippings left in any of the air intakes or under the hood could become a potential fire hazard.
- Remove grass from under the hood with spanner / scraper tool.
- Using a soft brush, remove grass clippings from all air intakes.
- Remove the blade to gain access to the fan and clean with a soft brush.
- Wipe over the surface of your lawnmower with a dry cloth.
5. STORAGE
5.1 To store the mower
The product must be stored away from children.
- Disconnect the product from the mains.
- Clean the mower (see 4. MAINTENANCE).
- Store the mower in a dry, enclosed and frost-free place where it is protected from damage.
5.2 To select the storage positions [Fig. S]
There are two kinds of storing the mower:
- Lying storage position
– Wall-mounting storage position
NOTE: When wall-mounting storage, always hang the mower from the lower handle ⑦ cross section.
5.3 To fold the handle [Fig. S]
- Lift up and support the handles ①/⑦ by approximately 5 cm.
- To unlock, push the lower handle ⑦ inwards from both sides simultaneously.
3. For the lying storage position:
Rotate the handles ①/⑦ forwards.
Or:
For the wall-mounting storage position:
Rotate the handles ①/⑦ backwards.
- Loosen the handle knobs ④ and fold the upper handle ①.
Make sure that the cable is not locked between the lower and the upper handle.
5.4 To prepare for the end of the mowing season
- Replace blade, bolts, nuts or screws, if necessary.
- Clean your lawnmower thoroughly.
- Ask your local Service Centre to clean the air filter thoroughly and carry out any service or repairs required.
- Make sure that the electric cable is coiled properly.
5.5 To carry the lawnmower
Ensure the blade is facing away from you.
6. TROUBLESHOOTING

DANGER!
Risk of cutting injury from the blade.
If the product starts unintentionally, people can be injured by the blades.
→Wait until the blade stops. →Disconnect the product from the power supply. →Wear protective gloves when troubleshooting the product.
Problem Possible Cause Remedy
| Mower fails to operate | Is the power turned on? | → Check the fuse in the plug.→Replace if blown. |
| Fuse continues to blow? →Immediately disconnect from the mains electricity supply and consult your local approved Service Centro. | ||
| Is the correct starting procedure being followed? | →See To start the mower. | |
| Poor flotation Underside of the mower and / or the fan blades arc dirty. | →Clean the underside of the hood and the fan blades. | |
| Cutting height is too low. →Raise to a higher height of cut. See Adjusting the Cutting Height. | ||
| →If poor flotation persists, contact the local approved Service Centro. | ||
| Poor grass collection | Is the grassbox fitted correctly? | |
| Are you mowing in straight lines? | →Follow the procedure described In Poor Rotation. | |
| Are you cutting more than one third of the grass length? | ||
| Do you need to raise the cutting height? | ||
| Excessive Vibration | →Replace broken or missing plastic cutters. | |
| →Check plastic cutters are filled correctly. | ||
→ If vibration persists, immediately disconnect from the mains electricity supply and consult your local approved Service Centre.

NOTE: For any other malfunctions please contact the FLYMO customer service. Repairs must only be done by FLYMO customer service or specialist dealers approved by FLYMO.
- TECHNICAL DATA
| Electric Rotary Lawnmower | Unit | Value9679093-xxHover Vac 250 | Value9679659-xxHover Vac 260 | Value9679661-xxHover Vac 270 |
| Cutting width | cm | 25 | 26 | 27 |
| Speed of rotation cutting blade | R/min | 7000 ± 5% | 7000 ± 5% | 7000 ± 5% |
| Cutting height | mm | 10 - 30 | 10 - 30 | 10 - 30 |
| Grass collector capacity | l | 15 | 15 | 15 |
| Power | kW | 1.4 ± 5% | 1.4 ± 5% | 1.4 ± 5% |
| Weight | kg | 6.5 | 6.5 | 6.5 |
| Sound pressure level Lpa1) | dB(A) | 89 | 89 | 89 |
| Uncertainty kpA | dB(A) | 3.0 | 3.0 | 3.0 |
| Sound power level LwA2) measured / guaranteed | dB(A) | 93 / 94 | 93 / 94 | 93 / 94 |
| Hand / arm vibration avsw1) | m/s 2 | < 2.5 | < 2.5 | < 2.5 |
| Uncertainty kvsw | 1.5 | 1.5 | 1.5 |
Measuring process complying with: 1) EN (EC 62841-4-3 2) RL 2000/14/EC / S.I. 2001 No.1701
NOTE: The stated vibration emission value has been measured according to a standardized test procedure and can be used for comparison of one electric power tool with another. It can also be used for preliminary evaluation of exposure. The vibration emission value can vary during actual use of the electric power tool.
8. SERVICE
Please find the current contact information of our service on the back page and online:

https://www.flymo.com/uk/content/contact-us
9. DISPOSAL
Disposal of the product

The symbol indicates that the product is not household waste. Recycle the product through your local collection system for electrical and electronic equipment.
This will help to ensure proper waste disposal at the end of its service life. For more information, contact your local authorities, municipal waste disposal service, your GARDENA dealer or retailer. Improper disposal may have a negative impact on the environment and human health due to the possible presence of hazardous substances.
IMPORTANT!
→ Dispose of the product through or via your local recycling collection centre.
https://www.flymo.com/uk/content/contact-us
9. DISPOSAL
https://www.flymo.com/uk/content/contact-us
9. DISPOSAL
https://www.flymo.com/uk/content/contact-us
9. DISPOSAL
Product disposal

https://www.flymo.com/uk/content/contact-us
9. DISPOSAL
https://www.flymo.com/uk/content/contact-us
9. DISPOSAL
https://www.flymo.com/uk/content/contact-us
https://www.flymo.com/uk/content/contact-us
9. DISPOSAL
https://www.flymo.com/uk/content/contact-us
9. DISPOSAL
https://www.flymo.com/uk/content/contact-us
9. DISPOSAL
Product disposal

The symbol indicates that the product should not be disposed of with household waste. Recycle the product at your local collection point for electrical and electronic equipment.
This is how you ensure proper waste disposal at the end of its service life. For more information, contact your local authorities, municipal waste disposal services, the GARDENA representative, or dealer. Due to the potential presence of hazardous substances, improper disposal in waste can have a negative impact on the environment and human health.
IMPORTANT!
→ Take the product to your local recycling center.
9. DISPOSAL
9. DISPOSAL
9. DISPOSAL
9. DISPOSAL
9. DISPOSAL
9. DISPOSAL
9. DISPOSAL
Product disposal

2.3 Mount the cable clamps
9. DISPOSAL
9. WASTE DISPOSAL
9. DISPOSAL
Product disposal

9. DISPOSAL
Product disposal
9. DISPOSAL
https://www.flymo.com/uk/content/contact-us
9. DISPOSAL
Disposal of the product

| UKCA Declaration of Conformity [only for UK]The manufacturer: GARDENA Germany AB, PO Box 160 89, SE-103 92, Stockholm, Sweden hereby certifies that, when leaving our factory, the unit(s) indicated below is/are in accordance with the UK Regulations, designated standards of safety and product specific designated standards.This certificate becomes void if the units are modified without our approval. | |
| Description of the product: Electric Rotary Lawnmower | |
| Type: Hover Vac 250 | Hover Vac 260 |
| Hover Vac 270 | |
| Article number: 9679093-xx | 9679659-xx |
| 9679661-xx | |
| UK regulations: S.I. 2008/1597 | S.I. 2016/1091 |
| S.I. 2012/3032 | |
| S.I. 2001/1701 | |
| Designated standards: EN ISO 12100 | EN 62841-1 |
| EN IEC 62841-4-3 | |
| Approved Body: DEKRA Testing and Certification GmbHHandwerkstraße 1570565 StuttgartGermany | |
| Approved Body Number: 0158 | |
| Noise level: measured / guaranteed 9679093-xx: 93 dB(A) / 94 db(A)9679659-xx: 93 dB(A) / 94 db(A)9679661-xx: 93 dB(A) / 94 db(A) | |
| Conformity Assessment Procedure: According to S.I. 2001/1701 Art.11 Schedule 9 | |
| Dokumentation Deposited: GARDENA Manufacturing GmbH,Technische Dokumentation,A. OchsD-89079 Ulm, Hans-Lorenser-Str.40 | |
| UK importer:Authorized representative | Husqvarna UK LimitedPreston Road, Aycliffe, County DurhamUK DL5 6UP |
| Ulm, 25.03.2025 | Martin LienhardSenior Vice PresidentBusiness Unit Electric and Battery |
ROBERTO C. FUMBO S.R.L.
Pseudo Norden
Let
Bumavilu 70-1625
Volynov. 2 Rudar, dis
Buenos Aires
Phone: +54 11 5263-7862
Ventas@lumber.com
Armenia
AES System
Marsha Babakervan Avenue 56-2
Denny (1270) 60 651 65
1.10.19. [1374] DO LOT 02:1
metscharyanovichun.com
Australia
Husqvarna Australia Pty. Ltd.
Locked Sec
Central Coast BC
NSW 2352
Dana: (1 81)01 2 4352 7406
- (1-2) 10, 243.2745
•
info@pictures-garden.ez
Bahrain
M.H.A.Mahruus
BUILDING 208 BLOCKS 56
ROAD 328
HUA 320
Banyx +072-1740 8000
- +373 1146 2052
Belarus / Беларусь
СОО «Мастен Гарсен»
030138.5 Muyex
2016.1. МАРСК,
Parkway Tom Vin Pa 70
POSTO: 2016. VI. 61. 20 Pwww.(0267)61-165-63
FUND: 1-36, FUT 105 383
Brazil
forclura humpinas e Matrues Ltd
Reclass Phaquensis of Alistica
Aurora Juscelho Schleschen
de of course Quinka
3J03 Brazil
Phone: 1+55; 41 3595 9600
garden,customerservice@husqartogroup.com
Chile
Unit 3-5 75 Luee Tower D, No. 798, In Zhang Rd, Chang
Ghln2-6, 17, Laval, Haver B, No.148, Sh Zhenj HK, Chang Mino Dist. Saoqha, DPC, 200935
Colombia
Equinas de Treatro Columbia SAS
C# 68 D No 25 B E6 01 618
GRI: 10 L 40 E 2 D 30 GRI: 576 California Times Control
51000 Dominican Republic
Phone: (1) 808-582-0478
$70. Bellashvli street
0159 Trills: Georgia
Number: i+5051372
info@interwate.com
millc-6.01 $55.021.03 m.9c
www.transporter.com
Service Address and
Importer to Great Britain
Husgame UK
Preslun Road
Syclife Industrial Deck
Boiler
Ren, J. A. S. Mie Covate Park
County Durham
DILS ED
Pam. (144) (324 844 4538
customservices@husuariu.co.uk
Greece
11.41A9030702
A##, Allp#o 92
Alfica
14.15442
E-mail: No
[14] (+70) 217 5183 100
info@pencipengules.com
Hong Kong
Tung Ta Company
151-153 Hot Bun Road
Kaur Toro, Keylon
Hong Kong
Huang Hong
- LHE. (d2) 2003-1002
11. Stock Trading
Hungary
Hunipalini Magyardos/Al K.
E2 E1 U 1 - 3
1944 Budapest
Phone: (36) 1251-4161
wwwszocialathuseparin@huspansgroup.com
Iceland
BYKO obi
Sorawski 20
3011.12.2
200 Kapitacu
- [354] 513 4020
Iraq
Akshifemal Alakıdar Company
Al-Faysalich, Near Estate Ba
Mecul
Page 1:964.78 18 18 46 75
Ireland
Lifflor Distributors Ltd.
309 MW Business Park, Balwoodan
15 Dublin
15 DOLLIM B### 25% 1 874 7620



- CARTON CONTENTS
- EN ELECTRIC ROTARY LAWNMOWER
- ORIGINAL INSTRUCTIONS
- SAFETY
- SYMBOLS ON THE PRODUCT
- WARNING
- GENERAL SAFETY INSTRUCTIONS
- GENERAL MACHINE SAFETY WARNINGS
- SAVE ALL WARNINGS AND INSTRUCTIONS FOR FUTURE REFERENCE
- WORK AREA SAFETY
- ELECTRICAL SAFETY
- PERSONAL SAFETY
- MACHINE USE AND CARE
- SERVICE
- LAWNMOWER SAFETY WARNINGS
- ADDITIONAL SAFETY INSTRUCTIONS
- INTENDED USE
- DANGER
- RISK OF INJURY
- ADDITIONAL ELECTRICAL SAFETY INSTRUCTIONS
- RISK OF CARDIAC ARREST
- ADDITIONAL PERSONAL SAFETY INSTRUCTIONS
- RISK OF SUFFOCATION
- SAFETY CUT-OUT
- ASSEMBLY
- TO FIT THE LOWER HANDLES TO THE LAWNMOWER [FIG. A]
- TO FIT THE UPPER HANDLES TO THE LOWER HANDLES [FIG. B]
- FIT THE CABLE TO THE HANDLES USING THE CLIPS PROVIDED
- TO ASSEMBLE THE GRASS BOX COVER [FIG. E]
- TO ADJUST THE CUTTING HEIGHT
- TO REMOVE AND FIT THE FAN BLADE
- TO REMOVE AND FIT THE BLADE AND FAN
- TO ASSEMBLE AND FIT THE BLADE AND FAN
- OPERATION
- TO ADJUST THE HANDLE
- TO MOVE THE HANDLE TO THE FORWARD POSITION [FIG. C]
- TO MOVE THE HANDLE TO THE DOWN POSITION [FIG. C]
- TO MOVE THE HANDLE TO THE OPERATING POSITION
- TO START THE MOWER
- TO START
- TO STOP
- TO OPERATE THE MOWER
- CAUTION
- TO USE THE MOWER WITH THE GRASS BOX
- TO EMPTY THE GRASS BOX [FIG. L]
- MAINTENANCE
- TO CLEAN THE MOWER [FIG. P]
- →THE AIRFLOW SLOTS MUST ALWAYS BE CLEAN
- STORAGE
- TO STORE THE MOWER
- THE PRODUCT MUST BE STORED AWAY FROM CHILDREN
- TO SELECT THE STORAGE POSITIONS [FIG. S]
- TO FOLD THE HANDLE [FIG. S]
- FOR THE LYING STORAGE POSITION
- FOR THE WALL-MOUNTING STORAGE POSITION
- TO PREPARE FOR THE END OF THE MOWING SEASON
- TO CARRY THE LAWNMOWER
- TROUBLESHOOTING
- DISPOSAL
- DISPOSAL OF THE PRODUCT
- IMPORTANT
- PRODUCT DISPOSAL
- MOUNT THE CABLE CLAMPS
- WASTE DISPOSAL
Brand : FLYMO
Model : Hover Vac 250
Category : Lawn mower