
SimpliStore 340 Li - Lawn mower FLYMO - Free user manual and instructions
Find the device manual for free SimpliStore 340 Li FLYMO in PDF.


| Product Type | Battery-powered lawn mower |
| Model | SimpliStore 340 Li |
| Brand | Flymo |
| Power Source | Rechargeable lithium-ion battery |
| Battery Voltage | 20 V |
| Battery Capacity | 2.0 Ah |
| Cutting Width | 34 cm |
| Cutting Height | 25 mm to 65 mm (5 positions) |
| Grass Box Capacity | 30 L |
| Weight | 8.5 kg |
| Dimensions (L x W x H) | 100 x 38 x 40 cm |
| Drive Type | Push (manual) |
| Cutting System | Rotary blade |
| Mulching Function | Yes |
| Collection | Rear grass box |
| Handle Type | Foldable ergonomic handle |
| IP Rating | IPX4 (splash proof) |
| Noise Level | 82 dB(A) |
| Vibration Level | 2.5 m/s² |
| Charging Time | Approx. 60 minutes |
| Run Time | Approx. 30 minutes |
| Features | Compact storage, lightweight, easy start, height adjust lever |
| Maintenance | Clean after use, sharpen blade regularly, store indoors |
| Safety | Safety switch, blade brake, keep hands/feet clear |
| Spare Parts | Blade, battery, charger, grass box available from Flymo |
Frequently Asked Questions - SimpliStore 340 Li FLYMO
User questions about SimpliStore 340 Li FLYMO
0 question about this device. Answer the ones you know or ask your own.
Ask a new question about this device
Download the instructions for your Lawn mower in PDF format for free! Find your manual SimpliStore 340 Li - FLYMO and take your electronic device back in hand. On this page are published all the documents necessary for the use of your device. SimpliStore 340 Li by FLYMO.
USER MANUAL SimpliStore 340 Li FLYMO
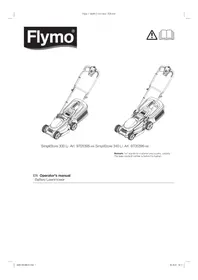
SimpliStore 300 Li Art. 9705395-xx SimpliStore 340 Li Art. 9705396-xx Remark: "xx" stands for customer and country variants. The basic product number is before the hyphen.
EN Operator's manual
Battery Lawnmower
A1 A2 A4 |  |  |
| A3 | ||
A5 A6 A'  |  |  |
A8 A9 A10 |  |  |
O1 O2 O3 |  |  |
| 04 | 05 06 07 | ||
 |  |  |  |
| 08 | Q9 | O10 | |
 |  |  | |
| 011 | O12 | S1 | |
 |  |  | |
| T1 T2 T3 | |||
 |  |  | |
EN Battery Lawnmower
- SAFETY 4
- ASSEMBLY 5
- OPERATION....5
- MAINTENANCE 6 5.STORAGE 6
- TROUBLESHOOTING 7
- TECHNICAL DATA....7
- ACCESSORIES 8
- SERVICE/WARRANTY....8
Original instructions.

This product is not intended for use by persons (including children) with reduced physical, sensory or mental capabilities, or lack of experience and knowledge, unless they have been
given supervision or instruction concerning use of the product by a person responsible for their safety. Children should be supervised to ensure that they do not play with the product. The use of this product by young people under the age of 16 is not recommended.
Intended use:
The FLYMO Battery Lawnmower is intended to mow lawn in private domestic gardens and allotments.
The product is not intended for long term use.

DANGER! Risk of injury!
→ Do not use the product to cut bushes, hedges, shrubs, to cut off climbers or grass on roofs or balcony boxes, to chop up branches, twigs and to level irregularities in the soil. Do not use the product on a slope steeper than 20° maximum.
1. SAFETY
IMPORTANT!
Read the operator's manual carefully before use and keep for future reference.
Symbols on the product:


Keep bystanders away.
Valid for the battery mower.
Beware of sharp blades. Blades continue to rotate after the motor is switched off. Have disabling device before maintenance.
Secure the working area before starting to work. Watch out for hidden cables.
General safety warnings
Electrical safety

DANGER! Electric shock!
Risk of injury due to electric shock.
→ The product must be supplied through a residual current device (RCD) having a rated residual operating current not exceeding 30 mA.
Training
a) Read the instructions carefully. Be familiar with the controls and the correct use of the machine. b) Never allow children or people unfamiliar with these instructions to use the machine. Local regulations can restrict the age of the operator. c) Never operate the machine while people, especially children, or pets are nearby. d) Keep in mind that the operator or user is responsible for accidents or hazards occurring to other people or their property.
Preparation
a) While operating the machine always wear substantial footwear and long trousers. Do not operate the machine when barefoot or wearing open sandals. Avoid wearing clothing that is loose fitting or that hanging cords or ties. b) Thoroughly inspect the area where the machine is to be used and remove all objects which can be thrown by the machine. c) Before using, always visually inspect to see that the blade, blade bolt and the blade assembly are not worn or damaged. Replace worn or damaged components in set to preserve balance. Replace damaged or unreadable labels. d) Before use check the supply and extension cord for signs of damage or aging. If the cord becomes damaged during use, disconnect the cord from the supply immediately. DO NOT TOUCH THE CORD BEFORE DISCONNECTING THE SUPPLY. Do not use the machine if the cord is damaged or worn.
Operation
a) Operate the machine only in daylight or in good artificial light. b) Avoid operating the machine in wet grass. c) Always be sure of your footing on slopes. d) Walk, never run. e) Mow across the face of slopes, never up and down. f) Exercise extreme caution when changing direction on slopes. g) Do not mow excessively steep slopes.
h) Use extreme caution when reversing or pulling the machine towards you.
i) Stop the blade(s) if the machine has to be tilted for transportation when crossing surfaces other than grass, and when transporting the machine to and from area to be used.
j) Never operate the machine with defective guards or shields, or without safety devices, for example deflectors and / or grass collector, in place.
k) Switch on the motor carefully according to instructions and with feet well away from the blade(s).
Do not tilt the machine when switching on the motor, except if the machine has to be tilted for starting. In this case, do not tilt it more than absolutely necessary and lift only the part, which is away from the operator.
m) Do not start the machine when standing in front of the discharge opening.
n) Do not put hands or feet near or under rotating parts. Keep clear of the discharge opening at all times.
o) Do not transport the machine while the power source is running.
Stop the machine, and remove the disabling device. Make sure that all moving parts have come to a complete stop:
- whenever you leave the machine, – before clearing blockages or unclogging chute, – before checking, cleaning or working on the machine,
- after striking a foreign object. Inspect the machine for damage and make repairs before restarting and operating the machine;
if the machine starts to vibrate abnormally (check immediately)
- inspect for damage,
- replace or repair any damaged parts,
- check for and tighten any loose parts.
Maintenance and storage
a) Keep all nuts, bolts, and screws tight to be sure the machine is in safe working condition. b) Check the grass collector frequently for wear or deterioration. c) Replace worn or damaged parts for safety. d) On machines with multi blade, take care as rotating one blade can cause other blades rotate. e) Be careful during adjustment of the machine to prevent entrapment of the fingers between moving blades and fixed parts of the machine. f) Always allow the machine to cool down before storing. g) When servicing the blades be aware that, even though the power source is switched off, the blades can still be moved. h) Use only genuine replacement parts and accessories.
Additional safety warnings
Battery safety

DANGER! Fire risk!
The battery to be charged must be placed on a nonflammable, heat resistant and non-conductive surface while charging.
The battery must not be charged unattended.
The supply terminals are not to be short-circuited.
Keep corrosive, flammable and easily combustible objects clear of the battery charger and the battery.
Do not cover the battery charger and the battery while charging.
Disconnect the battery charger immediately in the event of smoke formation or fire.
Only use FLYMO batteries for the FLYMO battery product. FLYMO cannot accept any liability for the batteries of other manufacturers. If they are of minor quality, they could cause a fire or explosion hazard!
Do not use the FLYMO charger to charge external rechargeable batteries, as FLYMO cannot guarantee compatibility and could therefore present a risk of fire or explosion.
Do not charge non-rechargeable batteries.

DANGER! Risk of explosion!
Protect batteries from heat and fire. Do not leave on radiators or expose to strong sunshine for long periods.
Do not operate them in explosive atmospheres, e.g. in the presence of flammable liquids (vapours), flammable gases or accumulations of dust. Batteries may create sparks which could ignite the mixtures.
Check your replacement battery before each use. Visually check the battery before each use. A non-functioning battery must be disposed of correctly. Do not send by post. For further details, please contact your local disposal companies.
For risks of injury do not use the battery as a power source for other products. Only use the battery for the FLYMO product intended.
Only charge and use the battery in ambient temperatures of between 0 °C and 40 °C. Allow battery to cool down after long periods of use.
Check the charging cable regularly for signs of damage or ageing (brittleness). Only use it in perfect condition.
Do not stow or transport the battery above 45 °C or in direct sunlight. Ideally, the battery should be stored below 25 °C so that self-discharge is low.
Do not expose the battery to rain, water (immersion) or wet conditions.
Keep battery in order (clean) especially air vents.
If usage of the battery is not planned for a certain time (winter period) reload the battery to avoid a deep discharge.
Do not store the battery in a product to prevent self-discharge, misuse and accidents.
Do not store the battery in places where static electricity is present.
Electrical safety

DANGER! Cardiac arrest!
This product makes an electromagnetic field while it operates. This field may under some conditions interfere with active or passive medical implants. To decrease the risk of conditions that can possibly injure or kill, we recommend persons with medical implants to speak with their physician and the medical implant manufacturer before you operate the product.
Only use the battery product between 0 °C and 40 °C.
Do not use under wet conditions.
Personal safety

DANGER! Risk of suffocation!
Small parts can be easily swallowed. There is also a risk that the polybag can suffocate toddlers. Keep toddlers away when you assemble the product.
Do not use the start levers alternately.
Do not disassemble the product further than the delivery status.
Use gloves, wear slip-resistant shoes and wear eye protection.
Do not overload the mower.
Never operate the product when you are tired, ill or under the influence of alcohol, drugs, or medicine.
Danger of slipping:
in wet grass
- on steep slopes
during transport
Be careful while going backwards.
2. ASSEMBLY

DANGER! Risk of injury!
injury when the product starts accidentally.
→ Remove the battery, remove the safety key and use gloves before you assemble the product.
To assemble the handle [Fig. A1/A2/A3/A4]:
- Put the springs on the shafts.
- Put the handle plates on the shafts.
- Put the lower handle on the shafts.
- Put the washers on the shafts.
- Insert the bolts into the quick-release levers.
- Screw the quick-release levers loosely onto the shafts and clamp them down.
- Put the upper handle on the lower handles and slide the screws through the boreholes (there are 2 holes in the lower handle to choose the desired height).
- Put the washers on the screws.
- Screw the locking nuts onto the screws.
- Attach the control cable with the cable clips.
To assemble the grass box [Fig. A5/A6/A7/A8/A9]:
- Push the grass box handle into the slots in the grass box cover until it audibly engages.
- Slide the grass box tongue into the slots in the grass box until it audibly engages.
- Align the grass box cover and the grass box locators.
- Fold the grass box cover towards the grass box.
- Push the grass box cover onto the grass box. Make sure that all clips are snapped in correctly.
To attach the grass box to the lawnmower [Fig. A10]:
- Lift the protective cover.
- Attach the grass box to the hooks on the rear of the mower.
3. OPERATION

DANGER! Risk of injury!
Injury when the product starts accidentally.
→ Wait for the blade to stop, remove the battery, remove the safety key and use gloves before you adjust or transport the product.
To charge the batteries [Fig. 01]:
![FLYMO SimpliStore 340 Li - To charge the batteries [Fig. 01]: - 1](/content/2026/07/1411729/images/cd219d6bc0c77e1e221f4a60789f249b46be15cdc40a52eb4d956f8ac75ee561.jpg)
CAUTION!
Overvoltage damages the batteries and the battery charger.
→ Make sure that you use the correct mains voltage.
Before you use the batteries the first time, the batteries must be completely charged.
The lithium-ion batteries can be charged in any state of charge and the charging process can be disconnected at any time without damaging the batteries (no memory effect).
- Connect the battery charger into a mains socket.
- Connect the battery charger cable to the batteries.
When the charging control lamp at the charger flashes green and the 3 green LEDs on the battery light up one after the other, the battery is being charged.
When the charging control lamp at the charger illuminates permanently green the battery is completely charged (Charging time, see 7. TECHNICAL DATA).
- Examine the charge status regularly while you charge.
- When the batteries are completely charged, disconnect the batteries from the charger.
- Disconnect the charger from the mains.
Battery charging indicator [Fig. 02]:
→ Push the button on the battery.
The battery charging indicator is displayed for 5 seconds.
2/3 charged: 3 green LEDs illuminate; 1/3 charged: 2 green LEDs illuminate; < 1/3 charged: 1 green LED illuminates
Reserve: 1 green LED flashes
To adjust the cutting height:
For the first cut of the season, always cut on the highest cutting height possible, and gradually lower the cutting height over successive cuts to your desired height for the lawn.
Only for 300 Li (in 3 positions) [Fig. O3/O4/O5/O6/O7]:
The cutting height can be adjusted from 25 - 65 mm.
Position 'Low' (25 mm): Cutting height setting should only be used on well maintained 'manicured lawns' without excessive moss or thatch.
Position 'Mid' (45 mm): Cutting height setting is suitable for most lawns.
Position 'High' (65 mm): Cutting height setting is used when your lawn has excessive growth such as following holidays or first cut of the season.
→ Move both axles to the desired position in the E-Gate. Make sure that both sides of the axle are in the same position. Make sure that both axles are in the same position.
Only for 340 Li (in 5 positions) [Fig. O8]:
The cutting height can be adjusted from 20 - 60 mm (from rear to front).
Position 1 (20mm): Cutting height setting should only be used on well maintained 'manicured lawns' without excessive moss or thatch.
Position 2 (30 mm): Cutting height setting is suitable for most lawns.
Position 3 (40 mm): Cutting height setting is suitable for most lawns.
Position 4 (50 mm): Cutting height setting is suitable for most lawns. Position 5 (60 mm): Cutting height setting is used when your lawn has excessive growth, such as following holidays or the first cut of the season.
- Pull the lever toward the wheel.
- Move the lever to the desired position.
- Release the lever and let it engage.
To start the mower [Fig. 09 / 010]:
DANGER! Risk of injury!
Risk of injury if the product does not stop when you release the start lever.
→ Do not bypass the safety devices or switches. For example, do not attach the start lever to the handle.
To start:
The product is provided with a two-switch safety device (safety key with starting lockout) to prevent the product from being turned on by accident.
There are two start levers. Either one has to be used to start.
- Open the battery cover.
- Put the batteries into the battery holders until they audibly engage.
- Put the safety key into the mower and turn it to position I.
- Push the starting lockout with one hand and pull the start lever with the other hand.
The mower starts.
- Release the starting lockout.
Only for 340 Li [Fig. O11]: The level indicator opens during mowing. When it closes during mowing, the grass box is full and must be emptied.
To stop:
- Release the start lever. The mower stops.
- Turn the safety key to position 0 and remove it.
Tips to use the mower:
If grass residue is left in the discharge opening, pull the mower backwards about 1 m so that the grass residue can drop out downwards.
To produce a well-maintained lawn and optimise the cutting performance, we recommend to cut the lawn regularly once a week if possible. The lawn becomes denser if you cut it frequently.
After relatively long cutting intervals (holiday lawn), first of all cut in one direction with the highest cutting height and then cut in the crosswise direction with the required cutting height.
If possible, only cut the grass when it is dry, if the grass is damp, the cutting pattern will be uneven.
Cutting performance and battery charge:
The lawn area which can be cut on each battery charge depends on several factors such as moisture, grass density and cutting height. In order to ensure an optimal use of space, do not turn the mower on and off too frequently as this severely reduces the battery running time. The cutting performance for each battery charge can be ideally utilised by increasing the cutting height and frequent mowing.
Transport position [Fig. 012]:
The easy transport position provides additional mobility due to its upright driving position. Easy to get on and off the lawn at any distance.
- Attach the grass box to the switch box (see 5. STORAGE).
- Pull the mower to and from the lawn when it is set in the storage position.
4. MAINTENANCE
DANGER! Risk of injury!
injury when the product starts accidentally.
→ Wait for the blade to stop, remove the battery, remove the safety key and use gloves before you maintain the product.
To clean the mower:
DANGER! Risk of injury!
k of injury and risk of damage to the product.
→ Do not clean the product with water or with a water jet (in particular high-pressure water jet). → Do not clean with chemicals including petrol or solvents. Some can destroy critical plastic parts.
The airflow slots must always be clean.
To clean the underside of the mower:
The underside is easiest to clean after you mowed.
- Lay the mower on its side carefully.
- Clean the underside, the blade and the discharge opening with a brush (do not use sharp objects).
To clean the overside of the mower and the grass box:
- Clean the overside with a damp cloth.
- Clean the airflow slots and the grass box with a soft brush (do not use sharp objects).
To clean the battery and the battery charger:
Make sure that the surface and the contacts of the battery and the battery charger always are clean and dry before you connect the battery charger.
Do not use running water.
Clean the contacts and the plastic parts with a soft and dry cloth.
5. STORAGE
To put into storage [Fig. 09]:
The product must be stored away from children.
- Turn the safety key to position 0 and remove it.
- Remove the battery.
- Charge the battery.
- Clean the mower, the battery and the battery charger (see 4. MAINTENANCE).
- Store the mower, the battery and the battery charger in a dry, enclosed and frost-free place.
Storage position [Fig. S1]:
- Remove the grass box.
- Set the mower to the highest cutting height.
- Fold the handle flat and lock it in position 4.
- Stand the mower upright.
- Make sure that the grass box is completely empty.
- Attach the grass box to the switch box with the storage hook. Make sure that the grass box is completely secured; the storage function is accomplished.
- Store the mower in an upright position.
Disposal:
(In accordance with RL2012/19/EC/S.I. 2013 No. 3113)

The product must not be disposed of as normal household waste. It must be disposed of in line with local environmental regulations.
IMPORTANT!
→ Dispose of the product through or via your municipal recycling collection centre.
Disposal of the battery:

The FLYMO battery contains lithium-ion cells that should not be disposed of with normal household waste at the end of its life.
Li-ion
IMPORTANT!
→ Dispose of the batteries through or via your municipal recycling collection centre.
- Discharge the lithium-ion cells completely (contact the FLYMO Service).
- Protect the contacts on the lithium-ion cells against short circuits.
- Dispose of the lithium-ion cells properly.
6. TROUBLESHOOTING
DANGER! Risk of injury!
Risk of injury when the product starts accidentally.
→ Wait for the blade to stop, remove the battery, remove the safety key and use gloves before you troubleshoot the product.
To replace the blade [Fig. T1]:
DANGER! Risk of injury!
Risk of injury when the blade turns and it is damaged, bent, out of balance or has chipped edges.
→ Do not use the mower when the blade is damaged, bent, out of balance or has chipped edges. → Do not regrind the blade.
The FLYMO spare parts are available from your FLYMO dealer or from the FLYMO service.
Only use an original FLYMO blade:
• FLYMO replacement blade for 300 Li: Art. FLY 069 • FLYMO replacement blade for 340 Li: Art. FLY 087
SimpliStore 300 Li [Fig. T2]:
- Ensure the lawnmower is stopped and disconnected. Insert a screwdriver through the reinforced hole on the deck into the drive pulley wheel to stop the wheel from turning during the blade change.
- Unscrew the blade bolt. Take care not to damage the drive pulley wheel when applying force.
- Remove the blade bolt and the washer.
- Remove the blade.
- Put the new blade on the lawnmower.
- Put the washer and the blade bolt on the lawnmower.
- Screw the new blade tight with the blade bolt. Tightening torque is 15 – 20 Nm. Do not over-torque. Take care not to damage the drive pulley wheel when applying force.
- Ensure the screwdriver is removed before attempting to turn on the machine.
SimpliStore 340 Li [Fig. T3]:
- Ensure the lawnmower is stopped and disconnected. Insert a screwdriver through one of the holes in the spacer into the reinforced hole on the deck to stop the axle from turning.
- Unscrew the blade bolt. Take care not to damage the spacer when applying force.
- Remove the blade bolt and the washer.
- Remove the blade.
- Put the new blade on the lawnmower.
- Put the washer and the blade bolt on the lawnmower.
- Screw the new blade tight with the blade bolt. Tightening torque is 15 – 20 Nm. Do not over-torque. Take care not to damage the spacer when applying force.
- Ensure the screwdriver is removed before attempting to turn on the machine.
Problem Possible Cause Remedy
| Mower does not start | Safety key is not in position I. | →Turn the safety key to positionI. |
| Battery is not put completely into the battery holder. | →Put the battery completely into the battery holder until it audibly engages. |
Problem Possible Cause Remedy
| Mower does not start | Battery is empty. | → Charge the battery. |
| Motor is blocked. → Remove the obstacle.Start again. | ||
| Engine Is Jammed and makes a noise | Motor Is blocked. → Remove the obstacle.Start again. | |
| Cutting height is too low. → Raise the cutting height. | ||
| Loud noises, the mower is rattling | Screws on engine, its fixing or on the mower chasing are loose. | → Let the screws be tightened by an authorised specialist dealer or the FLYMO Service. |
| Mower runs unevenly or vibrates strongly | Blade is damaged / worn or the blade mounting is released. | → Replace the blade. |
| Blade is very dirty. | → Clean the blade. | |
| Lawn Is not cleanly mowed | Blade is blunt or damaged. | → Replace the blade. |
| Cutting height is too low. → Raise the cutting height. | ||
| Red Error-LED on the battery illuminates | Battery temperature is out of range. | → Use the battery in surroundings where temperatures are between 0 °C and 40 °C. |
| After pushing the button no LED on the battery illuminates | Battery is defective. | → Replace the battery. |
| After pushing the button the LED on the battery flashes red. | Battery temperature is out of range. | → Use the battery in surroundings where temperatures are between 0 °C and 40 °C. |
| Charging control lamp on the charger does not illuminate | Battery charger or charging cable are not connected correctly. | → Connect the battery charger and charging cable correctly. |
| Charging control lamp on the charger illuminates red | Battery temperature is out of range. | → Use the battery in surroundings where temperatures are between 0 °C and 40 °C. |
| Charging control lamp on the charger flashes red | Battery error/battery defective. | → If the battery cannot be reset by connecting it to the charger, contact the FLYMO Service. |
![FLYMO SimpliStore 340 Li - SimpliStore 340 Li [Fig. T3]: - 1](/content/2026/07/1411729/images/05d8bc17321cca49b454a929d3395906efe2eaa3900075e8f234382cdb181944.jpg)
NOTE: For any other malfunctions please contact the FLYMO Customer Service. Repairs must only be done by FLYMO service departments or specialist dealers approved by FLYMO.
7. TECHNICAL DATA
| Battery Lawnmower | Unit | ValueSimpliStore 300 LI9705395-xx | ValueSimpliStore 340 LI9705396-xx | |
| Speed of rotation cutting blade | R/min | 3500 | 3300 | |
| Cutting width | cm 30 | 34 | ||
| Cutting height adjustment | mm | 25 – 65(3 positions) | 20 – 60(5 positions) | |
| Volume of grass box | l | 30 | 35 | |
| Weight (without Battery) | kg | 8.0 10.4 | ||
| Sound pressure level LpA1) Uncertainty kpA | dB (A) | 88.43.0 | 82.73.0 | |
| Sound power level LWA7) :measured/guaranteedUncertainty kWA | dB (A) | 88 / 891.0 | 86 / 871.0 | |
| Hand/arm vibration awba1) | m/s2 | < 2.5 | < 2.5 | |
Measuring process complying with: 1 EN 60335-2-77 2 RL 2000/14/EC / S.I. 2001 No.1701

NOTE: The stated vibration emission value has been measured according to a standardized test procedure and can be used for comparison of one electric power tool with another. It can also be used for preliminary evaluation of exposure to vibration. The vibration emission value can vary during actual use of the electric power tool.
| Battery B16-2025A | Unit | Value (Art. 967913201) |
| Battery voltage | V (DC) | 20 |
| Battery capacity | Ah | 2,5 |
| Number of cells (Li-Ion) | 5 | |
| Battery charging time (approx.) | min. | 120 |
| Lawn area per battery charge (approx.) | m2 | 250 |
Appropriate FLYMO System Batteries B16-2025A: Art. 967913201
Battery Charger 20 V Unit Value (Art. 967913301)
| Mains voltage V (AC) 120 |
| Mains frequency Hz 50 – 60 |
| Rated Power W 20 |
| Output voltage V (DC) 20 |
| Max. output current mA 1000 |
Appropriate FLYMO Battery Chargers 20 V: Art. 967913301
- ACCESSORIES
| FLYMO ReplacementBattery B16-2025A | Battery for additional duration orfor replacement. | Art. 967913201 |
| FLYMO Battery Charger20 V | Charger to charge the FLYMO BatteriesB16-2025A | Art. 967913301 |
| FLYMO Replacement Bladefor 300 Li | As replacement for blunt blade. Art. FLY 069 | |
| FLYMO Replacement Bladefor 340 Li | As replacement for blunt blade. Art. FLY 087 |
9. SERVICE/WARRANTY
Service:
Please contact the address on the back page.
Warranty statement:
In the event of a warranty claim, no charge is levied to you for the services provided.
Husqvarna UK Ltd. grants a warranty for all original FLYMO new products for two years from the date of original purchase from the retailer, provided that the devices have been for private use only. This manufacturer's warranty does not apply to products acquired second hand. This warranty includes all significant defects of the product that can be proved to be material or manufacturing faults. This warranty is fulfilled by supplying a fully functional replacement product or by repairing the faulty product sent to us free of charge; we reserve the right to choose between these options. This service is subject to the following provisions:
- The product has been used for its intended purpose as per the recommendations in the operating instructions.
- Neither the purchaser nor a third party has attempted to open or repair the product.
- Only Original FLYMO replacement parts and wear parts have been used for operation. • Presentation of the receipt.
Normal wear and tear of parts and components (such as blades, blade fixing parts, turbines, light bulbs, V-belts/toothed belts, impellers, air filters, spark plugs), visual changes, wear parts and consumables are excluded from the warranty.
This manufacturer's warranty is limited to replacement and repair of products in accordance with the abovementioned conditions. The manufacturer's warranty does not constitute an entitlement to lodge other claims against us as a manufacturer, such as for damages. This manufacturer's warranty does not, of course, affect statutory and contractual warranty claims against the dealer/retailer.
The manufacturer's warranty is governed by the law of the Federal Republic of Germany.
In case of a warranty claim, please return the faulty product, together with a copy of the receipt and a description of the fault, with postage paid to the service address.
Consumables:
The blade and the wheels are consumables and are not included in the warranty.
PRODUCT LIABILITY
In accordance with the German Product Liability Act, we hereby expressly declare that we accept no liability for damage incurred from our products where said products have not been properly repaired by a FLYMO-approved service partner or where original FLYMO parts or parts authorised by FLYMO were not used.
EC DECLARATION OF CONFORMITY
The undersigned hereby certifies as the authorized representative of the manufacturer, Husqvarna AB, 561 82 Huskvarna, Sweden, that, when leaving our factory, the unit(s) indicated below is/are in accordance with the harmonised EU guidelines, EU standards of safety and product specific standards. This certificate becomes void if the unit(s) is / are modified without our approval.
| Description of the product: | Mower SimpliStore | |
| Product type: | 300 20V Li340 20V Li | |
| Article-Number: | 9705395-xx9705396-xx | |
| CE-Directives: | 2006/42/EC2014/30/EU2011/65/EU2000/14/EC | |
| Harmonised EN: | EN ISO 12100EN 60335-1EN 60335-2-77 | |
| Deposited Documentation: | GARDENA Technical Documentation,M. Jäger, 89079 Ulm | |
| Conformity Assessment according to: | 2000/14/EC Procedure: art. 14 Annex VI | |
| Noise level: measured / guaranteed: | Art. 96705395-xx: 88 dB(A) / 89 dB(A)Art. 96705396-xx: 86 dB(A) / 87 dB(A) | |
| Ulm, 06.10.2021Authorised representative: | Reinhard PompeVice President Products | Wolfgang EngelhardtVice President Supply Chain |
UKCA DECLARATION OF CONFORMITY
The manufacturer: Husqvarna AB SE 561 82 Huskvarna, Sweden hereby certifies, when leaving our factory, the unit(s) indicated below is/are in accordance with the UK Regulations, designated standards of safety and product specific designated standards. This certificate becomes void if the units are modified without our approval.
| Description of the Product: | Mower SimpliStore |
| Product type: | 300 20V Li340 20V Li |
| Article Number: | 9705395-xx9705396-xx |
| UK regulations: | S.I. 2008/1597S.I. 2016/1091S.I. 2012/3032S.I. 2001/1701 |
| Designated Standards: | EN ISO 12100EN 60335-1EN 60335-2-77 |
| Authorised Representative: | Husqvarna UK Limited |
| Deposited Documentation: | Preston Road,Aycliffe,County DurhamUKDL5 6 UP |
| Noise level: measured / guaranteed | Art. 9705395-xx: 88 dB(A) / 89 dB(A)Art. 9705396-xx: 86 dB(A) / 87 dB(A) |
| Conformity Assessment according to: | According to S.I. 2001/1701 Art. 11 Schedule 9 |
| Aycliffe, 06.10.2021Authorised Representative: | John ThompsonDirector |
Service Address and Importer to
Great Britain
Husqvarna UK Ltd
Preston Road
Aycliffe Industrial Park
Newton Aycliffe
County Durham
DL5 6UP
Phone:+44 (0) 344 844 4558
customer.services@husqvarna.co.uk

22301-85.960.01/1021
Husqvarna AB
Drottninggatan 2
SE-561 82 Huskvarna
Sweden
Our policy of continuous improvement means that the specification of products may be altered from time to time without prior notice.
Copyright © 2021 Flymo S.A. All rights reserved.
Flymo® and other product and feature names are registered or unregistered trademarks of Flymo S.A.


- EN BATTERY LAWNMOWER
- ORIGINAL INSTRUCTIONS
- INTENDED USE
- DANGER! RISK OF INJURY
- SAFETY
- IMPORTANT
- DANGER! ELECTRIC SHOCK
- TRAINING
- PREPARATION
- OPERATION
- MAINTENANCE AND STORAGE
- ADDITIONAL SAFETY WARNINGS
- DANGER! FIRE RISK
- DANGER! RISK OF EXPLOSION
- ELECTRICAL SAFETY
- DANGER! CARDIAC ARREST
- PERSONAL SAFETY
- DANGER! RISK OF SUFFOCATION
- ASSEMBLY
- TO ASSEMBLE THE HANDLE [FIG. A1/A2/A3/A4]
- TO ASSEMBLE THE GRASS BOX [FIG. A5/A6/A7/A8/A9]
- TO ATTACH THE GRASS BOX TO THE LAWNMOWER [FIG. A10]
- TO CHARGE THE BATTERIES [FIG. 01]
- CAUTION
- BATTERY CHARGING INDICATOR [FIG. 02]
- TO ADJUST THE CUTTING HEIGHT
- ONLY FOR 300 LI (IN 3 POSITIONS) [FIG. O3/O4/O5/O6/O7]
- ONLY FOR 340 LI (IN 5 POSITIONS) [FIG. O8]
- TO START THE MOWER [FIG. 09 / 010]
- TO START
- TO STOP
- TIPS TO USE THE MOWER
- CUTTING PERFORMANCE AND BATTERY CHARGE
- TRANSPORT POSITION [FIG. 012]
- MAINTENANCE
- TO CLEAN THE MOWER
- THE AIRFLOW SLOTS MUST ALWAYS BE CLEAN
- TO CLEAN THE UNDERSIDE OF THE MOWER
- TO CLEAN THE OVERSIDE OF THE MOWER AND THE GRASS BOX
- TO CLEAN THE BATTERY AND THE BATTERY CHARGER
- DO NOT USE RUNNING WATER
- STORAGE
- TO PUT INTO STORAGE [FIG. 09]
- THE PRODUCT MUST BE STORED AWAY FROM CHILDREN
- STORAGE POSITION [FIG. S1]
- DISPOSAL
- DISPOSAL OF THE BATTERY
- LI-ION
- TROUBLESHOOTING
- SIMPLISTORE 300 LI [FIG. T2]
- SIMPLISTORE 340 LI [FIG. T3]
- TECHNICAL DATA
- SERVICE/WARRANTY
- SERVICE
- WARRANTY STATEMENT
- CONSUMABLES
- PRODUCT LIABILITY
- EC DECLARATION OF CONFORMITY
- UKCA DECLARATION OF CONFORMITY
- GREAT BRITAIN
Brand : FLYMO
Model : SimpliStore 340 Li
Category : Lawn mower