USER MANUAL AME 842 VIKING
VIKING AMM 842, AME 842
natural_image
Mechanical assembly diagram showing a car wheel with attached suspension components (no text or symbols)
natural_image
Mechanical assembly diagram showing a wheel with a knob and a lever mechanism (no text or symbols)
natural_image
Mechanical assembly diagram showing a wheel, gear, and pulley components (no text or labels)
natural_image
Illustration of a cartoon character with a large upward arrow, no text or symbols present
natural_image
Close-up of a motor or steering wheel with visible control panel and gear mechanism (no text or symbols)
natural_image
Close-up of a car tire with attached electrical plug and mechanical components (no visible text or symbols)
natural_image
Mechanical assembly diagram showing a component with bolts and gears (no text or labels)
VIKING AMM 842, AME 842
natural_image
Diagram showing mechanical components with arrows indicating motion or force direction (no text or symbols)
natural_image
Diagram of a vehicle wheel with a curved ramp and directional arrow, no text or symbols present

natural_image
Close-up of a mechanical assembly with two circular components and directional arrows indicating movement (no text or symbols)
DEUTSCHDE
SYMBOLE
The following symbols appear on the machine.
They are there to remind you of the care and attention required in use.
This is what the symbols mean:
Warning!
Read the instruction manual and the safety manual before using the machine.
Warning!
Do not insert your hands or feet under the cover when the machine is in operation.
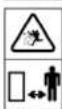
Warning!
Watch out for discarded objects. Keep on-lookers away.
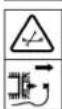
Warning!
Before starting repair work, remove the spark plug cable from the spark plug.
INTRODUCTION
This cutting deck is available as standard in two versions:
- with mechanical setting of the cutting height (AMM 842).
- with factory-fitted, electrical setting of the cutting height (AME 842).
ASSEMBLY
DECK ARMS
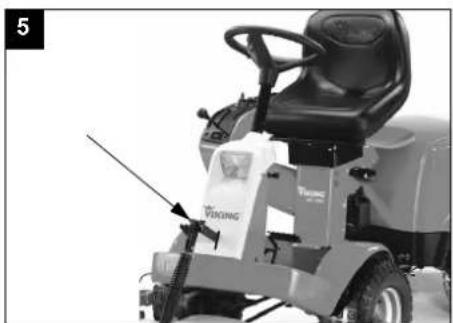
- Install the left and right deck arms in the cutting deck's front two corners. Use the existing screw and flat washer (fig. 5). Tighten the screw. After tightening, it should be possible to move the deck arms up and down.
- Do not hook the rear part of the deck arms onto the deck yet (See "Cutting deck" point 4 below).
CUTTING DECK
- Place the cutting deck in front of the machine.
Set the maximum cutting height.
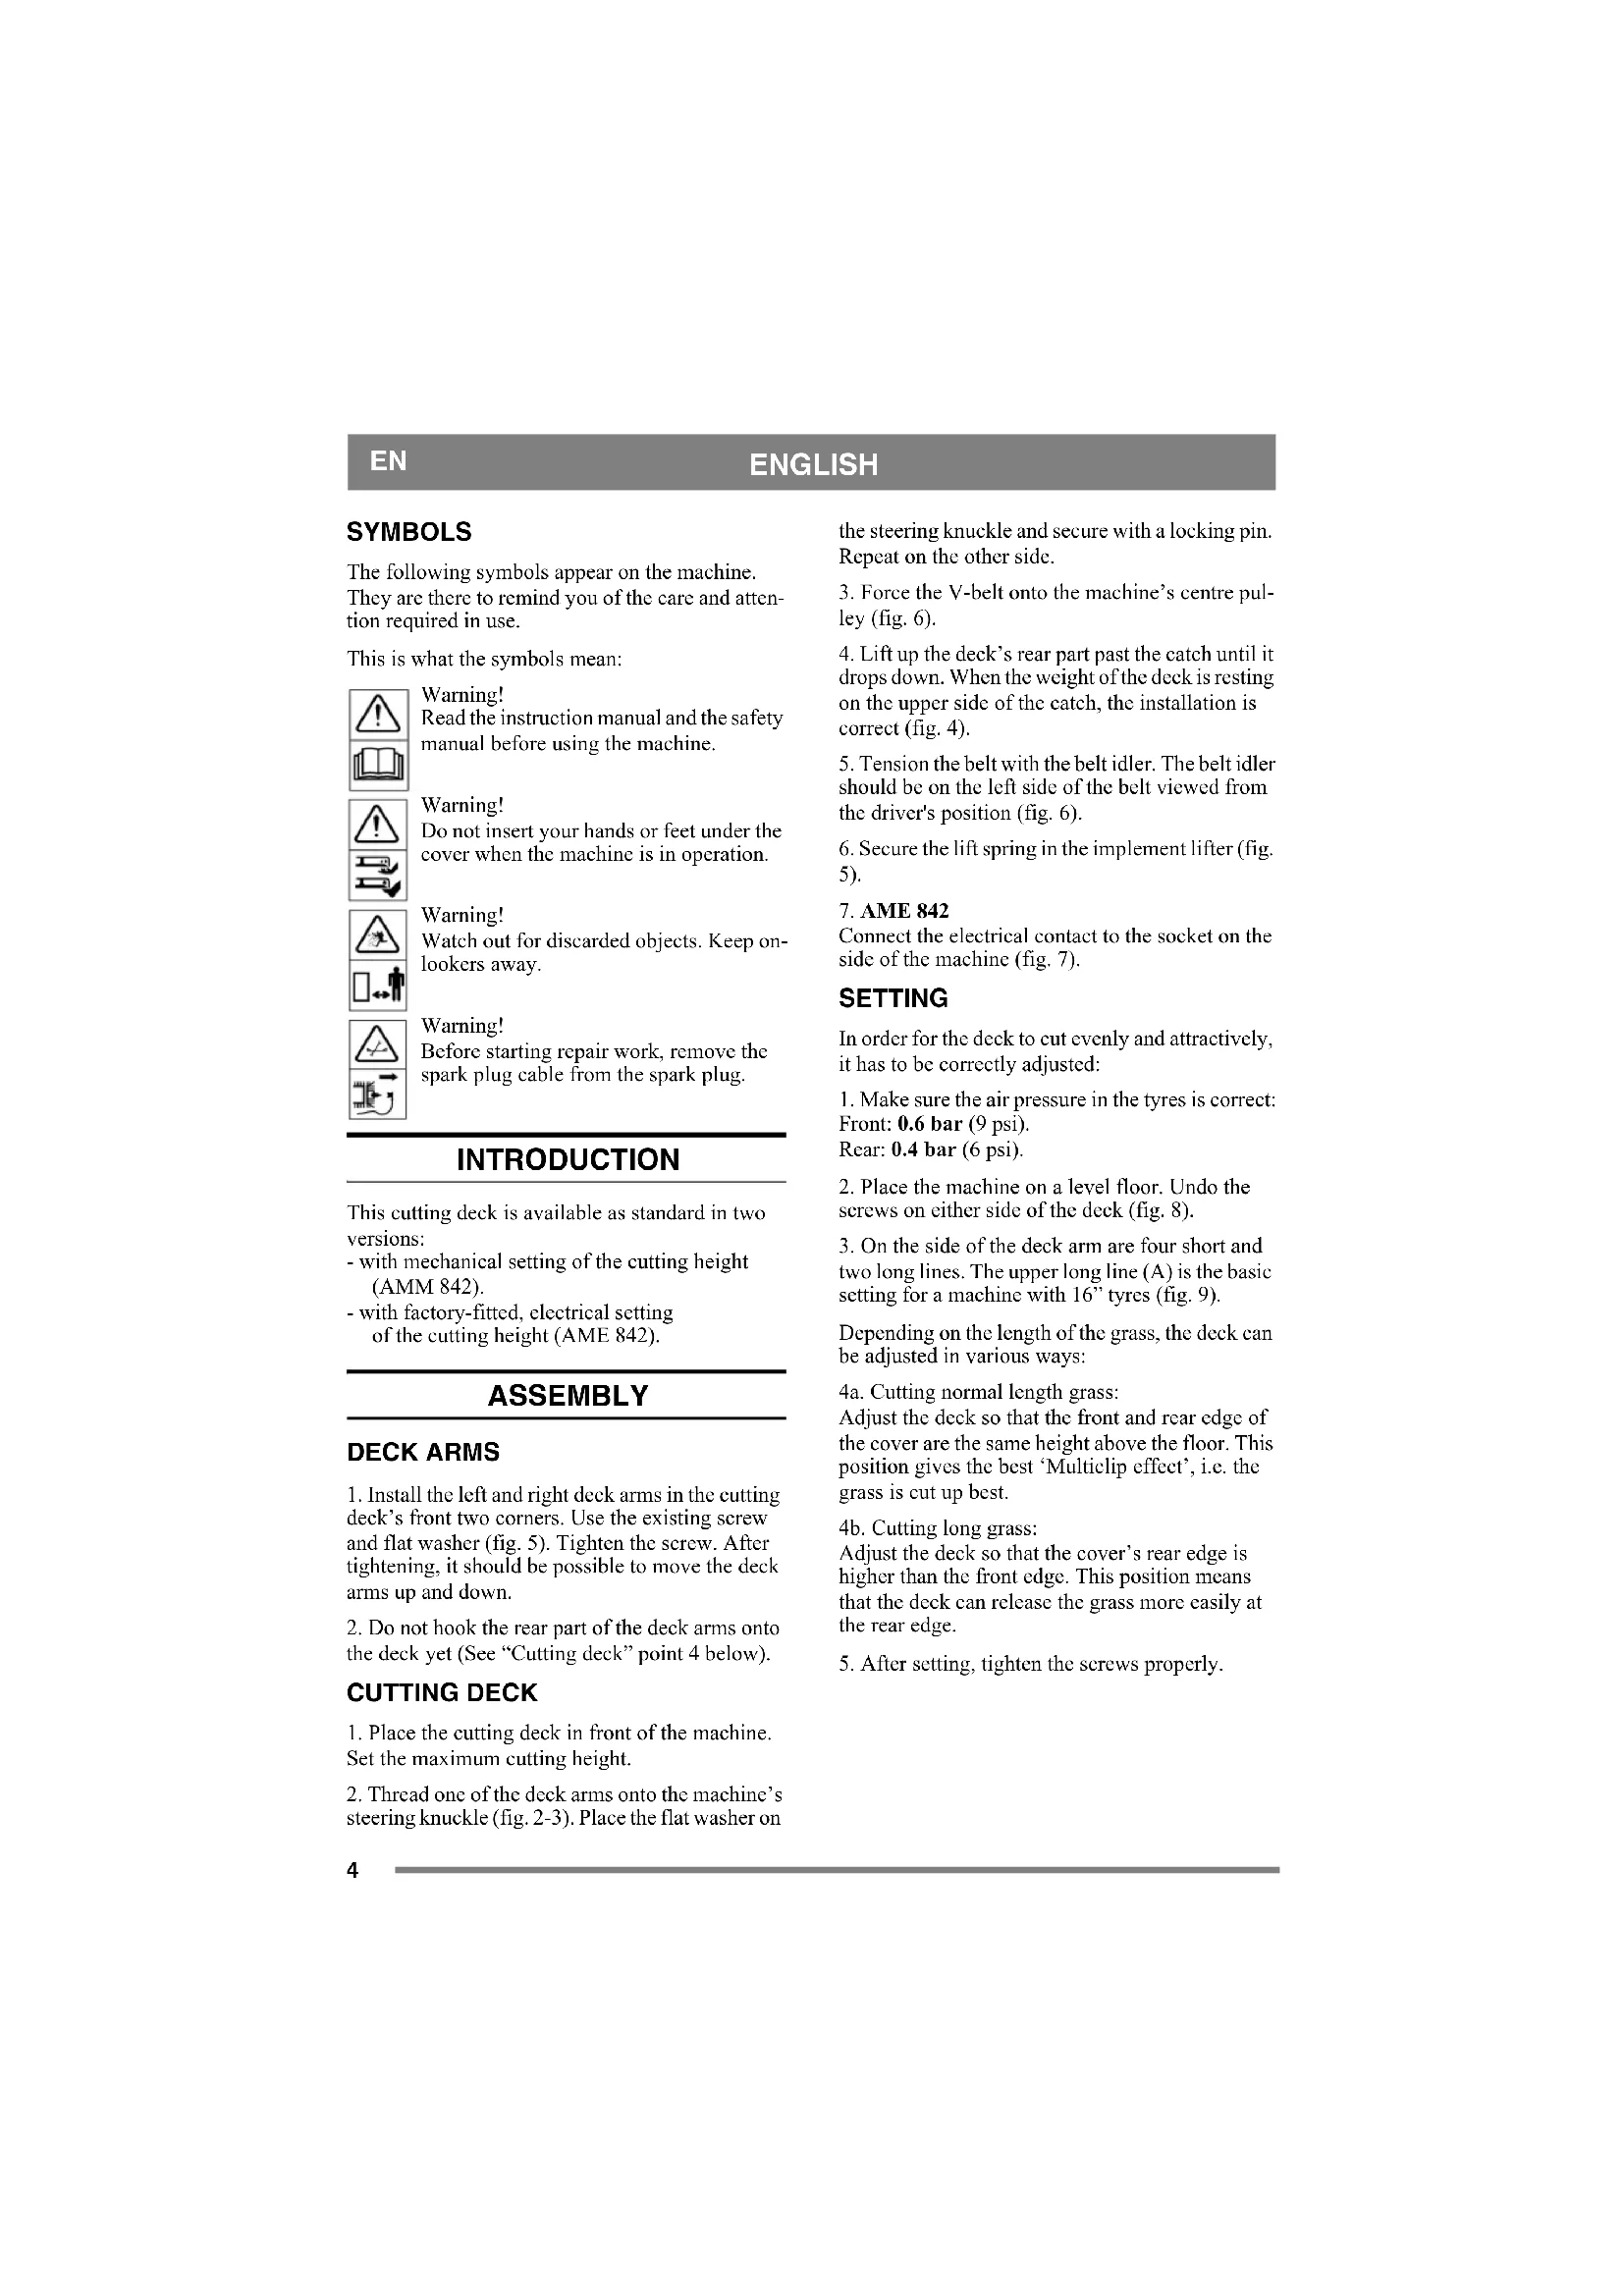
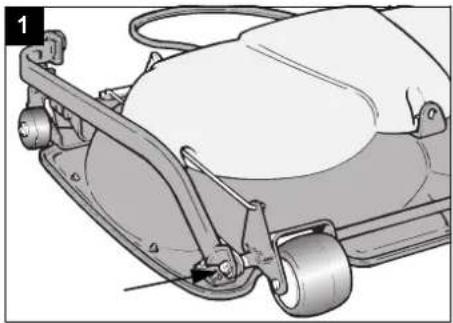
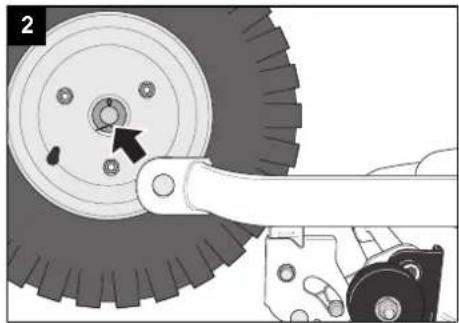
- Thread one of the deck arms onto the machine's steering knuckle (fig. 2-3). Place the flat washer on
the steering knuckle and secure with a locking pin. Repeat on the other side.
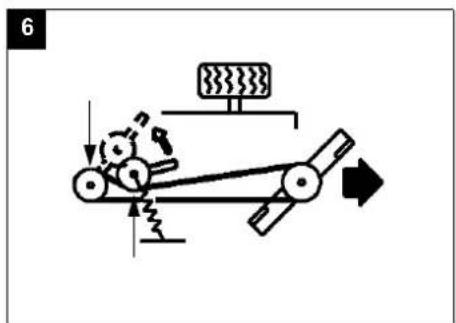
- Force the V-belt onto the machine's centre pulley (fig. 6).
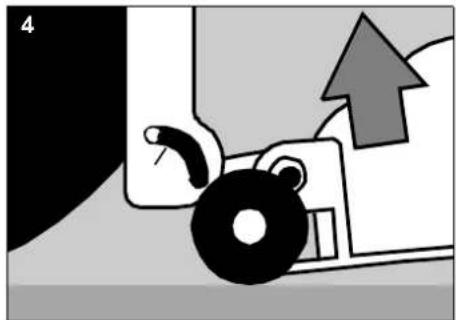
- Lift up the deck's rear part past the catch until it drops down. When the weight of the deck is resting on the upper side of the catch, the installation is correct (fig. 4).
- Tension the belt with the belt idler. The belt idler should be on the left side of the belt viewed from the driver's position (fig. 6).
- Secure the lift spring in the implement lifter (fig. 5).
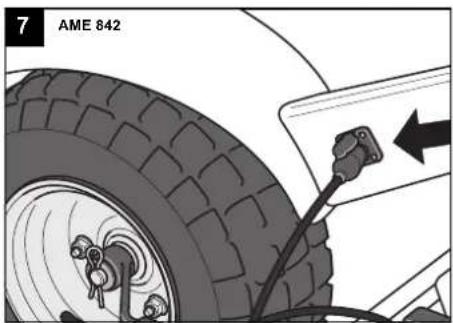
- AME 842
Connect the electrical contact to the socket on the side of the machine (fig. 7).
SETTING
In order for the deck to cut evenly and attractively, it has to be correctly adjusted:
- Make sure the air pressure in the tyres is correct: Front: 0.6 bar (9 psi).
Rear: 0.4 bar (6 psi).
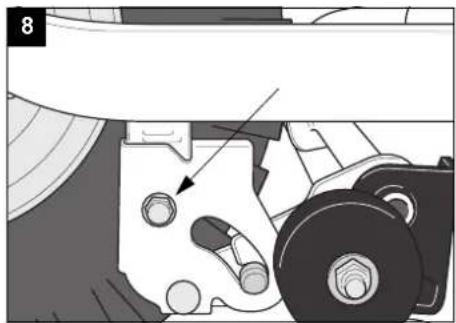
- Place the machine on a level floor. Undo the screws on either side of the deck (fig. 8).
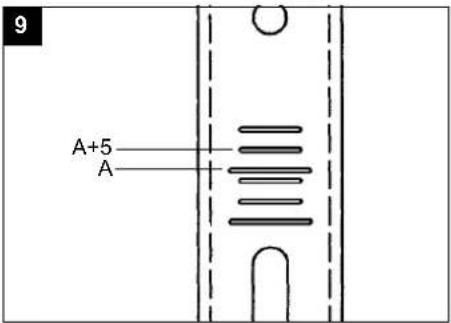
- On the side of the deck arm are four short and two long lines. The upper long line (A) is the basic setting for a machine with 16" tyres (fig. 9).
Depending on the length of the grass, the deck can be adjusted in various ways:
4a. Cutting normal length grass:
Adjust the deck so that the front and rear edge of the cover are the same height above the floor. This position gives the best 'Multiclip effect', i.e. the grass is cut up best.
4b. Cutting long grass:
Adjust the deck so that the cover's rear edge is higher than the front edge. This position means that the deck can release the grass more easily at the rear edge.
- After setting, tighten the screws properly.
USING THE MACHINE
CUTTING HEIGHT
AMM 842:
The cutting height can be varied between a number of fixed positions, from 30 to 85 mm.
AME 842:
The cutting height is continuously variable from 30 to 85 mm.
Note: Stated cutting heights apply when the machine is on a firm surface.
CUTTING TIPS
For optimum 'Multiclip effect', follow these tips:
- cut frequently.
- run the engine at full revs.
- keep the underside of the cutting deck clean.
- use sharp blades.
- do not cut wet grass.
- cut twice (with different cutting heights) if the grass is long.
SERVICE AND MAINTENANCE
PREPARATIONS
Unless otherwise stated, all service and maintenance must be carried out on a stationary machine when the engine is not running.

Prevent the machine from rolling by always applying the parking brake.

Prevent unintentional starting of the engine by always stopping the engine, disconnecting the spark plug cable from the spark plug and earthing it. Disconnect the negative cable from the battery.
MAINTENANCE TIPS
To make cleaning and maintenance easier, the cutting deck can be folded up:
- Set the cutting height setting to the maximum cutting height.
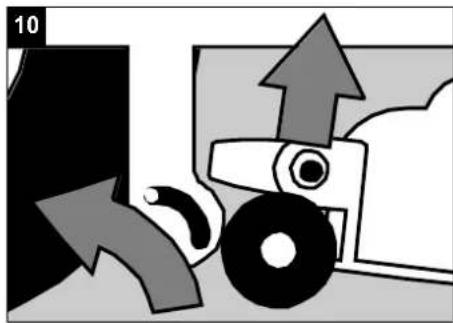
- Lift the rear edge of the deck with one hand (fig. 10).
- Push up the catch and release the rear edge of the
deck (fig. 10).
- Repeat the procedure on the other side.
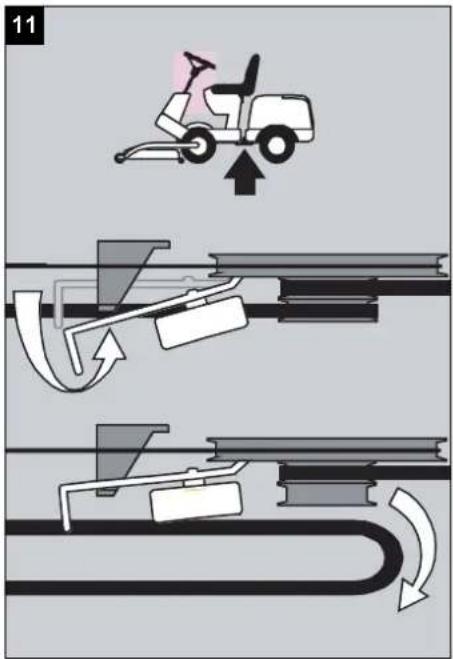
- Hook the belt idler arm on the mount (fig. 11)
- Force the belt off the centre pulley.
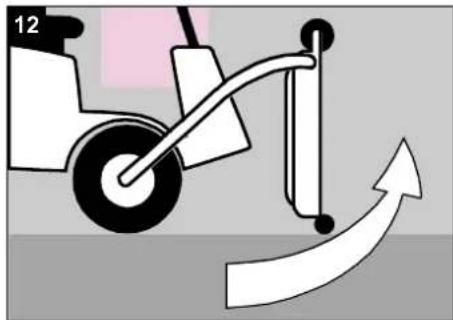
- Fold up the deck to the vertical position (fig. 12).
When the deck is folded down to working position, ensure that the catch drops down into position when the rear edge of the deck is lifted up (fig. 4).
CLEANING
After each use, the underside of the cutting deck should be rinsed off.
If the grass has dried solid, scrape clean the underside.
If necessary, touch up the underside with paint to prevent corrosion.
BLADES

Use protective gloves when changing blades to avoid cutting yourself.
Ensure that the blades are always sharp. This produces the best cutting results.
Always check the blades after a collision. If the blade system has been damaged, defective parts should be replaced.

Always use genuine spare parts. Non-genuine spare parts can entail a risk of injury, even if they fit the machine.
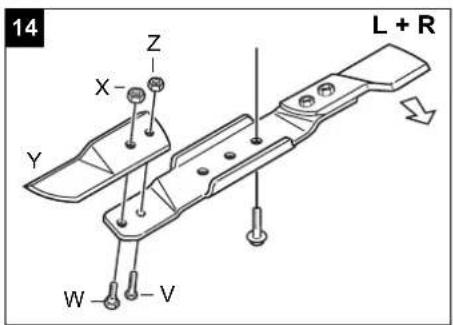
Install the blades according to fig. 13 where the blade edge is marked. The folded-up edge of the blade should be positioned inwards towards the blade holder.
The cutting system comprises two blade bars with two replaceable blades Y (fig. 14). When replacing blades, both should be replaced to avoid imbalance.
Install the new blades. Tighten screws V and W properly. Tightening torque: V - 9.8 Nm, W - 24 Nm.
In the event of a powerful collision, the blades may be bent out. Undo the locking nut X and fold back the blade. Install a new genuine break bolt V.
Tighten the locking nuts X and Z.
POSITIVE DRIVE BELT
Both blades are powered inside the deck by a positive drive belt.
If one of the blades has struck a solid object (e.g. a stone), the belt tension may be altered. This can lead to the positive drive belt 'over-meshing' which, in the long term, can damage the blades.

Following a powerful collision, always check that both blades are at right-angles to each other (fig. 13).
The working areas of the blades overlap each other. If the blades' position in relation to each other has been altered, there is a considerable risk of the blades striking each other. This can entail serious damage to the cutting deck.
If this is the case, take the machine and cutting deck to a service workshop for repair and inspection.
TECHNICAL DATA
| AMM 842 AME 842 |
| Cutting width 107 cm 107 cm | |
| Cutting height 30-85 mm 30-85 mm | |
| Net weight 53 kg 53 kg | |
FR
FRANÇAIS
SYMBOLES
SERVICE OG VEDLIKEHOLD
FORBEREDELSE