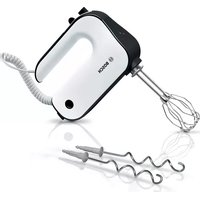
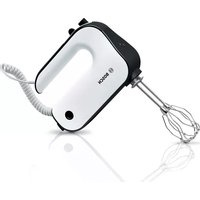
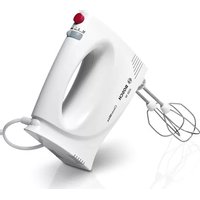
ErgoMixx MS6CB61V1 - Blender BOSCH - Free user manual and instructions
Find the device manual for free ErgoMixx MS6CB61V1 BOSCH in PDF.
User questions about ErgoMixx MS6CB61V1 BOSCH
0 question about this device. Answer the ones you know or ask your own.
Ask a new question about this device
Download the instructions for your Blender in PDF format for free! Find your manual ErgoMixx MS6CB61V1 - BOSCH and take your electronic device back in hand. On this page are published all the documents necessary for the use of your device. ErgoMixx MS6CB61V1 by BOSCH.
USER MANUAL ErgoMixx MS6CB61V1 BOSCH
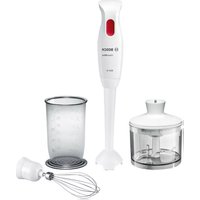
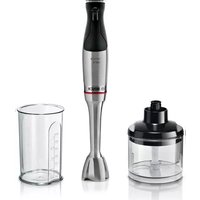
ErgoMixx and MaxoMixx Fresh Vacuum System
This accessory is designed for the ErgoMixx and MaxoMixx hand blenders. Follow the operating instructions for the hand blender. Never use the accessory for other appliances. Only use matching parts together. This accessory is suitable for vacuum-sealing Bosch bags and containers. The accessories are suitable only for the use described in these instructions.
Safety information
Risk of suffocation!
- Keep children away from vacuum zipper bags.
- Do not allow children to play with vacuum zipper bags.
Warning!
Before attaching or removing accessory, always wait until the appliance has come to a standstill and pull out the mains plug.
- Do not operate at no-load.
- Never immerse the vacuum pump in liquids and do not clean under running water or in the dishwasher.
- All ingredients must be hygienically faultless. During handling, the rules of kitchen hygiene must be observed.
Always allow food to cool down before vacuum-sealing. - Check the quality of food after storage. Do not use food of dubious quality.
Important!
- Never reach into sealing elements with sharp, pointed or metal objects.
- Storage containers and zipper bags are dishwasher and freezer safe.
-
Make sure to remove the container lid or to open the zipper bag before microwaving.
In the microwave, food can be re-heated in plastic containers or bags for no longer than 90 seconds at a maximum of 900W. -
Plastic storage containers, drip trays and zipper bags are suitable for a temperature range of -18 °C to 85 °C.
Bags used to store raw meat, fish or poultry cannot be reused.
It is essential to clean the accessory thoroughly after each use or after it has not been used for an extended period. "Cleaning and maintenance" see page 14
Overview
→Fig.A
1 Vacuum pump
a Vacuum valve
b Connection for base unit
2 Storage container *
a Container made of:
Tritan-plastic
Glass
b Drip tray *
c Lid
d Sealing clips
e Vacuum seal
f Vacuum indicator
g Setting rings for date (day/month)
h Lid gasket
3 Vacuum zipper bags *
a Zip lock
b Marking line max
c Vacuum seal
- Depending on model
Before using for the first time
Before the new accessory can be used, it must be fully unpacked, cleaned and checked.
Warning!
Never put a damaged accessory into operation!
Check that all parts are present and examine them for obvious damage.
→Fig.A
Thoroughly clean and dry all parts before using for the first time.
"Cleaning and maintenance" see page 14
Parts and controls
Storage containers
Use to store food under vacuum to preserve the freshness and extend the shelf life of food contained in them, to marinate food, or to reheat it in the microwave. The glass container is also suitable for use in the oven.
Before using the containers in the microwave or oven, make sure you remove the lid.
Important!
- Do not fill the container higher than 1 cm below the rim.
- The glass container can be put in the heated oven directly from the freezer.
- Never put a hot container in water. Allow the container to cool slowly.
Lid with vacuum seal
For airtight sealing of the containers.
The lids of the storage containers are equipped with a vacuum indicator. When the indicator visibly dimples inwards, a vacuum has been attained.
To remove a lid with vacuum applied, first grip the vacuum seal at one end and pull it up. Sufficient air has to get inside for the lid to be removed.
The lids of the storage containers are equipped with a date indicator. Turn the two rings to set the day and month when the food was added.
Drip tray
The drip tray separates the food from liquid that is excreted during storage. Liquid collects under the drip tray.
Vacuum zipper bags
Use to store food under vacuum to preserve the freshness and extend the shelf life of food contained in them, to marinate food or for sous-vide cooking.
Use only original Bosch vacuum zipper bags.
For storing liquids (such as soup) we recommend using containers.
Sous-vide cooking
Sous-vide cooking is a method of cooking under a vacuum at low temperatures.
Health risk!
When preparing food for sous-vide cooking it is important that you always follow the application and hygiene instructions below:
Only use high-quality, perfectly fresh food.
- Wash and disinfect your hands.
Take extra care when preparing critical food, such as poultry, eggs and fish.
Always keep work surfaces and chopping boards clean.
- Maintain the cold chain. Make sure that you only interrupt it briefly to prepare the food, and then return the food in its vacuum-sealed bag to the refrigerator for storage before you cook it.
Once the food is cooked, consume it immediately. Do not store it after cooking - not even in the refrigerator. It is not suitable for reheating.
Where possible, position the items of food in the bag next to each other and not on top of each other.
We recommend to keep the vacuum seal out of the water.
For professional sous-vide cooking results we recommend to use Bosch vacuum drawer.
Use
Warning!
- Before attaching or removing vacuum pump, always wait until the drive has come to a standstill and pull out the mainsplug.
- Do not use hand blender with vacuum pump for more than 10 minutes. Then leave the base unit and the pump to cool down.
- Storage in vacuum is not a substitute for food storage in the refrigerator or freezer.
- Always allow food to cool down before vacuum-sealing.
Fitting the vacuum pump
→Fig. B
- Place the vacuum pump on the base unit and lock into position.
Removing the vacuum pump
Fig. 6
Hold down both release buttons and remove the vacuum pump from the base unit.
Vacuum-sealing with containers
Image sequence D
- Add prepared or cooked food to the appropriate container. Do not fill above the max mark.
- Make sure that lid gasket is inserted correctly. Fit the lid and close securely with the sealing clips. Set the date using the two rings on the lid.
- Place the base unit with the vacuum pump on the container's vacuum seal and hold securely.
- Press Turbo button ①. The appliance remains switched on as long as the button is pressed.
- The vacuum pump draws the air out of the container. When the vacuum indicator visibly dimples inwards, a vacuum has been attained.
- Release the button.
- Remove the base unit with the vacuum pump from the container. Disconnect the mains plug.
Note: Store the vacuum-sealed container with the lid facing up.
Vacuum-sealing with zipper bags
Image sequence
- Add the food to the bag.
Note: Do not overfill the bag. Make sure the area of the vacuum seal is kept clean. Special care is needed when vacuuming juicy, moist or marinated food.
- Place the bag on a flat surface. Lightly press the air out of the bag and close the zip lock tightly along the entire length.
Note: When vacuuming juicy, moist or marinated food, hang the vacuum zipper bag from the worktop. Make sure that the vacuum seal rests on the surface.
Fig.
Important!
- The contents must not exceed the max marking line.
- The area beyond the max line and both sealing elements must be clean.
-
If zip lock is not clean and completely closed, vacuum cannot be generated.
-
Place the base unit with the vacuum pump of the bag's vacuum seal and hold securely.
- Press Turbo button ①. The appliance remains switched on as long as the button is pressed.
- The vacuum pump draws the air out of the bag. This makes the bag contract and envelop the contents.
- When the bag is sufficiently vacuumed, release the button.
Note: Pay special attention if liquid is excreting and approaching the max line. Release the button before liquid crosses the max line.
7. Remove the base unit with the vacuum pump from the container. Disconnect the mains plug.
Opening containers or zipper bags
Fig. 6
To open a container, grip the vacuum seal at one end and pull it up. Sufficient air has to get inside the container.
- Open the sealing clips and remove the lid.
Fig. H
To open a zipper bag, pull the zip lock apart and open completely.
After use, vacuum zipper bags must be cleaned carefully and dried off completely.
Cleaning and maintenance
The appliance and the individual parts used must be thoroughly cleaned after each use.
Warning!
- Do not use cleaning agents containing alcohol or spirits.
- Do not use sharp, pointed or metal objects.
- Do not use abrasive cloths or cleaning agents.
- Never immerse the vacuum pump in liquids and do not clean under running water or in the dishwasher.
- Clean all parts immediately after use. This will prevent residues from drying on and possibly attacking the plastic (e.g. essential oils in herbs).
- When processing food such as carrots, plastic parts may become discoloured, but this can be removed with a few drops of cooking oil.
In Fig. 1 you will find a summary of how to clean the individual parts.
Clean the vacuum pump with a damp cloth and dry.
Clean the other accessory parts with a detergent solution and a soft cloth or sponge or place them in the dishwasher.
Vacuum zipper bags which will be reused, should be cleaned carefully and dried off completely. Bags used to store raw meat, fish or poultry should not be reused.
Remove lid gasket for cleaning.
→Fig. J
Removing the setting rings
Image sequence
The setting rings in the lid of the vacuum container can be removed in order to clean them thoroughly.
-
Insert a small screwdriver into one of the two recesses of the safety ring and carefully lever out the ring by applying light pressure.
-
Remove the safety ring and setting rings as shown. Thoroughly clean and dry all parts.
- Insert the setting rings in the order shown. Insert the safety ring by applying light pressure until it clicks into place.
Accessories
Accessories and spare parts can be purchased via trade stockists or customer service. As the product range is being constantly extended, it is possible that there are meanwhile other accessories that are not listed here. In this case go to www.bosch-home.com to see the latest accessories available.
Accessories
| MSZV0FC3 3 storage containers 0.9 I / 1.2 I / 1.7 I |
| MSZV0FC2 2 storage containers 1.2 I |
| MSZV0FCG1 Glass-storage container 1.2 I |
| MSZV0FB1 10 bags small, 1.2 I |
| MSZV0FB3 10 bags large, 3.8 I |
| MMZV0BT1* ToGo bottle (0.5 I) |
| MMZV0SB0* Container, round (0.75 I) |
| MMZV0SB1* Container, round (1.5 I) |
| MMZV0SB2* 2 containers, round (0.75 I and 1.5 I) |
- This accessory has been developed for the VitaPower vacuum mixer but is compatible with the ErgoMixx and MaxoMixx fresh vacuum systems.
Round storage containers MMZV0S.. do not have a vacuum indicator. The vacuum time is 45 seconds.
Subject to change.
Troubleshooting
In the following table you will find solutions for problems or faults which you can easily rectify yourself. If a fault cannot be eliminated, please contact customer service.
| Problem Possible ca | use Remedy | |
| No vacuum can be generated in the storage container. | Lid is not fitted properly / completely. | ■ Check the clips. Close them correctly. |
| The lid gasket is not inserted correctly. | ■ Position the lid gasket properly. | |
| Lid or sealing elements are soiled or damaged. | ■ Check lid, vacuum seal and lid gasket for damage. ■ Check that all parts are clean and dry, in particular the sealing elements. ■ Clean them thoroughly and leave to dry in the air. → “Cleaning and maintenance” see page 14 | |
| No vacuum can be generated in the zipper bag | Zip lock is not completely closed. | ■ Close the zip lock tightly along the entire length. |
| Zip lock or vacuum seal is soiled or damaged. | ■ Check that sealing elements are clean. ■ Clean them thoroughly and leave to dry in the air. → “Cleaning and maintenance” see page 14 | |
| The zipper bag is defective. | ■ Check the zipper bag for damage. If damaged use another zipper bag. → “Accessories” see page 15 | |
| The vacuum in the zipper bag is not maintained. | Holes may be made in zipper bags by sharp objects in the food to be vacuum-sealed (e.g. bones). | ■ If damage has been caused by sharp edges on the food to be vacuum-sealed, position them in the zipper bag so they cannot damage the walls of the bag. |
| Sealing clips do not fit on the container. | Sealing clips for glass and plastic containers are of different dimensions. | ■ Use corresponding lid. |
Vacuumzakken metZIPsluting
AEndringer forbeholds.
Afhjælpning af fejl
Apne beholder aller glidelaspose
→Bilde
Endringer forbeholds.
Utbedring av feil
I tabellen nedenfor finner du lösninger på problemer eller feil som du enkelt kan utbedre selv. Dersom en feil ikke lar seg utbedre på dette viset,@mà du henvende deg til kundeservice.
| Problem Mulig ørsak | Tiltak | |
| Det kan ikke produse-res vakuum i oppbe-varingsbeholeren. | Lokket er ikke satt forskriftsmessig/fullstendig på. | ■ Kontroller klipsene. Lukk klipsene forskriftsmessig. |
| Lokkets pakning er ikke satt inn forskriftsmessig. | ■ Plasser lokkets pakning forskriftsmessig. | |
| Lokket elleritetningselementene er tilsmusset eller skadet. | ■ Kontroller om det finnes skader på lokket, vakuumlåsen og lokkets pakning.■ Kontroller om alle delene er rene og tørre, særligitetningselementene.Rengjør grundig og la dem tørke i luften.→"Rengjøring og pleie" se side 44 | |
| Det kan ikke produse-res vakuum i vakuum-poseden med glidelås. | Glidelåsen er ikke helt likket. | ■ Lukk glidelåsen forsvarlig over—hele lengden. |
| Glidelåsen ellervakuumlåsen er tilsmusset eller skadet. | ■ Kontroller omitetningselementene er rene.Rengjør grundig og la dem tørke i luften.→"Rengjøring og pleie" se side 44 | |
| Vakuumposen med glidelås er defekt. | ■ Kontroller om det finnes skader på vakuumløsen med glidelås. Hvis den har skader, på du bruke en annen vakuumpose med glidelås.Tilbehør" se side 45 | |
| Vakuumet oppretthol-des ikke i vakuumpo- Sen med glidelås. | Det kan oppstå hul på grunn av skarpe deler i varene som vakuumeres (f.eks.bein). | ■ Dersom skarpe kanter på varene som vakuumeres har foråsaket skader, på de skarpe kantene plasseres slick i vakuumposen med glidelås at de ikke kan skade poseveggen. |
| Låseklipset passer ikke på beholderen. | Låseklipsefor glass- og plastbeholderere har ulike mål. | ■ Bruk rett lokk. |
Avsedd användning
KoHTeHep dJa XpaHeHnA
ДяханеняnpoodyKTOBВBakyyme c ueIbKO KaK MoXHO DoIbWe COxpaHHTb IN CBexEcTb I npuROdHOCTb,3aMapuHOBAt b INIIN CHOBA pa3OrpeTB MmKpoBOJHOBOI neu.CTeKJIaHHbIKToHepNoDxoIDIT IN DJIa DyXOBKn.
IpeXe Yem CTaBnTb KOHTeHep B MInKpOBoNHOByIO NeYb NIN DyXOBKy, HxKHO CHrTb C Hero KpbIuKy.
Baxho!
B KOHTeHHepe DOJxHo OCTaBaTbCn He MeHee 1 cm Do BepxHero Kpa.
CTeKJIaHHbI KOHTeHep MOxHO CTaBHTb I3 MOpO3nJIbHnKa IprMo B HArpeTyIO dYXOBKy.
He cTaBtB rOpAun KOHTeHep B BOy. KoHTeHep DOJxEh OCTbIBaTb MeDJIeHHO.
Kpbiuka C BaKyymHbIM 3aTBOPOM
Дя repMeTnUHOrO 3aKpbIbAHnKaHTeHepa.
KpbIuKa KOHTeHepa IJxpaHeHnOcHaUeHa NndIkAToPOM BaKyyma. EcInNHDnKaTOp 3aMeTHo IpOrHyT BHyTpB, ToBaKyym Co3DaH.
YTo6bI ChrTb KpbIshky npn HauNnuBakyyMa, ChaJana Bo3bMntecb 3a
BaKyMhBn 3aTBOp C OndHc TOpOHbI n NotaHnTe BBepx. BoHyTp b DOnxHo nonactb DoCTaTOUHO BO3dYxa, YTo6bl KpbIuKy MoXHO 6blNO CHrTb.
KpbiWiKn KOHTeHepOB dIy XpaHeHnOcHaUeHbI HdNkAToPOM DaTbI. BpaUaO6a KOnbua, MoXHO yCTaHOBNTb DeHb INMeCra, KOrDa IPOdyKTbI 6blIN NOMEuEhblB KOHTeHep.
Kaneьная peшета
KaneNbHapeWeTkaOTDeJareT npOdyKtbl
Pn XpaHeHn OT BbIeJIouXxCs
XndKocTe. KndKocTn HakpNBAIoTcno
KaneNbHoPeWetkoi.
BakyyMhblnakeT
ДяханеняпоукTOВВBaKyyMe C ZeIbIO KaK MoXHO DoJIbWe COxpaHNTb IN CBExeCTb I npIROdHocTb, 3aMapuHOBaTb IN JINI pNiroTOBtB NO TEXHOJOrn CyBnD. IcNoIb3yIte ToIbKO opRHaJIbHbIe BaKyyMHbIe NaKeTbI Bosch.
IprnoToBJIeHne nO TexHOJOrnCyBnD
TexHONOrnCyBnD-3TO npNroTOBJeHne B BaKyUMe npn Hn3Knx TempepaTypax.
PnckIJIy3OpOBbI!
Ipn npiroTOBHeHn npOyKToB no TexHOJOrn cyBn, Heo6XoJMo co6IIOaTb cNeDyUoJIne npaKTnueckne COBeTbI yKa3aHnI NO rInHe:
IcnoJIb3yIte TOnbKO CBexNe npOdyKtbl camoro BbICOKO KaueCTBa.
MoTe n de3nHΦnucpyuIte pyKn.
Ckoponoptaunec npodyktb, Hanpimep nTuCy, yau npb6y, cJeNyET rOToBnTb COCo6o TuaTeNbHOCTbU.
ДерхиTe BЧИСТОТе NOВЕРХЮСТИnpa3deIIOUHbIe DOCKN.
CobIoJaIte MeToD XOJOnHbHOU cENI, KOtOpa MoKet 6bITb HeHaIOJIro IpePbHa JnUsb dIpy IOdROTBN pOdyKTOB. Do npOcecca npriTOBHeHna XpaHnTe npOdyKtbl B BaKyUMhIx NaKeTaX B XOJOnHbHnke.
Iocne npiroTOBJIeHnI npOdyKtbl CNeDyET yNOTpe6ntb B NnUy HemeJHeHNO.ДNTeJIbHOe XpaHHeH, B TOM YNCNE B XOJOnIbHnKe, HeOnyCTmO. OHI He IpeHa3HaueHbI DnI NOOrpeBa.
Pa3MeaTe npOdyKtB B nakeTe NO BO3MOxHocTN PAnOM DpyC Dpyrom, Ho He dpyr Ha dpyre.
KlaanHe pekomeHnyetcnaorpykaTb BBOy.
Дя npocceccnoHaJIbHOrO npiroTOBJIeHnI
6JIoD IO TexHOJorIN cyBn peKOMeHnyEm
BbIDBxHOn JxNk Bosch dJa
BaKyUmPoBaHnI.
Приимененье
Bнманne!
- BaKyHMbI Haoc MoXHo yCTaHaBnBaTb NII ChImaTb TOJIbKO nOcNe OCTaHOBKn np6opa IN 3BLeueHn ITeNCeJbHOB BnIKN IN3 pO3eTKn.
- He nCnoJb3OBA Tb NorpyxHoi MmKcep C Bakyymhblm HAcOCOM DoJIbwe 10 MNHyT. Nocne 3TOrO DaTb OCHOBHomy 6NOKy n HaocCy OCTbITb.
-XpaHeHne B BaKyUme He 3aMeHreT XpaHeHne IpoDyKTOB B XOJIOuINbHNKe INM MOpO3NlBHNke.
-Перд ВаумpoBaHem 6aTeIbHo DaITe npOdyKTam OCTbITb.
YctaHOBka BakyyMHoro Hacoca
→PncyHok
YCTaHOBnTe BaKyyMhbln HaCoc Ha OCHOBH06nK n 3aΦnKcnpynte erO.
ChyTne BaKyymHoro Hacoca
→PucyHOK
Дерха НжаТьIMN обе КнОКИ pa36ЛOKИРOBК, CHIMITE BaKyyMHын Hacocс OCHOBHOrO 6ЛOKA.
BakyymnpobAHne KOHTeHepa
→PraD pncyHkoB D
- NomeCTIte NO- INN INPnroTOBHeHbIe npOdyKTBIB COOTBeTCTByIOuIN KOHTeHep. Ipn 3Tom yUHTbBaIte paCNOJIOXeHne MeTKn max.
- Y6eIntecb, yTO yNIOHTHnTeJIb KpbIuKIN BCTaBHeH npaBnIbHo. YcTaHOBInTe KpbIuKy I NIOTHO 3aXmnte 3aXmAmN. C NOMoUbIO DByx KOJeC Ha KpbIuKe yCTaHOBInTe DaTy.
3.ПиЖМTe OCHOBHO6nOK c BaKyyMHbIM HaCOCOM K BaKyyMHOMy 3aTBOPY KOHTeHepa n ydePKNBaITe. - Haxmnte Typ6o-KhONky ①. Pnp6op pa60taeT, noka hXkata KhONka.
- Bakyymhbln Hacoc OTKaunBaet Bo3dyx n3 KOHTeHepa. KOrda INDkaTOp BaKyyMa 3aMeTHO BOrHyT BHyTpB, Bakyym Co3dAn.
- OTnycTne KhoNky.
- CHIMITE OCHOBHOJ 6JOK C BAKyyMHbIM HAcOCOM c KOHTeHepa. BbInbTe BNkCy CETeBOrO uHypa n3 po3eTKn.
Yka3aHne: xpaHnTe BaKympoBaHHbIKoHTeHep KpbIuKOJ BBepX.
BakyymnpobAHne nakeTa
→PraD pncyHkoB E
- NomeCTnTe npOdykTbI B naKeT.
Yka3aHHe ne nepenonHnTe naket.
O6IacTb BaKyymHO 3aTBopa DoJXHa
copejKaTbcB YnCTOTE.Oc6o TuaTeNbHO
DeiCTByITE pN BakyMnpOBAHn COHybIX,
MOKpbIX INI MapINHOBAHHbx IPOyKTOB.
2.Помecntte NaKeT Ha poBHyIO NOBepxHocTb.CJerKa BblaBNTe BO3dYx N3 NaKeTa N PLOTHO 3aCTeHNTe 3aCTeKKy NO Bcei DnHe.
Yka3aHHe: npn BaKyymnpOBaHN COHybIX, MOKpbix nIN MapINHOBAHHbIX pOyKTOB CBecbTe BaKyymhBI NaKeT BHN3 c pa6oey NOBepxHocTN. BaKyymhBI 3aTBOp DOJKeH 6bITb CBepy pa6oey NOBepxHocTN.
Puc. F
Baxho!
- YpOBeHb coOpJxMOro He DoJxHe npeBblaTb OTMeTKy max.
-06a yINOTHTeJIbHbIX 3IeMeHTa N o6NaCTb 3a OTMeTKoN max DOJXHbI 6bITb YNCTbIMN. -
Ecnn 3aCTeKKa He Yncta N He NOJIHOCTbH 3aCTeHTyTa, Co3DaHHe BaKyyMa HeBO3MOxHOb.
-
ПижмITE OCHOBHOбLOK CBaKyMHbIM HAcOCOM K BaKyMHOMy 3aTBOPY NaKeTa n ydepxnBaITe.
- Haxmte Typ6o-KhONky ①. Pnp6op pa60taet, noka hXkata KhONka.
- Bakyymhbln Hacoc OTkaunBaet Bo3dyx n3 naKeTa. 3a cuet 3Toro NaKeT CxIMaeTcN O6BOJAKINBAET coepKIMoe.
- После Вakутураима накеотпунсте Конку.
Yka3aHHe:OCO6OBHNMaTeJIbHO CJeIHTe 3a TeM, He BbIXoNT JN KNDKOCTb HApJxU N He PnBbNXKaETcR JN K OTMeTKe max. OTNyCTnte KhoNky, npexdyeem KNDKOCTb npeBbICNT OTMeTKy max.
- CHIMITE OCHOBHOI 6JOK C BaKyMHBIM HAcOCOM c KOHTeHepa. BbInbTe BNJKy CeTEBOrO UHypa n3 po3ETKn.
OTKpbITne KOHTeHepa NJI NaKeTa
→Pnc. 6
UTo6bIOTKpbITb KOHTeHep,BO3bMNTecb 3a BaKyumhBn 3aTBOp C OJHOCTOPOHBI NNOTAHTE BBepx.B KOHTeHep DOJXHO IONACTb DOCTaTOUHO BO3dyxa.
Pa3OMKHInTe 3axnmbi n CHMnTe KpbIshKy.
Pnc. H
UTo6bl OTKpbITb naKeT, pacCTerHnTe 3aCTeKky IN NOJIHOCTbIO packpoIte ee.
Iocne HcnoJb3ObaHnBaKyyMHbIe naketbl HyxHO TuaTeJIbHO YNCTNTb IN XopoWo cyuNTb.
Ounstka n yxoid
Iocne kaxdo npimeneHn np6op nICNoB3OBaHHbIe OTdeJIbHbIe qactn DOJXHbI 6bITb TtcaTeJbHO OUYueHbI.
BHHMaHHe!
-He nCnoJb3yIte MOUuIe cpeIcTBA, coepkaune aankorolb IIN cInpT.
-He nCnoJb3yIte MeTaJIInueckne I octpOKoHeHbIe npEIMTeI, a TaKKe npEIMTeI C OCTpbIM KpOMKaMn.
-He npimemnTe rpy6yIO TkaHb nIa6pa3NBhle YNCTaUne cpeDcTba.
- Hn B Koem clyuae He norpykaite BaKyyMhbl HaCoc B XnIDKOCTN He MOiTe NOD npOTOCHOB BOOn INIIN B NOcyDOMOEUHO MaUNHe.
- Ouchntte qactn np6opa cpa3y nocne nCnoJb3ObaHn. TOrda ocTaTKn npOdyKTOB He npICOXHyT, nIpaCTMaCCa He 6yDet NOBpeXdEHa (HaNPmep, 3nnpHBIM MacJamn n3 npraHoCTe).
-ПиобразOTKE,нанример,Моркови
На пл actMacCObIx DeTaIax MoKeT
ПОЯВИТьСА CBETHOH HAnTe, KOTOpБИ
УдДАЛЯЕТСС ПOMOUsH OHeCKOЛьКИX
КапелpbacITteJIbHOrO Macla.
Ha pnc. noka3aHo, KaK uNCTnTb OTdEhbIe Yactn.
■Пopotп Te BaKyHMbI HaCoc BnaXHOr TpAknO N BblCyUInTe erO.
OuHuaTe npOue npHaJdxKHOCTMblbHbIM paCTBOPOM mMgKOITKaHbIO nIIN r6ko Jn6o MoTe INX BVocydomoeHoi MaunHe.
BakyyMHbIe naKeTbI, nCNoJIb3yEmbIe NOBTOPOHO, HxKHO TuaTeJIbHO uNCTNTb I XopoOo cyuNTb. NaKeTbI, B KOTOpbIX XpaHnIN cbIpoe MrcO, pb6y INI INITUcy, HeNb3r NcNoJIb3OBaTb NOBTOPOHO.
■Перед чИСТКОДСHIМЛТЕУПЛOTНHTЕЛБ Крblшк.→Pис.
CHaTne yCTaHOBOUHbIX KOJeC PnCuyKOB
YcTaHOBOUHbIe KOJIbUa, pacNoJIOXeHHbIe B KpbIuKe BaKyyMHO KOHTeINHepa, MOxHO CHrTb DnA BblONHeHry TuaTeNbHO OChCTKn.
- BCTaBbTe MaIeHbKyIO OTBepTKy B ODNH n3 DByX Na3OB CTOIopHOrO KOJIbUa N OCTOpOXHO N3BJIeKInTe KOJIbUc C JIeKIM HAXHMOM.
- ChIMITE CTONOPHoe KOJIbUO n UCTaHOBOUHbIe KOJIbUa, KaK NOKa3aHo Ha pUCyHKe. Bce DeTaN TuaTeNbHO ONUCTHTe I npocuWnte.
- BCTaBbTe yCTaHOBOUHbIe KOJIbua B NocJeIOBaTeIbHoCTn, yKa3aHHoH Ha pncyHke. BCTaBbTe cTOnOpHoe KOJIbUcO C JeRKM HaxKIMOM, YTO6bl OHO 3aΦNkCInpOBaNoCb.
Принолжностn
$$ \therefore a, b, c = 1 $$
$$ \therefore \text {j i} \omega \text {i} \text {a b i a} \text {i} \text {g} \text {i} \text {c l} \text {a} \text {i} \text {a} \text {i} \text {a} \text {i} \text {i} \text {i} \text {i} \text {i} \text {i} \text {i} \text {i} \text {i} \text {i} \text {i} $$
$$ \aleph_ {g} \text {l a l b o j i g w g i t y j a i l i f i s i o n j a z i e} \aleph - $$
$$ . \dot {g} \dot {l} \dot {b} \dot {u} \dot {l} \dot {y} \dot {1} \dot {a} \dot {l} \dot {w} \dot {e} \dot {g} \dot {g} \dot {y} \dot {z} \dot {l} \dot {y} \dot {z} $$
$$ j _ {0} \in {1, 2, 3, 4, 5, 6, 7, 8, 9, 1 0, 1 1, 1 2, 1 3, 1 4, 1 5, 1 6, 1 7, 1 8, 1 9, 2 0, 2 1, 2 2, 2 3, 2 4, 2 5, 2 6, 2 7, 2 8, 2 9, 3 0, 3 1, 3 2, 3 3, 3 4, 3 5, 3 6, 3 7, 3 8, 3 9, 4 0, 4 1, 4 2, 4 3, 4 4, 4 5, 4 6, 4 7, 4 8, 4 9, \dots } $$
$$ \left. \right.\left. \right.\left. \right.\left. \right.\left.\left.\left.\left.\left.\left.\left.\left.\left.\left.\left.\left.\left.\left.\left.\left.\left.\left.\left.\left.\left.\left.\left.\left.\left.\left.\left.\left.\left.\left.\right.\right.\right.\right.\right.\right.\right.\right.\right.\right.\right.\right.\right.\right.\right.\right.\right.\right.\right.\right.\right.\right.\right.\right.\right.\right.\right.\right.\right.\right. $$
$$ \int_ {0} ^ {\infty} \frac {1}{x} d x = \int_ {0} ^ {\infty} \frac {1}{x ^ {2}} d x = \int_ {0} ^ {\infty} \frac {1}{x ^ {3}} d x = \int_ {0} ^ {\infty} \frac {1}{x ^ {4}} d x = \dots $$
$$ \left. \right.\left. \right.\left. \right.\left. \right.\left.\left.\left.\left.\left.\left.\left.\left.\left.\left.\left.\left.\left.\left.\left.\left.\left.\left.\left.\left.\left.\left.\left.\left.\left.\left.\left.\left.\left.\left.\right.\right.\right.\right.\right.\right.\right.\right.\right.\right.\right.\right.\right.\right.\right.\right.\right.\right.\right.\right.\right.\right.\right.\right.\right.\right.\right.\right.\right.\right. $$
$$ \therefore \dot {a} = \dot {a} _ {0} $$
$$ \text {a b} \text {j} \text {i} \text {i} \text {i} \text {i} \text {i} \text {i} \text {i} \text {i} \text {i} \text {i} \text {i} \text {i} \text {i} \text {i} \text {i} \text {i} \text {i} \text {i} \text {i} \text {i} \text {j i} $$
$$ 1. 0 \dot {a} \dot {a}. g $$
$$ \int_ {0} ^ {\infty} \frac {1}{x ^ {2}} \int_ {0} ^ {\infty} \frac {1}{x ^ {3}} \int_ {0} ^ {\infty} \frac {1}{x ^ {4}} \dots \int_ {0} ^ {\infty} \frac {1}{x ^ {n}} $$
$$ g \left[ \begin{array}{l} \ddot {a} _ {1} \dot {a} _ {2} \dot {a} _ {3} \dot {a} _ {4} \dot {a} _ {5} \dot {a} _ {6} \dot {a} _ {7} \dot {a} _ {8} \dot {a} _ {9} \dot {a} _ {1 0} \dot {a} _ {1 1} \dot {a} _ {1 2} \dot {a} _ {1 3} \dot {a} _ {1 4} \dot {a} _ {1 5} \dot {a} _ {1 6} \dot {a} _ {1 7} \dot {a} _ {1 8} \dot {a} _ {1 9} \dot {a} _ {2 0} \dot {a} _ {2 1} \dot {a} _ {2 2} \dot {a} _ {2 3} \dot {a} _ {2 4} \dot {a} _ {2 5} \dot {a} _ {2 6} \dot {a} _ {2 7} \dot {a} _ {2 8} \dot {a} _ {2 9} \dot {a} _ {3 0} \dot {a} _ {3 1} \dot {a} _ {3 2} \dot {a} _ {3 3} \dot {a} _ {3 4} \dot {a} _ {3 5} \dot {a} _ {\mathrm {的}} \right] $$
$$ \therefore \mathrm {g l} _ {\mathrm {b}} \mathrm {d} \mathrm {l} \mathrm {a l l} \mathrm {c} \mathrm {g} \mathrm {l} \mathrm {g} \mathrm {a} $$
$$ \Delta \alpha = \sum_ {i} ^ {n} a _ {i} g _ {i} $$
$$ J a l S i l L g e a d j i g a l i n g e a d j i t y o l o g a l i s w i t h $$
$$ \ddot {c} \dot {s} \dot {s} \dot {s} \dot {s} \dot {s} \dot {s} \dot {s} \dot {s} \dot {s} \dot {s} \dot {s} \dot {s} \dot {s} $$
$$ \int_ {0} ^ {\infty} \frac {1}{x ^ {2}} \int_ {0} ^ {\infty} \frac {1}{x ^ {3}} \int_ {0} ^ {\infty} \frac {1}{x ^ {4}} \dots \int_ {0} ^ {\infty} \frac {1}{x ^ {n}} $$
$$ \therefore \square \square \square $$
$$ \therefore \text {a b i l l} j \neq \text {a b i l l} j \neq j $$
$$ \mathbf {J} \ddot {\delta} _ {j j \Delta} \leftarrow $$
$$ b _ {i} \dot {a} _ {i} c _ {i} \dot {c} _ {i} e _ {i} j _ {i} $$
$$ \begin{array}{c} \end{array} $$
$$ \begin{array}{l} \dot {g} | j \dot {a} | \dot {a} | j \dot {a} | \dot {b} \dot {c} | g | b \dot {a} | \dot {a} | \dot {c} | \dot {d} | g | j \dot {a} | \dot {a} | \ \dots \ddot {a} \dot {a} \dot {a} \dot {a} \dot {a} \dot {a} \dot {a} \dot {a} \dot {a} \dot {a} \dot {a} \ \end{array} $$
$$ \begin{array}{l} \begin{array}{l} \dot {1} \dot {2} \dot {3} \dot {4} \dot {5} \dot {6} \dot {7} \dot {8} \dot {9} \dot {1 0} \dot {1 1} \dot {1 2} \dot {1 3} \dot {1 4} \dot {1 5} \dot {1 6} \dot {1 7} \dot {1 8} \dot {1 9} \dot {2 0} \dot {2 1} \dot {2 2} \dot {2 3} \dot {2 4} \dot {2 5} \dot {2 6} \dot {2 7} \dot {2 8} \dot {2 9} \dot {3 0} \dot {3 1} \dot {3 2} \dot {3 3} \dot {3 4} \dot {3 5} \dot {3 6} \dot {3 7} \dot {3 8} \dot {3 9} \dot {3 0} \dot {3 1} \dot {3 2} \dot {3 3} \dot {3 4} \dot {3 5} \dot {3 6} \dot {3 7} \dot {3 8} \dot {3 9} \dot {3 0} \dot {3 1} \dot {3 2} \dot {3 4} \dot {3 5} \dot {3 6} \dot {3 7} \dot {3 8} \dot {3 9} \dot {3 0} \dot {3 1} \dot {3 2} \dot {3 4} \dot {3 5} \dot {3 6} \dot {3 7} \dot {3 8} \ j i j a q j i j a b c d e f g h i j k l m n o p q r s t \ . \text {区} \downarrow \downarrow \downarrow \ \lim _ {x \rightarrow - \infty} \frac {\sin x}{x ^ {2}} \ l g o a g l i n e s 1 j = 2 1 a l s \ \leq r \equiv \frac {1}{2} \cdot \frac {1}{2} \cdot \frac {1}{2} \cdot \frac {1}{2} \cdot \frac {1}{2} \cdot \frac {1}{2} \cdot \frac {1}{2} \cdot \frac {1}{2} \ \therefore \text {a d} = \text {i} \text {i} \text {i} \text {i} \text {i} \text {i} \text {i} \text {i} \text {i} \text {i} \text {i} \text {i} \text {i} \text {i} \text {i} \text {i} \ \end{array} $$
$$ \text {i} \text {i} \text {i} \text {i} \text {i} \text {i} \text {i} \text {i} \text {i} \text {i} \text {i} \text {i} \text {i} \text {i} \text {i} \text {i} \text {i} \text {i} \text {i} \text {i} \text {i} $$
$$ \dot {E} \text {j e a b g i v a l l} \text {a s s l i} \text {i j i} \text {a l l i i} \text {g} \text {a b} \text {g} $$
$$ \int \mathrm {d} \omega \mathrm {d} \xi \mathrm {d} \eta \mathrm {d} \varphi \mathrm {d} \psi $$
$$ J a e l l \geq 0 \text {且} a _ {i} ^ {\prime} = 1, \text {且} a _ {i} ^ {\prime} = 1 $$
$$ \text {F} \delta \rightarrow $$
$$ ! p a $$
$$ - . m a x $$
$$ \left. \frac {1}{2} \sum_ {i = 1} ^ {n} \sum_ {j = 1} ^ {m} \sum_ {k = 1} ^ {n} \sum_ {l = 1} ^ {m} \sum_ {m = 1} ^ {n} \right} $$
$$ . \max _ {i} \text {a l l} b i j \in s \text {j} \text {j} \text {j} \text {j} \text {j} \text {j} \text {j} \text {j} \text {j} \text {j} \text {j} \text {j} \text {j} \text {j} \text {j} \text {j} \text {j} \text {j} \text {j} \text {j} $$
$$ \text {l a i l a l i e o g l a i l i b i c a l l} \quad \text {i d} \quad \text {i n} \quad \text {y} \quad \text {l o i d e} - \text {y} \quad \text {c l} $$
$$ . \dot {E} \cup \dot {B} \cup \dot {B} \cup \dot {B} $$
$$ \ddot {s} \omega_ {1} \dot {y} 1 j _ {\mathrm {g a l l}} b i o i l $$
$$ . m a x \quad \text {a} \text {d} \text {d} \text {d} \text {d} \text {d} \text {d} \text {d} \text {d} \text {d} \text {d} \text {d} \text {d} \text {d} \text {d} \text {d} \text {d} \text {d} \text {d} \text {d} \text {d} \text {a} $$
$$ \left| \omega_ {1} \right| = 1, \quad \left| j _ {2} \right| = 1, \quad \left| s _ {1} \right| = 1 $$
$$ . 7 \text {m} \dot {\varepsilon} $$
$$ \therefore c [ b ] = 1 $$
$$ \text {H} \delta_ {\text {J}} \leftarrow $$
$$ j e \quad l a s d i f b i z o n t l j a r g h p a r a m e t e r $$
$$ J o l \leq 1, 1, a = 1, b = 2, $$
$$ \frac {1}{2} \frac {1}{2} \frac {1}{2} \frac {1}{2} \frac {1}{2} \frac {1}{2} \frac {1}{2} \frac {1}{2} \frac {1}{2} \frac {1}{2} \frac {1}{2} \frac {1}{2} \frac {1}{2} $$
$$ . J o l s l i b l y l e g i d e j a n g l e i z e c l g o l l a c e j a $$
.2
$$ \ddot {a} _ {i j k l} g \dot {a} _ {k l} $$
$$ \mathrm {i} \frac {\partial}{\partial t} \mathrm {a d i s i w a l l} g \mathrm {b o l l} g \mathrm {j} \mathrm {g a l l} \mathrm {a b s i l u t y} $$
$$ \therefore \lim _ {x \to 1} \frac {1}{x + 2} $$
$$ ! 4 \dots $$
$$ \Delta g a l l \quad g \quad J g a S l l \quad g c \quad g j i n i \quad C l a b i o p i d i s w i t h - $$
$$ \therefore \Delta = 0 $$
aai jiljai jai Jia Ubiill
1
!
aole 0
A
1
- 1 1 a
a
-2
.
1 1
1
i j 1
.
.
J 1
.
Jaa 1
Jn Jn Jn Jn Jn Jn Jn Jn Jn Jn Jn Jn Jn
s
在 Rt ABN 中:
1
y
aalal gall aagaae logg n nn
biitii 1
eLiJ 1
Jilgllg jyjzill
biitai 5
1gll 1
a 1
g 1 g
eell no aee eae 1
gell aee jao abgeaaal w5y1 y1 pdd
.
e 1
gallolia gall no aie yao uol
a
a 1
e 1
1
2
b* b
C
d d
()
cIbll 01
3
biinal
max
jllc
J 1
J 1
gaaagaae gaaagaae
1
1
A
i
jil(A1i0g )
ar-4
Jaaaiy jaleic g bali
g 1111
g 1 g
gss

J 1
!
1
1
1 !
1
bili
.
i
1
L
1 !
A
-
一


Thank you for buying a Bosch Home Appliance!
Register your new device on MyBosch now and profit directly from:
- Expert tips & tricks for your appliance
- Warranty extension options
- Discounts for accessories & spare-parts
- Digital manual and all appliance data at hand
- Easy access to Bosch Home Appliances Service
Free and easy registration - also on mobile phones:
www.bosch-home.com/welcome
BOSCH
HOME APPLIANCES
SERVICE
Looking for help?
You'll find it here.
Expert advice for your Bosch home appliances, need help with problems or a repair from Bosch experts.
Find out everything about the many ways Bosch can support you:
www.bosch-home.com/service
Contact data of all countries are listed in the attached service directory.