
HATS6CBS4BWIFI - Range hood HAIER - Free user manual and instructions
Find the device manual for free HATS6CBS4BWIFI HAIER in PDF.
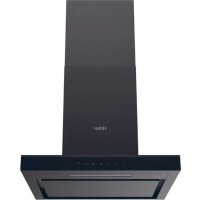



| Product type | Extractor hood |
| Brand | Haier |
| Model | HATS6CBS4BWIFI |
| Power supply | 220-240 V ~ 50 Hz |
| Motor power | 200 W |
| Number of speeds | 5 (including 2 boost) |
| Maximum airflow | 650 m³/h |
| Maximum noise level | 65 dB(A) |
| Dimensions (W x D x H) | 600 x 500 x (350-1200) mm |
| Net weight | 15 kg |
| Lighting type | LED, 1.5 W max |
| Grease filter | Non-stick metal, dishwasher safe |
| Activated charcoal filter | Optional, annual replacement (for recirculation) |
| Wi-Fi connection | Yes, 802.11 b/g/n, 2.4 GHz |
| Mobile app | hOn |
| Minimum distance above cooking surface | 65-75 cm |
| Exhaust duct diameter | 150 mm |
| Timer function | Yes, automatic shut-off after 5 minutes |
| Material | Stainless steel and glass |
| Installation type | Wall-mounted, external extraction or recirculation |
Frequently Asked Questions - HATS6CBS4BWIFI HAIER
User questions about HATS6CBS4BWIFI HAIER
0 question about this device. Answer the ones you know or ask your own.
Ask a new question about this device
Download the instructions for your Range hood in PDF format for free! Find your manual HATS6CBS4BWIFI - HAIER and take your electronic device back in hand. On this page are published all the documents necessary for the use of your device. HATS6CBS4BWIFI by HAIER.
USER MANUAL HATS6CBS4BWIFI HAIER
INSTALLATION AND USER'S MANUAL
CONTENT
INTRODUCTION 02
SAFETY PRECAUTION 02
ELECTRICAL INSTALLATION 04
SPECIFICATION 05
INSTALLATION (VENT OUTSIDE) 06
INSTALLATION (VENT INSIDE) 13
DESCRIPTION OF COMPONENTS 14
OPERATION 14
MAINTENANCE 17
TROUBLESHOOTING 18
CONFORMITY WITH DIRECTIVES 19
ENVIRONMENTAL PROTECTION 19
INTRODUCTION
Thank you for choosing this cooker hood.
This instruction manual is designed to provide you with all required instructions related to the installation, use and maintenance of the appliance. In order to operate the unit correctly and safely, please read this instruction manual carefully before installation and usage.
The cooker hood uses high quality materials, and is made with a streamlined design. Equipped with large power electric motor and centrifugal fan, it also provides strong suction power, low noise operation, non-stick grease filter and easy assembly installation.
Hereby, Candy Hoover Group Srl declares that the radio equipment is in compliance with Directive 2014/53/EU and with the relevant Statutory Requirements (for the UKCA market).
The full text of the declaration of conformity is available at the following internet address: www.candy-group.com
SAFETY PRECAUTION
Never let the children operate the machine. The cooker hood is for home use only, not suitable for barbecue, roast shop and other commercial purpose. The cooker hood and its filter should be clean regularly in order to keep in good working condition. Clean the cooker hood according to the instruction manual and keep the unit from danger of burning. Forbid the direct baking from the gas cooker. Please keep the kitchen room a good convection. Before connecting this appliance check that the power supply cord is not damaged. A damage supply cord must be replaced by qualified service personnel only. There shall be adequate ventilation of the room when the range hood is used at the same time as appliances burning gas or other fuels; The air must not be discharged into a flue that is used for exhausting fumes from appliances burning gas or other fuels; Regulations concerning the discharge of air have to be fulfilled.
- Children should be supervised to ensure that they do not play with the appliance.
- Do not flambe under the range hood.
The range hood is not intended to be installed over a hob having more than four hob elements.
- There shall be adequate ventilation of the room when the range hood is used at the same time as appliances burning gas or other fuels (not applicable to appliances that only discharge the air back into the room);
- The details concerning the method and frequency of cleaning.
- There is a fire risk if cleaning is not carried out in accordance with the instructions;
- Do not flame under the range hood;
- CAUTION: Accessible parts may become hot when used with cooking appliances.
Electrical Shock Hazard
Only plug this unit into a properly earthed outlet. If in doubt, seek advice from a suitably qualified engineer. Failure to follow these instructions can result in death, fire, or electrical shock.
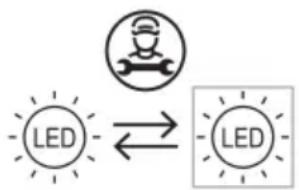
The lamp used in this product is not suitable for use in the lighting of a room.
The purpose of this lamp is to provide illumination for using the product.
Electrical Installation
All installation must be carried out by a competent person or qualified electrician. Before connecting the mains supply, ensure that the mains voltage corresponds to the voltage on the rating plate.
Direct Connection
The appliance must be connected directly to the mains using an omnipolar circuit breaker with a minimum opening of 3 mm between the contacts.
The installer must ensure that the correct electrical connection has been made and that it complies with the wiring diagram.
The cable must not be bent or compressed.
Regularly check the power plug and power cord for damage. If the supply cord is damaged, it must be replaced by a special cord or assembly available from the manufacturer or its service agent.
WARNING: This is a Class I appliance and MUST be earthed.
This appliance is supplied with a 3-core mains cable coloured as follows:
Brown = L or Live
Blue = N or Neutral
Green and Yellow = E or Earth
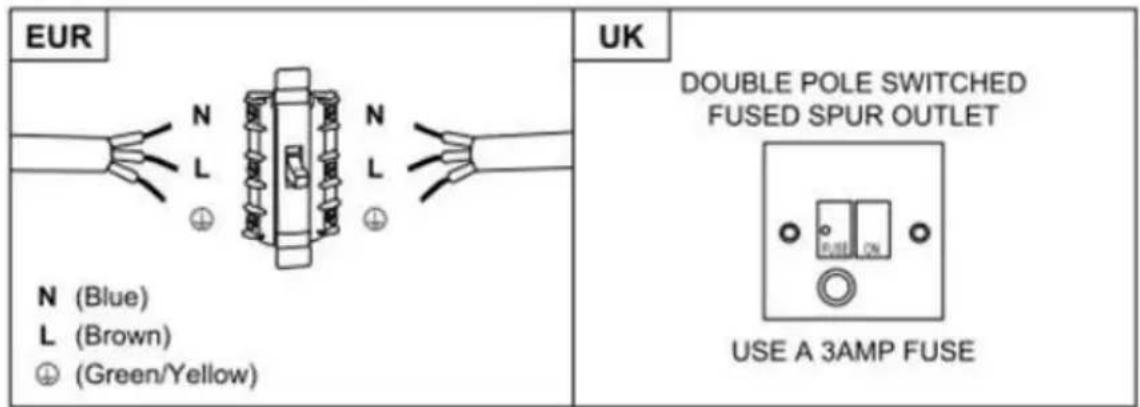
The fuse must be rated at 3 Amps.
Standard Installation Accessories List
| Spec. Qty | Illustration Picture | |
| Casing 1 | ||
| Upper Chimney 1 | ||
| Lower Chimney 1 | ||
| Lower chimney bracket 1 | ||
| Upper chimney bracket 1 | ||
| Hanging Board 1 | ||
| φ8 rawl plugs φ8×φ6 white color | 9 | |
| Screws ST4.0×30 | 9 | |
| φ7.2screws ST4.0×8 | 2 | |
| Air outlet 1 | ||
| Carbon filter | 2 |
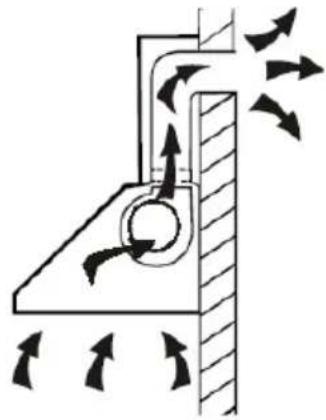
If you have an outlet to the outside, your cooker hood can be connected as shown in the picture below by means of an extraction duct (enamel, aluminum, or flexible pipe, non-flammable, with an interior diameter of 150mm).
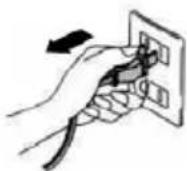
- Before installation, turn the unit off and unplug it from the outlet.
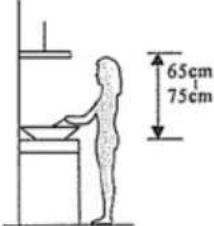
- The cooker hood should be placed at a distance of 65-75 cm above the cooking plane for best effect.
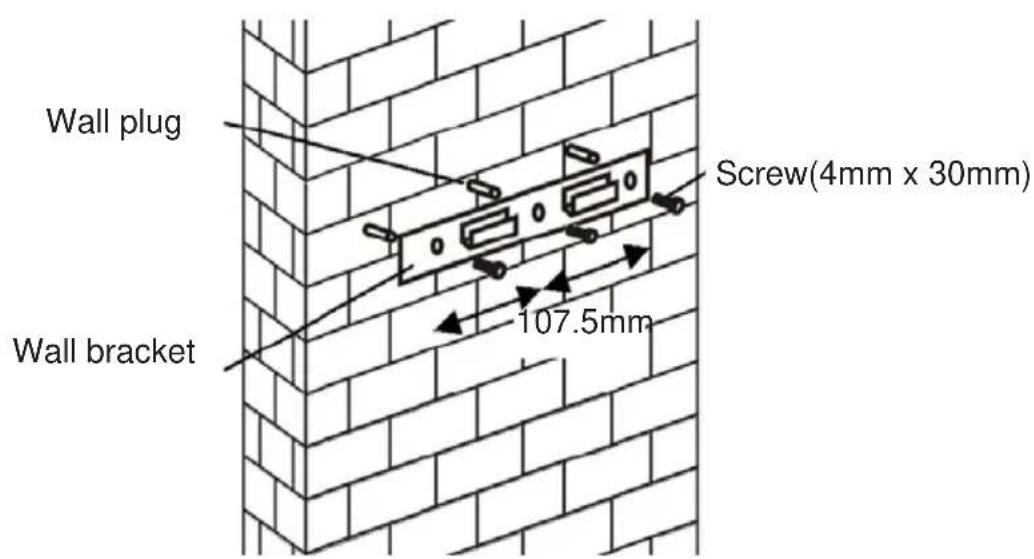
- Drill 3 x 8mm holes to accommodate the bracket. Screw and tighten the bracket onto the wall with the screws provided.
- Lift up the cooker hood and hang it onto the wall bracket hook.
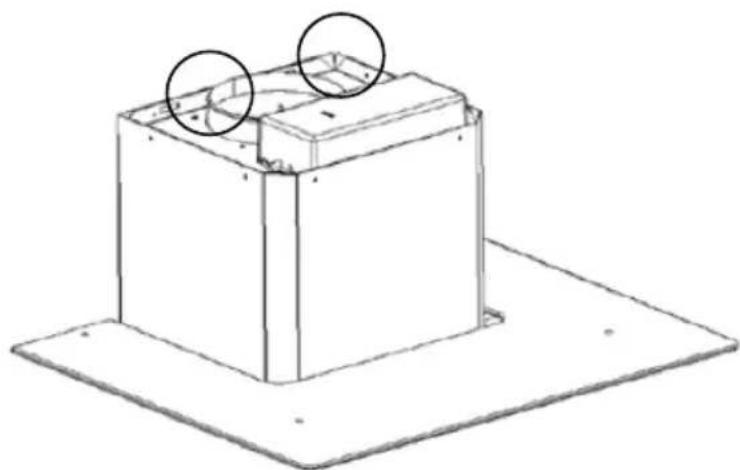
- Fix the one-way valve to the air outlet of the cooker hood. Then, attach the exhaust pipe onto the one-way valve as shown below.
Exhaust pipe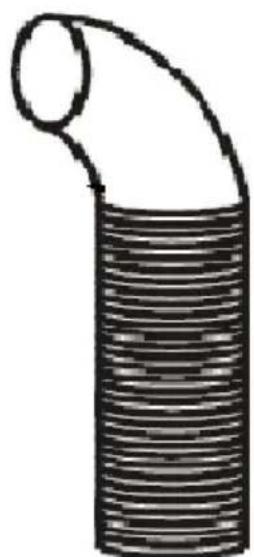

Cooker hood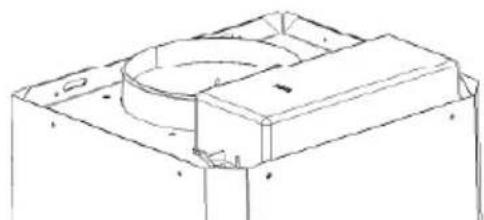
6.
i. Place the glass in the appropriate position on top of the cooker hood.
ii. Fix with 4 screws and washers. To avoid cracking the glass, do not overtighten the screws.
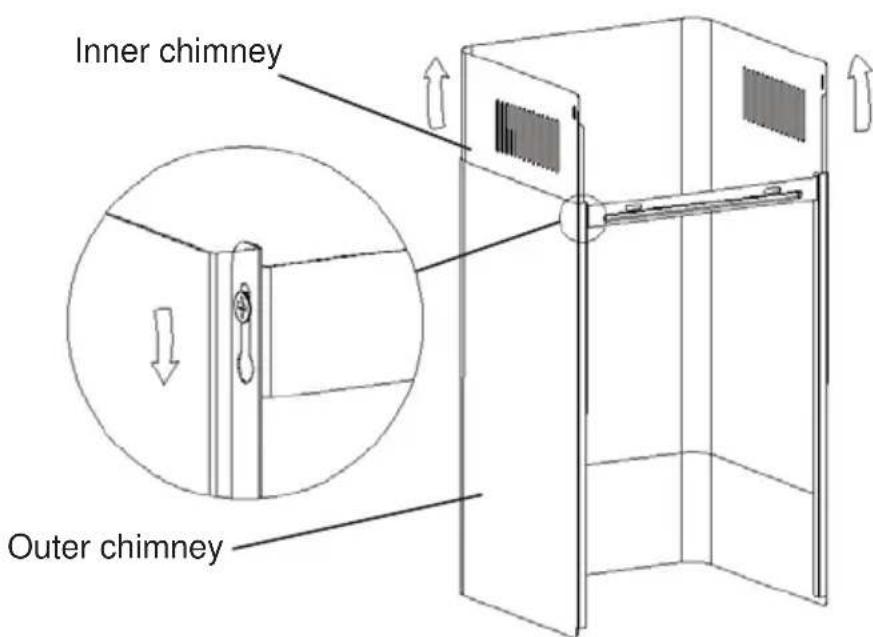
i. Insert the inner chimney into the outer chimney, then pull the inner chimney upward. Adjust to reach the required height.
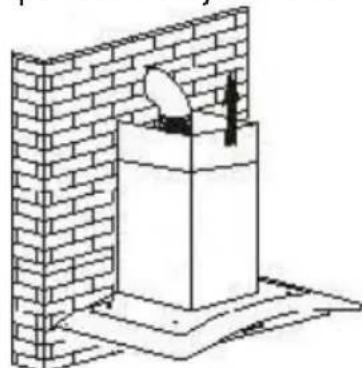
ii. Slide the chimney to adjust its height. When the desired height is reached, hang the fixing hole onto the fixing screws as shown in the pictures below.
8.
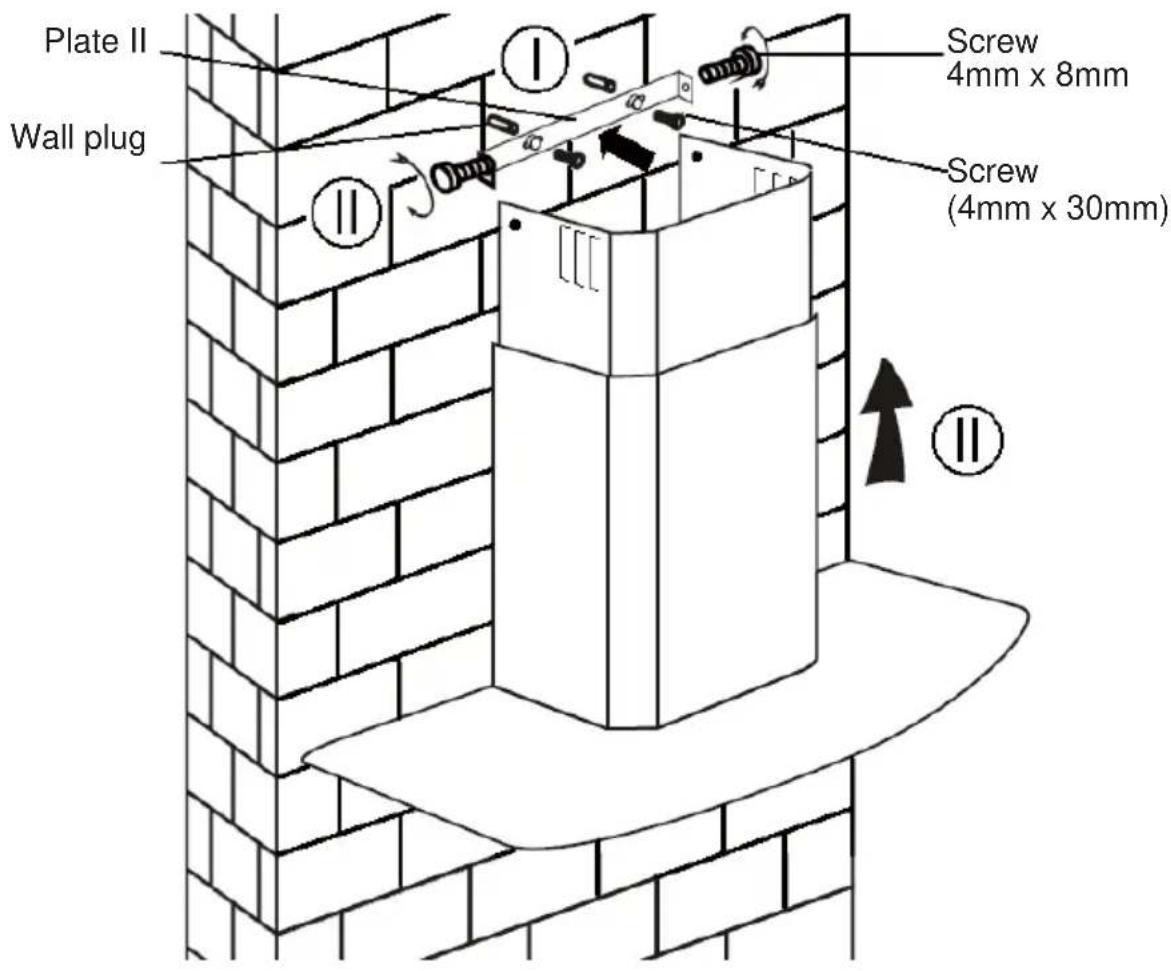
i. Drill 2 x 8 mm holes to accommodate plate II. Screw and tighten plate II onto the wall using the 2 screws provided. ii. Assemble the chimney onto the unit and fix it with 2 screws.
Standard Installation Accessories List
| Spec. Illustration | Picture Qty | |
| Air Deflector | 1 | |
| Bracket | 1 | |
| φ8 rawl plugs φ8×φ6 white color | 2 | |
| Screws ST4.0×30 | 2 | |
| Screws ST3.5×12 | 2 |
INSTALLATION (AIR DEFLECTOR):
The air deflector is included and is not optional.
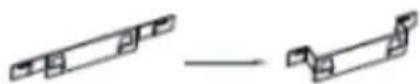
- Before installation, bend both ends of the bracket as shown below:
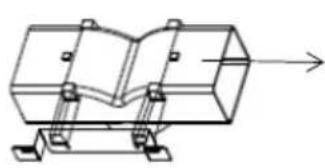
- Fix the bracket to the T-shaped plastic outlet using the 2 provided ST3.5x12mm screws.
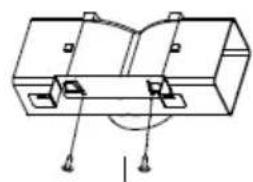
3. Drill 2 holes for the wall plugs, then screw and tighten the bracket onto the wall using the 2 provided ST4x30mm screws.
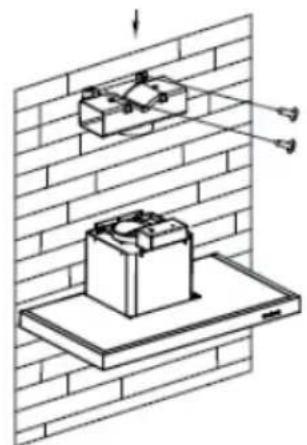
- Attach the exhaust pipe onto the air outlet of the cooker hood as shown below:
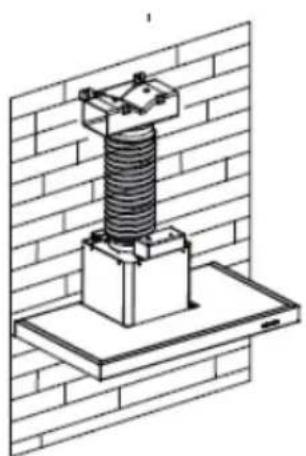
5. Install the chimney onto the unit and fix it.
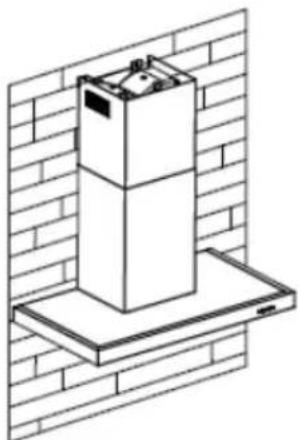
Please note: The T-shaped plastic outlet and the v-flaps cannot be used at the same time. You can use them in two ways: 1) Add the v-flap to the existing outlet; 2) Use the T-shaped plastic outlet without adding the v-flap.
Note: The product is provided with a v-flap accessory. This accessory is not mandatory for installation, operation, or use of the product.
INSTALLATION (VENT INSIDE)
If you do not have an outlet to the outside, exhaust pipe is not required and the installation is similar to the one shown in section "INSTALLATION (VENT OUTSIDE)".
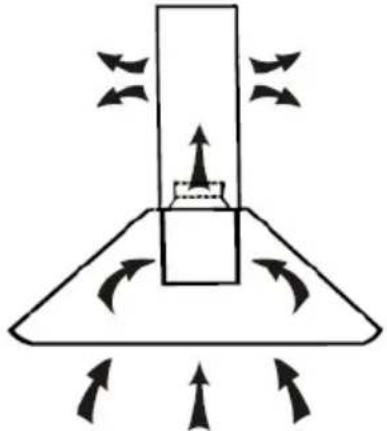
Activated carbon filter can be used to trap odors.
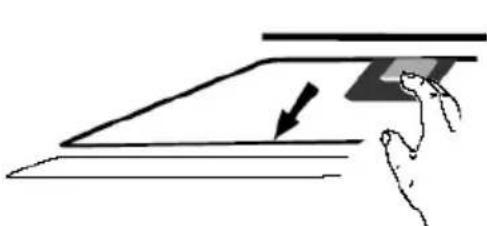
In order to install the activated carbon filter, the grease filter should be detached first. Press the lock and pull it downward.
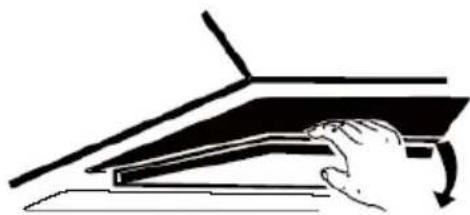
Plug the activated carbon filter into the unit and turn it in clockwise direction. Repeat the same on the other side.
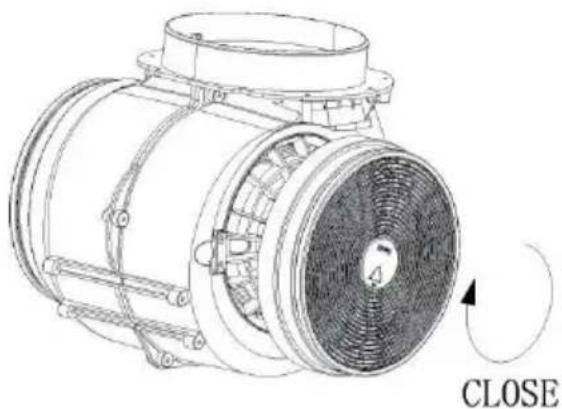
NOTE:
o Make sure the filter is securely locked. Otherwise, it would loosen and cause dangerous. When activated carbon filter attached, the suction power will be lower.
DESCRIPTION OF COMPONENTS
CONFIGURATION 1
It's used for ventilation on the kitchen. It is suitable for simmering and cooking which do not make much steam.
2 Medium Speed button
Airflow speed is ideally for ventilation in standard cooking operation.
3 High Speed button
When high density of smoke or steam produced, press high-speed button for high effective ventilation.
B Boost 1(speed 4)
Press speed B button 1, the backlight of speed B button is on, and the cooker hood is working at boost mode;
B+Boost 2 (speed 5)
Press speed B button 2, the backlight of speed B+ button is on, and the cooker hood is working at boost mode;

Light: Short press for lighting on & off
Quick timer: Long press the light button for 3 seconds, fan speed buttons will flash and enter into 5-minute countdown. After 5 minutes, motor and light will turn off automatically with three buzzer sounds.

Wi-Fi Connection
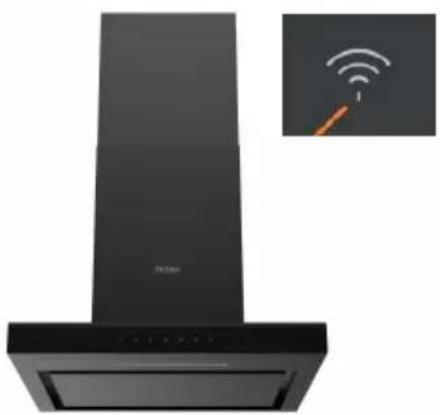
Long press WiFi icon to enter connecting mode: the backlight of WiFi icon keeps flashing to indicate connection is in progress, the backlight of WiFi icon is lit to indicate it is connected, same for standby mode; long press WiFi icon again to stop the connection;
CONFIGURATION 2
1
2
3
B
·
STANDBY MODE.
After plug in, all lighting, system in STANDBY MODE.
1
Low Speed button
It is used for ventilation in the kitchen. It is suitable for simmering and cooking that do not produce much steam.
2
Medium Speed button
This airflow speed is ideal for ventilation during standard cooking operations.
3
High Speed button
When high density of smoke or steam is produced, press the high-speed button for effective ventilation.
B
Booster function
This hood has a booster function. To activate the booster, press B to reach speed 4, entering the highest speed while the hood is in use. It will increase speed for 5 minutes before slowing down again.

Light
Short press to turn the light on and off.
Quick timer: Long press the light button and hold for 3 seconds. The fan speed buttons will flash and enter a 5-minute countdown. After 5 minutes, the motor and light will turn off automatically with three buzzer sounds.

Wi-Fi Connection
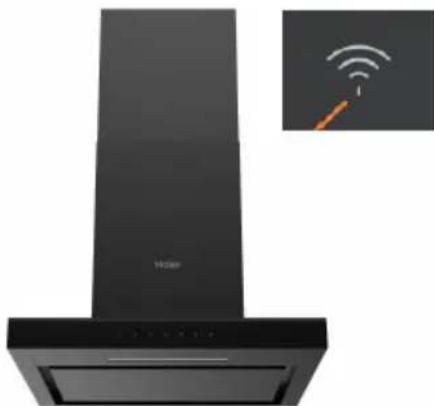
Long press the Wi-Fi icon to enter connecting mode: the backlit Wi-Fi icon flashing indicates that the connection is in progress, while the backlit Wi-Fi icon staying lit indicates a successful connection, and the same applies in standby mode. Long press the Wi-Fi icon again to stop the connection.
Download hOn App

First, download the hOn app and install it on your portable device. Then register your hood.


NOTE
Get ready to add your appliance
Stay close to your appliance. While in front of your appliance, ensure that your smartphone is connected to a 2.4GHz Wi-Fi network with a strong signal.
CHANGE WI-FI SETTINGS
Public networks are not allowed due to low security and reliability. Prepare to enter your home Wi-Fi password.
The image of the hood is for presentation purposes only and may not be perfectly representative.
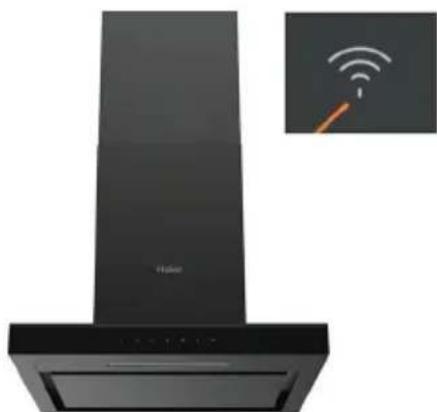
1- Press the Wi-Fi button until the icon starts blinking. When the pairing is completed, the Wi-Fi icon will stay on.
MAINTENANCE
Before cleaning, switch off the unit and unplug it.
I. Regular Cleaning
Use a soft cloth moistened with hand-warm, mildly soapy water or household cleaning detergent. Never use metal pads, chemical, abrasive materials, or stiff brushes to clean the unit.
II. Monthly Cleaning for Grease Filter
ESSENTIAL: Clean the filter every month to prevent any risk of fire.
The filter collects grease, smoke, and dust... so the filter directly affects the efficiency of the cooker hood. If not cleaned, the grease residue (potentially flammable) will saturate on the filter. Clean it with household cleaning detergent.
III. Annual Cleaning for Activated Carbon Filter
Apply SOLELY to units installed as a recirculation unit (not vented to the outside). This filter traps odors and must be replaced at least once a year
depending on how frequently the cooker hood is used.
IV. Changing a Light Bulb
Remove the screws on the glass, take off the hood glass. Find the bulb that requires replacement; you will find it located in the light fixture which is inside the exposed section of the canopy.
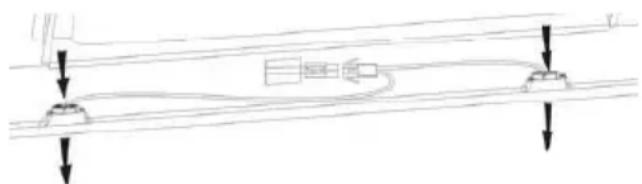
Disconnect the light wiring point and remove the bulb holders and wiring from the hood. Important: It is not possible to replace the bulbs individually; it will be necessary to obtain the bulbs, bulb holders, and wiring as a complete part. (LED light: MAX 1.5W)
Fit the replacement bulbs, bulb holders, and wiring in the same manner as the originals. Then reconnect the light wiring point.
Refit the hood glass and fasten the glass screws. Make sure the screws are fully tightened.
TROUBLESHOOTING
| Fault | Cause | Solution |
| Light on, but fan does not work | The fan blade is jammed. | Switch off the unit and repair by qualified service personnel only. |
| The motor is damaged. | ||
| Both light and fan do not work | Halogen light bulb burn. | Replace the bulb with correct rating. |
| Power cord looses. | Plug in to the power supply again. | |
| Serious Vibration of the unit | The fan blade is damaged. | Switch of the unit and repair by qualified service personnel only. |
| The fan motor is not fixed tightly. | Switch off the unit and repair by qualified service personnel only. | |
| The unit is not hung properly on the bracket. | Take down the unit and check whether the bracket is in proper location. | |
| Suction performance not good | Too long distance between the unit and the cooking plane | Readjust the distance to 65-75cm |
| Technology Wi-Fi | |
| Standard 802.11 b/g/n | |
| Frequency Band(s)[MHz] | 2400 MHz - 2483.5 MHz |
| Maximum Power[mW] | 100 mW |
| Product information for networked equipment | |
| power consumption of the product in networked standby if all wired network ports are connected and all wireless network ports are activated: | 2W |
| How to activate wireless network port: | If the Hood has been enrolled with the APP, turn on the Hood to activate wireless network port. |
| How to deactivate wireless network port: | If the Hood has been enrolled with the APP, turn off the Hood to deactivate wireless network port. If the Hood hasn't been enrolled with the APP, wireless network port will be deactivated even the Hood is on. |
CUSTOMER ASSISTANCE SERVICE
If you cannot identify the cause of the operating anomaly, switch off the appliance and contact the Assistance Service.
PRODUCT SERIAL NUMBER. Where can I find it?
It is important to inform the Assistance Service of your product code and its serial number (a 16-character code that begins with the number 3); this can be found on the guarantee certificate or on the data plate located on the appliance.
This will help avoid wasted trips by technicians, thereby (and most significantly) saving the corresponding callout charges.
This appliance is marked according to the European directive 2012/19/EU on Waste Electrical and Electronic Equipment (WEEE).

WEEE contains both polluting substances (which can cause negative consequences for the environment) and basic components (which can be re-used). It is important to have WEEE subjected to specific
treatments, in order to remove and dispose of all pollutants properly, and to recover and recycle all materials.
Individuals can play an important role in ensuring that WEEE does not become an environmental issue; it is essential to follow some basic rules:
WEEE should not be treated as household waste;
WEEE should be handed over to the relevant collection points managed by the municipality or by registered companies. In many countries, for large WEEE, home collection may be available.
In many countries, when you buy a new appliance, the old one may be returned to the retailer, who has to collect it free of charge on a one-to-one basis, as long as the equipment is of equivalent type and has the same functions as the supplied equipment.
Get ready to add your appliance
Stay close to your appliance. While in front of your appliance, ensure that your smartphone is connected to a 2.4GHz Wi-Fi network with a stronger signal.
CHANGE WI-FI SETTINGS
Public networks are not allowed due to low security and reliability. Prepare to enter your Home Wi-Fi password.

Blue = N (Neutral)
Get ready to add your appliance
Stay close to your appliance. While in front of your appliance, ensure that your smartphone is connected to a 2.4GHz Wi-Fi network with a stronger signal.
CHANGE WI-FI SETTINGS
Public networks are not allowed due to low security and reliability. Prepare to enter your Home Wi-Fi password.
HAIER HOOD REGISTRATION
Blue = N (Neutral) or NEUTRAL
Green and yellow = E (Earth) or GROUND
Get ready to add your appliance
Stay close to your appliance. While in front of your appliance, ensure that your smartphone is connected to a 2.4GHz Wi-Fi network with a stronger signal.
CHANGE WI-FI SETTINGS
Public networks are not allowed due to low security and reliability. Prepare to enter your Home Wi-Fi password.
REGISTRATION OF A HAIER HOOD
INSTALLATION (INDOOR VENTING)
Get ready to add your appliance
Stay close to your appliance. While in front of your appliance, ensure that your smartphone is connected to a 2.4GHz Wi-Fi network with a stronger signal.
CHANGE WI-FI SETTINGS
Public networks are not allowed due to low security and reliability. Prepare to enter your Home Wi-Fi password.
REGISTRATION OF HAIER EXTRACTOR HOOD
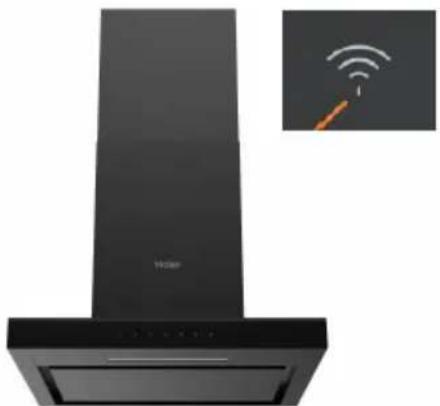
The sole purpose of the image is to present the extractor hood. It may not be fully representative.
TROUBLESHOOTING 113
CUSTOMER SERVICE 114
INTRODUCTION
Thank you for choosing this extractor hood.
Get ready to add your appliance
Stay close to your appliance. While in front of your appliance, ensure that your smartphone is connected to a 2.4GHz Wi-Fi network with a stronger signal.
CHANGE WI-FI SETTINGS
Public networks are not allowed due to low security and reliability. Prepare to enter your Home Wi-Fi password.
REGISTRATION OF HAIER EXTRACTOR HOOD
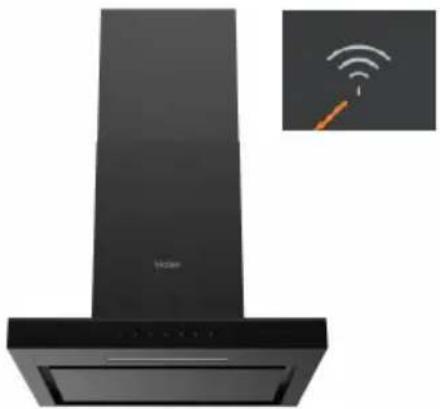
The sole purpose of the image is to present the extractor hood. It may not be fully representative.
1- Press the WiFi button until the icon starts blinking. Once pairing is complete, the WiFi icon will be on.
MAINTENANCE
Get ready to add your appliance
Stay close to your appliance. While in front of your appliance, ensure that your smartphone is connected to a 2.4GHz Wi-Fi network with a stronger signal.
CHANGE WI-FI SETTINGS
Public networks are not allowed due to low security and reliability. Prepare to enter your Home Wi-Fi password.
REGISTRATION OF HAIER EXHAUSTER
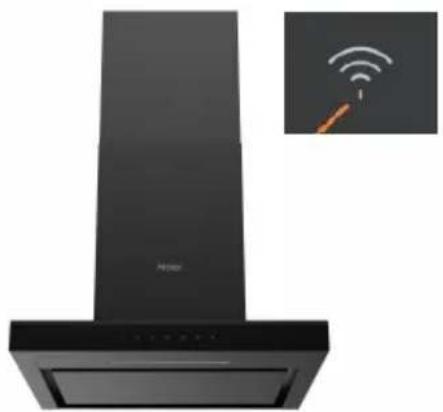
INSTALLATION (RECIRCULATION) 146
INSTALLATION (Wall mounting)
INSTALLATION (RECIRCULATION)
Get ready to add your appliance
Stay close to your appliance. While in front of your appliance, ensure that your smartphone is connected to a 2.4GHz Wi-Fi network with a stronger signal.
CHANGE WI-FI SETTINGS
Public networks are not allowed due to low security and reliability. Prepare to enter your Home Wi-Fi password.
Get ready to add your appliance
Stay close to your appliance. While in front of your appliance, ensure that your smartphone is connected to a 2.4GHz Wi-Fi network with a stronger signal.
CHANGE WI-FI SETTINGS
Public networks are not allowed due to low security and reliability. Prepare to enter your Home Wi-Fi password.
REJESTRACJA OKAPU HAIER
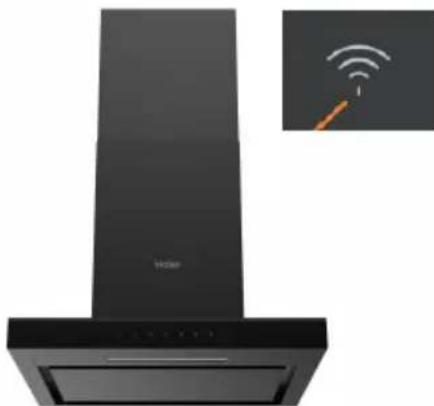
INSTALLATION (EXTERNAL VENTING) 177
INSTALLATION (RECIRCULATION) 184
DESCRIPTION OF PARTS 185
OPERATION 185
MAINTENANCE 188
TROUBLESHOOTING 189
COMPLIANCE WITH DIRECTIVES 190
ENVIRONMENTAL PROTECTION 190
INTRODUCTION
INSTALLATION (RECIRCULATION)
Get ready to add your appliance.

Stay close to your appliance

While in front of your appliance, ensure that your smartphone is connected to a 2.4GHz Wi-Fi network with a stronger signal

Public networks are not allowed due to low security and reliability.

Prepare to enter your Home Wi-Fi password.
REGISTRATION OF HAIER EXTRACTOR HOOD
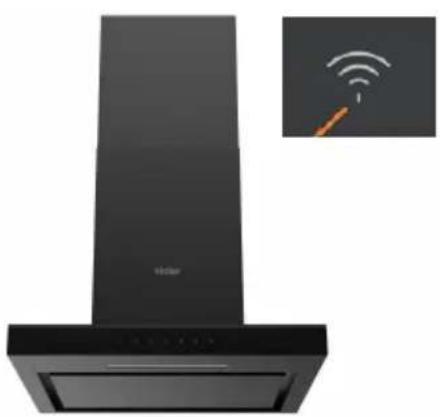
Get ready to add your appliance
Stay close to your appliance 2 While in front of your appliance, ensure that your smartphone is connected to a 2.4GHz Wi-Fi network with a stronger signal
CHANGE WI-FI SETTINGS
3 Public networks are not allowed due to low security and reliability. Prepare to enter your Home Wi-Fi password.
REGISTRATION OF THE HAIER EXTRACTOR HOOD
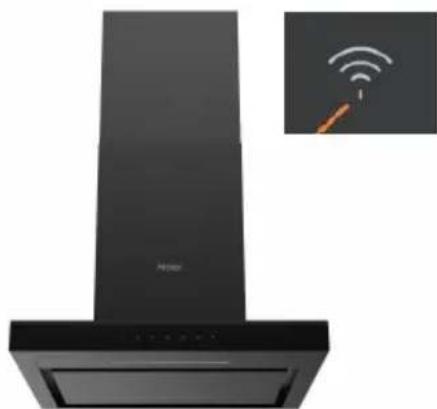
The image of the extractor hood is only for reference. It may not be accurate.
CUSTOMER SERVICE FOR APPLIANCES
If you are unable to provide the required information, deactivate the appliance and contact the support service.
Get ready to add your appliance

Stay close to your appliance

While in front of your appliance, ensure that your smartphone is connected to a 2.4GHz Wi-Fi network with a stronger signal
CHANGE WI-FI SETTINGS

Public networks are not allowed due to low security and reliability.

Prepare to enter your Home Wi-Fi password.
REGISTER YOUR HAIER APPLIANCE
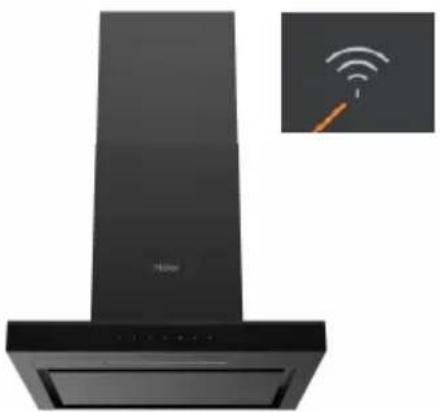
Get ready to add your appliance

Stay close to your appliance

While in front of your appliance, ensure that your smartphone is connected to a 2.4GHz Wi-Fi network with a stronger signal
CHANGE WI-FI SETTINGS

Public networks are not allowed due to low security and reliability.

Prepare to enter your Home Wi-Fi password.
REGISTERING YOUR HAIER APPLIANCE
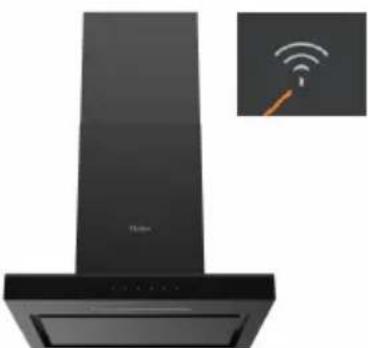
You need to insert the power plug into the socket and not use an extension cord.
- First, you need to insert the plug into the socket, as shown in the figure below:

- Secure the bracket on the T-shaped plastic outlet with 2 screws ST3.5x12 mm.
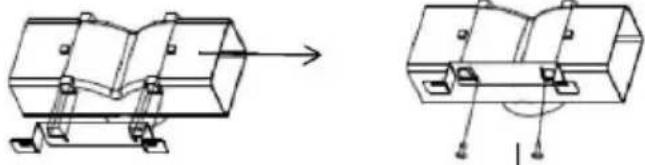
Get ready to add your appliance

Stay close to your appliance

While in front of your appliance, ensure that your smartphone is connected to a 2.4GHz Wi-Fi network with a stronger signal
CHANGE WI-FI SETTINGS

Public networks are not allowed due to low security and reliability.

Prepare to enter your Home Wi-Fi password.
REGISTERING YOUR HAIER VACUUM CLEANER
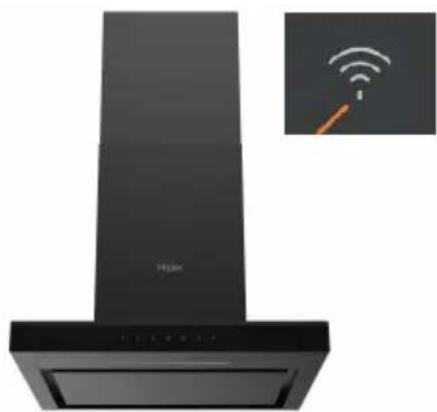
The image of the vacuum cleaner is for illustrative purposes only. It may not fully represent the actual model.
Get ready to add your appliance

Stay close to your appliance

While in front of your appliance, ensure that your smartphone is connected to a 2.4GHz Wi-Fi network with a stronger signal
CHANGE WI-FI SETTINGS

Public networks are not allowed due to low security and reliability.

Prepare to enter your Home Wi-Fi password.
REGISTRATION OF THE HAIER VACUUM CLEANER

Get ready to add your appliance

Stay close to your appliance

While in front of your appliance, ensure that your smartphone is connected to a 2.4GHz Wi-Fi network with a stronger signal
CHANGE WI-FI SETTINGS

Public networks are not allowed due to low security and reliability.

Prepare to enter your Home Wi-Fi password.
HAIER HOOD REGISTRATION
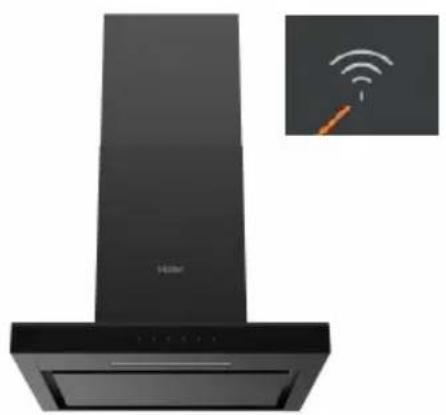
The image of the hood is for illustrative purposes only. It may not be fully representative.
CUSTOMER SUPPORT SERVICE
Get ready to add your appliance
Stay close to your appliance 2 While in front of your appliance, ensure that your smartphone is connected to a 2.4GHz Wi-Fi network with a stronger signal
CHANGE WI-FI SETTINGS
3 Public networks are not allowed due to low security and reliability. Prepare to enter your Home Wi-Fi password.
HAIER HOOD REGISTRATION

- INSTALLATION AND USER'S MANUAL
- CONTENT
- INTRODUCTION
- THANK YOU FOR CHOOSING THIS COOKER HOOD
- SAFETY PRECAUTION
- ELECTRICAL SHOCK HAZARD
- ELECTRICAL INSTALLATION
- DIRECT CONNECTION
- WARNING: THIS IS A CLASS I APPLIANCE AND MUST BE EARTHED
- STANDARD INSTALLATION ACCESSORIES LIST
- INSTALLATION (AIR DEFLECTOR)
- INSTALLATION (VENT INSIDE)
- NOTE
- DESCRIPTION OF COMPONENTS
- CONFIGURATION
- MEDIUM SPEED BUTTON
- HIGH SPEED BUTTON
- B BOOST 1(SPEED 4)
- B+BOOST 2 (SPEED 5)
- LIGHT: SHORT PRESS FOR LIGHTING ON & OFF
- WI-FI CONNECTION
- STANDBY MODE
- LOW SPEED BUTTON
- BOOSTER FUNCTION
- LIGHT
- SHORT PRESS TO TURN THE LIGHT ON AND OFF
- DOWNLOAD HON APP
- GET READY TO ADD YOUR APPLIANCE
- CHANGE WI-FI SETTINGS
- MAINTENANCE
- REGULAR CLEANING
- MONTHLY CLEANING FOR GREASE FILTER
- ANNUAL CLEANING FOR ACTIVATED CARBON FILTER
- CHANGING A LIGHT BULB
- CUSTOMER ASSISTANCE SERVICE
- HAIER HOOD REGISTRATION
- REGISTRATION OF A HAIER HOOD
- INSTALLATION (INDOOR VENTING)
- REGISTRATION OF HAIER EXTRACTOR HOOD
- THANK YOU FOR CHOOSING THIS EXTRACTOR HOOD
- REGISTRATION OF HAIER EXHAUSTER
- INSTALLATION (WALL MOUNTING)
- INSTALLATION (RECIRCULATION)
- REJESTRACJA OKAPU HAIER
- REGISTRATION OF THE HAIER EXTRACTOR HOOD
- CUSTOMER SERVICE FOR APPLIANCES
- REGISTER YOUR HAIER APPLIANCE
- REGISTERING YOUR HAIER APPLIANCE
- REGISTERING YOUR HAIER VACUUM CLEANER
- REGISTRATION OF THE HAIER VACUUM CLEANER
- CUSTOMER SUPPORT SERVICE
Brand : HAIER
Model : HATS6CBS4BWIFI
Category : Range hood