
129LK - Brush cutter HUSQVARNA - Free user manual and instructions
Find the device manual for free 129LK HUSQVARNA in PDF.




| Product type | Petrol brushcutter |
| Brand | Husqvarna |
| Model | 129LK |
| Weight (without fuel or accessories) | 6.0 kg |
| Power source | 2-stroke petrol/oil mixture (ratio 1:50 with Husqvarna oil or 1:33 with other oils) |
| Fuel tank capacity | 0.34 L |
| Cylinder displacement | 27.6 cm³ |
| Maximum engine speed | 8500 rpm |
| Idle speed | 3200-3600 rpm |
| Spark plug | NGK CMR6A (gap 0.5 mm) |
| Main functions | Weeding, clearing, cutting, sweeping, scraping |
| Compatible accessories | Weed trimmer head T25, guard, optional accessories (sweeper, hedge trimmer, edger, saw, cultivator) |
| Routine maintenance | Air filter cleaning (every 25h), spark plug check, shaft lubrication (every 30h), cooling system cleaning |
| Safety | Mandatory protective equipment (helmet, ear protectors, goggles, gloves, boots), safety distance 15 m, stop engine before intervention |
| Repairability | Have complex repairs done by an authorised workshop; spare parts available from Husqvarna dealer |
| Warranty | Professional assistance by authorised dealer |
| Sound level (acoustic pressure) | 95 dB(A) measured at ear level |
| Guaranteed sound power level | 114 dB(A) |
Frequently Asked Questions - 129LK HUSQVARNA
User questions about 129LK HUSQVARNA
0 question about this device. Answer the ones you know or ask your own.
Ask a new question about this device
Download the instructions for your Brush cutter in PDF format for free! Find your manual 129LK - HUSQVARNA and take your electronic device back in hand. On this page are published all the documents necessary for the use of your device. 129LK by HUSQVARNA.
USER MANUAL 129LK HUSQVARNA
GB Operator's manual 2-24
SE Bruksanvisning 25-47
DK Brugsanvisning 48-70
NO Bruksanvisning 71-93
Symbols on the machine and/or in the manual:
WARNING! Clearing saws, brushcutters and trimmers can be dangerous! Careless or incorrect use can result in serious or fatal injury to the operator or others. It is extremely

important that you read and understand the contents of the operator's manual.
Please read the operator's manual carefully and make sure you understand the instructions before using the machine.

Always wear:
Wear a protective helmet where there is a risk of falling objects
Approved hearing protection Approved eye protection

Max. speed of output shaft, rpm

max 000rpm
This product is in accordance with applicable EC directives.

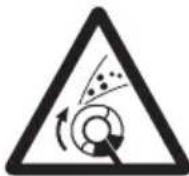
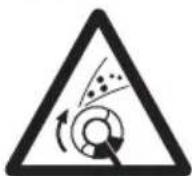
Watch out for thrown objects and ricochets. (129L, 129LK)
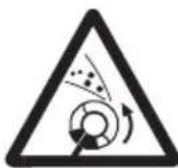
Watch out for thrown objects and ricochets. (129C)
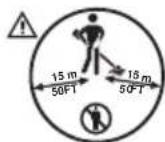
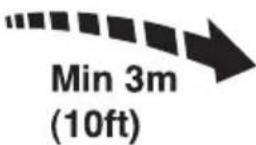
The operator of the machine must ensure, while working, that no persons or animals come closer than 15 meters.
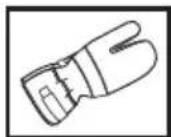
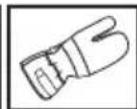
Always wear approved protective gloves.

Wear sturdy, non-slip boots.
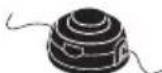
Only use non-metallic, flexible cutting attachments, i.e. trimmer heads with trimmer cord.


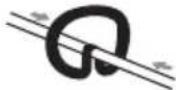
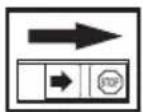
Arrows which show limits for handle positioning.
Noise emission to the environment according to the European Community's Directive. The machine's emission is specified in the Technical data chapter and on the label.

Other symbols/decals on the machine refer to special certification requirements for certain markets.
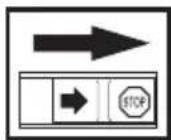
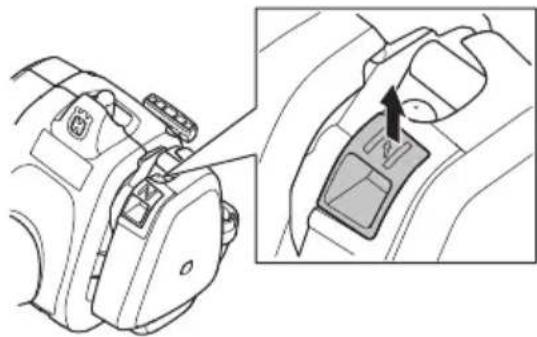
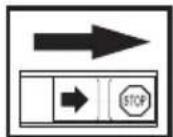
The engine is switched off by moving the stop switch to the stop position. CAUTION! The stop switch automatically returns to the start position. In order to prevent unintentional starting, the spark plug must be removed from the spark plug when performing maintenance.
Always wear approved protective gloves.
Regular cleaning is required.
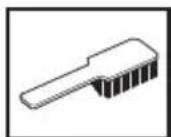
Visual check.

CONTENTS
Contents
KEY TO SYMBOLS
Symbols on the machine and/or in the manual: ... 2
CONTENTS
Contents 3
Note the following before starting: 3
INTRODUCTION
Dear Customer, 4
WHAT IS WHAT?
What is what on the grass trimmer? 5
GENERAL SAFETY PRECAUTIONS
Important 6
Personal protective equipment 6
Machine's safety equipment 7
Cutting equipment 9
ASSEMBLY
Fitting the loop handle 10
Assembling and dismantling the two-piece shaft . 10
Assembling the cutting equipment 11
Fitting the trimmer guard and trimmer head 11
Fitting the trimmer guard and trimmer head 11
FUEL HANDLING
Fuel safety 12
Fuel 12
Fueling 13
STARTING AND STOPPING
Check before starting 14
Starting and stopping 14
WORKING TECHNIQUES
General working instructions 16
MAINTENANCE
Carburettor 18
Muffler 18
Cooling system 19
Spark plug 19
Two-piece shaft 19
Air filter 20
Maintenance schedule 21
TECHNICAL DATA
Technical data 22
EC Declaration of Conformity 24
Note the following before starting:
Please read the operator's manual carefully.

WARNING! Long-term exposure to noise can result in permanent hearing impairment. So always use approved hearing protection.

WARNING! Under no circumstances may the design of the machine be modified without the permission of the manufacturer. Always use original accessories. Non-authorized modifications and/or accessories can result in serious personal injury or the death of the operator or others.

WARNING! A clearing saw, brushcutter or trimmer can be dangerous if used incorrectly or carelessly, and can cause serious or fatal injury to the operator or others. It is extremely important that you read and understand the contents of this operator's manual.
INTRODUCTION
Dear Customer,
Congratulations on your choice to buy a Husqvarna product! Husqvarna is based on a tradition that dates back to 1689, when the Swedish King Karl XI ordered the construction of a factory on the banks of the Husqvarna River, for production of muskets. The location was logical, since water power was harnessed from the Huskvarna River to create the water-powered plant. During the more than 300 years in existence, the Husqvarna factory has produced a lot of different products, from wood stoves to modern kitchen appliances, sewing machines, bicycles, motorcycles etc. In 1956, the first motor driven lawn mowers appeared, followed by chain saws in 1959, and it is within this area Husqvarna is working today.
Today Husqvarna is one of the leading manufacturers in the world of forest and garden products, with quality as our highest priority. The business concept is to develop, manufacture and market motor-driven products for forestry and gardening, as well as for the building and construction industry. Husqvarna's aim is also to be at the front edge for ergonomics, usability, security and environmental protection. That is the reason why we have developed many different features to add to our products within these areas.
We are convinced that you will appreciate with great satisfaction the quality and performance of our product for a very long time to come. The purchase of one of our products gives you access to professional help with repairs and service whenever this may be necessary. If the retailer who sells your machine is not one of our authorised dealers, ask for the address of your nearest service workshop.
It is our wish that you will be satisfied with your product and that it will be your companion for a long time. Think of this operator's manual as a valuable document. By following its content (usage, service, maintenance, etc), the life span and the second-hand value of the machine can be extended. If you sell this machine, make sure that the operator's manual is passed on to the buyer.
Thank you for using a Husqvarna product.
Husqvarna AB has a policy of continuous product development and therefore reserves the right to modify the design and appearance of products without prior notice.
WHAT IS WHAT?
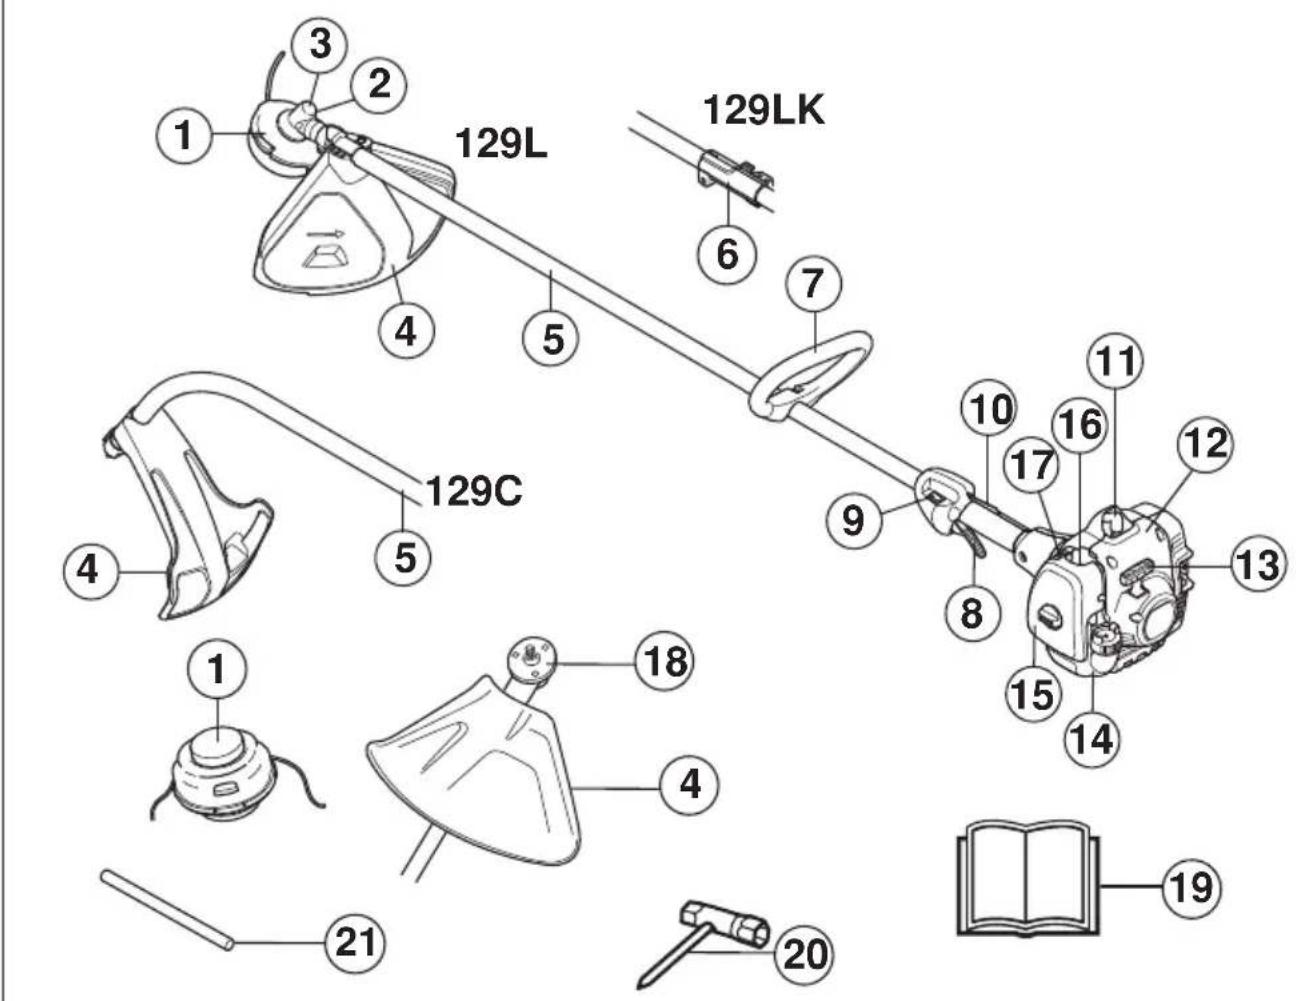
What is what on the grass trimmer?
1 Trimmer head 2 Grease filler cap, bevel gear 3 Bevel gear 4 Cutting attachment guard 5 Shaft 6 Shaft coupling 7 Loop handle 8 Throttle trigger 9 Stop switch 10 Throttle trigger lockout 11 Spark plug cap and spark plug
12 Starter housing 13 Starter handle 14 Fuel tank 15 Air filter cover 16 Primer bulb 17 Choke control 18 Drive disc 19 Operator's manual 20 Combination spanner 21 Locking pin
Important Personal protective equipment
IMPORTANT!
The machine is only designed for grass trimming and grass clearing.
The only accessories you can operate with this engine unit are the cutting attachments we recommend in the chapter on Technical data.
Never use the machine if you are tired, if you have drunk alcohol, or if you are taking medication that could affect your vision, your judgement or your co-ordination.
Wear personal protective equipment. See instructions under the "Personal protective equipment" heading.
Never use a machine that has been modified in any way from its original specification.
Never use a machine that is faulty. Carry out the safety checks, maintenance and service instructions described in this manual. Some maintenance and service measures must be carried out by trained and qualified specialists. See instructions under the Maintenance heading.
All covers, guards and handles must be fitted before starting. Ensure that the spark plug cap and ignition lead are undamaged to avoid the risk of electric shock.
The operator of the machine must ensure, while working, that no persons or animals come closer than 15 meters.
Carry out an overall inspection of the machine before use. See the maintenance schedule.

WARNING! This machine produces an electromagnetic field during operation. This field may under some circumstances interfere with active or passive medical implants. To reduce the risk of serious or fatal injury, we recommend persons with medical implants to consult their physician and the medical implant manufacturer before operating this machine.

WARNING! Running an engine in a confined or badly ventilated area can result in death due to asphyxiation or carbon monoxide poisoning.

WARNING! Never allow children to use or be in the vicinity of the machine. As the machine is equipped with a spring-loaded stop switch and can be started by low speed and force on the starter handle, even small children under some circumstances can produce the force necessary to start the machine. This can mean a risk of serious personal injury. Therefore remove the spark plug cap when the machine is not under close supervision.
IMPORTANT!
A clearing saw, brushcutter or trimmer can be dangerous if used incorrectly or carelessly, and can cause serious or fatal injury to the operator or others. It is extremely important that you read and understand the contents of this operator's manual.
You must use approved personal protective equipment whenever you use the machine. Personal protective equipment cannot eliminate the risk of injury but it will reduce the degree of injury if an accident does happen. Ask your dealer for help in choosing the right equipment.

WARNING! Listen out for warning signals or shouts when you are wearing hearing protection. Always remove your hearing protection as soon as the engine stops.
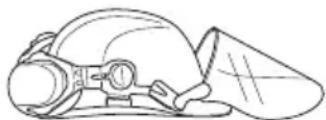
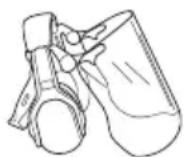
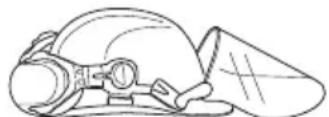
HELMET
Wear a protective helmet where there is a risk of falling objects
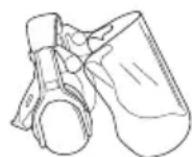
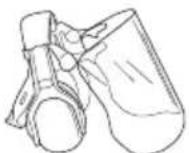
HEARING PROTECTION
Wear hearing protection that provides adequate noise reduction.
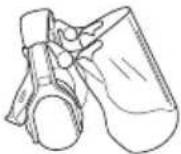
EYE PROTECTION
Always wear approved eye protection. If you use a visor then you must also wear approved protective goggles. Approved protective goggles must comply with the ANSI Z87.1 standard in the USA or EN 166 in EU countries.

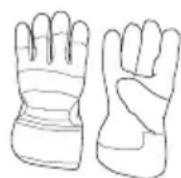
GLOVES
Gloves should be worn when necessary, e.g. when fitting cutting attachments.
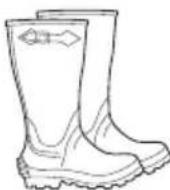
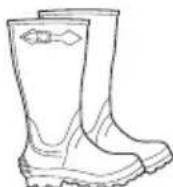
BOOTS
Wear sturdy, non-slip boots.
CLOTHING
Wear clothes made of a strong fabric and avoid loose clothing that can catch on twigs and branches. Always wear heavy, long pants. Do not wear jewellery, shorts sandals or go barefoot. Secure hair so it is above shoulder level.
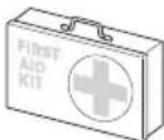
FIRST AID KIT
Always have a first aid kit nearby.

Machine's safety equipment
This section describes the machine's safety equipment, its purpose, and how checks and maintenance should be carried out to ensure that it operates correctly. See the "What is what?" section to locate where this equipment is positioned on your machine.
The life span of the machine can be reduced and the risk of accidents can increase if machine maintenance is not carried out correctly and if service and/or repairs are not carried out professionally. If you need further information please contact your nearest service workshop.
IMPORTANT!
All servicing and repair work on the machine requires special training. This is especially true of the machine's safety equipment. If your machine fails any of the checks described below you must contact your service agent. When you buy any of our products we guarantee the availability of professional repairs and service. If the retailer who sells your machine is not a servicing dealer, ask him for the address of your nearest service agent.

WARNING! Never use a machine with faulty safety equipment. The machine's safety equipment must be checked and maintained as described in this section. If your machine fails any of these checks contact your service agent to get it repaired.
Throttle trigger lockout
The throttle lockout is designed to prevent accidental operation of the throttle control. When you press the lock (A) (i.e. when you grasp the handle) it releases the throttle control (B). When you release the handle the throttle control and the throttle lockout both move back to their original positions. This movement is controlled by two independent return springs. This arrangement means that the throttle control is automatically locked at the idle setting.
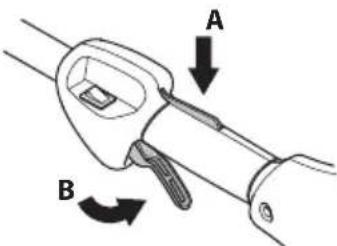
Make sure the throttle control is locked at the idle setting when the throttle lockout is released.
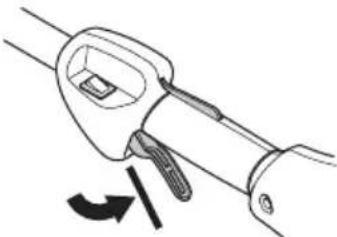
Press the throttle lockout and make sure it returns to its original position when you release it.
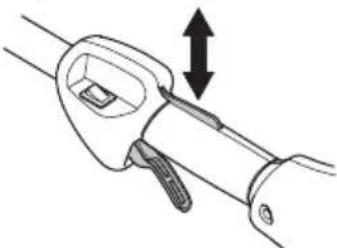
Check that the throttle trigger and throttle lockout move freely and that the return springs work properly.
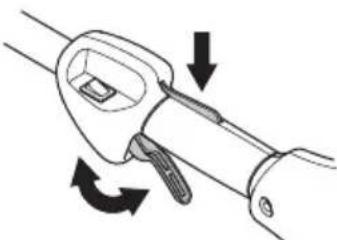
See instructions under the heading Start. Start the machine and apply full throttle. Release the throttle and check that the cutting attachment stops and remains at a standstill. If the cutting attachment rotates with the throttle in the idle position then the carburettor idle setting must be checked. See instructions under the heading Maintenance.
GENERAL SAFETY PRECAUTIONS
Stop switch
Use the stop switch to switch off the engine.
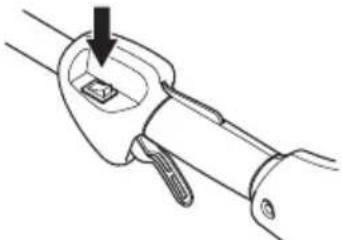
Start the engine and make sure the engine stops when you move the stop switch to the stop setting.
Cutting attachment guard

This guard is intended to prevent loose objects from being thrown towards the operator. The guard also protects the operator from accidental contact with the cutting attachment.
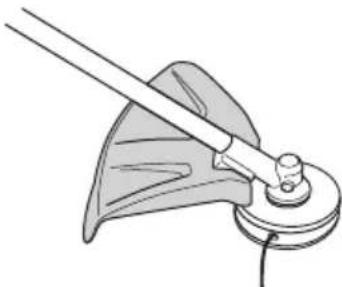
Check that the guard is undamaged and not cracked. Replace the guard if it has been exposed to impact or is cracked.
Always use the recommended guard for the cutting attachment you are using. See chapter on Technical data.

WARNING! Never use a cutting attachment without an approved guard. See the chapter on Technical data. If an incorrect or faulty guard is fitted this can cause serious personal injury.
Muffler
The muffler is designed to keep noise levels to a minimum and to direct exhaust fumes away from the user. A muffler fitted with a catalytic converter is also designed to reduce harmful exhaust gases.
In countries that have a warm and dry climate there is a significant risk of fire. We therefore fit certain mufflers with a spark arrestor mesh. Check whether the muffler on your machine is fitted with this kind of mesh.
For mufflers it is very important that you follow the instructions on checking, maintaining and servicing your machine.
Never use a machine that has a faulty muffler.
Regularly check that the muffler is securely attached to the machine.
If the muffler on your machine is fitted with a spark arrester mesh this must be cleaned regularly. A blocked mesh will cause the engine to overheat and may lead to serious damage.

WARNING! Mufflers fitted with catalytic converters get very hot during use and remain so for some time after stopping. This also applies at idle speed. Contact can result in burns to the skin.
Remember the risk of fire!
GENERAL SAFETY PRECAUTIONS

WARNING! The inside of the muffler contain chemicals that may be carcinogenic. Avoid contact with these elements in the event of a damaged muffler.

WARNING! Bear in mind that:
The exhaust fumes from the engine are hot and may contain sparks which can start a fire. Never start the machine indoors or near combustible material!
Cutting equipment
This section describes how to choose and maintain your cutting equipment in order to:
- Obtain maximum cutting performance.
- Extend the life of cutting equipment.
IMPORTANT!
Only use cutting attachments with the guards we recommend! See the chapter on Technical data.
Refer to the instructions for the cutting attachment to check the correct way to load the cord and the correct cord diameter.

WARNING! Always stop the engine before doing any work on the cutting attachment. This continues to rotate even after the throttle has been released. Ensure that the cutting attachment has stopped completely and disconnect the spark plug cap before you start to work on it.

WARNING! A faulty cutting attachment may increase the risk of accidents.
Trimmer head
IMPORTANT!
Always ensure the trimmer cord is wound tightly and evenly around the drum, otherwise the machine will generate harmful vibration.
- Only use the recommended trimmer heads and trimmer cords. These have been tested by the manufacturer to suit a particular engine size. This is especially important when a fully automatic trimmer head is used. Only use the recommended cutting attachment. See the chapter on Technical data.
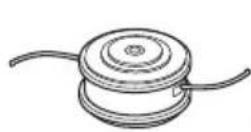

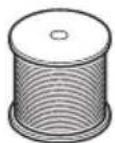
- Smaller machines generally require small trimmer heads and vice versa. This is because when clearing using a cord, the engine must throw out the cord radially from the trimmer head and overcome the resistance of the grass being cleared.
- The length of the cord is also important. A longer cord requires greater engine power than a shorter cord of the same diameter.
- Make sure that the cutter on the trimmer guard is intact. This is used to cut the cord to the correct length. To increase the life of the cord, it can be soaked in water for a couple of days before use. This will make the cord tougher so that it lasts longer.
Fitting the loop handle

- Clip the loop handle onto the shaft. Note that the loop handle must be fitted between the arrows on the shaft.
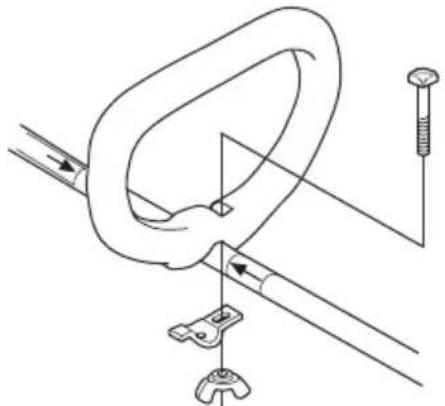
- Fit the bolt, securing plate, and wing nut as shown in the diagram. Tighten the wing nut.
Assembling and dismantling the two-piece shaft
(129LK)
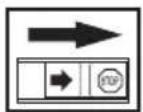
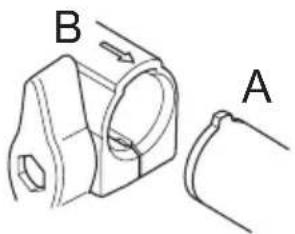
Assembly:
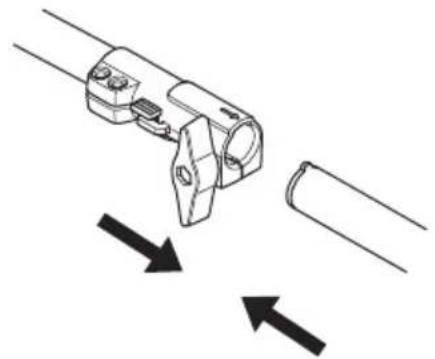
- Loosen the coupling by turning the knob.
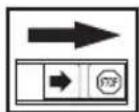
- Align the tab of the attachment (A) with the arrow on the coupling (B).
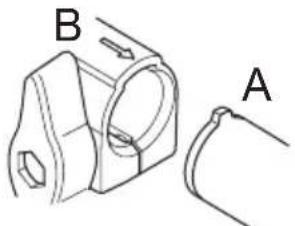
- Push the attachment into the coupling until the attachment snaps into place.
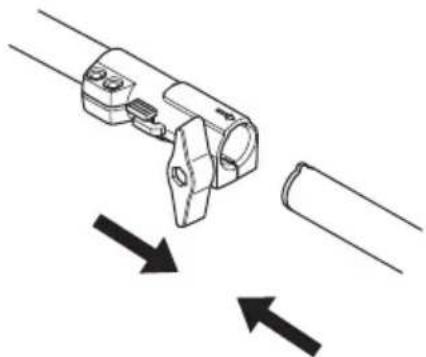
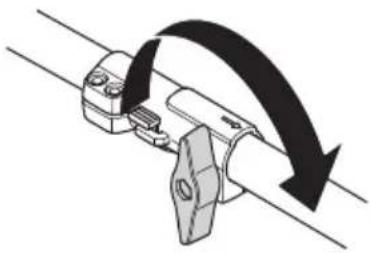
Before using the unit, tighten the knob securely.
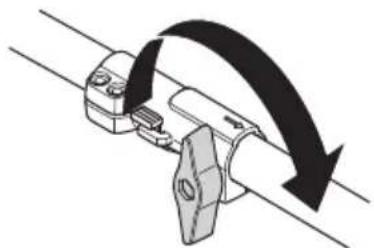
Dismantling:
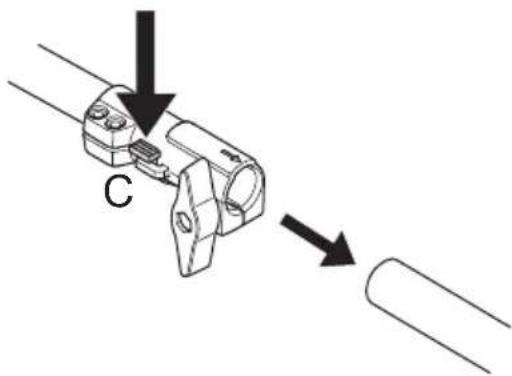
- Loosen the coupling by turning the knob (at least 3 times).
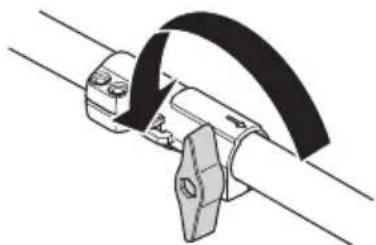
- Push and hold the button (C). While securely holding the engine end, pull the attachment straight out of the coupling.
Assembling the cutting equipment

WARNING! Never use a cutting attachment without an approved guard. See the chapter on Technical data. If an incorrect or faulty guard is fitted this can cause serious personal injury.
Fitting the trimmer guard and trimmer head
(129L, 129LK)
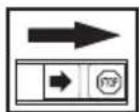
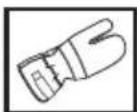
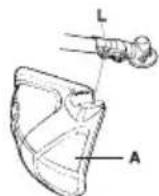
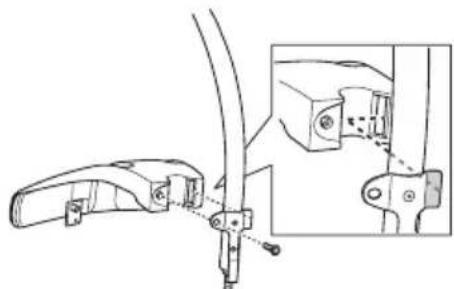
- Fit the correct trimmer guard (A) for use with the trimmer head. Hook the trimmer guard/combination guard onto the fitting on the shaft and secure with the bolt (L).
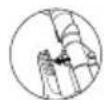
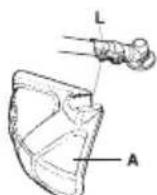
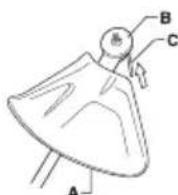
- Fit the drive disc (B) on the output shaft.
- Turn the output shaft until one of the holes in the drive disc aligns with the corresponding hole in the gear housing.
- Insert the locking pin (C) in the hole to lock the shaft.
- Screw on the trimmer head/plastic blades (H) in the opposite direction to the direction of rotation.
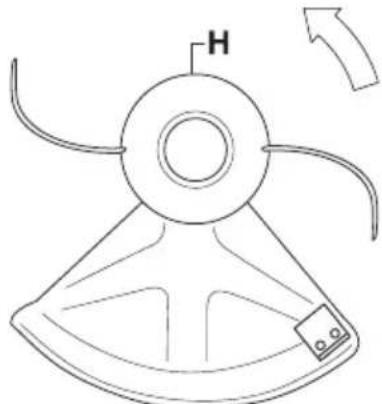
- To dismantle, follow the instructions in the reverse order.
Fitting the trimmer guard and trimmer head
(129C)
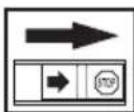
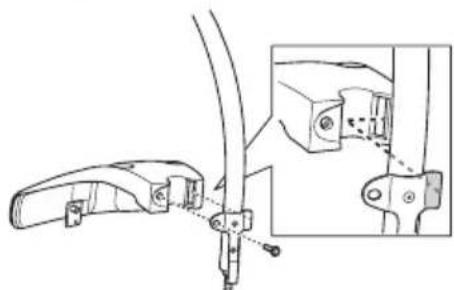
- Fit the guard as shown in the diagram. Tighten securely.
- Fit the dust cup on the shaft. The nut must be completely covered by the dust cup.
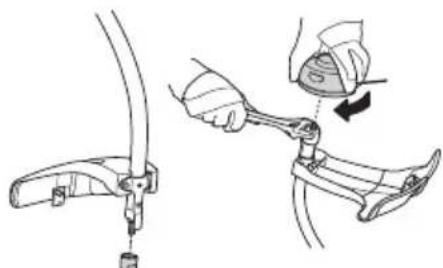
- Hold the dust cup with a spanner to prevent the shaft from rotating.
- Screw the trimmer head onto the shaft.
Fuel safety
Never start the machine:
1 If you have spilled fuel on it. Wipe off the spillage and allow remaining fuel to evaporate. 2 If you have spilled fuel on yourself or your clothes, change your clothes. Wash any part of your body that has come in contact with fuel. Use soap and water. 3 If the machine is leaking fuel. Check regularly for leaks from the fuel cap and fuel lines. In the event of leakage, contact your service agent.
Transport and storage
- Store and transport the machine and fuel so that there is no risk of any leakage or fumes coming into contact with sparks or open flames, for example, from electrical machinery, electric motors, electrical relays/ switches or boilers.
- When storing and transporting fuel always use approved containers intended for this purpose.
- When storing the machine for long periods the fuel tank must be emptied. Contact your local petrol station to find out where to dispose of excess fuel.
- Ensure the machine is cleaned and that a complete service is carried out before long-term storage.
- The transport guard must always be fitted to the cutting attachment when the machine is being transported or in storage.
- Secure the machine during transport.
- In order to prevent unintentional starting of the engine, the spark plug cap must always be removed during long-term storage, if the machine is not under close supervision and when performing all service measures.

WARNING! Take care when handling fuel. Bear in mind the risk of fire, explosion and inhaling fumes.
Fuel
CAUTION! The machine is equipped with a two-stroke engine and must always be run using a mixture of petrol and two-stroke oil. It is important to accurately measure the amount of oil to be mixed to ensure that the correct mixture is obtained. When mixing small amounts of fuel, even small inaccuracies can drastically affect the ratio of the mixture.

WARNING! Fuel and fuel fumes are highly inflammable and can cause serious injury when inhaled or allowed to come in contact with the skin. For this reason observe caution when handling fuel and make sure there is adequate ventilation.
Petrol

CAUTION! Always use a quality petrol/oil mixture at least 90 octane (RON). If your machine is equipped with a catalytic converter (see chapter on Technical data) always use a good quality unleaded petrol/oil mixture. Leaded petrol will destroy the catalytic converter.
Use low-emission petrol, also known as alkylate petrol, if it is available.
Ethanol blended fuel, E10 may be used (max 10% ethanol blend). Using ethanol blends higher than E10 will create lean running condition which can cause engine damage.
- The lowest octane recommended is 90 (RON). If you run the engine on a lower octane grade than 90 so-called knocking can occur. This gives rise to a high engine temperature, which can result in serious engine damage.
- When working at continuous high revs a higher octane rating is recommended.
Two-stroke oil
- For best results and performance use HUSQVARNA two-stroke engine oil, which is specially formulated for our air-cooled two-stroke engines.
- Never use two-stroke oil intended for water-cooled engines, sometimes referred to as outboard oil (rated TCW).
- Never use oil intended for four-stroke engines.
- A poor oil quality and/or too high oil/fuel ratio may jeopardise function and decrease the life time of catalytic converters.
- Mixing ratio 1:50 (2%) with HUSQVARNA two-stroke oil. 1:33 (3%) with oils class JASO FB or ISO EGB formulated for air-cooled, two-stroke engines.
| Petrol, litre | Two-stroke oil, litre | |
| 2% (1:50) 3% (1:33) | ||
| 5 0,10 0,15 | ||
| 10 0,20 0,30 | ||
| 15 0,30 0,45 | ||
| 20 0,40 0,60 | ||
FUEL HANDLING
Mixing
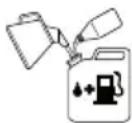
Always mix the petrol and oil in a clean container intended for fuel. Always start by filling half the amount of the petrol to be used. Then add the entire amount of oil. Mix (shake) the fuel mixture. Add the remaining amount of petrol. Mix (shake) the fuel mixture thoroughly before filling the machine's fuel tank.
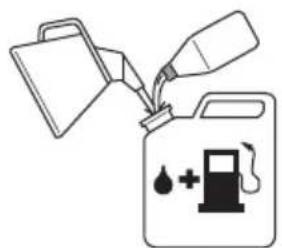
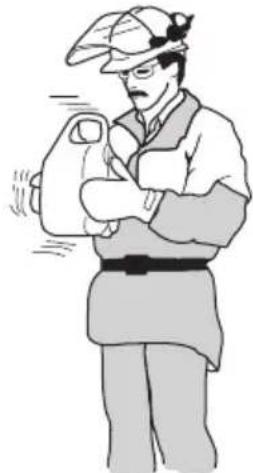

- Do not mix more than one month's supply of fuel at a time.
- If the machine is not used for some time, the fuel tank should be emptied and cleaned.

WARNING! The catalytic converter muffler gets very hot during and after use. This also applies during idling. Be aware of the fire hazard, especially when working near flammable substances and/or vapours.
Fueling

WARNING! Taking the following precautions will lessen the risk of fire:
Mix and pour fuel outdoors, where there are no sparks or flames.
Do not smoke or place hot objects near fuel.
Always shut off the engine before refuelling.
Always stop the engine and let it cool for a few minutes before refuelling.
When refuelling, open the fuel cap slowly so that any excess pressure is released gently.
Tighten the fuel cap carefully after refuelling.
Always move the machine away from the refuelling area and source before starting.
Always use a fuel container with an anti-spill valve. If you have spilled fuel on it, wipe off the spillage and allow remaining fuel to evaporate. Clean the area around the fuel cap. Contamination in the tank can cause operating problems. Ensure that the fuel is well mixed by shaking the container before filling the tank.
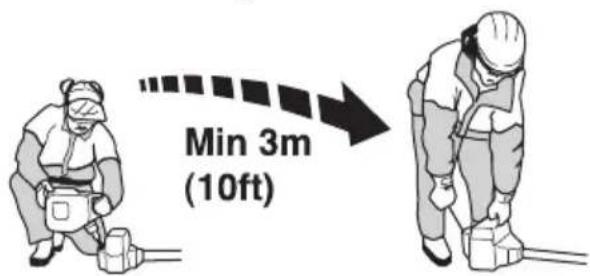
STARTING AND STOPPING
Check before starting

- Check that the trimmer head and trimmer guard are not damaged or cracked. Replace the trimmer head or trimmer guard if they have been exposed to impact or are cracked.
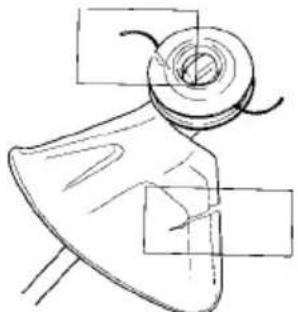
- Never use the machine without a guard nor with a defective guard.
- All covers must be correctly fitted and undamaged before you start the machine.
Starting and stopping


WARNING! The complete clutch cover and shaft must be fitted before the machine is started, otherwise the clutch can come loose and cause personal injury.
Always move the machine away from the refuelling area and source before starting. Place the machine on a flat surface. Ensure the cutting attachment cannot come into contact with any object.
Make sure no unauthorised persons are in the working area. Otherwise there is a risk of serious personal injury. The safety distance is 15 meters.
Starting a cold engine
Primer bulb: Press the air purge diaphragm repeatedly until fuel begins to fill the diaphragm (about 10 times). The diaphragm need not be completely filled.
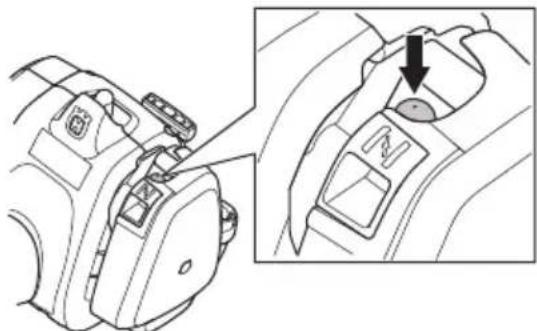
Choke: Set the choke control in the choke position.
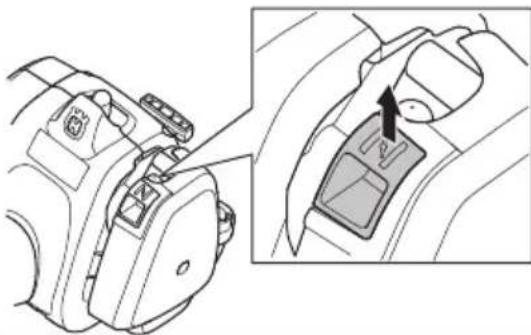

WARNING! When the engine is started with the choke in choke position the cutting attachment will start to rotate immediately.
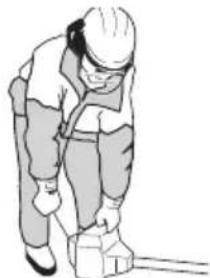
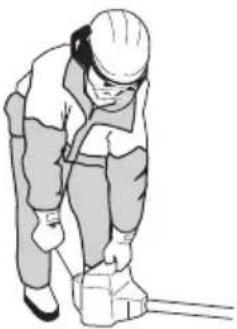
Hold the body of the machine on the ground using your left hand (CAUTION! Not with your foot!). Grip the starter handle, slowly pull out the cord with your right hand until you feel some resistance (the starter paws grip), now quickly and powerfully pull the cord. Never twist the starter cord around your hand.
NOTE!
Do not squeeze the throttle control while attempting to start the engine.
Repeat pulling the cord until the engine attempts to start (or a maximum of 3 pulls). If the engine starts or attempts to start, push the choke lever down to the run position. Keep pulling the cord powerfully until the engine starts. Once the engine starts, allow it to warm up for 30 seconds before applying full throttle.
CAUTION! Do not pull the starter cord all the way out and do not let go of the starter handle when the cord is fully extended. This can damage the machine.
Starting a warm engine
Primer bulb: Press the air purge repeatedly until fuel begins to fill the bulb. The bulb need not be completely filled.
Push the choke lever down to the run position. Keep pulling the cord powerfully until the engine starts. Once the engine starts, apply full throttle.
Stopping
Stop the engine by switching off the ignition.
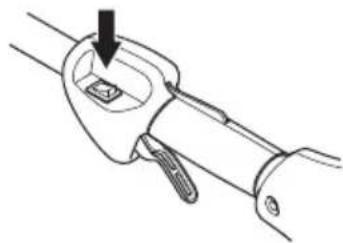
CAUTION! The stop switch automatically returns to the start position. To prevent unintentional starting, the spark plug cap must be removed from the spark plug when assembling, checking, and/or performing maintenance.
General working instructions
IMPORTANT!
This section covers the basic safety precautions for working with a trimmer.
If you encounter a situation where you are uncertain how to proceed, you should ask an expert. Contact your dealer or your service workshop.
Avoid all usage which you consider to be beyond your capability.
You must understand the difference between forestry clearing, grass clearing, and grass trimming before use.
Basic safety rules


1 Look around you: - To ensure that people, animals or other things cannot affect your control of the machine. To ensure that people, animals, etc., do not come into contact with the cutting attachment or loose objects that are thrown out by the cutting attachment. - CAUTION! Do not use the machine unless you are able to call for help in the event of an accident. 2 Inspect the working area. Remove all loose objects, such as stones, broken glass, nails, steel wire, string, etc. that could be thrown out or become wrapped around the cutting attachment. 3 Do not use the machine in bad weather, such as dense fog, heavy rain, strong wind, intense cold, etc. Working in bad weather is tiring and often brings added risks, such as icy ground. 4 Make sure you can move and stand safely.
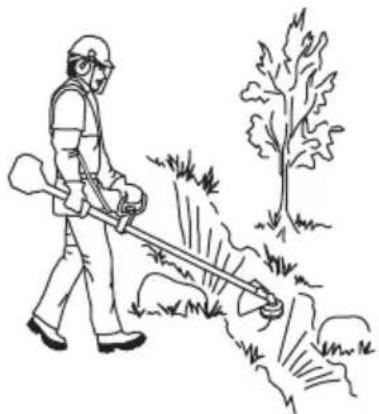
5 Keep a good balance and a firm foothold. Do not overreach. Keep proper footing and balance at all times.
6 Always hold the machine with both hands. Hold the machine on the right side of your body.
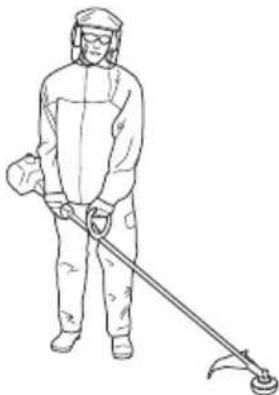
7 Keep the cutting attachment below waist level. 8 The engine must be switched off before moving. 9 Never put the machine down with the engine running unless you have it in clear sight.

WARNING! Neither the operator of the machine nor anyone else may attempt to remove the cut material while the engine is running or the cutting equipment is rotating, as this can result in serious injury.
Stop the engine and cutting equipment before you remove material that has wound around the blade shaft as otherwise there is a risk of injury. The bevel gear can get hot during use and may remain so for a while afterwards. You could get burnt if you touch it.

WARNING! Watch out for thrown objects. Always wear approved eye protection. Never lean over the cutting attachment guard. Stones, rubbish, etc. can be thrown up into the eyes causing blindness or serious injury.
Keep unauthorised persons at a distance. Children, animals, onlookers and helpers should be kept outside the safety zone of 15 metres. Stop the machine immediately if anyone approaches. Never swing the machine around without first checking behind you to make sure no-one is within the safety zone.
Basic working techniques
Always slow the engine to idle speed after each working operation. Long periods at full throttle without any load on the engine can lead to serious engine damage.

WARNING! Sometimes branches or grass get caught between the guard and cutting attachment. Always stop the engine before cleaning.
Grass trimming with a trimmer head

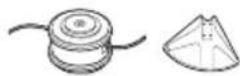
Trimming
- Hold the trimmer head just above the ground at an angle. It is the end of the cord that does the work. Let the cord work at its own pace. Never press the cord into the area to be cut.
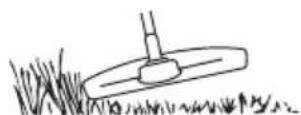
- The cord can easily remove grass and weeds up against walls, fences, trees and borders. However it can also damage sensitive bark on trees and bushes, and damage fence posts.
- Reduce the risk of damaging plants by shortening the cord to 10-12 cm and reducing the engine speed.
Clearing
- The clearing technique removes all unwanted vegetation. Keep the trimmer head just above the ground and tilt it. Let the end of the cord strike the ground around trees, posts, statues and the like. CAUTION! This technique increases the wear on the cord.
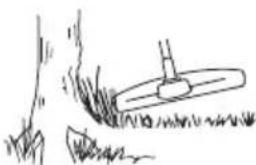
- The cord wears quicker and must be fed forward more often when working against stones, brick, concrete, metal fences, etc., than when coming into contact with trees and wooden fences.
- When trimming and clearing, you should use less than full throttle (80%) so that the cord lasts longer and to reduce the wear on the trimmer head.
Cutting
- The trimmer is ideal for cutting grass that is difficult to reach using a normal lawn mower. Keep the cord parallel to the ground when cutting. Avoid pressing the
trimmer head against the ground as this can ruin the lawn and damage the tool.
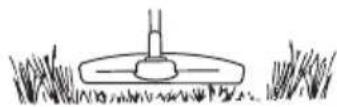
- Do not allow the trimmer head to constantly come into contact with the ground during normal cutting. Constant contact of this type can cause damage and wear to the trimmer head.
Sweeping
- The fan effect of the rotating cord can be used for quick and easy clearing up. Hold the cord parallel to and above the area to be swept and move the tool side to side.
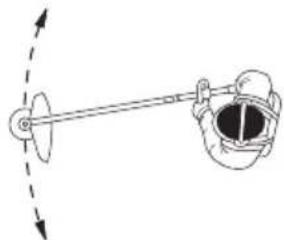
- When cutting and sweeping you should use full throttle to obtain the best results.
IMPORTANT! To avoid unbalance and vibrations in handles trimmer head cover need to be cleaned every time cord is refilled. In addition, check other part of the head if needed to be cleaned.
Carburettor
Adjustment of the idle speed
Before any adjustments are made, make sure that the air filter is clean and the air filter cover is fitted.
Adjust the idle speed using the idle adjustment screw T, if it is necessary to readjust. First turn the idle adjustment screw T clockwise until the cutting attachment starts to rotate. Then turn the screw anticlockwise until the cutting attachment stops. The idle speed is correctly adjusted when the engine will run smoothly in every position. The idle speed should also be well below the speed at which the cutting attachment starts to rotate.
Recommended idle speed: See the Technical data section.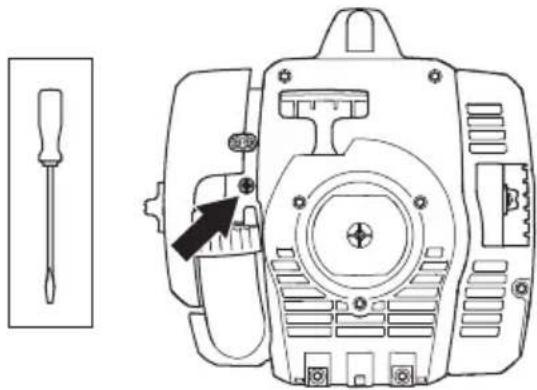

WARNING! If the idle speed cannot be adjusted so that the cutting attachment stops, contact your dealer/service workshop. Do not use the machine until it has been correctly adjusted or repaired.
Muffler
CAUTION! Some mufflers are fitted with a catalytic converter. See chapter on Technical data to see whether your machine is fitted with a catalytic converter.
The muffler is designed to reduce the noise level and to direct the exhaust gases away from the operator. The exhaust gases are hot and can contain sparks, which may
cause fire if directed against dry and combustible material.
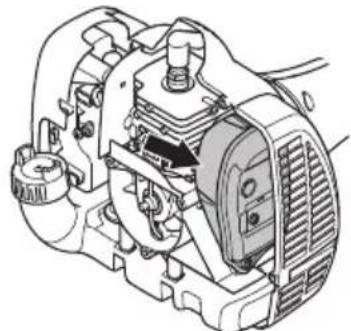
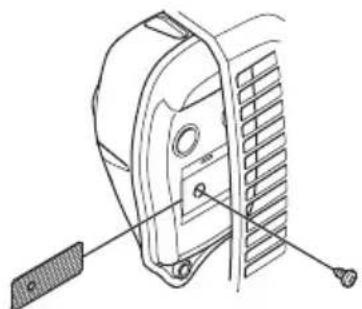
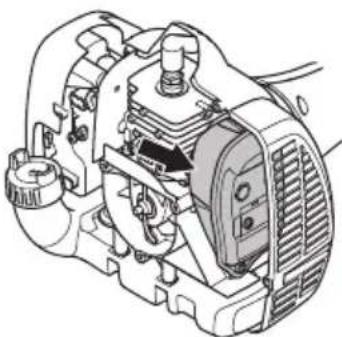
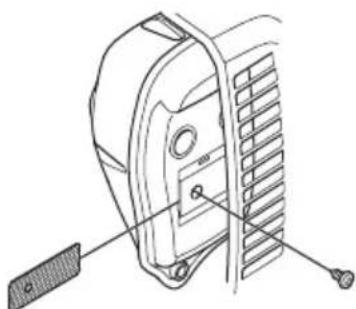
Some mufflers are equipped with a special spark arrestor mesh. If your machine has this type of muffler, you should clean the mesh at least once a month. This is best done with a wire brush. On mufflers without a catalytic converter the mesh should be cleaned weekly, or replaced if necessary. On mufflers fitted with a catalytic converter the mesh should be checked, and if necessary cleaned, monthly. If the mesh is damaged it should be replaced. If the mesh is frequently blocked, this can be a sign that the performance of the catalytic converter is impaired. Contact your dealer to inspect the muffler. A blocked mesh will cause the machine to overheat and result in damage to the cylinder and piston.
NOTE!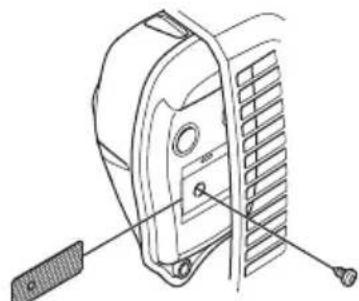
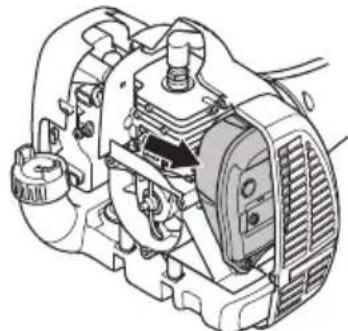
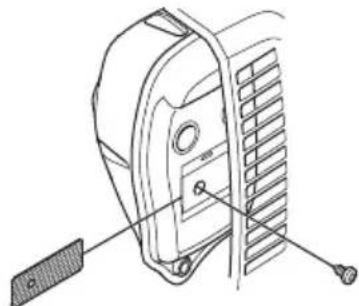
Rear housing shown removed for clarity only. It is not recommended to remove cover for maintenance of screen.
CAUTION! Never use a machine with a defective muffler.

WARNING! Mufflers fitted with catalytic converters get very hot during use and remain so for some time after stopping. This also applies at idle speed. Contact can result in burns to the skin. Remember the risk of fire!
MAINTENANCE
Cooling system
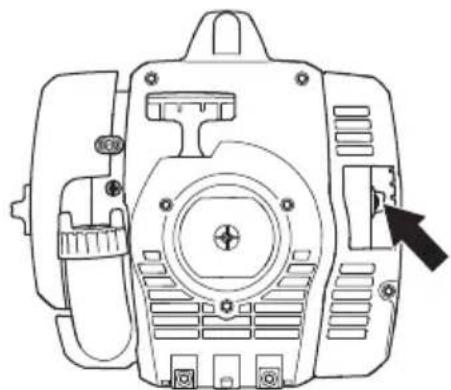
To keep the working temperature as low as possible, the machine is equipped with a cooling system.
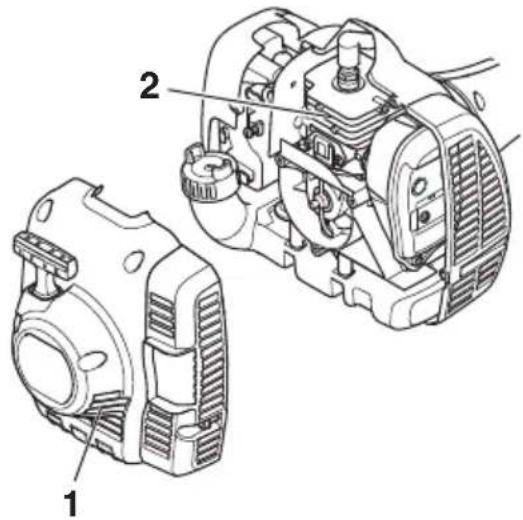
The cooling system consists of:
1. Air intake on the starter.
2. Cooling fins on the cylinder.
Clean the cooling system with a brush annually or more often in demanding conditions. A dirty or blocked cooling system results in the machine overheating, which causes damage to the piston and cylinder.
Spark plug

The spark plug condition is influenced by:
- Incorrect carburettor adjustment.
- An incorrect fuel mixture (too much or incorrect type of oil).
- A dirty air filter.
These factors cause deposits on the spark plug electrodes, which may result in operating problems and starting difficulties.
If the machine is low on power, difficult to start, or runs poorly at idle speed: always check the spark plug first before taking any further action. If the spark plug is dirty, clean it and check that the electrode gap is 0.5/0.6 mm.
The spark plug should be replaced after about a month in operation or earlier if necessary.
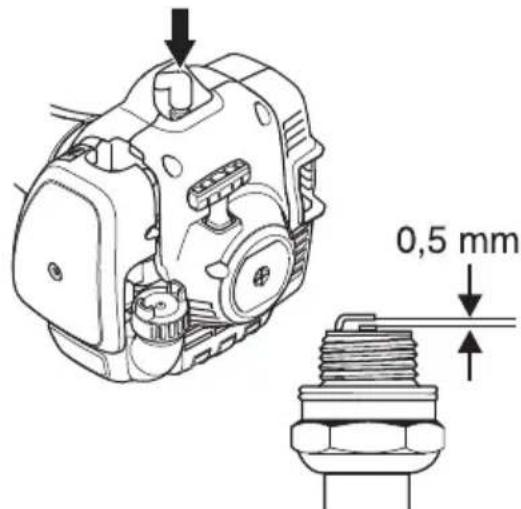
CAUTION! Always use the recommended spark plug type! Use of the wrong spark plug can damage the piston/cylinder. Check that the spark plug is fitted with a suppressor. See the Technical data section.
Two-piece shaft
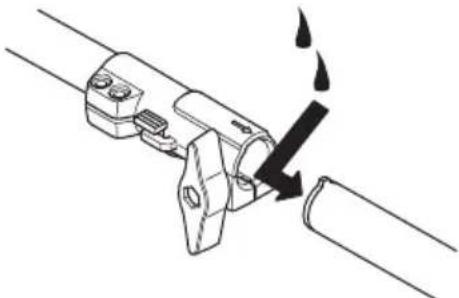
The drive shaft end in the lower shaft should be lubricated with grease every 30 hours. There is a risk that the drive shaft ends (splined coupling) on models with two-piece shafts will seize if they are not lubricated regularly.
Air filter
The air filter must be regularly cleaned to remove dust and dirt in order to avoid:
- Carburettor malfunctions Starting problems
- Loss of engine power
- Unnecessary wear to engine parts.
- Excessive fuel consumption.
Clean the filter every 25 hours, or more regularly if conditions are exceptionally dusty.
Cleaning the air filter
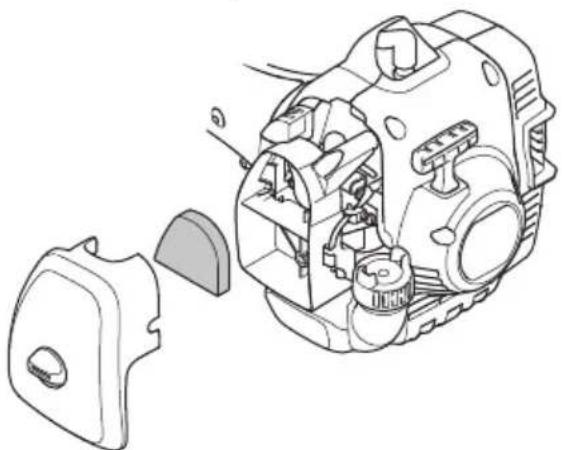
Remove the air filter cover and take out the filter. Wash it clean in warm, soapy water. Ensure that the filter is dry before refitting it.
An air filter that has been in use for a long time cannot be cleaned completely. The filter must therefore be replaced with a new one at regular intervals. A damaged air filter must always be replaced.
If the machine is used in dusty conditions the air filter should be soaked in oil. See instructions under the heading Oiling the air filter.
Oiling the air filter
Always use HUSQVARNA filter oil, art. no. 531 00 92-48. The filter oil contains a solvent to make it spread evenly through the filter. You should therefore avoid skin contact.
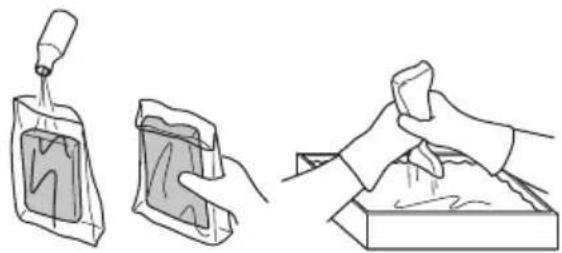
Put the filter in a plastic bag and pour the filter oil over it. Knead the plastic bag to distribute the oil. Squeeze the excess oil out of the filter inside the plastic bag and pour off the excess before fitting the filter to the machine. Never use common engine oil. This would drain through the filter quite quickly and collect in the bottom.
Bevel gear

The bevel gear is filled with the right quantity of grease at the factory. However, before using the machine you should check that the bevel gear is filled three-quarters full with grease. Use HUSQVARNA special grease.
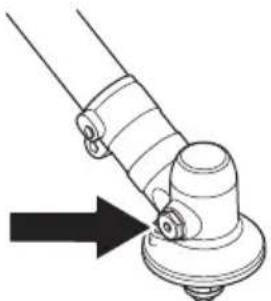
The grease in the bevel gear does not normally need to be changed except if repairs are carried out.
MAINTENANCE
Maintenance schedule
The following is a list of the maintenance steps that must be performed on the machine. Most of the items are described in the Maintenance section. The user must only carry out the maintenance and service work described in this Operator's Manual. More extensive work must be carried out by an authorized service workshop.
| Maintenance | Weekly maintenance | Monthly maintenance | Annually maintenance |
| Clean the outside of the machine. X | |||
| Make sure the throttle trigger lock and the throttle function correctly from a safety point of view. | X | ||
| Check that the stop switch works correctly. X | |||
| Check that the cutting attachment does not rotate at idle. X | |||
| Clean the air filter. Replace if necessary. X | |||
| Check that the guard is undamaged and not cracked. Replace the guard if it has been exposed to impact or is cracked. | X | ||
| Check that the trimmer head is undamaged and not cracked. Replace the trimmer head if necessary. | X | ||
| Check that nuts and screws are tight. X | |||
| Check that there are no fuel leaks from the engine, tank or fuel lines. | X | ||
| Check that the bevel gear is filled three-quarters full with lubricant. Fill if necessary using special grease. | X | ||
| Check the starter and starter cord. X | |||
| Clean the outside of the spark plug. Remove it and check the electrode gap. Adjust the gap to 0.5 mm or replace the spark plug. Check that the spark plug is fitted with a suppressor. | X | ||
| Clean the outside of the carburettor and the space around it. X | |||
| Clean the machine's cooling system. X | |||
| Clean or replace the spark arrester mesh on the muffler (only applies to mufflers without a catalytic converter). | X | ||
| Check the fuel filter for contamination and the fuel hose for cracks or other defects. Replace if necessary. | X | ||
| Check all cables and connections. X | |||
| Check the clutch, clutch springs and the clutch drum for wear. Replace if necessary by an autorized service workshop. | X | ||
| Replace the spark plug. Check that the spark plug is fitted with a suppressor. | X |
Technical data
| 129C 129L 129LK(A05328CCHV) (A05328CSHV) (A05328CSHV) | |||
| Engine | |||
| Cylinder displacement, cm3 | 27,6 | 27,6 | 27,6 |
| Cylinder bore, mm 36,0 | 36,0 | 36,0 | |
| Stroke, mm 27 | 27 | 27 | |
| Idle speed, rpm 3200-3600 | 3200-3600 | 3200-3600 | |
| Recommended max. speed, rpm 8500 | 8500 | 8500 | |
| Speed of output shaft, rpm | 8500 | 8500 | |
| Max. engine output, acc. to ISO 8893, kW/ rpm | 0,8/8000 | 0,8/8000 | 0,8/8000 |
| Catalytic converter muffler | Yes | Yes | Yes |
| Speed-regulated ignition system | Yes | Yes | Yes |
| Ignition system | |||
| Spark plug | NGK CMR6A | NGK CMR6A | NGK CMR6A |
| Electrode gap, mm | 0,5 | 0,5 | 0,5 |
| Fuel and lubrication system | |||
| Fuel tank capacity, cm3/litre | 340/0,34 | 340/0,34 | 340/0,34 |
| Weight | |||
| Weight without fuel, cutting attachment and guard, kg | 4,6 | 5,2 | 6,0 |
| Noise emissions | |||
| (see note 1) | |||
| Sound power level, measured dB (A) | 105 | 105 | 105 |
| Sound power level, guaranteed LWA dB (A) | 114 | 114 | 114 |
| Noise levels | |||
| (see note 2) | |||
| Equivalent sound pressure level at the operator's ear, measured according to EN ISO 11806 and ISO 22868, dB(A): | 93 | 95 | 95 |
| Vibration levels | |||
| (see note 3) | |||
| Equivalent vibration levels (ahv,eq) at handles, measured according to EN ISO 11806 and ISO 22867, m/s2 | |||
| Equipped with trimmer head (original), left/right | 3,7/3,6 | 9,9/8,9 | 9,9/8,9 |
Note 1: Noise emissions in the environment measured as sound power (LWA) in conformity with EC directive 2000/14/EC. Reported sound power level for the machine has been measured with the original cutting attachment that gives the highest level. The difference between guaranteed and measured sound power is that the guaranteed sound power also includes dispersion in the measurement result and the variations between different machines of the same model according to Directive 2000/14/EC. Note 2: Reported data for equivalent sound pressure level for the machine has a typical statistical dispersion (standard deviation) of 1 dB (A). Note 3: Reported data for equivalent vibration level has a typical statistical dispersion (standard deviation) of 1 m/s^2
TECHNICAL DATA
| 129LK | ||
| Approved accessories Type Cutting | attachment guard, Art. no. | |
| Blade shaft thread M10 | ||
| Trimmer head T25 (Ø 2.0 - 2.7 mm cord) | 574 19 87-01 | |
| 129C, 129L | ||
| Approved accessories Type Cutting | attachment guard, Art. no. | |
| Blade shaft thread 3/8 R | ||
| Trimmer head | T25 (Ø 2.0 - 2.7 mm cord) | 574 47 95-01 |
| T25C (Ø 2.0 - 2.7 mm cord) | 574 47 95-01 |
The following attachments are recommended for the specified models.
| Optional accessories Art No. Use with | ||
| Clean sweep attachment with shaft SR600 537 19 67 | 01 129LK | |
| Hedge trimmer attachment with shaft HA 850 537 19 | 66-06 129LK | |
| Edger attachment with shaft 537 19 69-01 129LK | ||
| Saw attachment with shaft PA 1100 537 18 33-16 129LK | ||
| Saw attachment without shaft PA | 537 18 33-11 129LK | |
| Cultivator attachment with shaft CA 150 | 537 42 54-01 129LK | |
| Trimmer attachment with shaft TA 850 | 537 35 35-01 | 129LK |
EC Declaration of Conformity
Issuer's name: Husqvarna AB, SE-561 82 Huskvarna, Sweden, tel: +46-36-146500.
Husqvarna AB claims sole responsibility for the object of this declaration: Trimmer and/or Brushcutter, platform(s) A05328CCHV / A05328CSHV representing models 129C, 129L / 129LK respectively from 2013 serial numbers and onwards. The platform number and Model number are clearly stated in plain text on the type plate along with the year with subsequent serial numbers.
The object of the declaration described above is in conformity with the requirements of the Council's Directives:
- 2006/42/EC "relating to machinery" 17 May 2006.
- 2004/108/EC "relating to electromagnetic compatibility" 15 Dec 2004
- 2000/14/EC "relating to noise emissions in the environment" 08 May 2000
In accordance with Annex V, the declared sound values are stated in the technical data sheet of the operator's manual.
The following standards have been applied:
EN ISO 12100:2010, EN ISO 11806-1:2011, ISO 14982:1998, CISPR 12:2007
TÜV Rheinland N.A. has carried out a voluntary examination on behalf of Husqvarna AB, providing AK72133896.01 - Certificate of conformity to EC Council directive 2006/42/EC for machinery. This certificate is applicable to all manufacturing locations and Countries of Origin, as stated on the product. The supplied grass trimmer and/or brushcutter conforms to the example that underwent examination.
Signed on behalf of: Husqvarna AB, Huskvarna, Sweden, 2013-12-27.

Ronnie E. Goldman, Director of Engineering. (Authorized representative for Husqvarna AB and responsible for technical documentation.)
SYMBOL KEY
Warning: thrown objects and ricochets. (129L, 129LK)

Warning: thrown objects and ricochets. (129C)
WARNING! Remember that:
Cylinder diameter, mm 36.0 36.0 36.0
Piston stroke, mm 27 27 27
Idle speed, rpm 3200-3600 3200-3600 3200-3600
Fuel mixture 358
Refueling 359
Cooling system 434
Spark plug 434
Two-piece shaft 434
Choke: Pull out the choke.

WARNING! If the engine starts with the choke in the choke position, the cutting attachment will start rotating immediately.
Hold the machine on the ground with your left hand (WARNING! Do not hold it with your foot!). Grasp the starter handle, slowly pull the cord with your right hand until you feel a definite resistance (the starter pawls engage), then pull the cord quickly and forcefully. Never wrap the starter cord around your hand.
Do not press the throttle trigger while attempting to start the engine.
Pull the cord repeatedly until the engine starts (or a maximum of 3 pulls). If the engine starts or attempts to start, push the choke lever down to the run position. Pull the starter cord forcefully until the engine starts. After starting the engine, let it warm up for 30 seconds before pressing the full throttle.
CAUTION! Do not pull the starter cord all the way out and do not let go of the starter handle when the cord is fully extended. This may damage the machine.
Cooling system 457
Spark plug 457
Cylinder diameter, in mm 36.0 36.0 36.0
Piston stroke, in mm 27 27 27
Idle speed, rpm 3200-3600 3200-3600 3200-3600
Recommended maximum speed, rpm 8500 8500 8500
Output shaft speed, rpm 8500 8500 8500
Max. engine power, acc. to ISO 8893, kW/rpm 0.8/8000 0.8/8000 0.8/8000
Catalytic converter exhaust
Yes Yes Yes
Starting system governed by speed
Yes Yes Yes
Ignition system
| Svjecica | NGK CMR6A | NGK CMR6A | NGK CMR6A |
| Razmak elektroda, u mm | 0,5 | 0,5 | 0,5 |
Fuel and lubrication system
Fuel tank capacity, cm³/l 340/0.34 340/0.34 340/0.34
Weight
Weight, without fuel, cutting equipment and guard, kg 4.6 5.2 6.0
Noise emission
Cooling system 503
Spark plug 503
GENERAL SAFETY INSTRUCTIONS
GENERAL SAFETY INSTRUCTIONS
BOOTS
GENERAL SAFETY INSTRUCTIONS
Stop switch
The stop switch is used to switch off the engine.
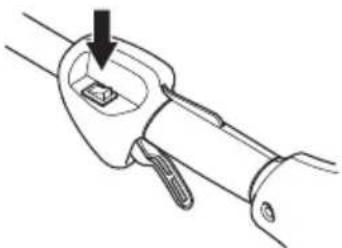
Start the engine and check that the engine stops when the switch is moved to the stop position.
Cutting attachment guard
This guard is intended to prevent objects from being thrown towards the operator. The guard also prevents the operator from coming into contact with the cutting attachment.
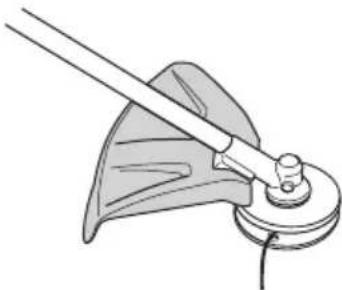
Check that the guard is not damaged or cracked. Replace the guard if it has been subjected to impact or has cracks. Always use the recommended guard for the specific cutting attachment. See the Technical data section.

WARNING! Under no circumstances may cutting equipment be used without approved equipment mounted. See Technical data section. Fitting the wrong or damaged guard can lead to serious personal injury.
Muffler
The muffler is designed to reduce noise as much as possible and to direct exhaust gases away from the operator. The catalytic converter muffler is designed to reduce harmful components in the exhaust gases.
In hot and dry climates there is a risk of fire. Therefore, we have equipped certain mufflers with a so-called spark arrestor mesh. Check whether it is present on your machine's muffler.
For the muffler, it is very important to follow the instructions for inspection, maintenance, and service.
Never use a machine with a defective muffler.
Regularly check that the muffler is securely attached to the machine.
If the muffler on your machine is equipped with a spark arrestor mesh, it should be cleaned regularly. A clogged mesh leads to engine overheating, resulting in serious engine damage.

GENERAL SAFETY INSTRUCTIONS

WARNING! Keep in mind:
Exhaust gases from the engine are hot and may contain sparks, which can cause fire. Therefore, never start the machine indoors or near flammable materials!
Cutting equipment
Cylinder diameter, mm 36.0 36.0 36.0
This product complies with the standards specified in the CE directives.
Beware of thrown objects and ricochets. (129L, 129LK)
Beware of projected objects and ricochets. (129C)
EC Declaration of Conformity 531
- Insert the hose into the fitting until it clicks into place.
- Before using the unit, tighten the button well.
Disassembly:
| İsteğe®,®,®,®,®,®,®,®,®,®,®,®,®,®,®,®,®,®,®,®,®,®,®,®,®,®,®,®,®,®,®,®,®,®,®,®,®,®,®,®,®,®,®,®,®,®,®,®,®,®,®,®,®,®,®,®,®,®,®,®,®,®,®,®,®,®,®,®,®,®,®,®,®,®,®,®,®,®,®,®,®,®,®,®,®,®,®,®,®,®,®,®,®,®,®,®,®,®,®,®,® | ||
| Teşhizat borusunun fi rçalanması SR600 537 19 67-01 129LK | ||
| Teşhizat borusu ve Çüt Biçme makasi HA 850 537 19 66-06 129LK | ||
| Teşhizat borusu ile�� kesimi 537 19 69-01 129LK | ||
| Testere ile teşhizat borusunun birleşime girmesi PA 1100 537 18 33-16 129LK | ||
| Teşhizat borusu olmadan testere kesimi. PA 537 18 33-11 29LK | ||
| CA 150 hareket mili ile Çüm Biçme makinese donanım 537 42 54-01 129LK | ||
| TA 850 hareket mili ile Biçme makinese donanım 537 35 01 129LK |
The tool switches off by moving the switch to the stop position. Attention! The stop contact automatically returns to the start position. To prevent accidental starting, the spark plug cap must always be removed from the spark plug during transport, inspection, or maintenance.
Wear special protective gloves.
Requires regular cleaning.
Visual inspection point.
Storage

Explanation of symbols
Symbols on the device or in the manual: 555
Contents
Content 556
Before starting work, check the following: 556
INTRODUCTION
Dear customer! 557
What is it?
What is it for example? 558
GENERAL SAFETY INSTRUCTIONS
Important information 559
Operator protective equipment 559
Machine safety devices 560
Adjustable equipment 562
ASSEMBLY
Assembling the feed handle 564
Assembling and disassembling the two-piece shaft 564
Mounting the adjustable equipment 565
Installing the example head 565
Installation of the head 565
WORKING WITH FUEL
Safety rules when refueling 566
Fuel 566
Refueling 567
STARTING AND STOPPING
Check before starting 568
Starting and stopping 568
OPERATING METHOD
Operator's instructions 570
TECHNICAL MAINTENANCE
Carburetor 572
Silencer 572
Cooling system 573
Spark plug 573
Output shaft 573
Air filter 573
Maintenance track 575
TECHNICAL SPECIFICATIONS
Technical specifications 576
Warranty and compliance 578
Before starting, check the following:
Carefully read the operating instructions.

WARNING!
Prolonged exposure to noise can cause irreversible hearing damage.
Always use special headphones.

WARNING! Under no circumstances is it permitted to make changes to the original design of the machine without the manufacturer's permission. Use only original spare parts. Making unauthorized changes or using unauthorized accessories can lead to serious injury or even death of the operator or other persons.

WARNING! A trimmer, brush cutter, or mower used carelessly or incorrectly can be a dangerous tool that can cause serious or fatal injury to the user or bystanders. It is extremely important that you read this manual and understand its contents.
What is what on the trimmer?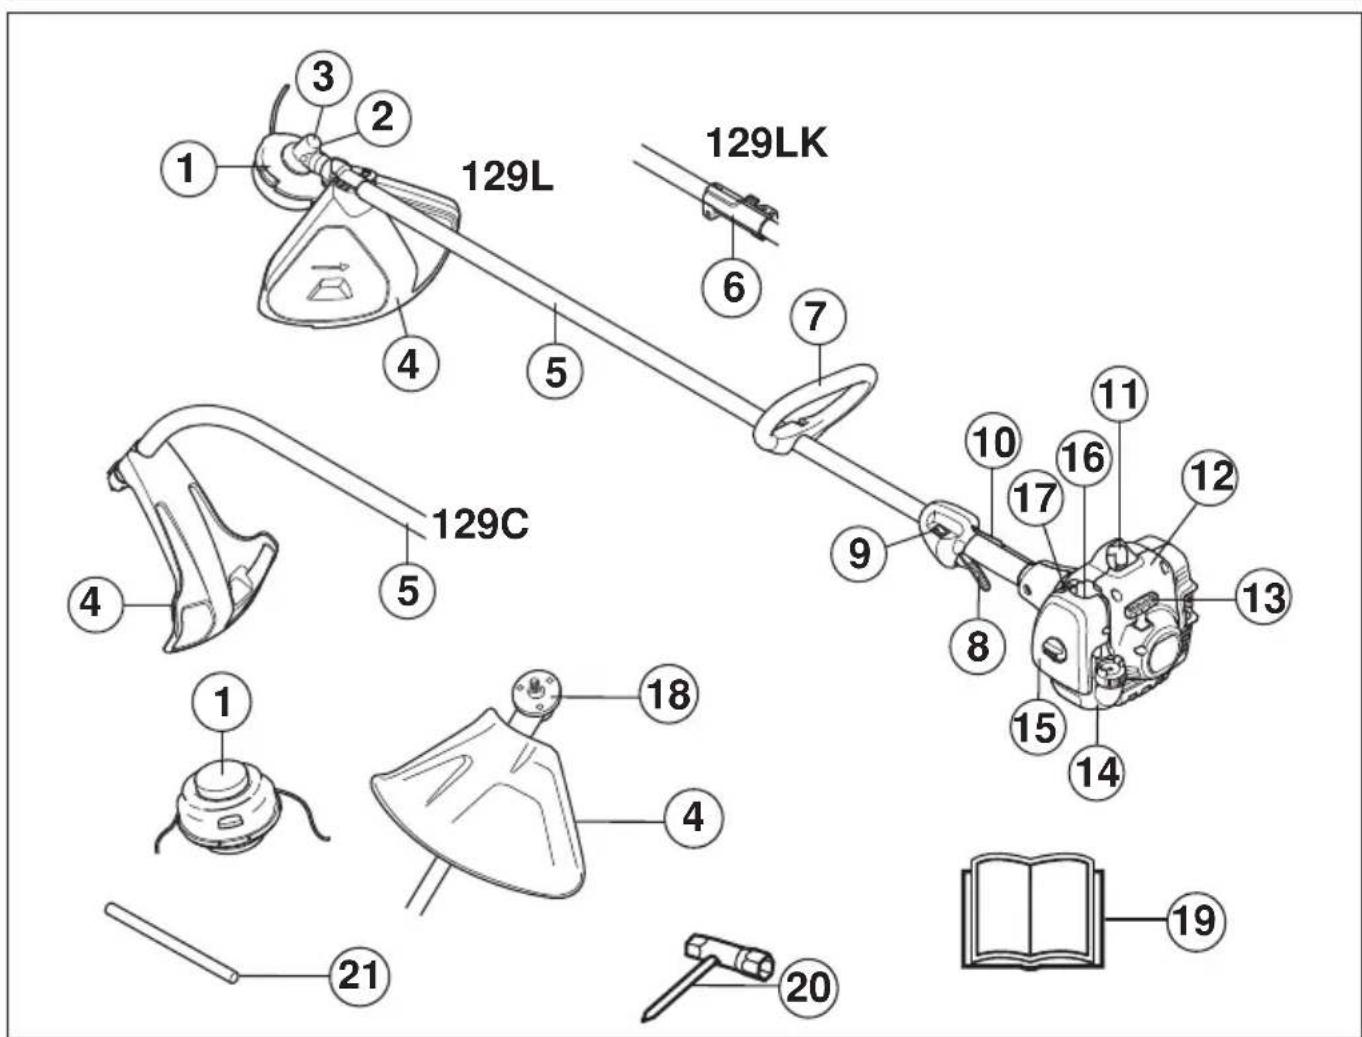
1 Trimmer head 2 Cap for the hole for consistent lubrication, angular gear 3 Angular gear drive 4 Protective equipment 5 Tube shaft 6 Connection 7 Loop handle 8 Trigger 9 Switch 10 Trigger lock button
11 Spark plug cap 12 Starter 13 Starter handle 14 Fuel tank 15 Air filter cover 16 Fuel pump 17 Primer bulb 18 Spark plug wire 19 Operator's manual 20 Universal wrench 21 Retaining pins
Important information
IMPORTANT!
The machine is only designed for grass trimming and grass clearing.
The only attachments that may be used with the engine as a drive are the cutting equipment recommended by us or listed in the Technical Data section.
Never work with the machine if you are tired, have consumed alcohol, or are taking medication that affects your vision, reactions, or coordination.
Use personal protective equipment. See the section 'Personal protective equipment'.
Never work with a machine that has been modified compared with the original version.
Never operate a defective machine. Carry out regular checks of the protective devices, maintenance, and servicing in accordance with this manual.
Some maintenance and servicing operations must be performed only by qualified specialists. See the indicated sections in 'Maintenance'.
Before starting work, it is necessary to install all covers, guards, and handles.
Make sure that the spark plug cap and spark plug wire are not damaged to avoid the risk of electric shock.
The machine operator must ensure that there are no people or animals within a radius of 15 m during operation.
Before starting operation, carry out a general inspection of the machine (see the maintenance and repair schedule).

WARNING! The machine creates an electromagnetic field during operation. Under certain circumstances, this field may cause interference with passive or active medical implants. To avoid the risk of serious injury or death, persons with medical implants should consult their doctor and the implant manufacturer before operating this machine.

WARNING! Operating the machine in a closed or poorly ventilated area can lead to fatal consequences due to oxygen depletion or carbon monoxide poisoning.

WARNING! Never allow children to operate the machine or be near it while it is running. Because the machine is equipped with a contact stop with spring return and can be started at low speed and with force on the starter handle, even small children may, under certain circumstances, create the force necessary to start the machine. This creates a risk of serious injury to people. Therefore, always remove the spark plug cap when you leave the machine unattended.
Operator protective equipment
WARNING!
A trimmer, brush cutter, or edger used carelessly or incorrectly can be a dangerous tool that can cause serious or fatal injury to the user or bystanders. It is extremely important that you read this manual and understand its contents.
During machine operation, always use approved protective equipment. Protective equipment cannot completely eliminate the risk of injury, but in the event of an accident, it can reduce the severity of the injury. Consult your dealer for help in selecting protective equipment.

WARNING! Always heed the warning signals or shouts when using hearing protection. Remove the hearing protection immediately after you have stopped the engine.
HELMET
Protective helmet in cases where there is a risk of falling objects
GENERAL SAFETY INSTRUCTIONS
HEARING PROTECTION
Always use approved hearing protection with adequate noise reduction.
EYE PROTECTION
Always use approved protective glasses. When using a brush cutter, you must also use approved protective glasses. Approved protective glasses are those that meet ANSI Z87.1 for the USA or EN 166 for EU countries.

GLOVES
If necessary, for example, when assembling the cutting equipment, you should wear gloves.

CANO
Use non-slip and stable footwear.
WORK CLOTHING
Wear clothing made of thick fabric. Avoid loose clothing that could get caught on bushes or branches. Always wear sturdy trousers. Do not wear jewelry, belts, or sandals, and do not walk barefoot. Long hair must not hang below the shoulders.
FIRST AID KIT
Always keep a first aid kit with you for providing first medical aid.
SAFETY DEVICES
This section discusses the protective devices, their operation, and the basic rules that must be followed to ensure safe work. To find out where the elements or mechanisms of the machine are located, see the section "What is What?"
The service life of the machine may be shortened in the event of an accident or increased if the machine is not serviced properly and if service and/or repair was not performed professionally. If you need additional information, contact your nearest service workshop.
WARNING!
Servicing and repairing the machine requires special training. This is especially important for work with protective devices. If any of the faults described below are detected in the machine, immediately contact your service specialist. When purchasing any of our products, we guarantee professional repair and service. If the supplier who sold you the machine is not a service dealer, ask them for the address of the nearest specialized workshop.

WARNING! Never work with a machine with faulty protective equipment. Perform the inspection and carry out all maintenance measures described in this section. If these checks reveal any faults, immediately call a repair specialist.
ALL INSTRUCTIONS FOR ADULTS
Throttle trigger lock lever
The blade guard prevents accidental engagement. When the guard lever (A) is activated (i.e., when you release the handle), it releases the blade guard (B). When you release the handle, the guard lever and blade guard return to their original position. This return is achieved by independent return springs. This mechanism ensures automatic locking of the blade guard when the machine is at idle.
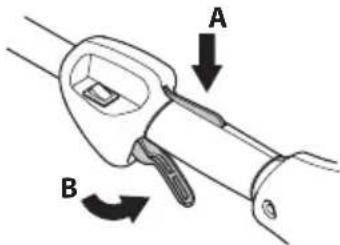
Check that the blade handle, at the moment of return of the locking lever, is locked in the original position at idle.
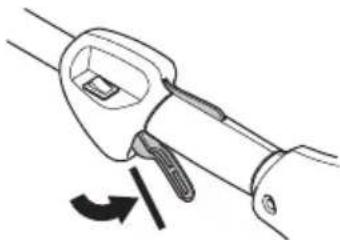
Press the locking lever of the blade and make sure that it returns to its original position when released.
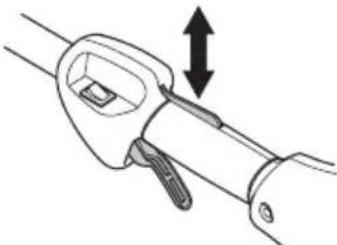
Check that the blade handle and the locking lever move freely and that the return springs work properly.
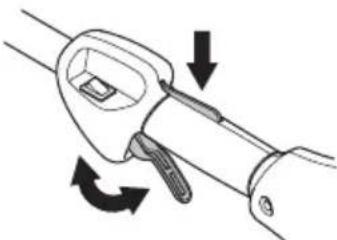
See instructions in the section on starting. Turn on the machine and fully open the blade guard.
Release the blade guard lever and make sure that the cutting equipment stops and remains stationary. If, after placing the blade guard in the idle position, the cutting equipment continues to rotate, you should check the idle speed adjustment of the carburetor. See instructions in the section on technical maintenance.
Switch
This switch is used for a complete stop of the engine.
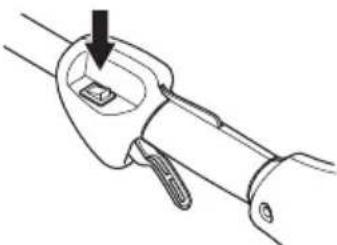
Start the engine and check that it stops when the switch is moved to the stop position.
Protection of cutting equipment

This guard is designed to prevent objects from being thrown in the direction of the user. The guard is also designed to protect the user from accidental contact with the cutting equipment.
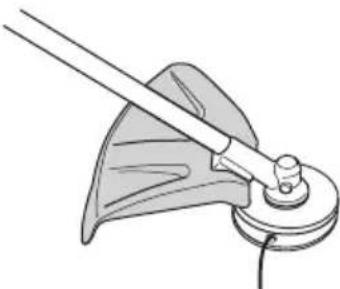
Check that the guard is not damaged and that there are no cracks. Replace the guard if it has been damaged by impact or if there are cracks.
Always use the recommended guard for each type of cutting equipment. See the chapter on technical data.
GENERAL SAFETY INSTRUCTIONS

WARNING! It is strictly forbidden to use the cutting equipment without the recommended guard installed. See the chapter on technical data. Installation of an incorrect or damaged guard may lead to serious injury.
The device is designed to reduce the noise level of the air flow entering the working area. The device, equipped with a catalyst, is also designed to reduce the content of harmful substances in the exhaust gases.
In countries with hot and dry climates, the likelihood of fires is obvious. Therefore, we equip some devices with a spark-arresting mesh. Check whether the device of your machine is equipped with such a mesh.
For a device of this type, it is very important to follow the instructions for checking, maintenance, and servicing.
Never use the machine with a defective device.
Periodically check that the device is securely attached to the machine body.
If the device on your machine is additionally equipped with a spark-arresting filter, it should be cleaned regularly. A clogged filter can cause the engine to overheat and lead to serious engine damage.

WARNING! The catalyst device heats up strongly during operation and remains hot for some time after operation. This also happens in idle mode. Contact can cause burns. Remember the danger of fire!

WARNING! The device contains elements that can cause cancer. Avoid contact with these elements in case of device damage.

WARNING! Remember the following:
Exhaust gases from the engine may contain sparks that can become a source of fire. Therefore, the machine should never be started indoors near easily flammable material.
Cutting equipment
This section describes how you, through proper maintenance and use of the correct cutting equipment, can:
- Achieve maximum cutting efficiency. - Extend the service life of the cutting equipment.
BAHHO!
Use the cutting equipment only with the guard intended for it! See the chapter Technical data.
Use the instructions for the cutting equipment for correct installation of the string and selection of the correct string diameter.

WARNING! Always turn off the engine before starting work on any part of the cutting equipment. It continues to rotate even with the clutch released. Make sure that the cutting equipment has stopped completely and disconnect the spark plug wire, before starting work on it.

WARNING! A faulty cutting equipment increases the risk of accidents.
Trimmer head
BAHHO!
Make sure that the trimmer string is wound evenly and tightly on the drum, otherwise there may be dangerous vibrations.
-Use only recommended trimmer heads and strings. They have been checked by the manufacturer for size compatibility with the specific engine. This is especially important when using a fully automatic trimmer head. Use only recommended cutting equipment. See the chapter Technical data.
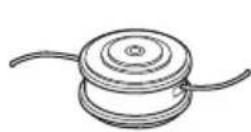

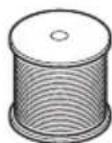
-Usually, smaller machines require larger trimmer heads and vice versa. This is because when cutting with a string, the engine must be able to throw the string in a radial direction from the trimmer head, while encountering resistance from the grass being cut. -The length of the string is also important. A longer string requires a more powerful engine than a shorter string of the same diameter. -Make sure that the knife, located on the trimmer guard, is not damaged. It is used to cut the strings to the correct length. -For double-edged strings, it may be necessary to soak them in water for a few days to make them softer and last longer.
Assembly of the loop handle

Slide the loop handle onto the shaft tube. Remember that the loop handle must be positioned between the arrows on the shaft tube.
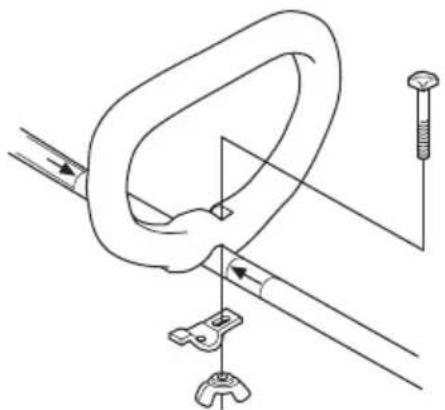
- Install the bolt, washer, and knob with covers as shown in the figure. Tighten the knob with the covers.
Assembly and disassembly of the two-piece shaft
(129LK)
Assembly:
- Release the coupling by turning the handle. Align the protrusion with the groove (A) so that it is on the same line as the arrow on the coupling (B).
Press the coupling until it clicks into place.
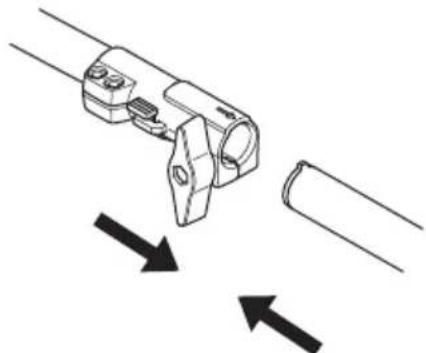
Before use, tighten the handle well.
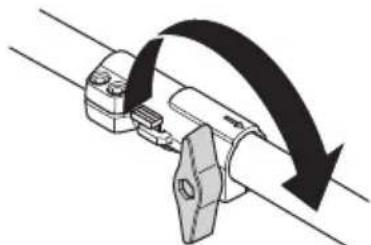
Disassembly:
- Release the coupling by turning the handle (at least 3 times).
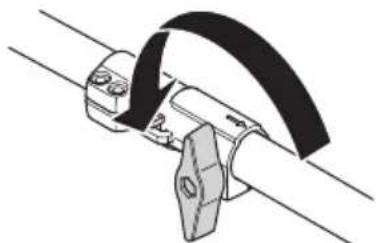
Press and hold the button (C). Pull the coupling apart while pulling the handle.
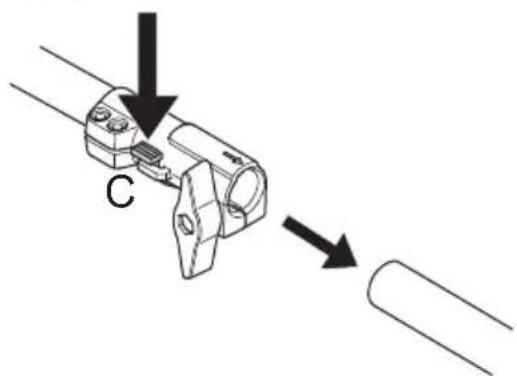
ASSEMBLY
Mounting the equipment

WARNING! It is strictly forbidden to use the equipment without the recommended guard installed. See the Technical Data chapter. Incorrect installation or damaged guard can lead to serious injury.
Installing the guard and trimmer head
(129L, 129LK)
- Install the trimmer guard (A) for work with the trimmer head. The trimmer guard / combined guard should be attached to the bracket on the shaft tube and fixed with the screw (J).
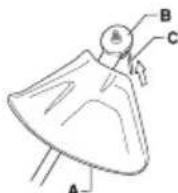
Slide the drive disc (B) onto the output shaft. Turn the shaft until one of the holes in the drive disc aligns with the hole in the gear housing. Insert the locking pin (C) into the hole to lock the output shaft. Screw the trimmer head / plastic nut (H) onto the thread in the direction of rotation.
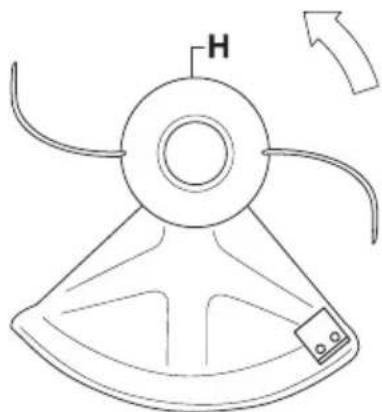
Repeat all operations in reverse order.
Installing the nozzle and the approximate head
(129C)
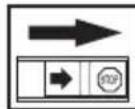
- Install the nozzle as shown in the figure. Tighten it well.
Put the dust cap on the axle. The cap must be completely covered by the cap.
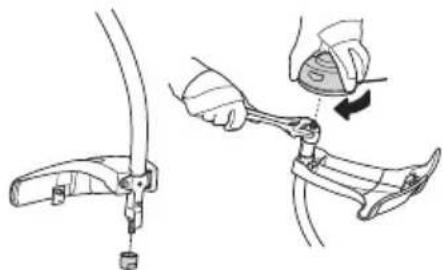
Secure the dust cap with a hex key to prevent the axle from rotating. Screw the approximate head onto the axle.
Safety rules when refueling
Never start the machine:
1 If you have spilled fuel on it. Wipe the nozzle and leave the remaining gasoline to evaporate. 2 If you have spilled fuel on yourself or your clothing, change your clothing. Wash the parts of your body that were in contact with the fuel. Use soap and water. 3 If there is a fuel leak on the machine. Regularly check the fuel tank cap and hoses for leaks. In case of a leak, contact a service center.
Transport and storage
The machine and fuel must be stored and transported in such a way that there is no risk of leaks or vapors coming into contact with sparks or open flames, for example, near electrical machines, electric motors, electrical or power switches/heaters. Fuel should always be stored and transported in special containers intended for this purpose. - Before storing the device for a long period, the fuel tank must be emptied. Drain it at a local gas station where you can dispose of the used fuel. Make sure the machine is well cleaned, and before long-term storage, full maintenance is performed. - When transporting or storing the machine, a transport guard for the cutting equipment must always be installed. Secure the machine during transport. - To prevent accidental starting of the engine, the spark plug cap must be removed during long-term storage if the machine is left unattended and during any maintenance.

WARNING! Be careful when handling fuel. Remember the danger of fire, explosions, and inhaling vapors.
Fuel
ATTENTION! The machine is equipped with a two-stroke engine and must always run on a mixture of gasoline and oil for two-stroke engines. To obtain the correct fuel mixture ratio, carefully measure the amount
of oil entering the mixture. When preparing a small amount of fuel mixture, even a small inaccuracy can significantly affect the quality of the fuel mixture.

WARNING! Fuel and its vapors are highly flammable and can cause serious injury if inhaled or in contact with skin. Therefore, be careful when handling fuel and ensure good ventilation when handling fuel.
WARNING! Always use a fresh mixture of unleaded petrol with a minimum octane rating of 90 (RON). For engines with a catalytic converter (see chapter Technical data), only unleaded petrol with an admixture of oil is used. Unleaded petrol damages the catalytic converter.
If possible, use environmentally friendly, i.e. alkylate petrol.
It is permitted to use a petrol-ethanol fuel mixture E10 (ethanol content not more than 10%). If you have used a mixture with a higher ethanol content, this may affect the operating conditions and cause engine damage.
- Recommended minimum octane rating 90 (RON). If the engine is operated with a lower octane rating than 90, the engine may produce knocking. This leads to an increase in engine temperature, which in turn can lead to serious damage. For prolonged operation at high speeds, it is recommended to use petrol with a higher octane rating.
Oil for two-stroke engines
To achieve maximum performance, use HUSQVARNA oil for two-stroke engines, which is specially designed for our air-cooled two-stroke engines. Never use oil intended for water-cooled two-stroke outboard engines, i.e. "outboard oil" (designation TCW).
Never use oil for four-stroke engines. Low quality oil or an excessively rich oil/fuel mixture can create a risk of damage to the catalytic converter and shorten its service life. - Mixing ratio: 1:50 (2%) with HUSQVARNA oil for two-stroke engines. 1:33 (3%) with other oils for air-cooled two-stroke engines, class JASO FB/ISO EGB.
Mix the fuel and pour it only outdoors in a place where the possibility of sparks and ignition is excluded.
Do not smoke or leave warm objects near the fuel.
Before refueling, always stop the engine.
Before refueling, you must switch off the engine and let it cool down for a few minutes.
When refueling, the fuel tank cap should be opened slowly to gradually release excess pressure.
After refueling, tighten the fuel tank cap firmly.
Before starting, always move the machine away from the refueling area.
Check the fuel tank cap for leaks. If you have spilled fuel on it, wipe off the splashes and let the remaining gasoline evaporate. Clean the fuel tank cap. The presence of impurities in the fuel tank can cause interruptions in engine operation. Make sure the fuel is well mixed by shaking the container before refueling the fuel tank.
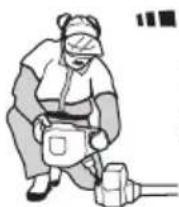
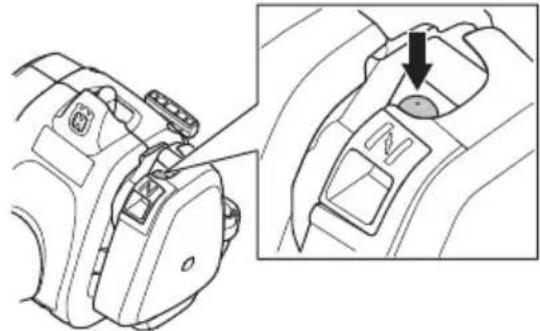
Check the primer
- Check the trimmer head and the trimmer guard to ensure they are not damaged and have no cracks. If cracks have formed or if the trimmer head or the trimmer guard has been subjected to a strong impact, they should be replaced.
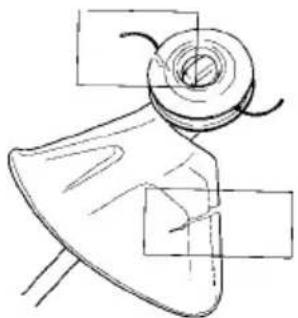
Never use the machine without the guard or with a damaged guard. All caps must be correctly installed without damage before starting the machine.
Starting and stopping


WARNING! Before starting the tool, the cap must be fully aligned with the exhaust pipe, otherwise, loosening of the connection and injury may occur.
Before starting, always move the machine away from the refueling area. Place the machine on a stable surface. Make sure that the cutting equipment does not touch any obstacles.
Make sure there are no bystanders in the work area; otherwise, there is a risk of serious injury. The risk zone is 15 meters.
Starting the cold engine
Fuel pump: Press the primer bulb several times until fuel fills it (about 10 times). The bulb does not need to be filled completely.
Fuel choke: Set the fuel choke to the closed position.
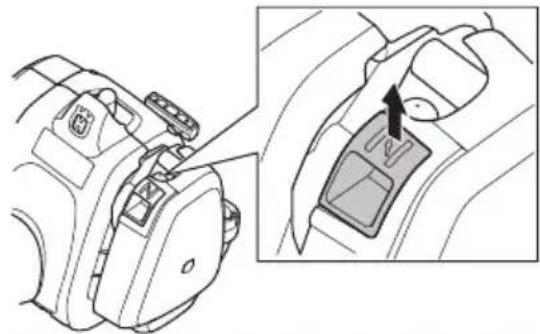

WARNING! When starting the engine with the choke in the closed position, the cutting equipment starts to rotate immediately.
Hold the machine body on the ground with your left hand (attention! not with your foot!). Grasp the starter handle with your right hand and pull it slowly until you feel resistance (the catch engages), then pull the cord with a sharp pull. Never wind the starter cord around your hand.
When attempting to start the engine, it is forbidden to press the gas trigger.
Pull the starter cord several times until the engine attempts to start (no more than 3 pulls). When starting or attempting to start the engine, move the choke lever to the operating position. Pull the starter cord until the engine starts. After the engine starts, let it warm up for 30 seconds before engaging full throttle.
WARNING! Do not pull the cord out completely and do not release the starter handle when the cord is fully extended, as this may cause damage to the machine.
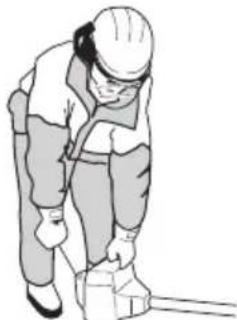
Starting a warm engine
Fuel pump: Press the rubber bulb of the fuel pump several times until fuel begins to flow into it. The bulb does not need to be completely filled.
Move the choke lever to the operating position. Pull the starter cord until the engine starts. After the engine starts, engage full throttle.
Stopping
The engine stops by turning off the ignition.
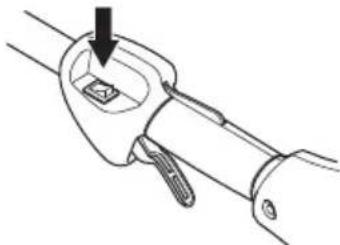
WARNING! The stop contact automatically returns to the start position. To prevent accidental starting, always remove the spark plug cap when checking or servicing.
General operating instructions
IMPORTANT!
This section lists the main safety measures to be taken when working with the trimmer.
If you find yourself in a situation where you feel uncertain, stop and ask for advice from a specialist. Contact your dealer or service workshop.
Do not attempt to solve any problem if you think it is beyond your capabilities.
Working with the trimmer, always follow the instructions and be careful with the cutting head and the trimmer line.
Basic safety rules


- Position the machine so that there is no risk of injury to people or animals, or damage to objects that could interfere with your work.
- Make sure that no one can come into contact with the cutting equipment or with objects that could be thrown by the cutting equipment during operation.
- Warning! Never use the machine in situations where you cannot call for help in case of an accident. 2 Check the work area. Remove all loose objects, such as stones, broken glass, nails, wire, ropes, and the like, which could be thrown or caught in the cutting equipment. 3 Do not operate the machine in poor weather conditions, such as dense fog, heavy rain, strong wind, severe cold, etc. Working in poor weather is very tiring and creates additional risk, e.g., slippery ground or unpredictable direction of tree fall, etc. 4 Make sure the machine is stable.
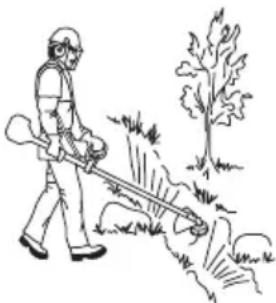
5 Maintain good balance and a secure footing. Do not overreach.
Always maintain proper posture and balance.
6 Always hold the machine with both hands. Hold the machine on the right side of your body.
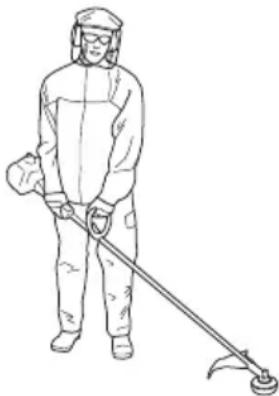
7 The cutting equipment must be in good condition. 8 When moving, the engine must be switched off. 9 Do not drop the machine on the ground with the engine running, except in emergencies when it is clearly visible.

WARNING! The user of the machine and no one else must attempt to remove cut material while the motor is running or while the cutting equipment is rotating, as this could lead to serious injury.
Before removing material wrapped around the blade shaft, stop the motor and the cutting equipment, as this creates a risk of injury. The blade can become hot during operation and remain hot for some time. This creates a risk of burns upon contact.

WARNING! Beware of thrown objects. Always wear approved safety glasses. Never lean over the cutting equipment. Stones, debris, etc., can be thrown into the eyes and cause blindness or serious injury.
Bystanders must not be in the work area. Children, animals, spectators, and helpers must be outside the work area at a distance of at least 15 m. If someone approaches you while you are working, stop the machine immediately. Never turn around with the machine without first looking behind you and making sure that no one is in the danger zone.
Basic working principles
After each work operation, the engine should be allowed to idle for a while. Too much idling without load can cause serious damage to the engine.

WARNING! Sometimes branches or grass get caught between the protective guard and the cutting equipment. Before you continue, stop the engine.
Trimmer head for trimming grass

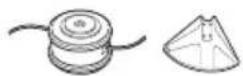
Trimmer line
Hold the trimmer head directly above the ground. The work is done with the end of the line. Let the line work at its own speed. Do not force the line into the area being mowed.
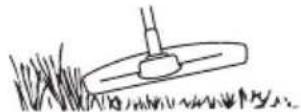
The line can easily cut grass and weeds near walls, fences, trees, and curbs, but it can also damage the sensitive bark on trees and shrubs and damage the edges of fences. The risk of damage to plants is reduced by shortening the line to 10-12 cm and reducing the engine speed.
Mowing
- For mowing, all unwanted vegetation is removed. Hold the trimmer head directly on the ground, tilting it. The end of the line hits the ground around trees, posts, statues, etc. NOTE! This method increases line wear.
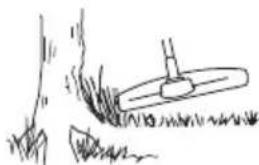
The line wears out faster and must be replaced more often when working among stones, bricks, concrete, metal fences, etc. than when working among trees and wooden fences.
- For trimming and mowing, do not fully open the throttle (80%) to extend the life of the line and reduce wear on the trimmer head.
Recommended equipment
The trimmer is ideal for cutting grass that is difficult to reach with a regular lawn mower. During cutting, hold the line parallel to the ground. Avoid pressing the trimmer head to the ground, as this can damage the lawn and the tool.
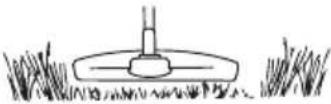
Do not allow constant contact of the trimmer head with the ground during cutting. Constant contact can lead to damage and wear of the trimmer head.
Sweeping
The ventilating effect of the rotating line can be used for quick cleaning. Hold the line parallel to the area to be cleaned and move the trimmer from side to side.
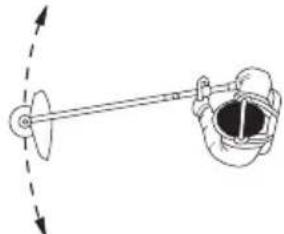
- For mowing and sweeping, to achieve the best results, the throttle should be fully open.
IMPORTANT! To avoid imbalance and vibration of the handles, it is necessary to clean the trimmer head cover every time after refilling the line. Also check the other parts of the head for the need for cleaning.
Kap6upaTop
PereynilpoBka xoJocToRo xa
PepenpeynpoBkO, npOBepTe, yTo6bI BO3dyHbHnbltp 6bln uCTbIM, n yTo6bHa HEM 6blno KpbuKn.
OTperyIpyTe xOJocToxOBDHTOMxJOcTOro xoTaT,ecn3To Heo6xoJIMo.BhaJaHe noBepHnTe BnHT T no yacOBoCtpeKe Do Tex nop, noka peJyUe o6OpyIOBaHne He HaNyET BpaaTaTbCra.3aTeM nobopaunBaTe BnHT npOTNB yacOBo CtpeKn, noka peJyUee o6OpyIOBaHne He octaHOBnTc. IpaBnJIbHoN cHTaEtCra peryInpobKa, npi KOtopoIN DBInrAteJIb POBHO pa60TaET B JIO60m NOJooKeHN. DOn HauJa BpaueHnpeKyuEro 6OpyIOBaHnDolJHe OCTabaTbc DOcTaTOuHb CBO6OHDhXoJ.
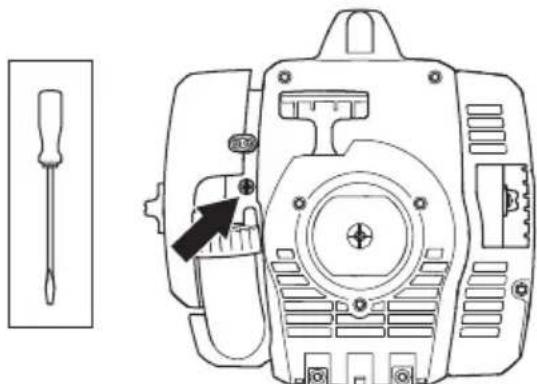
PekomeHnyeMoE KOJI-BO 06opoTOB Ha xoJIOCTOM oxy: CM. Pa3JeI TexHnueckne xapaKTepcntKN.

IPEyIPEJDEHNE!EcInxOIOCTbIe 06opoTbHeBO3MOKHO OTpeYIpOBAbTaK,HTo6blpeHyUe8 06OpyIOBaHne cToJIo HeNoDnHHo, 06paauTeCb K npOaBcy/B MacTepcKyU. He noJIb3yIITecb MaunHo, noka He 6yDeT BblnoJIHeHa TouHa peYIpOBAKa NII peMOHT.
TnyuNTeJIb
BHIMAHHE! HekoTopbIe rLyuNTeJI N OChaSeHbI KaTaN3aTOPOM. Cm.rIaby TexNueckne daHHbIe, YTO6bI y3HaTb ecTB JI Na BaWei MaUNHe KaTaN3aTOP.
Iyntb cnykET dIa CHHHeHn ypoBHa Mya N OToBa paKaJIeHHbIX Bixlonhbx r3OB ot pa6oero. Bixlonhbe ra3bl oeyb ropaye N MOryt coephaT hckpbl, YTO MoKeT npNBecTN K NoJapy ppi npamom nonadaHn Ha cyxon I BocnlaMeHIOUnc MaTePnaI.
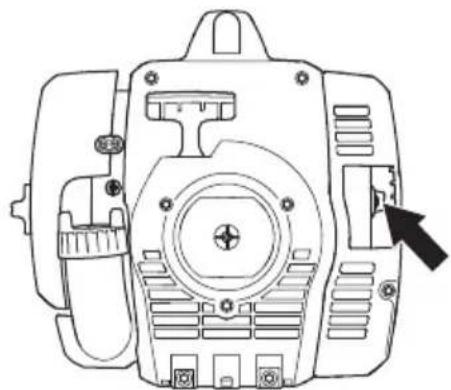
B HekoToBbX rJyUInTeJIx npEynCmOtpen CneuNaIbHbI NcKporacnteIb. EcN Ba7a Ma7nHa 60pyoBaHa TaKIM rJyUInTeJIem, ceTKy fNilbTpacLeNyTe OuyuaeT He MeHee OndHoro pa3a B Mecra.PekomeHdyetcNcoJIb3oBaTb cTaIbHyu UeTKy.EcN Ha BaWeM INcTpymEHTe CTOnT rJyUInTeJIb TaKOro Tnna, To cETKy cJeDuET oYuTaB He peKe oDHoro pa3a B HeJeLIO.Ha rJyUInTeJIax c KaTaJIuN3aTopOM, TaKyIO ouNcTky DocTaToUHO npOn3BOuNTb pa3 B MecA.U. PpN Bo3HNIKHOBeHm IOBpeHdEHN Ha ceTKe ee cJeDuET 3aMeHHTb. EcN cETKa YAcTo 6bIbaeT 3acopeHa, 3HaUYt FyHKUg KaTaJIuN3aTopa yxUdSeHa. O6paauTecb K BaWEmy npOdaBu 3a COBeTom. 3acOpEnue cETKn BBi3OBeT nepepeB DnIg aTeJIa NOBpeHdEHe UINHHpa I nop7r.
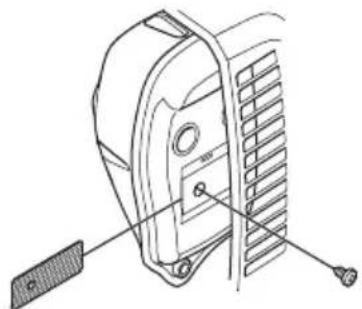
Ha pucyHke 3aHnY qacTb KOpnyca He noka3aHa TOnbKO dIHarJnHocTn. He peKoMeHdyetc CHMAtb KpbIiKy dJIra 06cnyHbAHnE 3KpaHa.
BHIMAHHE! He noJIb3yIeTcMb MaunHoi c nobpeKJdeHHbIM rJyWHTeJIem.

PNEyPENHEHNE!IywnTeJIb KaTaN3aTopa cnIbHo HArpeBaetcB npocce pa6oTbN nocne pa6oTb HeKoToOpoe BpemO octaeTcRopAHM. 3TO npocxOAnIT N BPENMe xOIOCToro XoJa.CopnKOCHOBeHne MoHET Bb3BaTb OOHr KOHN.POMHNTe 06 onacHocTn nohapa!
Cnctema oxlaaJdeHna
ДляобеспуняКAKMOJOHO6OJIeHIN3KoI pa60eY TempepaTpybMaUNHaOBOpydoBaHa cnCTeMoI OXJaHDeHIN.
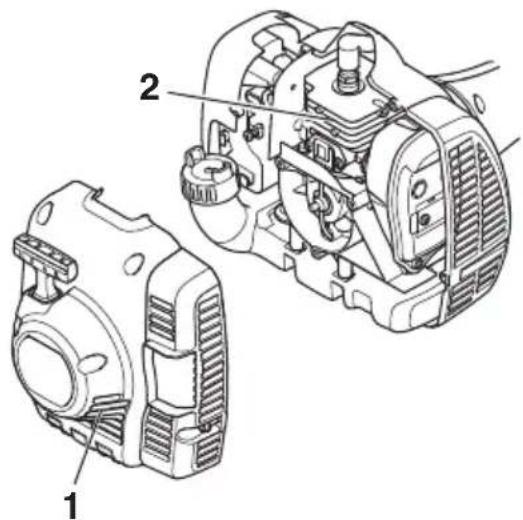
Cooling system components:
1 Air intake of the block head. 2 Cooling fins on the cylinder jacket.
Clean the cooling system with a brush once a year or more often when operating in unfavorable conditions. Contamination or clogging of the cooling system can lead to engine overheating and cause damage to the cylinder head.
Spark plug

The following factors affect the operation of the spark plug:
- Incorrect carburetor adjustment.
- Unsatisfactory fuel mixture (too much oil or unsuitable oil). - Dirty air filter.
These factors contribute to the formation of carbon deposits on the spark plug electrodes and can lead to misfires and starting difficulties.
If the engine loses power, starts poorly, or runs poorly: first of all, check the idle speed; first of all, check the spark plug. If the spark plug is dirty, clean it and check the electrode gap, 0.5/0.6 mm. Replace the spark plug every month of operation or more often if necessary.
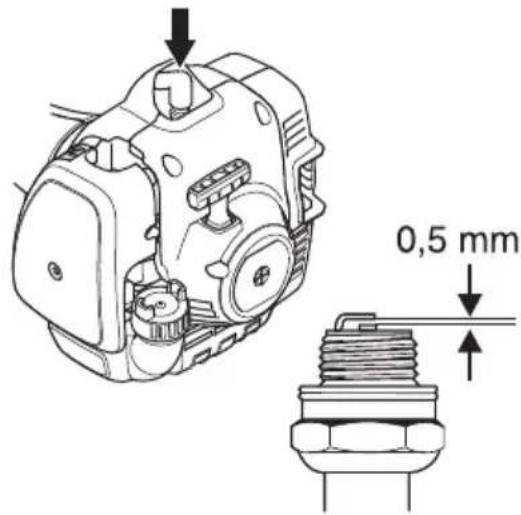
WARNING! Always use only the specified spark plug! Using an unsuitable model can lead to serious damage to the piston/cylinder. Make sure that the spark plug is equipped with a radio interference suppressor. See the Technical Specifications section.
Drive shaft

The cone of the drive shaft in the drive section should be lubricated from the inside with grease after every 30 hours of operation. In this case, if not lubricated regularly, there is a risk of the drive shaft cones seizing (with splined connection) of the two-section shaft.
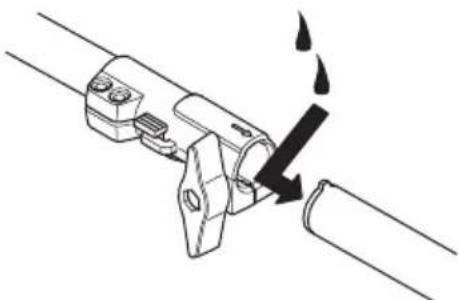
Air filter
The air filter should be cleaned regularly to avoid the following damage:
Carburetor malfunction, starting difficulty, loss of engine power, accelerated wear of engine parts, excessive fuel consumption.
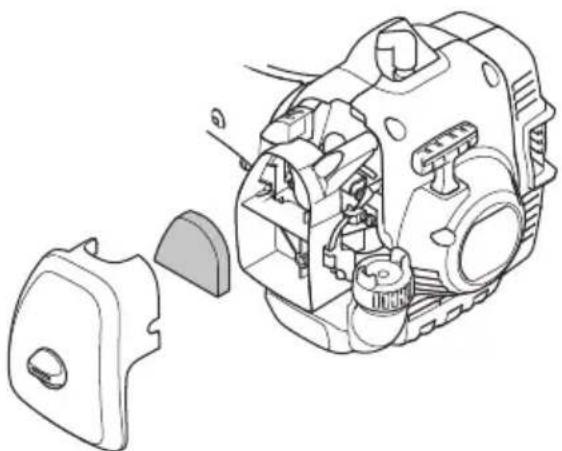
The air filter must be cleaned every 25 hours of use, if the work area is very dusty.
Cleaning the air filter
Remove the air filter, remove the cover of the cylinder. Rinse with clean, warm soapy water. Before reassembly, make sure the filter is dry.
After some time of operation, the air filter cannot be completely cleaned. Therefore, it must be replaced periodically. A damaged air filter must be replaced.
If you use the machine in dusty conditions, the air filter must be soaked in oil. See the section Oiling the air filter.
The device complies with EU requirements.

Beware of objects that may fly out. (129L, 129LK)

Beware of objects that may fly out. (129C)
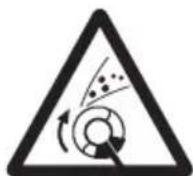
The operator must not be under the influence of drugs.
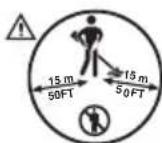
Wear protective gloves.

Wear non-slip footwear.
Use only non-metal attachments, such as a trimmer head with a trimmer line.
Cuts that show the direction of rotation of the tool.
Noise emissions into the environment comply with EU standards. Detailed information about the noise emissions of the tool can be found in the "Technical Data" section and on the label.

These markings on the tool meet the requirements of special certificates for certain markets.
This manual has been translated from the original language. WARNING! The translation is automatic.
To turn the device on, the cartridge must be fully charged and stored at a temperature that does not damage the instrument, as well as during all maintenance procedures.
Wear protective gloves.
It is necessary to clean the instrument.
Remove the cover.
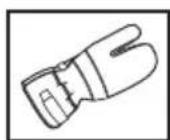
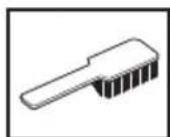

Contents of some sections before the table of contents.
CONDITIONS OF USE
Symbols on the product and/or packaging: 579
CONTENTS
Contents 580
Some sections and their contents: 580
Introduction
User manual, 581
What is a thermometer 582
It must be able to work, as needed, for example, during changes or installation of the attachment.
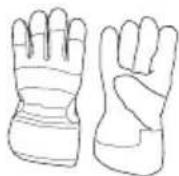
FOOTWEAR
Wear protective footwear with non-slip soles.
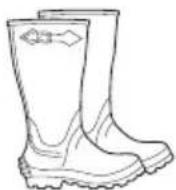
CLOTHING
Wear clothing made of sturdy fabric; wear loose-fitting clothing that covers your arms and legs. Protect your clothing and long pants. Do not wear clothing that is torn, sandals, or loose items, and do not walk barefoot. Keep your hair so that it is above your shoulders.
GLOVES
Keep gloves at hand.

SAFETY DEVICE
The safety device and its purpose are described in detail below, and it is explained how to properly perform checks and maintenance for correct functioning. Refer to the section "What is it?" to see where these devices are located on the tool.
The service life of the tool may change, and the danger of injury may increase if it is maintained incorrectly, or if maintenance and repairs are performed by unqualified persons. If you need additional information, please contact the nearest service center.
IMPORTANT
To perform maintenance and repairs, special training is required. This especially applies to safety work. If the tool does not meet one of the inspection requirements listed below, contact the service center. For any of these items, we guarantee professional repair and maintenance. If the seller from whom you purchased the tool does not provide maintenance services, ask them where the nearest service center is located.

WARNING! Never use the tool with a faulty safety device. The safety device must be checked and inspected according to the instructions in this section. If the tool does not meet at least one of the inspection requirements, contact the service center for repair.
This guard is intended to protect the user from flying objects that may occur during work. This guard protects the user from contact with rotating elements.
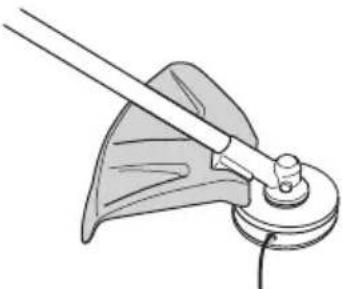
Check that it is not damaged and has no cracks. Replace the guard if it has been hit or has a crack.
3aBnKopntyTecKaKHyXOM,io peKoMeHIOBaHnIJIbBAHOBJIeHXHa daHm MoMeHT pIXyHx HacaDOK. NbBiTbcr po3diN "TexHiHi DaHI".

YBAI! Hikoln He KopucTytecpiHuymHaacdkam6e3 BiIOBIDHO3axncHoro KOHyxa. DnBiTbc np3diJ"TexHiDHI.BNKOpNCTaHHHeCnpabHoro Yn He BiIOBIDHOKOHyxa MoHe cnpuHNHTn cepNo3HinopaHeHH.
InyuHnK
IyushNK npn3NaeHnn IJn 3MeHneHHyUymiB Ta BiBDoy BxNOnHnx ra3iB BiKOpNCTyBaHa.
IyushNK,kyo6HaHaHO KaTajtHNM cnaJIOBaueM BnXJIOHNx Ra3IB,TaKOH 3MeHwye BKNiD NkIDINBHXpeOBNH.
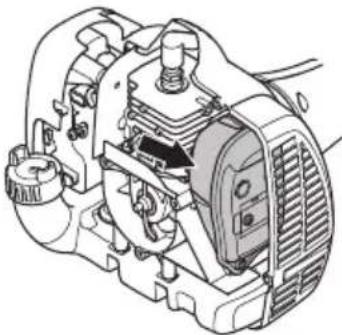
Ipi po6oTi y KpaHax i3 TeNIm Ta cyxIM KJIiMaTOM icHyce cepNo3Ha He6e3neKa 3aRopHH. 3 orJy Ha ue, DeaKi InyuHnK O6laNDHyOTbcr icKponorIINHaOyo CiTKoIO. IpeBipTe, H rLyuHnK Ha Baowomy IncTpymEnTi o6laDHaHn TaKOIO ciTKoIO.
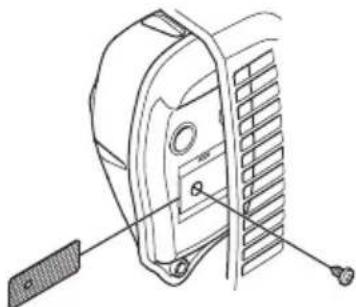
Y KopncTyBaHHI rnyuHnKOM DyHe BaHHJIINBO DoTpMMyBaTnCBAkAzIBOK 0do nepeBipKn, DoTgJyTa o6cIyroBvBaHHI hCTpyMeHTy.
HikoJHe KOpNCTyTecraIHCTpyMeHTOM i3 HecnpaBnM rnyuHnKoM.
PeryIpaHNo nepeBipraTe, qn rJyUnK HaDiHo npNkpinJIeHm IOn IHcTpymEnTy.
KJIO rIyHnIK iNCTpyMeHTy 06JaHaHO icKponorIINHaOoCtKoIO, II cIiD peryIaRPhO uNCTNTN.3a6pydHeHa ciTKa npN3BeDe do neperpIBAHNA BnryHa, IO MOHe CnpNCHNTcepNo3He NOro NoWKoDHeHH.

YBAI!IyuHnK,6bJaHaHn KaTalITNHyHM cnaJIbOVAeBMBIXJIoNHx ra3iB,DyHe cINbHO HarpIbAeTbcN iD cacpo60Tu IJeKNI Yac 3aJIbMaTeBcR rapaHm nicIa 3ynHKn. Lc TaKOH CTocyeTbcra po60Tu Ha XoJoCTOMy xOdy.PnDoTopKy MoHHa OTPMaTn onIKu Wkip.Nam'TaTaTe npo He6e3neKy 3arOpHH!

YBAI! BcepeHnHi rnyuHnKa MICTbXIMUHHeJeMeHTN,IO MOyTB 6yTN KaHcEporEHnMn. RaO rLyuHnk NowKOJHeHo, yHnKaTe KOHTaKTy i3 cMMeJeMeHTaMn.

YBAΓA! Nam'ЯтайTe:
BnxlonHi ra3n Maotb BnCOky TemnepaTpy i MoHcytb MicTHTi icKpn, BiD kNx MOHnIbe 3aropHH. HikoJI He BMkaTe iHcTpymEt y npMiuEHHi cn 6IJI NERKO3aIMCTNX MaTeiaJIB.
Pikyu cnpaJHeHnA
The device is designed to be selected and adjusted according to the specific working conditions:
- To achieve maximum performance in operation;
- The service life of the cutting tool is extended.
IMPORTANT
Use only the recommended nozzles! See the "Technical Data" section.
Use the wrench to check the correct installation of the cord and the correctness of its diameter.

WARNING! Before any work, make sure the nozzle is completely stopped. The nozzle may continue to rotate even after the device is turned off. It is recommended to wait until the nozzle has completely stopped, and then disconnect the cable from the power source before starting work with the nozzle.

WARNING! A defective nozzle can increase the risk of an accident.
Trimmer head
IMPORTANT
It is mandatory to ensure that the trimmer cord is taut and evenly wound on the spool, because if this is not done, the tool will create strong vibrations.
Use only the recommended trimmer heads and cords. They have been tested by the manufacturer and correspond to the given tool size. It is forbidden to use any other automatic trimmer head. Use only the recommended cutting attachments. See the "Technical Data" section.
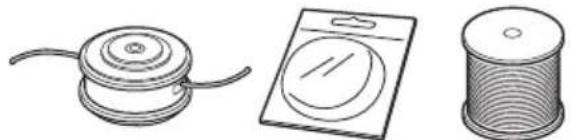
For a smaller tool, as a rule, smaller trimmer heads and attachments are needed. It is important that when cutting with a cord, the cord must be fed in a radial direction from the trimmer head, while providing resistance to the cut grass. - The correct length is important. A longer cord requires a stronger pull, while a shorter cord of the same diameter is easier to pull. - Check the cord on the trimmer head in order. It serves to cut the cord to the required length. - To increase the working life of the cord, it can be soaked in water for several hours. This makes the cord more flexible and it will last longer.
Assembly
Installation of the loop handle

Tighten the trimmer head. Note that the trimmer head must be installed with the arrows on the shaft.
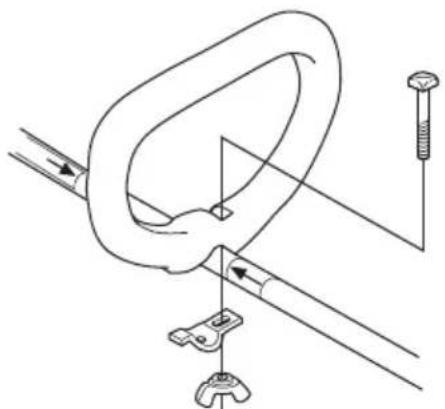
- Install the bolt securing the plate and the coupling nut, as shown in the diagram. Tighten the coupling nut.
Installation - Removal of the eccentric shaft
(129LK)
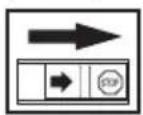
Installation:
Release the coupling by turning the locking head. - Install the protrusion of the attachment (A) opposite the arrow on the coupling (B).
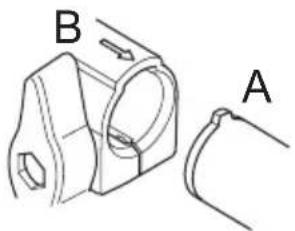
Insert the attachment into the coupling until the locking point.
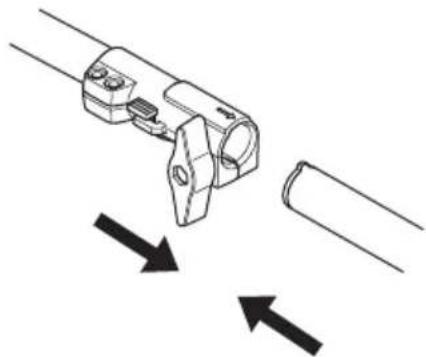
- Before starting work, tighten the locking head.
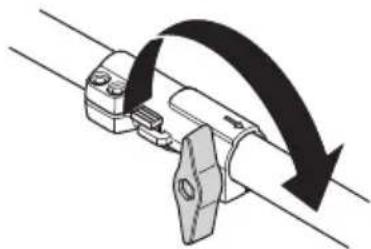
Removal:
Release the coupling by turning the locking head (approximately 3 turns).
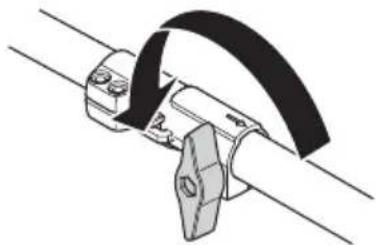
Press and hold the button (C). While holding the button, pull the attachment straight out of the coupling.
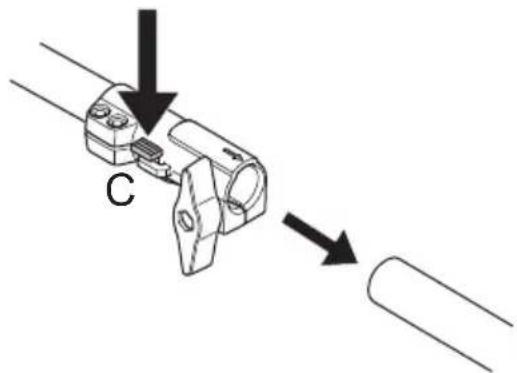
Installation of the grass cutting head.

WARNING! Never use attachments without the appropriate protective guard. See the "Technical Data" section. Use of an incorrect or damaged guard can cause serious injury.
Installation of the trimmer guard and trimmer head
(129L, 129LK)
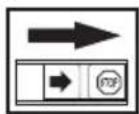
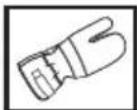
Install the appropriate guard for the trimmer head on the trimmer head (A). Close the trimmer head guard / install the combined guard for the shaft and secure it with the bolt (L).
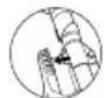
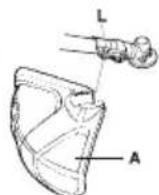
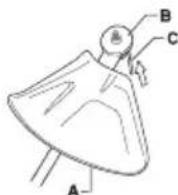
Install the drive disc (B) on the output shaft. Rotate the shaft so that one of the holes in the drive disc aligns with the corresponding hole in the gear housing. Insert the locking pin (C) into the hole to lock the shaft. Install the trimmer head / plastic blade (H), screwing them in the direction opposite to the rotation direction.
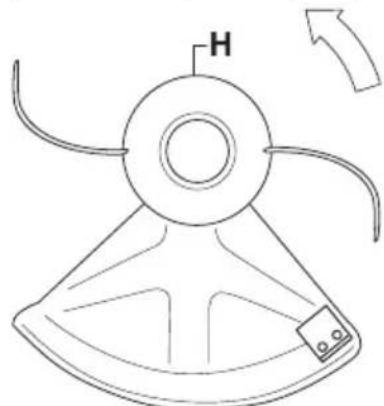
- For disassembly, perform the instructions in reverse order.
Installation of the trimmer head guard and trimmer head
(129C)
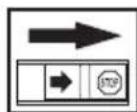
- Install the guard as shown in the diagram. Tighten securely.
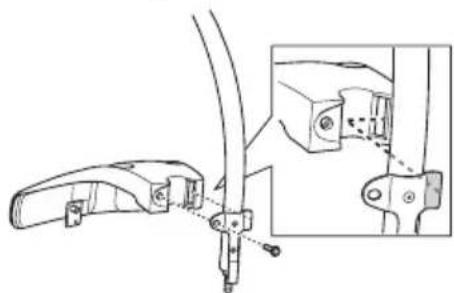
- Install the dust cap on the shaft. The shaft must be completely covered with the dust cap.
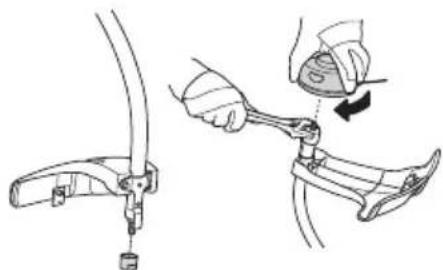
Hold the dust cap with a wrench to prevent the shaft from rotating. Install the trimmer head on the shaft.
Safety precautions when refueling
Never use the tool in the following cases:
1 If you spill fuel on it, wipe the tool and wait until the fuel evaporates. 2 If you spill fuel on yourself, change clothes immediately. Wash the parts of the body that came into contact with fuel with soap and water. 3 If the tool leaks fuel, regularly check that the fuel tank cap and fuel lines do not leak. In case of leakage, contact a service center.
Transportation and storage
Store and transport the tool with fuel so that in case of accidental fuel leakage, the fuel does not come into contact with open flames or sparks from electrical machines, motors, electrical relays/switches, or boilers. Use an approved container intended for fuel for storage and transportation. When storing the tool for a long period, the fuel tank must be empty. To find out where to dispose of leftover fuel, contact a local gas station. Before storing the tool for a long period, make sure it is clean and all appropriate maintenance procedures have been performed. When storing or transporting the tool, wear protective gloves. Secure the tool during transportation. To prevent accidental engine start, the spark plug cap must be removed during long-term storage, when the tool is not under supervision, and during all maintenance procedures.

WARNING! Be careful when working with fuel. Remember the risk of fire and explosion and the danger of fuel vapors.
Fuel
WARNING! The instrument is designed to operate on a two-stroke engine, so for proper operation it is necessary to use a mixture of gasoline and motor oil for two-stroke engines. To obtain the mixture in the correct proportion, it is important to accurately measure the amount of oil. When mixing an unknown amount of fuel, even a small inaccuracy can significantly affect the proportion of the mixture.
590 - Ukrainian

WARNING! Fuel and its vapors are highly flammable and can cause serious injury when inhaled or if they come into contact with the skin. Therefore, be careful when working with fuel and make sure the room is sufficiently ventilated.
Gasoline

WARNING! Always use a clean gasoline/oil mixture with an octane number of at least 90 (RON). If the instrument is equipped with a catalytic converter for exhaust gases (see section "Technical Data"), use a gasoline/oil mixture that does not contain lead. The use of leaded gasoline will damage the catalytic converter.
For environmental protection, use gasoline with a low level of harmful emissions (so-called alkylate).
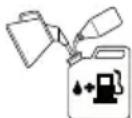
It is allowed to use a fuel mixture of gasoline and ethanol E10 (ethanol content not more than 10%). In the case of using a mixture with a high ethanol content, the working conditions may deteriorate, and engine damage may occur.
The minimum recommended octane number is 90 (RON). When using gasoline with an octane number lower than 90, so-called knocking may occur. This causes overheating of the piston, which can lead to its serious damage. - When operating at high speeds, we recommend using gasoline with a higher octane number.
Oil for two-stroke engines
For best results, use HUSQVARNA two-stroke engine oil, specially designed for our two-stroke engines with air cooling. Never use oil intended for two-stroke engines with water cooling, which is often called outboard oil (marked TCW). Never use oil for four-stroke engines.
Low oil quality and/or too much oil in the mixture can damage the catalytic converter and shorten its normal service life.
- Proportion 1:50 (2%) HUSQVARNA two-stroke engine oil.
1:33 (3%) when using other oil for two-stroke engines with air cooling, class JASO FB/ISO EGB.
Fuel pump: Press the fuel pump bulb several times until fuel begins to fill the carburetor. The carburetor should not be completely filled.
Press the choke lever down to the working position. Make several attempts until the engine starts. After the engine starts, fully open the throttle valve.
Turn off the device, turn on the ignition.
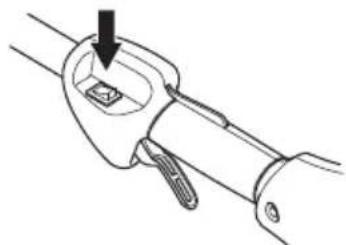
WARNING! The engine will automatically return to full throttle. To avoid an unintentional start, the cutting attachment must be fully stopped when storing, if the tool is not under strict supervision, and also during all maintenance procedures.
General safety instructions
WARNING
This section describes the main safety rules for working with the trimmer.
If a situation arises where you are not sure about doing further work, stop and ask a specialist. Contact the dealer or service center.
Do not attempt to do what seems beyond your capabilities.
Understand the difference between cutting trees, mowing grass, and trimming grass.
Basic safety rules


1. Follow the instructions: - Never allow anyone to take control of the tool. - To make sure that the cutting head or objects that may fly off during work do not fall into the field of view of people or animals. - WARNING! Do not use the tool if, in case of an accident, there is no possibility to call for help. 2. Check the equipment. Remove all loose objects such as stones, broken glass, wire, metal wire, ropes, etc., that may fly off and get caught in the cutting head. 3. Do not use the tool in bad weather - rain, fog, strong wind, strong wind, when it is very cold, etc. Working in bad weather is tiring and also creates a safety hazard, such as ice. 4. Make sure you can stand and move safely.
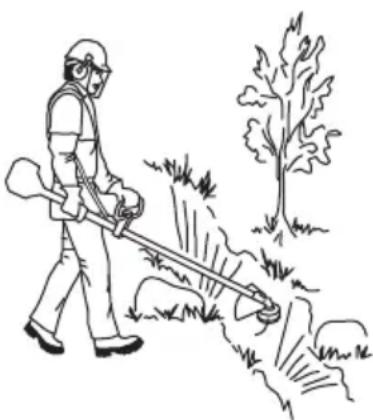
5. Watch your balance and stable footing. Do not apply excessive force. Maintain proper posture and balance. 6. Always hold the tool with both hands. Hold the tool on the right side of your body.
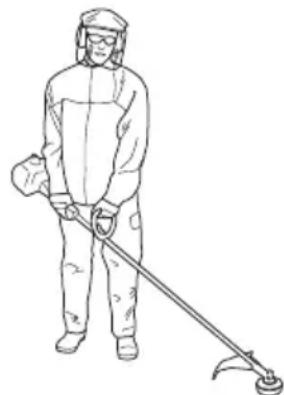
7. Keep the cutting head below waist level. 8. Before moving to another place, turn off the engine. 9. Never place the tool with the engine running on the ground unless it is well supported.

WARNING! Neither the user nor anyone else is allowed to remove the cutting material while the engine is running or the head is rotating, as this can cause serious injury.
Before adjusting the cutting head, turn off the engine and stop the rotating element; in this case, there is a risk of injury from the gear drive that may heat up after some time. Touching it may cause burns.

WARNING! Before operating the tool, read the instruction manual. Check that the tool is in good working order. If any damage is found, do not use the tool and contact a service center. Improper use can cause serious injury.
Bystanders must be at a safe distance. Children, animals, bystanders, and helpers must stay outside the danger zone, which is 15 meters. If the tool is dropped, immediately turn it off. Never pick up the tool without first checking that no one is behind you.
Basic operation
Always turn off the tool and let it cool down after each work operation. Prolonged operation of the tool at full power without any load can cause serious damage to the tool.

WARNING! The blade and the cutting attachment can cause cuts and injuries. Before any work on the tool, always turn off the tool.
Before adjustment, make sure that the air filter is clean and that the air filter cover is installed.
If necessary, adjust the idle speed using the idle adjustment screw. First, turn the idle adjustment screw clockwise until the cutting attachment starts to rotate. Then turn the screw counterclockwise until the cutting attachment stops. A correctly adjusted tool runs smoothly in any position. The idle speed must be significantly lower than the speed at which the attachment starts to rotate.
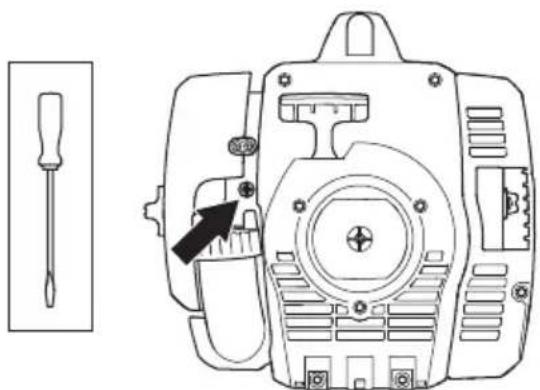
Recommended number of revolutions at idle speed: see section "Technical data".

WARNING! If you cannot adjust the speed so that the attachment stops, contact your dealer or a service center. Do not use the tool until it is properly adjusted or repaired.
Muffler
WARNING! The muffler is equipped with a catalytic converter. If the tool is equipped with a muffler of this type, see the section "Technical data".
The muffler is designed to reduce noise and to direct exhaust gases away from the user. Exhaust gases are very hot and can, if they come into contact with
dry or flammable materials, cause a fire.
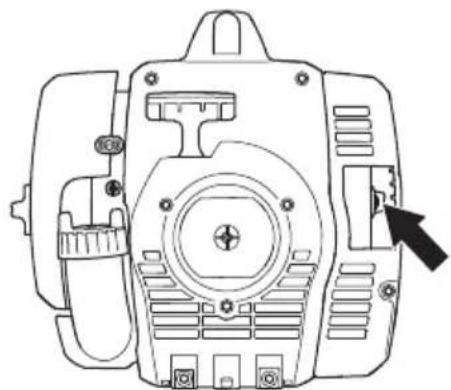
The muffler is equipped with a special spark arrestor mesh. If the tool is equipped with a muffler of this type, the mesh should be cleaned once a month. It is best to do this with a wire brush. Mufflers that are not equipped with a catalytic converter should be cleaned more often or as needed. Mufflers equipped with a catalytic converter should be checked and cleaned as needed. A damaged mesh should be replaced. If the mesh is frequently clogged, this indicates that the catalytic converter is not working properly. Contact your dealer to have the muffler checked. Working with a clogged muffler can cause overheating of the tool, which can lead to damage to the cylinder and piston.
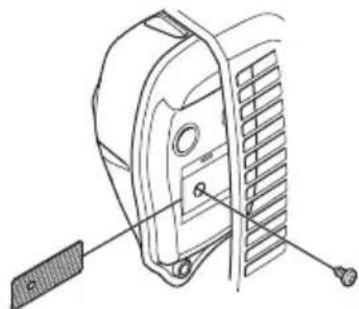
The housing is made of plastic. It is not recommended to remove the cover for technical service of the screen.
WARNING! If you use the tool incorrectly, it can be dangerous.

WARNING! When using the tool, it heats up strongly during operation and after a few minutes of operation it is filled with warranty fluid. This applies to idle operation. When starting, you can hear a characteristic sound. Remember about fire safety!
Cooling system
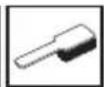
The tool is equipped with a cooling system.
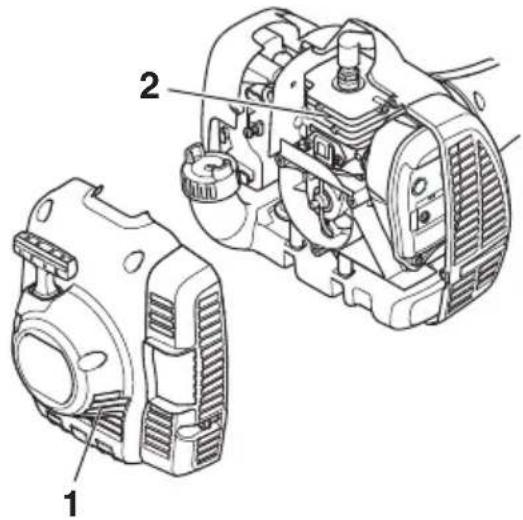
It consists of:
1. Air intake on the starter. 2. Cooling fins on the cylinder.
Clean the cooling system with a brush or compressed air in dusty conditions. A dirty or blocked cooling system can cause the tool to overheat, which will lead to damage to the nozzle and cylinder.
Spark plug

The condition of the spark plug is affected by:
- A poorly adjusted carburetor.
- An incorrect fuel mixture (too much oil or wrong type). -A dirty air filter.
These factors cause deposits on the spark plug electrodes, which can lead to problems in operation or difficulty starting.
If the engine loses power, is difficult to start, or runs poorly at idle, first check the condition of the spark plug. If the spark plug is dirty, clean it and check that the electrode gap is 0.5/0.6 mm. The spark plug should be replaced approximately every month of operation or earlier if necessary.
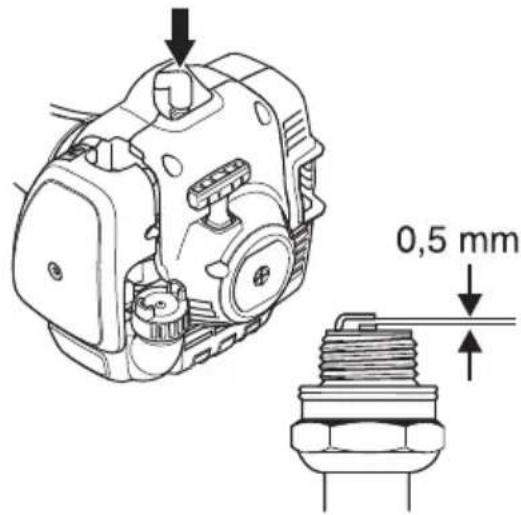
WARNING! Use only recommended spark plugs. Using incorrect spark plugs can damage the piston/cylinder. It is recommended that the spark plug has the correct voltage. See the "Technical Data" section.
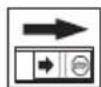
The air filter should be changed every 30 hours. There is a risk that the air filter (or its replacement) on models with two filters may become clogged if they are not changed regularly.
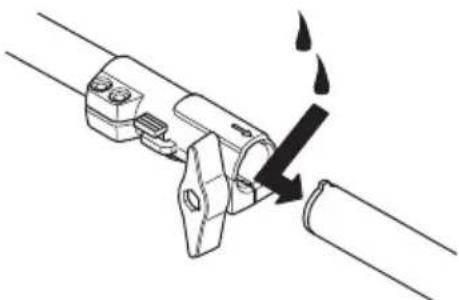
Air filter
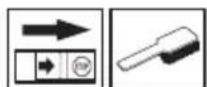
The air filter needs to be checked regularly for dirt and dust to avoid:
- Carburetor malfunctions - starting problems, loss of power, and increased fuel consumption.
- Premature wear of engine parts.
Increased fuel consumption.
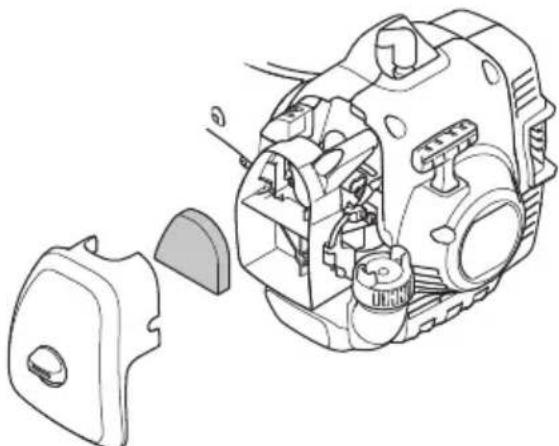
Clean the filter every 25 hours of operation, and more often when working in dusty conditions.
Cleaning the air filter
Remove the air filter cover and take out the filter. Wash it in warm water with soap. Dry the filter completely before reinstalling it.
Do not use a compressed air filter that has been used for a long time. It should be replaced periodically. A clogged filter must be replaced.
If the tool is used in conditions with a lot of dust, the air filter should be cleaned more often. Instructions are in the section titled 'Replacing the air filter'.
Replacing the air filter
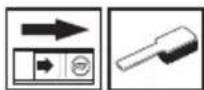
Use only the original filter, art. N531 00 92-48. The filter oil contains a special oil for even distribution over the filter. Therefore, it is worth avoiding its substitutes.
Place the filter in a plastic bag and pour filter oil over it. Shake the plastic bag to distribute the oil. Squeeze out excess oil from the filter into the middle of the plastic bag and pour it out before installing the filter in the tool. Never use used motor oil. It will only soak through the filter and remain on it.
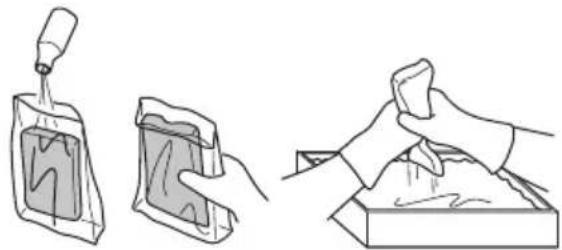
Gearbox

The gear transmission should be filled with the required amount of oil. However, before using the tool, you need to check that the gear transmission is filled with three quarters of the oil.
Use special oil NUSVARNIA.
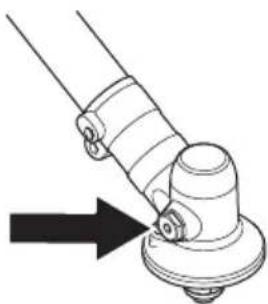
As a rule, the oil does not need to be changed, except in the case of transmission repair.
Maintenance schedule
We provide a list of maintenance activities to be performed. The items are described in the section "Maintenance". The user manual describes only the maintenance activities described in the user manual. Serious work should be performed by service centers.
Protective helmet in case there is a risk of falling objects
- Approved hearing protection - Approved protective goggles
Maximum reverse speed, rpm

max 10000rpm
The product is designed for cutting metal on shafts with a diameter of up to 10 mm.

Remove the cutting objects. (129L, 129LK)
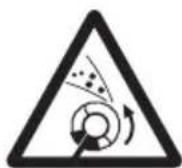
Remove the cutting objects. (129C)

During operation, the machine operator must ensure that people are at least 15 m away.
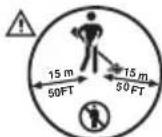
Wear approved protective gloves.

Use stable footwear.
This is intended only for non-metal, hard rubber processing, which means a three-part head with a three-part body.
The marked arrows indicate the limits for the supply of the primary air intake.
The noise emission in the surrounding area is in accordance with the Directive of the European Community. The machine's emission is a characteristic of the design and is above the limit.
The remaining symbols/markings with symbols, designated for the machine's installation, are subject to specific requirements regarding the certificate for certain markets.
The engine is switched off by moving the switch to the "STOP" position. ATTENTION! The switch is automatically
returned to the initial position. To prevent unintentional starting, the cable of the light must be disconnected from the light during installation, inspection, and/or maintenance.
Wear protective gloves.
Regular cleaning is required.
Visual inspection.

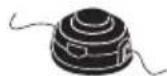

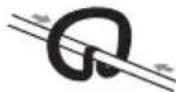

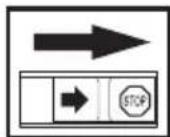

CONTENTS
Contents before starting|Safety
EXPLANATION OF TERMS
DESIGNATIONS
SYMBOLS ON THE MACHINE AND/OR
OPERATING MANUAL:603
Please pay attention to the following:
Note: 604
INTRODUCTION
Dear user! 605
What are the?
What are the examples? 606
SAFETY INSTRUCTIONS
WORK
Fill in 607
Length of protective clothing 607
Protective equipment on the machine 608
Relay equipment 610
MOUNTING
Mounting the direct handle 612
Mounting and dismounting
Inserting the 612
Mounting the tensioner 613
Mounting the trigger guard N
Trigger guard 613
Mounting the trigger guard n
Trigger guard 613
WORKING WITH FUEL
Safety when working with fuel 614
Fuel mixture 614
Refueling 615
STARTING AND STOPPING
Checks before starting 616
Starting and stopping 616
MANUAL
Basic operating instructions 618
ADJUSTMENT
Carburetor 621
Exhaust system 621
Cooling system 622
Ignition system 622
Crankshaft balancing 622
Air filter 623
Maintenance 624
TECHNICAL SPECIFICATIONS
Technical specifications 625
Compliance statement 627
Attention to the following:
Read the operating manual carefully.

WARNING! Improper use of this machine can lead to permanent hearing damage. Always use approved hearing protection.

WARNING! Under no circumstances should you modify the original design of the machine without the manufacturer's permission. Use only original accessories. Unauthorized modifications or accessories may cause serious injury or death to the operator or others.

WARNING! The lawn mower, trimmer, or edger, if used carelessly or incorrectly, are dangerous instruments that can cause serious or fatal injury to the operator or bystanders. It is very important that you read this operator's manual and understand its contents.
Dear customer!
Congratulations on your choice to purchase a Husqvarna product! The Husqvarna company has a long history, stretching back to 1689, when King Karl XI built a factory for producing muskets on the banks of the Husqvarna River. The choice of location - on the Husqvarna River - was quite logical, as the river was used for producing energy through flowing water, thus securing a source of power. Over the course of more than 300 years, the Husqvarna factory has produced a wide range of products, from wood stoves to modern kitchen machines, washing machines, bicycles, motorcycles, etc. The lawn mower with manual start was produced in 1956, and in 1959 the first motor-driven mower was produced, and this is the sector in which the Husqvarna company works today.
Today, Husqvarna is one of the leading manufacturers of forestry and garden equipment, with quality and productivity as top priorities. The core business concept is the development, production, and marketing of forestry and garden equipment with manual start, as well as equipment for the construction industry. Our focus is always on being at the forefront of ergonomics, forestry, work safety, and environmental protection, and in these areas we have developed a number of features that improve the functionality of our products in these sectors.
We are confident that you will be very satisfied with the quality and productivity of our product over a long period of time. The purchase of one of our products gives you access to professional help for repairs and service when needed. If the dealer who sold you the machine is not one of our authorized service dealers, please contact the address of our nearest service center.
Keep this manual in a safe place and make sure that all users read it. If you sell the machine, make sure that the new owner gets the operator's manual. The operator's manual is an important document. Failure to follow the instructions (for operation, service, maintenance, etc.) can significantly shorten the service life of the machine and reduce its value. If you decide to sell the machine, be sure to give the operator's manual to the new owner.
Thank you for choosing a Husqvarna product.
Husqvarna AB constantly improves its products and reserves the right to change the design, appearance, and other features without prior notice.
What is what on the trimmer?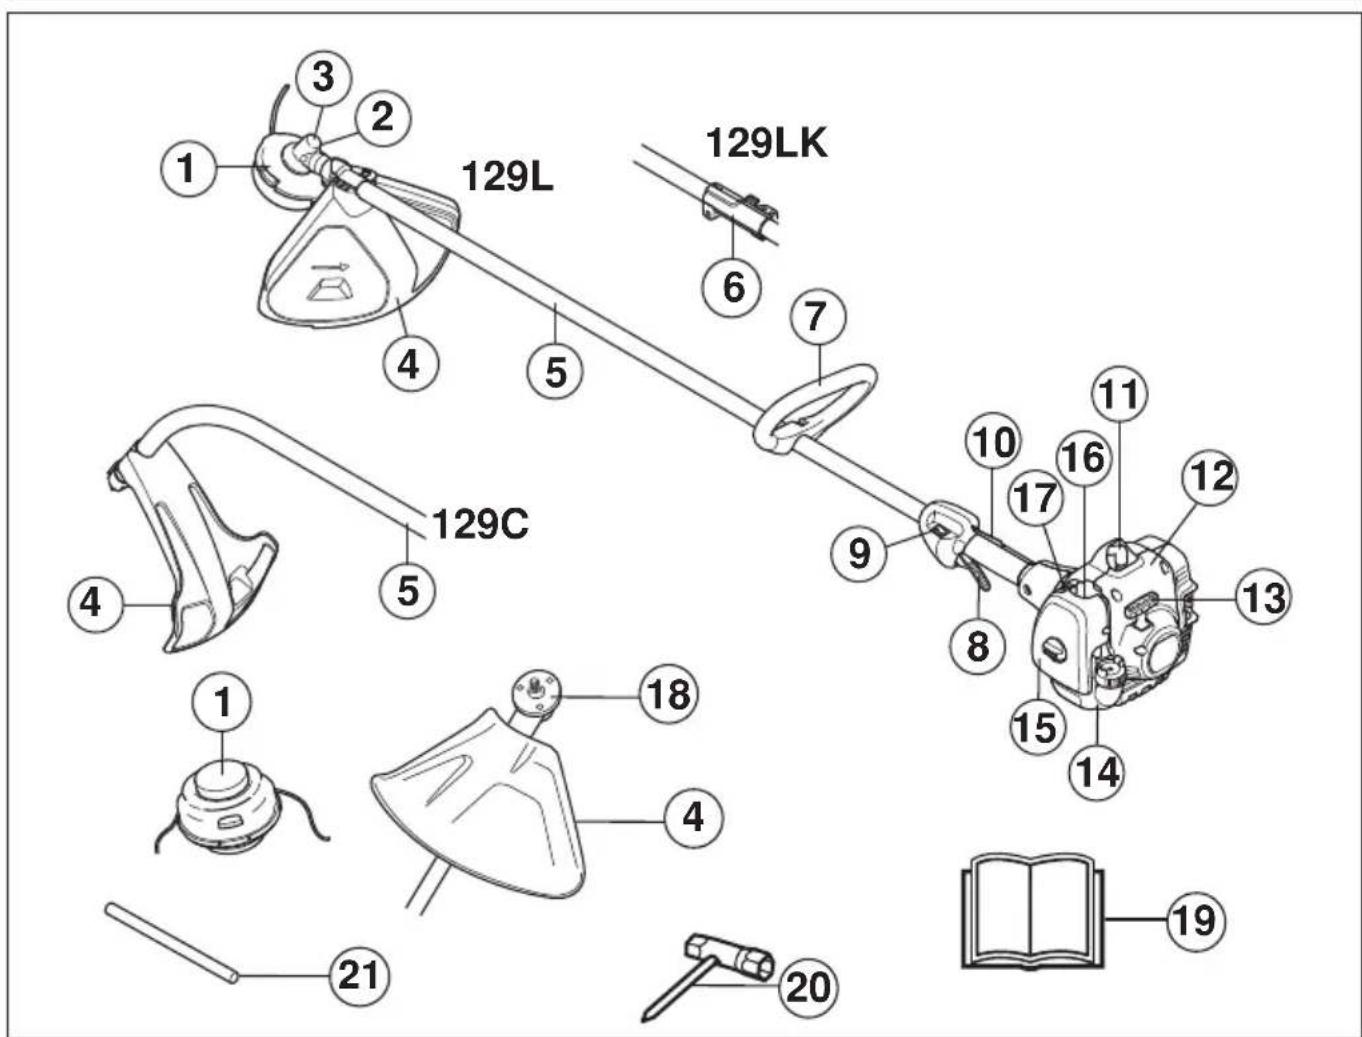
1 Trimmer head 2 Grease fitting 3 Gear angle 4 Gear angle 5 Guard 6 Drive shaft 7 Shaft coupling 8 Throttle control 9 Throttle trigger 10 Throttle lock
11 Spark plug cap, spark plug 12 Starter 13 Starter handle 14 Fuel tank 15 Fuel filter cap 16 Fuel pump 17 Muffler 18 Air filter 19 Operator's manual 20 Combination wrench 21 Spark plug
Note
WARNING!
The machine is intended only for trimming and mowing grass.
The only accessories that you may use with the engine as a power source are those recommended by us. See the Technical data section.
Never operate the machine if you are tired, or under the influence of alcohol or drugs that affect your vision, coordination, or judgment.
Use personal protective equipment. See the section on personal protective equipment.
Never use a machine with modified original construction.
Never use a machine that is defective. Perform the safety checks, maintenance, and service described in this operator's manual. Certain service and maintenance operations must be performed only by qualified service personnel. See the section on maintenance.
All covers, guards, and handles must be mounted before starting work. Make sure that the spark plug cap and ignition cable are in good condition to avoid the risk of electric shock.
Before starting work, the operator of the machine must ensure that people are at least 15 m away.
Perform regular maintenance of the machine to prevent misuse, see the maintenance schedule.

WARNING! This machine creates an electromagnetic field during operation. Under certain circumstances, this field may interfere with active medical implants. To minimize the risk of serious or fatal injury, people with medical implants should consult with their doctor and the manufacturer of the medical implant before starting to work with this machine.

WARNING! Operating the engine in a closed or poorly ventilated area can lead to death from suffocation or poisoning with carbon monoxide.

WARNING! Never allow children to use the machine or to be near it. The machine is equipped with safety devices, but it can be started accidentally by children due to their curiosity and strength. This poses a risk of serious injury. Therefore, keep the machine away from children when it is not under direct supervision.
Personal protective equipment
REMEMBER!
The mower blade, trimmer head, or other attachment, if used carelessly or incorrectly, are dangerous tools that can cause serious or fatal injury to the operator or bystanders. It is very important to read this operator's manual and understand its contents.
When working with the machine, you must always use personal protective equipment approved by the relevant authority. Personal protective equipment does not eliminate the risk of injury, but it reduces the severity of injury in case of an accident. You can contact your dealer for help in choosing suitable equipment.

WARNING! Be careful with the warning labels on the machine when using it. Always follow the instructions on the labels.
HELMET
Protective helmet in cases where there is a risk of falling objects
EAR PROTECTION
It is necessary to work with ear protection, providing sufficient hearing protection and comfort.
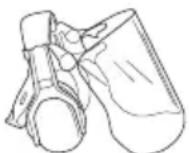
PROTECTIVE GOGGLES FOR EYES
Use protective equipment for the eyes. If you use a mask, make sure to use protective glasses. Protective glasses are available with side shields that meet standard ANSI 387.1 for eye and face protection.

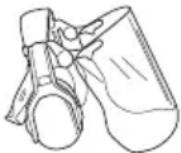
GLOVES
Gloves should be used when necessary, for example when installing the equipment.
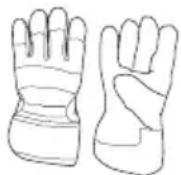
BOOTS
Use sturdy, non-slip boots.
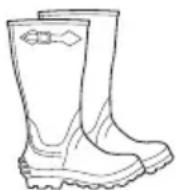
WORK CLOTHES
Wear bright clothing to avoid being hit by wide loads that can easily get caught on clothing or skin. Wear bright clothing. Do not wear loose clothing, jewelry, or sandals, and do not work barefoot. Keep your hair away from the machine.
FIRST AID KIT
The first aid kit must always be within reach.

Machine safety equipment
This section describes the various safety devices of the machine, their operation, and how to perform the inspection and maintenance to guarantee safety during work. This section is key - it describes which of these devices are installed on your machine.
The service life of the machine can be shortened and the risk of accidents increased if the technical maintenance of the machine is not carried out correctly and if maintenance and preventive activities are not performed professionally. If you need more information, please contact your nearest service center.
REMEMBER!
Any service and repair of the machine requires special training. This is especially true regarding the safety equipment of the machine. Contact the service center if the machine does not pass the prescribed checks. When purchasing our product, we guarantee the provision of qualified repair services and service. If the place where you bought the machine is not a specialized distributor, ask for the nearest service workshop.

WARNING! Never use a machine with defective safety equipment. Perform the checks and maintenance as described in this section. If the machine does not pass any of the prescribed checks, contact the service center to perform repairs.
Throttle valve lock
THROTTLE VALVE LOCK - A construction that prevents the throttle valve regulator from sticking. When the lock (A) is pressed against the handle (i.e., when the handle is pressed), the throttle valve button mechanism (B) is released. When you release the pressure on the handle, the regulator and the throttle valve lock return to their initial position. This is accomplished with the help of two independent return springs. This position
SAFETY INSTRUCTIONS
The throttle valve regulator automatically returns to the idle position.
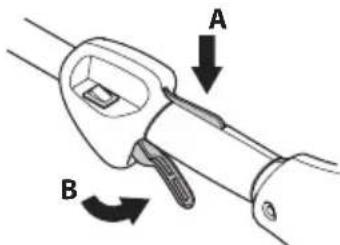
Make sure that the throttle valve regulator is in the idle position before the throttle valve lock is set to its initial position.
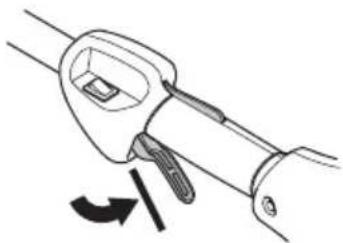
Press the throttle valve lock and make sure that when you release it, it returns to its initial position.
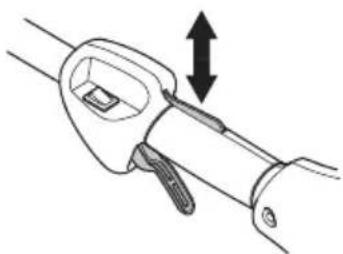
Make sure that the button mechanism and the throttle valve lock move freely and that the return springs are in good condition.
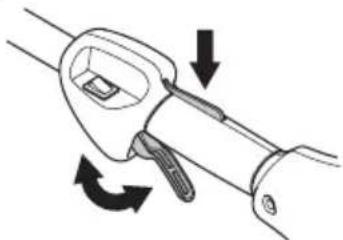
Read the instructions in the Starting section. Start the device and wait for the gas to settle. Release the gas regulator and make sure that the cutting attachment stops and remains completely still. If after supplying gas and the idle speed, the cutting attachment continues to rotate, the carburetor idle speed adjustment must be checked. Read the instructions in the Tuning section.
Stop switch
Use the stop switch to turn off the engine.
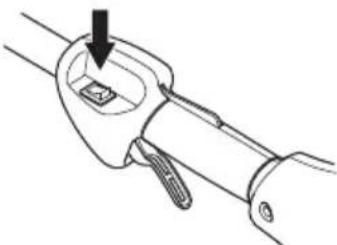
Turn on the engine and make sure that it turns off when the switch is placed in the Stop position.
Guard for cutting attachment

This guard is designed to prevent objects from being thrown towards the operator. The guard also protects the operator from the cutting attachment.
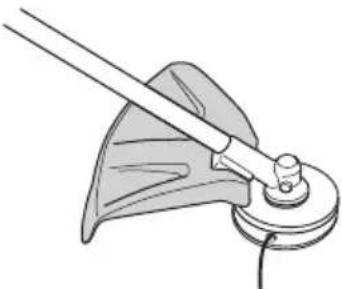
Make sure that the guard is not damaged and that it is not worn. Replace the guard if it has been subjected to impacts or if it has cracked.
Use only the recommended guard for the specific cutting attachment. See the Technical specifications section.

WARNING! Do not use the machine without first installing the appropriate protection. See the Technical Specifications section. Using incorrectly or improperly protected equipment can lead to serious personal injury.
Exhaust
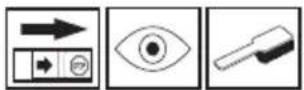
The exhaust must be vented to the minimum required level of noise and the exhaust gases must be discharged from the workplace. The exhaust, equipped with a catalytic converter, is designed to reduce the emission of harmful substances in the exhaust gases.
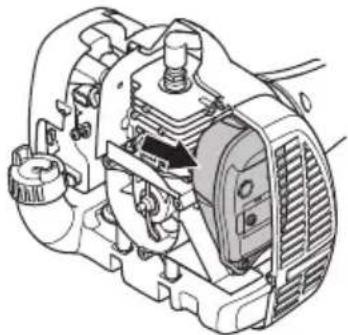
In hot and dry climates, the risk of fire is high. For this reason, we equip the exhaust with a spark arrestor. Check that the exhaust is equipped with such a device.
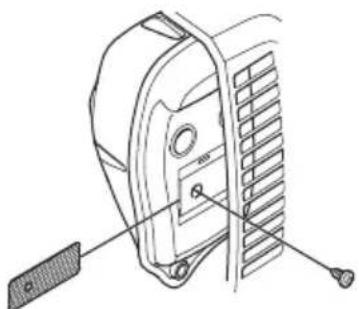
With regard to the exhaust, it is extremely important to follow the instructions for inspection, maintenance, and service.
Never use the machine with a damaged exhaust.
Check regularly the tightness of the exhaust attachment to the machine.
If the machine's exhaust is not equipped with a spark arrestor, it must be cleaned regularly. A clogged arrestor causes the engine to overheat and can lead to serious damage.

WARNING! Exhausts equipped with a catalytic converter become very hot during operation and for some time after. This is also important for proper handling. Touching them can cause burns. Be aware of the risk of fire!

WARNING! The contents of the humidifier filter contain chemicals that may be carcinogenic. In case the humidifier filter is damaged, dispose of the filter with these elements.

WARNING! Do not forget that:
The exhaust gases from the engine are hot and may contain sparks that can cause a fire. Never start the machine indoors or near flammable materials!
Regular equipment
This section describes how, through proper maintenance and correct selection of regular equipment, the following is achieved:
- Maximum efficiency is achieved when cutting. - The service life of the cutting equipment and the regular equipment is extended.
REMEMBER!
Before using the device, read the safety instructions. See Technical Specifications.
Refer to the instructions for the device for correct winding of the cord and selection of the correct cord diameter.

WARNING! Always unplug the device before filling it or working with any part of the device. To avoid burns, do not touch the gas regulator. Make sure the device is switched off and unplug the power cord from the outlet before filling it or working with it.

WARNING! Improper use of the device may increase the risk of fire.
Sample head
REMEMBER!
It is necessary to always make sure that the sample cord is wound tightly and evenly around the drum, otherwise dangerous vibrations of the machine may occur.
We work with the sample head and sample cord supplied by us. They have been tested by the manufacturer to match the dimensions of the specified injector. This is especially important when using an automatically operated sample head. We work with the recommended equipment. See Technical Specifications.
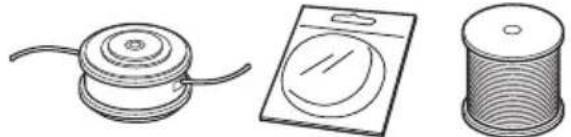
The smallest machine requires the smallest sample heads and cords. This is due to the fact that when cutting with a cord, the engine must move the cord in the cutting area of the sample head and simultaneously overcome the resistance of the grass being cut. - The length of the cord is important. A long cord requires less engine power than a short cord with the same diameter. - Make sure that the guard is not damaged. It is used for adjusting the cord to the required length. To increase the life of the cord, you can soak it in water for a few hours. The cord becomes more flexible and lasts longer.
Mounting the trimmer head

- Place the trimmer head on the two-section shaft. Pay attention that the trimmer head must be mounted between the marks on the two-section shaft.
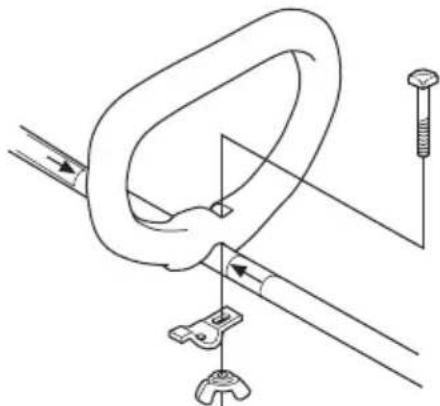
- Mount the bolt, the washer, and the wing nut according to the figure. Tighten the wing nut.
Mounting and dismounting of the two-section shaft
(129LK)

Mounting:
Unscrew the connector for the back cover. -Align the marker on the equipment (A) with the arrow on the connector (B).
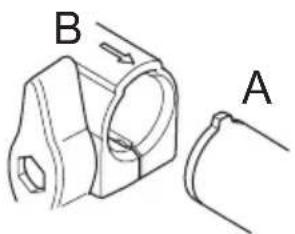
-Press the equipment into the connector until it clicks into place.
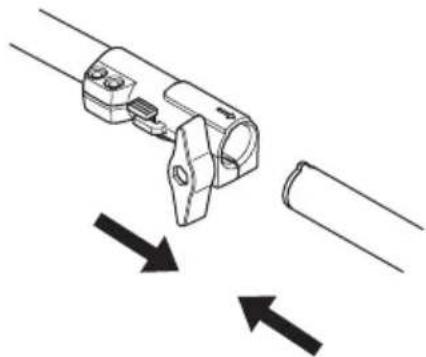
-Tighten the right screw to use the module.
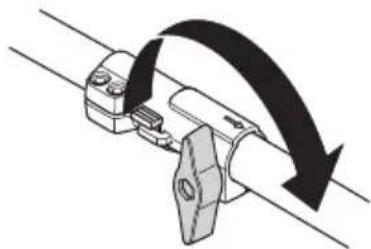
Disassembly:
Unscrew the connector for the back cover (at least 3 turns).
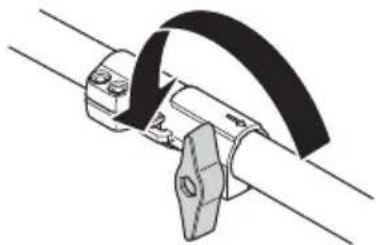
Press the release button (C). Pull the right side of the device, then remove the equipment from the connector.
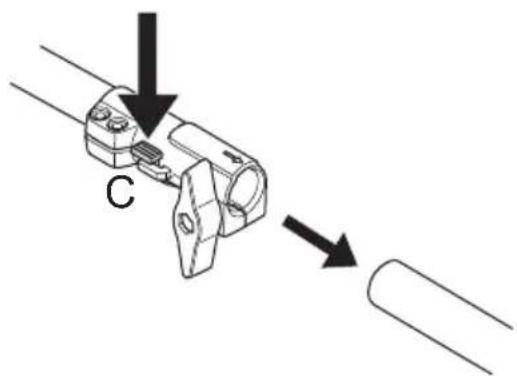
Mounting the equipment

WARNING! Under no circumstances should the equipment be used without the proper protection being mounted. See the technical characteristics. Use of incorrect or improperly installed protection equipment can lead to serious personal injury.
Mounting the sample protection and the sample head
(129L, 129LK)
- Mount the supplied sample protection (A) for work with the sample head. The sample protection/combined protection is attached to the shaft of the two-section valve and is fixed with one screw (D).
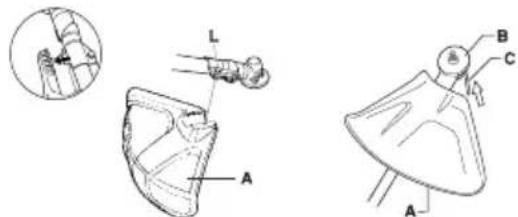
-Mount the locking ring (B) onto the shaft end. Turn it around the shaft until the hole in the locking ring aligns with the hole in the adapter. -Insert the locking screw (C) into the hole to fix the shaft. Tighten the sample head/plastic jaws (H) in the opposite direction of rotation.
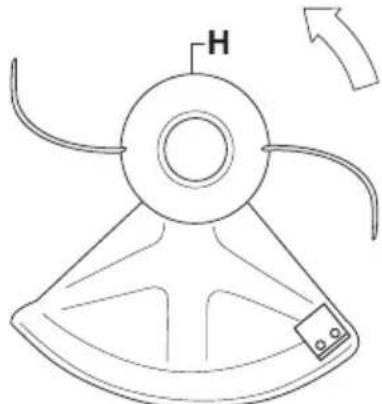
-Disassembly is carried out in reverse order.
Mounting the sample protection and the sample head (129C)
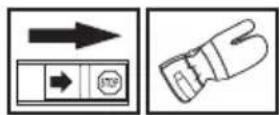
- Mounting is carried out as shown in the figure.
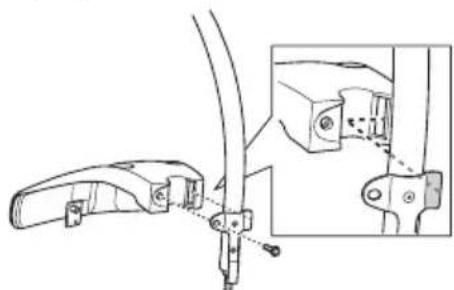
- Mount the spark plug cap firmly. It must be removed from the spark plug.
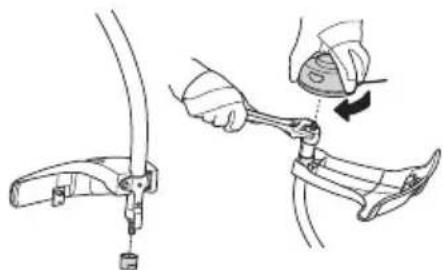
Tighten the spark plug cap with the help of pliers, so that it does not turn. - Screw the spark plug head onto the cap.
Safety when working with fuel
Never start the machine:
1 If you have spilled fuel on it. Wipe off the spilled fuel or oil and let the remaining fuel evaporate. 2 If you have spilled fuel on yourself or your clothes. Wash the parts of your body that have been in contact with fuel. Use soap and water. 3 If the machine has a fuel leak. Check regularly for leaks from the tank and fuel lines. Contact service in case of a leak.
Transport and storage
Store and transport the machine and its fuel in such a way that there is no danger of possible leaks or vapors coming into contact with sparks or open flames, for example from electric machines, electric motors, electric/electronic switches or heaters. - The fuel must be stored and transported in specially designed and approved containers for this purpose. If the machine is to be stored for a longer period, the fuel tank must be emptied. Contact a gas station for information on how to dispose of fuel residues. - Make sure that the machine is clean and that long-term preservation has been carried out after complete servicing. The transport protection equipment must be installed when transporting and storing the machine. - Secure the machine during transport. To prevent unintentional starting of the engine, the spark plug cap must be removed during storage if the machine is not in use, and when performing any technical maintenance operation on the machine.

WARNING! Be careful when working with fuel. Remember that there is a danger of fire, explosion and inhalation of vapors.
Fuel mixture
ATTENTION! The machine is equipped with a two-stroke engine and must run on a mixture of gasoline and two-stroke oil. To obtain the necessary mixture ratio, the amount of oil must be measured precisely. When mixing small quantities of fuel, due to inaccuracies and deviations
the amount of oil may not correspond to the required mixture ratio.

WARNING! Fuel and fuel waste products are highly flammable and can cause serious injury or damage if they come into contact with skin. For this reason, pay attention when handling fuel and always ensure adequate ventilation.
Gasoline
ATTENTION! Use a mixture of quality gasoline/oil with at least 90 octane (RON). If the machine is equipped with a catalytic converter (see the technical data chapter), use only unleaded gasoline/oil mixtures of good quality. Leaded gasoline destroys the catalytic converter.
If you have access to unleaded petrol, i.e. alkylate petrol, it is recommended to use it.
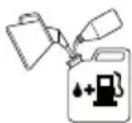
Fuel with ethanol mixtures can only be used E10 (mixture with max. 10% ethanol). The use of ethanol mixtures higher than E10 can create unfavorable conditions that can damage the engine.
- The lowest recommended octane number in the fuel is 90 (RON). If you supply the engine with fuel with an octane number lower than 90, knocking may occur. This leads to high engine temperature, which can cause serious engine damage. - For prolonged operation at high speeds, the use of fuel with a higher octane number is recommended.
Two-stroke engine oil
-Use HUSQVARNA two-stroke engine oil, which is specially produced for two-stroke engines with air cooling, to ensure the best performance. Never use two-stroke oil intended for outboard engines with water cooling, even if it is labeled
as oil for outboard engines (which carries the name TCW).
The use of oil for four-stroke engines is prohibited. Mixing low-quality oil or excessive oil/fuel ratio can pose a danger to the catalytic converter and damage the exhaust system. - Mixture composition
1:50 (2%) with HUSQVARNA two-stroke oil.
1:33 (3%) with other oils intended for two-stroke engines with air cooling, classified for JASO FB/ISO EGB.
Trimmer head

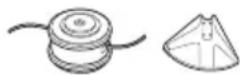
Trimming
-Hold the trimmer head directly above the ground and tilt it slightly. The work is done from the edge of the cord. Let the cord work at its own pace. Never press the cord against the trimming area.
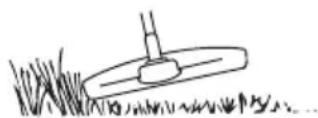
The cord can easily trim grass and weeds near walls, fences, trees, and curbs, but it can also damage the sensitive bark of trees and shrubs, as well as the edges of fences. - The risk of damage to plants is minimized thanks to the cord extending 10-12 cm and the reduced number of engine revolutions.
Clearing
-When clearing, the unwanted vegetation is removed. Hold the trimmer head directly above the ground. Tilt the cord slightly so that it cuts the ground around trees, fences, statues, and stones. WARNING! This method removes the cord.
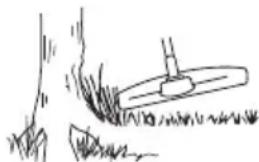
Working with stone, bricks, concrete, metals, paints, etc. is much more dangerous than working with wood and wooden materials. - When cutting and trimming, you must not inhale the dust and gases (80%), in order to prolong the cord and to reduce the wear of the trimmer head.
Cutting
- The trimmer is designed for cutting grass in places where it is difficult to use a mower. The cord is directed towards the ground for cutting. Avoid hitting the trimmer head against the ground, as you can damage the grass and the device.
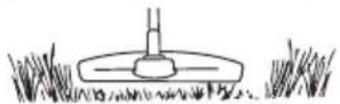
AVOID HITTING THE TRIMMER HEAD AGAINST THE GROUND. CONSTANT HITTING CAN DAMAGE AND WEAR OUT THE TRIMMER HEAD.
Trimming
The action of the wind can be used for quick and easy trimming. Direct the cord towards the area you are trimming, moving the device forward and backward.
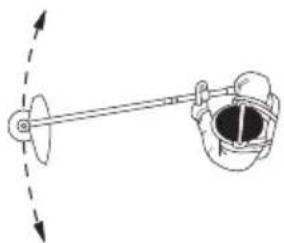
- When cutting and trimming, you must use the full gas to achieve good results.
REMEMBER! To prevent imbalance and vibrations, the trimmer head must be cleaned every time before using the cord. Also check that all parts of the head are free from dirt.
Carburetor
Idle speed adjustment
The initial adjustment must be set with the engine off and the air filter in place.
Adjust the idle speed with the idle speed screw T, if necessary. Turn the idle speed screw T clockwise until the cutting attachment starts to rotate. Then turn the screw counterclockwise until the cutting attachment stops rotating. Correct idle speed is achieved when the engine runs smoothly in all positions. There must be a significant reserve in speed when the cutting attachment starts to rotate.
Reference values for idle speed: see section Technical characteristics.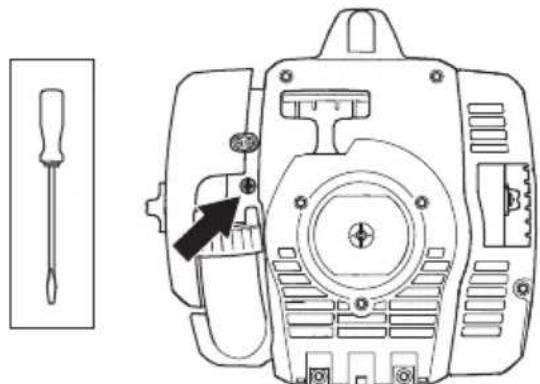

WARNING! Contact the distributor/service if the idle speed cannot be adjusted so that the cutting attachment stops. Stop using the machine until it is adjusted or repaired.
Maintenance
WARNING! The machine is equipped with a catalyst. See the Technical Characteristics section to determine if your machine is equipped with a catalyst.
The exhaust is designed to reduce noise and to remove the exhaust gases from the operator. The exhaust gases are hot and may contain sparks, which can cause a fire if they land on dry or flammable material.
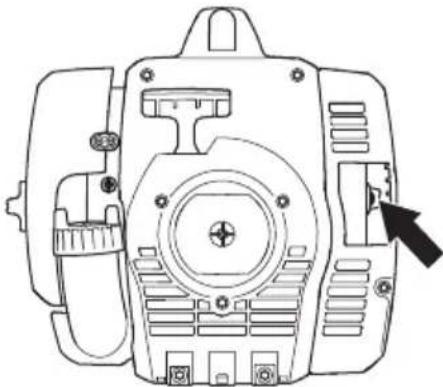
Some exhausts are equipped with a special spark arrestor mesh. If your machine is equipped with this type of exhaust, follow the maintenance instructions. Cleaning is done with a wire brush. The mesh of the exhaust without a catalyst is cleaned and, if necessary, replaced with a new one. The mesh of the exhaust with a catalyst is checked and, if necessary, replaced every month. In case the mesh is damaged, it must be replaced. Frequent clogging of the mesh may be an indication of damage to the catalyst. Contact the distributor for a technical inspection. If you work with a clogged mesh, the engine will overheat, which can damage the cylinder and piston.
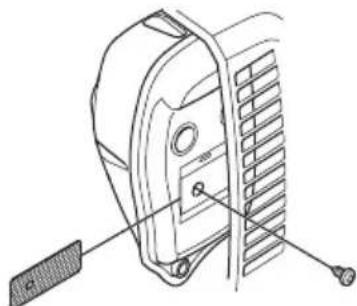
The rear part of the housing is shown removed solely for clarity. It is not recommended to disassemble the cover for technical maintenance of the machine.
WARNING! Never work with the machine if the exhaust is damaged.

CAUTION! The exhaust, equipped with a catalyst, becomes very hot during operation and remains so for some time after. This is valid for the exhaust pipe. Touching it can cause burns. Be careful of fire hazard!
Cooling system
To achieve the lowest possible working temperature, the machine is equipped with a cooling system.
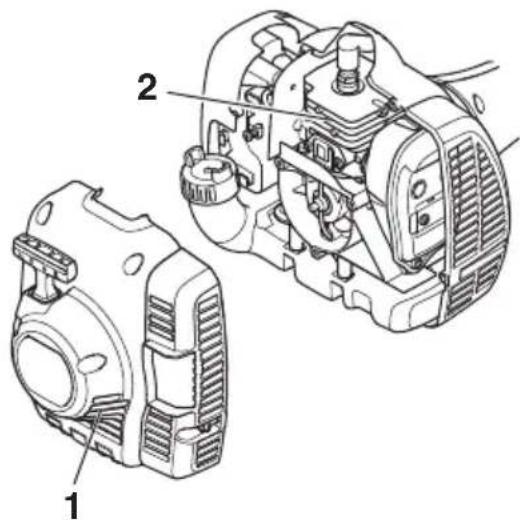
The cooling system consists of:
1 Air intake device in the starter. 2 Cooling fins on the cylinder.
Clean the cooling system regularly or more often in dusty working conditions. A clogged cooling system causes overheating of the machine, which leads to damage to the cylinder and piston.
Spark plug

The condition of the spark plug is affected by:
- Incorrect carburetor adjustment.
- Incorrect oil mixture in the fuel (too much oil or poor quality oil). - Clogged air filter.
The spark plug electrode gap should not be adjusted. The spark plug must be replaced if it is worn or if there are difficulties when starting.
If the engine works with low power, the machine starts with difficulty and runs unevenly: you must first check the spark plug. If the spark plug is dirty, it must be cleaned and the
electrode gap checked to be 0.5/0.6 mm. The spark plug must be replaced about every one month or more often, if necessary.
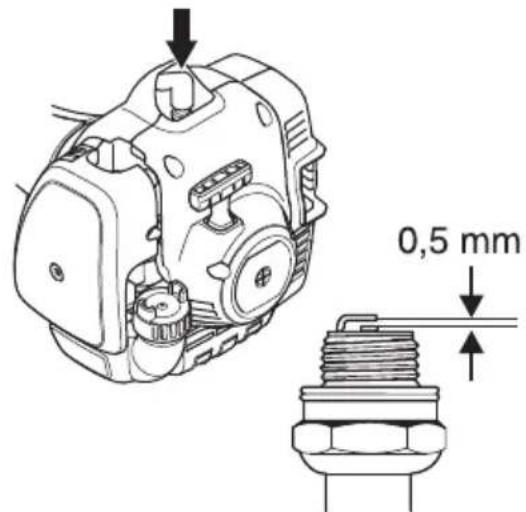
WARNING! Use only the recommended type of spark plug! Using the wrong type of spark plug can cause serious damage to the engine/muffler. Make sure the spark plug is equipped with a radio interference suppressor. See the technical characteristics section.
Lubricating the two-stroke shaft

The end of the drive shaft in the lower part of the two-stroke shaft must be greased through the grease fitting after every 30 working hours. There is a risk of seizing of the drive shaft bearing (the needle bearings) on the two-stroke shaft if it is not greased regularly.
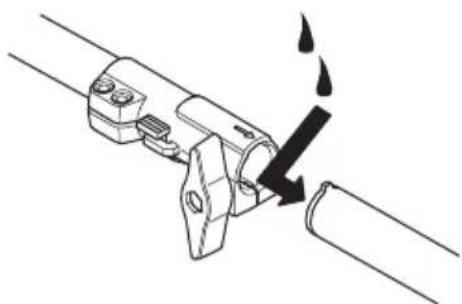
Air filter

The air filter must be cleaned regularly of dust and dirt to avoid:
Disturbances in the carburetor operation - Difficult starting - Decrease in power - Unnecessary wear of engine parts - Increased fuel consumption.
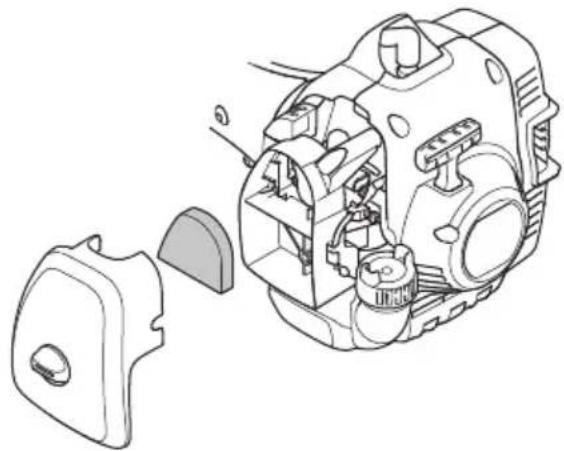
The air filter must be cleaned after every 25 working hours or more often, if the working place is very dusty.
Cleaning the air filter
Remove the cover of the air filter. Take out the filter. Wash it in warm soapy water. Before reassembling, make sure the filter is dry.
An air filter used for a long time cannot be cleaned completely. Therefore, at certain intervals of time it must be replaced with a new one. A damaged air filter must be replaced immediately.
If you use the machine in very dusty conditions, check the air filter more often. See the section Lubricating the air filter.
Lubricating the air filter

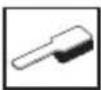
Use only HUSQVARNA original two-stroke oil, art. no. 531 00 92-48. The two-stroke oil contains additives that ensure even lubrication of the engine. Always follow the instructions to avoid direct contact with the oil.
Place the machine on a flat surface and fill the oil tank with two-stroke oil. Fill the oil tank up to the mark and distribute the oil. Start the engine and let it run for a few seconds, then check for leaks and top up if necessary. Never use ordinary engine oil. This will quickly destroy the engine.
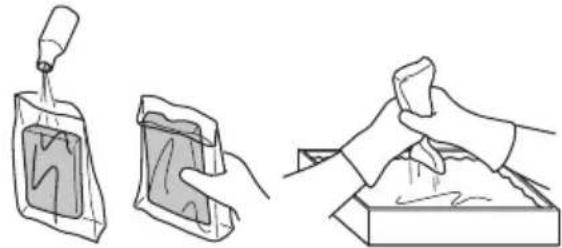
Gearbox oil

The gearbox is filled with the correct amount of grease at the factory. Before using the machine, make sure the gearbox is filled to 3/4 with grease. Use only special HUSQVARNA grease.
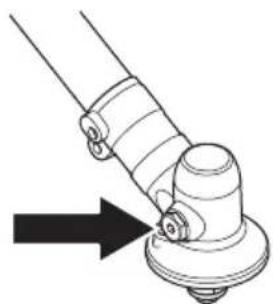
Normally, the grease does not need to be replaced unless the gearbox is repaired.
Maintenance
Follow the maintenance schedule below. The items listed are described in the Maintenance section. The user should only perform the maintenance described in this operator's manual. More extensive repairs should be carried out by an authorized service workshop.
| Посларыка | Седимочи обскльвае | Месухо обскльвае | Ежeroано Текнисту обскльвае |
| Посларыка Посларыка Посларыка Посларыка Посларыка Посларыка Посларыка Посларыка Посларыка Посларыка Посларыка Посларыка Посларыка Послael Послael Послael Послael Послael Послael Послael Послael Послael Послael Послael Послael Послael Послael Послael Послael Послael Послael Послael Послael Посл Gael Послael Послael Послael Послael Послael Послael Послael Послael Послael Послael Послael Послael Послael Послael Послael Послael Послael Послael Послael Послrael Послael Послael Послael Послael Послael Послael Послael Послael Послael Послael Послael Послael Послael Послael Послael Послael Послael Послael Послael Послelin Послael Послael Послael Послael Послael Послael Послael Послael Послael Послael Послael Послael Послael Послael Послael Послael Послael Послael Послael Послalgorithm Послael Послael Послael Послael Послael Послael Послael Послael Послael Послael Послael Послael Послael Послael Послael Послael Послael Послael Послael Послalt Послael Послael Послael Послael Послael Послael Послael Послael Послael Послael Послael Послael Послael Послael Послael Послael Послael Послael Послael Послae Послael Послael Послael Послael Послael Послael Послael Послael Послael Послael Послael Послael Послael Послael Послael Послael Послael Послael Послael Послao Послael Послael Послael Послael Послael Послael Послael Послael Послael Послael Послael Послael Послael Послael Послael Послael Послael Послael Послael Посл智能手机 Послael Послael Послael Послael Послael Послael Послael Послael Послael Послael Послael Послael Послael Послael Послael Послael Послael Послael Послael Послail Послael Послael Послael Послael Послael Послael Послael Послael Послael Послael Послael Послael Послael Послael Послael Послael Послael Послael Послael Послakin Послael Послael Послael Послael Послael Послael Послael Послael Послael Послael Послael Послael Послael Послael Послael Послael Послael Послael Послael Послainer Послael Послael Послael Послael Послael Послael Послael Послael Послael Послael Послael Послael Послael Послael Послael Послael Послael Послael Послael Послαι Послael Послael Послael Послael Послael Послael Послael Послael Послael Послael Послael Послael Послael Послael Послael Послael Послael Послael Послael Послaine Послael Послael Послael Послael Послael Послael Послael Послael Послael Послael Послael Послael Послael Послael Послael Послael Послael Послael Послael Послalien Послael Послael Послael Послael Послael Послael Послael Послael Послael Послael Послael Послael Послael Послael Послael Послael Послael Послael Послael Послanimal Послael Послael Послael Послael Послael Послael Послael Послael Послael Послael Послael Послael Послael Послael Послael Послael Послael Послael Послael Послuel Послael Послael Послael Послael Послael Послael Послael Послael Послael Послael Послael Послael Послael Послael Послael Послael Послael Послael Послael Послел Послael Послael Послael Послael Послael Послael Послael Послael Послael Послael Послael Послael Послael Послael Послael Послael Послael Послael Послael Посл试剂 Послael Послael Послael Послael Послael Послael Послael Послael Послael Послael Послael Послael Послael Послael Послael Послael Послael Послael Послael Послalert Послael Послael Послael Послael Послael Послael Послael Послael Послael Послael Послael Послael Послael Послael Послael Послael Послael Послael Послael Послaval Послael Послael Послael Послael Послael Послael Послael Послael Послael Послael Послael Послael Послael Послael Послael Послael Послael Послael Послael Послafil Послael Послael Послael Послael Послael Послael Послael Послael Послael Послael Послael Послael Послael Послael Послael Послael Послael Послael Послael Послacellular Poclalt Poclalt Poclalt Poclalt Poclalt Poclalt Poclalt Poclalt Poclalt Poclalt Poclalt Poclalt Poclalt Poclalt Poclalt Poclalt Poclalt Poclalt Poclalt Poclalt Poclal Poclalt Poclalt Poclalt Poclalt Poclalt Poclalt Poclalt Poclalt Poclalt Poclalt Poclalt Poclalt Poclalt Poclalt Poclalt Poclalt Poclalt Poclalt Poclalt Poclalm Poclalm Poclalm Poclalm Poclalm Poclalm Poclalm Poclalm Poclalm Poclalm Poclalm Poclalm Poclalm Poclalm Poclalm Poclalm Poclalm Poclalm Poclalm Poclalm Poclalt Poclalm Poclalm Poclalm Poclalm Poclalm Poclalm Poclalm Poclalm Poclalm Poclalm Poclalm Poclalm Poclalm Poclalm Poclalm Poclalm Poclalm Poclalm Poclalt Poclalt Poclalt Poclalt Poclalt Poclalt Poclalt Poclalt Poclalt Poclalt Poclalt Poclalt Poclalt Poclalt Poclalt Poclalt Poclalt Poclalt Poclalt Poclalg Poclalt Poclalt Poclalt Poclalt Poclalt Poclalt Poclalt Poclalt Poclalt Poclalt Poclalt Poclalt Poclalt Poclalt Poclalt Poclalt Poclalt Poclalt Poclalt Pocl alt Poclalt Poclalt Poclalt Poclalt Poclalt Poclalt Poclalt Poclalt Poclalt Poclalt Poclalt Poclalt Poclalt Poclalt Poclalt Poclalt Poclalt Poclalt Poclalt PoclALT Poclalt Poclalt Poclalt Poclalt Poclalt Poclalt Poclalt Poclalt Poclalt Poclalt Poclalt Poclalt Poclalt Poclalt Poclalt Poclalt Poclalt Poclalt Poclalt Poclalted Poclalt Poclalt Poclalt Poclalt Poclalt Poclalt Poclalt Poclalt Poclalt Poclalt Poclalt Poclalt Poclalt Poclalt Poclalt Poclalt Poclalt Poclalt Poclalt Pocl Balt Poclalt Poclalt Poclalt Poclalt Poclalt Poclalt Poclalt Poclalt Poclalt Poclalt Poclalt Poclalt Poclalt Poclalt Poclalt Poclalt Poclalt Poclalt Poclalt Poclakt Poclalt Poclalt Poclalt Poclalt Poclalt Poclalt Poclalt Poclalt Poclalt Poclalt Poclalt Poclalt Poclalt Poclalt Poclalt Poclalt Poclalt Poclalt Poclalt Pocllt Poclalt Poclalt Poclalt Poclalt Poclalt Poclalt Poclalt Poclalt Poclalt Poclalt Poclalt Poclalt Poclalt Poclalt Poclalt Poclalt Poclalt Poclalt Poclalt Poclaltung Poclalt Poclalt Poclalt Poclalt Poclalt Poclalt Poclalt Poclalt Poclalt Poclalt Poclalt Poclalt Poclalt Poclalt Poclalt Poclalt Poclalt Poclalt Poclalt Poclhalt Poclalt Poclalt Poclalt Poclalt Poclalt Poclalt Poclalt Poclalt Poclalt Poclalt Poclalt Poclalt Poclalt Poclalt Poclalt Poclalt Poclalt Poclalt Poclalt Poclslalt Poclalt Poclalt Poclalt Poclalt Poclalt Poclalt Poclalt Poclalt Poclalt Poclalt Poclalt Poclalt Poclalt Poclalt Poclalt Poclalt Poclalt Poclalt Poclalt PocIalt PocIalt PocIalt PocIalt PocIalt PocIalt PocIalt PocIalt PocIalt PocIalt PocIalt PocIalt PocIalt PocIalt PocIalt PocIalt PocIalt PocIalt PocIalt PocIalt Poclalt PocIalt PocIalt PocIalt PocIalt PocIalt PocIalt PocIalt PocIalt PocIalt PocIalt PocIalt PocIalt PocIalt PocIalt PocIalt PocIalt PocIalt PocIalt Poclalt Poclalt PocIalt PocIalt PocIalt PocIalt PocIalt PocIalt PocIalt PocIalt PocIalt PocIalt PocIalt PocIalt PocIalt PocIalt PocIalt PocIalt PocIalt Poclalt PocIalt Poclalt PocIalt PocIalt PocIalt PocIalt PocIalt PocIalt PocIalt PocIalt PocIalt PocIalt PocIalt PocIalt PocIalt PocIalt PocIalt PocIalt PocIalt Poclalt Poclalt Poclalt PocIalt PocIalt PocIalt PocIalt PocIalt PocIalt PocIalt PocIalt PocIalt PocIalt PocIalt PocIalt PocIalt PocIalt PocIalt PocIalt Poclalt PocIalt PocIalt Poclalt PocIalt PocIalt PocIalt PocIalt PocIalt PocIalt PocIalt PocIalt PocIalt PocIalt PocIalt PocIalt PocIalt PocIalt PocIalt PocIalt Poclalt PocIalt Poclalt Poclalt PocIalt PocIalt PocIalt PocIalt PocIalt PocIalt PocIalt PocIalt PocIalt PocIalt PocIalt PocIalt PocIalt PocIalt PocIalt PocIalt Poclalt Poclalt PocIalt Poclalt PocIalt PocIalt PocIalt PocIalt PocIalt PocIalt PocIalt PocIalt PocIalt PocIalt PocIalt PocIalt PocIalt PocIalt PocIalt PocIalt Poclalt Poclalt Poclalt Poclalt PocIalt PocIalt PocIalt PocIalt PocIalt PocIalt PocIalt PocIalt PocIalt PocIalt PocIalt PocIalt PocIalt PocIalt PocIalt Poclalt PocIalt PocIalt PocIalt Poclalt PocIalt PocIalt PocIalt PocIalt PocIalt PocIalt PocIalt PocIalt PocIalt PocIalt PocIalt PocIalt PocIalt PocIalt PocIalt Poclalt PocIalt PocIalt Poclalt Poclalt PocIalt PocIalt PocIalt PocIalt PocIalt PocIalt PocIalt PocIalt PocIalt PocIalt PocIalt PocIalt PocIalt PocIalt PocIalt Poclalt PocIalt Poclalt PocIalt Poclalt PocIalt PocIalt PocIalt PocIalt PocIalt PocIalt PocIalt PocIalt PocIalt PocIalt PocIalt PocIalt PocIalt PocIalt PocIalt Poclalt PocIalt Poclalt Poclalt Poclalt PocIalt PocIalt PocIalt PocIalt PocIalt PocIalt PocIalt PocIalt PocIalt PocIalt PocIalt PocIalt PocIalt PocIalt PocIalt Poclalt Poclalt PocIalt PocIalt Poclalt PocIalt PocIalt PocIalt PocIalt PocIalt PocIalt PocIalt PocIalt PocIalt PocIalt PocIalt PocIalt PocIalt PocIalt PocIalt Poclalt Poclalt PocIalt Poclalt Poclalt PocIalt PocIalt PocIalt PocIalt PocIalt PocIalt PocIalt PocIalt PocIalt PocIalt PocIalt PocIalt PocIalt PocIalt PocIalt Poclalt Poclalt Poclalt PocIalt Poclalt PocIalt PocIalt PocIalt PocIalt PocIalt PocIalt PocIalt PocIalt PocIalt PocIalt PocIalt PocIalt PocIalt PocIalt PocIalt Poclalt Poclalt Poclalt Poclalt Poclalt PocIalt PocIalt PocIalt PocIalt PocIalt PocIalt PocIalt PocIalt PocIalt PocIalt PocIalt PocIalt PocIalt PocIalt Poclalt PocIalt PocIalt PocIalt PocIalt Poclalt PocIalt PocIalt PocIalt PocIalt PocIalt PocIalt PocIalt PocIalt PocIalt PocIalt PocIalt PocIalt PocIalt PocIalt Poclalt PocIalt PocIalt PocIalt Poclalt Poclalt PocIalt PocIalt PocIalt PocIalt PocIalt PocIalt PocIalt PocIalt PocIalt PocIalt PocIalt PocIalt PocIalt PocIalt Poclalt PocIalt PocIalt Poclalt PocIalt Poclalt PocIalt PocIalt PocIalt PocIalt PocIalt PocIalt PocIalt PocIalt PocIalt PocIalt PocIalt PocIalt PocIalt PocIalt Poclalt PocIalt PocIalt Poclalt Poclalt Poclalt PocIalt PocIalt PocIalt PocIalt PocIalt PocIalt PocIalt PocIalt PocIalt PocIalt PocIalt PocIalt PocIalt PocIalt Poclalt PocIalt Poclalt PocIalt PocIalt Poclalt PocIalt PocIalt PocIalt PocIalt PocIalt PocIalt PocIalt PocIalt PocIalt PocIalt PocIalt PocIalt PocIalt PocIalt Poclalt PocIalt Poclalt PocIalt Poclalt Poclalt PocIalt PocIalt PocIalt PocIalt PocIalt PocIalt PocIalt PocIalt PocIalt PocIalt PocIalt PocIalt PocIalt PocIalt Poclalt PocIalt Poclalt Poclalt PocIalt Poclalt PocIalt PocIalt PocIalt PocIalt PocIalt PocIalt PocIalt PocIalt PocIalt PocIalt PocIalt PocIalt PocIalt PocIalt Poclalt PocIalt Poclalt Poclalt Poclalt Poclalt PocIalt PocIalt PocIalt PocIalt PocIalt PocIalt PocIalt PocIalt PocIalt PocIalt PocIalt PocIalt PocIalt PocIalt Poclalt Poclalt PocIalt PocIalt PocIalt Poclalt PocIalt PocIalt PocIalt PocIalt PocIalt PocIalt PocIalt PocIalt PocIalt PocIalt PocIalt PocIalt PocIalt PocIalt Poclalt Poclalt PocIalt PocIalt Poclalt Poclalt PocIalt PocIalt PocIalt PocIalt PocIalt PocIalt PocIalt PocIalt PocIalt PocIalt PocIalt PocIalt PocIalt PocIalt Poclalt Poclalt PocIalt Poclalt PocIalt Poclalt PocIalt PocIalt PocIalt PocIalt PocIalt PocIalt PocIalt PocIalt PocIalt PocIalt PocIalt PocIalt PocIalt PocIalt Poclalt Poclalt PocIalt Poclalt Poclalt Poclalt PocIalt PocIalt PocIalt PocIalt PocIalt PocIalt PocIalt PocIalt PocIalt PocIalt PocIalt PocIalt PocIalt PocIalt Poclalt Poclalt Poclalt PocIalt PocIalt Poclalt PocIalt PocIalt PocIalt PocIalt PocIalt PocIalt PocIalt PocIalt PocIalt PocIalt PocIalt PocIalt PocIalt PocIalt Poclalt |
Technical data
| 129C 129L 129LK(A05328CCHV) (A05328CSHV) (A05328CSHV) | |||
| Дыгател | |||
| Обем Haцлиндьра, см³ | 27,6 | 27,6 | 27,6 |
| Диаме Тьр Haцлиндьра, ММ 36,0 36,0 36,0 | |||
| Ход 6уталa, ММ 27 27 27 | |||
| Овороти Ha пазенхoД, о6/Min 3200-3600 3200-3600 3200-3600 | |||
| Преторьчан МaksималпсвхоборOTи, о6/Min 8500 8500 8500 | |||
| Сkopост Ha вьртоно Ha ВODIMЯ Вал, о6/Min 8500 8500 | |||
| Мakсималha мошонст Ha дыгателя сьгл. ISO 8893, KBТ/ob/Min | 0,8/8000 0,8/8000 0,8/8000 | ||
| Aусnyх с каталзатор Дa Дa | |||
| Заплente Лю усточьо c рergулатор за оворотile Дa Дa | |||
| Заплente Л� сисема | |||
| Заплente Л� сbesц | NGK CMR6A | NGK CMR6A | NGK CMR6A |
| Xлавина мениду eлькторide, MM | 0,5 | 0,5 | 0,5 |
| Сисема Ha зхарны/сmaэbahe | |||
| КаразитET Ha pezeрьога rapivBo, cm³/лNTprn 340/0,34 | 340/0,34 | 340/0,34 | |
| Терло | |||
| Терло бeз горовTo, рженьто оворудвае иPreдпал�я, Кг | 4,6 | 5,2 | 6,0 |
| Шурови emиси(Bин. забелегka 1) | |||
| Равнише Ha звковая eфekt, Изөрөнö в dB (A) | 105 | 105 | 105 |
| Равнише Ha звковая eфekt, rapaHTираHo LWA dB (A) | 114 | 114 | 114 |
| Равнише Ha shuma(Bин. забелегka 2) | |||
| ЕквьалentHo НВо Ha звкового наляганe B'bypxuухото Ha оретаю, Изөрөнö сьгласHo EH ICO 11806 и ICO 22868, дБ(A) | 93 95 95 | ||
| Равнише Ha вьрагия(T(Bин. забелегka 3) | |||
| ЕквьалentHo НВа Ha вьрагияа (ahv.ed)Врькoxваткит, Изөрөнö сьгласHo EN ISO 11806 и ISO22867, m/s² | |||
| ОворUDан c Trпмерна Глава (opirginhalna), лявО/dясно | 3,7/3,6 | 9,9/8,9 | 9,9/8,9 |
Note 1: Noise emissions to the surroundings, measured as sound power (LwA) according to EC Directive 2000/14/EC. The noise levels for the machine have been measured with original cutting equipment that gives the highest noise level. The difference between the guaranteed and measured noise level is that the guaranteed noise level includes the spread of the measurement results, as well as the variation between different machines of the same model, in accordance with Directive 2000/14/EC. Note 2: The stated data for equivalent sound pressure level for the machine has a typical statistical dispersion (standard deviation) of 1 dB (A). Note 3: The stated data for equivalent vibration level has a typical statistical dispersion (standard deviation) of 1 m/s2.
Technical data
TKV Rheinland N.A. has voluntarily performed control on behalf of Husqvarna AB. Ref. AK72133896.01
- Certificate of conformity with Council Directive 2006/42/EC regarding machinery. This certificate is valid for all production units in the country of origin, as stated on the product. The supplied units/accessories conform to the sample placed under control.
Issued on behalf of: Husqvarna AB, Huskvarna, Sweden, 27-12-2013.

Ronnie E. Goldman, Director of Engineering. (Authorized representative of Husqvarna AB for technical documentation.)
Chronological notes:
Potential danger. Read the operating instructions before use.

Approved protective equipment. Approved protective gloves.
Max. no-load speed, r.p.m.

max
10000rpm
This product complies with the following standards.
Protect the tool and the accessories. (129L, 129LK)


Protect the tool and the accessories. (129C)

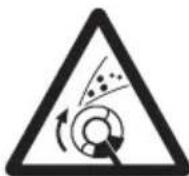
The operator of the machine must ensure that no people or animals are closer than 15 meters from the work area.
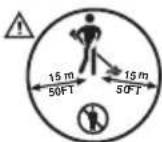
Always use approved protective gloves.

Wear stable, anti-slip footwear.
Use only approved, suitable cutting blades, e.g. cutting discs or cutting cords.
Shows the limits of the position of the handle.
Disposal of waste in accordance with the EU Directive. The disposal of the machine is described in the chapter Technical characteristics and disposal.

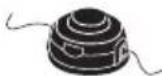

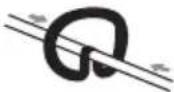
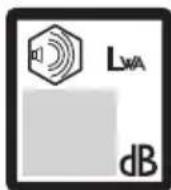
The symbols/labels on the machine refer to specific requirements for the disposal of products in certain markets.
The starter switch turns on the engine automatically. WARNING! The starter switch engages automatically when the engine is started. To avoid
accidental starting, always remove the key from the ignition when assembling, checking, or servicing.
Always use approved protective goggles.
Troubleshooting
Visual inspection.

CONTENTS
Before starting the engine, check
EXPLANATION OF SYMBOLS
General safety instructions 643
MAINTENANCE
Carburetor 645
Starter 645
Fuel system 646
Belt 646
Air filter 646
Air filter 647
Maintenance program 648
TECHNICAL DATA
Technical data 649
EC Declaration of Conformity 651
Original instructions
Original instructions




- SYMBOLS ON THE MACHINE AND/OR IN THE MANUAL
- CONTENTS
- KEY TO SYMBOLS
- INTRODUCTION
- WHAT IS WHAT
- GENERAL SAFETY PRECAUTIONS
- ASSEMBLY
- FUEL HANDLING
- STARTING AND STOPPING
- WORKING TECHNIQUES
- MAINTENANCE
- TECHNICAL DATA
- NOTE THE FOLLOWING BEFORE STARTING
- DEAR CUSTOMER
- WHAT IS WHAT ON THE GRASS TRIMMER
- IMPORTANT PERSONAL PROTECTIVE EQUIPMENT
- IMPORTANT
- HELMET
- HEARING PROTECTION
- EYE PROTECTION
- GLOVES
- BOOTS
- CLOTHING
- FIRST AID KIT
- MACHINE'S SAFETY EQUIPMENT
- THROTTLE TRIGGER LOCKOUT
- STOP SWITCH
- CUTTING ATTACHMENT GUARD
- MUFFLER
- CUTTING EQUIPMENT
- TRIMMER HEAD
- FITTING THE LOOP HANDLE
- ASSEMBLING AND DISMANTLING THE TWO-PIECE SHAFT
- DISMANTLING
- ASSEMBLING THE CUTTING EQUIPMENT
- FITTING THE TRIMMER GUARD AND TRIMMER HEAD
- FUEL SAFETY
- TRANSPORT AND STORAGE
- FUEL
- PETROL
- TWO-STROKE OIL
- MIXING
- FUELING
- CHECK BEFORE STARTING
- STARTING A COLD ENGINE
- NOTE
- STARTING A WARM ENGINE
- STOPPING
- GENERAL WORKING INSTRUCTIONS
- BASIC SAFETY RULES
- BASIC WORKING TECHNIQUES
- GRASS TRIMMING WITH A TRIMMER HEAD
- TRIMMING
- CLEARING
- CUTTING
- SWEEPING
- CARBURETTOR
- ADJUSTMENT OF THE IDLE SPEED
- COOLING SYSTEM
- SPARK PLUG
- TWO-PIECE SHAFT
- AIR FILTER
- CLEANING THE AIR FILTER
- OILING THE AIR FILTER
- BEVEL GEAR
- MAINTENANCE SCHEDULE
- EC DECLARATION OF CONFORMITY
- EN ISO 12100:2010, EN ISO 11806-1:2011, ISO 14982:1998, CISPR
- SYMBOL KEY
- IGNITION SYSTEM
- FUEL AND LUBRICATION SYSTEM
- WEIGHT
- NOISE EMISSION
- GENERAL SAFETY INSTRUCTIONS
- DISASSEMBLY
- EXPLANATION OF SYMBOLS
- BEFORE STARTING, CHECK THE FOLLOWING
- IMPORTANT INFORMATION
- OPERATOR PROTECTIVE EQUIPMENT
- WARNING
- CANO
- WORK CLOTHING
- SAFETY DEVICES
- ALL INSTRUCTIONS FOR ADULTS
- THROTTLE TRIGGER LOCK LEVER
- SWITCH
- PROTECTION OF CUTTING EQUIPMENT
- BAHHO
- ASSEMBLY OF THE LOOP HANDLE
- ASSEMBLY AND DISASSEMBLY OF THE TWO-PIECE SHAFT
- MOUNTING THE EQUIPMENT
- INSTALLING THE GUARD AND TRIMMER HEAD
- INSTALLING THE NOZZLE AND THE APPROXIMATE HEAD
- SAFETY RULES WHEN REFUELING
- OIL FOR TWO-STROKE ENGINES
- CHECK THE PRIMER
- STARTING THE COLD ENGINE
- GENERAL OPERATING INSTRUCTIONS
- BASIC WORKING PRINCIPLES
- TRIMMER HEAD FOR TRIMMING GRASS
- TRIMMER LINE
- MOWING
- RECOMMENDED EQUIPMENT
- KAP6UPATOP
- PEREYNILPOBKA XOJOCTORO XA
- TNYUNTEJIB
- CNCTEMA OXLAAJDEHNA
- DRIVE SHAFT
- CONTENTS OF SOME SECTIONS BEFORE THE TABLE OF CONTENTS
- FOOTWEAR
- SAFETY DEVICE
- INYUHNK
- PIKYU CNPAJHEHNA
- INSTALLATION OF THE LOOP HANDLE
- INSTALLATION - REMOVAL OF THE ECCENTRIC SHAFT
- INSTALLATION OF THE GRASS CUTTING HEAD
- INSTALLATION OF THE TRIMMER GUARD AND TRIMMER HEAD
- INSTALLATION OF THE TRIMMER HEAD GUARD AND TRIMMER HEAD
- SAFETY PRECAUTIONS WHEN REFUELING
- TRANSPORTATION AND STORAGE
- GASOLINE
- BASIC OPERATION
- REPLACING THE AIR FILTER
- GEARBOX
- CONTENTS BEFORE STARTING|SAFETY
- ATTENTION TO THE FOLLOWING
- PERSONAL PROTECTIVE EQUIPMENT
- REMEMBER
- EAR PROTECTION
- PROTECTIVE GOGGLES FOR EYES
- WORK CLOTHES
- MACHINE SAFETY EQUIPMENT
- THROTTLE VALVE LOCK
- SAFETY INSTRUCTIONS
- GUARD FOR CUTTING ATTACHMENT
- EXHAUST
- REGULAR EQUIPMENT
- SAMPLE HEAD
- MOUNTING THE TRIMMER HEAD
- MOUNTING AND DISMOUNTING OF THE TWO-SECTION SHAFT
- MOUNTING
- MOUNTING THE SAMPLE PROTECTION AND THE SAMPLE HEAD
- MOUNTING THE SAMPLE PROTECTION AND THE SAMPLE HEAD (129C)
- SAFETY WHEN WORKING WITH FUEL
- FUEL MIXTURE
- TWO-STROKE ENGINE OIL
- CARBURETOR
- IDLE SPEED ADJUSTMENT
- LUBRICATING THE TWO-STROKE SHAFT
- LUBRICATING THE AIR FILTER
- GEARBOX OIL
- BEFORE STARTING THE ENGINE, CHECK
Brand : HUSQVARNA
Model : 129LK
Category : Brush cutter