ZR10F - Elliptical bike Reebok - Free user manual and instructions
Find the device manual for free ZR10F Reebok in PDF.

User questions about ZR10F Reebok
0 question about this device. Answer the ones you know or ask your own.
Ask a new question about this device
Download the instructions for your Elliptical bike in PDF format for free! Find your manual ZR10F - Reebok and take your electronic device back in hand. On this page are published all the documents necessary for the use of your device. ZR10F by Reebok.
USER MANUAL ZR10F Reebok
04 reebokfitnessequipment.com

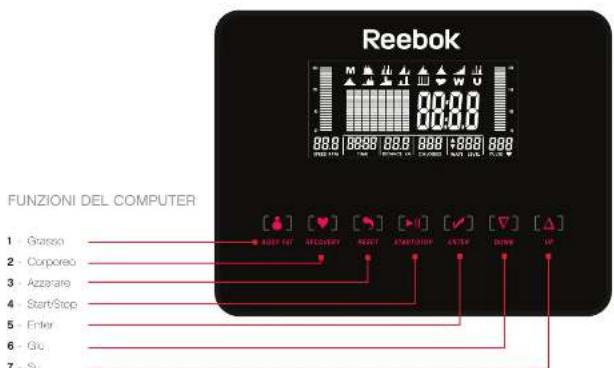
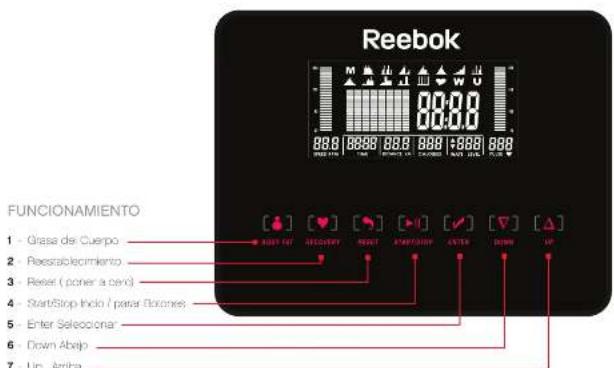
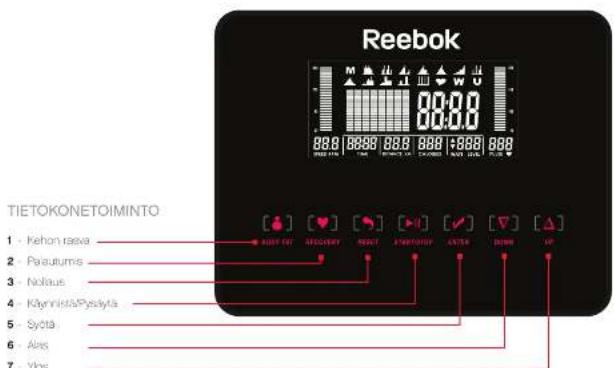
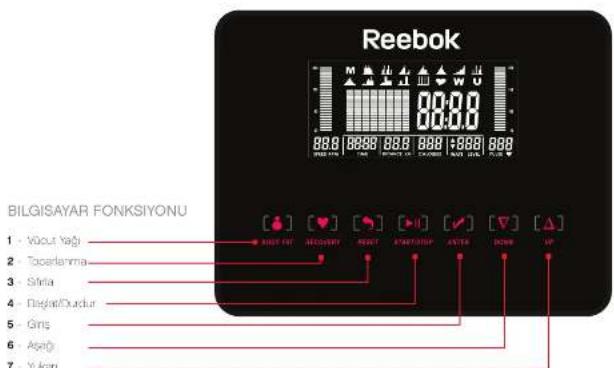
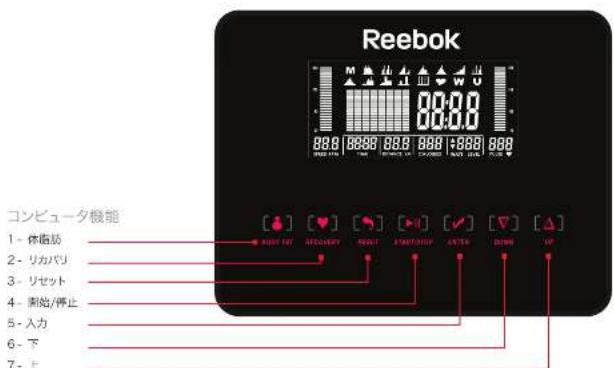
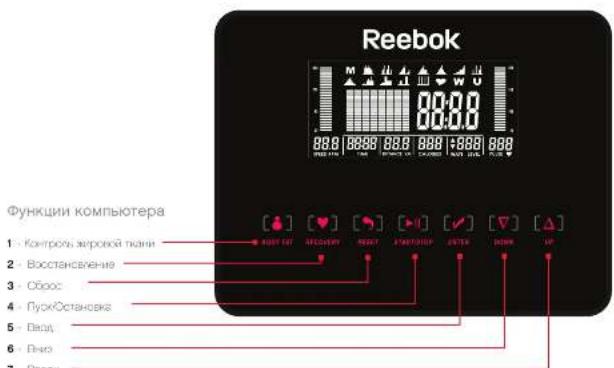
BUTTON FUNCTIONS
UP
Used to increase resistance level and confirm a selection
DOWN
Used to continue resistance level and confirm a collection
ENTERA
Used to confirm a setting or section
RESET
Does to meet (to main mert) while setting up a website or when pushed for two seconds the computer will boot and start from default settings.
START/STOP
Pereepeepn eegpnnne
RECOVERY
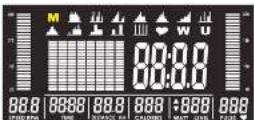
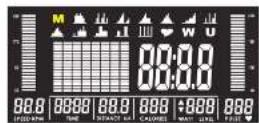
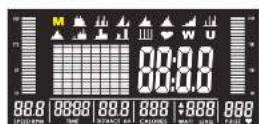
time will count between 00:00 and 99:00 (in minutes)
SPEED
Current tax rate is based on the disputed between 00 and 800 km or miles
DISTANCE
Accumulates the sum of the difference between 00 and 100.00 m of miles
CALORIES
Rocds the users calorics curz bawoon 8 and 999
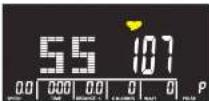
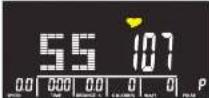
PULSE
will measure and display the above pulse window 30 and 250cpm A pulse starm will be heardwhen you exceed the preset target pulse.
RPM
Measures the rotation of the wheel in a minute between 0 and 999 am.
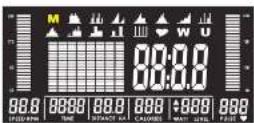
Console User Guide
05

06 reebokftnesequipment.com
OPERATION
POWER ON
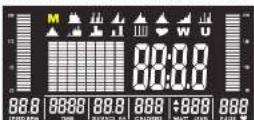
Once your fitness equipment is assembled and correctly positioned, start pedaling above (5PPM). The computer will turn on and all the LCD segments will light up for 2 seconds.
GETTING STARTED
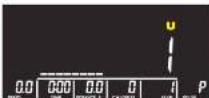
The console will display UI
Use the UP /DOWN keys to change between user profiles UI, US and U4
Press ENTER to confirm your question.
Set your gender (male is the default using the UP DOWN keys Press ENTER to confirm
Set your age (25 years is the default) using the UPDCAN keys Press ENTER to confirm
Set your height 160cm is the default using the UPDOWN keys Press ENTER to confirm
Set your weight 250kg is the default using the UPDCWN keys Press ENTER to confirm
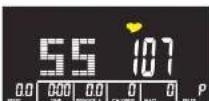
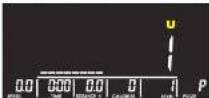
You will now see the startup screen (M will be 'testing).
When you stop pedaling the console will remain on for 30 seconds (when battery is fully charged) before entering power saving mode.
PROGRAM SELECTION
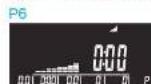
From the startup screen, you can choose from a number of programs MANJAL, PLIP2, HRC, WAT, or USER PROGRAM:
During any program, you can cause your workout by pressing STARTSTOP. To adjust the resistance level press JDCDOWN and to return to the main menu press RESET.
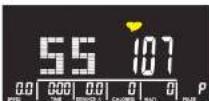
MANUAL MODE M
Press UP/DOWN until Manual [M] is flashing.
- Press ENTER to confirm
- Set your program targets level will be flashing Adjust using the UP / DOWN keys
4 Press ENTER to confirm - Repeac for time, distances, calories and pulses, each time pressing ENTER to confirm NOTE: If you do not want to get a barotic value then just press enter to leave as zero.
- Press STARTSTOP button to begin your workout.
If you have set multiple targets, the program will end once the first target has been achieved.
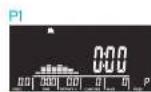
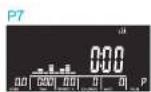
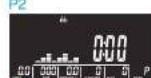
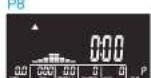
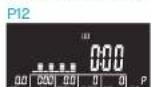
PROGRAM MODE (P1-12)
1 Press UP / DOWN until your required workout program is flashing (choice of 12)
2. Press ENTER to confirm
3. Press UP/DOWN to set workout level and time
4. Press START/STOP to begin your workout


Console User Guide
07

08 reebokfitnessequipment.com
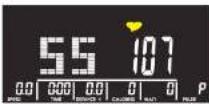
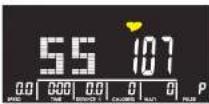
HEART RATE CONTROL
Press UP /DOWN until the IRC program is flashing
2. Press ENTER to confirm
3. Press UP/Down to select 5% 75% 90% or TA (TARGET H-R - default = 100bp)
If you have selected TA then use the URIDOWN ways to change your target pulse value.

To calculate your target heart rate
Formula: (220 - Age) \times
Example Age 25 (choosing 75% you will target your heart rate to 120-25 x 75x-146mm
4. Press UP / DOWN to set workout time
5. Press START/STOP to begin your workout.
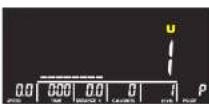
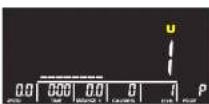
USER PROGRAM MODE U
Press UP/DOAN until user program is flashing.
2. Pass ENTP to confirm:
3. Press UP / DOWN to set resistance of each column.
4. Press ENTER to move to the next column.
5. Press START/STOP to confirm
6. Press UP/DOWN to set workout time.
7. Press START/STOP to begin your workout
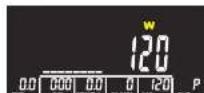
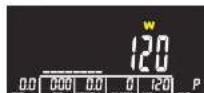
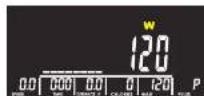
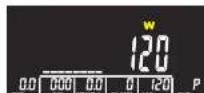
WATTS MODE W
Press UP / CCAN Until Wets program (W) is flashing
2. Press ENTER to confirm
3. Press UP/DOWN to set target WATTS.
4.2023年5月19日
5. Press UP / DOWN to set TIME
6. Press STARTSTOPE in begin www.wk901

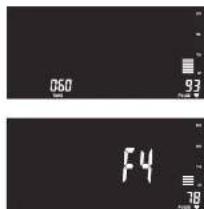
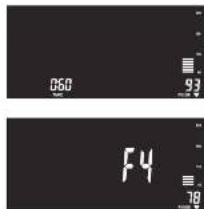
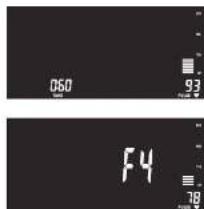
RECOVERY MODE
This function evaluates your fitness level by measuring how quickly your heart rate "reovers" over a period of 1 minute.
1. PRESSURE BEFOREBY key at the end of your workout
2. You must hold the pulse a senior throughout the recovery test.
3. The time will count down from 60 seconds At the end of the recovery program you will be given a score
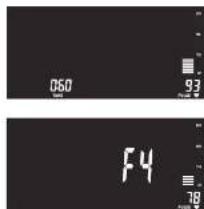
| 10 | OUTSTANDINGS |
| 10×F=20 | EXCELLENT |
| 20×F<29 | GOOD |
| 30×F<39 | FAIR |
| 40×F=59 | BELOW AVERAGE |
| 60 | POOR |
Console User Guide
09

10 reebokfitnessequipment.com
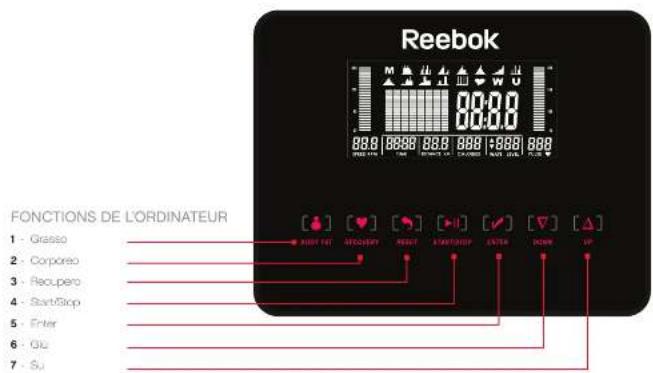
BODY FAT
With the console in STCF mode, press the BODY FAT key.
Hold the nano pulse sensors throughout the 8 second measurement failure to do this will result in Ei being displayed.
Two results will be shown
F=Pat%(5-60%)
BODY FAT
| SEX | LOW (-) | LOW/MED (+) | MEDIUM (▲) | MEDIUM(HIGH (●)) |
| MALE | <13% | 13%-25.9% | 26%-30% | >30% |
| FEMALE | <23% | 23%-35.9% | 36%-40% | >40% |
E=B×V(S-SO)
BMI (BODY MASS INDEX)
| BMI SCALE | LOW | LOWMED | MEDIUM | MEDIUM/HIGH |
| RANGE | <20 | 20-24 | 24-265 | >265 |
TROUBLESHOOTING
Why wont the consolet turn on?
A. Fedal the product until above 15cm This will provide power to the console
Why does the console not stay on for 90 seconds when stop pealing?
A The rechargeable batteries may need replacing or charging up. Pedaling should recharge the batteries.
Why is there an error code E-E on my console?
A. Ensure the cables are properly connected into the rack of the console
03 reebokfitnessequipment.com
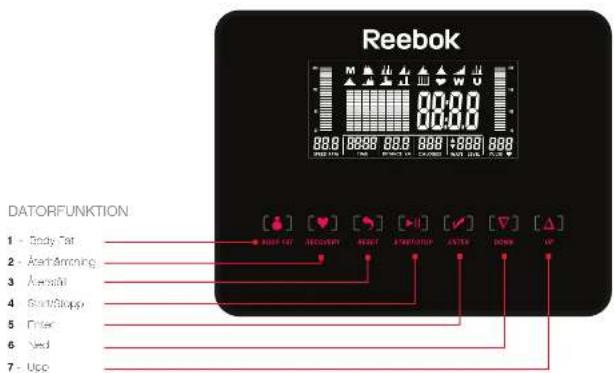
FONCTIONS DES TOUCHES
UP
Account the wheel revolutions per minute from 0 to 998 revolutions per minute
05 reebokftnesequipment.com
UTILISATION
POWER ON
Iosur 15 Fm. Lcnrucn rulr, aie quienlncs oaei nler cLan Gc alareont pordt e 2 asones
DÉMARRAGE
La console allefiche UI
From the startup screen, you can choose from a number of programs: MANUAL, PHP2, PHP, WAT, or USER PROGRAM.
During any program, you can cause your workout by pressing STATISTCR. To adjust the resistance level, press J-PDOWN and to return to the main menu, press RESET.
MODE MANUAL M
07 reebokfitnessequipment.com
CONTRôle DE LA FREQUENCY CARDIAQUE
09 reebokfitnessequipment.com
BODY FAT (MASSE ADIPEUSE)
reebokfitnessequipment.com
13 reebokftnesequipment.com
FUNZIONAMENTO
POWER ON
Dado ao memoriar e positao ncorrattrements la vostra apparechatura il fitness, commincate a pedalaria onuna velocita superiore a 15 gir al minuto.
comer 4 accendera e tui segment LCD lampexgannper 2 second
PER COMINIARE
La console va en zzzu UT
Usa: tasi UP / DOAN per campore (profik utente tra U,UP,US e L4
Premene ENTER per contemare la selezione.
Impostare il secco (i) default e maschol useridto fast UP / DOWN Premate ENTER por conformare
Impostare lata ( default 625 annu) usando I tasti UP / DOWN Premaere ENTER per convermare.
Impocare fatezza (i dafulte 180cm) usando /last UP /DOWN Premes ENTER per confermance
Impostare il peso 1 deraut e 50 kg uanda o test UP / DOWN Premere ENTER per codernare
Cere appenir la schemata dawvamento lampeggera 10
MODALITA PROGRAMMA (P1-12)
reebokfitnessequipment.com
CONTROLLO DELLE PULSAZIONI CARDIACHE
PremereUP/COANIno a far lampegargl programmaHRC
2.Preemption/NTER par conformance
3.Present LIP /DOWN per seazioneare 55%,75%,90%o TA default di pulsazione operative
-100 botti al minuto

reebokfitnessequipment.com
GRASSO CORPOREO
Can in conple lne hll cxaltst STp preme I tess BCDY FAT (prese copeo)
reebokfitnessequipment.com
reebokfitnessequipment.com
FUNKTIONNSWEISE/BEDIENUNG
reebokfitnessequipment.com
HERZFREQUENZORIENTIERTES TRAINING
reebokfitnessequipment.com
BODY FAT
reebokfitnessequipment.com
reebokfitnessequipment.com
OPERACION
ENCENDIDO
reebokfitnessequipment.com
CONTROL DEL PULSO
Pulse URIDOW hetaque el programa HPC aparezca
2. Puse ENTER para confirmar
3. Puse UP/COAN para seleccionar 58%78%90%o TA (OBETAO HR = pre prograrado = 100ppm)
reebokfitnessequipment.com
GRASA DEL CUERPO
reebokftnessequipment.com

reebokfitnessequipment.com
FUNCOES
LIGACAO
39 reebokfitnessequipment.com
reebokfinessequipment.com
GORDURA CORPORAL
Cama canda en moo STOP Pressone a tegb ABDY FAT
reebokfitnessequipment.com

KNAPPEFUNKSJONER
OPP
Drues is ae monstanen hong bekretie in valg
NED
Pruces in redox reaction mechanism testing (redox) of
LEGG INN
Braepa: eckroto on irslling oerveig.
TILBAKESTILL
Boketihg atake a hoxeienyermnusieletopp
cn tringset, cior, hve d, trilr pe den To seluror v
Caaeeerreee eaeenee eaeenee
START/STOPP
Trykk for ane stane efferstoppeer teryrgepk.
RESTITUSJON
Pp#p#rbcf#t##e#edg#y#
TILBAKESTILL
Try for a steie oedneiree eae eep
kontoler
DATAFUNKSJONER
TID
Inlaltele melomocOg 0650 (mtnn ng selanr)
HASTIGHET
Nnepee tnerpnsrpsnre 01 1000kmelrrn
DISTANSE
F
KALORIER
Feglstererbrukere na kortbemng melk Cog 99
PULS
10000000000000000000000000000000000000000000
duovnckienenrndnnne m
RPM
b
Brukerveiledning For Konsoll
44

45 reebokfitnessequipment.com
BAUK
STRÖMMEN PÁ
Wt ronngsutrostrat or salt semen ag stnrolk, skal au oggmo t rakke over IbHm.
mimic rhinoeck mkr mki. Determeahed, sate c4 oLc-oxo-ceming hse Ia kink.
KOMMETGANG
C
Ebrk CPTN NED-atazo for a cyto mclb bkrprol UU, U2, U3 og u
Try on ENTEF for a bekafte def du har vact
gnnn nnnnnnnnnnnnnnnnnnnnnnnnnnnnnnnnnnnnnnnnnnnnnnnnnnnnnnnnnnnnnnnnnnnnnnnnnnnnnnnnnnnnnnnnnnnnnnnnnnnnnnnnnnnnnnnnnnnnnnnnnnnnnnnnnnnnnnnnnn nn
eig nnter 25 9r stnndttd 13 108 FFFNFD tneire TrrnrsFNTFR for A nekrlte
eepn hape 160cm ar sordarwad boke CHTNepaetne. nyck eKf for a bekelle
Eegg mvek 10 kg er standard veabnke CHP/NTlastene, rikp EER for a bekefte
M
Nanochromatin 6, 10kDa, conserved protein 100, estimated in vitro experiments, not well described for net profit (in) chromosomal organization.
PROGRAMUTVALG
4.1y4pA EINER for a bcefcfa
Gloma for lid dianae xioncr ag pus ag tykpe ENIEI hvor gang for a bokto
Mik Hs ou kovil atic inn mahorrykcr dare paehr fana son stape nll
Inkpa 8AHI /1024nappen for accynno tcnngn
Hrs ou herlagirn frcmo, il programmnot slutr nandur her nndd dctarste maet
PROGRAMMODUS (P1-P12)
- Trykkp eCPF, H2E2I trinagoprogrammet oU, hA hkeybnB a bkyh (2vlgmalghf6) 2. Trykkp cTERER for bekare:
3.TykepeCFF/THCDforaseerlingarksgbtd. - Tykpe START STOPF for aegymenren
P1 P7
P2 P8
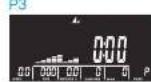
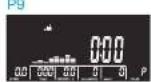
P3 P9
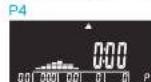
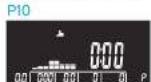
P4 P10
P5 P11
P6 P12
Brukerveiledning For Konsoll
46

47 reebokfitnessequipment.com
PULSKONTROLL
- Toxig pOFF/NEO:HPC-programmct
- TRICK ENTER FOR A BANK OFS
3.102459787655%75%82%21TAADETH-MB-PUL-10250cm cr 690pa
Ies au her yag TA or kae au OFF TCCaste er forandhe din malouverd.

Skepnerduutchmeus
Form 220 minu#n
Tseme: Ader 25 ar, wde 75 % of puleen. in ake pa sere 20 minus 26 x 75 - 146in
4. tykpeoNEL for aegyrrnng
3. Tykk paaSTAR (RT)PP for aepreeremert

BRUKERPROGRAMMODUS
- Tnpe GFF/NEF 1 or Kepxramme clnir
2.1001001001001001001001001001001001001001001001001001001001001001001001001001001001001001 - TrykpiNPFR/NFDRslegeipimotmtntheorponne
4.10
5.1024137A7TSTOP2HJ11
8.12022NEG
1.

WATT-MODUS W
reebokfitnessequipment.com
KROPPSFETT
Mod konsider STOPPmodus trykpa BODY FAT (KNOTFET)benon
locuusensrane nae idan under malingen 5 aekunertg der kke der viblvnt
| KONN (AWT) | KWINDUS (MILLION) | ▲ | MINI (SHEET) |
| MANY < 12% | ||
| KINNI < 23% |
=EMI(0-5C)
PMUJOYMASSNDEX
| BMISKALA | LAV | LAWIMDELS | MIDDELS | MODELSA-2 |
| OMTADE | ≤ 20 | 20-24 | 24-265 | ≥265 |
FEILSOKING
Hysocir kieckcn sllp?
A Trkpe pedeene t dc enover 15 rom Da y konecien ta strom
G:Horor kke konapen pa 50 sekunderner,eg aluter a teke pa padesiene?
A de onlcbare baterene ma kanske lytes, n eelen pnes. Ved itakke pa pedete p
1
2.Hyororocn follkds (E) p.
A Sarg for st kaclen or ordentikokot bokkonsclen
Bruksanvisning for konsolen
50

51
reebokfitnessequipment.com
KNAPPARNAS FUNKTIONER
UPP
Arwanda for art h o a motzandivianoch bookratics.
NEO
Anandam Sutarni, Saman Ramaswamy, Aviksharvi Sen (2019)
ENTERA
Awands for at bckltae or reainng oict val
ÄTERSTÄLL
Aimende for 6000ermeslikhuiuHuiang wanluyi meunn mian cnapanasepsie hails in kharakpon hals nnc Ive skoder kocce datam och stanan lgan iHan standerinolinsitngara.
START/STOPP
Inyck for an state eeler stoppe at traning guases
ATERHAMTNING
Eprpma for aie hntes tterrnnngorme
ÄTERSTÄLL
rrn rnrnnrnnn nnnnne
DATORFUNKTIONER
TID
100000000000000000000000000000000000000
HASTIGHET
reebokfitnessequipment.com
ANVANDA
POWER ON (Ström på)
Nertringsuunien orn fandimonct onr sallal, o r reat borgi tarnl oovt irrem 24 koloes catem poh ach Loo-ajcmonn 12Aekoon.
KOMMA IGANG
"Koncokrys 1yss UI
BnK CINNEDaetno for eoyimolmbrkorprofL UU 03og
Trck pa CNTER for at belrata dt val
Sridirtd, 11111111111111111111111111111111111111
Suhndir fieet foreepa 25.000000000000000000000000000000000000000000000000000000
Sial in dr angu foimol, p 10 cmmed U-DCN knacnna Iyoc pe nIEH for all bekafo
Sialn dr vii (forsalt p50 kgmec 100X2K-mpgrrna Iyckp -THER for att belrta
Nu srd du startupsharcn (Mblnk)
Nan da sotar tmea an kemsen pail o selender om batae an fulusatacch gir seam in oncertspagc
PROGRAMVAL
- ran statioskarmon kau vala cts antai program. MANKAL F-1/2, H. 00, WAI, chst U8H1FPOHAW (sienkndapssp)
This programmaticanis auiy hainfotporege genonl type pSTFOTOP "Tofal, anmshnnded nyder hapd oUOWM. For us erms in the nainly marger nyder hapd note
MANUELLT LAGE M
-
Tyck cai UPDCAN tla (Malt 1g) bHan
-
pck cak nif for ar bokra
-
Stal inine natalen for programmet Nwerns bilan Anda med UPDCN-nsppn
1-Typ pa Entor for atbve
- Dispensing instructions for total solids, calcium carbonate, using syphilis-proof polystyrene paper, using syringe pen. ENI-ER, ENI-Biofloxacin.
CRSOrnulrnnnne nre ene rnrnnne nee eae
- Tyck cSA AITSTKHApcon for at stana ct terIngapees
om so her glatt in flare maderden gshl progrmner met def fora makcerher uscnitie
PROGRAM-lage (P1-12)
- Trck pa LNCCNtile dot onskado trangngpogrammet cinkar 12 est vaje blanc
- Tock pA DYTEER for at bekrta
- Tyck cA UPDCNn rnr sial in tnnr gnai cchtd
- Tyck cA ARTISTCPT for art sata dt rongosss
P1 P7
P2 P8
P3 P9
P4 P10
P5 P11
P6 P12
| 00 | 00 | 01 | 01 | P |
Bruksanvisning for konsolen
54

55 reebokfitnessequipment.com
PULSMATNING
reebokfitnessequipment.com
KROPPSFETT
Ner konapon an atoppagry. tyckpe BODY FAT-napon
Iill pulsarsorema under hea mminger pa 8 sekundcr. om du hte gder visas tarmepelancet D-
Two resultant visors:
-10%
KFCP205-11
| KON | LAST (€) | LAST/MEDE (€) | MEDE (▲) | MEDE JHOGT (▲) |
| MAN | < 15% | 15%-25.9% | 25%-30% | >30% |
| KWINNA | < 25% | 25%-35.1% | 35%-40% | >40% |
=EMI(-50)
B.MI (KROFFSETT)
| FIRE SLOW CONTROL MECHANISMSHOCK | |||
| INTERVALL <20 20 24 241265>265 | |||
FEI.SOKNING
F.VanRokppaae<paicn into pa?
Trmpailloverapn.
F VArF 4 konscln inta pa. 50 secund erter at Jag her slutranmpen
3. De nodngnabotter erne kanebe berover byts titer Iolana. Cm du inparb for contienema Iddes
+yutysyssfkekuu=bpminkusd
S Krytolentat kubirnst nitrulnntipkorene t
59 reebokfitnessequipment.com

KNAPFUNKTIONER
OP
Bruege t at age moosstandienvauag poocfte at Valg
NED
Trapez 0 atter modulatronovoxo (besscrff) et vix
INDTAST
Pepetn bekein er muainge et vng
NULSTIL
Hamburg university of technology under the supervision of the research program oll. Huisbrink is to acknowledge V. Companzer, Janetzot and Szeto for understanding the results.
START/STOP
ink p for at state oer souse tneering
GENOPRETNING
El programa I at leste d syste k y m
NULSTIL
1.1.2.4 for n malotics de-fuchsianidee chns up serice konsoles.
COMPUTERFUNKTIONER
TID
Tienlter metem 400og hptgmmpeanndy
HASTIGHED
Aetl 100000000000000000000000000000000000000
DISTANCE
Vae den tonieedane rene 00ggele
KALORIER
Angorbrboeckalcrm0g996
PULS
Midor cog visor drugons puls motm 30 og 236 aleg crrn rut Dor horos en pusslam nighoinsen for destnoa-suanus overdores.
OMDR/MIN
Mier pcalr ernreerper mnrmeel 996
61 reebokfitnessequipment.com
FUNCTION
STROM TIL
Nir di fitnesusstry et semiet og placacet korekt, skai du bingnda en tarese od perakne over 15 omdranae.
Componen tonides, og alle LCD-segmenter wl lyte 12 selunder
AT GAI GANG
Kongsplan vears UT
BnCOPENEDKnapper for at 5kfe Talmbruggerpro/4,02U5p9U4
Trk pE ENTER locat bekeetie valg
Indl dt kon lstanderdinstling er mani veh hasiip af OPNE kneppo Tlyk pa ENTER for at belrae
Indst din alder (standard indstilling er 25 a/veed hjaep at OPNED knapper, Tryk pa ENTER for at belrafe
IndiI dt hine standarddilling er 160cm ) whe aep at ORNOED knapper . Tryk pa ENTER for beakrata. IndiI dt vaagt standardding er 50 kgdt whe aep at OPNED knapper . Tryk pa ENTER for beakrata.

Du vi nu er en startkaem M vi blinke
Nur du stopper at triadre i pedealee vill konselien forbie taend: 90 sekere (nwas bacterien er fuct opedat), fer geni darl i sternstepeardust.
PROGRAMVALG
Fra startkaarmen kan duvalige melem fikkelige programmer, MANUEL FIPT2 HRC, WART eker BRUGPRPROGAM.
6 Try pS STARTSTOP knappen for at starta raanrpen
63 reebokftnessequipment.com
KONTROL AF HJERTEFREKVENS (HRC)
TryppaORPEDindllHPCprogrammetbink
2. Trk pE ENTER for at bekeefes
3. Try pA PRDfED at 4556%75%00% eer TA DESTINATIONS HIERRE/REVEN
Nar du har vagr.4 skal du bruge OPINED knapper for at aerde din destinacionspus
For at beregni din destinacionshjertereikys.
Formal (225-acien)X_3%
Eksempel Aler 25 vaalger 75% din destribationshjertehkvees 22:25 x 75%-140min
4TrypOPNED for atndile taernrged.
5 Tryp4 STARSTSTOP for at starte trinergen
BRUGERPROGRAM U
1 Tryk pA ORNED indihbrugeprogram clirker.
2. To pA ENTER for a
3. To k p OPNED for at indale moogzard for hwer kpone
4.1025
5. Tolk pO STARTSTOP for at bekefne
8. Toke pA OPINCD for at odilile tneringaid
7 TrypSTAR7STOP for at state inening
WATT W
Thy pA OPNED indill Wst-progarm Wblker
2Try pa ENTER for atokrtae
3. Tyk pA CRNED for an indelite destina
4. To k pA ENTER for at bekele
5. To pAOPNER for at rsele TID
6. Tolk pSTABSTOP for at stte trntnrnn
GENOPRETNINGSTILSTAND
Denne fukion wunderin kondition yed at malle, wort huntit din henerlelvens (oue) 'kemmer sig' over an period of 1 min.
65 reebokfitnessequipment.com
KROPSFEDIT
Nir konsolien er STOPHstand skal du trykke pahmpen KROPSFEDT
Hold pulsen-scored 18 sekund er for amme pulsen, hva du like holder dem after holder torkert, vi. E4 vise pkrkemeren
Derivatives to resuitater
F=Periodic(5.00%)
KROPSEFDI
| KON | LAV (-) | LAV/MIDDEL (+) | MIDDEL (▲) | MIDDEL/H2U (●) |
| MANDI | < 13% | 13%-25.9% | 26%-30% | >30% |
| KVMNDE | < 23% | 23%-35.9% | 36%-40% | >40% |
E=B×1(5-SC)
BMI(BCDYMASSINDEX)
| BMI-SKALA | LAV (1) | LAW/MIDDEL (2) | MIDDEL | MIDDEL/H2AI |
| OMHADIE | < 20 | 20-24 | 24-265 | >265 |
FEJL FINDING
reebokfitnessequipment.com
NAPPAINTOIMINNOT
YLös
Kayritatsean vasutazosion nostamisein je vallman varwastimanein
ALAS
Kylasterin vastusason (kaskermenaen ja valinnen varvistirismen.
Syotä
Kayetan asekuksen ta valirn an valyistameen.
Nollaus
69 reebokfitnessequipment.com
KAYTTO
VIRTA PÄALLE
reebokfitnessequipment.com
SYKESEURANTA
LParyVLOSALASnepama kurnes IRConemayknu
2. Yabwata palaamala SYOTARApparata
3. Euro YLCS AS prorimia to valce 55% 75% 90% ta TA asples(4+100 bp)
jps valer TA mura tayotes/teanovn painamala YOGM AS nappaimia

Teyoreykeen laskemmen
Kaayy0220-1kaiX %
EerderkKur 25 yugts, taycbeey on 20-25x75%-146 bpm/min
Aseta herjotteuila canamala YLCs-ALAS-nepplimia
5.Aloha harjotsepu painamala KAYHNIISTAPYSAYTA-eppaima
KAYTTAJAN OHJELMATILA U
PinaYCSWASPAHPOOENKINKIN
2 Yahsta caramala STO1A napcama
3. Asata vastus kuhunen sarekeneeepn painamala YOGAL AS rapparnie
4 Simy seurayean sazakkeaeen panamells SYCTA-napcants
5. Vahwaa parrama KAYNNSTAPYMAHnappnta
6. Asera haornteluea prinrnna 1128vA AS carpaiaie
Aora hartoctelpuanamelle KAYNNISTAPY8AYArappnnta

WATTIA-TILA W
PainyLCS-ALASnapparnknesWattachemaWvikkuu
2. Yalwsta parnatae SYOTAPA pappant
3. Aseta tawite wATIT painamella YLC9-MLASnepamia
4.2017年1月1日至2017年12月31日
5.AaataAkanapnralta 10
A
PALAUTUMISTILA
Tama toriminto arivk kunrceos mittaamale kukke nnoeesti sykees palauu
yden minuun akera
PainPALAUTUMIScapopmaennheipteaspaatymz
2.500.00元/份(含税)申购费率8折优惠至0.6%(含)
3. Alesymn lasku kyskne 60 ruknniia Pekunmichimn npurss
| 10. | ENSILUOKKAINEN LOISTAVA |
| 10×F-20 | LOISTAVA |
| 20×F-29 | HYVA |
| 30×F-39 | KOHTLUILLINEN |
| 40×F-59 | ALLE KESKIARVON |
| 60. | HEIKKO |
reebokfitnessequipment.com
KEHON RASVA
Pana KEHON PASVAPnppantj kongolinee PYSAVTuaa
Pids kinn slykasanturesta 8 sekunn nittauken aan Jolein tel de, vinhe E naky nytossa
Koksih lussta hytataa
F=1+2×%(-50%)
KEFCAFASVA
| SEX | AUANDERH | AUANDERNORMAUX | NORMAL▲ | NORMALITYPENMONEN(●) |
| MALE | <13% | 13%-25.9% | 26%-30% | >30% |
| FEMALE | <23% | 23%-35.9% | 36%-40% | >40% |
B=(Rv/仿50)
BMI(PAINCINDEKSI)
| FANCOINDEKSIASTEKKO | AHMANEN | AHMANENNORMANDI | NORMANDI | NORMALLYNORMONEN |
| RALIA-ARVOT | <20 | 20-24 | 241-265 | >265 |
VIANMAARITYS
K Mies komee kdynnnst?
1' Pcle aetcty 15 klerostas minutssaa tadoissa Taiauocstkonsotin viran
K Mka konsie pyy paia 90 seumn ajan lun icpetan poliern sen?
V. Ladstawat aar on eha wndettava tane on laaattaya Polkemien buel lada aar
K: Mka konsisaa naky virhekoodi E-6?
V. Vermata, eta kaspit on litety kunnois konsin skar
Konsol Kullanici Kilavuzu
74

75 reebokfitnessequipment.com
TUS FONKSIYONLARI
YUKARI
Direc:seviyemi antimak ve or segmi onaylemak kuni sukutan.
ASAGI
Dinitp:pwesainzaiastmak vs ber seqim onayasamak. igni sutenl.
GIRIS
Braayen vaya segmi oneyarnak cn xylanir
SIFIRLA
Eir anrroman ayarayan ana menyue donnek kin laian yi da iin sanie baoi ng zanan biigay varssan ayaranyen yienlen bagar
BASLAT/DURDUR
Anrernmank bagatmax yvea durumak ion basir
TOPARLANMA
Kelp tataperanma durnumu test etmexicn bit program
SIFIRLA
Cnicadian ayantiems veiier slimek ve konsola yeniden guc vermeik ican.
BILGISAYAR FONKSIYONLARI
ZAMAN
Zaman 000 Ie 9959 (dakkasianye) arasinda seyiacakti
HIZ
Geerl antrenman hiz 00 Ile 999 Km veya Miraanda gCsterll
MESAFE
00-999 km wyea MI areaside toplam mesaley hesaplan
KALORILER
0ve 99 arasnda kulanciann yaktik kalonker keydieocen
NABIZ
30 ve-230bpm arasnda kularci nabzni diper ve gourntui. Bir nabe alarm
duyur onceden ayar hede' naeepignds
DEVDK
0e 193prn anrndale dc daika jcnf mldnouu oper
Konsol Kullanici Kilavuzu
76

77 reebokftnesequipment.com
KULLANIM
GUÇ ACİK
Fitness cinaizn mona nolidkan we dogu yedistildikdn sanra 15PPM zperinde patal gmeey baglaym
BigSayar acirve tumLCD segmenten 2 sanjeyan
BASLARKEN
Konside UI gofnir
Kulans profiUT, U2, U3 ve U4 arenda degekik yamak icin YUKARJ ASADI tujann kalarim
Secm onlayamak ion ENTERa been.
YOKARASALI (1)
YUKARASAGIugannnyylanarakayynnyanaynlywnansaylan2510OnayarnkipinENTERtugunaean
YUKARASAGULAMKULANARAKBOUNZAYARLYNVAESANL160cmCOnaylamekipINENTERTUGUNAbasm
YUKARSAJU tusernn nulanatak agnirzayaraynversaylen 50 kgdr, Cnyarnakipr ENTER hua basn.
Simdi bsangic eannn gcecsin M varip sred
Fedai cewimey durdurufugun zaman konsoi 90 saniye aok kalir gayya doh teel, cota
guc tianfu moduns gre
PROGRAM SECI
Baeangc eannn aegi proanr anandin tegm yapainie MNTEL P12 HRC WAT
reebokfitnessequipment.com
KALP HIZI KONTROLU
HRC program yamp oene kader YUKA HSAO tina been.
2. OnawamakoinENTPBusane bain
3.YUKAFISAGUNBnA
TA sechener hede rabe degerin deqirmek jin YUKARWSAGugannu kannn

Hedaf xarp hzrihessapamek qin
Formul(120,Yagx %)
OneK:Yag 25%75 seciierck hede'kap hizn(220-25) x 78%-146dk
Antrenman zanann ayarlemk Icn YUKARASAGI teguna basn
5.Antrenmane balaak ion BASLATDURDUR tuguna basn.
KULLANICI PROGRAMI MODU U
Kuller programy yamp sone hder YUKARASAGtus na basn
2. Onlayamakicn ENTER Tucane been
3 Her sutunun dirncin ayaraimakgin YUKARASA tuguna basin
1. Sonald sutura geomek cin ENTER fuguna basn
5. Cnaydakicn BASLATCURDURtugune bae
6. Ancreman zaman ayaramak kjin YUKARWASA tuguna basn
7.Antermae aessermek icin BASATURUSugang bean.
WATTS MODU W
Werts program yenio sonei kdar YUKARASAOI tupura besin
2. Onemak cnc ENTEEUSUEBASIN
3.1
4. Onlayamasi cio ENTEF seurc basio
5. ZAMAN KARAMEK CHIN YUKAI SAI TUNA BAIN
6. Antimicrobials biosimilarsin BAS ATOTUBOELusma biosimilars
TOPARLANMA MODU
Bu forksyon 1 daikkakbr sure icinde kato hizmne re kadar cabuk toparlndgnr okener
Innesse yentia dejelerir.
Aeromone gong sgrn a REcERY DOPAP ANMAL Naans tao
2.100%000%000%000%000%
3Zarantayic 60 sariyder gen layer Tepdiamma programm in sannda sien puer verieckit

| 10 | OLAGANOSTU |
| 10xF-20 | MUKEMVEL |
| 20xF-29 | IYI |
| 30xF-39 | ORTA |
| 40xF-59 | ORTALAMA ALTI |
| 60 | KOTU |
Konsol Kullanici Kilavuzu
80

81
reebokfitnessequipment.com
VUCUT YAGI
KoroD DRRMA modundeyken VUCUT YAGI luguna been
B sanie dcumocunca el nabz sensoderini tutur, aksi talvdire
E-gordauerit.
Baaocqoserrn
F=1%5%(65-50)
YUCUT YAGI
| CINSYET | DUSUK(H) | Dusuk/Orta(H) | Orta(▲) | Orta/Yükesk(◆) |
| ERKEK | <13% | 13%-25.9% | 26%-30% | >30% |
| KADIN | <23% | 23%-35.9% | 36%-40% | >40% |
B-Bv(5-50)
BMI (VOCUT KUTLE INDEKSI)
| BIM OCEGI | DUSUK | Cusuk/Orta | Orta | Orta/Yuksek |
| ARALIK | < 20 | 20-24 | 24-265 | >265 |
SORUN GIDERME
S:Koreai neder spilmoyor?
Cirpmustineokana kadar pedala basn Bu konsla gupver.
$ Pedal cevmey ducurdugumde neden konso:90 sanye agk kalmyor?
C:Saedleblir pilern odigirimes weya san edimnes genelvcr opalr Pedal cevm pilen gader
S Neden konsoluma hata kodu E-5 var?
C:Kabibarn kortoln anssra dgtn pagandirnd erin olur
CONSO-UL·U一S—·gaiD
82

83 reebokftnesequipment.com
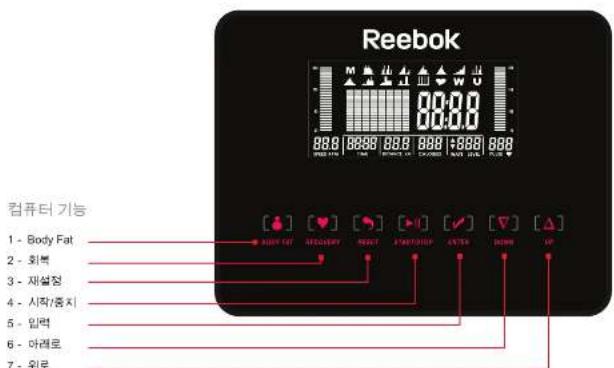
夕機能
UP(上)
85 roebokfitnessequipment.com
操作
電源才
87 reebokftnessequipment.com
派拍口一儿
89 reebokfitnessequipment.com
体脂肪
B.M.I (BODY MASS INDEX)
reebokfitnessequipment.com
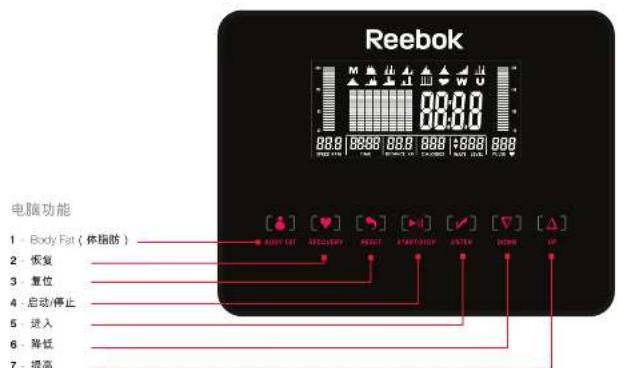
按钮功能
提高
用来增大阻力水平和确认选择。
降低
用来减小阻力水平和确认选择。
进入
用来确认一项设置或选择。
复位
rebekfitnessequipment.com
运行
电源开启
95 reebokfitnessequipment.com
心率控制
reebokfitnessequipment.com
身体脂肪
99 reebokfitnessequipment.com
币
UP引
哉孕孕藻凿皂皂藻皂藻藻藻皂藻皂藻皂藻皂藻皂藻皂藻皂藻皂藻皂藻皂藻皂藻皂藻皂藻皂藻皂藻皂藻皂藻皂藻皂藻皂藻皂藻皂藻皂藻皂藻皂藻皂藻皂藻皂藻皂藻皂藻皂藻皂藻皂藻皂藻皂藻皂藻皂藻皂藻皂藻皂藻皂藻皂藻皂藻皂藻皂藻皂藻皂藻皂藻皂藻皂藻
DOWN 0
刘贤今备备备备备备备
ENTER
中
RESET 重新设置
备备备备备备备备备备备备备备备备备备备备备备备备备备备备备备备备备备备备备备备备备备备备备备备备备备备备备备备备备备备备备备备
START/STOP
中
RECOVERY 型号
中
RESET
reebokfitnessequipment.com
告
前元
山兰山:念念念念念念念念念念念念念念念念念念念念念念念念念念念念念念念念念念念念念念念念念念念念念念念念念念念念念念念念念念念念念念念念念念念念念念念念念念念念念念念念念
人
金0010五
哉韵曾韵凿韵曾韵凿韵曾韵凿韵曾韵凿韵曾韵凿韵曾韵凿韵曾韵凿韵曾韵凿韵曾韵凿韵曾韵凿韵曾韵凿韵曾韵凿韵曾韵凿韵曾韵凿韵曾韵凿韵曾韵凿韵曾韵凿韵曾韵凿韵曾韵凿韵曾韵凿韵曾韵凿韵曾韵凿韵曾韵凿韵曾韵凿韵曾韵凿韵曾韵
五
MANUAL(个号)P1-P12.H.R.C.(合时全)WATT(
在本示用自三星云图
中
中
今号豆三M
reebokfitnessequipment.com
半半半
reebokfitnessequipment.com
#
金自
reebokfitnessequipment.com
1-MepnA Ainouc Euparos
2-Aroaraoaon
3-Mn6evioo
4-EKUVNON/NAOON
5-Eiipboc
6-K
7-E1y
AEIOTOYPRIE NAHKTPQN
UP ENANO
XpOaOaOaOaY a va oufjEoi to emTeo avTtAeTnK oKa va eBEOeOeOeI eMTOeY
DOWN KATΩ
Xnpnnoaetra yea yaeueeBto ertnedooovtanaocny Kaa eTREBaDaeuAee mEAtyO.
ENTER E1000
109 reebokfthnessequipment.com
AEITOYPTIA
ANOITMA
MoIc e oEIOUoOuOIOOIOIOIOIOIOIOIOIOIOIOIOIOIOIOIOIOIOIOIOIOIOIOIOIOIOIOIOIOIOIOIOIOIOIOIOIOIOIOIOIOIOIOIOIOIOIOIOIOIOIOIOIOIOIOIOIOIOIOIOIOIOIOIOIOIOIOIOIOIOIOIOIOIOIOIOIOIOIOIOIOIOIOIOIOIOIOIOIOIOIOIOIOIOIOIOIOOO 26000000
EKEINONTA
Hkovaoa 8a eppovio U1
Xpapnnpaepnnpaup/DOWNyaVa aaaaalepeaaeau npaauU1,U2,U3KU4.
PNTTO ENTERIy wemfepnncn mny aayr da
TOMOTIYO TO qAOLOS (aVPOAC EAVN pOeMIyO) XPNJAPONKUWTO TANKPA U P / DOWN. NIOATE TO ENTER YA cMPLDAIAU.
ToTnEeTeRy TnIaKDaOc (25 eN iiva npoAev) xnpoiopuovtac to mKtpa UP / DOWN. Itoe To ENTER yraBuaia
TantoRrto 1000000000000000000000000000000000000000000000000000000000000000000000
Tanaeratrto f 10aoc aag (50 kla eivn npmaclny) xpaqauoauoaoa r taikpia UP / DOWN. Dicote to ENTER w y mcbolioan.
Baaie np aoy oovn kivnong Mto pnte va aoboojye)
OtA t a 1000000000000000000000000000000000000000000000000000000000000000
ENIAOHNPOPPAMMATO
And try out of the enzyme, uterpoeite va enlelece to aie pioe npoyqauwve. XEIPOKINHTO (MANUAL), P1- P12.H.R.C.W., WATT NTPPMAXM XPHET (USER PROGRAM).
KARI YN DsopkO tOcUdYrTn TnpuApAuaoc, mOpUaTe Vb dKaOpEe Tnv dcqnr oac nCovia to START I STOP. Tio va puiueo. To immlo 0vniouanms meae ta NknpaUP / DOWN KA yva amnppepe eTO Kupuc neuvie nrete RESET.
XEIPOKINHTH (MANUAL) ENIAOTH M
- Nsore UP/DOWN pexj n evseqn Manual M va avoepoohvvi
- Nort ENTER y a mpeaioon
- TornBertnTouc oioxou tou npoyauoio To emtio Bo prrto ov aoaooiyuiu. Publiotri xiongmoiuaaiao to UP / Down
- NantENTER yia mfeipbdo
- Etnaatae yio to xpovo, tvn atoataon, tnc 8pmbdeK cai Tov Kpboxok taio, Kaob o poTcovto ENTERYO aepbdo
IHMEIOJH:Av biv BiaRt va opiae pia aia oioyou toa amr meate ENTER yva napaeu np6v.
6. RIOE TO TAMKPOI START / STOP yia va taikwaeTe rny tiipomovon da
Av exte opioi moaamouc oixous, to npoypapua 0 Ano pnoos oroxos eemuy.
111 reebokftnesequipment.com
EAEFXOESKAPDAIAKOY TAAMOY
- Nore UP / DOWN pixr 10 HRC npovpaa oavbaa
- DETE ENTER yX EMBBOLWON
- DnrrrUPDOWN yq vq cmEer 55%,75%,90% nTA (TARGET H.R.-npocmoy=100bpam).
A
An Eunian 10000000000000000000000000000000000000000000000000000000000000000000000000

Tva uroayoteov aoxo Tou kapaiakou taipoua
Ymohayoi6:(220-nKia)x-%
Ploepaio: Me Nkia 25 enw emayovra 75%. Btoe oce o kopko 20 (220-25) x 75% = 148
4. The UP / DOWN yio va totoBertnptte to xpovo aonnon
5. Ncrt START / STOP yva givnntre my npomovn ooc
IPOIPTAMMA AEITOYPIA XPHETHU
- The UP DOWN pIpypyppa ypan aaoepn
- DETE ENTER y0 EMBEBOWON
- TnrrrUPDOWN yqa rnoBtcttny aonrnnn kntjmuoc
- NIOE ENTER Vx va mropeit 0r erouvo tjupe
- Ncrt START/STOP yempeaiwn
- Nore UP / DOWN yio va totoBertnoTo xpOvo daKnonc
- nore START / STOP va va ekivnpert my npomovn oac

ENIOTH WATTS W
- NcTATE UP /DOWN pexi to npoypaua Watts (W) ovoBooBpui
- NIOENT ENTER yx mpeoiwn
- TnOe UP/DOWN yea ronoBEnCte to doxo TuW WATTS.
- NIDENT ENTER yq mbetaaiwn
- DGE TUP / DCWN vq yTO TOBETNEETO XPOV GKNONC
- Digt START/STOP yg rmBgeGwgn
ENIIOH AEITOYPIA2 ANIKATA2A2HE
Aun n Aetoupyo aolaoyol to Etttno 10 quokn ooc katoaotaae peipuovtto to noo yypnoo a Kpabokoc TAPACO KAKKATIPOK TAY KADDOEIOA MIE PEOBDOU 1 AETTO.
1. Disoge to panktoo RECOVERY gto tAgc nsc npnpvncs pcc
2. O npente va kparate tou aonntpncs kapbiakou taou kaobn my dopkaiaou eayxou atokatodarqns
3. To xpvopno 8o jmuon ovo pao 10 to 60 bunepoAema. To taoou npovpauo aotokaraoaocn BdoedipiaBaoyolaiya.
| 1.0 | TEAIEIA |
| 1.0<F<2.0 | E3AIPETIKH |
| 2.0<F<2.9 | KAAH |
| 3.0<F<3.9 | METPIA |
| 4.0<F<5.9 | KATO TOY METPIOY |
| 6.0 | KAKH |
OdyieXphoKovoAs
112

113
reebokfitnessequipment.com
METPHH ANIOYE OMATO
Me Tny Kovoda stny Etnoyn STOP. Nte to nAkrpo BODY FAT
KoHOTe 10a oaiyIepnck KApEkoAoiLe Oe anly 8 TeupeOeNtWu eipnion. Av otouxTe va to kaveix, oubi aoyiOIO E-1 OeiTaeau Tpu eapvOioX.
AcoonneAepnnaeBepovvctio
F=Fat%(5-50%)
METPHEN AINOYESQMATO
| ΦYAQ | XAMHAO(-) | XAMHAO/MEIAO (+) | MEIAO (▲) | MEIAO / YPHAO (●) |
| ANTPAI | <13% | 13%-25.9% | 26%-30% | >30% |
| ΓYNAIKA | <23% | 23%-35.9% | 36%-40% | >40% |
B=BMI(5-50)
B.M.I (AEIKTHMAGAZEQMATOE)
| KAMAKA ΔEIKTH MAZAS LOMATOIS | XAMHAO | XAMHAO / MEZAIO | MEZAIO | MEZAIO / YPHNO |
| EIIINEO | < 20 | 20-24 | 24.1-26.5 | >26.5 |
ANTIMETQNIH HPOBAHMMATON
E: fari 8ev oovdei n kowobka;
A: H Tepioppupuuy revtndrpeo va elvotapamovcno 15 rpm.Auro 8a doy vny evpeyoxnovdo
E: Fii n kovobda dev npapeve avopvyn yia 90 deupeoerra apoo ataonnna T nevrk
A: Oi YevapovopoiKoulev, protipatice, protipe via xepovotvia vortkazadionan y apopnion. Kavovotz TeVtia 04: EvapovopoiKoulev Tst protopic.
E:101 eivai evoc kwiokos opahmuoc E-5 0vKovOa oou
A:BeBaaWBeTeOn Ta KaKuDg Eivai OauTc uuvdeepevv OTO Tnou poc nKovOaAc
HCTpyKnn no KOHCnA nn noB3OBaTeA
114

115
reebokfitnesssequipment.com
ФУHKUIMKHOJOK
BBEPX
Inocytosoma: yIyIyIyIyIyIyIyIyIyIyIyIyIyIyIyIyIyIyIyIyIyIyIyIyIyIyIyIyIy
BHN3
Inovonoviridae yu yuyunshenjiyueyin componenmeng hui nongyuan hui hui
BBOA
VicnctvctyivnVnVnVnVnVnVnVnVnVnVnVnVnVnVnVnVnVnVnVnVnVnVnVnVnVnVnVnVnVnVnVnVnVnVnVnVnVnVnVnVnVnVnVnVnVnVnVnVnVnVn
CEPOC
KMOLOVZAOYDA ZAO ADOBAPATI E OCHOOHBO MHO Yo Boe pOo HACIOPOPE PENKIA TEPHIPOKIN, KPOE CTOF, PPOH KAKARIN PPOH KPOE, POPOKIN, POPOKIN, POPOKIN, POPOKIN, POPOKIN, POPOKIN, POPOKIN, POPOKIN, POPOKIN, POPOKIN, POPOKIN, POPOKIN, POPOKIN, POPOKIN, POPOKIN, POPOKIN, POPOKIN, POPOKIN, POPOKIN, POPOKIN, POPOK
NYCK/OCTAHOBKA
Heegaeter, 1964, 1975, 2003, 2008, 2010, 2013, 2016, 2019, 2020, 2023, 2025, 2027, 2030, 2033, 2035, 2037, 2040, 2043, 2045, 2047, 2050, 2053, 2055, 2057, 2060, 2063, 2065, 2067, 2070, 2073, 2075, 2078, 2081, 2083, 2085, 2087, 2089, 2091, 2093, 2095, 2097, 2100, 2103, 2105, 2107, 2109, 2111, 2113, 2115, 2117, 2119, 2121, 2123, 2125, 2127, 2130, 2133, 2135, 2137, 2139, 2141, 2143, 2145, 2147, 2149, 2151, 2153, 2155, 2157, 2159, 2161, 2163, 2165, 2167, 2169, 2171, 2173, 2175, 2177, 2179, 2181, 2183, 2185, 2187, 2189, 2191, 2193, 2195, 2197, 2199, 2201
BOCCTAHOBAEHNE
IOTPOMMAJDA TPOO09K1CTEHTEHOCCTAHOBHIERCEPHOTOPHOVA
CEPOC
Histochemical, microfibrillar, myoepithelial cells VCTA-HOBB1/HEK293T-EBER2 KO H1080 EK3/HEK293T
KOMIbIOTEPHBIEΦYHKUIN
BPEMH
Oeepemrnr 000 np 959 (mhybceosy
CKOPOCTb
Teiayuan oopocbcto 80 spnpe Tnpopopoe 000098 kwh (W
ANCTAHUNA
Orpaeae hnoydo nactnuee a dnerane e 002099 mthm
KANOPM
Fermpnepyienonneepnncnnpnnnnpnnnnpnnnnnne nnnnnnnnnnnnnnnnnnnnnnnnnnnnnnnnnnnnnnnnnnnnnnnnnnnnnnnnnnnnnnnnnnnnnnnnnnnnnnnnnnnnnnnnnnnnnnnnnnnnnnnnnnnnn
NyABC
Intraepidymal or intraepidymal myxovirus nonacute lymphoma or 30-32 yozoary in myeloid T cell neoplasms (1) HCMH-HOHP-HOHP-HOHP-HOHP-HOHP-HOHP-HOHP-HOHP-HOHP-HOHP-HOHP-HOHP-HOHP-HOHP-HOHP-HOHP-HOHP-HOHP-HOHP-HOHP-HOHP-HOHP-HOHP-HOHP-HOHP-HOHP-HOHP-HOHP-HOHP-HOHP-HOHP-HOHP-HOHP-HOHP
OEOPOTOB B MNYHY
Haeepn (no cOpOa maxbka a Myty (0 99 99
MOUHOCTb B BATTAX
OcpaaeTnpeGrenne MoOnocnB Oepe TpeHnpoeB aKanBahe o1 0o99 B
HCTpyKUHN KOHCOON AAR NOB3OBATEA

117
reebokfitnessequipment.com
3Kcnnyatua
BKNIOUOHEHNEIITAHN
Hahayakshmi oboomco copbpa a cpoovtncn Knoepo, c nookoo knoe hnoopn narey coovcne 0000036 6 M97V 10 15 1284, KowhoTOKA KNOOCH, H 2 A C 2697B ABOCROR BC 8K-000018
HAAYAO PA5OTbl
HaKoHooBdyerBbeBaeHoU
Aaepnepnnne a n 10500nnaonrnanrno npnra - U, U2, U3 wth U4 - vnnnny mnnnnn nnne nee
Handmail ENTER (Becon, 400mmertssythm60p
Wawa cRbO hON (no yomnHIO yctarHcH HxHCKH npHmOyH CKNUPDYN (SeepxH-H) Harnme ENTER (BocL, 1000a, nroA, 26846, bccpC).
Berecne cai raccip (no yooohy oohy oohmohy 25 nen) npn noonn noonn noonn UPONN (BeepeRshs). Haeane ETER (Bec),-05a noopreabw. upobp.
Bekiminci Cokci (no yuksuzhimi) yozhanluyi 100 cmi rpi nmoa hnnk UPRCDN (BepxBand)
Kamimn ENTER (Boc), Tofo, nojat nojatpoyin bu.50c
Baeacn cnc (no ym74nH - 50 k np novnn HONK UPOCWN (IsepBHL) - Taewite ENTER (Proc), hns2 mnpreps, e6op
reebokfitnessequipment.com
KOHTPOAB CEPDEUYHOFO PNTMA
Haaaie hnnnnpnnpnnn nnnnne nnnnne nnnnne nnnnne nnnnne nnnnne nnnnne nnnnne nnnnne nnnnne nnnnne nnnnne nnnnne nnnnne nnnnne nnnnne nnnnne nnnnne nnnnne nnnnne nnnnne nnnnne nnnnne nnnnne nnnnne nnnnnee
2 HaeHnENTER(Boc)1065nntaepbBcCp
3. Higashiyan UFOChin (Benzylhexane 55%, 78%, 90% w/v TA (saponins copolymer) perm no: yuongsheng-100 - YAPSO B MINTY).

Facier ppeSyemoro cepaHoro prma
DapwYx:220-Bocpact)x
Hnepoe 701 non bocpacte 25 net Bbip66m 75% to konoh- h opoeh n p/m (20 - 25) x 75 % - 146/
4HorpbyHcknUPDOWN(BepxB-3a#epepepepe
5.HaHmTe HcHmry STARTSTOP (THCtOCTaHOBA) HOBs HbHsTpeHHPOEY
PEKIM NO/63OBATEBCKOINPOPAMMbU
- HsowwaeRie hONcLPCOWN (Bepa/THA) nOK HE HENHET MNTERNS NOHOBATEKAN nporpaVM
- HAKMTE ENTER (Bocd) hnofoaepb
- Hwawasre (PONAN (ReepwFru) wrin ssareh componrwnne h xanon onn
- AERRENEENNNN KONOWCNI KNOHN HAWWAPTE ENTER
5.Hakmre STARlSTOPyckOctaKeKaA dnn noqteoxeHn
6 NcnpbnyHONKUPDCOMN(BBepxBm3a#nrepepaTpeHHo00 - HAKIMTEKONKY STARTSTOP (YCKOCTAHOBAL NOBENHENTPEHTPOBY
PEKIMMOUHOCTW
HAKIMAREXHONIKLPYDCWNBEEPWBSNNOHAHEHHERMMFRCPPMAVQHPCCCTA W
2. HwkeTn ETER (Becal) mroE hnrreepae Tep
3. Atonosynon UPDCN [BepnE] 1947
4.10000000000000000000000000000000000000000000000
5. 100000000000000000000000000000000000000000000000000000
6. Hexawte 10cm STAPSTOP (TynCctncal nofBn) ptnpocny

PEKUMBOCCTAHOBAEHNR
DyHcHgUQeAeBtPOeHbHrOePpOoBnHOCTNpyEaBctPOeHmpeHnTOrTOckp
400000000000000000000000000000000000000000000
1 1
2. FLOWS IN THE PPOPMES BY MONTH (XOXO) AND BY MONTH (HOT) AND BY MONTH (FIRE) AND BY MONTH (HYDROPHEN) AND BY MONTH
3. TAPESHETOOPHTAHOTHTTATB
onepaunnpeynrnnnpaaep
| 10 | ПЕВСХОДБИ |
| 10XF-20 | OTVHHUM |
| 20XF-29 | XOPCUIM |
| 30XF-39 | HENIXO |
| 40XF-59 | HYKE CPEDHOTO |
| 60 | C7AEBI |
HCTpyKnn no KOHCnN AAR NOB3OBATEA
120

121
reebokfitnessequipment.com
reebokfitnessequipment.com
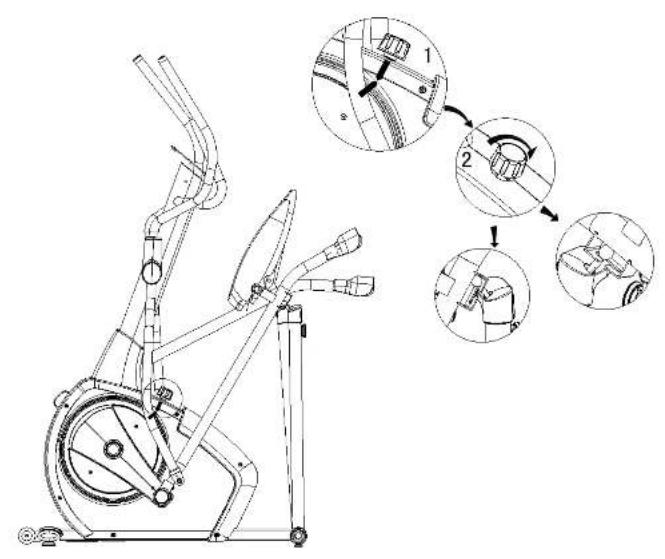
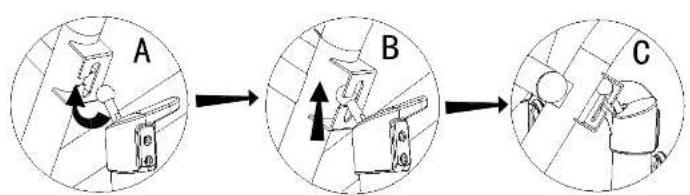
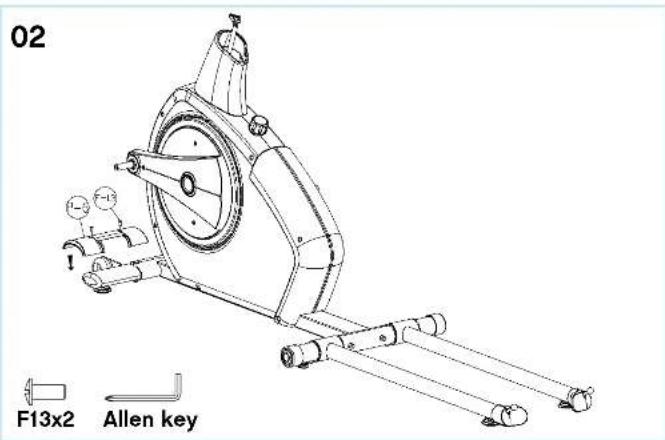
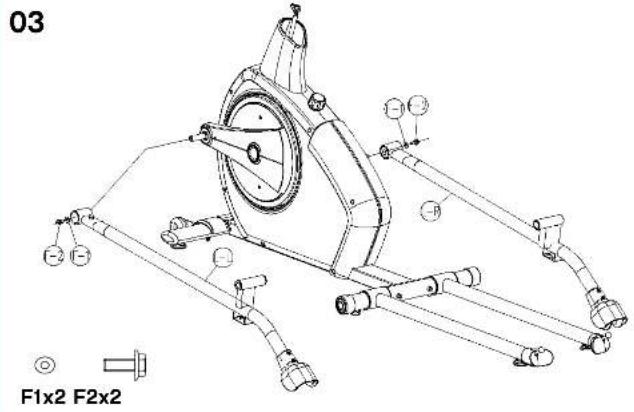
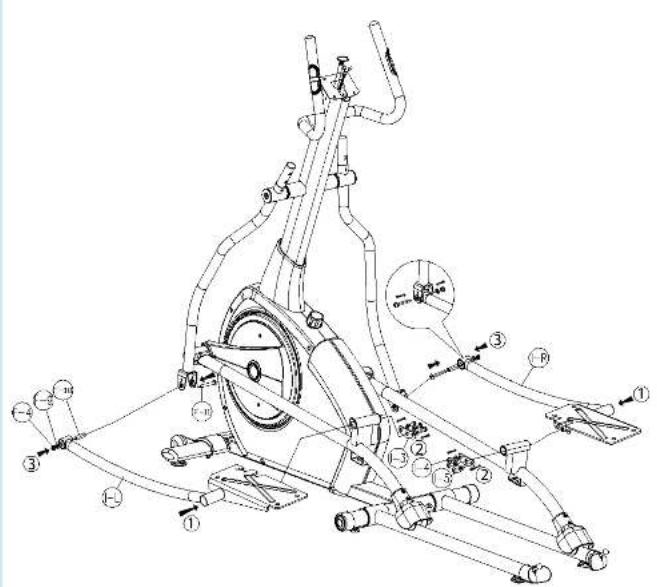
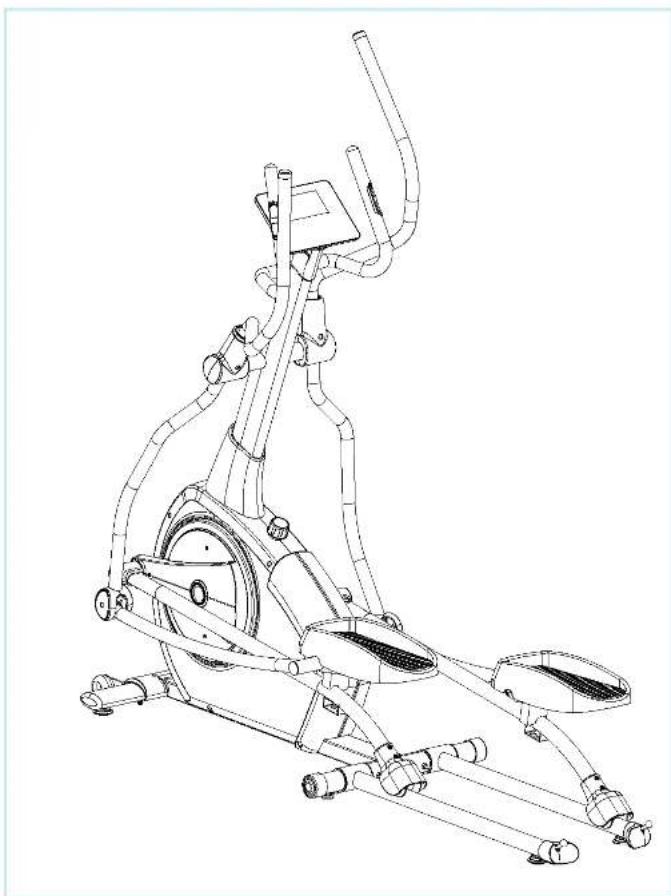
Assembly Guide
A No Front DtwC Ehtca
02
03
reebokfitnessequipment.com
Images for illustration purposes only
| ML MR | 1/1 | |
| LL HR | 1/1 | |
| CL CR | 1/1 | |
| N | 1 | |
| ∅ ∅ ∅ ∅ | 1/1 | |
| DASH DASH | 1/1 | |
| O | 1 | |
| LL LR | 1/1 | |
| B | 1 | |
| A-1 R | 1/1 | |
| 1 | ||
| PS | 1 | |
| P1 | 1 |
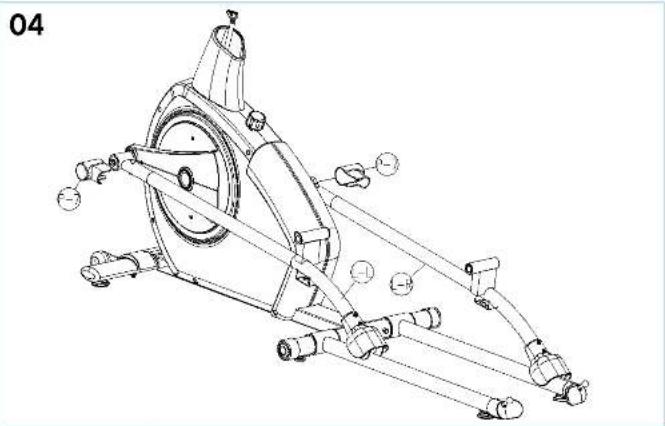
Assembly Guide
A No Frnt Dnpe Ixtice
04
05 rebokftnessequipment.com
Images for illustration purposes only
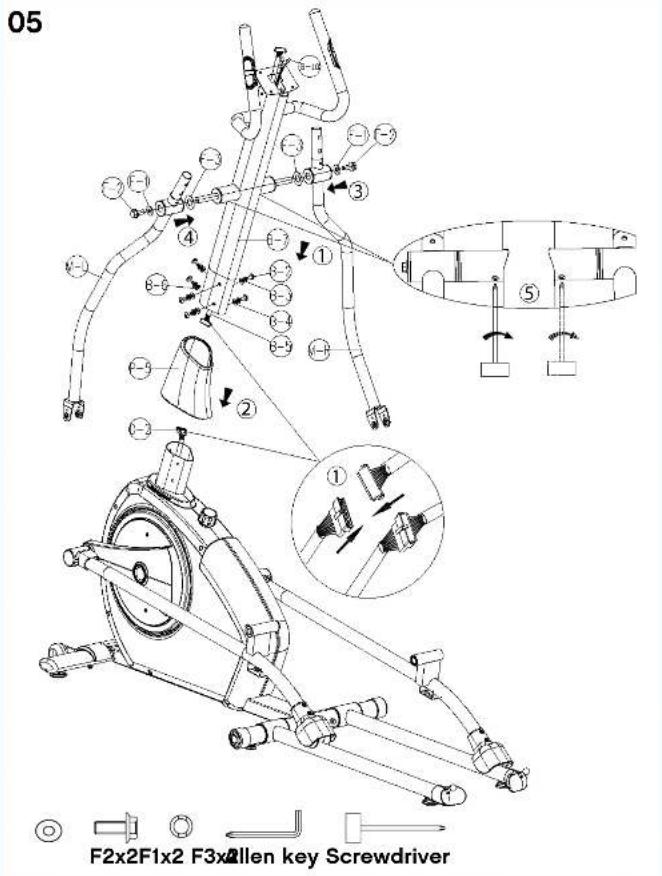
Assembly Guide
410HortDlnslpia cckc#nssqjpmntcom
06
07 reebokfitnessequipment.com
Images for illustration purposes only
06 07
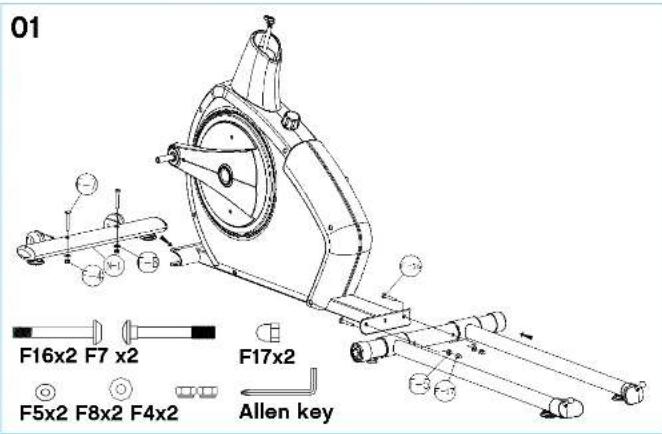
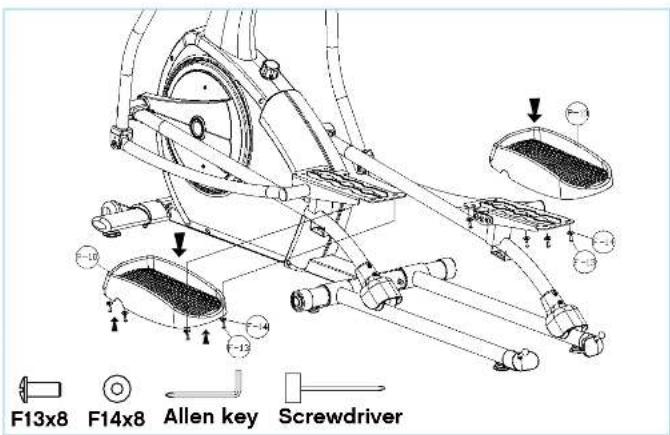
F4x2 F9x2 F10x2 F11x2 Allen key AifereLwdriver

Assembly Guide
AIFortDnCip
08
09 reebokfitnesepquipment.com
Images for illustration purposes only
Assembly Guide
A No Frnt Dnse Etoa
10
11 reebokftnessequipment.com
Images for illustration purposes only

11 12
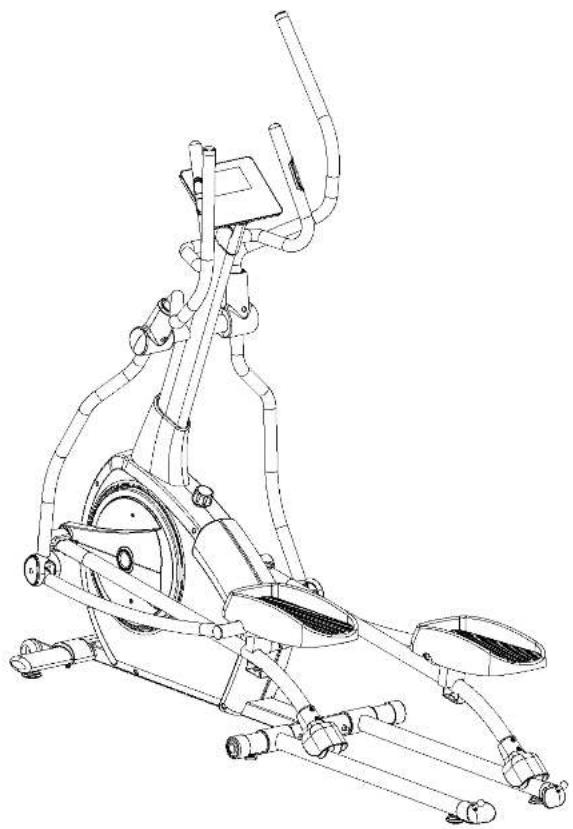
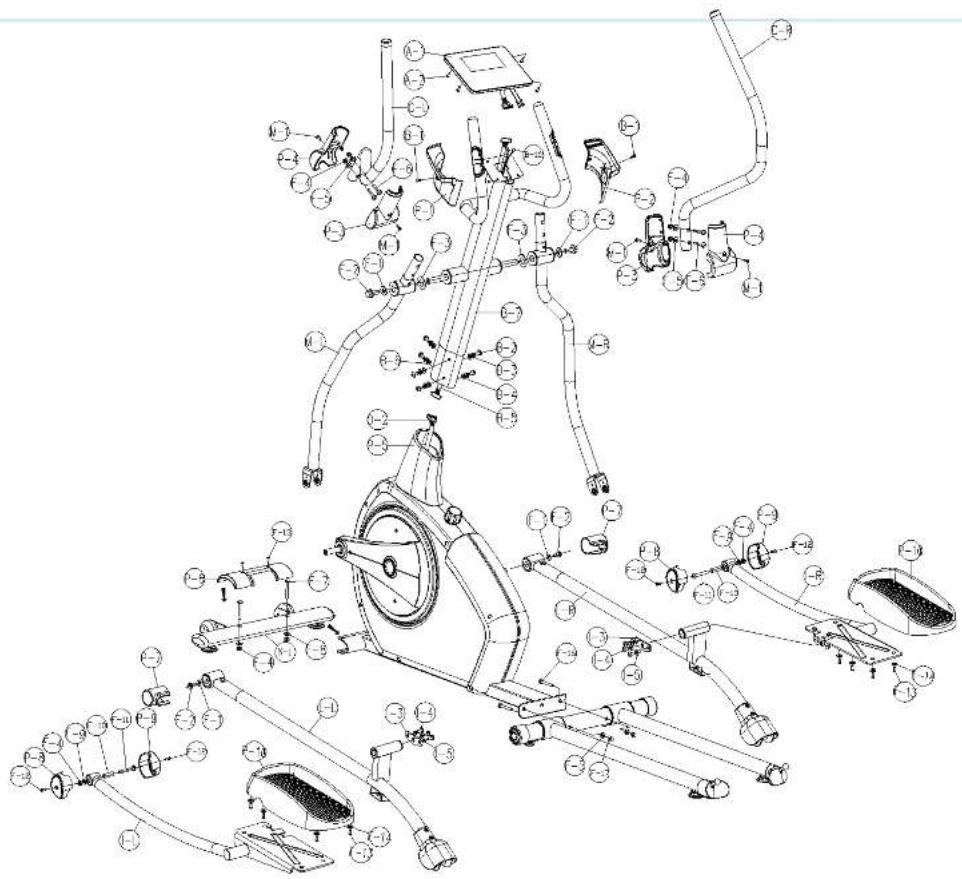
Exploded Diagram
401
12
13
reobokftnessequipment.com
Exploded Diagram
AFTFNTDnIg
14
15
reobokftnessequipment.com
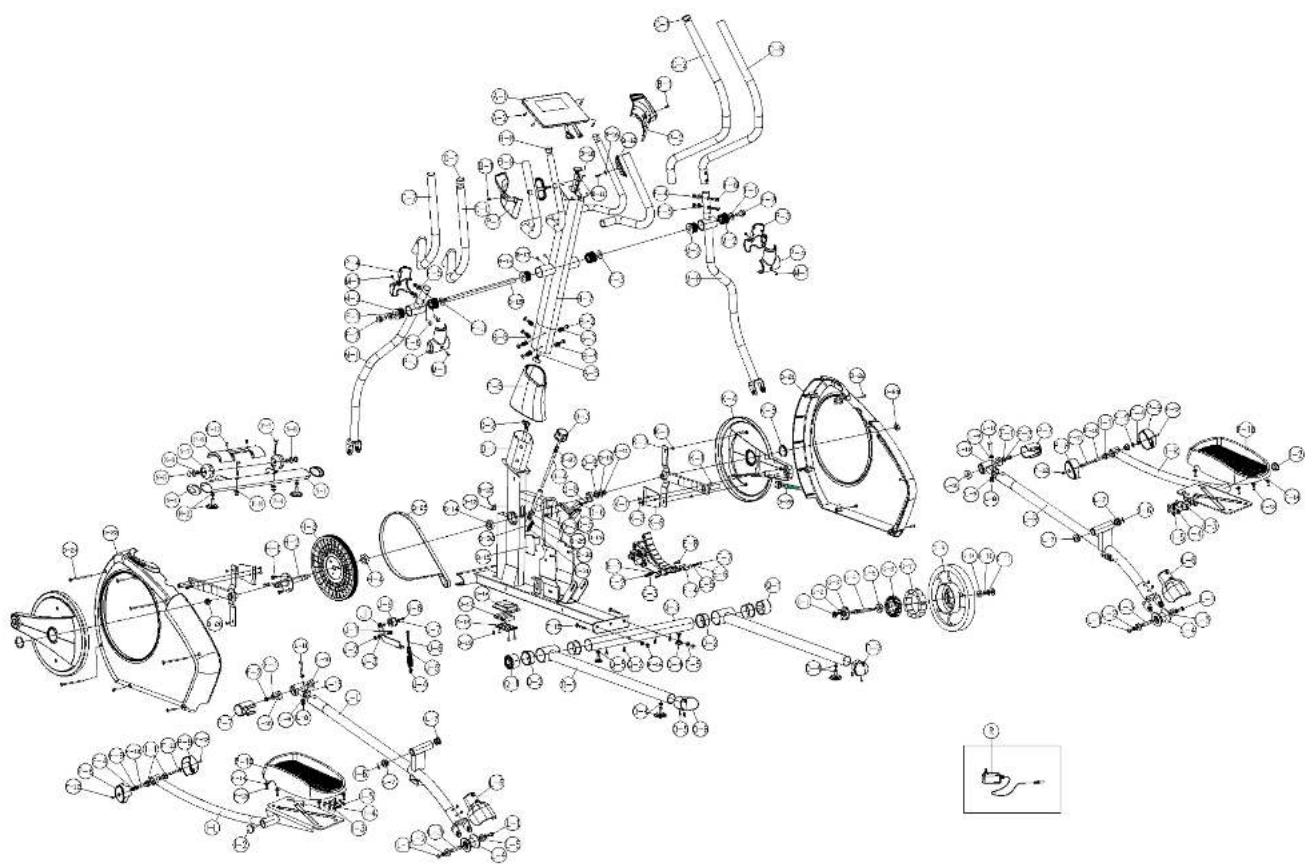
Parts List
A
17 reebokftnessequipment.com
| No. | Description/Quantity | Quantity |
| A-1 | Computer,SG788-67 | 1 |
| A-2 | Screw,MS10-4 | 4 |
| B | Handker post,set 9024 (PWS24) | 1 |
| B-1 | Screw,MS10-R-84 | 2 |
| B-2 | Screw,MS10-L-25x1Gm/m,6 | 1 |
| B-3 | Spring washer,05-1*1p12.2/2.1(STR) | 1 |
| B-4 | Flat washer,080x19x4 | 2 |
| B-5 | Upper cable wire,12P,PZ-14-12P | 1 |
| B-6 | Semi circle washer,050x19x2L | 2 |
| B-7 | Handker post,6024 | 1 |
| B-8 | Flat copper,1(STR) | 2 |
| B-9 | Foam grip for handker,b200x23x0.1m/(STR) | 2 |
| B-10 | Hand puse,arc600+700(LP) | 1 |
| B-11 | Screw,Max20L | 2 |
| B-12 | Hand puse,PN | 2 |
| B-13 | Screw,Max50L,8.8 | 2 |
| B-14 | Screw for ask of handker(PCM) | 2 |
| B-15 | Side of handker,0x35x55(MI) | 1 |
| B-16 | Semi circle washer,1-ST (Q35) | 2 |
| C | Upper handker set,6034 (STR) | 1 |
| C-1 | Left Upper handker,6024 | 1 |
| C-2 | Right Upper handker,6024 | 1 |
| C-1 | Flat cupp+1/4" | 2 |
| C-2 | Form grip for handker,S300x300x5.0m/(SI/K) | 2 |
| D-1 | Main frame,3024 | 1 |
| D-2 | Lower cake wire,700L,12P,PE-14-12P | 1 |
| D-3 | Disc stopper,60L,13L | 1 |
| D-4 | Screw,Max4L | 1 |
| D-5 | Support,ST | 1 |
| D-6 | Flat washer,p7x12x1t-3 | 1 |
| D-7 | Wood felt,S40x30" | 1 |
| D-8 | Screw,M40x10L(Stm/m) | 2 |
| D-9 | Flat washer,p20.5xp0x10Q35 | 1 |
| D-10 | Wear washer,q20x30x8L,85Km | 1 |
| D-11 | C Type ring,p20 63Km | 1 |
| D-12 | Screw,Max10L | 1 |
| D-13 | Screw lnter,4000 | 1 |
| D-14 | 6004RS bearing,6004RS | 2 |
| D-15 | Control board | 1 |
| D-16 | Lower cover for battery box,BAL/US3 | 1 |
| D-17 | Battery AA1120mmH | 5 |
| D-18 | Lipcar cover for battery box,BAL/US3 | 1 |
| D-19 | Screen,MS10L | 4 |
| D-20 | Nutz,414p1.2x310T | 2 |
| D-21 | Right clean cover,TU | 1 |
| D-22 | Screw,Max10-8 | 1 |
| D-23 | Left chain cover, FU | 1 |
| D-24 | Screw,M40*50L | 4 |
| D-25 | Belt,L6 1143mm(450J) | 1 |
| D-26 | Nylon nut, NU | 2 |
| D-27 | Spring,8x8x8x8x10 | 1 |
| D-28 | DC wire,400L | 1 |
| D-29 | Hot nut | 2 |
| D-30 | Nylon nut | 2 |
| D-31 | Flat washer | 1 |
| D-32 | Flat washer | 1 |
| D-33 | Hot tail | 1 |
| E-5 | Goat hair set(CAR.F B00L) | 1 |
| E-1 Flat washer,#0010x1L Q235 | 1 | |
| F-2 Nylco nut,46 | 1 | |
| E-3 Bushing,#0102"SL | 1 | |
| L-4 Magneto set, q200-12-12 | 1 | |
| E-5 Flat washer,#06013x1L Q235 | 2 | |
| F-6 Spring washer,#6, 65Mh | 2 | |
| F-7 Heat,Screw,M#P01*01RL | 2 | |
| E-8 Heat,screw,M#P02SL(ST) | 1 | |
| F-1 Flat washer,#0907x21-4 | 1 | |
| I-2 Nylco screw,M#P01X20SL | 4 | |
| F-3 Move washer,#200x30x30.3t | 2 | |
| F-4 Nylco nut,46 | 8 | |
| F-5 Semi circle washer,#01019x2t | 6 | |
| I-6 Cartilage screw,M#P01Z25x40L | 4 | |
| F-7 Cartilage screw,M#P01Z25x40L | 2 | |
| I-8 Flat washer,#06019x2t | 2 | |
| F-9 Flat washer,#06019x2t | 2 | |
| F-10 Bushing,#15*36.5l | 2 | |
| F-11 Screw,M#P01 250x50(6m/m) 2 | 1 | |
| I-12 Screw,M#P02SL | 4 | |
| F-13 Screw,M#P01X2L | 10 | |
| F-14 Flat washer,#06010x1t 5 | 1 | |
| F-15 End cap | 2 | |
| F-16 Screw,M#P01 250x50 | 2 | |
| G Fyshel set. | 1 | |
| G-1 Flat,#5-76 | 2 | |
| G-2 Screw,#40,70x30 | 3 | |
| G-3 End cap for cell set,#56*13T | 1 | |
| G-4 End for,Fyshel,#56*26*17.5L | 1 | |
| G-5 A#D#BS bearing,#0005S | 1 | |
| G-6 Cell set | 1 | |
| G-7 Magnet,#24*15*28 | 10 | |
| G-8 Flywash,#20*30*30H35NKP 2mm | 1 | |
| G-9 GDOORS bearing,#0000RS | 1 | |
| G-10 Flat washer,p104p10x1 | 1 |
| H-1 | NaL376*284.35 | 1 |
| H-1 | Ade set | 1 |
| H-1 Hx | Screw,45#P1.25x12.204 | 3 |
| H-2 | Adw,p20*1.05L | 1 |
| H-3 | B3 Pull,p20*6(p=0) | 1 |
| H-4 | Sphg,p20.5w25p7.5mm | 1 |
| I | Small pedal arm set,6024 | 1 |
| H- | Left small pedal arm,6024 | 1 |
| H-1 | Right small pedal arm,6024 | 1 |
| H-2 | Connecting sleeve for lower handlebar | 4 |
| H-3 | Flat cap for small pedal arm | 2 |
| H-3 | Connector for small pedal arm,3T FL | 2 |
| H-5 | Flat washer,#9*19*2T | 5 |
| I-5 | Screw,M9P1.25*16L(6mm) | 6 |
| H-6 | Wave washer,#7.5p25w0.3t | 2 |
| J | Idler set | 1 |
| J-1 | Hex.Screw,M9P1.25*20L | 1 |
| J-2 | Nylon nut,MB | 1 |
| J-3 | Flat washer,#5w25w25t | 1 |
| J-4 | Spring,p20*12x12.27 | 1 |
| J-5 | Spring bracket,#14*30L | 1 |
| J-6 | Hex.Screw,M9P1.25*100L | 1 |
| J-7 | Flex washer,#13L,Q335 | 1 |
| J-8 | Hex.Screw,M9P1.25*20L | 1 |
| K | Dent cover,6024 | 2 |
| K-1 Hex. Screw,M9SdL | 4 | |
| K-2 Dsc,B624 | 1 | |
| K-3 Hex. Screw,M9SdL | 1 | |
| K-4 Dsc cover | 1 | |
| K-5 Cap for disc cover | 1 | |
| K-6 Inner cover for disc cover | 1 | |
| L | Pedal arm set,6024 | 1 |
| L-1 | Left pedal arm,6024 1 | |
| L-2 | Right pedal arm,6024 | 1 |
| L-1.1 Hex. Screw,M9P1.25*16L(6mm) | 4 | |
| L-2 Riz. Screw,M9P1.25*16L(6mm) | 2 | |
| L-3 Acks for wheels,#12.5x0.61 | 2 | |
| L-4 Width,#61x25x30.6 2 | ||
| L-5 6001RS bearing,0001RS | 4 | |
| L-6 Cover for wheel | 2 | |
| L-7 Screw,M9P1.25*10 | 8 | |
| L-8 Bushing,#26.7w17.12x15L | 4 | |
| L-9 Nylinder set,608 | 2 | |
| L-10 | Flat washer,#4#16x14 | |
| L-11 | 0001RS bearing,0001RS | 4 |
| L-12 | Hex.Screw,M9P1.25*40L | 2 |
| L1-2 | Connector for pedal arm,6027 | 2 |
| L1-4 | Fixed pin,6024 | 2 |
| L1-5 | Flat ware | 4 |
| L1-6 | Spring washer | 4 |
| L1-7 | Knock for fixed pin | 2 |
| M | Linear handbarger,6024 | 1 |
| ML Lc: fork handbarger,6024 | 1 | |
| MR Right fork handbarger,6024 | 1 | |
| N 1 | ScrewM5P0.8x4L | 4 |
| N 2 | Sleeve for fork handbarger | 4 |
| N | Fork switcher set,6024 | 1 |
| N 1 Front stabilizer,6024 | 1 | |
| N 2 Adjusting cap,90 | 2 | |
| N3 Cap,S#/R-TM/R | 2 | |
| N4 Front cam for front stabilizer,ON | 2 | |
| N5 NutMII | 2 | |
| N8 Biasing,6026x6026mm | 2 | |
| N 7 Transportation wear | 2 | |
| N 8 C ring,6028 | 2 | |
| O | Slider set,6024 | 1 |
| Dc1 Slock | 2 | |
| O-2 Connecting screw for rear stabilizer | 4 | |
| Dc2 Acquering cap, gill | 2 | |
| O-5 Screw,M512L | 4 | |
| O-6 Left and cap for skater | 1 | |
| O-7 Right end cap for skater | 1 | |
| P1 Left cover for handbarger | 1 | |
| P 2 Right cover for handbarger | 1 | |
| P-3 Front cover for upper handbarger | 2 | |
| P-6 Back cover for upper handbarger | 2 | |
| P-5 Cover for handbarger post | 1 | |
| P-6 Cover for front stabilizer | 1 | |
| P-7 Cover for pad arc | 2 | |
| P-8 Left cover for lower handbarger | 2 | |
| P-9 Right cover for lower handbarger | 2 | |
| P-10 Front set (right & left) | 2 | |
| Q | Base stabilizer set,6024 | 1 |
| Q-1 End cap for rear stabilizer,950 | 2 | |
| Q-2 Base, Screw,M5P0.8x2L(5mm) | 4 | |
| Q-3 Rear stabilizer,6024 | 1 | |
| Q-4 Adjusting cap,20/30L | 2 | |
| Q-5 Base, M5 | 2 | |
| R | Adaptor,R6V,50H2.5WDC 1A | 1 |
| hondalet kit | 1 |
Correct Use
4 No Fort Inde sipica
18
19 reebokfitnessequipment.com
Images for illustration purposes only Images for illustration purposes only