SIG 1200S - Generator STANLEY - Free user manual and instructions
Find the device manual for free SIG 1200S STANLEY in PDF.
| Brand | Stanley |
| Model | SIG 1200S |
| Product type | Portable generator |
| Weight | 13 kg |
| Power source | Unleaded petrol, 4.5 L tank |
| Engine | 4-stroke, single cylinder, OHV, 53.5 cc |
| Rated power (PRP) | 1.0 kW |
| Output voltage | 230 V ~ |
| Frequency | 50 Hz |
| Rated current | 4.3 A |
| Power factor | 1.0 |
| Oil tank capacity | 0.25 L (15W40 oil recommended) |
| Spark plug | TORCH A7RTC |
| Noise level | 95 dB(A) |
| Protection rating | IP 23M |
| Main functions | 230 V~ socket, economy switch, overload indicator, automatic oil cut-off |
| Maintenance and cleaning | Oil change, air filter cleaning, spark plug check, cleaning with a damp cloth |
| Safety | Mandatory grounding, overload protection, automatic low oil shut-off |
| Spare parts and repairability | Spark plug, air filter, spark plug wrench kit, funnels included; repair by certified expert |
| Warranty | 24 months |
| General information | Outdoor use, do not connect to public grid, operating temperature -10 to 40 °C |
Frequently Asked Questions - SIG 1200S STANLEY
User questions about SIG 1200S STANLEY
0 question about this device. Answer the ones you know or ask your own.
Ask a new question about this device
Download the instructions for your Generator in PDF format for free! Find your manual SIG 1200S - STANLEY and take your electronic device back in hand. On this page are published all the documents necessary for the use of your device. SIG 1200S by STANLEY.
USER MANUAL SIG 1200S STANLEY
GB Original instructions
natural_image
Close-up of a hand adjusting a mechanical component with a handle and internal structure (no visible text or symbols)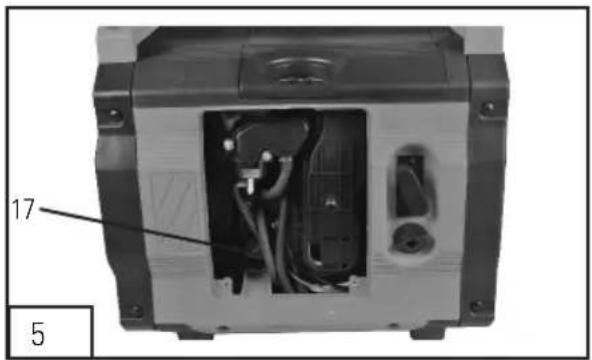
natural_image
Interior view of a device casing with visible internal wiring and components (no text or symbols)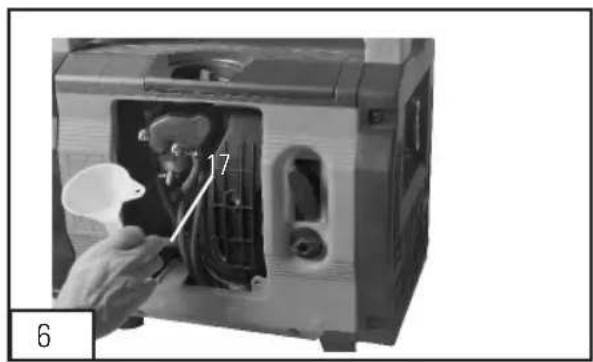
natural_image
Close-up of a hand using a tool to clean or install a device into a container (no visible text or symbols)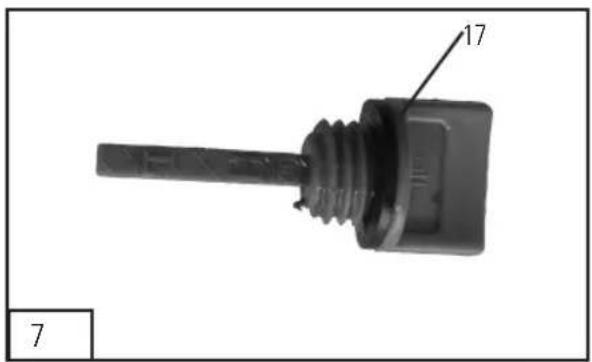
text_image
17 7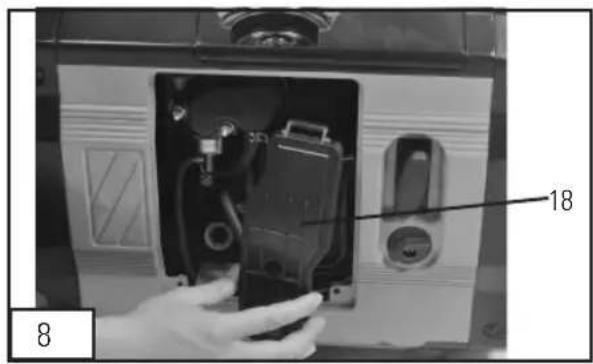
text_image
18 8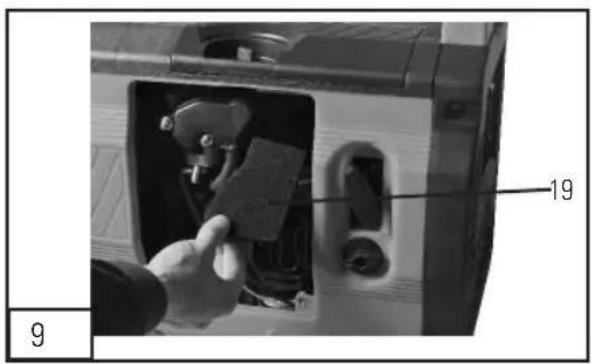
text_image
19 9
natural_image
Close-up of a hand operating a printer with a cable inserted, showing internal components (no visible text or symbols)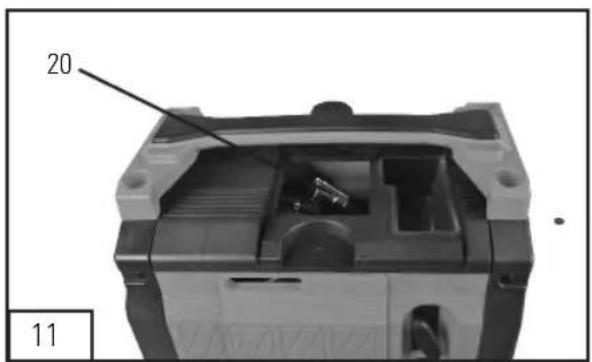
text_image
20 11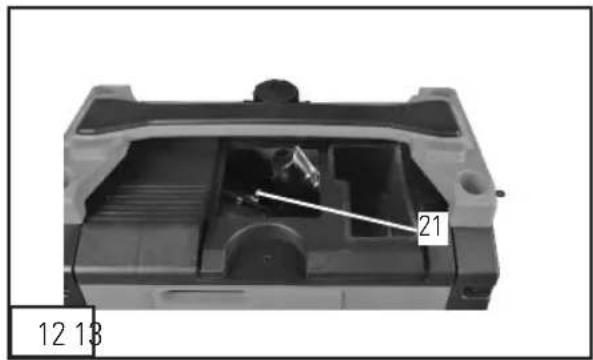
natural_image
Mechanical component diagram showing internal structure with numbered annotations (12, 13, 21) and no readable text or symbols beyond labels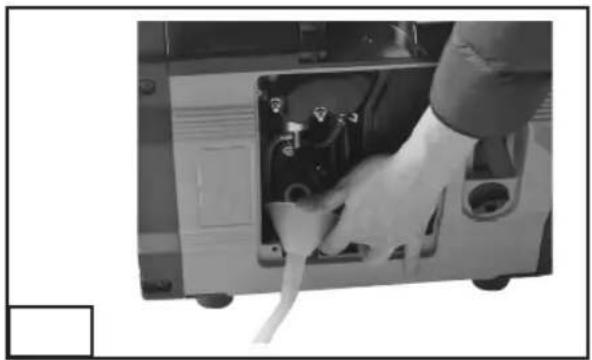
natural_image
Close-up of a hand inserting a cable into an electronic device casing (no visible text or symbols)1. Foreword
We congratulate you on your decision to buy a Stanley generator. Before the delivery, our generators are subjected to strict quality controls.
Stanley generators are lightweight, quiet, compact and traditionally reliable. Durability, smooth start-up behaviour and high efficiency have been a standard in all Stanley generators.
Attention: Please read this manual carefully before using the generator for the first time and observe the instructions contained therein. Keep this operating manual carefully so that you can use it later, if necessary, or forward it to subsequent owners of the generator.
2. General safety instructions
In the operation of this generator, you have to observe the safety instructions. Before maintaining or servicing the generator, read the operating manual carefully. Incorrect installation of the generator may lead to feedback that destroys the generator and causes fire.
When using the generators with the appliances which do not conform to EMC regulation, the appliances may not be started because of the electromagnetic interference. Generator will not damage the appliances.
WARNING:
Always read the basic safety instructions before using this generator. Observe the instructions contained therein in order to avoid the risk of fire, electric shock and injuries.
Instruction:
- Provide for a clean and tidy working area. Untidiness may lead to accidents.
- Don't work with the generator in explosive atmospheres where there are inflammable liquids, gases or dusts. Protect the generator from rain or humidity.
-
Keep children away from the generator when it is being used. In case of distraction, you might lose control over the generator. Only allow instructed personnel to operate the generator.
-
Keep the unused generator out of the reach of children. Don't allow persons to use the generator if they are not familiar with it or if they haven't read these instructions.
- Don't use excessive force!
- Use the correct tool for cleaning, maintenance and installation.
- Wear correct working clothes; avoid loose clothes, gloves, scarves, rings, necklaces or bracelets or other jewellery as they could get caught in moving components. Wear shoes with anti-slip soles.
- Wear personal protective equipment (hearing protection, protective goggles, respirator mask).
- During transport and operation, the generator must be installed on a horizontal surface, standing in a vertical position, and secured against shifting, if necessary.
- Never stand on the generator. Keep the hands and feet away from the generator. Serious injuries might result if the generator tilts over.
- Keep the generator clean. Service the generator carefully. Only use carefully maintained generators. Do not modify the generator.
- Remove adjusting tools or wrenches before switching the generator on.
- Be careful, pay attention to what you do and work reasonably with the generator. Don't use the generator when you are tired.
- Before using the generator firstly check the generator. Check whether parts are broken or damaged so that the generator's functioning is impaired. Only have your generator repaired by qualified experts and only with original spare parts.
- Please use the generator as intended. Only use the spare parts recommended by the manufacturer.
WARNING: If the instructions in this manual are not complied with, there is a risk of injury or
even danger to life.
Keep this operating manual carefully.
Additional safety instructions
- Secure the generator against shifting and toppling during transport.
- Place the generator at least 1m away from buildings and the equipment connected to it.
- Do not expose the tools to damp or dust. Permissible ambient temperature -10 to +40^ , max. altitude above sea level 1000m , relative humidity: 90% (non-condensing).
- Check the generator for damage and leakage before every use.
- Keep the generator away from flammable liquids, gases or dusts. The generator must not be operated in environments with flammable liquids, gases or dusts.
- Operate the generator on a level surface. Otherwise, fuel will be spilled.
- Have the installation carried out only by a specialized electrician in order to satisfy all legal requirements.
- Keep children and pets away from the generator.
- Wear suitable clothes. Don't wear loose clothes or jewellery. Keep hair, clothes and gloves away from moving parts.
• Always refuel in well ventilated places. - Fuel is extremely flammable and under certain conditions also explosive.
- Switch the engine off and refuel in well ventilated rooms. Wipe up fuel immediately in case of overflow.
- Never touch the generator with wet hands.
-
Protect the generator from rainfall or snowfall.
-
If this generator is damaged, it has to be repaired by the manufacturer or their customer service or a qualified person in order to avoid any risks.
- Exhaust gases are toxic! Only operated the generator outside, in well ventilated places.
- Be careful when refuelling and handling fuel and oil in any way. In case of contact with skin and inhalation (vapours!), they are detrimental to health.
- In order to avoid electric shocks, use only overload switches recommended by the manufacturer.
Attention! Defective overload switches may only be replaced with identical overload switches with identical performance data.
- Due to the high mechanical loads, only rubber cables or similar designs may be used.
- When using the extension cable, please note the following:
Guard against electric danger. When working outdoors, use only extension cables that are approved for outdoor use and which are marked accordingly (HO7RN-F).
- The overall length of the extension cables used may not exceed 50 m for 1.5 mm ^2 and 100 m for 2.5 mm ^2 .
G B
3. Description of symbols

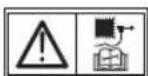
Read and understand the safety instructions before using the generator.

During operation, toxic gases are produced e.g. carbon monoxide (Which is a colourless and odourless gas) this gas may lead to by suffocation. Only operate the generator outside to ensure adequate ventilation.

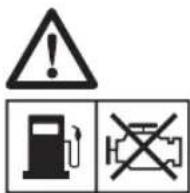

Switch the engine off and allow to cool before refuelling the generator. Fuel is extremely flammable and under certain conditions can be explosive. Only refuel the generator in well ventilated areas ensuring that naked lights, sparks and cigarettes are not present. Any spillage of fuel should be immediately cleaned up.
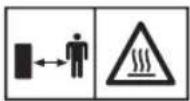
The exhaust gets very hot during opeartaion. Allow the engine to cool before performing maintenance storage and refuelling. Do not touch the exhaust to avoid the risk of burns and injury.

The generator must not be connected to the public power supply. In case of improper connection there is a risk of fire and damage to property including electrocution to persons using the generator and working on the public power supply.

Warning hazardous voltages are present when the generator is in use, Always switch the generator off before performing maintenance.

Wear ear protection when using the generator.

Earth terminal connection refer to instruction manual for use.

Disconnect all equipment from the socket outlets when performing maintenance or when left unattended and switched off.

Wear good quality, strong gloves.

Check the oil level before operation.

Choke lever

In compliance with applicable European directives

Never expose the device to rain.

Strictly no naked flames or smoking near the appliance!
Caution Risk of injury! Switch off the engine before servicing and Pull the spark plug connector.

Guaranteed sound power level

Before first use, pour in the oil!
4. Proper use
The device is designed for applications operated with a 230 V alternating current source.
Be sure to observe the restrictions in the safety instructions. The generator is intended to provide electric tools and light sources with electricity. When using the device with household appliances, please check their suitability in accordance with the relevant manufacturer's instructions. In case of doubt, ask an authorized dealer of the respective appliance. The machine is to be used only for its prescribed purpose. Any other use is deemed to be a case of misuse. The user / operator and not the manufacturer will be liable for any damage or injuries of any kind caused as a result of this.
5. Layout and items supplied (Fig. 1-3)
- Carry handle
- Tank cover
- Petrol cock
- Starter cable
- Motor cover
- Choke lever
- ON/OFF switch
- Earthing connection
- Economy switch
- 230 V\~ socket
- Operating status indicator
- Overload indicator
- Low oil indicator
- Screwdriver
- Spark plug spanner
- Oil filler/drainage funnel
- Oil filler/drainage plug(dipstick)
- Air filter cover
- Air filter element
- Spark plug cover
- Spark plug
6. Technical data
Engine
Model: HH144F
Protection type: IP 23M
| Engine: | 4-Stroke,Single cylinder,Air-cooled,OHV. |
| Cubic capacity: | 53.5 cc |
| Oil tank volume: | 0,25 L |
| Fuel tank volume: | 4,5 L |
| Spark plug: | TORCH A7RTC |
Generator
| Mains voltage (V): | 230 V |
| Frequency (Hz): | 50 Hz |
| Ampere (A): | 4,3 A |
| Weight: | 13 kg |
| Nominal power PRP (kW): | 1,0 |
| Power factor: | 1,0 |
| Power class: | G2 |
| Noise: | 95 dB(A) |
Application information:
- Optimum temperature in operation: 5 - 40 °C.
- Altitude: maximum 1000 m.
- Optimum temperature for storage of the generator: -25 - 70 °C.
7. Before putting the generator into operation
Remove the packaging material and check that all items have been supplied. Place the generator on a firm, flat surface near the electrical equipment and ensure proper ventilation.
7.1 Electrical safety:
- Electric supply cables and connected equipment must be in perfect condition.
- The generator is to be operated only with equipment whose voltage specifications conform with the generator's output voltage.
- Never connect the generator to the power supply (socket-outlet).
- Keep the cable length to the electrical equipment as short as possible.
7.2 Environmental protection
- Dispose of soiled maintenance material and operating
materials at the appropriate collection point.
- Recycle packaging material, metal and plastics.
7.3 Connecting to earth (Fig.1)
The housing is allowed to be connected to earth in order to discharge static electricity. To do this, connect one end of a cable to the earth connection on the generator (Item 8) and the other end to an external earth (for example an earthing rod).
7.4 Topping up fuel (Fig.2)
WARNING
Switch off and ensure you are in a well ventilated area.
Unscrew the tank cover (Item 2) and add enough unleaded gasoline using a filler neck.
Ensure that you do not overfill the tank and spill petrol. (If you do spill, wipe up the excess amount and wait until the vapors have evaporated – danger of ignition.) Screw the tank cover back on.
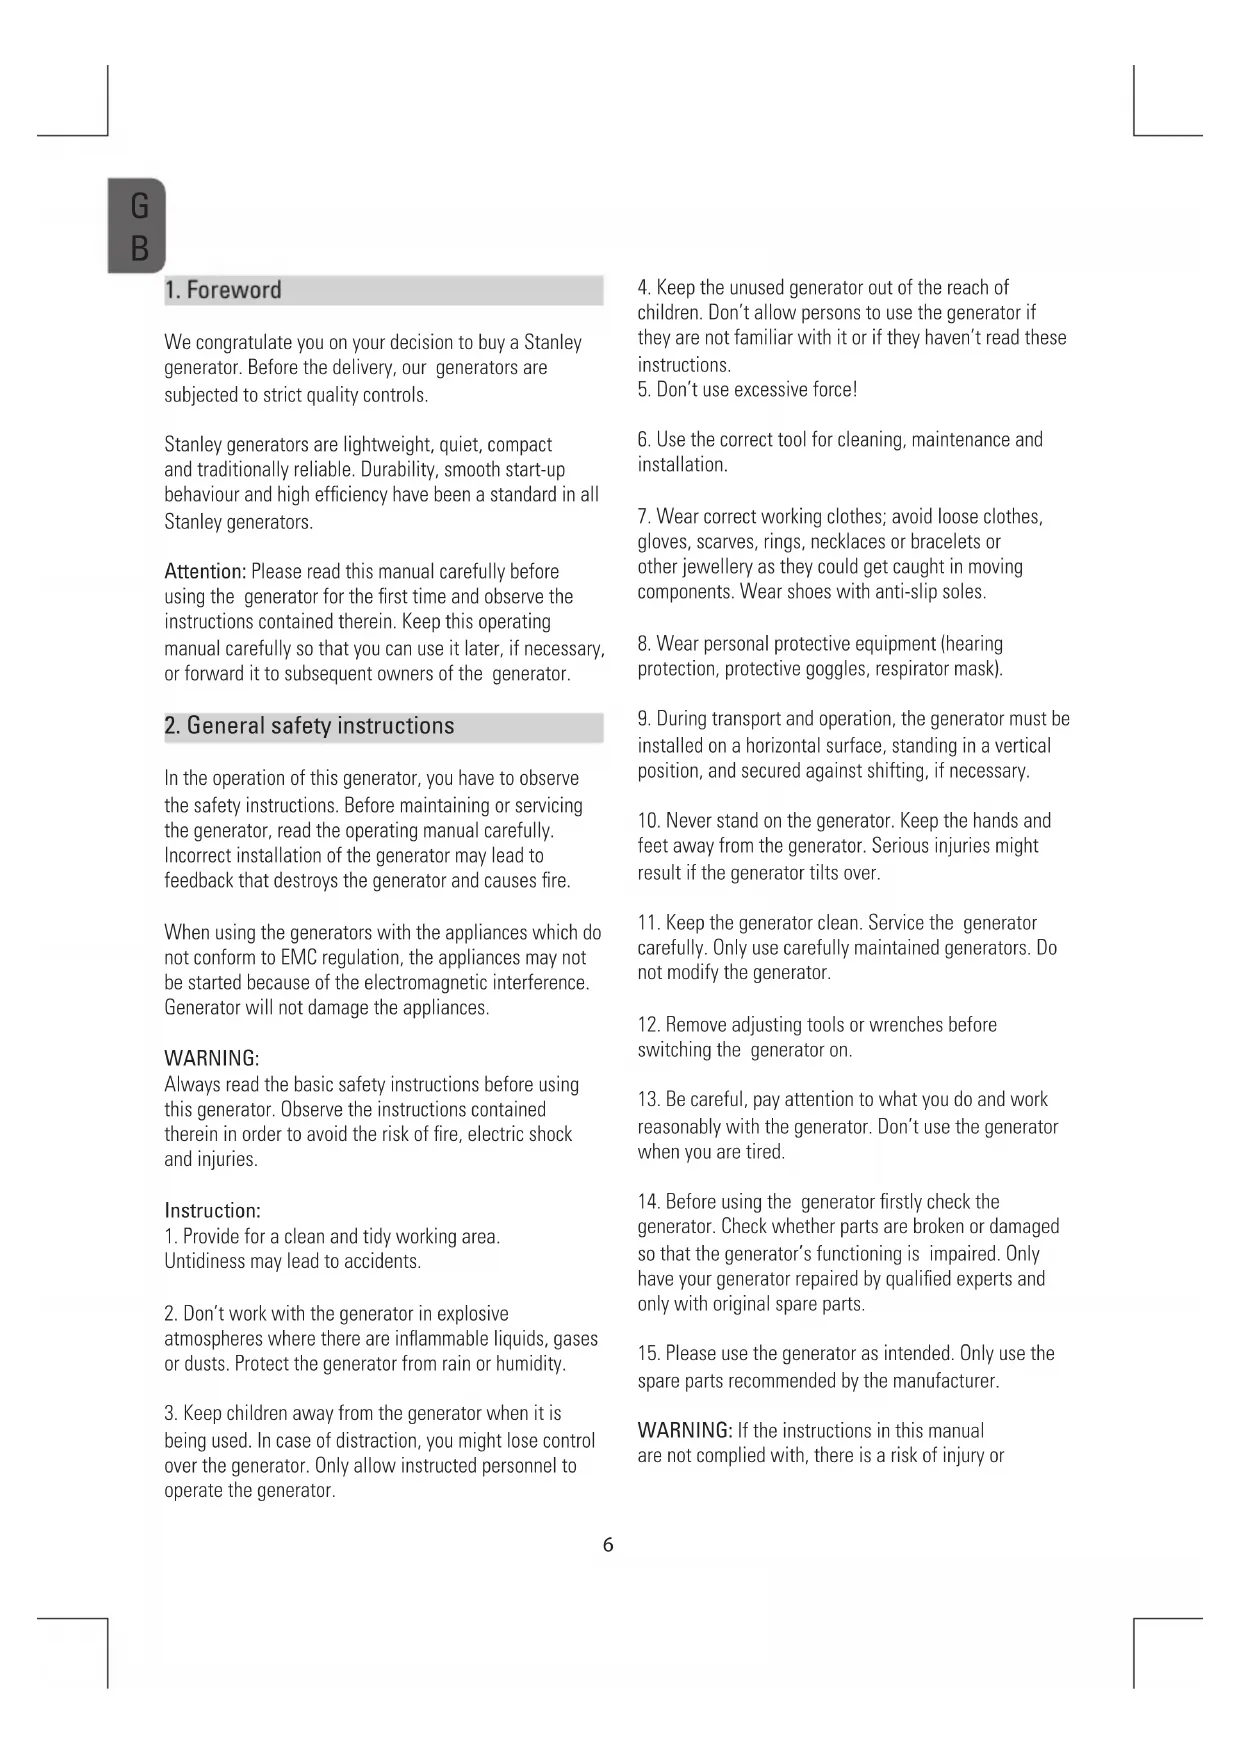
7.5 Topping up oil (Figs. 4-7)
WARNING
Switch off and ensure you are in a well ventilated area.
Remove the engine cover (Item 5). Open the oil filler screw (Item 17) and add approximately 0,25 l of engine oil (15W40) using the supplied oil filler funnel (Item 16) or until the top fill mark on the oil dipstick (Item 17) is reached.
Important:
Do not screw in the oil dipstick to check the oil level – only insert it as far as the thread. Close the oil filler opening and remount the engine cover.
Important! You must fill up with engine oil and fuel before you can start the engine.
8. Operation
- Check the fuel level and top it up if necessary.
- Make sure that the generator has sufficient ventilation.
- Make sure that the ignition cable is secured to the spark plug.
- Inspect the immediate vicinity of the generator.
- Disconnect any electrical equipment which may already be connected to the generator.
8.1 Starting the engine (Figs. 1, 2)
Important: Do not use any chemical starting agents such as highly volatile fuels or similar.
- Open the Petrol cock (Item 3) by turning it down.
- Move the ON/OFF switch (Item 7) to the "ON" position.
- Pull the choke lever (Item 6) to "choke" position.
- Start the engine with the starter cord (Item 4) by pulling the handle forcefully. If the engine does not start, pull the handle again. Important:
Always pull the starter cable slowly until you feel the initial resistance before you then pull it quickly to start the engine. Do not allow the starter cable to whip back of its own accord.
- Push the choke lever (Item 6) back approximately 5 to 10 seconds after the engine has started.
8.2 Economy mode
Economy switch (Item 9) in the "Eco" position:
The engine speed is regulated in accordance with minimum power requirements and the generator runs quietly and efficiently.
Economy switch (Item 9) in the "Max" position:
The generator runs at maximum speed.
8.3 Connecting consumers to the generator (Fig. 2)
- Connect the 230 V\~ electrical appliances to be powered to the socket (Item 10). Important: This socket is allowed to be exposed to a continuous (S1) load of 1000 W and temporarily (S2) for a maximum of 5 minutes to a load of 1020 W.
- Do not connect the generator to the household mains system, since this may damage the generator.
Note: Some using electrical appliances here but not through out manual (power jigsaws, drills, etc.) may have a higher level of power consumption when used in difficult conditions.
8.4 Overload cut-out (Fig. 2)
230 V socket
- The status indicator (Item 11) is lit green during normal operation.
- An overload has occurred if the status indicator light goes out and the overload indicator (Item 12) light up red.
- Reduce the level of power to be drawn.
Important: If an overload occurs, ensure that the power drawn does not exceed the generator's maximum power output and that no defective electrical appliances are connected.
8.5 Switching off the engine
- Before you switch off the generator, allow it to run briefly with no electrical equipment connected so that it can cool down.
- Move the ON/OFF switch (Item 7) to the OFF position.
- Close the petrol cock (Item 3).
9. Cleaning, maintenance, storage, transport and ordering of spare parts
Switch off the motor and pull the spark plug boot from the spark plug before doing any cleaning and maintenance work on the equipment.
Important: Switch off the generator immediately and contact your service station:
• In the event of unusual vibrations or noise.
- If the engine appears to be overloaded or misfires.
9.1 Cleaning
- Keep all safety generators, air vents and the motor housing free of dirt and dust as far as possible. Wipe the generator with a clean cloth or blow it with compressed air at low pressure.
• We recommend that you clean the generator immediately each time you have finished using it.
- Clean the generator regularly with a moist cloth and some soft soap. Do not use cleaning agents or solvents; these could attack the plastic parts of the equipment. Ensure that no water can seep into the generator.
9.2 Changing the oil and checking the oil level (before using the generator) (Figs. 4-7 and 13)
The motor oil is best changed when the motor is at working temperature. Pease also read the service information.
- Keep a suitable, leak-tight receptacle within reach when performing an oil change.
- Remove the engine cover (Item 5).
- Open the oil filler screw (Item 17) and use the oil drain funnel(Item 16)
- Drain the used oil into a suitable receptacle by tilting the generator.
- Add new engine oil with the oil filler funnel(Item 16) until the top fill mark on the oil dipstick (Item 17) is reached.
Important: Do not screw in the oil dipstick to check the oil level – only insert it as far as the thread.
- Use the motor oil 10W-30 or 10W-40 for general, normal use. The motor oil 5W-30 is recommended for low-Temperature environment. (-20 degree to 0 degree)
G B
- Dispose of the used oil properly by taking it to a collection point. Most filling stations, repair garages, and recycling centers will accept used oil free of charge. Do not add antifreeze or transmission fluid to the used oil. Keep used oil out of the reach of children and away from sources of ignition.
9.3 Automatic oil cut-out
- The engine will not start if it does not have enough oil.
- If the engine is low on oil while it is running, the oil warning indicator (Item 13) will light up red and the engine will stall. The oil indicator goes out when the engine has come to a complete stop.
- The engine oil must be topped up before the engine can be started again.
9.4 Air filter (Figs. 8, 9)
Clean the air filter at regular intervals, and replace it if necessary. Please also read the service information.
- Remove the air filter cover (Item 18).
- Remove the air filter (Item 19).
- Clean the air filter by tapping it. In cases of stubborn dirt first clean with soapy water, then rinse with clear water and air-dry before reinserting. Important: Do not use abrasive cleaners or petrol to clean the air filter.
- Assemble in reverse order.
9.5 Spark plug (Fig. 10-12)
Check the spark plug for wear at regular intervals. Please also read the service information.
- Remove the motor cover B (Item 5).
- Pull off the spark plug boot (Item 20) by twisting it.
- Remove the spark plug (Item 21) using the supplied spark plug wrench (Item 15).
- Clean the spark plug with a copper wire brush or fit a new one.
- Assemble in reverse order.
9.6 Maintenance schedule
| Regular service periodPerform at every indicated month or operating hour interval, whichever comes first. | Each use | First month or 20 Hrs. | Every 3 months or 50 Hrs. | Every 6 months or 100 Hrs. | Every year or 200 Hrs. | |
| ITEM | ||||||
| Engine oil | Check level | O | ||||
| Change | O | O | ||||
| Air cleaner | Check | O | ||||
| Clean | O (1) | |||||
| Spark plug | Check-adjust | O | ||||
| Replace | O | |||||
| Spark arrester | Clean | O | ||||
| Valve clearance | Check-adjust | O (2) | ||||
| Combustion chamber | Clean | After every 300 hrs. (2) | ||||
| Fuel tank and filter | Clean | O (2) | ||||
| Fuel tube | Check | Every 2 years (Replace if necessary) (2) | ||||
| Remark:(1) Service more frequently when used in dusty areas.(2) These items should be serviced by your servicing dealer, Refer to the manual for service procedures.Failure to follow this maintenance schedule could result in non-warrantable failures. | ||||||
9.7 Storage
- Empty the petrol tank using a petrol suction pump.
Important: Do not empty the petrol tank in enclosed areas, near fire or when smoking.
Petrol fumes can cause explosions and fire.
-
Start the engine and run it until the tank and fuel line are completely empty and the engine stalls.
-
Let the generator cool down.
-
Remove the spark plug and pour approx. 20 ml of engine oil into the cylinder.
-
Pull the starter handle slowly several times to coat the internal parts.
-
Screw the spark plug back in.
-
Store the generator in a well-ventilated, safe place.
9.8 Transport
-
Wait until the generator has cooled down.
-
Always transport the generator in the upright position.
9.9 Ordering replacement parts:
Please quote the following data when ordering replacement parts:
- Type of generator.
• Article number of the generator.
10. Disposal and recycling

The generator is supplied in packaging to prevent its being damaged in transit. This packaging is raw material and can therefore be reused or can be returned to the raw material system.
The generator and its accessories are made of various types of material, such as metal and plastic.
Defective components must be disposed of as special waste. Ask your dealer or your local council.
Additional safety instructions
7.3 Aardverbinding (afb.1)
text_image
Warning symbols for fuel and vehicle accidents, including warning triangle, fuel pump icon, no valve, and flame warning signtext_image
Warning symbols for fuel and vehicle accidents, including warning triangle, fuel pump icon, no longer warning sign, and flame warning signtext_image
Warning symbols for occupational and non-occupational settings, including a triangle warning, person figure, exclamation mark, and cross symbol.text_image
Warning symbols for fuel and vehicle accidents, including warning triangle, fuel pump icon, no crossing, and flame warning signRead and understand the safety instructions before using the generator.
text_image
Warning symbols for fuel and fire, including warning triangle, fuel pump icon, and no-drawn valveOriginal Declaration of Conformity
CE
GB
hereby declares the following conformity under the EU Directive and standards for the following article
D
Hiermit erklären wir die Einhaltung folgender EU-Direktiven und Vorgaben durch den folgenden Artikel:
NL
verklaart hierbij dat het volgende artikel voldoet aan de daarop betrekking hebbende EG-richtlijnen en normen
1
dichiara la seguente conformità secondo le direttive e le normative UE per l'articolo
NO
erklærer herved følgende
konformitet ifølge EU-direktivet og
standarder for den følgende artikkelen
Δήλωση συμμόρφωσης
GR
GR δηλώνει την παρακάτω συμμόρφωση κάτω από την Οδηγία της Ε.Ε. και τα στάνταρ του παρακάτω άρθρου
PT
declara a seguinte conformidade de acordo com a directiva EU e normas para o artigo
Matrix GmbH
Postauer Str. 26
D-84109 Wörth/Isar
Germany
Fax: +49 (0) 8702/45338 98
E-Mail: info@matrix-direct.net
F déclare la conformité suivante selon la directive UE et les normes pour l'article
erklærer hermed, at følgende produkt er i overensstemmelse med nedenstående EU-direktiver og standarder:
förklarar härmed följande
SE överensstämmelse enligt EU-direktivet och standarder för följande artikel
FIN vakuuttaa täten, että seuraava tuote täyttää ala esitetyt EU-direktiivit ja standardit
PL deklaruje, ze produkt jest zgodny z następujacymi dyrektywami UE i normami
CZ prohlašuje následující shodu podle smernice EU a norem pro výrobek
ES declara la conformidad siguiente según la directiva la UE y las normas para el artículo
EE deklareerib vastavuse järgnevatele EL direktiividele ja normidele
Inverter generator / SIG 1200S
2006/42/EC
2014/35/EU
97/68/EC_2012/46/EC
2014/30/EU
2002/95/EC
2002/96/EC
R&TTED 1999/5/EC
2000/14/EC_2005/88/EC
95/54/EC
73/23/EWG
EN ISO 8528-13; EN 55012; EN 61000-6-1
The technical documentation is kept by our authorized representative:
Matrix GmbH
Postauer Str. 26
D-84109 Wörth/Isar
Germany
Wörth/Isar, den 23.05.2017
This appliance is a quality product. It was designed in compliance with current technical standards and made carefully using normal, good quality materials.
The warranty period is 24 months and commences on the date of purchase, which can be verified by the receipt, invoice or delivery note. During this warranty period all functional errors, which, despite the careful treatment described in our operating manual, are verifiably due to material aws, will be rectified by our after-sales service staff.
The warranty takes the form that defective parts will be repaired or replaced with perfect parts free of charge at our discretion. Replaced parts will become our property. Repair work or the replacement of individual parts will not extend the warranty period not will it result in a new warranty period being commenced for the appliance. No separate warranty period will commence for spare parts that may be fitted. We cannot offer a warranty for damage and defects on appliances or their parts caused by the use of excessive force, improper treatment and servicing.
This also applies for failures to comply with the operating manual and the installation or spare and accessory parts that are not included in our range of
products. In the event of interference with of modifications to the appliance by unauthorised persons, the warranty will be rendered void.
Damages that are attributable to improper handling, over loading, or natural wear and tear are excluded from the guarantee.
Damages caused by the manufacturer or by a material defect will be corrected at no charge by repair or by providing spare parts.
The prerequisite is that the equipment is handed over assembled, and complete with the proof of sale and guarantee.
For a guarantee claim, only use the original packaging.
That way, we can guarantee quick and smooth guarantee processing.
Please send us the appliances post-paid or request a Freeway sticker.
Unfortunately we will be unable to accept appliances that are not postpaid.
The warranty does not cover parts that are subject to natural wear and tear.
If you wish to make a warranty claim, report faults or order spare parts or accessories, please contact the after-sales centre below:
Subject to change without prior notice.
Please check our service centres at www.matrix-direct.net.
D GARANTIE
Tradepartner and aftersales office:
Please check our service centres at www.matrix-direct.net.