
MUM6N16 - Food Processor BOSCH - Free user manual and instructions
Find the device manual for free MUM6N16 BOSCH in PDF.

User questions about MUM6N16 BOSCH
0 question about this device. Answer the ones you know or ask your own.
Ask a new question about this device
Download the instructions for your Food Processor in PDF format for free! Find your manual MUM6N16 - BOSCH and take your electronic device back in hand. On this page are published all the documents necessary for the use of your device. MUM6N16 by BOSCH.
USER MANUAL MUM6N16 BOSCH
natural_image
Illustration of a kitchen appliance with a blender and a side view showing its lid (no text or symbols)MUM6N..

BOSCH
1 Päckchen Backpulver
125 ml Milch
This appliance is designed for processing normal household quantities in the home or similar quantities in non-industrial applications. Non-industrial applications include e.g. use in employee kitchens in shops, offices, agricultural and other commercial businesses, as well as use by guests in boarding houses, small hotels and similar dwellings.
Use the appliance for processing normal quantities of food for domestic use.
The Instructions for Use refer to several models. Differences are identified.
Please keep the Instructions for use in a safe place. If passing on the appliance to a third party, always include the operating instructions.
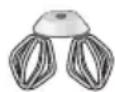
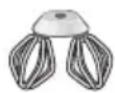
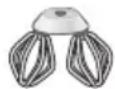
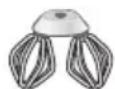
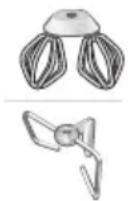
Overview
Please fold out the illustrated pages!
Fig. A
1 Base unit
2 Rotary switch
3 Drive for bowl/tools
4 Drive for blender
5 Protective cover for blender drive
6 Cord store
Bowl:
7a Stirring bowl
made of plastic or stainless steel (depending on model)
7b Lid rim
7c Lid
Tools:
8a Double whisk (some models)
e.g. for whipping cream and mixing light doughs
8b Kneading hook
e.g. for kneading heavy dough
8c Dough blade
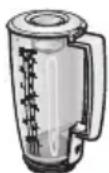
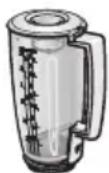
Blender (some models):
9a Blender jug
9b Lid with feed tube
9c Funnel
9d Blade insert
Safety Information

Risk of electric shock!
Connect and operate the appliance only in accordance with the specifications on the rating plate.
Do not use if the cord or appliance is damaged.
Keep children away from the appliance.
Supervise children to prevent them from playing with the appliance.
Do not allow persons (also children)
with restricted physical sensory perception or mental abilities or with lack of experience and knowledge to operate the appliance unless they are supervised or have been instructed in the use of the appliance by somebody who is responsible for their safety.
Keep hands clear of rotating parts.
After using the appliance, before cleaning the appliance, if leaving the appliance attended or if the appliance malfunctions, always pull out the plug.
Do not pull the cord over sharp edges or hot surfaces.
To prevent injury, repairs such as replacing a damaged cord, should only be carried out by our customer service.
Never immerse the base unit in water or place under running water.
Change accessories and tools only when the appliance is at a standstill (rotary switch 0/off). Use the appliance with original accessories only.
Operating the appliance

- Before operating the appliance and accessories for the first time, clean thoroughly; see “Cleaning and servicing”.
Preparation
- Place the base unit on a smooth and clean worktop.
- Pull out the power cord.
- Insert the mains plug.
Selecting the setting
- Rotate the switch to the required setting.
$$ 0 / \text { off } = \text { Stop } / \text { Off } $$
$$ M = \text { Pulse switch } $$
Hold rotary switch. The drive operates at maximum speed.
$$ \text { Settings } 1 - 4 = \text { Operating speed } $$
$$ (1 = \text { slow }, 4 = \text { fast }) $$

Important information
If the protective cover is placed on the blender drive, the appliance can be operated with the mixing bowl only.
If using the blender drive, place the protective cover on the unused drive for the bowl.
Working with the bowl and the tools
Double whisk (some models)
for whisking egg whites, cream and light dough, e.g. sponge mixture.
Kneading hook
for kneading heavy dough and mixing-in ingredients that ought not be cut (e.g. raisins and chocolate chips).
If using the kneading hook, first insert the dough blade.


Note:
The function and use of stainless steel and plastic bowls (depending on model) are the same and are therefore not differentiated in the diagrams.
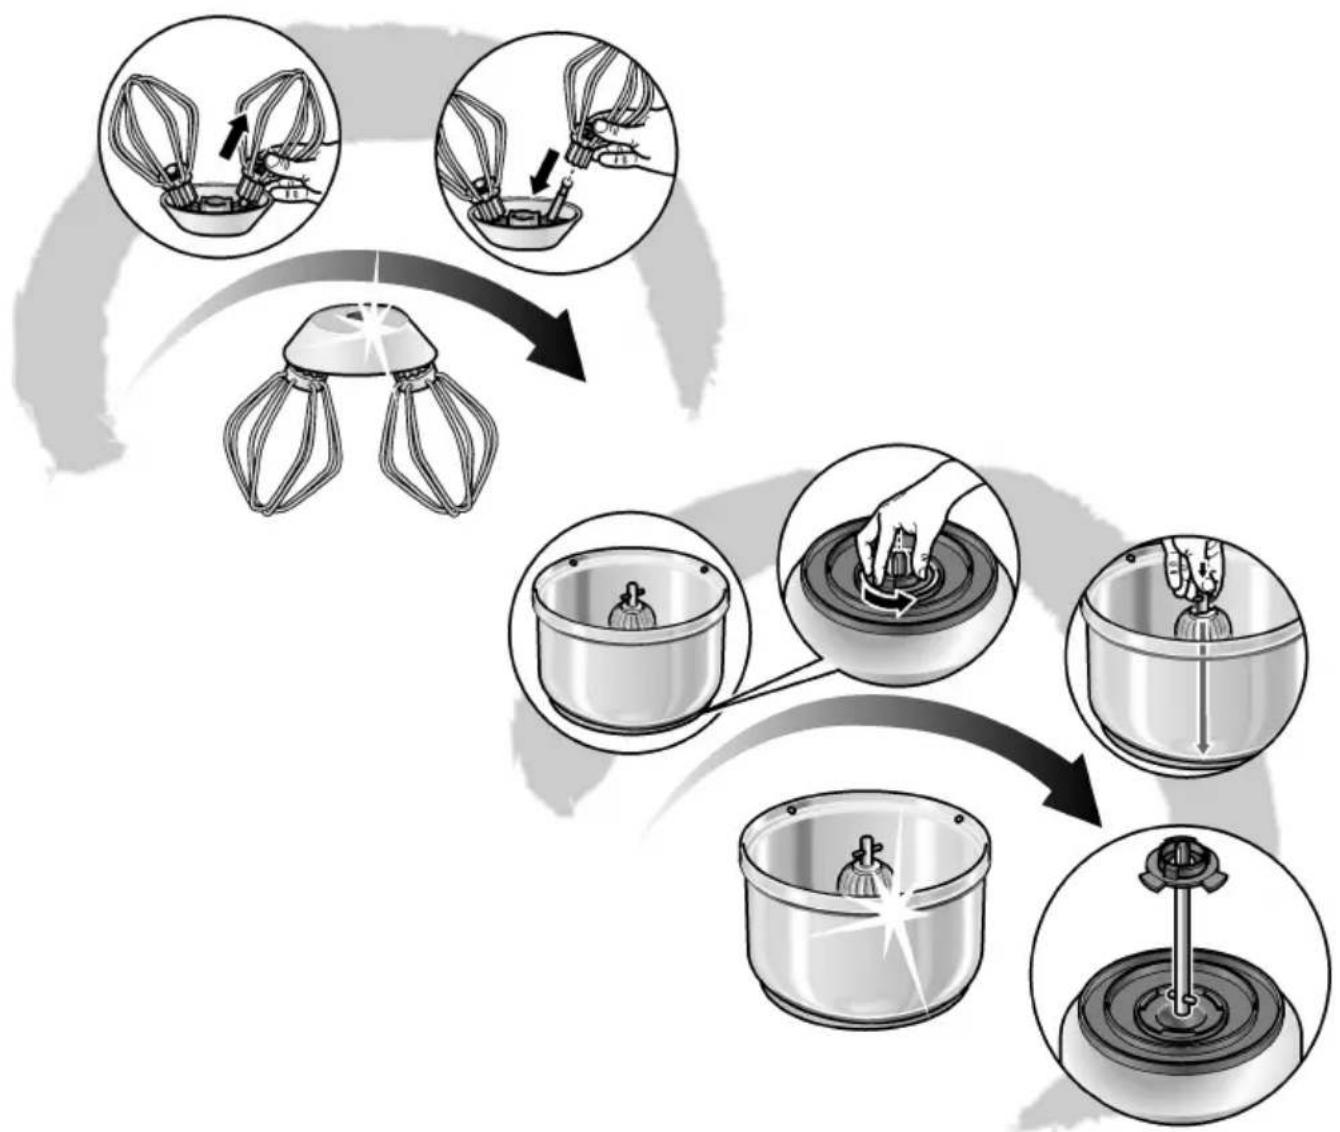
Figure B
- Attach the mixing bowl and rotate all the way in an anti-clockwise direction.
- Insert required tool pair:
Double whisk: - Attach the double whisk to the drive shaft in the bowl.
- Ensure that the gearing meshes fully; if required rotate slightly and press on.
Kneading hook: - First place the dough blade on the drive shaft in the bowl, then
- attach the kneading hook to the drive shaft in the bowl.
Use the recommended tools for the recipes. - Attach the lid rim and rotate it all the way in an anti-clockwise direction.
- Put the ingredients to be processed into the bowl.
- Attach the cover.
- Set the rotary switch to the desired setting. Our recommendation:
- whisking at setting 3–4,
- mixing in at setting 1–2.
- Kneading hook: first stir in at setting 1, knead at setting 3.
Adding more ingredients
- Switch off the appliance with the rotary switch.
- Remove the cover.
- Add ingredients.
After using the appliance
- Switch off the appliance with the rotary switch.
- Pull out the mains plug.
- Remove the lid and lid rim by rotating them in a clockwise direction.
● Take the tool out of the bowl.
- Remove the bowl by rotating it in a clockwise direction.
- Clean all parts, see “Cleaning and servicing”.
en
Blender
(some models)


Figure C
- Remove protective cover from the blender drive. To do this, press the back of the protective cover and remove the cover.
- Place the protective cover on the drive for bowl/tools.
- Attach the blender and rotate all the way in an anti-clockwise direction. Ensure that the marks on the blender and appliance are in alignment!
- Add ingredients.
- Maximum amount of liquid ingredients = 1.25 litres;
- Maximum amount of frothing or hot liquids = 0.5 litres;
- Optimum processing amount of solid ingredients = 100 grams.
- Attach the cover and as far as possible in a clockwise direction. The lug on the blender cover must be fully located in the slot in the blender handle! Blender will not work unless the cover has been attached and locked.
- Set the rotary switch to the desired setting.

Important information
When working, hold the blender cover by the edge.
Adding more ingredients
- Switch off the appliance with the rotary switch.
- Remove the cover and add ingredients
or - take out the funnel on the blender cover and gradually add solid ingredients via the feed tube
or
- pour liquid through the funnel.
After using the appliance
- Switch off the appliance with the rotary switch.
- Pull out the mains plug.
- Rotate the blender in a clockwise direction and remove.
Tip: It is recommended to clean the blender immediately after use.
Cleaning and servicing

Cleaning the base unit


- Pull out the mains plug.
- Wipe the base appliance and protective cover with a damp cloth. If required, use a little washing-up liquid.
- Then dry the base unit.
Cleaning the bowl and tools
Fig. D

Bowl and double whisk are dishwasher-proof.
Dismantle double whisk for cleaning.
- Pull whisks out of the holder.
- After drying the whisks, re-insert them, ensuring that the gearing meshes fully.
Clean kneading hook with a brush under running water. If required, use a little washing-up liquid.

Important information
Before cleaning the bowl in the dishwasher, take the drive shaft out of the bowl.
- Rotate the bowl and base upwards.
- Rotate and remove drive shaft from the fins in an anti-clockwise direction.
- Pull out drive shaft.
- After drying the parts, re-insert the drive shaft.
- Lock drive shaft in position by rotating it in a clockwise direction.
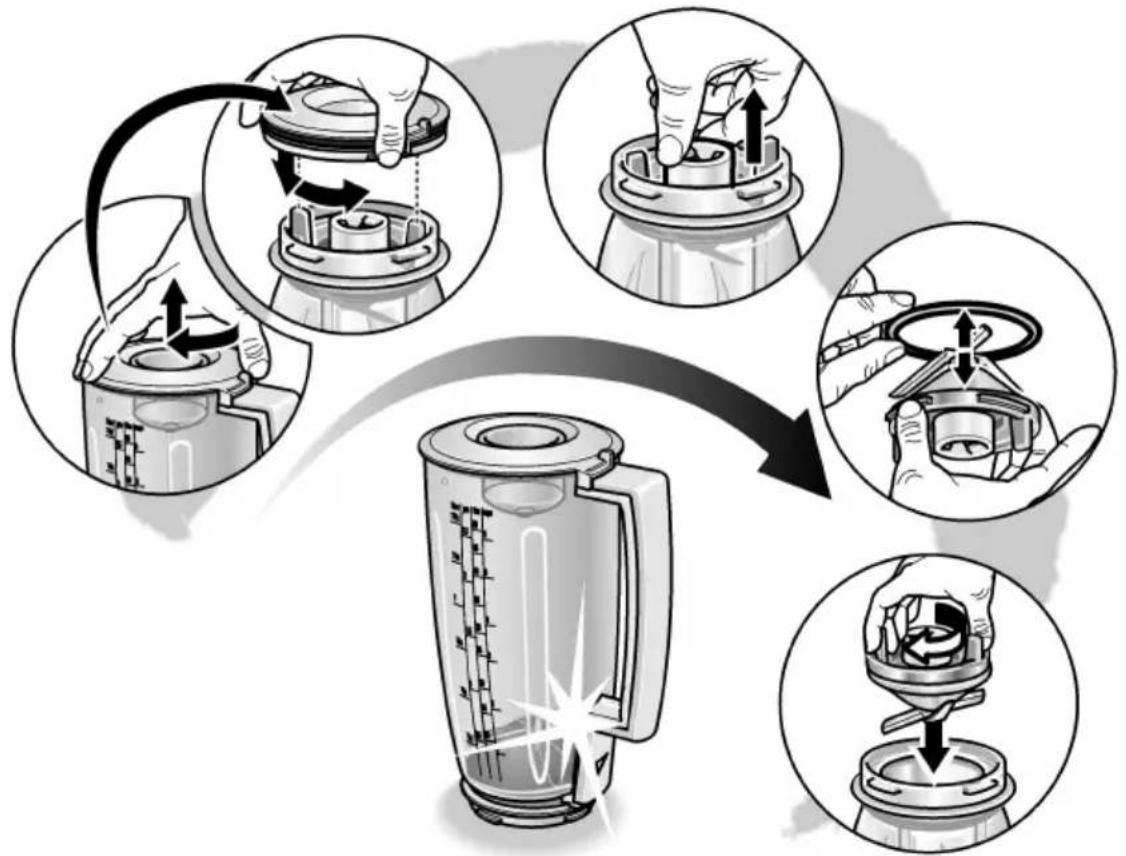
Cleaning the blender
Fig. E


It is recommended to clean the blender immediately after use. This will prevent residue from drying on and attacking the plastic (e.g. by essential oils in herbs).
- Clean blender jug (without blade insert), lid and funnel in the dishwasher.
- Clean blade insert with a brush under running water. Do not leave in water!
Tip: Pour water with a little washing-up liquid into the attached blender (approx. half full). Switch on the blender for several seconds (setting M). Pour out the water and rinse out the blender with clear water.
Troubleshooting

Appliance does not start
- Check the power supply.
- Check the mains plug.
- Switch appliance to 0/off and then back to the required setting.
When using the blender:
- Screw the blender on tight as far as possible.
- Attach the blender cover and screw on as far as possible.
When using the bowl/tools:
- Attach protective cover to the blender drive.
Blender does not start working or stops during use, the drive is "humming".
The blender blade is blocked by one of the ingredients.
- Switch off the appliance and pull out the mains plug.
- Detach the blender and remove the obstruction.
- Re-attach the blender.
- Switch on the appliance.

Important information
If the fault cannot be eliminated, please contact customer service.
Recipes
Whipped cream
200 g–1500 g
- Using the double whisk, whip cream for 1½ to 4 minutes at setting 3–4 (depending on amount and properties of cream).
Beaten egg white
2 to 20 egg whites
- Using the double whisk, beat egg whites for 2 to 6 minutes at setting 4.

Sponge mixture
Basic recipe:
3–4 eggs
3–4 tbs. hot water
150 g sugar
1 packet of vanilla sugar
150 g flour
50 g cornflour
1 tsp. baking powder
- Using the double whisk, mix ingredients (except flour and cornflour) for approx. 4–6 minutes at setting 4 until fluffy.
- Rotate switch to setting 1–2 and spoon in the sifted flour and cornflour within approx. 12 to 1 minute.
Maximum quantity: 3 x basic recipe
Cake mixture
Basic recipe:
4 eggs
250 g sugar
1 packet of vanilla sugar
250 g butter or margarine (room temperature)
500 g flour
1 packet of baking powder
125 ml milk
- Mix all ingredients for approx. 12 minute at setting 1–2.
- Then, using the double whisk, mix for approx. 3–4 minutes (if processing maximum quantity for approx. 5–6 minutes) at setting 4.
Maximum quantity: 3 x basic recipe
Short pastry
Basic recipe:
125 g butter (room temperature)
100–125 g sugar
1 egg
1 pinch of salt
1 packet of vanilla sugar
250 g flour
Note:
If processing the maximum quantity, use the kneading hook with dough blade!
- Mix/knead all ingredients for approx. 12 minute at setting 2.
- Then mix/knead for approx. 1 minute (if processing maximum quantity for approx. 3–4 minutes) at setting 3–4.
Maximum quantity: 3 x basic recipe
Yeast dough

Basic recipe:
500 g flour
1 egg
60–80 g fat (room temperature)
60–80 g sugar
200–250 ml lukewarm milk
25 g yeast or 1 packet dried yeast
Peel of 12 lemon
1 pinch of salt
- Knead all ingredients for approx. 12 minute at setting 1–2.
- Then process with the kneading hook for approx. 4–6 minutes at setting 3.
Maximum quantity: 4 x basic recipe
Wholemeal mixed wheat bread

Basic recipe:
325 g freshly ground wholemeal flour
325 g white flour Type 405
100 g rye flour Type 630
75 g liquid fermented dough
12 tbs. caraway
12 tbs. bread seasoning
12 tbs salt
1½ packets of dry yeast
450–500 ml warm water
- Knead all ingredients for approx. 12 minute at setting 1–2.
- Then process into a dough for approx. 4–6 minutes at setting 3.
- Leave the dough to prove until it is double the size and knead again for approx. 1 min. at setting 3.
- Place dough in a greased loaf tin and leave to prove again, then bake.
Tip:
Instead of freshly ground wholemeal flour, freshly ground spelt flour can be used.
Maximum quantity: 2 x basic recipe
Mayonnaise
2 eggs
2 tsp. mustard
250 ml oil
2 tbs. lemon juice or vinegar
1 pinch of salt
1 pinch of sugar
- Blend all ingredients (except oil) for several seconds at setting 1.
- Then slowly pour the oil through the funnel and blend at setting 3–4 until the mayonnaise emulsifies.
Honey bread spread
50 g butter (from refrigerator) 250 g honey (from refrigerator)
- Cut butter into small pieces and put into the blender.
- Add honey and blend for 15 seconds at setting 4.
Information concerning waste disposal

This appliance is labelled corresponding to the European Directive 2002/96/EC relating to waste electrical and electronic appliances – WEEE. The Directive paves the way for effective EU-wide withdrawal and utilization of waste appliances.
Please ask your dealer or inquire at your local authority about current means of disposal.
Guarantee
The guarantee conditions for this appliance are as defined by our representative in the country in which it is sold. Details regarding these conditions can be obtained from the dealer from whom the appliance was purchased.
The bill of sale or receipt must be produced when making any claim under the terms of this guarantee.
- Retirez le couvercle.
3–4 eetlepels heet water
150 g suiker
1 pakje vanillesuiker
150 g meel
50 g aardappelmeel
1 theelepel bakpoeder
450–500 ml warm water
r i n0i/Z0f f = St op/Kapali
M = M o m
(waste electrical and electronic equipment - WEEE)
bosch-infoteam@bshg.com
flowchart
graph TD
    A["Step 1: Handwashing"] --> B["Step 2: Cutting down"]
    B --> C["Step 3: Stopping with a brush"]
    C --> D["Step 4: Stopping with a brush"]
    D --> E["Step 5: Stopping with a brush"]
    E --> F["Step 6: Stopping with a brush"]
    F --> G["Step 7: Stopping with a brush"]
    G --> H["Step 8: Stopping with a brush"]
    H --> I["Step 9: Stopping with a brush"]
    I --> J["Step 10: Stopping with a brush"]
D
flowchart
graph TD
    A["Feeding Basket"] --> B["Heating Basket"]
    B --> C["Heating Round"]
    C --> D["Heating Cover"]
    D --> E["Heating Sink"]
    E --> F["Heating Stover"]
    F --> G["Heating Cover"]
E
flowchart
graph TD
    A["Step 1: Hand turning on blender"] --> B["Step 2: Rotation of hand to blade"]
    B --> C["Step 3: Rotation of hand to blade"]
    C --> D["Step 4: Rotation of hand to blade"]
    D --> E["Step 5: Rotation of hand to blade"]


