
Optimum MUM9YT5S24 - Food Processor BOSCH - Free user manual and instructions
Find the device manual for free Optimum MUM9YT5S24 BOSCH in PDF.
| Product type | Food processor |
| Brand | Bosch |
| Model | Optimum MUM9YT5S24 |
| Power supply | 220-240 V, 50/60 Hz, alternating current with grounding |
| Power | Not specified in the manual |
| Speeds | 7 speeds + M/A position (automatic start/stop with Sensor Control Plus) |
| Drives | 3: main (black), front (yellow), rear (red) |
| Mixing bowl | Stainless steel, capacity up to 3.5 kg of cake batter |
| Included utensils | Profi Flexi whisk, professional balloon whisk, dough hook |
| Special features | Sensor Control Plus (automatic programs for cream, egg whites, yeast dough), integrated scale, timer, DURATION function |
| Display | Digital screen with settings, error messages, and duration |
| Controls | Rotary switch + touch keys (selection, adjustment, timer, scale) |
| Swivel arm | EasyArm: motorized lifting assistance |
| Cable winder | Automatic, max length 1.25 m |
| Safety | Anti-restart, overload protection, swivel arm safety, interlock safety |
| Cleaning | Bowl, lid, and utensils dishwasher-safe; appliance base wipe with damp cloth; do not immerse in water |
| Optional accessories | Grater, multimixer with citrus press, pasta machine, multi-grinder kit, meat grinder, blender, additional bowl (ref. MUZ9ER1) |
| Usage | Household use only, up to 2000 m altitude |
| Manual languages | FR, DA, DE, EL, EN, ES, FI, IT, KK, NL, NO, PT, RU, SV, TR, UK |
| After-sales service | BSH Home Appliances S.A., 13-15 ZI Breedeweues, 1259 Senningerberg, Tel.: 26349300 |
Frequently Asked Questions - Optimum MUM9YT5S24 BOSCH
User questions about Optimum MUM9YT5S24 BOSCH
0 question about this device. Answer the ones you know or ask your own.
Ask a new question about this device
Download the instructions for your Food Processor in PDF format for free! Find your manual Optimum MUM9YT5S24 - BOSCH and take your electronic device back in hand. On this page are published all the documents necessary for the use of your device. Optimum MUM9YT5S24 by BOSCH.
USER MANUAL Optimum MUM9YT5S24 BOSCH
Register your new Bosch now: www.bosch-home.com/welcome
MUM9... OptiMUM

BOSCH
de Gebrauchsanleitung
en Instruction manual
fr Wode d'emploi
it Istruzioni per l'uso
n! Gebruiksaanwijzng
da Brugsanvisning
no Bruksanvising
sv Bruksanvisning
fi Kayttoohje
| de | Deutsch | 3 | |
| en | Engl i s h | 24 | |
| f r | Français | 44 | |
| i t | I t a l i ano | 65 | |
| n l | Nederl ands | 86 | |
| d a | Dansk | 107 | |
| n o | Nors k | 126 | |
| s v | Svenska | 145 | |
| f i | Suomi | 164 |
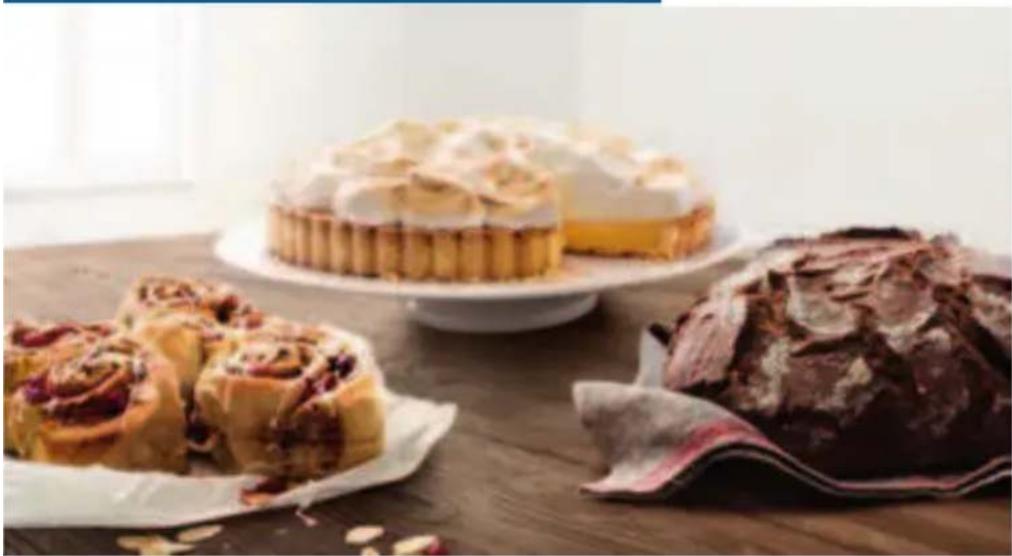
This appliance is intended for domestic use only for processing normal amounts of food at the time for domestic use. Do not exceed per ton quantities. → “Recipes” see page 36
The appliance is suitable for mixing, kneadi. The appliance must not be used for processing or objects. Additional applications are poss approved by the manufacturer are used. Only with approved genuine parts and accessories. accessory parts for other appliances.
Only use the appliance indoors at room tempe 2000 m above sea level.
Important safety information
Read and follow the instruction manual caref reference! Enclose these instructions when y to someone else. If the instructions for cor are not observed, the manufacturer's liabil i damage will be excluded.
This appliance can be used by persons with r sensory or mental capabilities or lack of ex knowledge if they have been given supervisic concerning use of the appliance in a safe wa understand the hazards involved. Keep childr appliance and connecting cable and do not al appliance. Do not let children play with the user maintenance must not be performed by ch
Risk of electric shock and fire!
The appliance may only be connected to a alternating current via a correctly installed. Ensure that the protective conductor system supply has been correctly installed.
-
Connect and operate the appliance only in specifications on the rating plate. Do not power cord and/or appliance are damaged. O service may repair the appliance, e.g. by power cord, in order to avoid hazards.
-
Never connect the appliance to timer swi' controllable sockets. Never leave the appl it is switched on!
-
Do not place the appliance on or near hot. The power cord must not come into contact pulled across sharp edges.
■ Never immerse the base unit in water or dishwasher. Do not steam- clean the applian appliance with damp hands.
■ After each use, whenever the appliance is assembly, prior to disassembly, prior to c of an error, the appliance must always be mains.
Ris k of injury!
Before replacing accessories or additions during operation, the appliance must be sw disconnected from the power supply.
■ Whenever the swivel arm is lowered, do no housing to avoid your fingers or hands get adjust the swivel arm while the appliance
■ Only use tools when the bowl is insertedthe protective drive covers are in place!fit the bowl , cover and drive covers accor
■ While operating the appliance, never reach shaft with your hands. Do not insert any o spoon) into the bowl or filling shaft. Kee and other utensils away from rotating part the drive continues for a short time. Wait to a standstill.
-
Never use tools and accessories or 2 acco time. When using the accessories, follow the instructions enclosed.
-
When using accessories, observe the col o the drives and accessories.
Risk of suffocation!
Do not allow children to play with packaging
Caution!
We recommend that the appliance is never than is necessary to process the ingredient at no-load.
■ Your work surface should be easily accessible moisture, firm, flat, dry and large enough from splashing and to let you work unhindered
Important!
It is essential to clean the appliance thorc after it has not been used for an extended p maintenance" see page 36
Congratulations on the pur your new Bosch appliance. further information about on our website.
www.bosch-home.com
Our appliances continuously
further development. For th
individual functions may di
instructions. In this case
a newer version of these in
available on our website.
When using this instruction
You can fold out the cover
instructions. There you will
marked with letters and num
Reference will be made to
throughout the manual (e.g.
sequence 3).
#
ou .can. find
u.r. intended use product s
Important safety information
Overview.
Before using the appliance
fumrd etrhge first time
Bartesa səmd operating controls
Pree parrn dne.
$etctki mghs.t.h.e.
. Ws iunct i wintsh oust additional function
Using the time and timer functions
Using Sensor Control Plus
ldgieng of the hegal es
Ug i ng q q q gssq q rait sons
Cleaning and maintenance
ReSei Pppustrations
Re- pradjment of tools
Safety systems
Disposal
Guarantee
Troubleshooting
Accessories
Overview
Please fold out the illustrate
→ Fig. A
Base unit
1 Rotary switch
a I I l u m i n a t e d r i n g (o p e r a t i o n i n d i c a t o r)
b Setting dial
2 Release button
3 Swivel arm
4 Main drive (black)
a - Opening for inserting tools check that all the parts are
5 Front drive (yellow)
a Protective drive cover
6 Rear drive (red)
a Protective drive cover
7 Cable storage compartment
cable reel*
8 Recesses for bowl
Control panel
9 Function buttons
a Function selection buttcontrols
b Setting buttons
10 Display
Bowl
11 Stainless steel mixing
12 Cover
a Filling shaft
Tools
13 Professional flexible beatngwhisk
a Protective cap with eject bettons
14 Professional stirring whetck appliance has 3 different d
a Protective cap with ejmatir budrtiones, black (4)
15 Kneading hook
a Protective cap with ejecebsustodiness with a bevelclear.
- Depending on the model
Note: Your kitchen machine cforesuswing accessories
additional accessories dependngoneonthe
model.
Before using the applifor or paghe first time
Before the new appliance can be it must be fully unpacked, clear checked.
ation indicator) Caution!
Never operate a damaged appli ar
Remove the base unit and al
accessories from the packaging
dispose of all packing materi
Check that all the parts are
examine them for obvious damage
Fig. A
Thoroughly clean and dry all
, before using for the first time
"Cleaning and maintenance"
page 36
Parts and operating
Controls
Colour coding
The drives have different coloy yellow and red). This colour co
How can also be found on the access?
use accessories for the drive \
colour.
Dr jyegwhisk
ect Bgtt ans
Thek appliance has 3 different c
Mvatributrtioines,black (4)
For using tools or for using
eocct ebsustodriness with a bevel-glear .
Front drive, yellow (5
eForresuswinghaccessories with a ye
aoge tonr h
Rear drive, red (6)
For using accessories
connector.
Protective drive covers ( 5a and
For covering unused drives.
Further information: "Access
page 41
Display
→ Fig. A
: Settings, information, errorvalues are indicated on thelong texts will run from righto display them fully
Example:
YEAST DOUGH
HOLD ROTARY S WITCH ON
AST DOUGH
ON M/A FOR 2s
The language in which the text can be changed. "Settings page 30
Function buttons
→ Fig. A
The appliance has 3 to 5 function (depending on the model), using special additional functions and programmes can be selected and a
Butt ons
| * | Sensor Control Plus / Programme selection / Back |
| * | Timer / Selection / Back |
| * | Scales / Tare / Back |
| - | Reduce selection/ values |
| + | Increase selection/ values |
- Depending on the model
Function selection buttons
Briefly pressing them will a function selected. Press and the selected function. "Optill"wi appear on the display again.
Note: The buttons are operated touching them with your finger. kimeshenges alans may impair the f th spuytonerel, it is not possible buttons ewith nojretrs (e.g. wood
Rotary switch withilluminated ring
→ Fig. 8
The rotary switch is used to set required speed, start an automatic programme or to switch the appli off. The integrated illuminated up during operation. The appli gn o longer switch on if there is appliance operation, if the elec trip or the appliance has a def
exit | umi natted ayierg will light up.
Settings
M/A The setting M/A has two diff functions:
Standard (M) :
buttonstantaneous switching which
at maximum speed/ fast . Hol automatic
down rotary switch for the
dusted.
duration.
With Sensor Control Plus (A)
Automatic regulation of the After activating the automa set the rotary switch to M/ in this position for a few The rotary switch will rema to M/A and will revert back after the automatic program ended. The appliance is swi
"Using Sensor Control PI
Page 33
st opt heSwitch off
Fuhet | igeolding in" at
minimumpspeed /veryslow
7 Speed settings
1: low speed / slow
7: maximum speed / fast
Tools
→ Fig. A
Professional flexible beating whisk
For stirring dough, e. or mousse. For folding beaten egg white.

in cr
Professional stirringFor beating egg white
cream and stirring light e.g. sponge mixture.

Kneading hook
For kneading heavy dough (e.g. yeast dough) and ingredients which are be chopped (e.g. raisin

Recommended speeds
For folding in and mix ingredients gently (e.g. beaten egg white)
1-2 For stirring and mixing
3 For kneading heavy dough kneading hook
5-7 For stirring and whipping (e.g. whipped cream) with professional flexible be or the professional stir
M/A For using the tools with Sensor Control Plus "SensordControlPUs"see
Re- adjustment of tools
The appliance is factory-set professional stirring whisk bottom of the bowl to ensure are mixed together perfectly touch the bottom of the bowl from it, the gap can be easi "Re-adjustment of tools"
Swi vel arm
Fig. 6
The swivel arm is move
insert or to remove a tool
The swivel arm features an
function, which supports the upward movement of the swivel arm.
Bowl and cover
→Fi g. D
The appliance comes with a spec
which is securely attached to the
throughput insertion and rotation.
is secured to the swivel arm and
automatically when the swivel
Inserting and removing to
The tools are equipped with eject on the protective cap which are facilitate removal of the tools. Insert tool: Insert the tool into drive until it locks into place then covered by the protective Remove tool: Press both eject to until the tool is released. Take of the drive.
nag dif fere nent Ca b] e r e e n →Fi g. A
Depending on the model The
ingredients
appliance is equipped with an a
cable feel. Pull out the power
go to the required length (max.
slowing realease; the cord is loc
Reduce cable length: Pull gently
eatinngwhiaikow it to wind up to
trong h. Then gently pull the cord
slowly release; the cord is loc
important: Do not push the cord
hand. If the cord jams, pull out
the way and then allow it to win
Cable thet oage C ompa r ingme nents
fi ght tools
Depending on the model: The app is equipped with a cable storage compartment. The length of the can be adjusted as required by or pushing it back.
Safety systems
The haplance has various safet Easysymet systems" see page 38
Preparation
- Place the base unit on a smooth, or display for the scale and stable surface.
- Pull the power cord out tChangirnguiand saving setti length. The current setting is chan
Press the release button andutrtadine+ or -.
the swivel arm to the stop Press and hold buttons and
Place the cover with the fisilmng asheafutslay untill "SETUPSAVE"
the front on the main drive.briefly appears on the display
Insert the bowl . When doingRebeasebuteons ⑦ and + aga
processes on the base unit . The changed settings are saved
Turn the bowl anticlockwise Example: i t Locks
into place.
The base unit is prepared for further use and hold buttons and important: Do not slide the applamancemabqtil the configura on the work surface as this may be phed. the functioning of the scales. Remove buttons and again appliance, lift it. Keep pressing button until
Settings
Press the release button and push the swivel arm down until it looks into place.
■ Plug the mains plug into the mains.
The appliance is switched on
"optiL" appears on the display. Press the button or repeat Note: If the appliance is not used and hold buttons and operated within a certain period must be displayed until "SETUPSAVED" will slowly fade and switch to standby, appear once again when any button is touched.
Press and hold buttons 已 and ^+ at the same time until the configuration is opened.
- Release buttons and ^+ agaiTme language selection is set. Selecting setting display.
Selecting setting
The following settings appear to release buttons and + again: sequence each time button This brieftage selection is said
pressed: Hold down one of the functions ( / / ) until "obligate" appears o Language in which the display text's are. The appliance is displayed. use.
Note: If the appliance is swit d Volume of the acoustic signals- setting in 6 levels from off to loud.
- BRIGHTNESS Brightness of the display - setting in 6 levels from dark to bright.
Using without addit Operating the appliance
functions
Risk of injury!
- Do not insert the mains plu@tunigl ( "Recommended spec all preparations for workings with page 29)appears on appliance are complete. the display and the elapsed
- While operating the appliandue atme news displayed in minreach into the bowl or fillisncsmsd.f.
- Do not operate the appli Note: wlf hbe duration is 60 min in the cover in place. hours are also displayed:
- Al ways wait for the drive. to Pcomes so he ingredents unt standstill before moving the ashwi eed tahr required result.
or changing tools. 7. Turn the rotary switch to 0 - For safety reasons, always uninitil the drive comes to a stop protective drive covers on tDies connectthe mains plug.
rear drive. 8. Press the release button and
Important :
- Prepare the base unit as 9 des furbe the bowl clockwise unt under "Preparation". raised. Remove the bowl.
- The appliance cannot be ①it Pheedsoboth eject buttons un unless the bowl has been insrealt used. Take the tool out c correctly. 11. Take the cover off the drive
Note: The function "TIME" starts 12. Clean all parts immediately automatically with every use, count cleaning and maintenance ongoing processing duration and a geodesic
this on the display.
Image sequence F
- Depending on the process your task, appliance and its fund select the professional flexive beating page 36
whisk, professional stirr iAddwhiskmore ingredients or kneading hook "Tools sMooseingredients can also be a page 29insert the tool intopfheemai ng. drive until it locks into place. The drive is then covered by the protective cab:the applianso is runn
- Put the ingredients to be processed ingredients through the bowl.
- Press the release button and push the swivel arm down until it locks into place.
Risk of injury!
Carefully lower the swivel arm! Make sure you do not get your hands on spoon) into the bowl or filling
Image sequence H
- To add larger quantities or turn the rotary switch to O. the drive comes to a standstill
en Using the time and timer function
- Press the release button7.andOncai sthe remaining duration the swivel arm to the stop. elapsed, an acoustic signal wi
- Add the ingredients directly to the haappowalnce will stop pr Press the release button and aaptuosmatllcally. "FIS THE" appears on swivel arm down until it locthse iditsplpalyace. "otill" appears on the display. Note: Setting the acoustic sig Continue processing your ingediSnt sngs" see page 30
Using the time and timer function
The appliance features a time and store effect the mains plug. function. The following functions processing with the "I" function available: ended.
"TIME" function
Display of the elapsed processing duration and maintenance (standard setting). The "TIME" function 36 starts automatically once the process processing of food has been started. - The duration is indicated o
Notes:
- Press button 已 briefly duringngi pueesaidn0 seconds: "01:30". to switch on the "THE" function.duration is 60 minutes or mon - Hold button 已 down during prccsso ngi splayed: "1:01:30". to reset the display to "00:00".- Press button + or - at any t
"THER" function
Setting of a required duration. Once the timer (the appliance will continue) will sound and processing will stop. The function may also be used without turning the rotary switch to O if processing food (e.g. for boiling or resting, The remaining durable remains saved and the countdown times of food). continue after the appliance is
Image sequence
1.Prepare the appliance.Add jngregiow button to switch
2. Plug the mains plug into the mainears on the display. The "p" appears on the display. function has been activated as
3. Press button . appears on the using the timer without processing display. Press button . appears on
4. Set the required processing duration using button + or -. The values will change faster if the respective button is pressed and held down. The set processing duration will remain saved for approx. 5 minutes.
5. Set the rotary switch to the required setting 6. The remaining duration will on the display and the count down
6. The remaining duration will be shown on the display and the countdown will continue.
■ Once the duration has elapsed, a palpation with integrated signal sounds. "FINISH TIMER" aptearepbnons >300ml and >700ml " are the display. not displayed for "CRAW." # g" flashes
Notes:
- Press button ① briefly twice to stop the timer or to start it again. The display shows the quantity of food. If food starts to be processed, automatically uses the using the timer, the appli a tions. If less or more clean continue to run until the displ aying weight will flash.
duration has elapsed and tNootnesstop
processing automatically.
Using Sensor Control
Depending on the model, the appliance may be equipped with Sensor Control
automatic programmes. Sensors - Do not add ingredients until the processing of the ingredients has been selected and the scalp the appliance off once the pre-programmed or "0.00 lb" (dependent consistency has been reached setting) or "ADD INGREDIENTS" appears
consistency has been reached. The following automatic programmes are displayed: available with Sensor Control Plus: the appli
一 CREAM
Automatic preparation of
EGGWHITE
Automatic preparation of egg white
YEAST DOUGH
Automatic preparation of
Selecting programme
Press button . "Crew" appears onThe age, the temperature and the display. contents of the ingredients
Press button or buttons time required and the results The following programmes appear in Control Plus cannot produce sequence: optimum results unless the eg
onThe age , the temperature andcontents of the ingredients :
time required and the resultare Senisor Control Plus cannot p
Programme Tool / Ingredients
| STEMI >300 ml * | Professionals stirr 300-700 ml cream |
| STEMI >700 ml * | Professionals stirr 700-1500 ml cream |
| EGG WHITE | Professionals stirr White of 2-12 eggs |
| YEAST | Kneading hook Ingredients and qu according to the r |
| DOUGH |
- Before using the automatic
Sensor Control Plus for the fi
Pitien machine must have bee for at least two minutes to e.
pollance
sensory function correctly.
not add ingredi ons unti has been selected and the scents and switch or 0.001b (depend e-programmed or "AD INGREDIENTS appears setting) or
onthe displayed.
If the appliance is switched to the rotary switch, the menu is immediately displayed.
- When processing has been stated (Sensor Control Plus, do not add more ingredients.
- Sensor Control Plus is only for the described tools and is least dough. (in the specified quantities)
combinations are not possible
optimum results unless the egg fresh or the cream has been (approx. 6 °C).
- Cream which was previously cannot be whipped.
Whisk Cream which contains additional lactose-free cream can not produce ideal results.
- Do not add sugar , flavoursadditives for cream or beatennutite® Sensor Control Plus is onepeThe buttons are locked once
Sensor Control Plus has started
- Turn the rotary switch t00 "SSTCONTRON" appears
Sensor Control Plus. A slight temperature control program. Sensor Control must be overcome for this. monitors the processing.
- If the result is not howyouOwcehthe pbebprogrammed cor turn the rotary switch to sehas ngeen (achieved, an acoustic cream and beaten egg white) wirl lseumd and processing will 3 (for yeast dough) and contiHnuears on the display. process the ingredients untinNotte Sststirred the acoustic si consistency is achieved. "Settings" see page 30
- Do not start Sensor Control. The rotary switch automatics second time with ingredient st whoch "p" appears on the already been processed. display.
Example: Making beaten 13 egg Disconnect the mains plug. white with Sensor Control Processing with the "EGG WHITE" function is ended.
Image sequence J
-
Clean all parts immediately
-
Prepare the base unit and s"teamng and maintenance" professional stirring whisk.page 36
- Press the release button and push the
swivel arm down until it lUSki ng t hec scales
- Plug the mains plug into the mains
"Optiliny appears on the display appliance may be equipped with - Separate the eggs (2-12 eggs) The following applications are
- Press button "CREM" appears on the display. Weighing the added ingredient in the display. Note: Models without a scale display "CREAM >300ml .Press button - Pre-setting a desired weight again. "CREAM >700ml " appears on the count ing down until sufficien di display. have been added (with audible
- Press button. "EGHIDE" appears have been added (with audit bit on the display. information signals).
Note: If appliances feature integrated scales, these are now calibrated steps individual. If less than dashes appear in succession on the display during calibration: "----" (tare). provide correct measurement on "0.001b" appears on the display (depending The appliance has 4 weight on the setting).
- Add the egg white to the bowl. In the feet. The scales only. ROTARY SWITCH ON N/A FOR 2s" the correct results if all o! appears on the display. standing on a solid and level. Do not put any clothes or other
- Turn the rotary switch to M/A and hold in this position for 2 seconds. The work ton must not be sub
- After 2 seconds the rotary switch is automatically fixed in this position and remains on M/A after being released by other activities
Important: If the rotary switch does not remain M/A, it was not held for long enough in this position.
- Do not slide the applianPreabset tong the weight
the work surface as this may impair the
functioning of the scales.1 To move that ton
appliance, lift it. appliance again.
- After switching on or resetting the dashes appear one
scales, they are calibrated for a brief moment (tare). During this process, do not touch the appliances on the device.
not touch the appliance or 2. place any "0 lb" appears on the d items on top of it (e.g. wooden spooning on the setting). tea towel etc.). are ready.
- Ensure that measuring jugs 100g or "0.20 lb" appears on the packaging are not lying on top of the display (depending on the set of appliance (e.g. on the edge of the set the required weight (500 filling shaft)). 0.10-6.00 lb) using the + or -
Weighing ingredients
Image sequence K
- Prepare the base unit.
- Plug the mains plug into the From "40g", a recurring acoustic "otill" appears on the display. sounds. The lower the remaini
- Press button and don't touch the faster the accl apliance again. sounds.
Individual dashes appear oneNote:erSatching the acoustic sio other on the display during calSettings: see page 30
“- - - - - ” (tare). 7. At 10g (meaning that the pr
- "0g" or "0.001b" appears on the quantity has been added), then (depending on the setting). The scales
are ready. 8. If the pre-set quantity has - Add ingredients. The scale expeeded the acoustic signal weight.
- Start processing or put out Note Setting the acoustic si ingredients ready for use. "Settings" see page 30
- Press button and do not the additional weight is indi the appliance again. "0g" or 00h" a minus symbol. If the e appears on the display (depending on 25g -25g is disc the setting). The scales are Yeser remove the excess qu
- Add all desired ingredients and weihold down one of the them in this manner. buttons ( / / ) until "optical"
Process the weighed ingredients s . "Using" without additional functions" see page 31
Note: If button is pressed while
processing food, "FOR SCALE
STOP MACHINE"appears on the display.
Using accessories
Cleaning and maintena
Your kitchen machine offers Theuapelriance and the tools use of accessories that significi ccntthyoreoxg hmdy cleaned after each its functions. Depending on the Firing,
certain accessories are already included electric shock! in the scope of supply. If an accessory the appliance before is not included, it can be purchased immerse the base unit via trade stockists or customers and do not clean in the dish
Preparation for accessoaiuee son!
The base unit requires differentDopmentarusteemy cleaning agent depending on the accessory. containing alcohol or spirits
■ Place the base unit on a smoDhnoCleE any sharp, point and stable surface. objects.
■ Pull the power cord out to-t De ne quisedabrasive cloths length. agents.
Prepare the base unit as show not wedge plastic parts depending on the accessory. dishwasher as they could be
Fig. M
- Preparation for tools. Cleaning the base unit
- Preparation for accessories Removable protective driven drive with bevel gear and accessory base unit and drive used in place of the bowl. a soft, damp cloth and dry or
- Preparation for accessory on red drive, for example blender or multi choppr.
- Preparation for accessory onoyepagwclean the bowl, cov drive without outlet openingqorsfwoth a detergent solution e.g. multi-blender or citrussoftpressloth or sponge, or put
5.Preparation for accessory shwber drive with outlet opening forAlfo,alel.gparts to dry. continuous-feed shredder.
Important :
■ Observe yellow, red or black marks.
drive and accessory. "Colou200-cd1500g"g
See page 27 Whip the cream with
■ Al ways secure unused drives with the professional stirring whi protective drive covers. to 4 minutes at setting 7 du
See the separate instructions for the quantity and properties of the cream.
Note: For models with Sensor Cor use the automatic programme.
Sensor Control Plus" see page 33
Egg whites
- 2-12 egg whites
Beat the egg whites with the professional stirring minutes at setting 7.
Note: For models with Sensor use the automatic programme. Sensor Control Plus" see page
Sponge mixture
Basic recipe
-3 eggs
- 3-4 tbsp hot water
- 150 g sugar
- 1 sachet vanilla sugar
- 150 g f l our
- 50 g cornflour
-
Baking powder if required about 12 minute at setting 1 ,
-
Beat the ingredients (except for about 10 minutes at setting up and cornflour) with the primate quantity: 4 x basic recipe
stirring whisk for approx. 4-6 minutes at setting 7 until frothy. Yeast doug
■ Turn the rotary switch to setting and spoon in the sifted flour and cornflour within approx. 1/2 to 1 minute and mix.
Maximum quantity: 2 x basic recipe fat (room temperature)
Cake mixture
Basic recipe
-3-4 eggs
- 200-250 g sugar
- 1 pinch salt
- 1 sachet vanilla sugar or 12 lemon
- 200-250 g butter or marg (room temperature)
- 500 g f l our
- 1 sachet baking powder
- 150 ml mi I k
■ Mix all ingredients with flexible beating whisk for
1½ minute at 2setaridngthen for - 500 g flour
approx-3 minutes at setting 7.250 g eggs
Maximum quantity: 212× basic
Shortcrust pastry
Basic recipe
- 125 g butter (room)
whi sk0f qr254 gt sugar
-1 egg
Cantir qipinRnHus,s.al t
A Usi ngl e lemon peel or vani 33250 g flour
- Baking powder if required
Mix all ingredients with the flexible beating whisk for all 12 minute at setting 2, then: 2-3 minutes at setting 6.
From 500 g f lour:
■ Knead ingredients with the kneading hook for
about 1 / 2 minute at setting 1,
ceport hobutuminutes a. setting: Maxxismunpantity: 4 x basic rec
Yeast 4-6 minutes dough
Basic recipe and 500 g flour 1 e g q u x.
recipe g fat (room temperature) -80 g sugar
- 200- 250 ml |ukewarm milk
- 25 g fresh yeast or 1 sache
- Peel from 1 / 2 Iemon
- 1 pinch salt
Mix all ingredients with the Pk from approx. ½ minute at then for approx. 3-6 minutes
Maxnumquantity:3xbasicreg
Note: For models with Sensor Cor use the automatic programme. Sensor Control Plus" see page 3:
Pasta dough
sjcrcipe
- 500 g f l our
250 g eggs (approx. 5)
repe 2-3 tbsp (20-30 g) cold water as required
Mix all ingredients for abo 5 minutes at setting 3 until for ms.
Maximum quantity: 1.5 x basic r
Bread dough
Basic recipe
- 1000 g f l our
- 3 sachets dried yeast
- 2 t sp s a l t
- 660 ml warm water
■ Mix all ingredients with hook for approx. 12 minute then for approx. 4-5 mi u
Maximum quantity: 1,5 x bas
Re - adjust ment of to
Risk of injury!
Pull out the mains plug before
Caution!
Only re-adjust tools in smabe possible to completely Iarm, and when doing so, thennot catch on the bottom orthe bowl . The optimum dista the tools and the bowl is 3
Image sequence
Insert the professional check the current setting
Press the release button and raise the swivel arm to the stop.
Hold the tool with one hand. Release the lock nut in a clockwise direction using a spanner wrench (10 mm).
- Adjust the distance to the bowl by turning the tool (1 whole turn corresponds to a height adjustment of 1 mm).
Turn anticlockwise:
Distance to bowl is reduced.
Turn clockwise:
Distance to bowl is increased.
Press the release button and push the swivel arm down until it locks into place.
Check the tool distance. The optimum distance between the tools and the bowl is 3 mm. Adjust if necessary.
Once the distance is perfectly adjusted, press the release button and move the swivel arm back.
Hold the tool with one hand. Turn the lock nut in an anticlockwise direction using a spanner wrench (10 mm).
Safety systemsStart lock-out
The appliance can only be switched to the bowl has been inserted and it locked into place, or if an been secured to the main drive, bevel gear and if the swivel at setting into the lower position.
Automatic power-on safety
If the power is interrupted, the oensins switched on, but the mo
not start again when power is no
To switch back on, first turn the
pre adjusting, and then switch on
Overload protection
The overload protection willsw
lower the swivel
motor off automatically during
tools should
One possible cause may be proce
on the edge of
too much food at once.
once between
Swivel arm protection devThe swivel arm will not unlocksanaccess whiysk sanfitted to the
Disposal
Disposo of packaging ir The guarantee conditions for mentally- friendly manner are tab idfined by our representative in the appliance is labelled iopoantoydancwhich it is sold with European Directive 20426106Eduitions can be obvi concerning used electricaheadaler from whom the a electronic appliances purchased. The bill of sale and electronic equipment be wEEu.ced when making an The guideline determinesthberaneof this guaranterework for the return and recycling of used appliances as aphangbereserved. throughout the EU. Please ask your specialist retailer about current disposal facilities.
Guarantee
Troubleshooting
In the following tables, you will find solutions for probl rectify yourself. If a fault cannot be eliminated, please
| Problem Possible | Cause Remedy |
| Nothing showndisplay. lll ump owdare supply.ring is off.Appliance cannot beswitched on. | Appliance hasnCheck the power supply.Plug the mains plug into the |
| Appliance doesstart.The illuminated ringlights up. | Anafety systactivated.“wafety systems”see page 38 |
| Appliance switduring use. | Smswith foodbeen processedeither at thetime or for terperiod. hSwitch the rotary switch to Othe mains plug.sReduce the processing quantiOoll Adrgwa the appliance to cooltemperature. |
| Swivel arm wasopened. ■Turn the rotary switch to O■Press the release button andswivel arm down until it lock | |
| Bowl or bevel(accessory)has themeines open. gTurn the rotary switch to Oasthe meins plug.Tighten the bowl by turningTighten the bevel gear and clocking lever completely. | |
| The swivel armbe opened. | Amamccessoryto the red rearDrievses. the release button andthe swivel arm. |
| Problem Possible cause Remedy | ||
| The scales do show any change added ingredi weight even thbiness than 0bengb).added. | The quantity added ingrediiness than 0bengb). | Add at least 5 grams (0.01 lb), thesscales will not provide cor negamment results. |
| The appliance not start the Sensor Control program and swith hcessition off again. | The srotary switch was emtothed held Pouslong enou gh in M/A. | |
| Sensor Control cannot be star ingrediants added before hbagscales werehas been selected and the sca indicates being already been added. | Models with sca empty the bowl . ingredients were Select programme again. Do not add ingredients until appears even t the ingredient achieved. | Do not add ingredients until indicates being already been added. |
| Di spl ay Possi ble cause Remedy | |
| EROR KOTOR OVERLOAD | Too much food has as bTaem the rotary switch to O processed either a the mains plug. same time or for ▪Reduce the processing quanl long a period. |
| The appliance or nTurn the rotary switch to O of the accessory blocked. | |
| Motor defective. If the message appears contin motor may be defective. Please customer service. | |
| EROR SCALE | The scales do not work reset the scales, hold de properly. |
| Scales defective. If the message appears contin scales may be defective. Please customer service. | |
| The scale is ex vibrations. | |
| The appliance has ▪Lefert the appliance and set o slid on the work ▪Refsaedte the scales and try aga before using the scales. | |
| Display | Possible cause | Remedy |
| ERRORARM OPEN | Swivel arm was opened. | Turn the rotary switch to O.Press the release button and push the swivel arm down until it locks into place. |
| ERRORCHECK BOWL | Bowl or bevel gear(accessory) has become loose. | Turn the rotary switch to O.Disconnect the mains plug.Tighten the bowl by turning until the stop.Tighten the bevel gear and close the locking lever completely. |
| FOR SCALESTOP MACHINE | Scale is switched on while the appliance is running. | Switch the appliance off and wait until it stops before using the scale. |
| OVERLOADSCALEORUNDERLOADSCALE | The measurement result is outside the measurement and display range of the scales (-990 g to 5000 g) | Do not add more than 5000 g of ingredients.Do not remove more than 990 g of ingredients. |
| OVERLOADORUNDERLOADwhen usingSensorControl Plus | Too much or too little of the ingredients was added for the selected programme. | Add ingredients according to the specified quantities.→“Using SensorControl Plus” see page 33 |
Accessories
Accessories and spare parts can be purchased via trade stockists or customer service. As the product range is being constantly extended, it is possible that there are additional accessories which are not listed here. In this case, go to www.bosch-home.com to see the latest accessories that are available.
| Accessories | Designation | Description |
| MUZ9VL1 | Continuous-feed shredder For cutting, shredding and grating fruit, vegetables and other foods. | |
| MUZ9VLP1 | Multi-blender with citrus press For chopping herbs, vegetables, apples and meat, for grating carrots, radishes, cheese, nuts and chilled chocolate. For squeezing oranges, lemons and grapefruits. | |
| MUZ9PP1 | Pasta press For making sheets of dough and tagliatelle. | |
| MUZ9TM1 | Multi-chopper set For grinding and chopping small quantities of spices, cereals, coffee or sugar. For cutting and chopping meat, fish, hard cheese, herbs, fruit, vegetables, nuts or chocolate. For mixing liquid or semi-solid food, for cutting/chopping raw fruit and vegetables, frozen fruit and puréeing food. | |
| MUZ9HA1 | Meat mincer with sausage stuffing and kebbe attachment For cutting fresh meat for steak tartare or meat loaf. For stuffing sausages. For making dough or minced meat pockets. | |
| MUZ9MX1 | Blender For mixing drinks, puréeing fruit and vegetables, preparing mayonnaise, chopping fruit/nuts and crushing ice cubes, for puréeing and mixing soups and sauces. | |
| MUZ9ER1 | Stainless steel mixing bowl with handles The bowl can be used to process up to 3500 g cake mixture. | |
| MUZ9KR1 | Plastic mixing bowl with handles The bowl can be used to process up to 3500 g cake mixture. | |
| MUZ9FW1 | Meat mincer For cutting fresh meat for steak tartare or meat loaf. | |
| MUZ9PP2 | Pasta inserts for MUZ9HA1 and MUZ9FW1 For making pasta. 5 different shapes available. | |
| MUZ9SV1 | Whirl insert for MUZ9HA1 and MUZ9FW1 For making whirls. 4 different shapes available. | |
| MUZ9CC1 | Dicer for MUZ9VL1 For cutting food into cube shapes. | |
| MUZ9PS1 | Chipper disc for MUZ9VL1 For slicing raw potatoes for chips. | |
| MUZ9SC1 | Professional Supercut reversible disc for MUZ9VL1 and MUZ9VLP1 For cutting fruit and vegetables into thick or thin slices. Particularly suitable for very soft or very fibrous food. | |
| MUZ9BS1 | "Baking Sensation" accessory set The set contains the following parts: MUZ9FW1 meat mincer (with perforated disc medium, 5 mm), MUZ9SV1 whirl insert, MUZ9KR1 plastic mixing bowl. | |
| MUZ9RV1 | Shredding attachment For cutting up and shredding food. | |
| MUZ9AD1 | Bevel gear for MUZ9RV1 Available separately if no bevel gear of another accessory is available. |
Compartment derangement du corden → Figure A
Savngemn svinges op for at
Reducering af kabellangde: Traek Let
i kablet, og rul det op, indit i langde er næet. Træk herefter i kablet, og slip det langsomf fastlåst.
ndseni nken
→ "I nd st i l I nger" s e s i d e→1 Bj I Iledrakke K
tidsbryteren. Di splayet viser Tko kpa tast . Di splayet
Funksj onen "I" er pa nytt aktiert.
Skyddslock for driving (5a For overtackning av driving anvands.
Mer information: "Ti I I beh sidan 161
et sprak som externa visas pa andra. "Inst all ningar" se si
Nrp/dnnsngs emoturs:
Avstandet till skalen minskas
Vridning medurs:
Avstandet till skalen okas.
To arrange an engineer visit, to order
spare parts and accessories or for
product advice please visit
www.bosch-home.co.uk
or call Tel.: 0344 892 8979*
*Calls are charged at the basic rate, please check with your telephone service provider for exact charges
GR Greece, Eλλας
BSH I kiakes Siskeves A.B.
Central Branch Service
17 km E. O. At hi non-Lami as
Potamou 20
14564 Kifisia
IavvAAHvio TnAeWvO:181 82
(Aotikn xpewon)
mail to: nkf - Customer Service
www.bosch-home.gr
HK Hong Kong
BSH Home Appliances Limited
Unit 1 & 2, 3rd Floor,
North Block, Skyway House,
3 Sham Mong Road
Tai Kok Tsui, Kowloon
Hong Kong
Tel.: 2565 6151
Fax: 25656681
mail to: bosch.hk.service@bs
www.bosch-home.cn
HR Hrvatska, Croatia
BSH kučni uredaji d.o.o.
Kneza Branimira 22
10000 Zagreb
Tel.: 015520888
Fax: 01 640 36 03
mail to: inform macij e. servis.
www.bosch-home.com/hr
HU Magyarorszag, Hungary
mail to: hibabej elentes@bsh
Alkatrészrendelés
Tel.: +361 489 5463
Fax: +361 201 8786
mailto:alkatreszrendeles@bsh.hu
www.bosch-home.com/hu
IE Republic of Ireland 494 Kaunas
BSH Home Appliances Ltd.
Unit F4, Ballymount Drive
Ballymount Industrial Estate
Walkinstown
Dublin 12
Service Requests, Spares and Accessories
Tel.: 01450 2655*
Fax: 01450 2520
www.bosch-home.co.uk
*0.03 € per minute at peak.
Of peak 0.0088 € per minute.
I L Israe
C/S/B/ Home Appliance Ltd.
1, Hamasger St.
North Industrial Park
Lod, 7129801
Tel.: 089777222
Fax: 089777245
mailto:csb-serv@csb-ltd.co.il
www.bosch-home.co.il
IN India, Bharat,
BSH Household Appliances
Mfg. Pvt. Ltd. Arena House, Main Bldg,
2nd Floor,
Plot No. 103, Road No. 12
MIDC, Andheri East
Mumbai 400 093
Toll Free 1800 266 1880*
www.bosch-home.com/in
- Mo-Sa: 8.00am to 8.00pm
(exclude public holidays)
IS Iceland
Smith & Norland hf.
Noatuni 4
105 Reykiavik
Tel.: 05203000
Fax: 05203011
www. smi nor . i s
IT Italia, Italy
www.bosch-home.com/it
KZ Kazakhstan, Ka3akctah
IP Turebekov Yerzhan
Nurmanovich
Jangeldina str. 15
Shimkent 160018
Tel.: 0252 31 00 06
m@bsaigcokka_kz@mail.ru
LB Lebadian,
Teheni, Hana & Co.
Boulevard Dora 4043 Beyrouth
P.O.Box 90449
Jdeideh, 1202 2040
Tel.: 01255211
mailto:Info@Teheni-Hana.
LT Li etuva, Lithuania
Senuku prekybos centras UAB
Jonavos g. 62
44192 Kaunas
Tel.: 0372 12146
Fax: 0372 12165
www.senukai.lt
UAB "AG Service"
R. Kalantos g. 32
5494 Kaunas
Tel.: 070055655
Fax: 037 331 363
mail to: servisas@agservice
www.agservice.lt
Baltic Continent Ltd.
Lukso g.23
09132 Vilnius
Tel.: 052741788
Fax: 05 274 1722
mail to:info@balticcontinent.1t
www.balticcontinent.lt
LU Luxembourg
mail to: serviss@elektronika.lv
www.elektronika.lv
MD Moldova
S.R.L. "Rialto-Studio"
- Lycceba 98
2012 KIINHEB
TeJ./ΦaKc:022 23 81 80
mailto:bosch-md@mail.ru
ME Crna Gora, Montenegro
Elektronika komerc
UI.Slobode 17
mail to: ekobosch. servis@t - com.
MK Macedonia,Makeonna
GORENEC
Jane Sandanski 69 lok.3
1000 Skopje
Tel.: 022 454 600
Mobil: 070 697 463
mail to: gorenec@yahoo.com
MT Ma I t a
Oxford House Ltd.
Notabile Road
Mriehel BKR 14
Tel.: 021 442 334
Fax: 021 488 656
www.oxfordhouse.com.mt
MV Raaj jeyge Jumhooriyyaa
Maledives
Lintel Investments
Ma. Maadheli, Majeedhee Magu
Malé
Tel.: 0331 0742
mailto:mohamed.zuhuree@
I n t e l. com. mv
NL Nederlande, Netherland Russia, Poccn
mail to: bosch-contact center www.bosch-home.com
bshg.com
Onderdelenverkoop:
Tel.: 0884244010
Fax:0884244801
mailto:bosch-onderdelen@bshg.com
www.bosch-home.nl
NO Norge, Norway
mail to: Bosch-Service-NO@bs
www.bosch-home.no
NZ New Zealand
BSH Home Appliances Ltd.
Unit F 2, 4 Orbit Drive
Mairangi Bay
Auckland 0632
Tel.: 0800 245 700*
Fax: 0800 256 535
mail to: after sales. nz@bshg
www.bosch-home.co.nz
- Mo-Fr: 8.30am to 4.00pm
(exclude public holidays)
PL Polska, Pol and
mail to: service.romania@bsht
www.bosch-home.ro
OOO“BCXБbITOBaTExHnKa"
CepBnC OT pOn3BOuNTeTnA
Maŋa Kanyxckay 19/1
119071 MockBa
ten.: 495 737 2961
mailto:mok-kdhl@bshg.com
www.bosch-home.com
SA Kingdom Saudi
Abdul Latif Jameel Electronics
and Airconditioning Co. Ltd.
BOSCH Service centre,
Kilo 5 Old Makkah Road
(Next to Toyota), Jamiah Dist.
P.O.Box 7997
Jeddah 21472
Tel.: 800 244 0043
mailto:kunnumalsp@aj.com
www.aljelectronics.com.sa
SE. com Sverige, Sweden
BSH Home Appliances AB
Landsvagen 32
169 29 Solna
Tel.: 0771 11 22 77 local rate
mail to: Bosch-Service-SE@bs
www.bosch-home.se
SG Sing 新加坡
BSH Home Appliances Pte. Ltd.
BIOK 4012, Ang Mo Kio Avenue 10
01-01 Techplace 1
Singapore 569628
Tel.: 6751 5000*
Fax: 6751 5005
mail to: bshsgp.service@bshq
www.bosch-home.com.sg
- Mo-Fr: 8.30am to 7.00pm, Sa: 8.30am to 5.30pm
(exclude public holidays)
SI Sloveni j a,
BSH Hišni aparati d.o.o.
Litostrojska 48
noo oom ubl jana
Tel.: 015830700
Fax: 01 583 08 89
mail to:info macij e. servis@bshg.com
www.bosch-home.com/si
SK Slovensko, Slovakia
BSH domaci spotbrebice s.r.o.
mail to: opravy@bshg.com
www.bosch-home.com/sk
TR Türkiye, Turkey
BSH Ev Al etleri Sanayi
ve Ticaret A.S.
Fatih Sultan Mehmet Mahallesi
Balkan Caddesi No: 51
34771 Umraniye, Istanbul
Bel.92164446333*
Fax: 0 216 528 9188*
mail to:careline.turkey@bshg.com
www.bosch-home.com/
- Cagli merkezini sabit hatlardan
aramanin bedeli sehir icücretlendirme,
Cep Telefonlarindan isekullanilan
tarifeye gore degijskenlik gostermektedir
TW Taiwan,
我們期盼您不斷的鼓勵與指導,
任何咨询或服務需求,
歡迎洽詢客服專線
BSH Home Appliances Private Limited
台北市內湖區洲子街80號11樓
11F., No.80, Zhouzi St., Nei
Taipei City 11493
Tel.: 0800368888
Fax: 02 2627 9788
mail to: bshtzn-service@bshg.cc
TOB "BCX NObyToBa TexHika"
TeJ.: 044 490 2095
mail to: bsh- service. ua@bshg.cc
Service-General SH.P.K.
Rruga Mag Prishtine-Ferizaj
70000Ferizaj
Tel.: 0290 321 434
Tel.: 0290 330 723
mailto:a_SERVICE@
gama - electronics.com
ha. com
AS Slbjj a, Selbr a BSLKurienonentid 3
BSH Kucilaparati d.o.o.
15th Road Randjespark
Private Bag X36, Randjespark
185 Midrand-Johannesburg
Tel.: 086 002 6724
Fax: 086 617 1780
mail to: appli anceservicez@bsr
www.bosch-home.com/za
Carl - Wery- Straße 34
81739 Munchen, GERMANY

Register your new Bosch now: www.bosch-home.com/welcome
MUM9... OptiMUM

BOSCH
es Instrucciones de uso
pt Instruções de service
el Odyiec xphong
tr Kullanim kilavuzu
IHCtpyKui3ekcnnyatauii
HctpyKnno 3Knnyataa
kk Pnaidanhy HcyKaybIfbl
ar
es Espanol 3
pt Portugues 25
eI EAnviká 46
tr Türkce 69
uk YkpaIHcbka 92
ru Pycckn 114
kk Ka3aKa7a 140
ar 180
Uso conforme a lo prescrit o
Introduciry retirar lasherrami ent as
→ Figura
PRES. INTER. ROT. P/M/A D
LEVEDADA
P/M/A DUR.2s
Montare retirar as ferrari
→ Fig. 田
Bater as claras 4 a 6制动 na
H aTIOOtao an to pToa oEvTaI.
TANEAAADIKOTHAEΦNO EYINHPETHSE NEAATON
SensorControl Plus (A) ile:
www.bosch-home.com/tr
www.bosch-yetkiliservisi.com
a OTrBip nIy BCTaHOBnEHn HacaDOK
5 IpeepnipBOd (XOBtN)
a 3axncha Kpnka npnbOda
6 3aDiHnPiNbOoD (YepeBOHn)
a 3axncha Kpnkna npnboda
7 BiDcik dJa 36epirAHnKa6eHIO a6o 3MOTyBaJIbHN npNCtpii*
8 PaaN dJa Yawi
PanaheIb ynpabNHHa
9 KhonknФункцi
a KhoNKn Bn6opy dyHKui*
b KhoNkn HacTpOIOBaHHa
10 DnCnnne
Uawa
11 Yawa 3 HepkaBIOOci CTani
12 Kpnska
a 3abaHTaKyBaJIbHa rOpNoBnHa
HacaKn
13 BiHnUOK-MiHaJka Profi Flexi
a 3axncha Kpnuka 3 po36JOKyBaJIbHIMN KHONkAMN
14 BiHnUOK-36nBaJIka Profi
a 3axncha Kpnka 3 po36NoKyBaJIbHIMN KHONkAMN
15 Raayok dny 3amiyBaHHa
a 3axncha Kpnka 3 po36NoKyBaJIbHIMN KHONkAMN
- 3aJexKHO BID MoJeJI
Bka3IBKa: 3aJexKHO BiD MoJeNi KyxOHnKOM6aH NocTaHaETbC3 DoJaTKOBm npuJaM.
Ipeed nepshm BnKOpncTaHHaM
Ipeed noaTkom ekcnnyatauio HOBOro npnady Ioro nOtpi6HO NobHicTO po3naKyBaTN, ONUCTNT Ta nepeBipNT.
ybara!
YxOJHOMy pa3i He BBOdbTe B eKcnpnyataciIO nowKOJXeHn npnaI
BnIMt b OCHOBHN 6JOK i BCE npuJa3ynapOBKn Ta 3HIMt b NaKyBaJIbHN MaTepiAn.
Ipebeipte Bci deTani Ha KOMnJIeKTHiCt b i BVdIMi NOsKOJxEHHa.
→ Manhohok A
Ipepei nepuim BnKOpncTaHHaM peteBHO ouNCTbTe Ta BucywiTb yci detani. «UuueHna ma doznao» du. cmop.105
Детаи ta elementnyypaBlinna
KoIbopoBe MapkyBaHHa
PpIBOAn MaOTb pi3Hi KOJbOpn (OOPHn, KOBtni i cepBOHn). Take KOJIbOpOBe mApKyBaHHa MOxHa No6aHTn TAKoX Ha npIaDi. BnKOpNCToBvYe npIaDn TINbKn Ha npIBOdi TORO JcAMOrO KOJbOpy.
Ppmbodn
→ MaJIHOHOK A
PpnaI o6nlaHaHn 3 piHmN npBOdaMn.
TolOBHn npNBoD, YOpHn (4)
Дя ВИКОРиСТангЯ HabaOK abo npnilaДя 3 KUTOBIM peDyKTopOM.
Ipeepn npBOD, KOBTN (5)
Дя ВИКОПИСТАнHAпиlaДЯ i3 KOВТИМ 3'EDHyBaJIbHIM eJemeHTOM.
3aDiHn npBOD, YepBOHn (6)
MoBy iHTeppeCy MoXHa 3MiHHTN.
«Napaempu» duε. cmop. 98
KhonknФункиi
MaJIHOHOK A
Ipnad Ma3-5 KhoNOK cyHKci (3aJexHo BID MoDeNi), 3a DonOMoROIO kKnx MOxHa BnBcapuN hAcTPOOBATN CneuiabHi DoaTkoBi cyHKci Ta aBTOMaTuHHi nporpaMn.
KhoNkn
YCTaHOBJIeHHa Ta BnMaHHa
HacaDok
→ MaJIHOHOK E
Ha 3axnchii Kpnu 3napaIe po36noKyBaJIbHi KHOKN, Aki CnpoUyOTb Ioro BnMaHH.
BCTaBHeHn3HaPdA: BCTaBTe 3HaPdIaB rOIOBn npuBoD do fikcaii. 3axncha KpUka 3akpNbAc npuBOd.
BnMaHn3HaJa:HaTNCiTB 06uDbI pO3bNOyBaJIbHi KHOKN, 106 3BiNbHHTN 3HaJaBnBd BID qikcaui. BnMiMb HacaKy 3 npVBoda.
3MOTyBaIbHn npncTpi
→ MaJIHOHOK A
3aIeXHO BiD MoIeI: npIpaI
yCTaTKOBAHO ABTOMaTHHm IpNCtPOEM
ДЯ 3MOTyBaHHKa6eJIIO.OdHM pyXOM
BNTaRHiTb Ka6eJIb Ha 6aXaHv DOBXnHy
(MaKcIMMym 125 cm)i NOBIbHO BiDnyCtITb
Ioro; Ka6eJIb 3aΦiKcyETbcra.
3MeHWeHHa DOBXnHn Ka6eIIO: 3JeRka NotarHITb 3a Ka6eJIb i DaIte NOMy 3MOtATnCSHa 6axKaHy DOBXnHy. Notim 3HOBy 3JeRka NotarHITb 3a Ka6eJIb i NOBInbHo BiDnycITb NOrO; Ka6eJIb 3aΦikCyETbcra.
Baxnbo: He hamaraTecs 3aTobxatn Ka6eIb y npnilad. RaKIO ka6eIb 3acTpRHe, Ioro cIId NOBHicTIO BNTaRHyTN, a NotIM DaTN NOMy 3MOTaTNCr.
Bicik JIy 36epirHnHa6eJIO
→ MaJIHOHOK A
3aIexHo BID MoJei: npuJa yCTaTKoBaHO BiDcIKOM dIy 36epirAHn Ka6eJIIO. DOBKINHy Ka6eJIIO XNVBHeHH MOxHa peryJIIOBaTn, BITraIOUH K6eJIb a60 3aHTOBXUOHy Ioro Ha3aI.
3an06ixhi cncTeMn
Ipnla yctaTkoBaHO 3anobixHHmN CnCTemAmn. «3anobixhiciucmemu» duBcmop.107
Pidrotobka
YcTaHOBIb OCHOBnI 6JOK Ha pIBHi, YnCTi i CTiKi NOBepxHi.
BntraHnItbKa6eJbHa nOtpi6Hy doBXnHy.
HaTnCiTb KONky po36JOKyBaHHra Ta NiHIMiTb BiKNDHm KPOHHTeH Do ynopy.
YcTaHOBIb KpUkCy Ha rOJOBHn nPnBOd TaK, 3aBaHTaKyBaIbHa rOpIOBnHa 6yNa cnpMaOBaHa Bnepei.
YcTaHOBIb YaUy. Pn UbOMy 3BepTaIte yBaIy Ha Na3N Ha OCHOBHOMy 6NoCi.
3aφikcyte yawy,do ynpoy nobepHyBwI II npOTn rOINHHKOBOI cTpiIKN.CHOBHN6JOK rOTOBN Do daJIbWoTOMKOpNCtAHH.
Baxnbo: He 3cyBaTe npnaHa po6oH niOBepxHi, ockIbKn ue MOKe nOpuHTn cyHKcIOHyBaHHa Bar.ДЯ nepemiiueHn npnada y Ioro cnid niD himatn.
Параметри
HaTnCiHb KhoNky po36JokyBaHHa Ta 3aΦikCyIte BiKuHn KPOHHTeH, onyCTnBUn NOrO.
BCTaBTe wTeNceIbHy BnIKy B po3eTKy. PpnaYbIMKHeHo.
Ha dncnnei 3'ABNTbcra iHdkacia
Bka3IBka: kUO 3 npuaom He BnKoHyBaTu JODHx DiynpoOBx NeBHoro Yacy, Dncnne NobiNbHO 3rache NpeeDe B pexm OciKyBaHHa. HatncHi6ydb-ky KhoNkY, 06 Ha dncnne 3HObY 3'BAuNaCb IHnKaCiA
OndohocHoHaTnCHiTb i BtpmMyTe KhoKnTa+,Uo6BnKnKaTu MeHIO HAcTPOIOBaHHra.
3HOBy BiDnycTiB KHONK Ta+
Bn6ip napametpa
KoXHe KOpOTke HaTnCHeHHa KHONK No cep3i BnKnKaTmHe HabeJeH HxKpe npaMeTpN.
MOBA
MoBa iHTepcpeuCy.
- 3BYK
TuyHCTb 3ByKy-HaCTpoIOeTbcB B6ctyneHIB,BiD6e33ByuHocTi Do ryHoro 3ByKy.
- RCKPABICTb
RcKpaBicTB DnCnpe - HAcTPOEbC8 B 6 CTyneHIB, BiD TEMHO DO CBITNoro.
- OД.ВИМIP. (у модених 3 Baramn)
OuHnue BmipIOBaHHa Macn — rpaMn (r) a6o 0yHTn (p.).
3MiHeHHa Ta 36epeXeHHa
BCTaHOBJIeHIX 3HaueHb
napametpiB
3MiHHTN NOTOUHe BCTaHOBJIeHe 3HaueHHa MoXHa 3a DOnOMOrOIO KhoIKN + a6o -.
OndohocHoHaTnchItbIBTPmmyTe KhoKn 念 i+,DOKnHaIncnnei HeHaIOBROHe3'ABNTbcraNOBIDOMJehHRA 《36EPEXKEHO》.
3HOBy BiDnyciTb KHONK Ta + 3MiHeHi 3NaueHHa 36epexeHo.
PnKla: Bn6ip MOBn
→ DnB. TaKoX KopoTky iHcTpkyiIO
OndHouacHOHaTnCHiTBiBTPmMyTe KhoNkTa+,IO6 BnKnKaTu MeHIO HAcTPOOBaHHJ.
HaTnCKaIte KhoNky LOKH He 3'ABuTbcr MeHIO Bn6Opy MOBN.
MOBA
YKPAIHcbKA
HaTnCKaIte KHOKy + a6o -, DOKn Ha dncJIeI He 3'YBNTbc8 6axKaHa MOBa.
OndohacnoHaTnCHiTbIBTPmmyTe KhoKn 念 i+,DOKnHaDnCnPeI HeHaIOBROHe3'ABNTbcNOBIDOMJEnHNAHALUTYBAHH36EPEXKEHO
HACTPOIOBA
3BEPEXKEHO
Ha nucnnei 3'BAntbca MeHIO Bn6opy MOBn.
3HOBy BiIpyCTITb KHONKn Ta +. Bn6paHy MOBy 36pejKeHo.
HaTnCHiTb i BTPmUyIte Ondy 3 KHOJOK Bn6Opy FynKuij ( / / ) ,doKn Ha dncnnei He 3'BAHTbcra IHnKaiaj 0till. PnpnaD roTOBni Do ekcnnyataui.
Bka3iBa: y pa3i BBIMKHeHHЯ npHnay NOBOPOTHM nepemikaem MeHIO Opa3y 3aKpNBaeTbcra.
BnKOpncTaHn86e3doaTkoBnx yHKci
He6e3neKa TpaBMyBaHHa!
BCTABJnTe wTencelbHy BnKy B po3eTKy, NIISe kIoo BnKoHaHO Bci Oepaui 3 NiDrTOBKn npnaDy do po6OTn.
-Пдчасpo6OTnpnlaуkaTeROpuH0 3a6bOpHeHO 3acOByBaTn pyKn B yaShy a6o 3aBaHTaKyBaIbHy roPNOBHy.
- IpaIouTe TiIbKn 3i BCTaHOBNeHOIO KpNtkoIO.
- PpeepeMeiueHnM BiKnDHorokpoHtTeHa a6o nepe3amHoHacaOk oob'3KOBO doyeKaITeCnOBHOI 3yNHNKn npNbOda.
- 3 mipkyBaHb 6e3neKn o6OB'3KOBO BCTaHOBJIOnTe 3axnChi KpnKn Ha nepeDiHi i 3aHi npBODi.
BaxjnuBo!
-ПiДroTyIe OCHOBnI 6JOK,ЯK OINcAHO Bpo3diI «ПiDrToBka».
-Прилад He BMnkaeTbcSЯкsoЧашу BCTaHOBJIeHO HEnpaBnIbHO.
Bka3iBka:ФyHKciA«UAC»aBTOMaTnUHO 3anyckaTebCn iD qac KOKHOro BVKOpNCTaHH,pe6cTpye TpNBanicTb nepepo6kn I noka3ye II Ha dinCnnei.
→PraMaJIIOHKB
- 3aIexHo BiToro, IIO noTpi6Ho nepepObHTn, Bn6epiTB BiHnQK-MiuaKny Profi Flexi, BiHnQK-36uBaKny Profi a6o raQkДЯ 3amiiyBaHH «HaCaku» duB. cmop.97. BCTaBTe 3napdA B rOJOBHn npVBOD do φikcaui. 3axncHa Kpnka 3akpnae npVBOD.
- 3aBaHTaXTe iHrpeDiEHTn dIy nepepo6Kn B aAuy.
- HaTnCHiB KONky poKyBaHHa Ta 3aΦikCyIe BiKnIhN KPOHHTeH, ONyCTNBuN Ioro.
He6e3neKa TpaBMyBaHHa!
Obepexno onyckaTe BiKnDnH KpoHsTeH! BybTe yBaXHi, 06 He dOnycTHTn 3aueMneHH naIbciB nn pyk.
YnpaBlinn npnilaIom
- BCTaBTe wTencelbHy BNlky B pO3eTKy. Ha dncnpei 3'ABNTbcr iHdNkaucia
- Поверніть посякayу baxkahe положеня (→ «Реком endobana wubokicmb» dué. cmop. 97). Ha dinçnéi 3'ЯВЯТься indикаг «UAC» i yac nepepo6kn, ilo Bxe MInHyB, y xBnInHax i cekyHdax.
Bka3IBka: KOJIu Yac DoCrae 60 XBUNH, BiO6paKaIOTBcR I ROINH: 1.01:30
- Npepeo6nayTe iHrpEiEcHTn,doKn He 6ynde doCraHyTo 6axaHn pe3yIbTaT.
- Поверніть поемпау у пооженя O. Дочекайся зушикни ривoda. Виимітьштencьну влку 3poэтkn.
-
HataHcHtB KhoNky po36JokyBaHHra Ta niHimItb BiKnHn KpoHwTeH Do ynpy.
-
3BilbHItb YaIy, nobepHyBUni 3a roDHHNKOBIO CTpiIKOIO. 3HiIMt b YaIy.
- HaTnChiIb o6nDi pO36nOKyBaIbHi KHOII, 3BInbHHTN 3HaPraJa BID φikcauii. BnMiTb Hacadky 3 npVbOda.
- 3HIMITb KpNShKy 3 npNBOda.
- Odpa3y nicJЯ BnKOpNCtAHHЯ OUncTbTe Bci DeTani. «UuueHHma doaJraD» duB. cmop. 105
Bka3iBka:HaBeHeHi TyT npKnaI 3aCTocyBaHHraDOnOMOxyTb Bam KpaIe No3HaHOMTNcra 3 HOBM npnIaOM Ta Ioro cyHKiaMNI.
«Peuenmu» dué. cmop. 105
IodabahnhiinrpeidicHTiB
BnKOpncTaHHaJIyNbHnKa uacy n TaMepa
Ppnaad Maec liuNbHK yacy n taMep. MoxNBI cyHKci onncaHO Hxue.
Функци «UAC»
IIndkaizy nepepo6kn, 0 MnHyB (cTaHapTHe 3NaueHHnaPametpa).
FyHKiJ 己 AC> aBTOMaTHUHO 3aNyCKaETbcra Ha noaTKy nepepo6kn npOdykTIB.
Bka3iBkn
- Μοδ yBIMKHyTN φyHKciIO «TAYMEP» nID qac nepepo6KN, KOPOTKOACHO HATNCiTB KONKy
- 06 ohnyntn Tpnbnicb niqac nepepo6kn, Kopotkoyacho HATNCHTb KHONky - BiHOBNTbcra iHdkaiai
Функця «ТаймЕР»
YcTaHOBJIeHHa6XaHoi TpINBaNocTi. KOnn 3aHaHn nepioJ uacy MInHe, npOlyHae 3ByKOBn CnHaJI npepeo6ka npuHnHTbcra. LIO cyHKciIO moXHa BnKOpNCTOBvBaTn He IINIwe dIy nepepo6Kn (Je, HApNKnaD, DJa KOHTPOII O Yacy npIrOTyBaHNr a6o BVtPmMyBaHHa npOdyKTiB).
→PraMaJIIOHKBI
1.ПiIroTuYTe npuJa.3aBaHTaXTe iHrpeDiEHTn.
2. BCTaBTe wTencelbHy BNlky B po3eTKy. Ha dinCnPei 3'ABNTbcr iHdNkaucia
3. HataNCHiB KhoNky .Ha dncnpei 3'ABNTbcI INdkaizr 00:00
4. YctaHObITb 6axaHy TpNBaIicTb nepepo6Kn 3a DOonomoTOKHOKN + a60 -. JaKIO BTPMByBaN BiNObiHy KHOKNy HAtNCHYTOU, 3HaueHnR 3MiHIOBaTMyTbCRA WBNIDHe. YcTaHOBJeHa TpNBaIicTb nepepo6Kn 36epiraetbcr BnpOIOBx Prn6n3Ho 5 XBNINH.
5. Поверпь поемикayубжане пложеня.
6. Ha dincnnei 3'YBnTbCra 3aNnKoBA TpuBaJIcTB i NOUHeTbcS 3BOpOTnB ViDnIK.
- Koln 3aIIuKOBn nepiod yacy MHe, npolyhae 3ByKOBn cHrHaI npnilad aBTOMaTNo HpInHHtB nepepo6ky. Ha dinCnJIeI 3'ABHTbcra NobiDomneHna «3ABEPU. TAIMEP».
Bka3iBa: nVB. iHΦopMaζio npo BCTaHOBJIeHHN 3ByKOBOrO cnHaJy «Inapempu» duε. cmop. 98 - Ha dincnnei 3'ЯВиься NOBIOMJIeHnRA «NOBEPH. INPEMINKAч Y INoIOK. O»
- ПовернiTь поемкayу пооженя O. Ha dincпел 3'ЯВТбся Идикагia
- BnIMtB wTeNceIbHy BNlky 3 po3eTKn.
- Переторуз ВИКОпсТанг amФункц«ТАМЕР»Завершени.
- Odpa3y nicJn BnKOpNCtAHnOuNCTbTe Bci Detani. «UuueHnma doaJrdo» duE. cmop. 105
Bka3iBkn
-ДоаВаиTe iHrpeDiEHTN,JIuWe KOnn Bn6paHo nporpamy,a Baru Noka3yIOTb «0「a6o «0.00Φ.»»(3anExKHO BiToro,якОДиNi CBtAHOBNeHo)a6o HaДиCnJIeI 3'ЯВиJaCry IHdNkaCiJg «IDODAITE IHrP.>
- Biö6paXeHy 3aJIuIbKOBy TpNBaIicTb y 6yDb-ЯКи MOpEHT MoXHa 3MiHHTn 3a DonOMOrO KHOKN + a6o -.
- 3yynHnTn a6o nepe3aynctnTaMep, DbiCi KOpOTKo HATNCHTbKHONKy (npnaI npOobxntbpo60ty).
- Κοδ πepeBaTn πepeo6ky, nobepHiTb nepemkauy noIoxKeHHa O. 3aIIuKOBa TpNBaNICTb 36epiraetbcra, i nicna NOBTOPHoro BBIMKHeHHa npnlaDy 3BOPOTHm BiNik npoOBJxyeTbcra.
- Ⅲo6 BmKHyTu TaMep, HATnCHiTb i BTPmMyTe KhONky .Ha DnCnPei 3'ABITbcA iHdNkauia 00.3HOB aKTNBBOBaHO cyHKciIO «UAC»
BnKOpncTaNHa TaMepa He dJa nepepo6kn npoDyKTiB
HaTnchItb KhONky .Ha dncnnei 3'ABNTbcra iHdNkaia 00:00.
YcTaHOBiTb 6aXaHy TpNBaJIicTb nepepo6kn 3a dONOMOroKHOKN + a6o -.
■ 3anyctnt TaMep, DbiKoPOTKO HATNCIb KONky
Ha nncnnei 3'ABntbca 3aunuKOBa TpuBanictb i noUHeTbcra 3BOpOTnBidnIK.
KoII 3aIaHn nepioJ yacy MInHe, npolyhae 3BykoBn cIrHaI. Ha IucnJIeI 3'ABiTbCra NOiDomJeHHA «3ABEPU. TAIMEP>.
Bka3iBkn
- 3yynHnTu a6o nepe3anyctntu TaMep, DbiK KOpOTko HaTNCHTb KHONKy
-Якwo noatn nepepo6ky npodyktib np3anyuheomy TaHmepi, npnilad npaIOBATmE,doKN He 3aBepuHTbcra 3BOPOTHNI BIDNIK Yacy,a NOTIM aBTOMaTNUHO npnnHHITb nepepo6ky.
BnKopncTaHnЯФyHKcii Sensor Control Plus
Ppnilad (3aIexHo BiD MoJIi) MaE yHKciIO aBTOMaTHUHO BnKoHaHHn nporpaM - SensorControl Plus. DaTnuK KoHTPOHOTb nepepo6ky iHRpeDiENTIB i aBTOMaTHUHO BmNKaOTb npilad nicJa DOcraHHeHHa 3aHaOH KOHCnCTeHcii. FyHKciA SensorControl Plus dae 3mory aBTOMaTHUHO BnKOHyBaTN Bka3aHI HxKHe nporpaMn.
- BEPLIKN
AByOMaTnUHe npNroTyBaHHa 36ntnx BepKIB.
-Яech.ынOK
ABTomatnue 36nBaHHReuHx 6iJkIB.
-ДПИЖ.TICTO
A B T O M A T N U H E p n u r o T y B a H N H d p i k d k o B O R O T i c T a.
Bn6ip nporpamn
HaTnchItb KhONky Ha dnCnIeii 3'ABNTbcra iHnkaiaiE《BEPLKU》.
HaTnChiTb KHONky a6o + / - .OdHa 3a OndHO 3'YBJIaTmUyTbcR Bka3aHi HIXKYe nporpaMn.
3a3daleridhe BCTaHOBJIeHHMaCn
→PraMaJIIOHKBI
- HataChiTb KhoNky i 6iNbwe He yinaIte npnlaD. Pid Yac KaIbpyBaHna Ha dncnnei no Yep3i BnBOJrbcra OkpeMi pncK: «- - - - - » (TapyBaHHa).
- Ha dinnei 3'YBnTbc8 iHnkaiaj «0» a6o «0.00 φ.» (3aJexHo BiD toro, kI oINHni BCtahOBNeHO). Baru rotobi do BnKOpncTaHHa.
- Ha dincnnei 3'ABNTbcra iHnkaiae 100r a6o 0.20 . (3anexhoBid toro, koi OdnHni BCTaHObNeHo).
-
YctaHObitb 6aKaHy Macy 3a DOonomoTOKHOKN + a6o - (50-3000 r/0,10-6,00 φ.).
-
3aBaHTaxTe iHrpeiEHTN. 3aJIuKoBA kIbKicTb BiO6paKaTaUMeTbc8 Ha dncnIe, HapnKnaD «65 r>.
6.Почнаночи 3i 3haueHЯ «40「ЛунathIME NOBTOPOBAHи 3ByKOBn CnHaN.ⅢO MeHwa 3aIIuWkoBa KINbKicTb,TOWBnDWe JyHaTmE 3ByKOBn CnHaN.Bka3IBKa:ДИВ.iHΦopMaciIO npoBCTaHOBJIeHHa 3ByKOBOr OcHnAly→ «Inapaempu» duB. cmop.98 - Koln 6ynde Docryto 3haeHHRA (0r) (3aHaHy KInbKicTb 3aBaHTaKeHo), 3ByKObN CnHaJ npnnHHTbcra.
8.у pa3i nepeBnueHnna 3aHaHOI KINbKOCTI 3ByKOBn CnHaJI NyHaTUME HenepePBHO. Bka3IBKa: nVB. iNΦopMaciIO npo BCTaHOBnEHHra 3ByKOBOrO CnHaJy «Inapempu» duB. cmop.98 HaMipHa Maca no3HauaeTbcra 3HaKOM mInyc. JaKIo 3aBaHTaxKeHo Ha 25 r 6IlbSe, HIX notpi6Ho, Ha DnCnPei BiO6paXaetbcra iHdNkaJia «-25r
■ПиберітьНадишковi iHrpedieHTn a6oHaTnCHiTb i BTPmUyIte Ondy3 KHOJOKBn6OpyФuHKcii(/ /),ДOKNHaДиCпeI He 3'ЯВtbcr iHДИKaцiya
BukopncTaHn npnaIaI
Дя Baшоу Кхонно KOMбаиha npOnHyETbC p3HomaHIThe npJaIdЯ, 3a DoNOMOIO YKORO MOXHa 3NaUHO po3wnpItn o6craf yHKci. 3aJexHo BiM OMeJI neBHe npJaIaIg BxODntb DO KOMNKeTyr NOCTaBKn. PpJaIaIy, JKe He BXODNTb DO KOMNKeTyr NOCTaBKn, MOXHa npD6aTN B mara3Inhax a6o cepBicHi clyx6i. «Ppuadə» du. cmop. 111
PiIroTOBka Do BnKOpncTaHHn npJaA
3aTeXHo BiD npnlaIaIy niIroTOBky OCHOB-Horo 6Ioka cnID BnKOHyBaTn NO-pi3HOMy.
YcTaHOBiTb OCHOBnH 6JOK Ha pIBHi, YnCTi i CTiKIn NOBepxHi.
BntraHnItbKa6eJbHa nOtpi6Hy doBXnHy.
3aIeXHO BiD npuJaIra NiIroTuYTe OCHOBHn 6JOK, k 3O6paKeHo Ha MaJIIOHKax.
→ MaJIHOHOK M
- NiIroTOBka Do BnKOpNCtAHHn HacaDOK.
2.ПiIroTOBka Do BnKOpncTaHn npuJaHa Na YOpHOMy npuBoDi 3 KytOBm peDyKTopom i npuJa, lo BCTaHOBJIHoTbcra 3amictb yawi.
3.ПIDROTOBka Do BnKOpncTaHHa npnaDHa YepBOHOMy npnbOdi, HapnknaIb6JeHepa a6o 6araToocyHKciOHaJIbHoro noDi6HIOBaYa.
4.ПIDROTOBka Do BnKOpNCTaHNa Ha XOBtOMy npnaDi npnaDja 6e3 BnIyCKHO O TBOPy DnI npOdyKTIB, HapnKnaD 6araToOpyHKcioHaNbHoro 6JeHdepa a6o npeca dnnuTpycoBnx. - IiIroTOBka Do BnKOpNCTaHnHa JXOBtOMy npNbOdi npNJad3 BnNyCKHm OTBOPom IJa npOdyKTIB, HAnpNKlaHnACKpi3HOi WaTkIBHuCi.
BaxjlnBo!
3BepTaIe yBary Ha XOBTe, YepBOHe Ta OOpHe MapkyBaHHa HnPnBOi Ta npnPaDi. «KoIbopooe MapkyBaHHa? duE. cmop. 95
■ПивODи,ио He BnKOpNCTOByIOTbCra, 3aBXKn 3akpNbaiTe 3axnCHmN KpnUkamn.
Oncycix noaIbuxiIMMOxHa 3HaHTN B OKpemim IHctpyKui IJa BiIDNOBIDHOro npua.
YnueHnTaDorJa
Ipnlai i BnKOpNCTOBvBaHi Hacadkn Heo6XiHNO rpyHTOBHO uNCTHTN nicJr KOxHOrO BnKOpNCtAHn → ManIOH
He6e3neka BpaXeHHa eJeKtpnHm cTpymOM!
- PpeD ouHueHHaM BnMaTte uTeNceIbHy BNkY 3 pO3eTKN.
Hikon He 3aHypoTe OCHOBn6Jok npnaDy B pIDnHa He MnTe B nocydomnHi MaunHi.
He BnKOpncToBvIe npOoUncHnK.
ybara!
He BnKOpncTObuYte 3acO6n dJa OunueHHa, 0o MICTaTb CnIPT.
He BnKOpncToBvIte roCTpi, KInHuaCTi a6o MeTaJIeBi IpeDMeTn.
He BnKOpncToBvIte JoxpCTKi rAnHipKn a6o 3acobn dny OOnuEHHa.
He 3aTnckaTe nIacTMacoBi eIemEnTH B NocydomNHi MaunHi, OckiNbKn Ze MoKe npu3BecTu Do ix 6e3noBopOTHOI DeOpMaui!
OuHHeHH OCHOBHO 6Ioka
3HIMITb 3axnchy KpuuKy 3 npuBOda.
IpoTpiB OCHOBHn 6nok npnnaTy Ta 3axnchy KpnuKy npNBOda M'koBOBONOIO rAnHipKOIO Ta daJe IM BNCOXHyTN.
OuHnHnHaWi Ta Hacadok
YuShy, KpNshky Ta HacaKn CnId MNTu M'koIO raHcyIPO a6o ry6KOIO, 3MOyeHO B LyKHOMy MNHOMy po3uHi. Ix TAKOx MOxHa MNTu B NocydomnHi MaunHi.
■ДаиTe BCIM DeTaIaM BnCOxHyTn.
PeCNTs
36nti Bepskn
3axnct BiD yBIMKHeHHa
Ppnilad BMnkaTbcra TijbKn ToDi, KOIN
yauy BCTaHOBNeHO 3aKCOBaHO,
Ppnila43 KytOBm peDyKTOPOM
pNkpinJeHO DO rONOBHOro npNBODa, a
BIDKNHNI KPOHHTeH 3aKCOBAHO B
HNXHBOMY NOJKeHHI.
Блokувань NOВТOPHOROBBIMKHeHH
Y pa3i npuyehn eJektponocaHn npnaad 3aannaaetbca BBIMKHeHM, aJe DBnHy nicra zboRo He 3anyckaetbcra. Iy NOBTOphoro BBIMKHeHH CNoayTKy nobephitb nepemkauch y noJoxeHH O, a notim ue pa3 yBIMKHITb npnaad.
3axnct BiD nepeBaHTaXeHHa
CnCTema 3axnty BiD nepeBaHTaxeHHaBtOMaTNUHO BIMKae DBNrHyN iD YacBnKOpNCtAHH. PnUHa zbOro MoKeNoJraTN B OndHouachi Nepepo6ci 3aHaToBeJIKOI KINbKOcTi npOdyKTIB.
3aNo6ixHn npncTpiBiDKnDHoro KpOHTeHa
BidknHn KPOHTeH He MoXHa
po36NOKyBaTn NepemictNTn, KaIO Ha
3aHbOMy npIBoDi BCTaHOBJeHO npIJaDJa.
YtNiI3aCiy
Ley npila MapkipobAoHO 3riHNO
noJoxeH eBponecboi DnpeKtBu
2012/19/EU cTocOBHo eJeKtpoHHx
Ta eJeKtpopnlaIb, 6o 6yIy y
BnKOpncTaHHi (waste electrical and
electronic equipment - WEEE).
DnpeKtBOIO Bn3HaayoTBcM MoJNBOCTi, kI E DiChmU y Mexax
EbponecboKO rO3y, 6oDo
npnHraTTa Ha3ad Ta yTuJI3aii
6yBuxy BnKOpncTaHHi npJaID.
Ppo akTyaNbHI MoJNBOcTI dJa
BnDaJIeHNa MoJHa dI3HaTnC
B CneuaI3OBAHOMy Mara3HHi.
YMOBN rapaHTii
CTOCOBHO zboRo npnnaDy diIOb yMOBn rapaHTii, 6o6 6yIn Ony6NIkOBaHI hAsmKOMnTeHTHM npedCTabHnTbOM B KpaIHi, B JaIK Bn npnd6aII npnilad. Bn MoKeTe B 6yd-akn Yac OdepXaTI y MBO n rapaHTiY cneiaI3OBAHOMy mara3HHi, B kKomBy npnd6aII npnilad, a6o 6e3nocepEnhbo B hawomy npedCTabHnTbi y Bac B kpaIHi. yMOBn rapaHTi Dn HimeuHN Ta aDpeCn Bn 3HaJdTe Ha octAHIX YOTnpboxctopihkax uei 6poUpyn. Kpim TOrO, yMOBn rapaHTi po3Miuehi Takox i B lHTepHeti 3a 3a3NaHeo aDpecoio. IJa KopNCtBuHnraPapntiHmN pocnyramn Heo6xIDHO B 6yd-akOMy BNnAky noka3aTN KBNTaHciIO npo onlatay.
MoxnBi 3miH.
YcynHnHeHecnpaBHOCTeH
Y Ta6nqx HnKyHe HaBeJeHO cnocO6n camocTiHoro BnpiJHnA npo6nem a6o yCyHeHHa HeCnpaBnOCTe. KUo ycHyTu HeCnpaBHicTb B OnPcaHn Cnoci6 He BdaETbcra, 3BepHiTbcra Do cepBicHoI cnyk6n.
Baxkhble npabnla texhkn 6e3oNaCHOCTN
BHNMaTeIbHO O3HaKOMbTeScb C INHCTpyKcnei NO 3KcNlyaTaCn, pni pa6ote pyKOBoDCTByuTEcB yka3aHnAIM DaHHoIN HNCTpyKcnn I COXpaHnIe ee dJaJIbHeJWeO nCNoJIb3OBaHnI! IpePaabAar np6Op dpYrIM NIIaAM, ppiIaRaIte daHHyU INHCTpyKcNIO. IpOn3BOAnTeJB He HecET OTBeTCTBeHHOCTn 3a NOBpeJxDeHnA, BO3HKnIe B pe3yIbTaTe HECo6JIooDeHnA Yka3aHn IIO npABInbHOMy npImeHnIO np6Opa. 3TOT np6Op MOrTy INCNoJIb3OBaTB NIIca C ORpaHHueHHbIMN cN3NuCeKNM, CeHCOPHbIMN IINI YMCTBeHHbIMN CNOco6HoCTaMn IINI He IMeIoUIMM DOCTaTOUHOrO ONbITa IINI 3HaHn, ecNI OHn HaxoJATcN IOd pRNCmotpom IINI pPoIJN COOTBeTCTByOUsN IHCTpyKTaX OTHOCIneIbHO 6e3ONaChoro POJIb3OBaHnI np6OpOM I YacHIIN DnECE6, KaKyIO OnaCHocTb HeCet B ce6e np6Op. DeTei HeJIb3A NOdnyckatb K np6Opuy INhUpy NITaHn, IM HeJIb3A POJIb3OBaTbcN np6OpOM. DeTAm 3aPpeUeHO INrpaTb C np6OpOM. PpOn3BOAnIb OuncTKy IN TexO6cJyXJVAHnE DeTAM He pa3pe7aeTcY.
Onachoctb nopaxeHn TOKOM N BO3ropaHn!
■Пибор можно пдкючать только К ол ektpocetи поременloro TOKa уеpe3 yctahOBlenHyIO corlacho пpeДпсаняm po3eTKy C 3a3emJIeHnEM. Y6eIITecb, чTO cnCTema 3a3emJIeHnЯ B DOMaшнeJ эл ektpoPBOdKe yCTaHOBJIeHa corlaCHO пpeДпсанЯM.
■При подклочени рпбopa и erо ekслuyaразци co6л�адаite DaHHbIe, пИВеDEньie Ha ФирмehHоТаБИчke. ПользOBaTbcЯ рпбором pa3peшaeTcra TOLbKO пи OTCyTCTBnN NOBpeждени Ka6eЯ n рпбopa.Bo n36жанe BO3нКHOBEня ONaCHO nCITyaци peMOHT pnp6opa, HanpIMep, 3aMeHy NOBpeждEHORO cTeBOrO shHupa, pa3peшaeTcra PpON3BOdNTb TOLbKO NaWei cepBnCHo CnyKbe.
Kateropnueckn 3anpeaetcnoKnHouatb np60p K TaMepam IIN po3ETkAM C nCTaHcNOHHbIM ynpabIeHHeM. Bcerda cneiTe 3a np60pOM BO Bpemr ero pa60tbl!
■ Hn B Koem Cnyuae He cTaBbTe npnbop Ha rOpayne NOBepxHocTn, Hanpnmep, Ha 3JeKtpoPnHTy, nnn B6n3n Hnx. CeTeBOJ ka6eJIb He doJIkeH COpnKacatbcra C rOpaymN qactaMn nIi npoxOJTb Ype3 octpbie rpaHn.
■ Hn B Koem cIyae He norgykaTb OCHOBHO 6JOK B BOdy n He Mblb B NocydomoeuHOn MaunHe. He nCnoJIb3yIte napOBbie OuncntTeJI. He nCnoJIb3yIte np6Op BnaJxHbIMn pyKaMn.
■После кадуо примен,在пOTсYТВипсмOTpa,пeredсборко,pa36opkoи nIN OUHcTKo,a TaKke B cIyuaeHeNCnPaBHOCTN 683aTeJIbHO OTcoEHNHTe np6Op OT cETN.
He ncknoueHa onachoctb TpaBMnpoBaHna!
■ПердзаменгпрнадлжностeилдОЛНHTьныx DeТал,在KOTOPbie BOВРЕмя pa6OTbI пИВODЯТСВДВИЖЕHne, ПпборdoJIXEN6bITb OTKJIQUEHN OTCOeДИHEn OT cETN.
■При onусяни NOBOPOTHOrO KPOHSTeHa He BBOdIte pykn i NaIbUcI B KOpNyc,ЧTOБi He npOn3OswNo IX 3aUeMJIeHnY. He N3MeHЯITE NOLOXKeHne NOBOPOTHO KPOHSTeHa, noka npIn6op BKJIIOUeH.
■ПользунТecь Нацдамп.TOLбко РИВСТАБLEHNOсMEсNTeЛьНОй Уаш,СУCTАновлесног КрblшКОИЗAUHTHBIMKрblшКAMINprIBODa!ПрипOLьЗOBани HацдамИ.YSTAHOBNTeСMEcTNTeЛьную Уаш,КрblшКИЗAUHTHBIEКрblшКИprIBODa CORlaCHOHHCTpyKcNn!
■ Bo Bpemra pa6oTbI np6opara Hn B KOem cnyae He onyckaTe pykn I naIbIcB CMEcNTeJIbHyIO qa7y IIN B 3arpy3OuHbI CTBOJ. He BCTaBnIte KaKHe-Jn6o PpeMeTbI (HaNPmep, pa3JIbBaTeJIb-HyIO loKky) B CMEcNTeJIbHyIO qa7y IIN B 3arpy3OuHbI CTBOJ. BepeRrTe pyKn, BOIocbl, PpeMeTbI ODeXdbI IN dpyrHe PpeMeTbI OT KOHTaKTa C BpaUaIOUIMNCs DeTaIaMn. NocLe BbIKNoyeHn IprNBoD eSe DBrJxETcRA HeKOToPoe Bpemr. Doxntecb NoHOn OCTaHOBKn pInBODa.
Kateropnueckn 3anpeaetcnaonb3oBaTb HacaKn n npHaJneXHOCTN INo 2 npHaadJeXHOCTOn OndHOBpeMeHNO. PnncnoJb3OBAHn npHaadJeXHOCTe pyKOBOdCTByTEcb DaHHOu INHCTpyKcNeI NO 3KcPnyataun N dpyrMM uHCTpyKcUAM, BXODAUM B KOMnJIeKT NocTabKN.
■Прии Испосьовни рпнадлжноcte собл�д Te CBetHyo Маркіровку на ппнадлжноctax и ппвODE.
Onachoctb ydywbj!
He no3BOJrB DeTm nIgpaTb C yNaKOBOHbIM MaTePnaJOM.
Bнманг!
■ PekomeHnyetc HN B KOem cIyuae He OCTaBnTb np6op BKJIIOUeHHbIM dOJIbSe, YEM 3TO Heo6XoDnMo dIЯ nepepa6OTKn npOdyKToB. He BKJIIOuAaTe np6Op BXOJocTyI.
Pa6oay noBepxHocTb doJnxHa 6bITb yDObHo dOCTynHO, BnaorctoKoI, npOuHO, POBHO, cyXoN IOCTaTOUHO 60JbWo, YTO6bl He npOxCxOAnIO NOBpeJdeHn OT 6pb3r, n MoXHO 6blNO 6ecnPpeTCTBeHHo pa6oTaTb.
BaxHo!
Iocne kaxdoTo npimHeHn IJn NocJe dInTeJbHO HeNCNoJb3OBaHn O6aTeJbHO TuaTeJbHO OunchTe npi6Op.
«Ouucmka u yxod» cm. cmp. 128
OT BCERO cepdca no3dpabBnaem Bac c nokynkO HOBOR npnbopa hnpmbi Bosch. DonoHnTeIbHyIO HHOpMauno haewe npodyKUn Bbl HaJeTe Ha hawecTpaHnue B INTepHeTe.
www.bosch-home.com
MblnoctoHno pa6oTaem HaYCOBepWeHCTBOBaHNEm Haux np6OpOB.103Tomy BO3MOxHO,TO OTDeJIbHbIe cyHKuIN OTnUaOTcR OT ONscAHNBA daHHo INCTpyKcIN.B nOdoNbIX cnyaX npOBepbTe HAnuHe HOBoB Bercn 3Toi INCTpyKcIN HaHaewm INHTepHET-caTe.
Ipn noJb3OBaHn daHHo nHCTpyKuNei no 3KcNPyatauue ee cTpaHnCbI O6NoXkM MoXHO pa3BepHyTb. Ta m npUBeDeHbI pncyHKn C 6yKBaMn HOMepAMn, Ha KOToPbI daeTcA CcblInKa B TEKCTe nHCTpyKuN (Ha npImep,
→PraD pncyHkoB 3).
OrnaBneHne
IcnoJb3ObaHnE no Ha3HaueHnIO 114
Baxkhble npabuIa texHnKu
6e3oNaChocTn 114
KoMnIeKTHbI O63Op 117
IpeepnepBbIM nCNoJIb3OBAHHeM 118
3JIeMeHbI ynpaBneHn n akceccyapbl ...118
IoproTOBka 120
POn3nHacTpoiKn 121
IprimeHeHne 6e3doONHnTeJIbHbIX yHKu
2 Khonka pa36KInpoBaHnA
3 NOBOPOTbI KPOHtTeiH
4 InaBbI npNBoD (YeepHbI)
a OTBepCTne IJy yCTaHOBKn HacaIOK
5 Ipeepn npBOd (XeJIbI)
a 3aunTHna KpbIwka npnBa
6 3aHn npBOd (KpaCHbI)
a 3aunTHaN KpbIuKa npNbOda
7 OtceK JIy XpaHeHna Ka6eN IIM mExaHN3M JIy HAMOTKN Ka6eN*
8 YrJy6eHnA dIa CmecnteJbHOu Yaun
Panaelb ynpabneHn
9 ΦyHKUHOHaJIbHbIe KhoIKN
a KhoNkBbI6opa yHKn*
b KhoNk yCTaHOBKn
10 Dusnnei
CmecnteJbHa YaSha
11 CmecnteHna YaHa n3 HepXkaBeIOuei cTaJIu
12 Kpbioka
a 3arpy3oHbI CTBOJ
Hacadkn
13 PpoeccnoHaBbIyHnBepcaIbHbI BeHcIK dJIpepeMeuBaHnA
a 3aHTbIKoJauHOK C OTCOeINHITeNbHBIMKHOKNAMN
14 PpocecnoHaJIbHbI BeHcNk IJI B36nBaHHa
a 3auntbI KOLnauOK C OTCOeINHITeNbHBIMKHOKNAMN
15 MecnIbHa HaCaJaKa
a 3aUHTbI KOLNaOc C OTCOeINHITeJIbHBIMKHOKNKaMn
* B 3aBNCIMOCTN OT MOdEJIIN
Yka3aHne. B 3aBnCmOCTN OT MOdJI KyXOHbI KOM6aIH NOCTaBJAreTC
B KOMPJIeKTe C DOONHHTeNbHbIMN npHaJNeXHOCTaMn.
IpeepHn npNbOd, XeJrTbI (5)
Дя npинадлжнocTei C XeJTbIM COeINHHTeIbHbIM 3JIeMeHTOM.
3aHnI npNBOd, KpaCHbI (6)
OnyckaTe NOBOPOTbI KPOHHTeH, co6JHOaOCTOpOXHoCTb! CJeIte 3a TeM, UTo6bl He npUeMTb pyKn IIN NaIbCuI.
PoiIb3OBAHne npI6Opom
- BCTaBbTe BnIky B po3eTKy. Ha dncnnee NOBNTcRd
- YctaHOBnTe NOBOpOTbI nepeKnHouaTeJIb Ha HxhBi pexIM ( PekomeHaauu no ycmaHOBe cKOpocMu>cm.cmp.119).Ha dncnnee nOaBntcA BPEM> nOTo6pa3nTc npoWeJUe BpeMa nepe6pa60TKB MmHyTaX N CeKyHdax.
Yka3aHHe: no nCTeueHn 60 MNHyT DOnONHInTeJbHo OTo6paKaIOTc TaCbI: 1:01:30
- NpepebaTbIBaHrpeJeHtBi Do nolyuHnJKeJaEMoPe3yNbTaTa.
- YcTaHOBnTe NOBOpOTbI NepeKJIHO- ChaTeNb B NoIOJKeHne O. DoXdITecb NoHOBn npNBOda. N3BNeKInTe BNkY n3 pO3eTKn.
- HaxMMTe Ha KhoNky pa36JIOKIpOBaHn I NOHMTe IOBOPOTbI KPOHHTeH Do ynpa.
- NOBEPHNTe CMECNTeJIbHyIO yaIy no yacobOu CTpeKN TAK, YTO6bl ee MOXHO 6blIO NOJHrTb. N3BNeKNTe CMECNTeJIbHyIO YaIy.
- HaxMMTe o6eOTcoeHNHTeJIbHbIe KHOIIKn IJIa OCBO6OxJdEHnHaHacAdKn. BbIHbTe HacAdKy n3 npNBoDa.
- CHIMMTE KpbIUKy c npNBOda.
- OuICTe BCE qactn np6opa cpa3y nocne nCNoB3OBAHnA. «Oucmka u yxod» cm. cmp. 128
Yka3aHHe. BocnoIb3yItec b TaKKe NOKa3aHHbIMN npImepamn npImeHEnn, YTO6bl JyUWe 03HaKOMNTbcr C npN6Opom n erO cyHKUraMn. «PeueenmbI» CM. cmp.128
Добавлие ИнгелянTOB
B npoceccpepepa60TK moXHO TaKKe 1doabnTb DOnONHnTeJbHbIe INHpeDneHTbl.
PncyHok
OcToPOxHO 3aRpy3nTe DOnONHnTeJIbHbIe INHrpeDnEHTbl Ype3 3arpy3oUHbI CTBOJ B KpbIuKe.
He nckIIOueHa onaChocTb TpaBMnpoBaHna!
Bo Bpempa60tbI np60pa HN B KOe Cnyae He onyckaIte pykn I naIbCuB CMeCnTeNbHyU YaSy NIN B 3aRpy3OuHbI CTBOJ. He BCTabJIaIte KaKne-Jn6o PpeDMeTbI (HaPnPmep, pa3nBaTeNbHyIO loKky) B CMeCnTeNbHyU YaSy NIN B 3aRpy3OuHbI CTBOJ.
→ PяД рисунков H
- YTO6bI 3aRpy3nTb 60nbLoe KOJIueCTBO npOdyKTOB nIN INHpeDIneHTOB, yCTaHOBNTe NOBOPOTbI INpeKeJIIOUaTeJIb B NpIoXeHne O. Doxdntecb NOnHOJ OCTaHOBKn pNBOda.
- HaxMMTe Ha KhoNky pa36IoknpoBaHnY I NOdHMMe IOBOPOTbI KPOHHTeH Do ynpa.
- 3arpy3nTe INHpeDneHTbI HENOCpeDCTBeHHO B CMEcHTeJIbHyU YaShy. HaxMnte Ha KHOkKy pa36NOKIpOBaHnY nOnyCTnTe NOBOPOTbI KPOHHTeIN BHn3 Do QnkCaun. Ha DnCnnee NpABNTcAptm. PpOdoJXnTe nepepa60Tky INHpeDneHTOB.
B3BeuBaHne HrpeDneHTOB
→ PraD pncyHkoB K
- POnrToOBbTe K pa6Ote OCHOBHoi 6JIOK.
- BcTaBbTe BnIky B po3eTKy. Ha dinCnnee NOABNTcA ctW.
- Haxmte KhoNky n 6oIbwe He npKacntecb K npnbopy. B npouecce kaIb6pOBKn Ha dinCnlee NocJeIOBATEJbHO NOBnIOTcR OTdEhbIe JINHIN: (-- -- - - - - - - - - - - - - - - - - - - - - - - - - - - - - - - - - - - - - - - - - - - - - - - - - - - - - - - - -
- Ha nucnnee noBntcra 0 Hnn 0.00 . (B 3aBncnmoCTn OT yCTaHOBKn). Becbl roTOBbl K pa6Ote.
- 3arpy3nte INHpeDneHTbl. Becbl noka3bIBaIOT Bec.
-
NaHnTe nepepaOToKy nIIN noIroTOBbTe DOIOJIHNTeJIbHbIe INHPeDIneHTbl.
-
Haxmte KhoNky n 60nbhe He npKacaiTecb K np6bopy. Ha dncnnee noBNTcR 0 nn 0.00 . (B 3aBNCIMOCtN OT yCTaHOBKn). BecbI roTOBbl K pa6ote.
- Добавы Te yka3aHHbIM o6pa30M BCE hyxHbIe INHpeDneHTbl N B3BeCbTe IX.
3aTeM BbINOJIHnTe nepepa60Ky B3BeUeHNbIX INHrpeIeHToB. «PpumHeHue 6e3doONHumeIbHbIX cyHKuU» CM. cmp. 121
Yka3aHne. EcIn B npocece nepepa6OTkn npOyKTOB HaxKaTb KHOkky ,Ha DnCpIee NOBNTcA «ПЯ BECOB MALINHA CTON»
IpeiBapnteHna yCTaHOBka Beca
→ PnypncyHkoB L
- Haxmnte KhoNky n 6oNbwe He npikacaiTecb K npnbopy. B npocece KaIbpoBkn Ha dncnnee nocJeDoBaTeIbHO IOABJrOTcR OTdJIbHbIe IINHN: (---> (Tapa).
- Ha nucnnee noBNTcRA «0r» nIIN «0.00Φ.» (B 3aBNCIMOCTH OYCTaHOBKN). BeCbI rOToBbIK pa6Ote.
- HaДиспjee NOЯВИТСЯ «100r» ИПИ «0.20Ф.»(ВЗавИСМОCTNOT yCTaHOBKN)
- KhoNkoI + nnn - yCTaHOBnTe HxKhbl Bec (50-3000 r / 0.10-6.00 fYHTOB).
- 3arpy3nte nHrpeDnEHTbI. Ha dinCnlee NOBNTcA HeIOCTaOuUe e KOINueCTBO, HAnpIMep, 65
- HauHna c 40r pa3daetcnoBTOPOUncs3ByKOBo CNHaJI. YemMeHbSe OCTaBWeecs KOINueCTBO,TeM6bICTpee 3ByuNT CNHaJI. Ka3aHne.YCTaHOBka 3ByKOBOrO cnHana IOnuuu Hacmpouku CM. cmp.121
-
Пи «0» (yctaHOBJIeHHoe KOJIuYeCTBO 3arpyKeHo) 3ByKOBoI CNrHaJI npeKpaTITcI.
-
Пи певышени установленьог Количесва сгнал 3ВучNT Heпрьвно. Указанne. Yстановka 3Вуково сгнана → «Поцшьн Начpoшku» CM. cmp.121 Донинельнь BEC OбОзнЧаETСА OTРИТЕЛБНIM 3HAKOM.ЕСИ КоличесTO певышени Ha 25 r, Диспей NOКAJESТ «-25 r».
■ИЗВЛЕКЛТЕЧЕЗМЕРНОЗагруженьhoe KOЛичEcTBOПpoДуКТOBИЛДерЖNTe HAXKaToI OndHyИЗФУнKЦЮHAJIbHbIX KHOJOK(/)ДОпЯВЛe"HЯHaДиСПЛee
IodroTOBka K nCNoJIb3OBaHnHO npHaJNeXHoCTeI
B 3aBnCmOCTn OT npHaJTeJXHocTn Tpe6yETc pa3JIuHna NOIROTBKa OCHOBHoro 6loka.
YCTaHOBNTe OCHOBHO6IOK Ha POBHyO, HCTyIO IN PPOUYIO NOBepxHOCtB.
BbITaHnTe ceTeBOI Ka6eJIb Ha HyXHyIO dnnHy.
I OndroTOBbTe OCHOBHO 6JOK, KaK NOKa3aHo Ha pucyHke.
PncyHok M
- NpOriToBka K INcNoJIb3OBaHnIO HaCaIOnK.
- IopIroTOBka K nCNoJIb3OBAHnIO npHaJIeXHOCTeN, NOkJIIOUaEMbIX K rIaNBOHMy npINBOdy UepHOrO UBeTa C yrIIOBoI nepeDaueN, IN pINHaIeXHOCTeN, YcTaHaBnIBaEMbIX BMECTO CMEcNTJIbHOJ YaII.
ru OuncKa n yxoD
- Подготовka К ИСПОЛБЗОВАнЮ npинадлесхноcte, NOДКЛHQUaEMbIX K npивODY кpacHOrO CBeta, HAnpIMep, 6JIeHdepa Ип MHorOФункUHOHaNbHOrO n3MeJbUHTeJI.
- IopIroTOBka K nCNoJIb3OBAHnIO npHaIeJXHOCTe, NOkJIIOUaEMbIX K npINBOy JKeIToTOrO ZBeTa, 6e3 OTBepCTna DIA BByNcKa IPOdYKTOB, HAnpIMep, MHOroQyHKUHOHaJIbHOrO 6JeHdepa INn COKOBbIXMajKN.
- ПОДROTOВКА K ИСПОЛБ3OBAHИО npINHaIJIeXHOCTeN, NOДКЛHQUaEMbIX K npINBOy JKeIToR O CBeTa, C OTBepCTnEm ДЯ BblNycka IpoDyKTOB, HApPIMep, yHNBepCaJIbHoI pe3Kn.
BaxkHo
CobioaTe KeIbIe, KpaChbIe nnuHepbIe MeTKn Ha npBObe n npHaadJeHocTax. «LbeMa MapkuoBa» CM. cmp. 118
HeuCNoJIb3yEmbIe npNBOJbIO 68a3aTeJIbHO doJXHbI 6bITb 3aKpbITbI 3aUHTHBIMn KpbIUsKaMn.
Bce daIbHeIWe onepaunn onncanbIB OTdeIbHOn IHCTpyKUnn nO 3KcNpyaTaunn DnA COOTBeTCTByUoSei npHaJdJeXHoCTn.
OuInCTka n yXoD
Iocne kaxdoTo npimHeHn np6Op nCNoJb30BaHHbIe HacaKn DOJXHbI 6bITbTtateJIbHO OHISeHbl. PncyHOK N
OnachocTb nopaxeHnA TOKOM!
- IpepeoHcTKoN 3BNeKeNTe BnKy N3 po3eTKN.
- Hn B KOem cIyuae He norgpykaite OCHOBHO6IOK B XIKOCTN I He MOITE erO B NOCyDOMOEuHOM MaUNHe.
He nCnoNb3yIe napOBBie ouHCTnTeIN.
BHIMaHne!
He nCnoIb3yIte moUuIe cpeIcTBA, coedePkaune aANKoROnb uIN cnInrT.
He nCnoIb3yIte MeTaJIInUeCKne I octpOKoHeuHbIe IpeDMetbl, a TaKKe IpeDMetbl C OCTpbIMKpOMkAMN.
He npimehnTe rpy6yIO TkaHb nIa6pa3nBhle yNCTAune cpeDCTBa.
He 3axmamte nlaactmaccoBbIe DeTaIN B NocydomoeyHOn MaUNHe, TaK KaK Bo3MOxHa INx HeycTpaHIMaJeΦopMaun!
OuHCTka OCHOBHOro 6JOKa
CHIMMTe 3aunTHbIe KpbIuKn npNBOIOB.
■Пртпг Te OCHOBHO 6JOK n 3aunTHbIe KpbIuKn npNBOO BmRKO BnaXHOn TKaHbIO N BBICyUInTe INX.
OuNTka CMeCNTeHNoYaHn HacaIok
OuHCTNTe CMEcHTeJIbHyU qaUy, KpbIuKy HacadKNMbIbHbIM paCTBOPOM MRAKONTKaHbIO INN r6KOJ N60 BBMOITe INX B NOcyDOMoeHOn MaUNHe.
■ДаиTe BBICOXHyTb BCeM YaCTaM.
PeçentbI
B36ntbIe cJNBKN
-200-1500r

CnBKn nepepa6aTbIBaTb 12do4MNHyTBpeXmE7,B 3ABNCIMOCTNOTKONUeCTBaN CBOICTB CNBOKCNOMOUIIO PPOeCCNOHaJIbHOro BEHNKAДЯB36NBaHЯ.
Yka3aHne. B moTeJx c cnCTeMoI SensorControl Plus nCnoJIb3yIte aBtomaTnueckyo nporpaMMy. «POnb3O8aHue cucmemou SensorControl Plus» cm. cmp. 124
RnHbIe 6eJKN
- 2-12 6eJkoB

■БeДиВ36иВаТьВ TeUeHne
4-6 MNHyT BpeXnme 7 C NOMOuIIO npocceccnoHaJIbHOro BeHcNka IJIaB36nBaHnI.
Yka3aHne. B moTeJx c cnCTeMoI SensorControl Plus nCnoJIb3yIte aBtomaTnueckyo nporpaMMy. «Ponb3o8aHuecucmemou SensorControl Plus» cm.cmp.124
БИСКВИTHOE TECTO OCHOBноpeCNT
3a
3-4 cT. n. ropayeB BoDbl
150rcaxapa

ru PeuentbI
1 naketika BaHnIbHoro caxapa
150mykn
- 50 r kpaXmana
- ecnnoTpe6yETc, hemhoro nekapckoro npooka
HrpeDneHTbI (Kpome Mykn KpaXmaJa) B36nBaTb B TeueHne npMepHo 4-6 MInHyT B peKIme 7 c NOMOuIO npocceCNOHaJIbHOro BeHUnKa dJRA B36nBaHnA Do o6pa3OBaHnA neHbl.
YcTaHOBnTB NOBOPOTbI nepeKIOUaTeIb Ha peKIM 1 IN B TeueHne npImepHO 12-1 MInHyTbI NODMeuBaTb NO CTOnOBoJ IOXKe IpoCeRHHyO MyKy IN KpaxMaI.
MaKcMaJIbHOe KOINueCTBO: 2-KpaTHoe KOINueCTBO IPOdYKTOB N3 OCHOBHOro peIeNTa
Cdo6Hoe TecTo OchoBno pecnt
- 3-4Яица
- 200-250 r caxapa
1 1eTka coJIi
1 NaKeTnK BaHnIbHo rO caXapa nIu ZeDpa c ½ JIMMOHa
-200-250 r cInBouHOro MaCna nIIMaprapnHa (KOMHaTHOH TempepaTypbI) - 500 r mykn
1 naketnk nekapcKOro npoWka
150MmMOJoka
Bce INHrpEeHEnTbI NepemeuBaTb CnMOUbIO npocecnoHaJIbHOro yHIN-BepcaJIbHOro BeHUnKa dIra nepemeuBAHNBA TceHHe NpIMepHO 12 MInHyTbIBpeKIMe 2,3aTeM B TeueHne pPImepHO 2-3 MNHyT B peKIMe 7.
MaKcMaJIbHoe KOINueCTBO: 21 / 2 -KpaTHoe KOINueCTBO IPOdYKTOB IN3 OCHOBHOpeCNTa
Necouhoe Tecto
OchOBHO peeNT
125 r cInBouHOro Macna (KOMHaTHOH TeMnepaTpybl)
100-125 r caxapa
1aHc0
1 1eTka coJIIN
- HEMHORO JIMMOHHO ueepbI INBaHINbHORO caxapa

- 250 r mykn
- ecnnoTpe6yeTc, hemhoro nekapckoro npooka
Bce INHrpEneHTbI nepeMeuBaTb c NOMOJIbIO npoPecCNOHaJIbHO rHIN-BepcaJIbHO BeHcNka dIa nepeMeuBAHNr B TeueHne pImepHO 12 MInHyTbIB peXIMe 2, a 3aTeM B TeueHne npimepHO 2-3 MNHyT B peXIMe 6.
При И спюльзовани 6олee 500 r mykn:
HrpeIeHTbI 3aMeuINBaTb C NOMOJIbIO MecnJIbHOH HacaIKN B TeueHne npMepHO 12 MNHyTbIB peKIMe 1, 3aTeM B TeueHne npMepHO 3-4 MNHyT B peKIMe 3.
MakcmaIbHOe KOJnueCTBO: 4-KpaTHoe KOJInuEeCTBO IPOdYKTOB IN3 OCHOBHOpeuNTa
He nckJIIOUeHa onaCHOCTb TpaBMnPOBaHnI
Ipeed perylnpoBaHnem n3BleKeNTe BnKny n3 p03ETKn.
BHHMaHHe!
PerynpoBaHne HacaDOK CNeDyET BbINONHtB MaIbIMn Waaramn. NOBOPoTHbI KPOHHTeH DOJXeH NOJIHOCTbIO ONYCKaTBcR, PnN 3TOM HacaIK He DoJXHbI 3aCTpeBaTb Ha HIXHeN 6OKOBoN NOBepXHOCTN CMEcNTeNbHOu YaSiN. ONTImaJIbHbI 3a3Op MExdy HacaKAMN cMEcNTeNbHOu YaWe npBeH 3 MM.
→ Pnyd pncyHkoB
■ПиВCTaBJIeHOMпpoфecCNoHaJIbHOM BeHcIkeДЯВ3бИBaHnI npOBepbTe nIoXKeHne HacaIKN.
HaxMMTe Ha KhoNky pa36JIOKInPOBaHnI NpOHNMTe NOBOPOTbI KPOHHTeIN Do ynpa.
■ПидерхиTe pyКон HаcaДу.Ослбte KOHTprAйKy, NOВЕрHyB ee BINьЧаТыМ raeчнblm KlnIOvOM (Ha 10 MM) no Yacobov CTpeЛke.
BpaueHnem HacaKnyCTaHOBNTepacctOraHne Do CmecTeJbHoYaShN(1 noHbI o6OpOT COoTBcTcByeTpereynpOBKe NO BbICote Ha 1 MM).
BpaueHne npotNB yacobO CTpeKn: pacCToRHe Do CmecHTeNbHOaShn CTaHOBNTc MeHbWe.
BpaueHne no yacoboi cTeJIke: pacCToHnE do CmecHTeIbHOu aUIN CTaHOBNTc 6OJIbSe.
HaXMMTe Ha KHOKNy pa36JIOKINPOBaHnI N onyCTNTe NOBOPOTbI KPOHHTeIH BHN3 DoΦNKcaUH.
■Пюверьтete3a3OpHacaKn.ОпиMaJIbHbI 3a3OpMeJxHy HacaKamNcMecnteJbHoYaWei paBeH 3MM.EcnnnoTpe6yEtca,OTperyIInpyTe 3a3Op.
Iocne ONTImaJIbHOJ yCTaHOBKn 3a3opa HaxMnte Ha KONky pa36JokpOBAHnI OTBeINTE Ha3aN IOBOPTHbI KPOHHTeH.
■ПидерхиTe pykoH hacaIky.3aTЯнITE KOHTprAky, NOBepHyB ee BnIbYaTbIM raeyHbIM KJIIOyOM (Ha 10 MM) npOTNB YacOBoi CTpeJKN.
CnCTembl 6e3oNaCHOCTN
БлOKировka BкЛюченя
Pn6op BkIouaeteTc TOnbKO npu yCIOBnU, UTO CMEcNTeJIbHa YaSha yCTaHOBJeHa N NOBepHyTa Do QnkCaun, INN ecIn Ha TlAbHOM PnIBOde 3akpePHeHa PnHaJNeXHoCTb C yrLoBOI nepeJaueH, IN ECNI NOBOPOTbIM KPOHHTeIN 3aΦNKcIpOBaH B HIXHM NOLOKeHN.
Kpyrnocytouhbl Telefoh cnjx6bI nopekkn*: 8 (800) 200-29-61
OΦnuaJIbHbI caHT B INHTepHeTe: www.bosch-home.ru
Adepea ABTOPH03OBAHbIX cepBnCHbIX ueHTPOB, a TAKKc BcHΦopMaunr No cepBnCHOMy 6cnyXnBaHHIO doCTynHa Ha oHnAnbHom caIte B INTEpHETe: www.bosch-home.ru.
Pekomehdyem Bam nonb3oBaTcR yCnyramn TOnkO ABTopH3OBAHHbIX cepBnchbIX cHTPOB.
OpHnHaIbHbIe akceccyapbI h cpeCTBa no yxody IJIa 6blTOBIOI TexHHKn Bosch Bbi MoXeTe npHO6peCTn B haWeM pHMeHHOM HHTepHemar3HHe: www.bosch-home.ru/store.C ycNoBHmI 3aka3, onaIbI h doctABKn BBI moXeTe oHaKoMnTbcra Ha caTe. TaKe opHnHaIbHbIe akceccyapbI h cpeCTBa no yxody BBI moXeTe npHO6peCTn B aTobTI0BAOBHbIbxCepBBCHbIX eCPBCHbIX eHTpAX.
1.ИЗдениe
- Moqenb
IyHKtI 1-2 3aONJIHIOCToTbKO Bcnyae,ecn 3TN DaHHble He coepXaTcB DOKymeHTax O nokynke n3dennn (kaccobbl uek n/nn TOBapHbI ueK,TOBAPHa HknaHa).
3.Даннгд�погмuaи pacnOCTpaHЯETcHa MaIbte 6bIToBbe npIbObI ToBapHoro 3haka Bosch:KoepBaEApKn, KoepMaunHbI, KoepMOnIKN, BeCbI, KyXHbIe KOM6aHbI, MHKcebpI, PbIncocbl, pe3kn, TocTebpI, yTOrH, fpeHbI, paCpPmHTeIN IJI BOLOC, 3JKeTPOuayHINK, COKOBbIXMaIKN, IN3MeIb-UTeIN, 6BeHdpeB, rAnDInbHbIe DoCKN, BaHNouHbIe BeCbI, yTOrH, napOBoBte cTaHcUN, rAnDInbHbIe DoCKN i aHaONrHbIIe Hm IN3deHnI.

- YBaXaembIe DAmbl IrocnoDa, coo6uaem Bam, yTo noTBePjXeHHe COOTBcTBnHaWeI npOdyKun O83aTeNbHbIM Tpe6oBaHHM B COOTBcTBN C 3aOKHOaTeNbCTBOM OcyueCTBnEaTcBΦpme O83aTeNbHO CEtnuKaUN N DeKnapnpoBaHHCOOTBcTBN.
HΦopMaunHO6OBa3aTeBbHomIOQTBePckEHN COOTBeTcBnHaunx pnpobov, B TOM cncne daHbIe O HOMpe ceptnfNkata cootBetCTBn (deKnapaunn o cooTBeTcBn) n cpoke er (ee) dJeCTBn Bbl MoKeTe NOnyUHT b OOO «BCX BblTOBbIe Pnpobbl.
Haapanyukn npon3bointcno kontpome TaPCHaHOnbHON KOpnpauN 5CX XaycrepeTe rM6X, aDpec 7a6-KBapTnpbl: 81739 MHOxen, Kapn-Bepn UTPacce 34, FepmaHn (BSH Hausgerate GmbH, Carl-Wery-Str. 34, 81739 Munchen, Germany).
OraHnaaue, BbIOHnHoueIyHKunu HIOCTPAHHORHO3rTOBtEny, yONHOMOeHNH3rTOBtEnm Ha OCHOBAHN DOrOBopa C HIM, ABnREcO OOO «BCX BbTObBe Ipn6Opby, 198515, CaKrt-PTepeByr, r. Pteprof, yN. Kapna CmHehca, d.l nT. A, fnnn an B r. MockBa, 119071, yn. Mana Kanyckan, d.l, Tenefoh (495) 737-2777, faKc (495) 737-2798.
- 06a3teBbIe CBeHnO TeXHuecknx XapaKTePncTnKax np6opa npBedeHb Ha TnOBo Ta6nUKe np6opa nnHa erO 3TNKeTke H/nn B coPiBOIDtBelHOJ DOkymeHTaun.
6. AkceccyapbI n cpeidCTBa no yxody
IJa 63ynpueHOrO yHKnUHOBoAH BaWe I TeXnHnN yXoDa 3a He npOnBDOInTeB peKOMeHyET nCnONb3oBaTb TOnbKO opRnHnAbHbIe AkccecCyapB I CpeCTBa NO xOyD. OpRnHaHbIbe akccecCyapB pa3paobTaHbI npOn3BOInTeMe, OH NHeaIbHO NoxOxJr HmEHO Ta Baeero np6opA. OprnHaHbIbe akccecCyapB I CpeCTBa NO xOyD COOTBeTCTBYOT CaMbI BbICOKM Tpe6OBaHHM KaueCTBa TobAPHRo 3haka Bosch, OH npoxOar 3aBOckne HcNbItaHnI DIA ObecneHeHH MaKcHMaNbHO HadeKHOCTB Pa6Ote. IO BcEM BonPocam, CBraaHHbIM c AkccecCyapAMn I CpeCTBaNo yOxyd I Na BaWe 6bIToBO TeXnHKn, Bbl MoKeTe o6paTbCBA B ABTOPi03oBaHHbIe cepBNCbIe ceHTpbI INI NO TenefoHcy Cnyk6bl NoepKKn.
7. rapaHTHn3rTOBNTeTn
Hnma nroTOBHTneIpeoCTabIeT Na npno6peTeHHb BamN B PoccnckOe Deepaunn 6bIToBO np6op rapaTHIO COOTBeTBM C deNCTyBuHm 3KohOnaTeJIbCTBOM PΦ cpoKOM 1 Ro. Ha npno6peTeHHb B Pecny6nke BeLanpyc 6bITOBn K OTOpOM npn NOKynke 6blB bIaHrnapaHTnHb TaioH, dEChTByOt rapaHTnHbie YCNoBN, he npotINBopeaune 3aKoHOaTeNbCTBy Pecny6nkn BeLanpyCb.
8. Bhimahne! Baxna HOpmaa nI na notpe6nte ne
Danb npn6op npedha3aueH nIcnoB3oBaHnN KcHIOHTbHO nIuHbIX, CEmeHbIX, DOMaunHX N HbIX HyKd, He CBra3aHbIX C Ocy ictbnneHem npednpHHMaTeNbckO DeTbeHbOCTn IIO6 yOBnetBOpEHm 6bTObbNOTpebOCTe B OFnce npedpnnrhy, ypeXekHeHHn oprahnaun. NcnoB3oBaHne np6oba B ceJnx, OTnUHbIX OT BbiyeKa3aHHbIX, ABnRETC HApweHem npabHn HndNekauen 3kCnnyataun np6opa.
Hannne fhpmeHH 3abOcko TnIOBO Ta6nKHa np6ope 08aTeBHO! Ioxaanycta, y6eIntecb E ee HauuHn coxpaHnte ee Ha np6ope BteueHe Bcero Cpoka cnK6bI np6opa. YdaneHHe Ta6nKBeet K o6e3nueHIO np6opa n BO3MOXbIM HapUweHnM npaBn erO 3kCnpyatau.
H3roBntb He Hecet OTBeTBeHHocb 3a HeOCTaTKn B np6ope, ecn cepBcHOn cnyKb6o ByetdoKa3aHO, TTO OH BO3HKnI NOcne nepeDaun np6opa Notp6eBtJIIO BCNECTBHe HApUeHNm I npabN nONb3OBaHN, TpaHcnpTIPBOKN, XpaHEHN, DeICTBN TpeBHX NII, HenpeODINMOI cnbl (noXapa, npipOAnOH KaataCtpoBHy t.n.). NonaHaHN b8IObIX HaceKOMbIX n Tpb3yHOB, BO3JeCTBnHbIX NOCTOpOHNX DaTOpOB, a Takke BCNECTBHe CyueCTeHHbIX HApUeHNm TexHccknx TpeBOAHN, OROBOpEHbIX B HhCTpyKUnn IO KcNpyaTuCN, B TOM YHCNE HeCTabNbHbOCTn napameTpOB 3JekrPoCeTI, yCTaHOBNeHHbx FOCT 32144-2013.
Ia nOHTBepKDeHn DaTb NOKyNk Pnp6opa npra rapaTHnHOM pemOHte Hn PpeDbAeHn HhIx PpeYCMOTpeHHx 3aKOHm Tpe6oBaHn y6eHtEnbHO npocm Bac coXpaHrTa DOKymEtbl O NOKynke (ueK, KBTaHcHIO, HhIbe DOKymEtbl, NOdTBePjDaUOuNe daTy n MeTo nOKynKn).
C6bIeHJnpeKoMeHauzainuNkOepKaaunxC8BnHCTpyKcnnnIO KcPnaTaunn (npaBnnaX npb3oBaHn), NpOKeTn36eKaTbpO6nEM B EKcPnyataunnpbopa n er06cbNykaBauHH.
HeicnpabHbIy3bl np6obOB B rapaHTnHbI nepno6 6ecnnaTHo peMOHTpyOTc HIN 3aMeHryOTc HOBbIMn. PeueHne Bonpoca o ceneco6pa3HOCTN X3aMeHbI Hn peMOHTa ocTaeTc 3a cnkybAmc cepBnca.
9.Инфомрази O cepBuce
B nepno nd nocne hcteueHHraapHTHoro cpoka haaHa Cnyj6a CepBnca, a taKke MaCTepCKHe HauHX npTHePOB BcERda rTOOBbl npEINOxHTb Bam cBOH ycynr. Cnncok adpecoB yOnHNOUHOeHHbIX 3rTOBOTeIeM NyHKTOB aBTOP3OBAHORo cepBnCHORO oCbNyXHBaHn HaxoHNTca Ha odHnAHLbHom caite b INtPrehete: www.bosch-home.ru.
Cpok cnykbbl Manbix 6bIb0x npnbopOB (Kpome KkyoONbIX KOM6aHOB n bInecocOB) coCTabnre 2 rOda. CpOK cnYk6bl KxyOHbIX KOM6aHOB n bInecocOB coCTabnre 5 net. CpOK cnYk6bl H3dennn HcHcNtce Tc DaTBI erO NOKynK, NIO npH HeBO3MOXHOCTn ee onpeDeneHH, c DaTI b3r0TOBNEHn H3dennn HaHeceHHo HA TINOBYIO Tabnuky H3dennn B COOTBeTCTBnco CTaHApTOM H3r0TOBNTen DaTaN3r0TOBNEHn MapKnpyeTcFD FMM, rge TT - roh n3r0TOBNEHn Mmuc 1920, a MM - mecau n3r0TOBNEHn. dna onpeDeneHHra Oda n3r0TOBNEHn npnbopa Heo6xoJHMo K 1920 npNbabntb uHNO TT.
*BecnnaTbI KpyrnoCyTouHbTeNefoH dA 3BOHkoB Ha TeppntOpn PΦ.
B34C065N1-1M00 03/2017
Информаця O 6ыITOBOI TexHnke, прOn3BeDeEHNoI NOД KOHTpOJeM KOHucePHa BCX XaycrepeTe Гm6X, Kapn-Bepn-Шт. 34, 81739 MioHxen, Германь в COOTBeTCTBnC Tpe6OBaHnMaN ΦeDEpaJIbHOrO 3akOHa PФ OT 23 HOЯбрЯ 2009 r. № 261-Φ3, 3akOHoJaTeJIbCTBa O TEXHnuecKOM peRyJInpOBAHnN I 3akOHoJaTeJIbCTBa O 3aUnTe npab notpe6nteJe PocsnckoI ΦeDEpaUIN
Ipoodykun: cokOBbIXmajkn, Mnkcepbl, 6neHdepbI, pe3Kn, Kxohhbie kombaunbl, Kofoemolkn, Mrcopy6kn, n3MeIbHTeTI
ToBapHbI 3HaK: Bosch
BHIMAHIE!AccopTImeHT npOdykunn NoCToHNO OOBnRETCa. TexHueckne XapakTePncTkn NpOdykun, B TOM UcCNE 3hepeo300fKeTbNBOCTN, NOCToHH COBepHcHCTBYOTCn. PpOdykunpeynoPpOceHypNoTBePckDeHnCOOTBeCTBnCOrIacHO DeNCTByIOUeMy 3aKOHDAteNBCTBv. INΦOPMaUNo OEKBmNTax AOKyAunhX CEPTHPKaTOB COOTBEcTBn H cPCKAX Nx DeNCTBn, AKTyAunHyIO NHΦOpMAUNo KIACCE n XapaKTePncTnKax 3Hepeo300fKeTbNBOCTN pOdykun, INΦOpMaUNo 6 aKtyAunHOM ACCoTImeTe npOdykun MOnHO NOnyHTb y opraH3aUN, BbINHOJauuSe IyHKUnn IHOCTaHNO 130ToBntEn Ha TepnnTopnn Pocckoi Φedepaunn OOO «5CX 5bITobbe PnpOpby», 198515, CaHKT-PTepe6pyr, r. Tepeprof, yn. Kapna CmmeHca, d.l ntt. A, fuiuua n B. MockBa, 119071, yn. Mana KaYxckra, d.15, tenefoh (495) 737-2777, paKc (495) 737-2798.
KoMaHnO OOC 《BCX BbITOBIe Pnp6pbl》,198515,CaHT-PTepe6pyr,r. Tepeprof,yn.Kapna CmmeHca,d.1 nT.A,ФинmaB Br.MockBa,119071,yN.MaJIa KaNyckKaJ,d.15,TeNEΦoH(495)737-2777,ΦaKc(495)737-2798 ocUeCTBnEET CBOIO DeTeNBHOCTB NO IOITBePKeHHIO COOTBETCTBnIPOyKUnO T mEHNI pOM3BOIDTEHNA H eINHO TaMOKeHHO TePPITOPM IN EbpAaNCKORO KOHOOMHHeCKORO COIO3A B COOTBECTBmC DeIECTBYOHIMNTEXMHueCKHMn PERlAmEHtAMn,B KaueCTBe yONHOMOeHHORO N3ROBOTeHem LIna,a TaKke BbINOHNReT TpeoBaHn,PpeDyCMTopeHhBte 3aKOHOMP N8148-Φ «O TexNHueCKOM peYInpoBaHn»ДЯ LInu,BbINOHNIOeO fHyHKUN INHOCTpaHHOrO N3ROBOTeHn Ha TeppNTOpN PoCCmckOnΦedepaun.
IMnpTePOM B PoCmKcyu OeepaunIO npOyKum, cepTnHpMupoBaHHo B KaueCTBe cepHNO3BODImoR, aJJIeTcO OOO «BCX BbTOBbIe Pnp6obIy), 1985, CaHKT-PtepeBypr, r PteeproΦ, yJ. Kapna CmmeHca, d.l JNT A, pHJInaB r. MockBa, 119071, yJ. Manra KanyckKa, d.15, Tenefoh (495) 737-2777.
OraHnaaueH, Yka3bIbaemoi Ha npodkyuM B cienx HneHTnckuaun npodkyuM n ocylueCTBnloiee nepBmHoe pa3MeIeHne npodkyuM ha bInke Ebporencokorco103a, ybnreTcpoepr BoW Xaycrepe Tm6X Kapn-Bepn-IIItp. 34, 81739 Miohxen, TepMaHn (Robert Bosch Hausgerate GmbH, Carw-Wey-Str. 34, 81739 Munchen, Germany).
OpHmHecknM NIOOM (N3ROTOBHTeM), OCUyEChTBLAHOUM OT CBOEFO IMEHN N3ROTOBNEHHE PNOyKUNI NTBEcTBEBHbIM 3a ee COOTBeCTBHe Tpe6oBaHnM pImMeHbIX TexHnecknx perJIaMeHOB, ABJrTeC5 CX XaycrepeTe rM6X, KapJI-Bepu-IIItp. 34, 81739 Mioxhen, FepMaHn (BSH Hausgerer GmbH, Carl-Wery-Str. 34, 81739 München, Germany).
Pn npeBo3ke, npory3ke pa3rpy3ke n xpaHeHn IpOdyKcHn cIeDyET pyKOBOCTBOBaTcR, NOMMO n3IOKeHHbIX B INHCTpyKcHn NO 3KcPnyaTcHn, cJeDyIOUmm Tpe6oBaHnMn:
3aPpeuaeTcnoBepraTb PPOyKmIO cyueCTBeHHbIM MExaHueckm Harpy3kAM, KOtOpble MOyT npNBecTN K NOBpeXJeHIO pOdyKmN HApuyHeHIO ee yNAKObKN.
Heo6xoJIMO n36eRaTb nonaHaHna H yNaKOBky npOdyKcMn BODbI nDpyrNx XKnKocTei.
Ipeep nepebo30koi nnn nepeauee Ha xpaehne 6bIbwe B 3Kcnpyaatau npOdykuu npn OtpuataeHbHO TemnepaType Heo6xOmo y6eHTbcB BOTCYTCTBn B npOdykuu BObl.
PpOyKzI npEHa3NaueHa K IcNoB3OBaHnO B yCNoBnX TeMpeaTypb BiIe 0°C n OTHocTeBHO BnaXHoCTN, He ppeBbIaUoJe 93%.
Ipeepn Hauanom 3KcPiyaataun npOykuun, dNITeJIbHOe Bpem HaxoNBueCn oN Bo3deNCBHeM OtpuataeHOB TeMnpaTpybl, Heo6xOIMBOBIDepkataB ee yCNOBHX KOMHaTHOH TemnepaTpybl HeckOJbKO Yacob.
Ppabnna pean3aun npOdykunn OnpedeTcra PpeepnayrMaMn po3HnuHoT pTOBn B COOTBeCTBn C Tpe6oBaHmN DeIcTByUeero 3aKHO daTeNbCTBA.
Yka3aHnno ytnnn3aun npOdyKcun coepxatcB nHCTpykun no 3Kcnnyataun moryT 6bIb yTOUHehbl y MyHnunnaBhbix opraHOB nCNOHNTEbHO Bnactn.
I py npdykunpean30abHHn 3rTOBtEnm B TeHne cpoka DeiCTBnA cePTNfKATAcooTBcTBN, 3OT cptnfKAT deiCTBtENe H npie ee nocTaBe, npodaKe i nCnOJIb30aHnn (npimeHeHn) B TeHne cpoKa cnXkb, yCTAHOBHeHOro B COOTBcTBN Co CtaTbe N 18 3aKOna P O 3aUInTe npab NotpBeTEn. Cpok cnYk6bHa npOdykTuO kka3An npOn3BODntenm B nictobke «INΦOPMaua n3rTOBtENe o rapaHTNHOM n cepBvCHOM 0cbnykBaHNH.
IpoDyKmOeT 6bItb IeHTnHmUPOBaHa NO MoDEnbHOMO O63aueHHNO (nonE-E-NR) , Anp6aunHOHOMY TnHy (nonE-Type)) n TOBAPHOmy 3Aky BApTOM 3rTOBtTEb 6bTobRA HxNkOuHcB E KcNpyaTuOHbIX DOKymTeX. B COOTBeCTBm C BYHTpeHHM CTAnDpTOM 3rTOBtTEb 6bTobRA TexHNA IeHTnHmUPOyETC No cIeDuoue cxeme:
E-Nr.
MaepnabHbHmOpE npedctabnraet cob6yKBeHHo-uzpOboe 063aueHe npodykun dInHOH He 6oee 10 CmBONOB, nCnoB3ayEmoe npn pOpaJe (MneHMeOmeBbIM 063aueHeEMn MIOBbI b6bTBOrO np6opa) TropOB mApKn Bosch. MaepnaJIbHbHm Hmep (MoJIb) yka3BaAETc MeJdy KcOdBm CnOBm E-E-Nr N KcOoi YePTOn / x
HndekcepeBnchOnCnyKbI-By3NaHoe cnpoBoe 063NaueHne, npncBaHaemoe eHNHe pOkyuBn B npouecce npon3BOcTBa H nCnoB3yeMoepceBnchOnCnyKbo.
3Kcnnyaatauohhie dokymehtb pa3pa6abtbaioTc B yHnHnunpoBaHHo fOpme IJIA 1nPpOKOro accopTmHeTA npOdykUIN, NO3OTOMy n3rTOBHTeEM npedymotpeho kya3ahne TPORO bO63aueHN pnpobA B 3KnNpyatauOnHHx DOkymeHTAX KAK NIOHCTBO, TAK YACTHNO, PNY CNOBNY, 3TO PO3BOrrnONPepenNTb pnpadNEXHOCTb dAHHO RCKNpyatauOnHHO DOkymeHTK BbTOBOMy npBOPy, CONPBOXdAMOMY 3TNM 3KcNpyataUNOHbIM DOkymeHTOM. UctaoHOBHeN B IpOceCE NIEHNTFPAKAUMC OOTBETCTBNA XAPAKTEPNCTNK BbTOBOPa NPbOpaNONOXEHNM, CDepKAsumcB pnpnaEaEBHX K Hemy 3KcnNpyatauOnHHbIX DOkymeHTax, pPBOIDTCN PyTEM aHaJIIN3a INHOFpMAUIN, IN3IOKeHHO B 3KcnNpyatauOnHHbIX DOkymeHTax.
B coCTAB 3KcPnPyatauHbIX DOkymeHOB, npEpyCMOTpeHHbIX N3ROTOBtEnem IINI pOdyKUIN, MORY TBxOJNTb Hactoiaa INHOpMaun, INCTpyKUN (pykoBOcTBO) NO 3KcPnPyatauHINΦopMaun o6 ycNobnx rapaHTNIHorO n cepBNCHO OcbNyKNAHn.
MapKIOBAAHne npOlykUmm OcUyIeCTBnIeTc H3rOToBtJeMHa TINIOBOI TaBNIuChe PnHbOpa, Ha YNAKOBOUHOH 3TNKeTKe, HENOCpeDCTBeHHo Ha yNaKOBK E pNbOpa, a TaKke MOKET PpON3BOODTbcra NbIMn CNOcObaMn, o6ecNEuBaIOUMM DoCTyNHOe HnAHIJHOe PpeDctABJIeHHe INΦOpMaun O npHbope B mectax npOdaek.

IpoDyKUH, KOTOPA npOUI npOeDpy NOITBepJdHnE CooTBeTCTBn COIaCHO Tpe6oBaHm TExHuecknx perIamHeTOB TaMOKeHHoTOco03a HINIL TeHXuecknx perIaMeHToB EBpaNcKO rKOHOMueckoro co103a, MapKnpyTeC eINbIM 3HaKOM o6paueHn IPOdyKUH na pblHe rocyapctB-ueHOB TaMOKeHHOrO co103a (EBpa3NIckoro 3KOHOMueckoro co103a).
PpOdyKuIcOoBtCTByET CJIeDyUOuIM TexHnueckm perJlAmeHTam TaMOxKeHHoro coIO3a:
- TP TC 020/2011 3JNeKTpOMaHnTHaH CoBMeCTNMOCTb TexHnuecknx CpeIDCTB
- TP TC 004/2011 O 6e3oNaChOCTn Hn3KOBONbTHORO 6OpdyoBaHn
TP EA3C 037/2016 O6 orpaHnueHn npImeHnra onaChbIX BeuecTB B n3dEINx 3neKtpoTeHHNK n paDIOeJIeKtpoHHNK c daTbI BCTyIpeHH erO B cnIy
3KcnPnyataunHbIe DOkymENTbHa n pOdyuKUIO BblIOINHOTc HA ypcckOMraB1ke. 3KnPnyataunHO bEdoyapCTBeHHbIXraBikax FOcydaptCBTueHOB EBaPnIKCROTO KHOHOMNCECKORO COI03A, OTNIHbIXoT pyccKOrO, npn HAIIMN COOTBETCTBOUIOx Tpe6ObaHN B3aHOJDAteJIbCTBE MOKHO 63eBO3Me3DNO pONyUHTy to TopryouIE Oprpan3aUIM-PEsNEHTo COOTBETCYIOero RocydTa-bNeHa EBpAsNKcOERKO KOHOHMcECKORO coOI3A.
HΦopmaqua O kOMIIeKtaaun npOdyuun npeIcTaBneHa B TropOBbIX 3aJax, MoKet 6bItb 3aIpoWHe Ha TeJeFOHy 6ecnJaTHoN «rOpuey JInHHN» (800) 200-2961, a TaKKe DoCTynHa B INHTepHene Ha caTte pOns3BODntenl rhtp://www.bosch-home.ru
| Topròboe obnoha- nhe | Anpóba- zinoHb# T# | Cerntfkhakat cooBtctBm | CTpaHa- m3rotobu- T# | ||
| PertncptauonH h#n Hoomep | D#a | Déi#ctbyet do | |||
| Cokoblykmaik | |||||
| MCP 3000 CNZP3 C-DE.A46.B.73451 08.2021 | CNCJ03 | C-DE.A46.B.73451 | 08.2021 | 07.02. | 2021 K |
| MES25A0 | CNCJ03 | C-DE.A46.B.73451 | 08.2021 | 06.07.02 | 2021 K |
| MES25C0 | CNCJ03 | C-DE.A46.B.73451 | 08.2021 | 07.02. | 2021 K |
| MES25G0 | CNCJ03 | C-DE.A46.B.73451 | 08.2021 | 06.07.02 | 2021 K |
| MES3500 | CNCJ03 | C-DE.A46.B.73451 | 08.2021 | 07.02. | 2021 K |
| MES4000 | CNCJ04 | C-DE.A46.B.73451 | 08.2021 | 07.02. | 2021 K |
| MES4010 | CNCJ05 | C-DE.A46.B.73451 | 08.2021 | 07.02. | 2021 K |
| Pezki | |||||
| MAS4000W | CNAS11ST | C-DE.A46.B.73634 | 19.02.2015 | 18.02. | 2021 C# |
| MAS4104W | CNAS11EV | C-DE.A46.B.73634 | 19.02.2015 | 18.02. | 2021 C# |
| MAS4201N | CNAS11ST | C-DE.A46.B.73634 | 19.02.2015 | 18.02. | 2021 T# |
| MAS4601N | CNAS11EV | C-DE.A46.B.73634 | 19.02.2015 | 18.02. | 2021 T# |
| MAS6151M | CAS12 | C-DE.A46.B.73634 | 19.02.2016 | 18.02. | 2021 C# |
| MAS6151R | CAS12 | C-DE.A46.B.73634 | 19.02.2016 | 18.02. | 2021 C# |
| MAS6200N | CAS12 | C-DE.A46.B.73634 | 19.02.2016 | 18.02. | 2021 T# |
| MAS9101N | AS9ST | C-DE.A46.B.73634 | 19.02.2016 | 18.02. | 2021 T# |
| MAS9454M | AS9ST | C-DE.A46.B.73634 | 19.02.2016 | 18.02. | 2021 C# |
| MAS9555M | AS10EH | C-DE.A46.B.73634 | 19.02.2016 | 18.02. | 2021 C# |
| Minkcepb, 6bnndpeb, n#melleyte | |||||
| MF Q2 2 1 00 | CNHR30 | C-DE.A46.B.73634 | 17.08.2016 | 16.08.202 | C# |
| MF Q2 2 1 0 D | CNHR30 | C-DE.A46.B.73634 | 17.08.2016 | 16.08.202 | C# |
| MF Q2 2 1 0 P | CNHR30 | C-DE.A46.B.73634 | 17.08.2016 | 16.08.202 | C# |
| MF Q2 2 1 0 Y | CNHR30 | C-DE.A46.B.73634 | 17.08.2016 | 16.08.202 | C# |
| MFQ2400 | CNHR30 | C-DE.A46.B.73634 | 7.08.2016 16 | 08.2021 C# | |
| MFQ240B | CNHR30 | C-DE.A46.B.73634 | 7.08.2016 16 | 08.2021 C# | |
| MFQ3010 | CNHR19 | C-DE.A46.B.73034 | 30.12.2015 | 29.12. | 12.2020 |
| MFQ3020 | CNHR19 | C-DE.A46.B.73034 | 30.12.2015 | 29.12. | 12.2020 |
| MFQ3030 | CNHR19 | C-DE.A46.B.73034 | 30.12.2015 | 29.12. | 12.2020 |
| MFQ3520 | CNHR17 | C-DE.A46.B.73034 | 30.12.2015 | 29.12. | 12.2020 |
| MFQ3555 | CNHR18 | C-DE.A46.B.73034 | 30.12.2015 | 29.12. | 12.2020 |
| MFQ36300D | CNHR27 | C-DE.A46.B.73034 | 30.12.2015 | 29.12. | 12.2020 |
| MFQ36300I | CNHR27 | C-DE.A46.B.73034 | 30.12.2015 | 29.12. | 12.2020 |
| MFQ36300Y | CNHR27 | C-DE.A46.B.73034 | 30.12.2015 | 29.12. | 12.2020 |
| MFQ36440 | CNHR27 | C-DE.A46.B.73034 | 30.12.2015 | 29.12. | 12.2020 |
| MFQ36460 | CNHR27 | C-DE.A46.B.73034 | 30.12.2015 | 29.12. | 12.2020 |
| MFQ36480 | CNHR27 | C-DE.A46.B.73034 | 30.12.2015 | 29.12. | 12.2020 |
| MFQ36GOLD | CNHR27 | C-DE.A46.B.73034 | 30.12.2015 | 29.12. | 12.2020 |
| MFQ4020 | CNHR22 | C-DE.A46.B.73034 | 30.12.2015 | 29.12. | 12.2020 |
| MFQ40301 | CNHR22 | C-DE.A46.B.73034 | 30.12.2015 | 29.12. | 12.2020 |
| MFQ40302 | CNHR22 | C-DE.A46.B.73034 | 30.12.2015 | 29.12. | 12.2020 |
| MFQ40303 | CNHR22 | C-DE.A46.B.73034 | 30.12.2015 | 29.12. | 12.2020 |
| MFQ4070 | CNHR22 | C-DE.A46.B.73034 | 30.12.2015 | 29.12. | 12.2020 |
| MFQ4080 | CNHR22 | C-DE.A46.B.73034 | 30.12.2015 | 29.12. | 12.2020 |
| MMB21P0R | CNSM10 | C-DE.A46.B.73592 | 17.02.2016 | 16.02.2021 | Ktai |
| MMB21P1W | CNSM10 | C-DE.A46.B.73592 | 17.02.2016 | 16.02.2021 | Ktai |
| MMB42G0B | CNSM11 | C-DE.A46.B.73592 | 17.02.2016 | 16.02.2021 | Ktai |
| MMB42G1B | CNSM11 | C-DE.A46.B.73592 | 17.02.2016 | 16.02.2021 | Ktai |
| MMB43G2B | CNSM12 | C-DE.A46.B.73592 | 17.02.2016 | 16.02.2021 | Ktai |
| MMB64G3M | CNSM13 | C-DE.A46.B.73592 | 17.02.2016 | 16.02.2021 | Ktai |
| MMB65GOM | CNSM13 | C-DE.A46.B.73592 | 17.02.2016 | 16.02.2021 | Ktai |
| MMR08A1 | CNCM13 ST1 | C-DE.A46.B.73343 | 29.01.2016 | 28.01.2021 | C# |
| MMR15A1 | CNCM13 ST2 | C-DE.A46.B.73343 | 29.01.2016 | 28.01.2021 | C# |
| MSM14000 | CNHR12C | C-DE.A46.B.73592 | 7.02.2016 16 | 02.2021 C# | |
| MSM14100 | CNHR12C | C-DE.A46.B.73592 | 7.02.2016 16 | 02.2021 C# | |
| MSM14200 | CNHR12C | C-DE.A46.B.73592 | 7.02.2016 16 | 02.2021 C# | |
| MSM14500 | CNHR12C | C-DE.A46.B.73592 | 7.02.2016 16 | 02.2021 C# | |
| MSM2410D CNH | R12C C-DE.A46.B.73592 17.02.2016 16.02.2021 C# | ||||
| MSM2410P CNH | R12C C-DE.A46.B.73592 17.02.2016 16.02.2021 C# | ||||
| MSM2410Y CNH | R12C C-DE.A46.B.73592 17.02.2016 16.02.2021 C# | ||||
| MSM2413V CNH | R12C C-DE.A46.B.73592 17.02.2016 16.02.2021 C# | ||||
| MSM24500 | CNHR12C | C-DE.A46.B.73592 | 7.02.2016 16 | 02.2021 C# | |
| MSM2450B | CNHR15 | C-DE.A46.B.73592 | 7.02.2016 16 | 02.2021 C# | |
| MSM2450B | CNHR15 | C-DE.A46.B.73592 | 7.02.2016 16 | 02.2021 C# | |
| MSM2450B MSM2450B MSM2450B MSM2450B MSM2450B MSM2450B MSM2450B MSM2450B MSM2450B MSM2450B MSM2450B MSM2450B MSM2450B MSM25 | CNHR15 CNHR15 CNHR15 CNHR15 CNHR15 CNHR15 CNHR15 CNHR15 CNHR15 CNHR15 CNHR15 CNHR15 CNHR15 CNHR15 CNHR15 CNHR15 CNHR15 CNHR15 CNHR15 CNHR15 CNHR15 | C-DE.A46.B.73592 17.02.2016 17.02.2016 17.02.2016 17.02.2016 17.02.2016 17.02.2016 17.02.2016 17.02.2016 17.02.2016 17.02.2016 | 7.02.2016 16.02.2021 7.02.2016 16.02.2021 7.02.2016 16.02.2021 7.02.2016 16.02.2021 7.02.2016 16.02.2021 7.02.2016 16.02 2021 C# | ||
| MSM64035 | CNHR24 | C-DE.A46.B.73592 17.02.2016 17.02.2016 17.02.2016 17.02.2016 17.02.2016 17.02.2016 17.02.2016 17.02.2 | |||
| MSM64120 | CNHR24 | C-DE.A46.B.73592 17.02.2016 17.02.2016 17.02.2016 17.02.2016 17.02.2016 17.02.2016 17.02.2016 17 | |||
| MSM64155RU CNH24 | C-DE.A46.B.73592 17.02.2016 17.02.2016 17.02.2016 17.02.2016 17.02.2016 17.02.2016 17 | ||||
| MSM66020 | CNHR25 | C-DE.A46.B.73592 17.02.2016 17.02.2016 17.02.2016 17.02.2016 17 | |||
| MSM66050RU CNH25 | C-DE.A46.B.73592 17.02.2016 17.02.2016 17.02.2016 17 | ||||
| MSM671X1 | CNHR26 | C-DE.A46.B.73592 17.02.2016 17.02.2016 17.02.2016 17 | |||
| MSM671X2 | CNHR26 | C-DE.A46.B.73592 17.02.2016 17.02.2016 17 | |||
| MSM671X3 | CNHR26 | C-DE.A46.B.73592 17.02.2016 17.02.2016 17 | |||
| Toproboe obnoahe- nne | Anopba- zouhien TIN | Ceptnkikat COOTBCTBn | CTpna- H3GTOTON- TEb | ||
| Руспрацион- нь homор | ДаТа Выдч. | Демстут До | |||
| Mikcebp, bnechenby, nmeblchteu | |||||
| MSM6B250 | CNHR11 | C-DE.AR46.B.73592 | 7.02.2016 16 | 02.2021 CnoB | HnA |
| MSM6B300 | CNHR12 | C-DE.AR46.B.73592 | 7.02.2016 16 | 02.2021 CnoB | HnA |
| MSM6B500 | CNHR12 | C-DE.AR46.B.73592 | 7.02.2016 16 | 02.2021 CnoB | HnA |
| MSM6B700 | CNHR12 | C-DE.AR46.B.73592 | 7.02.2016 16 | 02.2021 CnoB | HnA |
| MSM8 7 13 0 | CNHR28 | C-DE.AR46.B.73592 | 17.02.2016 | 16.02.2021 | CnoBnHn |
| MSM87140 | CNHR28 | C-DE.AR46.B.73592 | 7.02.2016 16 | 02.2021 CnoB | HnA |
| MSM87160 | CNHR28 | C-DE.AR46.B.73592 | 7.02.2016 16 | 02.2021 CnoB | HnA |
| MSM87165 | CNHR28 | C-DE.AR46.B.73592 | 7.02.2016 16 | 02.2021 CnoB | HnA |
| MSM8 7 18 0 | CNHR28 | C-DE.AR46.B.73592 | 17.02.2016 | 16.02.2021 | CnoBnHn |
| MSM8 8 19 0 | CNHR29 | C-DE.AR46.B.73592 | 17.02.2016 | 16.02.2021 | CnoBnHn |
| MSM881X1 | CNHR29 | C-DE.AR46.B.73592 | 17.02.2016 16 | 02.2021 CnoB | HnA |
| MSM881X2 | CNHR29 | C-DE.AR46.B.73592 | 17.02.2016 16 | 02.2021 CnoB | HnA |
| KxohonHle KOMoAHnBu | |||||
| MCM3100W | CNCM12 | C-DE.AR46.B.73522 | 12.02.2016 | 11.02.2021 | CnoB |
| MCM3110W | CNCM12 | C-DE.AR46.B.73522 | 12.02.2016 | 11.02.2021 | CnoB |
| MCM3200W | CNCM12 | C-DE.AR46.B.73522 | 12.02.2016 | 11.02.2021 | CnoB |
| MCM3 2 0 1 B | CNCM12 | C-DE.AR46.B.73522 | 12.02.2016 | 11.02.2021 | CnoB |
| MCM3401M | CNCM12 | C-DE.AR46.B.73522 | 12.02.2016 | 11.02.2021 | CnoB |
| MCM3 5 0 1 M | CNCM12 | C-DE.AR46.B.73522 | 12.02.2016 | 11.02.2021 | CnoB |
| MCM4000 | CNCM20 | C-DE.AR46.B.73522 | 12.02.2016 | 11.02.2021 | CnoB |
| MCM4100 | CNCM20 | C-DE.AR46.B.73522 | 12.02.2016 | 11.02.2021 | CnoB |
| MCM4250 | CNCM21 | C-DE.AR46.B.73522 | 12.02.2016 | 11.02.2021 | CnoB |
| MCM62020 | CNCM30 | C-DE.AR46.B.73522 | 12.02.2016 | 11.02.2021 | CnoB |
| MCM64051 | CNCM30 | C-DE.AR46.B.73522 | 12.02.2016 | 11.02.2021 | CnoB |
| MCM64085 | CNCM30 | C-DE.AR46.B.73522 | 12.02.2016 | 11.02.2021 | CnoB |
| MCM68840 | CNCM30 | C-DE.AR46.B.73522 | 12.02.2016 | 11.02.2021 | CnoB |
| MCM68885 | CNCM30 | C-DE.AR46.B.73522 | 12.02.2016 | 11.02.2021 | CnoB |
| MCM68885 | CNCM30 | C-DE.AR46.B.73522 | 12.02.2016 | 11.02.2021 | ClnoB |
| MCM68885 | CNCM30 | C-DE.AR46.B.73522 | 12.02.2016 | 11.02.2021 | ClnoB |
| MCM68885 | CNCM30 | C-DE.AR46.B.73522 | 12.02.2016 12.02.2016 | 11.02.2021 | ClnoB |
| MCM68885 | CNCM30 | C-DE.AR46.B.73522 | 12.02.2016 | 11.02.2021 | ClnoB |
| MCM68885 | CNCM30 | C-RE.AR46.B.73522 | 12.02.2016 | 11.02.2021 | ClnoB |
| MCM68885 | CNCM30 | C-DE.AR46.B.73522 | 12.02.2016 | 11.02.2021 | ClnoB |
| MCM64050 | CNUM5ST | C-DE.AR46.B.73522 | 12.02.2016 | 11.02.2021 | ClnoB |
| MCM64057 | CNUM5ST | C-DE.AR46.B.73522 | 12.02.2016 | 11.02.2021 | ClnoB |
| MCM64055 | CNUM5ST | C-DE.AR46.B.73522 | 12.02.2016 | 11.02.2021 | ClnoB |
| MUM54720 | CNUM5ST | C-DE.AR46.B.73522 | 12.02.2016 | 11.02.2021 | ClnoB |
| MUM54720 | CNUM5ST | C-DE.AR46.B.73522 | 12.02.2016 | 11.02.2021 | CnoB |
| MUM54720 | CNUM5ST | C-DE.AR46.B.73522 | 12.02.2016 | 11.02.2021 | CnoB |
| MUM54720 | CNUM5ST | C-DE.AR46.B.73522 | 12.02.2016 12.02.2016 | 11.02.2021 | CnoB |
| MUM54720 | CNUM5ST | C-DE.AR46.B.73522 | 12.02.2016 12.02.2016 | 11.02.2021 | CnoB |
| MUM54800 | CNUM5ST | C-DE.AR46.B.73522 | 12.02.2016 12.02.2016 | 11.02.2021 | CnoB |
| MUM54800 | CNUM5ST | C-DE.AR46.B.73522 | 12.02.2016 | 11.02.2021 | CnoB |
| MUM54800 | CNUM5ST | C-DE.AR46.B.73522 | 12.02.2016 12.02.2016 | 11.02.2021 | CnoB |
| MUM54920 | CNUM5ST | C-DE.AR46.B.73522 | 12.02.2016 12.02.2016 | 11.02.2021 | CnoB |
| MUM54920 | CNUM5ST | C-DE.AR46.B.73522 | 12.02.2016 | 11.02.2021 | CnoB |
| MUM54920 | CNUM5ST | C-DE.AR46.B.73522 | 12.02.2016 12.02.2016 | 11.02.2021 | CnoB |
| MUM54000 | CNUM5ST | C-DE.AR46.B.73522 | 12.02.2016 12.02.2016 | 11.02.2021 | CnoB |
| MUM54000 | CNUM5ST | C-DE.AR46.B.73522 | 12.02.2016 | 11.02.2021 | CnoB |
| MUM54000 | CNUM5ST | C-DE.AR46.B.73522 | 12.02.2016 12.02.2016 | 11.02.2021 | CnoB |
| MUM54100 | CNUM5ST | C-DE.AR46.B.73522 | 12.02.2016 12.02.2016 | 11.02.2021 | CnoB |
| MUM54100 | CNUM5ST | C-DE.AR46.B.73522 | 12.02.2015 12.02.2016 12.02.2016 | 11.02.2021 11.02.2021 | CnoB |
| MUM54100 | CNUM5ST | C-DE.AR46.B.73522 | 12.02.2016 12.02.2016 | 11.02.2021 11.02.2021 | CnoB |
| MUM54100 | CNUM5ST | C-DE.AR46.B.73522 | 12.02.2016 12.02.2016 12.02.2016 | 11.02.2021 11.02.2021 | CnoB |
| MUM54100 | CNUM5ST | C-DE.AR46.B.73522 | 12.02.2016 12.02.2015 12.02.2016 | 11.02.2021 11.02.2021 | CnoB |
| MUM54100 | CNUM5ST | C-DE.AR46.B.73522 | 12.02.2016 12.02.2016 12.02.2015 12.02.2016 | 11.02.2021 11.02.2021 11.02.2021 | CnoB |
| MUM54100 | CNUM5ST | C-DE.AR46.B.73522 | 12.02.2016 12.02.2016 12.02.2016 | 11.02.2021 | CnoB |
| MUM54100 | CNUM5ST | C-DE.AR46.B.73522 | 12.02.2016 12.02.2016 12.02.2016 | 11.02.2021 11.02.2021 11.02.2021 | CnoB |
| MUM54100 | CNUM5ST | C-DE.AR46.B.73558 | 16.02.2016 | 15.02.2021 | CnoB |
| MUM54100 | CNUM5ST | C-DE.AR46.B.73558 | 16.02.2016 | 15.02.2021 | CnoB |
| Mucopyck | |||||
| MFW3520G | CNFW3A | C-DE.AR46.B.72617 | 03.12.20 | 15 02.12 15 02.12 15 02.12 15 02.12 15 02.12 15 02.12 15 02.12 15 02.12 15 02.12 15 02.12 15 02.12 15 02.12 020 | CnoB |
| MFW3520W | CNFW3A | C-DE.AR46.B.72617 | 03.12.20 | 15 02.12 15 02.12 15 02.12 15 02.12 15 02.12 15 02.12 15 02.12 15 02. | |
Tnicti peTTe naJaIaIaNy
Бул КрьлгыTekжеуide naДануfa apHaIraH.БуИbIMdbl
TEK KaHa a3bIK-TyIik OHIMdeepiH KaIbINTbI TyPmbICTbIK KeJIemDe MeH
yaKbITTa eHney ywiH KOJaHbIHbI3. PyKcat etinreH MaKcMaJdBiK
KeIeMdepDcH acbIpMaHbI3. «Peuemmep»MbHa bemmi KaPaHbI3:153
6yIbIM a3bIK-TyIik eHIMdePiH apaIacTbIpy, nIey XeHe Karfyf
apHaIraH. KypbIrfbIHbI 6aCKa 3aTTeKTePdi Hemece 3aTTapDbI eHney
yushi Kojdahyra 60mamdbi. 1bifapuysbI TapanbIHAN KOJaHy yushi
pyKcat etinreH backa kocankbI 6eepin KOndaHfHaJa KocbIMU
KoIaHy TypJIepi De MymKIn 6OJaIbI. Kypblfbl TeK pyKcat etIinreH
6eIweKTepeHKepeK-kaTapMeH naJaHaHbIHb3. EaKaWah
KepeK-JkapakTapdbI backa Kypblfblnap ywiH naJaHaHaBbI3.
KypbIbI 6eJIme TempeatypacbIHdaIiWiKi KaJnapDa fHa HaXHe
TeHiz DeHreinHeN 2000 M deiHri 6nIKtKe KOndaHyra apHaIFaH.
MaHbI3dBiKayinci3dkTypaIbIMafNymaTTap
OcbI naIdaIaHy HycayIbIFbIH MyKnT OKbIN 1bIfbIHb3 XHe caKTan
KoibHbI3! KypblfblbI 6acka 6ipeyre 6epren Ke3de ocbl HycKayIbIK
Ta 6epinyi KepeK. BybIMdbI NaBbIKTbI Typde KOndaHy TpaJIbI
Hvckaynapfa cai opeket etinmereHde ocbl opekeTTepdien IbifaTbIH 1bIfbIHap ywiH eHdpwI TapaBbHaH Keinidik bepimei.
ByI 6yIbIM deHe, ce3im XaHHe aKbIn-0i KaBineTepi WeKteyni,
cohblmeh 6ipre taxipnbeci xhe 6iimixeTkikci3 aamnap
TapaNbHaH TeK 6aKbIay actbIHda 6oJFaHapbIHda, Hemece 6yIbIMdbI
Kayinci3 Tpyde KOndaHy 6oBbHwa mAmimetTepiH e3depiHe Xayantbl
TynfapanapdaH anbIn, ocbI 6yibIMdbI KOndaHydaH naJa 60na aNaTbH
KayinTerpi TyciHreHepiHne fana kondaHbIa anadbl. BaanapdbI
PnIaHaH6acbIH. BaIaIapFa OcbI KypblfBImeH O'HayFa pyKcaT
etnehi3. Baanaapfra Ta3aayfa XeHe TexHnKaIbIK KbI3MeT KepceTyre 6oImaIdbI.
OpTeHy XəHe 3JleKTp TOrbHa Tycy Kayni!
KypbIfblHbI TeK epexeJep 60yBHaOpHaTbIFaH Jepre KocblFaH pO3eTKa apKblbI aHbIMaJIbI TOKTBk TOK JeNiciHe KOCY MymKiH.
Iwki əJIeKTp CbIMdApbIHbIH Jepre TybIKTay KYneCiHiH epExeJIepre CəiKeC IaMbIKTbI TypDe opHaTbINFaHBiN TeKcepH3.
BvibIMdbI Tek KaHa cnpMaIbIK TaKtaWada KepcetinreH MJIImeTTepi
6oIbHwa icKe KocbIn KOJdaHbIHb3. Erep 6yIbIM HeMeCe OHbIH KyaT CbIMbl 3aKbIMdaJaLca, Ohbl naJaIaNbHaHb3. Kayinti JkaFdaJnap
TybHdaTnac ywiH, 3aKbIMdaHfah XeJire Kocy CbIMbIH aybICTbipy
CnayKtbI 6apnbIK XeHdey XymbICTapbIH 6i3in Kbi3MeT Kepcety
KehiHderi 6nikTi Kbl3MeTKepePiMi3 opbHdaybI KepeK.
KypbIfblHbI eWkaaHaN TaMep Hemece KaBbIKTaH backapblaTbIH po3eTKaJapfa KocnaHbI3. KypbIfblHbI naJaIaNHy Ke3iHde 6akblan TypblHbI3!
KypbIINfbIHbI bICTbIK 6eTTep yCTiHe Hemece KacbHa KOIMaHb3, MbICaJIbI, KOHΦopKa pNTanapbl, opHaTy. Kei Ka6eInh bICTbIK 6eJIkTepre Tnri36eHi3, eTKip WETTEpineH TaPTNaHbI3 Hemece TaCbIMaJdav TytKacbl peTIHe naJaIaNbHaB13.
■ Heri3ri Kypblfba f a ekaaah cy Turi36eH3 HeMece bIDbc JyfbI MaunHaFa caMaHbI3. Bymeh Ta3aJay KpaJIbH KOJaHa6aHbI3. KypblfblbI bINFaJdbI KOImeH KOJaHyfa 6OImaHbI.
■БиIMDbI eP naJaHaHydAn coH, Ohbl 6aKbIayCbI3 KaIdbIpfaHbIHbI3da, KypacTbIpbIN opHaTydaH aIdbIH, 6eKeTeReHiH3de Hemece Ta3aJaFaHbIHbI3da JxHe KaTeJIk NaIda BoJFaHDa ePkawan JeJIdeH axbipaTbIHbI3.
! KapakaTTaHy kayni 6ap!
Kymbic icTeiIreH KemeKi KaPAn He KocalKbI 6eIweKtepdi aImaCTbIPy aIdbIHda, 6yBIMDbI eWipin, KeiJeH axbipatYKepeK.
■ AynHaJMaJIbI TytKaHbI Tycipyde KopnycTbI YcTaMaHbI3, aNtnece CaycaK HemeCe KJI KbcJIbIN KaIybl MymKiH. ByIM KocylbI 6oJFaH Ke3De, aynHaJMaJIbI TytKaHbI peTTMeHi3.
AcapTapDbI TeK opHaTbINFaH Kece, opHaTbINFaH KaKnaK XaHe opHaTbINFaH KeTEK KaNTaMaCbIMeH naJaIaNbIHb3! KepeKJapaKTapDbI NaJaIaNFaH Ke3De KeceHi, KaKnaKTbI XaHe XeTeK KaNTaMaCbIH HycKayNbIK BoBbIHwa opHaTbINb3!
KoIdaHy 6apbICbIHda KOImeH KeceHi HemeCe TOnTbIpy WaxTxacBHy CTaMaHb3. EwKaHdA 3aTTapDbI (MbicaNbl. Wemi) KeceRe HemeCe ToNTbIpY WaxTxacBHa Kipri36eH3. KoI, Waa, Knim XHe 6acka Ka6DbIKTapdbI aHaHbIN TyprAn 6eJIWeKTePdeH aNbIC YCTaHb3. XeTeK eWipiInrHHe H Kein 6ipa3 yaKbIT XyMbIC icTeT NypaDbI. XeTeK ToNbIFbIMeH TOKtaFaHwa KyTHi3.
Ewkaan acnan neh kepek-kaapakdtbI HeMece 2 kepek-kaapktbI bipdei naiaHbaHbI3. KepeK-kaapakTApdbI KOJaHFaH Ke3de OnapdbI XHe OHbImeH bipre bepiInre H konDaHy TypaJIbI HyckayNbIKTbI YCTaHbIHbI3.
Kepek-kaapakapdbi naiaaahya kepek-kaapakap Meh KeTeKteperi Tycti beIinepdi eckepin3.
TsyHwbly kayni!
BaIaIapFa opam mATEpnaIadapbIMeH OiHayfa pyKcat etneHi3.
Ha3ap aydapbIhbl3!
KypbIbI eWkaaH a3bIK-TyJIkTePdi eHdey ywiH KepeKti yaKbITbIHAn Y3aFbIPaK yaKbIT 6Obbl KocblBn KOybIMaybl Na3bIM. Boc TypiHne icKe KocnaHbI3.
3nHapb6oNdbipMay yuH xHe Keeprici3 Kymbc icTey uH Kymbc aHaMbbl KaKcbI KeTineTih, bInFaIbIKKa Te3imDi, KaTTbI, TeH, Kypfak XHe XeTePNIk dApexKeJe YJKeH 6oNbTnic.
MaHbI3IbI!
KypblfblbI ap naJaIaHaH coH HeMece y3ak yaKbIT naJaIaHa6aJ KypreHde 6dEh Ta3aIahbI3. «Ta3aay XHe Kymy»MbHa bemmi KaPahbI3:153
Bosch qnpMaCbIHbIH XaHa 6yNbIMbIH caTbIN aIraHbIHbI36eH KytTbIKTaIMbI3. Bi3dIN 6yNbIMDaPbIMbI3 TypaBlkocbIMwa MJIImeTTepDi Be6caNTbIMbI3da Ta6a anacbl3.
www.bosch-home-com
BizhiKpybIrfblap daibIM keTinDipei.
Con ysiH Keibip cyHKnnaJnap ocbi
Hyckayda cunataTaNfAHHa aibIpMaUblbIfbl
6oanaBb.IyN xaraaJa 6i3iH nHTepHet
TopabMblaOcbI HyckayltbIH KaHapaK
HyckacblbIFbIH TeKcepiHi3.
Ocbi naIaIaNHy HcyKayIbIbIH naIaIaNHy yIiH: OcbI HcKayIbIKTbIH XaH 6eTTepiH aIbIbI3. OHda apin XeHe HemipIepMeH KepCetIirreH cypETep 6ap, onapDbI ocbl HcyKayIbIKTa XnI MbICaJIFa KeNTipiJeDi (MbICaJIbI, cypeTTep KaTApbl).
Ma3MyHbI
Tnicti peTte naIdaIaHy 140
MaHb3dblKayinci3dkTypaIbMafNMyMaTTap 140
Kannbl maniMeTep 143
Bipinwi naIdaIaHyaIaIbIh 143
Kypamda6eIweKTepeHbackapy 3JIemHTepi 143
Дайындан 146
Bafttamnap 146
KocbIMwa yHKnnaapcb3 naDanahy.. 147
YaKbIT XeHe TaMep yHKcIaCbIH naJaIaNy 148
SensorControl Plus MeHen naiandaHny 149
Tapa3bHbI naJaHaNy 151
Kepek-kaapakTapnb naaJanaHy 152
Ta3anay XeHe KyTy 153
PeuenTep 153
* Kip KjyfbI MauHnHaF6aJnAhbIcTbI
Функцянbl TaHday
nephelepi / C/
KbIcKa 6acydAn apKbIbI TaHdaJFaH
fynKcN8 6eJceHdpiJeDi. Bacbl yctay
apKbIbTaHdaJFaH fynKcNraH sbIfacbl3,
dnCnneJe KaTata naiDa
6oJaBt.
Hyckay: nephelepdi caycaKneH a3 Tnin naJaHaHyfa 6oJaDbI. AcxHa KaJra6bIH KIO nepHelepDiH XyMbICbHa ecep etyi MymKiH. 3aTTapMeH TnO (MbicJIbI, Wemi) MymKiH emc.
AinHaImaIbI aXbIpaTkbIw XapbIKTaHDbIpy

神兵
→ Cypet
AinHaMaIbI axbipaTkblneH KepeKTI
XbIaMdbIK TaHdaJaDbI, ABTomAtnka icKe
KocbIaDbI HeMece Kypblfbl eWeedi. Kymbic
ictey Ke3iHne kipictipinreH japbIKTaHdbIpy
Weh6epi KaHaDbI. KypblfbHbH bAckapybHa
KaTeiik naDa 6onca, 3NeKTpoHdbIK
CaKaTaBbIiTap icten KaJca Hemece Kypblfbl Da
akaylbIK 6oNca, Kypblfbl 6acka KocblMaIdbI
XHe JapbIKTaHdbIpY WeH6epi KaHaDbI.
YctaHOBKn
| M/A | M/A napametpiinde eki Typni функцялар бap: СтандагТ(M): МOMeHTTik KOCy eh XOFapbl аиналымдap санымeh /Жылдам. Ажыратнышты кеpekti Y3akMbKta УCTahbl3. |
| SensorControl Plus Mehen(A): Y3akMbIbH aBTOMaTTbI peTtey. АВТOMATИКаныбьбелсенидіргэн coH eшipriшу M/A- re petten ocbl Куinde biphewe cekyнД yCTahbl3. КOCKbl M/A hyKTeciHde kalbln aBTOMaTlka aЯталfaHнан coH О- re cekepiDi. Acnan eшipindi. → «SensorControl Plus Mehen naudalany» Мына Semmi kapaHbI3: 149 | |
| O | ToKtaty / Θш ipy |
| Q | «Кocу» Функцяпсын eh TemeH аиналымдap санымeh / eTe akblpbln |
| 1... | 7Жылдамыкбackыштапbl 1: ТemeH aiHaJIbIMdap санbl/akblpbln 7: eH xOFapbl aiHaJIbIMdap санbl Жылдам |
Kypanap
A cypet
PpoecchoHaIbI nImeni 6yfraybiu
Kambpbl 6ynfayfa apHaIFaH, MbicaJIb,KeCKe apHaIFaH KaMbip Hemece Mycc. Kapbl M3 Hemece kinereri KeTepy ywiH.
PpocceccnOHaIbI KaKkbIw
KyMbipTka akyb3bIH, Kinerenki Karfy XaHe XeHJI KaMbipDbI 6ynfayfa apHaHaH, Mbicanbl, BnCKBNT KaMbipbl.

Nneriu
AybipKaMbipnapdbi nneriwnen nney yuH (MbicaJbl, aUbITkbI KaMbip) nney XHe MaJaHaHbAaTbIH
HrpeJeHTepi apaIacbipyfa apHaIraH (Mbicalbl, Mei3, WOKoJaN nnITkanaIapbl).
| Жылдандьік 6оьынша усынbethаçтар | |
| Q | Турпіингroduиентерді кocу Же He abaɪлən apaɪauctbɪpy ушін (Mbɪcaɪbɪ, кeɪpɪshɪtɪŋreɪakʌt bɪ КeTepy ушін) |
| 1-2 | ИнгroduиentsTepdi кocblɪn apaɪaʊctbɪpy ушін |
| 3 | Ауblɪр кambɪрnapdɪилereɪшpen иney ушін |
| 5-7 | ИнгroduиentsTepdi кocу кeɪne Kaɪfy Ушін (Mbɪcaɪbɪ, kinereɪ) Profi Flexi kaɪkbɪшpen hemecce Profi Буɪfaybɪшpen |
| M/A | Açnanтaporдь SensorControl Plus → «SensorControl Plus Mehen naɪdaɪaHу»Mbɪha δemmi Καρaɪbɪz: 149 mehen naɪdaɪaHу Ушін |
Ynire 6aIhaHbICTbl: KypblfblHbl

ka6eIb 6eImwecimeH ka6dbiktaTaNfAH.KeI Ka6eIiH y3bIHdbIfbl Ka6eJIbTiapTy Hemece cany apKbIbI cAneKeCTeHdipyre 6oJaBl.
Bekity kynenepi
Kypblfblda Tpyni 6ekiTy kyynepei 6ap.
ApTbIK KYKTeMeDeH KopFaHbIC
ApTbIK KyKTeMe MOTOpDbI icTey Ke3iHne 3i eWipei. Byn KaFdaIbIH bIKTmAm c6e6i YNKeH KENEMepiH eHNeY 6onybl MymKiH.
AinHaMaJIbI TyTKa CaKTaftbIwbl
AinHaJMaJIbI TyTKa 6ocamn XHe KblKbIma KaTbIp, erep apKa KeTeKeTe KepeK-JapaK KaTaTbIH 6oNca.
Kokbicka TacTay

Opam MaTePnaIJaPbIH KOKbICKa TactaydbIH 3KOJIOrNJIbIK epexeJIepiH caKtAhnI3. ByI Kypblfbl 3JeKTPnIK JxHe 3JeKTPoHDbIK KypblfIap TypaIbI 2012 / 19 / EU EyponaIbIK DInpeKTNbAcBHa cai Tnicti TaH6aMeH 6enrIeHren (waste electrical and electronic equipment - WEEE). ByI DInpeKTNa KypamblHa EO ayMaftbIHa KaJDaHbIaTbIH KOJdaHbICTaH 5bIfapblFaH KypblfblApdbI eTKi3y XHe KOKbICKa Tactay TypaIbI YInFapbIMdap 6ap. KoKbICKa TactaydbIH HaKTbl aDicTepi TypaIbI aKnapaT any ywiH caTyMbImeH xa6apLnacbIbI3.
Kenildk shapTtapbl
OcbI KypblfBbIH, KeiNilik WapTTapbl 6i3in eKIN apkblbIKypbIbIcTbInaTbH ende aHbIKtaIaNbl. OcbI wapTTapfa KaTbICTbl TOJIbIK MAnIMeTTepdi KypblfBbIbI cTbIn anFaH deIdaIaNan 6iJyre 6oJaBl. Ecen-woT Hemece ty6ipTeK oCbI KeiNilik WapTTapbl 6oBbIHwa waBIMdHaHaHaKaPcetilnei.
Θ3repicepcaKtAnIbI.
AkaynbIKTap opbIH aIFaH XaFdaIaFbl KOMeK
TemeHderi keCTeIepDe e3iH3 OHai pette wewe aHaTBIn npo6nemanap ywiH weWIMdepdi WeimdepDi Ta6acbl3. Erep akayltb1 e3 6etIHwe Jxor aImacaHb13, Kb13MeT Kepcety optaIbIfbHa xa6apnaCbl3.
| Акayльк мумkin сбеншим | ||
| Диаспейшитоно Керсетпей катыр. Жарыкшибepi эшik. Керсеты Косылмай катыр. | Курьлгыда тOK жок. | ■ Tok КотсинTekсерінiz. ■ Ашаны розткага калfasыз. |
| Буйым icke Косылмай Тур. Жарыкшибepi Жанын Tур. | Сактыдыр ужени icke косылды. | → «Бекimу жушелегі» мына Бemmi Караныз: 155 |
| Буйым колдану Кezзінде ошірілін Калады. | Ингroducentерін Унken келемі бір'deі уakытta Нemece Тым узak eнділген. | ■ Аиhalмалы ожыраткышты O Кадамын Коьыныз. Ашаны šыл�огынiz. ■ Θн'dey келемін aзайтынiz. ■ Курьлгын bбел'me TemпepаТурасынda Суьыныз. |
| Аиhalмалы ТУТka aшылды. | ■ Аиhalмалы ожыраткышты O Кадамын Кoьыныз. ■ Бocaty Ту'mecin bасын, aiHaImaIbI ТУТканы tipeл'reнше TemeHre bасынiz. | |
| Kece hemecse Бурьштік Беріліс (kepek-jakap) ахырады. | ■ Аиhalмалы ожыраткышты O Кадамын Кoьыныз. Ашаны šыл'огынiz. ■ Kecehi tipeл'reнше bypan bekitihiz. ■ Бурьштік Беріліс'ti bypan bekitin 6угтayruTkiuShnToJbKxabHbI3. | |
| Аиhalмалы ТУТka aшылмайды. | Apka Кызblл я'veTeКte kepek-jakapkapap opHaTылfaH. | ■ Kepek-jakapkapapdbll weshiiz3. ■ Bocaty Tu'mecin bасын, aiHaImaIbI ТУТканы aшынiz. |
| Ингroducenter Косылca дa tappinga3bl шkahanda calmak Керсетпeид. | Салынган Ингroducenter calmarbl 5 rpaMMdah Кem (0,01 φ.). | Kemін'de 5 rpaMM kem (0,01 φ.) calbylniz3, эйтпес таразы dypbIC tapTu Hәтіжелеріn Керсетпeид. |
| Курьлгы тандалган SensorControl Plus багдарламасын icke кotsын backa eшпe徳д. | Бура'mа ретTERiш M/A Куиін'de я'veTeРліk yЗak yaKbIT caKТаIMaДы. | |
| Акayльк муMKн сбен瘙им | ||
| SensorControl Plus icke Косылмай жатур. «Инг佩диEHТЕРДI КOCY» пайда Болады, Инг佩диEHТЕр салынfvан болca на. | Тараазьсblбap Моденьдерde: Инг佩диEHТЕр тараазыбелсан бolyвIHAN aalbIH салынды. | ■Кесене bocaty. ■БаftdaplamaHI KaIta тандаиЗ. ■Инг佩диEHТЕрДI bafdaplama ТандаиВП тараазы «О» Неме «0.00ф.» (Баftdaplamara БайдаиВICTы) керсетілгэнDE Неме «Инг佩диEHТЕрДI KOCY» пайда Болганда салынbeth. |
| Ди检п徴 deri Керсөтkiш | Мумkin сбен Шewim | |
| KATEПК MOTOP APTbIK ЖYКТЕМСЛ | Ингде entertdIn улken калемi bidey yaыltta hemec TeIM узak eнделгeN. | ■ АиhalmaJIы axыраткbltsI O kaadamblHa koынbl3. Ашаны shыогарынbl3. ■ Θндey калемi a3aIbHbI3. ■ Курынblы 6eIme TempepaTypacbHda cbytblbl3. |
| Курынbl儿 hemecse kepek-жарakтap 6уfasлган. | ■ АиhalmaJIы axырatкbltsI O kaadamblHa koынbl3. Ашаны shыогарынbl3. ■ Курынblы/kepek-жарakтbl Tekcepin 6уfasлaydbl aIbIn TactaHbI3. | |
| Motop 6узblfAN. Esep xa6ap y3diKci3 kepcetince, мумки motр 6узblfAN. CepBvuctik Kbl3MeTke xabapnacbHbI3. | ||
| KATEПК TAPA3bl | Тара3bl dурьс icteme jkaTbIp. | ■ Тара3bl KaITapy: Функцялblk пернелердIn (#/C/)/C) bipin dinclPneide «рil» kergetilreHne 6aca 6epiH3. |
| ■ АиhalmaJIы axырatкbltsI O kaadamblHa koынbl3. Ашаны shыогarbbl3. ■ Sham. 10 мIN coH kaItaIaNbl3. | ||
| Тара3bl 6узblfAN. Esep xa6ap y3diKci3 kepcetince, мумки тара3bl 6узblfAN. CepBvuctik Kbl3MeTke хабapnacbHbI3. | ||
| Тара3bl dipindeyi mymknH. | Kурынblы actbHda bIDbc JyfbIu MaSHHa ICTEN TpyFaH JyMbIC TAKTaIapbHbIN YCTINDe naJdaIaNbIbI3. | |
| Курынblы тара3blHbI kondaHap aIbIbIa ЖуmbIC aImaRbIbIa ЖылЖытblbl. | ■ Курынblы кotepin KaIta KOnbHbI3. ■ Тара3blHa kaIIbHa KeItpin KaIta əpeket JaxaHbI3. | |
| KATEПК КОЛ ALБК | АйhalmaJIы TUTka aIbIbIbI. | ■ АиhalmaJIы axырatкbltsI O kaadamblHa koынbl3. ■ Бocaty Tuymecin bacbl, aiHaImaJIbI TUTkaHbI tipeIgReHse TemHe rge bacsbl3. |
| Ди检п徴 deri Керсетkiш | Муемки ce6e | Шewim |
| KATEПК KA3AHДы TEKCEPIH3 | Кеce Немец бурьштбк берinc (kepek-jakap) ажырады. | ■ Айнмалы щьыраткышты O кадамын koийныз. Ашаны shыларын. ■ Keceни tipelenгше bypan bekitihi. ■ Бурьштбк берincti bypan bekitin Бур fatTay ТуТьшВН Толык Кабын; ■ Kypынгын beshipinizда тра3ын; naйдананда andlnbIn TOKtafahra DeiiH kyrihi. |
| TAPa3blYUJIH MALINHAHbl TOKTATy | Тара3ы курьлгы ICTEN Tурганда KOCblДы. | |
| APTbIKЖYKTEME TAPA3bl Hemece KEMЖYKTEME TAPA3bl | Θлшey hétинеш; Тара3ыньн слш; Жэne корsetу аIMaынан ТьIC (-990 r - 5000 r) | ■ Ингелянт rep canmaы 5000 r ken bonmaybl Tmic. ■ Ингелянт rep canmaы 990 r kem bonmaybl Tmic. |
| APTbIKЖYKTEME Hemece KEMЖYKTEME SensorControl Plus Mehen naДалануda | Тацалган багдарлама уши ТыIM кeн Немец ТьIM Кem Ингелянт rep caIbIHgan. | ■ Ингелянт rep di Kelem мәлиmetтepi bonbIHwa caIbIHbI3. → «SensorControl Plus Mehen naДалану» Mына Semmi kapaыз: 149 |
Ka6dkTap
Kepek-kaapkapap kane Kocankb6eIeKepi cayda kane KnneHTTep Kbi3metHe any Mymki. Ohimdep katapbl apaibm keheinreHHe Ocbj Kepe de CnataTmaHa backa Kepek-kaapak konkeimdi 6onybl Mymki. Con ywiH www.bosch-home.com Topabha etin Kaicbl afblMbIK Kepek-kaapak YcblHbInfahbH Kepeci3.
(waste electrical and electronic equipment - WEEE).
algal all jbiy iiaj gai oia
y
oale! g aaiioll o jg 11 oaleiul
12all jg a jwuiu.
aill lla aiee iabii 1 1
a 1
Jn
Lilao jno jolal lgljnaaall b
j
JnBgul. Jusai Jusai sik
j 1 j 1 1 1 1 1 1 1 1
j 1
. S ADB = S COD + S_ BDO
i
1)
(ala 1 a
aLl 100
Laiai Jaiu
acllll 1
2
1 1
aocg y j 13 cglg
aI
j 1
10) 1
aclll jac
Jalai a
i
15 15 15 15 15
a 1
y
J 1
J 1
1 1
J 1
1 0
i j 1
a aaii i jil jll lalil pip
Jai j Jai all Jai 1
.
C
a
aI aI IaI aI aI aI aI aI aI aI
.
| ### | ### | ### |
| ### | ### | ### |
| ### | ### | ### |
| ### | ### | ### |
| ### | ### | ### |
| ### | ### | ### |
| ### | ### | ### |
| ### | ### | ### |
| ### | ### | ### |
| ### | ### | ### |
| ### | ### | ### |
| ### | ### | ### |
| ### | ### | ### |
| ### | ### ### | ### |
| ### | ### | ### |
| ### | ### | ### |
| ### | ### | ### |
| ### | ### | ### |
| ### | ### | ### |
| ### | ### | ### |
| ### | ### | ### |
| ### | ### | ### |
| ### | ### | ### |
| ### | ### | ### |
| ### | ### | ### |
| ### | ### | ### 2 |

aiee 1 aes
a
3
jLw cLo 3-4
150
- Li, Li, Li, Si, Si, Si, Si, Si, Si, Si
150
50
-
()
6 4 jj j
7 1
4
aolol
1 12 1/2 8 8
OE BC
2 2c:la1s! sAs
y
y
auiuui 1 aai
3-4
200-250
1
1/2 1
a
200-250-
()
500
1
150
1/2 1
2-3 2
7 1
21 2
2
!pala
-
a + b = 3
一
一
i 1
iie 1
1
gulwJglj
.
5
1 1
Jaaal gagg cgg a
m = 311
aiee eae ee eee
1
1

aagaaol
- p^2 ≥ 2
中
7 4 1
lg( x - 1) = 2( x - 1) x + 1
e yjzall jjrlbll 1
SensorControl Plus
pai piai111111
ar-9 «SensorControl Plus

6
.7 1
OE BC
FOR SCALE STOP MACHINE
(jglgj)
7 HOLD ROTARY SWITCH ON M/A FOR 2s
.(M/A 1
8
9
MAA! 120
- 4yjueepeeeeee eeeeee eeeeee eeeeee eeeeee eeeeee eeeeee eeeeee eeeeee eeeeee eeeeee eeeeee eeeeee eeeeee eeeeee eeeeee eeeeee eeeeee eeeeee eeeeee eeeeee eeeeee eeeeee eeeeee eeeeee eeeeee eeeeee eeeeee eeeeee eeeeee eeeeee eeeeee eeeeee eeeeee eeeee ee
1
()
jdyj 0 jyJ 1
ar-6 1
.0 1
j 1
a 1
.()
1 1
(y)←j
ar-12
5
()
:ailllllollae 1
()aalzallnglssll-
()
- 221c .
()jgl 1xla ()
:
-5
- (Jr0.01)
a 0.01)
$$ s _ {j} \leqslant 1 1 \text {c i l l} \leqslant 1 1 g \leqslant 1 1 g \leqslant 1 1 g \leqslant 1 1 g \leqslant 1 1 $$
$$ e l e a l \geqslant 1 0 0 $$
$$ . S e n s o r C o n t r o l \text {P l u s} $$
$$ S e n s o r C o n t r o l \text {P l u s} $$
$$ \therefore \mathrm {a l o a} _ {\mathrm {o}} \mathrm {j} \mathrm {j} \mathrm {j} \mathrm {j} \mathrm {j} \mathrm {j} \mathrm {j} \mathrm {j} \mathrm {j} \mathrm {j} \mathrm {j} \mathrm {j} $$
$$ \text {S e n s o r C o n t r o l} \quad \text {P u b l i c a l} - $$
$$ \text {i} \text {i} \text {i} \text {i} \text {i} \text {i} \text {i} \text {i} \text {i} \text {i} \text {i} \text {i} \text {i} \text {i} \text {i} \text {i} \text {i} \text {i} \text {i} \text {i} \text {i} $$
$$ \therefore \Delta B A D \cong \Delta C D O \cong \Delta C D O $$
$$ \left. \right.\left. \right.\left. \right.\left. \right.\left.\left.\left.\left.\left.\left.\left.\left.\left.\left.\left.\left.\left.\left.\left.\left.\left.\left.\left.\left.\left.\left.\left.\left.\left.\left.\left.\left.\left.\left.\right.\right.\right.\right.\right.\right.\right.\right.\right.\right.\right.\right.\right.\right.\right.\right.\right.\right.\right.\right.\right.\right.\right.\right.\right.\right.\right]\right]\right]\right] $$
$$ \left. \int_ {0} ^ {1} \int_ {0} ^ {1} \int_ {0} ^ {1} \int_ {0} ^ {1} \int_ {0} ^ {1} \int_ {0} ^ {1} \int_ {0} ^ {1} \int_ {0} ^ {1} \int_ {0} ^ {1} \int_ {0} ^ {1} \int_ {0} ^ {1}\right) 7 $$
$$ \left. \rho (\text {j a n d} \text {a l l} \text {c o l l}) 3 \text {a r r o r} \right] (\text {a l l}) $$
$$ \mu \text {g} \text {g} \text {g} \text {g} \text {g} \text {g} \text {g} \text {g} \text {g} \text {g} \text {g} \text {g} \text {g} \text {g} \text {g} \text {g} \text {g} \text {g} \text {g} \text {g} \text g g g g g g g g g g g g g g g g g g g g g g g g g g g g g g g g g g g g g g g g g g g g g g g g g g g g g g $$
$$ \therefore \omega_ {1} = 2 $$
$$ \text {S e n s o r C o n t r o l P l u s} \quad \text {L i d i g i n} \quad \text {L i d i g i n} \quad \text {L i d i g i n} \quad \text {L i d i g i n} \quad \text {L i d i g i n} \quad \text {L i d i g i n} \quad \text {L i d i g i n} \quad \text {L i d i g i n} \quad \text {L i} $$
$$ \therefore \int_ {a} ^ {b} \int_ {c} ^ {d} \int_ {e} ^ {f} \int_ {g} ^ {h} \int_ {i} ^ {j} \int_ {k} ^ {l} \int_ {m} ^ {n} \int_ {o} ^ {p} \int_ {q} ^ {r} \int_ {s} ^ {t} $$
$$ \therefore \text {a b a s i n g l y} \int_ {\mathcal {S}} \int_ {\mathcal {S}} \int_ {\mathcal {S}} \int_ {\mathcal {S}} \int_ {\mathcal {S}} \int_ {\mathcal {S}} \int_ {\mathcal {S}} \int_ {\mathcal {S}} \int_ {\mathcal {S}} \int_ {\mathcal {S}} \int_ {\mathcal {S}} \int_ {\mathcal {S}} $$
Sensor Control PI
0
S OBC = S BOC + S_ BOC
2
a1 = 23,a2 = - 43,b1 = 56,b2 = - 35
3
sotimM
(2-12) 4
5
()
i 100
CREAM>300ml
jll 1300<
$$ \ll C R E A M > 7 0 0 m l \gg $$
$$ . (J a 7 0 0 < \dot {s} \dot {s} \dot {s} \dot {s} \dot {s}) $$
auiiie 6
()
20 1
AD = 2
[1 - a\log {ac}]
111 1
J 1
bclua g ⑤ jill biai
a 1000000000000000000000000000
.
palea aiee eee
法一法
00:00
Jlll jll lll jll jll jll jll jll jll jll jll jll jll jll jll jll jll jll jll jll jll jll jll jll jll jll jll jll jll jll jll jll jll jll jll jll jll jll jll jll jll jll jll jll jll jll jll jll jll jll jll jll jll
GB Great Britain
BSH Home Appliances Ltd.
Grand Union House
Old Wolverton Road
Wolverton
Milton Keynes MK12 5PT
To arrange an engineer visit, to spare parts and accessories or for product advice please visit www.bosch-home.co.uk or call Tel.: 0344 892 8979
Calls are charged at the basic rate, please check with your telephone service provider exact charges
GR Greece, Eλας
BSH Ikiakes Siskeves A. B.
Central Branch Service
17 km E. O. Athinon-Lami as
Potamou 20
14564 Kifisia
Πανελήνιο τηλέφωνο: 181 82
(Aστική χρεωση)
mail to: nkf-Customer Service
www.bosch-home.gr
HK Hong Kong,
BSH Home Appliances Limited
Unit 1 & 2, 3rd Floor,
North Block, Skyway House,
3 Sham Mong Road
Tai Kok Tsui, Kowloon
Hong Kong
Tel.: 2565 6151
Fax: 2565 6681
mail to: bosch.hk.service@bs.com
www.bosch-home.cn
HR Hrvatska, Croatia
BSH kučni uredaji d.o.o.
Kneza Branimir 22
10000 Zagreb
Tel.: 01 552 08 88
Fax: 01 640 36 03
mail to: informacije.servis
www.bosch-home.com/hr
IE Republic of Ireland
BSH Home Appliances Ltd.
Unit F4, Ballymount Drive
Ballymount Industrial Estate
Walkinstown
Dublin 12
Service Requests, Spares and Accessories:
Tel.: 01450 2655
Fax: 01450 2520
www.bosch-home.co.uk
0.03 € per minute at peak.
Off peak 0.0088 € per minute
I L Israen, C/S/B/ Home Appliance Ltd. 1, Hamasger St. North Industrial Park Lod,7129801 Tel.:089777222 Fax:089777245 mailto:csb-serv@csb-ltd.co.il www.bosch-home.co.il
IN India, Bharat,
BSH Household Appliances
Mfg.Pvt.Ltd.Arena HouseMain Bldg
2nd Floor,
Plot No.103,Road No.12,
MIDC, Andheri East
Mumbai 400 093
Toll Free 1800 266 1880
www.bosch-home.com/ in
Mo-Sa: 8.00am to 8.00pm (exclude public holidays)
I S Iceland
Smith&Norland hf.
Noatuni 4
105 Reykjavik
Tel.:05203000
Fax:05203011
www.smior.is
IT Italy BSH Elettrodomestici S.p.A. Via a.M.Nizzoli 1 20147 Milano (MI)Numero verde 800 829 120 mailto:info.o.it @bosch-home ng.com www.bosch-home.com/ it
KZ Kazakhstan, Ka3aKCTah
IP Turebekov Yerzhan
Nur manovich
Jangeldina str. 15
Shimkent 160018
Tel.: 0252 31 00 06
ma@tsigevka_kz@mai
LB Lebadian,
Teheni, Hana & Co.
Boulevard Dora 4043 Beyrouth
P.O. Box 90449
Jdeideh, 1202 2040
Tel.: 01 255 211
mai to: Info@Teheni-Hana.
LT Lietuva, Lithuania
Senuku prekybos centras UAB
Jonavos g. 62
14192 Kaunas
Tel.: 0372 12146
Fax: 0372 12165
www. senukai.lt
UAB "AG Service" R. Kalantos g. 32
52494 Kaunas
Tel.: 0700 556 55
Fax: 037 331 363
mail to: servisas@agservice.com
www.agservice.lt
Baltic Continent Ltd.
Ukšinç, 23
09132 Vilnius I int
Tel.: 05 274 1788
Fax: 05 274 1722
mailto: info@balticcontinent. It
www.balticcontinent. It
LU Luxembourg
BSH élémenténagers S.A.
13-15, ZI Breedeweues
1259 Senningerberg
Tel.: 26349 300
Fax: 26349 315
Reparaturen: lux-repair@bshg.
Ersatzteile: lux-spare@bshg.com/lu
LV Latvija,Latvia
SIA "General Serviss"
Bullu iela 70c
1067 RiGa
Tel.:067425232
mailto:info@serviscer
www.serviscentrs.lv
ElkorServiss
Brivibas gatte 201
1039Riga
Tel.:067070520-36
Fax:067070524
mailto:info@elkorserviss.lv
www.elkorserviss.lv
SiAlektronika-Serviss
Tadaiku iela4
1004Riga
Tel.:067717060
Fax:067601235
mailto:serviss@elektronika.lv
www.elektronika.lv
MD Moldova S.R.L. "Rialto-Studio" FyLyceba 98 2012 KnuimnEB
Tei./fakc:022238180 mailto:bosch-md@mail.ru
ME Crna Gora, Montenegro
Elektronika komerc
Ul. Slobode 17
84000 Bijel O Polje
Tel./Fax: 050 432 575
Mobil: 069 324 812
mailto: ekobosch.servis@t-com
MK Macedonia, Makeonna
GORENEC
Jane Sandanski 69 lok. 3
1000 Skopje
Tel.: 022 454 600
Mobil: 070 697 463
mail to: gorenec@yahoo.com
MT Malta Oxford House I Notabile Road Mr iehel B Tel.: 0214423
Fax: 021 488 656 www.oxfordhouse.com.mt
MV Raaj jeyge Jumhooriyya
Maledives
Intel Investments
Ma. Maadheli, Majeedhee Magu
Male
Tel.: 0331 0742
mailto:mohamed.zuhuree@
I ntel . com. mv
NL Nederlande, Netherland Russia, Poccn
mail to: bosch-contact center www.bosch-home.com
bshg.com
Onderdelenverkoop:
Tel.: 0884244010
Fax:0884244801
mailto:bosch-onderdelen@bshg.com
www.bosch-home.nl
NO Norge, Norway
mail to: Bosch-Service-NO@bs
www.bosch-home.no
NZ New Zealand
BSH Home Appliances Ltd.
Unit F 2, 4 Orbit Drive
Mairangi Bay
Auckland 0632
Tel.: 0800 245 700*
Fax:0800256535
mail to: after sales. nz@bshg
www.bosch-home.co.nz
- Mo-Fr: 8.30am to 4.00pm
(exclude public holidays)
PL Polska, Pol and
mail to: service.romania@bsht
www.bosch-home.ro
OOO“BCXБbITOBaTExHnKa"
CepBnC OT pOn3BOuNTeTnA
Maŋa Kanyxckay 19/1
119071 MockBa
ten.: 495 737 2961
mailto:mok-kdhl@bshg.com
www.bosch-home.com
SA Kingdom Saudi
Abdul Latif Jameel Electronics
and Airconditioning Co. Ltd.
BOSCH Service centre,
Kilo 5 Old Makkah Road
(Next to Toyota), Jamiah Dist.
P.O.Box 7997
Jeddah 21472
Tel.: 800 244 0043
mailto:kunnumalsp@aj.com
www.aljelectronics.com.sa
SE. com Sverige, Sweden
BSH Home Appliances AB
Landsvagen 32
169 29 Solna
Tel.: 0771 11 22 77 local rate
mail to: Bosch-Service-SE@bs
www.bosch-home.se
SG Sing 新加坡
BSH Home Appliances Pte. Ltd.
BIOK 4012, Ang Mo Kio Avenue 10
01-01 Techplace 1
Singapore 569628
Tel.: 6751 5000*
Fax: 6751 5005
mail to: bshsgp.service@bshq
www.bosch-home.com.sg
- Mo-Fr: 8.30am to 7.00pm, Sa: 8.30am to 5.30pm
(exclude public holidays)
SI Sloveni j a,
BSH Hišni aparati d.o.o.
Litostrojska 48
noo oom ubl jana
Tel.: 015830700
Fax: 01 583 08 89
mail to:info macij e. servis@bshg.com
www.bosch-home.com/si
SK Slovensko, Slovakia
BSH domaci spotbrebice s.r.o.
mail to: opravy@bshg.com
www.bosch-home.com/sk
TR Türkiye, Turkey
BSH Ev Al etleri Sanayi
ve Ticaret A.S.
Fatih Sultan Mehmet Mahallesi
Balkan Caddesi No: 51
34771 Umraniye, Istanbul
Bel.92164446333*
Fax: 0 216 528 9188*
mail to:careline.turkey@bshg.com
www.bosch-home.com/
- Cagli merkezini sabit hatlardan
aramanin bedeli sehir icücretlendirme,
Cep Telefonlarindan isekullanilan
BSH Home Appliances Private Limited
台北市內湖區洲子街80號11樓
11F., No.80, Zhouzi St., Nei
Taipei City 11493
Tel.: 0800368888
Fax: 02 2627 9788
mail to: bshtzn-service@bshg.cc
TOB "BCX NObyToBa TexHika"
TeJ.: 044 490 2095
mail to: bsh- service. ua@bshg.cc
Service-General SH.P.K.
Rruga Mag Prishtine-Ferizaj
70000Ferizaj
Tel.: 0290 321 434
Tel.: 0290 330 723
mailto:a_SERVICE@
gama - electronics. com
ha. com
X3 3b1j a, SeB1a
BSH Kučni aparati d.o.o.
Milutina Milankovica br. 9ž
11070 Novi Beograd
Tel.: 011 353 70 08
Fax:0112052389
mail to: informacije.servis-sr@
bshg.com
www.bosch-home.rs
ZA com South Africa
BSH Home Appliances (Pty) Ltd.
15th Road Randjespark
Private Bag X36, Randjespark
185 Midrand-Johannesburg
Tel.: 086 002 6724
Fax: 086 617 1780
mail to: appli anceservicez@bsr
www.bosch-home.com/za

