
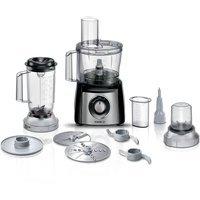
MC812S734G - Food Processor BOSCH - Free user manual and instructions
Find the device manual for free MC812S734G BOSCH in PDF.


| Product Type | Food Processor |
| Brand | Bosch |
| Model | MC812S734G |
| Dimensions (W x H x D) | 25 cm x 40 cm x 30 cm |
| Weight | 8.5 kg |
| Power Consumption | 900 W |
| Voltage | 220-240 V |
| Frequency | 50/60 Hz |
| Bowl Capacity | 4.0 L (working capacity) |
| Number of Speed Settings | 7 (including pulse) |
| Pulse Function | Yes |
| Main Functions | Chopping, Slicing, Shredding, Mixing, Kneading, Pureeing |
| Material of Blades | Stainless steel |
| Material of Bowl | Plastic (BPA-free) |
| Dishwasher Safe Parts | Bowl, lid, attachments (except motor base) |
| Safety Lock | Yes (prevents operation without lid) |
| Non-Slip Feet | Yes |
| Cord Length | 1.2 m |
| Warranty | 2 years |
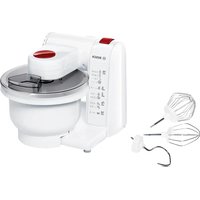
| Included Accessories | S-blade, slicing disc, shredding disc, dough hook |
Frequently Asked Questions - MC812S734G BOSCH
User questions about MC812S734G BOSCH
0 question about this device. Answer the ones you know or ask your own.
Ask a new question about this device
Download the instructions for your Food Processor in PDF format for free! Find your manual MC812S734G - BOSCH and take your electronic device back in hand. On this page are published all the documents necessary for the use of your device. MC812S734G by BOSCH.
USER MANUAL MC812S734G BOSCH
This appliance is intended for domestic use only. Use the appliance only for normal amounts of food. The appliance is suitable for mixing, kneading, and shredding food. The appliance must not be used for other substances or objects. Additional appliances or other accessories approved by the manufacturer may be used with the appliance. Only use approved genuine parts. Do not use the accessory parts for other appliances. Only use the appliance indoors at room temperature and at altitudes up to 2000 m above sea level.
Important safety notices
Read and follow the instruction manual carefully. Enclose these instructions when you give the appliance to someone else. If the instructions for correct use are not observed, the manufacturer's liability for damage will be excluded.
This appliance can be used by persons with reduced physical, sensory, or mental capabilities or lack of experience and knowledge if they are given supervision or instruction concerning use of the appliance in a safe way and if they understand the hazards involved. Keep children away from the connecting cable and do not allow them to use the appliance. Do not let children play with the appliance. Cleaning and user maintenance must not be performed by children.
⚠️ Risk of electric shock and fire!
■ Connect and operate the appliance only according to the specifications on the rating plate. Do not use the appliance if the power cord and/or appliance are damaged. Only a qualified service technician may repair the appliance, e.g., by replacing the power cord, in order to avoid hazards.
■ Never connect the appliance to timer switches or remotely controllable sockets. Never leave the appliance unattended while it is switched on!
■ Do not place the appliance on or near hot surfaces. The power cord must not come into contact with hot parts or be pulled across sharp edges.
■ Never immerse the base unit in water or wash it in a dishwasher. Do not steam-clean the appliance. Do not touch the appliance with damp hands.
■ After each use, whenever the appliance is being assembled, disassembled, or cleaned, and in case of malfunction, the appliance must always be disconnected from the mains. ■ If the power is interrupted, the appliance switches off and restarts when the power is restored.
⚠️ Risk of injury!
■ Before replacing accessories or additional parts during operation, the appliance must be switched off and disconnected from the power supply. After switching off, the drive continues running for a short time. Wait until the drive has come to a complete standstill.
■ While operating the appliance, never reach into the filling shaft with your hands. Always use the pusher to add ingredients. Do not insert any objects (e.g., cutlery) into the bowl or filling shaft.
■ Care should be taken when handling sharp cutting blades, emptying the container, and during cleaning. ■ Do not touch the sharp edges of the universal cutter with bare hands. When not in use, always store the universal cutter with the blade guard on. Do not grasp the sharp blades of the cutting discs. Take hold of the cutting discs by the hub. ■ Never reach into the attached blender jug. Do not reach into the blender jug until the drive has stopped. Do not touch the blender blades with bare hands.
⚠️ Risk of scalding!
When processing hot liquids, steam escapes the lid. Add a maximum of 0.4 litres of hot liquid.
⚠️ Risk of suffocation!
Do not allow children to play with the packaging.
Caution!
We recommend that the appliance is never switched on for longer than is necessary to process ingredients. Do not expose the blender jug to temperature extremes.
⚠️ Important!
It is essential to clean the appliance thoroughly after it has not been used for an extended period. See "Maintenance" on page 11.
Explanation of the symbols on the appliance.

Follow the instructions in the operating manual.

Caution! Rotating blades.

Caution! Rotating tools.
Do not reach into the filling opening.
Congratulations on the purchase of your new Bosch appliance.
For further information, visit our website.
You can find our products please fold out the illustrated → Fig. A
Contents
Intended use
Important safety notices
Overview.
Before using the appliance for first time 5.
Parts and operating controls
Preparation
Use of tools.
Cutting discs
Citrus press
Blender
Sample recipe for the blender
Universal cutter
Cleaning and maintenance
Troubleshooting
Special accessories
Disposal
Guarantee
1 Base unit
a Rotary switch
b Illuminated ring (operati
c Drive (2 or 3-speed *)
d · Cable storage compartment
Bowl
Drive shaft · 1 · (grey)
Drive shaft 2 (black) *
Li d
f · Drive housing for 1 stirring
Disc·hol der
Cutting discs * 13
a · Reversible slicing disc -
b · Reversible shredding disc coarse / fine
c French fries disc
d Asian vegetable disc
9 Citrus press *
a Strainer basket
b Pressing cone
10 Universal cutter *
a Jug with drive
b Lid
n Before using the appliance for the first time
11 Blender
a Blender jug made of b Blade insert c Lid d Filling opening e Funnel
12 Accessories bag
* depending on model
Low speed, black
to drive shaft 2
For using the metal kneading hook.
Medium speed, grey to drive shaft 1
For using the cutting citrus press.


High speed, red without drive shaft
Place the blender
universal cutter.

Before using the appliance for the first time, using the blender and universal cutter.
Before the new appliance can be used, it must be fully unpacked, cleaned and
→ Fig. B
Caution!
Never operate a damaged appliance. Acquired speed or to switch the
■ Remove the base unit and off. The integrated illuminated accessories from the packaging during operation. If there is dispose of the packing materialation, the electronic fuses ■ Check that all parts are present and has a defect, the app examine them for obvious damageer switch on and the ill → Fig. A will flash.
Thoroughly clean and dry all important parts before using for the first time. Only use the rotary switch to switch the appliance on and off. Switching on the appliance with the lid open will damage it. See "Cleaning and maintenance" on page 11.
Parts and operating controls
Important!
The bowl, lid, and jug of the blender are not suitable for use in the microwave.
Colour coding
The appliance has a speed drive and Pulse function (depending on the model). Every setting is identified with a different colour (black, grey, and red). This
coding system can also be found on the accessories. The accessories are automatically connected to the right speed setting.
Settings
| M | Instantaneous switching at maximum speed. Hold do switch for required durat |
| n0/ off s aSt opt/t eSwiatmch of f |
| ahin | foperu#nignspeed steplessl |
| - | adjustable from low to hi |
| max | speed. |
| Pulse Intermittent operation aery speed mum speed. Recommededifferent making e.g. milkshake. This blendour |
Cable storage compartment and use of tools
See Fig. ©
The appliance is equipped with a cable storage compartment. The length of the power cord can be adjusted as required by pulling it out or pushing it back. After finishing work, push the power cord into the cable storage compartment. Jerk it back in. For cutting and chopping.
Preparation
Place the base unit on a stable surface. Pull the power cord out to the required length.
Risk of injury!
Do not insert the mains plug until all preparations for work on the appliance are complete. While operating the appliance, do not reach into the bowl or fill it. After switching off, the tools continue running for a short time. Only use tools or accessories when they are at a standstill.
Important!
- Do not switch the appliance on until the tools or accessories have completely attached.
- The appliance cannot be switched on unless the bowl has been inserted correctly and closed with the lug must be fully inserted into the bowl handle.
- Only use the rotary switch to turn the appliance on and off.
△Risk of injury!
While operating the appliance, keep the length of the intake required by the filling shaft. Do not insert any objects (e.g. a spoon) into the bowl or filling shaft. Do not pull the power cord.
Unnever salary blade
For cutting and chopping
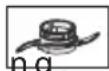
⚠️Risk of injury!
Do not touch the sharp edges of the blade with bare hands. In use, always store the universal blade in the appropriate holder. Take hold of the blade by the edge of the plastic.
Kneading hook (plastic)
For whole kneading (e.g. yeast dough, the mixture) and mixing ingredients which are not to be chopped (e.g., raisins, chocolate chips) → Fig. D 1. Attach the bowl. Observe the Change marking (▼) when doing so. Once the drive is engaged, turn the bowl clockwise as far as possible.
- Press drive shaft 1 into the tool holder until it locks into position.
Once the plane tool holder is aligned with the drive, place the universal blade or kneading hook on the tool holder.
swiftbadeon
Inserted Caution!
The lid Do not add Ingredients until to fin the slot of fitted.
- Add ingredients.
- h to attach the lid with the pus the marking (▼) when doing
- Rotate the lid clockwise as possible.
- Insert the mains plug. Set switch to the desired setting
Adding more ingredients
- To add more ingredients, set switch to 0/off. Remove the pu and add ingredients through opening.
■ Add liquids through the The pusher insert can be measuring jug.
Kneading hook (met
used kneading heavy dough and
mixing in ingredients which are
- After processing, set the switch to off. Go raisins, cho
0/off. Disconnect the mains
p1 Fg. F
Emptying the bowl
- Place drive shaft 2 on the
- Rotate the lid anti-clockwise and Caution!
remove.
Always use drive shaft 2 with t
- Take the tool holder with hengimeral
blade or kneading hook out2.of Attheachbwlhe bowl. Observe th
Remove the tool from the tool marking(·▼) when doing so.
- Rotate the bowl anti-clockwise and clockwise as far as pos:
Remove. Empty the bowl.
- Place the metal kneading hook
Clean all parts immediately after use. Press firmly.
→ “Cleaning and maintenance”
Add ingredients.
page 11
- Attach the lid with the pusher
Stirring whisk
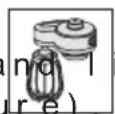
the marking (▼) when doing
For cream, egg white and light
Rotate the lid clockwise as
dough (e.g. sponge mixture). Not possible.
suitable for solid ingredients. Insert the mains plug. Set
switch to the desired setting
→ Fig. ☐
"Adding more ingredients"
- Attach the bowl. Observe the
marking (▼) when doing so.
Rotate the
bowl clockwise as far as possible.
Disc
- Place the drive shaft on the drive. Clean all parts immediately.
- Insert the stirring whisk in "the drive and maintenance"
housing until it locks into
position.
- Attach the drive housing to the drive
shaft, rotating slightly.
Cutting discs
- Add ingredients.
- Attach the lid with the Δ Risk of Obsurgery!
the marking (▼) when doing spot grasp the sharp blades of
- Rotate the lid clockwise as curtiang discs. Take hold of
possible. the edge only. Do not reach int
- Insert the mains plug. Setting r o always use the pusher
switch to the desired settings.
■ After processing, set the rotary switch to Reversible slicing
0/off. Disconnect the mains
Reversible switching dis
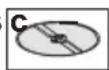
■ Clean all parts immediately after use
→ “Cleaning and maintaining,” marking on the reversible slici
page 11 "1" for the thick cutting side
"1" for the thick cutting side
"3" for the thin cutting side
Caution!
The reversible slicing disc is
for slicing hard cheese, bread,
chocolate. Only slice boiled wa
when they are cold.
Reversible shredding coarse / fine

- Attach the disc holder to rotating it slightly.
For shredding vegetables, fruit, and the like, attach the lid with the pusher, except hard cheese (e.g. Parmesan) marking (▼) when doing a Marking on the reversible shredding disc. Rotate the lid clockwise as "2" for the coarse shredding side.
"4" for the fine shredding side. Insert the mains plug. Set
Caution!
The reversible shredding disc for shredding nuts. Shred soft nuts of the coarse side only.
switch to the desired setting is not suitable. Add the ingredients for slice shredding and push down with a cheese with pusher, applying light press before hand if necessary.
French fries disc
For slicing raw potatoes for chips.
After processing, set the switch to 0/off. Disconnect the mains plug. Clean all parts immediately. Doing so prevents residue from drying on. Cleaning and maintenance.
Asian vegetable disc
For slicing fruit and vegetables into fine strips for Asian vegetable dishes.
Clean all parts immediately. Doing so prevents residue from drying on. Cleaning and maintenance.
Note: Attach French fries disc and Asian vegetable disc with the blade facing up.
Discs suitable for other food processing are available from specialist outlets.
Empty the disc holder before the processed food reaches the edge of the disc holder.
Pusher with insert
Fig. G
Note: Add chocolate before switching on and cover with the pusher. After processing, push down with the pusher.
The pusher can be used in two ways.
Variant 1: For e.g. herbs, leeks, carrots.
Insert the pusher in the opening of the press.

Push down the food to be processed, squeezing juice out of fruits, e.g., oranges, grapefruit, using the citric pusher insert.
Variant 2: For e.g. apples, Caution.
Position the pusher insert in the press and rotate until both parts are completely connected before use.
Push down the food to be processed with the pusher. Fig. 11
→ Fig. H
- Attach the bowl. Observe the marking (▼) when doing so.
- Attach the bowl. Observe the marking (▼) when doing so. Replace the drive shaft on the bowl, turning clockwise as far as possible. Place the strainer basket of
- Place the drive shaft on the drive, observe the marking (
- Take the disc out of the protective cover. Place the disc on the disc holder, with the desired slicing/shredding side facing up. Turn the disc so that the lug on the disc holder engages with the disc openings. The disc must rest on the lateral lugs of the disc holder. Attach and press on the bowl handle. Insert the mains plug. Set the setting to min.
- Press one half of the citrus fruit down and rotate the pressing cone. The juice will flow into the container. Fully insert the blender handle.
After processing, set the Canutti amy switch to 0/off. Disconnect the mains plug. Do not operate the blender. Clean all parts immediately, otherwise the blender will not operate. Doing so prevents residue from drying on. → “Cleaning and maintenance” set the mains plug. Set page 11 switch to the desired setting.
Caution!
Check the fill level. Maximum processing quantity: 1000 ml fruit juice. For more ingredients, set switch to 0/off. Remove the lid.
Blender
For mixing liquid or semi-liquid foods, for cutting/chopping raw vegetables, and for puréeing.
Blender jug made of Tritan.
Tritan is an unbreakable plastic with no discernable taste or smell. The blender jug made of Tritan can be used with ice cubes and frozen food.

⚠️ Risk of injury
Never reach into the attached blender! Do not remove or attach the blender until the blade drive is at a standstill. Do not touch the blades of the blade insert with bare hands. Do not put detergent into the blender. Set to setting M for several seconds.
⚠️ Risk of scalding!
When processing hot liquids, steam escapes through the funnel in the lid. Add a maximum of 0.4 litres of hot liquid.
Caution!
Do not expose the blender jug to temperatures below 5 °C (from the refrigerator) or above 80 °C. - 5 g cinnamon
→ Fig. J
- Attach the blender. Observe the marking (▼) when doing so. Turn the blender clockwise as far as possible. Put the honey and cinnamon into the blender and blend at setting for a few seconds, then add the milk and blend for 3 seconds.
- Add ingredients.
Processing quantities
Solid food: For optimum results, 80 g
Liquids: max. 1.5 l
Hot or frothing liquids: max. 0.4 l
Adding more ingredients
- To process more ingredients, switch to 0/off. Remove the lid, add ingredients, or
- Remove the funnel and gradually load ingredients through the opening.
Pour liquid ingredients through the funnel.
After processing, set the blender to 0/off and disconnect the mains plug. Clean all parts immediately. To process ice, see "Cleaning and maintenance" on page 11.
Tip: To preclean, pour a little detergent into the attached blender until the water is soapy. Set to setting M for several seconds. Do not touch the water with bare hands. Then rinse the blender with water.
Sports drink
- 270 g honey (from the refrigerator, 5 °C)
- 5 g cinnamon
- 230 g milk
Note the recommended processing and times. → Fig. N

Universal cutter

■ Clean all parts immediately
→ “Cleaning and maintenance”
page 11
For cutting up small quantities of meat, hard cheese, onions, parsley, garlic, fruit and vegetables. It is not permitted to cut up peppercorns, sugar, poppy seeds, horseradish, or coffee beans.
For cutting up small quantities of meat, hard cheese, onions, parsley, garlic, fruit and vegetables. It is not permitted to cut up peppercorns, sugar, poppy seeds, horseradish, or coffee beans.
Cleaning and maintenance
The appliance requires no maintenance. Thorough cleaning will guarantee a long service life.
△ Risk of injury
Do not remove or attach the universal cutter until the drive has stopped. Never reach into the blades of the universal cutter with your hands. To remove it, use a suitable implement (e.g., a tool). Caution! The universal cutter will not operate unless the lid is screwed on tight.
General information
Clean parts immediately to prevent residues from drying and possibly attacking the hooped essential oils in herbs.
■ When processing food such as
Caution!
and red cabbage, plastic parts
The universal cutter will not operate unless the lid is screwed on tight.
may become discolored. This can be removed with a few drops of
→ Fig. K
Caution!
- Attach the jug. Observe the marking (▼) when doing so. Do not use cleaning agents that contain alcohol. Turn the jug clockwise as far as possible. Do not use any sharp, pointed objects.
- Add ingredients.
- Attach the lid and rotate clockwise. The lid lug must be fully inserted into the slot of the jug. Do not wedge plastic parts.
- Insert the mains plug. Turn the switch to setting M and hold it there briefly. Do not let the appliance run for too long, as the plastic parts could become permanently deformed.
Note: The longer the appliance is switched on, the finer the ingredients will be cut. Risk of injury when handling the blades!
With herbs, the desired result may be achieved very quickly after switching the appliance on. A brief "pulse" stop is sufficient. - Grasp the cutting discs by
the universal blade. Do not touch the sharp blades. - After processing, release the switch.
setting M may be sufficient. - Grasp the cutting discs by
■ After processing, release the switch. Disconnect the mains plug. Never grasp the sharp blade
switch. Disconnect the mains plug. Never grasp the sharp blade
After using the appliance
of the dicer insert. Grasp the
by the plastic stud in the c
■ Rotate the universal cutter by the plastic stud in the clockwise direction and remove. - Do not touch the blender blades.
■ Turn the universal cutter over, and the chopped food will fall into the lid. Use a brush to clean the blades.
■ Hold the lid. Rotate the jug cutting discs.
Turn clockwise and remove. ⚠ Risk of electric shock!
Remove the rest of the chopped food from the appliance before cleaning the jug using a suitable implement (e.g., spoon).
Cleaning the base unit. Fit the blade insert into the jug.
Never immerse the base unit in liquids or hold it under running water. Rotate the blade insert until the wing matches the marking on the blender jug. Do not clean the appliance in the dishwasher.
Wipe the base unit with a damp cloth.
If required, use a little washing-up liquid. Clean the blade insert with a brush.
Then dry the base unit.
Then dry the base unit. Cleaning the universal cutter: Clean the bowl, tools, and accessories immediately after use.
It is recommended to rinse or clean residues from drying or under running water immediately after use, especially when processing plastic or oils in herbs. Do not clean the appliance in the dishwasher.
Take accessories apart before cleaning. Do not use a brush. To dry, place the jug with the blade insert upside down. Do this in reverse order as described in the individual chapters.
After cleaning, allow all parts to dry thoroughly or rub dry.
thoroughly or rub dry.
Taking the stirring whisk apart for cleaning. Troubleshooting. ⚠ Risk of injury.
The stirring whisk can be taken apart for cleaning. Before dealing with any faults, unplug the mains plug.
→ Fig.
- Remove the stirring whisk from the gear. The laminated ring (operation
- Push in the lug and lift will flash if there is an error cover.
- Remove both gear wheels from the appliance has a defect. housing. Clean carefully with a brush.
- After cleaning and drying, re-assemble all parts in reverse order. Fault: Appliance is no longer working.
Cleaning the blender Possible cause: The appliance
The blender jug (without the blade insert) (e.g. tool jammed by food) and lid and funnel are dishwasher-proof. Do not clean the blade insert in the dishwasher but
under running water (do not soak in water):
■ Set rotary switch to 0/off.
Taking the blade insert apart for cleaning ■ Disconnect the mains plug.
→ Fig. M ■ Eliminate the cause of the
- Turn the empty blender jug Switch that appliance back of the blade insert anti-clockwise by the wings. The blade insert will release.
- Take the blade insert out and remove the sealing ring.
- After cleaning and drying, fit the sealing ring to the blade insert.
Possible cause:
An attempt was made to attach blender to the appliance whi
Remedial action:
■ Set rotary switch to 0/off. ■ Disconnect the mains plug. ■ Attach the bowl or blender. ■ Switch the appliance back on
Fault :
Appliance does not start.
Possible cause:
Parts not correctly attached. completely.
Remedial action:
■ Set rotary switch to 0/off ■ Disconnect the mains plug
Attach parts correctly after installation and under all conditions, following instructions and closing them as defined by our representative in the
country in which it is sold. Details regarding important information: these conditions can be obtained from
Important information:
If the fault cannot be eliminated, contact customer service (see service addresses at the end of the booklet).
Disposal

Dispose of packaging in an environmentally-friendly manner. The
appliance is labelled in accordance with European Directive 201
concerning used electrical and electronic appliances (
waste electrical and electronic equipment -
The guideline determines the framework for the return and recycling of used appliances as applicable
throughout the EU. Please ask a specialist retailer about current disposal facilities.
Guarantee
Other given and the conditions for are as defined by our representative in the
country in which it is sold. Details regarding these conditions can be obtained from
the dealer from whom the appliance was purchased. The bill of sale or receipt must be produced when making any claim under the terms of this guarantee.
Special accessories
(available from a specialist, included with the appliance)
French fries disc (MUZ45PS1)
For slicing raw potatoes for chips.
Asian vegetable disc (MUZ45AG1)
For slicing fruit and vegetables into fine strips for Asian vegetable dishes.
Grating disc coarse (MUZ45RS1)
For grating raw potatoes e.g. for potato pancakes or dumplings.
Potato fritter disc (MUZ45KP1)
For grating raw potatoes for rösti and potato fritters and for cutting fruit and vegetables into thick slices.
Changes reserved.



- IMPORTANT SAFETY NOTICES
- ⚠️ RISK OF ELECTRIC SHOCK AND FIRE
- ⚠️ RISK OF INJURY
- ⚠️ RISK OF SCALDING
- ⚠️ RISK OF SUFFOCATION
- CAUTION
- ⚠️ IMPORTANT
- EXPLANATION OF THE SYMBOLS ON THE APPLIANCE
- CONTENTS
- BASE UNIT
- CITRUS PRESS
- UNIVERSAL CUTTER
- N BEFORE USING THE APPLIANCE FOR THE FIRST TIME
- BLENDER
- ACCESSORIES BAG
- BEFORE USING THE APPLIANCE FOR THE FIRST TIME, USING THE BLENDER AND UNIVERSAL CUTTER
- PARTS AND OPERATING CONTROLS
- IMPORTANT
- COLOUR CODING
- CABLE STORAGE COMPARTMENT AND USE OF TOOLS
- SEE FIG. ©
- PREPARATION
- RISK OF INJURY
- △RISK OF INJURY
- UNNEVER SALARY BLADE
- ⚠️RISK OF INJURY
- KNEADING HOOK (PLASTIC)
- ADDING MORE INGREDIENTS
- KNEADING HOOK (MET
- EMPTYING THE BOWL
- STIRRING WHISK
- → FIG. ☐
- CUTTING DISCS
- REVERSIBLE SHREDDING COARSE / FINE
- FRENCH FRIES DISC
- ASIAN VEGETABLE DISC
- PUSHER WITH INSERT
- BLENDER JUG MADE OF TRITAN
- → FIG. J
- PROCESSING QUANTITIES
- SPORTS DRINK
- △ RISK OF INJURY
- GENERAL INFORMATION
- → FIG. K
- AFTER USING THE APPLIANCE
- POSSIBLE CAUSE
- REMEDIAL ACTION
- FAULT
- IMPORTANT INFORMATION
- DISPOSAL
- GUARANTEE
- SPECIAL ACCESSORIES
- FRENCH FRIES DISC (MUZ45PS1)
- ASIAN VEGETABLE DISC (MUZ45AG1)
- GRATING DISC COARSE (MUZ45RS1)
- POTATO FRITTER DISC (MUZ45KP1)
Brand : BOSCH
Model : MC812S734G
Category : Food Processor