
MultiTalent 3 MCM3501MAU - Food Processor BOSCH - Free user manual and instructions
Find the device manual for free MultiTalent 3 MCM3501MAU BOSCH in PDF.
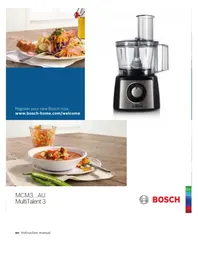


| Product Type | Food Processor |
| Brand | Bosch |
| Model | MultiTalent 3 MCM3501MAU |
| Power | 800 W |
| Bowl Capacity | 3.9 L (working capacity 2.0 L) |
| Dimensions (W x H x D) | 25.0 x 40.0 x 25.0 cm |
| Weight | Approx. 4.5 kg |
| Number of Speeds | 3 + Pulse |
| Main Functions | Chopping, Mixing, Kneading, Slicing, Shredding |
| Included Attachments | Stainless steel chopping blade, slicing disc (3 mm), shredding disc (4 mm), dough hook |
| Continuous Feed Chute | Yes, with pusher |
| Bowl Material | Plastic (SAN) with stainless steel blade |
| Safety Features | Safety locking system (lid and bowl interlock), non-slip feet |
| Cord Length | Approx. 1.0 m |
| Cleaning | Detachable parts dishwasher safe (except motor unit) |
| Spare Parts Availability | Replacement bowls, blades, discs available from Bosch service |
| Warranty | 2 years |
| Certification | CE, GS |
Frequently Asked Questions - MultiTalent 3 MCM3501MAU BOSCH
User questions about MultiTalent 3 MCM3501MAU BOSCH
0 question about this device. Answer the ones you know or ask your own.
Ask a new question about this device
Download the instructions for your Food Processor in PDF format for free! Find your manual MultiTalent 3 MCM3501MAU - BOSCH and take your electronic device back in hand. On this page are published all the documents necessary for the use of your device. MultiTalent 3 MCM3501MAU by BOSCH.
USER MANUAL MultiTalent 3 MCM3501MAU BOSCH
Register your new Bosch now: www.bosch-home.com/welcome

MCM3...AU MultiTalent 3
BOSCH

en English 3

For your safety
Before use, read these instructions carefully in order to become familiar with important safety and operating instructions for this appliance. If the instructions for correct use of the appliance are not observed, the manufacturer's liability for any resulting damage will be excluded.
This appliance is designed for processing normal household quantities in the home or similar quantities in non-industrial applications. Non-industrial applications include e.g. use in employee kitchens in shops, offices, agricultural and other commercial businesses, as well as use by guests in boarding houses, small hotels and similar dwellings.
Use the appliance for processing normal amounts of food for the household; see “Recipe examples” section.
This appliance is suitable for mixing, kneading, beating, cutting and shredding food. Other applications are possible if the accessories approved by the manufacturer are used. It must not be used for processing other objects or substances. Use the appliance with original accessories only. Please keep the operating instructions in a safe place. If passing on the appliance to a third party, always include the operating instructions.
General safety instructions
⚠️ Risk of electric shock
The appliance must not be used by children.
The appliance and its power cord must be kept away from children. Appliances can be used by persons with reduced physical, sensory or mental capabilities or lack of experience and knowledge if they have been given supervision or instruction concerning use of the appliance in a safe way and if they understand the hazards involved. Children shall not play with the appliance.
Connect and operate the appliance only in accordance with the specifications on the rating plate. Only use the appliance indoors at room temperature and up to 2000 m above sea level. Do not use the appliance if the power cord and/or appliance are damaged.
Before replacing accessories or additional parts, which move during operation, switch off the appliance and disconnect from the power supply. Always disconnect the appliance from the supply if it is left unattended and before assembling, disassembling or cleaning.
Do not place the power cord over sharp edges or hot surfaces.
To prevent injury, a damaged power cord must be replaced by the manufacturer, its customer service, or a similarly qualified person.
Only our customer service may repair the appliance.
Safety instructions for this appliance

Risk of injury

Risk of electric shock
If the power is interrupted, the appliance remains switched on and restarts when the power is restored.
Never immerse the base unit in liquids or place it under running water, and do not clean it in the dishwasher.
Before rectifying a fault, pull out the mains plug.

Risk of injury from the rotating tools!
While the appliance is operating, never place fingers in the mixing bowl. Always use the pusher for adding ingredients.
After switching off, the drive continues running for a short time.
Change tools only when the drive is at a standstill.

Risk of injury from sharp blades/rotating drive!
Never reach into the attached blender jug!
Do not remove/attach the blender jug until the drive has stopped. Do not remove/attach the universal cutter jug until the drive has stopped.

Risk of injury from sharp blades!
Do not touch blades of the universal blade with bare hands. When not in use, always store the universal blade in the blade guard. Clean them with a brush.
Do not grip the sharp blades or edges of the cutting discs. Grip the discs by the plastic part in the centre only!
Do not place fingers in the feed tube. Only use the pusher when adding more ingredients. Do not touch blades of the blade insert with bare hands. Clean them with a brush.

Risk of scalding!
If processing hot liquids, steam escapes through the funnel in the lid. Add a max. 0,4 litres of hot or frothing liquid.

Risk of injury!
Never assemble accessories on the base unit.
Explanation of the symbols on the appliance or accessory


Caution! Rotating tools.
Do not place fingers in the feed tube.
Lock blade insert in the blender or universal cutter jug.
Remove blade insert from the blender or universal cutter jug.
Blade insert with blender/cutting blade
Blade insert with grinding blade
Congratulations on the purchase of your new Bosch appliance. You can find further information about our products on our website.
Contents
For your safety 3
Overview 5
Operation 6
Cleaning and servicing....8
Troubleshooting 9
Storage....9
Disposal....9
Guarantee 9
Recipes / Ingredients / Processing ..... 10
Overview
The instructions describe different features of the appliance. Figure 1 shows an overview of the model.
Please fold out the illustrated pages.
Fig. A
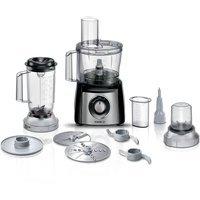
Base unit
1 Rotary switch
0/off = Stop
M = Instantaneous switching at maximum speed, hold switch for required blending duration.
maximum speed, hold switch for required blending duration.
1 = low speed - slow,
2 = high speed - fast.
2 Drive
3 Cord store
4 Bowl
5 Tool holder
6 Tools*
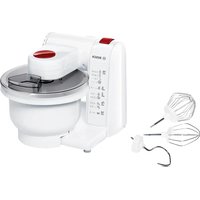
a Universal blade with blade guard b Kneading hook c Chopping disc
a Universal blade with blade guard b Kneading hook c Chopping disc
7 Cutting discs*
a Slicing reversible disc – thick/thin b Shredding reversible disc – coarse/fine c Reversible slicing/shredding disc
8 Lid
a Filler opening b Pusher
Accessories*
9 Blade insert with blender/cutting blade and seal 10 Blade insert with grinding blade and seal 11 Universal cutter jug 12 Blender jug 13 Lid for blender
a Filler opening b Funnel-shaped stopper
* for some models:
With the universal cutter use the appliance at full power (according to the recipe). You can find the recipe on the illustrated pages
(Fig. F).
If the universal cutter is not included with the hand blender, it can be ordered from customer service (order no. 12005833).
Operation
Before operating the appliance and accessories for the first time, clean thoroughly; see "Cleaning and servicing".
Preparation
■ Place the base unit on a smooth, clean surface. ■ Pull cable out of the base unit to the required length.
Important information
- Use only the rotary switch to switch the appliance on or off.
- Never switch the appliance off by rotating the bowl, the blender or a tool.
- Do not switch the appliance on unless tools or accessories have been completely attached.
Bowl with accessories/tools
⚠️ Risk of injury from the rotating tools!
While the appliance is operating, never place fingers in the mixing bowl. Always use the pusher for adding ingredients. After switching off, the drive continues running for a short time. Change tools only when the drive is at a standstill.
Warning!
When working with the bowl, the appliance cannot be switched on until the bowl has been attached and the lid has been attached and screwed on tight.
Universal blade

for cutting, mincing, mixing.
⚠️ Risk of injury from sharp blades!
Do not touch blades of the universal blade with bare hands. When not in use, always store the universal blade in the blade guard. Grip the universal blade by the edge of the plastic handle only.
Kneading hook

for kneading dough and mixing-in ingredients that ought not be cut (e.g. raisins and chocolate chips).
Chopping disc

for cream, egg white and mayonnaise.
Fig. B
■ Attach the bowl (arrow on bowl on dot on the appliance ▼) and rotate as far as possible in a clockwise direction (▼). ■ Insert tool holder into the bowl. ■ Insert universal blade, whisking disc or kneading hook into the tool holder and release.
Note position of the tools when inserting them! Press tools all the way down.
Warning!
Do not add ingredients until the tools have been inserted.
■ Add ingredients. ■ Attach lid with pusher (match arrow on lid on dot on bowl ▼) and rotate in a clockwise direction (▼). Lid lug must be located fully in the slot in the bowl handle.
■ Insert the mains plug. ■ Set the rotary switch to the desired setting. ■ To add more ingredients, set the rotary switch to 0/off. ■ Remove the pusher and add ingredients through the feed tube. Pusher can be used as a measuring cup.
Cutting discs
⚠️ Risk of injury from sharp blades!
Do not grip the sharp blades or edges of the cutting discs. Take hold of discs by the edge only! Do not place fingers in the feed tube. Only use the pusher when adding more ingredients.
Slicing reversible disc – thick/thin

for slicing fruit and vegetables.
Process at setting 1.
Identification on the reversible slicing disc: "grob" for the thick cutting side, "fein" for the thin cutting side
Warning!
The reversible slicing disc is not suitable for slicing hard cheese, bread, rolls or chocolate. Slice boiled, waxy potatoes only when they are cold.
Shredding reversible disc – coarse/fine

for shredding vegetables, fruit and cheese, except for hard cheese (e.g. Parmesan).
Process at setting 1.
Designation on the reversible shredding disc: "2" for the coarse shredding side "4" for the fine shredding side
Warning!
The reversible shredding disc is not suitable for shredding nuts. Shred soft cheese with the coarse side only at setting 2.
Reversible slicing/shredding disc

for slicing and shredding fruit, vegetables and cheese.
Process at setting 2.
Note: Do not process any hard foods using the slicing/grating reversible disc as this may blunt the blade. Use the slicing reversible disc (thick/thin) for this purpose.
Fig. C
■ Attach the bowl (arrow on bowl on dot on the appliance ▼) and rotate as far as possible in a clockwise direction (▼).
Insert tool holder into the bowl.
Depending on the required use:
Place cutting disc on tool holder. Turn required slicing/shredding side face up. Place disc on the disc holder so that the drivers on the tool holder grip the opening in the discs.
Attach lid with pusher (match arrow on lid to arrow on bowl ▼) and rotate in a clock-wise direction (▼). Lid lug must be located fully in the slot in the bowl handle.
Insert the mains plug.
Set the rotary switch to the desired setting.
Fill with contents which are to be sliced or shredded.
When adding contents which are to be sliced or shredded, apply only light pressure to the pusher. Remove the pusher and add ingredients through the feed tube.
Warning!
Empty the bowl before it becomes so full that the cutting or grating contents reach the carrier disc.
After using the appliance
Set the rotary switch to 0/off.
Remove mains plug. Rotate the lid in an anti-clockwise direction and remove. Remove tool:
Take tool holder together with universal blade, whisking disc or kneading hook out of the bowl. Remove the tools from the tool holder.
Take out the cutting discs by the plastic stud in the centre. Take tool holder out of the bowl. Rotate bowl anti-clockwise and remove. Clean all parts, see “Cleaning and servicing”.
Blender
Blade insert with blender/cutting blade for mixing liquid or semi-solid food, for cutting/chopping raw fruit and vegetables, for puréeing food.

Risk of injury from sharp blades / rotating drive!
Never place fingers in the attached blender! Do not remove/attach the blender until the drive is at a standstill. Do not touch blades of the blade insert with bare hands. Clean them with a brush.

Risk of scalding!
If processing hot liquids, steam escapes through the funnel in the lid. Add a max. 0.4 litres of hot or frothing liquid.
Warning!
Blender may be damaged. Do not process deep-frozen ingredients (except ice cubes). Do not operate blender when empty.
Fig. D
■ Place seal on the blade insert. Ensure that the seal is positioned correctly.
Important information
If the seal is damaged or not correctly positioned, liquid may run out.
■ Insert blade insert with blender/cutting blade into the blender jug and lock anti-clockwise. ■ Turn blender jug over (blade insert face down).
Cleaning and servicing
■ Attach the blender jug (match arrow on the jug to the arrow on the appliance) and rotate as far as possible in a clockwise direction. ■ Add ingredients.
Maximum capacity, liquid = 1.0 litres (frothing or hot liquids max. 0.4 litres).
Optimal processing capacity – solids = 80 g.
■ Attach lid and press firmly. Hold lid while working. ■ Insert the mains plug. ■ Set the rotary switch to the desired setting. ■ To add more ingredients, set the rotary switch to 0/off. ■ Remove the lid and add ingredients
or
■ remove the funnel and gradually add solid ingredients through the refill opening
or
■ pour liquid ingredients through the funnel.
After using the appliance
■ Set the rotary switch to 0/off.
■ Remove mains plug. ■ Rotate the blender in an anti-clockwise direction and remove. ■ Remove lid.
■ Loosen blade insert clockwise (☐) and remove from the blender jug.
■ Clean all parts, see “Cleaning and servicing”.
Universal cutter
Use (depending on model):
- With the blade insert with blender/cutting blade 🍼 for cutting and chopping meat, hard cheese, onions, herbs, garlic, fruit, vegetables.
- With the blade insert with grinding blade ① for grinding and cutting fairly small quantities of spices (e.g. pepper, cumin, juniper, cinnamon, dried anise, saffron), grain (e.g. wheat, millet, linseeds), coffee and sugar.
⚠️ Risk of injury from sharp blades / rotating drive!
Do not remove/attach the universal cutter until the drive has stopped.
Do not touch blades of the blade insert with bare hands. Clean them with a brush.
Fig. F shows guide values for the maximum quantities and processing times when working with the universal cutter.
Fig. E
■ Put down universal cutter jug with the opening face up. ■ Add food, which is to be cut, in the jug. Note MAX mark on the jug! ■ Place seal on the blade insert. Ensure that the seal is positioned correctly.
Important information
If the seal is damaged or not correctly positioned, liquid may run out.
■ Insert blade insert (☐/☐) into the universal cutter jug and lock anti-clockwise (☐).
■ Turn universal cutter over (blade insert face down). ■ Attach the universal cutter (arrow on jug on dot on the appliance ▼) and rotate all the way clockwise (▼). ■ Insert the mains plug. ■ Set the rotary switch to the desired setting.
Note: The longer the appliance remains switched on, the finer the ingredients are cut. Recommendations on using the accessories can be found in the section “Recipes/Ingredients/Processing”.
After using the appliance
■ Set the rotary switch to 0/off.
■ Remove mains plug. ■ Rotate universal cutter anti-clockwise and remove. ■ Turn universal cutter over (blade insert face up).
■ Loosen blade insert clockwise (✉) and remove from the universal cutter jug.
■ Empty jug. ■ Clean all parts, see “Cleaning and servicing”.
Cleaning and servicing
The appliance requires no maintenance.
Thorough cleaning protects the appliance from damage and keeps it functional.
An overview of cleaning the individual parts can be found in Fig. G.

Risk of electric shock
Never immerse the base unit in water or place under running water.
Warning!
Surfaces may be damaged. Do not use abrasive cleaning agents.
Note: If processing e.g. carrots and red cabbage, the plastic parts will become discoloured by a red film which can be removed with a few drops of cooking oil.
Cleaning the base unit
■ Remove mains plug. ■ Wipe the base unit with a damp cloth. If required, use a little detergent. ■ Then dry the base unit.
Cleaning the bowl and accessories

Risk of injury from sharp blades!
Do not touch blades of the universal blade with bare hands. Clean them with a brush. Do not grip the sharp blades or edges of the cutting discs. Take hold of discs by the edge only!
All parts are dishwasher-proof. Do not wedge plastic parts in the dishwasher as they could warp.
Cleaning the blender / universal cutter

Risk of injury from sharp blades!
Do not touch blades of the blade insert with bare hands. When not in use, always store the universal blade in the blade guard. Clean them with a brush.
The blender jug (without blade insert), lid and funnel are dishwasher-proof.
Do not clean the blade insert in the dishwasher, but under running water (do not soak in water). Remove seal for cleaning.
Troubleshooting

Risk of injury!
Before rectifying a fault, pull out the mains plug.
Fault:
Appliance does not start or appliance switches off during operation.
Possible cause:
Bowl or lid or the accessory has not been attached correctly or has become detached.
Remedial action:
■ Set the rotary switch to 0/off. ■ Correctly attach bowl/lid or accessory and screw on all the way. ■ Switch the appliance on again.
Important information
If the fault cannot be eliminated, please contact customer service (see customer service addresses at the end of this booklet).
Storage
Fig. H
The tools can be stored in the bowl to save space.
Disposal

Dispose of packaging in an environmentally-friendly manner. This appliance is labelled in accordance with European Directive 2012/19/EU concerning used electrical and electronic appliances (waste electrical and electronic equipment – WEEE). The guideline determines the framework for the return and recycling of used appliances as applicable throughout the EU. Please ask your specialist retailer about current disposal facilities.
Guarantee
The guarantee conditions for this appliance are as defined by our representative in the country in which it is sold. Details regarding these conditions can be obtained from the dealer from whom the appliance was purchased. The bill of sale or receipt must be produced when making any claim under the terms of this guarantee.
Changes reserved.
Recipes / Ingredients / Processing
| Tool Speed Time Recipes / Ingredients / Processing | ||
 | low approx.1-2 min | Yeast dough– Max. 500 g flour– 25 g yeast or 1 packet of dried yeast– 220 ml milk (room temperature)– 1 egg– 1 pinch of salt– 80 g sugar– 60 g butter– Graded rind of half a lemon■ Add all ingredients (except the milk) to the bowl.■ Set rotary switch to a low speed for 10 seconds.■ Add milk and stir at low speed for about 11/2 minutes.Ingredients should be at the same temperature. When the dough has a smooth appearance, place in a warm location. |
 | M Onions, garlic | – from 1 onion, quartered, up to 300 g– from 1 clove of garlic up to 300 g■ Process the onion/garlic until it has been chopped to the required size. |
 | high Hard cheese (e.g. parmesan) | – 10 g to 200 g■ Cut the cheese into cubes.■ Process until it has been chopped to the required size. |
 | high Chocolate | – 50 g to 200 g■ Cut or break the chocolate into pieces.■ Process until it has been chopped to the required size. |
 | high Parsley | – 10 g to 50 g■ Process the parsley until it has been chopped to the required size. |
 | high Meat, liver (for mince, steak tartare, etc.) | – 50 g to 500 g■ Remove bones, gristle and sinews. Dice the meat.Making sausage meat, stuffing and pâté:■ Put meat (beef, pork, veal, poultry, or even fish, etc.) together with other ingredients and spices into the bowl and mix into a dough. |
 | high approx.1.5 min– 2 min | Strawberry sorbet– 250 g frozen strawberries– 100 g icing sugar– 180 ml cream■ Put all ingredients in the bowl. Switch on immediately, otherwise the mixture will go lumpy. Mix until a creamy sorbet forms. |
 | low Beaten egg white- 2 to 6 egg whites■ Beat at a low speed. | |
| high Whipped cream- 200 g to 400 g■ Whisk at high speed. | ||
 | low/high | Mayonnaise- 1 egg- 1 tsp. mustard- 150-200 ml oil- 1 tbs. lemon juice or vinegar- 1 pinch of salt- 1 pinch of sugarIngredients should be at the same temperature.■ Mix all ingredients (except oil) for several seconds at setting 1.■ Switch appliance to setting 2, slowly pour oil through the feed tube and mix until the mixture emulsifies.Eat the mayonnaise immediately, do not store. |
 | high/M Nuts, almonds- 50 g to 200 g■ Remove shells completely, otherwise the blender blade will be blunted.■ Process the onion/garlic until it has been chopped to the required size. | |
 | high/M Puréeing fruit or vegetables- Apple sauce, spinach, carrot and tomato purée; raw or cooked■ Put ingredients and spices into the blender and purée. | |
 | high Chocolate-milk- 80 g–100 g cooled chocolate- approx. 400 ml hot milk■ Chop up the chocolate in the blender, add the hot milk and mix briefly. | |
 | M Honey and hazel nut spread- 15 g hazelnuts- 110 g blossom honey (room temperature)■ Put the nuts in the universal cutter jug and cut with the blender/cutting blade for 20 seconds on setting M.■ Remove the universal cutter jug, turn it over and take out the blade insert.■ Add the honey. Close the universal cutter jug again with the blade and put on the base unit.■ Wait until all the honey has run down over the blade. Then mix everything for 5 seconds on setting M. | |
 | Fig. F shows guide values for the maximum quantities and processing times when working with the universal cutter jug and the blade inserts. | |
Customer Service
DE Germany
AE United Arab Emirates
Jebel Ali Free Zone – Dubai
Tel.: 04 881 4401
mailto:service.uae@bshg.com
www.bosch-home.com/ae
Republic of Albania, Albania
ELEKTRO-SERVIS sh.p.k
Rr. Shkelqim Fusha, Selite,
Pallati "Matrix Konstruksion",
Ground floor and +1
1023 Tirane
Tel.: 4 2278 130, -131
Fax: 4 2278 130
mailto:info@elektro-servis.com
EXPERT SERVIS
Rruga e Kavajes,
Kulla B Nr 223/1 Kati I
1023 Tirane
Tel.: 4 480 6061
Tel.: 4 227 4941
Fax: 4 227 0448
Cel: +355 069 60 45555
mailto:info@expert-servis.al
Gate 1, 1555 Centre Road
Clayton, Victoria 3168
Tel.: 1300 369 744*
Fax: 1300 306 818
mailto:aftersales.au@bshg.com
www.bosch-home.com.au
*Mo-Fr: 24 hours
BA Bosna i Hercegovina, Bosnia-Herzegovina
"HIGH" d.o.o.
Gradačačka 29b
71000 Sarajevo
Tel.: 061 10 09 05
Fax: 033 21 35 13
mailto:bosch_siemens_sarajevo@
yahoo.com
European Trade Center Building, 5th floor
1784 Sofia
Tel.: 0700 208 17
Fax: 02 878 79 72
mailto:informacia.servis-bg@bshg.com
www.bosch.home.bg
BH Bahrain
Khalafat Est.
P.O. Box 5111
Manama
Tel.: 01 7400 553
mailto:service@khalafat.com
To arrange an engineer visit, to order
spare parts and accessories or for
product advice please visit
www.bosch-home.co.uk
or call Tel.: 0344 892 8979*
*Calls are charged at the basic rate, please check with your telephone service provider for exact charges
Greece, Hellas
BSH Ikiakes Siskeves A.B.E.
Central Branch Service
17 km E.O. Athinon-Lamias &
Potamou 20
14564 Kifisia
Unit 1 & 2, 3rd Floor,
North Block, Skyway House,
3 Sham Mong Road
Tai Kok Tsui, Kowloon
Hong Kong
Tel.: 2565 6151
Fax: 2565 6681
mailto:bosch.hk.service@bshg.com
www.bosch-home.cn
HR Hrvatska, Croatia
BSH kućni uređaji d.o.o.
Kneza Branimira 22
10000 Zagreb
Tel.: 01 552 08 88
Fax: 01 640 36 03
mailto:informacije.servis-hr@bshg.com
www.bosch-home.com/hr
www.bosch-home.com/hu
IE Republic of Ireland
BSH Home Appliances Ltd.
Unit F4, Ballymount Drive
Ballymount Industrial Estate
Walkinstown
Dublin 12
Service Requests, Spares and Accessories
Tel.: 01450 2655*
Fax: 01450 2520
www.bosch-home.co.uk
*0.03 € per minute at peak.
Off peak 0.0088 € per minute.
IL Israel,
C/S/B/ Home Appliance Ltd.
1, Hamasger St.
North Industrial Park
Lod, 7129801
Tel.: 08 9777 222
Fax: 08 9777 245
mailto:csb-serv@csb-ltd.co.il
www.bosch-home.co.il
IN India, Bhārat, भारत
BSH Household Appliances
Mfg. Pvt. Ltd. Arena House, Main Bldg,
2nd Floor,
Plot No. 103, Road No. 12,
MIDC, Andheri East
Mumbai 400 093
Toll Free 1800 266 1880*
www.bosch-home.com/in
* Mo-Sa: 8.00am to 8.00pm
(exclude public holidays)
IS Iceland
Smith & Norland hf.
Noatuni 4
105 Reykjavik
Tel.: 0520 3000
Fax: 0520 3011
www.sminor.is
IT Italia, Italy
www.bosch-home.com/it
KZ Kazakhstan, Казақстан
IP Turebekov Yerzhan
Nurmanovich
Jangeldina str. 15
Shimkent 160018
Tel.: 0252 31 00 06
mailto:evrika_kz@mail.ru
LB Lebanon
Teheni, Hana & Co.
Boulevard Dora 4043 Beyrouth
P.O. Box 90449
Jdeideh, 1202 2040
Tel.: 01 255 211
mailto:Info@Teheni-Hana.com
LT Lietuva, Lithuania
Senuku prekybos centras UAB
Jonavos g. 62
44192 Kaunas
Tel.: 0372 12146
Fax: 0372 12165
www.senukai.lt
UAB "AG Service"
R. Kalantos g. 32
52494 Kaunas
Tel.: 0700 556 55
Fax: 037 331 363
mailto:servisas@agservice.lt
www.agservice.lt
Baltic Continent Ltd.
Lukšio g. 23
09132 Vilnius
Tel.: 05 274 1788
Fax: 05 274 1722
mailto:info@balticcontinent.lt
www.balticcontinent.lt
LU Luxembourg
S.R.L. "Rialto-Studio"
ул. Щусева 98
2012 Кишинев
Unit F 2, 4 Orbit Drive
Mairangi Bay
Auckland 0632
Tel.: 0800 245 700*
Fax: 0800 256 535
mailto:aftersales.nz@bshg.com
www.bosch-home.co.nz
* Mo-Fr: 8.30am to 4.00pm
(exclude public holidays)
PL Poland
SA Kingdom of Saudi Arabia,

Abdul Latif Jameel Electronics
and Airconditioning Co. Ltd.
BOSCH Service centre,
Kilo 5 Old Makkah Road
(Next to Toyota), Jamiah Dist.
P.O.Box 7997
Jeddah 21472
Tel.: 800 127 9999
mailto:palakkaln@alj.com
www.aljelectronics.com.sa
SE Sverige, Sweden
BSH Home Appliances AB
Landsvägen 32
169 29 Solna
Tel.: 0771 11 22 77 local rate
mailto:Bosch-Service-SE@bshg.com
www.bosch-home.se
SG Singapore
BSH Home Appliances Pte. Ltd.
Block 4012, Ang Mo Kio Avenue 10
01-01 Techplace 1
Singapore 569628
Tel.: 6751 5000*
Fax: 6751 5005
mailto:bshsgp.service@bshg.com
www.bosch-home.com.sg
* Mo-Fr: 8.30am to 7.00pm, Sa: 8.30am to 5.30pm (exclude public holidays)
SI Slovenija, Slovenia
BSH Hišni aparati d.o.o.
Litostrojska 48
1000 Ljubljana
Tel.: 01 583 07 00
Fax: 01 583 08 89
mailto:informacije.servis@bshg.com
www.bosch-home.com/si
SK Slovensko, Slovakia
www.bosch-home.com/tr
BSH Home Appliances Private Limited
11F., No.80, Zhouzi St., Neihu Dist., Taipei City 114, Taiwan
11F., No.80, Zhouzi St., Neihu Dist.
Taipei City 11493
Tel.: 0800 368 888
Fax: 02 2627 9788
mailto:bshtzn-service@bshg.com
Service-General SH.P.K.
Rruga Mag Prishtine-Ferizaj
70000 Ferizaj
Tel.: 0290 321 434
Tel.: 0290 330 723
mailto:a_service@
gama-electronics.com
XS Srbija, Serbia
BSH Kućni aparati d.o.o.
15th Road Randjespark
Private Bag X36, Randjespark
1685 Midrand – Johannesburg
Tel.: 086 002 6724
Fax: 086 617 1780
mailto:applianceserviceza@bshg.com
www.bosch-home.com/za
![graph TD A["Step 1: Cutting into blender"] --> B["Step 2: Stopping cup"] B --> C["Step 3: Stopping cup with lid"] C --> D["Step 4: Stopping cup with lid and fan blade"] D --> E["Step 5: Stopping cup with fan blade and bowl"] E --> F["Step 6: Stopping cup with fan blade and bowl"] F --> G["Step 7: St…](/content/2026/06/1352745/images/6167882e8799b27cd6acba78fc09cd0209e978ec99d83423ad62620789708c69.jpg)
![graph TD A["Step 1: Stacking a blender with food, dipping into cup"] --> B["Step 2: Stopping a blender with liquid, pressing down on cup"] B --> C["Step 3: Stopping a blender with liquid, adding a lid, lifting the cup"] C --> D["Step 4: Stopping a blender with a bowl, pressing down on cup"] D --> E[…](/content/2026/06/1352745/images/b106baeeeb1ba449719b314b3ae442e6c8bbbae8441e9c6b0280f40ff1f450b1.jpg)
E![graph TD A["Step 1: Covering food, dipping into basket"] --> B["Step 2: Stacking bowl, pressing down"] B --> C["Step 3: Stopping a blender, pressing down"] C --> D["Step 4: Cutting into a microwave oven"] D --> E["Step 5: Insert a power outlet, press down"] E --> F["Step 6: Packaging, pouring conten…](/content/2026/06/1352745/images/f0420e13b680c28a50891a731d8ae92a0ed400be9c13859c79d4e4de9a3d3957.jpg)
F


x
60 g
40–60 s
2


X
50 g
(5-10)xM

x
100 g
40–60 s
2

x
50 g
40–60 s
2
![graph TD A["Beaker with lid"] --> B["Shrimpnet with cloth"] B --> C["Shrimpnet with cloth inside bowl"] C --> D["Shrimpnet with cloth inside bowl with cloth inside bowl"] D --> E["Shrimpnet with cloth inside bowl with cloth inside bowl with cloth inside bowl"] E --> F["Shrimpnet with cloth inside bo…](/content/2026/06/1352745/images/3eeabdc28b9e49e1638ebc308b75ea656ec650365992f1cf5e9ffc2d8a2a7ce2.jpg)
![graph TD A["Raw Material"] --> B["Step 1: Rotation of Nutrient"] B --> C["Step 2: Rotation of Nutrient"] C --> D["Step 3: Rotation of Nutrient"] D --> E["Step 4: Rotation of Nutrient"] E --> F["Step 5: Rotation of Nutrient"] F --> G["Step 6: Rotation of Nutrient"] G --> H["Step 7: Rotation of Nutrie…](/content/2026/06/1352745/images/c47c99bbdb2142c4c77d38cac5196e8bfffbc9a46b5e0b262dce435e4207e6d1.jpg)





- FOR YOUR SAFETY
- GENERAL SAFETY INSTRUCTIONS
- ⚠️ RISK OF ELECTRIC SHOCK
- SAFETY INSTRUCTIONS FOR THIS APPLIANCE
- EXPLANATION OF THE SYMBOLS ON THE APPLIANCE OR ACCESSORY
- CONTENTS
- OVERVIEW
- FIG. A
- BASE UNIT
- ROTARY SWITCH
- CORD STORE
- ACCESSORIES
- (FIG. F)
- OPERATION
- PREPARATION
- IMPORTANT INFORMATION
- BOWL WITH ACCESSORIES/TOOLS
- ⚠️ RISK OF INJURY FROM THE ROTATING TOOLS
- WARNING
- UNIVERSAL BLADE
- ⚠️ RISK OF INJURY FROM SHARP BLADES
- KNEADING HOOK
- CHOPPING DISC
- FIG. B
- CUTTING DISCS
- SLICING REVERSIBLE DISC – THICK/THIN
- SHREDDING REVERSIBLE DISC – COARSE/FINE
- REVERSIBLE SLICING/SHREDDING DISC
- FIG. C
- AFTER USING THE APPLIANCE
- BLENDER
- RISK OF INJURY FROM SHARP BLADES / ROTATING DRIVE
- RISK OF SCALDING
- FIG. D
- CLEANING AND SERVICING
- UNIVERSAL CUTTER
- ⚠️ RISK OF INJURY FROM SHARP BLADES / ROTATING DRIVE
- FIG. E
- RISK OF ELECTRIC SHOCK
- CLEANING THE BASE UNIT
- CLEANING THE BOWL AND ACCESSORIES
- RISK OF INJURY FROM SHARP BLADES
- CLEANING THE BLENDER / UNIVERSAL CUTTER
- TROUBLESHOOTING
- RISK OF INJURY
- FAULT
- POSSIBLE CAUSE
- REMEDIAL ACTION
- STORAGE
- FIG. H
- DISPOSAL
- GUARANTEE
- CUSTOMER SERVICE
- GREECE, HELLAS
- HR HRVATSKA, CROATIA
- IE REPUBLIC OF IRELAND
- IL ISRAEL
- IN INDIA, BHĀRAT, भारत
- IS ICELAND
- IT ITALIA, ITALY
- KZ KAZAKHSTAN, КАЗАҚСТАН
- LB LEBANON
- LT LIETUVA, LITHUANIA
- LU LUXEMBOURG
- PL POLAND
- SA KINGDOM OF SAUDI ARABIA
- SE SVERIGE, SWEDEN
- SG SINGAPORE
- TECHPLACE
- SI SLOVENIJA, SLOVENIA
- SK SLOVENSKO, SLOVAKIA
- XS SRBIJA, SERBIA
Brand : BOSCH
Model : MultiTalent 3 MCM3501MAU
Category : Food Processor