
ER5209 - Beard trimmer PANASONIC - Free user manual and instructions
Find the device manual for free ER5209 PANASONIC in PDF.
| Brand | Panasonic |
| Model | ER5209 |
| Product type | Beard trimmer |
| Power supply | 230 V AC, 50 Hz via mains adapter |
| Motor voltage | 1.2 V DC |
| Charging time | 8 hours |
| Operating time | Approx. 35 minutes of continuous operation |
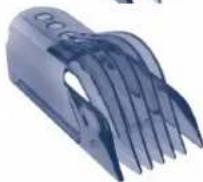
| Number of combs | 7 (3/6 mm, 9/12 mm, 15/18 mm, 20/30/40 mm, 50/60/70 mm) |
| Cutting height range | 1 mm to 70 mm (depending on attachment) |
| Natural cutting attachment | Yes, for thinning hair |
| Thinning attachment | Yes, for reducing volume |
| Washable | Yes, hand-held part washable under running water |
| Battery type | Built-in rechargeable nickel-metal hydride |
| Blade lifespan | Approx. 2 years (use 2 times/month, 20 min) |
| Battery lifespan | Approx. 4 years (recharge 3 times/month) |
| Mains operation | Yes, even if battery low |
| Safety | Unplug before cleaning, do not use in bathroom |
| Cleaning | Brush and rinse under running water |
| Lubrication | Apply oil before each use |
| Package contents | Trimmer, 7 combs, attachments, adapter, cord, oil, brush |
Frequently Asked Questions - ER5209 PANASONIC
User questions about ER5209 PANASONIC
0 question about this device. Answer the ones you know or ask your own.
Ask a new question about this device
Download the instructions for your Beard trimmer in PDF format for free! Find your manual ER5209 - PANASONIC and take your electronic device back in hand. On this page are published all the documents necessary for the use of your device. ER5209 by PANASONIC.
USER MANUAL ER5209 PANASONIC
Operating Instructions AC/Rechargeable Clipper Model No.ER5209
English 2
Dansk 26
Cesky 50
Deutsch 6
Portugues 30
Magyar 54
Francais 10
Norsk 34
Romána 59
Italiano 14
Svenska 38
Pycckn 63
Nederlands 18
Suomi 42
Türkce 68
Espanol 22
Polski 46
YkpaaiHcbka

Before operating this unit, please read these instructions completely.
Safety instructions
Failure to observe the Safety instructions may result in death, serious injury, electric shock, fire or short circuit.
Be careful when treating the AC adaptor
- Disconnect the AC adaptor from the outlet when cleaning the clipper.
- Always grip the AC adaptor and not the power cord.
- Do not use the clipper if the power cord or the AC adaptor is worn, or if the AC adaptor does not fit snugly in the outlet.
- Do not damage or deform the power cord. Do not place heavy objects on the power cord or trap it between objects.
- Clean the power plug regularly to remove any dust or dirt.
Keep out of liquid
- Do not use the clipper with AC operation in bathrooms.
- Do not insert and remove the AC adaptor with wet hands.
- Do not allow the AC adaptor to get wet.
- Do not wipe the clipper or AC adaptor with thinner, benzine or alcohol.
Failure to observe the following may result in injuries to the skin
- Do not press the blade against the skin.
- Do not use the clipper for any purpose other than trimming.
- Do not trim the hair of a pet.
- Check that the blades are not damaged or deformed before use.
Before using each time, apply oil at the places marked with arrows. (See page 5.)
Caution for charge
- Charging for longer than 48 hours may shorten the life of the battery.
- The clipper may become warm during operation and/or charging. This is normal.
- Charge the clipper at temperatures between 0^ and 40^ (32°F and 104°F) to work correctly.
- Do not use any power cord or AC adaptor other than one
2
specifically designed for this model. (RE5-97)
Caution for usage and storage
- Do not disassemble or modify the clipper. Do not attempt repairs.
- Repairs must always be requested to your dealer.
- Keep out of the reach of children.
- This clipper is for indoor use only.
- Do not store the clipper in a place exposed to direct sunlight or near a heater or other source of heat.
Specifications
Power source: 230 V AC, 50 Hz
Motor voltage: 1,2 V DC
Charging time: 8 hours
Airborne Acoustical Noise: 64 (dB (A) re 1 pW)
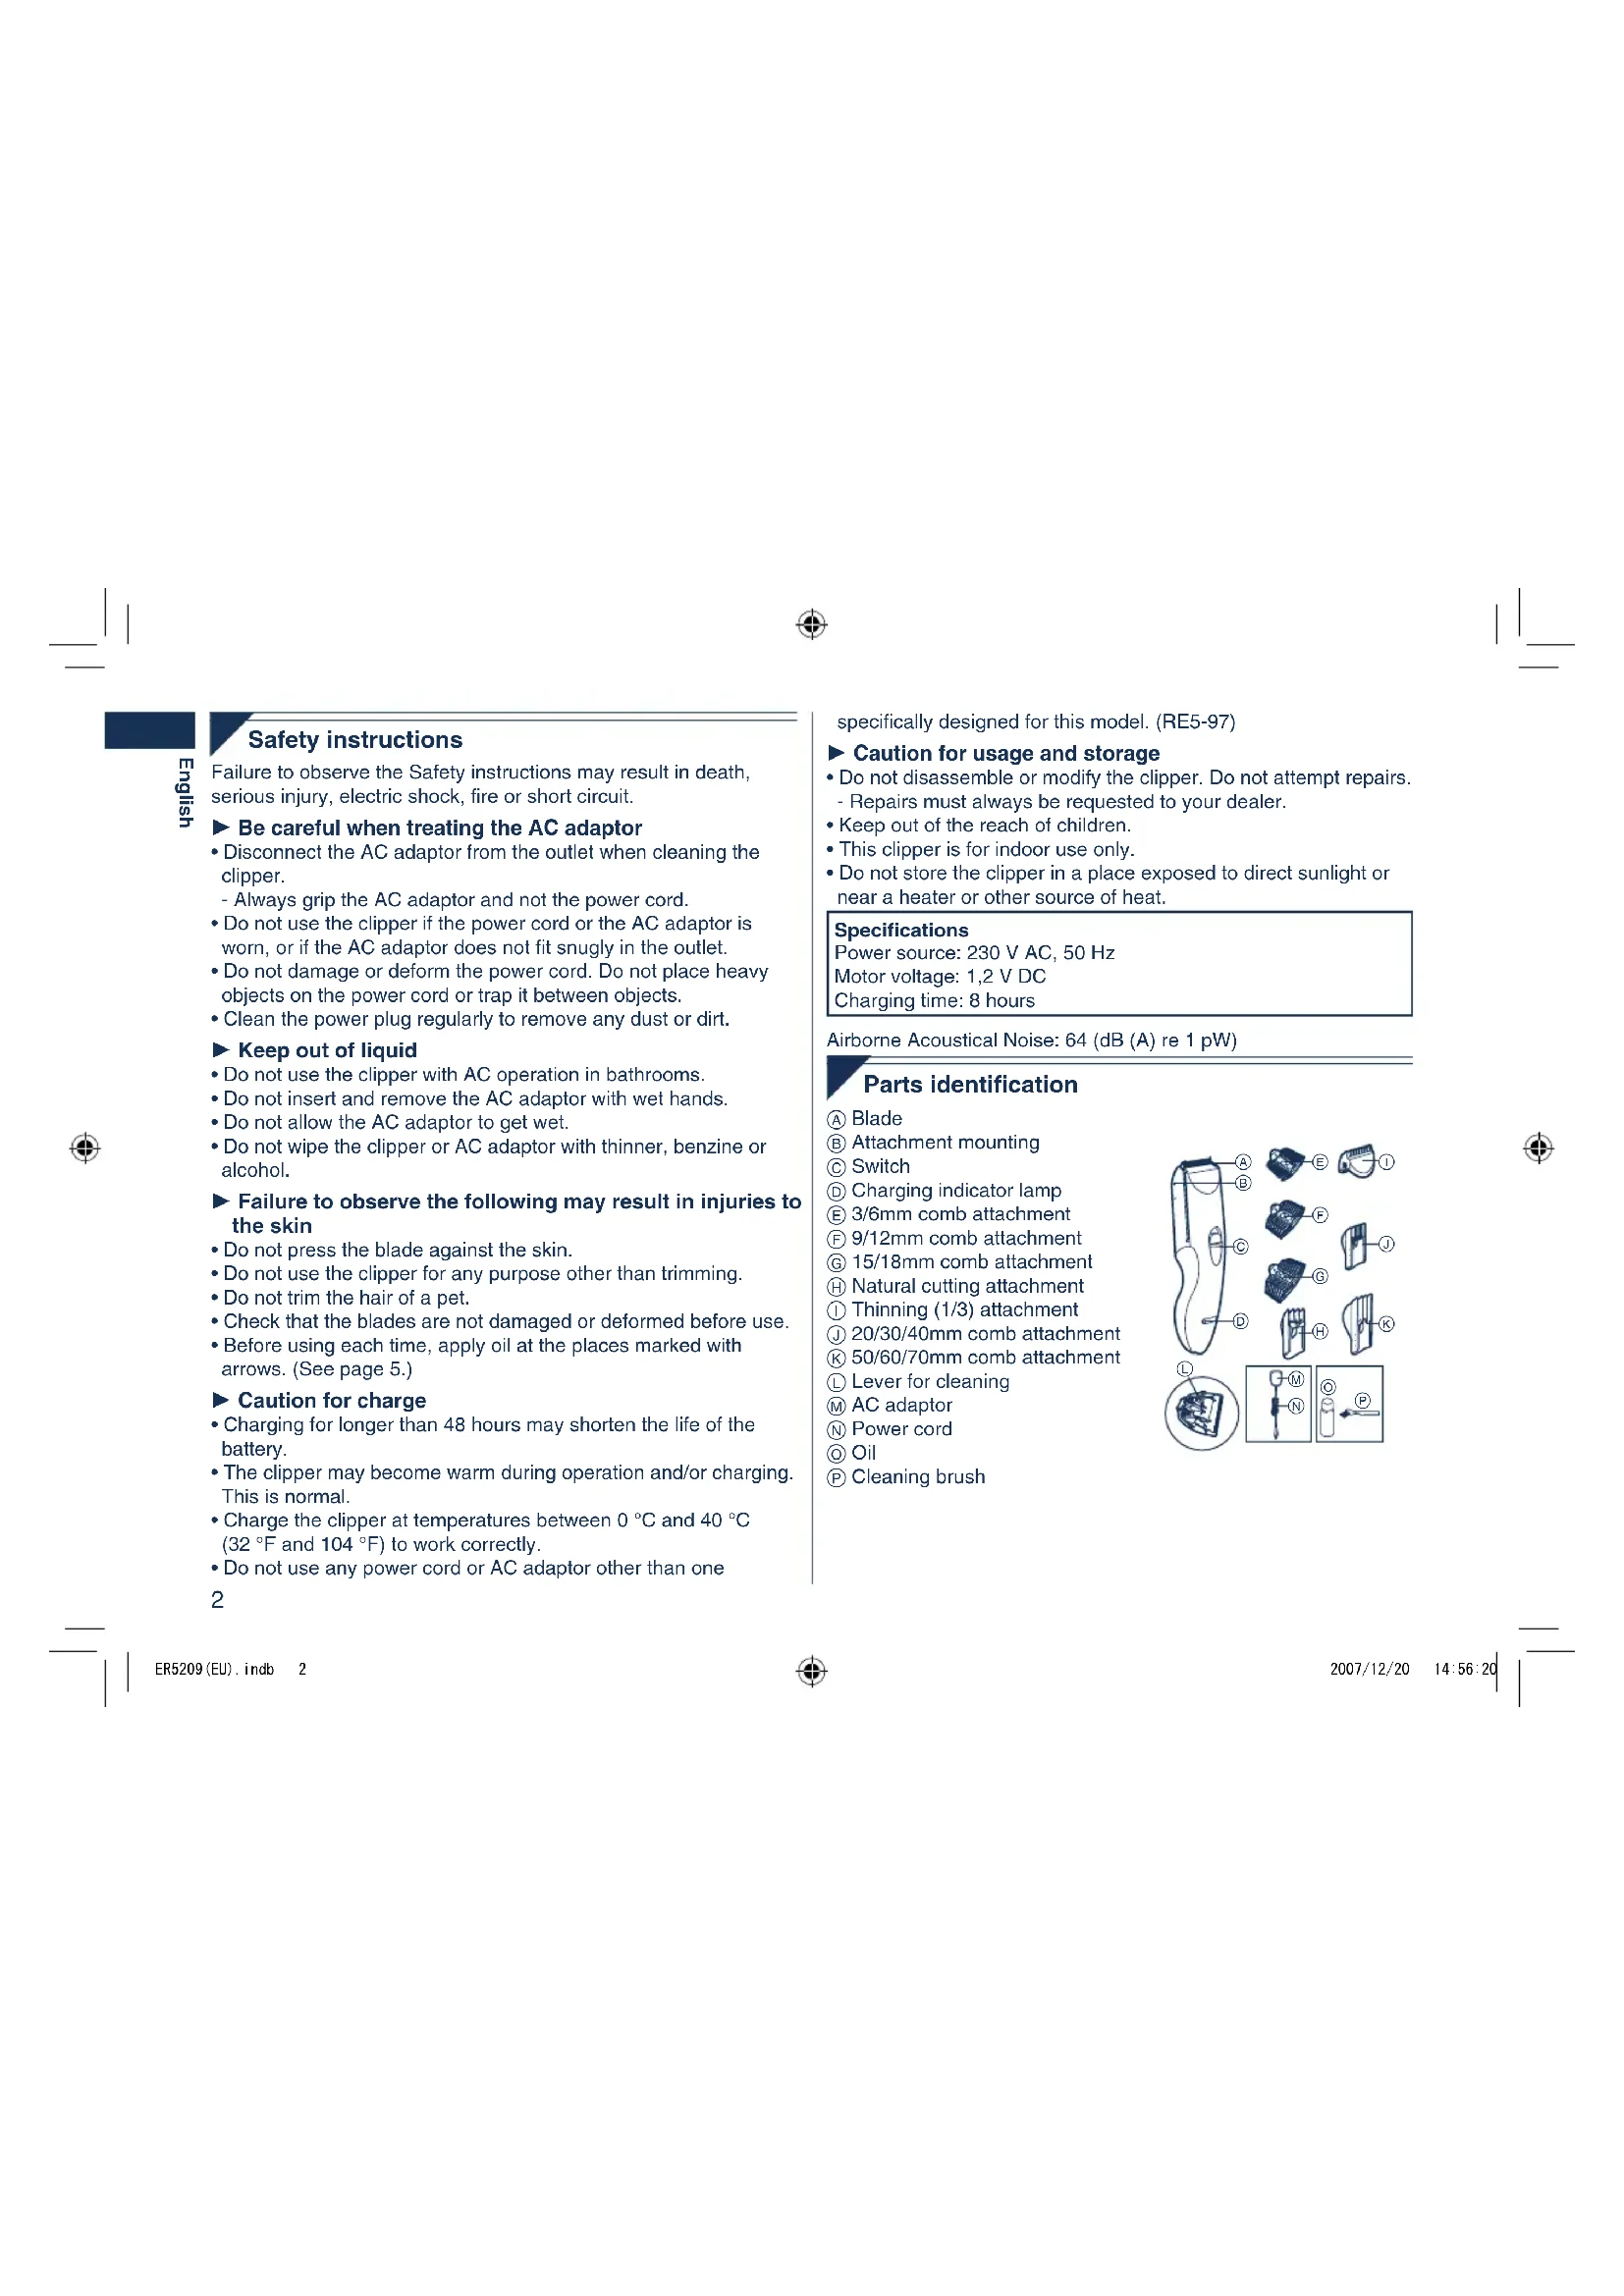
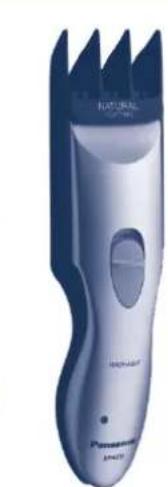
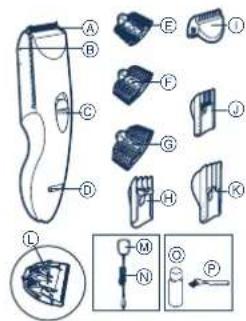
Parts identification
A) Blade
Attachment mounting
Switch
Charging indicator lamp
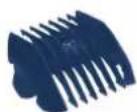
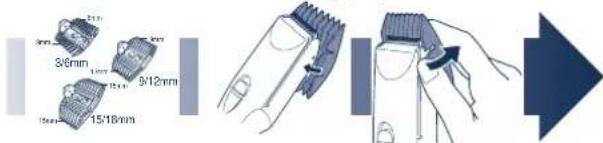
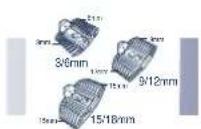
E 3/6mm comb attachment
(F) 9/12mm comb attachment
(6) 15/18mm comb attachment
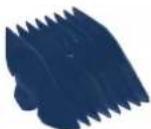
Natural cutting attachment
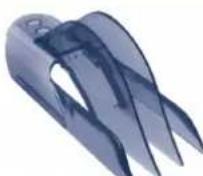
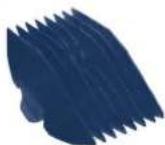
① Thinning (1/3) attachment
③ 20/30/40mm comb attachment
50/60/70mm comb attachment
Lever for cleaning
M AC adaptor
N Power cord
Oil
Cleaning brush

Chang Charging

-
Set the switch to "0=charge", and insert the power cord into the clipper.
-
Connect the AC adaptor into an outlet. The charging indicator lamp will light up.
-
Disconnect the AC adaptor from an outlet when charging is completed.
The charging time is 8 hours.
- 1 full charge will provide approximately 35 minutes of continuous operation.
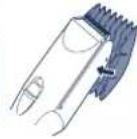
Inserting the attachment
20/30/40mm, 50/60/70mm comb attachments
-
Adjust the attachment to the desired trimming height by sliding it until it clicks while the switch is in "0-charge".
-
Set the attachment to the correct position. Otherwise you cannot set the switch to "1"
Actual hair length will be a little longer than the height you set.
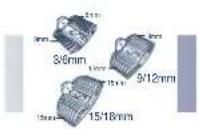
3/6mm, 9/12mm, 15/18mm comb attachments

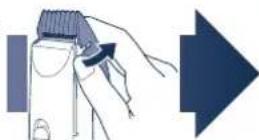
English
-
Select the cutting heights indicated on the insides and sides of the attachments.
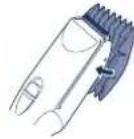
-
Mount the attachment to the clipper as illustrated.
-
To remove the attachment from the clipper
Natural cutting attachment
This attachment allows thinning of hair by cutting from the inner side. Hair volume is reduced, and hair tips are trimmed at various lengths to leave a natural look. Desirable hair lengths for this attachment: 30mm - 70mm (hair lengths shorter than 30mm may be too short to cut in some situations.)
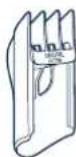
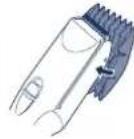
Thinning Attachment

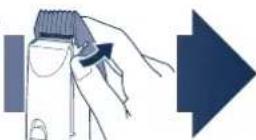
-
Insert the attachment over the trimming blades until it clicks as illustrated.
-
To remove the attachment, push both sides while pulling the attachment.
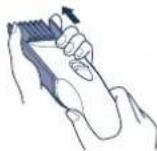
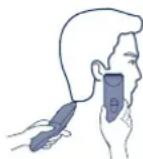
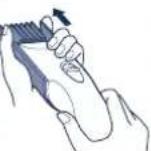
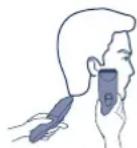
Cutting your hair
1 Cut hair to the correct height by moving the clipper back against the flow of the hair.
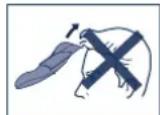
- Do not use the clipper in an inverted position. This can cut hair too deeply.

Trimming with no attachments
Cutting without an attachment will trim hair length to 1 mm or less.
- Cut hair by placing the clipper head directly on the scalp.
AC operation
If you connect the AC adaptor to the clipper in the same way as for charging, and set the switch to "1", you can use it even if the battery capacity is low.
- If the clipper does not operate, set the switch to "0·charge", wait about 1 minute and then set it back to "1".
- Be careful not to discharge the battery completely with the switch left in "1". It results in shortening the battery life.
Care
Blade maintenance
The following is the symbol for a washable clipper. The symbol means the hand-held part may be cleaned under water.

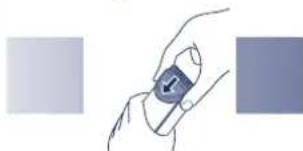
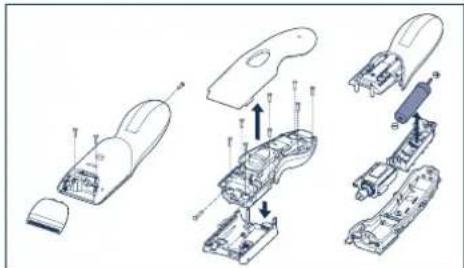
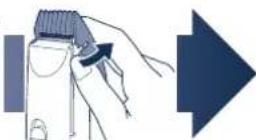
Mounting and removal of the blade
- Hold the clipper with the "Panasonic" mark facing upward and push the blade with your thumb while catching the blade in your other hand.
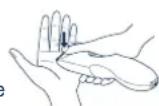
-
Be sure to set the switch to "0•charge" before you remove the blade.
-
To remount the blade, fit the mounting hook into the blade mounting on the clipper and push in until it clicks.
Blade life
Blade life will vary according to the frequency and length of use. It is expected to be about 2 years when using the clipper twice a month for 20 minutes each time. If cutting efficiency is reduced despite proper maintenance, change the blades.
Battery life
Battery life will vary according to the frequency and length of use. If the batteries are charged 3 times a month, the service life will be approximately 4 years.
- It is recommended that the clipper be recharged at least every 6 months even when not in regular use because the charge will drain from the batteries and their service life may be shortened.
Cleaning the blade
If washing in water
Warning - Detach the hand held part from the power cord before cleaning it in water.

-
Rinse off any hairs sticking to the blade and any hairs inside the clipper.
-
Shake the clipper 4 or 5 times gently, wipe off any water drops from the clipper and blade, and then let it dry onto a towel with the "Washable indicator facing upward.
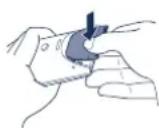
If cleaning with brush
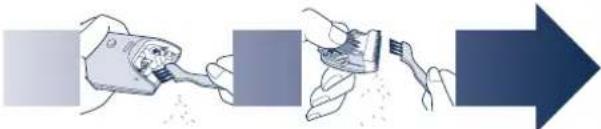
-
Brush off any hairs from the clipper and from around the blade.
-
Remove the blade and brush off the hairs from the blade edge.
-
Brush the hairs out from between the fixed blade and the moving blade while pressing down on the lever for cleaning to raise the moving blade.
After cleaning the blade with water or brush
- Apply a few drops of the oil to the points indicated by the arrows.
2. Remount the blade on the clipper.
- Apply the oil to the clipper after use. Otherwise the blades may become dull, make abnormal noises, or becomes hot and lead to the deterioration of cutting performance.
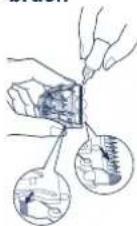
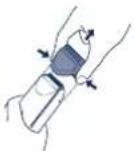
Removing the built-in rechargeable battery
Remove the battery as illustrated.
- Disconnect the clipper from the outlet when removing the battery.
- Fully discharge the battery.
- Be careful not to short the + and - terminals of the battery after removing it.
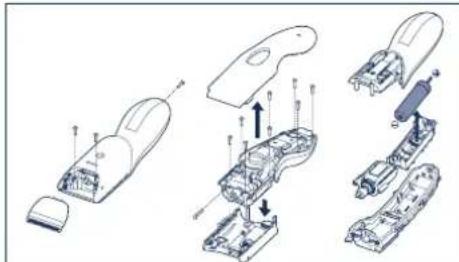
Important notice regarding environmental protection The built-in rechargeable Nickel-Metal Hydride battery contains substances that may be environmentally harmful. Please remove the battery before discarding your clipper.
Please read "Information on Disposal for Users of Waste Electrical & Electronic Equipment" on page 77.
yeshen
Sicherheitshinweise
Opetzkammen 20/30/40 mm, 50/60/70 mm
Identification of dele
Blad
Holder til aggregator
Kontakt
Opladningsindikatorlampe
E 3/6 mm aggregate
(9/12 mm aggregate)
⑥ 15/18 mm aggregate
Aggregat til naturlig klipning
① Udtyndingsaggregat (1/3)
① 20/30/40 mm aggregate
K 50/60/70 mm aggregate
① Rengøringshandtag
AC-adaptor
N Elledning
Olie
Rengaringsbørste
psued
Opladning

1. Indstil
kontakten pa "0-charge", og tilslut elledingen til hartrimmeren.
3/6 mm, 9/12 mm 15/18 mm aggregator
1.Vaelg klippelengde i henhold til angivelserne pa siderog indersiden af aggregaterne
-
Pasaaggregatet pa härtrimmerensom beskrevet.
-
Sādān tages aggregated at trimmeren
Trimming Eden aggregate pasat
Hvis违法犯罪, including the following:
Vær forsiktig nár du handterer vekselstrømsadapteret
Sette inn tilbehoret
20/30/40mm, 50/60/70mm kamtilbehør
Koicowski 3/6 mm, 9/12 mm, 15/18 mm
BbTaunTe 6aTapeo, Ka nokaHaHo Ha pncyHke.
- PnH3Bnehen 6atapeoKIOHTyeCTPOCTBOOT 3NEKTPOCETN.
- PnHOCTbO pa3pndte 6atapeo.
He 3ambikaiTe noonkntelhbln OTpuatalehlblnoioca6atapen nocne ee n3BneHnE.
PpmeaHnno oxpae Okpykaoue Cpebl
BCTpoehnnape3apkaemAHKKeIb-MetanlonnpHnHa6batapee COepkNT KOMIOHEtbl, KOToPbIE MOrYT pndctabnTB onaCHocTb dNl OKpykaouie cpde. Pede yTuIN3aueJe yCpOncTBa N3BneKaTe H3 Hero batapeo.
YcTaHOBnEHnI npOn3BOUnteMeB nOpJKe n.2 cT.5ΦepeaIbHorO 3aKoHa PΦ "O 3aunite npab NotpeBnteNe" cspk Cnyk6bl dnaDahoro 3dENPApBeH7 rOanm C DaTb I npOn3BOCTBa npn ycNobn, YTO 3dENNE NcIOB3yETcB C TPOROM COOTBeCTBn C HAcToRuei INHCTpyKuIN NO 3KCNpyATAuIN N pPIMHeHMbIMn TEXHnueckMN CTAnapTaMn.

ME10
CdeJanaHO Kntae
3TOT np60p npedha3HaeH TObKO dIg DOMaushero IcNoB3ObaHn.
NahacnHK 3Jektpnk BopKc BaH6ao (YaHckoy) Ko..Tt.
"INHpOpMaJnNoObpaueHmIOcOTXoAMnDnIaCTpaH,HeBXoJauxxB EBponeckm Coo3"cm.Ha cTp.83.
Güvenlik bilgileri
DToH,DOKHeNouyTe3ByKKnauaHHA.
BcTaHOBiTb HacaIky npabnblHy no3uio. JaKuo
BUNbORe He 3pOBeHTe,TOJI He 3MOKeTe BUCTaBNTN NepemKah YnO3uio "1".
-ФakTuHa DoBxHnHa NiDcTpnxKeHOro BoNocra 6yDe
TPOXH GINbUHO, HIX Ta BnCoTA, RKY BN BnCTABUN Ha MaunHui.
KOM6iHOBaHi HacaKn 3/6MM,9/12MM Ta 15/18MM
1. 06epitb BncoTy
CTPNKKN,
3aHaYeHy Ha
6iHnx Ta
BHYtpiWHX
CTOPOHAX
HacaIok.
2.BctaHObITb
Hacádky Ha
MaunHky
CTPXXN BOLOCCR
3a 3pa3KOM,
HaBeHeHM Ha
MaJIHOHky.
HacaKa dnn npnpoDhoI ctpnKKn
LHaHacadkaD03BONae npopixyBaTN BONOCn, nipri3aOnu
Ioro 3epeHH. TaKIM YHOM 3MeHIVETbca 06'EM
BONCC, a KINYKIN BONCC nip3aOpTbCn Ha pJ3HJ
DOBJKNIH,HaBvBAOHTAKUMYHOMPNDOPHBORBNITJAY.
BaxkaHnOBxHnBaONocnIyuei Hacan:30 MM
70 MM (BOLOCCAOBMOHIO MEHH 30 MM MOKE B
DAKX BUNaKax 6yTN 3HaHTo KOPOTKIM DnA
niDCTpRAnHH.)
HacaKa dnn npopiKyBaHHa


1.3a 3pa3KOM,HaBeHeHm Ha
MAJIOKHY, BCTAHOBiTb
HacaKy nobepx ne3,doKn
HeNooycTe3ByKKnlaaHaHn.
2.卍63HnHaKaKy,
HACTNCHITb Ha Hei 3 60kIB Ta
BNTTGHITb ii.
Y:
360kIB Ta


Пдрizаннь ВОпсся
1ПлдірікTe BONOCсdoNotpI6Hoi DOBXHH,петeMIuCyHmMaunHkyДЯ CTPNKn BONOCc npTo nHaPryMy poCTy BONOC.

He BnKOpCTOByIe MaunHky dIa CTPNKKBONCCy HAnpMyPoCTy BOnoccy. YbOMByBnAky IcHy Hebe3neKa TOrO, 00 BOnoc6 Bye3p3aHe HaTo rno6ko.

Piip3aHH6e3HacaDOK
Пдзгн ВООСь 6e3 HacaoK MoKHHa Na DoBxHHy Do 1 MM.
1.ПлдзайТБОСС,po3MiUOун rolOBky MaunHKn ПД прмIM KytOM Do shkpin rolOBn.
BnKOpncTaHnHa aanTepa 3MiHHoro cTpyMy
KJIO BNI JIKJIOHHTe aadantep 3MIHHORO CTpyM Do MaunHKN TaKIM CaMM NHOM, AK NIXKHOaTe Y IIOI ZAPRkEHNH AkyMNRTOPA, ae PNI LcOMY BNCTABITNEpePMKauy y NIOI zuo "1", ToD BI N3MOKeTBE NKOPNCTOBAYBt MauHHKY HABIT, KONI AkyMNRTOP MaunHKN p03prkEHN.
- RaKIO npri TAKOMy iNkIOUeHHi MaunHka DnI CTpNKKn BOLOccr He npaIOc, nepeCTABTe nepEMKau y no3NIQUO "0-charge", 3aueKaIte opiEHTOBHO 1 xBNINHy, a ToDI nepeKNIQUITb nepEMKau Ha3aIy no3NIQUO "1".
PnicraToro, kBn 3aBepWNTe BnKOpNCtHNaMaunHKiBd aanTepe 3mHnHO CTpyM, He 3aJnWaaTe nepeMnKaU y no3uji"1". Lc MoKe npN3BecTu Do nOBHoro p03pJxKeHHa akymyIaTota Ta do 3MeHwHeHH
KHeHied
74

DatyBnroTOBnHeH3a3NaHeNoHaBnpo6i.
Panasonic Electric Works Wanbao (Guangzhou) Co.,Ltd.
Wanbao Base Shiguang Road, Panyu District, Guangdong, 511495 CHINA
NaHaoHik EneKtpik BOpKc BaH6ao (YaHxoy) Ko.,Tt.
BaHbao Bn3 ⅢIryaHr Poad, PAnIO DInCTpiKT, ryaHrkoy, ryaHrdOH, 511495, KITAI
PpOHTaTe po3Din "HfOpMaJia 10oYo yTnI3aII B KpaIHax, kI He BXoYrB EcbpeNcKm CoO3" Ha cTOp.83.


English
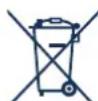
Information on Disposal for Users of Waste Electrical & Electronic Equipment (private households)

This symbol on the products and/or accompanying documents means that used electrical and electronic products should not be mix with general household waste For proper treatment, recov and recycling, please take
these products to designated collection points, where they will be accepted on a free of charge basis.
Alternatively, in some countries you may be able to return your products to your local retailer upon the purchase of an equivalent new product.
Disposing of this product correctly will help to save valuable resources and prevent any potential negative effects on human health and the environment which could otherwise arise from inappropriate waste handling.
Please contact your local authority for further details of your nearest designated collection point.
Penalties may be applicable for incorrect disposal of this waste, in accordance with national legislation.
For business users in the European Union
If you wish to discard electrical and electronic equipment, please contact your dealer or supplier for further information.
Information on Disposal in other Countries outside the European Union
This symbol is only valid in the European Union.
If you wish to discard this product, please contact your local authorities or dealer and ask for the correct method of disposal.
Deutsch

m = 311 ;
m = 311 ;
m = 311
IeCTBIE 3T0R CMBONA
pacnpocptpnaTeTc TOnbKa Ha
EbponeKmCoiO3. Ecnn Bbl
coBupaTeCb Bbl6pOuTb
DaHHn npOyKT, y3HaHTe B
MeCThIX opAraHx BnACTIn IINy
yDInpea, Ka KcNeYet
NoCTynbTc OTOxDAMn TAKORO
Tnna.
Türkce
Kullanilmayan Elektrikli ve Elektronik Aletlerin Elden Çikarilmasina Liskin Bilgi (bireysel kullaniclar)
m = 311
Wanbao Base Shiguang Road, Panyu District, Guangzhou, Guangdong, 511495 CHINA
No.2 EN, GE, FR, IT, DU, SP, DA, PT, NW, SW, FI, PL, CZ, HU, RO, RU, TK, UA Printed in China


- Safety instructions
- Be careful when treating the AC adaptor
- Keep out of liquid
- Failure to observe the following may result in injuries to the skin
- Caution for charge
- specifically designed for this model. (RE5-97)
- Caution for usage and storage
- Specifications
- Parts identification
- Chang Charging
- Inserting the attachment
- Cutting your hair
- Care
- Blade maintenance
- Mounting and removal of the blade
- Cleaning the blade
- If washing in water
- After cleaning the blade with water or brush
- Remount the blade on the clipper.
- Removing the built-in rechargeable battery
- yeshen
- Sicherheitshinweise
- Identification of dele
- Opladning
- Indstil
- Vær forsiktig nár du handterer vekselstrømsadapteret
- Sette inn tilbehoret
- ME10
- Güvenlik bilgileri
- KOM6iHOBaHi HacaKn 3/6MM,9/12MM Ta 15/18MM
- 06epitb BncoTy
- 2.BctaHObITb
- HacaKa dnn npopiKyBaHHa
- Пдрizаннь ВОпсся
- English
- Deutsch
- Türkce
Brand : PANASONIC
Model : ER5209
Category : Beard trimmer