
MZE28 - Iron MPM - Free user manual and instructions
Find the device manual for free MZE28 MPM in PDF.
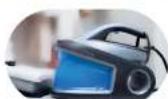
| Product type | Steam generator iron |
| Brand | MPM |
| Model | MZE28 |
| Water tank capacity | 1.5 L |
| Soleplate type | Ceramic |
| Power cord length | 1.9 m |
| Connection cable length | 1.55 m |
| Weight (full tank) | Approximately 5 kg |
| Heating time | Approximately 35 seconds |
| Ironing functions | Steam, dry, vertical, powerful steam (double impulse) |
| Automatic shut-off (Fireman) | Yes, after 30 minutes of inactivity |
| Anti-drip | Yes (DRIP STOP) |
| Active descaling system | Yes, with removable filter cartridge |
| Cartridge replacement | Every 2 to 3 months (depending on frequency of use) |
| Self-cleaning function | Yes, after approximately 25 hours of pump operation |
| Iron lock on base | Yes, with locking button |
| Maintenance | Clean with damp cloth; do not immerse |
| Cable storage | Yes, integrated compartment under the base |
| Power supply | Mains (standard plug) – see rating plate |
Frequently Asked Questions - MZE28 MPM
User questions about MZE28 MPM
0 question about this device. Answer the ones you know or ask your own.
Ask a new question about this device
Download the instructions for your Iron in PDF format for free! Find your manual MZE28 - MPM and take your electronic device back in hand. On this page are published all the documents necessary for the use of your device. MZE28 by MPM.
USER MANUAL MZE28 MPM
EN W/VE wish you satisfactor from using the product and invite you to check a wide range of other MPM apparatus
Temperature optimisation system for all materials

Pump system with continuous steam supply
Locking system on the base of the iron
1.2 L removable water tank with fiber

Ready to use after 25 s
AUTO SHUT-OFF - Automatic shutdown after 10 minutes.

Power cord with a length of 1.00 m
Ceramic solpeiata
BEZPECNOSTNI POKNY PRIPOUZIVANI
SAMOČISTENI - CALC CLEAN
ISEPUHASTUV-CALC CLEAN
Boo eVnuepawvvi otkata tn xpno
n 214a Tnc ouokue nC mnpEi va 4
nou uusnlae c thepookpaoic. To ayiyua Touc mnpesi va npokafoi ykaumata, unv ayyizrTe TcOe p eC ePiavEIEc Tnc ouokunc n.x. ta otoixia epyaiaac tou oibnpou (noi) oibepa), tmuata tou nepiBnaPatoC nou bpiokovtal o e aecn yietviaon mTa otoixia epyaiaac tnC ouokunc.
IPEPIPAAHTHESYKEYH
- Read this Manual thoroughly before use.
- Plug the iron to PE (protective earth) mains outlets only.
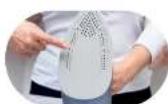
- Be extremely careful when children are near the appliance! Never touch or let the appliance hot surfaces be touched when ironing.
- Do not immerse the appliance or its power cord in water or other liquids.
- Never leave the iron unattended when plugged into mains.
- Never leave the power cord hanging over sharp edges and keep it away from hot surfaces.
-
Periodically inspect the power cord for damage.
-
Do not use the appliance when damaged and/or its power cord or plug is damaged; have an Authorised Service repair it for you.
-
Always unplug the power cord when the appliance is not in use.
-
Before cleaning the appliance, unplug it from the mains and wait until it cools down completely.
-
When refilling the appliance tank water or emptying it, first unplug the power cord from the mains.
-
Fill the iron water tank with water only. Distilled (demineralised) water is recommended to prevent scale deposit on the inner surfaces of the iron.
-
Never add any chemicals to the water for the iron. They may damage the appliance.
-
Use this appliance only as intended.
- This appliance is intended for household use only.
- Do not use this appliance outdoors.
- Do not open the water tank lid when ironing.
- Use and put away the iron on a solid, firm surface.
-
Do not use the iron if it has fallen down, has visible damage or leaks water.
-
This product may only be operated by children 8 or more years old, mentally and/or physically deficient persons and persons without knowledge of or experience in operation of this appliance type if supervised or instructed in safe operation, with clear understanding of all related risks. Children without supervision may never clean or maintain/care for this appliance.
-
Keep this appliance and its power cord out of the reach of children below 8 years old.
- Children must not play with the device.
- When finished ironing, empty the iron water tank completely.
- Never iron any clothes or materials on people or animals.
- Risk of burns - do not direct vapour at people or animals.
- Never unplug the appliance by pulling by the power cord.
- Never plug the power cable with wet hands.
- Never wind the power cord around the iron before it cools down.
- Never put the appliance near electric or gas burners, cookers, ovens, etc.
- This appliance is not compatible for use with external power timers or separate remote control systems.
- Before putting the iron away on a pad or base, make sure that the pad/base rests on a solid, firm surface.
- Before turning on the appliance, make sure that the mains voltage matches the parameters on the appliance nameplate.
- Keep your children safe: do not leave any parts of the packaging readily accessible (i.e. plastic bags, cardboard boxes, polystyrene inserts, etc.).
-WARNING! Never let children play with plastic film or bags. Choking/asphyxiation hazard!
CAUTION! Hot surface! This symbol indicates that the surface of the appliance may reach very high temperatures during use. Touching it may result in burns; do not touch the hot surfaces of the appliance e.g. the working elements of the iron (the iron's foot), parts of the casing located in the immediate vicinity of the working elements of the appliance.
DESCRIPTION OF THE APPLIANCE
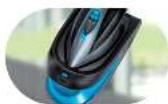
- Water reservoir with a capacity of 1.2 L
- Removable cartridge with an an - ti-scale filter
- Hole for pouring in water
- Iron base
- Iron lock button in the base
- Control panel
-
Power switch
-
Button for steam burst selection - SET
- Self-cleaning button
- Steam shot button
- Ceramic soleplate
- Cord connecting the iron with the base
- Mains cable
- Storage space for cables
CONTROL PANEL
a. Fireman function - AUTO OFF
b. Low power steam shot ECO mode
c. Strong steam shot mode
d. Water reservoir empty
e. Self-cleaning
BEFORE FIRST USE
- Remove all stickers, covers and protective film from the iron's soleplate.
- Completely unfold the power cord and the steam hose.
- Place the iron on a stable, flat surface.
- Always place the iron on the specially designed plate in its bottom part.
CAUTION! Fumes can emanate from the iron and white powder may appear on its soleplate during the first use. The fumes should disappear shortly and the white powder should disappear after several uses.
PREPARATION FOR USE
FILLING THE WATER RESERVOIR
- Make sure the appliance is not connected to the mains.
- Remove the water reservoir (1) from the iron base (4) by pulling the handle at the top of the reservoir.
- Check that the anti-foam filter cartridge (2) is correctly fitted.
- Fill the reservoir with water to the maximum level (MAX level marked on the reservoir water inlet). Tap water can be used - a filter cartridge that prevents the formation of deposits will soften the water. If the anti-foam filter cartridge already needs to be replaced and you do not yet have a new cartridge, use distilled water.
- Slide the filled tank (1) into the iron base (4) until it locks into place.
Once the tank is empty, the pump will stop and a LED (d) will light up on the control panel (6). If this happens, disconnect the iron from the mains and refill the tank.
CAUTION! Never use the appliance without the anti-limescale filter cartridge.
CAUTION! Only water may be poured into the reservoir. Other liquids may damage the appliance.
CAUTION! Do not fill the tank over the MAX level.
The anti-lime filter cartridge should be replaced approximately every 2 or 3 months, however, this period may vary depending on the frequency of use and the hardness of the water used.
USING THE APPLIANCE
It is recommended to place the iron on a base with anti-slip feet to protect the iron's soleplate from damage. Do not place the iron on the metal bracket.
The appliance is equipped with a function that allows the iron to be locked in the base by pushing and sliding the button (5).
It is recommended to use a mesh / ventilated ironing board to avoid excessive condensation from the steam.
Make sure the ironing board is stable before using it. Make sure that the place for the steam generator has adequate load strength (the appliance with a full water container weighs around 5kg ).
It is not recommended to use boards made from chipboard.
SETTING THE TEMPERATURE
Consult the ironing instructions on the garment's tag. The iron is provided with the foot temperature optimisation system for all materials. There is no need to set the temperature manually.
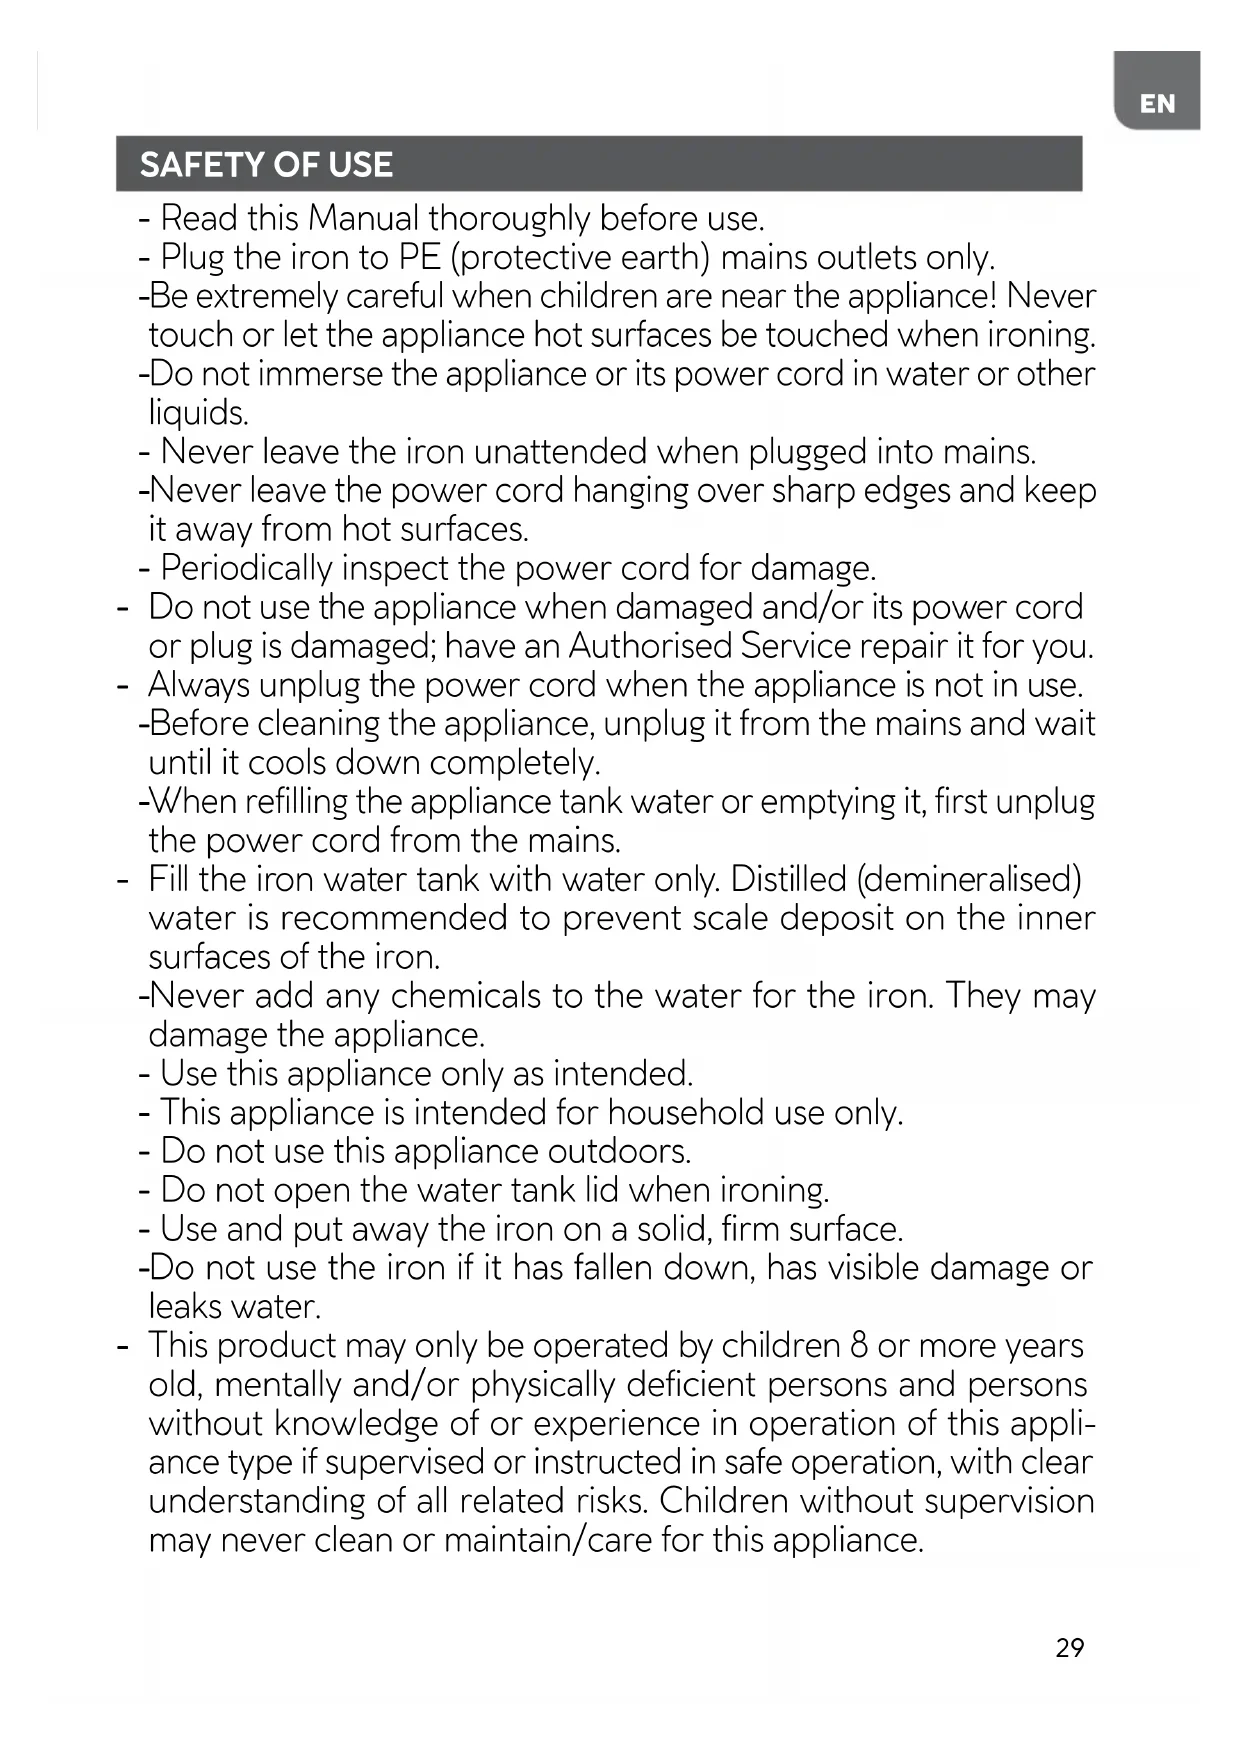
STEAM IRONING
CAUTION! The iron shoots a lot of hot steam! Risk of scalding!
- Fill in the water reservoir as described in the "Filling the water container" chapter.
- Connect the appliance to the mains.
- Steam ironing is only possible once the appliance has heated up. Otherwise, water may start pouring from the nozzles.
- Wait until the indicator (c) on the control panel (6) stops flashing then the foot is properly warmed up. The appliance is ready for use after approximately 35 seconds.
- Us the programme selection button (8) to select the force of the steam shot.
- Keep the steam shot button (10) depressed when ironing.
TIP! The iron features strong steam shot function for easier ironing of stubborn creases. To activate it, press the steam ejection key (10) quickly 2 times within 1 second. It takes 2 seconds for the steam to be ejected.
IRONING WITHOUT STEAM
- Do not press the steam shot button (10) when ironing.
VERTICAL STEAM IRONING
The iron may be held vertically to iron hanging curtains or garments (jackets, suits, overcoats).
- Hold the iron in parallel to the ironed fabrics, several centimetres away, and move it while keeping the steam shot button (10) depressed.
CAUTION! The iron shoots a lot of hot steam! Risk of scalding! Never aim the steam at people or animals!
FIREMAN FUNCTION - AUTO OFF
The iron features the "FIREMAN" function. This is an electronic safety appliance that switches off the iron when not in use for about 10 minutes. The feature works when the iron is placed horizontally or vertically. The function is signalled by an audible signal, followed by the flashing of the indicator light (a) on the control panel (6). Then, after about 30 minutes, the AUTO OFF function will trigger, the iron will automatically switch off.
ANTI-DRIP SYSTEM
The iron is equipped with the anti-drip system, thus its will automatically stop producing steam when the temperature is too low.
ACTIVE ANTI-SCALE SYSTEM
This system prevents the scale to be deposited. It protects the fabrics from the release of dirty, stony residue during ironing. It also extends the life of the appliance. The tank is pro - vided with the anti-scale filter cartridge.
CLEANING AND MAINTENANCE
- Disconnect the power cord from the mains after use.
- Wait until the iron and the soleplate cool down.
- Gently clean with a damp cloth.
- Use a damp cloth with a non-abrasive, liquid cleaning agent to remove any sediment or dirt from the iron's soleplate.
CAUTION! Never submerge the iron in water or rinse it under running water.
CAUTION! Do not use metal brushes or any abrasive items. Do not use strong deter - gents to clean the iron.
- Wipe the iron's base with a damp cloth.
SELF-CLEANING - CALC CLEAN
- Refill the water reservoir as described in the "Filling the water reservoir" chapter.
- Place the iron in a safe position, so as to avoid scalding.
- Connect the appliance to the mains and switch on with the button (7).
- Once the warm-up is complete (indicator (c) stops flashing and remains lit steadily), hold down the self-cleaning button (9) for 3 seconds.
- The appliance beeps three times and the LED (e) starts flashing. It takes about 2 minutes to complete the self-cleaning process.
- Once the self-cleaning is over, the iron beeps three times and the indicator goes out.
CAUTION! When the steam pump has run for approximately 25 hours, the self-cleaning light (e) will appear on the control panel (6) to indicate that the self-cleaning must be carried out.
FINISHING THE WORK
- Disconnect the power cord from the mains.
- Wait until the iron and the soleplate cool down.
- Empty the water reservoir (1).
-
The appliance's base is designed to hold the power cord and the connecting hose in a special compartment.
-
Assemble the connecting cable and the power cable, then insert into the cable storage space (14).
TECHNICAL SPECIFICATIONS
Technical specifications are given on the product nameplate.
Length of mains cable: 1.9m
Connecting hose length: 1.55m

CAUTION! MPM agd S.A. reserves the right to technical changes.
Proper disposal of the product (waste electrical and electronic equipment)
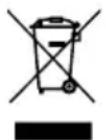
Marking on the product indicates that after the service-life of the product expires, it should not be disposed with other type of municipal waste. Used equipment may have a negative impact on the environment and health of people due to potentially containing hazardous substances, mixtures and components. Mixing electric waste with other types of waste or disassembling those in an unprofessional manner may cause a release of substances that are hazardous to the environment and health.
Used equipment should be handed-over to a point for collection of electric waste. In order to obtain detailed information regarding the electric waste collection points, the user should contact the municipal point of electric waste collection or used equipment processing department.
AKTIVÄ ANTI-CALC SISTÉMA
BESCHRIJVING VAN HET APPARAAT
ACTIEF ANTIKALKSYSTEEM
PekomeHdyetcraCTaBtBaTbYTOHaNoctabKy,KOTOPaO OChaUeHaHeCKoJIb3AUMN HOKKAMNdIaUHTbIOOuBBIoT NOBpeKDeHn.YTOr HeIb3aCTaBtBaHMaMeTaJI. IInueckyIO NoCTabKy.
B npn6ope npedycmOTpeHa yHKunyHKcaUN yTOra B OCHOBAHN nyTeM hXkataHn cDBrAHHKONKn (5).
PekomeHdyetc HcnoIb3ObaTb ceTuAtyIO/BeHTnI npyeMyIO rJaIINbHyIO DOCKY, YTO6bl n36exaTb Upe3MepHOJ KOHeHcaUHnnapa.
BbI6npa rIaIbHyIO DOCKy, 6paTne BHMaHHe Ha ee yCTOuYBOcTB. Y6eIHTecb, 7TO MeTo dIra napoBoi cTaHcunn 6IaJaet DOCTaTOUHO rpy3OnoDbemHoCTbIO (Bec np6opa c IONhbIM 6akOM coCTabJrE T OKOJO 5 Kr).
He pekomehnyetc nCnoJb3ObaTb rnaHnIbHbIe DOCKN co cToJeuHnuei n3 DCII.
YCTAHOBKA TEMINEPATYPbI
O3HaKOMbTecb C INHCTpykCnA M N O yTIOXeHNIO Ha 3TNKeTke ODeJdbI, KOToPyIO HxHNO npoyTIOXHTb. YTOr OCHaUeN CnCTeMOn, ONTUMN3NPyIOSeI Tempeatypy IaIKN DJI Bcex MaTePnaJIoB. Het Heo6xOdImOCTn BpyHyIO yCTaHaBnBaTb Tempeatypy.
YTIOXHEHNE C IAPOM
BHHMAHNE! YIor npo3BoNT 6oIbwoe konHueCTBO ropeyero npa! OnacHoctb noIyuEHH oXorOB!
- 3anonHnTe pe3epByap BOIOJ, KaK onncAoB pa3dene «3anonHeHne pe3epByapa nBODbl?
- ПОДКЛЮЧИТЕ устюпостBO K Альктpoсети.
- YTOXeHnE c napOM BO3MOxHO TOJbKO nOcNe 3aBepSeHnHaRpeBa. B npOTNBHom cIyuae n3 OTBepCTN MOxET BbITEKaTb BOda.
- Поюждnte, поа Индикатop (c) на панелу упавлени (6) He nepectaNET MIRATb, 3TO O3-Haayet,чTo Лanka npabnIbHNo nporpeTa.YCTpoiCTBO rOTOBK INCNOJIb3OBAHIO npIMepHO uepe3 35 cekyHd.
- BbI6epnte cnny BbI6poca npa c nomOuH KhoNKn BbI6opa nporpaMMbl (8).
- [IaIbTe OeJxNy, yIepKxIBa KHOJIky BByIbIpcOca npa (10).
YKA3AHNE! UTo6bI n36aBnTbcra OT cHbHbIX cKlaDOK, YTOR OCHAueH FOyHKUneB3pbIBHO BbI6pOca npa. UTo6bI aKTbBnPoBaTa b erO, 6bICTpo HaxMnte KONKy Bbl-6pOca npa (10) 2 pa3a B TeueHne 1 cekyHdbI. BbI6poc npa dIITcra 2 cekyHdbI.
YTIOXHEHNE BE3 IAPA
- Bo Bpemr yTIOXeHnHe haxmMaTe KHOIpKy BbI6pOca npa (10).
BEPTUKAJIBHOEYTIOXHEHNE C IAPOM
Bucrune wtopb i n odejdy (KypTK, KocTIOMbI, naIbTO) MOxHOr rnaDnTb, dePka yTIOB.
BepTKaJIbHO.
BepTnKaJIbHo.
- Дерхи te yTIO r noOswBOI napaJIneIbHOMatepnaIy Ha paCCToHn HeCKoJIbKnx caHTIme- TPOB n nepemeuAte yTIOr, Haxab KhoNky BbIbpoca napa (10).
BHIMAHHE! YIor npo3BODNT 60nbwoe konuyeTBO ropyero npa! Onacnoctb noyuene nOxorob! He hapabnTe ctpyo npa Ha IIOdeN JKNBOTbIX!
AKTINBHAR CNTHEMA 3AUHTbI OT HAKINI
IpeoTbpaaaet o6pa3ObaHne HaKnn. 3aunuae TkaHn OT BbITEkHn OCTaTKOB HaKnn BO Bpem rnaKKn. PpOJIeBaET cPOK cnyX6bl ycTpoiCTBa. Pe3epByap oHaueh KapTpndxem C npOTNBOpENHHbIM fNlbTPOM.
OuNTKA IN KOHCEPBAU
- Nocne nCnoB3OBAHnO TCOeDnHte UHyp NHTaHnO T 3NeKtPoCeTn.
- Ndooxndte, noka yTou nncnojb3yemaia oNCTabka yTOra OCTbHyT.
- PpOtpnTe yTIOB BnaXHOI cAnfoKoN
- YdaIte IIO6bIe OTIOKeHnI nn dpYrne 3aRpa3HeHnC nOIOWBbl BnaXHOJ caNΦeTKoI c NcNoJIb3OBaHHem MArKOrO MoUSeIero CpeICTBa.
BHIMAHNE! Hnkorda He norpykaite yTIOB B Body n He npombibaTe ero noKpaHOM.
BHIMAHNE! He nCloB3yIe npoBOJouHyO uetky nn dpyrne a6pa3NBbIe npedMeTbI. He nCloB3yIte cnJIbHOeIcTBUoUne MOIOUne cpeCTBa Ira YnCTKN YTOra.
- PpOtpnTe nOCTaBky yTIOra BJIaXHOI TkaHbIO.
CAMOOUCTKA - UNCTbI KAJbCNI
- ДолейтевodyвpeзерbyapВ COOTBETCTBUN C INHCTpykuzmaN B pa3deNe «HaonHeHne pe-3epByapaДЯВODы》.
- NocTaBbTe yTIOB B 6e3OJaCHOM NOLOKeHn, YTObI n36ExaTb OwnpBaHnra TropueN BO-Doi.
3.Подклочи te yctpoiCTBO K əJIeKtpocetn IN BKlChuTe erO KhoIkoN (7). - После заBERшеня pa3oRpeBa (инДИКATOP (c) NepeCTaET MInrAteB IN ROpNT NOCTOHRHO) ydePJINBAIte KhoNkY camooUcnTkn (9)В TeueHne 3 cekyHd.
- YcTpoIcTBO n3dAcT TpN 3ByKOBbIX CnHaJa, a INHnKaTOp (1) NaHET MInrA Tb. CamooUncTk a 3aHmaeT OkONo 2 MNHyT.
- По завершени самоочистки утог сюва поадост ри 3ByKOBbIX сигнана, a ИнданkaTOp (e) norachet.
BHIMAHHE! Korda napoboH hacoc npopap60taeT npimepeHo 25 yacOB, Ha naheJn ynpabIeHH (6) noBNTcH HndNKatOp camoouncCTKn (e), yka3bIBaIOuNn Ha Heo6xOAnMocTb camoouncTKn.
3ABEPLSEHNE PABOTbl
- OToeHNHTb WHyp NITaHnO T 3JIeKtPoCeTn.
- Ndooxndte, noka yTIOr n IcnoIb3yEma nOCTabKa yTIOra OCTbIHHT.
- OnopokHeHpe3epByapa IJIa BOJbI (1).
- Ochobahne yctpoiCTBa cKOHcTpyuPObaHO TaKIM o6pa3OM, uTo uHyp nHTaHnI N CoeHNHe TELbHbI uHyp MOxHO HamOtA Tb Ha CneuNaBHO NOIroTOBJeHHoe MeCTO.
- Co6epnte coeHnHbI KabeN N KaBb NtAHN, 3aTeM BCTaBbTe INX BOTcK dJa XpaHeHna KaBnei (14).
TEXHnueCKNE DAHHbIE:
TexHnueckne npaMeTpbl yka3aHbHa 3aBODCKo Ta6JnUcKe n3eJInr.
NAPLNANIE NADOBY NA VODU
- Uistite sa, ze je zariadenie odpojené od elektrickej siete.
- Odstrante nadrz na vodu (1) zo zakladne zhelicky (4) potiahnutim za rukovat umiestnenu v hornej casti nadrze.
- Skontrolujte, Či je kazeta s filtrom proti parám (2) správné nainstalovaná.
- Naplnte nadrž vodou na maximálnu uroven (maximána uroven oznacéná na naplni vody v nadrži). Mõze sa použit voda z vodovodu - kazeta s filtrom na ochranu pred tvorbou usadeninzmákci vodu. Ak je uz potrebné vymenit kazetu s filtrom proti pare a este nemáte novú kazetu, použite destilovanú vodu.
- Zasunte naplenu nadrž (1) do základne zhelicky (4), kým nie je uzamknutá.
Ked'dojde voda v nadrži, cerpadlo sa vypne a na ovladacom paneli (6) sa rozsvieti indikator (d). V takom pripe musite odpojit napajanie a naplit nadrž.
SAMOČISTENIE - CALC CLEAN
- Dopíñajte vodu do nádrže podlaPokynov v Časti „Plnenie nádrže na vodu".
- Zehlicku umiestnite do bezpečnej polohy, aby ste zabránili obareniu horúcouvodou.
- Pripojte zariadenie k napajaciemu zdroju a zapnite ho tlacidlom (7).
- Po dokončeni zahrievania (indikátor (c) prestane blíkat a nepretržite sa rozsvieti), podržte ho 3 sekundové samočistiacte tlácidlo (9).
- Zariadenie zaznie trikrát a kontrolka (y) bude blikat. Samočistenie trva asi 2 minúty.
- Po dokončeni samočistenia zhehlicka opat vydá tri pipnutia a kontrolka (kontrolky) zhasné.
-ДiTи He noBHHi rpaTn 3 npncToPoEm.
-Псяпасувань ВлNTN BODY, 3aIIshnacB pe3epByapi.
-Hi B ykomy pa3i He npacvBaTn oJr a6o npedMeTu Ha IIOJx Yu TBapuHax.
-He6e3neka onikib - He cnpymoByte napy Ha IIOdei abo TBapnH.
-
He BnIMaTn BnIky 3 po3eTKn, TaryHyu 3a Ka6eJb.
-
He BCTaBnTn BnIky B pO3eTKy MOKpIMn pyKaMn.
-He HAMOTyBaTn 5Hyp XINBJIeHHaHBKOJIO npIJaIy, NOKI BiH He OxOJOnHe.
-He po3miuBaN npncptiN no6n3y eJeKtpnHnx i ra3OBNX nIIT, KOHΦOpOK, dYXOBOK TOnO.
-Ппсстрин He пиз nauseй дя роботи 3 ВИКОпСТаHHЯМ 3OBHiiшнix taIMepiB abo OkpeMoI сnteMn ДИСТаHцIHOrO kepyBaHHЯ.
CAMOOUHJ - CALC CLEAN
- 3aIIte Body B 6ak BiINOBiIDNo Do iNCTpyKci, HabeDeHx y po3diJI «3anOBHeHHpe3epByapa DnBODI».
- NocTaBTe npacky B 6e3neuHemicue, uo6 yHnKHyTOnikIB rapauO BOdoIO.
3.Пдклioчыnpсстпдо eilekpomepeki ta yBIMKHITb NOrO 3a DoIOMorOIO KhoNkn (7).
4.Псязавершенипорриby (iHДикатop (c) nepectae 6лIMaTN i CBITNbCЯ noctiHo) ytpnMynte KhoNkCy camOoUHSEHHRA (9) HATNCHYTOI npOTyROM 3cekyHd. - Ппсстрий подость тprи 3BykoBi сngнал, a iHdNKatop (e) nochе 6лмати. Camoочишени. 3aIMa€ 6лИЗькO 2xbnInH.
- Пись заBERSEння самоочишени пpackа 3Нову подость Трп 3ВуКОВi сИндан, a iHДИкa-Top (e) 3rache.
YBAFA! Koln napobn hacoc npoppaioe np6n3no 25 roHN, ha naheJI kepyBaHHa (6) 3'ABNTbcra iHdkatop camoouueHHa (e), kN Bka3yE Ha Heo6xHicTb camoouH- uenHH.
3ABEPUeHHPOBOTN
- BiD'eɪnHaɪte MepexeBn Ka6eBb BiD Mepexi.
- 3auekaTe, nOKn npacka Ta oCHOBa OXOJHOHyTb.
- CnpoKhiTb pe3epByap IJIa BOiN (1).
- Ochoba npictpoIO cKOHcTpyOBaHa taKIM uHOM, IIO Ka6eIb JINBJIeHHra Ta 3'EDHyBaJIbHn Ka6eIb MOxHa po3MiCTHTU y CneIaJIbHO BiDBeDEHOMy IJRA UBOrO MiCiI.
- 3'εdHaηTe 3'εdHyBaIbHn KαβeI b i KαβeI b XnBneHn, a NOTIM BCTaBte ix y BiDcIK dIy 36epi-rAHHa KaβeIb (14).
TEXHIYHXAPAKTEPHNTNU
Texhihi napametpn HabeedeHo Ha 3aBODcbki T6nuci Bnpo6y.
ObKHa Ka6eJIO KNBHeHra:1,9 M
IobxHa 3'eHyBaIbHOro Ka6eIIO:1,55 M

YBAGA!ΦipMa MPM agd S.A.3aJIuHaε 3a co6oIO npaBO BVocHTN TexHiHi 3miHn.
IpaBnIbHna yTnIIN3aunr npOdykTa (n3HoWeHHoe 3JIeKtpnueckoe n 3JIeKTPoHHoe o6OpyDoBaHne)
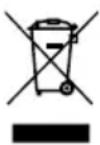
MapknpoBka Ha npOyKTe yKa3bIbaeHa To, YTO npOdyKT He CJIeDyET Bbl6paCbIBaTb Bmecte C DpyrIMN 6blIOBbIMN OTXODAMN NO OKOHuaHn Cpoka Cnyk6bl. N3HOWeHHOE O6OpYOBaHne MOJxET OKa3bIBaTB BpeIHoe BO3JeICTBnE Ha OKpyKaIOUyO CpeNy I3IDOPOBBe ueNoBeka N3-3a NOTEHUNaJIbHOro COJepKaHn ONaCHbIX BeIcEeB, Cmeen KOMNOHeTOb. CMeuINBaHne OTXODOB BVnDE N3HOWeHHORO 3JKeKtpOnHoro N 3JKeKtpnueckoro O6OpYOBaHn C DpyrIMN OTXODAMN N11
nx HenpoeeccnoHaBna pa36opka MoKet npnbecn K BbI6pocy BeuecTB, BpeHbIX IJRA 3doOpBba I OKpykaioe CpeBb. N3HOweHHoe yCTPOINCTBO Heo6xoDnMo CdaTb Ha NyHK T c6opa OTPa6OtaHHoro 3neKtpnueCKORIO 3neKTPoHHORO 6OpUOBAHNA. YTO6bl NOnyuNTb NOpO6HyIO INΦOpMaUNO O MeCTe CdaUN3neKTPnueCKNX I3neKTPoHHbIX OTXODB, NOJIb3OBAteNb DOJKeH 6paTtbcra B MeCTHB INyHK T c6opa 6OpPyDoBaHNA DnA yTNIN3aCnn INN Ha 3aOBn PO nepepa6OTke IN3HOweHHoro 6OpUdoBaHNA.
Szanowy Kliencie!
Legible signature of the buyer
4. GWARANCJA NIE SA OBJECT:


- BEZPECNOSTNI POKNY PRIPOUZIVANI
- SAMOČISTENI - CALC CLEAN
- ISEPUHASTUV-CALC CLEAN
- nou uusnlae c thepookpaoic. To ayiyua Touc mnpesi va npokafoi ykaumata, unv ayyizrTe TcOe p eC ePiavEIEc Tnc ouokunc n.x. ta otoixia epyaiaac tou oibnpou (noi) oibepa), tmuata tou nepiBnaPatoC nou bpiokovtal o e aecn yietviaon mTa otoixia epyaiaac tnC ouokunc.
- IPEPIPAAHTHESYKEYH
- DESCRIPTION OF THE APPLIANCE
- CONTROL PANEL
- BEFORE FIRST USE
- PREPARATION FOR USE
- FILLING THE WATER RESERVOIR
- USING THE APPLIANCE
- SETTING THE TEMPERATURE
- STEAM IRONING
- CAUTION! The iron shoots a lot of hot steam! Risk of scalding!
- IRONING WITHOUT STEAM
- VERTICAL STEAM IRONING
- FIREMAN FUNCTION - AUTO OFF
- ANTI-DRIP SYSTEM
- ACTIVE ANTI-SCALE SYSTEM
- CLEANING AND MAINTENANCE
- SELF-CLEANING - CALC CLEAN
- FINISHING THE WORK
- TECHNICAL SPECIFICATIONS
- Proper disposal of the product (waste electrical and electronic equipment)
- AKTIVÄ ANTI-CALC SISTÉMA
- BESCHRIJVING VAN HET APPARAAT
- ACTIEF ANTIKALKSYSTEEM
- YCTAHOBKA TEMINEPATYPbI
- YTIOXHEHNE C IAPOM
- BHHMAHNE! YIor npo3BoNT 6oIbwoe konHueCTBO ropeyero npa! OnacHoctb noIyuEHH oXorOB!
- YTIOXHEHNE BE3 IAPA
- BEPTUKAJIBHOEYTIOXHEHNE C IAPOM
- AKTINBHAR CNTHEMA 3AUHTbI OT HAKINI
- OuNTKA IN KOHCEPBAU
- CAMOOUCTKA - UNCTbI KAJbCNI
- 3ABEPLSEHNE PABOTbl
- NAPLNANIE NADOBY NA VODU
- SAMOČISTENIE - CALC CLEAN
- CAMOOUHJ - CALC CLEAN
- 3ABEPUeHHPOBOTN
- TEXHIYHXAPAKTEPHNTNU
- IpaBnIbHna yTnIIN3aunr npOdykTa (n3HoWeHHoe 3JIeKtpnueckoe n 3JIeKTPoHHoe o6OpyDoBaHne)
- Szanowy Kliencie!
- GWARANCJA NIE SA OBJECT:
Brand : MPM
Model : MZE28
Category : Iron