
58G952 - Saw Graphite - Free user manual and instructions
Find the device manual for free 58G952 Graphite in PDF.
| Type de produit | Tronçonneuse thermique |
| Marque | Graphite |
| Modèle | 58G952 |
| Cylindrée | 52 cm³ |
| Puissance moteur | 2 kW (2,7 CV) |
| Longueur du guide | 400 mm |
| Pas de chaîne | 0,325" (8,255 mm) |
| Épaisseur de chaîne | 0,058" (1,47 mm) |
| Vitesse maximale | 10 500 min⁻¹ |
| Ralenti | 3 000 min⁻¹ |
| Capacité réservoir carburant | 550 ml |
| Capacité réservoir huile chaîne | 260 ml |
| Lubrifiant chaîne recommandé | SAE 10W-30 |
| Poids (sans guide ni chaîne) | 4,9 kg |
| Dimensions (sans guide) | 400 x 240 x 280 mm |
| Niveau de puissance acoustique | 110 dB(A) |
| Niveau de pression acoustique | 96,7 dB(A) |
| Vibrations poignée avant | 7,907 m/s² |
| Alimentation | Mélange essence sans plomb 95 / huile 2T (25:1 après rodage) |
| Allumage | Électronique à étincelle |
| Bougie d'allumage | L7T, BPM7A, CJ6Y |
| Frein de chaîne | Automatique par inertie + manuel |
| Pompe à huile | Automatique avec débit réglable |
| Accessoires inclus | Guide, chaîne, fourreau de protection, griffe, récipient mélange, clé bougie, tournevis, clé hexagonale, lime |
| Année de fabrication | 2019 |
Frequently Asked Questions - 58G952 Graphite
User questions about 58G952 Graphite
0 question about this device. Answer the ones you know or ask your own.
Ask a new question about this device
Download the instructions for your Saw in PDF format for free! Find your manual 58G952 - Graphite and take your electronic device back in hand. On this page are published all the documents necessary for the use of your device. 58G952 by Graphite.
USER MANUAL 58G952 Graphite
CAUTION: BEFORE USING THE PETROL CHAIN SAW READ THIS MANUAL CAREFULLY AND KEEP IT FOR FUTURE REFERENCE.
DETAILED SAFETY REGULATIONS
SAFE USE OF PETROL CHAIN SAW
Warning!
- Persons unfamiliar with instruction manual are not allowed to use chain saw.
- Use the chain saw for cutting wood only.
- Other use of the chain saw is the sole responsibility of the user who should bear in mind that it may be dangerous.
The manufacturer is not responsible for losses and damages resulting from unintended use of the chain saw.
WORKPLACE
a. Keep your workplace tidy and ensure it is well lit. Untidiness and insufficient illumination contribute to accidents especially when chain saws are in use.
b. Keep children and bystanders away from the workplace. Distraction may cause loss of control over the tool.
PERSONAL SAFETY
a.Use safety equipment, such as work suit, protective glasses, protective shoes, protective helmet, earmuff protection and leather gloves. Using safety equipment in appropriate conditions reduces risk of body injury.
b.Do not overestimate your abilities. Stand firmly and keep your balance at all times. It enables better control over the saw in unpredicted situations.
c. Do not wear loose clothing or jewellery. Keep your hair, clothes and gloves away from moving parts. Loose clothing, jewellery or long hair may be caught by moving parts.
TRANSPORTATION AND STORING
a. When carrying the chain saw switch off the engine, put on the chain cover and switch on the chain brake. Carrying unsecured and operating chain saw may cause body injury.
b. Carrying the chain saw is possible only when holding its front handle. Other parts may not ensure appropriate grip and even cause injury.
c. Inspect your chain saw. Check alignment and fixing of moving parts, check against part cracks and all other factors that may affect operation of the saw. Repair the saw before use if it is found damaged. Many accidents are caused by improper maintenance of tool.
d. Cutting chain should be clean and sharp. Proper maintenance of sharp cutting edges of chain reduces the risk of jamming and makes operation easier.
POWER TOOL USE AND CARE
a. Check proper operation of the saw brake regularly. In emergency situation, non-operational brake may make chain disengagement impossible.
b. When work with the chain saw is completed, the tool must be cleaned carefully as well as used personal protective equipment, while the sensitive components must be maintained.
OPERATION
- Switch off the chain saw engine before releasing the chain brake.
-
Be very careful at the end of a cut, because the saw having no support in processed material falls down due to its inertia, which may cause injuries.
-
When working for a long time, the saw operator may experience formication and numbness in fingers and hands. Stop working in such case, because numbness reduces precision in saw use.
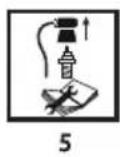
- Fill the fuel tank of the saw with petrol and oil blend when the engine is off and cooled down, otherwise there is risk of spilling the blend and ignition from hot parts of the saw.
- It is forbidden to use open flame and smoke cigarettes.
- Do not start the saw when leakage is found, it may cause fire.
- The saw heats considerably during operation. Be careful and do not touch hot parts of the saw with unprotected parts of your body.
- Only one person can operate the chain saw at a time. All other persons shall be away from working area of the chain saw. Especially children and animals should be away from working area.
- When starting the saw, its chain must not rest on the processed material or touch anything else.
- When working with the chain saw hold it with both hands by both handles. Keep firm body position.
- Children and juveniles cannot operate the chain saw. Allow access to the saw only to adults who know how to handle the tool. This instruction manual should be given with the chain saw.
- Stop working with the chain saw with first signs of fatigue.
- Before starting to cut set the chain brake lever in appropriate position (pull it to yourself). It is also hand guard.
- Move chain saw away from the material being cut only when the cutting chain is working.
- When cutting processed sawn wood or thin branches use support (sawing horse). Do not cut several boards at the same time (placed one on top of another), or material held by other person or held with foot.
- Long objects should be firmly fixed before cutting.
- In uneven, sloping terrain proceed with your work when facing upwards.
- When cutting through always use the bumper spike as a point of support. Hold the saw by the rear handle and guide with the front handle.
- In case the cut cannot be completed in one run, pull the saw a little back, put the bumper spike in another place and continue the cut lifting rear handle slightly.
- When cutting in horizontal plane, position yourself at an angle as close to 90^ from cutting line as possible. Such operation requires concentration.
- When the chain is pinched when cutting with the tip of the bar, the saw may recoil towards operator. Because of this effect cut with the straight part of the chain whenever possible. Then, in case of pinching, the recoil effect changes direction away from the operator.
- Be very careful when cutting wood when there is the risk of splitting. Pieces of wood that are cut off can be flung in any direction (risk of body injury!).
- Only trained persons should cut tree branches! Uncontrolled fall of a tree branch constitutes a risk of body injury!
- Do not cut with tip of the guide bar (risk of recoil).
- Pay special attention to branches under strain. Do not cut branches, which hangs freely, from below.
- Always stand to the side of predicted fall line of the tree that is to be cut.
- During a tree fell there is a risk that branches of the tree, or trees in proximity, will break and fall. Be very careful, otherwise a body injury may occur.
- On a sloped terrain the operator should stay on upper part of the slope with respect to the tree being cut, never lower.
-
Watch out for logs that may roll down towards you. Jump away!
-
Operating saw tends to rotate when tip of the chain guide bar touches processed material. In such case the saw may get out of control and move towards the operator (risk of body injury!).
- The tree cuttings should be preceded with preparation of the work place consisting of the removal of lower interfering branches and clearing the area around the tree trunk.
- Do not work in strong wind, which may influence the predicted tree falling direction and cause its uncontrolled felling.
- Do not carry out cuttings in conditions of limited visibility, when it is foggy, rains or snows.
- Do not overreach and do not cut above your shoulder height, or when standing on a tree, ladder, scaffold, trunk, etc.
- A well-equipped first aid kit should be available near the work place.
To prevent saw recoil follow below instructions:
- Never start or guide a cut with the tip of the guide bar!
Always start cutting with saw previously switched on! - Ensure the cutting chain is sharp.
- Never cut more than one branch at a time. When cutting off, watch out for surrounding branches. When cutting a tree through, watch out for nearby tree trunks.
Explanation of used symbols


- Caution, use precaution measures
- Fire hazard
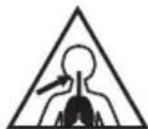
- Exhaust gas poisoning hazard
- Use protective gloves
- Switch off the engine and remove wire from the ignition plug before commencing any maintenance or repair
- Read instruction manual, observe warnings and safety conditions therein!
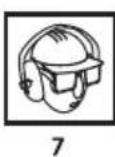
- Use head, eyes and ears protection
- Danger of recoil
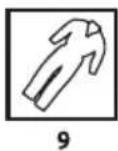
- Use protective clothes
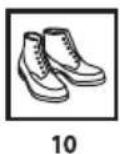
- Use protective shoes
- Do not put your hands or legs close to cutting parts
CONSTRUCTION AND USE
Petrol chain saw is a hand-held tool. It is driven by an air cooled, two-stroke combustion engine. Tool of this type is designed for tasks in home garden. The saw can be used for cutting down trees, cutting branches, firewood, wood for fireplace and other tasks where cutting wood is necessary.
Use the device according to the manufacturer's instructions only.
DESCRIPTION OF DRAWING PAGES
Below enumeration refers to the device elements depicted on the drawing pages of this manual.
-
Throttle lever lock
-
Choke cable
- Knob for air filter lid
- Air filter lid
- Front handle
- Brake lever
- Guide bar fixing nuts
- Chain tension adjustment screw
- Oil feed adjustment screw
- Casing
- Throttle lever
- Main handle
- Starter line
- Ignition switch
- Fuel filler plug
- Carburettor adjustment screws, L and H
- Low speed adjustment screw T
- Oil filler plug
- Bumper spike
- Guide bar
- Chain
- Guide bar chain wheel
- Differences may appear between the product and drawing.
MEANING OF SYMBOLS

CAUTION

WARNING

ASSEMBLY/ SETTINGS

INFORMATION
EQUIPMENT AND ACCESSORIES
- Guide bar guard - 1 pc
- Guide bar
3.Cutting chain - Bumper spike + bolts -1 set
- Fuel and oil mix tank -1 pc
- Sparking plug wrench with screwdriver - 1 pc
7.Screwdriver -1 pc - Hexagonal key 2 pcs
- File 1 pc
Prior to carrying the chain saw slide chain cover onto guide bar and chain. When carrying the chain saw, hold it by front handle. Do not carry the saw when holding main handle. If several cuttings are to be made, switch off the chain saw with the ignition switch between consecutive tasks.
The bumper spike should be attached to the chain saw at all times due to safety reasons. The bumper spike is a support point and reduces the kickback risk.
- Fasten the bumper spike (19) to the chain saw case using bolts (included).
INSTALLATION OF GUIDE BAR AND SAW CHAIN
Prior to guide bar installation remove plastic transport spacer, placed on guide fixing screws under the guard. Use pin and adjustment screw for adjustment of chain tension. It is very important that the bolt located on adjustment screw falls into hole in the guide bar during installation of the guide bar.
You can move the bolt to the front and back by turning the adjustment screw. Those parts must be set appropriately prior to starting guide bar installation in the saw.

DESCRIPTION OF DRAWING PAGES
Below enumeration refers to the device elements depicted on the drawing pages of this manual.

Guide bar and chain are supplied separately.
- Brake lever (6) must be in the upper (vertical) position (fig. A).
- Unscrew the guide bar fixing nuts (7) and remove the casing (10).
- Put the chain (21) onto driving chain wheel located behind the clutch.
- Install the guide bar (20) (slide it behind the clutch) onto guiding screws (c) and push towards driving chain wheel (fig. B).
- Put the chain (21) onto guide bar chain wheel (22) from below.
- Move the guide bar (20) away from the driving chain wheel, so chain guiding links are placed in the guide bar groove.
- Ensure the pin (a) of the chain tension adjustment screw (8) is in the middle of the lower hole (b) of the guide bar (20), adjust when necessary (fig. B).
- Place the casing (10) in its place and fix by slightly tightening guide bar fixing nuts (7).
- Strain the chain appropriately using the chain tension adjustment screw (8). Chain tension is appropriate when the chain can be lifted by 3 to 4mm in the middle of the guide bar in horizontal position.
- Firmly tighten guide bar fixing screws (7) while holding the guide bar tip.

Prior to guide bar and chain installation ensure that position of chain cutting blades is appropriate (correct position of the chain on the guide bar is shown on the tip of the guide bar). Always wear protective gloves during checks and installation of the chain to prevent cuts from sharp edges of the chain.

New chain requires start-up period, which lasts approximately 5 minutes. Chain lubrication is very important in this phase. Check chain tension after start-up period and readjust if necessary.
Check and adjust the chain tension frequently. Too loose chain can easily slide off the guide bar, quickly wear out or quickly wear out the guide bar.


FILLING SAW TANK WITH OIL

Oil tank in new chain saw is empty. Fill the tank with oil prior to first use.
- Unscrew oil filler plug (18).
- Pour in maximally 260ml of oil (be careful to avoid contamination of oil during filling of the tank).
- Screw oil filler plug (18).

Do not use oil that has been already used or regenerated, as this may damage the oil pump. Use SAE 10W/30 oil for the whole year, or SAE 30W/40 in summer and SAE 20W/30 in winter.

FILLING THE FUEL TANK

When filling the fuel, follow these rules:
Engine must not work,
- You must not spill the fuel.
Accordingly to the below table, mix petrol (lead-free with octane number 95) with good quality engine oil for two stroke engines.
RECOMMENDED FUEL BLEND RATIO
| Working conditions Petrol : oil |
| First 20 hours of operation 20 : 1 |
| After 20 hours of operation 25 : 1 |

- Unscrew fuel filler plug (15).
- Pour in previously prepared fuel blend (max. 550 ml).
- Screw fuel filler plug (15).

Most problems with combustion engines result directly or indirectly from fuel used. You must not use oil designed for four-stroke engines to prepare fuel blend.


Hold the chain saw with both hands during operation.
-
Check level of the fuel tank and the oil tank.
-
Make sure the brake lever (6) is in the switched on position (shifted to the front).
- When the engine is cold, pull out the choke cable (2).
- Pull the starter line (13) a few times to pump the fuel into the engine.
-
Set the ignition switch (14) to switched on position (fig. C).
-
Place the saw on stable ground.
-
While holding the saw pressed against ground, pull the starter line (13). First slowly so to hear the clutch gears, then pull it strongly (fig. D).
- Keep pulling the starter line (13) until the saw starts for a moment and goes out.
- Then press the throttle lever lock (1) and throttle lever (11) slightly to turn off the choke (the choke cable will retract automatically to switched off position).
- With the choke off, pull the starter line (13) again until the engine starts (you may need to pull a few times).
- Allow the engine to warm up. If necessary, increase the speed by pushing the throttle lever (11) slightly.
- Move the brake lever (6) to switched off position (shifted to the back).
Make a cut.
Do not start the engine while holding the saw in hands. During start up the chain saw must rest on ground and be held firmly. Ensure the chain is free to move without contacting any object. Do not cut any material with the choke cable pulled out.
STOPPING THE ENGINE
- Release the throttle lever (11) and allow the engine to run idle for a few minutes.
- Set the ignition switch (14) to STOP position.
CHECKING CHAIN LUBRICATION
Check lubrication of the chain and oil level in the tank before starting to work. Switch on the saw and hold it above ground. If you see enlarging oil marks, the chain lubrication works well (fig. E). If there are no oil marks or they are very small, use oil feed adjustment screw (9) to make appropriate adjustments. In case the adjustment brings no effects, clean oil outlet, upper hole of chain tension and oilway, or contact service.
Make adjustments when the saw is switched off, observe precaution measures and do not allow the guide bar to touch ground. Operate the tool safely and maintain at least 20~cm distance from ground.
Use oil feed adjustment screw (9) to set amount of supplied oil accordingly to respective operating conditions.
MIN position - oil flow decreases.
MAX position - oil flow increases (fig. F).
When cutting hard and dry wood and using whole length of the guide bar when making a cut, set the oil feed adjustment screw (9) to the MAX position.
You can reduce amount of oil supplied by turning oil feed adjustment screw (9) to MIN position, when cutting soft and damp wood, or when only part of the working length of the guide bar is used.
Oil tank should be almost empty when the fuel tank is emptied. When filling the fuel remember about filling oil tank as well.
CHAIN LUBRICANTS
Durability of chain and guide bar depends heavily on quality of lubricant. Use only lubricants, which are designed for chain saws.

Never use regenerated or previously used oil for chain lubrication.
CHAINGUIDEBAR

Guide bar (20) is exposed to heavy wear especially in tip and bottom part. To prevent side wear due to friction, it is recommended to turn over the guide bar every time the chain is sharpened. Clean the guide bar groove and oil holes on that occasion. Guide bar groove is rectangular. Check the groove against wear. Put rule to guiding strip and outer surface of a chain tooth. If you observe distance between, the groove is correct. Otherwise the guide bar is worn out and needs to be replaced.
CHAIN WHEEL

Driving chain wheel is subject to especially heavy wear. Replace the chain wheel when you observe clear signs of wear of wheel teeth. Worn chain wheel additionally reduces durability of chain. Chain wheel should be replaced by authorised service workshop.
ADJUSTMENT OF CARBURETTOR

Chain saw carburettor is factory set, however it may require precise adjustment when operating conditions change. Before starting to adjust the carburettor ensure new air filter and fuel filter are installed and tank is filled with appropriate fuel blend.

Adjust the carburettor with guide bar and chain installed.
- Screw in both adjustment screws (L and H) (16) until stop (do not overtighten) (fig. G).
- First, unscrew two adjustment screws (16) as specified below:
- L screw: by 1 1/4 of a turn
- H screw: by 1 3/8 of a turn
- Start up the engine and allow it to heat up while holding throttle lever (11) pressed in half.
After the engine has been heated, release pressure on the throttle lever (11) and allow the engine to run slowly. - Turn the screw (L) slowly clockwise until idle run achieves its maximum speed, then turn the screw counter-clockwise by 1/4 of a turn.
- Turn low speed adjustment screw (T) (17) counter-clockwise until the chain stops moving. When slow speed appears to be too low, turn the screw clockwise (fig. G).

Avoid touching the muffler. Hot muffler may cause severe burns.
CHAIN BRAKE

The saw features automatic brake, which stops the chain in case of recoil during chain saw operation. The brake engages automatically when force of inertia is applied to a weight located inside the brake casing. The chain brake can also be switched on manually, when the brake lever (6) is moved towards the guide bar (20). Switching the chain brake stops the chain movement in 0.12 sec.
BRAKING CHECK

Ensure the brake operates correctly before each use of the saw.
- Put operating saw on the ground and open the throttle fully for 1 - 2 seconds to allow the saw engine to operate at its maximum speed.
- Push the brake lever (6) forward. The chain should stop immediately.
- In case the chain stops slowly or does not stop at all, replace the brake band and clutch drum before using the chain saw again.
- To release the brake, pull the brake lever (6) towards the main handle (12) so you can hear sound typical of blockade snapping.

Ensure the chain brake operates correctly and the chain is sharp. It is very important for keeping potential recoil at a safe level.

CHECKING BRAKE ENGAGEMENT
During this check the saw engine should be switched off.
- Lift the saw while holding the front handle (5) and main handle (12) approximately 35cm above wooden object.
- Let the front handle (5) go and allow the guide bar to tilt under its own weight and touch the wooden object (fig. H).
- At the contact with the wooden object, the chain brake should engage (brake lever (6) moves forward to the ON position).

Ensure the chain brake operates correctly before starting any task. In case the brake does not operate efficiently, adjust it or repair in authorized service site.
In case the engine operates at high speed with the chain brake switched on, the saw clutch will overheat. When the chain brake engages during operation of the engine, release the throttle lever immediately and keep engine speed at low level.
CHAIN TENSION ADJUSTMENT

Cutting chain tends to lengthen during operation due to higher temperature. Longer chain loosens and may slip off the guide bar.
- Loosen the guide bar fixing nuts (7).
- Ensure the chain (21) remains in the guiding groove of the guide bar (20).
- Use a screwdriver to turn the chain tension adjustment screw (8) clockwise, until the chain is strained appropriately (it should slightly hold the guide bar in horizontal position).
- Check the chain tension again (it should be possible to lift the chain by approximately 3 - 4mm in the middle of the guide bar) (fig.1).
- Tighten firmly the guide bar fixing nuts (7).
Do not over-tension the chain. Adjustment of overly heated chain may lead to excessive tension when cooling down.
-
Before starting any planned task, familiarize yourself with section describing safe rules for chain saw operation. It is recommended to gain experience by cutting waste wood pieces. It will also allow to find out the chain saw possibilities.
-
Always observe safety regulations.
-
Use the chain saw only for cutting wood. Cutting other materials is forbidden.
-
Intensity of vibrations and recoil change depending on the type of wood being cut.
- Do not use the chain saw as a lever to lift, move or split objects. When the chain is pinched in wood, switch off the engine and drive wooden or plastic wedge into the processed piece to release the chain saw (fig. J). Start the tool again and commence cutting carefully.
- Do not fix the saw to a stationary work station.
- Attaching other devices, which are not allowed by the chain saw manufacturer, to the chain saw drive is forbidden.
- It is not necessary to apply big force to the chain saw when using the tool. Apply light pressure only while the engine operates with the throttle fully opened.
When the chain saw is pinched in kerf during cutting, do not remove it forcefully. It may cause loss of control over the chain saw, operator injury and/or damage to the chain saw.

Release the chain brake before starting to work.
- Press the throttle lever lock (1) and throttle lever (11) (wait until engine reaches its full speed before starting to cut).
- Keep maximum speed for the whole time.
- Allow the chain to cut wood. Press down the saw lightly (fig. K).
- Stop pressing the saw at the end of the cut to avoid loosing control over the tool.
- When the cutting has been finished release the throttle lever (11) and allow the engine to run idle.

- Switch off the engine before putting the chain saw away.
Keeping high speed of the engine when not cutting wood causes unnecessary losses and wear of parts.

PROTECTION AGAINST RECOIL

Recoil is movement of the guide bar of the chain saw up and/or back, which happens when the part of the chain on the guide bar tip encounters an obstacle.
- Ensure the processed material is firmly fixed.
- Use clamps to fix the material.
- Hold the chain saw with both hands when starting up and during operation.
- During recoil the chain saw cannot be controlled and the chain is loosened (fig. L).
- Incorrectly sharpened chain increases risk of recoil.
- Do not cut above level of your shoulders.


Avoid cutting with guide bar tip, it may cause sudden recoil - to the back and up. Always use complete safety equipment and appropriate working clothes when operating the chain saw.


Disassembly of protections, inappropriate operation, maintenance, improper guide bar or chain replacement may contribute to increase of risk of body injury in case of a recoil. Never modify the saw in any way. By using modified chain saw, the user looses all warranty rights. Warranty voids also when the chain saw is used inaccurately to information contained in this manual.

CUTTING PIECES OF WOOD

When cutting wood follow guidelines for safety of work and do as follows:
- Ensure the wood piece cannot be moved.
-
Use clamps to fix short pieces of material before cutting.
Cut wood or wood-like materials only. -
Before cutting ensure the chain saw will not come into contact with stones or nails, as it could cause pulling the saw out and damage to the chain.
- Avoid situations when working saw might touch wired fence or ground.
- When cutting branches support the saw as much as possible and do not cut with the tip of the guide bar.
- Watch out for obstacles such as protruding stumps, roots, hollows and holes in the ground, as they may be cause of an accident.

FELLING A TREE

Define the tree fall line. Consider wind, lean of the tree, location of heavy branches, complexity of work after tree fall and other factors.
- When tidying area around the tree remember to ensure proper ground grip and escape path to use when the tree falls.
- Predict and tidy up two escape paths at 45^ angle, counting from the line opposite to expected line of the tree fall. There must be no obstacles on these paths (fig. M).
- Make a notch at the side of the fall, one third of the trunk diameter deep (fig. N).
- Make a felling cut at the side opposite to the previously made felling notch, and a little higher than lower surface of the notch.
- Insert wedges on time to avoid pinching of the saw chain.
- Fell the tree by driving a wedge rather than cutting through the whole trunk.


When felling trees observe all safety rules and do as follows:
- When the chain is pinched, switch off the chain saw and release the chain with a wedge. Wedge should be made of wood or plastic. Never use steel or cast iron wedge.
- Falling tree may pull other trees.
- Danger zone radius is 2.5 height of the falling tree (fig. M).


- If the operator is inexperienced or amateur it is recommended to have a training rather than gaining the experience without supervision.
Do not fell trees when:
- Conditions in danger zone cannot be determined due to fog, rain, snow or darkness.
- Line of tree felling cannot be determined due to wind or wind blows.
CUTTING THROUGH TRUNKS
- Press the bumper spike (19) against the material and make a cut (fig. 0).
- If the cutting cannot be finished even after the chain saw range is fully utilized, do as follows:
- Move the guide bar back from the cut material to a certain distance (with cutting chain still operating) and move the main handle (12) a little down, support the bumper spike (19) and finish the cut by lifting the main handle (12) a little.
Always keep good feet and ground grip. Do not stand on the trunk.
- Watch out for possibility of the trunk rotation.
- Observe manual guidelines related to work safety to avoid the chain saw recoil.
Always finish cutting at the side opposite to compressive stress to avoid pinching the chain in kerf.
Before starting to work check the stress direction in the trunk that is to be cut, to avoid pinching chain of the saw.
- To eliminate stress, the first cut should be made at the tension side.
- When cutting a trunk that is lying on the ground, first make a cut deep 1/3 of the trunk diameter, then turn the trunk over and finish cutting at the opposite side.
- When cutting a trunk that is lying on the ground, do not allow to sink the cutting chain into the ground under the trunk. Negligence may cause immediate damage to the chain.
- When cutting trunk that is lying on the slope, the operator should always be at the slope side above the trunk.
CUTTING A TRUNK LIFTED ABOVE THE GROUND
In case the log is supported or placed on stable sawing horse, depending on the place of operation, make the cut 1/3 of the trunk diameter deep on the side under tension and finish cutting on the opposite side (fig. P and R).
TRIMMING/CUTTINGBUSHESANDTREBRANCHES
- Start cutting branches of a felled tree at its base and continue towards top of the tree. Do small branches with a single cut.
- First, check which way the branch bends. Then make a cut from the inside of the bend and finish cutting on the opposite side. Be careful, the branch being cut may spring back.
- When trimming tree branches, always cut downward to enable free fall of cut branch. However, sometimes undercutting the branch from the bottom may be helpful (fig. S).
- Be very careful when cutting a branch that may be under stress. Such branch may spring aside and hit the operator.
Do not cut branches when climbing up the tree. Do not stand on ladder, platforms, logs or positions that may cause loss of balance and control over the chain saw. Do not cut above level of your shoulders. Always hold the chain saw with both hands.
Ensure the engine is switched off and is cold before cleaning, checking or repairing the chain saw. Disconnect wire from the ignition plug to prevent accidental start up of the engine.
STORAGE
-
Empty the fuel system before deciding to store the tool for more than one month.
-
Drain fuel from the fuel tank, start the engine and allow it to use all remaining fuel and stop working.
- Use new fuel each season. Never use any cleaning agents on fuel tank, it may damage the engine.
- Pay special attention to keep the ventilation holes of the engine casing pervious.
Clean plastic parts with mild detergent and a sponge. - You can proceed with maintenance actions only described within this instruction manual. Any other action can be carried out only by authorized service.
- Do not make any changes in chain saw construction.
- When not in use, chain saw should be stored clean, on flat surface, in dry place and beyond reach of children.


When storing it is important to avoid deposition of rubber particles in basic parts of the fuel system, such as carburettor, fuel filter, fuel line and fuel tank. Fuels with alcohol additives (ethanol or methanol) may absorb moisture, and that during storing causes separation of fuel blend ingredients and formation of acids. Acidic petrol may damage the engine.
AIR FILTER


Dirty air filter reduces efficiency of combustion engine and causes increase of fuel consumption. Clean the air filter after each 5 hours of the saw operation.
- Clean the air filter lid (4) and its surroundings, so the dirt does not get into carburettor chamber after the lid is removed.
- Unscrew knob for air filter lid (3) and remove air filter lid (4).
- Remove air filter (d) (fig. T).
- Use water with soap to clean the filter, wash with clean water and dry thoroughly.
- Install air filter. Ensure the grooves on the air filter rim match protrusions on the air filter lid (4).
- When installing the air filter lid (4) make sure to properly place ignition plug wire and access sleeves for carburettor adjustment screws.


Do not wash the air filter in petrol or any other flammable solvent to avoid fire hazard or appearance of dangerous vapours.
CYLINDER FINNING


Dust deposition on the cylinder finning may cause motor overheating. Check regularly and clean the cylinder finning when carrying out maintenance of the air filter.
GUIDE BAR AND CHAIN


Check condition of the guide bar and chain every 5 hours of the saw operation.
- Set the ignition switch (14) to off position.
- Loosen and unscrew the guide bar fixing nuts (7).
- Remove the casing (10) and disassemble guide bar (20) and chain (21).
Clean oil holes and groove (e) in the guide bar (20) (fig. U). - Lubricate tip chain wheel of the guide bar (22) through the hole (f) located on the guide bar tip (fig.W).
- Check condition of the chain (21).
CHAIN SHARPENING

Pay attention to cutting tools. Cutting tools should be sharp and clean, it allows efficient and safe operation. Operating the saw with blunt chain causes quick wear of the chain, guide bar and driving chain wheel, and breaking the chain in the worst case. That is why it is important to sharpen the chain on time.
Chain sharpening is a complex operation. Sharpening the chain by yourself requires use of special tools and skills. It is recommended to entrust sharpening the chain to qualified persons.
FUEL FILTER
- Unscrew the fuel filler plug (15).
- Use wire hook to remove the fuel filter (g) through the fuel filler hole (fig. X).
- Disassemble the fuel filter and wash it in petrol or replace with a new one.
Install the fuel filter in the tank.
- Tighten the fuel filler plug (15).
When the filter has been dismantled use the wire hook to hold up the end of the suction line.
Be careful during fuel filter installation to prevent contamination from getting into the suction line.
OIL FILTER
- Unscrew oil filler plug (18).
-
Use wire hook to remove the oil filter (h) through the oil filler hole (fig. Y).
-
Wash the oil filter in petrol or replace with a new one.
-
Remove dirt from the tank.
Install the oil filter in the tank. -
Tighten oil filler plug (18).
When putting the oil filter into the tank make sure it reaches front right corner.
IGNITION PLUG
To maintain reliable operation of the device, check condition of the ignition plug on a regular basis.
- Remove air filter lid (4).
-
Remove air filter (d).
-
Remove wire (i) from the ignition plug.
- Put on plug key (included) and unscrew the ignition plug (fig. Z).
- Clean and adjust spacing between contacts (0.65 mm) (replace ignition plug when necessary).
OTHER INSTRUCTIONS
Ensure there are no fuel leaks, loosened joints or damages of main parts, especially main handle joints and guide bar fixing. When you find any damage, make sure it is repaired before next use of the chain saw.
All faults should be repaired by service workshop authorized by the manufacturer.
TECHNICAL PARAMETERS
RATED PARAMETERS
| Petrol Chain Saw | |
| Rated parameter Value | |
| Engine displacement 52 cm | 3 |
| Guide bar working length 450 mm | |
| Engine power 2,0 kW (2,72 KM) | |
| Engine speed with cutting system (maximum) | 10500 min-1 |
| Idle rotational speed 3000 min | -1 |
| Average fuel consumption 1,63 l/h | |
| Fuel Petrol / oil (for 2-stroke engines) 25:1 | |
| Fuel tank capacity 550 ml | |
| Chain oil tank capacity 260 ml | |
| Carburettor MP132 | |
| Ignition system CDI | |
| Ignition plug L7T / L8RTC | |
| Oil feed system Automated pump with controller | |
| Chain wheel (teeth x pitch) 7T x 8,25 mm | |
| Dimensions (LxWxH) (w/o guide bar) | 400x240x280 mm |
| Weight (w/o guide bar and chain) | 5,35 kg |
| Chain guiding in guide bar Bearing | mounted toothed wheel |
| Type of guide bar GRAPHITE 18" (450 mm) | |
| Type of chain 180PXBK095 Oregon | |
| Chain pitch 0,325" (8,255mm) | |
| Chain thickness 0,058" (1,47 mm) | |
| Year of production 2019 | |
NOISE LEVEL AND VIBRATION PARAMETERS
Sound pressure: Lp_A = 96.7dB(A) K = 3dB(A)
Sound power: LW_ = 110dB(A) K = 3dB(A)
Vibration acceleration a_v
- front handle: a = 7,907 m/s^2 K = 1,5 m/s^2
ENVIRONMENT PROTECTION
Do not dispose of electrically powered products with household wastes, they should be utilized in proper plants. Obtain information on wastes utilization from your seller or local authorities. Used up electric and electronic equipment contains substances active in natural environment. Unrecycled equipment constitutes a potential risk for environment and human health.
- Right to introduce changes is reserved.
Grupa Topex Spólka zogranożcza odpowiedzialnosci" Spólka komandytowa with seat in Warsaw at ul. Pogranicznia 2/4 (hereinafter Grupa Topex) informs, that all copyrights to this instruction (hereinafter Instruction), including, but not limited to, text, photographs, schemes, drawings and layout of the instruction, belong to Grupa Topex exclusively and are protected by laws accordingly to Copyright and Related Rights Act of 4 February 2004 (ustawa o sprawie autorskim i prawach pokrewnych, Dz. U. 2006 No 90 item 631 with later amendments). Copying, processing, publishing, modifications for commercial purposes of the entire Instruction or its parts without written permission of Grupa Topex are strictly forbidden and may cause civil and legal liability.
YCTAHOBKA WINHbI NcENI
Дяретулковинотажени саджат ретулкововьн виги зхbat.Во Врем мontакuaци очен baxho,чTo6bi 3axbat,pacnoonoхецн ha perynpooboyHom BnHTe,BoWeB OTBepctne Ha uHHe.
Nobopot BnHTa 6ydtnepeBnraTb perynnpoBOHb3axBaT Bnepei Ha3ad. 3TN 3JeMeHTbl Heo6xOIMo npabNbHo yCTaHOBtB, npexde yem yCTaHaBnBaTb shHy.

HnHa n ceNB noCTabJIaOTcB p3a06paHHOM BnEe.
- Pbyar TopMo3a (6) DoJxHeH HaxOuNTbC8 B BepxHem(BePTKakbHom) NoJoxEHN (Pnc.A).
Ocna6bTe n CHUMITE KpeenexHbI raKn WInHbI (7), CHUMITE KOxyx TopMo3a (10). - YCTAHOBHTe cenb (21) Ha Betyu 3Be3doUky.
HaedeHbTe 5nHy (20) Ha HappaBnIOUne BnHTbI (no3aDn CuenHeHna) (c) npeMeCTNTe B HappaBHeHn Bedyuee 3Be3doQKn (pnc.B). - PpOpyCTnTe ueb (21) MeKdy 3y6bAMn HOCBOB 3Be3DOUKN HINb (22).
-NotHnTe WnHy (20) Bnepe TaK, YTO6bI HnPaBnAoune3BeHbI cENI NIOTHO CENB Na3 WnHbI.
Y6eIntecb, yTO perynipOBouhB 3axBaT (a) Ha perynipOBoHOM BnHTe (8) COBMeuaeTcC HIXHM OTBepCTnEM (b) Ha WnHe (20), (ecn Heo6xOIMo, OTperynipOBaTb) (pnc.B). - YctaHOBNTe KOxyx TopMo3a (10) n 3aTnHTe KpeNEXHbIe raiKu (7).

- Otperynipyte HatakeHne cenn nnilb c nomoobu BNHTapeynipOBKn (8).HaTaeHne otpeynipObaHo npabnloHo,ecn ceB moXHO npnoDnBb B ceHTpe uHHb Ha 3 - 4 MM, KOrda uHa HaxODNTCB TROPoHTaBbHom NIOJKeHN.
- OkohuateIbHO 3aTHeNte KpeEnKhIbe raKn HnHbI (7), npUdepXnBa HocOByIO YacThb HnHbI.

Ipepe yctahOBko cenHa uHny Heo6xOdmo npOBepntb npabnBhoe HnpabnEne pexyux 3BeHeB cenn (npabnBhoe HnpabnEne noka3aHo Ha Hocoboy actu Wnhbl). Pnb3yTEcb 3aunThbIMn nepaTkAMN dna 3aunTbI pyK Bo Bpem MoTtKa n npOBepKn cen.
KaKdyIO HOByIO ueb 6kaTbIbAitc, KaK MHNmym, 5 MN. Ia npTnRPKn DeTaneu n pacnPepenHna Macna no 3aOpam. 3aTe m npOBepBe HataKeHne cenu n OTperynpuyTe, ecnn Tpe6yetca.
CnCTematnueckn npobepaIte n perynpyTe HataKeHne Tcenn, TaK KaK paTaNyTaA cenb MoKeT NERKO CCKOHTb C HAnpaBnIOe IuHbI, a TAKKe 3TO yCKOpReT N3HOC cENn IuHbI.
3APABKAIIINJIIMACJOM
Pnna npodaetc n yctbIM macJIbHbIM 6aKOM. Npeq nepBbIM NCNoIb3OBAHNEM cneDyET 3aIpaBtB Nnny MacnOM.
- OTKpoIe KpbIuKy MaCnaHoro 6aKa (18).
BneTe MaKcMym 260 Mm Macna (BHMaHne! BO BpeM 3anONHeHn6aKa MaCJOM CNeIeNTe 3a TEM, YTO6bIB Hero He nonaHn HkKaKe 3arpa3HeHH).
- 3aKpOte KpbIuKy MaCnHOro 6aKa (18).

3anpeaetc 3anpaBnTb nnny otpa6oTaBmnn BOCCTAHOBHeHHbIM MacnOM, TAK KAK 3TO MoXeT Bbl3BaTb nobpejHne HnctpyMeHTa. NcnoNb3ObaTb MacNo SAE 10W/30 B TeueHne BCero roDa nn neTom SAE 30W/40, a 3nmoi SAE 20W/30.
3ANPABKA NINJI TONINBOM
BoBpMa3a npabKn NnblbTOnnnBOMco6nOaTe cneDyUoue yka3AHN:
- Bbiknouhte DburaTeNb
- CtapaIrebc He npoJntb TOnnBO.
CmeaTe 6eH3n (6ecBnHcObbl c OKtaHOBBm YCNOM 95) C BbICOKOKaueCTBeHHbIM MaclOM DnA DByXTaKTHORO DBNiratena CORIacHO TaBnue.
PEKOMEHyEMbI KOΦΦUNEHT CMEUBAHNA
OBPE3KA IN NOJPE3KA CYHB
HaHnTe 6pe3aTb cyb n BetBn y OCHOBaHn NOBaHnHO DepeBa n DbraraiTec b K Bepxuyke. ManeHbkne CuyknydaJnTe OHNIM DBNXKeHnEM.
- Chayana npoBpe, B kkyo cToPOHy n30rHyta BetKa. 3aTe m Cenai Te npBbI 3aIIu Co cToPOHb I3rN6a, a 3aBepWnte C npTINBOJIOJXHO CTOpOHb. ByIbTe OCTOpOHHb, YTO6bl 06pe3aemar BetBb He OTCKOUnHa3aI.
-Nope3aBETBnDepeBBeB,ABRnAteCbOTBepxuKn BnH3, NO3BOJRAOTpe3aHHbIM BetBAM CBO6oHO naTaB. HOrda, OHaKo,MOKeT NToP6oBaTcN ODoPe3Ka cyBeB CHN3y (pnc. S).
CobnIaTe npdeEnbHyO octopoxHocTb BO BpeM nope3Kn BetBeB COCToAHn HApJxHeHn. TaKaBETB MoKcT OTCKOHTb NyapuTB Bac.
3anpeaetc 3ane3aht Ha depebo c uebIO nope3cuybe. He ctoIte Ha neCTnuax, natafopmax, Ha 6peBHe N BIO6om dpyrom noJooKeHH, B KOTOpOM Bbl MOXeTE NOPEpTb paBHOBecne nn KOHTponb HAd nnNoi. He nope3aTe BetBN, HaxoJaune C Bbiye ypoBHa Bauix Pneu. Nny depKnte DByMa pykAm.
TEXHNUECKOE OBCJNYKUBAHNE
Pnctynar K qntke, npOBepKe nn pemOHy y6eHNTecb, 70 DBnraTeB nIIbl OCTAHOBHeN n OxlanJeH. OToCoEHNHTe npoBOD OT CBeu 3aXnHaHn, TTo6bl npedynpeDntb cnayhnhnyck DBnraTeB.
XPAHEHNE
-NepeTEm, KaYy6paTb NnIy Ha XpaHeHne Ha cPOK 6Oone Mecua, CneTe BCe TOnnNBO n3 6aKa.
CneTe TOnNnBO, BKNIOHTe DBrATeNB n DaTe emy octaHOBNTbCA H3-3a OTCYTCTBNA TOONBA.
KaJdbn ce3OH nCOnb3yIte HOBO TOnNIBO. 3anpeaetc HCTNb TOINNBHb6ak KaKIMN-N6o YnCTAUMNCPECTBaM, TaK Ka3TO MOKeT NOBpeNTb DnRrataeIb.
Cneinte 3a Tem, yTo6b BEHTnuaHNoHHbE OTBepCTN B Kopnyce DnurataTe He 6bln 3aKynOpHebl.
-Пл actmaccobbe 3nemeHtI npoTnpaTe ry6ko, nCnoB3y HearpeccunBHOe uCTrue e CpeCTBO.
Pa3peaetcBbInoHbTbToIbKO Te pa60tbl no yxOy 3a nnno, KOTOpbIe yKa3aHb B daHHOM pyKOBODCTBE. Bce npoune pa60tbl DoJHKbI BbINoHbTbcB C cepBnCHOM ueHTpe.
3aPpeaaeTcHMeHbKOHCTpyKuIIO Nnbl.
-HeuCNoB3yEmyI npIy xpaHnTe B uCTOM COCTOHN Ha IIOCKoN IOBepxHOCTN, B cyXOM N HeDOCTYINHom DnA DeTeM MeCTe.
Bo Bpemx XpaHnna No3a60bTecb O Tom, 4To6bl Ha OCHOBhix 3eMeHTax TOnNtBHO CNCTeMb NINbl, TaKnx KAK Kap6kpatop, TOnNtNBHy bInbTp, TOnNtNBHa rtpy6Ka nn 6ak, He HakaPnBnAbaCpe3uHOBa nInb. TOnNtNBHbIe Cmecn C mCnONb3OBAHHem 3TaHOba NIN MetaHOba MOryt NorIoUaTb Blary, 4TO npNbOBDNT K pa3deneHIO φpaKun TOnNtBa n 6pa3oBaHnIO KNCNOT. KncNoTHbIe NcnapenHry MOryt NOBpeDntb DnurateJb.
BO3DyUHbI ΦNlbTP

3aqrpaehnboBdUHbI pNtchnaeMoHoctb DBnraTeIyBEnuHbaeT pacxOJToNNBa.BoDyuHbI pNtchntte nocne kKaDbix 5 yacob pa6oIbI nnbl.
- PpOtpaIte KpbIuKy TOnnBa (4) IN PocTpaHCTBO BOKpyr Hee, YTO6bI 3aRpa3HeHn He NonanB KaMepy Kap6iopaTopa.
- OTBnHTnte BnHT KpbIuKKn ΦHbTpTa (3) n CHMnTE KpbIuKy (4).
BbHbTe BO3dyuHbI ΦnIbTp (d) (puc.T). - PpOMoIe Fmbltp B MblbHoi BOe, 3aTeM B HcTOn n npocyuHte.
-yctahOBHTe hnltp 06paTHO, npn 3TOM na3bl NO KpaM hnltpa DonxHb COBnaatb C BbCTynamn Ha ero KpbIke (4). - YctaHabnBaa KpbIshky Bo3dyuHoro fNbItpa (4) y6eIntecb, UTO npBOoD CBeU 3axnraHn BnHTbI peynpOBKn Kap6opatopa HaxOaTcHa CBOxMecTx.

4To6bI n36ExaTb BO3HNKHOBeHnnoXapA HnBpeHbIX nCnapeHn, 3anpeaaetc npOMbIBaTb BO3DyHbI ΦnIbTp B 6eH3nHe nn DpyroNerOBocnnamHnIOuecn KJDKoCTn.
OPE6PEHNEUINHDA

HbIb, HakaJIbNAIOUncra Ha Ope6peHHn cIIINHpa, MoKET BblBaTb nepepeB dBIRatena. IpOuNca BO3dyHbI bINbTp, nepNoDnueckn ouuauTe TAKKe ope6peHne cIIINHpa..
UHNA UZENb

PocneKaJbIX5yacOBpa6oTbI npOBepeTecoCTOHHeuHbI uenn.
- PnepeknoHTe BblKnIOuOaTeIb 3aKnraHn (14) B nNoJKeHne BkNIOUeHO".
- Ocna6bte n CHMnTE KpeNEXHbI raKu nnHbI (7).
- CHIMMTE KOKxu (10), HappaBnIooy (20) n cenb (21).
OuCTnTe OTBepTn noaun Macna n na3 (e) uHbI (20) (pnc. U).
CMaxkBeTe BeDomyo 3Be3doUky uHHb (22) Upe3 OTBepCTne (f), HaxoJueecBa HOCOBu qactu uHHb (puc.W) - PpOBePbTe coCToHnne cen (21).
3ATOUKA LENI

Cenb Tpe6yet Oco6oro BHNMaHa. Cenb DOnJHs 6bTb Octpo n uCTO,3TO ObecneuBAeT 0phiKtNBHyIO 6e3oNaChyio pa60Ty. Pa6ota c3aTynnEHHo NcEhBO Bb3bBAeT 6bCTpbN u3Hoc cENn, HnBn b BeNyue 3Be3doQKn, a B KpaHnx CnyaX MoKeT npBecn K CpBBy cENn. PToTMo CnCTemTuHeCKn Heo6xOIMO npOBODNb 3aTOUYcN.
3aTOUka cENN ABJIeTcra CNOXHbIM npoceccOM. CamocToarTeBHa
3aTOUka cenn Tpe6yET nCnONb3OBaHnA CneuaJIbHbIX
INCTpyMeHTOB, a TAKKe H HABbIKoB. IOnrOmy peKOMeHdyETc
0bpaataBC K CNEuAnlnty.
TOnJIuBHyI ΦHJIbTP

- OTKpoIe KpbIshky TOnJIINBHorO 6aKa (15).
C NOMOsbIO KpOcKa n3 npOBONKn BbHbTe TOnNnBbIy fNbTp (g) yepe3 TOnNnBO3aNNBHOe OTBepCTne (Pnc. X). - BbHbTe TOnJIINBHyI ΦnIbTp, npOMOte erO B 6eH3nHe nn 3aMeHInTe HObbM.
- YctaHOBtTe TOnNnBHyI ΦnBtp o6paTHO.
3aKpoTe KpbIkwTy TOnNnB03aAnHBHOrO OTBepCTn (15).

Tocne BbIeMKn TOnNnBHorO fNtbpTa, npuepKnte KoHeu TOnNnBHO Tpy6Kn C NOMoCbIO KpOyKa.
YctaHabnBaTOnnBbHbI ΦnBtp 06paTHo, cneinte 3aTeM, yTo6bl B TonnBHyO Tpy6ky He nonan Kacne-nn6o 3arp3HeHH.
MACJIARHOIΦNJIbTP

- OTKpoTe KpbIuKy MaCnaHoro 6aKa (18).
C NOMOUbIO KpIouKa I3 npoBOJIoKn BbIHbTe MacJIaHOH φNtBtp (h) uepe3 MacNo3aJIbHbOE OTBePCTne (PUC.Y). - PpOMouTe MaCJIaHOH ΦIbTp B6eH3nHe IIN 3aMeHHTe HOBbIM.


- Ha BCaKn Cnyaayu ydaIne 3arpa3HeHna n3 pe3epByapa.
- YCTAHOBNTe MacJHHOIINbTp o6paTHO.
3akpoTe KpbIuKy MacnaHoro 6aka (18).
YCTaHABINBaaMaCnHHO B6ake y6eHTecb, YTO OH cOpNkacaetc C npeHNm npaBBm yrnom.
CBEA 3AXUNAHN
Дя 6ecnepe6oHoi pa6Obl DnurataTeJI Heo6xoJIMOn nepnoDUnueckn npOBepaTb coCTOHaHne CBeu 3axnraHna.
- CHIMMTE KpbuKy Bo3yHoro qnIbTpTa (4).
BbIbTe Bo3dYHbHnΦnTp (d) - CHINMITE npoBOD (i) co cBeu 3aKnraHna.
C NOMOUIKIOA(BXODNT B KOMNNEKT cENI) BBHbTe CBeuy 3aKnraHn (puc. Z).
OuHCTnTe n OtperynUpyTe 3a3Op (0,65 MM) (3ameHnTe cBeyy 3aKunraHn,ecnn Tpe6byTc).
DONOHHTENbHbIe YKA3AHN
IpoBepaIte HNCTpyMeHT Ha npEIMeYTeUKN TOINIBa INOBpeXdHnOCHOBHbIX 3JeMeHToB, B qACTHO, pyKoTKn IN KpeXeHbIe 3JeMeHToB WInHbI; IpoBepaIte 3aTJkKy KpeXeHbIX 3JeMeHToB. B Cnyae O6HApXeHn NIObIx NOpeXeHdHn, npeD CNeDyUOuM INCNoJIb3OBAHNEM NINbI CneDyET YcTpaHNTb BCE HeNoJaKn.
Bce HenoanKn DOnKnbl yCtpaHrTa cABTOpN3ObaHHo CepBucHO MaCTepCKo NPOUNBOIDNTEN.
TEXHNUECKNEIAPAMETPbI
HOMHAJIbHbIE DAHHbIE
INHOPMAUOBHEWMAIIBNPAU
YpOBeHb 3ByKOBOro DaBNeHn: LpA=96,7 Πδ(A) K = 3 Πδ(A)
YpOBeHb3ByKOBOuMoUHOCn: LW_ = 110 Φ(A)K=3Ω6(A)
Bn6poycokopehne a.
- nepenhy pykortka: a h=7,907 m/c² K=1,5 m/c²
3AUNTA OKPYXKAIOUCEI CPEBJI
3nKETPPOPNBOPDnHE CNEETY BnBOPACMBATBMECTC DOMAHMMMOTOKDMN, NK CNEETY NEPePAbT B CNEIMANBNNH NYPHT YTMINIAHIN HNFOPMAGHO HA TEMY TMYMAAAMOKET PNPQCTABTHPNOAEJN HNDNEMN MNTCHBE BAACTN.3NEKPTPOHOH NNEKPTPOHOE OBOyPDBOHMe, OPAOBOTBUECB CPCK KCNPIATAAOMC ODPKJKT OTANHE DPNOXYAOUCE CpeDb EueCTBa. OOBpyoBAHHe, NOneepHyTOE PNOECY BTOPOHNO NEPEpOBOtKN, BAIETCN NOTENNAHBO ONAOBHNI OOKPYAOUWcpeDb I 3DOPOBBaYOBOBa.
- Octabnnem 3a coboi npabo BBOJntb NImMeHnH.
KOMNAHn Grupa Topex Spolka z ogranizcona odpowiedzialnosica" Spolka komandytowa, paononoHN B apuaue no apecy: ul. Pograniczna 2/4 (danee, Grupa Topex) cooasaet, tno BCE atbOPKne IpaRa ha CodepaKna HactoaeNHTCPyKNa (Danee, NHTCPyKNa), B T.Y. TeKT, foTporpAHH, CXEMH, pMCYHKN M PeTeKu, A TAKKE KOMPONHOKA, pMHNAPNEKAT NOKNUHTeHNO KOMIANHn GRupa Topem nauuJeHakOOn or 4 eOpAHn 1994 rda oBAPCkOMPiabe n CmckhIXI npaaB (BeCTHNI KAKOHDAteJIbHXI AKTOPI NT 90 nO3 c 136 nocne, mJ). KONIPORBAHn, BOCPGNB3EbenHe, NybIKaJIaJIa, NMMEHEHne NImENTOB NHTCPyKJIN 6e3 nbcMeHHoro corlAnca KOMnA HnGrupa Topex cTPOrO 3anpeHoo MoKeT NobeHs 3a Coobr pRaxkCkyo YrONORHY OTRETCBHENHOCT.
HHOPMALU O DATE N3ROTOJEHNA
YKA3AHABCEPNHOMHOMEPE, KOTOPbIH HAXODNTCA HA N3DEJIIN
PpaoK paunHpoBKn HhOpMaun cnJeDyUoN:
2XXXXYYG****
Tae
2XXX-rodn3rotOBHeHn,
YY-MecuN3rOToBHeHn
G-KoT ToproBm MapKn (nepBa 6yKba)
***** - NOPAKOBbI HOpEu N3dEnnA
NATOBOLOH H KHP AN GRUPA TOPEX Sp. z o.o. Sp. k., ul. Pograniczna 2/4, 02-285 Warszawa, Poland
UA 3 OPUNIHJY
ПИЛKA ЛAHцIOROBA БEH3иHOBA 58G952
INPMITKA: INPEED TUM RIK PINTYATN DO EKCNIYATAUII IHCTPYMEHTY, CIIID YBAKHO O3HAHOMITNCRA 3 CIIEIO IHCTPYKLIIEO N 3BEPEETN II B DOCTYNHOMY MICLI.
INPABNIA TEXHIKU BE3NEKN
BE3NEKA KOPNUCTYBAHHI INIKAMN IAHIOROBUM BEH3HOBUM
HACTAHOBA
-He3haomi 3iieio hctpykciio oco6n He donyckaotbca do KopncTybaHHIhctpymeHTom.
JaHOrOBy NnKy DonyckaetbCBAKOpNCTOByBaTu BKnIOUHO do PO3nnIOBAAHNepeBHN.
KopucTyBaH Hece nobHy BiNobiIaNbHcTb B pa3i BuKOpIcTaHH HHe 3a npn3HaueHHM, 00 e He6e3neHMM.
Bupo6nK 3Himae 3 ce6e 6ydb-ky BiNOniBaIbHiCt b 3a uKOu, noHeceni KopcTByaueM BHaCNIIOK HENpaBUNbHOI ekcnnyataui iHCTpymEnTy.
POBOYE MICUE
a. Po6oue Micce cnI ytpmyBAtn B uNCTOTI Ta 3a6e3neuHTM Nomy do6pe oCBiTIOBAAHHe. Henpu6panicmb ma no2ane OCbImnHRe po6o0o Micra cnpuraomb pu3ky mpaMy6AHHa; Oc6nubO ue cmocyEmcbE kcnnyamaui nauo208ux nu.
b.He cnid donyckatnpncytocti diren u ctopohhix Ha micui npaui. Po0cepejxehn yea zu onepamopa moke npu3ecmu do bmpamu KOHpmio Had IHcmpymemom.
INPABUNAOOBOHCTOIBE3NEKN
a.CnIb BukopncTOByBaN 3ac06n Ooc6nctOi 6e3neKn, HnP., po6oui KOM6IHe3OH, 3axuChi OKynApu, 3axuChe B3yTTA, 3axuChi KACKy uHabyuHnK Ta shkipnPykabuCi. BukopucmaHH 3axuchozo cnpoadxehn e biOnobihux ymoBXCKOpouc pu3ukmpaBamU3My.
b.He cnid nepeoiciHOBATn BlaCHNX MOKNUBOCTeN. CnId npauIOBATu NBHI N03Ni, uO6 3aBXn 3a6e3neYbana pIBHOBARY TINA. Ue do38oJIc 3aneBHmu HauKpauiu KOHmpoIb HAD IHcmpymemom B Heneped6ayBuHux 06cmabHax.
c.3a6oPOnHcTbCn npauOBaTu y wupokomy 3aBeneKOMy B6paHni, a6o matn ha co6i npuPKacn. Bonocca, oJr, pykabnci cnid TpMaTHn 3daN BiD pyxomnx qactnn IHCTpymEnTy. Wupoku odae, npukpacu yu doBe BOncca MoXymb 3aayenumcra pyxomi qacmuH u HcmpyMeHmy.
TPAHCNOPTYBAHHTA 3BEPIFAHH
a. Nepu hix nepeHocnTu IHcTpyment DeiHne, cnid BmKHyTu ABnryH, 3akpTu nnbHn naHucor KoxyXOM i3a6NoKYBaTu raIbMa. IpeHouyBaHH nuku y BBIMKhyMOny cmaHi ma makoi, uo He 3abe3neueHa KoxyXOM, 3dAmHe cnpuuhumucr do bunaKy mpaBammu3My.
b. IpehenowybaHHn nnKn DonyckaTbcBnKIOUHO 3 ytpmByBaHHm II 3a npoBiHne pykib'A. 3axbam 3a iHwi enememu nuku He 3damen 3aneBHumu adekbamhoi MiHocmi ii ympumahna, a, Harnpomu, 3damen donpoBADmu do mpabMaMu3My.
c.Паця 3 nнлкоу Bmarae 6e3nepepbHoro KOHTpOIO. CnId cnpaBANTn, qn He nepeinnaIOTbc ODA 3a ONDy Ta qn pyxaOTbc BInbHO pyxomi YactHH INCTpyMeHTy, Ta qn He MaTb Micue NOkOKeHH YacTHN, a TAKOK n He CTANcYMOBn, IO MOKytB BnINHyTN Ha nPaIQo IHCTpMenty. NpeD TNM JN pNctynATn Do ekCnnyatauII IHCTpyMeNTA, IORo CNiD BiPemOnTyBaTN. Bazamo HeuacHux Bunadki8 cmanoc3 npuyHu BuKOpucmaHH HecnpaBHOz0 ihcmpymehma.
d.Пиьнл NaHIOr NOBHeH 6yTH HArOCTpeHIM 36epiraTcB B uCTOTI. IpaunbHuI dozna3a pIsaNBHM NaHIOZOM 3 zoCmpMu OkpaKaMaU ckopoue pu3UK 3aknluOBaHH i noneuye ecKnnyamaio.
NPABUNA EKCNYATAU TAOJIA 3A NIKOIO
e.HanexnTb 0o kkiCb yac nepeBipatn CnpabHictb ranm nnKn. HecnpaBni 2anMa He 3dAmHi MummEo 3ynuHumu naHou 8 He6e3neHi cumyaui.
f.卍opa3ynicra3abepweHHnpaui nNkoio ii cnip petenbHO ouCTnTu, ouCTnTu BkOpncTahi 3acobn iHnBiyalbHorO 3axncty niDAtu BpaanBi By3nn KOhceBauiHm 3axoam.
EKCPIIYATAUIA
-Nepp HIX po36nokybaTn raIbMa naHcIora, cIiB BmKHyTN DnRyH nnKn.
Cπi36epiratu oco6nBy 06aunHCTb, 3abepuyou npo3nnIOBaHHoOckIbKn nnka, 10 He Mae onOpny Bnrrnpo3nnIOBaHO MATEPIany, naa e nBnaCHO Baro - ce 3DaThe cnpnuHHTnc DO BnnaKy TpaBMATN3My.
Пд ус Трьалои паши палы рук та 3an'яст КОпета loKут bЗанIMITn.В takOMy BUNaIky peKOMeHnyetbca 3po6tNi nepepy Bpo6oti,OCKINbKN 3aHIMiHHeДо3BOJIe onepatopoi cnpabHo KepyBaTи nIKoHO.
He donyckaetbcBnKOpncTOByBaTn Dxepena BIDkpntoro BORHIO a6o naHTN.
HANOHBOBaB6ak NnKn 6eH3NHO-ONNBHO cyMiWIO DONYCKaETbCB BNUKIOUHO npu BUMKHeHOMy DBNYHi, IO OCTIr. HexTyBaHHaM npabINOM 3arpoxye pn3NKOM 3aMaHHa NaHbBA Bi pO3neueHx enemTeB nkn.
3a6opohraeBCB MKNATN NIKy B pa3i BNABNEHH Teyi 6EH3Hny a6o HerepMeTuHOCTI naNBHOICNTEMN, OCKINbKn ue cnoKexOHe63neuHm.
Piuc npaui nuka Harpiaetbca; pekomehyetcb36epiratn 06aunictb i He Topkatae HeazuueHmuaCTnHaMtni npo3neuehnx enemtib nnkn.
-Пинka BIMarae BVKNIOUHO OJHOOcIbHoro BnKOpIcTahHa. CToPOHHI OcO6n He DOnyckaIbCra Ha pOboi MaIaNHyK, De npaioTOb NaHOrOBOO NnKOIO.OcoBNIBO KaterOpuHO He cnID dOnyckatnpocTyHocti diTei I TBapIN No6N3y po6Ouro Micua.
-Пд ус CBIMKHeHЯ LaHQuI NmKn He NOBHeH TopKaTnca aHi MaTePiaNy, lo NiJrae Po3nnIOBaHHo, aHI 6yDb-8kNx IHnx npEdmetiB.
Piac npaui NaHOrOBy nNky cnid zinko TpMaTOn o6o pykam BiNobiHO 3a 06nDbpaykib'.PiauHOBaTu cnid B neBHI no3nii.
- DITn Ta niDnITkn He DonyckaHbCn Do npaui nnko. Do npaui nnkoIO DonyckaHbCn BnKnIOuHO dopocni OcO6n, 0o npoiun IHCTpykTax i HABUHN. NpepaBaN nauKorOBy nnky HaCTynHomy KopNCHTyBaueBi CnI pA3OM 3 ciEIO IHCTpyKciEIO.
- He cniiKopncTyBaTnca NaHcIgOBoHO NIIKOBO BCTaHIyTomN.
- Nepw Hix po3noaTu PO3nnIOBaHH, cnI nepeBecTu Baxinb ralmb naHcua y BiNobiIne noLoXeHH (npTAYn B Hapmky do ce6e). Baxinb BodHOuac e 3axnCHM KOxyxOM dna 3an'AcTa.
BnCyBaIOuN IaHcIOrOBy nIIky 3 MaTepiany, He OOnyckaETbcI BmNKaTI: NaHcIg NOBHeH pyxATncb.
-Пд уac розиюваня колд i ДовогохмуpekomeHyetcб вкористовати КOSTИ. He onyckaetbcpo3nIOBATN KINbKa DoWOK ODHouacHO (HabITb JAKOBOH N BklaheI WtabeNem) Yu MATEpiany, kyn 3 Iworo60ky nIqTpmyetbcra HWOO Oco6oTO;Takox 3a6opohetbcnpntckatn obpo6nIOBAHm MaTepiAn HorOIO.
-Obri MaTepiAn, 10 NiIraTb po3nIOBaHHIO, NOBHHI 3HepyoxmIOBaTncB BiNOBiHNM MeToaMn.
-Po3nnIIOUH MaTepiA Ha noXnIi NOBepxHi, onepatop NoBHeH 3aMaTn po6Ouy No3uTo TaKIM YHOM, 06 6bnueM 6ytn 3BepHyTM do yxNny.
-Пд час рознюваня колд pekomehубсьВИКОРиCTOByBaTи 367accty nIINOPY. YtpmmyTe 3aHepyKIB' HENOXHTHO,HaTOMICTb KepyTe NnIKOIO 3a Donomoroi npoBIDHORo pyKIB'a.
- y BnnaKy, KOJIH He BdaEtcBpa03nnuTn KOLOy 3a OHN pa3OM, cnD BucHyTN NnKy Deo Ha3a, nepecyHytn nIINOPky i npOobxTuPo3nnHOBaHHa, 3nerKa niIMauOn 3aHHe pykIB'a.
-Пд чс ripиэтаб Horo po3nHOBaHH cIД hamarTcBCTATN nIkyTom 90° (a6O mKacmambHO Ha6nHexHMdoHboro) BiHOCHO liHII po3TNHy. Пд чс takoi onepaui cIД36epiratn oc6nbBy obayHICTb.
- Y BINA KI 3aKINHeHH NaHcIora B MATEpIani nac po3TnHy npoBIOHO YoACTHOIO WHN ICHyE IMOBipHCTb T.3B. ABNua "BiD6NTTg IHCTpyMeHTA B HAnpAMky OepaTopa. Y 3B'3KY 3 UIM peKOMeHdyETbCn NO MoKInBOcTI HaMaRaTcN BIKOHyBaTN PO3NIIOBAHH HxKHbOIO YactHOIO WHN, OCKIbKn npu CbOMY, B BINaKDy 3aKINHeHH NaHcIora, HAnpAMOK BiD6NTT8 Bye BiOnepaTopa.
Oco6nBy 6aHcHtB cnid 36epiratn niD ac po3nnIOBaHHn DepeBHH, 0o Mae TeHdEHIo Do PO3KOJIIOBAHH. WIMATN KOIO, 10o BIDCKAkyTOb, MOKytb PO3NIATNA C B DOBIbHOMy HAnpAMky (i cTAHOBHT Pn3NK TpaBMaTH3My!).
-06p3aHHn 1nna 3 npeb DonyckaoTbcBnKIOUHO CneuaJIbHo HauyeHIOO6n! HeKOHTponBoBaHe naIHnCnnnHnx rINOK 3arpoxye TpaBMaTHmOM!
3a60pOHaTeBcB BnKoHYBaTn po3nnIObHH npOBiHO 即THNOO ⅢHn(3OrnAHy Hpu3NK TpaBMAtn3My).
Oco6nBy ybary cnid 3BepHytn Ha rinn, 0o 3HaxoDntbcra nI HAnpyKeHHm BnaCHO BarIO. 3a6OpOHCTbcra CnnIOBaTn rinn, 0o BinbHO 3Bncae, 3Hn3y.
-ⅡI yac CTnHaHH HepeBa He donyckaetbcra CtaBAt Ha IiHII Horo oukiybaHoro naiHH.
Piac naHnna HepeBO MoKe 3nMaTH rnnycihixpeB, HABITb cinkom cyciHi peBa, kci CBOIM naHHM 3aTHI CNpuHHNTcA Do TpaBMaTHMcy. Cn36epiratn Oo6nHy obauHicb y BnnaKax, 0o 3arpoxyoTbpMaTHMOM.
-Пд ус CTинанн Дерв Ha noxinx NOBepxHx onepaTop
NOBINH ChBaTn Bnue Ha yxni, HIX 3haxoDntbCra CTOB6yp
Дерв, BxOДHOMy pa3i He Huxque.
3BaKaIe Ha KOIoN, 10 MoKryb CKOTUNCBA HAnpMky onepaTopa.HeraHOp ypaAte BID KOIO, 10 cCKOuyTbc!
-Плка,ло npaц�с,српчнгзнанусypotnB nДЗИЗИЗHЯпЕнHAIIH3ВИРУОЧМlaHц罗M B MATEPIAN,лO O6bpo6IIOeTBcR.ВТAKOMY BINNAJky Плка може NOBecTиСН HeKoHTpOJIbOBAHIM YIHOM I BnRAJIYE TeHdEHIQ Do BiIDbNTT B HAnpamKy onepaTopa (pN3NK TpaBMaTH3My).
- Nepu Hix Opiatn DepeBa, Heo6xio nirotybnt Micue npaui, 0 no nonrae Ha ycyeHHi HxHix rIOK, kipneewkoJkaIOTb, Ta np6paTm Micue DOBkOJa DepeBa.
-HeDonyckaetbca npauOBaTu nii qac cnIbHOro Bitpy,Ani 3dAteH 3MiHtN OUYkBaHn HaprMOK naIHnHa DepeBa a60 CnpuHHTu Ioro HeouikyBaHe naIHnHa.
-HeDonyckaetboc6p3aTNepeBaByMOBaxO6MeXeHOI BnIMoCTiPiacrMaHy,doNyaboCHironady.
He donyckaTbcra Bn3hauatn liHIO po3nnIOBaHHB niue pIBH nIeey HcToaHn Ha depebi, npa6uHi, nnaTphiopmi, KOoDi TOO.
Ha Micu po6oTn nobHHa 3HaxOHTncra o6pe o6naHaHa anTeyka nepwoi donomor.
063ano6irtn yBnuy Bi6ntT, cnid dOpmyBaTnca HactynnHex npabn:
3a60pOHaTbCPO3nOuHAtn 1npoOBxByaP03nIOBAAHH npoBiHO qACTnHO uHN!
-3axoundnca po3nnnoBAtn MaTePian cnTinbKn nnkoio, naHcior aKoi Bxe pyxaetbc!
Baxnbo nepekoHaTnc, 0o naHcIg E DOCTaTHbO HaroctpeHm.
-3a6opohraetbca odHoyacHO po3nnIOBaN 6Inbwe HIX ONDy rinky. Pid cac cnNIOBaHHra RINOK CnID ODHoyacHO 3BeptaHa yBary Ha cyciHi rIKn. Pid cac cnNIOBaHHra DepeBa peKoMeHdyetbca odHoyacHO 3BeptaHa ycidiHa depeBa.
YMOBHI NO3HaQKIN

1

2
3
4
5

6
7
9
10
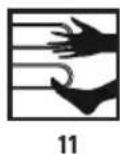
11
1.Ybara!CnD36epiratn06aunHCTb
2.3arp03a BnHnKHeHH noKeXki
3. 3arp03a OTPyHHB BUXNINOM
4. Bārātān 3axniči pykánbuci
5.BmKHytn rehepatop i BiD'EnHaTn DpoTn BiD CbiQok 3anaJIeHHa, nepu HIX 3axOOnTncr O6CnyROByBaTu N peMOHTyBaTu reHepatao
6.ПочNTаTe iHcTpyKciU,DOTpMmYTeCb npaBn TExhIKN 6e3neKn,IIO MICTaTbcR B Hi!
7.3a6oPOnHaETbcn npauObaTn 6e3 3aco6iB 3axncty roNoB, 30py Ta cnxy
8.Pn3NK TpaBMaTN3My BHaCniIDOK BiD6NITTA
9.Bdrgatn3axncnOa
10. B3yTn 3axnche B3yTTa
11. Tpimatn KInizBkn Noadani BiD roctpxe enemetib!
БУДОВАIПИЗHAЧЕНЯ
JaHIOROBA 6eH3nHOBA nnka HaleXntb do pyHoro IHCTpymEtly.BoHa npaioe BiD DBOUINIHDPoBOr DOBURYA BHTpiHbOro 3ropHHa 3 NOBITpAHM OXOJNOJKeHHAM. DaHn IHCTpymEt Npu3HaueHm Do BNKOpNCTAHH Ha npucn6Hi iinHui. NInky DOnyckaeTBCa BNKOpNCTOBYBaTHo CnNUIOBAHHpeB, o6Pi3aHH rInna, nIroTOBKn NaINBHOI DepeBHN, pOdo KOMHy qn IHuNX TocNoapcbkNx NOTpe6, 0n nepeD6aauToP03nnIOBAHH.
He donyckaTbca BnKOpncTOByBaTu n eNeKTpOIHcTpymeH He 3a npu3HaueHHaM.
ONMC MAJIIOHKIB
Ipeenik enemertib 30BHIHbOro BnIy dy eektpoIHCTpymeHTy, 103a3haehn HxKue, CTocyETbcra MaJIOHKIB do ciE IHCTpykuii.
1.Блкувань вальдреси.
2.PyKIB'do cTepyBaHHaDpocenEM
3.ΓBnHT KpniuKNOBITpaHOrO φinbTpα
4.KpniknabitpHorofoibtpa
5. Pykiv' npovidne
6.Baxinbranbm
7. Taink KpinnneHHn H
8.ΓBnHTHaTaryBaHHHaHJOra
9.ΓBHTperynIOBaHHKilbKoCTi noaqiOnNB
10. Kopnyc
11. Baxinb npocenj
12. Pykib' oOCHOBHe
13. Tpoc nyckoBoi MyfTu
14. Khonka 3anaeneHHa
15.Kpnska naJIINBHO 6aKy
- PerynobJIbHI rBnHTn Kap6IopaTopa Li H
- TperynIOBaHHa WbNkoCTi o6eptAHHa IIOBOMy xOdi
18.Kpnska OINVBHORO 6aKy - 3y6uactn ynop
- HanpymHa mHa
- NaHcIg
22.Повіднізірочкішнін
I CHYE MOKINIBCTB BIMHHOCTMI KAKTUNHUM 30BHNIHIM BURNADOM ENKTPOHCTPYMHTY Ta TAKHM,IO 306paken Hn MA MIOHNY.
ONUCTPAΦIHHX CUMBOJIIB

YBA!

3ACTEPEXEHH

MOHTAK/HANAULTYBAHH

IHΦOPMALIJI
NPUHAJEXKHOCTI AKCECYAPN
1.KoxyuxuHH3axnchn -1wT.
2.巾Ha HanpMaHa 1
3. LaHucor 1 uT.
4.ynop3y6actn+ΓbHHTn -1KOMnn.
5. KaHicTpA dna 6eH3nHOBO-ONNBHOI cyMIi -1 wT.
6.KnoucbiKOBu3BnKpyTKo-1wT.
7.Bukpyka 1
8.Knou TopueBm WeecnturpanHH -2Wt.
9.Hannok 1
IITROBKA DO POBOTN
TPAHCNOPTYBAHHIAHUROBOIINIKN

Npeep nepeheceHHa nauoroboi nukn cnid nepeycim Haidit 3axncn Koxyx Ha uHy 3 nauHOrom. Npehocntn nnky cni 3a npoB1ne pykib'. He donyckaetbcra nepehocntn nnky 3a OCHOBHe pykib'. Y BnnaKy Heo6xIdnocti npoBeEHn KInbKOx onepaui po3nnIOBaHH no cep3i, To MIX TaKIMN onepauiMn NKy cnld BmNKKaTn 3a DonomoroIO KHONK 3anaJIeHH.
MOHTAK 3y64ACTORO yNOPY

3 orny Ha acnektn 6e3neKn Ha nnuizi 3abknd nobHHe 6ytn 3akpinneHn 3y6actn ynop. BIn Bukohye fynkuio Toukn onOp Ta ckopooye pn3NK BuHmKHeHHaBnua (BIDnTTA).
MOHTAK WUHHI JAAHIOFA

CnHa HataRyBaHnHaHcIora peryNIOeTbc3a DonomoroO WbOPHn HpeYrauiHOro rBnHTa. Pid qac MOnTaXy wHHu DyKe BaxKnBO npOKoHTpONIOBaTH, 0o6 WbOpIHb, 1o Po3taWobAHn Ha perynaiHOMy rBnHTi, 3ackoOH Do BiIDNOIBHO OTBOPY BwnHi.
WbopiNb nepecyBaetbC Bnepei-Ha3aund xom o6epTaHH perynaHOro rBnHTa. Li eneMeHTN KOHcTpyKu cI BCTaHOBTn HAnEXHM uHOM, nepu HIX po3noHNATM MOHTAX uHH.

HnHaI JAnHcIg NoCTaayoTbC B po3i6paHOMy cTahi.
Baxinb ranbM (6) NOBHeH 3HaXoNDTc b y BepxHbomy nonoxeHHI (BeptnKaNbHOMy) (Ma.n.A).
BnBepHyTu raiKu, 10 KpInIbTb uHy (7), i3HrtN KoJyX (10).
HaIITn IaHcIor (21) Ha npoBIDHy 3ipOuy, 0o 3hAxOAnTbcra No3ady xpaONOBORo MexaHI3My.
HacnTn uhy (20) BCyBaOnx xpanOBm MexaHI3MOM) H npoB1Hi rBHTn (c) IOTUCHYn B HAnpMky npoB1HOr KOla, 0 npuBOInb NaHIOr (MaI.B).
- HadiTn NaHucor (21), nouHaouy 3Hn3y, Ha npoBIDHe 3aOKpyrIeHHa WnH (22).
- PpocuyHyu (20) B Hanpmy BiD npoBidHoro 3aOKpyrIeHHra uHH TaKIM uHOM, 06 npoBidiHaHKn LaHcIora OINHHNCBA KaHABU
- Ipebipntu, u wboipb (a) Ha rBnHtI peryIOBaHHHaTAYBaHHHaNciora (8) 3hAxOHTbcn no cepeHHn HxKbHoroOTbopy (b) uHHn (20) (B pa3i noptbe cnid BiDperyIOBaTHnoTOJNOXeHHCa Me TaKIM YHOM) (MaN. B).
- POMICTHTN KOxyx (10) Ha Micce i o6epexHo npTAYrKaAMn KpInneHHaHH (7).
HaTARTH NaHcIg rBHTOM (8) y BCTAHOBNEHOMy NOPRky. 3a BiNIOBIDHe BBaxKaETbCRA HATrYBaHHra, 3a KORO MOKHA BiTARTH NaHcIg Ha 3-4 MM BiD WnHn B II cepEnHi YacTHHi, B ToH qac AKA Cama NnKk 3hAxODNTbC RAropnOHTaNbHOMy NONOKeHHi.
Miunopnntartnraekn KpinnneHnn7OndHouacho npntprmyuynnpoBIDhyactnHynnn.

Nepw HIX KpInNTn WnHy I NaHcIor, cnID nepeBipntn npabunbHictb po3aWyBaHHra roctpnx OkpaIOK naHOK naHcIora (npabunbHnn nopAIOk po3aWyBaHHnaHciora Ha nnHI nokaahm Ha npoBidiH niacTHNI ocTahboi). 063anO6irtn TpaBMyBaHHIO uee3 roCTpi OKpaIKn iD qac nepeBipkn Cnnn HataRyBaHHI HadIBaHHnaHcIora, cnID 3aBXKn npauOBaTN B 3axncHX pyKaBnCx.

Hobn lahior Bmarae dekoro yacy Ha nptnpahna, 0tpnbacnp6n.5XB.Pnp cybomy BKpaBaxnbe do6pe3maCTNTn naHcIor. Picra toro k npepiOp nptnpapn Hmhyb, cnid nepeBipuTu nny hatarybaHHaHau i, B pasi notpe6n,DOTaRTN noRo.
Cny HatarybHaHa NaHcOra cnI nepeBiprTa YKOMora
yactiie, ockInbKn npOBncn nnHcUor 3dateH nERKO 3ICKOHTN
3 WHN, WBNKO 3HOwyeTbcra cam i e npuHHo WBNDKORO
3HOwYBaHHaHH.
OJINBAHHOJMBN

OINBn6ak HOBOI nIKHe mICTNb OINBn. Tomy, npw hix yBMkHyTN NIKy Bnepwe, cnid 3aNTN ONBy BOINBn6ak.
BnBnHTn KpnuKy OOnBHorO 6aKy (18).
3aONBHTO OINBOHO B 06'EMI He 6INbue 260 M (3BaXaIte, 106 BCEpeHnHy 6aky He nOpTpannn JODHI Domiikn 3abpydHeHH).
3aBHTn KpuKy OINBHorO 6aKy (18).

He donyckaetbca BnKOpncTOByBatn BiDnpaucobany perehepoBaHny OINBy, OCKInbKn BOHa MoKe cnpuHHNTncdo nookodkeHH OINBHorO HAcocy. B 6eH3nHOBI nui diOnyckaetbca BnKOpncTOByBatn OINBn TnNIB SAE 10W/30, 0e npuaTHIO uINopiuHo, a6o NtHIO onNBy TnNy SAE 30W/40 Ta 3moby tnuy SAE 20W/30.
DOLINBAHHB EHNH

PiHac HauBaHHaNaBa Do 6ky cnid DotpmyBaTnca HactynnX npabn:
-He BMNKaTN Dburyha;
-He po3nBaNnNA.

PnirrotyBatn cymi 3 6eH3nHy (Heetnbobahoro OKtaHOBm Yncnom 95) 3 kICHO MOTOPHOO OINBOIO DO DBOUNIHDPOBHX DnryHb y nponopiqx, 0o Bka3aHI B Ta6nui HnKHe.
PEKOMEHIOBAHI IPOIOPUII
PeryIOBaHHaKap6HopaTopaBi6yBaETbcraI3BCTaHOBNEHMn WInHO Ta NaHcHOrM.
3arBHTnO6nBa peryauiHrBHTn (LiH) (16) no onopy (ane He nepetrayatn) (Ma. G).
Tojnoocna6nTuOuDBa peryuaHrBuHTn (16)K Bka3aHO HxKye:
- rBnHT L: Ha 1 1/4 o6epTa;
-ΓBnHTH:Ha13/8o6ePa.
BiiKpTN 3acNIHKy IPOCEY (11) HANOIOBHy, 3anyCTNTn DBuRyH i 3aueKaTu, DOKN BIn HE nporpiIbCra.
- Picra toro ak Dnryh nporpiBCB, BiXnat npocenb (11) 3aunwn Tn Dnryh npauOBATn Ha JnoBnx o6epTx.
- Nobibho NOBepTaTn rBnHT (L) Bnpabo, DOKn He 6yde DOcARHYTO NONOKeHHa, 0o BiNOBiJaMa KMCMajbHIM

06eptam, a toDi noBepHyTN RBnHT B 3BOPOTOMy HAnpMky, To6To BnIBO, Ha 1/4 06epty.
- 06epTaTn rBnHT rnoBnx o6epTiB (T) (17) BnIBO,doKn naHcIor He nepeTaHe pyxatncb. y BnnaKy kkuo aoNobi o6epTu BnBnTbC3aHn3bkMm, rBnHT o6ePaToB bnpaBO (MaI.G).
He cnid TopkaTnca rnywnka. RaKIO rnywnk e rapyum, ce 3daThe cnpuuHHTncdO cyTTeBOrO oniKy.
TAlbMOJIAHUOTGA

DanaHnka 06JnHaHa ABToMaTHNMMraBmMn, 1o HeraHo 3ynHHIOb pyx IaHOra B BNnAdky ABnIa BiDnTTn iN cac po3nnHOBAHH. TaBMa cnpaBoByIOb ABToMaTHNHO 3aBdKn INepuiHOMy MEXAH3My, BCTAHOBJeHOMy nKOPNYCOM raBm. RaBMa NaHOra TaKox DOnyckaTeBCa 3anyatn BpyHy, nepeBODaY BaxInb raBm (6) B HAnpymk ynnn (20). Pyx NaHOra 3ynHHeTbcqyeep 0,12 cek. nicna CnpaBoByaHHraBm.
NEPEBIPKA CNPABHOCTI RAJBM
Upa3y nepeq ceprobm ceaHcom BnKOpNCTaHHI INIKN CnI nepeBipNT cnpaBHicTB ranbM.
-ⅡIaBOrO NnKy KnaDyTb Ha 3emNIO, BMNKaIOTb DnRyH i BnBOJrTa Ioro Ha HauBnUoi Oeptu, NOBHCIO BIkPnBaOH npocenb Ha 1-2 cekyHn.
Toi tOXBaOTb Baxinb ralbm (6) ynepeJ. NaHcIor nobHeH HeraHIO 3yINHHT npx.
-Kaio naHOr 3ynnHcTBcNOBInbHo, a6o He 3ynnHcTBcB3arani, cIi3aMHNr rAbnMIBHy CTPiKy Ta 6apabAH MyfTn 3yennHH, nepHiX BkOpncTOByBaTu Nnky.
- Ⅲo6 po36nokybaTn ranbMa, cnid BiTiTaTn BaxkInb ranbM (6) HAnpamky oChOBHOrO pyKIB' (12), nOKn He raQOK xpanOBoro MexaHi3My He 3ackOuHTb B Na3 i3 XapaKTEPHM KnaCaHHM.

Ipebeipka cnpabHocti ranbmi roctpoTn pi3anbHex OkpauKo IaHciora 0opazy neepk KoxHHM YeproBm ceAHcom npaici nnkoHO HaneXHTb do nepwoeproBnx pernaMeTHNX 3axoIB, 3o 3ae3neuyOt b MAcumambHo 6e3neuHn pibehk KopncTyBaHHI hCTpyMeHToM, 3bOaun Bi6ntTdo mHiMy.
NEPEBIPKA CINPABHOCTI FYHKU ABTOMATNUHORO CINPAUBOBYBAHHRAJBM
Ipebeipka fynkui ABOTMaTHUHO CnpaobyBaHHraJbM BIKOHYEbC3 BUMKHeHIM DBNYHom.
Плнги плky, trmaоч ii 3a npobidhe pykib' (5) i ochOBhe pykib' (12), np6n. Ha 35 cm had depeb'aHOIO 3arotobkoIO.
Bunycntn3pyknnpoBHe pykib'(5)i datn nuiCi 3Bicntnc TaKIM qHOM,06 uHa nD BlaCHO BaroIO nepexnnnaCdoHN3y i TOpKHynacrpeb'raHOI 3arOTOBn (man.H).
- Odpa3y Jnicra TopkaHHdo DepeB'HOI 3arOTOBKn NOBHHI BBIMKHYTNC RAbnMa NINKN (BaXInb raBm (6) NOBHeH ABTomaTHNO nepEMICHTNC BnepeB nO3nioo «BBIMKHYTO»).
Nepw Hix 3axoHTnc npaOBoTn, cnid nepeBipTu cnpaBHictb ralbMa IaHcIora. y BnnaKy, KOIN ranbMa cnpaoboytbe HeoctaTHbo eEeKTHBHO, cnid BiDperynIOBaTn ix a60 3BepHyTncdo ABTOpH2ObaHoro cepBichoro ceHTpy 3 MeTOO ix pEMOHTy.
PpauaBnuryha Hbucoknx 06eptaxi3 BBIMKHTMn rAebmam Cnpuunnaetbcra do neperpiabHH MyfTu 3uenneHH nnKn. Ra Tlkbn raIbMa cnpaubobyt, B ToT yac Jk DnByH npaioe, cnId HeraiHo BiDnyctntu Baxinb dpocen i nepeBectn DnByH Ha IIOBni xiD.
HATryBAHHJAHUOTGA

Iiuc npaui nIbHn IaHcior 3aateH po3aryBaTncB Hacniok HarpibaHn. Ce npu3BOuNTb do niBnueHH imOBipHOCT ioro 3PbAHn3 HanpMaHOJ uHH.
- Pocna6ntn TbHHTn 6JOKyBaHHa HapmHOi WHN (7).
- IpeebipuTu, u3haxoDntbcra naHcior (21) B HappMHOmy nai 10HHn (20).
3a DOnOMOIO BnKpyTNIiKpyTInBnPaBO TBnHT HATrByBaHH NaHOrA (8), ax Noro 6yde HATrHyTO
BIDNIOBIDHM YHOM (npn cby mHy cnid opejHo NiIDTPMByATN BROP3OHTaBbHOmy noNoXeHHI).
3HOBy nepeBipuTu Cny HataRyBaHHa NaHcUora (3a Koro MOxHa BIDTaTn NaHcUor Ha 3-4 MM BiD uHHn B II cepedhi yactHiI) (MaI.1).
MiUHO DOTaHTN TBHNTN 6LOKyBaHH HAnpMaHOI (7).

He donyckaTbca HataryBaTu NaHcIor 3aHaTcNo CnBHM 3ycnllm. He peKomeHdyeTbCBAu BkOHyBaTu NiTiaryBaHHa NaHcIora, KaIO BIn E CnBHo HarpITM; ce 3daTHe npN3BeCTn Do noRo nepetrayBaHH nicra BuCTnrAHH.

PNAIINIKOIOJAHUCIOROBOIO

-Перш Их Зхоити СпацьВати Nнлко, сдл обовякоб Oзайомпся 3празвлами 6eЗnekn паці NaHцorOBО nнко. PekomeнуETbcn nepш 3a Bce notpeHyBaTиСг Н BiДхODax DepeBa. Lc TaKoJ Do3BONITb 6nXKue OзайOMNTIC 3MOxJIINBOCTMn NnIKN.
Cn1d63yMOBHO HacniDyBaT npabn Texhki 6e3neKn.
JaHOrOBy NIKy DONYCKaETbcB BUKOpNCTOBYBaTN BKNIOUHO Do PO3NIIOBAHH DepeBHH. 3a6oPOnrTbcB BUKOpNCTOByBaTN NIKy Do nepTeHHAHH IHINX MaTePiABiB.
Onip, Bi6paia i cna Bi6nTTra 3MiHIOUbCBA 3aIeXHOCTi BID ratyHKy po3nnIOBaHOrO depeBa.
HeDonyckaTbCBAKOpIcTOBByBaTu NaHcIorOBy NnKy B AKOCT Baxenrdo NiimMaHH,nepeCyBaHHN yPo3dineHHo6'kTIB. Y BnnaKy 3aknnHeHHNaHOra CnID BmKHyTN DnRyrH i B6NTu B DepeBO nactIKOBuN yn DepeB'aHH KInH,0o6 BnTAtn NnKy (MaJ.J).PiCnZbOro 3HOBy BBIMKHyTN NnKy i 3HOBy ObepeXHo cnpObyTa n po3noatn po3nnIOBaHHa.
-He donyckaetbcB BnKOpNCTOBByBaTn nnky do npaui Ha wtatni.
3a6bopohraTbcra NiKIOUOATn Do NOBOy NnKN iHsi npnaDn, He neped6auehi Bnpo6hNkOM nNkn.
BxoDi onepauii po3nnHbAHHe Ma nOtpe6n cnpuHnHa nnkydoataKOBe 3cun. Donyckaetbcra CnpuHnTINbKn Heykn HaTCK, KOIn nnKa npauo 3 NOBHCTIO Bdkpu Tdpocenem.

Y BnnaKy 3aKlnHeHH uHH nNKn He donyckaetbcn HamaRatnc Bntrtn II 3 yCunm. Ce 3arpoxye Btpato KOHTpOIO HaI NIKKOIO I TpaBMyBaHHM onepaTopa Ta/a6o nowkodKeHHM nNkn.

Ipeep noaTkom npaic cnid biDyctnra bMa.
HaTnCHyTN KhoNky 6NoKyBaHHaBaxKeI npocen (1) i BaKInb dpocen (11) (nepei NoayKom po3nnuobAHna cnd 3aueKaTH, DOKN DnRyH He Ha6epe NobHy wBnKicTB o6epTaHH).
Tpe6a cnikyBatn 3a TmM, 0o6 wBnkiCTb He naDana.
- NaHOr NOBUNHe NnNTn DepeBO B ToI yK NnKa ONyCKaETbCn IID BlaCHO BarIO; ONYCKaETbCn HeCNlbHO npNTcKaTN NNIky DOHN3y (MaN.K).
- 06 He BtpaTn KOHTpOIO 3a NnKoIO, HapnKiHcI onepaJIi He cII CnpNHHATn Ha NnIKy TnCK.
- No 3aikyuH onepaui CnB BIDnyctntu Baxinb npocen (11), uo6 DnurHy nepeunwOB Ha JnoBm xi.
-Perw Hix BiKnaCTn NnKy, cnD BmKHyT n DnHyH.
IIOBA npaunn Hb BncoKnx 0eptax npn3BODntb do 3aIBNX BNTpat nannBa i 3HOCy 3anactn.
3ANOBIGAHHRABNUBYIBDNTTTA

IiI ABHcEM «BID6HTT» MN PO3yMIeMo pyx HnPnMHOI uHH NaHcIOROBoI NnKN BROPy i/4u Ha3aI, 10 MoKe MaN MlCe B BnNaKky, KOJI NaHcIg CBOIM φparmeHtOM, 10 3HaXoINbCra Ha MakIBci WnH, CTnKaETbC3 nepeWkoIO.
CniyneBHNTnca, 0o po3naIOBaHm MaTePian HadiHo ykpinnneHn.
-ⅢO63HepyXOMNTMaTePian, CnIckOpNCtataTcR 33aTNCKHNx enemEtIB.
PiJ qac BBIMKHeHHI npaui nnky cnid zinko TpMaTu Oboma pykAMn.

PiJ ac Bi6nTTa NOBediHka NmKn E Heneped6ayBaHO, a HataRyBaHH naHcIora nocna6IOeTbcra (MaL.L).
- Iorao HaroctpeHn nauqor 36inbwye puznk noa Bua biDntra.
3a6bOpHReTbcBnKoHyBaTn onepaio po3nnHbaHH Ha BnCOTi BNue pIBH nneueH.
CnId yHnKaTu onepaui, 3a kNx po3nnIOBaHH BnKOHyETbcra MakIKoIO WnH, OckIbKu ce 3daTHe BnKInKaTu HeOciYBaHe Bi6nTT TaNNKn Ha3ad, DorOpn. Pid cac npau NaHcIgROBOIO nnKO CnI o6OB'3KO BO eKinipyBatncr B NobHk KomnKeT 06NaHaHH Do npau 3 nnKOTo Ta MaTH Ha Co6i BiNObIHn Po6ouH OJr Ta B3yTT.
DemontaxauchnnpctocybaHb, HebiNobiHe 06cnyrobyBaHH, perlamenthi poBOTn HnepabunbHO BUKOHa3aMiHa WnHn YnLaHcOra 3aDiTH np3BecTN Do 36IbweHHn p3uKny TpaBMATn3My B pa3i BNHKHeHH RAwna BiD6ntT. KateropuHn He donyckaetbCn BHOCHTN 6yblrki 3mHN B KOHCTpykuo nnnKn. Y BnAnkypoKNTyBAHH NnKko,do KOHCTpykuq IeKBIeCHn CAMOHNH 3miHn, KOpNCYBaU BTPaAe 6yJb-riR rapaTIHI npaba.RapaTIA TAKOX 3HimaetbCyr BnAnky BUNOPNCtAHn NNKN 3 npoyuHnM npabIn, HabedeHnx Bciin HCTpykuii.
PO3NIIIOBAHHI IMATKIB DEPEBHHI
IiucnepetnHaHHMaTa DepeBnH CNiD OtnpmyBaTnC npabnTexhik6e3neKn i nocTynatn HAcTyHm qHOM:
CniD nepekoHaTcA, 00 UMaT MaTepiany HadiHOr 3afoKcbAHn.
Kopotki WMaTn DepeBHH Npeep NoaTKOM po3nnkBaHH cnid 3HepyXOMHTN 3a DonomoroHO 3aTNCKHN npCTOCyBaHb.
HeOnyckaetbcnpeTnHaTHiHIMatepiann,HIX DepeBo i nnomatepiann.
- Iepw Hix 3axoDHTnCn PpaIbTaH nnKIOU, Tpe6a yneBHNTncB, 100 nNkA He 3iTKHeTbcR B npOeci npaui 3 KameHem u n CBAxOM, OckInbKn 3daTHe cnpuHHNTncr DO Bn6HTTnNNkn 3pyk i NowkoJKeHHnHaHOra.
- Hanexntb yHnKaTu CnTyauiB JnKx NnKa, 10 npaioe, 3daTHa CTNkHYTnC3 IpotaHO OropoKeIO qI 3emKeIO.
Piuc o6p3aHHr rHnIg no moKnnBOcTI nIepTu nnkyiHAMaraTCA He npauoBAt MakiKBIOU HNN.
CnI3BepTaYbaryHaTaki nepewkoJn,IKNHI,KopiHHA MTA KaHBN B 3emni,OKINbKNOTpannaHHdo HNX 3daTHCnpuunHHTNCoTO TaBMATM3My.
BAJIKA DEPEB
OuiHnHa npMOK naiHHa DepeBa 3 nonpaBkoHO Ha BiTeP, Kyt POCTy DepeBa, HapmOK poCTy TOBcTnx rINOK, CKnaHicTb BAKN Too.
Ouuaoumicue doBkona depeba cnid nam'raTn npo Heo6xndictb 3a6e3neunco6i do6py onopy Ha rpynti Ta Micue dna Bixody niq cac naHHepeba.
Heo6xioHO 3ab6aHTn Dba nyT iBixOy, zo po3taoobyatmytbcn iND KytOM np6bn.45° do liHii, 0e noIOOBXeHHAM liHii HamiueHoro naIHnHapeBa, ane 3 npOTnHexHO BIDHOcHcMo rO DepeBa 6oky. Ha uNX nyTnx He NOBHNO 6yTu XoDnHX nepeuKoD (mam.M).
BnKoHaTn npOnnn Ha OndHy TpeTnHy TOBunHn CTOB6pya 3 60ky, B RKn DEpeBO NOBHHO Bnactn (man. N).
Bukohai npounn 3 npounexhoro 60ky (To6to 3 60ky, npounexhoro do 60ky naiHna) Ha pibhi, 1o e Tpoxn Buiim, Hix HxNHOBepxHn nepwO npounny.
CnIcBcOeUacHO BCTaBnTn KInHn, 063an06irtn 3aklnHeHHIO naHcOra nnKn.
-DepeBO BAnrBb 7naxOM B6nBaHHKnHy,a He 7naxOM po3nnIOBAHH CTOB6pya HAcKpi3b.
IiicBaikndepeBcnidotpmyBatncBcx npabntexhki 6e3nekn i nocynatn HactynHm qHOM:
- y BnnaKny 3aKlnHeHH naHcIora, cnid BmKHytn nNkky i 3BInbHnT naHcIor, B6NBn Knn. Donyckaetbcra
BUNkopnCTOByBaTH KINHH 3 DepeBa qN nlaactMaHc. 3a6opohrTbcra BUNkopnCTOByBaTH cTaIbHI Ta YabyHHI KINHH.
- Depebo, 0o nadae, 3aTHe noTARTH 3a co6oO cyciHn depeba.
3a He6e3neHy BBAKAcTbC3OHa,IOBxNHa JKOi DOpIBHIOE 2,5 BnCOTn DepeBa, Oo BAHTbcra (MaI.M).
-8KIO onepatoP nNKn E HeOcBidueHm 0do BAKN DepeB,TO He donyckaetbca HamaraTncn HABHTNCn BAHTN DepeBa camToykkn, a cnip npouTn HabuHaH.


3a6opohetbcnHIOBAtn DepeBa TBaNX BnnaKkX:
Hemoxnbo BCTaHOBtyn MOB B 30hi He6e3neKn BHacniok Tymany,douy,chironady nu cytinkb;
HEMOXINBO3NEBHICTOBH3HaHTN HANPROMnadiHHn DepeBa BHacldOK noCTIHORO n NOPBbactoro BItpy.

PO3NIIIOBAHHKoIOn

- PnTncHtB 3y6aCTm ynop (19) Do KOIoN I BUNKoHaIe po3nnIOBaHHra (MaN.O).
- y BnnaKky kko He bdaetbca 3aBepuNTn po3nuiIOBAHH, He 3BaKaIOUHa Te, IO BcIMoXJIbOCTI IpocyBaHH NnIKN 6yNo BnuepNaHO, HaneKHTb:
BIBECTUHNY3MatepianyHaNebHyBIDCTaHb(npuCbomy NaHcIOTNOBHeHpyxATncbHopMaJIbHo)i,TPOX3MICTNBUN OCHOBpkyib'(12)BHN3,CnePTNoROrBynOp(19)IBKoHaTI PO3NIIOBAHH,NOTPOXYNJIMaOuO NCHOBpeykb'(12)


PO3NJIIOBAHHKOLOHA 3EMJI
Cπi3aBxMnMatn zinky onopy nHir.3a6opohetaTbca CToAHTHaKOJOni.
Cπiδ 3aBxAn nAm'AtaTn, ξo nobaneHa KOOnDa 3daTHa NOKOTHTNCb.
CnI dOtpmMyBaTnca npabun Texhikn 6e3neKn 3 Meto 3ano6irahnnr Bnua BiDnTT.
3aBepuyBaTH p03nHOBaHH cIg 3aBxKn 3 6Oky npOTnHexHO HAnpMky HAnpyKeHH, 0o6 3ano6irTu 3akInHeHHIO NaHOra NIKu B npOnNI.

- Nepw hix po3nooyatnpaio, cnid nepebipntn Hanpmaok iii cnHanyjxehnB KOoI, kka nlaerae po3nnIOBAHHO, 3 MeTOIO 3ano6irAHn 3aklnneHHIO naUora nukn B nponni.
-Perpnn nponn BkOHyEbCn no HanpyKeHn cTopoHi, 00 DO3BONRe yCyHyTN HAnpyKeHHa
Пд ус розиювань колд, со лжntь, поедсIM ВИКОнуетбя порпл зcropи Ha 1/3 Товшии, тdi Колда перeroptaetбя i порпл заершуеть с 3 НарЯМКУ, пpoTNUEKHO nepшOMY.
PiYac po3nnIOBAHHKoIOni, 00 neKHTb Ha 3emNl, BaxnBO He donyctntn 3aRn6neHHaHOra B 3emNIO iN KOLOIO. HexyBaHHuieBmORO 3daTHe np3BcTn DO MTTECBO NOWKoJXeHHaHOra.
Piac nepetny Kono, 0o JexaHa cxu, onepaTOp 3aBxNIOBUNHeH 3HaXOHTncb Bnue No cxuNy.

PO3NIIIOBAHHKOKOJHAKO3JIAX

Y BnnaKy po3nnIOBaHH Kono, 0o NiInepti, 4u po3miueHHa CTInkx Ko3Jax -- B3aneXeHocT BiD Micu nepetHy, -- 3aBxN CnID BnKOHaTn npOnn Ha ONDy TpeTHy TOBunH Konoi 3 6Oky HAnpyKeHH, BNTAHTN WnHy i 3abepwnu PO3nnIOBaHH 3 npOnNeKHO 6Oky (MaN.Pir).

OBPI3AHH/NIPI3KAIINIADEPEBIKYUIB
-06pi3aHHr iINr 3BaIeHOro DepeBa cnI pO3noaTu BID KOpEHa I pyxATnC B HAnpRmKBy BepXIBKn. ToHKe rInr O6pi3aOTb EINHM pyxOM.
Cnip npepyim nepebipu, B kOMy Hapmky BuHnaetbcr rinka. Todi cnid BnKOHaTI niDpi3 6Oky BuHny i 3abepwn nponn 3 npotnnexkHoro 6Oky. CnI 3abXn nnam'raTn, 00 BiDpi3yBaHa rinka 3daTHa BiCKOHTN B HApmky OepaTopa.
-06pi3n rinn 3a8knn cnid 3ropn DOHN3y, no6 He nepewkoJkaTn BinbHomy naHHIO BIHTNaHOrO rinn. IHOi, OHaK, MoKe 3HaDoBnCn iDTHaHHra nIN3y (MaN.S).
- Oco6nBy 06aHicb cnid 36epiratn nid yac BiTnHaHHr rinn, 0e HAnpyxKeHM. Taki riKn nicra BiTnHaHHr 3daTHi BiCKoHTn Ta BApInu onepatopa.
He donyckaetcb o6p13aTu rlln, BnDnpauOncb Ha depeBo. He donyckaetcb cTbAtu Ha npabuHn, natafOpMn, KOonu Hn HnX npedMeTaX, 0o He daIOt bdoctaTHboi onopn Ta pIBHOar n He cnPnHOb yTPmAHNO NobHoro KOHTPOHn Had nnko. 3a6obpOHReBcBnKohyBaTN onepaio P03nnIOBAHHa HnCOiT Bnue pIBHnneey. Nid qac npaui nnky cnid zinKO TpMaTn O6oma pykam.
36EPIFAHHRAOBCNYROBYAHH
Nepu hix 3axoNDncb uHCTnT, nepeBiprtn n peMOHTyBaTn nnky, Hanexntb yneBHNTncb, 00 DBNyH BmKHeHni xOJDNH. BiE'EnHaTn DpI Bid CbiKu 3anaHOBaHH, 06 yHEMOxNBtBuNaADKOBE BBIMKHeHH DaBryHa.
36EPITAHH
-Перш hix CXOBATn IHCTpymEnT Ha 36epiraHn Ha nepioDobwH, HIX ODNH MICAuB, HanExKHTb NOBHcITO 3JNTn NaNBO.
-Дяцьога�ивocToyHb36aKy,BMNKaHbDbnHyI YekaiTb,doKINBHHeBnnpaiopeewTKib naiNba 3CnCTemn.
KoHoro HOBOrO Ce3OHy HaneJntb BnKOpNCTOByBaTn CBIXe naHBO.He DonycKaetbca YnCTNTu 6ak IHCTpyMeHTy 3 BnKOpNCTaHHM DeTePreetiB, OckInkNue MoKe cnpuHHTnc Do N0wKOJxEHn DBuRgamma.
CniO 06OB'3KOBO yneBHNTCb, 100 BeHTnIaHHi IINHH B KOpNcI DnRyHa c HCTUMn He 3AtynIOTbc Tnpcoo, B Hx HnHe HAKONuYcTBCnn.
Пл actNKOBi eemeHTn IHCTpymeHTy donyckaetbca YIcTNTu 3a DonomoroIO M'RAKO DeTepreHTy i ry6kn.
3 pernaemTHnx po6it 3 nIkoIO donyckaioTBcB BnKIOUHO t, oO onncahi B ui IHCTpykui. Byb-aki p60TN NOBHHi BnKOHyBaTcBnKIOUHO B aBTOpN3OBaHOMy CepBicHOMy 3aKnadi.
KateropnHo He donyckaetbca BHOcHTN 6ydb-ki 3MiHN B KOHCTpykuio nnkn.
-Пилka,ио HeIo He KOpuctyIOTbcra,NoBnHa 36epiratncryHCTOIO,Ha Pnacki NOBepxHi,B cyxomy Micci,HeoctynHomyДЯДITEI.
Baxnbo 3bepHytn ybary, n6o6 niq qac 36epirahnHe HakoNnuBannc oacn 3 qactoyok rymn B ochOBHX enementax naNBHOi CNCTeMn: B Kap6bopatopi, naNBHOMy Ibtpi, naNBHOMy uanh3u 6eH3o6aky. NaNBH cmyi3 3doabAHm cnpTy (etahony qu metny) 3dathi nornHaTH Bonory, no nd ac 36epirahnn np3bOndt do po3dineHH phakui naNBHOi cymiu yTBopeHH Kncnoti BuNPaOByBaHH 3daTHI cnpuHHNTncdo nowkodkeHH dBuhya.
NOBITPAHNIΦJIbTP
3a6pydhenn noBipHn nBtp cnpHnEbCdo ckopoueHH BuaTHoCTI DByrHa BHTpiuHbOrO 3ropHH Ta 3iNbweHH Btpat naHb. NobipHn nBtp niDnae HnHIO 5 roDn pObotn nnKn.
OuHCTHTN KPNKU NOBITPRAHO fINbTpa (4) Ta Micue DOBkona Hei, 6o6 nIac II 3HRTB 6pyd He notpanNB Do kamepn Kap6upopata.
BnBHTTNrBHTN KpnuKNOBITpHoro nIbTpTa3HATN KpuKny NOBITpHoro nIbTpTa4.
Bntartn noBirpHHn pInbtp (d) (mAn. T).
- PpOMTN pINbTp BOIOIO 3 MNOM, ONOIOCHyTH NICTOHO BOIOIO i BnCyuNTN.
BCTAHOBHTN fInbTp Ha Micce i nepekoHaTcA, 0o BnKNo6Kn Ha Okpaui niobITpHoro fInbTp aO6pe nacyoTb Do BnCTyniB Ha Kpnu niobITpHoro fInbTp (4).
BctaHOBIOUky KPNK Ky nobITpHoro fInbtpa (4), cnI nepekoHaTcA, 30 dpit 3-Had CbiuK 3anaIOBaHH i rBHTn peryIOBaHH Kap6Opatopa 3hAxOJaTBcH a CBOIX Micx.

3 MToIO yHnKHeHH He6e3neKn 3aOropHH qI φOpMyBaHH He6e3neuHX BNapOByBaHb 3a6opOHcTBcMNT NOBITpHHN InbTp B 6eH3nHi Ta iHnX p03uHHNKax, IIO lerKO 3aMaIObCra.
OPE6PENHcIJIHDPY

Hn, 0o HakoNpyEcBaHa ope6peHHI cunIHpa, MoKe npn3BecTn Do neperpiBaHH DaBryHa. CtaH 3a6pydHeHHOpe6peHHcuiHpy cnid nepioDnuHo nepeBipatn i uCTHTu OopayoDHouacHO 3 ouHueHHM NobiPraHOro fInbtpa.

HANPRAHSAUNHATAJAHUOT

50rodin npaicnHanekntb nepebipatn ctaHnn Taanuora
BctahOBHTKONKY 3anaeHHA (14) B noJIOXeHHBUMKHyTO.
- Nocna6nti BIDKpyTn rBHTu 6NoKYBaHHa WHH (7).
- 3HATN KOKJYX (10), BNTAHTN WNHY (20) Ta 3HATN JAnHcIQR (21).
OuNTn OTBOpn HAOINBHeHH Ta na3 (e) B Hanpymn (20) (MaI.U).
3MaCTnI npObiHy 3ipOyKb HAnpmaHni (22) Kpi3b otBip (f), 303hAxoDnTbcra Ha MaKiBui Wnnu (mAn.W).
- Ipebeipntn ctaH naHcIora (21).
TOCTPIHHNAHQUORA

Ctany p3aIbHoro IHcTpymHaHanekntb npndinTn Oco6nBy ybary.CnpabHa i 6e3abapiHa eKcnnyataia DocraTaBc3a yMOBN BnKOpNCtAHn p3aIbHoro IHcTpymHa, 0o E HaroctpeHm N36epiraetcb B uHCTOTi. Y BnnaJky eKcnnyataii nnKn 3 Tynm NaHcIorom Cam NaHcIg, HAprrMa HnHa Ta npobiHa 3ipOuKa nepeUacHO 3HOwSyTBcA, a B KpaHbomy BnnaJky ue MoKe npN3BeCTn Do 3pNBy NaHcIora 3 HnPamHOI. Tomy RoCTpIHNaHcIora NOBnHHBO BnKOHyBaTnc CnCTeMaTHNo I BuachO.
TcHnHaHOra BIDHocntbCdo CKnaHnx Oepaui. Do camoctiHoro roctpiHHaHciora BMaraetbCra HABBHCnueianbHorIO hCTpyMeHTy, a TAKOX xNCTy. HeKbaniipikobani oO6n He donyckAOTbcn do roctpiHHaHciora BeH3nHOBOI nnnk.
NAJINBHHΦIbTP

BnRBnHTn KpuuKy 6eH3o6aKy (15).
Kpi3b ropnoBHy 6eH3o6ky BNTaTn naNBn fiNbTp (g) 3a DOnomoroHO npToHOrO raKa (MaN.X).
3HrTn nannBHHn fInbTp i npomTu Noro B 6eH3uHi a60 3aMIHTn Ha HOBn.
BCTaHOBNI nnHBHn 6ky.
- 3arBnHTn KpnuKy 6eH3o6aKy (15).

Bntarhybwn nannBnHn fInbTp 3a donomoro raKa ytpmmyte kiHeubHarHtanaBHoro nanBHoro wnaHry Habcy.
Iiuc MoTaxy naNBHoro fInbTpba BaxKnBO 6ytn 0epeXHM i He donyctntu, 0o6 do harHitaBHoro naNBHoro 7nAHry notpanNB 6yd-akn 6pyd.
ONIBHNIΦIbTP

BnBnHTN KpnuKy OINBHoro 6aKy (18).
Kpi3b ropnoBHy oJNBHoro 6aKa BNTaTn OJNBHni iIbTp (h) 3a DOnOMorOIO npTaHO rayka (MaN. Y).
-Помити OINBнI ΦiNbTp B 6eH3nHi a6o 3aMInTu nOro Ha HOBn.
Ouuctn6aoykBid6pydy.
BCTAHOBHTOINHBHnΦIbTpB6aKy.
3aBnHTKpNkOyOnNBHO6aky(18).

Bknaaoun OINBHH PInbTp Do 6aKa BaKnBO nepekoHaTc,IO Binh Topkaetpc npaboro nepedhborkyta.
CBI4A 3AIIAIOBAHH

3 MeTOIO 6e3aBapInHOE KcNpyatauH IHCTpymHTy cnI npioDnHNOpeBipTu CTAH CbiK 3anaIOBAHH.
BunBnHTnKpnuKy noBipraHOro pTa4).
- BuTARn NOBITPAHm fInbTp (d).
3HnDpi (i) 3-Ha CBiuKu 3anaKoBaHHa.
HaKHyBn Ha CBiKy CBiKOBn KNo, 0o BXOHTb DO KOMNKeTy NOCTaBKn NINKn, BURBnHTnC BcIky (Ma.n. Z).
OuHCTnI bIDperyIOBATn BiCTaHa MIX KOHTaMn (0,65 MM) (a6o B p3i notpe6n 3amHHTn CTApy CBiKy Ha HOBy).
IHHI HACTAHOBU
HaIeKntb nepeBipuIn hNCTpMeHT Ha HABHicTh BNTiKaHH naNaBa, noCna6neHnx KpinHe b i NsKOJKeHb OCHOBHX enEmeHTIB INCTpMeHTy, a OcO6nBO cNoNyueHHa pyKi'B' i KpinHeHHa WHH. Y BnAnky CTBepXeHHa 6yDb-RAkNX nowKOJKeHb nepeq cepROBm BnKOpNCtAHHAm IHCTpMeHT CnID BiDpeMOHTyBaTn.
B pa3i 6yNb-8Knx HENONaOK cnI 3BepTaTnCn Do aBTOpN3ObaHoro cepBicHoro ueTpBy Bnpo6nka.
TEXHIYHI XAPAKTEPNCTUKN
HOMIHAbHI XAPAKTEPUCTUKU
PRACE S RETEZOVOU PILOU

BALKU ZAGESANA BEZ ATBALSTA

Svarigi, lai uzglabasanas laikagumijus putekji neuzkratos uz degvielas sistemas pamatelementiem, piemeram, karburatora, gaisafiltra, degvielas vada vai degvielas tvertnes. Degviela ar spirta (etilspirta vai metilspirta) piemaisijumu var absorbet mitrumu, kas uzglabasanas laikavar novest lidz degviolas maisijuma sastavdalu sadaliisanai un skabju veidosanas. Skabais benzins var bojat dzineju.

- Jastav stabili. Nedrikst stavet uz balka.
- Jabut uzmanigam, bajkis var ripot.
- leverot instrukcijas noradijumus par drosu darbu, lai varetu izvairities no atsitiena paradibas.
Zagësana vienmér jæbeldz lekseja koksnes sprieguma pretëja puse, lai nenotiku kedes aizkileşanas zaga cela.

- Pirms darba uzsaksanas parbaudit zagejama balka ieksejasprieguma daribas virzenu, la izvalritos no kedes aizkileesan.
Pirmais iezagejums ir javeic spriegumam paklautaja puse, laikvidetu spriegumu.
Zagejot balki, kas atrodas uz zemes, vispirms ir javeic zagejums lidz 1/3 no balka diametra, tad pagriezt balki un pabeigt zagesanuprejej puse.
Zagjot balki, kas atrodas uz zemes, nedrikst pieaut kedes saskari ar zemi zem balka. Preteja gadijumavar uzreiz bojat kedi.
Zagjot balkus, kas atrodas uz nogazem, operataram in jaatrodas augstak par balki.
BALKA PARZAGESANA UZ BALSTIEM

Ja balkis tiek balstits vai atrodas uz stabiliem stekiem, tad atkariba no zagejuma vietas vienmer sakumapnepiecsams iezaget lidz 1/3 no balka diametra iekseja sprieguma puse un beigt zagesanu preteja puse (P un R zim.).

Netirgsaisafiltrsamazinaieksdedzesdzinejaproductivatiun palielina degvielas pateriu. Gaisafiltrirjatiraikpec5zaga darba stundam.
Notirigaisafilvaku(4)un apvidu ap to,laivaka nonemsanalaikatirumineieijklutkarburatorakamera.
- Atskruvēt gaisa filtra vāka grieztuvi (3) un nonemt gaisa filtra vāku (4).
- Iznemt gaisa filtru (d) (T zim.).
-
Izmazgat filtru udeni ar ziepem, noskalot tira udeni un nosusinat.
-
Piestiprinat gaisa filtru, parliecinoties, ka rievas, kas atrodas gaisa filtra malā, atbilst gaisa filtra vaka (4) izcilniem.
- Piestiprinot gaisa filtravaku(4), nepiecesams parliecinaties, ka aizdedzes sveces vads un karburatora regulacijas skruves atrodas tam atbilstošas vietas.
Laiizvairitos no ugunsgreka vail bistamiem iztvaikojumiem, tad gaisa filtru nedrikst mazgat benzina un viegli uzliesmojos skidinatajos.
CILINDRA RIBAS

KOKU UN KRUMU ZARU ZAGESANA / APZAGESANA
Nogazta koka zaru zagesana ir jasak no koka pamatnes un tad virzities galotnes puse. Mazi zari ir japarzagre ar vienu kustibu.
Vispirms parbaudit, kurā puse zars ir noliekts. Tad sakt zaget vispirms no noliekuma puses un pabeigt - no pretejas puses. Ir jabut uzmanigam, lai zagejamais zars „neatlektu" atpakal.
- Apzagejot koku zarus vienmér ir jasak no virsotnes un tad virzities pamatnes puse, laujot nozagetiem zariem brivi krist. Tomér daskart labak ir apzaget apakséjos zarus (S zim.).
- Ir jabut uzmanigam zagejot zaru, kas var but saspringtā stavokli. Tads zar sèc zagésanas var atlekt un iesist operatoram.

Zarus nedrikst zaget, kapjot kokā. Nedrikst stavet uz kapnem, platformam, balkiem un citas pozicijas, kuras var zaudet lidzsvaru un kontrlipar zagi. Zagis vienmér ir jatur abas rokas.

TAIENDAVAD OHUTUSJUHISED
BRNSIINIMOOTORIGA KETTSAAGIDE KASUTAMIST PUUDUTAVAD OHUTUSJUHISED
Ettevaatust!
TOOTAMINE/SEADISTAMINE

Sa juhtplaat ja kett tarnitakse saest eraldi.
PALKIDE SAAGIMINE MAAPINNAL
3APEXDAHE HA PE3EPBOAPA HA TPNOHA CMACNO


Pe3epBoapbT 3a MacNo Ha HOBn TaPnoE npa3eH.3aToBa npeNi TbpBata yNtpe6a e Heo6xOIMo Da HAnbIInTe pe3epBoa Apc MaCNO.
- OTBHNTBame 3anyaKaTa Ha pe3epBoapa (18).
HaHnBame MaKcMmaHNo 260 ml macno (BHMaaiTe da He nonaHbT Bpe3epBoapra HkaKbO TnaDbu).
3aBnHTBaMe 3anyuAnKaTa Ha pe3epBoapa (18).

He 6nBa da ce n3non3Ba ynoTpe6raHo nn pereheepnpaHo MacNo, TbKato TOBa moKe da DOBee do nobpeHa Ha MacneHata nomna. N3non3BaIte maclo SAE 10W/30 npes qanata roDHa nn npes naTo SAE 30W/40,a npes 3nMaTa SAE 20W/30.
3APEXDAHE HA PE3EPBOAPA C TOPUBO


Pn3aepKaHaTo Ha ropu Bo cnaBaIte CneHnte npabua:
-AburatetaH moKe da 6bDe BkIoueH.
-He 6nBa da ce donycka pa3nBaHeto Ha ropuBO.

CmecBaTe 6eH3nH (6e3oJIOBc c OKtaHOBO Ynclo 95) C BVCOKOKaueCTBeHo MacNo 3a DByTaKTOBn DBNrTaTeN CnopeD CneHNTE Ta6eN.
INPENOPbYBAHIN PONOPUHN HA CMECTA

HANPABLBAUHA HNA HA BEPNRATA


HaPabnBaAata Ha Bepurata (20) e n3noKeHa Ha ooc6eHO nHTeH3NBHO n3xA6BaHe Ha npedHaTn DOnHaTa qact. C cen da ce n36ber He eHoctpaHHo n3xA6BaHe BCNEcTBne Ha TbpKaHTo, npenopbua Ce npn BCaKo ocTppeHa Bepurata Da ce o6pbuHa uHHa. CbueBpeMeHHo cneJa da Ce nouchn yner Ba WnHATA n OTBOpNTe 3a MacNoto. Ynert Ha uHa HATA mnpabOBrBnHa φopMa. PpOBepaBae yner OTHOCHO CTeneHTa Ha n3xA6BaHe. DOneneTe NmHn KBm HapabnBaAata nnAnk a N BnHnHATA NOBpXHOCT Ha 3b6a Ha Bepurata. Ako 3abeNknte nponyka Mexdy TaX, TOBA O3NaUaBA, ye yneT e Hapei. B npotinBn cnuyaunu HnHata BepoTHO e n3xA6eHa n CneBda Da 6bnde CmeHeHa.

BEPNXHO KONEIO


BepnKHOTo 3aDbNkBaIo KOIe e enemeH, KOITo e oco6eHo n3IOKeH Ha N3xa6BaHe. B cnyaay, ye 6bDat 3a6en3aHn BVIMn npu3Haun Ha 3xa6BaHa He 3b6nte Ha BepnKHOTo KOIe, Te CneBa Da 6bDat CMeHEN.H3xa6eHOTo BepnKHO KONO DonbHNTeHNO cbKpaUaBA TpaHocTt Ha Bepurata Ha TpMOHa. BepnKHOTo KOIe Tp6Ba Da 6bDe CmeHEN BO TOpnsuHa cepBu3Ha pa6otnnHua.

PEYIINPAHE HA KAPBOPATOPA


Kap6byatopbHa TpnoHa e perynnapa Hpa6pnH, Ho MoJe da
e Heo6xOIMO DonbHInTeHNO perynnpaHe npn PpomHaHa
pa60thnte ycNoBna. Ipei Da npnc7bnite KbM perynnpaHTo
Ha Kap6byatopa, Tp8Ba Da npOBepnte daHn ca MOHTnpaHn
Bb3dyuHnTf pNtbp n ROpNBnT fNtbp n daHn e 3apeHc
CBOTBEhTO KOJIueCTBO ROpNBHa CMEc.


PerynnpaHeTo Ha Kap6ypaTopa Ce n3BbPwBa npu MoHTnpaHa 1HnHa n Bepura.
3aBHTBaTe DbTa perynnpaun BNHTa (LH) (16)do Kpa (6e3da 3aTgATE MHORO 3pabo) (hept. G).
- PbPBO OTBnHTBaTe DbTa perynnpaun BNHTa (16) no HauHa nocoueh No-dony:
-BHTL:11/4o6opota
-BuHT H:13/8 o6oPota
BknOuBaTe Dnuratena n ro octaTe da 3arpee npn HauChaTdo noNoBuHata NoCT Ha dpocena (11).
CnE3aRpaBaHeTo Ha DnRaTeNr OcBo6oxJaBaTe NoCTa Ha dpocena (11) n octabte DnRaTeNr Da nopao60Tu Ha 6aBHN o6opotn.
3aBpTaikn NocteneHNO BuHTa (L) HADACHO, NO MOMeHTa, B KOITo 6aBHnTe 06OpOTbDat MaKcMaHn,a CneTobA rBpBaTe HaJIBO c1/4 06OpOT.
3aBbptBaTe BnHTa 3a perynnpaHTo Ha 6abHnTe o6oPOTn (T) (17) HANBO, Dotoraba Korato Bepnrata npeTahe da ce
IpeiBcKa eHa yNoTpe6a Ha TpnoHa Tp6Ba Da KOHTpOIpNaTe DeiCTBnETo Ha cnnpaKaTa
CnaraTe pa6oteuTprnoH Ha 3emraN BKNIOUbaTe DnRaTeJHa Hau-BucOKN O6OpOTn Pn NbIHO OTBapHe Ha IpOcena 3a1-2cekyHn.
BknquBaTe cnnpaKaTa 6ytaKn IocTa (6) Hanpe. Bepurata 6n TpaBano BeHara da cIpe.
-Ako Bepurata cnpa 6abno nnnn3o6uo He cnnpa,To Tpna Da ce CMeHN JeHTata Ha cnnpaKaTa n 6apaaHa Ha CbeDInHnten npdN NOBtOPHa yNOTpe6aHa TpnOHa.
3a da ce ocbo6oDn cnnpauKaTa Tp8Ba da ce npemecTn IocTa (6) B nocoka Ha rnaBHa Ta pkoxBtKa (12)dokaTo yyeTe xapaKtephOto 0paKaBaHe Ha 6nokupOBkata.
IpoBepkata Ha DeiCtBeTo Ha cnnpaKaTa Ha Bepurata, KaKTo n ToBa, daHn Bepurata e HaoCTpeHa npEn BCka EaHa yNtpe6a Ha TpnoHa e MHoro BaXHa N No3BOJraBa da Ce OrpaHnuebENTyAnHoto OTcKaaHe Do 6e3OnacHO HNO.
KOHTPOJ HA AKTUBUPAHETO HA CINPAKATA
IIO Bpeme Ha KOHTpona DnuratEnr Ha TpnoHa Tp6Ba Da 6bJe n3KIOUeH.
-Повигате trpoHA nbpkeиkn ro 3a npedHaTa pbkoxBaTka (5)ИЗra rnaBHaTa pbkoxBaTka (12) Ha OKOLO 35 cm NaД nbpBeHnneMeHT.
- Pnyata npedHata pbkoxbatka (5) n octabte uHata da ce HAKLOHN HAnpei NOc co6ctbeHata cn TeXeCT n da DOKOCHe DpbEHn enemHT (rys.H).
-ПиДOKOCBaHToHaIbPBeHnIeIeMeHT6nTpIbANoJace BKNIOUc CnnpaKaTAt Ha TpNOHa (NocTbHa CNnpaKaTa (6) 6bde aBtOMaTHueCKn IpemecTeH HanpeB NnoJxHeN E BKNIOUeHO).
Ipei npncbnahe KbMa pa6ba da ce npoepn daa cnnpaKaTHa TpnoHa e n3npabHb.Bcnya,ye cnpaKaTa e Hn3npabHb,Tpa6Ba npncbnahe KbMa pa6ota da ce perynpa nn peMOHTupa BOTOpn3npaH cepBn3.
Ako DBnraTeTn pa60n C BncoKa ckOpocHa 06OpOtnTe npn BKIOueHa CNpaUca Ha Bepurata, TOBa ue DoBede do nperpbaHe Ha cBeHNHTenHa TpnoHa. Cne KaTo 3aedctBa cnpuKATA Ha Bepurata No BpeMeTo, KOrato DBnTaTeTn pa60n, Tpr6Ba He3a6abHo Da OCbo6oJnte loCTa Ha Dpocena n da NpeBKnIOuHTe DBnraTeTn Ha 6abHn O6OpOTn.
HATRAHE HA BEPUIATA HA TPOHA
IIO Bpeme Ha pa6oTata C TpnoHa pexeMaTa Bepira ce yDbNJaBA BCNECTBHe Ha HarpBaHTo. Pa3TerHaTata Bepira ce pa3XnA6Ba n MoKe Da Ce N3xNy3N OT HanpaBnBaUaTa 1nHa.
- Pa3xna6BaTe KpeNexKnIe raiKn Ha uHa Hata (7).
-Поберразе Дал Верига (21) ce hamupa Byneя Haшнога (20).
C NOMOHTA Ha OTBepTKa 3ABHNTBaTe HADCHO BHTA 3a HATrAHe HA Bepurata (8) DOkato Bepurata He 6bJe DOCTaTbUHO HaterHa (BHIMATEHNODpKaKn HAnpaBnBaUaTa WnHa B XOpN3oHTaHNo NonoKeHne). - OTHOBO npOBepBArte HaTARaHeTo Ha Bepurata (Bepurata 6M
Tp6BaNo Da MoKe Da 6bDe NOBUNrHata BbTpE B WnHaTa H BnCOUHa OKoNo 3-4 MM (pept.1).
- 3Драво 3аТгATEКрЕнжнITE raикHAшнота(7).

He 6nBa da ce Hata Bepurata npekaneo cnHOr PerynpaHeto n3BbPseHo npu cnHOr HarpTa Bepura MoKe Da doBeDe do npekomepHoto u HataRaHe cnei n3CTnBaHTo.

PABOTA C BEPUKHHN TPNOH

-ПпддпсьnteКМПланиранata pa6ota Tp6BaДа ce 3an03HaeTe CTOUkATA CBdbpxaHa npabuNaT a 3a 6e3onacpa6ota C BepnKHH TpnoH . PpenopbUca ce NpBPO da ceNoynpaxnbaTe pexkeN HeHyxHn Napye Ta DpbBeCnHaToBa ue Bn NOMorHe Da ce 3an03HaeTe No- noDpO6Ho CB3MOXHOCTNE Ha TpNOHa.
BunHnCneDbA da ce cna3BaT npabnata 3a 6e3onacHOCT.
BepnKHNrTpnoH MoKe Da 6bJe n3NoI3BaH caMo 3a p3aHe Ha DbpBecuHa. He ce pa3peWaba da ce peXaT c Hero npyr MaTePuaH.
- INHTeH3NHBOCCTa Ha Bn6paunTe n efeKtBT Ha OTCKaHaTeO ca pa3NJuHN npn pR3aHeTo Ha pa3NJuHN BuIOBE bPBeTa.
- He ce pa3pewba N3non3BaHeTo Ha BepnKnn TpnoH KaTIOoc Cnykce 3a NOBnrahe, IpemecTBaHe nn pa3dneHa 06ekTu. B cnyau Ha 3akLeuBaHe Ha Bepnrata, Tpr6Ba da CeN3KlouH DnurTaTeN n Da ce B6Ne B IbpcBuHaTa NlaCTMaOBnN DbPBeH KInH, 3a Da ce OcBo6oOn TpnoHa (ept.J).OTHOBO BKIOUbaTe ypeDa n OSe BeHNbX BHNMaTeJHO pnicTbNBate KbM p3aHeTO.
- TpnoHbT He e npeha3HaueH 3a ctauHOnapHo noJI3BaHe.
3a6paHeNo e BkIouBaHeTo KbM Hero Ha pyuYypeN, KOnTo He ca ynpomeHaTn OT npoun3BouNTeJHa TpnoHa.
- Pp n p3aHeTo He e HuykHo da ce HaTncka TpnoHa MHOrO cUInHO. Tpa6Ba Da ce Okaxe cAmo MaIbK HATnCK, KOraTO TpNOHbT pa60Tu npu N3qAno OTbOpen dPocen.

Ako no BpeMe Ha p3aHeTo TpnoHbTe 3aKneuBn Bnpoe3a, B HkaKbB CnyaH He 6Ba Da To n3DbPbATE Hacnna. ToBa MoKe Da DoBeDe Do 3ary6a Ha KOHTpoB Bbpx TpNoHa Ndo HapaHbAHe Ha onepaTopaN /nn Do NobpeKdaHe Ha TpNoHa.

Ipei3anoyBaHeHa pa6oTaCnnpaKaTa Ha Bepurata Tpa6Ba Da 6bJe n3KIOUeHa.
- Hatnche 6ytoHa 3a 6nokpobkata Ha nocta Ha npoceta (1) nocTa Ha npoceta (11) (npen da zanouhepe p3aheTo NookaTe,doKaTO dBiratent DOCTHHe nbHa CKOPoCT).
- No Bpeme Ha pa60Ta NpDbPkaIe TbIHa CKOpOCT.
- Octabete Bepurata Da pexe DpbbecnHaTa. HauckaTe TpuoHa jeko HaOny (yept.K).
3a Da He 3ary6nte KOHTpon, KbM KpaHa Onepaunra Ta Tp8Ba Da npctaHeTe Da HATNCKaTe TpnoHa.
Cnep npknIouBaHe Ha p3aHTo Ocbo6oTe NoctHa Dpocena (11) no3BOJBAuKn Ha DBurTaTeJa pa6OtN Ha npa3eH xOJ.
-ПпeДи Да OCTaВTe TpNoHa,ИЗКЛоЧeТ eДВИrATeЯ.

IopdbpkaheTo Ha Bucokn 6obopoHa TpuoHa 6e3 p3aHe Ha IbpbecnHa BOi Do n3nnuHa 3ary6a N n3xa6raBe Ha qactnte.

3AUNTAOTOTCKAYAH
Ioi otckauehe ce pa3bnpa DnBxKeHne Ha HnpaBnaBaUata WnHa Ha Bepurata Ha TpnoHa Harope N /nn Ha3aD, Koeto MoKe da Ce cnuyu, KORAto Bepurata Ha TpnoHa Cbc CBOra Ta PpeHa YacTe ce onpe B HRAKbB PpeMet.
- Tp86Ba da ce y6eDnte daHn 06pa6oTbaHnT MaTePnaI e 3dpaBO zakpenen.
-3a 3aKpeBbHeTo Ha MaTepuAna H3NoJ3BaIte KIeMn.
-Пи ВКИОУBAHETO И NO BpeMe Ha pa6oTa TpnoHa Tp86BaДа; ДьрЖNTe 3ДрВО CДБeТe рБе.
-Пиу OTСКУАнTo TpNOHbTe n3BBH KOHTpoN, BepURAte ce pa3xna6Ba (rys.L).

- Henpabunho HaooctpeHaTa Bepira nobuaba pucka oT Otckaayhe.
- Hukora He 6nBa Da n3BbPwBaTe p3aHe Ha BnCOuHa no-Harope oT paMeHaTa.
Tp6Ba da ce n368Ra p3aHeto c nomoTa ha npedHa taCt Ha uHATA, noHeXe TOBa MoXe da npedn3BnKa BHe3AnHO OTc4aHa He TaPnoHa HaaN Harope. Ppi pa6Ota C bepnxKnH TpNO BNHarIn Tp6Ba da ce n3NoJ3Ba nbHa eKnnpOBka, KaKTo n CbOTBeTHo pa6OTHO 6NeKIO.
Demontkbt Ha 3aunTHnTe npucnoc6neHn, HnnpabunHto 06cnyBahe, noDpBka nn Hn npabunHo n3BbpueHa t cMaHa Ha napabnaBaTata uHa Ha Beprata, Morat da DOBeaTdo NobuwaBaHe Ha pckAOTeneChn YbpeKDaHn npu eBeHTyAnHO otCKaHa. He ce pa3peWaba N3BbPwBaHeTo Ha KaKBnto n Da 6nlo peKOHCTpyKuHa TpuOHa. B cnyaH na 3N0n3BaHe Ha camOBolno peKOHCTpypanh TpnoH notpe6nteR ty6n BCaKaBn Pnpa npou3n3aUn OT rapauneta. 3ary6bata Ha rapaHnmaoKeJa da 6bde pe3yntat cbtakoHa n3non3BaHeTo Ha TpNoHa B pa3pe3 C nHofopmaunnte CbDpbxauCe B HactoJta NHCTpyKUIn.
PRAHE HA NAPYETA bPBECUNA
Ppna3aHTo Ha napeTa DpbBecnHa Tp6Ba Da cna3BaTe yka3aHnra 3a 6e3oNaCHOCT Ha Tpyda n da NoctbNbate no CneHnHaunH:
-Проверете далл napчeto MaTepruaн He MoKe Да ceпгмecTN.
Kbcnte napeta Maepn an npen 3anoBahe Ha p3aHeTo Tpa6Ba da 3aKePmC nOmoTuHa KJIemN.
- Moxe da pexete caMo IbpbecuHa nIu IbpbecuHonoDo6n MaTePuaI.
-Ппсдп рязанго провере Ддл Трноьт HЯma DA ce HaTbKHe Ha KaMbHи NIN TBO3dEN,Ты КATO TOBa 6N MOrNo DA DOBeDEdo OTNNEcBAHe Ha TpnoHa N NOBpeXdaHe Ha Bepnata.
-368BaTe CnTuaynn, npu KOnTo pa6oTeuynr TpnoH 6mMOrbna Ce DOKOCHe Do TeNeHa OrpaDa Nn Do 3emTa.
-При рязан Ha KLOH, ДOKOLKOTo E Bb3MOxHo NOДпрайТуТpoHA И се CTарай Te Д He peЖeTe C npedHaTаЧаТНЯн HabpавlaBaца ТИнHa HБеригагаТа HТрноHA.
-06bphete BHMHHe Ha npenrTCTBnO T pOaHa CTbpuaIINbHOBe, KopeHN, BnB6HaTHnH N DyNk N 3eMaTAt, Tb KaTO TeMOrat Da 6bDaT npuHnHa 3a HeuacteH CnyaH.
PRA3AHE HA DbPBETA
Onpeene nocokata Ha naahe Ha dbpBoto, mmaKn ppeBnD yxaun Bbtp, HknoHa Ha dbpBOTO, pa3noJooKeHneTo Ha TeKKnte KIOHn, CTeNEHTa HA TpyNDcT Ha N3BpWBaHaTa pa6ota cnE NOBaIbAHeto n dpyrN noo6Hn 0cbTeTcBA.
-Пи NOUcTBaHTo HA MxCTO OKoI OJbPBOTo Tp6Ba Da OCTaBnTe DOCTaTb4HO MxCTO,3a Da MoXeTe Da ce OTdpbNHeTe NO BpeMe Ha NpaHaTe HO Ha DbPBoTo I Da o6bpHeTe BHMaHHe Ha Cta6uHIOCTTa Ha TepeHa
- Tp6Ba npedBapnteHn Da npedBnnte n nouchnte Dba nbTg 3a OTdpBnBaHe noD bTbN okono 45^ ot nnHnraT a npotnbONIOJXHa npedBnXdHaT a nocoka Ha naDaHTo Ha dbpBoto. Ha Te3n nbTuHa He 6nBa da NMa HnKaKBn npenrCTBn (pept.M).
-ИЗББршетпьрвоналенпрозн eнэТpeТоТДиамETbaHaДБРВTo OTKbM CтpaHATA Ha NaDAHeTo My (Чeрт. N).
-ИЗББРЕТЕ ПОPEЗ OT ПОТИВОПОЛЖΗТа CTраHA Na NBРВИ ПОPEЗ МАДКо NO-BИСКО O T ДОЛНИ Край HA NBРВИ ПОPEЗ
B CbOTBeTHMOMeHT NbXaTe KInHOBe,3a Da He Ce 3akneu Bepurata Ha TpuOHa.
-ДьрвTo ce nobaЯЧeЗ подпранс Клн,а He Che p3aHTo My npe цяlaTа shIpOuHa.
Pn np3aHa HaDbpBeta Tp6Ba Da ce cna3BaT BcNqKn npabua 3a 6e3oNaCHOCT N da ce noc7bNA no cneHnHaunH.
-Ako ce CTnHRe Do 3akLeuBaHe Ha BepurTa Ha TpNoHa, Tpa6Ba Da ce N3KnOuy TpNoHa n da Ce ocbo6oDu
Bepnata c nomoeta Ha KInHa. KmHOBete Tp6Ba da ca n3pa6oTeHN ot DbpBO HnnnnactMaca.B HnKaKbCnyaH He ce pa3pewaba N3non3BaHeto Ha CTOMaHeH nn 4yuryHeH KNHOBe.
-Падацото дьрв може да nobоче сбс ce6e cn pyru nDbpBeta.
- Onachata 30Ha ce paBnBa Ha 2,5 dbnKnHa nOBaHTo DbpBO (cepT.M).
-Ako onepaTopbTe hauHaeuo nn HeonntHO nue, To npenopbUba ce da He ce onntBa da yu cam, a da npemHe kypc Ha o6yehne.

He 6nba da ce pekata bpbbTa CneHnte cnuyan:
- Ako He Morat da ce onpeenr Tycobnra B Onachata 30na npaMbrna, DbKd, CHEROBaleKu nn 3npa.
- Ako He MoKe CbC CuRyPhOCT Da ce onpeDen NocokaTa Ha nadaHTo Ha DpbTO nopadn Cunen BBTbp.

PRAHAHE HA HbHOBE

- PnTuNCKate onOpHna 19) KbMaTePnAna n N3BbPWBATE pR3aHTo (Hept. O).
Bcnya,ye He cte ycnei Da npNKIOUHTe p3aHTo BbnpekuN3pepnaHTo Ha Ba3MOXHOCTNe 3a npMeCTBaHe Ha TpnoHa,TO Tpa6Ba:
Ja n3dbpnaTe HnpaBnBaauaTa uHa Ha3aHa 3BecTHo pa3ctOHHne OT o6pa6oTBaHnMaTePnAn (npu pa6oTeua peKeega Bepira) n da npemeCTNTe IeKO rnaBHata pboKoxBatka (12), kato noDnnpate onOpHnA uin (19) otDony u DOBbpWnte p3aHTo NOBnraKn rnaBHata pboKoxBatka (12) neKO harope


PRAHE HA NOBALEHO DbPBO
BUNHARn Tp6Ba Da cTOnTe Cta6HnHO Bbpxy 3emrTa. He cTOnTe Bbpyx NObaEn HbPBeTa.
BHHmabai Te nobaleHOTo DbpBO Da He ce o6bpe.
Cn3BaIte yka3aHnraTa B NHCpyKunra Ta Kacaen 6e3onacnoCTT ha Tpyda, 3a da n36erHete otckaayeho Ha TpnoHa.
Bunhar npra6ba da 3abpbwbaTe p3aHeto ot ctpaHaT npotnbONOJoxHa Na nocokata Ha HanpeKeHneto B DbpBeCUNHa TcEe Da He Donychem Do 3akneBaHeto Ha Bepnrata Ha TpnoHa B npope3a.

-Ппеди Заночане Ha pa6ota npobepete nocokata Ha
HanpekeHneTo B dbpBOTO, Koeto ue pekeTe 3a da n36eHete
3akNeuBaHTo Ha BepuTATA Ha TpnoHa.
-ПьpoBTo ряЗанТрябВа ДИЗБPиITE OT CTpaHATA HAMnPaUca ce noH anpeXeHne c ueH erOBTO eIIMmHnPaHe.
-Пун раа He NaOBaIeHo DbPBO, NpPBO Tp6Ba Da n3BbpWnte p3aHe HaDbN6OuHa 1/3 OT dNaMeTbpa My, CnE TOBa O6pbUaTe DbPBoTo I DoBbPWBate P3aHTo OT npOTUBONOxKHATA CTpaHa.
-Пи рязанго Ha NOBaJIeNo ДьрВо He 6ИBA DA NO3BOJRAБЕВерURAда BA BNe3e B ZemЯТа NOД Hero. Hecna3BaHTo Ha TOBa MОждд IOBede Do MOMeHTaIIHO NOBpeJdaHe Ha BEpRarata.
-Пу раразането на NOвалени Дьрета hamпаши се на Habкнонеша NOьрхнocт onepaTopbT BnHarN Tpr6ba da CTOn NO-BuCOKO OT DьрВOT.
PRAHE HA DbPBO Cn3IOL3BAHETO HA NOIOPA

Pn pr3aHe Ha dbpBeta onpHbBpy Cta6nnH noDnpn B 3aBncmocT OT MCTOTO Ha pr3aHTo BNHaR Tpr6Ba Da ce n3BbPs npope3 Ha nb6OuHa eHa TpeA ot DnAmetbpa OTkBM CTpaHata, KbTeO e HAnpeXeHneTc, a Cne ToBa 3aBpWBate pr3aHTo OTkBm npOTNBONONOxHATA CTpaHa (hept. PIR).
PRAHE /IOOPRA3BAHE HA KIOHNAbPBETA XPACTN

-ПодразьанetoHa Klnohite Ha nobaleHite DbpBeta 3anoBaTe OTdony n npOdbnKabate B nocoka Ha Herobata Kopoha. Maiknte KIOHHTa Tp6Ba Da ce OTP3BATc einn 3amax.
- NpBPO ce npOBepBa Ha KOJ cTpaHa e orbHaT KNoHbT. CnEd TOBa N3BbPwBaTe NpBBOHaaJIHTo p3aHe OTKbM cTpaHaTa Ha OrBaHaTe Iro 3aBBpWBate OT npOTNBOIOnOxHaTa cTpaHa. BHIMaBaIte OTP3aHNr KNo Ha He OTCKoHn Ha3aJ.
-Пи OTрЯЗВаHTo Ha KNoHn Ha IdbpBeta BnHaHr Tpr6BaДа ce pexe OTrope HaIOny N03BONJaBnHa OTPa3AnN KNoH CBO6OJHo Da NaHHe Ha 3emTa. NoHrkora obaue MoKe Ja ce HANOx OTрЯЗВaHTo Ha KNoHa OTdOny (Uept.S). - Tp6Ba Da 6bDeTe Oco6eHO BHIMaTeHn npn p3aHeTo Ha KIOH, KOIto e HaterHa. TaKbB KIOH MOKe CneD OTP3BaHeTo My Da OTCKOuN Da ydApn OpePapota.
He 6nBa da pekete KnoHnTe KatepeKnCe Ha DpbBoTo. He 6nBa da cTOne Ha CbIb6n, PnAtΦOpMn, DpbBa Nm BdpYn NoD6Hn No3nCmN, KOIno 6nxA Mornn Da Dobedat Do 3ary6a Ha paBHOBeCne n HA KOHTpOIN Bbpxu TpNoHa. He 6nBa da n3BbPbWbATE p3aHe Ha BnCOUHn HaD BaWnte paMeHa. TpNoHa TpRb6Ba Da ce DbpKn BNHar n CDBete paue.
OBCLNYKBAHE N NOДРБЖKA
Ipei npncbnahe KbM noocmbaHTo, npOBepkata nn peMOHTa Ha TpnoHa, Tp6Ba Da cTe cnryphn, Ye Dbratent e n3KnoueH e n3ctuHa. CbaTare Ka6ena ot 3anaHata Cbeu 3a da n36erHeTe cnuyauHOTo BKIOUbaHe Ha Dbratena.
CbXPAHRAHE
-Ппдддббддoctabeн ha cbxpaheHne 3a nepnoD no-dbIbT OT eINH MeceU, OT TpNoHa Tp6Ba n3quNo da ce n3npa3Hn HEROBOTO roPBO.
-Ⅲnpa3BaTe rOpBOTO OT pe3epBoapa, BKIOUOBate dBnIaTeTn ITO OCTABTe da pa60TN, DOKATO rOpBOTO CE n3eepnn.
BceKn ce3oH 13no13BaIte HOBO rOpIBO. HnKora He 6nBa da Ce n3no3BAT KAKBnTO n Da 6nIO NOuNCtBAuC pEcdTBA 3a pe3epBoapHa HrOpNBTo, NoHeXe ToBA MoKe da DObede do NobpeDa Ha Dnuratela.
CneBa Da o6bphete Oco6eHO BHMaHHe Ha ToBa, BEHTnlaIauIOHHTe OTBOpN B Kopnyca Ha DnurataTena da ca npoxoIMNI.
-3a nouCTBaHe Ha nactMacOBte enemeHT Tp8Ba da ce n3non3Ba cna6 deTeprHn Tb6a.
Paepwaba ce npobexkaheTo cAmo Ha Te3n onepaun no NoDpBkKaT, KOInTO ca ONuCAH B Hactoata NHCtpyKUn. BcUKN octaHnn onepaun Moat da 6bDat N3BbpWbaHcAMo BOtOpu3npaH cepBu3.
-He ce pa3peuaba N3BbPwBaHTo Ha KaKbnto n da 6nno npomeH B KOHCTpyKunraHa TpnoHa.
Korato TpnoHbT He e n3non3BaH, ToT Tp8Ba da 6bde CbxpaHBAH CneI NOuNCtBAHTo My Bbpxy Nnocka NOBbpXHOCT, Ha cyxo MACTO, HeIOCTbNHO 3a deua.
MHoroe BaxHo Da He Ce Donyue No BpeMe Ha CbXpaHeHneTo cb6npaHTo Ha YtaKa OT rMyeHn qactuB O OCHOBHTe enementHa RopNBHata CnCTema-Kap6ypaTopa,ropNBHn HnTbp, Tpb6ata, NO KoTo NoctbnBa RopNBOTO nnn pe3epBoapa. TOpNBc CbCdbpJxHae Ha eTnIOB nnn MeTnIOB anKoxoN Morat Da NorIbUaT Bnarata, KoTo No BpeMe Ha CbXpaHraHeto BOd IO TDeJIHe Ha RopNBHata Cmec N o6pa3yBaHTo Ha KInCeJIHH. TaKb 6eHnMoKe da DOBeDe Do NobpeDa Ha DnurTaTeJ.
Bb3dUyWeHΦnITbP
3aMbpceHnT Bb3dyuWeH fNtBp npei3BnKBa HamaIbaHe Ha efeKTNBHOCTTa Ha DnraTeJc BbTpEeHo rOpeHe yBeIuHaBaHe Ha pa3XoJa Ha rOpNo. B3dyuHnT fNtBp Tpa6Ba da 6bJe noocTBaH cneD BCEk5 Yaca pa6ota Ha TpnoHa.
-ПочNTВATE KanakaHa Bb3dUwHnH HmITbP (4) nOBbpxHOCTTa OKOJO Hero, 3aДа He npOHnKHAT OTNaDbu npH HerOBOTcBaJIrHe b KaMepaTa Ha Kap6ypatopa.
OTBnHTBaTe BbPToka Ha KaNaka Ha Bb3dyWHnHa qntbp (3) n DEMoHTnpaTe Kanaka Ha Bb3dyWHnHa qntbp (4).
OCTPEHE HA BEPURA TATA HA TPNOHA

Ha pexeune INCTpymEnTn CneBa Da ce 06pbua nobuHeno BHNMaHne. Pexeune INCTpymEnTn Tpr6Ba Da ca OCTpn NcHtN, KOETrapaHTnpa 63abapunHTo N63oNaCHO N3BbPbBaHe Ha pa6otata. Pa6otata CtpnoHa, KOITNO MTA BApRa, BOINdo yckopeHO I3xa6BaHe Ha Bepurata, HAnpaBnBaUaTa 7HnHa N 3aDbNkBaUsoTO KoneNo HA Bepurata, a MoKe da DObeDe DOpN do CKbcBaHe Ha Bepurata. 3aToBA e MHOrO BAKHo CBOEBpeMeHHo Da ce Haoctpn Bepurata.
Octpeho Ha Bepurata e MHORO cnoxHa onepaia. CamoctoTHeHOTo octpehe Ha Bepurata n3nckBa ynoTpsebata Ha CneuaHn HnCTpymEnu YmHna. IpenOpbya Ce nobepaHaTo Ha Ta3n Opeaua Ha KBaIINΦnupaHn Nua.
TOPUBEHΦNITbP

- OTBHNTBaTe 3anyuJaKaTa Ha pe3epBoaapa 3a ropnBO (15).
C nomooTa Ha TeHe Ka KyKuKa N3BaKaDaTe rOpNBnHnΦnTbp (g) npes 0TBopa 3a HAnBaHe Ha rOpNBOTo (pept. X).
- DEMOHNTnPaTe rOpNBnHnΦnITbP n FO n3MnBaTe c 6eH3nH nnnrTO CMeHrTe C HOB.
-MoHTnpaTe ropBnHnI pntbp Bpe3epBoapa
3aBnHTBaTe 3anyuankata Ha pe3epBoapa 3a rOpno (15).

CneI demoHTnpaHTo Ha rOpBnHnO nTbp n3noJ3BaTe Kyka 3a Da nobDnHHe T KpaHa CmYkATEHNn npOBODnK.
PnMOHTaKaHaTropBnHPhnTpBnMaBaTeJaHe6n CmyKaTeHHNpOBoDnKDaIpOHnKHATHkAKnBTnAbu.
MACJENΦNJITbP

-
OTBHtBaTe 3anyuJkata Ha pe3epBoapa 3a MacnoTo (18).
C nomoTa Ha TeHe KaKnKa N3BaxDaTe MaCneHn HnTbp (h) npes 0TBopa 3a HanBaHe Ha MacnTo (ept. Y).
-IMMBATE MacHeHn Hb B 6eH3n IIN FO CMeHrTe CBOH. -
OTeTpaHbATE BCNUKoTNaDbuO ope3epBoapa.
-MoHTnpaTe MaCHeHnIe HnTbp Bpe3epBoapa.
3aBnHTBaTe 3anyuwaKaTa Ha pe3epBoapa 3a MacNo (18).
Pn cnaheTo Ha MaclenHn PnTbp B pe3epBoapa Tp6Ba Da npOBepnte daHn ToI ce DoKocBDo npedHn Decen bTbN.
3ANAJIHA CBEU
C ue63ynpeHOTo yHKnOHNpaHe Ha ypeHa Tp6Ba nepnoDnHO da ce npOBepaCbctoHTo Ha 3anaHata CBeu
-ДемонТиразеКанakaHaВьздушниФиNTbp(4).
- N3BaXdTe Bb3dyuHnHn HnTbp (d).
CbaTaeKa6ena (i) ot 3anaHaTa Cbeu.
C NOMOHTa Ha KJIIOUa 3a CBEu (B EKINIPOBKaTa) OTBnHTBaTe 3anaHATA CBEu (Hept.Z).
-ПоунстбATEиperynipate pa3ctOryHneTo MeJxky KOHTaKTHTe (0,65mm)(npn Heo6xoIIMOCt CmEHaTe 3anaHata CBee).
ДPyгУКАн<|im_start|>
IpoBepete daHn Hma TeObe Ha rOpBBO, pa3xna6eHN Bpb3Kn n nobpeHn OCHOBH uactn, oco6eHO Bpb3Knte Ha pbkoxBatKnte n 3akpenBaHTo Ha HnpaBnBaUaTata WnHa. B cnya, ue 6bdat OTkpTNn HkaKBn NobpeN, To npEi NOBTOPHATA ynotpe6a Tp6Ba da Cte cnryphN, ye TpnoHBt e 6nn peMOHTnpaH.
BcKaBb BnD He3npaBHOCTn 6n Tp8BaNo Da 6bDaT OTCpaHBAH NOTOPUNPAHNA cepBnHa npo3BOAnTeJRA.
TEXHNUECKN NAPAMETPN
HOMUHAJIHN DAHHN
DAHHN3A WYMA N BNBPAUNITE
HnBOHaakcyTmHOTaHnrahe:Lp=96,7dB(A)K=3dB(A)
HnboHaakcyTnuaHTaMoUHOC:T LW_A = 110 dB(A)K=3dB(A)
CTOnHOCT Ha Bn6paounOHHTe yckopeHnA:
- npedHa pbkoxBaTka: a = 7,907 m/s² K = 1,5 m/s²
3AUNTA HA OKONHATA CPEIA
IpycknHc n cekpnckoc 3aepbahe He 6ma pa ca nxmbpnnb 3aeHIO C DOMHNIHT OTNDAB, a da 6bTAT npedeAHn HpeLKnHnr B cBtOeBHNTnpedPnTHN. HFOpMnAOTHO CHPOeKINHr DA pno3BOEADPTn H npDOKYTA NMI MECTHNE BACTN. HIOHCoeHc eENETPKCHN n enekpONHHC bOpBKeHn CYbPdAT cybCTAHmK KOHO He ca HeyptpanHa 3a OKOHATA cepa.CbOpkHeN KIOHO He ca 6bnHpeLpNPAHn, npctdTaBNHnat oTeHNMAHn OAnchOCT 3a OKOHATA cepa H 3aDpAEto HxaOPaT
3ana3Ba ce npabOTo 3a n3BbpuBaHe Ha npomeHn.
Grupa Topex Spoko z agronomicz opodwiedzialnosci' Spoko kamytoywa csc cedanuhe Bb Pabawa h ul. Pogranica 2 / 4 (HapnHaHa no-Hatar: Grupa Topex) HINpOmpmHa, he BCANKAH ABTOPKn npaa bPxy CbPbXAHETO Ha HACTOna HATA HPCYPKU (HAPVAA no- HNTATkC, INCTPCKUYN), KINVAUaMekMy DpyrTO HeHHA TcKCT, NOMCETeHNHe CHMK, CXEMI, YEPTeKs, a sbTu taka HEHHTe KOMIOHMeRt, npHAnDekat NaNIOvouHHO HA Grupa Topex nNDaKHTa H naPaa 3auHtA cbfNaCHO 3aKoHa 04 fepBypap 1994 rOHa 3a ABTOCPKO npArO bcpnHtMy npBaB (BHK dPbXAEBcHTNK 2006 N9 03o.631 cNo-hatatbHInme pnpomEH). KOIpAteHO Bb3PONBEXeKaHTo, ny6NkYbAbeHOT, MOHINPAHApETe KOMEpeCe Kaen H naata NHCTPKUYK, KaTKo H OTeHAte H eneHHTe Ene 563 cblnACMeHO HA Grupa Topex I3p3eHo B NHcMeH oFpMa, e CTOPO 3abpaHEn O MoKe da NoBeE do npBnHAneTo Km IpaKaJdN KnHK3aTeNA OTOBPOCT.
HR PRIJEVOD ORIGINALNIH UPUTA BENZINSKA LANCA CANA PILA 58G952
POZOR: PRIJE POÇETKA KORISTENJA ELEKTRICNOG ALATA TREBA
PAŽLJIVO PROćITAT UPUTE ZA UPOTREBU | SPREMITI IH ZA
DALJNJE KORISTENJE.
DEDALJNI PROPISIO SIGURNOSTI
SIGURNOST KOD KORISTENJA BENZINSKIH LANCAH PILA
Upozorenje!
- Osobe koje nisu upoznale sadrzaj doticih uputa ne smiju koristiti lancanu pilu.
Lancan pilu koristite isključivo za rezanje driveça.
Korisnik snosi potpunu odgovornost za koriistenje pile u druge svre imajuci na umu da to moze predstavljati opasnost.
-Proizvodačne snosi odgovornost za štepe prouzročene nepravilnim korištenjem lançane pile.
RADNO MJESTO
a. Vase radno mesto odzavajte urednim i osiguraje dobro osvjetlenje. Neredineosvjetljeno radno podruce moze dovesti do nezgoda, pogotovo kad koristite lancane pile
b.Djecu i druge osobe drzite podalje od radnog podruca. Ako bi skrenuli pozornost sa posla, mogli bi izgubiti kontrlu nad uredajem.
SIGURNOST LJUDI
a.Nosite sredstva obnbe zaistte kao sto su kombinezon, zaistne naocele, zaistne cipele, zaisttna kaciga, stitnike za sluh te koznate rukavice. Koristenje sredstava obnene zaistte smanjue opasnost od tjelesnih nezgoda.
b. Ne precjenujte svoje mogucnosti. Zauzmite siguran i stabilan položaj tijela i odrzavajte u svakom trenutku ravnotezu. Na taj način možete pilu bolje kontrolirati u neocekivanim situacijama
c. Ne nosite siroku odjecu ili nakit. Neka vaša kosa, odječa i rukavice budu što dalje odPokretnih dijelova. Mlohavu odjecu, nakit ili dugu kosu mogu zahvatitiPokretni dijelovi uredaja.
TRANSPORT I SKLADISTENJE
a.Ako prenosite pilu ugasite motor, stavite stitnik lanca i ukljucite kochnicu lanca. Prenojsene uključene i ne osigurane pile moze dovesti do tjelesnih ozljeda.
b.Pilu mozte prenositi samo kad je drzite za prednji rukohvat. Druga mjesta mogu biti nedovoljno sigurna za stabilno drzanje a cak i dovesti do ozljeda.
c. Pilu morate kontrolirati. Provjerite ravnocu ill pricvrscivanjePokretnih dijelova,puknuca dijelova i sve druge cimbenike koji mogu utjecati na rad pile.Ako utvrdite ostecenja,popravite uredaj prije upotrebe. Nepravilno oderzavanje je uzrok mnogih nezgoda.
d. Rezni lanac treba biti Čist i oštar. Pravilno odžavanje reznih povrsina lanca smanjije rizik da se zaglavi i olaksava upotreba.
KORISTENJE I BRIGA O UREDAJU
a. Povremeno provjeravajte pravilan rad kočnice pile. Pokvarena kočnica moze dovesti toga da se pomak reznog lanca nece iskljuciti u situaciji koja stvara opasnost.
b.Svaki put nakon zavrsetka rada pažljivo očistite pilu i korištena sredstva individualne zaštite, a na osjetljivim podsklopovima uredaja obavite aktivnosti povezane s odžavanjem.
RAD
- Iskjučite motor pile prije nego oslobodite kočnicu lanca.
- Budite posebno oprezni pod kraj rezanja jer bila bez otpora u rezanom materijalu opada snagom slobodnog pada, sto moze prouzrociiti ozljede.
- Kod dugotrajnog rada rukovatelj moze osjetiti da mu prsti trnu a ruke se koce. U tom slucaju prekinite rad jer ukočenost smanjupe preciznost kod korišenja pile.
Zabranjeno je pusiti blizu uredaja i prisilaziti s otvorenomvatrom. - Spremnik goriva punite smjesevinom goriva i ulja punite kod isključenog i hladnog motora, jer postoji rizik od da se gorivo prolije i zapali od vrucih elementata pile
- NePokrecite uredaj akoprimijetiteznakove propustanja ili istjek goriva jer bi to moglo uzrokovati pozar.
- Tijekom rada pila se dosta nagrije i zato budite oprezni kako ne biste dosli u dodir s vrućim elementima pile.
- U jegnom trenutku pilu我会 koristiti iskljucio jeder osoba. Sve druge osobe - a pogotovo djecu i zivotinja - drzite podalje od zone djelovanja lançane pile.
TijekomPokretanja pilerezni lanac ne mozete naslonitina materijal predviden za rezanje niti dozvoliti da bilo stododiruju
Tijekom rada s pilom uredaj drzite cvrsto s obje ruke, koristeci oba rukohvata. Zadrzite cvrsti položaj. - Pilu ne smiju koristiti djeca niti nepunoljetne osobe. Ure'daj mozete dati na korištenje iskljucivo odraslim osobama koje znaju kako s njime rukovati. Zajedno s pilom dajte i doticne upute za upotrebu.
- Ako osjetite da ste umorni, odmah prekinite korištenje urežaja.
- PrijeNgu počnete rezanje uvijek pravilno namjestite polugu kočnice lanca (privucite k sebi). Ona vam je istovremeno i zašita za dlan.
- Lančanu pilu odmicite od rezanog materijala iskljucivo kad radi rezi lanac.
Pri rezanju dasaka ili tankih grana svakako upotrjebljavajte potporanj (kozlic). Ne smijete rezati nekoliko dasaka istovremeno (polozenih Jedna na drugu) ili materijal koji drzi druga osoba ili akog pridržavate nogom. - Ako rezete duge elemente, onda oni trebaju biti pričvṛśceni na odgovarajući način.
- Na kosom nagnutom terenu uvijek režite kad ste okrenuti prema gore.
- Kad rezete po cijeloj duzini ili potpuno, uvijek morate upotrjebljavati uporne zupce kao potpornu tocku. Pilu drzite za straznji rukohvat i vodite pomocu prednjeg rukohvata.
- Ako nemate mogucnost da izvedete rezanje odjednom, povucite pilu malo unazad premjestite uporne zupce i nastavite rezati malo podizuci strazenji rukohvat.
- Kod horizontalnog rezanja stanite pod kutom koji se za najmanje 90^ razlikuje od linije rezanja. Takav pothvat zahtijeva vašu koncentraciju.
- Ako se tijekom rezanja lanac zaglavi svojim vrskom, moze doci do povratnog udara u smjeru rukovatelja. Zbog toga uvijek kad je to moguce rezite s donjim dijelom lanca jer u tom slučaju kada se lanac zaglavi povratni udar se nece usmjeriti prema rukovatelju.
- Posebno oprezni budite kod rezanja stabla koje se raskoljava. Odrezani komadi drva mogu biti odbacivani u razlicitim smjerovima (rizik od tjelesnih ozljeda!).
- Piljenje grana trebaju izvoditi osobe koje su za to školovane! Nekontrolirani pad odrezane grane predstavlja opasnost od tjelesnih ozljeda!
- Ne smijete rezati vrskom vodilice lanca (opasnost od povratnog udara).
- Posebnu pozornost obratite kad rezte napregnute grane. Nemoje odrezivati grane koje slobodno vise
- Uvjek stojite sa strane predvidene linje pada stabla koje
namjeravate rušiti.
- Kod obaranja driveca postoji opasnost da se polome ili padnu grane i drva koje su u blizini. Kad se stablo rusi postoji rizik pucanja i padanja grana s driveta ili stabala koja se nalaze u blizini. Budite posebno oprezni jer postoji opasnost od tjelesnih ozljeda.
- Na padinama se rukovatelj treba nalaziti na dijelu uzbrdice koja je iznad piljenog stabla, nikad ispod.
- Pazite na panjeve koji bi mogli pasti na rukovatelja. Umaknite!
- Pila uPokretu cesto se okrece kada vrsk vodilice dira obradivani materijal. U tom slucaju na nekontrolirani nacin pila se moze pomaknuti u smjeru rukovatelja. (mogucnost ozljedal).
- Prije negro počnete rezati drvo, priprepreme si radno područje, odnosno uklonite donje grane i ocistiti povrsinu oko panja drva.
- Zabranjeno je raditi s pilom kad puše jak vjetar, koji moze promijeniti smjer padanja drva ili dovesti do nekontroliranog pada drva.
U slucaju nepovoljnih vremensikh uvjeta, ograničene vidljivosti, kiše, snijega nemojte rezati drvo pomocu pile.
- Ne smijete koristiti pilu iznad visine ramena ili stojeci na drivecu, ljestvama, skelama i slično.
- Blizu mjesta na kojem radite, morate imati dobro opremljen ormaric za prvu pomoć.
Kako biste sprijecili povratni udar slicedite slicedece upute:
Nikad ne rezite vrskom vodilice lanca!
- Uvjek počnite rezani sa pilom koja je vec uPokretul!
- Provjerite je li rezni lanac dovoljno oštar.
- Nikad nemojte istovremeno rezati više od jeder grane. Kod rezanja obratite pažnju na druge grane. Kad režete stablo po dužini, pazite na panjeve droveča koji su u blizini.
Objasnjenke koriistenpiktograma.

1
2
3
4
5

6
7
8
9
10
11
- Pozor, pridržavaj se sigurnosnih uputa
- Opasnost od pozara
- Opasnost od trovanja ispusnim plinovima
- Koristite zašitne rukavice
- Prije početka korištenja ili popravljanja ureža je sključite motor i skinite kontakt sa svjecice za paljenje
- Procitajte upute za koristenje i uzmite u obzir upozorenja i sigurnosne uvjete o kojima je rijec u uputama.
- Koristite sredstva za zašitu glave, vida i sluha
- Opasnost od povratnog udara
- Koristite zašitno odijelo
- Koristite zašitnu obúću
- Ruke i noge drzite podalje od elementata za rezanje
KONSTRUKCIJA IN NAMJENA
Benzinska lančana pila je ručni alat. Pokreće je 2 taktni benzinski motor hladeni zrakom. Uredaj je namijenjen za upotrebu u vrtovima, moze sluzit za obaranje stabala, rezanje driveta piljenje grana, driveta zaogrjev za kamine i u druge svrhe vezane uz rezanje driveta.

- Uporne zupce (19) pričvrstite na kucište pile (vijci u isporuci). MONTAZA VODILICE I LANCA PILE
Prije montaze vodilice odstranite plasticnl transportnl umetak koji se nalazi na vijcima za pričvṛśčivanje vodilice ispod kucista. Za regulaciju natezanja lanca sluzi klin i vijak za regulaciju. Bitno je da tijekom montaze vodilice klin koji se nalazi na regulacijskom vijku ud e u otvor na vodilci. Postupkom okretanja regulacjskog vijka mozete micati klin prema naprijed i natrag. Prije početka montaze vodilice na pili morate pravilno namjestiti te elemente.

OPSTE MERE BEZBEDNOSTI
MERE BEZBEDNOSTI PRILIKOM UPOTREBE LANÇANIH BENZINSKIH TESTERA
Upozorenje!
- Osobama koje nisu upoznate sa tekstom uputstva nije dozvoljeno da koriste lancanu testeru.
Lancana testera koristi se iskljucivo za secenje.
Korisnik snosi celokupan rizik u slucaju drugacije upotrebe testere, caki kada zna da takva upotreba moze biti opasa.
-Proizvodač ne snosi odgovornost za oštećenja nastala nepravilnom upotrebam lançane testere.
MESTORADA
EKKINHSHTOY KINHTHPA

EkTeIawTac epyaic e μe to aUooPiOvo kpatate to μe ta duo xepia.
ELeyTe kata noo unapxei kaouio oTo doxieio kaouimwV kai adi oTo doxieio laiou.
Bebaiowte 01 o moxlc n6) bioketai otn theon tnc evpyoioinoc (exei metakivnipoc ta npoc).
- ME KpOo Tov KIVnTHpa TpaBnEte To Okoivievaalaktn Tpoopodooiac (2).
Avntote kaouio oToov kivntnpa tpaWvTac epiKec opoc to Okoivi EKKIVNONC (13).
MetakivnoteTovdiakottn avapalenc (14) 0tn oon tnd Evpyoioinoc (EIK.C).
ToOnoETnTe To aUooPiOvo nAvw oE mia Otaeepn Baoi (E6a0oc).
KpatnoTe to aauoopiovo me oiyoupi, atnpioovtac to 0edeltaoc, kai tpaBnEto oKOvi EKKivnonc (13), otv apx npayu, mexoi va aeitoupynoei Ouvdeogoc, kai katomiv tpaBnEte TIO duvatata (EK.D).
- Suexiote va tpaBate to okiwi ekkivnnc (13), ec otou o kivtnpac tou aauoopiovou ekkivntheta iya ouvtuo xovikoi diatma.
Katov MIOTE TOV mXavio KLEIDWATOC TOI dApayatoc aepoc (1) kai meta MIOTE EAAPPIA TOV MOXLO TOU dApayatoc aepoc (11) wote va anevepyooinoe TOT evaalaktn TPOPOOAC (TO oKoiiv evalaknt TPOPOOAC 0a metakivnTei autouata OTH eon TNC anevepyooinong).
Me anevpyooinveo tv evaalaktn troopodooiac tpaBnEte aanmuia popa to okiovi ekivnongc (13) wote va ekivnthei o kivtnpac (tibavov va xpeiaotei va totpaBnEte mepikec opec).
Aphote tvkivtnpva va 0epmuovtei. Eav xpeiaotei, auEhote tic otpopec nieovtac eapwoc tvuoxtou diaappaymuoc aepoc (11).
Metakivnote tv oxo n (6) ot n tnc anevpyoioanc (etakivnote tv npoc ta niow).
Paymuatoonote Tnv konn.

Anayopeueta EKKIVNON tou KIVNTnpot auoopnpoivo me to eva xepi. Katatv EKKIVNON 0 npenei va otnpieTeTo aauoopnpiovo oTo edeltaoc kai va to kpatate nolu ka. Bebaowte Oti n alvaia da unopei va nepiatpeetai avemuodota, xupic va epxetai e npanf me onoiadnoote avtkeiyeva. Anayopeueta va npayatonoite kom onoiovnonuukwve Byauevo to okoiv evaalaktnt npopdooiac.
AKINHTOIOIHEH TOY KINHTHPA

Xaalapwote to moxtoou aepoppaktn (11), wote o kivntnpac va aeitoupynoe xwpic qoptio.
- Metakivnote to diakontn avapaeEnc (14) oyn then STOP.
AINANENTHEAAYEIAA

EeivvTac nV epyia, eEyEte Tn iavon tnc aluaioac kai to eniede tou alanavtikou otn deaeve.n. Evpyooinote to auaopnpiovo kai kpatate To naW ano To edapoc.Eav ta ixvn Tou lamavtikou biakpivovta oAo kai mio Evtova, auto onaivei ot to liavntiko eoepxetai oot (EK.E).Eav ta ivyn Tou alanavtikou dev unapoxuv nival Eaaxota, oeiieete va puthetaiete tv npaoh alanavtikou me tv koxia puthetaionc alanavanc9. Zepintwn kata tv nOia n puoian dev exei anoepeip anotaleogua, oepiaetve kaqapiote tn ov nI alanavancn aouidac, tvnv own TeVTwpatoc nC aluaioac kai tvnyo alanavtikou, n va anotavthe OTO Kevtpo texviinco unootnpiicn.

EkTeEite tn pOthione anevpyooinuevo to epyaieio npwvtac touc kavoe aopaaeiac kalnpooexovtac n lava unkyakouma to edapoc,ia loyouc aoopaiaiac,diatnpeite tvn anostaan no to aluooepiovo ec to edapoc twv 20 ekatootwkar' elaxioto.

Me tov koxia puouioc linavoc (9)puoioTe tv npoxn linavtikou avaloya e TIC ouvkec epyaicac.
O△HROSTONOOETHEHTHEAAYIADAE
O odnyoc tootheonc tnc aluaiaoc uipotataevtovn oopa. Se nepintwn othopac twv dovtw, opeiAe va avikataohtoe tv odnyo. O ohpaevo c odnyoc meiwet nTv nepiodo letoupyiac tc nca lauoidac tou auaooPiovou. Ppaatonoieite tv avikataotaon tou odnyou oTo Kevtpo texviknc unootnpicnc.
PYOMIHTOYEEAEPOTHPA
O Eaeepwnpac tou auaonpiovou exputhetai ano tou kataokeuaoth, owc, evdeextal va xprcei puthetaionc oe nepintwan aalaync twv ouvthenkwv aeitoupyiac. Ipotou Eeknoe i nputhetaion tou Eaeepwnpa, bbetaowite yia tnu unapen Tou qiatpou kaovioukai aepoc, kaowkai bevivnc.
IpaaypatonoieTe npouoianTou eapwthpapeykateotnevec Tna kai nvaia
Biodote Touc koylaic puthetaionc (L Kai H) (16) ec to taoct nci diapounic (oxi opwocn oou oiktata) (EIK.G).
Katoiv, Ee18wote touc koxliec puthetaic (16) onwc opicta npakatw:
-Koyla L: kata tic 1/14 oToPoeC
KoXiaH:KaTaTic13/8OToPooPec
- Evpyoioiote tov kivtnpa kal apntote tov va thepavtei eElaapwc nioevo to moxto tou aepoppaktn (11).
Katoniv npoeppuavoc tou kvnthpa, meiwote tyn aokouevn niean oto moxto tou aepoopaktn (11) kal aonote tov kvnthpa va letoupynoe ie xaunna taxutnta.
Σtpepe apya tov koxia (L) npoc ta deic ewc tnv eniteu Tuv meyiotw otpoow Tou kivntnpa kal katoniv, otpept npoc ta apioptepa kata 1/4 tnC otpoqnc.

CANDELA DI ACCENSIONE

- DETAILED SAFETY REGULATIONS
- SAFE USE OF PETROL CHAIN SAW
- Warning!
- WORKPLACE
- PERSONAL SAFETY
- TRANSPORTATION AND STORING
- POWER TOOL USE AND CARE
- OPERATION
- To prevent saw recoil follow below instructions:
- Explanation of used symbols
- CONSTRUCTION AND USE
- DESCRIPTION OF DRAWING PAGES
- MEANING OF SYMBOLS
- EQUIPMENT AND ACCESSORIES
- INSTALLATION OF GUIDE BAR AND SAW CHAIN
- FILLING SAW TANK WITH OIL
- FILLING THE FUEL TANK
- RECOMMENDED FUEL BLEND RATIO
- STOPPING THE ENGINE
- CHECKING CHAIN LUBRICATION
- CHAIN LUBRICANTS
- CHAINGUIDEBAR
- CHAIN WHEEL
- ADJUSTMENT OF CARBURETTOR
- CHAIN BRAKE
- BRAKING CHECK
- CHECKING BRAKE ENGAGEMENT
- CHAIN TENSION ADJUSTMENT
- PROTECTION AGAINST RECOIL
- CUTTING PIECES OF WOOD
- FELLING A TREE
- CUTTING THROUGH TRUNKS
- CUTTING A TRUNK LIFTED ABOVE THE GROUND
- TRIMMING/CUTTINGBUSHESANDTREBRANCHES
- STORAGE
- AIR FILTER
- CYLINDER FINNING
- GUIDE BAR AND CHAIN
- CHAIN SHARPENING
- FUEL FILTER
- OIL FILTER
- IGNITION PLUG
- OTHER INSTRUCTIONS
- TECHNICAL PARAMETERS
- NOISE LEVEL AND VIBRATION PARAMETERS
- ENVIRONMENT PROTECTION
- YCTAHOBKA WINHbI NcENI
- 3APABKAIIINJIIMACJOM
- 3ANPABKA NINJI TONINBOM
- OBPE3KA IN NOJPE3KA CYHB
- TEXHNUECKOE OBCJNYKUBAHNE
- XPAHEHNE
- BO3DyUHbI ΦNlbTP
- OPE6PEHNEUINHDA
- UHNA UZENb
- 3ATOUKA LENI
- TOnJIuBHyI ΦHJIbTP
- MACJIARHOIΦNJIbTP
- CBEA 3AXUNAHN
- DONOHHTENbHbIe YKA3AHN
- TEXHNUECKNEIAPAMETPbI
- INHOPMAUOBHEWMAIIBNPAU
- 3AUNTA OKPYXKAIOUCEI CPEBJI
- HHOPMALU O DATE N3ROTOJEHNA
- YKA3AHABCEPNHOMHOMEPE, KOTOPbIH HAXODNTCA HA N3DEJIIN
- UA 3 OPUNIHJY
- ПИЛKA ЛAHцIOROBA БEH3иHOBA 58G952
- INPABNIA TEXHIKU BE3NEKN
- BE3NEKA KOPNUCTYBAHHI INIKAMN IAHIOROBUM BEH3HOBUM
- HACTAHOBA
- POBOYE MICUE
- INPABUNAOOBOHCTOIBE3NEKN
- TPAHCNOPTYBAHHTA 3BEPIFAHH
- NPABUNA EKCNYATAU TAOJIA 3A NIKOIO
- EKCPIIYATAUIA
- БУДОВАIПИЗHAЧЕНЯ
- ONMC MAJIIOHKIB
- ONUCTPAΦIHHX CUMBOJIIB
- NPUHAJEXKHOCTI AKCECYAPN
- IITROBKA DO POBOTN
- TPAHCNOPTYBAHHIAHUROBOIINIKN
- MOHTAK 3y64ACTORO yNOPY
- MOHTAK WUHHI JAAHIOFA
- OJINBAHHOJMBN
- DOLINBAHHB EHNH
- PEKOMEHIOBAHI IPOIOPUII
- TAlbMOJIAHUOTGA
- NEPEBIPKA CNPABHOCTI RAJBM
- NEPEBIPKA CINPABHOCTI FYHKU ABTOMATNUHORO CINPAUBOBYBAHHRAJBM
- HATryBAHHJAHUOTGA
- PNAIINIKOIOJAHUCIOROBOIO
- 3ANOBIGAHHRABNUBYIBDNTTTA
- PO3NIIIOBAHHI IMATKIB DEPEBHHI
- BAJIKA DEPEB
- PO3NIIIOBAHHKoIOn
- PO3NJIIOBAHHKOLOHA 3EMJI
- PO3NIIIOBAHHKOKOJHAKO3JIAX
- OBPI3AHH/NIPI3KAIINIADEPEBIKYUIB
- 36EPIFAHHRAOBCNYROBYAHH
- 36EPITAHH
- NOBITPAHNIΦJIbTP
- OPE6PENHcIJIHDPY
- HANPRAHSAUNHATAJAHUOT
- TOCTPIHHNAHQUORA
- NAJINBHHΦIbTP
- ONIBHNIΦIbTP
- CBI4A 3AIIAIOBAHH
- IHHI HACTAHOBU
- TEXHIYHI XAPAKTEPNCTUKN
- HOMIHAbHI XAPAKTEPUCTUKU
- PRACE S RETEZOVOU PILOU
- BALKU ZAGESANA BEZ ATBALSTA
- BALKA PARZAGESANA UZ BALSTIEM
- CILINDRA RIBAS
- KOKU UN KRUMU ZARU ZAGESANA / APZAGESANA
- TAIENDAVAD OHUTUSJUHISED
- BRNSIINIMOOTORIGA KETTSAAGIDE KASUTAMIST PUUDUTAVAD OHUTUSJUHISED
- Ettevaatust!
- TOOTAMINE/SEADISTAMINE
- PALKIDE SAAGIMINE MAAPINNAL
- 3APEXDAHE HA PE3EPBOAPA HA TPNOHA CMACNO
- 3APEXDAHE HA PE3EPBOAPA C TOPUBO
- INPENOPbYBAHIN PONOPUHN HA CMECTA
- HANPABLBAUHA HNA HA BEPNRATA
- BEPNXHO KONEIO
- PEYIINPAHE HA KAPBOPATOPA
- KOHTPOJ HA AKTUBUPAHETO HA CINPAKATA
- HATRAHE HA BEPUIATA HA TPOHA
- PABOTA C BEPUKHHN TPNOH
- 3AUNTAOTOTCKAYAH
- PRAHE HA NAPYETA bPBECUNA
- PRA3AHE HA DbPBETA
- PRAHAHE HA HbHOBE
- PRAHE HA NOBALEHO DbPBO
- PRAHE HA DbPBO Cn3IOL3BAHETO HA NOIOPA
- PRAHE /IOOPRA3BAHE HA KIOHNAbPBETA XPACTN
- OBCLNYKBAHE N NOДРБЖKA
- CbXPAHRAHE
- Bb3dUyWeHΦnITbP
- OCTPEHE HA BEPURA TATA HA TPNOHA
- TOPUBEHΦNITbP
- MACJENΦNJITbP
- 3ANAJIHA CBEU
- ДPyгУКАн<|im_start|>
- TEXHNUECKN NAPAMETPN
- HOMUHAJIHN DAHHN
- DAHHN3A WYMA N BNBPAUNITE
- 3AUNTA HA OKONHATA CPEIA
- HR PRIJEVOD ORIGINALNIH UPUTA BENZINSKA LANCA CANA PILA 58G952
- DEDALJNI PROPISIO SIGURNOSTI
- SIGURNOST KOD KORISTENJA BENZINSKIH LANCAH PILA
- Upozorenje!
- RADNO MJESTO
- SIGURNOST LJUDI
- TRANSPORT I SKLADISTENJE
- KORISTENJE I BRIGA O UREDAJU
- RAD
- Kako biste sprijecili povratni udar slicedite slicedece upute:
- Objasnjenke koriistenpiktograma.
- KONSTRUKCIJA IN NAMJENA
- - Uporne zupce (19) pričvrstite na kucište pile (vijci u isporuci). MONTAZA VODILICE I LANCA PILE
- OPSTE MERE BEZBEDNOSTI
- MERE BEZBEDNOSTI PRILIKOM UPOTREBE LANÇANIH BENZINSKIH TESTERA
- MESTORADA
- EKKINHSHTOY KINHTHPA
- AKINHTOIOIHEH TOY KINHTHPA
- AINANENTHEAAYEIAA
- O△HROSTONOOETHEHTHEAAYIADAE
- PYOMIHTOYEEAEPOTHPA
- CANDELA DI ACCENSIONE
Brand : Graphite
Model : 58G952
Category : Saw