
K3 Home & Pipe - Pressure washer Kärcher - Free user manual and instructions
Find the device manual for free K3 Home & Pipe Kärcher in PDF.
| Product type | High-pressure cleaner |
| Brand | Kärcher |
| Model | K3 Home & Pipe |
| Supply voltage | 220-240 V ~ 50-60 Hz |
| Rated current | 6 A |
| Working pressure | 8 MPa (80 bar) |
| Maximum permissible pressure | 12 MPa (120 bar) |
| Water flow rate | 5.7 l/min |
| Maximum flow rate | 6.3 l/min |
| Detergent flow rate | 0.3 l/min |
| Max. supply pressure | 1.2 MPa |
| Max. supply temperature | 40 °C |
| Dimensions (L x W x H) | 275 x 276 x 803 mm |
| Operational weight | 6.0 kg |
| Protection class | II |
| Protection degree | IP X5 |
| Sound pressure level | 74 dB(A) |
| Sound power level | 90 dB(A) |
| Hand-arm vibration | < 2.5 m/s² |
| Main functions | High-pressure cleaning, detergent suction, pressure adjustment (Vario Power), rotary nozzle, washing brush, foam nozzle |
| Safety | Main switch, gun handle lock, discharge valve with pressure switch |
| Maintenance and cleaning | Regularly clean the water inlet screen and detergent filter |
| Spare parts and repairability | Original accessories and spare parts available at www.kaercher.com |
| General information | Free user manual and instruction sheet available for download |
Frequently Asked Questions - K3 Home & Pipe Kärcher
User questions about K3 Home & Pipe Kärcher
0 question about this device. Answer the ones you know or ask your own.
Ask a new question about this device
Download the instructions for your Pressure washer in PDF format for free! Find your manual K3 Home & Pipe - Kärcher and take your electronic device back in hand. On this page are published all the documents necessary for the use of your device. K3 Home & Pipe by Kärcher.
USER MANUAL K3 Home & Pipe Kärcher
www.kaercher.com/dealersearch
Technische Daten
71364 Winnenden (Germany)
Tel.: +49 7195 14-0
Fax: +49 7195 14-2212
Winnenden, 2016/04/01
Contents
Safety EN5
Environmental protection. EN 5
Description of the Appliance. EN 6
Assembly. EN 6
Start up EN 6
Operation. E N
Transport E N
Storage EN8
Care and maintenance EN 8
Troubleshooting. EN 8
Accessories and Spare Parts EN 8
Warranty E N
Technical specifications. EN 9
EU Declaration of Conformity EN 9
Safety

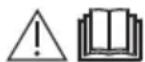
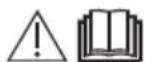
Please read these original operating instructions and the enclosed safety in
structions prior to the initial use of your device. Proceed accordingly. Keep both booklets for future reference or subsequent owners.
Proper use
This high pressure cleaner is designed for domestic use only.
- for cleaning machines, vehicles, buildings, tools, facades, terraces, gardening tools, etc. by means of a high-pressure water jet (if necessary, with additional cleaning agents).
with accessories, replacement parts and cleaning agents approved by KARCHER. Please observe the information accompanying the cleaning agents.
Hazard levels
△DANGER
Pointer to immediate danger, which leads to severe injuries or death.
△WARNING
Pointer to a possibly dangerous situation, which can lead to severe injuries or death.
CAUTION
Pointer to a possibly dangerous situation, which can lead to minor injuries.
ATTENTION
Pointer to a possibly dangerous situation, which can lead to property damage.
Symbols on the machine
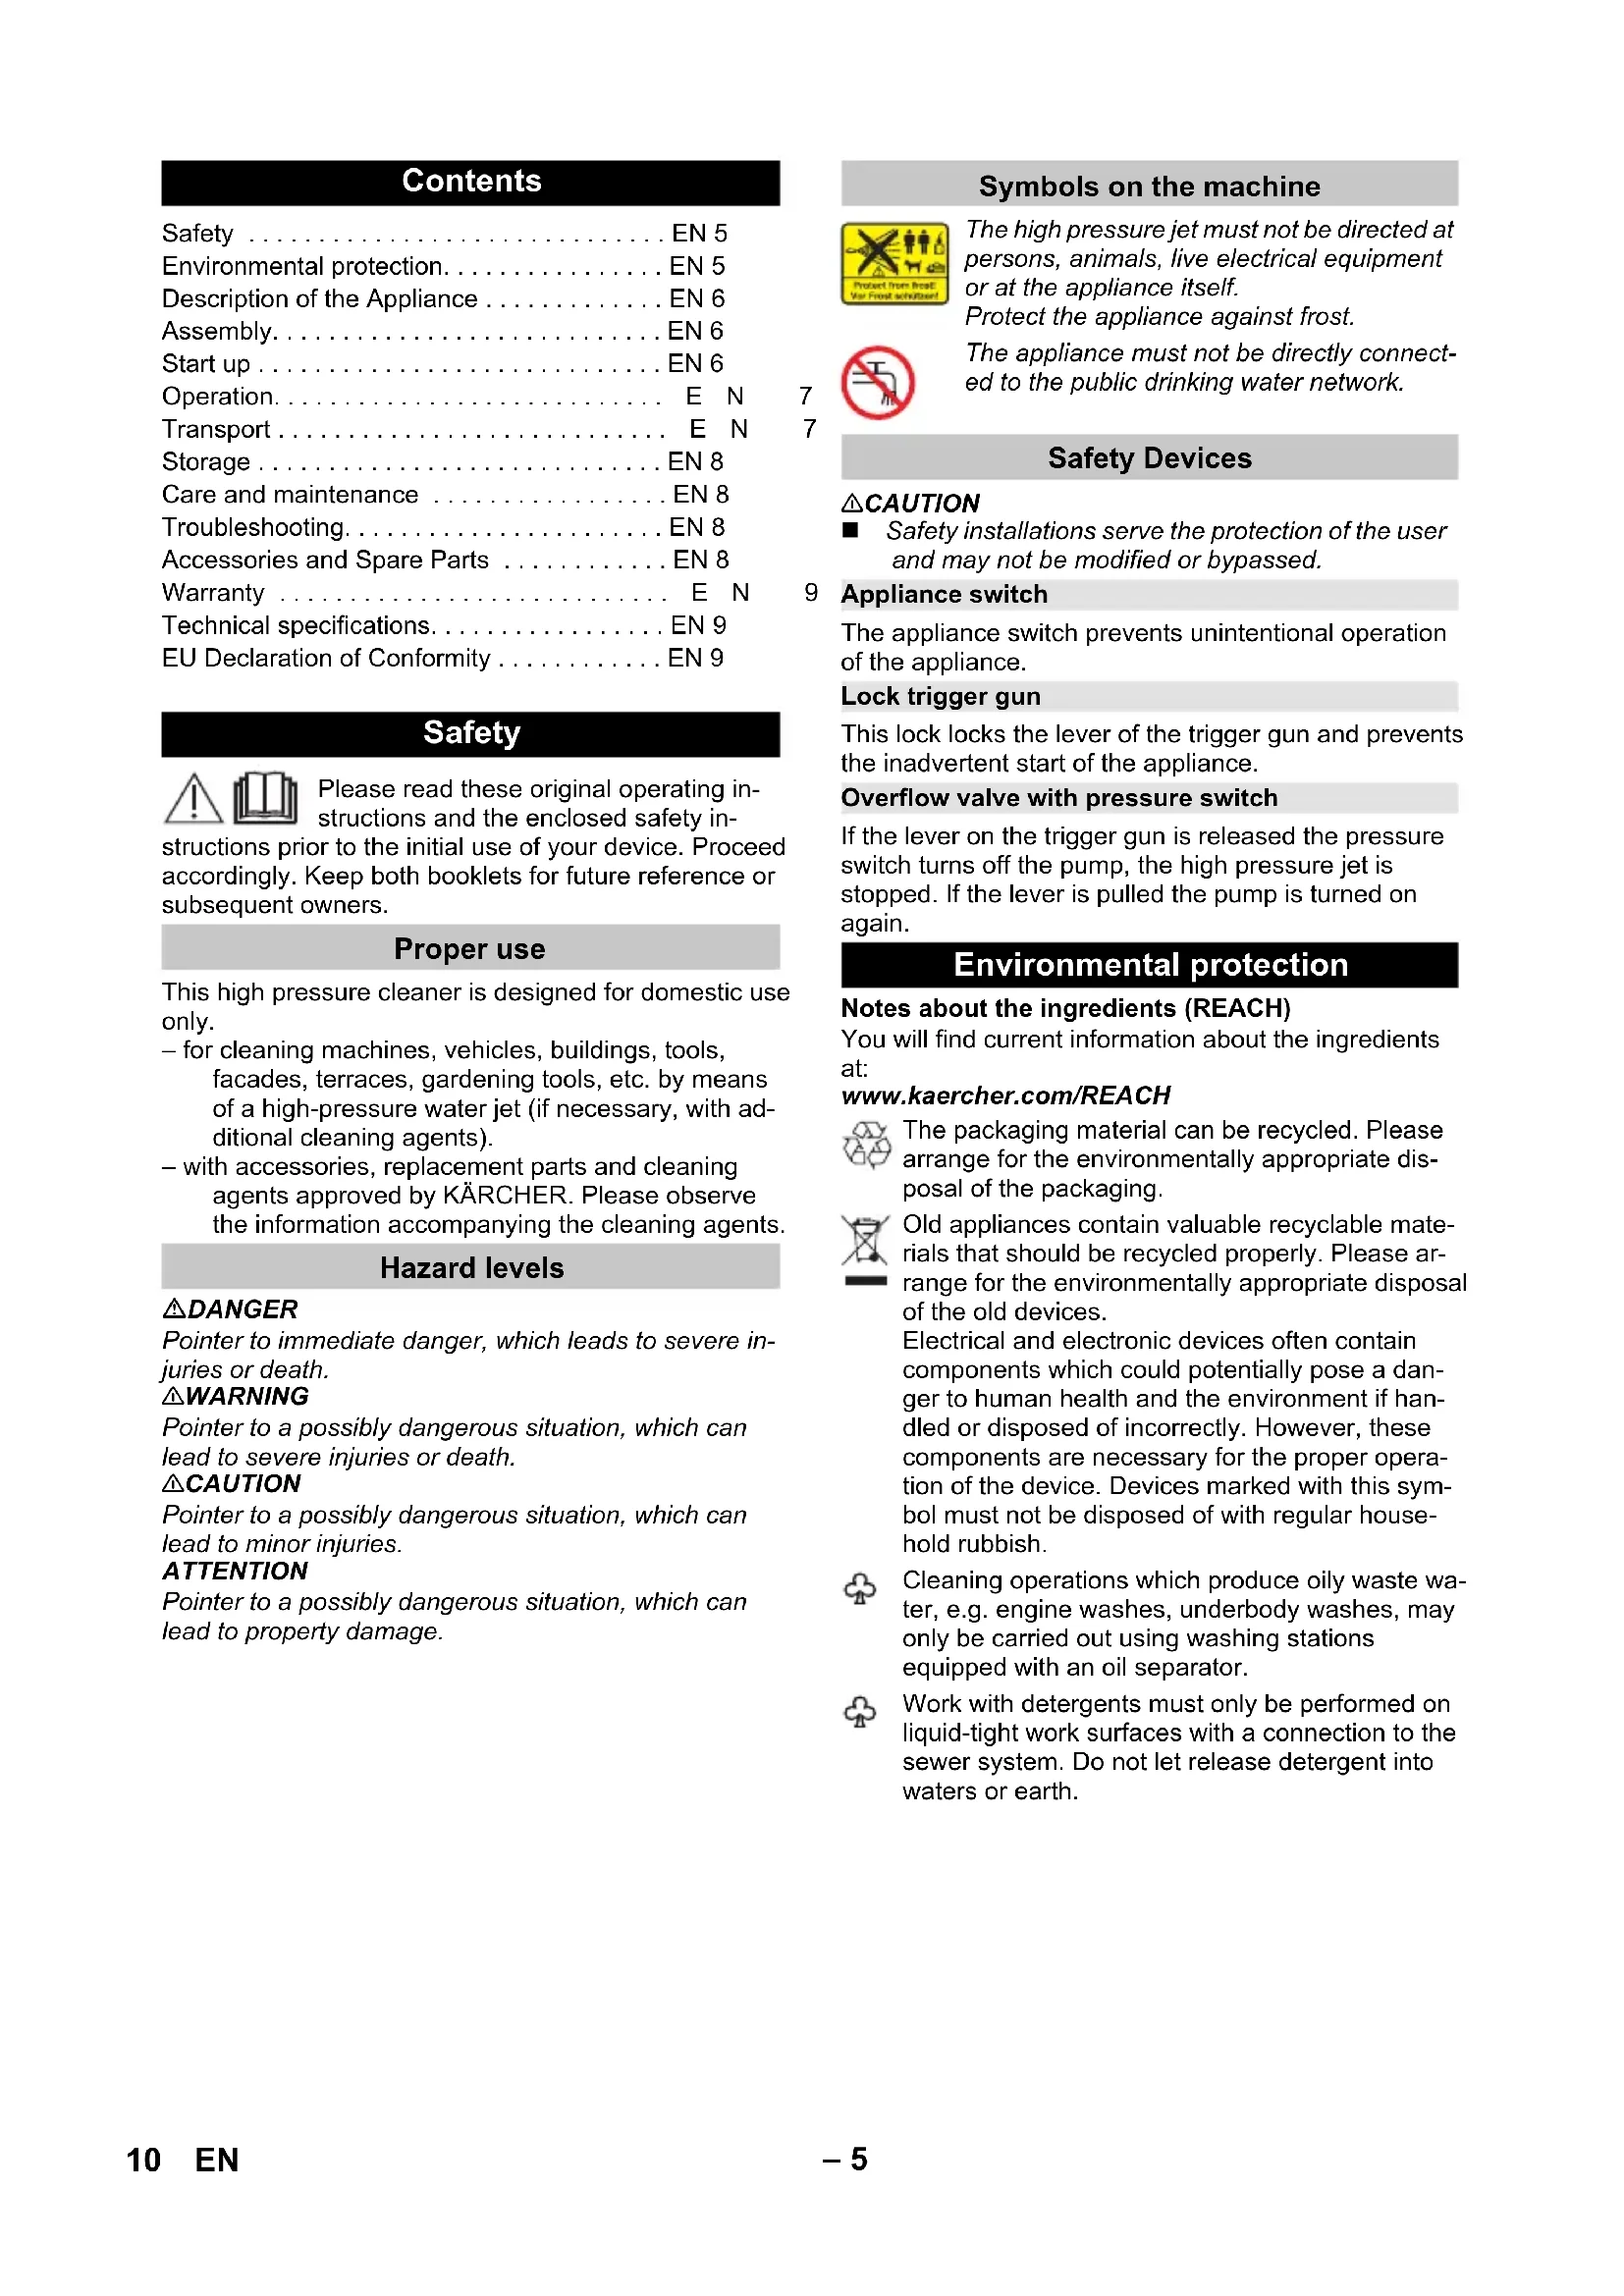
The high pressure jet must not be directed at persons, animals, live electrical equipment or at the appliance itself.
Protect the appliance against frost.
The appliance must not be directly connected to the public drinking water network.
Safety Devices
CAUTION
Safety installations serve the protection of the user and may not be modified or bypassed.
9 Appliance switch
The appliance switch prevents unintentional operation of the appliance.
Lock trigger gun
This lock locks the lever of the trigger gun and prevents the inadvertent start of the appliance.
Overflow valve with pressure switch
If the lever on the trigger gun is released the pressure switch turns off the pump, the high pressure jet is stopped. If the lever is pulled the pump is turned on again.
Environmental protection
Notes about the ingredients (REACH)
You will find current information about the ingredients at:
www.kaercher.com/REACH

The packaging material can be recycled. Please arrange for the environmentally appropriate disposal of the packaging.

Old appliances contain valuable recyclable materials that should be recycled properly. Please arrange for the environmentally appropriate disposal of the old devices.
Electrical and electronic devices often contain components which could potentially pose a danger to human health and the environment if handled or disposed of incorrectly. However, these components are necessary for the proper operation of the device. Devices marked with this symbol must not be disposed of with regular household rubbish.

Cleaning operations which produce oily waste water, e.g. engine washes, underbody washes, may only be carried out using washing stations equipped with an oil separator.

Work with detergents must only be performed on liquid-tight work surfaces with a connection to the sewer system. Do not let release detergent into waters or earth.
Description of the Appliance
These operating instructions describe the maximum equipment. Depending on the model, there are differences in the scopes of delivery (see packaging).
The scope of delivery of your appliance is illustrated on the packaging. Check the contents of the appliance for completeness when unpacking.
In the event of missing accessories or any transport damage, please contact your dealer.
Illustrations on fold-out page!
1 High pressure connection
2 Appliance switch ,0/OFF" / ,I/ON"
3 Storage hook for mains connection cable
4 Storage for high pressure hose
5 Transport handle
6 Water connection with integrated sieve
7 Detergent suction hose with detergent filter and lid
8 Detergent Tank
9 Coupling element for water connection
10 Storage for spray lance
11 Storage for trigger gun
12 Mains cable with mains plug
13 Bearing wheel
14 Trigger gun
15 Lock trigger gun
16 Clamp for high pressure hose
17 High pressure hose
18 Spray lance with pressure regulation (Vario Power) Carrying out the most common cleaning tasks. The work pressure can be stagelessly regulated between "Min" and "Max". You can add detergent when "Mix" is selected.
In order to adjust the working pressure, release the lever of the trigger gun and turn the spray lance to the desired position.
19 Spray lance with Dirtblaster
For strong contaminations
* Optional
20 Washing brush
Suitable for use with detergents.
21 Foam nozzle
For effective detergent foam.
22 Detergent
** Additionally required
23 Fabric-reinforced water hose with commercially available coupling.
-
Minimum diameter, 1/2 inches (13 mm).
-
Minimum length 7.5m
Assembly
Mount loose parts delivered with appliance prior to startup.
Illustrations on fold-out page!
Illustration A
Insert the transport wheels and lock them.
Illustration B
Insert the transport handle and screw in.
Illustration C
Screw the coupling element to the water connection on the appliance.
Illustration D
Pull out the clamp for the high pressure hose from the trigger gun.
Illustration E
Connect high pressure hose to trigger gun.
Push the clamp in until it locks. Check the secure connection by pulling on the high-pressure hose.
Start up
Park the appliance on an even surface.
Illustration F
Connect the high pressure hose to the high pressure connection of the appliance.
Insert the mains plug into the socket.
Water supply from mains
For connection values, see type plate/technical data.
Observe regulations of water supplier.
ATTENTION
Impurities in the water can damage the high-pressure pump and the accessories. For protection, the use of the KÄRCHER water filter (optional accessory, order no. 4.730-059) is recommended.
Attach the water supply hose to the coupling on the water connection.
Connect the water supply hose to the water supply.
Completely open the water tap.
Operation
ATTENTION
Dry running of more than 2 minutes leads to damage of the high-pressure pump. If the appliance does not build up pressure within 2 minutes, switch the appliance off and proceed in accordance with the instructions in Chapter "Troubleshooting".
High pressure operation
CAUTION
Keep a distance of at least 30~cm when using the jet for cleaning painted surfaces to avoid damage.
ATTENTION
Car tyres, paint or sensitive surfaces such as wood should not be cleaned with the dirt blaster, as there is a risk of damage.
Illustration 6
Push the spray lance into the trigger gun and fasten it by turning it through 90^ .
Turn on the appliance "I/ON".
Unlock the lever on the trigger gun.
Pull on the lever of the trigger gun; the device will switch on.
Note: Release the lever of the trigger gun; the device will switch off again. High pressure remains in the system.
Operation with detergent
Note: Detergent can only be added when the device is operated in low pressure mode.
△DANGER
When using detergents, the material data safety sheet issued by the detergent manufacturer must be adhered to, especially the instructions regarding personal protective equipment.
Illustration H
Fill the detergent solution in the detergent tank (observe dosage instructions on the packaging of the detergent).
Illustration 1
Close the detergent tank with the lid.
Lock the detergent tank in place on the appliance.
Illustration J
Use spray lance with pressure regulation (Vario Power).
Turn the spray lance to "Mix" position.
Note: This will mix the detergent with the water stream.
Optional
Illustration K
Connect the detergent tank to the foam nozzle.
Connect the foam nozzle to the trigger gun.
Recommended cleaning method
Spray the detergent sparingly on the dry surface and allow it to react, but not to dry.
Spray off loosened dirt with the high pressure jet.
Operation with washing brush
ATTENTION
Risk of damage to the paintwork
When working with the washing brush, it must be free of dirt or other particles.
Push the washing brush into the trigger gun and fasten it by a 90^ turn.
Note: If required, the washing brushes can be used to work with detergent.
Interrupting operation
Release the lever on the trigger gun.
Lock the lever on the trigger gun.
Insert the trigger gun in its holder.
During longer breaks (more than 5 minutes), also turn the appliance off using the "0/OFF" switch.
Finish operation
CAUTION
Only separate the high-pressure hose from the hand spray gun or the appliance when there is no pressure in the system.
After operation with detergent: Run the machine for approximately 1 minute for a clear rinse.
Release the lever on the trigger gun.
Turn off the appliance "0/OFF".
Disconnect the mains plug from the socket.
Turn off tap.
Press the lever on the trigger gun to release any remaining pressure in the system.
Lock the lever on the trigger gun.
Detach the appliance from the water supply.
Transport
CAUTION
Risk of personal injury or damage!
Mind the weight of the appliance during transport.
When transporting by hand
Pull the appliance by its transport handle.
When transporting in vehicles
Empty detergent tank.
Secure the appliance against shifting and tipping over.
Storage
CAUTION
Risk of personal injury or damage! Consider the weight of the appliance when storing it.
Storing the Appliance
Prior to extended storage periods, as during the winter, also observe the instructions in the Care section.
Park the machine on an even surface.
Push the casing of the quick coupling for the high pressure hose toward the rear and disconnect the high pressure hose from the appliance.
Press the disconnect on the trigger gun and remove the high pressure hose from the trigger gun.
Insert the trigger gun in its holder.
Engage the spray lance in its compartment.
Stow away the mains cable, the high-pressure hose and accessory on the appliance.
Frost protection
ATTENTION
Appliances and accessories that are not completely drained can be destroyed by frost. Completely drain appliance and accessories and protect them against frost. To avoid damage:
Completely drain all water from the appliance: Switch the appliance on with detached high pressure hose and detached water supply (max. 1 minute) and wait, until no more water exits at the high pressure connection. Turn off the appliance.
Store the appliance and the entire accessories in a frost free room.
Care and maintenance
△DANGER
Risk of electric shock.
Prior to all work on the appliance, switch off the appliance and pull the power plug.
Clean the sieve in the water connection
Clean the sieve in the water connection regularly.
Remove coupling from the water connection. Illustration L
ATTENTION
The sieve must not be damaged.
Pull the sieve out using flat pliers.
Clean the sieve under running water.
Reinsert the sieve into the water connection.
Cleaning the detergent filter
Prior to longer periods of storage, e.g. in the winter:
Remove filter from suction hose for detergent and clean under running water.
Troubleshooting
You can rectify minor faults yourself with the help of the following overview.
If in doubt, please consult the authorized customer service.
△DANGER
Risk of electric shock.
Prior to all work on the appliance, switch off the appliance and pull the power plug.
Appliance is not running
Pull on the lever of the trigger gun; the device will switch on.
Check whether the voltage indicated on the type plate corresponds to the voltage of the mains supply.
Check the mains connection cable for damages.
Pressure does not build up in the appliance
Check setting at the spray lance.
Check water supply for adequate delivery rate.
Pull out the sieve in the water connection using flat-nose pliers and clean under running water.
Appliance ventilation: Switch the appliance on with the high-pressure hose detached and operate (max. 2 minutes) until the water exits the high-pressure connection without bubbles. Switch off appliance and reconnect high-pressure hose.
Strong pressure fluctuations
Clean high-pressure nozzle: Remove dirt and debris from the nozzle bore, using a needle and rinse through with water from the front.
Check water flow quantity.
Appliance is leaking
Slight leakage from the appliance pump is normal. If the leakage increases contact the authorized customer service.
No detergent infeed
Use spray lance with pressure regulation (Vario Power). Turn the spray lance to "Mix" position.
Clean the detergent suction hose filter.
Check the detergent suction hose for kinks.
Accessories and Spare Parts
Only use original accessories and spare parts, they ensure the safe and trouble-free operation of the device. For information about accessories and spare parts, please visit www.kaercher.com.
Warranty
The warranty terms published by the relevant sales company are applicable in each country. We will repair potential failures of your appliance within the warranty period free of charge, provided that such failure is caused by faulty material or defects in manufacturing. In the event of a warranty claim please contact your dealer or the nearest authorized Customer Service centre.
Please submit the proof of purchase.
Addresses can be found under:
www.kaercher.com/dealersearch
Technical specifications
| Electrical connection | |
| Voltage 220-240 | V |
| 1~50-60 Hz | |
| Power consumption 6 A | |
| Protection class IP X5 | |
| Protective class II | 回 |
| Mains fuse (slow-blow) 10 A | |
| Water connection | |
| Max. feed pressure 1,2 MPa | |
| Max. feed temperature 40 °C | |
| Min. feed volume 8 l/min | |
| Performance data | |
| Working pressure 8 MPa | |
| Max. permissible pressure 12 MPa | |
| Water flow rate 5,7 l/min | |
| Max. flow rate 6,3 l/min | |
| Detergent flow rate 0,3 l/min | |
| Recoil force of trigger gun | 12 N |
| Dimensions and weights | |
| Length | 275 mm |
| Width | 276 mm |
| Height | 803 mm |
| Weight, ready to operate with acces-sories | 6,0 kg |
| Values determined as per EN 60335-2-79 | |
| Hand-arm vibration value | <2,5 m/s2 |
| Uncertainty K | 0,3 m/s2 |
| Sound pressure level LpA | 74 dB(A) |
| Uncertainty KpA | 3 dB(A) |
| Sound power level LwA + Uncertainty | 90 dB(A) |
| KwA | |
Subject to technical changes.
EU Declaration of Conformity
We hereby declare that the machine described below complies with the relevant basic safety and health requirements of the EU Directives, both in its basic design and construction as well as in the version put into circulation by us. This declaration shall cease to be valid if the machine is modified without our prior approval.
Product: High pressure cleaner
Type: 1.676-xxx
Relevant EU Directives
2000/14/EC
2014/30/EU
2006/42/EC (+2009/127/EC)
2011/65/EU
Applied harmonized standards
EN 50581
EN 55014-1:2006+A1:2009+A2:2011
EN 55014-2: 2015
EN 60335-1
EN 60335-2-79
EN 61000-3-2: 2014
EN 61000-3-3: 2013
EN 62233: 2008
Applied conformity evaluation method
2000/14/EC: Appendix V
Sound power level dB(A)
Measured: 88
Guaranteed: 90
The undersigned act on behalf and under the power of attorney of the company management.

CEO

S. Reiser
Head of Approbation
Authorised Documentation Representative S. Reiser
71364 Winnenden (Germany)
Phone: +49 7195 14-0
Fax: +49 7195 14-2212
Winnenden, 2016/04/01
Table des matieres
Sécurité FR 5
www.kaercher.com/REACH

www.kaercher.com/dealersearch
\section*{Caracteristiques techniques}
2006/42/CE (+2009/127/CE)
2011/65/UE
71364 Winnenden (Germany)
Telephone:+49719514-0
Winnenden, 2016/04/01
Indices
Sicurezza. 5
www.kaercher.com/REACH

www.kaercher.com/dealersearch
Dati tecnici
2006/42/CE (+2009/127/CE)
2011/65/UE
71364 Winnenden (Germany)
Tel.: +49 7195 14-0
Fax: +49 7195 14-2212
Winnenden, 2016/04/01
Inhoud
Veiligheid NL 5
www.kaercher.com/dealersearch
Technische gegevens
71364 Winnenden (Germany)
Tel.: +49 7195 14-0
Fax: +49 7195 14-2212
Winnenden, 2016/04/01
Indices de Contents
Seguridad ES 5
www.kaercher.com/REACH

2006/42/CE (+2009/127/CE)
2011/65/UE
71364 Winnenden (Germany)
Tele.: +49 7195 14-0
Fax: +49 7195 14-2212
Winnenden, 2016/04/01
Indices
Seguranga. PT5
Dados techniques. PT 9
www.kaercher.com/REACH

A boa nao atinge a pressao de service
2006/42/CE (+2009/127/CE)
2011/65/UE
71364 Winnenden (Germany)
Tel.: +49 7195 14-0
Fax: +49 7195 14-2212
Winnenden, 2016/04/01
Indholdsfortegnelse
Sikkerhed DA 5
2006/42/EF (+2009/127/EF)
2011/65/EU
Anvende harmoniserede standarder
EN 50581
EN 55014-1:2006+A1:2009+A2:2011
EN 55014-2: 2015
EN 60335-1
EN 60335-2-79
EN 61000-3-2: 2014
EN 61000-3-3: 2013
EN 62233: 2008
Anvende overensstemmelsesvurderingsprocedu-
2000/14/EF: Bilag V
Lydeffektniveau dB(A)
Malt: 88
Garanteret: 90
71364 Winnenden (Germany)
TIf.: +49 7195 14-0
Fax: +49 7195 14-2212
Winnenden, 2016/04/01
Innholdsfortegnelse
Sikkerhet N O
Miljøvern. NO 5
www.kaercher.com/REACH

Materialet i emballasjen kan resirkuleres. Kvitt deg med emballasjen pa miljøvennlig mate.

Relevant EU-directiver
2000/14/EF
2014/30/EU
2006/42/EF (+2009/127/EF)
2011/65/EU

S. Reiser
Head of Approbation
71364 Winnenden (Germany)
TIf: +49 7195 14-0
Winnenden, 2016/04/01

S. Reiser
Head of Approbation
Dokumentationsbefullmaktigad:
S. Reiser
71364 Winnenden (Germany)
Tel.: +49 7195 14-0
Fax: +49 7195 14-2212
Winnenden, 2016/04/01
Sisallysluettelo
Turvallisuus F15
www.kaercher.com/dealersearch
Tekniset tiedot
Sahkollitanta
71364 Winnenden (Germany)
Puh.: +49 7195 14-0
Winnenden, 2016/04/01
www.kaercher.com/REACH

Ta ulika ouokeuoaiac evai avakukwoiua. Atnopipiye tn ouokeuosaia e oikooyikto poto.

Oi TAIcSc OUKEueS TEPIEXouv TOnuTima avakukwaiuaiká, ta otioia tha TpeTie va diatihEvta ia avakukwon. ATOOUPETe TIC TAIIEc OUAKEUEc ME OIKoALoyIKo TpOTIO.
Oi nAekptikec kai oI nAektpovikec oukeuec ouxva Tepiaaavouv Eapntnata, TOn Oe Tepintwn AavOaovnc metaxepionc n atoppipns mTropouv va aToteleouv eotia kivduov yia tnv uyia kai to TepiBaAov. Auta ta Eapntnata eivai oWs attapaitnTa yia tn owtn aeitoupyia tnc oukeu-nc. OI oukeue c Tou pepouv auto to ouuBoo dev ETITpeTTai va TETIOUVtai Ota OKoutidia.

Oi epyaoc kaopou, kata tio otoies pokuTTouv anovepa Tnou Tneipexouv laia, x. nuaio KIVntnpw, nuaioTOU kATW npouc Tuv oxmuTow, EITPTIOVTai mvo e Nauvtnpia Tou dia-Teouv diaxpiotn laiwv.

Oεpyaicεμαπoppuavtiko μtropovvaekteλouvtai mvo oudatooteyeic εntipaveieεεpyaiaεouvdean oto ouotnma atoppoç βpwukouvepu. To atoppuavtiko δev tpeTεi va kataλnyeota nótyea udata n oto edapoc.
περιγραφή συσκεύης
Evtoves biakmuavoeis trieons
71364 Winnenden (Germany)
Tnλ: +49 7195 14-0
Φαξ: +49 7195 14-2212
Winnenden, 2016/04/01
icindekiler
Güvenlik T R
Cevre koruma TR 5
Cihaz tanimi TR6
Montaj TR 6
Isletime alma TR6
Calistirma T R
Taşima. TR 7
Depolama TR8
Koruma ve Bakim TR 8
Arizalarda yardim TR 8
Akesesarveyedekparcalar TR8
Garanti. TR 9
www.kaercher.com/REACH

71364 Winnenden (Germany)
Tel.: +49 7195 14-0
Winnenden, 2016/04/01
OrnaBneHne
Besonacnoctb RU 5
3aunTaOkpykaUoSei cpebl. RU 5
Oncanhe np6opa. RU 6
MoHTaK. RU6
Hauano pa6oTbI. RU 6
3Kcnnyataa. RU7
TpaHcnpOpBka RU7
XpaHeHne RU8
YxOД n TexHnueckoe 06cIyKuBaHne. .RU 8
POMOUB Cnyuae HenoJaOK RU 8
PpHnHaJIeXHOCTn 3aIacHbIe deTaJIu . . . .RU 9
TapaHTnRA 9
TexHueckne daHHbIe RU 9
3aBHeHne O COOTBeTCTBn EU RU 10
Be3onachoctb
IpeepnepBbIM npimHeHem yctpoiCTBa npouHTaTe 3Ty opunHaJIbHyIO nH
CTpykqIIO NO 3KcNlyaTaunn n npnlaeraembte yka3aHnno TExNHke 6e3oNaChocTn. DeNCTByIe TB COOTBeTCTBnC HmN. CoXpaHnTe o6e 6poWOpbl dnn daNBHeJwero noJIb3OBAHNn nn nIe CJeDyUoEro BnaJeBca.
IcnoJb3OBAHHe nHa3HaueHnIO
HaHbMoeHybAnnapaT BbcOKoro DaBHeHnIpeHa3HaueH ToIbKO Ipy NcNoIb3OBAHHB DOMaUHEM XO3RJCTBE.
-ДЯ MOй Maшин, abTomobиNei, CTpoEHn, HCTpyMeHTOB, facaIDOB, Teppac, caIOBbIX npINHaJIeXHOCTeI N T.D. C NOMOuBIO CTpyN BOdBi NOI BbICOKIM DaBHeHneM (PpN Heo6xOUMocTn Cdo6aBJIeHneM MoUux CpeDCTB).
-Пи ATOM npIMHeHIO NOJIeKAT npHaIeKHOCTN,3aIacHbIe YAcTn U NcTReUne CpeCDTBa,pa3peWeHHbIe Ira NcNoJIb3OBAHnA ΦIpMoI KARCHER.Yka3AHn, npINoXeHHbIe K NcTReUm CpeDCTBaM, NOJnEeKAT CO6JIuDeHIO.
CTeneHb onaCHOCTN
ONACHOCTb
Yka3aHue omHocumelbHo HenocpecdmeHHO 2p03a ue onachocmu, komopar npueodum K mJKeJIbIM yeeyam unu K cmepmu.
△PENDyNPEKDEHNE
Yka3aHue omHocumelbHO 803MOXHO nOmeHuaJIbHO onachou cumyaauu, Komopar Moxem npueecmu K mKeIbIM yeebym UUNK Cmepmu.
OCTOPOXHO
Yka3aHue Ha nomenuaIbHo onachyU cmyauu, Komopar moXem npueecmu K noIyuHeu Ie2kuxmpaem.
BHIMAHHE
Yka3aHue omHocumelbHO 803MOKHOJ nOmeHuaJIbHO onaCHou cumyaauu, KOMOPaJ MOxem noBney MamepuaJIbHi yueep6.
CnMBOJIbHa np6ope

He Hanpaenb cmpy oobi nod ebicokum Hanopom Ha IIOdeu, KUOBmHbix, EKIOueHHOe 3NEkmpueeckoe obopyoobaue uHa camo ycmpoucmeo.
www.kaercher.com/REACH
YnakoBoUHbIe MaTePnaJIbI NOJaIOCTc BTOpH- Ho npepa6oKe. YnakoBky Heo6xOIMO yTuIN3npoBaTb 6e3 yuep6a dnn OkpykaIouei cpebl.
OTcnykBwne yctpoCTBa coepKat npiroNbIe DnB TOpNHyO NcONb3OBaHn IeHHbI MaTePnaIbI, KOTopBie DOJXhbl nepeDaBaTcRa Ha nepepa6OtKy. OTCnykBwne yctpoCTBa Heo6xOIMo yTuIN3InPoBaTb 6e3 yUep6a IyIg OkpyKaIOuIe Cpebl. 3NeKtpueckne n 3NeKtpoHbIe np6Opbl qacto CoepKAT KOMNoHEtbl, KOTopBie npn HnPaBnBHom 6paueHn IIN HeHaJIeKaIeYyTN3aUNn PpeCTabIAKT NOT ToEHuaNbHyO onaCHOCTb IIN JeN I3KOJOrNI. TeM He MeHee DaHHbIe KOMNoHEtbl Heo6xOIMbl dIy npaBnBHO pa60bl np6Opa. Pnp6Opbl, 6o3HaueHHbIE 3TNm CImBOLOm, 3anpeSeHO yTuIN3InpOBA Tb BMeCTe C 6bITobBIMn OTXODAMN.
Pa60tblno ouhctke,Be3yIbTaTe KOToPbIX 6pa3yeTc8 OTOXOJaB BODa,CoepKaaJg MaCna, HanpIMep, nPOMbIBKa DBuRaTeN, MoiKa DnHua, DOxKbI pON3BOUHTbc TOnbKO Ha MOeYbIX PNOUaKax C MacNoOTDeJInteJIem.
Pa60TbICMOUIMM CpeCTBaMn DOJXHbI npoBOINTBcra TOJIbKO Ha pa6OuIX NOBepxHOCTaX, He npOHnuaeMbIX DnRA KUNKOCTeN, C NOKJIIOUeHNEMK 6bTOBOI KaHJIIN3aUN. MoUe cpeCTBa He DOJXHbI NonaDaTb B BOIOeMbI INI NOUYB.
OnncanHe np6opa
B daHHom pyKOBOCTBe no 3KcnNpyataun daHO onncaHne np6opac MaKcImaIbHo KOMnKeKTauee. KomJIeKTAuaOTINuAeTcB 3aBNCMOCTn OT MOneJN (CM. ynaKOBky).
KomnneKtaun npnbopa yka3aHa Ha ynakOBke. Pnp pacnakokBKe np6bopa npOBepntb KomnneKtaunHO.
PnO6hApXeHn HEOCTaIOUx npHaJdIeKHOCTe
HnIOBpeXeHn, IOnyueHHbIX BO BpEmr TpaHCnOpTnpOBKn, CJIeDyET YBeDMNTb TOPROByIO opraHn3aunIO,
npoDaBswyo np6op.
PncyHKn cm. Ha BknaJaKe!
1 CoeHHeHne BbICOKO daBJIeHn
2ΓaBbHb BbIKIouaTeIb ,0/OFF" / ,I/ON" (0/BbIKI / I/BKJI)
3 KpOuKn dnn xpaHennCeTeBoro shHypa
4 XpaHHeH WJHaHra BbICOKOr DaBHeHn
5PyKoTka
6 3JIeMeHT IJII NOJIKIOUeHn BOIOChA6KeHn Co BCTPOEHHbIM CETYATbIM ΦINbTpOM
7 BcabsBaIOUm IJnAHr MOUeero CpeICTBa C mIbTpOM MOUeero CpeICTBa N KpbIiKoN.
8 Pe3epByap dIЯ moIooero cpeIcTba
9 CoeINHnTeIbHbI 3JIeMeHT IINIPOKJIIOUeHnB ODBI,
10 XpaenHe cTpyHOn Tpy6Kn
11 XpaHHe npHoro nIcToIeta-pacbIInTeIa
12 CeTeBOI Ka6eJIb CO WTeNCEJIbHOB BNIOI
13 TpaHcnpTHoe Koneco
14 PuyHoi nIcToJeT-pacbInnteB
15 BLOKINOBka pyHoro nIcToIeta-pacblnteIa
16 Cko6a dnia uHaRa BbICOKo DaBneHn
17 WlaHr BbICOKOr DaBJIeHnI
18 CtpyHnA Tpy6Ka c peryJrTOpOM daBJeHnA (Vario Power)
Tpy6ka npedHa3HaueHa dna cambix pacnpoctpaHHeHHbIX 3aau no nucTe. Pa6oee daBneHne peRyInpuyetcBeccTyeneHato MeKdy Min"u,Max". B noIOxehn "Mix" BO3MOxHO do6abJeHne MoO- Uero cpeDCTBa.
IpynnpOBKn pa6oero daBneHna CneJeT OTnyCTNb pbiHar nctOJeTa-pacnbInTeJn NOBepHyTb ctpyHyTOpy6ky B XeNaemoe NonoXeHne.
19 CtpyHnA Tpy6Ka c pfe3oI dIy ydaIeHnra rpa3n DnY yCTOuHBbIX 3aRpa3HeHn
\*B kauectBe onLIMN
20 Mojuəya ətka
PpeHa3HauHa Ipa6oTbIC MOUcIM CpeDCTBOM.
21ΦopcyHkaДЯчNTKNпehoN
INHTEHCBHOROBCEHNBAHNA MOUeero CpeI-CTBa.
22 Mojuuee cpeCTBO
** DononHnteIbHo Tpe6yeTc
23 ApMnpoBaHHb BODaHOH WNaHc CtHaapTHOH MyΦToI
-MNHIMaJIbHbI dIaMeTp 1/2 IIOIma (13 MM)
-MMHMaJIbHaJnHa7,5M.
MOHTAX
Ipeen haayanom 3Kcnnyataun annapaTa yCTaHOBntb npinaraemble He3akpenHHe bYeactn.
PucyHKn CM. Ha BknaJaKe!
PncyHOK A
YcTaHOBnTb n 3aΦnKcnpoBaTb TpaHcNoptHbIe KOpneca.
PncyHOK B
→ HacaNTb n 3aBnHTNTb pyKy dIra TpaHcnpTnpOBKN.
PncyHOK C
HaxoIaIyIOcB KOMnIeKTe CoeINHITeJIbHyO MyfTy NOcOeINHITe K 3IeMeHTy aIInapaTa IJa IOdaU BObl.
PncyHOK D
→ 3Bnueb 3axm dIy IJnaHa BbICOKO rabneHn 13pyHOro nCTOneta-pacnbInTeTn.
PncyHOK E
BCTaBnTB WNaHr BbICOKOro DaBHeHnB pyHOn nICTOJET-pacnbIInTeJIb.
Bdabntb ckoy do qnkcaun. NpOBepntb HadeKHOCTb KpeHHeHry, NotaHyB 3a WJaHr BbICOKOrO daBJeHry.
Haayano pa6oTbI
NocTaBnTb yCTpoNcTBo Ha poBHyIO NOBepxHOCtB.
PncyHok F
CoeHHTbIaHr BbICOKOrO daBHeHnC coeHHeHnEM BbICOKOrO daBHeHn.
→ BCTaBnTb ceTeByIO wTeNceJIbHyIO BnIky Bpo3eTKy.
Iopdaa BObI N3 BOOnpoBODa
IapaMeTpblnnoKlnoueHna yka3aHbHa 3aBOcko Ta6JNue Hpa3dJe "TexHnueckne daHHbe".
CobnoTaIe npednicaHna npednpnraTna BOOCha6-KeHH.
BHIMAHHE
3aapra3neHua, codepkauece 8 oede, Moaym eb13- 6amb noepkdeHua Hacoca blicoko20 daeneHua u npuHaednHexOcmte. Dna 3auumbI peKomeHyemcra UcnoIb3oeamb eodHOJoumbp KARCHER (cneuuaIbHbe npuHaednHexHocmu, Homep dnn 3aka3a4.730- 059).
BCTaBnTb WlaHr NpaHn BODbl B COOTBeTCTByHO- Uee coeINHeHne.
→ POnCOeHNHTb BOaHOI WNaH K BOaONPOBOy.
→ ΠοηHOCTBIO OTKpoIe BOdONpOBOhBkpaH.
3Kcnnnyatauia
BHIMAHNE
Pa6oma ecxyu e meyehue 6onee 2 mHym npueodum K ebixody u3 cmpo haocca ebicokoo daenue. Eclu ycmpoucm8o e meyehue 2 mHym He habupaem daenue, mo eo cneoyem ebiknouumb u deucmeobamb e coomaemcmauu c yka3aHuaM, komopbie npueodamcra 2naabe ,POMOUBcnyuae Henoanadok".
Pexm pa6oTbI BbICOKO rDaBJeHnA
OCTOPOXHO
Ppu Moke naKupoBaHHb noeepxHocme cnedyem bidepXueamb paccmohue 30 cm om fopcyHKu do noeepxHocmu, uMo6bl u36examb noepexdeHua naKupo8ku.
BHIMAHHE
He yucmumb aemomobunbHbIe wuHbI, naokpacouhoe nokpbimue uUyecmeunbHbIe noBepxHocmu (Ha npumep, depeeaHHbe) c npumeHenmuem fpe3bl dny ydaenHu apr3u. CyuecmByem onachocmb noBpeXkdeHua.
PncyHok 6
HaeneHbTe Ha pyuHoi nIcToIeT-pacNbIInIeNb CTpyHHyTO Tpy6ky I3aΦnKcnpyIe ee, NOBepHyBa 90°.
BKNIOHTb annapaT ,I/ON" (I/BKJI).
Pa36JIOKINPOBaTb pIur pyHOro nIcToIeTa-pac- nblNTeJIa.
→ Notaryt b 3a pbyar, annapaat BKJIOHTcra.
Yka3aHne: Ecn pbyar cHOBA ocbo6oNTc, annapat CHOba OTKnOHTc. BbICOKoe daBnEHe coXpaHReTc B CnCTeMe.
Pexm pa6oTbI c MOIOUc m CpeCTBOM
PnmeHne:MoOoee cpeCTBO MOKeT IO6aJIaTb-Cr TOJbKO pN H3KOM DaBHeHH.
ONACHOCTb
Ppu npumehenu yucmuaux cpecme cneyem coBnodamb mpeboauncaepmuufukama 6e3onacnocmu npou3oDumela, ocobehno yka3aHura omHocumelho npumehu cpecme uHDubdyaIbHO 3auumbl.
PncyHok H
3aIITb pactbop MOUoero cpeDCTBa B pe3epByap IЯ MoUoero cpeDCTBa (co6JIIOdA yKa3aHnna no Do3npOBKe Ha eMKoCTn IЯ MOUoero cpeDCTBa).
PncyHok
3aKpbItb pe3epByap Inra MOUero cpeIcTBA KpbIuKOI.
3aBnHyb peepByap IJIa MOUeRo cpeCTBa B annapaT.
PncyHok J
Cemky HnIb3r no6peKdAmb.
→ BbIaHHTb cTeKy nNoCKORY6aAMn.
→ Cetky ouuatab noD npoToUHO BDOI.
CHOBA BCTaBtB CETKY B NOBOD BObl.
OuNCTka qnIbTpna Jn MOUeero CpeIcTba
IpeepdIInTeBbIM XpaHeHnEM,HanpImep,3IMoN:
→ CHNMTe ΦnIbTp n3 BCaCbIbAUoIero wJHaHra dnn MOUoIero CpeDCTBa n npOMouTe erO npOTouHoi BOdoi,
POMOUIB CNYUae HENOLAIOK
He6oIbIe HeIcnpaBHOCT MoXHo yCTpaHHTb camOCToTeIbHO C NOMOuBcNeDyUoero ONUsHaN. B cIyuae comHeHnCJIeDyET o6paTaBcB yNoJHMoueHHyO cIyK6y cepBnCHOrO 06cIyKuBaHn.
ONACHOCTb
Onachocmb npaxehua 3neKmpuueckum mOKOM.
→ Ipeo npoebeHnIobix pa6om no 06cnyku- bauHIO ycmpoucmeo cneoyem bIKNUOumb u 3- 8neub umencelbHyIO BuNKU u3 po3emku.
Pn6op He pa6oTaet
→ BbITaHyTb pbIar pyHOro nIcToIeta-pacNbJIInTeJIra, np6Op BKJIIOHTCRA.
→ PpOBePbTe COOTBeTCTBnE HAnpJxKeHnY, yKa3aHHoRTO B 3aBOdCKoT Ta6NnUKe, HAnpJxKeHnIO nCTouHnka3NeKtPo3Heprn.
→ IpoBepntb ceTeBoi Ka6eIb Ha NOBpeKdEHHa.
DabHeB np6ope He yBeHnUBaetcA
→ PpOBePntb HAcTpoNkCtpyHOn Tpy6Kn.
PpOBepntbdoCTaTOUHOCTbObeMaNoaUNBObl.
BbHbTe c nOmoIbIO nIOCKoRy6ueB ceTeBOI 0nIbTp I3 3JIeMeHTa IJRA BOIOChA6KeHnI nIpoMoIte erO npOTouHOI BOIo.
YdaJIeHHe Bo3dyxa n3 np6opa: BkJIIOHTb annapat 6e3 noIKNIOUeHHORo BBICOKOHAnOPHoro WJHaHra n NOIOXJaTb (he 6OJee 2 MNHyT), Noka n3 BblcOKOHAnOPHoro WJAHra He NaHET BbIXOJITb BOJa 6e3 ny3bIPbKOB Bo3dyxa. BblKIOHTb np6Op n3aHOBO NoDCOEINHITb BBICOKOHAnOPHbI WJaNHR.
CnIbHbIe nepenaIaBneHna
OuHCTnTb φopcyHky BbICOKoRo DaBHeHna: IroN-KoYdAJIITb 3aIrp3HeHne n3 OTBepCTnq φopcyHkn N IpOMbITb ee Cnpedn BODoI.
→ PioBepbTe KOINueCTBO IOdaBaEMoB BoDbI.
Pn6op HereepMeTuyeH
He3haHTeJIbHaH HeIepMeTnUHocTb annapata 06-ycIOBHeHaTexHnueckmN OcObeHOCTAm. Ppi CINbHOH HeIepMeTnUHocTn 6paTHTeCb B aBTOpu3OBaHHyO cnyk6y cepBuCHoro 06cnyKuBaHnA.
YnctTaeCpeDcTBoHeBCaCbIBaeTc
IcnoIb3oBaTb CtpyHyTo Tpy6ky C peryJrTopom DabHeHnra (Vario Power). NObepHyTb CtpyHyTo Tpy6ky B noNoKeHne „Mix"
OuHCTnTb HINbTp BO BCaCbIbAHOcEM WNaHRe MOIOUeO CpeDCTBa.
PpOBePHT BcAcBbAIOUm WnHaHr DnMaMOUeRo CpeDCTBa Ha nepeRn6bl.
PpHnHaJnxHoCTn n 3anaChbIe deTaJIi
NcnoB3yuteOpunHnabHbIe npnHaJnxKHOCTn 3a- nuaactn - TOnbKO OHN rapaHTnpuyOT 6eOanachyo N 6ecnepe6oHy opaToY yctpoiCTBa.
HopMaUIO O npuHaJnxKHOCTx N 3aNCACTX Bbl MOKeTe HaHTn Ha caTte www.kaercher.com.
TapaHTn
B kaxdoi cTpaHe DeiCTByIOT COOTBeTcBEHNO rapaHTnHbIe ycIOBnA, n3daHHbIe yNONHMOUeHHo OPraHN3auei c6bIa HaWe npOdyKuIM B daHHO CTpaHe. Bo3MoXhIbe HeNCnpabHocTo np6opBa TteHne rapaHTnHoro cPoka Mbl yctpHaREM 6ecnlaTHO, ecnn npuHa3aKnHouaeTcB DepeKtax MaTePNaON BnN Ow6kax npn N3rTOBJeHn. B CJIyuae BO3NHKObeHn npTeHsBn B TeueHne rapaHTnHoro cPoka npoc6ba o6paatbcra, mEer npn Ce6e Yek O NOKyIke, B ToproByo opraHn3aunIO, npodABWyo Bam np6Op nIN B 6JnxKaIyUo yNONHMOUeHHyO cIyX6y cepBnCHOrO 06CnyKBAHn.
Data BbInycka OTo6paXaETcHa 3aBODCKoT Ta6nue K 3aKoInpOBaHHOM BVNe. Pn 3tOM OTdEnbHbIe UΦpbl IMeIOT CneDuOuee 3HaueHHe::
Приимер: 30190
3 roB BbInycka
0 CToneTne Bbinycka
1 DecaTnIeTne BbInycka
9 BTOPAuPpa Mecaa BBInycka
0 nepBaIuΦpa MeCya BbInycka
TakIM 06pa3OM, B daHHOM npHMepe K0d 30190 O3Haayet DaTy BbInycka 09 /(2)013.
aDpeCa Bbl CMOKeTe HaHTn Ha Be6-CTpaHnue: www.kaercher.com/dealersearch
TexHnueckne daHHbIe
71364 Winnenden (Germany)
Ten.: +49 7195 14-0
ΦaKc: +49 7195 14-2212
Winnenden, 2016/04/01
Tartalomjegyzék
Biztonsag. H U
www.kaercher.com/REACH

71364 Winnenden (Germany)
Tel.: +49 7195 14-0
Fax: +49 7195 14-2212
Winnenden, 2016/04/01
Obsah
Bezpečnost CS5
Ochrana zivotniho prostredi CS 5
Popis zařizení CS6
Montáz. CS 6
Uvedeni do provozu CS 6
Provoz. CS7
Preprava C S
Ukladani C S
Osetrovani a udrzba. CS 8
www.kaercher.com/REACH

www.kaercher.com/dealersearch
Technické udaje
2006/42/ES (+2009/127/ES)
2011/65/EU
71364 Winnenden (Germany)
Tel.: +49 7195 14-0
Fax: +49 7195 14-2212
Winnenden, 2016/04/01
Vsebinsko kazalo
Varnost SL 5
Varstvo okolja SL5
Opis naprave. SL 6
Montaža. S L
Zagon 6
Obratovanje. SL7
Transport. S L
Skladischenje SL8
Vzdrzevanje.. 58
Pomoc pri motnjah SL 8
Pribor in nadomestni deli.. .SL 8
Garancija S L
Tehnicni podatki.. 59
Izjava EU o skladnosti.. SL 9
Varnost
Pred prvo uporabo vase naprave preberite to originalno navodilo za uporabo in pri
lozene varnostne napotide. Ravnajte v skladu z njimi.
www.kaercher.com/dealersearch
Tehnični podatki
71364 Winnenden (Germany)
Tel.: +49 7195 14-0
Winnenden, 2016/04/01
Spis tresci
Bezpieczenstwo PL5
www.kaercher.com/REACH

www.kaercher.com/dealersearch
Dane techniczne
2006/42/WE (+2009/127/WE)
2011/65/UE

S. Reiser
Head of Approbation
71364 Winnenden (Germany)
tel.: +49 7195 14-0
faks: +49 7195 14-2212
Winnenden, 2016/04/01
Cuprins
Siguranta. R O
www.kaercher.com/REACH

Transportul in vehicule
Goliti rezervorul cu solutie de curatat.
Asigurataparatulcontraalunecarii rasturnarii.
Depozitarea
△PRECAUTIE
www.kaercher.com/dealersearch
Date tehnice
Racord electric
Directive UE respectate:
2000/14/CE
2014/30/UE
2006/42/CE (+2009/127/CE)
2011/65/UE
Norme armonizate utilizezate:
EN 50581
EN 55014-1: 2006+A1: 2009+A2: 2011
EN 55014-2: 2015
EN 60335-1
EN 60335-2-79
EN 61000-3-2: 2014
EN 61000-3-3: 2013
EN 62233: 2008
71364 Winnenden (Germany)
Tel.: +49 7195 14-0
Fax: +49 7195 14-2212
Winnenden, 2016/04/01
Obsah
Bezpečnost SK 5
Pokyny k zlozeniu (REACH)
Aktualse informácia o zloženi najdete na: www.kaercher.com/REACH

Obalove materialy su recyklovatel'ne. Obal zlikvidujte podla ekologickych zasad.

www.kaercher.com/dealersearch
Technické udaje
Elektrická przypojka
| Napätie 220-240 | V |
| 1~50-60 Hz | |
| Elektrický prud 6 A | |
| Stupeř ochrany IP X5 | |
| Krytie II | 回 |
| Sietový istic (pomalý) 10 A | |
| Vodovodná prípojka | |
| Prívodný tlak (max.) 1,2 MPa | |
| Prívodná teplota (max.) 40 °C | |
| Privodné množstvo (min.) 8 l/min | |
| Üdaje o vykone | |
| Prevádkový tlak 8 MPa | |
| Max. prípustné tlak 12 MPa | |
| Dopravované množstvo, voda 5,7 l/min | |
| Maximálne dopravované množstvo 6,3 l/min | |
| Dopravované množstvo, Čistiaci prostriedok | 0,3 l/min |
| Reaktivna sila ručnej strikacej pišto-le | 12 N |
| Rozmery a hmotnost' | |
| Dlžka 275 mm | |
| Śirka 276 mm | |
| Vyška | 803 mm |
| Hmotnost', s príslušenstvom pripra- vené na prevádžku | 6,0 kg |
| Zistené hodnoty podl’a EN 60335-2-79 | |
| Hodnota vibrácić v ruke/ramene | <2,5 m/s2 |
| Nebezpečnost' K | 0,3 m/s2 |
| Hlučnost' LpA | 74 dB(A) |
| Nebezpečnost' KpA | 3 dB(A) |
| Hlučnost' LwA + nebezpečnost' KwA | 90 dB(A) |
2000/14/ES: Priloha V

S. Reiser
Head of Approbation
71364 Winnenden (Germany)
Tel: +49 7195 14-0
Fax: +49 7195 14-2212
Winnenden, 2016/04/01
Pregled sadržaja
Sigurnost H R
Zastita okolisa . HR5
Opis uredaja HR6
Montaza. H R
www.kaercher.com/REACH

Materjali ambalaže se mogu reciklirati. Ambalažu odložite na OTPad u skladu s propisima o ochuvanju okoliša.

Stari uredaji sadrze vrijedne materijale koji se mogu reciklarati te bi ih stoga trebalo predati kao sekundarne sirovine. Stare uredaje odlozite na otpad u skladu s propisima o ocuvanju okoliša. Elektrni i elektronicki dijelovi cesto sadrze sastavne dijelove koji pri pogresnom rukovanju ili pogresnom zbrinjavanju mogu prestavljati potencijalnu opasnost za ljudsko zdravlje i okolš. Ipak, ti sastavni dijelovi nužni su za propisani pigeon uredaja. Ureduzi označeni ovim simbolom ne smiju se odlagati u komunalni otpad.

www.kaercher.com/dealersearch
Tehnički podaci
2006/42/EZ (+2009/127/EZ)
2011/65/EU
Primijenjene uskladene norme:
EN 50581
EN 55014-1: 2006+A1: 2009+A2: 2011
EN 55014-2: 2015
EN 60335-1
EN 60335-2-79
EN 61000-3-2: 2014
EN 61000-3-3: 2013
EN 62233: 2008
71364 Winnenden (Germany)
Tel.: +49 7195 14-0
Winnenden, 2016/04/01
Pregled sadržaja
Sigurnost. S R
Zastita zivotne sredine . SR 5
Opis ureda ja SR6
Montaza. S R
Stavljanje u pogon. SR 6
Rad . SR 7
Transport. S R
Skladistenje. SR 8
www.kaercher.com/REACH

Ambalaža se moze ponovo preraditi. Ambalažu odložite u OTPad ekoloski primereno.

Stari uredaji sadrzej vredne materijale sa sposobnoscu recikliranja i treba ih dostaviti na ponovnu preradu. Stare uredaje odlozite u otpad ekoloskiprimereno.
Elektricni i elektronski uredaji sadrze cesto sastavne delove koji, u slucaju nepravilnog rukovanja ili nepravilnog odlaganja u opstad, mogu da predstavljaju potencijalnu opasnost za zdravlje Ijudi i okolinu. Ipak, ovi sastavni delovi su neophodni za pravilan rad uredaja. Uredi koji su označeni ovim simbolom ne smeju da se odlažu u kučni opstad.

Radovi na cisćenju kod kojih nastaju uljne OTPadne vode, kao što su pranje motora, pranje donjug dela vozila, smeju da se izvode samu perionicama sa separatorom ulja.

S deterdžentima se sme raditi samo na vodonepropusnim radnim povrsinama koje su prikljucene na kanalizacionesystem. Ne dozvolite da deterdženti prodru u povrsinske vode ili tlo.
Opis uredaja
U ovom uputstvu za rad opisana je maksimalna oprema. U zavisnosti od modela postoje razlige u sadrzaju isporuke (vidi ambalazu).
www.kaercher.com/dealersearch
Tehnicki podaci
2006/42/EZ (+2009/127/EZ)
2011/65/EU
Primenjene uskladene norme:
EN 50581
EN 55014-1:2006+A1:2009+A2:2011
EN 55014-2: 2015
EN 60335-1
EN 60335-2-79
EN 61000-3-2: 2014
EN 61000-3-3:2013
EN 62233: 2008
71364 Winnenden (Germany)
Tel.: +49 7195 14-0
Winnenden, 2016/04/01
CbDbPkaHne
CnryphocT BG5
Ona3BaHe Ha OKoHaTa cpea BG 5
OncanHe Ha ypeJa BG6
MoHTaK BG6
Ipyckahe B ekcnnoataaia BG 6
Ecknoataua BG7
TpaHcnpT. BG7
Cbxpanenne BG8
PnKn n PndpBxka BG 8
IOMOu npn HEn3npaBHOCTN BG8
PnHaJNeXHocTn npe3epBn yactn .BG8
TapaHua. BG 9
Texnueckn daHHN BG9
ECДeKnapaun3a cBoTBcTbue .BG9
Cunypnoct
Ppei npBpTO n3noI3BaHe Ha Baunypei npOyeTe TOBa opuHnHaHO ynT
BaHe 3a pa6oTa n npInnoXeHnTe yka3aHnna 3a 6e3Onac-HocT. DeIcBaIte cNopeTdax. 3ana3e Te DBeTe KNHXKn 3a No-KbCHA ynotpe6a nn 3a eBENTyaJIeN NocNeDBAu C6ObCTBeHnK.
YnoTpe6a no npedHa3NaueHne
N3noI3BaIte ypeDa 3a noUHCTBaHe NOD BnCOKo HaJIraHe cAmO B YAcTHN DOMAKINCTBa.
-3a nouchTbaHe Ha MaunHn, ABTomo6nH, CTponTeHH KOHCTpyKuHN, HNCTpyMeHTn, facaH, TepaCn, rpaHnckn ypeDn np. C BOHa ctpy nOd BVcOKo HaJrahe (aKe e Heo6xOIMo C do6aBka HaNouchTbaU npenapaTu).
-cpa3peHEnOT KARCHER npHaJnEHHocTn, pe3epBHN YacTN nNouchTbaU npenapATn. Cna3BaIte yKa3aHnraTa, npINIOKeHN KbM NouchTbaUInTe npenapATn.
CTeneHnHa onachoct
ONACHOCT
Yka3aHue 3a HenocpeDcmeHo ap03uO anachocm, KOmo eodu do mekku meenechu HapaHraBaHur unu do Cmbp.
△NPEDyUNPEXDEHNE
Yka3aHue 3a 8b3MOxHa onacha cumyaucu, Koarmo MoKe da doeede do mexku meenechu HapaHaeHuur unu do cmbpm.
△PENEIA3NIOBCT
Yka3aHue 3a eb3MOxHa onacha cumyauzu, Koymo MoKe da doede do Jeku HapaHaeBuHa.
BHNMAHNE
Yka3aHue 3a 6b3MOxHa onacha cumyaun, Koymo MoKe da doede do MamepuanHu uemu.
CnmboJnHa ypeJa

He hacoueame cmpyma nod eucoko Ha Iraahe KbM Xopa, KueomHu, AkmuHo enekmpuuecko oobpydeae uuu KbMa camur ypeo.
Ypeda da ce na3u om 3ampb38ahe.
Ypeobm He buea da ce Eknouea Henocpedcmeho KbM obuecmehama mpeka 3a numeHa eoda.
Ppepa3n npncnocobenra
△PENEIA3NBOCT
IpeNa3Hume npucno6bneu cnyxam 3a 3a-uma Ha nompe6umena He 6uba da 6bdam npomeHa unu 3ao6ukanHu.
PpeKbcBauHa ypeDa
PpeKbcBaHT Ha ypeHa npeIOTBpaTBA HenpeHAmepeHOTo NyckaHe B EKcIIoataaHa ypeHa.
Yka3aHn3a cbCTaBKeTe (REACH)
AkyaHa HOpMaun 3a cbCTaBKeTe He HamepuTe HA:
www.kaercher.com/REACH

OnakOBbHnTe MaTePnaIIMoraT da ce peuKnIpaT. MoIa OTCpHaBaIte OnakOBKIne KaTO OTNaDbU, Ona3BaIKN OKONHaTa CpeDa

CTapnte ypeiNbBpKAT ceHHMaTePnAIn, noDnEkaUHa peuKnIpaHe, KOTo MoRat da 6bDat ynoTpe6EHn NOBtOHO. Monr OTCpaHBAITE CTapnte ypeiN KATO OTnaDbU, Ona3BaIKoKOHATA cpeia.
EneKtpnuecknte n eNeKtpoHHnTe ypeHn YecTo cbBpKaT cbCTaBH NactN, KOUTnp HnepaunHo 6opabHe uHn HnpaBnHO n3XBpIHa He MoRat Da npedctaBnBaT NOteHnAHa onachocT 3a OBeWkoTO 3dpabe H 3a OKonHata cpeHa. Bbnpekn TOBa 3a npabnHata ekCnloataaHa Ha ypeInTe Te3n CbCTaBH NaCTn Ca Heo6xOdmN. 0603NaehnTe C To3n CNMBon ypeHn He Tpr6Ba da 6bDat n3XBpJIHN C 6ntOBtne OTnaDbu.

IeHocn no NouchTbaHeTo, npu KOnTO ce OTJe- Ia Mpbcha B0da,CbDbpxkaMa Macna,HanpImep npn MneHe Ha DnurateJin, MneHe Ha NODobe, MOKe Da Ce N3BbPwBa Camo Ha Mecta, KbTeTo Ca npedBndeHn pe3epBoapn 3a cbbnpaHe Ha Macna.

Pa60tata c NouchTbaun npenapatn e no3BOJeha camo Bbpxy yctOuHNB Ha TeUHOCTn pa60THN NOBbpxHOCTc N3BOD KbM KaHaJIIm3auJrTa 3a MpbCHa BOda. He dOnyckaIte NouchTbaunTe npenaPATn da nonadT BbB BOHNTE baceHHn JIn NOvBAta.
OnncanHe Ha ypeDa
B Ta3n HNCTpykun 3a ynoTpe6a e onncaHo MaKcImaJIHOTo 06OpyDbaHe. B 06ema Ha doctabka mma pa3JnKnB 3aBNCIMOCT OT MOeJa (BnxTe OnakOBkata).
O6embT ha DocTaBka Ha ypea e n3o6pa3eH ha onakobkata. Ppi pa3oNaKOBaHe npObepTe daJIu cbDbpKaHneTo e nbNHO.
PnIINCBaun npHaJNeXHocTn nn npTpaHCnpTHN 10 MoJyBEdomeTe Baun Tbproe.
BuxTe pfurpnte Ha pa3rbaHaTa Ta CtpaHua!
1ИЗВОДзавсOKOналяганe
2П配电вачи на урета / ^ / / ^
3 Kyka 3a cxbxpanHeHne Ha 3axpanBaunKa6eI
4 Macto 3a cbxpanenHe Ha Mapkya 3a pa6ota noHaJraHe
5ДьбЖka3aТранспoptиранe
6Bp3ka 3a B0da C Brpaedha ZeKa
7 BcmykaTeIeH Mapkyu nouchTbau npenapat c cnntbp nouchTbaa npenapat n kanak
8 Pe3epBoap nouchTbaa npenapaT
9 Kynnnyr 3a Cbpb3BaHe KbM 3axpaHbaHe C B0da
10 MrcTo 3a CbXpaHeHne Ha CTomaHeHaTa Tpb6a
11 Macto 3a cbxpanenHe Ha nctoneta 3a pbHOp npbckaHe
12 Mpexobn 3axpaHbaa Ka6eI c uenceI
13 TpaHcnpTHO KOJIeNo
14 NICTOJET 3a pBHyo npbckaHe
15 BLOKINOBKa NICTOJeT 3a pBHyNo npbckaHe
16 Cko6a 3a mapkyua 3a pa6oTa nOu HaJraHe
17 Mapky 3a pa6oTa noH naIraHe
18 Tpb6a 3a pa3npackBaHe c perynipaHe Ha HanaHetaTo (Vario Power)
3a Hau-6nHHe BIOBe NOUCBaHe. Pa60T HTO HraHaHe MoKe Da ce perynipa 6e3cteneHHO MeJy Min" n.Max".B noNoKeHne ,Mix" moKe da Ce Do3npa NoCCTBaU npenapat.
3a perynipane Ha pa6oTHOTo HnIrahe nycheTe IocTa Ha nIcToJeTa 3a pbHNo npbCKaHe n 3aBbPte Pa3npbckBaUaTa Tpb6a Ha XeHaHTo NonoXeHne.
19 Tpb6a 3a pa3npbCKBaHe c MeJaUka 3a MpbCOTnra Ta
22 PouncTbaa npenapaT
**ДоьнHTeHо e Heo6xOuMo
23Подсилен c Teктил МарКуч 3a BOda cbc ctaHdapTeH KynIyHr.
3aunTa OT 3ampb3BaHe
BHIMAHHE
He HanbIHO u3npa3HeHume ypeDu u npuHaadnHexHoc Mu Mozam da do8edam do 3ampb3BaHe. N3npa3Heme yepa u npuHaadnExHocmume HanbIHO u zu 3auumeme npomue u3Mp3BaHe.
3a n36yBaHe Ha 7eTn:
→ ɪnɪpɑaɪsHætE ypeə haɪbɪnHo oT Bɔdɑtæ: BkɪnʊcTe ypeə 6e3 nɒBbɪp3aɪn MapKу 3a pa6oTa nɒd hʌŋraHe i 6e3 nɒBbɪp3aɪHO 3axpaɪhBaHe c Bɔda (mʌkC. 1 mɪn) nɪsɪyaKaɪte, ὁkɑtO oT nɪsBOda 3a BɪncOko hʌŋraHa e cnpe da nɪsɪnɪ3a Bɔda.ɪsɪkɪnʊcTe ypeə.
YpeJa n BCnUKn npHnAaJIeXHoCTn Da ce cbxpaHaBt B 3aIuTeHO OT 3Ampb3BaHe MrcTo.
PnJn nOaDpBxKa
ONACHOCT
Onachocm om mokoe yap.
Ipeu ecuyku deuHocmu no ypea mou da ce u3- Knouu u da ce u3bau uencena.
POMOu npH HEn3npaBHOCTN
MoKeTe cAmn Da OTcTaHInTe Dpe6HInTe NOBpeN, KaTo CNeDbATE DaDeHNte No-DOny ONncAHn.
B cnlyaHa cblmHeHne ce o6bphete KbM OToPn3npaH cepBn3.
ONACHOCT
Onachocm om mokoe yap.
Ipedu bcuku deuHocmu no ypea mou da ce u3- KIOUu U da ce u3eau u enceja.
YpeIbT He pa6oTu
→ ⅢdþpnaTe nocTa ha nucToeta 3a pbHNO npb-ckaHe, ypeBbT ce BKNIOyBa.
→Пюоверета ддл пооченOTHa TINOBATA Ta6eJI-KaTa HAnpeXeHne CbBnada C HanpeXeHneTo Ha N3TOUHnKa Ha TOK.
IpoBepeTe 3axpaHbAuznKa6eI 3a yBpeKdane.
YpeBt He doCTura HanaRaHe
→Пюверетен actpoikataHa Tpb6ata 3a pa3npbc-KBaHe.
ΠροΒερετe, ἀπη ποδαναHετο ὅν BΟγ e c ἀσθα-TbύHo KΩΙΝΥΕCTBO.
I3TeIJIeTe ueKkaTa OT Bpb3KaTa 3a KpaHa 3a BOda C NOMOuTa Ha IIIOCKn KNeUu I a NOUcTeTe IOd TeuaBa BOda.
06e3Bb3dUwabaHe Ha ypeHa: BkIIOyete ypeDa 6e3 mapkyu 3a pa6oTa nOd HAnrahe Nn3yakaKe Te (MaKc.2 MNHyTu), DOKATO BOdaT a3ANOChE Da n3- IIN3a 6e3 Mexypeta OT IN3BOda 3a BnCOKo HAnraHe. IN3KIOyete ypeHa n OTHOBo NOdBpbXeTe mapKyua 3a pa6oTa nOd HAnraHe.
CnHn Kone6aHnB HaNraHaTeO
Πочиствае на дюза високо habярах: Maxhete 3ambpcraBaHnryta OT OTbopa Ha dюзаТС nOMOцтА NaИглa ИЗплakHete C BOda HAnpeД.
→ПpoBepeTe De6uTa Ha BoDaTa.
YpeBt He e xepMeTnueH
→ MankaTa JInca Ha xepMeTnUHocT Ha ypeJa e o6yCNoBHea Texnueckn. Ppi CunHa Jnnca Ha xepMeTnUHocCe 06bPheTe KbM OToPiuPAH cepBu3.
IOncTbaOTo CpeDCTBO He Ce 3acMyKBa
Da ce n3noJ3Ba Tpb6a 3a pa3npackBaHe c peryiPapaHe Ha hajraHaTe (Vario Power)
Tp6ata 3a pa3npckBaHe da ce 3aBbptn B noIOKHe "Mix".
→ ΠоунстeteфитьраHaBCMyKaTeHnMaMapKyu3a NOUHCTBaAIO CpeIcTBO.
Пюоверете BCMykaTeHnma Mapky 3a NOuchTbaUcO cpeДСТВО 3a OьHaTи MeCTa.
PnHaJnxHocTn np3epBn qactn
N3noJ3BaIte cAmO opuHnHaJIH aKceCoap n opuHnHaHN pe3epBHN qAcTn, NO To3n Haun HcNpyraTe 6e3onachata n 6e3npo6mHa ekcnnoataaHa ype- da.
MozheTe Da Hamepnte NnHOpMaun 3a akcecoapn ne pe3epBn Yuactn Ha www.kaercher.com.
Rapanz
BbB BcKa CtpaHa BaxaT rapaHUnOHnTe ycNoBn, ny6JNKyBaHN OT OToPn3npaHATA OT Hac dNCTpn6yTopcKaΦnMa.EBeHTyaJIHn NOBpeDN Ha BaunyypeIOTCTpaHIM B pAMKITE Ha rapaHUnOHnCspk 6e3nnatHo,aKO CE Kacae 3a DeΦeKT B MaTePnaHnTE nIN npi npOn3BODCTBO.B rapaHUnOHe cnyaA CE o6bpHete KbM DnCTpN6TyOpa Nn NaH-6n3KnO TOpN3npaH cepBn3,KATO PpeDCTaBnTe KACOBa7BeJExkka.
Adepeu He HamepuTe Ha:
www.kaercher.com/dealersearch
TexHHueckn DaHHN
| Еléкtripецко зхранвае | |
| Нашижени 220-240 | V 1~50-60 Hz |
| Консу мачи ratа на тok 6 A | |
| Граду с на зашита IP X5 | |
| Клас зашита II | 回 |
| Предпазител (иментел) 10 A | |
| Зхранвае с вoda | |
| Налгаце на постывацата вoda (makc.) | 1,2 MPa |
| Temпература на постывацата вoda (makc.) | 40 °C |
| Дебит за постывацата вoda (mн.) | 8 Л/мен 8 Л/мен 8 Л/мен 8 Л/мен 8 Л/мен 8 Л/мен 8 Л/мен 8 Л/мен 8 Л/мен 8 Л/мен 8 Л/мен 8 Л/мен 8 Л/мен 8 Л/мен 8 Л/мен 8 Л/мен 8 Л/мен 8 Л/мен 8 Л/мен 8 Л/мен 8 Л/мен |
dannn 3a MouHocTta
Pa60THo HnlaIraHe 8 MPa
MakcmaHNo donyctnmo hajrahe 12 MPa
Ie6nt,Boa5,7n/MnH
MaKcImaJIeN De6nT 6,3 n/MnH
Ie6nt, npenapatn 3a nouchTbahe 0,3 n/MnH
CunaHaOTnpaHa nictoeta 3a 12N pbyHO npckaHe
Pa3mepn Terna
Дьнина 275 MM
UnpuHa 276 MM
BucouHa 803 MM
Terno, B roTOBHOcT 3a pa60Ta c npn- 6,0 Kr HApJNeXHocTu
YctaHOBeH cToHocTn cbIacHo EN 60335-2-79
| Стоимост на вибрацнист в облес- Та на длива - ръкatable | <2,5 M/ceк2 0,3 M/ceк2 |
| Hecinурноct K | |
| Нubo на звуka LpA | 74 dB(A) |
| Heусточиноct KpA | 3 dB(A) |
| Нubo на звуковая мошноct LWA + hy- усточиноct KwA | 90 dB(A) |
3ana3BaMe cn npaBoTo Ha TexHnueeCKn npomeHn.
ECДeКларацnia 3a cboTBetCTBHe
C HactoIooTO DeKnapuPame, Ye CHTnpaHaTa No-dOmy MaunHa CbOTBeTCTBa NO KOHcENU IN KOHcTpkyuN, KaTOn IIO Haunn Ha IPOUN3BOJCTBO, PpUlaH O T HAc, Ha CbOTBeTHnte OCHOBn N3NCKBaHn 3a TexHuecka 6e30NaChOcT n 6e3BpeDHOCT Ha DInpeKtNBte Ha EC. Ppi npomeHn Ha MaunHaTata, KOnTo He ca CbLnacyBaHn C HAc, HactoIaaTa DeKnapauN ryn BaNdHOCT.
PpOdyKT: PapOuNCTaUka/napocTpuyka 3a pa-60Ta nOd hAraHe
Tun: 1.676-xxx
Hamnpaun npnloxe Hne DnpektnBuHa EC:
2000/14/EO
2014/30/EC
2006/42/EO (+2009/127/EO)
2011/65/EC
Hamepnn npnloKeHne xapmoHn3npaHn cTaHdapTN:
EN 50581
EN 55014-1: 2006+A1: 2009+A2: 2011
EN 55014-2: 2015
EN 60335-1
EN 60335-2-79
EN 61000-3-2: 2014
EN 61000-3-3: 2013
EN 62233: 2008
PpInIOxEN MeToD 3a OueHka Ha CbOTBeTcTBneTO: 2000/14/EO: PpInOxKeHne V
HnBO Ha wym dB(A)
U3mepeHo: 88
TapaANTupaHo: 90
Iopnncannte DeiCTBaT NO Bb3IOXeHne N KaTO PbJHO-MOuHnU Ha ynpaBnteJIHOTo TAnO.

H.Jenner
CEO

S. Reiser
Head of Appropriation
ПьЛHOMOUIHK NOДOKуМЕNTaцИЯТа:
S. Reiser
71364 Winnenden (Germany)
Ten.: +49 7195 14-0
c: + 49719514 - 2212
Winnenden, 2016/04/01
Sisukord
Ohutus. ET 5
Veevarustus veevargist
Uhendamiseks vajalikke andmeid vt tuubisildilt/tehnilisest dokumentatsionist.
www.kaercher.com/dealersearch
Tehnilised andmed
Elektrühendus
Toode: Korgsurvepesur
Tüup: 1.676-xxx

S. Reiser
Head of Approbation
71364 Winnenden (Germany)
Tel: +49 7195 14-0
Winnenden, 2016/04/01
Satura raditajs
Drosiba LV5
Vides aizsardziba LV 5
Krasas bojajumu risks
Stradajot ar mazgāsanas suku, tai jabut tirai no netiru-miem un citam dalinam.
lespraudiet mazgāsanas suku rokas smidzina-sanas pistole unnofiksejiieto,pagriežotpar 90^
Norade: Vajadzibas gadijuma kopa ar tirisanas lidzekli var izmantot a imazgasanas sukas.
Darba pärtraukšana
Atlaidiet rokas smidzinataja sviru.
Noblokejiet rokas smidzinaesanas pistoles sviru.
Rokas smidzina'sanas pistoli ievietojiet tais paredzetaja glabasanas nodalijumā.
Garakos darba partraukumos (ilgakos par 5 minu-tēm) papildus izslédziet arī aparata sledzi ("0/OFF").
Darba beigšana
△UZMANIBU
Atvienojiet augstspiediena sluteni no rokas smidzinanas pistoles vai ierices tikai tad, kad sistema vairs nav spiedena.
Pec darba ar tirisanas lidzekli: darbiniet aparatu apm. 1 minuti, lai to izskalotu.
Atlaidiet rokas smidzinataja sviru.
Izslédziet aparātu („0/OFF“).
Atvienojiet kontaktspraudni nokontaktligzdas.
Aizveriet udens krnu.
Nospiediet rokas smidzinataja sviru, lai izlaistu sistēmā atlikušo spiedienu.
Noblokejiet rokas smidzinaesanas pistoles sviru.
Atvienojiet aparatu no udens padeves piesleguma.
Transportesana
UZMANIBU
Savainosanas un bojumu gusanas risks! Transportejot nemiet vera aparata svaru.
Transportesana ar rokam
www.kaercher.com/dealersearch
Tehniskie dati

S. Reiser
Head of Approbation
71364 Winnenden (Germany)
Talr.: +49 7195 14-0
Fakss: +49 7195 14-2212
Winnenden, 2016/04/01
Turinys
Suga LT 5
www.kaercher.com/REACH

www.kaercher.com/dealersearch
Techniniali duomenys
71364 Winnenden (Germany)
Tel.: +49 7195 14-0
Faksas: +49 7195 14-2212
Winnenden, 2016/04/01
3Mict
Бezпека. U K
3axnCT HABKOINHbOro cepeDoBua. .UK 5
Onc npocpoU. UK 6
YcTaHOBka UK6
BBeHeHH Beknnyataio UK 6
Ekcnnyataia. UK 7
TpaHcnpTyBaHHa UK 7
36epirannn UK8
IorT Ta texHnue o6cnyroByBaHHa. UK 8
IOnomora y BnnaKy HenoJaok. UK 8
Ppniladny 3anachi deTani UK8
Tapantir U K
Texhiyhi xapaKTepeNCTnKn UK 9
3aBa npB iDIOB iHicTb EbponecboKoro cnIBTOBAPnCTBa UK 9
Be3neka
Ipeed nepuMM BIKOpNCtAHNm npnlaNy npouHTaTn 10 opriHaNbHy iHCTpyKciio 3
eknyataui i Bka3iBkn 3 texhikn 6e3neKn, 10 doaIotbcra. IiaTn BiinobiHNO Do Hnx. 36epexitb ix dna noDaIbwoKopncTyBaHHa6o nlaHactynHoro BlaChnKa.
PpabnIbHe 3acTocyBaHn
Ley OunuBau BncoKoro TnCKy npn3HaueHn TiIbKn DnBnBkOpncTahHn B DomaunhBomy roCnoapCTbi.
-ДЯ OУншЕнгmaunH,abTomO6inib,6yIDBeIb,IHCTpyMeHTIB,ФacadIB,Tepac,IpncadN6Hnx npuJaIB Ta IH.CTpyMeHem BOniPi TnCKOM (Pn He-06xHocTi,3doDaBaHHaM 3aco6iB DnA UUeHH).
- Pn 3bomy 3acocybaHHIO nIINraIOT bONOMIXHe 6bnHann, 3anactnH ta 3acobn DnA Ynue Hn,do3BoneHi nN BnKOpncTahHn fipmoIO KARCHER. Bynb naCk, cniDyTe Bka3iBkam do 3acobn dnyuueHHn.
PibeHb He6e3neKu
HE6E3NEKA
Bka3i8ka uodo He6e3neku, rka 6e3nocepedHbO 3a2poKyE ma npu3eodumb do mxxmpaem Yu cmepi.
△NONEPEDXEHH
Bkasika odo nomenuho mojueoi Hebe3neuohcumyaui, 0o moke npuzecmu do mxxkux mpaem cucmepmi.
OSEPEXHO
Bkasika odo nomenuho He6e3neuoi cumyaui, kao Moke cnpuuhumu ompumahnnaeaux mpaem. yBARA
Bka3i8ka 0do moKnueoI nomEnuH No6e3neHi cmyau, 0o MoKe CnpuuHmu Mamepiabhi 36umku.
CnmboHnHa npncTpoi
5

He cnprmoeyeamu cmpymiHb odu nid eeIukum muckom Ha IIOdeu, meapun, yiMKHehe eJeKmpuue HcobadHaHHa Ha cam npucmpiu.
Cni3axuamnpunaedipo3y.
Ipucmpiu He moxna nioknouamu 6e3noceppeHbO do mpybonpoBody 3 numHO o-doio.
3axnchi 3ac06n
OBEPEXHO
3axuchi npucmpoi cnyyiomb dna 3axumy kopucmyaeivb.3mHa 3axuchux npucmpoivu HexmyBaHHa Hmu He donyckaembcra.
BmMkau npncTropo
TOnOBHn BmNka3anobiraecamOJIbHi np60ti ana-paty.
www.kaercher.com/REACH

NakybalbHIMatepianniidaoTbcBtopHHn nepepo6ci.Ynakobky Heo6xioHo yTuNi3yBaTu 6e3 uKoDn DnroDokinn.

Pnncpoi, 0o BiDnpaouBaHn, MicTb ciHHi MaTepiAn, kI noTpio HepeDaBAtn Ha BToPNHny nepepo6ky. Ctapi npncpoi Heo6xidHo yTuNi3yBaTn 6e3 uKoOn dna DOBkInnn.
EneKtpuHi Ta eNeKtpoHHi npuaHn HauchtiWe MicTb CKnaOBI yacTHN, kYi y pa3i HnnpaBnIb-Horo NOBOJXeHH 3 HMM a60 HnnpaBnIbHOI yTuNi3aui MoKyTB CTBOpHTN noteHuiHy He6e3-NeKy dN3dopOB' JIODHN Ta HABKOINHbOro cepeoBnua. Ondak ui YacTHN Heo6xDi nHaLeXHOI ekCnnyataui npuaNy. PpuaHn, no3NaueHi cM CmMBONOM, 3abOpOHReTbcr yTuNi3-yBaTN pa3OM 3 No6yTOBm CMITTM.

Po60Tu 3 OuHueHHa, B knx 3'ABTcBc BiDnpa- cyBOBaHa BOda 3 BMICTOM MaCTnla, HapnKnaI, npomBaHHra DBnHyHa, MTTTa DnUca, NOBnHi BVKOHyBaTHCb TIlbKn Ha MNHnx MaJdaHnKaX 3 BiD6ipHNkOM MaCTnla.

Pobotn 3 MnHmM 3ac6amn NOBHHI BKNOHyBaTncb TlbnKHa pObouNX PNOUHNAX, He npOHKnHXdnnpDHN, 3 BxOdom y noSyTOBy KaHani3aio. MnHi 3ac06n He NobHHI nOTpannY BOOnMN a6o rpyHT.
Onnc npnctroio
Ycmynocihny3ekcnnyatauii HabeJeHO onnc npnctpo 3 mAKcmaIbHOIO KOMnneKTAueIO. KomnneKtaua BIDpi3HReTbcra 3aJexKHO Bi, MoJIe (INB. yNaKyBaHHa).
KomnneKtaia npncTopo 3a3haeHa Ha ynaKobu. Pnpo3nakyBaHHi npncToPO nepEBipNTN KOMnneKtaio.
Y pa3i Hectaui DoDAkOBOrO 6bIaNHaHHa 60 yuKoJXeHb, OTPIMAHnx NiD Yac TpaHCnOpTyBaHHra, CIId NObiDOMTe npo ue B ToproBEnbHy opraHi3aciIO, Jka npoda-ana anapaT.
PncyHKn DnB. Ha apkywi-BknaDi!
13'εДнанньвсOKоТTNCKY
2 TOnOBHn BmKau "0/OFF" / "I/ON" (0/BIMK. / I/YBIMK.)
3 TauKn dny 36epirahn MepeXhoro shypa
436epirahnHaunHryBucokoroTnCKy
5PyuKa dIraTpaHcnOpTyBaHHa
6IiBedeHnBOi i3 BCTaHOBHeHM ciTuaCTNM fipbtpom
7 BCMOKTyBaIbHn IaHaR MnHoro 3acO6y 3 pIb-tpOM MnHoro 3acO6y Ta KpuKkoH.
8 Pe3epByap dIy MmHoro 3ac06y
9 YacntHa 3'EDHaHHaIy NiBEdeHHBaDn
10 36epiraaHcTpymHHoo Tpy6K
11 36epirahn pyuHoro nicToJeTy-po3nnIOBbau
12 MepexeBn Ka6eIb i3 wTeNceIbHOBO BnKoHO
13 TpaHcnpThe KOneco
14 Puyhni nicToIeT-po3nJIIOBaUa
15 BlokyBaHnI pyHoro nictoJe-t-po3nIIObau
16 Cko6a dny shnaHry BncoKoro Tncky
17PykabBucOKoroTnCKy
18 CtpyMeHeBa Tpy6ka 3 peryIHOBaHHm TnCKy (Vario Power)
Дяшрокоу снкту задач 3ицень. Робочи ТИСК ПЛавно ретуновся МИ „МIN"Та Мax".В поожени „Mix" можниюdoданMuNiHi 3a-cobи.
IpynOBaHH po6OTo Tccky cnID BiDnyCTTN BaxiNb nicToJeTa-po3nnIOBaHa NOBepHyTNCtpymHH Ty6ky B baxaHe NOJoxHn.
19 CtymHeBa Tpy6ka 3 ppe3oIO IЯ CTiKnx 3a6pydHHeHb
\*Braokci onii
20 LITka DnA MMTT
Pn3HaHeNo DnIpo60TN 3 MNHIM 3ac06om.
21 Conno dny niu
IINTEHCNBHORO cniHKoBaHHaMNIHO 3ac06y.
223acicidJyHnEHHa
\*\*OdaTkoBO 3HaIo6ntbca
23 ApMOBaHn BOJAHn WJIaHr 3i CTaHdApTHO MyΦ-TOHO.
-MiHimaBnI diaMeTp 1/2 IIOIma (13 MM)
-MiHimaJIbHa DOBXnHa 7,5M
YCTaHOBKa
Ipeenouatkomekcnnyataa anapaty BCTaHOBTN Idoani He3akpinnehi YactHH.
PncyHKn DnB. Ha apkywi-Bknaui!
PncyHok A
BctaHOBtTu 3aΦikCyBaTu TpaHcnpTHi KOneca.
PncyHok B
HacaIITn Ta 3aIBNHTnPyUky IJIraTpaHCnOpTyBAHHJ.
PncyHOK C
3'εнувалыну мфту 3 компгту пд'энайт do elementy anapata Дл подаьань Вodyn.
PncyHOK D
→ BntTn 3aTnckau dIy IJnaHra BnCOKOro TnCKy 3 pyHoro nictOJeTa-po3nnIOBaHa.
PncyHok E
BCTaBHTn ⅢNaHr BnCOKOr TnCKy BpyHn nicto- let-p03nIIOBAu.
Bdabntn ckoy do fikcaii. Ipebeipntn Hadii-HicTb KpiIeHHra, NotrHyBun 3a WlaHr BnCOKoro TnCKy.
BVeDeHnB EeknJnyTauiIO
→ IocTaBnT npicTpH na pIBHy noBepxHIO.
PnCyHOK F
3'εДНИ 於нанг ВUCOKOТ TUCKY C NiД'ЕДHAHHAM BUCOKOТ TUCKY.
BCTaBTe MepeXeBn uTeKepe y po3eTKy.
IopaaBHH BOn 3 BoDoroHy
IotyHKHtB nB. Ha 3BoDcbKi T a6JIuCi/ B TexHiUHX daHIX.
IotpmyTecb npad nipnemCTBa BOOnocTaahna. YB4A
Bodhi 3abpydHHeHH MoKymb cnpuuHmu NowkOde Hacocy bucoko0o mucky ma npuna0do. Dna 3axcmy padumo ckopucmamucb bodnum fInbmpom KARCHER (cnueiaIhe npuna0do, home pnn 3amoe HeHH 4.730-059).
BctabtnuIinaHnIpaIbOaIbOaN MyfTy BiNo-BiHoro 3'EDHaHH.
PiD'EDHaTN BOdHm UJnAHr DO BOOBOyD.
→ NobHicTHo BiIkpNITe BoDorIHn KpaH.
Ekcnnyatauaia
YBARA
Po6oma ecxy npomra2om 6ilbwe 2 xeunun npueo-dumb do buxody 3 nay hacoc a bucoko2o mucky. RaKuo npucmpiu npomra2m 2 xeunun He habupaec muck, mo uo2o cnid bumkhymu ma diyu eioeioho ekazikam, kpi npueodmbc8 2naei "Donomoza y bunadky Heno-nadok".
Po6ota nID BnCOKM TnCKOM
△OSEPEKHO
PekomeHIOBaHI MeToIOn OUHHeHH
Po3nnntn HeBEnky KInbKicTb 3ac06y dnyu- uenHna cyxy nobepxHIO Ta 3aNnHTn diTn (He BnCnxatn).
3MnIe po3HHeHn 6pyd cTpymHeHm BucOKoro TnCKy.
Pexm3MnHIOUzITKOIO
YBAGA
Pu3uk nowkodxehnnaKoap6o8o2o nokpumma Neped po6omoo 3 MuOoo uimkoocid nepekoHa-mucra b momy, oO eoHa ouuueHa Bid 6pydy a6o ihuux cmopOHHX yacmok.
BCTaBHTMmHyUtiKy BpyHm po3nJIIOBaTu 3aΦiKcYbATn II, NOBepHyBUn Ha 90^
Ppimitka: Y pa3i noTppe6n uiTkn dny MNTT TaKoX MOxHa BnKOpNCTOBvBATn dny po6OTn 3 MnHm 3ac06om.
PpnnnHn eKcNpyataio
3BilbHtB BaxjIB 3 pyuHm po3nIIOBaYeM
3a6JokyBaTN BaJIb pyHOro nicToJeTy-pO3nIIO-Baaya.
BCTaBnTu pyHn nictoJeT-po3nIIOBaUy Tpmau.
→Плдчастпвалиnxpepepypo60tbynoHa5xBNH)anapat cniBbIMNKaTN.0/OFF"(0/BIMK.).
3aikHcHHpo60Tu
△OSEPEXHO
Ulahe bucokozo mucky i0'dcHybamu iD pyHo2o po3nunobaya a6o npucmpo mo bku modi, konu 8 cu-cmemi iicymhiu muck.
Picra po60tn 3 MnHm 3acobom: 3 MeTOIO nOtoCKaHH DaTn NoppaIOBaTN npNJady IpOTAROM 6JN3bKO 1 XBNIHN.
3BilbHItb BaxjIb 3 pyuHm po3nIIIOBaYeM
BumKHyTu anapaT "0/OFF" (0/BMk.).
→ BntarHitb MepexHn uTekep 3i uTencelbHOi po-3eTKI.
3akpnTu BOdopBoiHn KpaH.
→ HaTnCHyTuHa pyuKy po3nnHOBaua, 0o6 3MeHUN-TN TnCK y CnCTeMI.
3a6nokyBaTu BaKijb pyHoro nicToJeTy-po3nIIO-Baay.
→ Biokemtn anapaT BiD BoDOnocTaaHn.
TpaHcnpTyBaHHa
△OSEPEXHO
He6e3neka mpaem ma nowkodkeh!
Ppu mpaHcnpmyeaHHi cnid 3eephymu yba2y Ha baey npucmpoio.
TpaHcnpTyBaHHBpyHy
→ PpuiJaT TaTT 3a pyu Ky dIy TpaHcnOpTyBaHHa.
TpaHcnpTyBaHHraPahCnOpTHHM3ac06amN
→ CnpoxxHt6akJIMnIOyO3ac06y.
3aφikcyBaTn npuaB iD 3CyHeHHra Ta nepeKndaH H.
36epiraHHN
OSEPEXHO
He6e3neka mpaem ma nowkodxeHb!
Ipu 36epizanhi 8paxooybamu eazy npucmpoio.
36epiratnpncptpi
Ipeep Tpnbann 36epiraHnM, HapnKnA B3mKy, cnid doaatkoBO 3BepHyTN yBary Ha Bka3iBKn B po3diJl "DornaD".
BCTaHOBHT npncptiHa pIBHn IOBepxHi.
Haxatn Ha Kopnyc WbNkopo3'EMHOro 3'EdHaHHa DnBVCOKOHAnipHO rO hnaHra B HaprMky, 3a3Ha-ueHOMy CTpiJIKOTo, Ta BnHrtn BVCOKOHAnipHn WJahr.
→ HaTnCHyTuPo3MnKaJIbHy KHOJky Ha pyHOMy nictoJeTI-po3NnIIOBaU Ta BiDiJIInTu BnCOKoHaip-n Hnn IJAAH BiD pyHOrO nictoTea-po3NnIOBaYa.
BCTaBnT pyHnn nictoJeT-p03nnIOBaY TpImaU.
3aΦikcyBaTn CTpyMHHy Tpy6ky y BiINOBIHOMy TpIMaqi.
→ CknaTm MepexeBn Ka6enb, IlaHr BnCOKOro TnCKy Ta npnlaJaHa anapati.
3axnCT BiM oPo3iB
YBATA
He noeHicmIO eunopokHei npucmpoi ma obnadHaHHa MoKymb 6ymu nowkoDxeni npu diMopo3y. NobHicmIO eunopokHum npucmpiu ma obnadHaHHa, a makoX 3a-6e3neumu 3axucm eid mop03y
Uo6 yHnKHyTn NOnkOJKeHb:
3 anapaty cnid noBnicTo BuaHnTn BoNy. BMkaTn anapat 6e3 npneDHaHoro WlaHra BucOKoro TnCKy i 6e3 npneDHaHoro BOJOnocTaayHHa (MaKcMym Ha 1 xBUNHy) Ta noyeKaTu DOTu, DOKn npunHHTbcra BNTIK BoN 3i WLaHry BucOKoro TnCKy. BmKhItb anapat.
36epiratn npicctpii 3 ycima akcecyapamu y tennoMy npimiuehHI.
Dorna Ta TexHicHe 06cnyroByBaHHa
HE6E3NEKA
He6e3neKa ypaXeHHn eNeKmpuHm cmpyMOM.
Ipeep npoeedeHnem 6yob-kaux po6im 3 o6cnzyoeybaHH npucmpiu cnid eumkhymu ma eumraHymu umencelbny bukky 3 po3emku.
OuunenHcitknBipBeDeHHI BODN
CITky B niDBeHHi BOiOn OuHcyBaTn peRyIaPHO.
→ 3HnMyΦTy 3 BOJHOro UHaHy.
PncyHok L
YBARA
Cimky He MoXHa nowkodKyBaMu.
BUTARHyTu ciTy nIOCKORY6yAMN.
→ Tomtn ciTky ni npotiuHO BOIOIO.
3HOBy BCTaBHTn ciTky B nIDBeDeHHRAOIN.
OuHHeHHa pIbtpy dIa MmHoro 3ac06y
Ipeed dobrn m nepioom 36epiraHna, HapnKna y3mKy:
3HIMITbΦIbTp 3i BCMOKTyBaNbHOro UNaHry dna MNHOrO 3ac06y Ta npOMnTe NOro IpTOUHO BO-DOIO.
DOnomora y BnnaKy HenonlaK
He3naHHi yUkoJxehnBn MoKeTe BnnpaBnTcAmOCTiHo 3a DOnOMOrHO HAcTyNHorO OrJy.
YcMHHINX BUNaIckax,6yNb-JIacka,3BepTaIteCn DO KOMnTeHTHOI CnyKbN TexHiUHoi NiITpIMKn.
HE6E3NEKA
He6e3neKa ypaXeHH eJekmpuHUM cmpyMOM.
Npeed npoeedeHnem 6yob-kaux po6im 3 o6cnzyo8ybaHH npucmpiu cnid eumkhymu ma bumraHymu umencelbHy bunky 3 po3emku.
Pnnctri Hne npauc
→ BntraHytn BaXJIb pyHoro nictoIeta-po3nHOBa-ya, npncTpiB BMKHeTbcR.
IpebipTe BiNobiHicTb Hnpyr, Bka3aHOi y 3aBOcBki Ta6nucu, Hanpy3i DxkepeNa enekTpoeHeprii.
→ IpepeBipuTn MepeXeBn Ka6eBn Ha noIkoJKeHHa.
Pnncptpi He npaioe nid Tnckom
IpepeBipTuHacPoIOBaHHa CtpyMnHHoTpy6Kn.
→ IpepeBipNTIOCTaTHicTB o6'Emy noaui BOIN.
BntarHitb 3 donomoroIO nIOCKORY6uIB MEpeXeBn fIbTp 3 enemeHTy DnRA BOOONOCaAHNra Ta npoMnTe NOr O npoToHni BDi.
→ BvdaeneHH naBtpra i3 npncTpoHO: BbIMKHyTu npnctpii 6e3 niKluoyehoro BucOKoHaipHoro WnaHra Ta noyekatn (He 6JIbwe 2 XBInuH), NOK 3 BucOKoHaipHoro WlaHra He noyhe BHXOHTu BOa 6e3 6yIb6aWok nobitpy. BmKHyTu npncTpii Ta 3aHOBO npNcDHaTn WNaHR BUCOKO TnCKy.
Belenki nepenapn Tncky
OuHCTHTNΦOpCyHKy BnCOKOTo TnCKy:TOJIKOIO npi-6paTn 6pyd3 OTbOpyΦOpcyHKn Ta npOMTu II BO-doIO.
→ IpepeBipTe KINbKicTb NOaBaHoI BOuN.
Anapat HerepMeTnUHn
He3haHHy HerepMeTuHicTh anapaty 3ymoBJeHo TexHiHMN Ooc6JIINBOCTaMn. Pnp CunbHi HerepMeTuHocTi 3BepHiTcR Do aBTOpu3ObaHOi cIyK6n cepBichoro o6cnyroByBaHHa.
OuChn 3acio He BCMOKTyEcTbcra
BukopncToByBaTu cTpymeHeBy Tpy6ky 3 peryHOBaHHm TnCKy (Vario Power)
IobepHyTn CTpyMeHeBy Tpy6ky B noJoxKeHHa "Mix".
→ Πочисту сдьт р у BCMOKТУВальбHOMу wJlaHry MИнHorO 3acO6y.
→ ΠepebipNTu BCMOKTyBaJIbHn IJNaHr IJIaMnHoro 3ac06y Ha neperuHn.
Ppniladny 3anachi deTani
CniD BnKOpNCTOBByaTNI NIwe opurHaihBi KOMNJIeKTyUOci Ta opurHaJIbHi 3anacHI DeTani, TOMy IIOcame BOHr rapaHTyIb 6e3neHy Ta 6e3nepe6iHy EKCnnNyatauio npnna.
IhOpMaizj 0do KOMnKeTyuOuX Ta 3anachnx DetaJeN MiCTNbCra Ha caTi www.kaercher.com.
RapaHTia
YKoKHi KpaHII DiHOy MyOBn rapaHTi,HaJaHOI BiIOBbIHOIO fipMOIO-IPoDAJIeM. HeIOJaIKN Bpo6OI npICrPOIO MN yCyBaCMO 6e3KOITOBHO IPOTAROM TepMinHy DII rapaHTI, JAKIO BOHN BHKJIaKaHI 6paKOM MaTePiaNy YINOMNIKAIMN BIROTOBJIeHH. Y BNtAky NHHOI raPaHTI 3BePTIbCJ IO pOdaBua H NaH6JIHKuN ABTOpH3OBAHNI cepBicHHI CEHTP 3 DOkUMeHTaJIbHM IIIDTBEpIXeHHM IOKyIKN.
aIpeCN Bn 3MOKeTe 3HaNT Ha Be6-CTOpiHJI:
www.kaearcher.com/dealersearch
TexHiChi XapaKTepeNCTnKN
BidnoBidaHnapeKtnBa CC
2000/14/CC
2014/30/EU
2006/42/EG (+2009 / 127 / EG) 2011/65/CC
PpknlaadiharpMOH3yOuyi HOpMn
EN 50581
EN 55014-1: 2006+A1: 2009+A2: 2011
EN 55014-2: 2015
EN 60335-1
EN 60335-2-79
EN 61000-3-2: 2014
EN 61000-3-3: 2013
EN 62233: 2008
3actocobayhmeoouHKBIDNOIBHOCTI 2000/14/CC:IOIOBHeHHV
PibehnotyXhOCTi dB(A) BmipraH: 88 TapaHToBaHn: 90
Ti, xTO iINHcAINcR dIOHTb 3a 3aIITOM Ta DopyueHHM KepiBHNrTa.

yIOBHOBAxEHH IO DOKymeHTaJI: S.Reiser
Alfred Kaercher GmbH & Co. KG
Alfred-Kaercher-Str. 28 - 40
71364 Winnenden (Germany)
Tei.: +49 7195 14-0
Факс: +49 7195 14-2212
Winnenden, 2016/04/01


