POWX1331LI - Multitools PowerPlus - Free user manual and instructions
Find the device manual for free POWX1331LI PowerPlus in PDF.
| Brand | PowerPlus |
| Model | POWX1331LI |
| Product type | Cordless multi-tool (sawing, sanding, scraping, grouting) |
| Power supply | Lithium-ion battery 18 V, 1300 mAh (cell INR18650E) |
| Charger | Input 100-240 VAC, 25 W; output 21.4 VDC, 1.3 A max; charging time 1 h |
| Number of batteries included | 2 |
| No-load speed | 5000 – 19000 min⁻¹, adjustable in 6 positions |
| Included accessories | Triangular sanding pad, sanding finger, saw blades (4 sizes), segment blades (wood and carbide), scraping blade, abrasive sheets (grits 120/180/240) |
| Main functions | Sawing wood, plastic, metal, drywall; dry sanding; scraping paint and carpet; grouting |
| Noise level | Sound pressure LpA 81 dB(A); sound power LwA 92 dB(A) |
| Vibration | aw = 9.6 m/s², K = 1.5 m/s² |
| Warranty | 36 months (excluding battery, charger, normal wear) |
| Maintenance and cleaning | Clean ventilation slots with a soft cloth; do not use solvents; disconnect before maintenance |
| Safety | Use hearing protection, safety glasses and gloves; do not expose to water; do not open battery |
| Spare parts and repairability | Repair only by a Powerplus authorized service center; use original parts |
Frequently Asked Questions - POWX1331LI PowerPlus
User questions about POWX1331LI PowerPlus
0 question about this device. Answer the ones you know or ask your own.
Ask a new question about this device
Download the instructions for your Multitools in PDF format for free! Find your manual POWX1331LI - PowerPlus and take your electronic device back in hand. On this page are published all the documents necessary for the use of your device. POWX1331LI by PowerPlus.
USER MANUAL POWX1331LI PowerPlus
POWERPLUS HIGH QUALITY TOOLS

POWX1331LI
NL·FR·EN·DE·ES·IT·PT·NO·DA·SV·FI·EL·HR·SR·CS·SK·RO·PL·HU·RU·BG

NL NEDERLANDS VERTAALDE VERSIE VAN DE ORIGINELE HANDLEIDING
FR FRANÇAIS TRADUCTION DU MODE D'EMPLOI D'ORIGINE
EN ENGLISH ORIGINAL INSTRUCTION MANUAL
2 BEsCHRIJVING (FIG. A - FIG. 5)
Certification Manager
Datum: 13/11/2017, Belgium
Date: 13/11/2017, Belgium
1 APPLICATION 3
2 DESCRIPTION (FIG. A - FIG. 5) 3
3 PACKAGE CONTENT LIST 3
4 SYMBOLS 3
5 GENERAL POWER TOOL SAFETY WARNINGS 4
5.1 Working area 4
5.2 Electrical safety 4
5.3 Personal safety 5
5.4 Power tool use and care 5
5.5 Battery tool use and care 5
5.6 Service 6
6 MACHINE-SPECIFIC SAFETY WARNINGS 6
7 ADDITIONAL SAFETY INSTRUCTIONS FOR BATTERIES AND CHARGERS 6
7.1 Batteries 6
7.2 Charger
8 ASSEMBLY 7
8.1 Mounting sanding plate/ saw blade/ spatula (Fig. 1)
8.2 Mounting/changing the sand paper 7
9 OPERATION 8
9.1 Charging the battery pack (Fig. 4) 8
9.2 Removal / insertion of battery 8
9.3 Speed adjusting (Fig. 3) 8
9.4 Application tips 9
9.4.1 Selecting the Application Tool/Accessory.. 9
9.4.2 Sawing.. 9
9.4.3 Sanding 10
9.4.4 Scraping 10
10 CLEANING AND MAINTENANCE 10
11 TECHNICAL DETAILS 11
POWERPLUS HIGH QUALITY TOOLS
POWX1331LI EN
12 NOISE 11
13 WARRANTY 12
14 ENVIRONMENT 12
15 DECLARATION OF CONFORMITY 13
MULTI-USE TOOL 18 V POWX1331LI
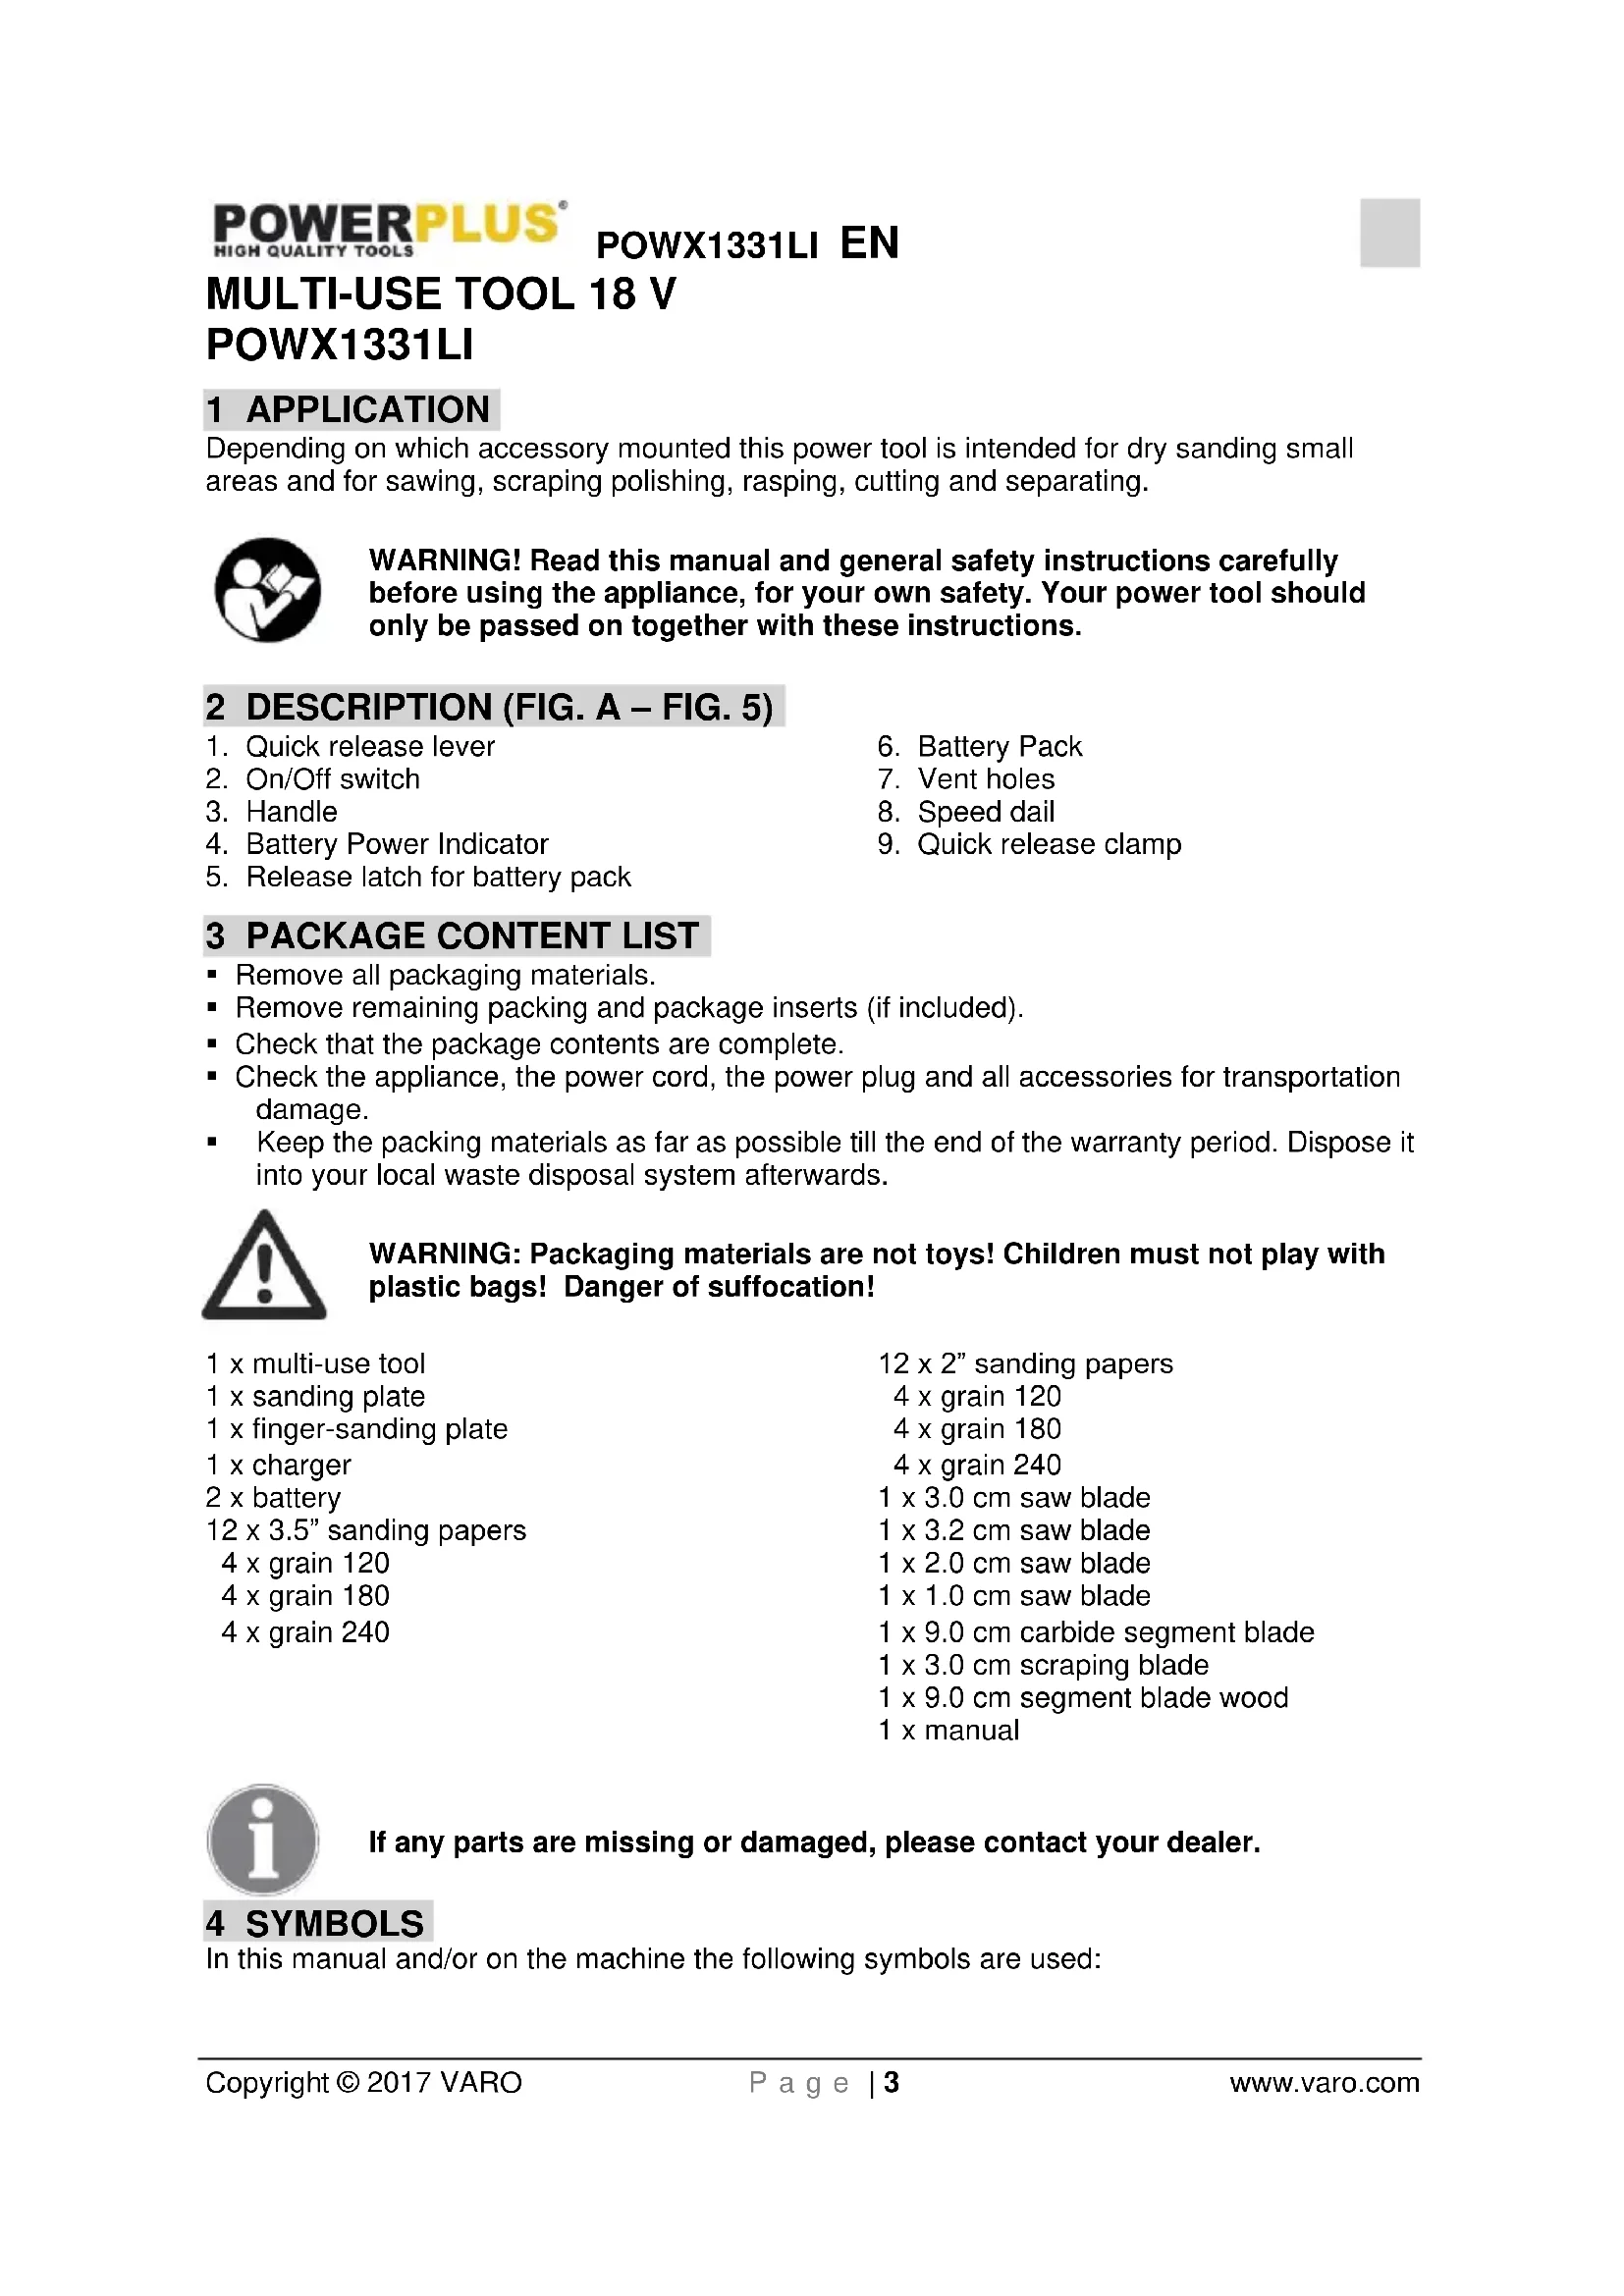
1 APPLICATION
Depending on which accessory mounted this power tool is intended for dry sanding small areas and for sawing, scraping polishing, rasping, cutting and separating.

WARNING! Read this manual and general safety instructions carefully before using the appliance, for your own safety. Your power tool should only be passed on together with these instructions.
2 DESCRIPTION (FIG. A - FIG. 5)
- Quick release lever
- Battery Pack
- On/Off switch
- Vent holes
- Handle
- Speed dail
- Battery Power Indicator
- Quick release clamp
- Release latch for battery pack
3 PACKAGE CONTENT LIST
- Remove all packaging materials.
- Remove remaining packing and package inserts (if included).
- Check that the package contents are complete.
- Check the appliance, the power cord, the power plug and all accessories for transportation damage.
- Keep the packing materials as far as possible till the end of the warranty period. Dispse it into your local waste disposal system afterwards.

WARNING: Packaging materials are not toys! Children must not play with plastic bags! Danger of suffocation!
1 x multi-use tool
12 × 2 sanding papers
1 x sanding plate
4 x grain 120
1 x finger-sanding plate
4 x grain 180
1 x charger
4 x grain 240
2 x battery
1 x 3.0 cm saw blade
12 × 3.5 sanding papers
1 x 3.2 cm saw blade
4xgrain120
1 x 2.0 cm saw blade
4× grain 180
1 x 1.0 cm saw blade
4 x grain 240
1 x 9.0 cm carbide segment blade

If any parts are missing or damaged, please contact your dealer.
4 SYMBOLS
In this manual and/or on the machine the following symbols are used:
POWX1331LI EN
| Denotes risk of personal injury or damage to the tool. | CE | In accordance with essential requirements of the European directive(s). | |
| Read manual before use. | Class II - The machine is double insulated; Earthing wire is therefore not necessary (only for charger). | ||
| MAX. 40°C | Ambient temperature 40 °C max. (only for battery). | Do not expose charger and battery pack to water. | |
| Use battery and charger only in closed rooms. | Do not incinerate battery pack or charger. | ||
| Wear ear guards and goggles | Wear gloves |
5 GENERAL POWER TOOL SAFETY WARNINGS
Read all safety warnings and instructions. Failure to heed warnings and follow instructions may result in electric shock, fire and/or serious injury. Keep safety warnings and instructions for future reference. The term "power tool" in the safety warnings refers to your mains-operated (corded) power tool or battery- operated (cordless) power tool.
5.1 Working area
- Keep working area clean and well lit. Untidy and dark areas can lead to accidents.
- Do not operate power tools in potentially explosive surroundings, for example, in the presence of inflammable liquids, gases or dust. Power tools create sparks which may ignite the dust or fumes.
- Keep children and bystanders at a distance when operating a power tool. Distractions can cause you to lose control of it.
5.2 Electrical safety
Always check that the power supply corresponds to the voltage on the rating plate.
- Power tool plugs must match the outlet. Never modify the plug in any way. Do not use adapter plugs with earthed power tools. Unmodified plugs and matching outlets will reduce the risk of an electric shock.
- Avoid body contact with earthed surfaces such as pipes, radiators, kitchen ranges and refrigerators. There is an increased risk of an electric shock if your body is earthed.
- Do not expose power tools to rain or wet conditions. If water gets inside a power tool, it will increase the risk of an electric shock.
- Do not damage the cord. Never use the cord for carrying, pulling or unplugging the power tool. Keep the cord away from heat, oil, sharp edges or moving parts. Damaged or entangled cords increase the risk of an electric shock.
- When operating a power tool outdoors, use an extension cable suitable for outdoor use. Using a cord suitable for outdoor use reduces the risk of an electric shock.
- If operating a power tool in a damp location is unavoidable, use a power supply protected by a residual current device (RCD). Using an RCD reduces the risk of an electric shock.
5.3 Personal safety
-
Stay alert, watch what you are doing and use common sense when operating a power tool. Do not use a power tool when you are tired or under the influence of drugs, alcohol or medication. A moment of inattention when operating a power tool may result in serious personal injury.
-
Use safety equipment. Always wear eye protection. Using safety equipment such as a dust mask, non-skid safety shoes, a hard hat, or hearing protection whenever it is needed will reduce the risk of personal injury.
-
Avoid accidental starts. Ensure the switch is in the off position before inserting the plug. Carrying power tools with your finger on the switch or plugging in power tools when the switch is in the on position makes accidents more likely.
-
Remove any adjusting keys or spanners before turning on the power tool. A spanner or key left attached to a rotating part of the power tool may result in personal injury.
-
Do not reach out too far. Keep your feet firmly on the ground at all times. This will enable you retain control over the power tool in unexpected situations.
-
Dress properly. Do not wear loose clothing or jewellery. Keep your hair, clothing and gloves away from the power tool. Loose clothes, jewellery or long hair can become entangled in the moving parts.
If there are devices for connecting dust extraction and collection facilities, please ensure that they are attached and used correctly. Using such devices can reduce dust-related hazards.
5.4 Power tool use and care
-
Do not expect the power tool to do more than it can. Use the correct power tool for what you want to do. A power tool will achieve better results and be safer if used in the context for which it was designed.
-
Do not use the power tool if the switch cannot turn it on and off. A power tool with a broken switch is dangerous and must be repaired.
-
Disconnect the plug from the power source before making adjustments, changing accessories, or storing power tools. Such preventive safety measures reduce the risk of starting the power tool accidentally.
-
Store power tools, when not in use, out of the reach of children and do not allow people who are not familiar with the power tool or these instructions to operate it. Power tools are potentially dangerous in the hands of untrained users.
-
Maintain power tools. Check for misalignment or jammed moving parts, breakages or any other feature that might affect the operation of the power tool. If it is damaged, the power tool must be repaired. Many accidents are caused by using poorly maintained power tools.
-
Keep cutting tools sharp and clean. Properly maintained cutting tools with sharp cutting edges are less likely to jam and are easier to control.
-
Use the power tool, accessories and cutting tools, etc., in accordance with these instructions and in the manner intended for the particular type of power tool, taking into account the working conditions and the work which needs to be done. Using a power tool in ways for which it was not intended can lead to potentially hazardous situations.
5.5 Battery tool use and care
-
Recharge only with the charger specified by the manufacturer. A charger that is suitable for one type of battery pack may create a risk of fire when used with another battery pack.
-
Use power tools only with specifically designated battery packs. Use of any other battery packs may create a risk of injury and fire.
-
When battery pack is not in use, keep it away from other metal objects, like paper clips, coins, keys, nails, screws or other small metal objects that can make a connection from one terminal to another. Shorting the battery terminals together may cause burns or a fire.
-
Under abusive conditions, liquid may be ejected from the battery; avoid contact.
POWX1331LI EN
If contact accidentally occurs, flush with water. If liquid contacts eyes, additionally seek medical help. Liquid ejected from the battery may cause irritation or burns.
5.6 Service
- Your power tool should be serviced by a qualified specialist using only standard spare parts. This will ensure that it meets the required safety standards.
6 MACHINE-SPECIFIC SAFETY WARNINGS
- Use the machine only for dry sanding. Penetration of water into the machine increases the risk of an electric shock.
- Keep hands away from the sawing range. Do not reach under the workpiece. Contact with the saw blade can lead to injuries.
- Use suitable detectors to determine if utility lines are hidden in the work area or call the local utility company for assistance. Contact with electric lines can lead to fire and electric shock. Damaging a gas line can lead to explosion. Penetrating a water line causes property damage or may cause an electric shock.
- When working with the machine, always hold it firmly with both hands and provide for a secure stance. The power tool is guided more secure with both hands.
- Secure the workpiece. A workpiece clamped with clamping devices or in a vice is held more secure than by hand.
- Do not use the machine when the quick release lever is not tightened.
- Keep your workplace clean. Blends of materials are particularly dangerous. Dust from light alloys can burn or explode.
- Wear protective gloves when changing application tools/accessories.
- Application tools/ accessories become hot after prolonged usage.
- Do not scrape wetted materials (e. g. wallpaper) or on moist surfaces. Penetration of water into the machine increases the risk of an electric shock.
- Do not treat the surface to be worked with solvent-containing fluids. Materials being warmed up by the scraping can cause toxic vapours to develop.
Exercise extreme caution when handling the scraper. The accessory is very sharp; danger of injury.
7 ADDITIONAL SAFETY INSTRUCTIONS FOR BATTERIES AND CHARGERS
7.1 Batteries
- Never attempt to open for any reason.
- Do not store in locations where the temperature may exceed 40^ .
- Charge only at ambient temperatures between 4^ and 40^ .
- Charge only using the charger provided with the tool.
- When disposing of batteries, follow the instructions given in the section "Protecting the environment".
- Do not cause short circuits. If connection is made between the positive (+) and negative (-) terminal directly or via accidental contact with metallic objects, the battery is short circuited and an intense current will flow causing heat generation which may lead to casing rupture or fire.
- Do not heat. If batteries are heated to above 100^ , sealing and insulating separators and other polymer components may be damaged resulting in electrolyte leakage and/or internal short circuiting leading to heat generation causing rupture or file. Moreover do not dispose of the batteries in fire, explosion and/or intense burning may result.
-
Under extreme conditions, battery leakage may occur. When you notice liquid on the battery, proceed as follows:
-
Carefully wipe the liquid off using a cloth. Avoid skin contact.
-
In case of skin or eye contact, follow the instructions below:
-
Immediately rinse with water. Neutralize with a mild acid such as lemon juice or vinegar.
- In case of eye contact, rinse abundantly with clean water for at least 10 minutes. Consult a physician.

Fire hazard! Avoid short-circuiting the contacts of a detached battery. Do not incinerate the battery.
7.2 Charger
- Use the charger provided with the tool only to charge the battery
- Never attempt to charge non-rechargeable batteries.
- Have defective cords replaced immediately.
- Do not expose to water.
- Do not open the charger.
- Do not probe the charger.
The charger is intended for indoor use only.
8 ASSEMBLY

WARNING: Always check that the power supply corresponds to the voltage on the rating name plate. Remove the power tool from the packaging. Do not plug it into the electrical grid before assembly.
8.1 Mounting sanding plate/ saw blade/ spatula (Fig. 1)

WARNING: Prior to assembly and adjustment always pull out the power plug from the mains socket.
Take care with sharp tools such as spatulas, saw blades or cutting blades.
- Loosen the clamping plate (b) by pulling the quick-release lever (1) completely open.
- Hold the opening of the quick-install saw blade, sanding plate or spatula toward the output spindle which between cover clamp (a) and clamping plate (b), push the accessory in and place it firmly onto the locating pins (c).
- Fasten using the quick-release lever (1) at the lock position as shown in the Fig. 1.
- Remove the accessory in the opposite way.

WARNING: This tool is equipped with quick-install accessories during operating; do not use any unmatched accessories.

WARNING: Check the tight seating of the application tool/accessory. Incorrect or not securely fastened application tools/accessories can come loose during operation and pose a hazard.
8.2 Mounting/changing the sand paper
With fast hook and quick release system.
- Position the sand paper and press by hand.
-
Press on the sand paper by giving it a short, firm push against the flat surface of sanding plate and switch on the power tool.
-
This ensures good adhesion and prevents premature wear.
-
If the point has become worn, pull off the sand paper, turn it through 120^ and place it on again, or change the sanding paper.
9 OPERATION
9.1 Charging the battery pack (Fig. 4)
a. Plug
c. Adapter
b. Charging socket
d. Power indicator
The battery pack has been shipped in a low charge condition to prevent possible problem. You should charge them prior to use.
Note: Batteries will not reach full charge the first time they are charged. Allow several cycles (drilling followed by recharging) for the item to fully charge. The battery should only be used indoors.
The battery as supplied is not fully charged. Therefore, let the tool charge initially for 7 hours. After the initial Charge, under normal usage, your tool should be fully charged in 1 to 1,5 hours. The battery pack will become slightly warm to the touch while charging, this is normal and does not indicate a problem.
Do not place the charger in an area of extreme heat or cold, it will best at normal room temperature.
Charging indication:
The adapter (c) has one LED light. (See Fig. 4)
- Plug the adapter (c) into suitable power outlet socket. The power indicator (d) will light green once the connection has successfully completed.
- Plug the charger plug (a) into the charging socket (b) of battery pack (6) and ensure to connect firmly. The power indicator (d) will be changed to red which on the adapter (c) that means the battery pack is charging.
- When the battery is loaded, the power indicator (c) change from red to green until the charger disconnect from the mains.
NOTE: If the battery does not fit properly, disconnect it and confirm that the battery pack is the correct model for this charger as shown on the specification chart.
Do not charge any other battery pack or any battery pack that does not securely fit the charger.
- Frequently monitor the charger and battery pack while connected.
- Unplug the charger and disconnect it from the battery pack when finished.
- Allow the battery pack to cool completely before using it.
- Store the charger and battery pack indoors, out of reach of children.
NOTE: If battery is hot after continuous use in the tool, allow it to cool down to room temperature before charging. This will extend the life of your batteries.
9.2 Removal / insertion of battery
WARNING: Before making any adjustments ensure the multi-use tool is switched off.
1 Hold the multi-use tool with one hand and the battery pack (6) with the other.
2 To install: pull and slide battery pack into battery port, make sure the latch (5) on the both side of the battery snap into place and battery is secure before begging operation.
3 To remove: use your thumb and fingers, press the battery release latches in and pull the battery pack off at the same time.
9.3 Speed adjusting (Fig. 3)
The tool can be set at 6-speed adjustment positions. The "1" position indicates the lowest and the "6" position indicates the highest speed, you can adjust different speed by turning the speed control dial (8) from "1" to "6" position. The operator may have to vary the speed to optimize working efficiency.
9.4 Application tips
9.4.1 Selecting the Application Tool/Accessory
| Accessory (Fig 5) | Material |
| A: 3.0 cm saw blade | Wooden materials, plastic, metal, gypsum and other soft materials. |
| B: 3.2 cm saw blade | Wooden materials, plastic, metal, gypsum and other soft materials. |
| C: 2.0 cm saw blade | Wooden materials, plastic, metal, gypsum and other soft materials. |
| D: 1.0 cm small saw blade | Wooden materials, plastic, metal, gypsum and other soft materials. |
| E: 9.0 cm segment blade | Wooden materials, plastic, metal, gypsum and other soft materials. |
| F: 3.0 cm scraping blade | Suitable for the removal of paint and carpet. |
| G: 9.0 cm carbide segment blade | Cuts grooves in drywall, plaster, lightweight concrete and similar materials |
| H: Triangular sanding pad | Sanding pad for 90x90x90 sized sanding papers. |
| I: Triangular sanding papers | Sanding papers in different grains: • 120 • 180 • 240 |
| J: Finger sanding pad | Sanding pad for finger sanding papers. |
| K: Finger sanding papers | Finger sanding papers in different grains: • 120 • 180 • 240 |
9.4.2 Sawing

Use undamaged faultless saw blades only. Deformed, blunt saw blades or saw blades that are otherwise damaged can break.

Plunge cuts may only be applied to soft materials, such as wood, gypsum plaster boards, etc.!
Before sawing with saw blades in wood, particle board, building materials, etc., check these for foreign objects such as nails, screws, or similar. If required, remove foreign objects or use saw blades for metal.
9.4.3 Sanding
The removal rate and the sanding pattern are primarily determined by the choice of sanding sheet, the pre-set oscillation rate and the applied pressure.
Only flawless sanding sheets achieve good sanding capacity and extend the service life of the machine.
Pay attention to apply uniform sanding pressure; this increases the working life of the sanding sheets.
Intensifying the sanding pressure does not lead to an increase of the sanding capacity, but to increased wear of the machine and the sanding sheet.
For precise on-the-spot sanding of edges, corners and hard to reach areas, it is also possible to work with the finger sanding pad.
When selectively sanding on the spot, the sanding sheet can heat up considerably. Reduce the orbital stroke rate and allow the sanding sheet to cool down regularly.
A sanding sheet that has been used for metal should not be used for other materials.
9.4.4 Scraping
For scraping, select a high oscillation rate.
Work on a soft surface (e.g. wood) at a flat angle and apply only light pressure. Otherwise the scraper can cut into the surface.
10 CLEANING AND MAINTENANCE

Before performing any work on the equipment, pull the power plug.
- Keep the ventilation slots of the machine clean to prevent overheating of the engine.
- Regularly clean the machine housing with a soft cloth, preferably after each use.
- Keep the ventilation slots free from dust and dirt.
- If the dirt does not come off use a soft cloth moistened with soapy water.
- Never use solvents such as petrol, alcohol, ammonia water, etc. These solvents may damage the plastic parts.

Make sure no water can reach the inside of the power tool!
11 TECHNICAL DETAILS
| Model nr. | POWX1331LI |
| Voltage | 18 V |
| Battery capacity | 1300 mAh |
| No load speed | 5000-19000/min-1 |
| Number of speed settings | 6 |
| Battery cell | INR18650E |
| Battery pack | WTLB-01 |
| Charger | |
| Charge Time | 1 h |
| Charger rating input | 100-240VAC, 25W |
| Charger rating output | 21,4VDC, 1.3AMAX |
12 NOISE
Noise emission values measured according to relevant standard. (K = 3)
Acoustic pressure level LpA 81 dB(A)
Acoustic power level LwA 92 dB(A)

ATTENTION! Wear hearing protection when sound pressure is over 85 dB(A).
aw (Vibration)
9.6 m/s²
K = 1.5 m/s²
13 WARRANTY
This product is warranted for a 36-month period effective from the date of purchase by the first user.
- This warranty covers all material or production flaws excluding : batteries, chargers, defective parts subject to normal wear & tear such as bearings, brushes, cables, and plugs, or accessories such as drills, drill bits, saw blades, etc. ; damage or defects resulting from maltreatment, accidents or alterations; nor the cost of transportation.
- Damage and/or defects resulting from inappropriate use also do not fall under the warranty provisions.
We also disclaim all liability for any bodily injury resulting from inappropriate use of the tool.
- Repairs may only be carried out by an authorised customer service centre for Powerplus tools.
- You can always obtain more information at the number 00 32 3 292 92 90.
- Any transportation costs shall always be borne by the customer, unless agreed otherwise in writing.
- At the same time, no claim can be made on the warranty if the damage of the device is the result of negligent maintenance or overload.
- Definitely excluded from the warranty is damage resulting from fluid permeation, excessive dust penetration, intentional damage (on purpose or by gross carelessness), inappropriate usage (use for purposes for which the device is not suitable), incompetent usage (e.g. not following the instructions given in the manual), inexpert assembly, lightning strike, erroneous net voltage. This list is not exhaustive.
- Acceptance of claims under warranty can never lead to the prolongation of the warranty period nor commencement of a new warranty period in case of a device replacement.
Devices or parts which are replaced under the warranty therefore remain the property of Varo NV.
- We reserve the right to reject a claim whenever the purchase cannot be verified or when it is clear that the product has not been properly maintained. (Clean ventilation slots, carbon brushes serviced regularly, etc.).
- Your purchase receipt must be kept as proof of date of purchase.
- Your appliance must be returned undismantled to your dealer in an acceptably clean state, (in its original blow-moulded case if applicable to the unit), accompanied by proof of purchase.
- Your tool must be charged at least 1x per month to ensure optimal operation of this tool.
14 ENVIRONMENT

Should your appliance need replacement after extended use, do not dispose of it with the household refuse, but in an environmentally safe way.
Waste produced by electrical machine items should not be handled like normal household rubbish. Please recycle where recycle facilities exist. Check with your Local Authority or retailer for recycling advice.
15 DECLARATION OF CONFORMITY


VARO N.V. - Joseph Van Instraat 9 - BE2500 Lier - BELGIUM, declares that,
Product: Multi-use tool
Trade mark: POWERplus
Model:POWX1331LI
is in conformity with the essential requirements and other relevant provisions of the applicable European Directives, based on the application of European harmonized standards. Any unauthorized modification of the apparatus voids this declaration.
European Directives (including, if applicable, their amendments up to the date of signature):
2011/65/EU
2014/30/EU
2006/42/EC
European harmonized standards (including, if applicable, their amendments up to the date of signature):
EN60745-1:2009
EN60745-2-4:2009
EN55014-1:2006
EN55014-2:2015
Keeper of the Technical Documentation: Philippe Vankerkhove, VARO - Vic. Van Rompuy N.V.
The undersigned acts on behalf of the company CEO,

Hugo Cuypers
Certification Manager
Date: 13/11/2017, Belgium
Responsible de certifications
Fecha: 13/11/2017, Belgium
Certification Manager
13/11/2017, Belgium
1 APLICACAO. 3
2 DESCRIÇA(O FIG.A-FIG.5) 3
3 LISTADE CONTEUDO DA EMBALAGEM 3
4 SIMBOLOS 3
5 PROCEDIMENTOS GERAIS DE SEGURANCA 4
5.1 Area de trabajo 4
5.2 Seguranca eltrica 4
5.3 Seguranta persona 5
5.4 Manuseamento e emprego de ferramentas electrolyicas com precauacao... 5
5.5 Bateria -utilização eeguardados a ter.. 6
5.6 Assistance Tecnica 6
6 INSTRUÇÉS DE SERVICO ESPECÍCías DO APARELHO....6
7 INSTRUÇÉS DE SEGURANÇA ADICIONAIS PARA BATERIAS E CARREGADOS
7.1 Baterias 7
7.2 Carregadores 7
8 MONTAGEM 8
8.1 Montar o disco de lixa/ lamina de serra/ espátula (Fig. 1) 8
8.2 Colocar/mudar o papel de lixa 8
8.3 Montar a extracao de po (Fig. 4)
9 FUNCIONAMENTO 8
9.1 Carregar o Conjunto da bateria (Fig. 4) 8
9.2 Remover/Inserir a bateria 9
9.3 Ajuste de velocidade (Fig. 3) 9
9.4 Dicas de aplicacao 10
9.4.1 SeLECTIONAR a ferramenta de trabajo 10
9.4.2 Serrar 10
9.4.3 Lixar 11
9.4.4 Raspar 11
10 LIMPEZA E MANUTENCAO 11
11 DADOS TECNICOS 12
POWERPLUS HIGH QUALITY TOOLS
POWX1331LI PT
12 RUIDO 12
13 GARANTIA 13
14 MEIO-AMBIENTE 13
15 DECLARACAO DE CONFORMIDADE 14
FERRAMENTA MULTIUSOS 18 V POWX1331LI
1 APLICACAO
Data: 13/11/2017, Belgium
1 BRUKSOMRADE 3
2 BESKRIVELSE (FIG. A - FIG. 5) 3
3 PAKKENS INNHOld 3
4 SYMBOLFORKLARING 4
5 GENERELLE SIKKERHETSADVVARSLER 4
5.1Arbeidsplassen 4
5.2 Elektrisk sikkerhet 4
5.3 Personsikkerhet.. 5
5.4 Vær noyaktig og omhyggelig nár du omgås elektroverktøy... 5
5.5 Bruk og stell av batteridrevne verktoy 5
5.6 Service 6
6 MASKINAVHENGIG SIKKERHETSINFORMASJON 6
7 EKSTRA SIKKERHETSREGLER FOR BATTERIER OG LADERE
7.1 Batterier.. 6
7.2 Ladere. 7
8 MONTERING 7
8.1 Montere slipeplate/sagblad/spatel (Fig. 1)
8.2 Montere/skifte slitepapir (Fig. 2)
9 BRUK. 8
9.1 Lade batteripakken (Fig. 4). 8
9.2 Installere og fjerne batteriet (Fig. 3)
9.3 Hastighetsjustering (Fig. 3) 9
9.4 Tips om bruken 9
9.4.1 Valg av innsatsverktoy 9
9.4.2 Saging 10
9.4.3 Sliping 10
9.4.4 Skraping 10
10 RENGJØRING OG VEDLIKEHOLD 10
11 TEKNISKE DATA 11
POWERPLUS HIGH QUALITY TOOLS
POWX1331LI NO
12 STOY 11
13 GARANTI. 11
14 MILJ0 12
15 SAMSVARSERKLÄERING 13
18 V MULTIVERKTØYPOWX1331LI
1 BRUKSOMRADE
12 × 2 "slipepapir
1 x spliceplate
4xgr120
1 x fingerslipeplate
4xgr180
1 x Lader
4xgr240
2 x batteri
1x3,0cm sagblad
12 × 3 "slipepapir
1x3,2cm sagblad
4xgr120
1x2,0cm sagblad
4xgr180
1x1,0cm sagblad
4xgr240
1 × 9,0 cm karbid segmentsagblad

Hvis du oppdager manglende eller skadede deler ma du ta kontakt med forhandleren.
4 SYMBOLFORKLARING
8.1 Montere landslide/sagblad/spatel (Fig. 1)

10 RENGJØRING OG VEDLIKEHOLD

12 × 2 "slippaper
1 x slipplatta
4x grovlek 120
1 x fingerslipplatta
4x grovlek 180
1 x Laddare
4x grovlek 240
2 x batterier
1x3,0cm sagblad
12 × 3 slippaper
1x3,2cm sagblad
4x grovlek 120
1x2,0cm sagblad
4x grovlek 180
1x1,0cm sagblad
4x grovlek 240
1 x 9,0 cm extra litet segmentblad i hårdmetall

1x3,0cmskrapblad
5 TENIKE Π P O E I ΔΟ N O I H Ε E I Α Σ Φ A Λ E I A Σ Γ I A T A H Λ E K T P I K A E P A Λ E I A 4
5.1 Xwpos epyaia 4
5.2 HAAKtpiKa aovaaia 4
5.3 Aotuikn aovapaleia 5
5.4 Xpionkai φpovriδa rων ηλεκτρικων εργαλειων... 5
5.5 Xpnoi Kaipovriδa rou εpyaεiou 6
5.6 2
6 IPOEIOIHSEI AΦAIAEIGEIAEIGEIGEIA TO MHXANHMA
7 IPOsOETE OADHIEAΦAAEIAI A MNTAPIEKAI FOPTIETE
7.1 Mparapiεs 7
7.2 8
8 SYNAPMOAOH
8.1 v a p o o y n a a / p i o v / n a o u (E i k. 1) .
8.2 TootheTnog/aaayy yuaoxaprou 9
9 AEITOYPTIA 9
9.1 Φόρπητου πακετου μπαταρίας (Eik. 4) 9
9.2 Aqipaeon / rootheeTnOn Tns mparapias 10
9.3 Puroion tsraxturnta (Eik. 3) 10
9.4 10
9.4.1 Etnovn 3apntuaoc 10
9.4.2 Ipiovia 11
9.4.3 11
9.4.4 AnoEon 11
10 KAOAPIEMOe KAI SYNTHPHsH 12
POWERPLUS HIGH QUALITY TOOLS
POWX1331LI EL
11 TEXNIKA ΣTOIXEIA 12
12 0OPYBOs 12
13 ERTYH2H 13
14 IEPIBAAON 14
15 H H YMMOP H 14
EPTAAEIO NOAAANAQN AEITOYPTIQN 18 V POWX1347MC
1 EΦAPMÖΓH
Avaloya To Eaptnma Tnou TOnoTeiTai, auto To nEeKtpko Epyaeeio Ppooipetai yia e npn Aiaovn iKpwoV Tepioxwv, KaOwC KAI YIA Tpiovioa, aTOcEon, OTIABOW, TPIIPO, KOIN KAI diaxomega.

IPOEIAOIOIHSH! Ia Tn Dikn Oac aopalaia, diaBaoTe PPOeKTKa auto To Eyxepidio kai Tc odnyiecs aopalaiaac Tpiv xpnoiotoinoeteto mnxavna. Av dwoete to nlektpiKO epyaaleio oac oe allo xpnoTn, 0a TpeTTe va dwoete ma zi kai autec Tc odnyiecs.
Me "ypnyopo" yavzoo kai ouotma taxaic aen
ToTtOeTnOte To yuaXoYapTo KAI TIEOTe TO uE To XepI.
Piote to yuaoyapto e pia ouvtoun, otaepn wthon navw otnv tpieneo tiipaveia ng
Tlakac 5iavoc (12) kai thee oE aeitoupyia to nektpko epyaio.
-Auto eaaqalizkai kn npokolnon kui uotobici tvnpowp qopca.
Av to yuaoxapto qthetai, TpaBnETo Ew, yupioTe To kata 120° KAI TOITIOETNOTE TO nai, n aaaaTe yuaoxapto.
9 AEITOYPTIA
Adaptorul (c) include o lampa LED (Fig. 4).
POWX1331LI RO
Data: 13/11/2017, Belgium
URZADZENIE WIELOFUNKCYJNE 18 V 3
Data: 13/11/2017, Belgium
Ecnn deTaN OTCyTCTByOT NIN NOBpeXdeHbI, o6paNTecb K CBOemy dInepy.
4 yCJIOBHBIE O6O3HAUeHnIa
B daHOM pykoOCTBe n/nn Ha cAmo MaunHe NCNoJIb3yIOTc CJeDyIOUne CmBOJIbI:
AanTep (c) nMeET OINH CBeToIONoHyn HNdkaTOp. (Cm.Pnc.4)
- BCTaBbTe 7tEnceJIb aIaItepa (c) B COOTBeTCTByIOUyIO po3eTKy IITaHn.IHdNkaTOp IITaHn (c) 3aTOpNTcA 3eJeHbIM UBEtOM cpa3V NocNE VcneuHoro NOKlnOueHn.
- BCTaBbTe 3apJHoro yCtpoNCTBa (a) B rHe3do 3apJAKn (b) aKKyMyJrTOpHoro 6NoKa (7) n y6eHITecb B npOuHOM coEduHEHN. INdNKATOP NITaHNA (d) n3MeHIT cBeT Ha KpaCHbHa aadantpe (c), YTO O3HauaET npOeCC 3apJKn 6NoKa 6atapei.
- Korda akkymnyaTOp 3apAaTcra, INDnKaTOp NITaHna (c) CMeHNT cBET c Kpachoro Ha 3eJeHbI, NOka 3apAHOE VCTPOiCTBO He bYdET OTCOeDInHeHO OT aJIeKTPoCetN.
IPNMEUHNE: Ecnn aKKymyIaTOp He yCTaHaBnBaeTcnaJaXm 6pa3OM,OTcoeHHTe erO n y6eHntecb B npabInbHOJ MoJeN aKKymyIaTOpHoro 6noka dJa daHHoro 3apAnHO rYCTpoiCTBa, KaK nOKa3aHO B Ta6JIuCe TexHnueckx XapaKTePncTnK.
He 3apjkaTe aKKyMylTOpHbIe 6JIOK, KOToPbIE He COOTBeTCTBYOT 3apJHOmy yCTPOINCTBY.
- Yaune npOBepaIte 3apAHOe yCTPOE CTBO N AKKUMYTAOPHbN 6JOK pR N PONKIOUOHeHN.
- BbInbTe 3apdHoe yctpoIcTBO n3 po3ETKn IOTcoeHNHTe erO OT aKKymyIaTOPHO 6Joka No 3aBepseHm 3apdKn.
3.Пелед Исторбовем дайе akкулг�тогиму 6лOKУ NONHOCTьОXlaДИТьСА - XpaHnte 3apAHOe yCTpoiCTBO n aKKyMylTOpHbI 6JOK B NOMEUeHN, B HeOCTyHOM
PIMMEUHNE: Ecnn aKKymyIaTOP cTaHOBITcRrOpyM NocNe npoDOnXHTbHOrO nCNoJIb3OBaHnB INHCTpyMeHTe, daTe eMy OxJaNTbcra DO KOMHaTHOH TeMpepaTpybl nepei 3apAko. 3TO npoDnIT cPoK cnKy6bl aKKymyIaTOPOB.
9.2 Chamue/ycmaHOeKa aKKMyJnMopa
PNEyPExEHN:peepBbIOJIHeHemIHO6bIXpeyIpOBOKy6eNTecb,TO YHBepcaIbHbI pe3ak BbIKIOueH.
1 Depxnte yHnBepcaIbHbI pe3ak OJHO npKo, a akymyIaTOpHbI 6JOK (6) dpYrOpyKO.
2 ⅡyctaHOBKn:NOTAHHTe N BCTaBBte AKKMyJITOPHbI 6NOK B AKKMyJITOPHbIO TceK, y6eHITecb, yTO fIKCaTOp (5) cObeix CTopoH AKKMyJITopa 3aUeKNHJNC, aAKKMYJITOP 3aKpePHeH nepd Haayanom pa60Tbl.
3 60nbHn m naBcHm OCTaHbIMn naBcA MOCBOOHTe fHKCaTOPbIOHOBPMeHHo N3BNEKNTe AKVMNTOPHbI 6nOK.
9.3 PezylupoEka ckopocmu (Puc. 6)
10 OBCJNYKBAHNE N UNTKA

BHMaHne! Ipeed BbInonHeHem IIO6bIX pa6OT Ha o6OpydoBaHm BbIHMaTe WTeNceIbHyIO BnIKy n3 po3eTK.
CoepKnte BHTNJIaIOHHbIe OTBepCTnMaINHbIB YnCTOTE BO n36exAHne neperpeBa DnurateJra.
PeryIpaHO ouuuaTe KOpNc MaunHbI MraKoTpAnKO,KeNaTeJbHO nocJe KaXdoRo NCNoJIb3OBAHnA.
He donyckaTe nonadHnBbIn n rpa3n BBeHTNJrOHHbE OTBepCTnA.
Ecn np3b He oTxoNT, nCnoB3yIe MxKyIO TpIky, cnerka CMOueHHyIO B MbIbHOI BOe
He noIb3yItecb pactBOpHTeJAMN, TAKIMN KAK 6eH3NH, CnnpT, AMMnaUHaB BOa n T.I. 3TN BeueCTBa MOrYT NOBpeDITb PnactMacCOBBie DeTaJIi.

Y6eHNTecb, YTO BHyTpB 3JKeKtpOHnHCTpyMeHTa He MoXeT npOHnKaTb BOda!
11 TEXHnueCKne DAHHbIe
14 OKPYXKAIOUJAR CPEDA

EcnB Bau annapat Tpe6yet 3ameHb Iocne dIITeJIbHOro nCnoJIb3OBaHn, He Bbl6paCbIbaIte erO BMecTe C DoMaUHM MycOpOM, a NcNoJIb3yIte 3KOJIOnrueckn 6e3oNaChbI cnoc6 dIra erO yTnIIu3aun.
C OTXODAMN 3NEKTPnuecknx MaunH HeJIb38 O6paUaTbcra KAc C 06bIuHbIMN 6bITOBbIMN OTXODAMN. N03a6oTBTeCb 6bYtIN3aunrTam, Ie dIy 3TOO eCTb COOTBETCTByUOUIne yCTaHOBKn. PpOKOHcyIbTnpUYTeCb y MeCThIx OprAHOB BNaCTN INy y npOdaBua O BO3MOxHOCTHy TtIN3aUnn.
VARO N.V. - Joseph Van Instraat 9 - BE2500 Lier - BELBΓI, HACTOUM 3aABnEeT,
PpOdyKT:YHnBepcaIbHbIpe3aK
Mapka: POWERplus
MoeJIb:POWX133LI
COOTBETCTByeT O63aTeJIbHbIM Tpe6OBAHnM INHbIM COOTBETCTBYIOUm NOIOXKeHnM DeIcTByIOuNX Ebponecknx DnpeKTHB, OCHOBaHHbIX Ha Ebponecknx rapMOHN3npoBaHHbIX CTAndapTx. JIO6oe HecaHKUHOHpOBaHHOE N3MeHeHne yCTpoiCTBa aHHynpyet daHHoe 3aABnHeHne.
Ebponeckne dnpekTbbl (Bknohya, ecn npmehmo, nx nonpaBkn do daTbI noDncahna):
2011/65/EU
2014/30/EU
2006/42/EC
Ebponeckne rapMOHN3npOBaHHbI cTaHdapTbI (BkJIIOUa, ecNI npIMeHMo, nx nonpaBKn do DaTbI NOINCAHNA):
EN60745-1:2009
EN60745-2-4:2009
EN55014-1:2006
EN55014-2:2015
Держателов Тхионьдokум entaци:Филп Baнкерхов (Philippe Vankerkhove), VARO -Vic.Van Rompuy N.V.
HnKeNoDnncabwnc daeCTByeT OT nMeHN VcNoHHeIbHO rneKTopa KOMnaHIn,

Hugo Cuypers
MeHedjep no cepTnΦnkaun
Data: 13/11/2017, Belgium
1 IPEdHA3HauEHe H A EJEKTPOHCTPymeHTA. 3
2 OINCAHNE (ΦNΓ. A - ΦNΓ.5) 3
3 CnncbK HA CbIbPjXAHNETo HA ONAKOBKATA. 3
4 CnMBOJIH 4
5OBuINIPEyUNPEXJEHNA B63OJACHOCT PnN3IOJ3BAHE HA EJEKTPOHHCTPYMEHTN 4
5.1 Pa6omHa 30Ha 4
5.2 EneKmpo6e30nacHocm 4
5.3 JIuHa 6e3oNaChocm.. 5
5.4 3no3eane u apuxu 3a eenekmpouHcmpyMehma 5
5.5 Ynompe6a u epuku 3a uncmpymeHm Ha 6amepuu..
5.6 Cepu3Ho 06cnykeaHe.. 6
6 YKA3AHN 3A BE3OJACHA PABOTA, CNEUΦNCHN 3A 3AKYNEH N OT BAC ENEKTPOHCTPymeHT. 6
7 IOnbJIHNTeJIHH INHCTPYKcIIN 3A B6E3OJACHOCT 3A AKyMylATOPHN BATEPNN 3APJdHI YCTPOJCTBA...
7.1 Bamepuu 7
7.2 3apnHu ycmpoucmea.. 8
8 MOHTAX 8
8.1 MoHmupaHe Ha wnufoebyhama nnoya/pekeuur nucm/wa6bpa (Uz. 1) ...8
8.2 IocmaeHa/cmHa Ha uKypkama... 9
9 PA6OTA 9
9.1 3apejdahe Ha 6amepuma (fua.4) 9
9.2 OmcmpaHReae /nocmaeHa 6amepuyma... 10
9.3 Peaylupahe Ha ckopocmma (Fue. 6) 10
9.4 IpuioxHu cbeemu 10
9.4.1 Ⅰ36opHa pa6oTHnIHcTpyMeHT. 10
9.4.2 P83aHe 11
9.4.3 11
9.4.4 Ⅲa6poBaHe/cTbpraHe 11
10 IOUHCTBAHEIIOIDPbJKA 12
POWERPLUS HIGH QUALITY TOOLS
POWX1331LI BG
11 TEXHnueCKn DAHHN 12
12 12
13 TAPAHUN 12
14 OKOJIHACPEDA 13
15 DEKJIAPAUJ3ACbOTBETCTBNE 14
MHOROUEJEBV NHCTPymeHT 18 VPOWX1331LI
1 ПЕДHA3HAUECHNE HA ELEKTPOHCHTPUMEHTA
B 3aBnCmOCT OT MOHTnpaHaTa npHAnEeXHoCT, TO3n eIeKTPoHnCTpyMeHt e npeHa3HaueH 3a cyxo IJIOPOBaHe Ha MaIKN 30Hn, 7a6pOBAHe, NOJIIPAHe, INJIHe, PRA3aH e N OTPra3BaHe.

IpeynpejdeHne! Ipei Da n3noJ3BaTe HNCTpyMeHTa, npoyeTeBHNMaTeJIHO TOBa pKOBODCTBO N O6uNTe HNCTpyKcUN 3a 6e3OnaCHocT,3apaN BaWaTa CO6CTBeHa CNrpyHocT. Baunr eJeKTPOINHCTpyMeHT Tp8Ba Da ce IpeDaBA Ha dpyr cAmO 3aeDHO C HAcToaUnte HNCTpyKcUN.
2 ONICAHNE (ΦNΓ. A - ΦNΓ.5)
- JIoCT 3a 6bp3O OcBo6oxJaBaHe
- KJIIOU 3a BKNJ./N3KJI.
-
PbkoXBaTka
4.Индikatop 3a MoIHCCTTHa 6atepnaTa -
E3nue 3a ocbo6oxdaBaHe Ha 6atepnaTa
- Akymylatopha 6aTepey
- BeHTnlaUOHHN OTBOPN
8.ДиCKOBperyaTOpHaCKopoCTTa - Cko6a 3a 6bp3o ocbo6oxJaBaHe
3 CnncbK HA CbДbPxAHNETO HA ONAKOBKATA
- OTCTpaHete BCNUKOnaKOBbUHN MaTePnAIN.
- OtctpaHete octaHaNTe onakOBbUHN IN BpeMeHHN NOCTaBKn (ako nMa TaKnBa).
PpOBepTe daHn naKeTbT CbIbpxa BCNUK KOMNoHEHTN.
IpoBepTe dann ypeBt, 3axpaHbAunrKa6en, uencenbT n akcecoapnte He ca 6nn noBpeDeH np TpaHcnpTupaHe. - Ipa3eTe onakOBbHnTe MaTePnaI NoTuN Do KpaHa rapaHcNoHHnepnoD. CneT ToBa n3XbPnTe B nyHKT 3a cb6nPaHe Ha otNaDbuN.

BHIMAHHE! OnakOBbUHnTe MaTePnaIh He ca nrgpaKn! He no3BOJBaTe Ha deca da nrgpArT c HauNoHOBn Top6uKn! Pnck ot 3aDyuaBaHe!
1xMHOROueJIeBNHCTpyMeHT
1xnnactnHa3aunnoBaHe
1xnnactnHa 3a nnnoBaHe C opMaTa Ha npbCT
1x3apndno yctpoictBO
2x6aTeepn
12× 3'' uKypkn
4x1203bphncTOcT
4x1803bphncTOCT
4x2403bphncTOcT
12x2"шкypkn
4x1203bphncTOcT
4x1803bphnCTOCT
4x2403bphnCTOCT
1x3,0cmHOX
1x3,2cmHOX
1x2,0cmHOX
1x1,0cmHOX
1x9,0cm TBbPdoCnlaBeH cerMeHTnpaH HOX
1x3,0cmHOX3awa6ep
1x9,0cm cerMeHTnpaH HOX3a DbPBO
1xpbkoBOdCTBO

B cnya, Ye hakon yactn IINCBat nIi ca NOBpeHn, CBbpxKeTe ce C MeCTHn npedctabnteJ.
4 CnMBOJIi
B HacToaHnHaPbUHNK N/INN BbPxMy MaunHaTa ca N3NoJ3BaHn CJIeDHHTe CmBOJN:
BHHMaBaTe C octTp nHcTpMeHTn, KaTo 7NaTuJN, TpNoHn JIN HOXOBe.
Pa3xna6epe npntnckaata nactHa (b) ype3 n3TeTJHe Ha locta 3a 6bp30 ocbo6oxkdaBaHe (1) do nbJHo OTBapJe.
3aApbKTe OTBopa 6bp30 MOHTnpaunCe HOK, pNaCTnHaTa 3a WnObaHe IINnIaTynata KbM BbHnna WnHdEn, KOTo e MeJy NOKpNBHaTa cKo6a (a) n npNTnCKaunata nnactnHa (b), HATncHEte akcecoapa HABbTpne ng pa3noJoxeTe Cta6nHNO Bbpxu ceHTnpaunte uNTOBe (c).
3aterheke kato n3non3BaTe IocTa 3a 6bp30 ocbo6kdaBaHe (1) B 3aknueho noIOXeHne, KaKTo e NOKa3aHO Ha .1.
- Chemete akcecoapa no o6paTHnHaunH.

He 3apeKdaTe KAKBaTo n da 6nNo dpyra 6aTePnna nn 6aTePnna, KOrTO He npnIra cnrypHo KbM 3apAnHOTO yCTpOnCTBO.
- Ha6nIaBaTe yeCTo 3apAnHO yCTPOcTBO n 6aTePnra, dokaTo ca Cbbp3aHn.
- 3BaTe 5eCenJa Ha 3apAnHTo yCTpOcTBo n ro pa3KaayeTe ot 6aTepyra, Korato 3aBbPwnte.
- Octabete 6aTePnTa Da ce OxlaHn HnBJIHo, npedn da a n3noJ3BaTe.
- CbxaHbAte 3apdHTo yctpoCTBO n 6aTepyTa Ha 3akpntO, daJeY OT o6cera Ha deca.
3A6EJEXKKA: Ako 6atepnaTa e ropeuca cnei npoDbjnxTeHa ynoTpe6a, octabeTe Ja ce oxnndo ctaHn TaemnpaTypa npedn 3apekdahe. ToBa ue ydbjnx JKBOTA ha 6atepnnte.
9.2 OmcmpaHBeaHe /nocmaBHe Ha 6amepuMa
PNEyPExEHN: Ppei Da npaBnte KaBnTo I da 6nlo perynipOBKn ce yMepeTe, MeHOrOueJIeBnT INCTpymEnT e N3KIIouHeN.
1 XbaHete MHOUeIeBn IHCtpymeT c eHaTa cn pbka n akymyIaTOPHaTa 6aTePnra (6) C dpyrata.
2 3a HnctaHnpaHe: n3dbpnaTe n nnb3HeTe akymyIaTopHaTa 6aTePnB O TdeneHneTo 3a 6aTePnra, kaTO ce yBepnte, ye e3uHcT (5) OT dBete cTpaHn Ha 6aTePnraTa ce fHKCupa Ha MRCTO n 6aTePnraTa e NOCDnrypeHa, PpeDn Da 3anOHTe pa6ota.
3 3a oTcpaHbAbe: KaTO n3NoJI3BaTe CBOr NaJIeU INPbCTN, HATNCHEte e3NUETaTa 3a OCBO6OxJaBaHe Ha 6aTepeRA HAbIpe Nn3DbpNaIe AkyMyJAtOPHaT aTepeR B CbUOTO BpeMe.
9.3 Pezylupahe Ha ckopocmma (Fua. 6)
HnctpymEnbT MoKe Da 6bDe HAcTpoen B 6 No3uNn Ha CkOpocTTa. N03uN "1" yka3Ba HanHnCKata, a No3uN "6" yka3Ba Han-BnCOKata CKOpOCT, KATO MOKeTe Da HAcTponte pa3nUHNCKOpOCTn CbC 3aBbPtaHe Ha DnCKa Ha perynatopa (4) B No3uN OTo "1" Do "6". OpepatopBT MoKe Da npomeHa CkOpocTTa, 3a Da ONTNM3npa eFeKTNBHOCTTA Ha CBOrTa pa6ota.
9.4 PpuJoxHu cbeemu
9.4.1 N36op Ha pa60THnHnHCTpyMeHT
| Ак既要ар (Фиг. 5) | Материал |
| A: 3,0 см пох | Дървени материалу, пл actmaca,metan, rinnси друг'mekn materinaи. |
| B: 3,2 см пох | Дървени материалу, пл actmaca,metan, rinnси друг'mekn materinaи. |
| C: 2,0 см пох | Дървени материалу, пл actmaca,metan, rinnси друг'mekn materinaи. |
| D: 1,0 см пох | Дървени материалу, пл actmaca,metan, rinnси друг'mekn materinaи. |
| E: 9,0 см сergentиран пох | Дървени материалу, пл actmaca,metan, rinnси друг'mekn materinaи. |
| F: 3,0 см пох зашавер | Пождожац за остсановане на поя иhaltимки. |
| G: 9,0 см Тьрдоспален сergentиран пох | Изразда в каль в гинсокартон, мазлka, лекбетон и поюбни мaterinaи |
| H: Трьглна положka зашифоване | Пождожа зашифоване зашикукс с размер90x90x90. |
| I:Трильгелнишкypки | Шкypки с различна зврпостов: • 120 • 180 • 240 |
| J:Посложka зашифованecформата На пьст | Посложka зашифованecашкypкис формата на пьст. |
| К:Шкypкисформата на пьст | Шкypкисформата на пьстс различна Зврпостов: • 120 • 180 • 240 |
9.4.2 P3aHe

I3noJ3BaIte cAmO n3pAHN Ido6pe 3aToUeHn peXeun JNCTOBe. OrBHaTn, 3aTbNeHn IIN NOBpeDeHN peXeun JNCTOBe MORaT da ce cChyIaT.
Donycka ce npobuBaHeTo c pexeunia JnCT caMo Ha MeKn MaTepnai, KaTo DbpBecnHa, rHnckapToH nI np.!.
Ipei np3aHe C pexeun INCTOBE B DbPBO, TaanuT, CTponTeJHn MaTepnaHn npOBepTe 3a HJIyHne Ha yxKdN IpeDMeTN KATO NPOHn, BInTOBe NIN dpyrN NOO6HN. aKO e Heo6XoDMO,OTCTpaHete UyKdNTe PpeDMeTN INN N3NOJ3BaHTe pexeun INCTOBE 3a MetaI.
9.4.3 ⅢnfoBaHe
IHTEH3NBHOCCTTHa OTHemaHe I KaueCTBOTO Ha NOBbpxHOCTTa Ce ONpeJeT rnaBHO OT
n3bopa Ha shkypka, HactpoeHaTa YecToTa Ha Bn6pnpaHe n Cnilata Ha npITnCKaHe.
Camo shkypKn B 6e3yKOpHo cBcTOrHne OCnrypaBt Do6pa npOn3BOJNTeJIHOCT n ppeJa3BaT
eNEKTPoINHCTpyMeHrTa OT npExKeBpeMeHHO n3HOCBAHe.
IbpeHa pa6oTa npTnCKaTe eJekTpo-UNCTpyMeHTa paBHomepHo, 3a da yBeHnUHTe. IbIroTpauHOCTTa Ha uKypKaTa.
IpekomepHTo yBEnuBaHe Ha CnNaTa Ha npTnCKaHe He BOn Do yBeNnUbaHe N Ha INHTeH3NBocCTTa Ha OTHemaHe, a Do No-6bP3OTo n3HOCBaHe Ha ShKypKaTa N Ha eNEkTpOHnCtpymeHa.
3a npceu3HO uHnfoBaHe Ha brrn, pboBe n TpydnoocTbHn 3OHm MoKeTe da uHnfoBaTe n cAmO C Bbpxa Hn HraKo OT pboBete Ha uHnfoBaUata nnoua.
Pn uHIOBOaHe B TOUka WkypKaTa MoKe Da ce Harpee CInHO. HamaTe YeCTOTata Ha BbpaunTe n nepNouHcOCTaBraTe WkypKaTa Da ce OxJaN.
He n3no3BaIe 6Kypka, c KoTcTe o6pa6oTBaII MeTaN, 3a 7nObaHe Ha npyBn BIOBe MaTePnA.
9.4.4 Ⅲa6poBaHe/cTbpraHe
Pn 76pOBeH BnHar N36paTHe BnCoka YecToTa H Bn6paunTe.
Pa6oTe Te Bbpxy Meka OCHOBa (Ha np. DbpBeHo Tpynpe) nO d octbp bIbn C MaJka CnJa Ha npITnCKaHe. B npOTuBEN cnyaH ShnaknaT MaOke Da ce BpeKe B OCHOBaTa.
10 NOUHCTBAHE I IOIDPbJKA

IpeHn 3BbPwBaHe Ha KaKBaTo n Da 6nlo pa6oTa no 6opUdBaHeTo n3BaTe eJekTpnueckn yencei.
- PoiDlbpxaTe BeHTnlaOHHte npope3Ha HnHCTpyMeHTa YnCTn, 3a Da npedeOTbpaTne nperpraBaHe Ha DnBraTeJI.
- PernouHNO nooCTBaIte KOpnyca Ha nHcTpymeHTa C MeKa KbPna, 3a npenopbUbaHe cneB C8ka ynotpe6a.
- PoiDbpxaIe BeHTnlaUHnTe npope3n uCTn OT npax n 3ambpcBaHna.
Ako 3ambpcbaHnra He Morat da 6bdaT OTcpaHeH, n3noJ3BaIte MeKa Kbpna HanoeHa Cbc canyHeHa B0a.
He n3no13BaIte HIKORA pa3TBOpHTeIN KaTo 6eH3n, aKoxOJ, amOHyHa B0da N T.H. Te3n pa3TBopHTeIN MORAT Da NOpeaT pnaCTmacOBIne Yactn.