QRetraktor Fix - Car seat CASUALPLAY - Free user manual and instructions
Find the device manual for free QRetraktor Fix CASUALPLAY in PDF.
Frequently Asked Questions - QRetraktor Fix CASUALPLAY
User questions about QRetraktor Fix CASUALPLAY
0 question about this device. Answer the ones you know or ask your own.
Ask a new question about this device
Download the instructions for your Car seat in PDF format for free! Find your manual QRetraktor Fix - CASUALPLAY and take your electronic device back in hand. On this page are published all the documents necessary for the use of your device. QRetraktor Fix by CASUALPLAY.
USER MANUAL QRetraktor Fix CASUALPLAY
Barcelona (Spain) Tel: 24 938 648 02
Fax: +34 938 648 491
E-mail: play@play.cs
http: www.casualplay.com

900 150 346
Instruclones
Instruclons
Instructions
Anweisungen
Istruzione
Instruções
Instrukce
Utasitasok
Pokyny
Instrukcja
HnctpyKun
Espanol. 1
Català 9
English 17
Francais 24
Italiano 32
Portugues 40
Deutsch 48
Cesky. 56
Magyarul. 63
Slovensky. 71
Polskiv. 79
Pycckn 87

GB:Keep up your receipt in order to exercise your right as a consumer.
P. CoPPORATE BAIYOK, YIOTBO HMOB TOOOMHOOCHT BOOOHIOBBOTCR NPOBMA NOPTNOETN.
GB: The company reserves the right to make alterations to the product with regards to the description included in this instruction manual.
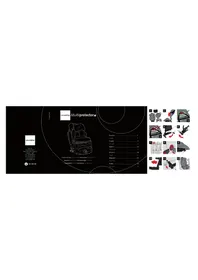
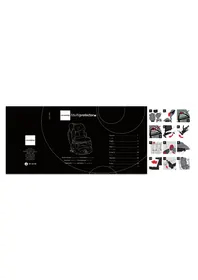
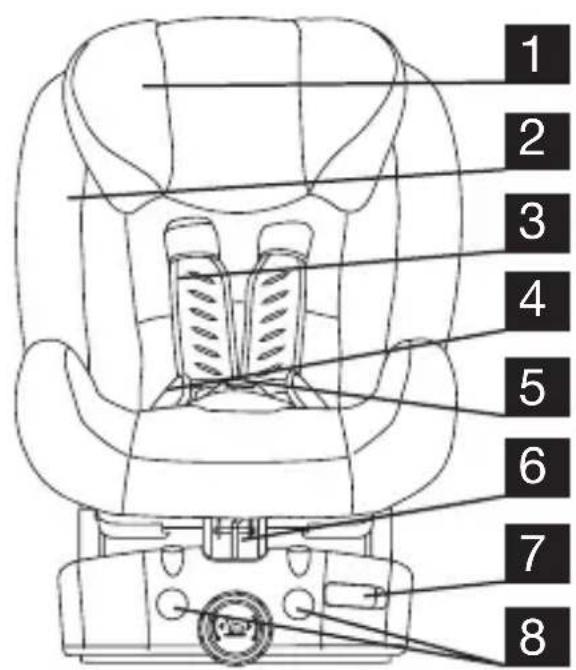
- Headrest
- Seat
- Shoulder pads
- Harness
- Buckle
- Lever to adjust the backrest position
- Isofix release handle
-
Slots for the optional support leg
-
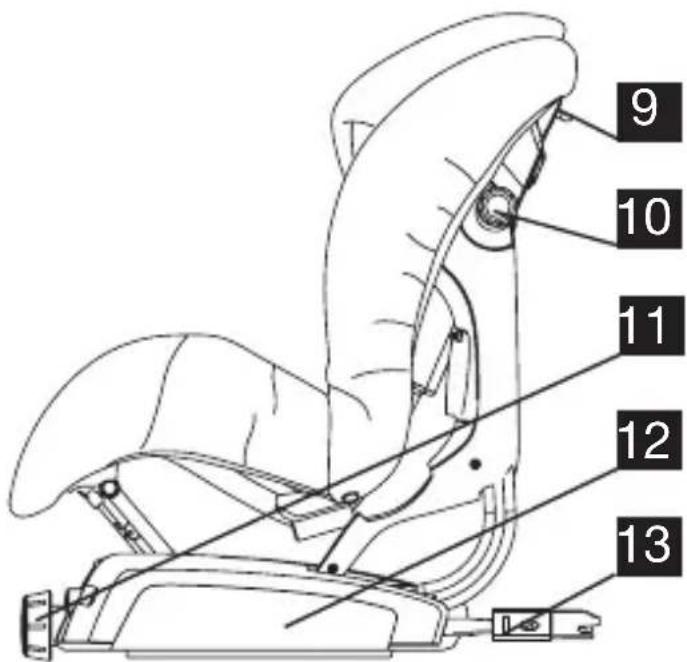
Top Tether ring
-
Harness and headrest height adjuster
- Isofix adjustment handle
- Base
- Isofix connectors
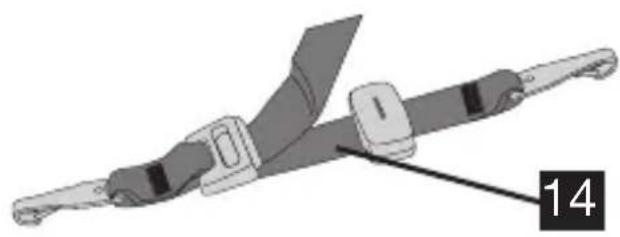
- Top Tether
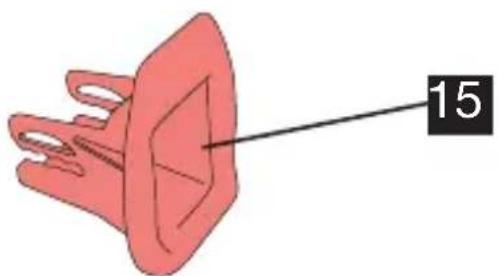
15 Centring clips (2 units)
NOTE
- This is a "UNIVERSAL" child restraint. It is approved to Regulation No.
44, 04 series of amendments, for general use in vehicles and it will fit most, but not all, car seats. - A correct fit is likely if the vehicle manufacturer has declared in the vehicle handbook that the vehicle is capable of accepting a "UNIVERSAL" child restraint for this age group.
- This child restraint has been classified as "UNIVERSAL" under more stringent conditions than those which applied to earlier designs which do not carry this notice.
- If in doubt, consult either the child restraint manufacturer or the retailer.
NOTE
- The category of this child restraint system is "SEMI-UNIVERSAL" and it is suitable for installation in the vehicles and in the seat positions indicated in the vehicle list inside this packaging.
- Other vehicles and seat positions may also be suitable for this restraint system.
- If in doubt, consult the manufacturer or retailer.
NOTICE
- This is an ISOFIX CHILD RESTRAINT SYSTEM. It is approved to Regulation n° 44, 04 series of amendments, for general use in vehicles fitted with ISOFIX anchorages systems.
- It will fit vehicles with positions approved as ISOFIX positions (as detailed in the vehicle handbook), depending on the category of child seat and of the fixture.
- The mass group and the ISOFIX size class for which this device is intended is: 9 - 18 kg and Class B1.
THE INSTRUCTION MANUAL SHOULD BE KEPT WITH THE Q-Retraktor fix WHILE IT IS IN USE.
Read these instructions carefully before using the article and keep them for future reference. The child's safety may be at risk if these instructions are not followed.
WARNING AND SAFETY NOTES
- The Q-Retraktor fix is a child safety seat belonging to Group 1 (from 9 to 18 kg).
- The seat can be installed in the vehicle using the Isofix connectors and the Top Tether (or the optional support leg).
- The original equipment must not be altered.
- After an accident the seat should be examined or replaced.
- Protect all parts of the seat from possible damage caused by the fold down seat or door of the vehicle.
- Protect all the metal parts that come into contact with the child from sunlight.
- The harness straps should never be twisted.
- Always use the safety seat, even on short journeys and never leave the child unattended inside the vehicle.
- Take the seat out of the car whenever it is not going to be used and keep it out of the reach of children.
- Any luggage or other objects that may cause injury in the event of a collision should be secured.
- We guarantee the safety of the device when it is used by the original buyer.
- It is not advisable to use second hand safety products.
- It is important that the other passengers in the vehicle also wear their seat belts, because in the event of an accident they could get flung about and injure the baby.
- If the seat is in the car and it is not in use, make sure it is fastened with the Isofix connected and the Top Tether (or the optional support leg).
Regularly check the different parts of the safety seat. - The seat should never be used without the upholstery.
- Only the upholstery supplied by the manufacturer of the seat should be used because it is an integral part of the product.
- You are responsible for the child's safety.
IMPORTANT: CONSULT THE VEHICLE INSTRUCTION MANUAL TO LOCATE THE FASTENING POINTS FOR THE ISOFIX SYSTEM AND THE TOP TETHER RING, AS WELL AS THE VEHICLES AUTHORISED FOR INSTALLATION WITH Support leg (OPTIONAL). IF IN DOUBT CONSULT YOUR VEHICLE DEALER.
ADJUSTING THE HEADREST
- Use the knobs on the sides to adjust the height of the headrest as required (fig.1).
- The headrest should be positioned so that the harness is at the height of the child's shoulders or slightly above. (fig.2).
How to use the buckle
To open the buckle, press the red button (fig.3).
- To fasten the buckle, put the two clasps together and insert them into the buckle (fig.4).
ADJUSTING THE RECLINING POSITION
- The reclining position of the child seat can be adjusted using the button found on the lower part of the seat (fig.5).
- Hold the button pressed down until reaching the required position, a click will indicate the different reclining positions.
FITTING THE INLET SOCKET
NOTE: If your vehicle already has these inlet sockets there is no need to fit them.
- Place the inlet sockets in front of both isofix anchor points, which are found between the seat and the backrest (fig.6).
INSTALLING THE CHILD SEAT IN THE VEHICLE (ISOFIX + TOP TETHER)
- Fit the inlet sockets. Consult the section explaining how to fit them if necessary.
- Position the child seat on the vehicle seat facing forwards.
- Extract the isofix connectors using the front button. Pull the button and turn it to the right (fig.7).
- Press the safety seat against the vehicle seat (fig.8) until both isofix connectors are fastened into the seat anchor points. It will click when correctly fastened (fig.9), and a green signal will appear on each connector (fig.10).
- Adjust the inclination of the seat. To do this consult the section referring to adjusting the reclining position.
-
Using the central button, adjust the chassis of the safety seat until it touches the backrest of the vehicle seat. Pull the button and turn it to the left (fig.11).
-
Clip the karabiner of the Top Tether (on the adjuster side) into the ring on the rear part of the backrest (fig.12), and connect the other end to the vehicle anchor point. (fig.13).
NOTE: consult your vehicle instruction manual to locate the Top Tether ring.
- Tighten the Top Tether until the red tab on the tension adjuster disappears (fig.14-15).
- Unfasten the harness buckle.
- Seat the child in the child car seat.
- Adjust the headrest.
- Extract the harness straps by pulling the top part while at the same time pulling the clasps and passing the straps over the child's shoulders.
- Fasten the safety buckle by joining the two clasps and inserting them into the buckle.
- The Retraktor fix harness is fitted with an automatic wind up system that adjusts the straps to fit the child's body.
- Lastly, make sure that the harness fits the child's body correctly, and if necessary, pull the abdominal belt a bit to eliminate any loose gaps.
NOTE: The Q-Retraktor Fix fix is fitted with an automatic wind up system, the same as the vehicle seat belt, which will lock the harness straps in the event of sharp braking or an accident.
TAKING THE CHILD CAR SEAT OUT OF THE VEHICLE (ISOFIX + TOP TETHER)
- Unfasten the safety harness and take the child out of the car seat.
- Unfasten the top tether by loosening the adjuster (fig.16) and unhooking both karabiners (fig.17).
- Release the two isofix connectors by pulling the front lever (coloured red) (fig.18). They will click when released, and a red signal will appear on both connectors (fig.19).
- Remove the child seat from the vehicle seat.
INSTALLING THE CHILD SEAT IN THE VEHICLE (ISOFIX + SUPPORT LEG)
NOTE: The support leg is an optional accessory that is sold separately.
-
Fit the inlet sockets. Consult the section explaining how to fit them if necessary.
-
Position the child seat on the vehicle seat facing forwards.
- Extract the isofix connectors using the front button. Pull the button and turn it to the right (fig.7).
- Press the safety seat against the vehicle seat (fig.8) until both isofix connectors are fastened into the seat anchor points. It will click when correctly fastened (fig.9), and a green signal will appear on each connector (fig10).
- Adjust the inclination of the seat. To do this consult the section referring to adjusting the reclining position.
- Using the central button, adjust the chassis of the safety seat until it touches the backrest of the vehicle seat. Pull the button and turn it to the left (fig.11).
- Take the two stoppers off the front part of the base (fig.20).
- Simultaneously press the two pivots found on the upper tubes (fig.21).
- Insert both tubes into the front slots. They will click when correctly fastened (fig.22).
- To adjust the height of the support leg, pull the red button found on the bar and pull the support foot until it touches the floor. Release the red part and check that it has not got stuck between two locking positions (fig.23).
WARNING: In order to obtain the maximum support possible, place it in the correct locking position.
WARNING: The support foot should not be in mid-air or resting on an object (fig.24).
- Unfasten the harness buckle.
- Seat the child in the child car seat.
- Adjust the headrest.
- Extract the harness straps by pulling the top part while at the same time pulling the clasps and passing the straps over the child's shoulders.
- Fasten the safety buckle by joining the two clasps and inserting them into the buckle.
- The Retraktor fix harness is fitted with an automatic wind up system that adjusts the straps to fit the child's body.
- Lastly, make sure that the harness fits the child's body correctly, and if necessary, pull the abdominal belt a bit to eliminate any loose gaps.
TAKING THE CHILD CAR SEAT OUT OF THE VEHICLE (ISOFIX + SUPPORT LEG)
- Unfasten the safety harness and take the child out of the car seat.
- Remove the support leg from the child seat. Simultaneously press the two buttons found on the upper part of the base and at the same time pull the support leg (fig.25).
- Release the two isofix connectors by pulling the front lever (coloured red) (fig.18). They will click when released, and a red signal will appear on both connectors (fig.19).
- Remove the child seat from the vehicle seat.
WARNING: If the retractor gets blocked, unblock it by pulling the two chest sections of the harness pressing on the metal plate where the harnesses are joined.
REMOVING THE UPHOLSTERY
- If necessary unfasten the harness.
- Move the headrest to the highest position.
- Take the cover off the headrest, unfastening the elastic straps on the back.
- Release the two plastic pivots on the backrest (fig.26). Pull the cover to the sides under the headrest.
- Undo the clasps and unfasten the elastic straps found on the armrests, on the left and the right (fig.27-28).
Pass the buckle through the upholstery. - Lastly, pull the upholstery upwards.
FITTING THE UPHOLSTERY
- Follow the same steps as above in reverse order.
- Make sure that the harness straps pass correctly though the gaps in the upholstery, and that they are not twisted.
MAINTENANCE
- Follow the washing instructions indicated on the different care labels on the fabric parts.
- The plastic parts can be cleaned with a soapy solution, do not use abrasive products.