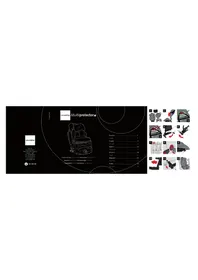
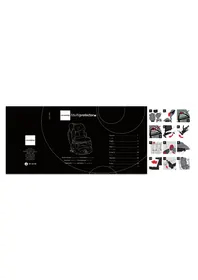
Bicare Fix - Car seat CASUALPLAY - Free user manual and instructions
Find the device manual for free Bicare Fix CASUALPLAY in PDF.
Frequently Asked Questions - Bicare Fix CASUALPLAY
User questions about Bicare Fix CASUALPLAY
0 question about this device. Answer the ones you know or ask your own.
Ask a new question about this device
Download the instructions for your Car seat in PDF format for free! Find your manual Bicare Fix - CASUALPLAY and take your electronic device back in hand. On this page are published all the documents necessary for the use of your device. Bicare Fix by CASUALPLAY.
USER MANUAL Bicare Fix CASUALPLAY
Congratulations Parents!
CASUALPLAY would like to thank you for purchasing this child restraint system.
This product has been designed, manufactured and approved under the strictest safest regulations. It has also been designed to be easy to use, but we need your collaboration for optimal functioning results of this safety seat.
Please read these instructions carefully before installing the product in the vehicle. The safety of your child depends on the correct use of this product.
Please contact us if you have any type of query (Tel., e-mail, see back of these instructions).
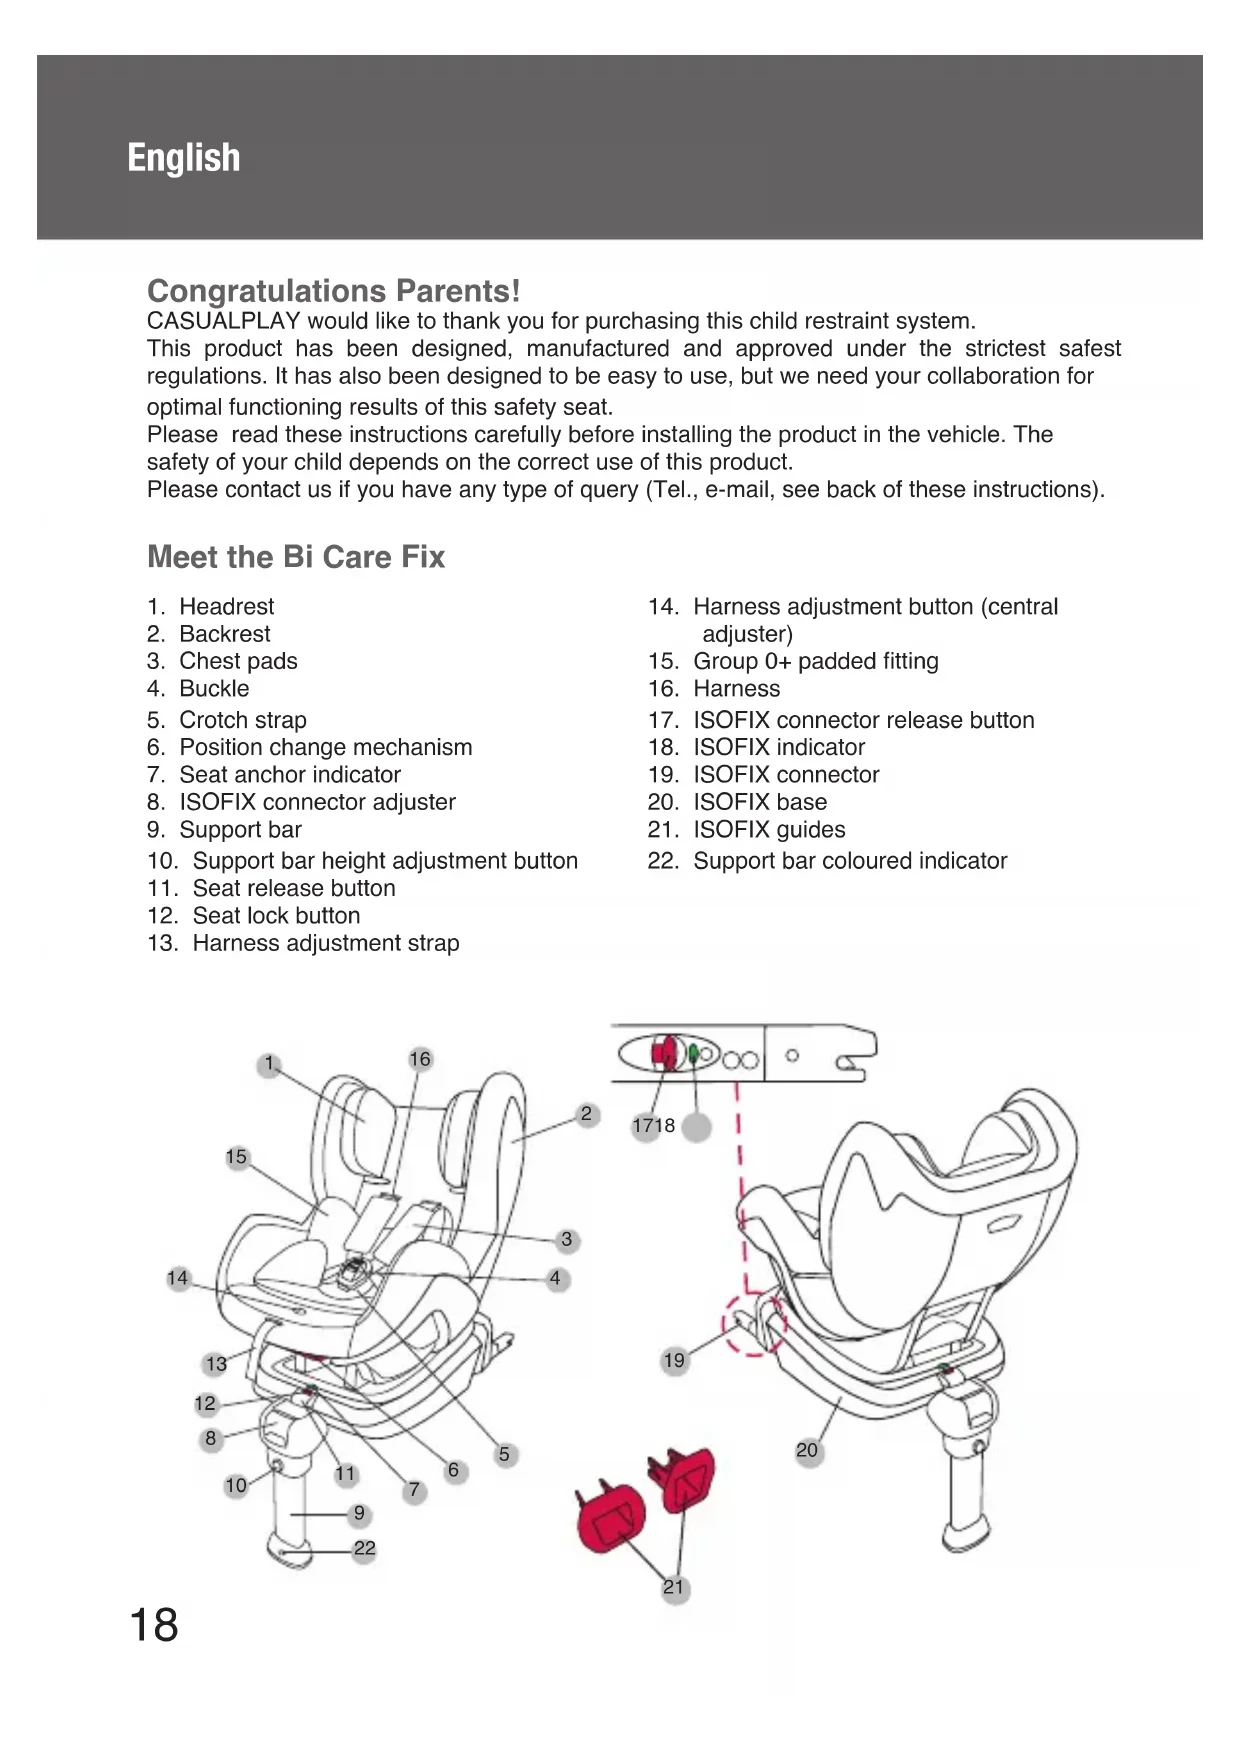
Meet the Bi Care Fix
- Headrest
- Backrest
- Chest pads
- Buckle
- Crotch strap
- Position change mechanism
- Seat anchor indicator
8.ISOFIX connector adjuster - Support bar
- Support bar height adjustment button
- Seat release button
- Seat lock button
-
Harness adjustment strap
-
Harness adjustment button (central adjuster)
- Group 0+ padded fitting
- Harness
17.ISOFIX connector release button
18.ISOFIXindicator
19.ISOFIX connector
20.ISOFIXbase
21.ISOFIX guides - Support bar coloured indicator

THIS INSTRUCTION MANUAL SHOULD BE KEPT WITH THE Bi Care Fix WHILE IT IS IN USE.
READ THESE INSTRUCTIONS CAREFULLY BEFORE USING THE ARTICLE AND KEEP THEM FOR FUTURE REFERENCE. THE CHILD'S SAFETY MAY BE AT RISK IF THESE INSTRUCTIONS ARE NOT FOLLOWED.
- The Bi Care Fix is a child safety seat belonging to group 0+ (0 - 13kg) and group 1 (9 - 18kg)
- The original equipment must not be altered.
After an accident the seat should be replaced. - Make sure that the fold down seat or doors of the vehicle cannot cause any damage to any part of the seat.
- In sunlight the inside of the vehicle can reach very high temperatures therefore it is advisable to cover the seat, when it is not in use, to protect the child from any possible burns.
- The straps should never be twisted.
Always use the safety seat, even on short journeys, and never leave the child unattended.
Take the seat out of the car whenever it is not going to be used for a while. - Any luggage or other objects that may cause injury in the event of a collision should be secured.
- We guarantee the safety of the device when it is used by the original buyer, do not use second hand safety products or seats.
- It is important that the other passengers in the vehicle also wear their seat belts, because in the event of an accident they could get flung about and injure the baby.
- Do not use the seat without the upholstery or with other upholstery that is not the original one.
- Wash the upholstery and fabric parts following the indications on the care labels on each part.
- Clean the plastic parts with mild soap and warm water.
- Make sure that the upholstery of the vehicle seat does not make it difficult to tighten the seat belt or adjust the harness of the seat.
- Remember that you are responsible for the child's safety.
AVISO
- This is an ISOFIX CHILD RESTRAINT SYSTEM. It is approved to Regulation No. 44, 04 series of amendments for general use in vehicles fitted with ISOFIX anchorages systems.
- It will fit with positions approved as ISOFIX positions (as detailed in the vehicle handbook), depending on the category of the child seat and of the fixture.
- The mass group and the ISOFIX size class for which this device is intended is: Gr. 0+ (0-13kg), Gr.1 (9-18 kg); B+ D..
AVISO
- This is a "SEMI-UNIVERSAL" child restraint system. It is approved for installation in the vehicles and on the seat positions indicated in the vehicle list contained inside this packaging.
- Other vehicles and seat positions may also be suitable for this restraint system.
- If in doubt, consult the manufacturer or retailer..
WARNING: This child restraint system should not be installed on seats fitted with an AIRBAG without it being deactivated first..
Instructions for use
Adjusting the headrest
- The headrest has 8 positions, to suit the child's height.
- Lift the upholstery (fig.01), pull the red handle while adjusting the height of the headrest. The height of the harness will also change along with the headrest.
WARNING: The height of the harness will also change along with the headrest.
Adjusting the length of the support bar
- Press the support bar adjustment button, and adjust the length until it touches the floor of the vehicle (fig.03).
- A green indicator will appear on the support bar when it is fitted correctly.
- Check that the support bar is locked into place and that it does not move upwards or downwards.
NOTE: Check that the length of the support bar is not halfway between two positions, and that it touches the floor.
Adjusting the ISOFIX connectors
- Gently pull the ISOFIX connector adjuster, found on the front of the Bi Care Fix base, this will pull the connectors out of the base (fig.04).
- With the ISOFIX connectors pulled out as far as they will go, fasten the base to the ISOFIX anchors on the vehicle seat (as a general rule they are situated between the backrest and seat of the vehicle). They will click when fastened, and a green indicator will appear on each of the ISOFIX connectors of the base (fig.05).
- To finish fitting the Bi Care Fix base to the vehicle seat, gently pull the ISOFIX connector adjuster again, while pressing the Bi Care Fix base against the seat.
- When you want to release the Bi Care Fix base from the vehicle seat, press both of the ISOFIX release buttons, found on the sides of the ISOFIX connectors of the Bi Care Fix base (fig.06).
Adjusting the backrest reclining position
- The Bi Care Fix has 3 reclining positions. For the group 0+ , only the reclining position 3 can be used.
- Pull the handle on the mechanism for changing the reclining position, found on the front part under the seat (fig.07), and place the seat in the required position by pressing the Bi Care Fix forwards or backwards. Once it has reached the required position, release the handle of the reclining mechanism. It will click when correctly fastened into place.
Adjusting the ISOFIX connectors
- Gently pull the ISOFIX connector adjuster, found on the front of the Bi Care Fix base, this will pull the connectors out of the base (fig.04).
- With the ISOFIX connectors pulled out as far as they will go, fasten the base to the ISOFIX anchors on the vehicle seat (as a general rule they are situated between the backrest and seat of the vehicle). They will click when fastened, and a green indicator will appear on each of the ISOFIX connectors of the base (fig.05).
-
To finish fitting the Bi Care Fix base to the vehicle seat, gently pull the ISOFIX connector adjuster again, while pressing the Bi Care Fix base against the seat.
-
When you want to release the Bi Care Fix base from the vehicle seat, press both of the ISOFIX release buttons, found on the sides of the ISOFIX connectors of the Bi Care Fix base (fig.06).
Adjusting the backrest reclining position
- The Bi Care Fix has 3 reclining positions. For the group 0+ , only the reclining position 3 can be used.
- Pull the handle on the mechanism for changing the reclining position, found on the front part under the seat (fig.07), and place the seat in the required position by pressing the Bi Care Fix forwards or backwards. Once it has reached the required position, release the handle of the reclining mechanism. It will click when correctly fastened into place.
NOTE: Make sure that the seat is locked into one of the three reclining positions, and is not halfway between two positions.
NOTE: If the Bi Care Fix is installed as group 0+ , only the reclining position 3 can be used.
Fitting/removing the seat from the ISOFIX base
- The Bi Care Fix can be installed facing forwards or backwards, depending on the mass group.
- Group 0+ (0-13 kg)/ Group I (9-18 kg). Facing backwards.
- Group I (9-18 kg). Facing forwards.
- Fit the ISOFIX guides on the vehicle seat, if necessary.
- Place the Bi Care Fix base on the vehicle seat.
- Before placing the Bi Care Fix seat in one of the two possible positions, the seat locking mechanism must be free. To do this, keep the seat locking button (red button) pressed down while pressing the seat release button (fig.08).
- Place the Bi Care Fix in one of the two possible positions, fitting the rods on the bottom of the seat into the anchor points on the base (fig.09).
- To lock the seat to the base, press the seat locking button (red button). The fastener indicator of the Bi Care Fix will turn green (fig.10).
WARNING: Make sure that the seat is correctly fastened to the base. To do this, check that the two rods, found under the seat, have been correctly fastened to the locking system.
- If you want to separate the Bi Care Fix seat from its base, you need to release the locking system. Keep the seat locking button (red button) pressed down while pressing the seat release button (fig.08). Pull the Bi Care Fix seat upwards.
Adjusting the harness
- To adjust the harness the first step is to check that the harness is at the correct height at the child's shoulders (fig. 02). To reach the correct height, adjust the Bi Care Fix headrest..
- Loosen the harness pressing the harness adjustment button and pulling the chest part of the harness (fig.11).
- To open the safety harness buckle, press the red button found in the middle of the buckle. Next, separate the two metal parts that were fastened to the buckle.
- Once the harness is placed on the child, bring the two metal parts together and insert them into the buckle. It will click when correctly fastened (fig.12).
- Adjust the harness to fit the child's body by pulling the harness adjustment strap (fig.13). The
straps should not be too tight or too loose.
IMPORTANT: Make sure that the harness straps are not twisted.
Installing the Bi Care Fix
Installing the Bi Care Fix as Group 0+ (0-13 kg)/ Group I (9-18 kg). Facing backwards
- Place the Bi Care Fix base on the vehicle seat, and pull the ISOFIX connectors out (fig.04). Consult the section referring to adjusting the ISOFIX connectors.
- Fasten the ISOFIX connectors of the base to the ISOFIX anchors of the vehicle seat, and make sure that a green indicator appears on both ISOFIX connectors of the base (fig.05). Press the base against the vehicle seat, to finish fitting it.
- Adjust the height of the support bar (fig.03), to do this consult the section on adjusting the length of the support bar.
- Release the seat locking system, and position the Bi Care Fix seat facing backwards.
- To lock the seat to the base, press the seat locking button (red button). The Bi Care Fix fastener indicator will turn green (fig.14).
- Place the child in the Bi Care Fix seat and fasten him in with the harness. Consult the section on adjusting the harness to correctly secure the child in the Bi Care Fix.
NOTE: If the Bi Care Fix is installed as group 0+, only the reclining position 3 can be used.
WARNING: Make sure that the seat is correctly fastened to the base.
Installing the Bi Care Fix as group 1 (9-18 kg) Facing forwards
- Place the Bi Care Fix base on the vehicle seat, and pull the ISOFIX connectors out (fig.04). Consult the section referring to adjusting the ISOFIX connectors.
- Fasten the ISOFIX connectors of the base to the ISOFIX anchors of the vehicle seat, and make sure that a green indicator appears on both ISOFIX connectors of the base (fig.05). Press the base against the vehicle seat, to finish fitting it.
- Adjust the height of the support bar (fig.03), to do this consult the section on adjusting the length of the support bar.
- Release the seat locking system, and position the Bi Care Fix seat facing forwards (fig.03).
- To lock the seat to the base, press the seat locking button (red button). The Bi Care Fix fastener indicator will turn green (fig.15).
- Place the child in the Bi Care Fix seat (fig.16), and fasten him in with the harness.
- Consult the section on adjusting the harness to correctly secure the child in the Bi Care Fix.
WARNING: Make sure that the seat is correctly fastened to the base.
Fitting/removing the upholstery
- Place the Bi Care Fix backrest in position 3, and take the seat off the base.
- Pass the plate that fastens the buckle to the seat, through the frame and the upholstery (fig.17).
-
Unfasten the Velcro on the backrest and take the upholstery off the seat.
Next, undo the two zips on the headrest and take off the upholstery that covers it. -
To fit the upholstery back on again, follow the same steps in reverse.
WARNING: Make sure that the harness straps are not twisted, and that the buckle is securely fastened to the frame.
Maintenance and cleaning
- Regularly inspect the restraint system to check that all the parts are in perfect condition.
- Clean the plastic parts with a damp cloth, and then dry them properly.
- If you want to wash the upholstery, it should be hand washed at a temperature of about 30^ . Do not use fabric conditioner, do not tumble dry and do not iron.
Felicitation aux parents!
GB: The company reserves the right to make alterations to the product with regards to the description included in this instruction manual. Keep up your receipt in order to exercice your right as a consumer.
P: KomnaHnO octaBnEeT 3a co6oN npaBO BHOcHTb N3MeHeHnB IpOdyKT B COOTBeTCTBnC yKa3aHHbIM B DaHHoN IHCTpyKcN N O NCNoJIb3OBaHnIO. CoXpaHnte BaW YeK, YTO6bl IMeTB BO3MOxHOCtB BOCNoJIb3OBaTbcra npaBaMn NOTpe6bTeIa.

PLAY S.A.
Ronda Boada Vell, 6
08184 Palau-Solita i Plegamans
Barcelona - Spain
Tel: +34 938 648 027
Fax: +34 938 648 491
information@play.es
www.casualplay.com

900 150 346