
Pet Hair Eraser 1987N - Vacuum Cleaner BISSELL - Free user manual and instructions
Find the device manual for free Pet Hair Eraser 1987N BISSELL in PDF.
Frequently Asked Questions - Pet Hair Eraser 1987N BISSELL
User questions about Pet Hair Eraser 1987N BISSELL
0 question about this device. Answer the ones you know or ask your own.
Ask a new question about this device
Download the instructions for your Vacuum Cleaner in PDF format for free! Find your manual Pet Hair Eraser 1987N - BISSELL and take your electronic device back in hand. On this page are published all the documents necessary for the use of your device. Pet Hair Eraser 1987N by BISSELL.
USER MANUAL Pet Hair Eraser 1987N BISSELL
natural_image
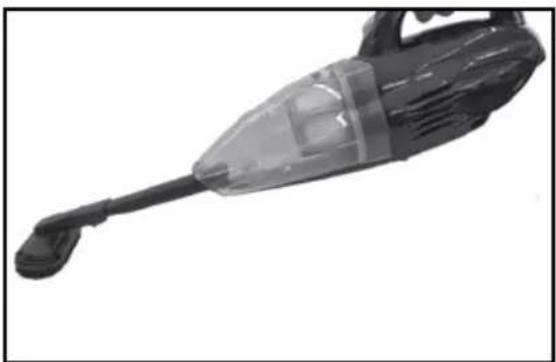
Top-down view of a black and white vacuum cleaner with visible internal components (no text or symbols)1987 SERIES
READ ALL INSTRUCTIONS BEFORE USING YOUR APPLIANCE.
When using an electrical appliance, basic precautions should be observed, including the following:

WARNING
TO REDUCE THE RISK OF FIRE, ELECTRIC SHOCK, OR INJURY:
» This appliance can be used by children aged from 8 years and above and persons with reduced physical, sensory or mental capabilities or lack of experience and knowledge if they have been given supervision or instruction concerning use of the appliance in a safe way and understand the hazards involved. Cleaning and user maintenance shall not be made by children without supervision.
» Children should be supervised to ensure that they do not play with the appliance.
» If the charger supply cable is damaged, it must be replaced by the manufacturer, its service agent, or similarly qualified person in order to avoid a hazard.
» Keep hair, loose clothing, fingers, and all parts of body away from openings and moving parts of the appliance and its accessories.
» Unplug from electrical socket when not in use and before cleaning, maintaining or servicing the appliance.
» Do not run appliance over cable.
» Do not leave appliance when plugged in.
» Use only as described in this user guide.
» Use only manufacturer's recommended attachments.
» Do not use with damaged cable or plug.
» Do not immerse in water or liquid.
» If appliance is not working as it should, has been dropped, damaged, left outdoors, or dropped into water; do not attempt to operate it and have it repaired at an authorized service center.
» Do not pull or carry charger by cable, use cable as a handle, close door on cable, or pull cable around sharp edges or corners.
» Keep charger cable away from heated surfaces.
» To unplug, grasp the charger plug, not the cable.
» Do not handle charger plug or appliance with wet hands.
» Do not put any object into openings.
» Do not use with any opening blocked; keep free of dust, lint, hair, and anything that may reduce air flow.
» Turn off all controls before unplugging.
» Use extra care when cleaning on stairs.
» Do not use to pick up flammable or combustible liquids, such as petroleum, or use in areas where they may be present.
» Do not pick up toxic material (chlorine bleach, ammonia, drain cleaner, etc.)
» Do not use appliance in an enclosed space filled with vapours given off by oil base paint, paint thinner, some mothproofing substances, flammable dust, or other explosive or toxic vapours.
» Do not pick up hard or sharp objects such as glass, nails, screws, coins, etc.
» Keep appliance on a level surface.
» Do not pick up anything that is burning or smoking, such as cigarettes, matches, or hot ashes.
» Do not use without dust bag and/or filters in place.
» Do not use outdoors or on wet surfaces.
» If your appliance has a motorized brushroll, do not leave machine running in the same spot without the handle fully upright.
» Battery pack and charger base output terminals are not to be short-circuited.
» Do not charge the unit outdoors.
» Do not incinerate the appliance even if it severely damaged. The batteries can explode in a fire.
» Always turn off this appliance before connecting or disconnecting the motorized nozzle.
» This appliance contains batteries that are non-replaceable.
» The appliance must be disconnected from the supply mains when removing the battery.
» The battery is to be disposed of safely.
» If your appliance is fitted with a nonrewireable BS 1363 plug it must not be used unless a 13 amp (ASTA approved to BS 1362) fuse is fitted in the carrier contained in the plug. Spares may be obtained from your BISSELL supplier. If for any reason the plug is cut off, it must be disposed of, as it is an electric shock hazard should it be inserted into a 13 amp socket.
WARNING
TO REDUCE THE RISK OF ELECTRIC SHOCK - DO NOT USE OUTDOORS OR ON WET SURFACES. RISK OF FIRE OR INJURY TO PERSONS. NO REPLACEMENT PARTS INSIDE. USE ONLY WITH THE CHARGER PROVIDED WITH APPLIANCE.
SAVE THESE INSTRUCTIONS
FOR OPERATION ON A 220-240 VOLT A.C. 50-60 HZ POWER SUPPLY ONLY.
This model is for household use only.
Thanks for buying a BISSELL vacuum
We're glad you purchased a BISSELL hand vacuum. Everything we know about floor care went into the design and construction of this complete, high-tech home cleaning system.
Your BISSELL hand vacuum is well made, and we back it with a limited one-year warranty. We also stand behind it with a knowledgeable, dedicated Consumer Care department, so, should you ever have a problem, you'll receive fast, considerate assistance.
My great-grandfather invented the floor sweeper in 1876. Today, BISSELL is a global leader in the design, manufacture, and service of high quality homecare products like your BISSELL hard floor cleaner.
Thanks again, from all of us at BISSELL.
man 1.7
Mark J. Bissell Chairman & CEO
Safety Instructions.....2
Product View.....4
Assembly 5
Operations 5-6
Maintenance & Care ..... 7-9
Troubleshooting ..... 10
Warranty 1
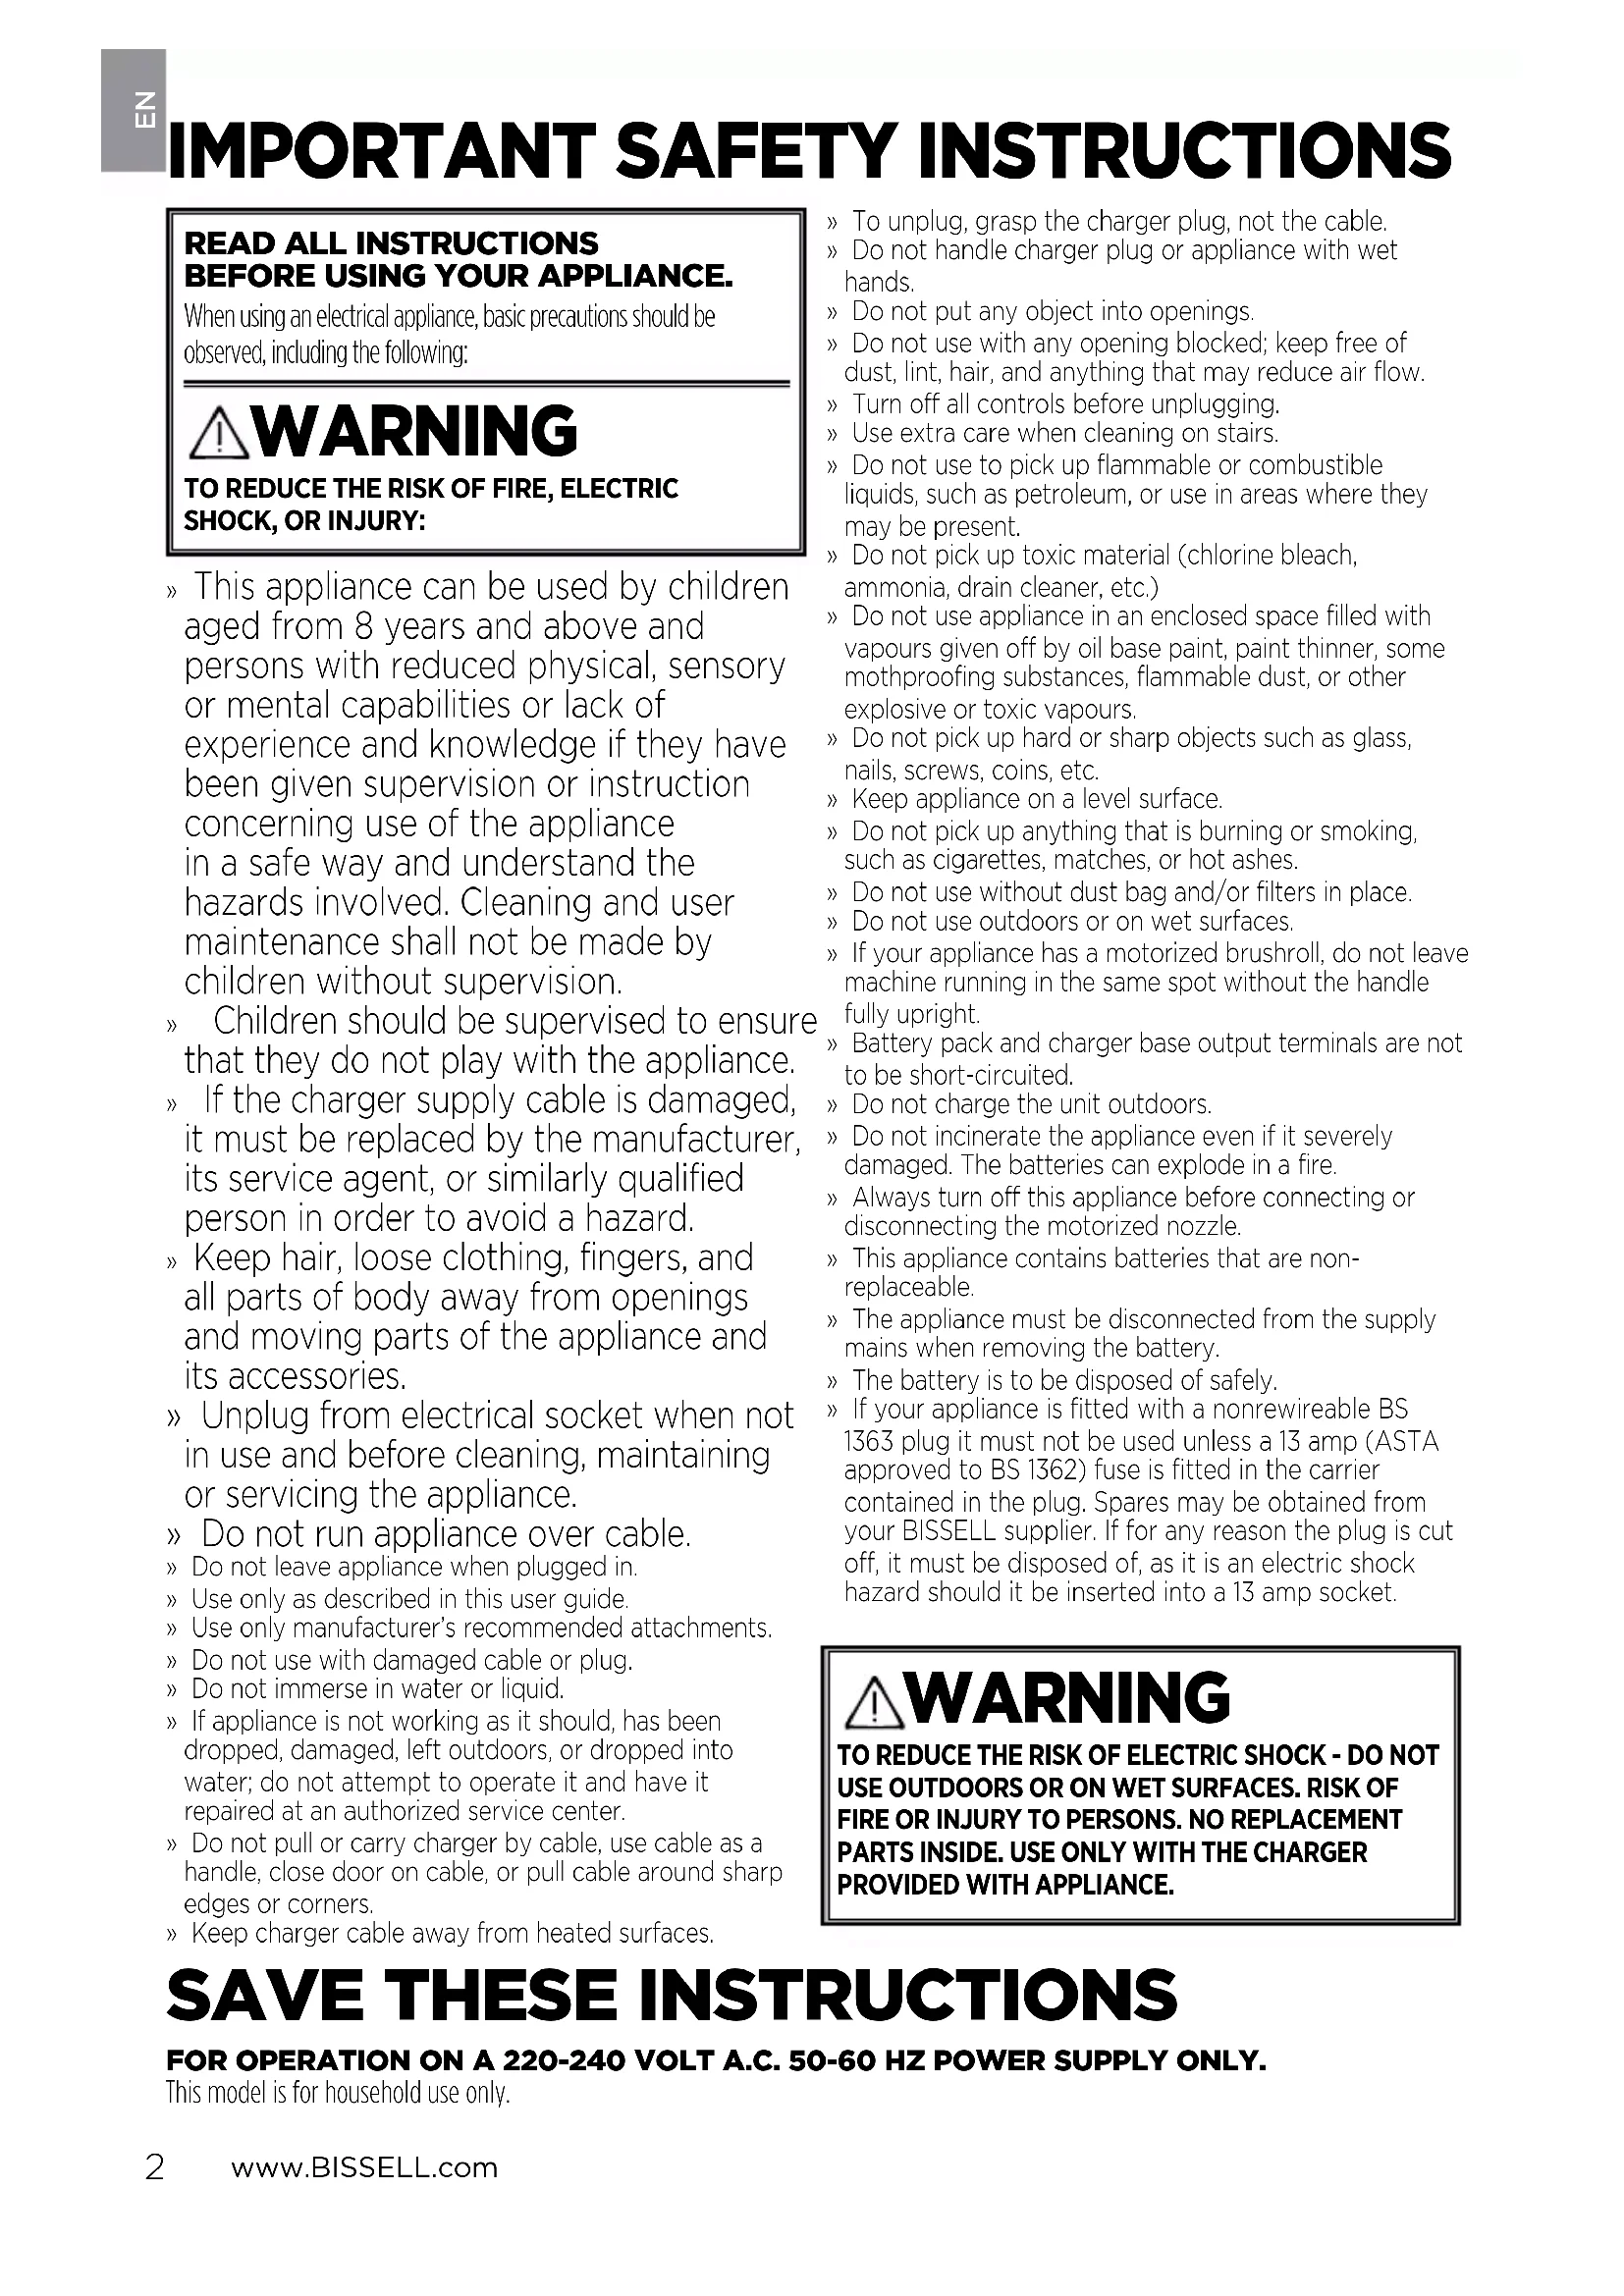
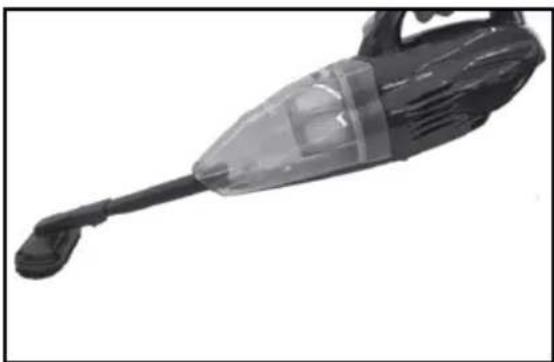
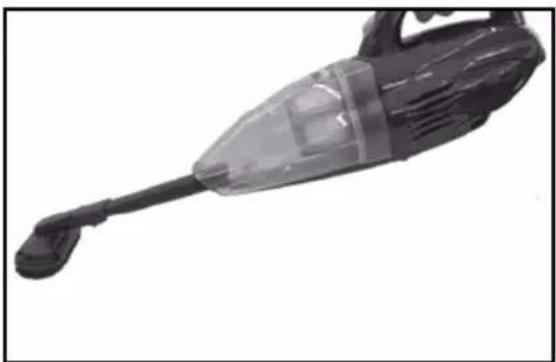
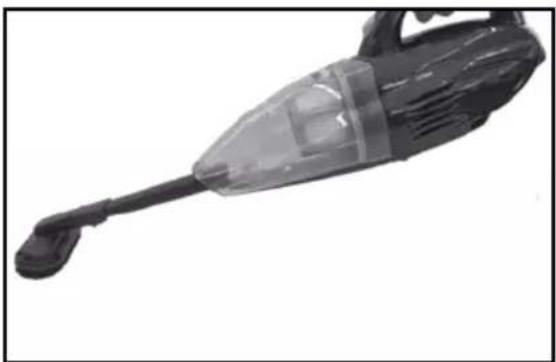
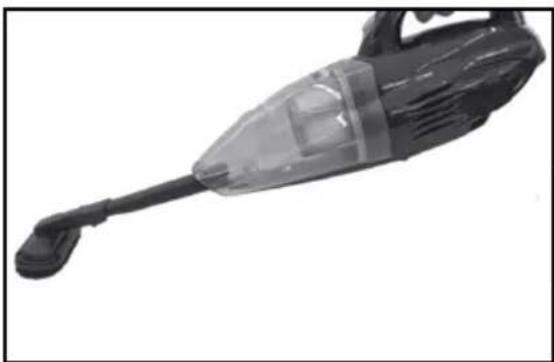
Product View
1 Dirt Cup
2 Filter
3 Washable Filter Cup
4 Charging Light
5 Dirt Cup Release
6 Power Button
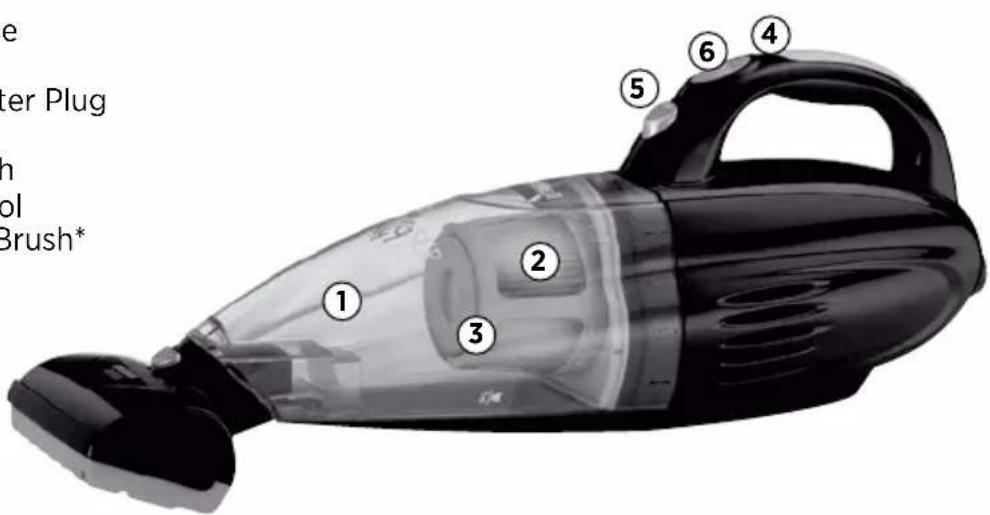
7 Charging Adapter Plug
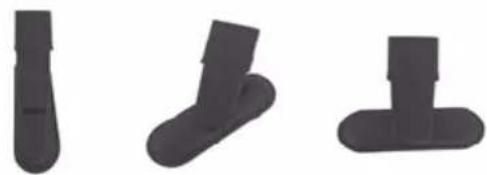
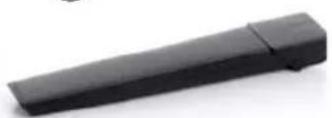
8 Crevice Tool
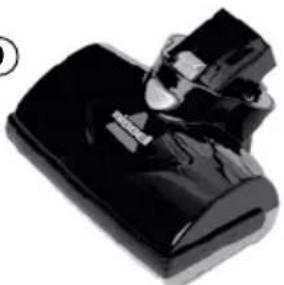
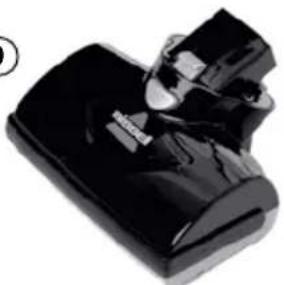
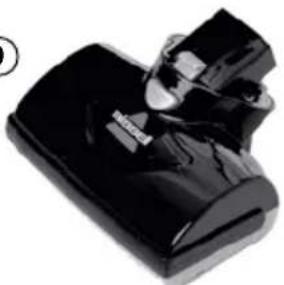
9 Motorized brush
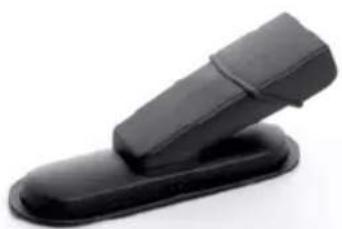
10 Upholstery Tool
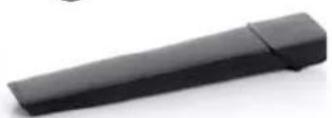
11 2-in-1 Dusting Brush*
text_image
e Water Plug n pol Brush* ① ② ③ ④ ⑤ ⑥7
natural_image
Black rectangular electronic device with attached cable and connector (no visible text or symbols)⑧
⑨

natural_image
Close-up of a black rubber or rubber component with a small metallic clip (no visible text or symbols)10

natural_image
Black plastic object with a flat lid, resting on a rounded base (no text or symbols visible)11

natural_image
Close-up of a black rubber strap or strap component (no text or symbols visible)*varies by model

WARNING
Plastic film can be dangerous. To avoid danger of suffocation, keep away from babies and children.

WARNING
Do not plug in your hard floor cleaner until you are familiar with all instructions and operating procedures.

WARNING
To reduce the risk of electric shock, turn power switch off and disconnect plug from electrical outlet before performing maintenance or troubleshooting checks.
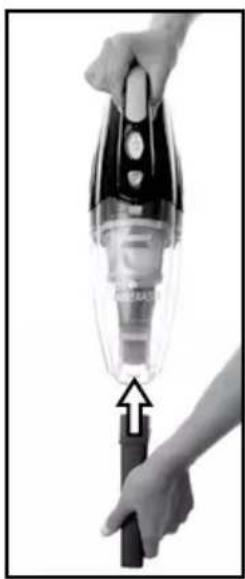
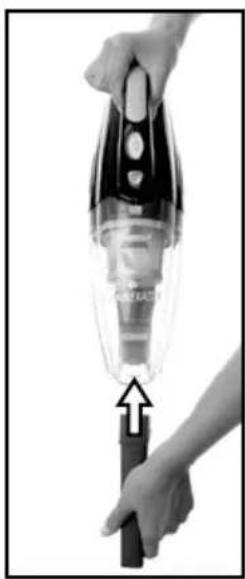
Your hand vacuum comes fully assembled.
WARNING
Do not plug in your hand vacuum until you are familiar with all instructions and operating procedures.
Charging
\*\*\*IMPORTANT\*\*\* ALWAYS TURN UNIT OFF PRIOR TO CHARGING\*
* failing to do so may result in battery not fully charging
- Insert charging adapter plug into the charging port on the back of the unit.
- Plug the adapter into the wall outlet. The power LED lights will illuminate when charging. Charge the unit completely for 5 hours prior to first use.
NOTE: The charge light will turn RED during charging and turn OFF once it is fully charged. The adaptor may become warm during charging – this is normal.
- When the unit is fully discharged, approximately 5 hours of charging time is required for the battery to regain full capacity.

natural_image
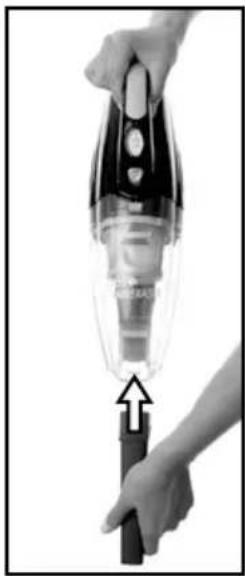
Close-up of hands using a tool to lift a black plastic bag, no text or symbols visibleOperations
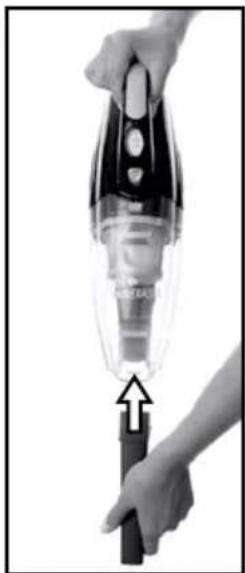
Using your hand vacuum
- Unplug the machine from the charging adapter.
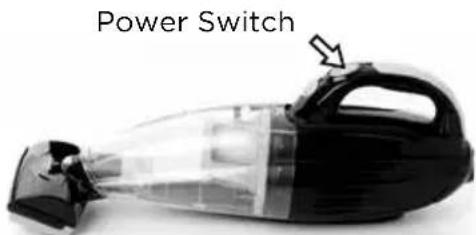
- The power button is located on the top of the handle.
- Push power button ON.
text_image
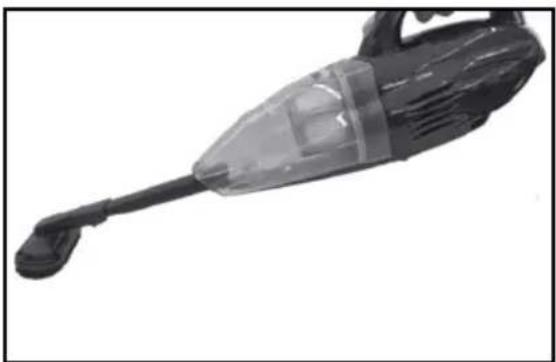
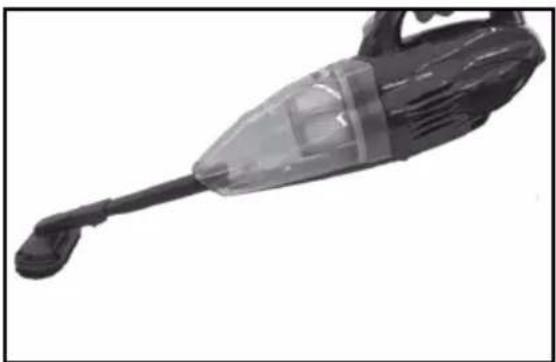
Power SwitchUsing the motorized brush
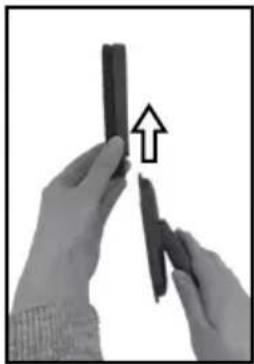
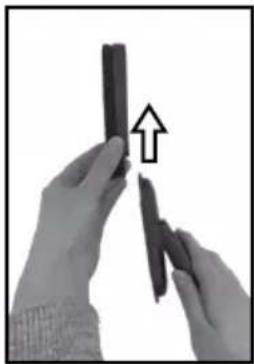
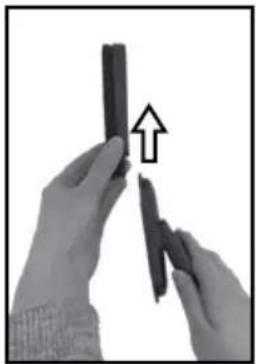
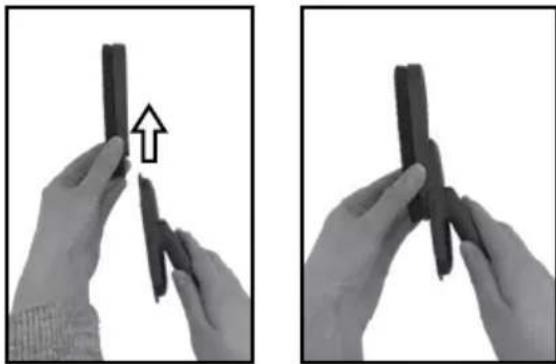
- To attach the motorized brush, make sure the unit is in the OFF position.
- Firmly insert the motorized brush into the nozzle of the hand vac until it snaps into place.
- To detach, press the button on top of the motorized brush and pull out.
- The motorized brush can be used to vacuum stairs, upholstery and other hard to reach areas.

natural_image
Close-up of a hand using a handheld device to lift a glass container (no text or symbols visible)
natural_image
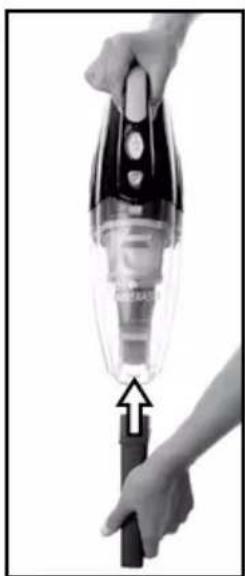
Hand holding a transparent blender with black base, no visible text or symbols on the device itselfUsing hand vacuum accessories
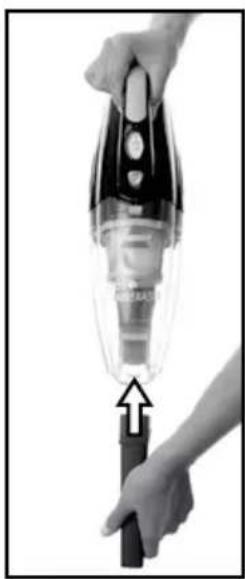
- To use hand vacuum accessories, remove the motorized brush as directed in "Using the motorized brush" section on page 5, and then insert the end of the tool into the end of the hand vacuum prior to turning hand vacuum ON.
- If your hand vacuum came with the 2-in-1 dusting brush, simply slide the dusting brush tool on top of the upholstery tool until you hear a click.
- Accessories can be combined together or used individually based on your cleaning needs.
NOTE: The upholstery tool can be rotated either clockwise or counterclockwise for cleaning convenience.
natural_image
Three black plastic objects with rounded ends, arranged horizontally (no text or symbols visible)①
natural_image
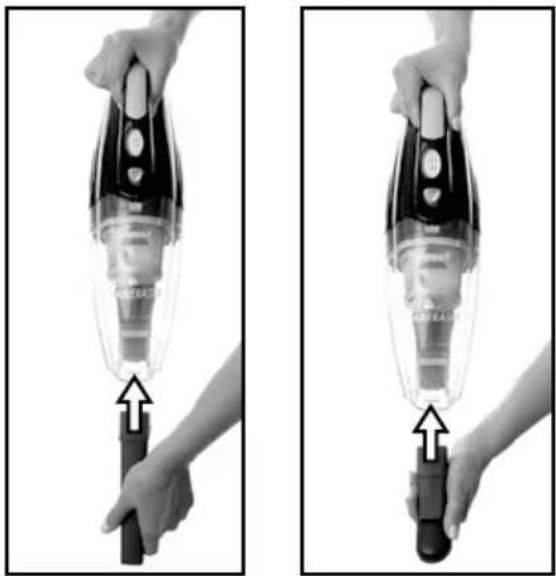
Close-up of a hand holding a transparent vacuum cleaner with an arrow pointing to the handle (no text or symbols visible)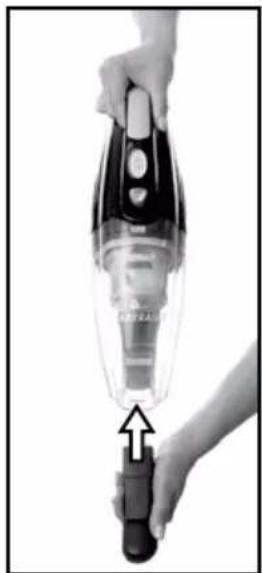
natural_image
Close-up of a hand holding a transparent vacuum cleaner with an arrow pointing to the handle (no text or symbols visible)2
natural_image
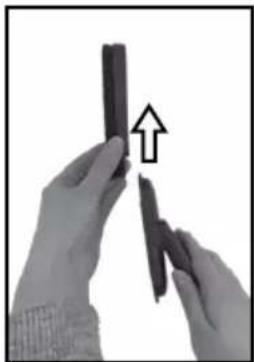
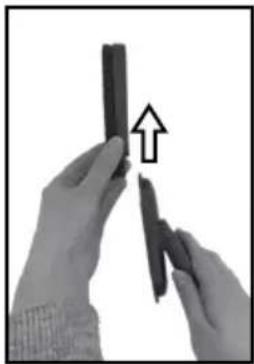
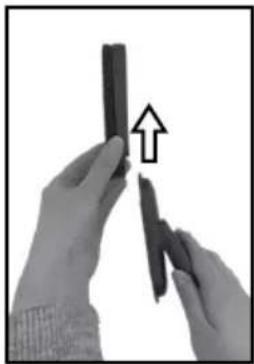
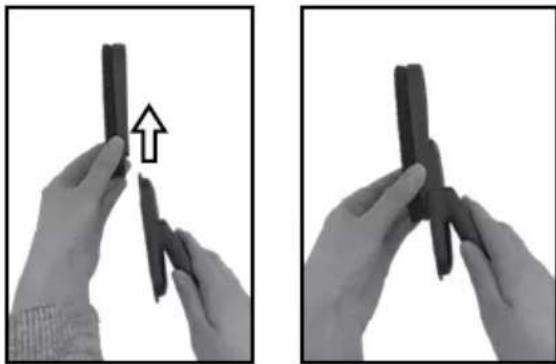
Close-up of hands holding two cylindrical objects with an upward arrow indicating motion (no text or symbols)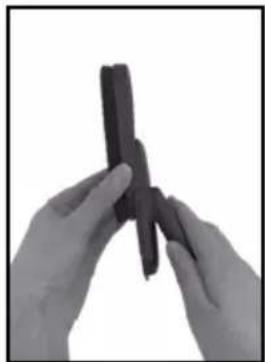
natural_image
Close-up of hands holding a dark, crumpled object against a white background (no text or symbols visible)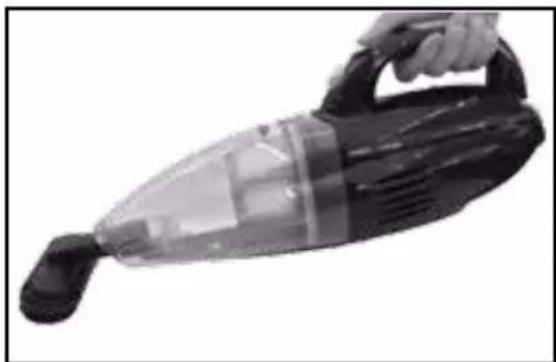
natural_image
Close-up of a black and white handheld vacuum cleaner with handle and spool (no visible text or symbols)3

natural_image
Close-up of a black handheld vacuum cleaner with a transparent handle and attached lever (no visible text or symbols)Maintenance & Care
To maintain maximum cleaning performance, the following maintenance steps must be performed:
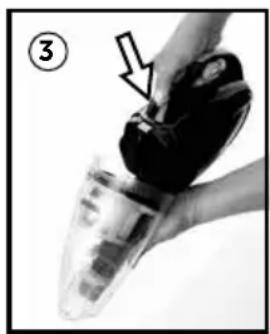
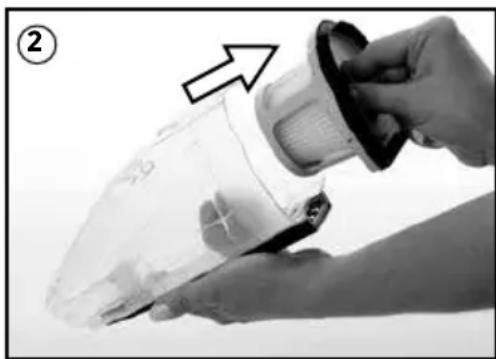
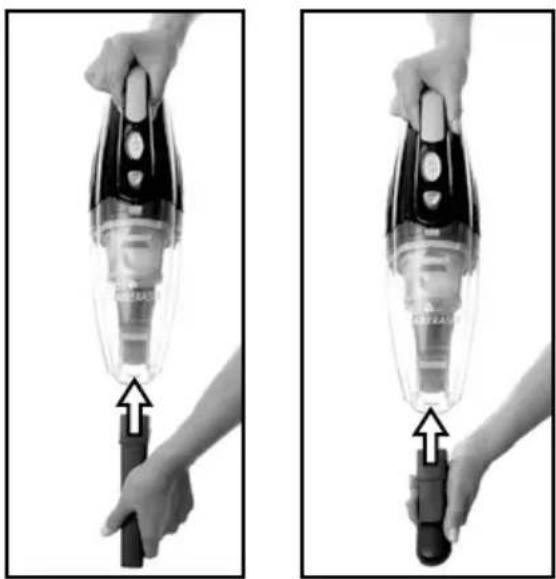
Emptying the dirt cup
Dirt cup should be emptied before debris reaches the FULL line on cup.
- Turn power OFF.
- Push Release Button.
- Hold the hand vacuum vertically and depress release button on the front to release dirt cup.
-
Grasp filter tabs and pull vertically to remove filter cup and empty dirt into waste container.
-
Replace filter back into the dirt cup and attach dirt cup to hand vacuum until it snaps securely into place.
WARNING
To reduce the risk of electric shock, turn power switch off and disconnect plug from electrical outlet before performing maintenance or troubleshooting checks.
natural_image
Close-up of a hand holding a black plastic device with an arrow pointing to it, no visible text or symbols
natural_image
Close-up of a hand holding a transparent plastic container with a cloth, showing a white arrow pointing to the lid (no text or symbols visible)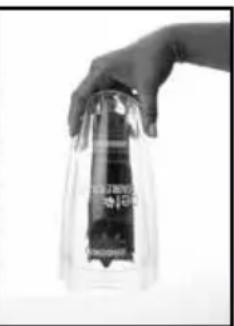
natural_image
Hand holding a transparent cylindrical container with a dark label, no visible text or symbols on the container itself.Cleaning or replacing the filter
The key to maximum performance is having a clean filter. Cleaning the filter after each use will help your vacuum operate at peak efficiency.
Use only genuine BISSELL replacement filters in your BISSELL hand vacuum.
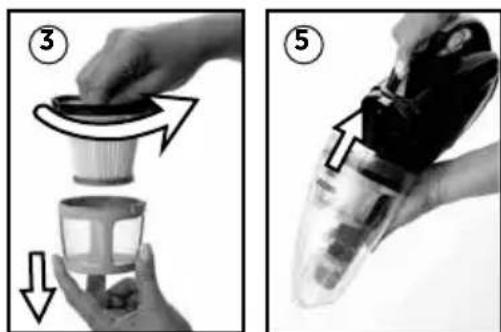
To clean filter:
- Turn power OFF.
- Remove the dirt cup as directed in "Emptying the dirt cup" in previous section.
3a. To remove filter cup from the dirt cup, grasp filter tabs and lift up to remove the washable filter cup from the dirt cup. Grip the filter cup and turn counterclockwise and lift down to remove filter from filter cup.
b. Tap firmly against the inside of a waste container, removing any visible dirt. - Replace filter back into the filter cup then turn clockwise to lock into place.
- Attach filter cup back into the dirt cup and attach to hand vacuum until it snaps securely in place.
NOTE: After heavy usage, you may clean the filter and filter cup by washing it gently by hand in warm water and mild dish detergent. Rinse thoroughly and make certain it is completely dry before replacing it.
WARNING
Do not operate appliance with damp or wet filters or without all filters in place.
natural_image
Close-up of a hand holding a transparent plastic container with a black lid, pointing to a textured surface (no text or symbols visible)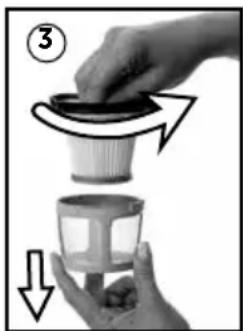
natural_image
Illustration of a hand holding a small container with arrows indicating motion or transformation (no text or symbols)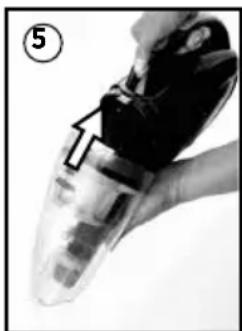
natural_image
Close-up of a hand holding a transparent plastic device with a black arrow pointing to a component (no visible text or symbols)Maintenance & Care
Nozzle and Motorized Brush Maintenance
Keep nozzle clean and free of debris by wiping with clean, damp cloth.
Brush Roll Maintenance
The brush roll may accumulate debris such as strings, hair and fibers. This type of debris can wrap around the brush and diminish its ability to clean effectively.
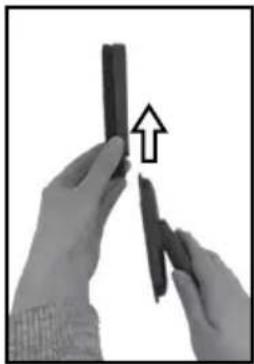
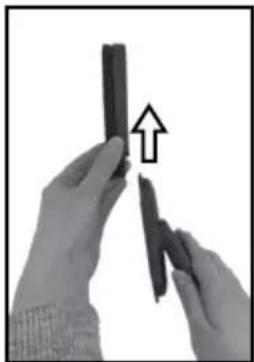
To remove brush roll for cleaning:
- Turn power OFF.
- Detach motorized brush if attached OR turn unit over to access the brush roll.
- To remove brush roll, use a coin to turn counterclockwise to unlock the brush roll.
- Then simply lift the brush out of the foot and clean off hair or other debris from brush roll.
- Place the cleaned brush roll back into the foot of unit and use coin to turn lock clockwise to lock into place.

natural_image
Hand holding a handheld electronic device with a screen and buttons (no visible text or symbols)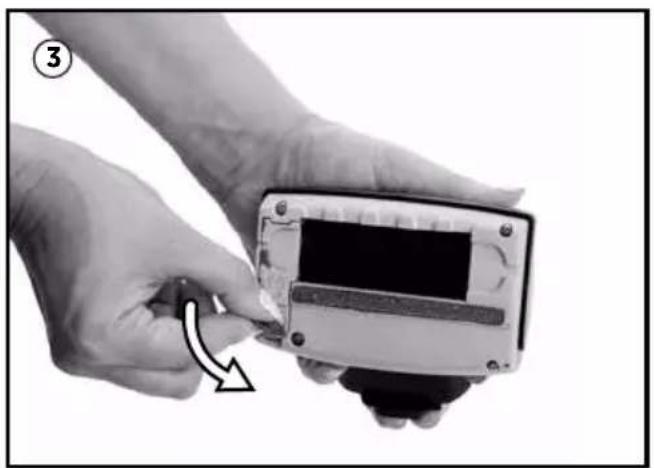
natural_image
Close-up of hands assembling a small electronic device with a curved arrow indicating rotation (no text or symbols visible)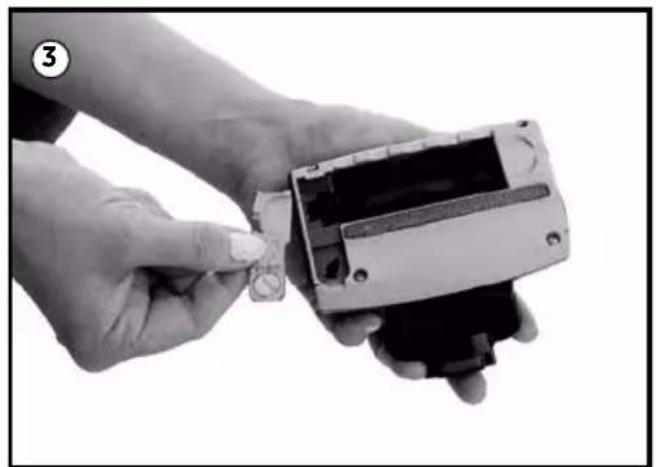
natural_image
Close-up of hands holding a small electronic device with a metallic connector (no visible text or symbols)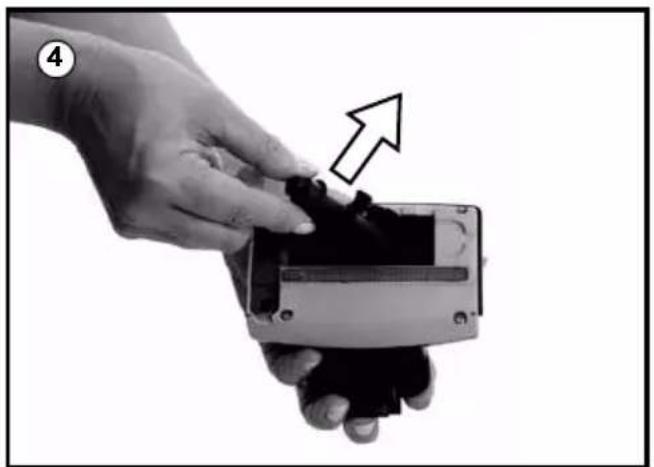
natural_image
Close-up of a hand holding a small electronic device with a black arrow pointing to it, no visible text or symbols.Maintenance & Care
Disposal of batteries
If your Pet Hair Eraser® Cordless Hand Vacuum is to be disposed of, the batteries should be removed and disposed of properly.
- IMPORTANT: Unplug charger.
- Remove dirt cup from handle.
- Remove (8) Phillips head screws and remove the lens from the hand vacuum.
-
Lift off the hand vacuum cover.
-
Remove the entire battery assembly from the cover.
-
Cut wires from the PCB and wrap the wire ends with insulation tape.
-
Keep Battery Pack together - DO NOT separate individual batteries. For specific disposal instructions of batteries, please contact your local battery recycling facility.
-
Discard remainder of product
CAUTION: Disconnecting the battery will destroy the appliance and void the warranty.

natural_image
Black and white photo of a handbag with a mesh wireframe overlay, no visible text or symbols8 screws
WARNING
This product contains Nickel Metal Hydride (Ni-MH) rechargeable batteries. According to government regulations, removal and proper disposal of Ni-MH batteries is required. For removal of the batteries in your Pet Hair Eraser® Cordless Hand Vacuum see instructions on this page.
| Problem Possible causes Remedies | ||
| Vacuum won't turn on | Battery is fully discharged Charge battery. Follow charging battery instructions on page 5 | |
| Vacuum cleaner has low suction | Dirt container is full Empty dirt container | |
| Dirt container is not installed properly | Position container correctly and snap firmly into place | |
| Filters need cleaning Follow filter instructions on page 7 | ||
| Filters need replacing | Visit www.bissell.com or call 1-800-237-7691 to order replacement filters | |
| Battery needs charging Charge battery. Follow charging battery instructions on page 5 | ||
| Visible dirt escaping from vacuum | Dirt container is full of debris Empty dirt container | |
| Filter is missing or installed incorrectly | Check filter for correct installation | |
| Hand vacuum won't charge | Machine is in the ON position Set the hand vacuum in the OFF position | |
| Not the correct charger Use only the charger that comes with the machine | ||
Please do not return this product tothestore.
Other maintenance or service not included in the manual should be performed by an authorized service representative.
Thank you for selecting a BISSELL product.
For any questions or concerns, BISSELL is happy to be of service.
Consumer Guarantee
This Guarantee only applies outside of the USA and Canada. It is provided by BISSELL International Trading Company BV ("BISSELL").
This Guarantee is provided by BISSELL. It gives you specific rights. It is offered as an additional benefit to your rights under law. You also have other rights under law which may vary from country to country. You can find out about your legal rights and remedies by contacting your local consumer advice service. Nothing in this Guarantee will replace or lessen any of your legal rights or remedies. If you need additional instruction regarding this Guarantee or have questions regarding what it may cover, please contact BISSELL Consumer Care or contact your local distributor.
This Guarantee is given to the original purchaser of the product from new and is not transferable. You must be able to evidence the date of purchase in order to claim under this Guarantee.
Limited 2 Year Guarantee from the date of purchase by original purchaser
Subject to the *EXCEPTIONS AND EXCLUSIONS identified below, BISSELL will repair or replace (with new or remanufactured components or products), at BISSELL's option, free of charge, any defective or malfunctioning part or product.
BISSELL recommends that the original packaging and evidence of the date of purchase be kept for the duration of the Guarantee period in case the need arises within the period to claim on the Guarantee. Keeping the original packaging will assist with any necessary re-packaging and transportation but is not a condition of the Guarantee.
If for your product is replaced by BISSELL under this Guarantee, the new item will benefit from the remainder of the term of this Guarantee (calculated from the date of the original purchase). The period of this Guarantee shall not be extended whether or not your product is repaired or replaced.
\*EXCEPTIONS AND EXCLUSIONS FROM THE TERMS OF THE GUARANTEE
This Guarantee applies to products used for personal domestic use and not commercial or hire purposes. Consumable components such as filters, belts and mop pads, which must be replaced or serviced by the user from time to time, are not covered by this Guarantee.
This Guarantee does not apply to any defect arising from fair wear and tear. Damage or malfunction caused by the user or any third party whether as a result of accident, negligence, abuse, neglect, or any other use not in accordance with the User Guide is not covered by this Guarantee.
An unauthorised repair (or attempted repair) may void this Guarantee whether or not damage has been caused by that repair/attempt.
Removing or tampering with the Product Rating Label on the product or rendering it illegible will void this Guarantee.
SAVE AS SET OUT BELOW BISSELL AND ITS DISTRIBUTORS ARE NOT LIABLE FOR ANY LOSS OR DAMAGE THAT IS NOT FORESEEABLE OR FOR INCIDENTAL OR CONSEQUENTIAL DAMAGES OF ANY NATURE ASSOCIATED WITH THE USE OF THIS PRODUCT INCLUDING WITHOUT LIMITATION LOSS OF PROFIT, LOSS OF BUSINESS, BUSINESS INTERRUPTION, LOSS OF OPPORTUNITY, DISTRESS, INCONVENIENCE OR DISAPPOINTMENT. SAVE AS SET OUT BELOW BISSELL'S LIABILITY WILL NOT EXCEED THE PURCHASE PRICE OF THE PRODUCT.
BISSELL DOES NOT EXCLUDE OR LIMIT IN ANY WAY ITS LIABILITY FOR (A) DEATH OR PERSONAL INJURY CAUSED BY OUR NEGLIGENCE OR THE NEGLIGENCE OF OUR EMPLOYEES, AGENTS OR SUBCONTRACTORS; (B) FRAUD OR FRAUDULENT MISREPRESENTATION; (C) OR FOR ANY OTHER MATTER WHICH CANNOT BE EXCLUDED OR LIMITED UNDER LAW.
Consumer Care
If your BISSELL product should require service or to claim under our limited guarantee, please contact us as follows:
Website:
www.BISSELL.eu
Email:
Customers.Bitco@bissell.com
Write:
BISSELL International Trading Company B.V.
Stadhouderskade 55
1072 AB Amsterdam
The Netherlands
Visit the BISSELL website: www.BISSELL.eu
When contacting BISSELL, have model number of cleaner available.
Please record your Model Number: ____ Please record your Purchase Date: ____
NOTE: Please keep your original sales receipt. It provides proof of the date of purchase in the event of a Guarantee claim. See Guarantee for details.
Bissell®
BEZDRASTOVY RUCNI VYSAVAC PET HAIR ERASER®

natural_image
Top-down view of a black and white vacuum cleaner device (no visible text or symbols)ŘADA 1987
DŮLEŽITÉ BEZPEČNOSTNÍ POKYNY
PŘED POUŽITÍM SPOTŘEBIČE SI PŘEČTĚTE VEŠKERÉ POKYNY.
USCHOVEJTE TYTO POKYNY
PROVOZ PŘI NAPĚTÍ 220-240 V STŘ. JE MOŽNÝ POUZE V SÍTI S FREKVENCÍ 50-60 HZ.
natural_image
Black rectangular electronic device with attached cable and connector (no visible text or symbols)8
⑨

natural_image
Close-up of a black plastic or rubber component with a glossy surface and a small protrusion (no visible text or symbols)10

natural_image
Black plastic object with a rectangular handle, resting on a rounded base (no text or symbols visible)11

natural_image
Close-up of a black rubber strap or grip component (no text or symbols visible)natural_image
Close-up of hands pouring liquid from a black bottle into a pen (no text or symbols visible)Provoz
natural_image
Close-up of a hand holding a blender with a black plastic cup and an arrow pointing to the cup (no text or symbols visible)
natural_image
Hand holding a transparent blender with black handle, no visible text or symbols on the device itselfnatural_image
Three black plastic objects with rounded ends, arranged horizontally (no text or symbols visible)①

natural_image
Close-up of a hand holding a vacuum cleaner with an arrow pointing to it, no visible text or symbols
natural_image
Close-up of a hand holding a compact vacuum cleaner with an arrow indicating the process (no text or symbols visible)2
natural_image
Close-up of hands holding two cylindrical objects with an upward arrow indicating motion (no text or symbols)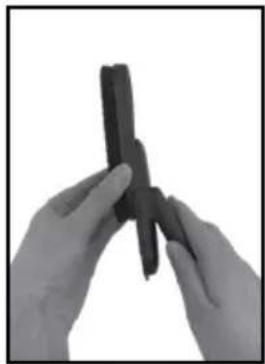
natural_image
Close-up of hands holding a dark, folded object (no text or symbols visible)
natural_image
Black and white photo of a hand holding a compact vacuum cleaner (no visible text or symbols)3

natural_image
Close-up of a black vacuum cleaner with a transparent handle and attached lever (no visible text or symbols)natural_image
Close-up of a hand holding a black plastic object with an arrow pointing to it, no visible text or symbols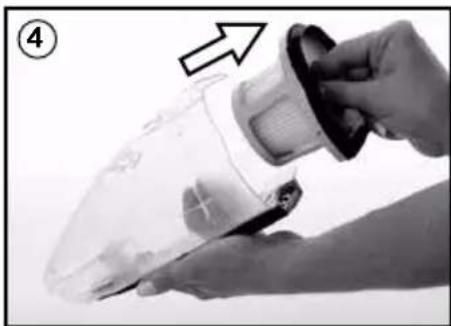
natural_image
Close-up of a hand holding a transparent plastic container with a black cover, no visible text or symbols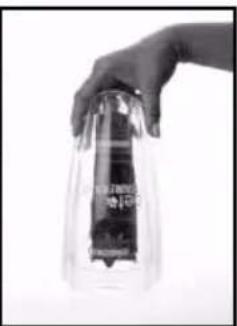
natural_image
Hand holding a transparent glass container with a dark internal object (no visible text or symbols)natural_image
Close-up of a hand holding a transparent plastic bag with a black clip, showing a hand holding the lid and an arrow pointing to it (no text or symbols visible)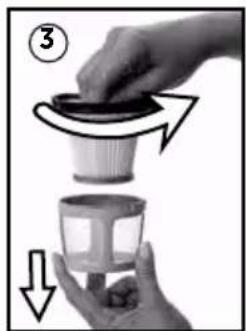
natural_image
Illustration of a hand holding a cup with arrows indicating rotation and downward motion (no text or symbols)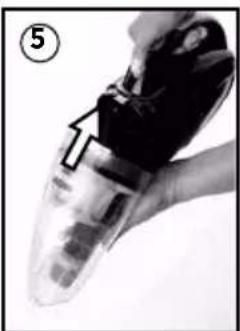
natural_image
Close-up of a hand holding a transparent plastic device with a black arrow pointing to a component (no visible text or symbols)natural_image
Hand holding a handheld electronic device with a screen and buttons (no visible text or symbols)
natural_image
Close-up of hands holding a small electronic device with a curved arrow indicating rotation (no text or symbols visible)
natural_image
Close-up of hands holding a small electronic device with a metallic connector (no visible text or symbols)
natural_image
Close-up of a hand holding a small electronic device with a black component, no visible text or symbolsLikvidace baterií
natural_image
Black and white photo of a hand mixer with mesh frame (no text or symbols)8 šroubů
natural_image
Close-up of a black and white vacuum cleaner with visible internal components (no text or symbols)SERIE 1987
Mark J. Bissell Chairman & CEO
natural_image
Black rectangular electronic device with attached cable and connector (no visible text or symbols)⑧
⑨

natural_image
Close-up of a black plastic or rubber component with a small protrusion (no visible text or symbols)10

natural_image
Black plastic object with a rectangular lid, resting on a flat surface (no text or symbols visible)11

natural_image
Close-up of a black rubber strap or strap component (no text or symbols visible)natural_image
Two hands pouring liquid from a black bottle into a small container (no text or symbols visible)Betrieb
natural_image
Black and white photo of a compact vacuum cleaner with a handle and internal structure (no visible text or symbols)natural_image
Close-up of a hand using a handheld device to lift a glass container (no text or symbols visible)
natural_image
Close-up of a hand holding a transparent vacuum cleaner with black handle (no visible text or symbols)natural_image
Three black fabric or sock-like objects arranged horizontally on a white background (no text or symbols visible)①
natural_image
Close-up of a hand holding a transparent vacuum cleaner with an arrow pointing to it, no visible text or symbols.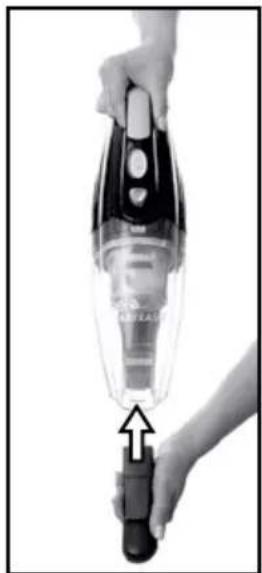
natural_image
Close-up of a hand holding a vacuum cleaner with an arrow indicating the handle (no text or symbols visible)2

natural_image
Close-up of hands holding a cylindrical object with an arrow pointing upward (no text or symbols visible)
natural_image
Close-up of hands holding a dark, folded object (no text or symbols visible)
natural_image
Black and white photo of a hand holding a compact vacuum cleaner (no visible text or symbols)3
natural_image
Close-up of a black vacuum cleaner with a transparent handle and attached lever (no visible text or symbols)Wartung und Pflege
natural_image
Close-up of a hand holding a small electronic device with a black clip, no visible text or symbols
natural_image
Close-up of a hand holding a transparent plastic container with a black clip, no visible text or symbols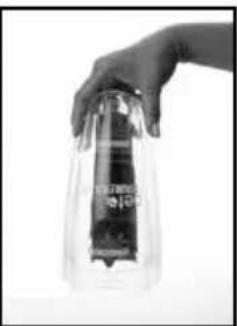
natural_image
Hand holding a transparent cylindrical container with internal components (no visible text or symbols)natural_image
Close-up of a hand holding a transparent plastic container with a black lid, showing a hand applying material to the cup (no text or symbols visible)
text_image
Diagram showing a hand holding a cup with arrows indicating rotation and downward motion, labeled with number 3.
natural_image
Close-up of a hand holding a transparent plastic device with internal components, no visible text or symbolsWartung und Pflege
DE
natural_image
Hand holding a handheld electronic device with a screen and buttons (no visible text or symbols)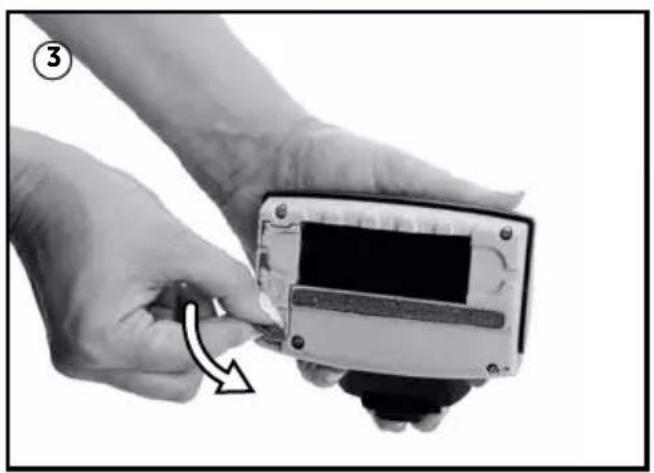
natural_image
Close-up of hands installing or adjusting a device with a curved arrow indicating rotation (no text or symbols visible)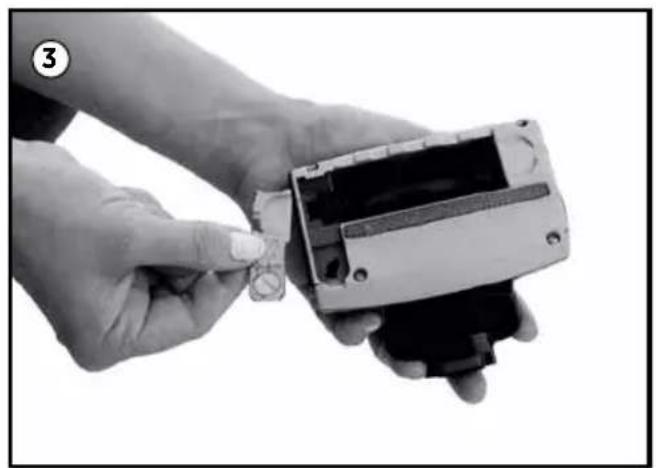
natural_image
Close-up of hands holding a small electronic device with a metallic connector (no visible text or symbols)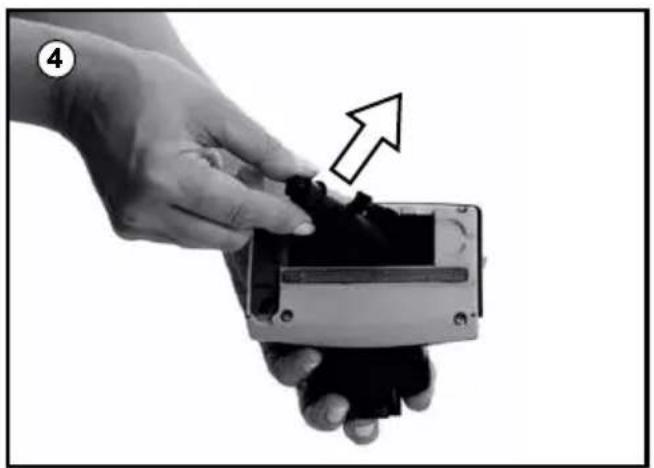
natural_image
Close-up of a hand holding a small electronic device with a black component, no visible text or symbolsWartung und Pflege
natural_image
Black and white illustration of a handbag with a mesh wireframe overlay, no text or symbols present.8 Schrauben
natural_image
Top-down view of a black and white vacuum cleaner with visible internal components (no text or symbols)1987-SERIEN
VIGTIGE SIKKERHEDSANVISNINGER
LÆS ALLE ANVISNINGER, INDEN DU BRUGER DIT APPARAT.
natural_image
Black rectangular electronic device with coiled cable and connector, labeled with number 7 (no visible text or symbols on body)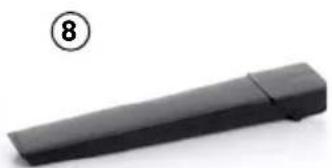
natural_image
Black rectangular object with a numbered circle (8) in the top-left corner, no visible text or symbols on the object itself.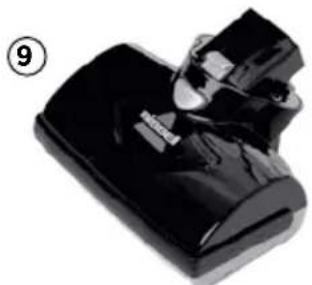
natural_image
Close-up of a black rubber clip with a white plastic cap, labeled with number 9 (no text or symbols on the clip itself)10

natural_image
Black plastic object with a flat lid, resting on a rounded base (no text or symbols visible)11

natural_image
Close-up of a black rubber strap or grip component (no text or symbols visible)*afhænger af model
ADVARSEL
natural_image
Two hands pouring liquid from a black bottle into a pen, no text or symbols visibleBetjening
natural_image
Close-up of a hand holding a blender with a black base, showing a mechanical press or tool (no text or symbols visible)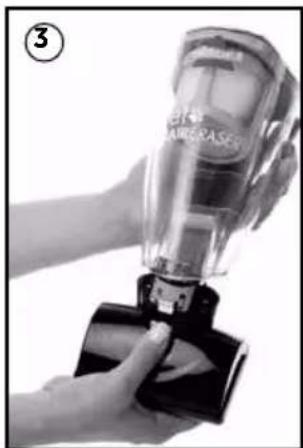
natural_image
Hand holding a transparent blender with black handle, no visible text or symbols on the device itselfBetjening
natural_image
Three black plastic test-like objects with rounded ends, arranged horizontally (no text or symbols)①
natural_image
Close-up of a hand holding a vacuum cleaner with an arrow pointing to the tip (no text or symbols visible)
natural_image
Close-up of a hand holding a compact vacuum cleaner with an arrow indicating the handle (no text or symbols visible)2

natural_image
Close-up of hands holding a cylindrical object with an arrow pointing upward (no text or symbols visible)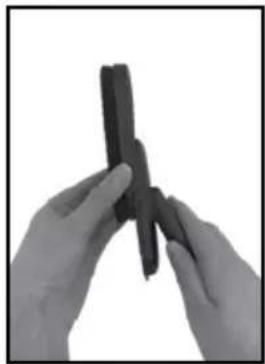
natural_image
Close-up of hands holding a dark, crumpled object against a white background (no text or symbols visible)
natural_image
Black and white photo of a hand holding a compact vacuum cleaner (no visible text or symbols)3

natural_image
Black and white photo of a handheld vacuum cleaner (no visible text or symbols)natural_image
Close-up of a hand holding a black plastic device with an arrow pointing to it, next to a transparent container (no visible text or symbols)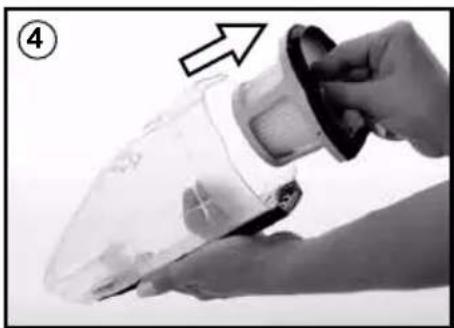
natural_image
Close-up of a hand holding a transparent container with a cloth, showing a white arrow pointing to the lid (no text or symbols visible)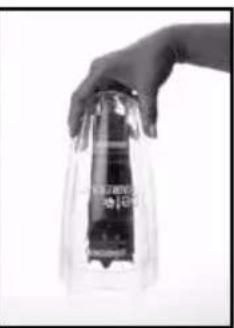
natural_image
Hand holding a clear glass container with a dark liquid inside (no visible text or symbols)natural_image
Close-up of a hand holding a transparent plastic container with a black lid, showing a hand holding the container and an arrow pointing to it (no text or symbols visible)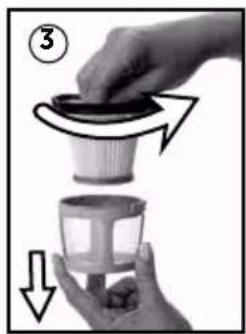
natural_image
Illustration of hands holding a container with arrows indicating motion (no text or symbols)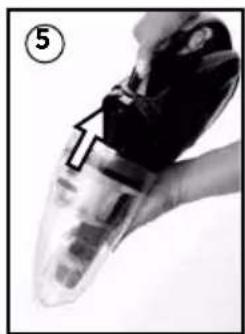
natural_image
Close-up of a hand holding a transparent plastic device with a black clip and arrow pointing to it (no visible text or symbols)natural_image
Hand holding a handheld electronic device with a screen, no visible text or symbols
natural_image
Close-up of hands holding a small electronic device with a curved arrow indicating rotation (no text or symbols visible)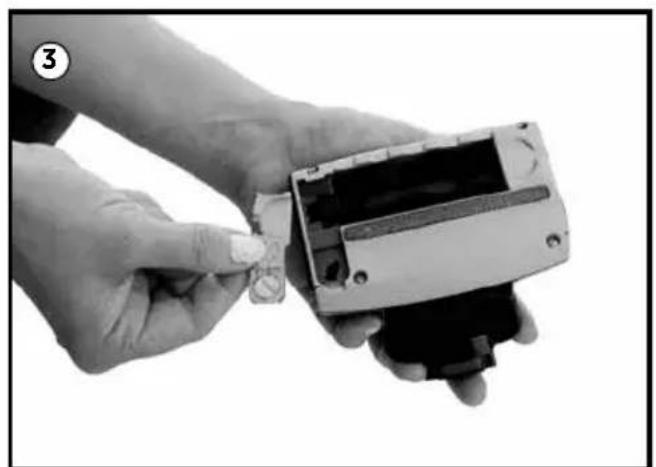
natural_image
Close-up of hands holding a small electronic device with a metallic connector (no visible text or symbols)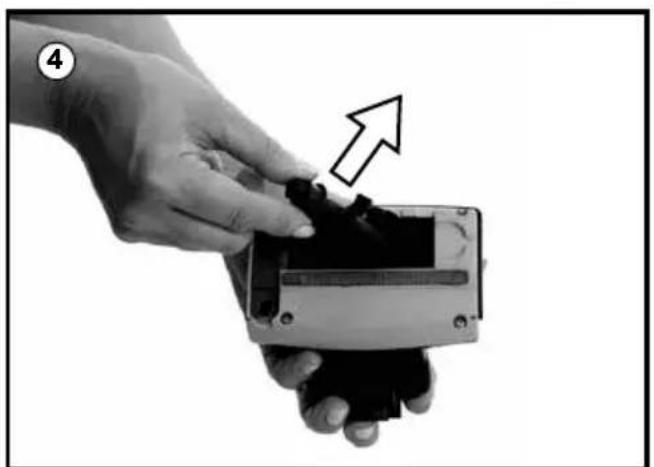
natural_image
Close-up of a hand holding a device with a black component and an upward arrow, no visible text or symbolsnatural_image
Black and white illustration of a hand mixer with mesh overlay (no text or symbols)8 skruer
natural_image
Close-up of a black and white vacuum cleaner with visible internal components (no text or symbols)PET HAIR ERASER® ASPIRADOR MANUAL SIN CABLES
SERIE 1987
natural_image
Black rectangular electronic device with attached black cable and connector (no visible text or symbols)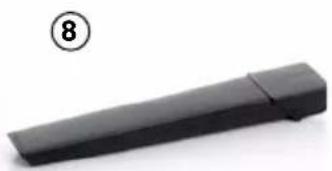
natural_image
Black rectangular object with a numbered label (8) in the top-left corner, no visible text or symbols on the object itself.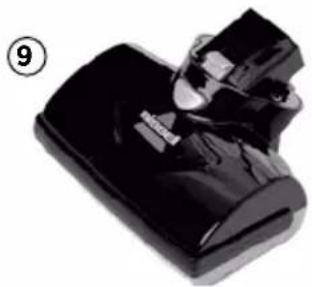
natural_image
Close-up of a black rubber clip with a white plastic cap, labeled with number 9 (no text or symbols on the clip itself)10

natural_image
Black plastic object with a rectangular clip, resting on a flat surface (no text or symbols visible)11

natural_image
Close-up of a black rubber strap or strap component (no text or symbols visible)natural_image
Close-up of hands holding a black plastic bag with a tool inserted, no visible text or symbolsFuncionamiento
natural_image
Close-up of a black handheld vacuum cleaner with a transparent lid and handle, showing internal components and a small arrow pointing to the part (no text or symbols visible)natural_image
Close-up of a hand holding a blender with an arrow pointing to the lid (no text or symbols visible)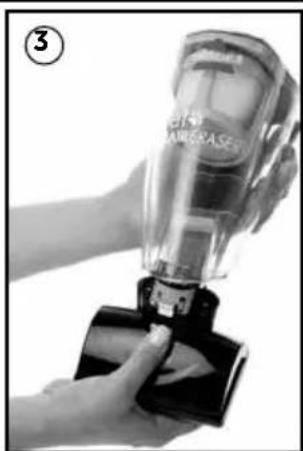
natural_image
Hand holding a clear vacuum cleaner with black base, no visible text or symbols on the device itselfFuncionamiento
natural_image
Three black plastic T-shaped objects of varying sizes arranged horizontally (no text or symbols)①
natural_image
Close-up of a hand holding a vacuum cleaner with an arrow pointing to the tip (no text or symbols visible)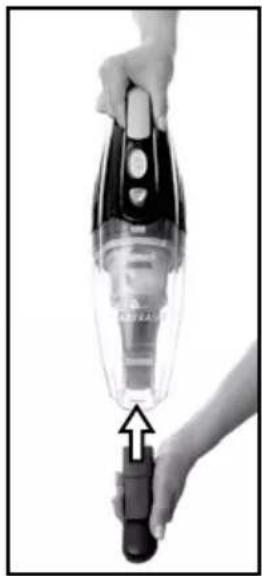
natural_image
Close-up of a hand holding a compact vacuum cleaner with an arrow indicating the handle (no text or symbols visible)2
natural_image
Close-up of hands holding two dark cylindrical objects with an upward arrow indicating motion (no text or symbols)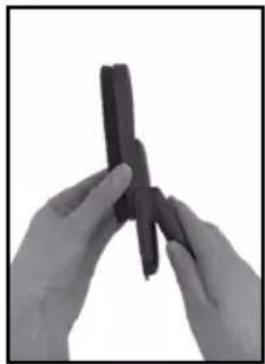
natural_image
Close-up of hands holding a dark, crumpled object against a white background (no text or symbols visible)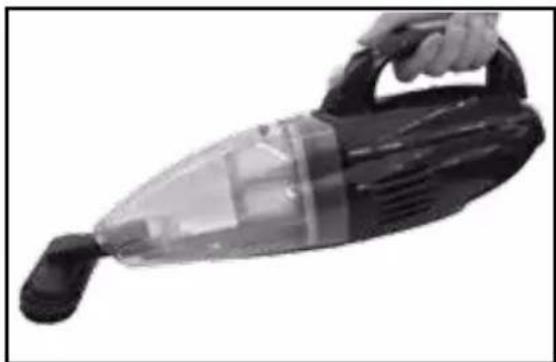
natural_image
Black and white photo of a hand holding a compact vacuum cleaner (no visible text or symbols)3

natural_image
Close-up of a black vacuum cleaner with a transparent handle and attached lever (no visible text or symbols)natural_image
Close-up of a hand holding a black object with an arrow pointing to it, next to a transparent container (no visible text or symbols)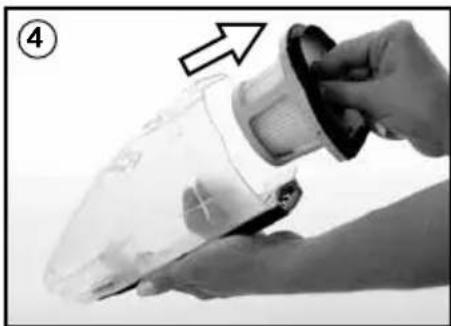
natural_image
Close-up of a hand holding a transparent plastic container with a black clip, no visible text or symbols
natural_image
Hand holding a transparent cylindrical container with a dark liquid inside, against a plain background (no text or symbols visible)natural_image
Close-up of a hand holding a transparent plastic bag with a black clip, showing a hand applying material to the cup (no text or symbols visible)
natural_image
Illustration of a hand holding a cup with arrows indicating rotation and downward motion (no text or symbols)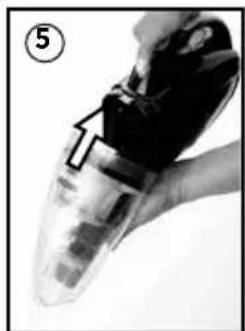
natural_image
Close-up of a hand holding a transparent object with internal layered structure (no visible text or symbols)natural_image
Hand holding a handheld electronic device with a screen and buttons (no visible text or symbols)
natural_image
Close-up of hands holding a small electronic device with a curved arrow indicating rotation (no text or symbols visible)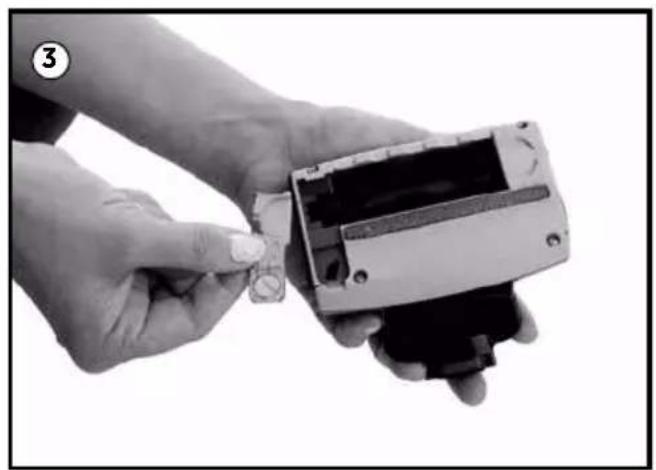
natural_image
Close-up of hands holding a small electronic device with a metallic component, no visible text or symbols
natural_image
Close-up of a hand holding a small electronic device with an arrow pointing to it, no visible text or symbols.natural_image
Black and white illustration of a hand mixer with mesh frame (no text or symbols)8 tornillos
natural_image
Top-down view of a black and white vacuum cleaner device with visible internal components (no text or symbols)1987-SARJA
natural_image
Black electrical adapter with coiled cable and connector (no visible text or symbols)⑧

⑨
natural_image
Close-up of a black rubber or rubber clip with a small white object on top (no visible text or symbols)10

natural_image
Black plastic object with a rectangular lid, resting on a flat surface (no text or symbols visible)11

natural_image
Close-up of a black rubber strap or grip component (no text or symbols visible)natural_image
Two hands pouring liquid from a black bottle into a small container (no text or symbols visible)Toiminnot
text_image
Virtapainikenatural_image
Close-up of a hand using a handheld device to lift a glass container (no text or symbols visible)
natural_image
Hand holding a transparent blender with black handle, no visible text or symbols on the device itselfToiminnot
natural_image
Three black 3D-rendered objects resembling testis or mechanical parts, arranged horizontally (no text or symbols)①

natural_image
Close-up of a hand holding a cleaning brush with an arrow pointing to it, no visible text or symbols
natural_image
Close-up of a hand holding a vacuum cleaner with an arrow pointing to the handle (no text or symbols visible)2
natural_image
Close-up of hands holding a cylindrical object with an upward arrow indicating motion (no text or symbols)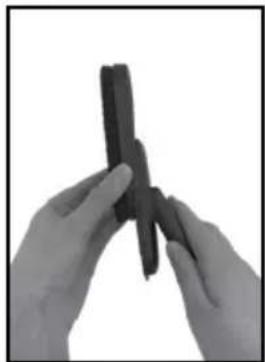
natural_image
Close-up of hands holding a dark, crumpled object against a white background (no text or symbols visible)
natural_image
Black and white photo of a hand holding a compact vacuum cleaner (no visible text or symbols)3
natural_image
Close-up of a black and transparent handheld vacuum cleaner (no visible text or symbols)Hoolto ja hoito
natural_image
Close-up of a hand holding a black plastic device with an arrow pointing to it, no visible text or symbols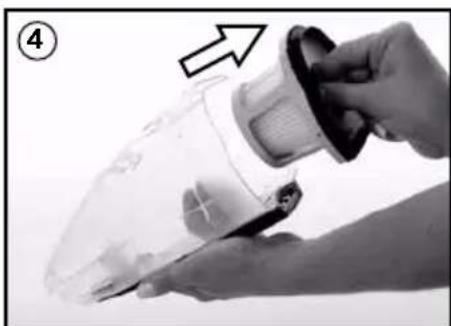
natural_image
Close-up of a hand holding a transparent plastic container with a black clip, no visible text or symbols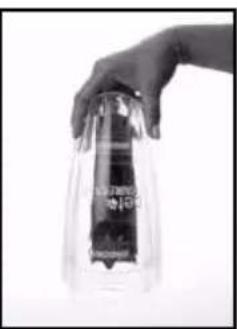
natural_image
Hand holding a transparent cylindrical container with a dark liquid inside, against a plain background (no visible text or symbols)natural_image
Close-up of a hand holding a transparent plastic container with a black cover, showing a finger pointing to the lid (no text or symbols visible)
natural_image
Illustration of a hand pressing down on a small container with arrows indicating motion (no text or symbols)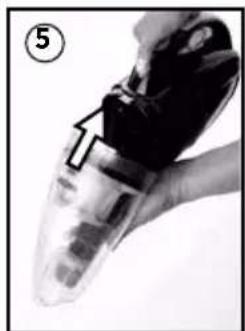
natural_image
Close-up of a hand holding a transparent plastic object with an arrow pointing to a section (no visible text or symbols)Hoolto ja hoito
natural_image
Hand holding a handheld electronic device with a screen and buttons (no visible text or symbols)
natural_image
Close-up of hands holding a small electronic device with a curved arrow indicating rotation (no text or symbols visible)
natural_image
Close-up of hands holding a small electronic device with a metallic connector (no visible text or symbols)
natural_image
Close-up of a hand holding a small electronic device with a black component, no visible text or symbolsHoolto ja hoito
natural_image
Black and white illustration of a handbag with a wireframe mesh overlay (no text or symbols)8 ruuvia
⚠️VAROITUS
natural_image
Top-down view of a black and white vacuum cleaner with visible internal components (no text or symbols)SÉRIE 1987
CONSIGNES DE SÉCURITÉ IMPORTANTES
LISEZ ATTENTIVEMENT TOUTES LES INSTRUCTIONS AVANT D'UTILISER VOTRE APPAREIL.
natural_image
Black electronic device with attached cable and connector, labeled with number 7 (no visible text or symbols on device body)
natural_image
Black rectangular object with a numbered circle (8) in the top-left corner, no visible text or symbols on the object itself.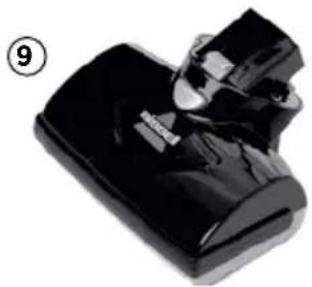
natural_image
Close-up of a black rubber clip with a white plastic cap, labeled with number 9 (no text or symbols on the clip itself)10
natural_image
Black plastic object with a rectangular clip, resting on a rounded base (no text or symbols visible)11

natural_image
Close-up of a black, oval-shaped object with textured surface (no text or symbols visible)natural_image
Two hands in protective gear handling a black plastic bag with a tool, no visible text or symbolsπ刀
Fonctionnement
natural_image
Black and white photo of a compact vacuum cleaner with a handle and lid, showing internal structure and a small arrow pointing to the handle (no text or symbols visible)natural_image
Hand holding a blender with a black plastic base, showing liquid being poured into it (no text or symbols visible)
natural_image
Hand holding a transparent industrial blender with black handle (no visible text or symbols)Fonctionnement
natural_image
Three black, rounded objects resembling mechanical or electronic components, arranged horizontally (no text or symbols visible)1
natural_image
Close-up of a hand holding a vacuum cleaner with an arrow pointing to the handle (no text or symbols visible)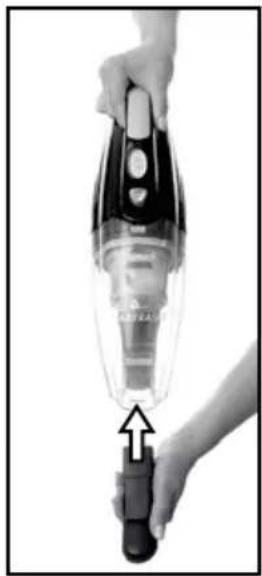
natural_image
Close-up of a hand holding a compact vacuum cleaner with an arrow indicating the handle (no text or symbols visible)2
natural_image
Close-up of hands holding a cylindrical object with an arrow pointing upward (no text or symbols visible)
natural_image
Close-up of hands holding a dark, crumpled object against a white background (no text or symbols visible)
natural_image
Black and white photo of a hand holding a compact vacuum cleaner (no visible text or symbols)3

natural_image
Close-up of a black vacuum cleaner with a transparent handle and attached lever (no visible text or symbols)Entretien
natural_image
Close-up of a hand holding a small electronic device with an arrow pointing to it, no visible text or symbols.
natural_image
Close-up of a hand holding a transparent plastic container with a black clip, no visible text or symbols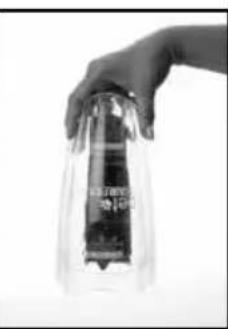
natural_image
Hand holding a transparent cylindrical container with a dark liquid inside (no visible text or symbols)工刀
natural_image
Close-up of a hand holding a transparent plastic device with a black clip, showing internal components and an arrow indicating direction (no text or symbols)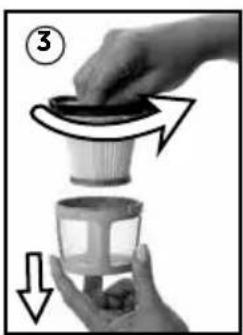
natural_image
Illustration of hands holding a cup and a container with arrows indicating motion (no text or symbols)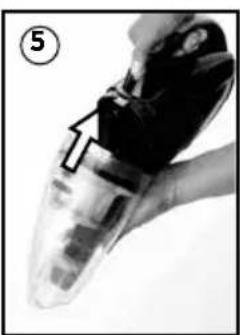
natural_image
Close-up of a hand holding a transparent plastic object with an arrow pointing to a component (no visible text or symbols)Entretien
natural_image
Hand holding a handheld electronic device with a screen and buttons (no visible text or symbols)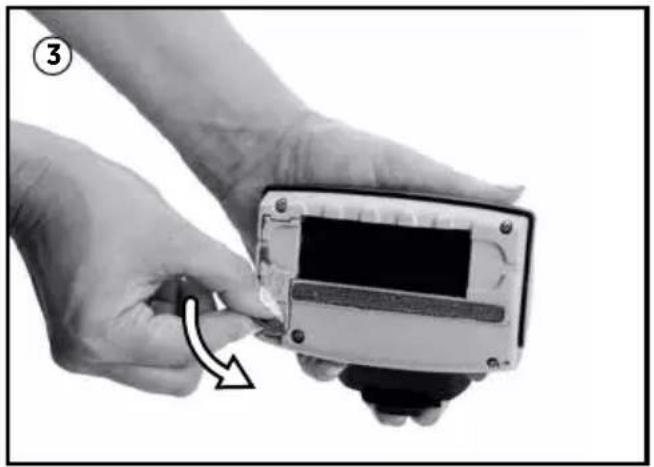
natural_image
Close-up of hands holding a small electronic device with a curved arrow indicating rotation (no text or symbols visible)
natural_image
Close-up of hands installing or adjusting a small electronic device component (no visible text or symbols)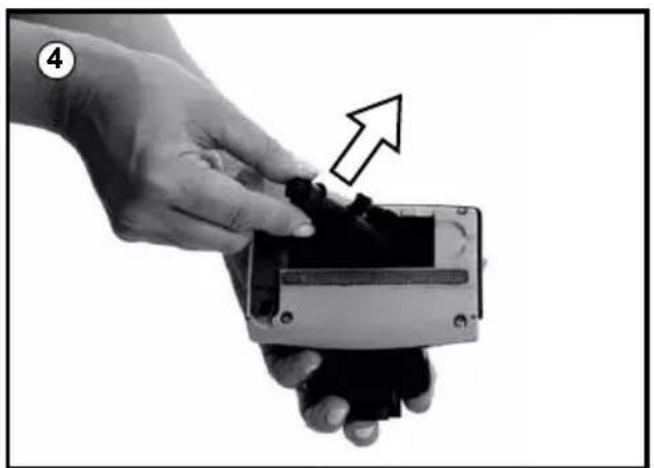
natural_image
Close-up of a hand holding a small electronic device with an arrow pointing to it, no visible text or symbols.natural_image
Black and white illustration of a handbar with a mesh wireframe overlay (no text or symbols)8 vis
\*EXCEPTIONS ET EXCLUSIONS DES CONDITIONS DE LA GARANTIE
natural_image
Top-down view of a black and white handheld vacuum cleaner device (no visible text or symbols)FONTOS BIZTONSÁGI ELŐÍRÁSOK
natural_image
Black rectangular electronic device with attached black cable and connector (no visible text or symbols)
natural_image
Black rectangular object with a numbered circle (8) in the top-left corner, no visible text or symbols on the object itself.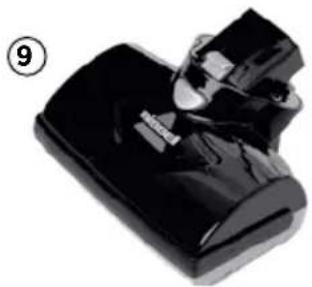
natural_image
Close-up of a black rubber clip with a white plastic cap, labeled with number 9 (no text or symbols on the clip itself)10

natural_image
Black plastic object with a flat top and rounded base, resembling a stylus or tool (no text or symbols visible)11

natural_image
Close-up of a black rubber strap or grip component (no text or symbols visible)natural_image
Two hands in protective gear handling a dark, glossy object with a tool inserted (no text or symbols visible)Használat
natural_image
Black and white photo of a compact vacuum cleaner with a handle and spout, no visible text or symbolsnatural_image
Close-up of a hand using a handheld device to lift a plastic bottle (no text or symbols visible)
natural_image
Close-up of a hand holding a transparent blender with black handle, no visible text or symbols on the device itselfHasználat
natural_image
Three black plastic USB clips arranged horizontally (no text or symbols visible)①

natural_image
Close-up of a hand holding a cleaning brush with an arrow pointing to it, no visible text or symbols
natural_image
Close-up of a hand holding a compact vacuum cleaner with an arrow indicating the handle (no text or symbols visible)2

natural_image
Close-up of hands holding a cylindrical object with an arrow pointing upward (no text or symbols visible)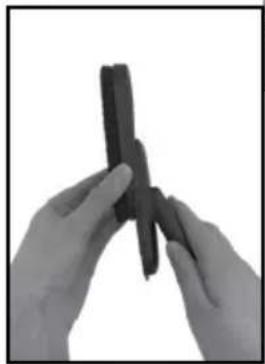
natural_image
Close-up of hands holding a dark, folded object against a white background (no text or symbols visible)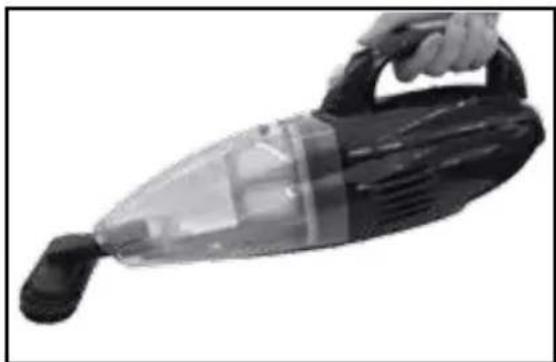
natural_image
Black and white photo of a hand holding a compact vacuum cleaner (no visible text or symbols)3

natural_image
Close-up of a black handheld vacuum cleaner with a transparent handle and attached lever (no visible text or symbols)natural_image
Close-up of a hand holding a black plastic device with an arrow pointing to it, no visible text or symbols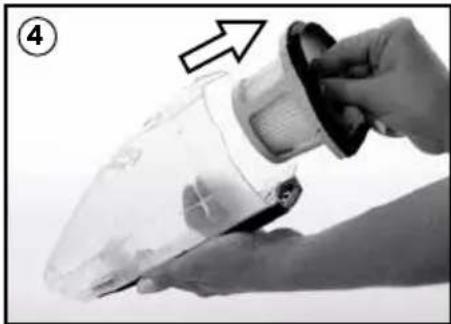
natural_image
Hand holding a transparent plastic container with a hose, no visible text or symbols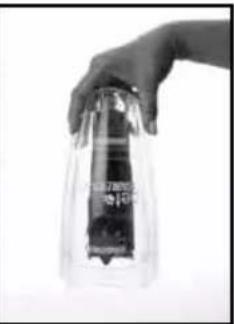
natural_image
Hand holding a transparent cylindrical container with a dark liquid inside (no visible text or symbols)natural_image
Close-up of a hand holding a transparent plastic container with a black tag, showing a hand applying material to the lid (no text or symbols visible)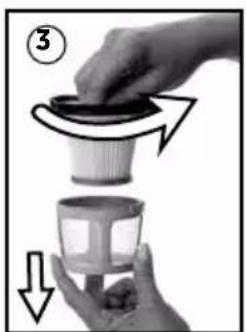
natural_image
Illustration of a hand holding a small container with arrows indicating motion or transformation (no text or symbols)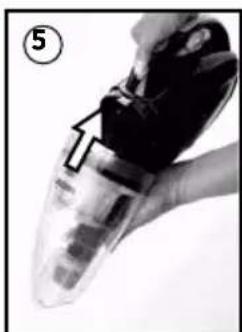
natural_image
Close-up of a hand holding a transparent plastic device with a black arrow pointing to a component (no visible text or symbols)natural_image
Hand holding a digital camera module with a screen, no visible text or symbols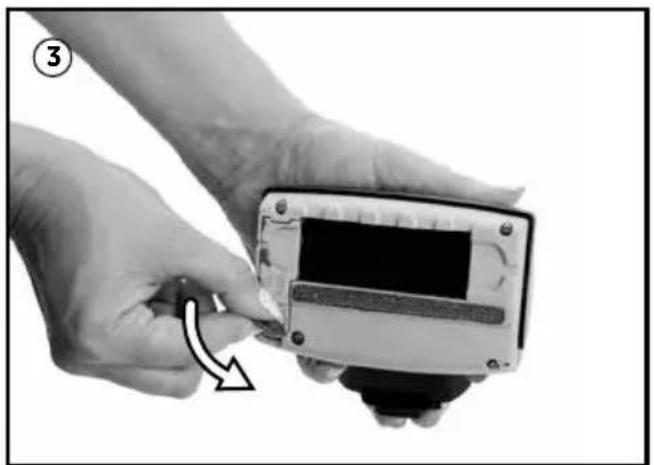
natural_image
Close-up of hands adjusting a small electronic device with a curved arrow indicating rotation (no text or symbols visible)
natural_image
Close-up of hands holding a small electronic device with a coin inserted (no visible text or symbols)
natural_image
Close-up of a hand holding a device with an arrow pointing to it, no visible text or symbolsnatural_image
Black and white illustration of a hand mixer with mesh frame (no text or symbols)8 csavar
natural_image
Close-up of a black and white vacuum cleaner with visible internal components (no text or symbols)ISTRUZIONI IMPORTANTI PER LA SICUREZZA
LEGGI TUTTE LE ISTRUZIONI PRIMA DI UTILIZZARE IL TUO APPARECCHIO.
natural_image
Black rectangular electronic device with attached cable and connector (no visible text or symbols)8

⑨

natural_image
Close-up of a black plastic roller or pushpin component (no visible text or symbols)10

natural_image
Black plastic object with a flat lid, resting on a rectangular base (no text or symbols visible)11

natural_image
Close-up of a black rubber strap or strap component (no text or symbols visible)natural_image
Two hands pouring liquid from a black bottle into a pen, no text or symbols visibleFunzionamento
三
natural_image
Close-up of a black and transparent vacuum cleaner with an arrow pointing to the handle (no visible text or symbols)natural_image
Close-up of a hand using a blender to lift a black plastic cup, with an arrow indicating the cup's tip (no text or symbols visible)
natural_image
Hand holding a transparent blender with black handle, no visible text or symbols on the device itselfFunzionamento
natural_image
Three black mechanical foot buttons arranged horizontally, no text or symbols visible①

natural_image
Close-up of a hand holding a vacuum cleaner with an arrow pointing to the handle (no text or symbols visible)
natural_image
Close-up of a hand holding a compact vacuum cleaner with an arrow indicating the process (no text or symbols visible)2
natural_image
Close-up of hands holding two cylindrical objects with an upward arrow indicating motion (no text or symbols)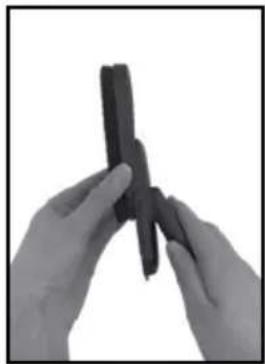
natural_image
Close-up of hands holding a dark, crumpled object (no text or symbols visible)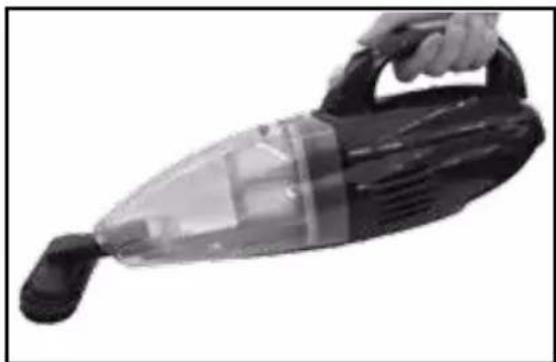
natural_image
Black and white photo of a hand holding a compact vacuum cleaner (no visible text or symbols)3
natural_image
Close-up of a black vacuum cleaner with a transparent handle and attached lever (no visible text or symbols)Manutenzione e cura
natural_image
Close-up of a hand holding a black object with an arrow pointing to it, next to a transparent container (no visible text or symbols)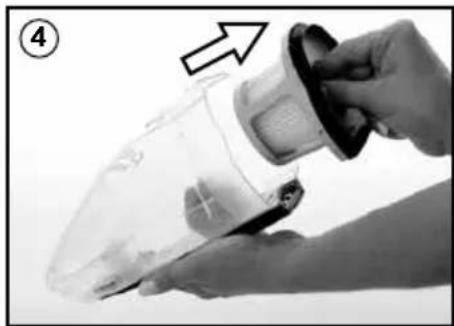
natural_image
Hand holding a transparent plastic container with a cloth, no visible text or symbols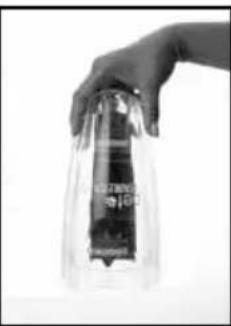
natural_image
Hand holding a clear glass container with visible liquid and text (no readable document text)natural_image
Close-up of a hand holding a transparent plastic device with a black clip, showing a handle and arrow indicating direction (no text or symbols)
natural_image
Illustration of a hand holding a small container with arrows indicating motion or transformation (no text or symbols)
natural_image
Close-up of a hand holding a transparent plastic object with an arrow pointing to it, no visible text or symbols.Manutenzione e cura
natural_image
Hand holding a handheld electronic device with a screen, no visible text or symbols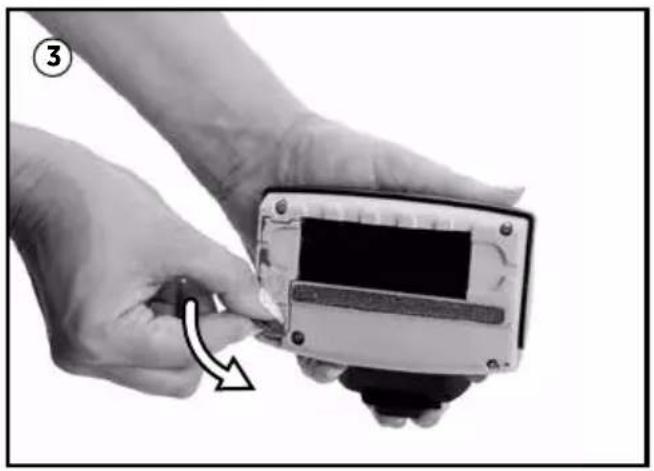
natural_image
Close-up of hands holding a small electronic device with a curved arrow indicating rotation (no text or symbols visible)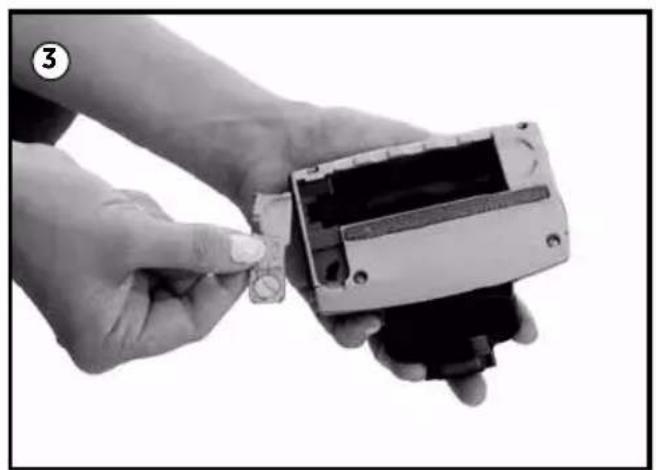
natural_image
Close-up of hands holding a small electronic device with a metallic component (no visible text or symbols)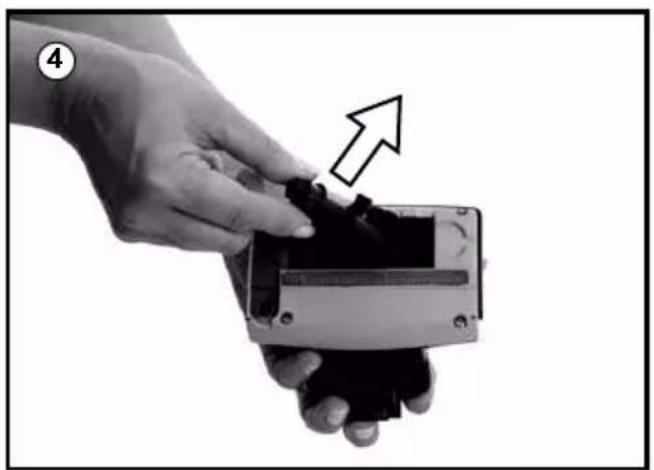
natural_image
Close-up of a hand holding a small electronic device with a black component, showing a pointing arrow (no text or symbols visible)Manutenzione e cura
natural_image
Black and white illustration of a handbar with a wireframe mesh overlay (no text or symbols)8 viti
⚠ AVVERTENZA
natural_image
Top-down view of a black and white vacuum cleaner device (no visible text or symbols)1987-SERIE
BELANGRIJKE VEILIGHEIDSINSTRUCTIES
LEES ALLE INSTRUCTIES GRONDIG DOOR VOORDAT U UW APPARAAT GEBRUIKT.
natural_image
Black electrical adapter with coiled cable and connector (no visible text or symbols)⑧
⑨
natural_image
Close-up of a black rubber or rubber clip with a glossy surface and a small metallic clip (no text or symbols visible)10

natural_image
Black plastic object with a rectangular handle, resting on a flat base (no text or symbols visible)11

natural_image
Close-up of a black rubber strap or grip component (no text or symbols visible)natural_image
Close-up of a hand using a power tool to lift a device, no visible text or symbols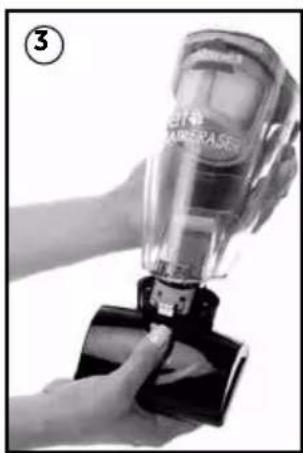
natural_image
Hand holding a clear vacuum cleaner with black handle, no visible text or symbols⚠ WAARSCHUWING
natural_image
Two hands in protective gear handling a black plastic container with a tool, no visible text or symbolsBediening
natural_image
Three black 3D-rendered objects resembling mechanical or electronic components, arranged horizontally (no text or symbols)①

natural_image
Close-up of a hand holding a vacuum cleaner with an arrow pointing to the handle (no text or symbols visible)
natural_image
Close-up of a hand holding a vacuum cleaner with an arrow pointing to the handle (no text or symbols visible)2

natural_image
Close-up of hands holding two cylindrical objects with an upward arrow indicating motion (no text or symbols)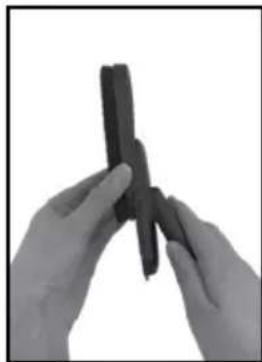
natural_image
Close-up of hands holding a dark, crumpled object against a white background (no text or symbols visible)
natural_image
Black and white photo of a hand holding a compact vacuum cleaner (no visible text or symbols)3

natural_image
Close-up of a black vacuum cleaner with a transparent handle and attached lever (no visible text or symbols)natural_image
Close-up of a hand holding a small black object with an arrow pointing to it, next to a transparent container (no visible text or symbols)
natural_image
Close-up of a hand holding a transparent plastic device with a black cover, showing a handle and part of the lid (no text or symbols visible)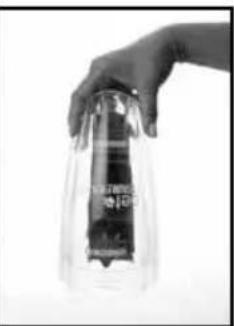
natural_image
Hand holding a transparent cylindrical container with a dark liquid inside (no visible text or symbols)Z
De filter schoonmaken of vervangen
natural_image
Close-up of a hand holding a transparent plastic container with a black clip, showing a hand holding the lid and an arrow pointing to the lid (no text or symbols visible)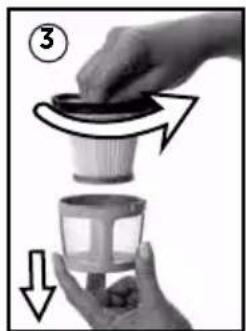
natural_image
Illustration of a hand holding a small container with arrows indicating motion or transformation (no text or symbols)
natural_image
Close-up of a hand holding a transparent object with a black handle and arrow pointing to a section (no visible text or symbols)natural_image
Hand holding a handheld electronic device with a screen, no visible text or symbols
natural_image
Close-up of hands holding a small electronic device with a curved arrow indicating rotation (no text or symbols visible)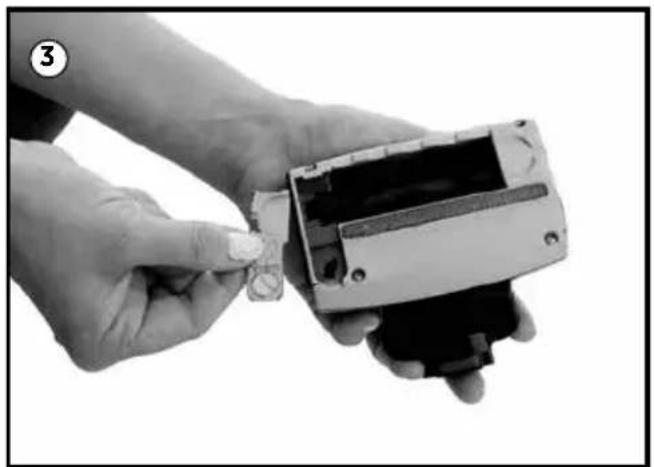
natural_image
Close-up of hands holding a small electronic device with a metallic connector (no visible text or symbols)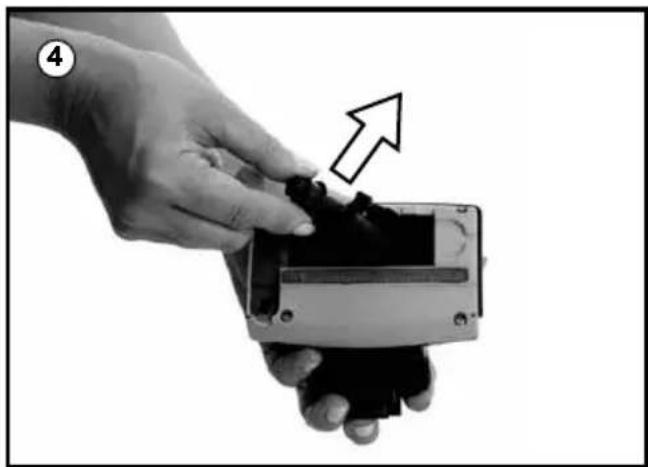
natural_image
Close-up of a hand holding a small electronic device with an arrow pointing to it, no visible text or symbols.natural_image
Black and white illustration of a handbag with a wireframe mesh overlay (no text or symbols)8 schroeven
Z
⚠ WAARSCHUWING
TRADL∅S HANDST∅VUSGER PET HAIR ERASER®

natural_image
Top-down view of a black and white vacuum cleaner device (no visible text or symbols)1987-SERIEN
VIKTIGE SIKKERHETSREGLER
LES ALLE REGLENE F∅R DU BRUKER APPARATET.
natural_image
Black rectangular electronic device with coiled cable and connector, labeled with number 7 (no visible text or symbols on the device body)
natural_image
Black rectangular object with a numbered circle (8) in the top-left corner, no visible text or symbols on the object itself.
natural_image
Close-up of a black rubber clip with a white plastic cap, labeled with number 9 (no text or symbols on the clip itself)10

natural_image
Black plastic object with a flat top, resting on a rounded base (no text or symbols visible)11

natural_image
Close-up of a black rubber strap or grip component (no text or symbols visible)natural_image
Close-up of hands holding a dark, glossy object with a tool inserted (no visible text or symbols)Bruk
text_image
StrømbryterZ
natural_image
Close-up of a hand holding a blender with a black base, showing a mechanical press or tool inserted (no text or symbols visible)
natural_image
Hand holding a transparent blender with black base, no visible text or symbols on the device itselfnatural_image
Three black plastic or rubber-like objects with rounded ends, arranged horizontally (no text or symbols visible)1

natural_image
Close-up of a hand holding a vacuum cleaner with an arrow pointing to the tip (no text or symbols visible)
natural_image
Close-up of a hand holding a compact vacuum cleaner with an arrow indicating the process (no text or symbols visible)2
natural_image
Close-up of hands holding two cylindrical objects with an upward arrow indicating motion (no text or symbols)
natural_image
Close-up of hands holding a dark, crumpled object against a white background (no text or symbols visible)
natural_image
Black and white photo of a hand holding a compact vacuum cleaner (no visible text or symbols)3

natural_image
Close-up of a black vacuum cleaner with a transparent handle and attached lever (no visible text or symbols)Vedlikehold
natural_image
Close-up of a hand holding a black object with an arrow pointing to it, no visible text or symbols
natural_image
Close-up of a hand holding a transparent plastic device with a black cover, showing a white arrow pointing to the component (no text or symbols visible)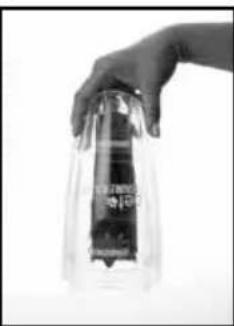
natural_image
Hand holding a transparent cylindrical container with a dark liquid inside, against a plain background (no visible text or symbols)natural_image
Close-up of a hand holding a transparent plastic container with a black clip, showing a hand holding the lid (no text or symbols visible)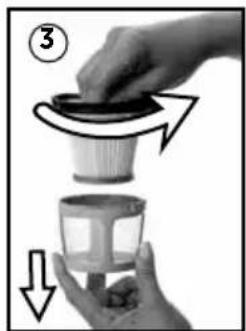
natural_image
Illustration of a hand pressing down on a cup with arrows indicating motion (no text or symbols)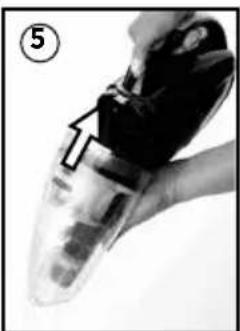
natural_image
Close-up of a hand holding a transparent plastic device with internal components (no visible text or symbols)Vedlikehold
natural_image
Hand holding a handheld electronic device with a screen and buttons (no visible text or symbols)
natural_image
Close-up of hands holding a small electronic device with a curved arrow indicating rotation (no text or symbols visible)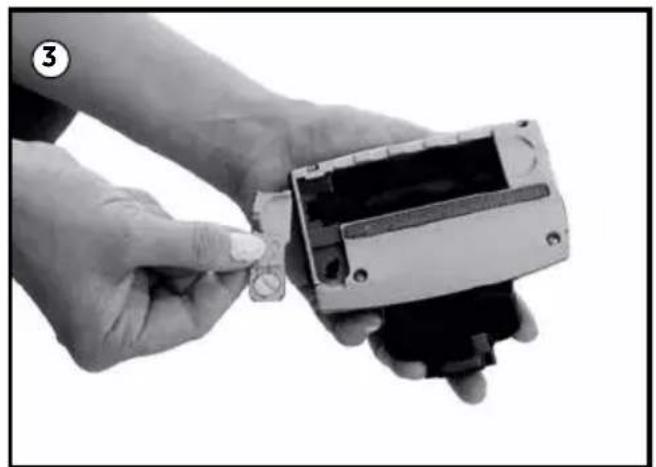
natural_image
Close-up of hands holding a small electronic device with a metallic connector (no visible text or symbols)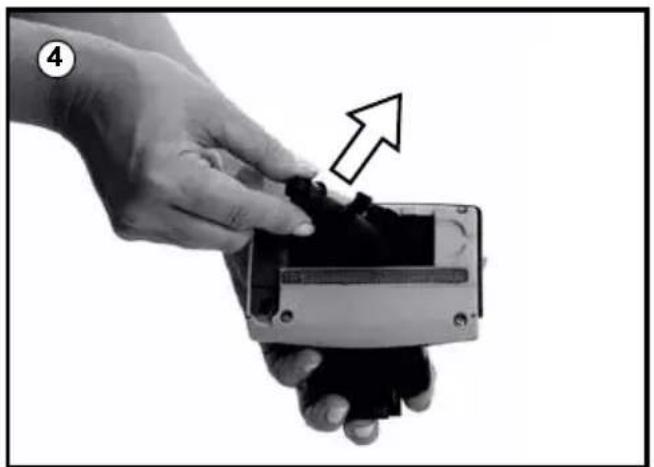
natural_image
Close-up of a hand holding a small electronic device with a black component, no visible text or symbolsVedlikehold
natural_image
Black and white illustration of a hand mixer with mesh overlay (no text or symbols)8 skruer
natural_image
Top-down view of a black and white vacuum cleaner with visible internal components (no text or symbols)WAŻNE INFORMACJE O BEZPIECZEŃSTWIE
PRZED SKORZYSTANIEM Z URZĄDZENIA PRZECZYTAĆ WSZYSTKIE INSTRUKCJE DOTYCZĄCE JEGO OBSŁUGI.
natural_image
Black rectangular electronic device with attached cable and connector, labeled with number 7 (no visible text or symbols on the device body)
natural_image
Black rectangular object with a numbered circle (8) in the top-left corner, no visible text or symbols on the object itself.
natural_image
Close-up of a black rubber clip with a small metallic clip, labeled with number 9 (no text or symbols on the clip itself)10

natural_image
Black plastic object with a rectangular lid, resting on a flat surface (no text or symbols visible)11

natural_image
Close-up of a black rubber strap or strap component (no text or symbols visible)natural_image
Close-up of hands holding a black plastic bag with a pen inserted, no visible text or symbolsEksplorattacjga
natural_image
Close-up of a hand using a power tool to lift a cylindrical device (no text or symbols visible)
natural_image
Hand holding a clear vacuum cleaner with black base, no visible text or symbols on the device itselfEksplorattacijga
natural_image
Three black plastic or rubber-like objects with rounded ends, arranged horizontally (no text or symbols visible)1
natural_image
Close-up of a hand holding a vacuum cleaner with an arrow pointing to it, no visible text or symbols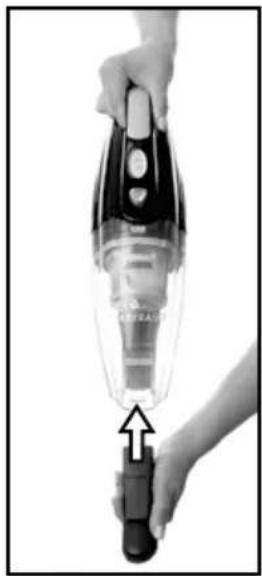
natural_image
Close-up of a hand holding a transparent vacuum cleaner with an arrow indicating the process (no text or symbols visible)2
natural_image
Close-up of hands holding a dark cylindrical object with an arrow pointing upward (no text or symbols visible)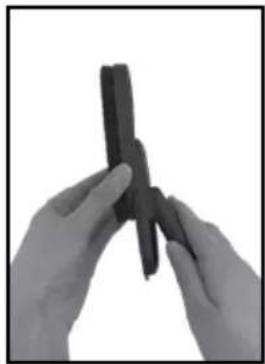
natural_image
Close-up of hands holding a small black object (no text or symbols visible)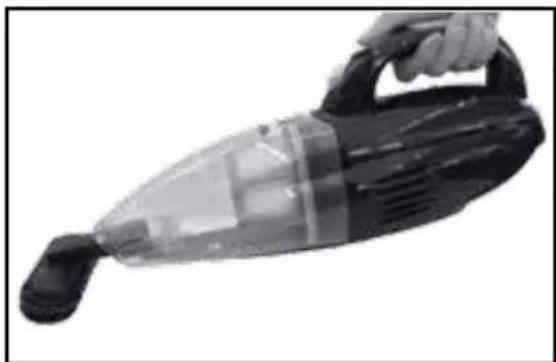
natural_image
Black and white photo of a hand holding a compact vacuum cleaner (no visible text or symbols)3

natural_image
Close-up of a black vacuum cleaner with a transparent handle and attached lever (no visible text or symbols)natural_image
Close-up of a hand holding a black plastic object with an arrow pointing to it, no visible text or symbols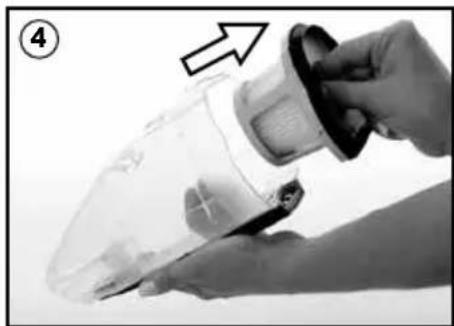
natural_image
Hand holding a transparent plastic container with a cap, showing a hand holding the container (no text or symbols visible)
natural_image
Hand holding a transparent glass container with a dark liquid inside, against a plain background (no visible text or symbols)natural_image
Close-up of hands holding a transparent plastic container with a cloth, no visible text or symbols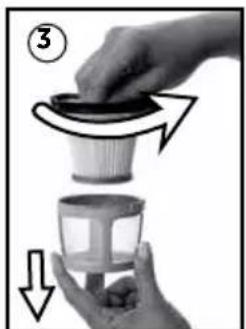
natural_image
Illustration of hands holding a container with arrows indicating motion (no text or symbols)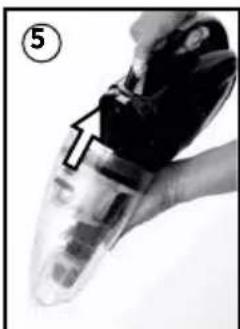
natural_image
Close-up of a hand holding a transparent object with a black arrow pointing to a dark object, no visible text or symbols.natural_image
Hand holding a handheld electronic device with a screen and buttons (no visible text or symbols)
natural_image
Close-up of hands holding a small electronic device with a curved arrow indicating rotation (no text or symbols visible)
natural_image
Close-up of hands holding a small electronic device with a metallic connector (no visible text or symbols)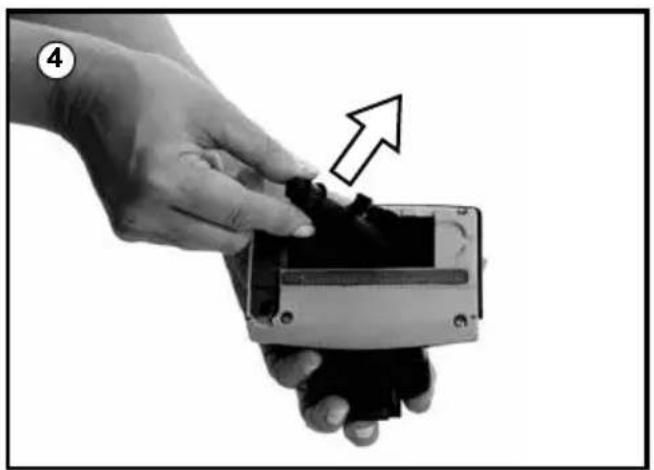
natural_image
Close-up of a hand holding a small electronic device with an arrow pointing to it, no visible text or symbols.natural_image
Black and white illustration of a handbag with a wireframe mesh overlay (no text or symbols)8 wkrętów

OSTRZEŻENIE
natural_image
Close-up of a black and white vacuum cleaner with visible internal components (no text or symbols)1987 SERIES
INSTRUÇÕES DE SEGURANÇA IMPORTANTES
LEIA TODAS AS INSTRUÇÕES ANTES DE UTILIZAR O SEU APARELHO.
natural_image
Black rectangular electronic device with attached black cable and connector (no visible text or symbols)
natural_image
Black rectangular object with a numbered circle (8) in the top-left corner, no visible text or symbols on the object itself.
natural_image
Close-up of a black rubber clip with a white plastic cap, labeled with number 9 (no text or symbols on the clip itself)10

natural_image
Black plastic object with a flat top, resting on a rounded base (no text or symbols visible)11

natural_image
Close-up of a black rubber strap or grip component (no text or symbols visible)natural_image
Two hands pouring liquid from a black bottle into a pen, no text or symbols visiblenatural_image
Close-up of a black and white vacuum cleaner with a handle and internal structure (no visible text or symbols)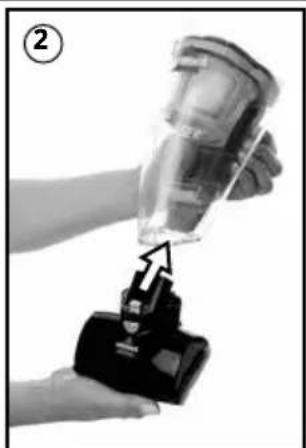
natural_image
Close-up of a hand using a handheld device to lift a glass container (no text or symbols visible)
natural_image
Hand holding a transparent blender with black handle, no visible text or symbols on the device itselfOperações
natural_image
Close-up of a hand holding a vacuum cleaner with an arrow pointing to the tip (no text or symbols visible)
natural_image
Close-up of a hand holding a compact vacuum cleaner with a black handle, showing internal structure and an arrow indicating motion (no text or symbols visible)
natural_image
Three black plastic objects with rounded ends, arranged horizontally (no text or symbols visible)2
natural_image
Close-up of hands holding a cylindrical object with an arrow pointing upward (no text or symbols visible)
natural_image
Close-up of hands holding a dark, folded object against a white background (no text or symbols visible)
natural_image
Black and white photo of a hand holding a compact vacuum cleaner (no visible text or symbols)pT
3
natural_image
Close-up of a black vacuum cleaner with a transparent handle and attached lever (no visible text or symbols)natural_image
Close-up of a hand holding a small black object with an arrow pointing to it, no visible text or symbols
natural_image
Close-up of a hand holding a transparent plastic container with a black cover, no visible text or symbols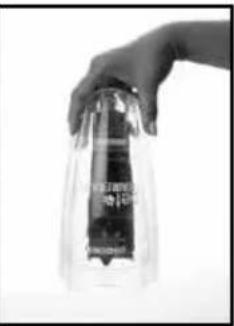
natural_image
Hand holding a transparent cylindrical container with a dark liquid inside, against a plain background (no visible text or symbols)natural_image
Close-up of a hand holding a transparent plastic container with a hose, pointing to the lid (no text or symbols visible)적
natural_image
Two-step illustration showing hand holding a cup and a vacuum cleaner's interior (no text or symbols)natural_image
Hand holding a handheld electronic device with a screen, no visible text or symbols
natural_image
Close-up of hands holding a small electronic device with a curved arrow indicating rotation (no text or symbols visible)
natural_image
Close-up of hands holding a small electronic device with a metallic housing (no visible text or symbols)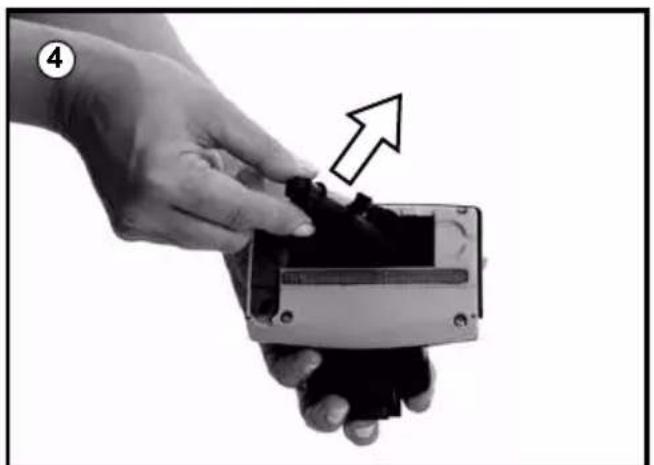
natural_image
Close-up of a hand holding a small electronic device with an arrow pointing to its component (no text or symbols visible)natural_image
Black and white illustration of a hand mixer with mesh frame (no text or symbols)8 parafusos
natural_image
Top-down view of a black and white handheld vacuum cleaner (no visible text or symbols)СЕРИЯ 1987
natural_image
Black rectangular electronic device with attached cable and connector, labeled with number 7 (no visible text or symbols on the device body)
natural_image
Black rectangular object with a numbered circle (8) in the top-left corner, no visible text or symbols on the object itself.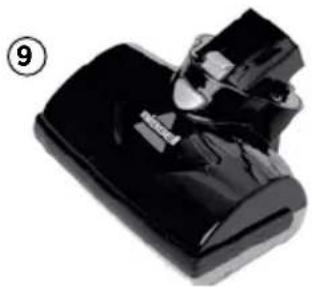
natural_image
Close-up of a black rubber clip with a small metallic clip, labeled with number 9 (no text or symbols on the clip itself)10

natural_image
Black plastic object with a rectangular lid, resting on a flat surface (no text or symbols visible)11

natural_image
Close-up of a black rubber strap or strap component (no text or symbols visible)natural_image
Close-up of hands pouring liquid from a black bottle into a pen (no text or symbols visible)Эксплуатация
natural_image
Close-up of a hand using a handheld device to lift a glass container (no text or symbols visible)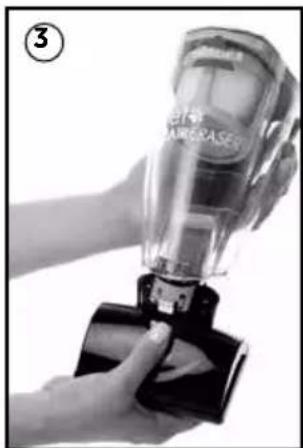
natural_image
Hand holding a transparent blender with black base, no visible text or symbols on the device itselfЭксплуатация
natural_image
Three black mechanical components with rounded ends, shown in a row (no text or symbols)①

natural_image
Close-up of a hand holding a transparent vacuum cleaner with an arrow pointing to it, no visible text or symbols.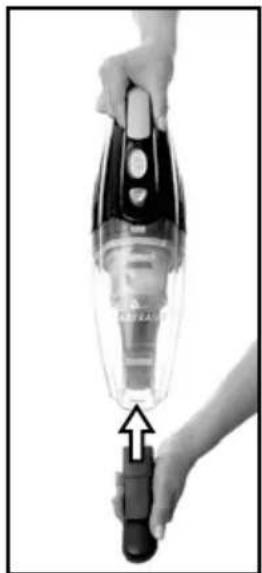
natural_image
Close-up of a hand holding a black vacuum cleaner with an arrow pointing to the handle (no text or symbols visible)2
natural_image
Close-up of hands holding a cylindrical object with an upward arrow indicating motion (no text or symbols)
natural_image
Close-up of hands holding a dark, crumpled object against a white background (no text or symbols visible)
natural_image
Close-up of a black and white handheld vacuum cleaner with handle extended (no visible text or symbols)3
natural_image
Close-up of a black handheld vacuum cleaner with a transparent handle and lever (no visible text or symbols)natural_image
Close-up of a hand holding a black plastic object with an arrow pointing to it, next to a transparent container (no visible text or symbols)
natural_image
Close-up of a hand holding a transparent plastic container with a black clip, no visible text or symbols
natural_image
Hand holding a transparent cylindrical container with a dark liquid inside (no visible text or symbols)natural_image
Close-up of a hand holding a transparent plastic container with a black tag, pointing to a cylindrical object (no text or symbols visible)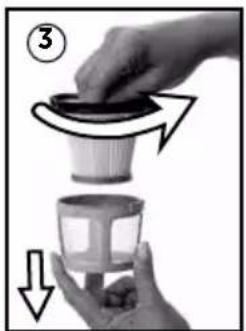
natural_image
Illustration of a hand holding a small container with arrows indicating motion or transformation (no text or symbols)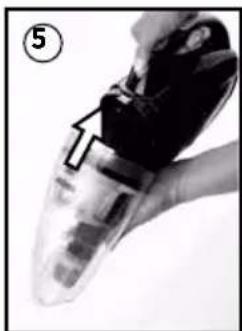
natural_image
Close-up of a hand holding a transparent object with an arrow pointing to it, no visible text or symbols.natural_image
Hand holding a handheld electronic device with a screen and buttons (no visible text or symbols)
natural_image
Close-up of hands holding a small electronic device with a curved arrow indicating rotation (no visible text or symbols)
natural_image
Close-up of hands holding a small electronic device with a close-up view (no visible text or symbols)
natural_image
Close-up of a hand holding a small electronic device with an arrow pointing to it, no visible text or symbols.natural_image
Black and white illustration of a hand mixer with mesh frame (no text or symbols)8 винтов

ОСТОРОЖНО
natural_image
Close-up of a black and white vacuum cleaner with visible internal components (no text or symbols)1987-SERIEN
VIKTIGA SÄKERHETSANVISNINGAR
LÄS ALLA ANVISNINGAR INNAN DU ANVÄNDER APPARATEN.
natural_image
Black rectangular electronic device with attached black cable and connector (no visible text or symbols)
natural_image
Black rectangular object with a numbered circle (8) in the top-left corner, no visible text or symbols on the object itself.
natural_image
Close-up of a black rubber clip with a white plastic cap, labeled with number 9 (no text or symbols on the clip itself)10

natural_image
Black plastic object with a rectangular handle, resting on a flat surface (no text or symbols visible)11

natural_image
Close-up of a black rubber strap or grip component (no text or symbols visible)natural_image
Two hands in protective gear handling a dark liquid bottle with a pen inserted (no text or symbols visible)Användning
natural_image
Close-up of a hand using a handheld device to lift a glass container (no text or symbols visible)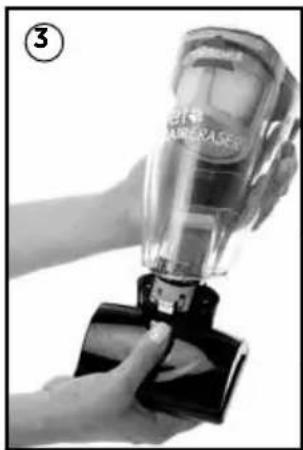
natural_image
Close-up of a hand holding a transparent blender with black base, no visible text or symbols on the device itself.S
Användning
natural_image
Three black plastic clip-like objects arranged horizontally (no text or symbols visible)①
natural_image
Two black-and-white photos showing hands holding a vacuum cleaner with arrows indicating the process (no text or symbols visible)2
natural_image
Two-panel image showing hands holding a cylindrical object, one with an upward arrow indicating motion (no text or symbols)
natural_image
Black and white photo of a hand holding a compact vacuum cleaner (no visible text or symbols)3
natural_image
Close-up of a black handheld vacuum cleaner with a transparent handle and lever (no visible text or symbols)natural_image
Close-up of a hand holding a small electronic device with an arrow pointing to it, no visible text or symbols.
natural_image
Close-up of a hand holding a transparent plastic device with a black cover, showing a hand adjusting its internal structure (no text or symbols visible)
natural_image
Hand holding a clear glass container with a dark object inside (no visible text or symbols)natural_image
Close-up of a hand holding a transparent plastic container with a hose, showing a handle and a paper towel being inserted (no text or symbols visible)
natural_image
Illustration of a hand holding a cup with a lid, showing a rotating top and a drop below (no text or symbols)
natural_image
Close-up of a hand holding a transparent object with a black arrow pointing to it, no visible text or symbols.natural_image
Hand holding a handheld electronic device with a screen and buttons (no visible text or symbols)
natural_image
Close-up of hands holding a small electronic device with a curved arrow indicating rotation (no text or symbols visible)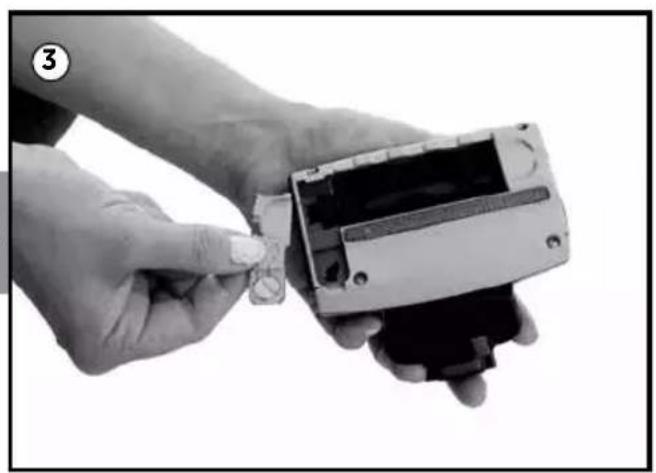
natural_image
Close-up of hands holding a small electronic device with a metallic component, no visible text or symbols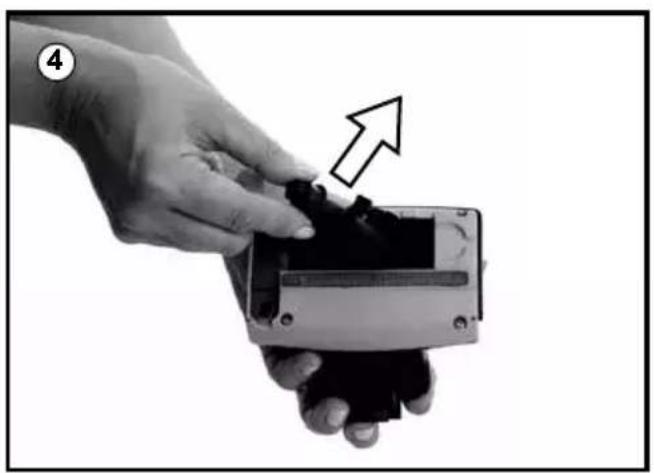
natural_image
Close-up of a hand holding a small electronic device with a black component, no visible text or symbolsS
natural_image
Black and white illustration of a hand mixer with mesh overlay (no text or symbols)8 skruvar
natural_image
Top-down view of a black and white vacuum cleaner with visible internal components (no text or symbols)DÔLEŽITÉ BEZPEČNOSTNÉ POKYNY
PRED POUŽITÍM SPOTREBIČA SI PREČÍTAJTE VŠETKY POKYNY.
natural_image
Black rectangular electronic device with attached cable and connector (no visible text or symbols)⑧
⑨
natural_image
Close-up of a black plastic electrical plug or connector (no visible text or symbols)10

natural_image
Black plastic object with a folded top, resting on a rounded base (no text or symbols visible)11

natural_image
Close-up of a black rubber strap or grip component (no text or symbols visible)natural_image
Two hands in protective gear handling a dark, glossy object with a tool inserted (no text or symbols visible)Obsluha
natural_image
Close-up of a hand using a blender to lift a black plastic cup, with an arrow indicating the process (no text or symbols visible)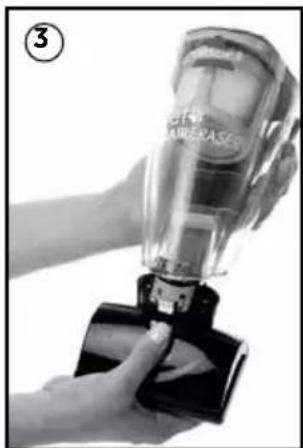
natural_image
Hand holding a transparent blender with black handle, no visible text or symbols on the device itselfnatural_image
Three black, rounded objects resembling test tubes or accessories, arranged horizontally (no text or symbols)①
natural_image
Two-panel black-and-white photo showing hands holding a vacuum cleaner with arrows indicating the process (no text or symbols visible)2
natural_image
Two hands holding a black cylindrical object, one with an upward arrow indicating motion (no text or symbols)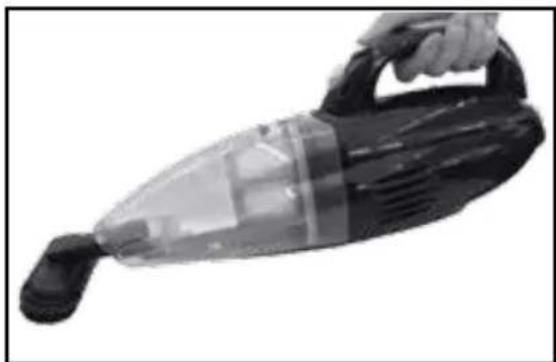
natural_image
Black and white photo of a hand holding a compact vacuum cleaner (no visible text or symbols)3
natural_image
Close-up of a black and transparent vacuum cleaner with a long tip, shown against a plain white background (no text or symbols visible)natural_image
Close-up of a hand holding a black plastic object with an arrow pointing to it, no visible text or symbols
natural_image
Close-up of a hand holding a transparent plastic container with a black cover, no visible text or symbols
natural_image
Hand holding a clear glass container with a dark liquid inside (no visible text or symbols)natural_image
Close-up of a hand holding a transparent plastic container with a black clip, showing liquid being poured into it (no text or symbols visible)
natural_image
Illustration of a hand holding a small container with arrows indicating motion or change (no text or symbols)
natural_image
Close-up of a hand holding a medical or laboratory device with a black arrow pointing to a component (no visible text or symbols)natural_image
Hand holding a handheld electronic device with a screen, no visible text or symbols
natural_image
Close-up of hands holding a small electronic device with a curved arrow indicating rotation (no visible text or symbols)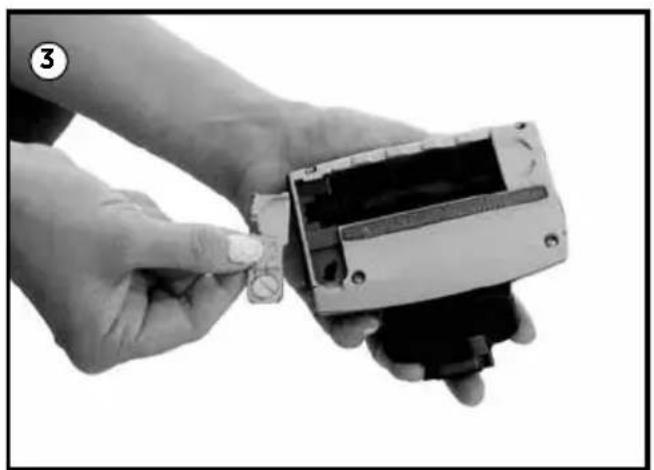
natural_image
Close-up of hands holding a small electronic device with a metallic connector (no visible text or symbols)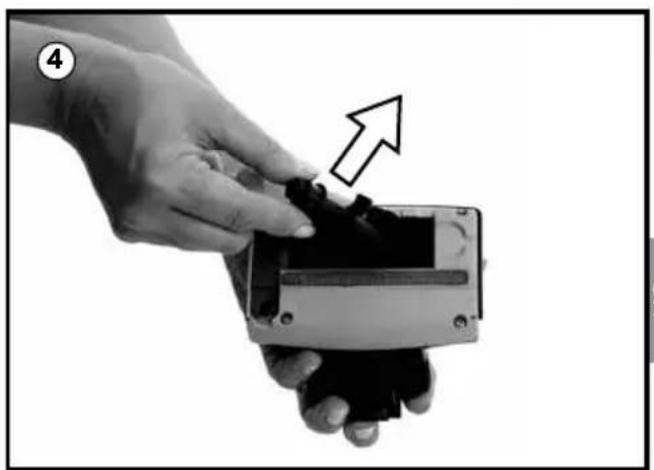
natural_image
Close-up of a hand holding a small electronic device with an arrow pointing to it, no visible text or symbols.natural_image
Black and white illustration of a handbag with a mesh wireframe overlay (no text or symbols)8 skrutiek