
Axos CYCLE PLA - Exercise bike KETTLER - Free user manual and instructions
Find the device manual for free Axos CYCLE PLA KETTLER in PDF.
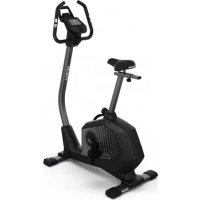
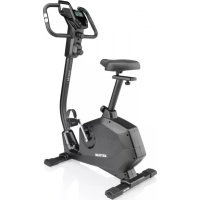
| Product type | Exercise bike |
| Brand | Kettler |
| Model | Axos CYCLE PLA |
| Power supply | Mains (electrical outlet) |
| Display | Digital screen displaying time, RPM, speed, distance, energy consumption (Kjoules/Kcal), pulse, age, temperature in standby |
| Training zones | MANUAL (manual), PROGRAM (12 predefined profiles), PERSONAL (personal profile), H.R.C. (pulse control) |
| Effort adjustment | Motorised, levels 1 to 16 |
| Pulse measurement | Hand sensors, ear clip, chest strap (compatible with uncoded Polar T34) |
| User memory | 4 profiles (U1-U4) with age and presets |
| Special functions | Quickstart, Recovery (fitness score F1-F6), Reset, START/STOP, rotary encoder |
| Energy consumption | Calculated according to braking level and pedaling frequency, displayed in Kjoules or Kcal |
| Standby mode | Temperature display, automatic shutdown after 4 minutes of inactivity |
| Safety | Pulse monitoring with audible alarm if exceeded, emergency stop via START/STOP |
| Maintenance | Check connections every 6 days, regular technical checks, use original Kettler parts |
| Training instructions | Based on age and heart rate (fat burning 65%, fitness 75% of max pulse) |
Frequently Asked Questions - Axos CYCLE PLA KETTLER
User questions about Axos CYCLE PLA KETTLER
0 question about this device. Answer the ones you know or ask your own.
Ask a new question about this device
Download the instructions for your Exercise bike in PDF format for free! Find your manual Axos CYCLE PLA - KETTLER and take your electronic device back in hand. On this page are published all the documents necessary for the use of your device. Axos CYCLE PLA by KETTLER.
USER MANUAL Axos CYCLE PLA KETTLER
natural_image
Three black-and-white product images showing earbuds, a connector, and a coiled cable (no text or symbols visible)
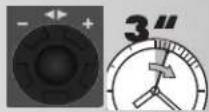
Kurzanleitung
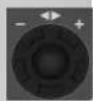
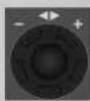
Funktionsbereich
Startposition = links
- Service 14
- Your Safety 14
Brief Description 15
• Display Area / Display 15
• Area of Operation / Buttons 15
• Functions of the Electronics 15
- Explanation of the Buttons 16
- Explanation of the Display 17
Quick Start (For Familiarising) 18
Quick Start
- Start of Training 18
• End of Training 18
• Standby Mode 18
Program Selection 19
MANUAL Training Area 19
• Training with Manual Load Adjustment
PROGRAM Training Area 20
- Training with Default Profiles
PERSONAL Training Area 21
- Training with Own Profile
H.R.C. Training Area 22
- Training with Pulse-Controlled Program
RECOVERY Function 23
• Recovery Pulse Measurement with Fitness Mark
End of Training and Standby 23
General Information 24
• System Tones 24
• Calculating the Fitness Mark 24
• Information about Pulse 24
Measurement
With Hand Pulse 24
With Ear Clip 24
With Chest Strap 24
• Faults in the Computer 24
Training Instructions 25
• Stamina training 25
- Load intensity 25
• Extent of load 25
Performance table 122
Safety instructions
Please observe the following instructions for your own safety:
- The training device must be set up on an appropriate and firm surface.
- Inspect the connections for firm fitting before initial operation and additionally after approximately six operation days.
- In order to prevent injuries caused by wrong stress or overstress, the training device may only be used in accordance with the instructions.
- It is not recommended to permanently set up the device in humid rooms due to the resulting corrosion development.
- Assure yourself regularly that the training device functions properly and that it is in duly condition.
- The operator is responsible for the safety controls, which have to be carried out on a regular and proper basis.
- Defective or damaged parts must be exchanged immediately. Only use original KETTLER spare parts.
- The device may not be used until after repairs are completed.
- The safety level of the device can only be maintained provided that it is regularly inspected for damage and wear and tear.
For Your Safety:
- Before starting the training, check with your GP that you are fit for training with this device. The doctor's findings should form the basis for the setup of your training programme. Incorrect or excessive training may damage your health.
- Systems to monitor your heart rate can be imprecise. Excessive training may result in serious damage to your health or death. Should you feel dizzy or weak, stop the training immediately.
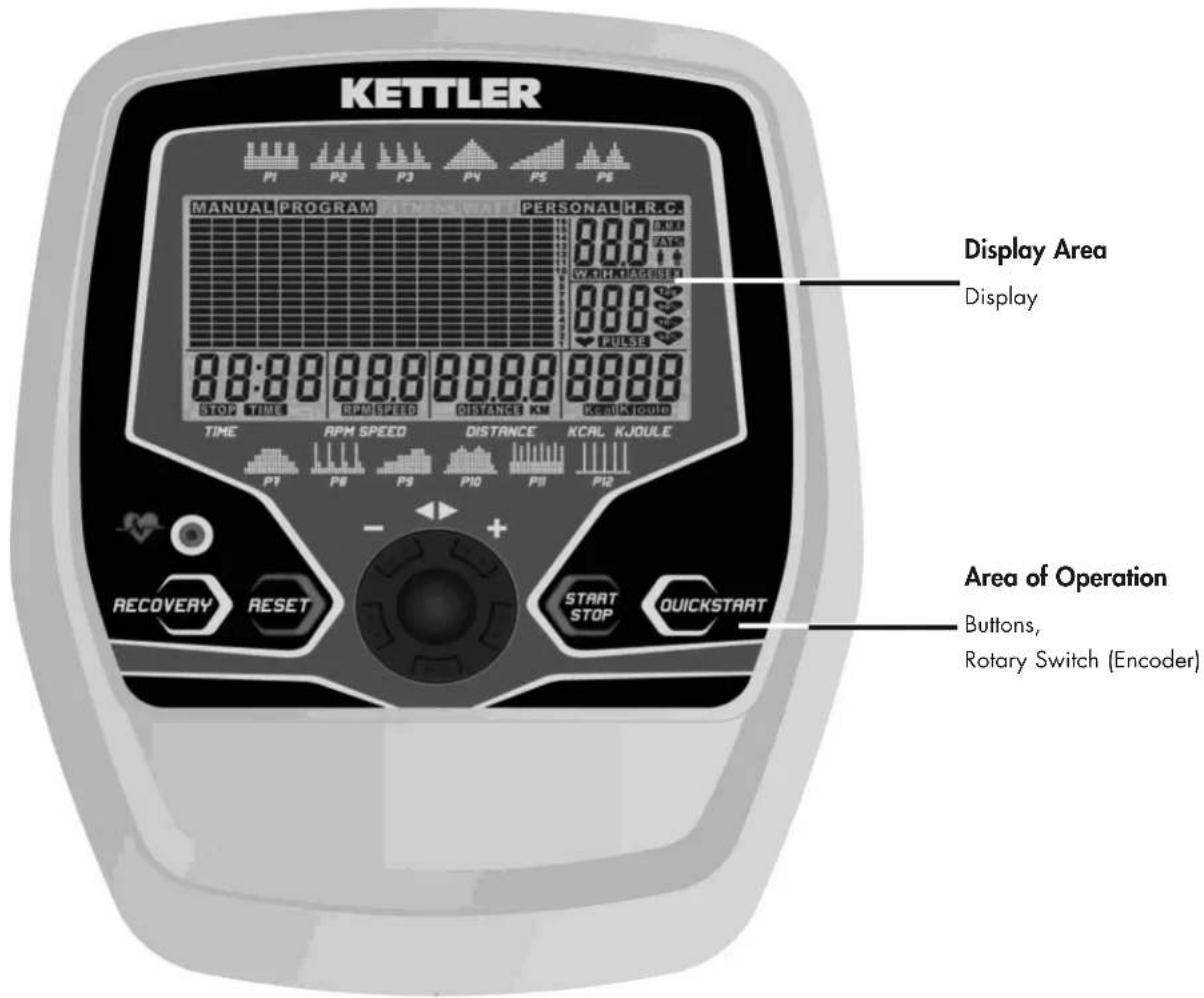
Brief Description
The electronics has an area of operation with buttons and a display area (display) with changeable icons and graphics
The electronics features the following functions:
• Memory and defaults for 4 people
• 4 training areas:
MANUAL = manual load adjustment,
PROGRAM = default profiles,
PERSONAL = own profile,
H.R.C. = pulse-controlled program
- Training defaults for saveable time, distance, energy consumption, pulse value monitoring
• Monitoring with visual and acoustic information
• Age-dependent target pulse
• Display of a fitness mark from 1 to 6, calculated with the recovery pulse value after 1 minute
• Motor-driven brake stage adjustment - Own load profile can be saved
• Calculation of the energy consumption according to brake stage and cadence - Selection of the display for energy consumption [Kjoule or Kcal]
• Temperature display in standby [°C] - Integrated pulse receiver for uncoded chest strap e.g. T34 from POLAR
Trainingsand Opeditinggadnleffong


Kjoule > Kcal > Kjoule


Brief Instructions
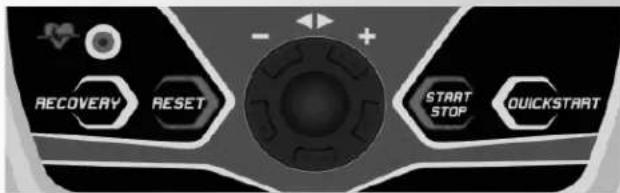
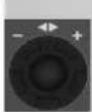
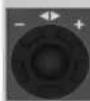
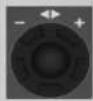
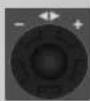
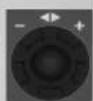
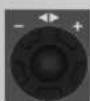
Area of Operation
The 5 buttons are briefly explained below.
All Buttons
• Display wakes up from standby mode
RECOVERY (recovery pulse with fitness mark)
With this function button, in the case of active pulse measurement, the recovery pulse function is started and a fitness mark determined.
RESET (press briefly) before the training
With this function button, the current display is cleared.
RESET (press for longer)
- Clear the display for a restart.
• In the case of selection: jumps one menu item further
• In the case of inputs: increases the input
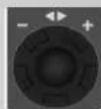
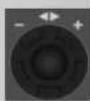
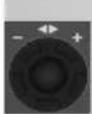
Encoder (turn left)
• In the case of selection: jumps one menu item further
• In the case of inputs: reduces the input
Encoder (press briefly)
• The selection or input is adopted.
The next menu item is called up.
Encoder (press for longer)
- The training selection of the current person is displayed again.
or
- The display is cleared with subsequent program or person selection.
RESET + Encoder (at the same time)
- Conversion of the energy consumption from Kilojoules to Kilo-calories
START STOP
- Start of training. The training time counts upwards.
- Training stop with STOP display. The training time is paused. The average of the brake stages is briefly displayed.
QUICK START
- "MANUAL" program is started. The training time counts upwards.
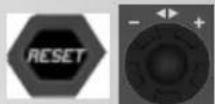
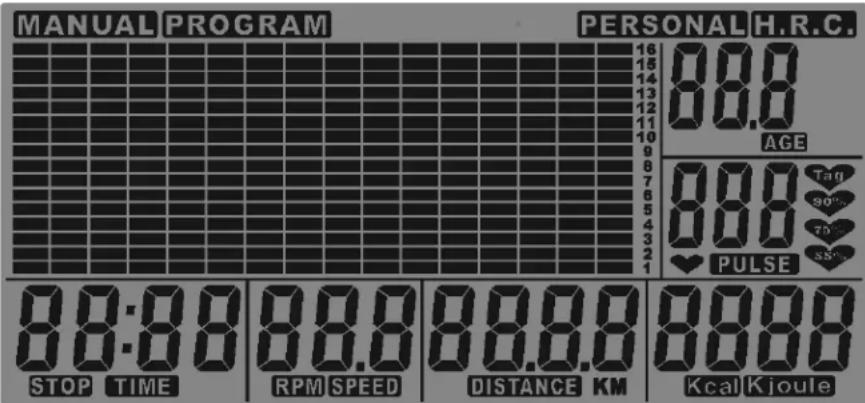
Pulse Measurement
Your pulse can be measured using 3 sources:
- Ear clip
- Hand pulse sensors
- Chest strap
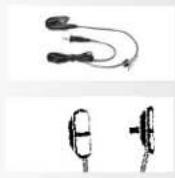
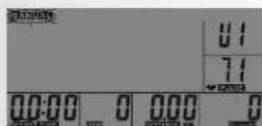
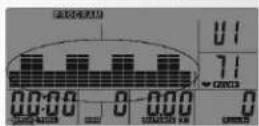
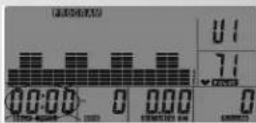
Display Area /Display
The display informs about the different functions.
Program selection from 4 training areas
MANUAL: The load stages are adjusted manually by the person training.
PROGRAM: 12 programs (profiles) adjust the load stages.
PERSONAL: Own profile adjusts the load stages
H.R.C.: The program for pulse training with the default of a training pulse
Load profile
Level = stage1-16
Start position = left
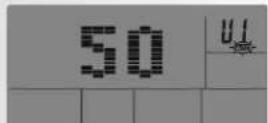
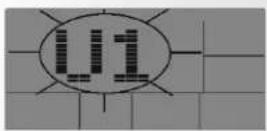
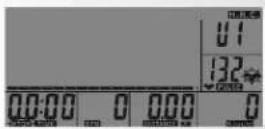
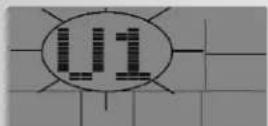
Person (USER)
U0 = guest, U1-U4
AGE
Age: 10-99
PULSE
Pulse Display
40 - 220
55%, 75%,
90%, Tag
Calculated pulse values according to age
TIME
Training time
Display
0:00 > 99:59
99:00 > 0:00
STOP
Break
Interruption to training
RPM
Cadence
Display
14 - 199
SPEED
Speed
Display
- 99,9 km/h
DISTANCE
Distance
Display
0:00 > 99:59
99:00 > 0:00
Kcal Kjoule
Energy consumption
Display
0 > 9999
9990 > 0
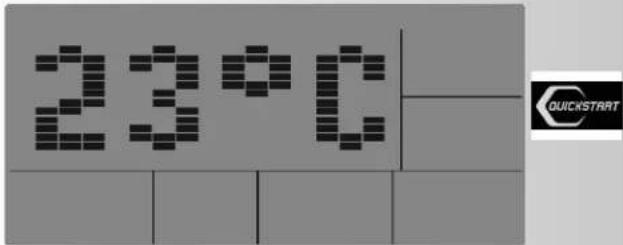
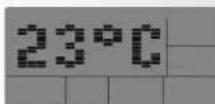
Standby mode with temperature display

The cadence in the instructions refers to a home trainer 60 rpm = 21.3 km/h.
In the case of a crosstrainer, the assignment is 60 rpm = 9.5 km/h
Training and Operating Instructions

natural_image
Two grayscale images: one showing a circular grid pattern with '10' and directional arrows, the other displaying a speaker grille (no text or symbols)
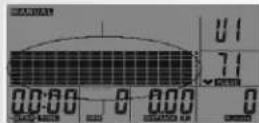
Quick Start (For Familiarising)
Quick Start:
Without Particular Settings
- Press "QUICKSTART".
Last user is displayed
or
Select person
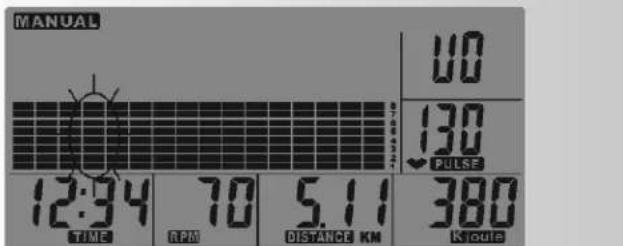
"MANUAL" programme is started. The training time counts upwards.
- Pedal
Cadence, speed, distance and energy consumption count upwards. Pulse, if a pulse measurement is active.
The current bar changes every 15 seconds.
Changing Load
- "Encoder right"
Load is increased in single steps.
- "Encoder left"
Load is decreased in single steps.
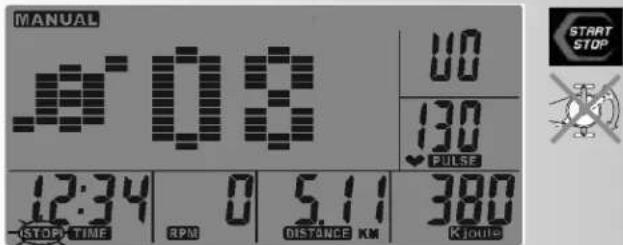
Interruption to Training
- Press "START STOP"
The average value (∅) of the load is briefly displayed. Cadence and speed display "0 values"
The training time TIME and STOP are displayed as flashing.
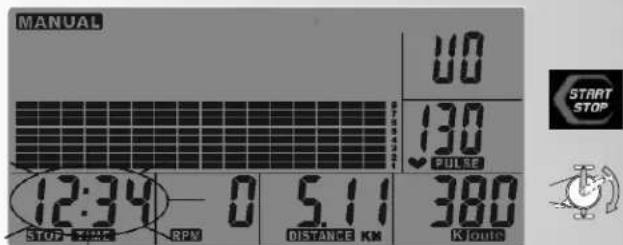
Continuing Training
- Press "START STOP"
- Pedal
or
End of Training and Standby Mode
The display switches to standby mode with temperature display 4 minutes after training has ended.
It is possible to continue the last training session if the display is reactivated by pressing a button or pedalling.
MANUAL Training Area
(Manual Load Adjustment)
Flashing areas can be changed.
- Turn "Encoder" to change.
- Press "Encoder" to adopt.
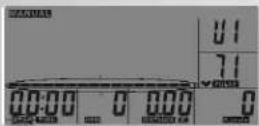
Inputting Personal Data
- Actuate "Button" or "Encoder".
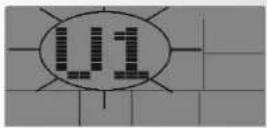
Last user is displayed as flashing.
Determine person
Adopt person (here, Person 1)
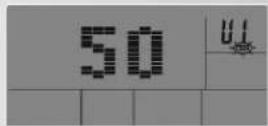
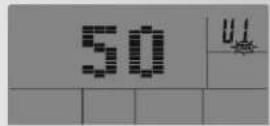
Input age
From the age input, the target pulse value is calculated in the H.R.C program according to the relationship of 220 minus age.
Adopt age (here, 50)
Training Selection
Set MANUAL training area
Adopt MANUAL
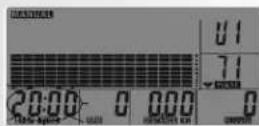
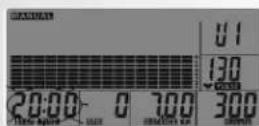
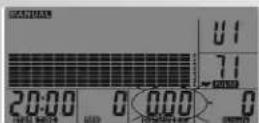
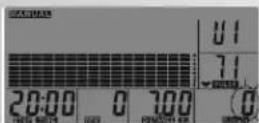
Specifying Training Values
Skip load (brake stage) or determine and adopt load (here; stage 8)
Skip training time or determine and adopt training time (here, stage of 20:00 minutes)
The set training time is converted to 16 profile bars. If no time is specified, the current bar changes every 15 seconds.
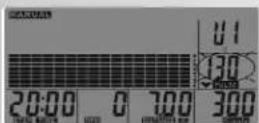
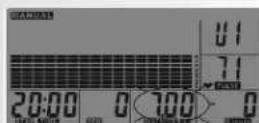
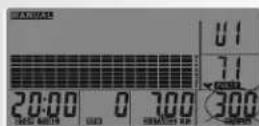
Skip distance or determine and adopt distance (here, 7.00 km)
Skip energy consumption or determine and adopt energy consumption
(here, 300 Kjoules)
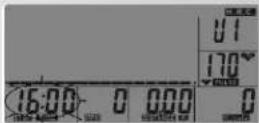
Skip pulse value or determine and adopt pulse value Again, training time, etc. (here, 130 strokes/min)
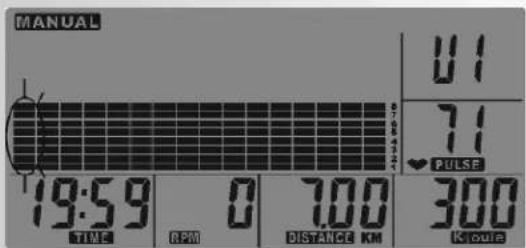
Training
- Press "START STOP"
- Pedal
Defaults for time, distance, energy consumption count downwards. In the case of active pulse measurement, the pulse is monitored and the value flashes if it is exceeded as a warning.
Changing Load
- "Turn Encoder right or left" Load is increased or reduced
Interruption to Training
- Press "START STOP"
The average value ( ) of the load is briefly displayed. Cadence and speed display "0 values".
The training time and STOP are displayed as flashing.
Continuing Training
- Press "START STOP"
- Pedal


Training and Operating Instructions


Comment:
If a default is reached (0 value flashes, 8 signal tones), the display shows interruption to training with flashing time display and STOP. The default values are displayed again. With the "START STOP" button and pedalling, the display is active again until the next default is reached.
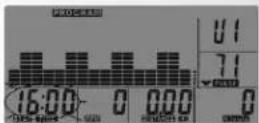
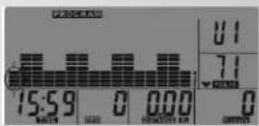
PROGRAM Training Area
Selection from 12 programs (profiles) which automatically adjust the load stages.
Input or confirm personal data
Select PROGRAM
Selection from 12 programs
(Here, P1)
Specifying Training Values
Skip training time or determine and adopt training time (Here, 16:00 minutes)
The set training time is converted to 16 profile bars. In the case of 16 minutes, one bar corresponds to 1 minute. If no time is specified, the current bar changes every 15 seconds.
Skip distance or determine and adopt distance
Skip energy consumption or determine and adopt energy consumption
Skip pulse value or determine and adopt pulse value
Again, training time, etc.
Training
- Press "START STOP"
- Pedal
Defaults for time, distance, energy consumption count downwards. In the case of active pulse measurement, the pulse is monitored and the value flashes if it is exceeded as a warning.
Changing Load
- "Turn Encoder right or left" Load is increased or reduced
Interruption to Training
- Press "START STOP"
The average value (∅) of the load is briefly displayed. Cadence and speed display "0 values".
The training time and STOP are displayed as flashing.
Continuing Training
- Press "START STOP"
- Pedal
PERSONAL Training Area
Create and train own profile
Input or confirm personal data
Select PERSONAL
There are 2 options: Creating the profile before training or during training.
Creating Profile Before Training
The first profile bar flashes and can be changed.
- Turn "Encoder" to change.
- Press "Encoder" to adopt the load and jump to the next bar
- Press "Encoder" for longer (doing this saves the profile)
Training time flashes and can be changed. (Here, 16:00 minutes). The set training time is converted to 16 profile bars. In the case of 16 minutes, one bar corresponds to 1 minute. If no time is specified, the current bar changes every 15 seconds.
Skip distance or determine and adopt distance
Skip energy consumption or determine and adopt energy consumption
Skip pulse value or determine and adopt pulse value
Again, training time, etc.
Training
- Press "START STOP"
- Pedal
Defaults for time, distance, energy consumption count downwards. In the case of active pulse measurement, the pulse is monitored and the value flashes as a warning if it is exceeded.
Creating Profile During Training
The first profile bar flashes and can be changed.
- Press "Encoder" for longer
Training time flashes and can be changed. (Here, 16:00 minutes)
Training
- Press "START STOP"
- Pedal
- "Turn Encoder right or left"
Load is increased or reduced
When jumping to the next bar, the stage is saved. If the time default is reached (0 value flashes, 8 signal tones), the display shows interruption to training with flashing time display and STOP. The default values are displayed again. The profile is saved.
With the "START STOP" button and pedalling, the display is active again.
Comment:
When the PERSONAL training area is called up, the own profile is displayed.
UM6786/UM6787

Training and Operating Instructions


H.R.C Training Area
Pulse-Controlled Program
If the current pulse is lower than the target pulse, the load is increased by one stage following 30 seconds. If it is higher, the load is reduced by one stage following 15 seconds.
Input or confirm personal data
Select H.R.C.
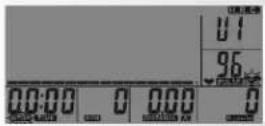
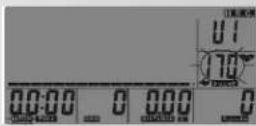
Specifying Target Pulse
There are 4 target pulse values, with 55%, 75%, 90% and Tag, to choose from. The pulse values to be displayed are calculated from the relationship of 220 minus the input age. In the case of 50 years, in the case of 55% = 96, 75% = 132, 90% = 158, Tag = 170 is displayed.
The "Tag" value can be changed.
55% flashes and can be changed.
- Turn "Encoder" to select the target pulse.
- Press "Encoder" to adopt the target pulse.
In the case of Tag, the value flashes and can be changed.
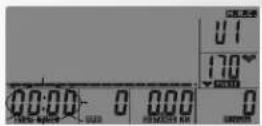
After specifying the target pulse, the pulse selection icon is displayed together with the current pulse.
Training time TIME flashes and can be changed. (Here, 16:00 minutes).
Skip distance or determine and adopt distance
Skip energy consumption or determine and adopt energy consumption
Again, training time, etc.
Training
- Press "START STOP"
- Pedal
The first profile bar flashes and moves to the right during training.
Defaults for time, distance, energy consumption count downwards.
The load stages are increased until the target pulse is reached.
Comment:
If the pulse measurement fails during the H.R.C. program, the load is reduced to stage 1 within 60 seconds.
If the stage 1 remains unchanged for 30 seconds, brief signal tones are output and the display shows interruption to training with flashing STOP
RECOVERY Recovery pulse stage
The RECOVERY function can be used after each exercise program.
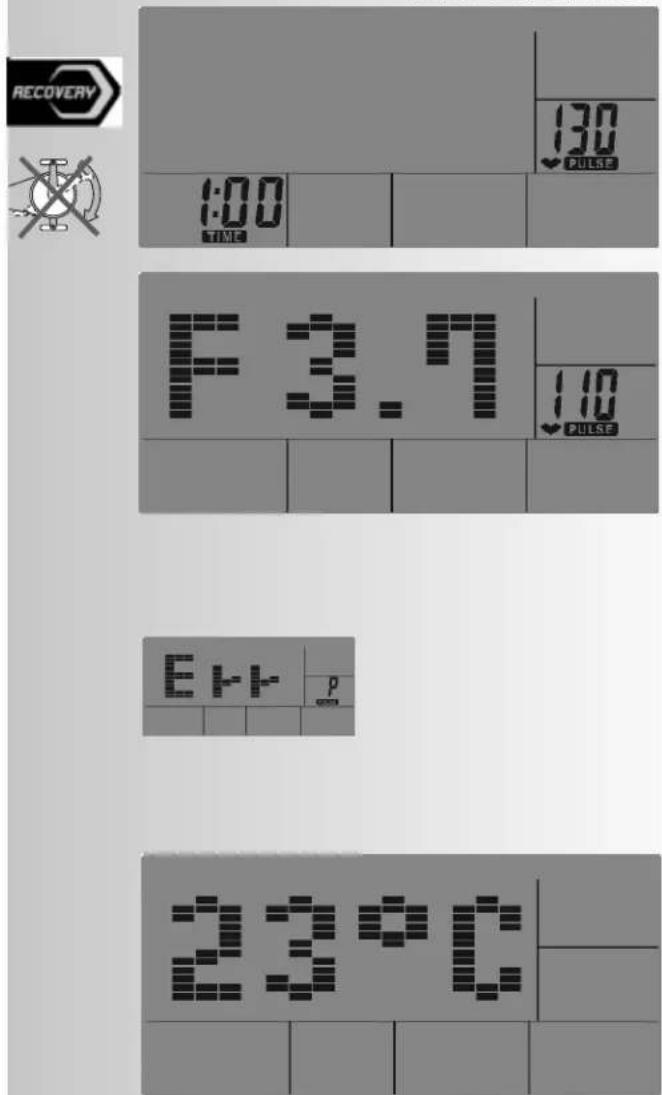
The RECOVERY button is used to initiate recovery pulse measurement at the end of exercising. Initial and final pulse during one minute are used to calculate deviation and a fitness score. In case of equal exercising, improvement of such score is a measurement for increase of fitness.
When reaching the target values, end exercising and press the RECOVERY button; then, leave your hands at the hand pulse sensors. In case of previous pulse measurement, the display shows 00:60 for time, and the PULSE display shows the current pulse value (flashing). The countdown starts at 00:60. Leave your hands at the hand pulse sensors until the countdown reaches >0<. The display will show on its right a value between F1 and F6. F1 is the best status; F6 is the worst status. The function can be ended by pressing again RECOVERY.
If no pulse is recorded during the time delay, the error message "Err" appears.
End of Training and Standby Mode
The display switches to standby mode with temperature display 4 minutes after training if there are no longer any buttons being pressed, no pulses arise owing to pedalling and no pulse is active.
It is possible to continue the last training session if the display is reactivated by pressing a button or pedalling.
UM6786/UM6787
Training and Operating Instructions
General information
System signals
Activation of the device
If you activate the device, a signal is emitted during the segment test.
Presetting
A short signal is emitted, if you reach a presetting like time, distance and KJoule/kcal.
Exceeding of maximum pulse
If the set maximum pulse is exceeded by one pulse beat, two short signals are emitted for the time of exceedance.
Calculation of fitness score
The computer calculates and assess the difference between the training and recovery heart rate and the resulting "fitness score" according to the following formula:
$$ \text { Score } (F) = 6 - \left(\frac {1 0 \times (P 1 - P 2)}{P 1}\right) ^ {2} $$
P1 = Training pulse P2 = Recovery pulse
Score 1 = very good Score 6 = poor
A comparison of the training and recovery heart rate is a quick and easy way in which to determine physical fitness. The fitness score is an orientation value to assess your recovering ability after physical exercise. Before pressing the recovery heart rate button and determining your fitness score, you should train at your own level of intensity for a significant period of time e.g. 10 minutes. For regular cardiovascular training you will discover that your "fitness score" improves.
Possibilities for Pulse Measurement
The pulse measurement starts as soon as the heart in the display blinks in time with your pulse beat.
With hand pulse
An extra-low voltage caused by the contractions of your heart is registered by the hand sensors and evaluated by the electronics assembly of the device.
• Always grab the contact faces with both hands.
- Avoid jerky grasping.
- Hold your hands calmly and avoid contractions and rubbing on the contact faces.
With ear clip
The pulse sensor works with infrared light and measures the variations in translucence in your skin, which are produced by your pulse beat. Rub your ear ten times strongly to activate the blood circulation before attaching the pulse sensor to your earlobe.
Avoid disturbing pulses.
- Attach the ear clip properly to your earlobe and look for the best point for the measurement (heart symbol blinks without interruption).
- Do not train directly under strong incidence of light, e.g. neon light, halogen light, spotlight, sun light.
- Completely eliminate any shocks or bounces of the ear sensor and the cable. Always attach the cable with a clip at your clothing or, even better, at your headband.
With breast clip
The internal pulse receiver is compatible to un-coded POLAR chest strap transmitters. For coded systems, wrong pulse values may be displayed. We recommend T34 by POLAR. Please observe the corresponding instructions.
A plug-in receiver is not necessary and should not be used for technical reasons.
Comment:
Only one way of pulse measurement is possible: either with ear clip or with hand pulse or with breast belt. If no ear clip is located in the pulse plug, hand pulse measurement is activated. If you insert an ear clip in the pulse plug, hand pulse measurement is automatically deactivated. It is not necessary to disconnect the plug of the hand pulse measurement.
Faults in the Training Computer
If the computer display is not functioning correctly, please remove the power supply and switch off the machine.
 |  | |
 | [727D] |  |
 | optional | [36X6] |
 | optional | optional |
For Your Safety:
Before beginning your program of exercise, consult your doctor to ensure that you are fit enough to use the equipment. Base your program of exercise on the advice given by your doctor. Incorrect or excessive exercise may damage your health.
Training Instructions
This device has particularly been designed and developed for leisure time sportsmen. It is excellently suited for cardiovascular training.
The training methodically has to be organised on the principles of stamina training. This will predominantly cause changes and adaptations of the cardiovascular system. This includes the reduction of the resting pulse frequency and of the load pulse.
This gives the heart more time for filling the ventricles and for the blood circulation of the cardiac musculature (through the coronary vessels. Moreover, depth of breathing and the volume of air that can be breathed in (vital capacity) are increased. Further positive changes take place in the metabolic system. In order to achieve these positive changes, the training has to be planned according to certain guidelines.
Planning and control of your training
The basis for your training planning is your current physical fitness condition. Your family doctor can diagnose your personal fitness by means of an exercise tolerance test, which will constitute the basis for your training planning. If you have not undergone an exercise tolerance test, high training exertion and/or overstraining must be avoided in all cases. The following rule should be considered in your planning: stamina training is controlled via the scope of exertion as well as via the level / intensity of exertion.
Regarding exertion intensity
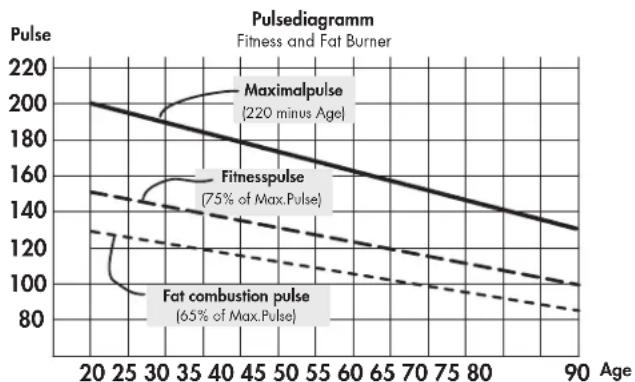
The intensity of exertion should preferably be checked in your fitness training via your heart's pulse rate. The maximum heart rate per minute of >220 minus age must not be exceeded. The optimum training pulse is determined by age and training target.
Training target: fat burning/weight reduction
The optimum pulse frequency is calculated using the empirical formula (220 - age) × 0.65 .
Advice: fat burning for energy supply only gains significance after a minimum training period of 30 minutes.
Training target cardio-vascular fitness:
The optimum pulse frequency is calculated using the empirical formula (220 - age) × 0.75 .
The intensity is predetermined in your training by means of the braking levels, ranging from 1-16. As a beginner, you should avoid too high braking level settings for your training, as this will quickly lead to exceeding the recommended pulse rate range. Start by using a low braking level setting and then approach your optimum training pulse step by step. Do not forget to regularly check during your fitness training whether you still range within the intensity area according to the above stated recommendations.
Sports physicians consider the following load factors to be positive for fitness:
| Frequency | Duration | |
| daily | 10 min | |
| 2-3 times weekly | 20-30 | min |
| 1-2 times weekly | 30-60 | min |
Beginners should not start with training units of 30 to 60 minutes.
A beginner training could be organised as follows during the first four weeks:
| Training frequency | Extent of training session |
| 1st week | |
| 3 times a week | 2 minutes of trainingBreak of 1 minute for physical exercises2 minutes of trainingBreak of 1 minute for physical exercises2 minutes of training |
| 2nd week | |
| 3 times a week | 3 minutes of trainingBreak of 1 minute for physical exercises3 minutes of trainingBreak of 1 minute for physical exercises2 minutes of training |
| 3rd week | |
| 3 times a week | 4 minutes of trainingBreak of 1 minute for physical exercises4 minutes of trainingBreak of 1 minute for physical exercises3 minutes of training |
| 4th week | |
| 3 times a week | 5 minutes of trainingBreak of 1 minute for physical exercises4 minutes of trainingBreak of 1 minute for physical exercises4 minutes of training |
In order to have a personal training documentation, you can enter the training values achieved in the performance table.
Prior to and after every training unit gymnastic exercises lasting approx. 5 minutes serve the warming up and/or cooling down. There should be a day without training between two training units, if you later on prefer to train three times a week for 20 - 30 minutes each. Otherwise nothing can be said against a daily training.
line
| Age | Maximalpulse | Fitnesspulse | Fat combustion pulse | | --- | ------------ | ------------ | ------------------- | | 20 | 200 | 150 | 130 | | 30 | 190 | 140 | 120 | | 40 | 180 | 130 | 110 | | 50 | 170 | 120 | 100 | | 60 | 160 | 110 | 90 | | 70 | 150 | 100 | 85 | | 80 | 140 | 95 | 80 | | 90 | 130 | 90 | 75 |F
Table des matières
natural_image
Three black-and-white product images showing earbuds, a connector, and a strap (no text or symbols visible)
Instructions succinctes
Zone fonctions
natural_image
Three black-and-white product images showing earbuds, a connector, and a strap (no text or symbols visible)
Korte handleiding
Functiebereik
Startpositie = links
Snelstart (ter kennismaking)
Quickstart:
2-3 peer week 20-30 min
1-2 peer week 30-60 min
natural_image
Three black-and-white illustrations of earbuds and accessories (no text or symbols)
- Pulsar "START STOP"
- Pulsar "START STOP"
- Pedalear
o bien
- Pulsar "START STOP"
- Pedalear
- Pulsar "START STOP"
- Pulsar "START STOP"
- Pedalear


- Pulsar "START STOP"
- Pedalear
- Pulsar "START STOP"
- Pulsar "START STOP"
- Pedalear
- Pulsar "START STOP"
- Pedalear
- Pulsar "START STOP"
- Pedalear
natural_image
Three black-and-white illustrations of earbuds and accessories (no text or symbols)
Guida rapida
Settore funzioni
natural_image
Three black-and-white illustrations of earbuds and accessories (no text or symbols)
Krótka instrukcja
Panel obstugi
- Wcisnąć "START STOP"
natural_image
Three black-and-white product images showing earbuds, a connector, and a strap (no text or symbols visible)
Stručný návod
Funkční oblast
natural_image
Three black-and-white illustrations of earbuds and accessories (no text or symbols)
Instruções breves
Área de funções
natural_image
Three black-and-white product images showing earbuds, a car, and a strap (no text or symbols visible)
Kort brugsanvisning
Funktionsområde
natural_image
Man performing a rowing exercise on a stationary bike (no visible text or symbols)
natural_image
Person riding a multi-rotor vehicle on a snowy mountain slope, no visible text or symbols
natural_image
Black-and-white photo of a woman riding bicycles with snow-capped mountains in the background (no text or symbols visible)
natural_image
Black-and-white exterior view of a modern outdoor patio with wooden table, chairs, and potted plant (no text or symbols visible)

- Kurzanleitung
- Funktionsbereich
- Brief Description 15
- Quick Start (For Familiarising) 18
- Program Selection 19
- MANUAL Training Area 19
- PROGRAM Training Area 20
- PERSONAL Training Area 21
- H.R.C. Training Area 22
- RECOVERY Function 23
- End of Training and Standby 23
- General Information 24
- Training Instructions 25
- Performance table 122
- Safety instructions
- Please observe the following instructions for your own safety:
- For Your Safety:
- Brief Description
- The electronics features the following functions:
- Trainingsand Opeditinggadnleffong
- Brief Instructions
- Area of Operation
- All Buttons
- RESET (press for longer)
- Encoder (turn left)
- Encoder (press briefly)
- Encoder (press for longer)
- or
- RESET + Encoder (at the same time)
- START STOP
- QUICK START
- Pulse Measurement
- Display Area /Display
- Program selection from 4 training areas
- Load profile
- Person (USER)
- AGE
- PULSE
- 90%, Tag
- TIME
- STOP
- RPM
- SPEED
- DISTANCE
- Kcal Kjoule
- Training and Operating Instructions
- Quick Start (For Familiarising)
- Quick Start:
- Changing Load
- Interruption to Training
- Continuing Training
- End of Training and Standby Mode
- MANUAL Training Area
- Inputting Personal Data
- Training Selection
- Specifying Training Values
- Training
- Comment:
- PROGRAM Training Area
- Selection from 12 programs
- PERSONAL Training Area
- Input or confirm personal data
- Select PERSONAL
- Creating Profile Before Training
- Creating Profile During Training
- H.R.C Training Area
- Specifying Target Pulse
- RECOVERY Recovery pulse stage
- General information
- System signals
- Activation of the device
- Presetting
- Calculation of fitness score
- Possibilities for Pulse Measurement
- With hand pulse
- With ear clip
- With breast clip
- A plug-in receiver is not necessary and should not be used for technical reasons.
- Faults in the Training Computer
- Training Instructions
- Planning and control of your training
- Regarding exertion intensity
- Training target: fat burning/weight reduction
- Training target cardio-vascular fitness:
- F
- Table des matières
- Instructions succinctes
- Zone fonctions
- Korte handleiding
- Functiebereik
- Snelstart (ter kennismaking)
- Quickstart:
- o bien
- Guida rapida
- Settore funzioni
- Krótka instrukcja
- Panel obstugi
- Stručný návod
- Funkční oblast
- Instruções breves
- Área de funções
- Kort brugsanvisning
- Funktionsområde
Brand : KETTLER
Model : Axos CYCLE PLA
Category : Exercise bike