
Ride 100 - Exercise bike KETTLER - Free user manual and instructions
Find the device manual for free Ride 100 KETTLER in PDF.
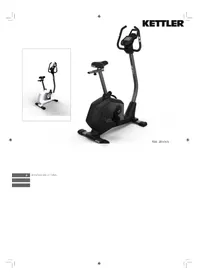
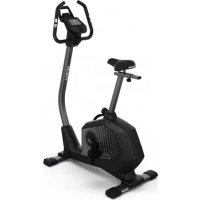
| Product type | Ergometric exercise bike |
| Brand and model | Kettler Ride 100 |
| Dimensions (L x W x H) | Approximately 100 x 50 x 130 cm |
| Weight | Approximately 35 kg |
| Maximum user weight | 130 kg |
| Power supply | Batteries (4 x AA) or mains adapter (not included) |
| Screen | Matrix display with backlight |
| Training programs | Free, Challenge, HIT, IPN, HRC (30 min fat/fitness), Configurator |
| Resistance modes | Auto (power maintenance) and Manu (constant resistance) |
| Heart rate measurement | Handlebar sensors and Bluetooth chest strap (not included) |
| Connectivity | Bluetooth 4.0 for chest strap, smartphone, tablet, PC |
| Main functions | User profile creation (up to 4), result tracking, IPN coaching, heart rate traffic lights, recovery pulse measurement |
| Number of buttons | 3 (central rotary actuator, two side buttons) |
| Available languages | French, Dutch, etc. (depending on settings) |
| Object mode | For use in public fitness room (reduced functions) |
| Connection | Not applicable (wireless) |
| Maintenance and cleaning | Wipe with a damp cloth and mild detergent; do not use solvents |
| Repairability | Spare parts available via Kettler; professional repair recommended |
| Warranty | 2 years (subject to conditions) |
Frequently Asked Questions - Ride 100 KETTLER
User questions about Ride 100 KETTLER
0 question about this device. Answer the ones you know or ask your own.
Ask a new question about this device
Download the instructions for your Exercise bike in PDF format for free! Find your manual Ride 100 - KETTLER and take your electronic device back in hand. On this page are published all the documents necessary for the use of your device. Ride 100 by KETTLER.
USER MANUAL Ride 100 KETTLER
Part B: Computer instructions ENGLISH
Freies Training / Quickstart S.12
You have made a perfect choice. Our experts in the sports team are convinced of this regarding all KETTLER quality products. This is – as it should be, of course – natural, but, putting all our subjectivity aside ;) we have solid reasons for this opinion: our standing for KETTLER products is based on a stable foundation from:
- nearly 70 years of experience in the areas aluminium and plastic production
- own construction and development
- own production and quality assurance
- carefully selected and quality assessed materials
interlinked research in cooperation with renown institutes
A high number of our products are manufactured from the start until completion in a production chain in our own factory. Employees in the single production works are often year
long members of the team. They are technically qualified and trained to check and control their own production phase.
The only thing left to say is - 3-2-1-go! Become a fan of our KETTLER products and reach your athletic ambitions in no time!
We wish you a lot of success!
Your KETTLER Sports Team

Start
FUNCTION OF THE BUTTONS
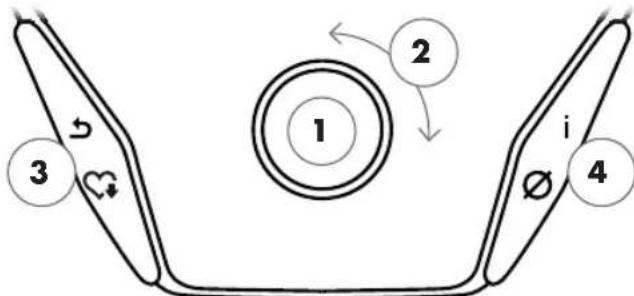
The training computer is equipped with three buttons: The rotary push-button in the centre and one button each on the right and left housing side. The following functions are allocated to these buttons:
In the menu view
When switching on the display, you will enter the menu view. You can change the settings of the user or device data, select a training and view your training results.
In the training view
After selecting a training, you will enter the training view. It shows all important training values and the training profile.
1 Rotary push-button - Push
By pressing the central button, you will enter the selected element. You will jump to the selected menu point or the selected training.
By pressing the central button, you will switch between the training modes AUTO and MANU. This function is not available for all trainings.
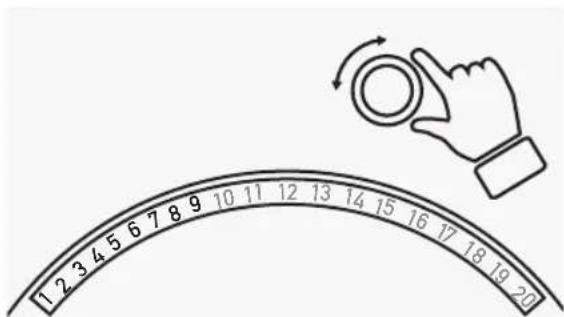
2 Rotary push-button - Turn
Change the selection in the active menu. The semi-circular figure in the lower part of the display shows additional options.
You can change the watt target level, resistance or target heart rate in Profile Training.
3 Left button
Return to the menu point on the higher level. Any changes made will be discarded.
Terminate the training cycle and start the heart rate recovery measurement. By pressing again, you will resume training.
4 Right button
Call up context information. The menu item is explained in detail.
Display of average values. By pressing the button, average values are displayed for several seconds.
Display switch-off
After 4 minutes of inactivity or by pressing the left button for a long time, the display switches off.
START MENU
Selection of the user.
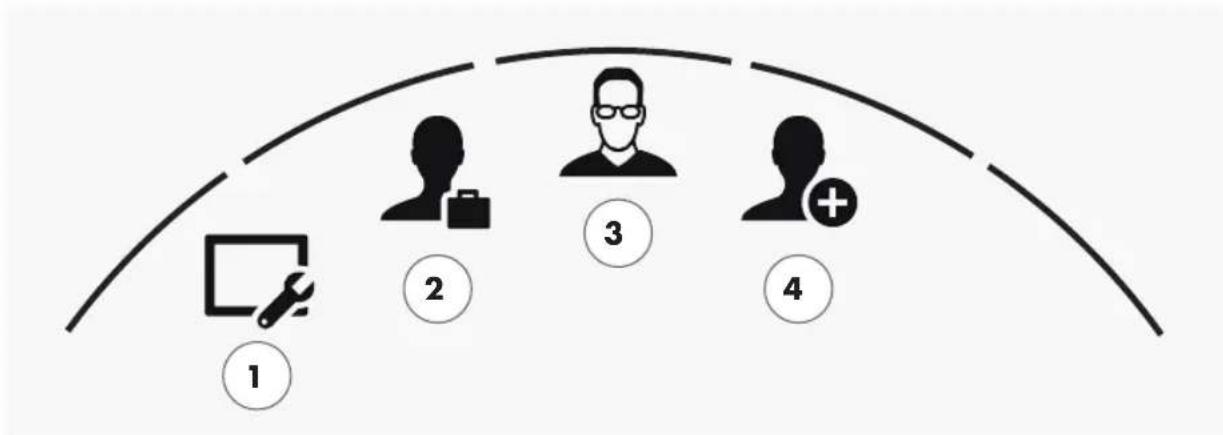
When starting the device, you will enter the start menu after a short welcome display. In this menu, you can mainly select the user and the applicable account for the trainer. Furthermore, you can create a new user and change user-independent basic settings in the menu item "device settings".
Start menu
All menu items in an overview (from left to right):
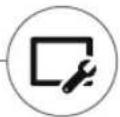
1 Device settings
In this menu item, you can change user-independent device settings (e.g. changing the device language, changing the unit of measurement, etc.).
2 Guest user
The guest user is a pre-set user profile. It enables training without requiring any settings. In the guest user profile, no training results are saved. Furthermore, no personal settings are possible.

3 Individually created user (designated with name)
On the right of the guest user, up to 4 individually created users will appear. They are designed as personal user accounts for the people training regularly on the equipment. The account enables personal settings and saves personal training results.
4 Create new user
In this menu, a new individual user can be created. If this menu point is chosen then name, gender, age, size and weight will be requested. Also, the user may select a profile face. Then, the new user will be added to the start menu.

CREATE USER

It's as simple as this.
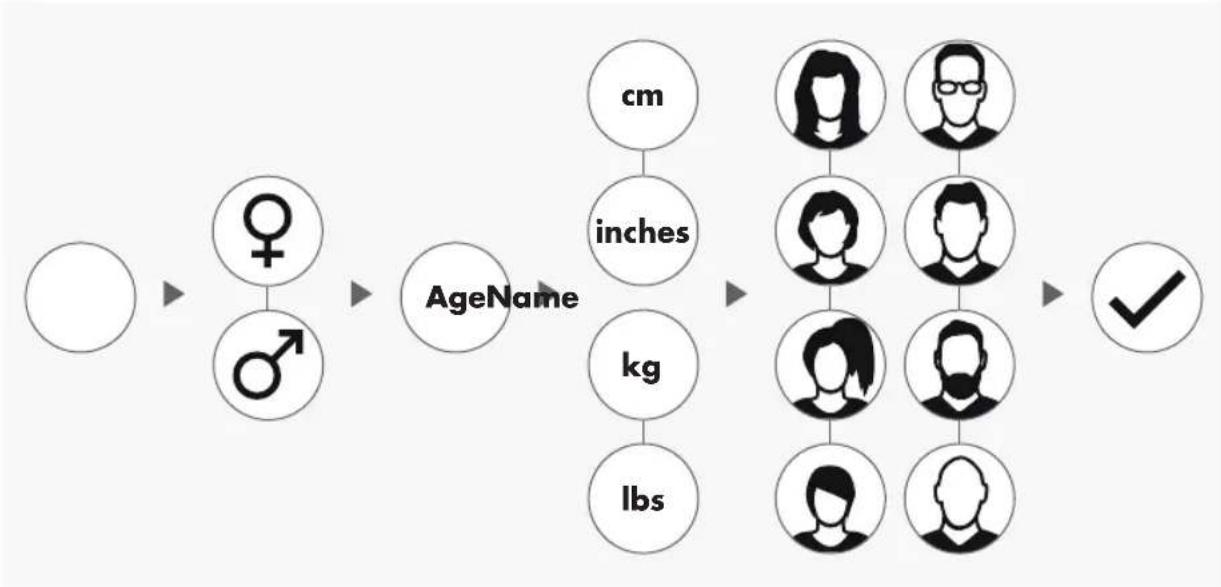
Select the symbol icon 'Create new user' on the right-hand side of the start menu and enter the selection by pressing the rotary push-button.
Step 1: Enter a name
You will be asked to enter your name. Enter one letter at a time and complete the entry by pressing the circular checkmark button. In case of a faulty input, you can jump back one letter with the left button.
Step 2: Enter data
Enter the corresponding data for age, gender, size and weight. This data is important for a correct calculation of training values and heart rate ranges.
Tip: All personal data can be changed after having created the user in the user menu under personal settings.
Step 3: Select profile image
In the end, select a profile image. This profile image will be displayed in the start menu as identifying symbol for your personal user profile. It will accompany you during your training.
Step 4: Finish
After selecting the profile image, creation of the personal user profile is completed and you will return to the start menu
Note: There is capacity for maximum four individually created users. If four users have been created, the symbol 'Create new user' will be hidden. In this case, delete one individual user first, before creating another user.
THE USER MENU
Your personal section.
If you have selected an individual user, you will enter the user menu of this person. Everything revolves about your personal training. The user menu of the guest user includes only the three elements on the right.
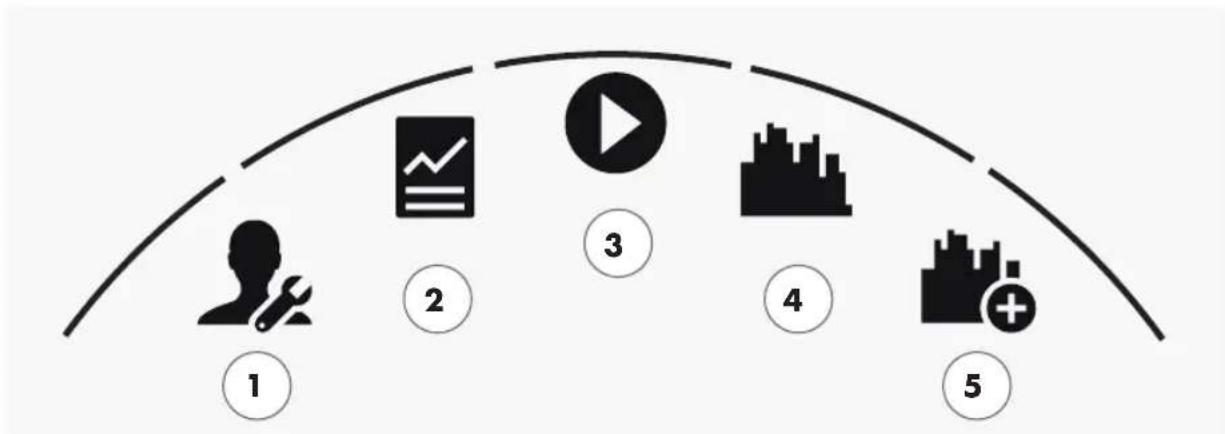
The user menu
All menu items in an overview (from left to right):
1 Personal settings
You can change all user specific settings under this menu item (e.g. changing the age). Changes in this menu have no impact on the data of other users.
2 My results
You can view your personal total performance and the result of the last training under 'My results'.
3 My last training
When selecting this menu point, you will automatically enter the last started training session. This menu point is always pre-selected when entering the user menu. So your last training is only one click away. The guest always starts in Quickstart / Open Training.
4 My training list
All trainings saved on the device can be found in the selection under this item. The different training modes are described in the chapter "Training" below.
5 Training configurator
With the training configurator, you can create a new, individual training in four simple steps. Refer to the chapter "The training configurator" on page 18 for more information.


Training
IWOULD LIKE...
...a training tailored to my needs!
There are many good reasons to take up fitness training - and even more training concepts... which makes it easy to lose track.... The most efficient training programmes for your personal training objective are listed on these two pages.

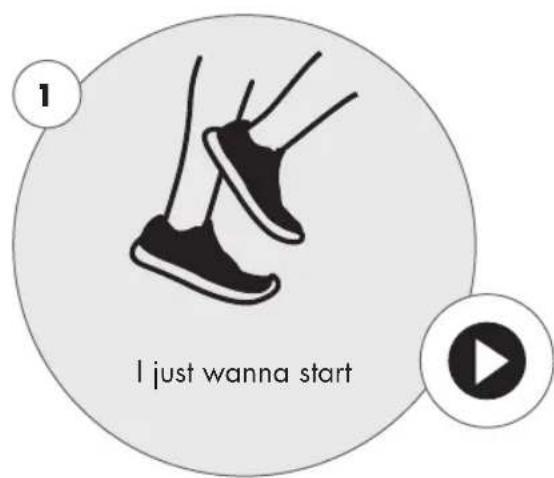
Free training / Quickstart p. 12 Start your training without changing any settings.
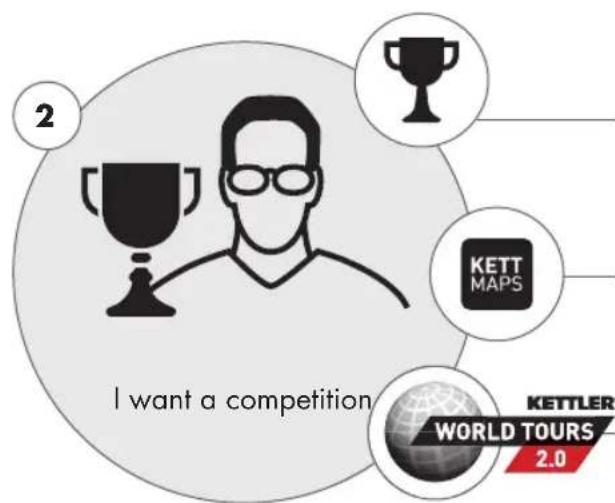
Challenge Training p. 12 Accept a challenge. Train against your personal best and cross the finish line first!
KETTMAPS p.19 Thanks to the APP, you can: Train in your living room - on the most stunning roads in the world.
KETTLER WORLD TOURS p.19 The PC software with video-realistic routes and exciting online races.
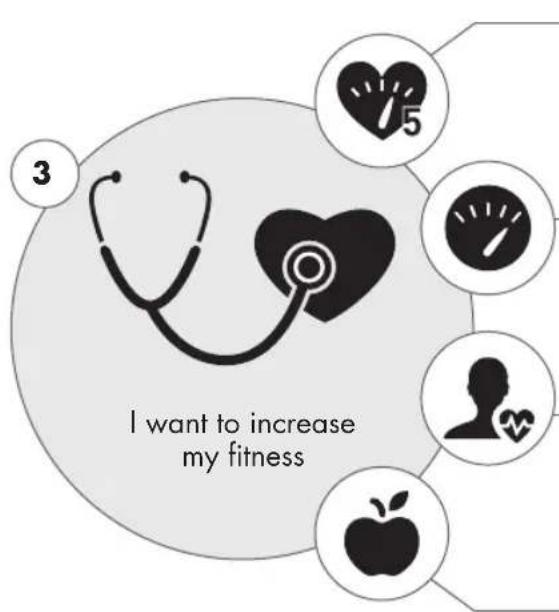
Training in the yellow zone p. 14
If the screen is illuminated in yellow, you train in the fitness zone. Thanks to the heart rate traffic light function, you keep the overview.
HIT training p. 12
Charge your training up! 5 highly intense intervals strengthen your cardiovascular system and accelerate the fat burning process.
IPN Coaching p. 13
Have our device integrated 'personal trainer' coach you. You will receive training tailored to your needs.
30 min. fitness p. 14
The 30 minute workout in the fitness zone. The program is adapted to your heart rate.
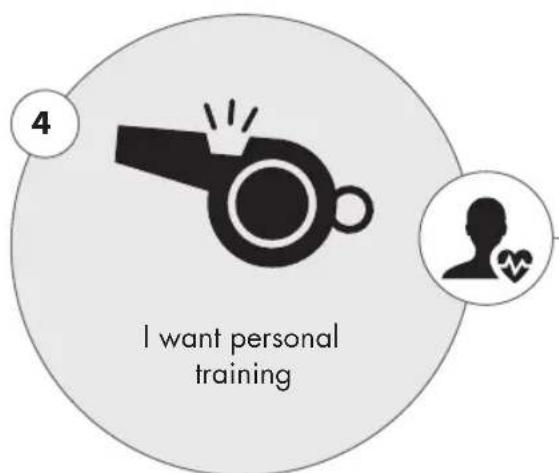
IPN Coaching p. 13
Have our device integrated 'personal trainer' coach you. You will receive training tailored to your needs.
Training in the green zone p. 14
If the screen is illuminated in green, you train in the fat burning zone. Thanks to the heart rate traffic light function, you keep the overview.
HIT training p. 12
Charge your training up! 5 highly intense intervals strengthen your cardiovascular system and accelerate the fat burning process.
IPN Coaching p. 13
Have our device integrated 'personal trainer' coach you. You will receive training tailored to your needs.
30 min. Fatburn p. 14
The 30 minute workout in the fat burner zone. The program is adapted to your heart rate.
THE TRAINING SCREEN
Keep an overview over all important training values.
When selecting a training, the screen switches into training view. It provides the following information for you:
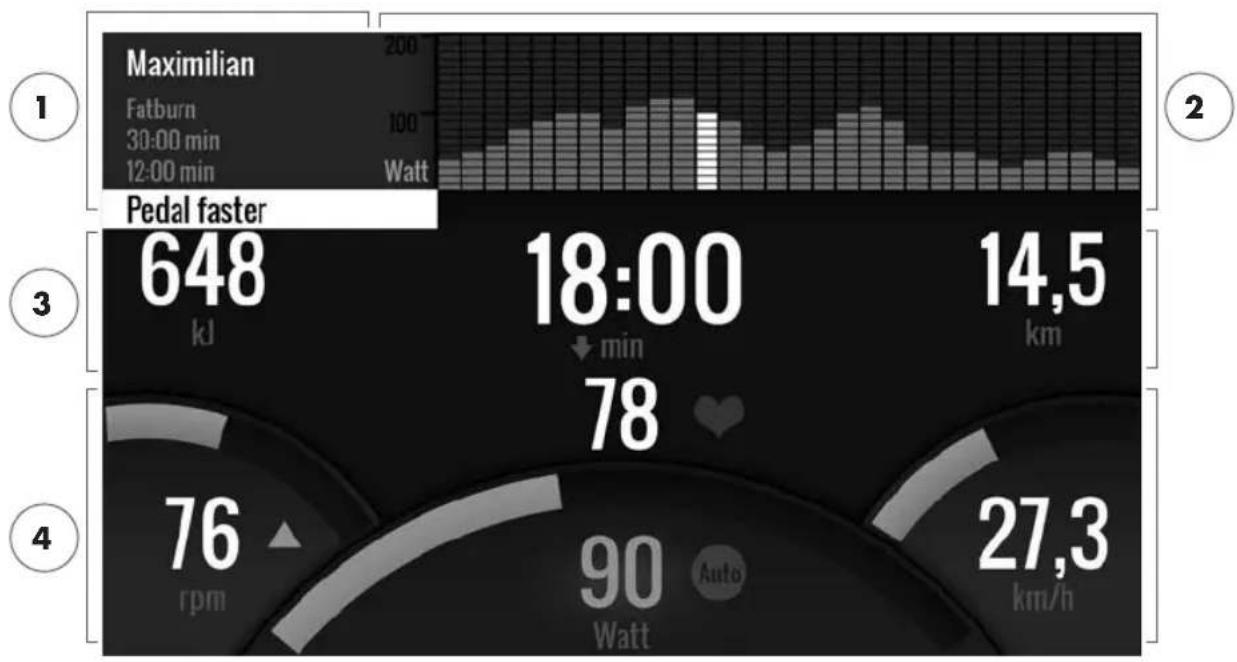
1 Information field in the upper left corner
This area displays basic information about the training. Current information has a white background.
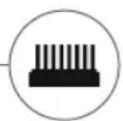
2 Matrix display in the upper right corner:
The matrix displays the training profile of the current training. The higher the individual bars, the more intense the effort at the given moment in the training. The current position is marked by a white bar.
3 Training quantity values
Below the information field and the training profile matrix, you will find all training quantity information about energy consumption, time and distance.
Tip: You can change the units for distance and energy consumption. In 'Start menu > Device settings > Units of measurement' you can switch between kilometres and miles. Each user can switch between kilojoule and kilocalories in the personal settings of his or her training menu.
4 Training intensity values
Heart rate frequency (with heart icon), pedalling frequency (rpm), speed (km/h or mph) and currently pedalled wattage (watts) show the intensity of your current training. If you press the right button during training, these four values will show the average values of the current training.
Colour coded allocation of the heart rate ranges.
During training, the training computer will attribute your current heart rate frequency in one of five heart rate zones. Each heart rate zone is highlighted with an individual colour. More information about the training according to heart rate zones can be found on page 14.
TRAINING MODES
The original Kettler ergometers with AUTO and MANU mode.
AUTO mode (speed independent)
In this mode, you enter the target output in watts. By turning the rotary push-button, the watt target value will change. The ergometer system will calculate the braking resistance from the watt target value and the current pedalling frequency and will change it immediately, when the pedalling frequency is changed. This will ensure that you train constantly at the pre-set watt output.
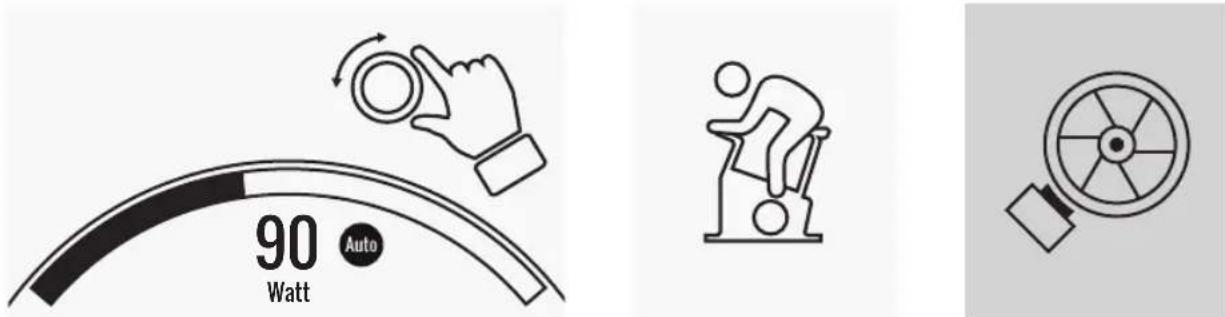
watt target value pedalling frequency braking resistance
MANU mode (speed dependant)

Choose brake resistance (or "a gear") in MANU mode. This stays constant, regardless of your pedal frequency. The power in watts is the end result and changes in the case of changes to the resistance level or pedal frequency.
braking resistance / "gear"
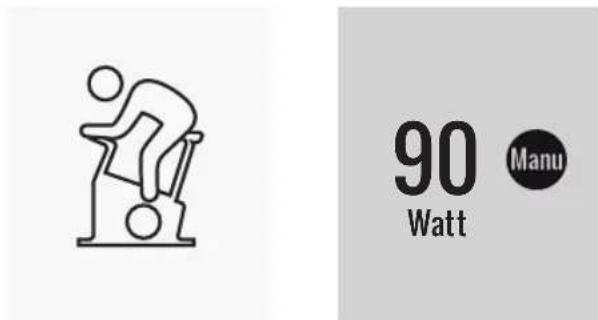
pedalling frequency watt value
FREE TRAINING / QUICKSTART

Go ahead without bothering to change settings.
Description of the training
There are no pre-settings for this training. By turning the central rotary push-button, you will change the braking resistance and thus the training intensity. By pressing the rotary push-button, you can switch between the modes AUTO and MANU. There is no training profile stored in the matrix views.
CHALLENGE TRAINING

Accept a challenge. Train against your personal best and cross the finish line first!
Description of the training
The Challenge training is a competition on a distance you've set. You will cycle in MANU mode with gear shift. It is not possible to switch to the AUTO mode. In place of a profile matrix, you will find a position display of you and your virtual opponent in the upper right corner of the screen. You can see who is currently leading.
In the first Challenge training, you will race against a virtual opponent. In later trainings, you will compete against your last time or your best time in the Challenge training. It is possible to change the race distance and start afresh against the virtual opponent.
HIT TRAINING

Intensity training for your cardiovascular system.
Background from sports sciences
This 20 minute program with five highly intense intervals will strengthen your cardiovascular system, increase the oxygen intake and decrease blood fat values. With every single training you will thus actively improve your health. According to scientific research, only one HIT session per week shows already positive effects on your cardiovascular system. At the same time, you will be burning a lot of calories. KETTLER recommends one session of HIT training per week in addition to your regular training.
Note: Before doing the HIT training for the first time, please consult with your doctor if this training form is suitable for you.
Description of the training
The HIT training is a 20 minute training with a focus on five highly intense intervals. It consists of a warming up phase, 5 intervals with recovery breaks in between and an active recovery phase in the end of the training. The program does not include intensity pre-sets for the individual training phases. In the warming-up and recovery phases, you will select an intensity that feels comfortable for your fitness level. During the intervals, you should give your personal maximum performance. Choose an appropriate resistance in advance.
During the intervals, the screen will change. The interval score will be displayed. The interval score is calculated from the pedal revolutions during the interval and a pre-factor for the set braking resistance. The goal is to achieve the highest total interval score possible during the 5 intervals. During the intervals, a constant braking resistance is required. Therefore, the training is only available in MANU mode.
IPN COACHING
Individual training program. The IPN program offers individual training programs adapted to your fitness level.
Background from sports sciences
The IPN program offers a training plan adapted to your personal training objective and your personal fitness level. In an automatically run fitness test, your personal fitness will be assessed. On the basis of the test result, a training plan with 24 sessions will be calculated and presented to you in a program. You can train according to this program in the weeks to come and you can rely on the fact that you're doing the most efficient training for your personal training objective. There are two alternative training objectives available: One with a focus on body shaping and another one to increase your fitness level.
Background: The program has been developed in cooperation with the Institute for Prevention and Aftercare (Institut für Prävention und Nachsorge) in Cologne. The name IPN program is refers to the name of the institute.
Description of the training
Before you start with the actual training, you have to do the fitness test. Select the element IPN coaching in the training list of your user: Fitness test. When selecting the fitness test, you need to answer five questions about your person first which are relevant for the test design. Then, you will enter the fitness test.
Note: You will be asked about your resting heart rate in one of the five questions. Measure it after a period of time without any physical effort. If possible, in the morning before getting up by feeling the pulse on an artery.
The test consists of maximum 5 stages with 3 minutes each, whereby the performance required will be increased from step to step. Thus, it starts with a moderate effort and will become more and more exhausting. It is to be expected that your heart rate will increase continuously. From your personal information, a target heart rate will be calculated which is of particular interest when reached in the test: The test will end at the end of the load level, when the target heart rate value is exceeded. Make sure that you maintain the prescribed pedal frequency during the test. On the screen, the test result is displayed in form of points when you have completed the test. This value (maximum is 100 points) can be compared to later test results and will show your personal fitness development.
Note: KETTLER recommends the use of a chest strap for the IPN test and for all IPN trainings afterwards. This form of the heart rate measurement is more accurate than the measurement of the heart rate on the hand and will deliver test results in better quality.
On the basis of the recorded test data, your personal training plan will be calculated. After completing the test successfully, you can select a training objective: You can choose between the training objectives figure shaping and fitness level increase.
Note: More information about the selection and the scientific background, you can find in the section 'Heart rate based training' in this manual.
You have now completed the IPN test phase successfully. In the training list of your user, the first training from the training plan will appear with the name IPN Coaching 1/24. When selecting an IPN coaching, you can first select the training duration. The recommended training duration of the selected training unit is always pre-set. Depending the time available and your motivation, you can adapt this duration accordingly. After setting the duration, you will start with the training.
The IPN training programs are tailor-made for you. During the training, you don't need to change any settings on the computer. The program will evaluate your heart rate constantly over the entire training and will control the intensity of the training by automatically adapting the target watt values. In addition, recommended pedalling frequency ranges are displayed for the individual sections of the training. You will recognise this on the white markers in the intensity bar above the pedalling frequency value. If possible, remain within in this predefined range between the markers. A training can include several modules with different intensity levels. Apart from phases with high intensity, there are phases for active recovery. You will recognise the recovery phases from the low target watt values (e.g. 25 watts).
Note: The training session of an IPN training plan are based on each other. First, you need to go through an entire IPN training session, before the computer offers the next session.
KETTLER recommends 2-3 training sessions per week in order to complete an IPN training cycle in 8-12 weeks. After completing the entire training cycle, a new test is planned.
Note: You can reset any started IPN training plan in the personal settings of your user. In this case, all sessions already completed will be deleted. You will start afresh with the fitness test.
HEART RATE BASED TRAINING
Listen to you heart rate - it will make your training efficient.
Background from sports sciences
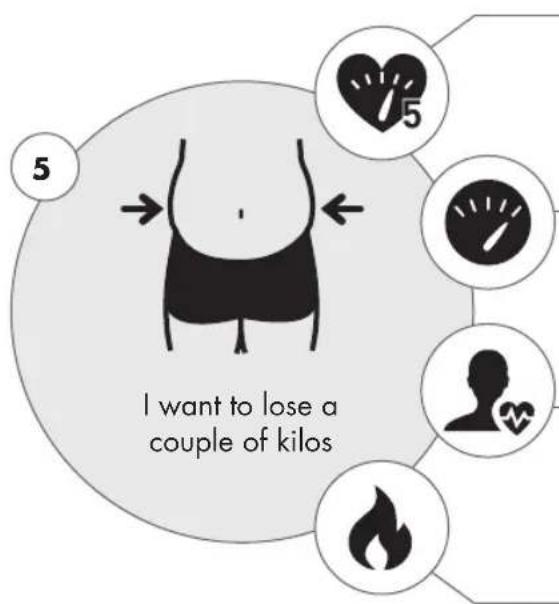
Basically, the human body has two energy sources: It burns fat and carbon hydrates. During normal physical activity and easy training, the body is in fat burning mode. If the effort and thus also the heart rate is increased, the body will change the ratio of the energy sources and will predominantly burn carbon hydrates.
Due to this fact, the heart rate is an important indicator: It provide information over the energy source the body is currently using. When training in the lower heart rate ranges 'blue' and 'green', the body is in fat burning mode. Perfect for people wanting to lose a couple of kilo's. When training in the upper heart rate ranges (yellow, orange and red), the carbon hydrate storage will be used predominantly as energy source. Training in these heart rate zone challenges the cardiovascular system and increases the fitness.
Description of the training
KETTLER offers a heart rate monitoring with the following functions and trainings:
1 Heart rate traffic light

Independent from the selected training, you can display the current heart rate zone with the heart rate traffic light function. The heart rate traffic light function will change
the colour of the training screen depending on the heart rate zone. This way, you can instantly see the heart rate zone you're in. The zones are colour coded as follows:
Heart rate zone name Heart rate ranges
Heart rate zone 5-red maximum range 91 - 100%
Heart rate zone 4 - orange intense stamina 81-90%
Heart rate zone 3 - yellow stamina 71 - 80%
Heart rate zone 2 - green fat burning 61.70%
Heart rate zone 1 - blue warming-up / recovery up to 60%
Train in the heart rate zone which is most effective for your personal training objective. Kettler recommends training in the green heart rate zone for fat burning and training in the yellow zone for improving stamina. Performance oriented athletes use the entire bandwidth of heart rate zones for an optimised training within their training plan.
Note: On delivery, the heart rate traffic light is activated. The maximum heart rate as start value of the heart rate zone determination is calculated according to the equation: Maximum heart rate = 220 - age. If you have determined individual heart rate ranges, e.g. within the scope of a performance diagnostics, you can enter them precise to one rate into the computer. You will find this function in Personal settings > Heart rate settings. If you prefer, you can disable the heart rate traffic light here.
2 Heart rate based training (HRC training)


For the heart rate based training, you will set a target heart rate or a heart rate progress curve for your training. The KETTLER training
equipment will control the braking resistance in a way that you will reach and keep the current set value. Training in the desired target heart rate range will become extra comfortable with this feature. Heart rate based trainings include:
- The training session '30 min. fatburn' (flame icon) for the target heart rate in the green fat burning range.
- The training session '30 min. fitness# (apple icon) which is regulated to the yellow stamina range.
- All pre-set trainings with the heart icon.
In addition, you can create further training sessions in the training configurator. The latter function is described in detail in the chapter "Training configurator".
Note: When starting the heart rate based training, the program will start on a pre-defined WATT value. Depending on the personal fitness level, the target heart rate will be reached too fast or too slowly. In this case, you can change the start watt value in User menu > Personal settings > Heart rate settings > HRC start level.
Constant heart rate measurement is required for heart rate based training. The best measurement quality and consistency is hart rate monitoring via chest strap. Therefore, KETTLER recommends to use a chest strap for all heart rate based trainings. As an alternative to the chest strap, monitoring via the hand heart rate sensors is possible. These sensors can be attached in the desired gripping position on the right and left of the handlebar. Always grip both sensors with normal force. As soon as the heart rate monitoring is active, the heart next to the heart rate display will flash. Please note that this measurement method can be impaired by movement, sweat or friction. If there is no heart rate signal during the heart rate based training, the braking resistance will be reduced to the minimum setting.
THE TRAINING CONFIGURATOR

Create your individual training - in 4 simple steps.
Background from sports sciences
The training configurator allows you to include your personal training concept and/or your personal training plan.
Description of the training
In the user menu, you will find the training configurator on the far right. By selecting it, you will enter the configuration menu consisting of 4 steps. The sum of the 4 selected options will result in your individual training. The order is as listed below:
Step 1: Select your personal training target
What do you want to reach with your training? You can select from three alternatives:

train a certain time
train a certain distance (in kilometres or miles)

burn a certain energy value (in kcal or kJ)
Step 2: Determine the size of the training target
e.g. 30:00 minutes, 10 kilometres or 500 kcal
Step 3: Determine the training mode
The pre-set training effort can fluctuate in a given training session. This is displayed graphically in the training matrix as training profile. The significance of the bars with different lengths in the training profile depends on the training mode. Again, you can choose from 3 alternatives:

Manu mode: The height of the bars describes the height of the braking resistance ("the gear"). You will train in MANU mode (see chapter "Training modes", p. 11)

Auto mode: The height of the bars describes the watt value to be output. You will train in AUTO mode (see chapter "Training modes", p. 11)
Heart rate mode: The height of the bars describes the target heart rate to be reached. You will train in HRC mode (see chapter "Heart rate based training", p. 14)
Step 4: Select or create your training profile
In the end, select the desired training profile for your training in step 4. In a flat training for example, the target value will not change during the training session. Further training profiles will offer moderate to demanding changes.

Turn the button in the selection menu all the way to the right in order to create your individual training in one extra step.
Note: The profile will determine the fluctuation width of the effort during training. You can determine during the training session whether this will happen on high or low intensity level: By turning the rotary push-button, you will slide the entire profile downwards.
After completing the configuration, the training will be saved in the training list (except for guest user). The name of the configured training will be as follows:
- On the left, next to the training name, you will find the symbol for the training mode (AUTO, MANU or HEART RATE), determined in step 3.
- The name of the training starts with the personal training objective (e.g. 30:00 minutes, 10 kilometres or 500 kcal) from the steps 1 and 2.
- Then, you find the profile name, determined in step 4.
Note: Some trainings with the name logic of the training configurator are already pre-configured in the training list. They help to simplify taking up the training but you are welcome to add your own configurations or replace them. The training list itself is logically sorted like a favourite's list. The trainings you use regularly and the ones you have recently added are on top. Configurations which haven't been used for a longer time will be moving downwards until they drop from the list. But don't worry: The trainings that will drop from the list are easy to create again in the configurator!
Pre-configured examples:
200 kcal Flat Course

40 Min The Alpine Pass

10 km Valley Trail

250 kcal Rolling Hills

25 km Interval

20 km In The Mountains

17 km Pyramid

25 km Valley Trail
PROFILE
No matter if flat course or alpine pass: Everyone can find a suitable training in this list.
Flat Course
On this entirely flat course, you won't find any changes in inclination. I.e. the training will require the same training effort for its entire duration.
Valley Trail
Just like on a hiking trail in the valley, you can take it easy. You will have to go uphill only now and then. There won't be any exhausting climbs.
Rolling Hills
You will make a tour over rolling hills. Moderate inclines and phases with less effort will alternate.
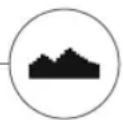
In the Mountains
The training profile will send you into the mountains. Long and arduous climbs will require all your stamina. As soon as you have reached the top, the effort will decrease like when cycling downhill.
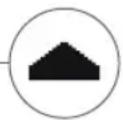
The Alpine Pass
The Alpine pass is a challenging mountain profile for real experts. Steep inclines with a short recovery break after the first peak. As soon as you have mastered the main peak, the effort will decrease continuously.
Pyramid
This belongs to the demanding training classics: The effort is increasing constantly without giving any break for recovery. After reaching the top of the pyramid, the effort still remains on a high level.
Interval
Demanding interval training. Effort and recovery phases will alternate constantly. Use the recovery phases for regeneration.
Customised
With a customised profile you can save your own personal route. Easy hills or rough mountains - it's up to you!


For everyone who is looking for a special training motivation.

Use of the KETTMAPS APP
With KETTMAPS, you can load many video-realistic routes as training motivation onto your smartphone or tablet. Even the free basic version offers several routes. For a small monthly fee, you will gain full access to the data base with several thousands of routes. Even personal route videos can be uploaded and added to the data base. The connection can be done via Bluetooth or via the front camera of your smartphone or tablet which is able to read your velocity. You can find the APP in the Apple Store or Google Play Store under KETTMAPS.
Use of KETTLER WORLD TOURS

This optional PC software indispensable for all ambitious fitness athletes. This software enables you to record real routes with your smartphone or GPS which you can use to train on you KETTLER Fitness equipment later with help of 3D maps. This way, you can train inside even if it snows, storms or rains outside and get the feeling as if you where on your own training route. In addition, you can cycle video-realistically on the most beautiful routes in the world and master any mountain of the Tour de France, if you like. But don't worry: even novices can reduce the brake power of these mountain stages, so that they are even possible for beginners to master. Furthermore, there is an online race function in the online mode, where you can plan and race virtual competitions with other users via the internet portal www.kettlerworldtours.de.
Further functions
HEART RATE RECOVERY MEASUREMENT

How long does it take until your heart rate recovers after the effort?
The heart rate recovery measurement is a tried and tested method to assess physical fitness. The faster the heart rate reverts to normal after the training effort, the better the physical fitness. The KETTLER heart rate recovery measurement assesses the heart rate slow down during a one minute test and will rate it with a number (1.0 = very good; 6.0 = not so good).
During training, you can start the heart rate recovery measurement by pressing the left button. The first heart rate is taken and displayed immediately at the beginning of the test. At the same time, a 60 seconds countdown will run backwards. Please use this time to recover and refrain from continuing to train. After the countdown has elapsed, the second heart rate is taken and the number for the heart rate recovery test is displayed.
The test should be started from intense effort. We advice you to avoid taking the heart rate recovery test in the end of the training because it would falsify the result.
MY RESULTS

The personal training storage in the device.
Each individually created user has the possibility to view his or her personally achieved training performance in the user menu under 'My results'.

In the section 'My last training', you can view the result of the last completed training session.

In the menu item 'My training scope', you can view all achieved performances. Apart from the values concerning total extent and average intensity, the current performances for IPN test, HIT training etc. are displayed.

With the third selectable menu item 'Reset training extent', the data from the category 'My training extent' can be reset to zero.
CONNECTIONS VIA BLUETOOTH
For the connection with chest strap, tablet or PC.
Establish connection to the chest strap
Using a chest strap, you can connect the KETTLER training computer to a heart frequency monitor that supports Bluetooth® low energy technology. The connection is set up via the Start Menu > Device Installations > Bluetooth Setup. In Bluetooth Setup, Bluetooth must be activated in the top bar. In addition, select 'Chest strap' in the line below as active mode. In the third line, you can select and couple the chest strap. When selecting this line, you will enter a list with already connected and available chest straps. Available chest straps are highlighted in blue. Here, you need to select the desired chest strap and connect it in the following context menu. If several users with different chest straps are training on the training equipment, the applicable chest strap must always be activated with the procedure described above.
Note: The sports device can only be connected to chest straps that support Bluetooth. When choosing a chest strap, make sure that it supports Bluetooth low energy technology. Chest straps with 5kHz technology (e.g. polar T34) cannot be connected.
Establish a connection with smartphone, tablet or computer
The KETTLER sports device can be connected to smartphones, tablets and PC via Bluetooth v4.0, making training possible with numerous APPs or the PC software KETTLER WORLD TOURS. The connection is set up via the Start Menu > Device Installations > Bluetooth Setup. In Bluetooth Setup, Bluetooth must be activated in the top bar. In addition, select 'APP / PC' in the line below as active mode. In the third line, the device name of your KETTLER fitness equipment will appear. When selecting the name, you can edit it. The next stage of linking now takes place in the Bluetooth Setup of the device you would like to connect. If a smartphone, tablet or PC is coupled, the training screen of the device is displayed with reduced functionality.
OBJECT MODE
Customized software version for the use in public gyms.
If you want to place the Kettler fitness equipment in a publicly accessible gym, we recommend to activate the object mode. This reduces the functionality and the training modes to all types which make sense when using the equipment once (e.g. as hotel guest). In addition, setting menus are disabled so that nothing can be changed. In the object mode, no personal data and training results can be saved.
Enable the object mode in the Start menu in Device settings. You are required to press all three buttons at once. By pressing the same button sequence, you will return to normal mode, if required.
Table des matieres
Démarrage
FUNCTION DES TOUCHES 4
LE MENU DE DEMARRAGE 5
CREER UN UTILISATEUR 6
LE MENU UTILISATEUR 7
Exercice
JEVEUX... 8
L'ECRAN D'EXERCICE 10
LE FEU DE SIGNALISATION DE POULS 11
LES MODES D'EXERCICE 11
EXERCICE LIBRE / DEMARRAGE RAPIDE 12
EXERCICE DE CHALLENGE 12
EXERCICE HIT 12
COACHING IPN 13
EXERCICE BASE SUR LE POULS 14
LE CONFIGURATEUR D'EXERCICE 16
2 Training a frequenza cardiaca controllata (HRC Training)


- Freies Training / Quickstart S.12
- FUNCTION OF THE BUTTONS
- In the menu view
- In the training view
- Rotary push-button - Push
- Rotary push-button - Turn
- Left button
- Right button
- Display switch-off
- START MENU
- Device settings
- Guest user
- Individually created user (designated with name)
- Create new user
- CREATE USER
- Step 1: Enter a name
- Step 2: Enter data
- Step 3: Select profile image
- Step 4: Finish
- THE USER MENU
- Personal settings
- My results
- My last training
- My training list
- Training configurator
- Training
- IWOULD LIKE...
- Training in the yellow zone p. 14
- HIT training p. 12
- IPN Coaching p. 13
- min. fitness p. 14
- Training in the green zone p. 14
- min. Fatburn p. 14
- THE TRAINING SCREEN
- Information field in the upper left corner
- Matrix display in the upper right corner:
- Training quantity values
- Training intensity values
- TRAINING MODES
- AUTO mode (speed independent)
- MANU mode (speed dependant)
- FREE TRAINING / QUICKSTART
- Description of the training
- CHALLENGE TRAINING
- HIT TRAINING
- Background from sports sciences
- IPN COACHING
- HEART RATE BASED TRAINING
- Heart rate traffic light
- Heart rate zone name Heart rate ranges
- Heart rate based training (HRC training)
- THE TRAINING CONFIGURATOR
- Step 1: Select your personal training target
- Step 2: Determine the size of the training target
- Step 3: Determine the training mode
- Step 4: Select or create your training profile
- Pre-configured examples:
- kcal Flat Course
- Min The Alpine Pass
- km Valley Trail
- kcal Rolling Hills
- km Interval
- km In The Mountains
- km Pyramid
- km Valley Trail
- PROFILE
- Flat Course
- Valley Trail
- Rolling Hills
- In the Mountains
- The Alpine Pass
- Pyramid
- Interval
- Customised
- Use of the KETTMAPS APP
- Use of KETTLER WORLD TOURS
- HEART RATE RECOVERY MEASUREMENT
- MY RESULTS
- CONNECTIONS VIA BLUETOOTH
- Establish connection to the chest strap
- Establish a connection with smartphone, tablet or computer
- OBJECT MODE
- Démarrage
- Exercice
- Training a frequenza cardiaca controllata (HRC Training)
Brand : KETTLER
Model : Ride 100
Category : Exercise bike