
Tour 300 - Exercise bike KETTLER - Free user manual and instructions
Find the device manual for free Tour 300 KETTLER in PDF.
| Product Type | Exercise Bike |
| Brand | Kettler |
| Model | Tour 300 |
| Onboard Computer | Display screen with menu and training display |
| Training Programs | Quick start, time/distance/calories target, HRC training, 6 profiles, individual configurator |
| Connectivity | Bluetooth 4.0 for smartphone/tablet, compatible with KettMaps |
| Heart Rate Measurement | Manual sensors and Bluetooth chest strap (optional) |
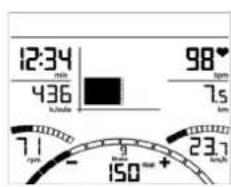
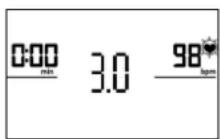
| Display | Time, distance, calories, speed, heart rate, profile |
| Resistance | Magnetic braking (adjustable by central knob) |
| Power Supply | Batteries (not included) or mains adapter (not included) |
| Safety | Safety instructions: sturdy support, check connections, avoid humidity, consult doctor before training |
| Maintenance and Cleaning | Check connections every 6 days, replace damaged parts, use original Kettler parts |
| Spare Parts and Repairability | Use only original Kettler spare parts |
Frequently Asked Questions - Tour 300 KETTLER
User questions about Tour 300 KETTLER
0 question about this device. Answer the ones you know or ask your own.
Ask a new question about this device
Download the instructions for your Exercise bike in PDF format for free! Find your manual Tour 300 - KETTLER and take your electronic device back in hand. On this page are published all the documents necessary for the use of your device. Tour 300 by KETTLER.
USER MANUAL Tour 300 KETTLER
Please observe the following instructions for your own safety:
The training device must be set up on an appropriate and firm surface.
- Inspect the connections for firm fitting before initial operation and additionally after approximately six operation days.
- In order to prevent injuries caused by wrong stress or over-stress, the training device may only be used in accordance with the instructions.
- It is not recommended to permanently set up the device in humid rooms due to the resulting corrosion development.
Assure yourself regularly that the training device functions properly and that it is in duly condition.
- The operator is responsible for the safety controls, which have to be carried out on a regular and proper basis.
Defective or damaged parts must be exchanged immediately. Only use original KETTLER spare parts.
- The device may not be used until after repairs are completed.
- The safety level of the device can only be maintained provided that it is regularly inspected for damage and wear and tear.
For Your Safety:
- Before starting the training, check with your GP that you are fit for training with this device. The doctor's findings should form the basis for the setup of your training programme. Incorrect or excessive training may damage your health.
- Systems to monitor your heart rate can be imprecise. Excessive training may result in serious damage to your health or death. Should you feel dizzy or weak, stop the training immediately.
The Training Program Computer System
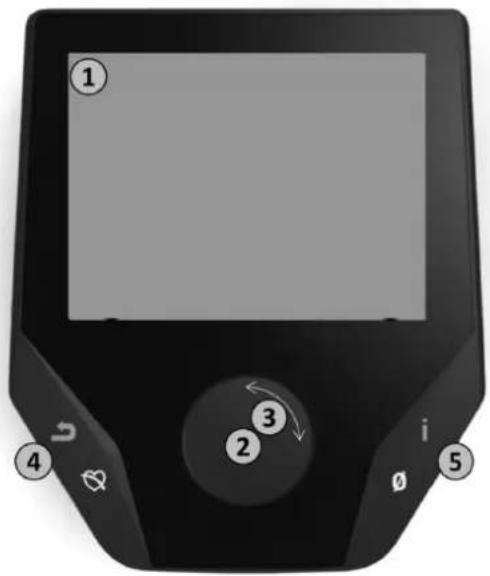
Display and Keyboard
1

1. Display
The display provides you with all important information. These distinctions should be noted between the Menu list and the Training Program list displays:
Menu Display
When the display is turned on, you arrive at the Menu list. Here you can make settings for the user or machine data, select a Training Program, and read your training results.
Training Display
After selecting a Training Program, you arrive at the Training Programs display. It provides you with all important training scores and the Training Program profile.
2
2. Central Key - Press
In the Menu: By pressing the central key you confirm the selected item. This brings you to the selected Menu item or the selected Training Program.
In the Training: no function
③
3. Central Key - Turn
In the Menu: change the selection in the respective Menu. The semicircular image in the lower display area indicates additional selection options.
In the Training: change the pedaling resistance (Brake/Watt).
4
4.Left Key
In the Menu: jump back to the main Menu. Any changes made will not be saved.
In the Training: end the Training Program and start the recovery pulse measurement. By pressing again, you can return to the Training Program.
5
5. Right Key
In the Menu: calling up of the contextual information. The significance of the Menu item is explained in more detail.
In the Training: display of average scores/values. When the key is pressed, average scores/values are displayed for a few seconds.
The Menu
First Level: The Start Menu - User Selection
Upon starting the machine you arrive, after a brief greeting, at the Start Menu. This Menu is primarily for selection of the user on whose account the Training Session is to take place. You may also add a new user and, under the item "Machine Settings", make basic settings for all users.
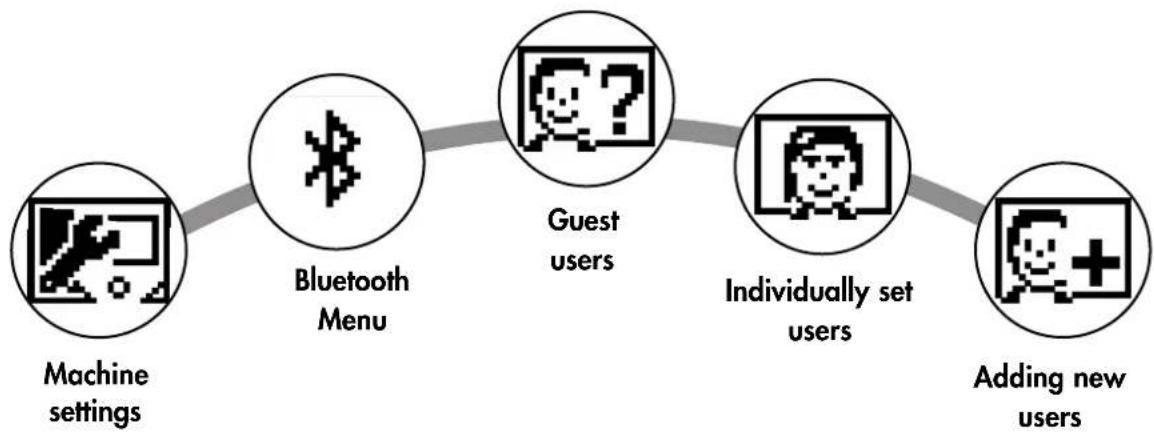
An overview of the Menu items (from left to right):

1. Machine Settings
With this Menu item you may make all multi-user machine settings (e.g., change machine language, change units of measure etc.).

2. Bluetooth Connection
In this Menu item you can connect the device with your smartphone or tablet PC via Bluetooth. You will find more information on this in the section "Creating a Connection with your Smartphone or Tablet PC".

3. Guest Users
The Guest User is a preset user profile. It gives you the option of training without presets. In the Guest User Profile no Training Program results are saved. No personal settings may be made.

4. Individually-created User Accounts (by name)
To the right of the Guest User there appear up to 4 individually-set users. These are designed as personal user accounts for persons who use Training Programs regularly. In the accounts, individual settings can be made and personal Training Program results can be saved.

5. Create new user
In this Menu a new individual user (see No. 3) can be entered. When this Menu is selected, name and age are requested. The user may also select a Profile Face. Finally the new user is integrated into the Start Menu.
Second Level: the user Menu - in the user's personal account
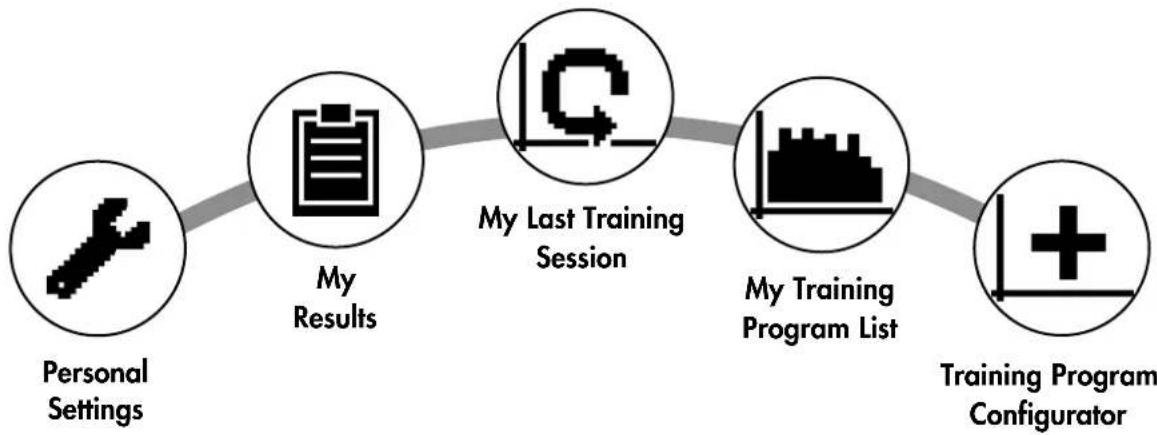
If you select an individual user, you will arrive at this person's user Menu. Here almost everything involves the personal Training Program. The User Menu for a Guest User contains only the three items on the right.

1. Personal Settings
In this Menu item you may make all user-specific settings (e.g., changing the age). Changes to this Menu do not affect the data of other users.

2. My Results
Under 'My Results' the personal overall performance achieved, and the results from the last training session, can be read.

3. My Last Training Session
When this Menu item is selected, you are taken directly to the last training session which was begun. This Menu item is always preselected when you arrive at the User Menu. Thus the last training session is only a click away.

4. My Training Program List
In this list you will find all training sessions which have been saved on the machine. The various Training Program types are described below.

5. Training Program Configurator
With the Training Program Configurator, an individual training profile may be set. Once you have set it, the profile will be stored in the Training Program List. For each user, there is storage space for an individually-configured Training Program. Through configuration of a new Training Program, the previous Training Program is overridden.
The Available Training Programs in the 'My Training Programs List' Menu
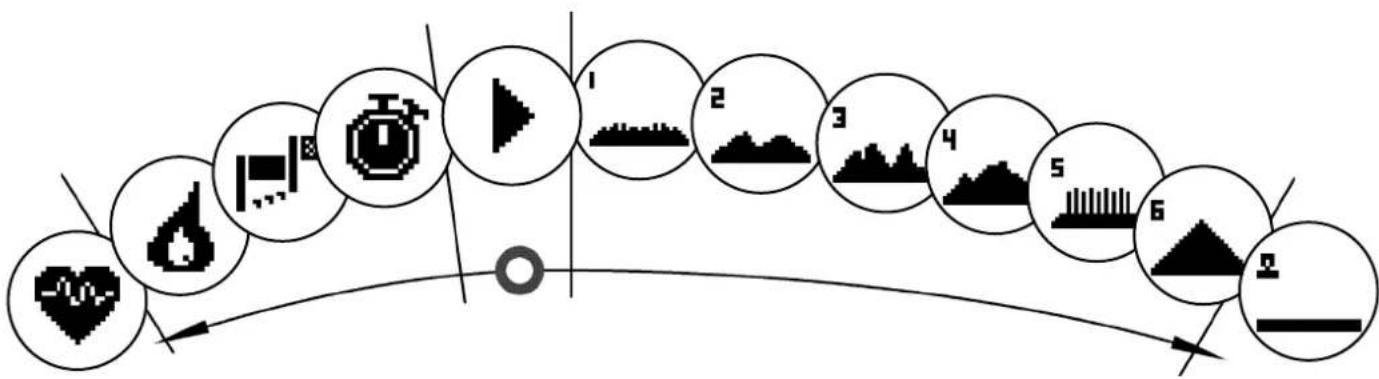
In the Menu item 'My Training Programs List' for an individual user or Guest User, various types of Training Programs are located. These are explained as follows:

1. Quick Start
Start a Training Session simply, without any further entry options. All scores/values are set at zero. You decide about Training Program duration and intensity. This Training Program is preset upon entry into the Menu 'My Training Programs List'.

2. Training Programs with target scores/values (time / distance / calories)
If you turn to the left from the starting point, you will arrive at the 3 Training Programs with target scores/values. Set yourself a personal target score/value for the Training Session, for time, distance, or an energy (calorie) value that you wish to burn off. Then during the Training Session the selected value will count down to zero.

3. Heart-Rate-Oriented Training Program (HRC Training Program)
To the far left of the selection list is the HRC Training Program. This is the ideal Training Program for training in a targeted manner to reach a certain defined heart rate range. Before the Training Session, enter a heart rate target. The exercise machine will then set the brake resistance in the Training Session such that you reach and maintain the heart rate entered. During the Training Session the central graphic in the display shows you whether you are training in the target range, or whether you are above or below the target range.
TIP: In the Menu under 'Personal Settings' > 'HRC Start Level' you can define a brake level at which you want to begin the HRC Training Session. Well-trained exercisers tend to select a higher Start Level; beginning exercisers usually select a lower setting.
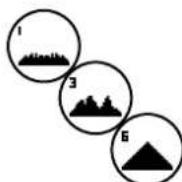
4. Profile Training Sessions
If you turn right from the starting point, you will arrive at the Profile Training Programs numbers 1-6. In Profile Training Programs the exercise machine automatically changes the brake level based on the profile. The brake level changes in Profiles 1-3 are moderate, in Profiles 4-6 more demanding. After selection of a Profile Training Program, set the Training Program duration and begin the Training Session.
TIP: by turning the central key (3) during the Training Session, you can push the entire Profile up or down.

5. Exercising with the self-configured Profile
To the far right of the selection list, the storage space for your individually-set Profile can be found.
Training Program Functions
Pulse Zones
5 Pulse Zones, Z1-Z5, are displayed. They are calculated based on the age entered.
Maximal Training Program pulse (HR Max) = 220 - age
Z1 = 50-60% of the HR Max = WARM-UP
Z2 = 61-70% of the HR Max = FAT BURNING
Z3 = 71-80% of the HR Max = ENDURANCE
Z4 = 81-90% of the HR Max = INTENSIVE ENDURANCE
Z5 = 91-100% of the HR Max = MAXIMUM RANGE
The Pulse Zones are displayed in the text space, when this function is activated under "Personal Settings>Pulse Zones".

Recovery Pulse Measurement
During the Training Session and active pulse measurement, press the Recovery Pulse key. After 10 seconds the measurement will begin.
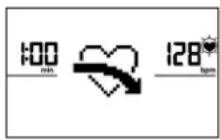
The device will measure your pulse in a 60-second countdown.
Subsequently, the recovery pulse grade will be displayed.
The display will be ended after 20 seconds or by pressing the Recovery Pulse key.
If at the beginning or end of the countdown no pulse is registered, an error message will appear.
Turning off the display
After 4 minutes without activity, or by pressing and holding the left key, the display is turned off.
Creating a Connection with your Smartphone or Tablet
The KETTLER Training Machine can be connected via Bluetooth with smartphones or tablet PCs beginning with Bluetooth v4.0, which enables training with KettMaps and other compatible APPs. The connection is made in the Start Menu under the Menu item Bluetooth setup. Select this Menu item by pressing the central key. In the resulting screen, the device waits for a signal from your smartphone or tablet. Please make sure that Bluetooth is activated on your smartphone or tablet and that the device is visible. As soon as the training computer recognizes your smartphone or tablet PC, it will request that you enter a code for authentication. Please enter this code into your smartphone or tablet PC. When the linkage is successful, the Bluetooth connection has been established. The authentication process is only necessary for the initial connection.
Notice: A connection with smartphone or tablet PC is only possible when the device is not in use. If necessary, you will be told to cease activity.
Using the KettMaps APP
You can use KettMaps to upload realistic video sequences of training courses, as training motivation, onto your smartphone or tablet PC. Even with the free basic version, a number of courses are available. For a small monthly fee, you can have complete access to the database with several thousand tra
ning courses. More information can be found at www.kettlersport.com
Update the Computer Software
From time to time, Kettler makes available software updates for the device's computer. All related information can be found at www.kettlersport.com.
Pulse Measurement
The pulse can be measured via 2 sources:
- Hand pulse
The connection is located on the back side of the display;
- Chest strap (Bluetooth)
The input is located on the back side of the display.
Chest strap not always included at delivery.
For heartrate-oriented Training Programs, the chest strap is recommended.
- EN - Biometrics exercise bike
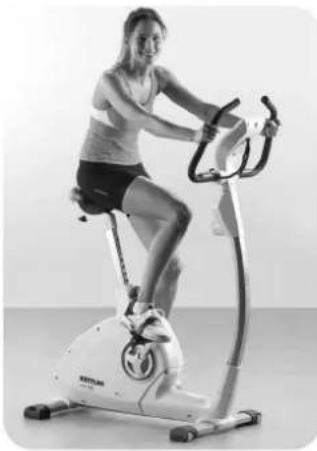
Home trainer - for anyone who likes cycling and wants to avoid strain on the joints
Due to the round leg movement this is a particularly gentle form of exercise for foot, knee and hip joints. It is ideal for regulated cardiovascular training with the training goal of fat burning, as the physical strain is lower than with running training. Therefore home trainers are also suitable for people who are overweight or who have physical problems and want to avoid too much strain on knee and hip joints.
For training related to the heart rate, a chest strap is recommended
The advantages:
ergonomic, optimally adjustable to the desired training position
- ideal for cardiovascular training and fat burning
- low strain on joints
- also suitable for overweight people and beginners
space saving and easy to transport

Setting the optimum sitting position
The ideal posture is to have your upper body slightly bent forward. If you have back problems, adjust the tilt angle so that the upper body is in an upright sitting position, which protects the spine and joints.
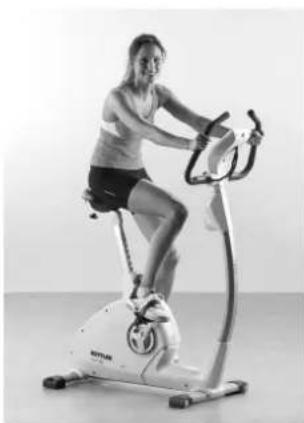
Seat height
First of all adjust the saddle to the optimum seat height. This is achieved when you can just reach the pedals with your heel with bent knees. You will maintain a round movement of the legs if you never completely stretch out the knee. Therefore you have a training which is gentle on foot, knee and hip joints.

Distance from saddle to handlebars
The saddle of your home trainer can also be adjusted horizontally (according to the model). To do this loosen the screws underneath the saddle and slide the saddle forwards or backwards down the bar, depending on your body height.
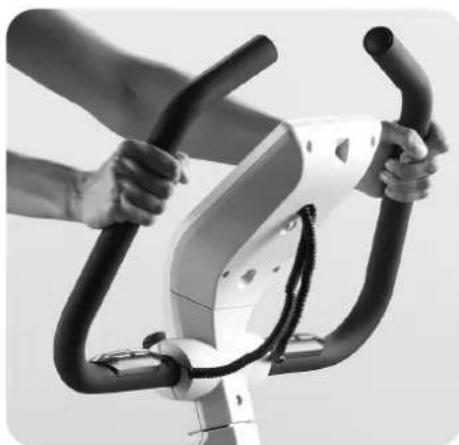
Tilting the handlebars
The tilt of the handlebars of your home trainer can be adjusted. Loosen the screws underneath the cockpit and set it in the optimum position. Then tighten the screws again so that the handlebars do not slip!!
Training variations
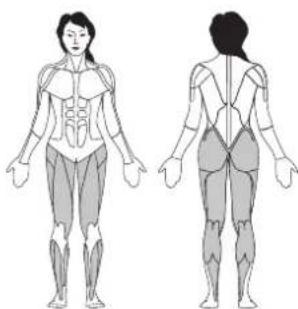
In order to increase the strain on the thigh and buttock muscles, emphasise your steps on the pedals. In order to achieve increased training of the back of the thighs, emphasise pulling the pedals with the loop upwards.
Furthermore you will have the opportunity to simulate a mountain ascent with high pedal resistance. In this training the stomach and back muscles, upper body and shoulder muscles will be included as well as leg muscles.
- EN - Biometrics exercise bike
Training recommendation
Always remember the stretching exercises afterwards in order to avoid injuries and muscle ache.
4 week training plan for beginners on the home trainer
| 1st week | 2nd week | 3rd week | 4th week | |
| Monday | 15 minutes at low impact stage 1-3 | 20 minutes at low impact stage 1-3 | 30 minutes at low impact stage 1-3 | 30 minutes at medium impact stage 4-6 |
| Tuesday | Break | Break | 30 minutes at low impact stage 1-3 | 30 minutes at medium impact stage 4-6 |
| Wednesday | 15 minutes at low impact stage 1-3 | 20 minutes at low impact stage 1-3 | Break | Break |
| Thursday | Break | Break | 30 minutes at low impact stage 1-3 | 30 minutes at medium impact stage 4-6 |
| Friday | 15 minutes at low impact stage 1-3 | 20 minutes at low impact stage 1-3 | Break | Break |
| Saturday | Break | Break | 30 minutes at low impact stage 1-3 | 30 minutes at medium impact stage 4-6 |
| Sunday | Break | Break | Break | Break |
Tip: From the 5th week increase the duration of the exercise intervals until you can run for 20 to 30 minutes without interruption. Ensure that you training pulse is approx. 60 - 65% of your maximum pulse frequency in the first 8 weeks and does not exceed 75% .
Date Restpulse Stress pulse Time Distance Energy
(min) (km) consumption

Date Restpulse Stress pulse Time Distance Energy
(min) (km) consumption

Date Restpulse Stress pulse Time Distance Energy
(min) (km) consumption


- Please observe the following instructions for your own safety:
- For Your Safety:
- The Training Program Computer System
- Display
- Menu Display
- Training Display
- Central Key - Press
- Central Key - Turn
- 4.Left Key
- Right Key
- The Menu
- An overview of the Menu items (from left to right):
- Machine Settings
- Bluetooth Connection
- Guest Users
- Individually-created User Accounts (by name)
- Create new user
- Personal Settings
- My Results
- My Last Training Session
- My Training Program List
- Training Program Configurator
- The Available Training Programs in the 'My Training Programs List' Menu
- Quick Start
- Training Programs with target scores/values (time / distance / calories)
- Heart-Rate-Oriented Training Program (HRC Training Program)
- Profile Training Sessions
- Exercising with the self-configured Profile
- Training Program Functions
- Pulse Zones
- Recovery Pulse Measurement
- Turning off the display
- Creating a Connection with your Smartphone or Tablet
- Using the KettMaps APP
- Update the Computer Software
- Pulse Measurement
- - EN - Biometrics exercise bike
- Home trainer - for anyone who likes cycling and wants to avoid strain on the joints
- The advantages:
- Setting the optimum sitting position
- Seat height
- Distance from saddle to handlebars
- Tilting the handlebars
- Training variations
- Training recommendation
- week training plan for beginners on the home trainer
Brand : KETTLER
Model : Tour 300
Category : Exercise bike