
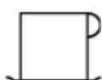
ES 1913 CB - Coffee machine BOMANN - Free user manual and instructions
Find the device manual for free ES 1913 CB BOMANN in PDF.
| Product type | Espresso coffee machine |
| Brand | Bomann |
| Model | ES 1913 CB |
| Power supply | 230 V, 50 Hz |
| Water tank capacity | Graduated glass carafe up to 4 cups |
| Coffee type | Ground coffee for espresso |
| Functions | Espresso and cappuccino preparation, steam outlet for frothing milk |
| Control elements | Switch, function selector (Off, Coffee, Steam), indicator light |
| Safety | Automatic shut-off, steam pressure, secure reservoir cap, lockable filter holder |
| Cleaning and maintenance | Descaling with citric acid, washing removable parts in soapy water (not dishwasher-safe) |
| Spare parts | Filter, filter holder, carafe, lid, drip tray, seals |
| Repairability | Do not repair yourself, contact a qualified technician or after-sales service |
| Warranty | 24 months from date of purchase |
| Included accessories | Spoon, carafe with lid and thermometer, filter, cup tray |
Frequently Asked Questions - ES 1913 CB BOMANN
User questions about ES 1913 CB BOMANN
0 question about this device. Answer the ones you know or ask your own.
Ask a new question about this device
Download the instructions for your Coffee machine in PDF format for free! Find your manual ES 1913 CB - BOMANN and take your electronic device back in hand. On this page are published all the documents necessary for the use of your device. ES 1913 CB by BOMANN.
USER MANUAL ES 1913 CB BOMANN
Overview of the Components.. Page 3
Instruction Manual. Page 31
Technical Data Page 33
Guarantee
FRANÇAIS
JEZYK POLSKI
Sommaire
D-47906 Kempen/Germany
Consommation: .800 W
Classe de protection: I
General Safety Instructions
Read the operating instructions carefully before putting the appliance into operation and keep the instructions including the warranty, the receipt and, if possible, the box with the internal packing.
- The appliance is designed exclusively for private use and for the envisaged purpose. This appliance is not fit for commercial use. Do not use it outdoors (except if it is designed to be used outdoors). Keep it away from sources of heat, direct sunlight, humidity (never dip it into any liquid) and sharp edges. Do not use the appliance with wet hands. If the appliance is humid or wet, unplug it immediately. Do not put it in water.
- When cleaning or putting it away, switch off the appliance and always pull out the plug from the socket (pull on the plug, not the cable) if the appliance is not being used and remove the attached accessories.
- Do not operate the machine without supervision. If you should leave the workplace, always switch the machine off or remove the plug from the socket (pull the plug itself, not the lead).
- Check the appliance and the cable for damage on a regular basis. Do not use the appliance if it is damaged.
- Do not try to repair the appliance on your own. Always contact an authorized technician. To avoid the exposure to danger, always have a faulty cable be replaced only by the manufacturer, by our customer service or by a qualified person and with a cable of the same type.
- Use only original spare parts.
- Pay careful attention to the following "Special Safety Instructions".
Children
- In order to ensure your children's safety, please keep all packaging (plastic bags, boxes, polystyrene etc.) out of their reach.
Caution! Do not allow small children to play with the foil as there is a danger of suffocation!
- To protect children from the dangers posed by electrical appliances, make sure that the cable is hanging low and that children do not have access to the appliance.
Special Safety Instructions
- The metallic parts become extremely hot. Touch only the handle.
- Place the machine on a heat-resistant, smooth, flat and non-slip surface.
- In order to avoid overheating, do not place the machine inside or under a cabinet. Make sure that enough space is left around the machine.
- Watch out for the hot vapor when opening the boiler lid.
- Never use the machine without water in it.
Always fill the boiler with cold water. - In order to make sure that no vapor pressure is left from the previous brewing operation, place a recipient flled with cold water under the vapor jet. Lift the recipient until the vapor
nozzle is immersed in the water. Turn the control knob to vapor release mode.
- Remove the fi liter holder and the boiler's lid only if all the vapor has been let out.
Turn the boiler lid to the left to screw it off;
Turn the boiler lid to the right to screw it on.
- Make sure that the boiler lid and the fi filter holder are properly and securely closed while using the machine since this machine is pressurized when operating.
- Use only water to fi II the boiler. Do not use any other liquid!
- If diffi culties are encountered when unscrewing the boiler lid, this may indicate that the machine is still pressurized. Let out the pressure with the procedure described above.
Overview of the Components
| 1 | Boiler | lid | |
| 2 Boiler tank opening | |||
| 3 | Control | selector | |
| 4 | „Ready“ | lamp | |
| 5 | Display | ||
| 6 | Brewing | head | |
| 7 | Filter | bowl | |
| 8 | Filter | holder | |
| 9 Filter catch | |||
| 10 | Spoon | ||
| 11 Tray | |||
| 12 | Drop grid | ||
| 13 | Glass pot | ||
| 14 Lid | |||
| 15 | Thermometer | ||
| 16 | Vapor jet | ||
Illustration 1
A Open - Handle position for the insertion of the filter unit
B Closed - Handle position for the use of the filter unit
Symbols on the Switch

Off
Brew

Release Steam
Before using for the first time
In order to remove all the dust that has deposited during the packing, wash the glass pot, the fi liter shell, the fi liter holder and the drip collection tray with warm soapy water. Do not use coarse or sharp cleansing agents. Wipe the base with a clean and humid towel.
Follow carefully the Safety Instructions!
It is highly recommended to carry out a complete brewing cycle as described in „Espresso Preparation" without any coffee powder before making your first cup of espresso or cappuccino. By doing so, any residual dust left inside the espresso machine
will be removed. The preparation of an espresso or cappuccino is different from that required for a normal cup of coffee. Both espressos and cappuccinos are made by pressing boiling water under pressure through finely ground coffee. Great attention is needed and it is highly recommended to read carefully all the instructions and safety indications provided herein, before brewing.
Tip: It is recommended to serve the espresso or cappuccino in pre-heated cups because the heat helps to retain the aroma!
How to make an Espresso
- Follow carefully the safety indications!
- Place the control knob in Off position.
- Lay the drop grid on the round depression in the drop collector cover.
- Remove the boiler lid and the fiiter holder. Should there be water in the boiler, turn the machine upside down and drain the water.
- Insert the fi lter bowl in the fi lter holder. Swing the fi lter protection to the back.
- Fill the fi tter bowl to the desired level (the inside of the fi tter bowl is marked with measure markings, 2 = 2 cups, 4 = 4 cups) with ground espresso coffee. Spread out the coffee evenly and press it down lightly with a spoon.
Important: The reason why the coffee is pressed in the filter bowl is to distribute evenly the coffee and not to compress it. If there is too much coffee, the flow of the water is blocked. This may cause damage to the machine or lead to injuries. Remove carefully any coffee from the rim of the filter.
- Insert the fi liter holder in the brewing head and turn the handle to the right (in direction) to position it correctly. Make sure that the fi liter holder is fastened properly to the brewing head to avoid the splashing of hot coffee.
- Fill the glass pot with enough cold water for the desired number of cups (do not exceed the 4 cup mark). Pour the water into the boiler.
- Put back into place the boiler lid and screw it on.
- Place the empty glass pot with the lid on at the center of the drip collection grid.
- Connect the appliance to a duly installed 230V/50Hz socket with earthing protection. Turn the control knob to brew position. The display lights up. After three minutes the espresso starts to flow into the glass pot. The ,Ready light goes on.
- When the brewing is over, turn the control knob to the Off position. Remove the glass pot from the drip collection grid.
- Wait a few seconds before removing the fiiter holder. Remove the fi liter bowl with the fi liter protection. Remove the remaining coffee. Clean the machine as described in "Cleaning and Maintenance".
How to make a Cappuccino
First prepare an espresso as described above and then proceed as follows:
-
Fill the hot espresso into (a) pre-heated cup/s.
-
Fill the glass pot up to the symbol with cold water.
Caution - release the residual pressure! Please note the special safety instructions when refl lling with water!
- Fill up the tank with the stated amount of water.
- Fill the glass pot with fresh, cold milk without exceeding the 4-cup mark. To obtain a good foam, use a high-fat milk!
- Place the glass pot under the steam nozzle.
- Turn the control switch to the release steam setting. After approx. 1-2 minutes steam comes out of the steam nozzle to froth up the milk.
- Lift the recipient until the vapor jet is immersed 1/2 cm in the milk. Turn the control knob slowly to the vapor jet position. The vapor is ejected from the vapor jet to froth up the milk. As the volume of the foam rises, lift the glass pot slightly so that the tip of the nozzle is always immersed in the milk. Continue this operation for approximately 45-90 seconds according to your taste or until the milk's volume has doubled. Make sure that the milk does not get too hot or scalded to avoid ruining the froth. Never dip the tip more than a centimeter into the milk. For proper frothing a hissing sound must be heard. Once the frothing is over, turn the control knob to the Off position. When finished, half of the contents of the glass pot will be composed of hot milk and the other half of foam.
- Scoop out the foam from the glass pot into the cup/s with espresso coffee. Add some milk. A cappuccino is 1/3 coffee, 1/3 hot milk and 1/3 frothed milk.
- In order to make sure that no vapor is left in the machine, place a recipient with cold water under the vapor jet and dip the vapor jet into the water. Turn the control knob to the vapor jet position. The remaining vapor is released if the vapor jet starts to bubble.
Important: the pressure of the machine must be released each time before brewing. As soon as the bubbling stops, pressure has been completely reduced. Turn the control knob to the Off position. Wait a few seconds after the brewing before removing the fiiter holder. Remove the remaining ground coffee. Clean the machine as described in „Cleaning and Maintenance".
Useful Tips
- The use of fi itered water or bottled water is highly recommended to enhance the taste of the espresso and to avoid the calcifi cation of the machine. Distilled water must not be used, as it is dull and tasteless.
- The secret for frothing the milk is the right technique, which can be acquired only with practice.
- If the brewing time of the coffee is longer than usual (i.e. if it takes too long for the coffee to flow out of the brewing head), then it is likely that the coffee is too fine, that too little coffee has been used or that the coffee was not pressed enough.
If the preparation time for the coffee is shorter (i.e. if the coffee flows quickly out of the brewing head), then it is possible that either the coffee was too coarse after it had been ground, the amount of coffee used was too small or the coffee was not pressed down firmly enough. -
If you prefer to have thicker "foam" for your milk, allow the foamed milk to stand for 30 to 60 seconds before you put it in the espresso.
-
If there is a signifi cant increase in the brewing time and/or frequent clogging of the vapor jet occurs, the machine is calcifi ed. Fill the boiler with a citric acid-based decalcifying agent (see dosing instructions provided by the manufacturer). Follow the instructions provided above in "How to make an espresso". Do not fill the fi lter bowl with coffee! After this operation carry out 2-3 brewing cycles with clear water.
Cleaning and Maintenance
- Follow carefully the safety instructions before cleaning the machine.
- Remove the plug and let the machine cool.
- Use a citric acid-based decalcifying agent for decalcifying.
Important Note! After descending the device boil fresh water in it several times (approximately 3-4 times) in order to remove any residues. Do not consume this water.
- Wipe the machine with a clean humid towel.
- Do not use detergents.
- Wash the fi liter shell, the fi liter holder, the glass pot, the pot lid, the boiler cap and the drip collection grid in a sink as usual.
- Do not wash any of the parts in the dishwasher.
- In order to clean the vapor jet let the vapor out for approximately three seconds after removing it from the milk. Turn the control knob to the Off position and wipe the vapor jet with a clean humid towel.
Attention: the metal vapor jet is hot!
Seals
Warning! Check the seals in the aperture of the boiler and on the fi liter holder regularly. If the fi liter holder can be moved too easily in the brewing head, the seal in the brewing head is worn.
Danger: The fiiter holder can become loose under pressure. Do not operate the machine until you have replaced the seal in the brewing head.
Technical Data
Model: ES 1913 CB
Power supply: 230 V, 50 Hz
Power consumption: 800 W
Protection class:
This device has been tested according to all relevant current CE guidelines, such as electromagnetic compatibility and low voltage directives, and has been constructed in accordance with the latest safety regulations.
Subject to technical changes without prior notice!
Guarantee
The device supplied by our Company is covered by a 24 month guarantee starting on the date of purchase (receipt).
During the life of the guarantee any fault of the device or its accessories ascribable to material or manufacturing defects will be eliminated free of charge by repairing or, at our discretion, by replacing it. The guarantee services do not entail an extension of the life of the guarantee nor do they give rise to any right to a new guarantee!
Proof of the guarantee is provided by the proof of purchase. Without proof of purchase no free replacement or repair will be carried out.
If you wish to make a claim under the guarantee please return the entire machine in the original packaging to your dealer together with the receipt.
Defects to consumables or parts subject to wearing as well as cleaning, maintenance or the replacement of said parts are not covered by the guarantee and hence are to be paid!
The guarantee lapses in case of unauthorized tampering.
After the expiry of the guarantee
After the expiry of the guarantee repairs can be carried by the competent dealer or repair service against the payment of the ensuing costs.

Meaning of the "Dustbin" Symbol
Protect our environment: do not dispose of electrical equipment in the domestic waste.
Please return any electrical equipment that you will no longer use to the collection points provided for their disposal.
This helps avoid the potential effects of incorrect disposal on the environment and human health.
This will contribute to the recycling and other forms of reutilisation of electrical and electronic equipment.
Information concerning where the equipment can be disposed of can be obtained from your local authority.
PnroTOBJIeHne ecnpcecco
- C6bHnOaIte yka3aHnI IO TEXHnke 6e3oNaChOCTn!
- YctaHOBHTe KOHTpOJIbHbI nepeKIOUaTeIb B INOJOKeHHe BblKn.
3.BCTaBbTe cETky-KanneyNoBHTe b Kpyrnoe yry6nHe Ha KpbIuKE BaHHb-KanJIecO6pHnKa.
4.CHIMnTe KpbIshky cBoIIepa H ydaJIte DepeKatelb FInIbItpa.Ecnn B BoIIepe HaxOJrTcH OCTaTKBODbl.To nepeBepHnTe npn6op n CneIe ee.
5.BCTaBbTe BPOHky FInIbTpBa DepKaTeJIb.HaKMnTe Ha KcTOp FInIbTpA NOTKINbTe erO HaaJ. - HanonHnTe BOpOHky fNtpa Do Heo6xOIMMoBbCOTbl MOIOTbM ECnPecCO-KoFe (Ha BHTpeHNHe qACTn BOpOHKn FIOIbTpA HMeETc MaKHPOBKa: 2 = 2aUKN, 4 = 4aUKN). PaBHOMePHo pacPepEnTe KoFe n CJIeKFa pINKMITE erO IIOKKoN.
BaxHoe npMueaHne: 3ta npOueDpya cnyKHT dIg 6oonee paBHOMepHO rpoacpeDeneHn KoFe no BOPOHKe FInbTp a He Iraero yNtOHeHH. NpePONHeHne FInbTp a MoXet npBecTN K bOKpOBKe nToKa Bobl Chee3 Hero, YTO
MOKET pINBecT N KONOMKe PpNbopa HnH HeCuaCTHomy Cnyuao. TuaTeIbHO ydaJIte C KpaEB FInbTpA BCE OCTaTKn KoFe.
7.BctabTe depKaTeIbΦnIbTaB B KINnTnIbHyIO rOIObky I, DnIrTO OTObI HaDeKHO 3aHKnCnPOBaTb Ero, NOBepHInTe pyKy BnpaBO (B HApBaBneHH).PpN 3OM o6paTIte BHIMAHHe HA To, YTObI depKaTeIbΦnIbTa PnPaBnIbHO nHaDeXHO CnDEI B rOIOBe KINnTnIbHnka, INaue Heo6paTMo BblOpblrBaHne Tropyero KOFe n3 np6opa.
8. HanonHnTe CTEKJIaHHy Kpykky Heo6xOIMMbIM KOINueCTBOM XOIOHOH BObl (He BblE MeTKN 4aWK). IepeneIte 3Ty B0y B6OpNep.
9. 3aKpOte BoHnep KpbIuKoN u 3aKpyTIne ee.
10. YctaHOBIne IyCTIyO CTekINHHyIO KpyKky Ha cepeINHy cETKN KANNEYIOBHTEIA.
11. BkHIOHTe np6Op B po3Ely C HApRJaHeHcETn 230 V, 50 Hz, yCTaHOBHeHHyO B COOTBeTCTBmC nPeDINCAHnMn. YcTaHOBITE KOHTPOIbHbN nepeKJIOUaTeNb B NOIOJeHne ,3aBapntb). CBeToHNdIKatop HaINHaET CBETNbCn. PnIMepHO uepe3 MInHytbl KoFe-3cnpecco HaINHaet NOCTyNaTb B CTekJIaHHy KpyKky. 3arOpaEt cIamNoYka .TOtOBo
12. KaTOnbKO npriroTOBnEHHe KOFe 3aKOHmIOcb, yCTaHOBnTe KOHTpOblHbI NpeEHIoateJIb B NOIOKeHHe BBIK. CHMNTe CTeKJIHHyIO KpyKKy C CETKN KaJIeyNOBtJIr.
13. Nocne okOHuaHn paObI, nepei cHTnem depKaTeJIa Hbtpa, nooJdnte HeCKoJIbKO CeKYH. 3aΦHKcpyte BOpOHky HbIbTpapn nOMoUu FNKcatopA. BbIKoTnTE OCTATKN MOIOTOro KoPe H3 FInbTpA. OUnCTHe np6Op kAc 3TO ONCAHO BΓaBe , YcNtKa H yXoJ 3a pnp6Opom
PnroToBneHne KannnyuHNO
Chauana npirotoBte Kofoe-3cnpecco, KaK 3TO 6blIO ONcaHOpahee,a 3aTeM NOCTyPnAte CNeDyUOIM Opa3OM:
- HanonHnTe rOToBbI KoFe-3Cnpecco B noDorpeTyIO(bIe) HauKy(II).
2.HanoHHTeCTeKJIaHHbIKoFeEHKXoIOHOIBOOIDOMCMBOJa
BHHMaHHe! CtpaBHe oCtatoHoe daBneHHe!
HaIINBaIte BOyTOJbKO Co6JIIOaIcneuaJIbHbIe yKa3aHnno TeXhNIke 6e3ONaCHOCTn!
- Hanai Te B pe3epBpyap yka3aHHe KOInueCTBO BObl.
- HanolHInTe CTeKJIHHYIO KpyKKy CBExKM, XOJIOHBIM MOLOKOM, OJHAKO He BbIe MeTKn, 4aUKN".ДЯ NOJUyeHnXOpOWe NeHbI Heo6xOdMIO pIPmEHTb MOLOKO NOBbIeHHOJ KINPHCTN!
- NpOCTaBbTe CTeKJIHHHyo KpyJHKy NOI napoBOe cOnNo.
- NOBEPHNTe KOHTpOJIbHbI nepeKIIHOaTeB B NOIOXKeHne NOdau napa. PnIMepHo ue3 1-2 MmHyTb I3 napOBoro COIIa HaHcHr NoCTyNaTb nap dA BCNEHbAHHa MOLOka.
- PnnoDbIMte ero taK, 406bl napOBoe conno norgpy3inocb BMOLOKa HnpimepHOnNoIcaHTmEtpa.MeIeHNOBepHtne KOHTPOlbHy nepeKIOuHaTeB NIOIOKeHne "Ponaya napa" (Dampf-Ablassung).Ns napOBORO cONla NaHnHaet NoCTynatb Nap N BCNeHNBaT b MOLOKO. YdepXHBa KOnHk napOBoro cONla noI camoI NOBepxHOCTbKO MOnOKa, nepemueaite COcyd KpyTOBbIMN
DINKHeHAM. KOrJa KOINueCTBO NHeI yBENuHTCRA, CnEka PnINoDbIMTe CTeKJIHHyO KpyKky, TAK YTO6bl KOHeu npaBOrO cOnla BCE Bpem HaxODINrCB MOnIOKe. PPOJONKaIte 3Ty nPoUeDpyB TceEHm PnIMepHO 45-90 CEyHd, Ha BaW BKyc INN NOKa OObEM MOLOKA yBENuHTcR HAnOpOBHy.CneIte 3a TEM, YTO6bl MONKO He nepePEnocb H He BCKIneNo, 3To TyT JHe yHNUTOKNT NeHy. He NorpyKaIte npaOBoe CoNlO B MONOk rIy6ke ODiHO rCaHTMEmTa. YIOBNETBOPHTeNBh pe3yNbTa DOCTHaETcR ecnn PocnyuBaETcRaPBnHOmeHHe. Pocne OKOHuaHra NpoUeDpyB BCNEHbAHnry UCTaHOBtE KOITpONbHb NepKIIouateNB B NOIOKeHHeBBkN. CTeKJIHHaR KpyKka coDePHTeNepb HAnOpOBHy NDoORPeToe MOnKO, HAnOpOBHy NeHy.
- PnI NOMOUI NOKKI DO6aBbTe NeHy I3 CTKJIaHHo KpyKKI B YAuKy(И) C rOTOBbIM KoFe-3cnpcecco. IpepeIe TyaJa KE octaTOK JxNdkoro MOnoka. KaNNyUHNO COCTOHT Ha ONDy TpeTb I3 K0Fe,Ha TpeTb I3 JxNdkoro,TopraHero I TpeTb BCNEHeHHOrO MONoka.
- UTo6bI y6eHnTcB r B Tom, He ocTaIOCb IIN B 6oJInepe npAOBoE DaJIeHHe O T npeBdyUeien paOBoI, NOCTaBBte NOI npAOBoE cOnIO COcyD C BODo N OKyHInTe erO B BOy. YcTAHOBITE KOHTPOJbHbI nepeKlIOuATEIb N NOIOKeHne "Noa npapa". EcnI np6Op cTOnN IOd DaJIeHEm, TO BOHa H bIxOde npAOBOr cOnla bEyITb.
Bakhoe npimeaHne:peed KaKdbIM HObIM BKIOUeHHeM C np6bopa Heo6XODnMo CnyCTnTb OcTaOHTHO daJIeHne napa. KaK TOnbKO 6ypNEHne BObl IpEkpATITCR, daJIeHne IOLHOCTbHO ynIaO. YcTAHOBITE KOHTPOlbHbI nepeKIOuHateB B NOLOKeHHeBBIKI. Nocne OKOHAnra paOToB,peepd CHrTHMe DEpKaTeRHaNbTpA,poJOKDInTe HeCKoNbKO cekyHd.3aFHKcpyte BOPOHky FnIbTpapn POMOUnn FnKCaTopa.BbIKONiTte OCTaTKM MONOTOr KoFe H3 FmIbTpA.OChNTe np6bop Ka3TO ONICAO BΓaBe, ChtKa HxOJD 3a np6bOpM
Pone3HbceCOBtbl
Дяучшень BKYCOBbIX KaueCTB ecPpecco-Kofoe nДЯ npedOTbpaUeHnOBpa3OBAHnHaKnIN B annapate peKOMeHdyETc pIIMeHrTb FInlTpOBAHHyIO BOHy IBOy N3 6ytbnok.ДиCunIpOBAHHyIO BOy He peKOMeHdyETc pIIMeHrTb, TAK KAK OHA HENPnATHa N63Bkycha.
Cekpet XopoWero BCNEHbAHMa MONoka JIeKHT B HAbBiKe, KOTOpBIMoKHO IpeoObpctu ToJIbKO peYJrApoH OYPaXHHcB B 3TOM.
EcnBpem npiroTOBHeHn KOe yINHAETc(KoFe n3 TOLOBKN KINPTNBLHnKa NOCTyNaET CNIWKOM MeDHeHO,TO npuHHO 3OTMy MOKeT 6bITb CNIWKOM MEJKO NOMOHTbIK KOe,3aBbIeHHaI DO3HPOBkA INCNIWKOM CINbHoe YNIOTHHe Hne eRO BΦINbTppe.
EcmBpme npirotoBneHn KOe yKopauBaetc (KoFe n3rnoBKn KINATbHnKa NOCTyNaET CnUkOM 6bICTpo),TO npuHOn 3OTMy MOKeT 6bITb CnUkOM rpyo NOMIoTbi KOe,3aHHKeHHa Do3npOBKa Hn CnUkOM Cna6oe yNIOtHeHHe erO BΦnIbTppe.
EcnBbIJIIO6te 60Jee IIOHTHyMOIOnHHyIO,NEHy"TOaIe TBCNEHeHHOMy MOLOKy pImepHo 30-60 ckyHn NocToTb, IN TOIbKO nOcne 3tOro doababeero B ecnpceco-KoFe.
- Ecnn HabIOaTc3HaHTeNbHOyeBENHHe BpeMeHN pInrTOBJIeHn KOFe H/INI rONOBKa KINrTINbHIKA IOCToHHo 3aIBaETcR, To Heo6xoDmO ydaNtB o6pa3OBaBswOcH aKKnB. HanOnHnTe 6oJIeP pactBOPOM dIyUdAeHn HAKINn Ha6a3E IIMOHHO KNCIObl (C6bIOJaTe Yka3AHN 3aBODa-N3rTOBNTEnI NO Do3nPOBKe). NocTyNaTe CoIaNcho NyHKTAM rIaBbl „pInrTOBJIeHne ecnPecco". Ondako 6e3 TOrO, YTO6bl HaCbInaTb MoIOTb KoFe B BOpOHky FInbTpal! NocNe ydaJIeHn HAKINn PpOHOHte annapat 2-3 pa3a TOnbKO c XJIOIDHO BOOD.
UHCTKa n yXoD 3a npH6Opom
- Ppeid nCTKoEe pa3 npouHTaTe yka3aHnNo TeHXnKe 6e30NaCHOCTN.
- BbInbte BnIky n3 po3eKn n daTe npnbopy ocTbIb.
-ДяудалениHaKINПпIMeHЯTeTOJIbKOcpeIcTbaHa 6a3eJIMMOHHONKICNOTbl.
BaxHoe npHmEaHne! Pocne ydaJIeHnHaKnn BCKNHTte B 3dJIIN HeckoIbKO pa3 BoY (npIM. 3-4 pa3a), KaJdb pa3 MeHRe ee Ha CBeJyO, YTObI ydaIITb OCTaTK. 3Ty BOy B NIIu Cy He ynotpe6IaTb.
- Pnprrte np6op uChbIM, BlaKhbIM pOnToTeHcEM.
- He npimehaTe HmkaKnx pactbOpnteJe.
- PpomoiTe BOpOHky FInIbTpA, DeepKaTeNb FInIbTpA, CTeknHHyN KpyKKy, KpbIuKy KoFeiHnKa, KOnnak 6oJIepa n CetKy-KanPeyNoBHTenb KaK OboHu BO MOIoUeM pactBope..
- He MoTHe HnKaknx DeTaJeB NocyDomOMeKe.
Дя OUCHTKn napOBORO cONla nocLe BCNEHbAHnro MOLOKa, DaIte npay BbICTyNaTb eEe npIMepHO 3cekHyDbI. 3aTeM yCTaHOBITE KOHTpOJIbHbI nepeKIIIOuATEnb B NOJOKeHHeBbIKI. IpOTpIte napOBoe cONIO YCHTBIM, BIAJHHbIM NOLOTEHcEM.
Будte octopokны! MeTaJIHueCKne YacTH napOBOrO conla CnIbHO HapReBaHOTcR!
Покладки
BHHMaHHe! PeryIaHPO KOHTpOINpyTe npOKJaKn B OTBepCTnN BoIIePa N DEpkAteNe FInbTpA. EcnI DePKaTeNb FInbTpA CnUkOM CBO6oHO CNHT B KINPAITILbHOI rOIOBe, TO pOKJaKa B rOIOBKe I3HOcHNaCb.
Onachoctb: Dejkatelb fHbItpa moKet cam OTKpyTHTcra nD daBHeHem npa.B 3tOM cIyuee 60JIbwe He noJIb3yItecb np6Opom, nKa B rOIOBKe He 6yJeT 3AmHeHa pOKlaJa.
TexHnueeckne daHHbIe
MoeIb: ES 1913 CB
3Jektponitahme: 230V,50Hz
Iotpe6nreMa MOnHocb: 800 BaTT
KnaCC 3aunTbI:
3To H3dJIeHHe IPOJLO BCE Heo6xOdombIe n AKTyAJIbHbIe npOBepKn, IpEINHCaHHbIe DInpeKTHBOI CE, K npHM. Ha 3JIeKTPOMaHTHHyO COBMeCTMIOCTb N COOTBETCTBNE Tpe6oBaHmK Hn3KOBoJbTHoT TEXHKe, OHO 6blIO TAKKe CCKHOpyuPObaHoN IOCTPoEOH C yUeTOM NOCJIeHNX Tpe6oBaHmNo TEXHKe 6e3OpNaCHOCTH.
Mbl octabnem 3a coo npabo Ha texhneckne nmehenra!
TapaANTHnHOe 683aTeIbCTBO
TapaHnHbI cpoK Ha TeppHTOpm Pocnncko FedepaunnyCTaHaBnBaETcN NtHOMOHyBMIM npedCTaBNTeJAMN.
KaccobbIyekBnIeTcraPaHTHbIM TaHOHc.Be3 HrOHeBO3MOKeH 6ecnlaTHbIpeMOHTIN3aMeHa 3dEInr.
B cnyae BO3HKNHOBKHnnpHTeH3n no rapaHTn, npeTBnTE 13JeIne B NOHOBKOMNKeTauHH, C opHnHaJIbHOI yNaKOBHOI n KACCObbIM YeKOM TOpROBToTKe, npOdaBWe 3To H3dJIeHe.
DeΦeKtBi 3HaWuBaEMbIX PnHAdIeKHOCTe IIN TpyUxCN DeTanei, a TaKKe YNCTKa, TexOcLyKuBaHne IIN 3aMeHa TpyUxCN DeTanei He NoJaAOT NOr rapaHTNO, I N03ToMy npOBoRrCa 3a OTdEhHyO ONlnty!
TapaHTn TepaETc npBckpbTHn H3deJIIN NOCTOPOHHIMN liuamH.
Pocne rapaHTm
Iocne oKoHuaHn Cpoka rapaHTn,peMOHT n3deJn npOn3BODNTc3a OnNAty, COOTBeTCTByUOUMM MaCTepCKHM nnnyHKtAMn CepBnCHOrO 06CnyKbHaHn.
BOMANN®
C. Bomann GmbH
Heinrich-Horten-Str. 17 - 47906 Kempen
Tel.: 02152/8998-0·Fax: 0 2152/8998911
e-mail: mail@bomann.de · Internet: www.bomann.de


- FRANÇAIS
- JEZYK POLSKI
- Sommaire
- General Safety Instructions
- Children
- Special Safety Instructions
- Illustration 1
- Symbols on the Switch
- Before using for the first time
- Follow carefully the Safety Instructions!
- How to make an Espresso
- How to make a Cappuccino
- Useful Tips
- Cleaning and Maintenance
- Seals
- Technical Data
- Guarantee
- After the expiry of the guarantee
- Meaning of the "Dustbin" Symbol
- PnroTOBJIeHne ecnpcecco
- PnroToBneHne KannnyuHNO
- BHHMaHHe! CtpaBHe oCtatoHoe daBneHHe!
- Pone3HbceCOBtbl
- UHCTKa n yXoD 3a npH6Opom
- Покладки
- TexHnueeckne daHHbIe
- TapaANTHnHOe 683aTeIbCTBO
- Pocne rapaHTm
- BOMANN®
Brand : BOMANN
Model : ES 1913 CB
Category : Coffee machine