
SR 4322 CDMP3 - Cd player/recorder AEG - Free user manual and instructions
Find the device manual for free SR 4322 CDMP3 AEG in PDF.
| Product type | CD player/recorder with radio |
| Brand | AEG |
| Model | SR 4322 CDMP3 |
| Mains power supply | 230 V, 50 Hz |
| Battery power supply | 6 x 1.5 V, type UM2/R14 |
| Power consumption | 18 W |
| Protection class | II |
| Net weight | 2.0 kg |
| CD compatibility | Audio CD, CD-R, CD-RW, MP3 CD |
| Maximum number of MP3 tracks | Up to 200 |
| FM radio ranges | 87.5 – 108.0 MHz |
| AM radio ranges | 530 – 1640 kHz |
| Antenna | Telescopic for FM, built-in for AM |
| USB playback | Yes (USB storage devices) |
| Memory card playback | Yes (SD/MMC) |
| Remote control | Yes, infrared |
| Playback functions | Play, pause, stop, skip, search, repeat (1, all, album), random, program |
| Clock | 12h display, setting with SET, HOUR, MIN buttons |
| Headphone jack | 3.5 mm stereo jack |
| Laser safety | Class 1 |
| Cleaning | Soft slightly damp cloth, unplug before cleaning |
Frequently Asked Questions - SR 4322 CDMP3 AEG
User questions about SR 4322 CDMP3 AEG
0 question about this device. Answer the ones you know or ask your own.
Ask a new question about this device
Download the instructions for your Cd player/recorder in PDF format for free! Find your manual SR 4322 CDMP3 - AEG and take your electronic device back in hand. On this page are published all the documents necessary for the use of your device. SR 4322 CDMP3 by AEG.
USER MANUAL SR 4322 CDMP3 AEG
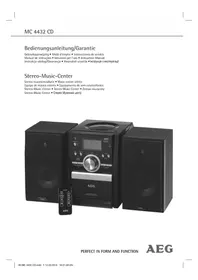
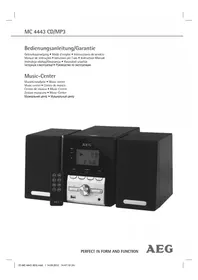
Radio stereo conlettore CD/MP3 · Stereo radio with CD/MP3 player
Stereoradio med CD/MP3-spiller · Radio stereofoniczne z odtwarzaczem CD/MP3
Stercorádio s CD/MP3 prehrávacem Szterco rádio CD/MP3 lejatszóval
CtepeofoHueckn paHIOpMmHK c CD/MP3-PIeieepom

PERFECT IN FORM AND FUNCTION
AEG
Deutsch
Inhalt
Overview of the Components.. Page 3
Instruction Manual. Page 46
Technical Data Page 50
Jczyk polski
Spis tresci
D-47906 Kempen/Germany
5 Bandkeuzeschakelaar (FM.ST / FM / AM)
Touche PLAY/PAUSE (Lecture/Pragge de I'heure (Au mode veille (OFF))
21 Fente de carte
Face arrière
22 Touche SET (Heure)
23 Touche HOUR (Heures)
24 Touche MIN (Minutes)
25 PHONES Prise casque
26 Raccordement electrique AC
27 Compartiment à piles
Télécommande
1 Touche
II (Lecture/Pause)
2 Touche PROGRAM (membre)
3
ches SKIP+ / SKIP-
3 Compartmento de CDs
regulador
4
TUNING
regulador
5 Selector de bandas (FM.ST / FM / AM)
$$ A M = \text {m a n h} \tilde {a}; P M = \text {t a r d e}. $$
INDICACAO:
Colocar as bacterias
+10 TRACK (5 do commando)
PRODUCT TO IEC 60825
LASER KLASSE 1
NACHIEC60825
store bande (FM.ST / FM / AM)
6
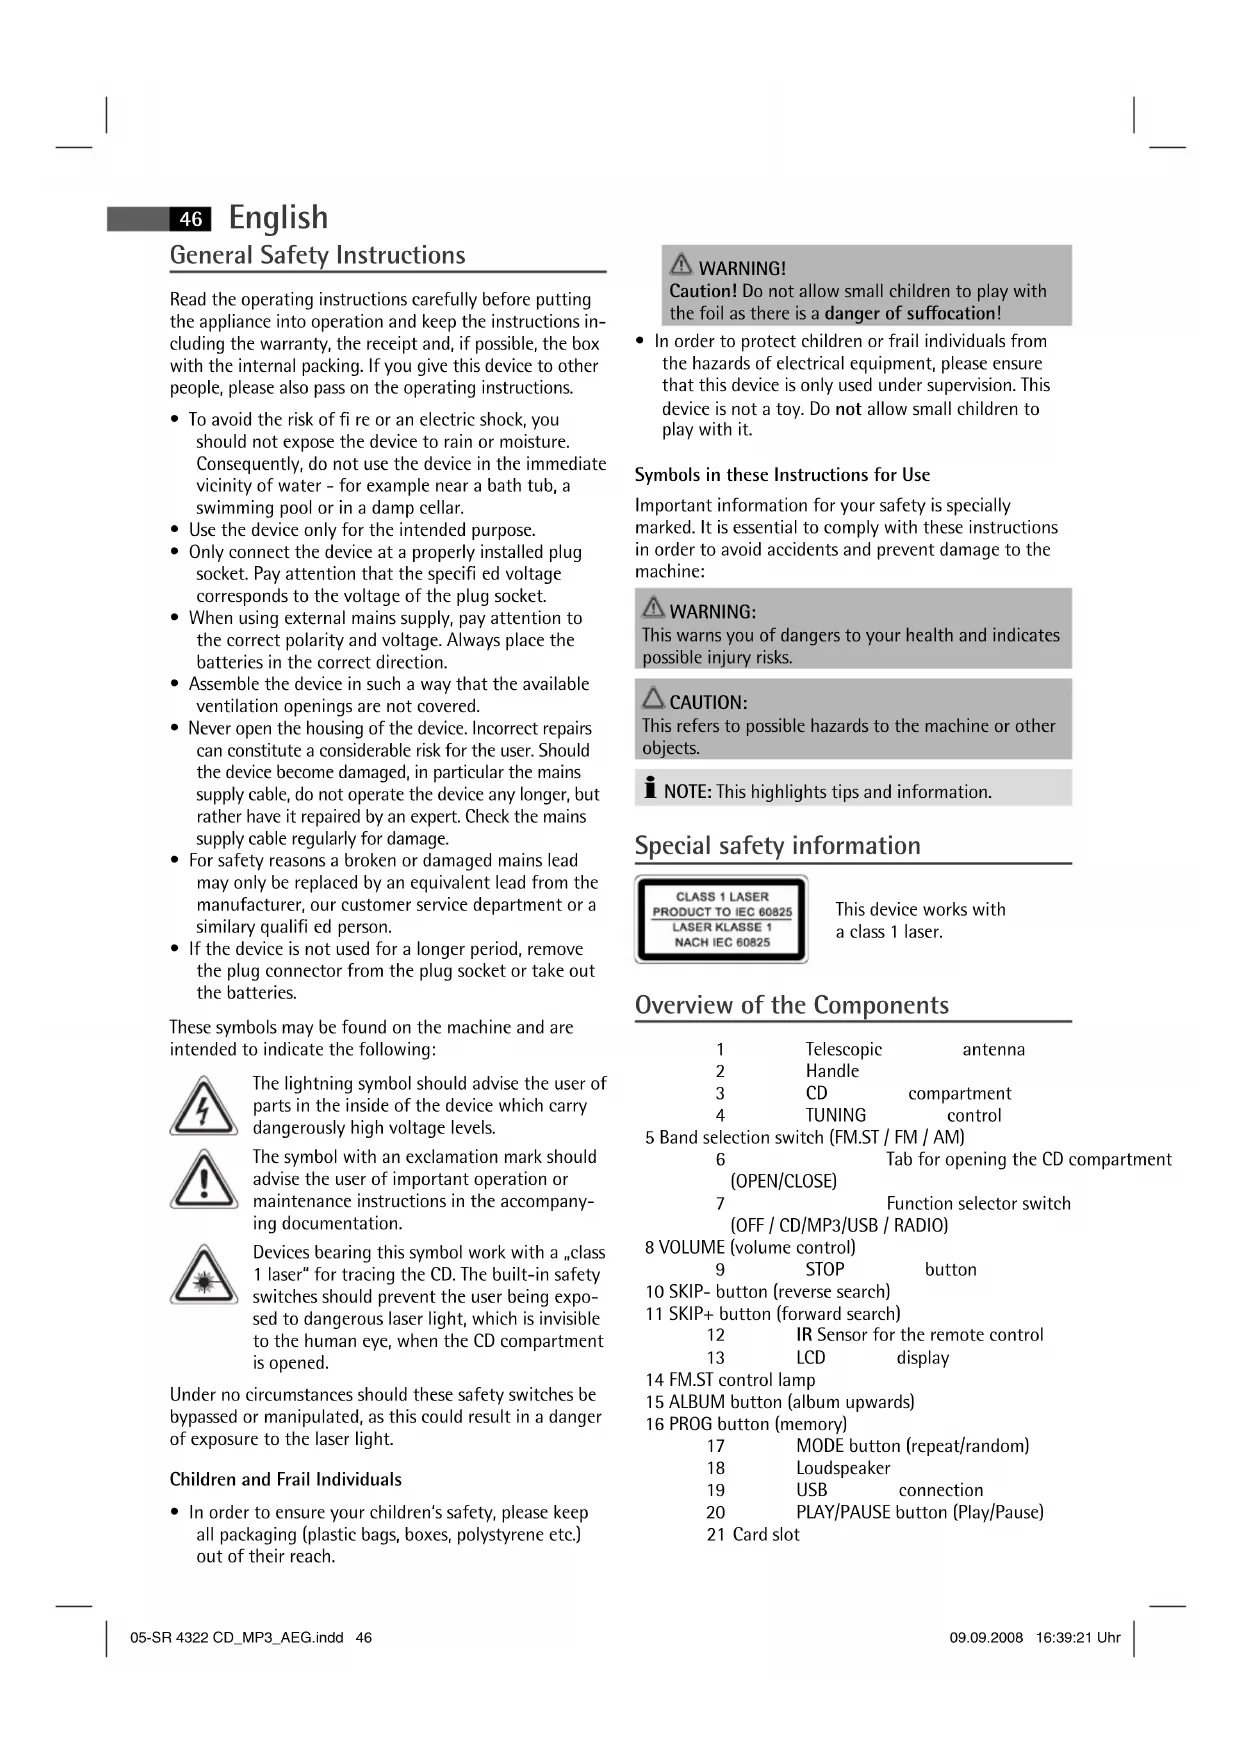
General Safety Instructions
Read the operating instructions carefully before putting the appliance into operation and keep the instructions including the warranty, the receipt and, if possible, the box with the internal packing. If you give this device to other people, please also pass on the operating instructions.
- To avoid the risk of fire or an electric shock, you should not expose the device to rain or moisture. Consequently, do not use the device in the immediate vicinity of water - for example near a bath tub, a swimming pool or in a damp cellar.
- Use the device only for the intended purpose.
- Only connect the device at a properly installed plug socket. Pay attention that the specified voltage corresponds to the voltage of the plug socket.
- When using external mains supply, pay attention to the correct polarity and voltage. Always place the batteries in the correct direction.
- Assemble the device in such a way that the available ventilation openings are not covered.
- Never open the housing of the device. Incorrect repairs can constitute a considerable risk for the user. Should the device become damaged, in particular the mains supply cable, do not operate the device any longer, but rather have it repaired by an expert. Check the mains supply cable regularly for damage.
- For safety reasons a broken or damaged mains lead may only be replaced by an equivalent lead from the manufacturer, our customer service department or a similar qualified person.
- If the device is not used for a longer period, remove the plug connector from the plug socket or take out the batteries.
These symbols may be found on the machine and are intended to indicate the following:

The lightning symbol should advise the user of parts in the inside of the device which carry dangerously high voltage levels.

The symbol with an exclamation mark should advise the user of important operation or maintenance instructions in the accompanying documentation.

Devices bearing this symbol work with a "class 1 laser" for tracing the CD. The built-in safety switches should prevent the user being exposed to dangerous laser light, which is invisible to the human eye, when the CD compartment is opened.
Under no circumstances should these safety switches be bypassed or manipulated, as this could result in a danger of exposure to the laser light.
Children and Frail Individuals
In order to ensure your children's safety, please keep all packaging (plastic bags, boxes, polystyrene etc.) out of their reach.

WARNING!
Caution! Do not allow small children to play with the foil as there is a danger of suffocation!
- In order to protect children or frail individuals from the hazards of electrical equipment, please ensure that this device is only used under supervision. This device is not a toy. Do not allow small children to play with it.
Symbols in these Instructions for Use
Important information for your safety is specially marked. It is essential to comply with these instructions in order to avoid accidents and prevent damage to the machine:

WARNING:
This warns you of dangers to your health and indicates possible injury risks.

CAUTION:
This refers to possible hazards to the machine or other objects.

NOTE: This highlights tips and information.
Special safety information

This device works with a class 1 laser.
Overview of the Components
1 Telescopic antenna
2 Handle
3 CD compartment
4 TUNING control
5 Band selection switch (FM.ST / FM / AM)
6 Tab for opening the CD of (OPEN/CLOSE)
7 Function selector switch (OFF / CD/MP3/USB / RADIO)
8 VOLUME (volume control)
9 STOP button
10 SKIP- button (reverse search)
11 SKIP+ button (forward search)
12 IR Sensor for the remote control
13 LCD display
14 FM.ST control lamp
15 ALBUM button (album upwards)
16 PROG button (memory)
17 MODE button (repeat/random)
18 Loudspeaker
19 USB connection
20 PLAY/PAUSE button (Play/Pause)
21 Card slot
Reverse Side
22 SET button (time)
23 HOUR button (Hours)
24 MIN button (minutes)
25 PHONES Headphones connection
26 AC Mains connection
27 Battery compartment
Remote Control
1 II button (Play/Pause)
2 PROGRAM button (memory)
3 SKIP + / SKIP - buttons (forward search/reverse search)
4 ALBUM UP button (album upwards)
5+10 TRACK button
6 MODE button
7 STOP button
Intended Use
This device is used for:
The reception of radio programmes
- Playing back audio/MP3 CDs.
It is intended exclusively for this purpose and may only be used as such. It may only be used in the manner described in these instructions for use. The device must not be used for commercial purposes.
Any other use of this device is considered to be contrary to the intended use and may result in damage to materials or even personal injury.
The firm ETV - Elektro-Technische Vertriebsgesellschaft mbH does not accept any liability for damage caused as a result of the use of this device contrary to its intended use.
Start-up of the device/introduction
- Please read the operating instructions carefully before using the device for the first time!
- Select a suitable location for the device, such as a dry, flat, non-slip surface on which it is easy to operate the machine.
- Ensure that the device is sufficiently ventilated!
- Remove the protective fi lm from the display if it is still present.
Power Supply
- Connect the power cable supplied (see battery compartment if necessary (27)) to a properly installed 230V / 50Hz safety power socket and the mains connector AC (26) on the back of the machine.
- Ensure that the voltage is the same as that indicated on the model identifi cation plate.
Setting the Time (in standby mode (OFF))
- Keep the SET button (22) pressed down.
- Press the HOUR button (23) in order to set the hours. Keep the button pressed down until the desired hour is reached.
- Press the MIN button (24) in order to set the minutes. Keep the button pressed down until the desired minutes are reached.
The time is stored automatically.
I NOTE:
The time is a 12 hour display.
AM = in the morning; PM = in the afternoon/evening.
I NOTE:
Storage/display of the time is lost as soon as the electricity supply is interrupted. If you would like the time to be displayed even when the device is not connected to the mains, place two batteries of type UM2/R14 1.5 V into the recess of the battery compartment (batteries not supplied). To do this, open the battery compartment cover on the bottom.
Inserting the Batteries (not supplied)
- Open the lid of the battery compartment (27) on the bottom.
- Insert 6 batteries of type UM2/R14 1,5V. Please ensure that the polarity is correct (see the floor of the battery compartment)!
- If the device is not used for a long period of time, remove the batteries to avoid the spilling of battery acid.
- Then close the battery lid.
I NOTE:
When a mains cable is connected the batteries are automatically switched off.
CAUTION:
- Different battery types or new and used batteries must not be used together.
- Batteries are not to be disposed of together with domestic wastes. Dispose of the used batteries at the relevant collection bin or at your dealer's.
WARNING:
Do not expose the batteries to high temperatures or direct sunlight. Never throw batteries into the fire. There is a danger of explosion!
Transport Safety Device, CD Compartment
- Open the CD compartment (3) by pulling the lid upwards by the tab (6).
- Before operating the machine for the first time, remove the transport safety device from the CD player if it is still in place.
English
Headphone Socket (25)
Please use headphones with a 3.5mm stereo jack plug; these should be inserted into the PHONES socket. The loudspeakers are then switched off.
Volume
The desired volume can be sent using the VOLUME / regulator (8).
Switch-off
The machine is switched off when the function selector switch (7) is turned to the OFF position. The time display appears. Unplug the device.
USB Connexion (19)
This device has been developed in accordance with the latest technical developments in the USB fi eld. Unfortunately the large number of diff erent types of USB storage media on off er today makes it impossible to guarantee full compatibility with all USB storage media. For this reason there may be problems in rare cases with playing back from USB storage media. This is not a malfunction of the device.
- Turn the function selector switch (7) to the CD/MP3/USB position.
- Keep the II PLAY/PAUSE button (20/1) pressed down in order to select USB mode. USB appears in the display.
- Connect a USB storage medium. After a few seconds the total number of tracks appears briefly and then playback begins. The current song and the letters MP3 and USB appear in the display.
For operating instructions please see the section "Playing CDs/MP3s".

NOTE:
If there is no CD in the CD compartment at the same time, the USB connection is automatically selected.

CAUTION:
Before you remove the USB storage medium turn the function selector switch (7) to the RADIO position.
Card slot (21)
- If you would like to play back data on an SD/MMC card please insert it into the opening provided.
- Turn the function selector switch (7) to the CD/MP3/USB position.
- Keep the II PLAY/PAUSE button (20/1) pressed down to select CARD mode. CARD appears in the display. After a few seconds the total number of tracks appears and then playback begins. The current song and MP3 and CARD appear in the display.
For operating instructions please see the section "Playing CDs/MP3s".

NOTE:
If a USB storage medium is connected it is not possible to select the memory card.
- If there is no CD in the CD compartment at the same time, the card slot is automatically selected.
Listening to the Radio
- Turn the function selector switch (7) to the RADIO position.
- Use the band selector switch (5) to select the desired frequency band.
$$ \begin{array}{r l} \text {V H F (S t e r c o)} & = \text {F M S T .}, \text {V H F} = \text {F M ,} \ & \text {M e d i u m w a v e} = \text {A M (M o n o)} \end{array} $$
- Tune in the desired station with the station adjustment knob TUNING (4).
- The FM.ST control lamp (14) only lights up when you have selected FM stereo and the station is being received in stereo quality. If reception is too weak and there is noise on the station being received, this lamp will flicker. Where reception is bad we recommend switching to FM.
- For VHF/FM mode pull out the telescopic antenna (1) and turn it to improve reception.
- An aerial is integrated into the device for the reception of AM stations. The machine can be aligned to the station by turning it. In this frequency band programs are transmitted in "mono" only.
Playing CDs/MP3
This is how you play a CD
- Turn the function selector switch (7) to the "CD/MP3/USB" position. The time display appears.
- Open the CD compartment (3) by pulling the lid upwards by the tab (6).
- Insert an audio CD with the printed side facing upwards on to the central cone so that the CD clicks into place and then close the lid of the CD compartment.
- After a few seconds the total number of songs/tracks is shown in the display.
- The CD will play from the first title. The track currently being played, or MP3 are shown in the display.
- In order to remove a CD, please press the STOP key (9/7), open the CD compartment and lift the CD out carefully.
Always keep the CD deck closed.

NOTE:
- In the case of CDs in MP3 format that contain folders, when the device changes to a different folder 001 appears for the first track of the new folder.
NOTE:
- If a disc is incorrectly inserted - or no disc has been inserted - the symbol n and the word "no" appear in the display.
- Playback of CDs produced by the user cannot be guaranteed due to the large variety of software and CD media available.
Description of the CD buttons
NOTE:
Some keys are to be found both on the device itself and on the remote control. Keys with the same designation have the same function.
II PLAY/PAUSE (20)
Pressing briefy:
You can briefly interrupt and resume playback using this button. The symbol fl ashes in the display. Pressing again continues playback.
Pressing for a longer time:
Selects the USB connection or card slot.
SKIP + / SKIP - (11 / 10 / 3)
With an audio CD or a CD in MP3 format playing:
With SKIP + you can jump to the next or previous track etc.
- If the button is kept pressed down, the machine starts to search through the tracks.
The SKIP - button can be used as follows:
Press once = This jumps back to the previous track.
Press twice = This plays the song before etc. If the button is kept pressed down, the machine starts to search through the tracks.
NOTE:
In the case of CDs in MP3 format that contain folders, when the device changes to a different folder 001 appears for the first track of the new folder.
STOP (9/7)
The CD stops.
MODE (17/6)
With an audio CD or a CD in MP3 format playing:
Press once = (the REP emits a fixed light) the current track is repeated continuously.
Press twice = (the REP ALL emits a fixed light) the whole CD is played continuously.
Press three times = the display contains the word RAND and the track number that is to be played first. All tracks are played back in random order.
Press four times = all functions are cancelled. The normal play mode is resumed.
Only for CDs in MP3 format
Press once = the current track is repeated continuously (REP appears in the display).
Press twice = the selected folder of the MP3 CD is repeated continuously (REP ALBUM appears in the display). Use the ALBUM UP button (15/4) to select individual folders.
Press three times = the whole CD is played continuously (REP ALL appears in the display).
Press four times = the display contains the word RAND, MP3 and the track number that is to be played first. All tracks are played back in random order.
Press five times = the function is deactivated and the CD is played in the normal mode.
ALBUM UP (15/4)
Press this button during playback to change to a higher folder. The display, e.g. ALBUM 001, fl ashes briefy. Then the CD begins to play back automatically. If the button is pressed in stop mode the display also fl ashes. Then start playback with the II PLAY/PAUSE button.
+10 TRACK (5 on the remote control)
Press this button to jump forwards 10 tracks at a time (provided that there are more than 10 tracks stored on the CD).
Programmed Play
This can be used to program any desired sequence of tracks.
- Press the STOP key (9/7).
- Press the PROG(RAM) key (16/2). The number "P01" (storage location) and the symbol PROG fl ash in the display. Use the SKIP+/SKIP- buttons (11/10/3) to select the desired track and then press the PROG(RAM) button again. The display changes to memory slot P02.
I NOTE:
- In the case of CDs in MP3 format only the titles within the current ALBUM are selected. Press the ALBUM UP button (15/4) to change the folder.
- In the case of CDs in MP3 format that contain folders, when the device changes to a different folder 001 appears for the first track of the new folder.
50
English
- Select the next track with the SKIP+/SKIP- key and press the PROG(RAM) key again. Repeat the procedure until all the desired tracks are selected.
- Press the II PLAY/PAUSE key (20/1). The playback starts. The first track number selected appears in the display and or MP3 and PROG light up. Press this button to pause briefly the playback.
- Press once the STOP key to stop the playback while retaining the program.
- To play the programme back again, press the▶I PLAY/PAUSE button.
- In order to delete the programme, first press the PROG(RAM) button in stop mode and then the STOP button. The PROG control lamp goes out.
The device stops automatically once the entire sequence of programmed tracks is completed. The abbreviation PROG goes off and the programmed order of tracks is deleted from the memory.
It is also possible to combine the programmed tracks with the REPEAT function. After you have programmed and started the device, please press the MODE button (17/6) up to three times and then you can use the functions as described under MODE".
Playing back Music in MP3 Format
With this device it is possible to play back pieces of music in MP3 format. The device also supports all standard CD types: CD, CD-RW, CD-R.
This machine of is able to play MP3 CDs. Up to 200 tracks can be compressed and stored on these CDs. Your machine detects an MP3 CD automatically (the total number of tracks and MP3s appears in the display). If you would like to play one of these CDs, proceed as described under "Playing CDs/MP3". Tracks can be programmed as described under "Playing Back Programmed Tracks".
Please note:
There are a number of diff erent recording and compression methods, as well as quality differences between CDs and self-recorded CDs.
Furthermore, the music industry does not adhere to fixed standards (copy protection).
For these reasons it is possible that in rare cases there are problems with the playback of CDs and MP3 CDs. This is not a malfunction of the device.
Cleaning and Maintenance
Always remove the mains plug before cleaning the machine.
- Any marks on the surface can be wiped off with a slightly damp cloth without any additives.
Troubleshooting
| Symptoms Course Solution | ||
| CD can not be played back. | CD is not inserted or inserted incorrectly. | Ensure that the disc is inserted with the label facing upwards. |
| Batteries too weak. | Insert new batteries or operate the device with the mains lead. | |
| CD jumps during playback. | Check the disc for fingerprints, dirt or scratches. | Check the disc for fingerprints, dirt or scratches. |
| Memory card does not play back or cannot be selected. | A USB storage medium is connected at the same time. | Remove the USB storage medium. |
Technical Data
Model: SR 4322 CD/MP3
Power supply: 230 V, 50 Hz
Battery operation: .6 x 1,5 V, Type UM2/R14
Power consumption: 18 W
Protection class: II
Net weight: 2,0 kg
Radio section:
Frequency ranges: VHF / FM 87,5 ~ 108,0 MHz MW / AM 530 ~ 1640 kHz
This device has been tested according to all relevant current CE guidelines, such as electromagnetic compatibility and low voltage directives, and has been constructed in accordance with the latest safety regulations.
Subject to technical changes without prior notice!

Meaning of the "Dustbin" Symbol
Protect our environment: do not dispose of electrical equipment in the domestic waste.
Please return any electrical equipment that you will no longer use to the collection points provided for their disposal.
This helps avoid the potential effects of incorrect disposal on the environment and human health.
This will contribute to the recycling and other forms of reutilisation of electrical and electronic equipment.
Information concerning where the equipment can be disposed of can be obtained from your local authority.
Język polski
51
8 VOLUME (regulator sily glosu)
52 Jezyk polski
9 Przycisk STOP
22 SET gomb (pontos idô)
23 HOUR gomb (Ora)
24 MIN gomb (per
25 PHONES
URH (sztcrco) = FM ST., URH = FM, kozéphullam = AM (mono)
(peKHM pe3epBa/CTeH6aI(OFF))
- HauKmte n depKhte hauKaToI KhoNky SET (22).
HaKMITE KhoNky HOUR (23), YTObIy yCTaHOBtB nOKa3AHnYacOB. IepKHTe ee HaKaToI Do yCTaHOBHeHry HxHBIX NOKa3AHn.
YtObI yCTaHOBnTb NOKa3AHnMnHYT HaKMITE KHONKY MIN (24). DePKeITe ee HaKaToN Do YCTaHOBJIeHn HyKhbIX nOKa3AHn. - YctaHOBJIeHHOE BpEMr 3aIOMnHaEeTcABTOMaTHueckn.

IPIMMEUHNE:
YacbpaobatoHb12aocOBompeKImeHHnKaun.
AM=do noJyH;PM=nocne noJyH.

IPIIMEYAHNE:
PamrB/nok3aHne yacob 6ydt NotepHa kak TolbKO npepBcTcNoaaye 3NeKtpo3Heprn. Ecn BxOHTe, YO6bl acsb bbl BN KBIIOHEnIOCTOHNHO, TaKHe n pnp OTKIOHEnNt OT 3NeKtpocTe,TO BCTaBbTe 2 BatapeKn TIN UM2/R14 1,5 VByrnybEHeNEOTdeneHnI DnB 6atapeek. (BaatapeKn He BXODAT B KOMPiKeT NocTaBKn).DnA 3TOI OTKpoTe KpbIshky OTdeneHnI DnBatapeek Ha HnKHe CTopoHe.
BCTaBHe 6aTapeek (6aTepeKn He KOMNJIeKTyOTcA)
- OTKpoIte KpbIuKy otceKa 6aTaapeek (27) Ha HnKHei CTopoHc H3dEINr.
BctabBe BOTcE6 6aTapeek Tna UM 2/R14 1,5V. CneInte 3a npabnIbHO nIpaHocTBIO (CMOTpn IHO OTcKa)! - Ecnn n3dennne doonroe Bpemr He 3KcnnyaTnpyetc, peKOMeHnyETcB bHyTb 6atapeKn, YTo6bl PpeoTbpaNTb INX «BbITEKaHHe».
3aKpoTe oTceK.

IPIMMEUHNE:
KaK TOnbKO pa3bEM CTeBOrO UHypa 6yIeT BCTaBnE H N3dJIne, NITaHHe OT 6atapeek AToMaTHueCKN OTKJIHOaETCA.

BHIMAHNE:
HnB Koem Cnyuae He MeuaTe HOBle 6aTapeKKn CoCTapbIMn, a TaKKe C 6aTapeKamn DpyTHNIOB.
HeBbIbPaBbAte6batapeMnBDOMaunHmMycop. POnKaJyNcTaCdaTeOTpa6oTaNHbIe 6batapeMnHa CneuJaBHbHInyHKTINPHeMa ININBTOpROByTOky.

IPEyIpyEHHEHEH:
He noBepraTe 6atapeKn CnIbHomy HarpBeBy nnn B03deNCTBnIO npAmbix cOnHeuHbIX nyueH. HnKOrda He 6pocaiTe 6atapeKn B orHOb.CyueCTByeT onaCHOctb B3pbBa!
TpaHcnpTHa ynakOBka CD nneepa
- OTKPOnte OTCEK CD (3), NOTAHYB BBepx KpbIky 3a nenecToK (6).
- PpeB BkHoueHEm ydaJIte H3 npOnrpBbATEJI TpaHCnOpTHyO yNaKOBky, eCNI TaKOBa IMeETCA.
THe3IO NOJKNHOeHnHayuHNKOB (25)
SKIP+/SKIP-(11/10/3)
Bo Bpem Bocnpon3BedeHn Dncka B FopMaTe Audio-CD nIIMP3:
Pn NOMOu KNHONK SNIP+MOxHO nepeepbHyTb Ha cnEduoIyUIO INI pdeBdyUO DOpOxy.
- EcnI depKnatb KhoNky HaaKato, To BKnHouHTcpeKIM nonCKa.
Pycckn
73
Khonka SKIP - mMeet cneyuoune ykuu:
1xpa3aHaKaTb= CkaQOK K npdeIdyuee IdoopKke.
2xpa3aHaKaTb= CkaQOKKcneDyHoueIopOKe H.T.I.EcJI NepKaTaB KHOKNy HaKaToI,TO BKNIOHTCpeXIMNONCKA.
I INPIMEUYAHNE:
Pn noB3oBAHH CD B φopMate MPc pa3nHbIMn
paHnMn, pni CmHe OJHO 0aHa Ha DpyRo IOBHReTc
001, YTO O3NaAeT nepByIO neChIO HOBOrO 0aHa.
STOP (9/7)
KOMnakT-DINCKOCTAHOBHTCA.
MODE (17/6)
Bo BpemBocnpo3BeDnA DnCKa BΦopMaTe Audio-CD nIIMP3:
1x pa3 HaKaTb = (REP CBeNTcH HenpepbIbHO) BOCPON3BODIMa HA DaHHbIM MOMENT neCHy ByET HenpepbIBHO NOBOTpTaBCr.
2x pa3 HaKaTb = ( REP ALL CBETnCTc HEnpepbIBHO) BECb KOMNaKT-DnCK 6yDet HEnpepbIBHO NOBTOpTaCB.
3x pa3 haKaTb = Ha dncJIe e NOBHTc COo6ueHne RAND n HOMep 3aIncn, KOtOpA8 dyTe BOCpOu3BODITbCn nepBoi. Bce 3aIncn 6dyT BOCpOu3BODITbCn OHa 3a DpyToB CnyaHOM nopJKe.
4x pa3 HaKaTb = BCE ΦyHKuH BbKlNoHaIOTc. Bocnpou3BeDeHne npOdoJXHTbcB HOpMaJIbHOM peKHMe.
TolboKdIaCD dncBc3aHncbIO BΦopMaTe MP3
1x pa3 HaKaTb = TeKyuzaI IopOka 6yIeT NoCToHNOBTOpTaBCa (Ha DnCIIee NOBHTCR REP).
2x pa3 hαkaTb = Bb6paHnHa nanka CD nCkca 3aHncbB BΦopMaTe MP3 6ydt NOCTOHHO BOCpOn3BOAnITbcra (Ha nCnIe NORBNTcR REP ALBUM). Pn nOMoU KHOKN ALBUM UP (15/4) DeNaETcRa Bb6Op nANKN.
3x pa3 HaKaTb = BeCb CD-ДИСК 6уДET NOCTOHHO
NOBTOPaTBcR (Ha DnCnIeE NOBHTCR
ALL).
4x pa3 haKaTb = Ha dncJIeep noBHTc coo6ueHne RAND, MP3 n HOMep 3aIncn, KOtOpA8 6ydt BocnpOu3BOuNTbc npBoi. Bce 3aIncn 6ydt BOCpOu3BOUntbc OHa 3a npYroB CnyauHOM npHKe.
5x pa3 HaxaTb = DeakmbpyetcH BOCpOn3BedeHHe CDnCKa nepeiET B HopMaIbHbI peKIM.
74 Pycckn
ALBUM UP (15/4)
HaKMnTe 3Ty KHOHKnY BO BpEm RA BOCpnON3BeDEHnRA, YTO6bI nepeTn Ha OndHy NaNkY BblEe. Coo6UeHne, K npMepy ALBUM 001, Mraet HeKOTOpoe BpEMr. Pocne 3TOrABOTOMaTHueckn CTapTyETcBOCpnON3BeHne CD-DnCKa. EcJn DEpaKaTb 3Ty KHOKNy HaxatoB pexHmE Stopp, To Ha DnCnIe TAKKe 6yJeT MIRATb COo6UeHne. Pocne 3TOrO CTapTyBEOCpnON3BeHne npn NOMOu KNOHKn II PLAY/PAUSE.
+10 TRACK (KhoHa 5 Ha Πy)
HaKIMMaTe Ha 3Tu KHOnKy, YTO6bIc KaKdBIM HaKaHtHeM nepeCKaKNBaTb BnepEi Ha 10 3aRrOBoKBo (ecm Ha KOMnAeTDCKe HMeetc60one 10 3arOBoKBo).
3neKtponHtAnHe: 230B,50T
MbOCTaBnem3aCobO npaBOHaTexHueckne H3MeHeHnI!
GARANTIE-KARTE

- Deutsch
- Inhalt
- Jczyk polski
- Spis tresci
- Face arrière
- Télécommande
- INDICACAO:
- Colocar as bacterias
- +10 TRACK (5 do commando)
- PRODUCT TO IEC 60825
- General Safety Instructions
- Children and Frail Individuals
- WARNING!
- Symbols in these Instructions for Use
- WARNING:
- CAUTION:
- Special safety information
- Overview of the Components
- Reverse Side
- Remote Control
- Intended Use
- Start-up of the device/introduction
- Power Supply
- I NOTE:
- Inserting the Batteries (not supplied)
- WARNING:
- Transport Safety Device, CD Compartment
- English
- Headphone Socket (25)
- Volume
- Switch-off
- USB Connexion (19)
- NOTE:
- Card slot (21)
- Listening to the Radio
- Playing CDs/MP3
- This is how you play a CD
- Description of the CD buttons
- II PLAY/PAUSE (20)
- SKIP + / SKIP - (11 / 10 / 3)
- STOP (9/7)
- MODE (17/6)
- ALBUM UP (15/4)
- +10 TRACK (5 on the remote control)
- Programmed Play
- 50
- Playing back Music in MP3 Format
- Please note:
- Cleaning and Maintenance
- Technical Data
- Meaning of the "Dustbin" Symbol
- Język polski
- Jezyk polski
- (peKHM pe3epBa/CTeH6aI(OFF))
- IPIMMEUHNE:
- IPIIMEYAHNE:
- BCTaBHe 6aTapeek (6aTepeKn He KOMNJIeKTyOTcA)
- BHIMAHNE:
- IPEyIpyEHHEHEH:
- TpaHcnpTHa ynakOBka CD nneepa
- THe3IO NOJKNHOeHnHayuHNKOB (25)
- SKIP+/SKIP-(11/10/3)
- Pycckn
- I INPIMEUYAHNE:
- Pycckn
- +10 TRACK (KhoHa 5 Ha Πy)
- GARANTIE-KARTE
Brand : AEG
Model : SR 4322 CDMP3
Category : Cd player/recorder