4521 - Alarm clock radio ELTA - Free user manual and instructions
Find the device manual for free 4521 ELTA in PDF.
User questions about 4521 ELTA
0 question about this device. Answer the ones you know or ask your own.
Ask a new question about this device
Download the instructions for your Alarm clock radio in PDF format for free! Find your manual 4521 - ELTA and take your electronic device back in hand. On this page are published all the documents necessary for the use of your device. 4521 by ELTA.
USER MANUAL 4521 ELTA
PROJECTIONS-LHERN RADIO MIT THERMOMETER ①
PROJECTION CLOCK RADIO WITH THERMOMETER
RADIO-REVEH, A PROJECTION
AVEC THERMOMETRE (FR)
PROJECTOROS RADIOS ORA HOMEROVEL
RADI OROLOGIO A
LIYANSTMALI SAATL RADIY ⑩
RADIO S PROJEKCNIMI
HODINAMATEPLOMEREM
CEAS CU PROIECTARE AFISAJ,
RADIO STERMOMETRIC
HPOEKILIOHBHEYACBETHAOHCTERMOMETROMRU
107
- THOYLACOBHHE
CTEPMOMETBP
MODELL 4521
PROJEKTIONS-UHRENRADIO MIT THERMOMETER
BEDIENUNGSANLEITUNG
SICHERHEITSHINWEISE
VORSICHT
Beware of small pieces and batteries, do not swallow them. It may be hazardous to your health and lead into suffocation. Please, Make sure to keep small devices and batteries out of the reach of children.

Important advice regarding hearing protection
Caution:
You care for your hearing, and so do we.
Therefore, use caution while using this appliance.
Our recommendation: Avoid high volumes.
Children should be supervised while using headphones; make sure that the appliance is not set to high volume.
Caution!
High volumes may cause irreparable damage to children's ears

NEVER let allow anyone, especially children, to put objects into the holes, slots or openings on this devise. This may lead into death due to electric shock. The device must only be opened by a qualified assistant.

Only use the appliance for its intended purpose.
This device may only be used in housings and business premises.

Please keep this instruction manual for further reference

Instructions on environment protection
Do not dispose of this product in the usual household garbage at the end of its life cycle; hand it over at a collection point for the recycling of electrical and electronic appliances. The symbol on the product, the instructions for use or the packing will inform about the methods for disposal.
The materials are recyclable as mentioned in its marking. By recycling, material recycling or other forms of re-utilization of old appliances, you are making an important contribution to protect our environment.
Please inquire at the community administration for the authorized disposal location.

Do not obstruct the ventilation of the device. Make sure, that no curtains, newspapers, furniture or any other type of object are blocking the ventilation system of the apparatus. The ventilation system must be clear of objects at all times! Overhealing may lead into serious damage of the device and reduce its performance and lifespan.

Heat and warmth
Do not expose the appliance to direct sunlight. Make sure that the appliance is not subject to direct heat sources such as heaters or open fire. Make sure that the ventilation slots of the appliance are not covered.

Moisture and cleaning
This appliance is not waterproof. Do not immerse player in water. Do not allow player to come in contact with water. If water gets inside the player it may cause serious damage. Do not use cleaning agents that contain alcohol, ammoniac, benzene or abrasives as these could damage the player. For cleaning, use a soft, moistened cloth.

Professional recycling
Batteries and packaging should not be disposed of in the trash. Batteries must be handed over to a collection centre for used batteries. Separating disposable packaging materials is ecologically friendly.
SAFETY INSTRUCTIONS
- READ INSTRUCTIONS - All the safety and operating instructions should be read before the unit is operated.
- RETAIN INSTRUCTIONS - The safety and operating instruction should be retained for future reference.
- HEED WARNINGS - All warnings on the unit and in the operating instructions should be adhered to.
- FOLLOW INSTRUCTIONS - All operating instructions should be followed.
- WATER AND MOISTURE - The appliance should not be used near water, for example, near a bathtub, washbowl, kitchen sink, laundry tub, swimming pool or in a wet basement.
- VENTILATION - Openings in the device serve its proper ventilation, are necessary for the operation and prevent overheating. The unit should be situated so that its location or position does not interfere with its proper ventilation. Do not place on bed, sofa, rug or similar surface that may block the ventilation openings, in a built-in installation, such as a bookcase or cabinet that may impede the flow of air through the ventilation openings.
- HEAT - The unit should be situated away from heat sources such as radiators, stoves, or other appliances (including amplifiers) that produce heat.
- POWER SOURCE - The unit should be connected to power supply only of the type described in the operating instructions or as marked on the unit.
- POWER CORD PROTECTION - Power supply cords should be routed so that they are not likely to be walked on or pinched by items placed upon or against them.
- NON-USE - During longer periods of non-use please disconnect from mains power supply and antenna.
- OBJECT AND LIQUID ENTRY - Care should be taken so that objects do not fall and liquids are not spilled into the enclosure through openings. Do not disassemble.
- DAMAGE REQUIRING SERVICE - The unit should be serviced by qualified service personnel when:
a. The power-supply cord or plug has been damaged.
b. Objects have fallen into, or liquid has been spilled into the unit enclosure.
c. The unit has been exposed to rain or moisture.
d. The appliance has been dropped, or the enclosure damaged. Only use controls and adjustments as specified in the manual.
e. The unit does not appear to operate normally.
f. The unit displays serious changes in its performance.
13. SERVICING - The user should not attempt to service the unit beyond that described in the user operating instructions. All other servicing should be referred to qualified service personnel.
14. CLEANING - Disconnect from mains power supply before cleaning. Do not use liquid or spray cleaners, only use a damp cloth. Follow the care and maintenance instructions in this manual.
15. LIGHTNING - During lightning and longer periods of non-use please disconnect from mains power supply and antenna.
16. SAFETY CHECK - After servicing the unit ask the customer service for a safety check.
17. OVERLOAD - To avoid fire and electric shock do not overload wall outlets and convenience
receptacles. 18. ELECTROSTATIC DISCHARGE - Disconnect from mains power supply and remove batteries if unit malfunctions. Reconnect after a short time.
THIS DEVICE IS INTENDED FOR CONTINUOUS OPERATION!
TO REDUCE THE RISK OF FIRE OR ELECTRIC SHOCK AND ANNOYING INTERFERENCE USE ONLY THE RECOMMENDED ACCESSORIES.
LOCATION OF CONTROLS AND FUNCTIONS

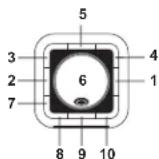
Top View
1 MODE Button
2 AL Set Button 3 AL1 Alarm 1
4 Narm 2
5 C/F Thermometer Switch ^ C / ^
6 Projector (within the ball)
7Adjustment Button
8Adjustment Button
9. On/Off
10 SNOOZE / SLEEP Button
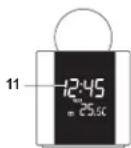
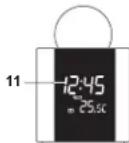
Front View
11 LCD Display
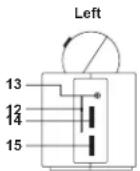
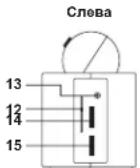
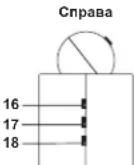
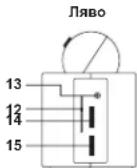
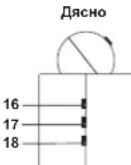
Side View
12 Frequency Display
13 LINE IN Jack
14 VOLUME+/-
15 TUNING
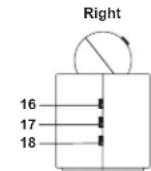
16 Night Illumination ON / OFF
17. Projector ON/OFI
18 AM/ FM Band Selector

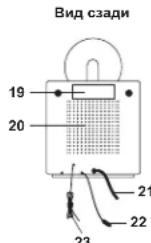
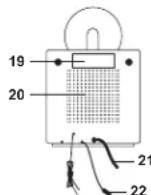
Device Rear View
19 Type label
20 Speakers
21 Mains power cable
22 Temperature sensor (Room temperature only)
23 FM wire antenna
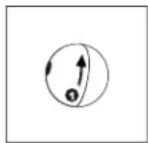
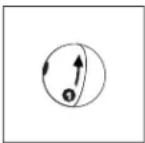
Projector
Turn the ball left to open (direction of arrow: OPEN): lake off the upper part.
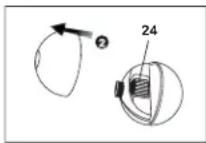
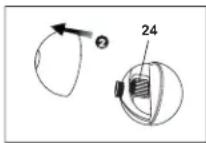
The FOCUS adjusting wheel (24) for setting the focal length is located within the ball.
Put back the upper hemisphere and turn right to secure (direction of arrow: CLOSE).
POWER SUPPLY AND BATTERIE BACKUP
The supply voltage for this device is 230V - 50Hz . The time settings are backed up by 3× 3V CR 2025 Lithium cell batteries (not included). Please observe the polarities when inserting the batteries. In case of power failure the device automatically activates the battery backup to save all time and timer settings.
GETTING STARTED
Press the RESET button at the bottom side of the UNIT after you have connected it to the mains
supply
The unit will display the full segment for about two seconds. Afterwards the unit turns back to normal mode.
There is a night illumination switch on the device (blue LED light) (16); set to ON to turn on the emergency light and set to OFF to turn it off again.
1. SETTING TIME AND DATE
During normal mode press MODE (1) for about 2 seconds in order to enter the time settings. Press MODE (1) multiple times to switch through the mode cycle:
Year (YR) - Day (D) - Month (M) - 12 / 24-Hour-Format (12H/24H)- Hours (Hour display is blinking)- Minutes (Minute display is blinking)- Normal
Adjust the corresponding settings as follows:
- Adjust the respective values with the buttons -B) and
Hold the buttons 8) and 7) pressed for quick adjustment.
-
Press MODE (1) after each respective setting to store and to enter the next setting.
-
The unit will turn back to normal mode and save all adjusted settings if you do not carry out any setting for a few seconds.
Setting the calendar year
Factory setting: 2006
Setting options : 2000 - 2099
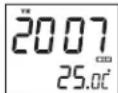
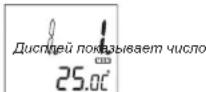
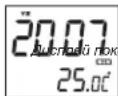
Display showing calendar year
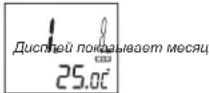
Setting the calendar month
Display showing calendar month
When setting the date the unit will calculate the weekday automatically.
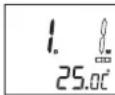
Setting the date (day)

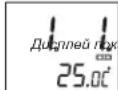
Display showing date (day)
When setting the date the unit will calculate the weekday automatically.
Setting the 12/24-Hour-Formats
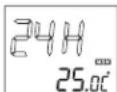
Display showing 12/24 H mode (Choice: 24-Hour-Formal)
Displaying 12 / 24-Hour-Formats

Display showing 12/24H mode (Choice: 12-Hour-Formal)
Setting the hours
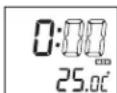
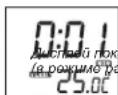
Display showing Hour mode (The hour display is blinking)
Setting the minutes
Display showing Minutes mode (The minute display is blinking)
When setting the minutes the seconds will be automatically reset to Zero.
Setting Alarm 1 and Alarm 2
During normal mode press AL Set (2) for about two seconds to display the alarm settings. Press AL Set (2) multiple times to switch through the mode cycle:
AL1 Hour settings - AL1 Minute setting - AL1 Weekday / Weekend settings - AL2 Hour settings - AL2Minute setting - AL2 Weekday / Weekend settings - Normal
Adjust the corresponding settings as follows:
Adjust the respective values with the buttons 6) and
Hold the buttons 8) and 7) pressed for quick adjustment.
- Press AL Set (2) after each respective setting to store and to enter the next setting.
- The unit will turn back to normal mode and save all adjusted settings if you do not carry out any setting for a few seconds.
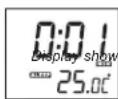
Display showing Alarm 1 hour settings (blinking hour display)
Display showing hour settings minute settings (blinking minutes display)
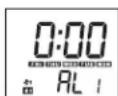
Display showing Alarm 1 weekday settings
- Monday till Friday (MON TUE WED THU FRI)
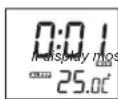
Display showing Alarm 2 hour settings (blinking hour display)
Display showing Alarm 2 minute settings (blinking minute display)
Display showing Alarm 2 weekday settings
- Monday till Friday (MON TUE WED THU FRI)
2. SETTING THE ALARM MODE AND TURNING ON/ OFF THE ALARM FUNCTION
Setting the alarm mode
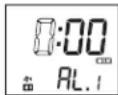
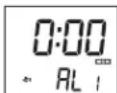
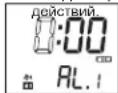
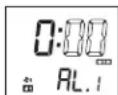
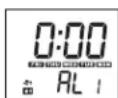
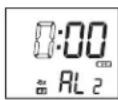
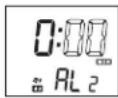
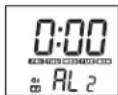
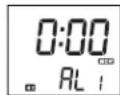
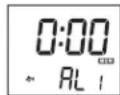
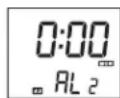
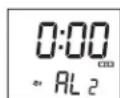
Press AL.1 (3) / AL.2 (4) to select music or buzzer mode. For buzzer wake-up signal the display shows 2 or 1, for radio wake-up call the display shows 2 or 1. Pressing AL.1 (3) / AL.2 (4) again will turn off the alarm function.
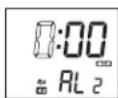
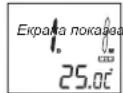
Display showing Alarm 1 with buzzer wake-up signal
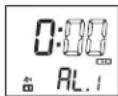
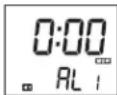
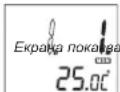
Display showing Alarm 1 with radio wake-up signal
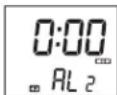
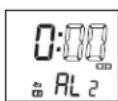
Display showing Alarm 2 with buzzer wake-up signal
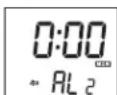
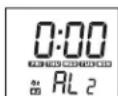
Display showing Alarm 2 with radio wake-up signal
Signal sound (Buzzer)
For the first 8 seconds there is one signal sound per second; for subsequent 8 seconds there are 2 signal sounds per second and 4 signal sounds for further 8 seconds. After that the signal sounds are beeping persistently. This signal structure will be repeated every minute.
3. DURATION OF ALARM AND SNOOZE-FUNCTION
The alarm function stays on for 30 minutes as long as you do not turn it off by pressing (9). Subsequently the unit resets automatically and will wake you up again the following day at the preset time.
Snoopze-Function
When the alarm is ringing press SNOOZE (10) to continue dozing; buzzer or radio will turn off temporarily.
The snoozing sequence lasts for 9 minutes.
You can repeat the snooze function up to three times. Subsequently the unit resets automatically and will wake you up again the following day at the preset time. During snoozing mode the displays 2/1 or 2/1 are blinking.
4.SWITCH DISPLAY CONTENT
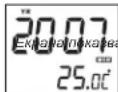
Press (8) to enter the calendar year display during normal mode. After 5 seconds the unit automatically turns back to normal mode.

ing calendar year
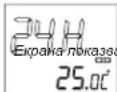
Press (7) to enter the date display (month and day) during normal mode. After 5 seconds the unit automatically turns back to normal mode.
ing date (month and day)
5. TURNOING OFF WITH SLEEP TIMER
Press SLEEP (10) during radio mode (see below) to display the sleep timer. The minute display is blinking and with each touch you shorten the time at which the radio will automatically turn off. You can choose between 90, 60, 30 and 15 minutes. The display shows SLEEP. By pressing (9) you can turn off the radio prior to the timer.
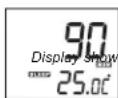
ing sleep timer
ing sleep timer (during radio mode)
6. DAYLIGHT SAVING TIME
During normal mode press (8) for about 5 seconds in order to activate / deactivate the summer time. Time display will change by one hour and will display

activated
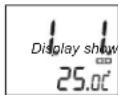
7. THERMOMETER
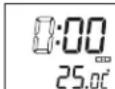
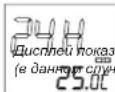
The room temperature is displayed in the range from 0^ to +50^ or from 32^ to 122^ . You can switch between Celsius and Fahrenheit mode by pressing C / F (5).
8. RADIO
- Press (b) to turn on the radio.
- Set the band selector AM / FM (18) to FM or AM.
- With the TUNING (15) knob you can search your favourite station.
- Turn the VOLUME +/ - knob to adjust the volume.
- Press (B) to turn off the radio.
Antenna
The radio has a built-in ferrite antenna for AM reception. For better reception you have to direct the unit.
There is a FM wire antenna at the rear side of the unit. Uncoil completely for best reception.
9. SETTING THE TIME FOR THE PROJECTOR
Turn off the unit by pressing ON / OFF (17).
Adjust the focal length with the FOCUS adjusting wheel (24).
You can turn the projector by 90^ and hence direct it towards the ceiling or a wall.
Notes:
Only in a dimmed room can you see the projected time. The range accounts for 1 to 3 meters.
Reset Button
The RESET button is located on the bottom side of the device and needs to be pressed after
changing batteries or malfunction. With this button you can delete all settings and reset to default settings.
TECHNICAL SPECIFICATIONS
Frequency range : MW (AM) 525 kHz - 1615 kHz
UKW (FM) 87.5 MHz - 108 MHz
aker Impedance : 8 Ω
Battery Backup : 3 x 3 V CR 2025 Lithium cell batteries (not included)
Power Supply: AC 230 V ~ 50 Hz
Power Consumption : 5 Watt
Weight : approx. 0.7 kg
Dimensions: approx. 101 x 101 x 153 mm
SUBJECT TO CHANGE WITHOUT PRIOR NOTICE.
MODELL 4521
RADIO-REVEIL A PROJECTION AVEC THERMOMETRE
MANUELD'UTILISATION
INSTRUCTIONS RELATIVES À LA SECURITÉ
ATTENTION
RISQUE DE CHOC ELECTRIQUE NE PAS OUVRIK
ATTENTION: ANOLO BILLOU,LLC
TENANTIENI, CHINESE PAPER 105
BETRILLES CAPACIT (OU LARRETS)
UNITLILHUI,LLC (APPEARUL,NL)
CONTINENT AUCHE PIQUE PUONGUÉ
PAPER 106, CHINESE PAPER 107
CONSERI ES RÉPARATIONS-UNI
SLIVIERG,ML. MANTANENCE ORAL/QUIFLE

UKW (FM) 87.5 MHz - 108
UKW (FM) 87.5MHz - 108MHz
alizza it timer sleep.
UKW (FM) 87.5 MHz - 108 MHz
2. USTAWIANIE TRYBU ALARMU I WŁACZANIE / WYLACZANIA FUNKCJI ALARMU
Wymiary:ok.101x101x153mm
SPECYFIKACJE PODLEGAJA ZMIANIE BEZ UPRZEDNIEGO POWIADOMIENIA
MODEL 4521 PROJECTIE KLOKRADIO MET THERMOMETER
GEBRUIKSAANWIJZING
VEILIGHEIDSINSTRUCTIES
BIJKOMENDEINFORMATIE

-Pazartesi-den Cuma'ya(MON TUE WED THU FRI)
KONUMARINA ALINMASI
Alarm Konumn Ayarlanmasi
UKW (FM) 87.5 MHz - 108 MHz
Hoparlor Empedansi:8Ω
Pll Yedeigi : 3 x 3 V CR 2025 Lityum saat pili (beraber verilmez)
Guc Kaynag: AC 230 V ~ 50 Hz
Guc Tuketimi ; 5 Watt
Aqiriik : YaklasiK 0.7 kg
DOPLNUJICI INFORMACE

Pozor na male dilly a baterie. Spolknuti ttechto pdefmedtuto muze vest k vaznemu zraneni nebo uduenf.
llavne dbeje na to,aby malé dily a baterie nebyly v dosahu deti.

Duleztara rada tykajici se ochrany sluchu
Upozorneni
MANUAL CU INSTRUCTIONUNI
INSTRUCTIUNI DE SIGURANTA

INFORMATII SUPLIMENTARE

Aveti grijia de componentele de dimensionali mici si baterii, nu le inghitti. Eie pot fi extrem de penculoaso putand afectand grav sanataea si sulocandu-va. Va rugam sa pastrati acste componente si baterille除去 del accessul copilor.

Frecventa ; MW (AM) 525 kHz - 1615 kHz
UKW (FM) 87,5 MHz - 108 MHz
Impedanta difuzzarelor : 8 Ω
Baterii de rezerva : 3 baterii cu litiu, de 3 V CR 2025 (nu sunt incluse)
VoltaJ:AC230V\~50Hz
Consumenergieelectricar :5Watt
Masa : aprox. 0,7 kg
Dimensiuni: aprox. 101 x 101 x 153 mm
SPECIFICATILE POT FI MODIFICATE DE CATRE PRODUCATOR FARA UN ANUNT PREALABIL.
MODEJIb 4521 ПОЕКLUOHьIE YACBI-PAДИС TEPMOMETPOM
PYKOBODCTBO NO 3KCNYYATAUIN
YKA3AHNIO TEXHNIK E3ONACHOCTN
BHIMAHNE
PVC 3389/PTAE/AQE60 LIOXU HE OPTEs/BATb
BHBV/VE/EBV CHIKSEBI/PI/CKA
PONCHIBARI TONTIC SHIMWU
SHINPOYAN 1985
BIOHILINE/NECTAEC
NATURAL GENE
NATURAL GENE
NATURAL GENE
ORAL/ANTIBIOTICS K
1214750-POPOLO 81369,
USA
E-mail: ORAL@antibiotics.com

TOCTC/TEK C
TOCTC/TEK N.H. DE KONDO
TOCTC/TEK N.H. DE KONDO
TOCTC/TEK N.H. DE KONDO
TOCTC/TEK N.H. DE KONDO
TOCTC/TEK N.H. DE KONDO
TOCTC/TEK N.H. DE KONDO
TOCTC/TEK N.H. DE KONDO
TOCTC/TEK N.H. DE KONDO
DAJIbHEIWARAHHFOPMAUIN

OctepaaiBc Hb0eBnHxDantAIN Batape, He HnTAtNE IN. 3o MoKt 6blr onACHO DnA Bauero 3DopobN INOBENyUdbie. PNOAnyCTA, pNIMATE MpeMbp, rTO6bl MaHneBku NpO6pu Hbataep XpANHInC B HeDCOTYHOM DnE Detm MeCt
BaxKHe peKoMeHdaaun OTHOCTeIbHo 3auNTbI cnyXaBHAmHae
Bb6epkTe C00 Cny, Mbl Toke.
TOMOTMY 6b7be TOcOpXbHn pRn noBtOBaHN daNHBm pRbOpOM. Haua PekoMOnaIaHn: NabeAerBe ToBnWbPROMKcN.
DnTdoXNbHAXoDHTcBnOIPINPIMCMOTPMnIPMNCIOB3OBAHHHAYUHNIKOB; y6eIeCTb,TOYyCPOTHCTBO HYEYCAHOBNEHO BABCOKNYP0BEHB POMKOCTN. BHMANHE!
Bolbua rpoMkoCT MOKET npHnHTb HcnonpaMbmyep6 cyxy deten.

HIKKOrDA HIOI3aONJIe HNKOMY,OCO6bHNO DcTAM,BCABNTBIPDmBTB OBTBepCTHHNUIEHN 3TOPOIN60pa.3TO MOKET PnBecTN K CMEPTN BCNECTNB NoPAKeHHN3NEKTPnHEeCKnM TokOM.OTKpBaTbPn6Op MoKET TOnbKO KBaNNuMPoBAHHN NMOUHKN.

INcNb3yOETOTnPn6oBTOKNOnpEDHAHauENHIO. 3OTnPn60MOKETNCN0L3OBATBOKTOK B6TOBtBxHmOfCNCHxNOMeEHXH.
ToXanyjCTa, cooxpHnHTe 37y HNCTpyKmIOI dAaBHeHwero HCNON3o5BHA8 KAYeTbe cnpabOvHnka.
Hnctpykunno 3aunTe Okpykaoue Cpebl
YeIyIIN3xpydAaHnnnI np6pB o IOHue cpoKa cNxyBbMeCte C oIbHMMI 6bIbOaMTOxOAaM;IEpeJaTe Oe BNYHKc6paD aIe HpePA60KtI ANKTEKCHKMI INN3eKPTHOHNyCTPOBTR. CmEBON IA hPOyTe, HNCTPyrCNIO nHOJcIBo3AHNO INYNAxoKA codepkAT IHnOPAMUO o CNOCo5e YyTHn43AUM.
MATEpIaHb IIOJNekK TIEpe6oBtKe, KAK YK3AHOH MaRkPovBaK. BIAIpoIaJIg MPEpe6oBtKe, BTIOPIHcYNIcNOIbO3aOHmIOIeMATEpIaHb INI HbIM CnOc06aM yTNlHa3auu CTaIPxINrPbO6oB bI cOyUcTeBNReTe aXbHb bNtAb B aATHTy OKyKaHwCpeDcEi.
XOAnyIaTHcY, 3aHnAeBROPOCDKoADMMHHCTPAuHN pacONONKEHe CHaIKUHOHPoBAHIXkYNHTOKO TYNH3AU.

He nprrnTCTayIte BEHNTNLIINPnp60A.56EHTeL, 7O CTcHcTeM BYHNTNLIINpnp60Be HsakBbIKOT 3AHABBC, 1a3GtB, M60Bn II IN pnpMDOT IIOKOB DpyTOI TINH CnCTeMa BHTNLIINPOCTHOIOHNIOJNKA 6bCBOBDH! Pepepepe MOKET pnpEBCN K cpeuehIM NOpBxqDhenm Pnp60a HCHMTIe ero pnpBDOiHTeHbOCTb I cpoK Czykbl.

Tenno nBnaxHoCTb
He no3aepraRte npi6bop BOa3eCTBnIO prrmaBHcONHbIHy uYb6dTeB, cTTO np6bop He no3aepraRte BOa3eCTBnIO hctOHTNHKn HANPMnE, OOBpBRaTeNII INN OTKpIHorO ONr. YOc0TObEPbTcB, cTTO BEINHnAIOHnIIh OTBepTrN pynp6bOp He 3AKbTpI.

Bnara n ouhctka
DnHnnI np6bpe H DoHOENPONHcMaBMy I He norgykaTe npeep B oOy. He OynckaTe KOHTAKa Tnpeep C BOO. EcnN BDO nonaet BHYtp Npeep, 3TO MOKET NOBneBcep83HeNOBpekZhenia. He nCOnb3yTe MoIOUme cpeCTBa, codEpaKeAaJI ANKOROLI, AMMAM, KEOAHNI LApABNAHBE BceCTBa, NOCKoYKI OH ONMYT BNOp4DITnIIEEP. DIn OHcCTKN PnO3yTcB MIRKO, YRALXKHHHON TKAHb.

PpoecchoHaBnHnpepea60Ka
Batapei an YIAYOKBA HE OJNHOJIy TYNINHOPABOTCS BMECTe C 0XTOAMM. Batapei OJNHOJIy NEPEAIBATCs B UHTEP C6OFA NCOY30AHHbIXbTAPae, OTAEneHE
OOnHpaOBOxh YynakOBouhXb MaTepeNaob RaJIeTcA 6BaepdHm IINr OkpyKaIOUeIe CpeDn.
YKA3AHNIO TEXHNIKBE3ONACHOCTN
1.BHIMMATEJIbHO IPOOHTITE IHCTPYKUIN -BCE YK33AHHN NO TEXKHKE 6E0NACHOTNI pyKOBODCTBO NO KcnnpytauIMdoHNbIbIpbOoHATaNbIdo HauaHa NCNOIbOBAHnycTpoiCTBa.
2. COXAPIHATE INCHYPKUYN -YK3A3AHNO TEKHNIE 6E0ANACHOHTN H KYPOKOBCTBO NO 3KcNpyatauINDnKbHb 6bTbCOXPAHEnIy Iaon cnpAknB b6yduym.
OSSPAUANTHE BHUMHAIME HINPNDYNEJDEHIN- Bce PNPENPKDHN HA KOPNCE YCTOCTB3A IN BYKPOBDCTBO NO 3KCPNPTALAMON DQNKH6bTu PNNHTs BO BHUMHAINE.
4.CNENYIHTEHCHTPYKUNM-BHNONHAREBCEHANCAHHHeNHCTPYKUNNOAKCNNYATAHKN
5.BODAH BNAFTA-yCTPOICTBO He DOJHO HCNIOB3OBaTcBcB03NE Bo3b, HanpIMpe, BO3NE bHb, paKoBHbY mBbIbNkA, KXOHHO paKoBHbI, EMKOTc H CBOIO, PnABateBnHORO GacceHa HIN B cIpOM NoJaane.
6. BEHTINIURN - OTBEPCTR B KOPYCS yCTPOCTBA CNYKAT D NBEHTINIURM; OHN HEOxOIMBIHn I ANHOMPAHNOI PABOITb YCTPOCTBA, TAK KAN PNEOTPRAIAOT ERO nepePB. YCTPOCTBO OIOHNb 6bIpaTcPONXHOE KTOA6p3AM, TOB6Ie MEOCTONONOEHN He nprratCTOBANO I IOHOMPAHNOI BEHTINIURN. He paoiIaIae TcPTOBCTH A XPOBAtn, DMBAH, KOER PI INI YNTHIOIO6bHIO NOBEXPHOCTX, INM I TAKMIE MeCTAX KAK KHNIKHAII NOPLA INI SKAΦ, rDE nOtOK BOyDxHa UPE3 OTBEPCTR BENTHINIURM BYET dATyDHN.
7. BbICOKAR TEMENPATYPA- yCTPOIACBO JOINKHO paoHONATB OJIAIOTN HKTNOKOB TENNA, TAKIX KAK PAADATOPBo OTONNEHHK, KYXOHBE NIIHTB, INN DpyNX yCTPOIcTB (BKNOVAY CYNINNTEN), KOTOPIE PNOSSBD 60500e KOJINECTBO TENNA.
8. ICTOCHIK 3NEKTPONTAHIN -YCTPOCTBOIOLIXHO6bITIOJIKHOHO TONKko K TAKOMY ITOCHIKNYIITAHN, TNI KOTOPORO OINCAH B PUKOBQCTBE NO AOKCNIYATAUHN, IIMKO YKAZAH HA KOPIVCE VCTPONTBA.
9UHYPNTAHIAI-HYUPHTNEKPTONAHIDONJENKHEPOPIRATAHKAMOB3OM,TOB6Iero HE 3A8EBAHN HORAMN,HNEPEKIXMAMINPNDETAMTNNOCTABEBNNHMMAHOHERNIPIADOM.
19. NEPEPbIBBbI B PABOTE-ecnIyctpoBcTBo HE nCIOJIbEycTdINTeHbHOB BpEMe, CNEyET OTKIOJUHTbE OEt OTOCTNHOITaTHNIA HAIHTEHNA.
- PNEDMETbI IN KIOKCTN -cneyET no3a60THTBCr o TOM, yTObI Ha YcTPOIcTB He naIaIIpaIINHbIe IpeIMETbI, a B ERO OTBAPCTMHe IpoIINBAIICMb JIKKOCTm. Hc pa3bIpaJIteVCTPOIcTBO.
- PEMOT NOBPEKDEHNI -YCTPOCTAOIIOJIeXHTPOMEHTO,BILIOJIHREbIM KABINMDPOBOAHNIMNEPCOHONAL,ECIN:
a. NOBpeKDeHbI uHyp nN BnKg 3JNEKtpoNTaHHa
b. Bnytpb kopyca yctpoiCTBa nonan npedMeTb nn KxdkocTb.
c. YCTPOHCTBO NOBeprnoCb BO3dEChTBIO DOXDA HIN BNAH
d. UcTpyCtBbIyO npOeHNO, IIO6 bIyN oRbEPKbnE ITOKOpN.CIOINbIyTe TIOJIbTe HACTPOIKn N pERYIWPOKOB, KOIpOBe bIyN kYea3BaI bIaHOM PyoKbOeDte
e.YcTpoiCTBO He yHKNIOHnpyeT HopMaIbHO
f. YcTpoIcTBo DEmOHCTpnpyeT 3HaHTeINbHbIe H3MeHeHnB CBOe npOn3BOJNTenbHOCTn. - YEXOCLNYKBAHHE - nonL0BATEbHe NOJHKHeIbTcBaOcNyKABaTbDAHO HeYCTOBcBtBuTO, Yo yKa3aHO B HAcToHMe pykoBcTeeNo KcKnpyTaauM.Bce Dpytme Bblb OfcNxyKBAHnDIOBbIbNtHbITcBaKBAHmDpOpaOBaHBMpecoHOMA
- YCHTKA - Nepd TAM, KAK CYCTHNTy yCTPOCTAO, OTCOENHATHE ORO IOTHOHNA HTHAHA. He NCIOHN3YTEI DNI YCHTKX JIMKHE INI BAP30BtObHbI MOOHUcpeCPDCTBA, NCIOHN3YTEI DNI 3TOTO TOBNO BIAKHYKO BATOBH, CNDyTe COOTBETCTBOYHM YK2AaHHN, 3KIOKHOHBM B DAHOM DYOKOBCTDE.
- FRO3A - 80 spemyro3a, a TaKoe B NpHbDnIe Horo nepeBba B kcnpytaun cyOCTOBTA, CNEyET OTKNHOBT ERO NTOCHTKBA ENEKTPOTNAHN AANTEHOT
- NPOBEPKA BEEONACHOCTN YOCTPOCTBA - NOCE PEMOTA/OBSCNYKBAHNA YOCTPOCTBA, NOPONCITE CNYX6BY POABTOI C NKONYATENMI NOPEBPIE T EGOANACCHOTY OYCTPOCTBA.
- INEPEPY3KA - BO I6E9bKaHn OAnOCHTo NOKaIpa IIN npAoxEHKe 3eKPTOPKOM, He nepey4kaii TOMauuHIO cetb 3eKtPOnTuAHII.
18.3NEKTOCTATMCECKN PA3PR-ecnYcTPOBCTBO HEpyHKUONHpyER HOPMABHO,OTc0eDMHTBEyCPTOCTBO ATNCTCHNKINITAHINH INBENKTEBATApeHH.Keep3He6bIbIOI POMEKKYTOBPEMHNOJQKTHOHTE 3NEKTOPTNTAHHECHO8.
DAHHOE YCTPOINCTBO PEPDAHAUEHO HENPEPBIBHO 3KCNYATAUIN
JYMEHbUEHnRAPOCABO3HNIKHOBENIPOKAPNAINIOPAKHEHNA 3JEKTPOKOM.A TAKKEBO3HNIKHOBENIEHEXEATENbHbIXNOMEX,NCIOJIb3yTE TOJIbKOPEKOMEHDBAHHbIE AKECECCYAPBI.
KHONKYNPABNEHNIYFHKUN

Budcbepxy
1 KhoNKA MODE
2 Khonka AL Set
3.3BOHOK1CAL1
4.3BHOH2□CA12
5 NepeKIOUaTeNb TePOMeTpa C/F (C/OF)
6 PpoeKTop (BHytpn WapnKa)
7.KhONKa HAcTPOKn
8.KhONKaHaCTPOKm
9. Khonka BKNBbIKI
10. Khonka SNOOZE/SLEEP

Bud cnpoein
11KKdncnne
Budc6oky
12.Ⅲkana yactOT
13 The3no Expona LINE IN
14. TpMkoCTb VOLUME+/-
15 HactpoiKa TUNING
16.HouHao noqCBetKa ON/OFF
17.BKN/BblkON/OFFnpoeKtopa
18. Npepk. dyaana3oHOB AM / FM
19 Ta6nnyka
20 DHHAMNK
21Hypntaanr
22 DaTHNK TEMNepaTyb (TOnbKO JnK KOMHATHOI TEMNepaTyb)
23 PpOBoNoHnHa FM aHTeHHa
PpoekTop
HOBEPHNTI ⅢAPKIN BNOB,HTO6bOTKpbl8o (HappanenBneCTpeKn:OPEN);CHMMTE BepXHOIO qACTb.
Kolenciko peryniopobika kphikyca FOCUS (24) paononokho Bhnyrt shapira.
YctahonBite BexpeHne Nonyuapire 6oepaHIO nObepcHTe 8nPABO, T0b6I3a#hKcPobAToE rO (hanpaBriHHe CTpRnK CLOSE).


OCHOBHOE IN PE3EPBHOE 3JIKTPONNTAHNE
HanPraXeHHe AneKToPiNTAHnA DnA DaHnOg YcTPOCTBa - 230 B (-50 Fu). PnI bBkIOUeHHNtAHnA, TekUJIe HAcTPOHnB PBeMeHHoCoxPAHOTOR pRn NOMOLNI MNTBEHOB BatapepAnEMeHTOB nHTAHnA - 3 x 3 V CR 2025 (he BxOaHT B KOMNNEKT). CoBIOJDAHTe. NOKAUYCTa, NOPLPHOCb, KOrDa 6yDte tABTAHTB aTaPaeHH. B CnYae IponaDAAHnE AINTOPTAHnA, YcTPOCTBO ABOMATHcCKM nePexOHTNnA HnTAHnAE O BATAPEek, YTObH CoXPaHHTB RCe HACTPoRnB PBeMHnN TnMApeHa.
HAUJIO PABOTBI
Pocne KKNKHeHn 3NekTPONTAHnHa HxMMtE KNKHy RESET, paONNOKeHHy Ha HxHHeH CTOPHOY cYTOPTAH.
YUCPSTOBB BcBETNT BeCb CEIMENT PImeMPO Ha 2 cekyHdb, Nocne Yero BEpTeC8A HOPMaIbHnB pexMn pa6b0f.
Ha yctpoCTbe cTb KHONKa HNOH NOcBETKn (CmH NCBToND) (16); YTO6bA KTHINPOBaTB NOcBETKy, YCTAHOBITE KHONKY B NOIOXENHE ON, YTO6bOTKNIKHMTb NOcBETKy, YCTAHOBITE KHONKY B NOIOXENHE OFF.
1.YCTAHOBKA BPEMEHN IATBI
Korda ytoPcTbEO HAOJIOCTB C B HOPMBAHOM Pekkime, HAKMNITE KHONKY MODE (1), uYEpKMBIte ee npmepHO 2 cekdy, tOsb0B MoTH B MHeMoH aNtpoK BpeMeHH. TTo6bI nepeKNOHATCB MeKdy HAcTOHAM, HAKMNITE KHNKY MODE (1):
FODY- (HR) -CIO (D)- Mecac (M) 12/24-OFOpMaT oO6PaknB apemEni (12 H/24 H)-Qac3 (3HAeHHeNc yaca 6bET mRAtG)- MHHyta (BHAnEHeNmMHTu 6bET mRHTa)- HopmLaIhpeK hEKHM
Otperynnpyte cootBctbyoune Hactpoikn cndyoumm 6pa0m
KoppeKtppyTe COOTBETCTBYOUHNE 3aHuEHNKHONKAMN (8) H
-ДябICТРОКOPPEKTHIPOBKNHAKIMMaTe KHOJIKN 8) n 7)c ydepkHaHcM.
Nocex Kacklund KoppeKTIPDOKM COBETCTBYKNEH HACTPOHM, HAKIMMAITE KHONY MODE (1). HTHOCH COXOHMTA, DABHOE, ZAHOOH B. RABTM, H. KEPDEIT, K. KENYIOV, HACTPOHM.
- UCTPOINCTBOBDAUATCB HOPMABHbPcXMM pa60TbC COXPANHEHM BCEX
OTOKPKEKTPOBAHHbX HACTPOE, ECNI B TcEHHeHE KcONLbX cekyIaB He He Daetae HnKaikx DeCTbN.
YcTaHOBka rOda
3aBocckaryyCTaHOBKa:2006
Bo3MOXHoe 3haueHne roda:2000-2099
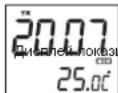
BaeT ro

YcTaHOBKa MeCra
Pn yCTAHOBKE DaTbI, yCTPOBCTBO BbHcIMNT DeHb HcDfN ABOTMAHTHeckM.
YcTaHOBka YnCnA
Pn yCTAHOBKe DaTbI,yCTPOBCTBO BILMCNT DeH HeDeHN ABOTMATHEeCKN.
YcTaHOBkaΦopMaTAtOTo6paXeHnBpeMeHH(12/24)
YcTaHOBk3BOHk6yDnIbHnKa1N3BOHk6yDnIbHnKa2
KoJIyA 3DCTIOHO HOHMOHTB H OMPAHBHOM POKMH, HAKMITE KOHNKY AL Sol (2), yIPOKHHBRIE BEE TETHEME. INPMDHO, IINBX CEXVHJ, YTBH NA HNCNNE BHCRETNICHL, HACTPOON BVXNHNIHKA.
TtO6bI nepeKIOUoTHaM cMeXy HAcToHkAMn, HaxmMaTe KhoNkY AL Set (2):
AL1HactpoKa Yaca-AL1HactpoKa MMHyTb - AL1 HactpoKa dHa HeDeiBbXoDbx - AL2
Hactpoika yaca - AL2 Hactpoika Mmhyb - AL2 Hactpoika nna He neIbIbxOxbIbIX - HopmaIbIbIbIpeXIM
OtperynnpyTe COOTBeTCTBtUHe HAcTpOuKn CneDyIOUm 06pa3oM
KoppektpyTe COOTBeTCTByIOUne 3aHaeHHa KHOKNaMn 8) n
-ДябьICTPOn KOPpeKTHIpOBKN HAXIMMaTe KHOIN 8)и C ydepKaHnEM.
- Nocne KaJdoi KoppekTnpoBKn COOTBeTCTByKoue HAcTPOuKn, HAKIMaIte KHonky AL Set (2),
TObI coXpaHnTb daHHoe 3aueHeN B nAMrTn INpeepTN K cneDykuoJeu HAcTpOKe
- YCTPOINCTBO 03BpaaaeTcB HOpMaHbHbI pexm pa6oTbI c coxApeHHem BceX
OTKOPpeKTHpOBaHHbIX HAcTpoEk,ecnB TeueHHe HeCKoIbKnX cekyHd Bb He deNaeTe HnKaKnx
Ducnneu nokazbjaem hacpmoy yaca dny 6yduunhka 1
(3H40Hu9 9caMu2aem)
Ducnneu noka3b6aem Hacmpouky MuHymby dnn 5dyunbHuka 1
(Muzaem 3haeyHue MuHymbi)
Ducnneu nokazbjaem hcmpouky dna hedenu dnny 6dyunbnuka 1
-cnohebnuka no narnhuuy (MON TUE WED THU FRI)
Ducnneu nokazbjaem HacmpoKy yaca dnybnuka 2
(MUaem 3HaueHue 4aca)
Ducnne nokaaeaem Hcmpouky Muhymba 8yduhuka 2
(MUzaem 3haeHue MUHyMbti)
Ducnneu nokaabaem hacpmouky dha hedenu dn syduunbuka 2
-cnoohoobnka no naHHu (MON TUE WED THU FRI)
2.YCTAHOBKAPEKIMBAUYINbHNAI BKNIQUEHNE/OTKJIIOUEHNEΦYHKUIN
ByDnIbHnKA
YcTaHOBkapeKIMa 6yDunbHnKa
HaKMTe AL.1(3)AL.2(4),YTObblbpaTBuHana-BOHOK HIN MeNoDIO
Ecnn n 6yunbHnKa Bb6paH 3BOHOK,Ha dncnnee 6ydt NOKaah 3HaOc2nn1,ecn
Bb6paHnpo6yKdHHe O T paHNO,Ha dncnnee 6dyet 3aayok2nn1,HTo6bl OTKnIOuHTb
fhykunio 6dynnbHnka, cneDyET eue paHaKaTb KhoNky AL.1 (3)AL.2 (4).
Ducneu nokaabaem cuhan 5yduunbHuka 1-380HOK
Ducne nokaaeem cuanb6yduhuka 1-eknouheu pauo
Ducneu nokaaeem cuanb yduunbHka 2-300K
Ducneu nokaaeeaem cuan 6yduhuka 2-eknouhepu pauo
3ByuHHe CnHana 6yDnBnHnKa (3BOHOK)
NepBbE 8 cekyHd 3ByHrT no oDHomY 3BOHky B cckyHdy; nocnedyoume 8 cckyHd 3ByHrT no 2
3BOHKA B cekyHny, n no 4 3BOHKA B cekyHny B cneDyKoUme 8 cekyHn. Nocne 3Toi cepnn 3BOHKo
6dJIHbIK HANMAET 3BEBHE HenpepbBHO. DAHHAI KOM6HNAHIAI 3AOHOB 6yDt NOBPTBcRA KKJYIO MYMHNY.
- NPOOJONKNEJIbHOCTb 3ByAHNn I ΦYHKUNI NOBTOPHORO CNHNA
BdHbHKA (SNOOZE)
BdynnbHnK 6ydt3BeHbTBteHne 30 MnyT,ecn BbHe HaxMeTe KOnky (9),Ytob
OTKIOHTBero. Nocne 3TOrO BydunbHnK OTKIOHaeTcR, Hpeea cyTKOnrTa AKTNBHPyETcR, TTo6bl
pa36ydtB Bac yctahOBnHHe Bpemr.
Функию nobTOphOro cnHana 6ydnbHnka (SnoOze)
Korda 3a3BHeHHT 6dyinbHK, Bbl moKeTe HaxaTb konky SNOOZE (10), 4ro6bl eue HeMHoro nocnata
6yDnBnK BpeMeHHOOTKNHHTC
HTepBaN MEXyD ayKTHBaIaMn 6ydiNbHmka -9MHHT.
BbMoKeTe nCnONb3oBaTb DaHHyO fHyKcHIO do Tpex pa3 noDpaI. Nocne 3TOrO 6yDnNBHK
OTKIOHuaetcH, Hpe3 cyTKn ONrTa bAknBnpyETcH, YTObpa36yDHTb Bac yCTaHOBneHHoe Bpemra.
BpeKMe snooze,Ha nncnnee 6dyT MraTb 3na 2/1nnn 2/1.
4.N3MEHEHNEHHFOPMAUHNHAUNCINEE
YTOHbM NIMIOO BHCRTNICI IQI, HAKMITE (B), KOBa YCTPOCTROH HAOJIOHTB HOBMAHbHOM PEXMKHE; HEP3 IPTB CEBKHy TcYPOCTROB BEHETCB HOBMAHbHbNbPEXMK HABOTAMINGECK.
33b6aem 200
Tc6bHaHnCnne nokaaanacb datA (Meccu HcNcno), HaxmTe 7)Korda yctpoiCTBO HAXOHTCNB HOPMAJIbHM pekMME; Ype3 PNTB CkYHyD YcTPOICTBO BEPHTC8 B HOPMAJIbHbE pekMlABOTMATNECKN.
3b1eaem damy (mecu u yucno)
5.ABTOMATMueCKOE BbIKIOUeyHNE PAIDNO TANMEPY
Korda yctpoctbno HaxodnTcB pexhme paHIO, HxMHTte KhoNky SLEEP (10) (cm. HNKe), YTO6bl
DnCNIe OTO6p3aH Taimae. Ho IAcnne HHeHET MHTaTb 3AHCHEHMe HtpePA B MHyTHaX, INPII
KaKDMONKAKATIN KHOKNI DAHNH IMtpeB (BPmE DO AOTAMHNEHCKO IBIHKHOHMe PAIDO
6yTeYMEHBuATcB. Bu MoXeTe Bb6PbT cNeDyUWNE 3HAeHHN: 90, 60, 30 mN 15 MNy. Ha
DNnnee 6yTeT hAayok SLEEP. Bu MoXeTe npocTo HxakTaB KOHKn (9) IN BkNIOHTb PAIO do
cpa6abBaBHn TaTMepae.
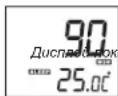
336aem maumep aomomamuueeKo20 6bKnoyehua
3NeKtpOnTuHHe:230B-50T
Notpe6nemMouHocb:5Bt
Bec : npMepHO 0,7 KR
Pa3Mepe
CNEUINKALMMOKETbItbN3MEHEHABE3NEBAPNTENbHOYBEOMNEHNA

MODEJI 4521
PPOXKELIOHEH PAHOACOBHK C TEPMOMETbP
PbKOBOCTBO3A YNOTPE6A
HHCTPYKUN 3A BE3ONACHOCT
DONJIHHTEJIHAHHΦOPMAUIN

Bnmaaate 3a Mank Nactn n Batepn, He n TnTnAte. Moke da ce Oakae onacho 3a 3apabe To n da obeep do aaduwaabe. Moia nae To mank ypcn n Batepn nabb H o6cera ha da.

BaxhenCBBETOTHACuCeDo3aunTaHaCnyx
PpeynpexkdeHHe:
Bne ce pnxnte 3a Bauy n cyx Hn Cbwo.
3aTOBa 6bTe BHMAtenHn, KOrato n3non3BaTe TO3n ypeD.
Hauata npenopbka; N36RBAHTe BnCOK 3Byk
Euata terpaBaa da che 6nnoaabaT, korato nnono3b cnyuaanu; ybepe ta ce ye peda He hactpoeh Hc nieh 3yck.
PpeynpckdHneI
Bucokn 3ByK MoKe Da npuHn HEnonpaBmA BpeHa DeTckn Cnyx.

HNIKOFA He no3oBnIb8aIte Ha NIKOgo, ooo6eHO ha Deua, da NoctBaR TpeDMTeN B TOBOpH, cunHtAHIN HN XBODeObe HA ToT yepd. OoMeKo da BoDEe Do CMbPT O ENekTOPOpB. Yepda TnpBBa Da ce TBapc rmo CkAnuMnpuH pncOehan.

Hanon3BaIte ypeDa cAmO 3a IpeHa3HaueHaTa ynoTpe6a.
To3n ypea moKe da ce u3non3Ba cAmO x Doma nn Ofmuca.

NaTe ToBa pBkoBOcTBo 3a 6bdeu ynotpe6a.

Hnctpykun 3a ona3BaHe Ha OKoJHaTa CpeDa
He HxBbLpIaIe npoDyKta B O6NkOBHBeIte MoDaIaIIOnTbAIScIeK pKaA HxImzHEHn MyIbKtI; npEJaTeA ro C bSbPateHEn NyHK t3 aeBxIKMpaHae HneEKPmCekN k ENEKTOHN ypeKn. CmBOHa na PNOyDKta, INCHPTyKuHKe 3a NytOpEa KIn OnaOKBkata Se IHCOPMipat 3a MeOTMeHn HxKaBpJHNe.
Matepnahnte ca roDnHa 3a peuKnKnupae, KaKTo e CnoMeHATO B MapKpOkoBkata. Ype3 peuKnKnupae HnI dytn H opmN Ha nobTOPhA yNoTpe6a Hc STAPy UpeDN. BNE DOHNHACrTo 3a ZauNTHa H NpPrOdHATA CpDA.
MOna 3aHnTaTe MeCTHata yIpaBa 3a OToPn3npaHO MlCtO 3a N3XbPnHe.

He npenpeyae BENTHINLAHTA Ha yepda. Yapepe Tae che npetda, BECTHIN, MeBEN mHn Dpyr npdMeTn He bknopat BENTHINLAHOHATA cNCTEMHa H anapata. BeNTHINLAHOHATA cNCTEMa TpRbBa da MoKe Da kyHIOHOHPa no BCKHO BPEme! IPrperbaeHETO MKe Da doBeDe Da cepno3Ha NopepeHa yepda aHa manHa HerOBOTo kyHIOHOHPaee H XWBOT.

TopeuHa n tonnHa
He nanaeIyepeHa npraKbIhHeBa CBeTnHa. YBepete ce, ye pede He e 130KeH H aDpEHTN HToTnHH NtOTHuHc Kato padAtopn HnOrb.H. YBepete ce, Ye BEHTHauHIOHNTE OTBOPn HA yPeHa cA3kYPn

Bnara n nouchTbaHe
TOny yeped he enPpOMoKaem! He notanaihe bBb Oda. He n03oRaBae KOtAKc B oda.AKO bNBe3a OBy pEya,TOBA MOKeJ a npnHnn CepHOHa RpeJa. HnON3BaTe NOuCTBaUm MATEpHAnH, KOIO CTbIbPkat anKOKoA, AMOHr, 6eHNHn PApaRkDaUa CSbCTANK Tb KAto TE MoRat da Noaepdrt yepda. 3aNoHCTBaHe mNOJI3BaTe MEKo, BlaXKnOpne.

PpoepcnoHaHNOpeuNKnnpaHe
Bateprrn 1n OAIokOBH nTpe6BaJa Cae 3x3xPnRt B 06uiTe OTnAa. Bateprrn Tpr6BaJ Da cpeIaBArB aCb6bpatehen nyHKT 3a HnOanBaHn Bateprrn OTdenHe Ha eHIOKHTNAn OAOkEP D eOpbe 3a ekOIOMrHATA cpeA.
YINTBAHE 3A BE3ONACTHOCT
- PPOETEYIbTBAHEO -BcHnHnHcykui3a6B30NaCTHOCTN yHnO7pe68aTp8BaDA 6bJATPNOHTENPiPeDnaCae pBaOToC yPeJa.
2.ANA3ETE HMCTPKUMITE -HNCTPKUMITE 3a 6beonactHOCTN ynoptpe6a Tp86aa da bdtat ctbxaehn a3b5eua cnpaba.
3.CNEUJAFHINI PNPYDLEPKEDEHIN -TRePAaBa da ce cnaabaB BcNnKPipeynpkeDeHHI INIHCANH bPxy ypeda nTei S ybn-TbAHTeO 3a YnTope6a.
4.CNEBAHTE HCHTPKUNTE -Tpa6ba da ce cna8at BcHKn HCTpykun 3a ynoTpe6a. - BODAI BNAFTA - Yepa He 6n TpB8A0 Da C8 n3no3Ba 6n3o Do BOda, Hapmep 6n3o Do dykaBHa, yMBAHNIK, KXHNcKa MNBk, OTKPHTa nepaHr, PnybEN 6aceHH INMOKPO anTpe.
BEBHNTLAUNI - OBpOte B ypea C ha HapaeBN 3A HeoBB AedKDA BHTBNTLAUNI. Te Ca HBe60xOJIMM 3A da pnpEaBAType aonpPrrBaBn. YpeDraTb6A da nocTeBA TAKA, He HerBOTO MeCtoTHAOXKOdHne HIN nonOeHXeHne Da He npEHn aa CboBDHO To My BEHTNIOPAHe (oxkAnDahe). He noCTABaYte ypea BbPxY neHn, DnHBn, OJeANIo nnOdoHb NoBbpxHOCT, KOTOn 6mMOnla Da zakRyne BEHTNIOUOHnMe My OTBPOK, KAIO To B 3atOBPeHN PNOcTpaHCTBa KATO b6MNIOTeKA INI uKaF, KOHTo CNPiAT CBODOHnRA pntOK Ha B3dX npce BENTHAONOHtO BTOP. - TONNHA - Ypeda Tprba Da e paaonnoxhen daenee OhtaOnHHnHa tonnHn KaTO padnatoR, neKn Hn DpyTaTexHnka, (BKNIOHTENHO yCNBaTe), KOHT MoRAT da KJIbYBaT ONNHA.
- INTOCHNIH A HEEPN-YpeBa TpRbA Da Ce CBPKe KbI STMHOHNH KA E HEPN CAMOT NTINa, NOOCHEH B yBnTBAHETAOy mTOPe6Ba NIK KAKTO E bSIOBAAHO Bpxy Hero.
- 3AaHTA HA 3AXPAHBAuNT KAEEN - 3axpaHbauNTe KaEBn TpBbA 86BjTAT INCTaHINa Hn TaKb HauN, Ye da He ce HactbNbat npx XoHe e Nn npOsbat O Heaa CTOKEHN B5Xpy Nn DO TRX.
- HEYNOTPE6A - 10. Iepeme Ha bIrrn nepiOn Ha neyntpe6a H ype9a, moNHa n3KIOHcTe ro tEgKpO3x4XdHAHeTO hAHTHeTA.
- PEPDA3BAEOT 3AM5PCBAAHIN TEHYOCTN - Tp8BaDa ce BHMNABpe3 OTOBPHTA Hyaepda a He haHaJIAT BbHHUN PEPTMENI mYTHeOCTN. He parrA3BaTe
12.ИЗСКВАЙМ ПИ PMO毛泽东Таразьма Дд Бд ремOTиран calo OT cneuaHIO 687096400000000000000000000000000000000000000000
a. 3axpaHbauT Ka6en nnu wencen e nopehen.
6. BBB BbtpewHocTtHa ypeDa ca nonaHaJIb BbHUnn npedMeTuN TeuHOCT.
B. Ypea e 6n n3noKeH Ha DbKd Hn Bnara.
r. Ypnda e 6nH3NcKAH, UINO6BkHa e NOpeRHeA. N3NO3BaTte cMoC KOTPONITE HACTPOKHTKE, KAKTO e K3AA3HO B NOTeBtENCKOTO bKOBOQCTBO.
D. YpeDa He DeiCtBa No HOpMaJIeH HaHH
e. Ypeqaoka3Ba cepno3n OTKIOHeHr O T HopMaJIHaTc pa6ota.
13. PEMOH - TpOBAaHTypea He TpRBea da ce OTHBa da ro npaa pnn HactbHnHn NOBpei HeONCAH B pKBOdCTbTOA ynoTpeBa.CBNNCnOxHN pMeOHn TpRBea da ce M3bPpuat ot CneuINHO obUYenHnPAoBTHN.
14. NOVICTBAHE -NIAKIOUETeYpOaONeOTeENKPOeXcTOxAaXpaBHeN pEaIN NOVCTBAHE. He NnON3BaIte TeyH INM AEPo3OJIHN NOVICTBAHm IpeNaPaTn a cAmO MeKa, BAnKaHa KbPHa. CnDaeBaITe YkaAaHnAa 3a NOVICTBAHcN IOpDpLbKkA OIKCNAMB T03N HApyNHK.
15. 3AUNITA O TbHINNo - No ephe Ma HpTMOeBTHNb Bpyr NtHn nepoMa H neHnyntpe6a, MoN HkHIOHBAHTy VcDgA oEOTKmEHECtO XaBxHHBeBn A hHTCHTa
16. IPOBEPKA 3A CNYPHOTCR -CnE d pemOH HA ypeDA, NOMONITE cnyKHTENITTE OT cepBa3a Da HanpaRbI PNOBEPK3A 3A CNYPHOT HA ypeDA.
17. IEPOTABPABAE - 3aДаиб36hethe anochCTObTbBnIaIeHMAREBAHne H enEeKTHpeckcN yadp He npETOBAPBAITE KOKAKTEHnE PAK30ANHTENITE B KONTO E BKNIOY UPEyA.
18. PA3TOBAPBAHE OT ENEKTOPOCTATUHHO HANPEXEHME- NAKIOHOTe eNkTOPO3aXpAHBaHTo I HAbaTe 6bAtePmTe, Ako ypeDa he paoToH KaTo TprBa. Cnep KpATO BPOMe OTHoBO NOCTABe To BApTeMnE INKIOHOTe GIEKTOPO3aXpAHBaHTo.
TO3N YPENE NPEHAA3HAUYEH 3A NPOBbJKNITEHIO DEICTBNE!
3A HAMARBAE HA PCKA OT NIOJAP IINI EIKTPOYAD JIOCAIDH CMUJEHN IINO13BAITE CAMO INPENOPB YAHITE AKCECOAH
PA3IIOJOKEHNE HA KOHTPOJNTE NФYHKUIN
M3rne otrope
1 MODE ByToH
2 AL Set ByToH
3 AL.1 AnapMa 1
C F Knoy 3a TeDMoMeTbO C/
6 PpokekTop (B Kpbra)
7 ByToH 3a HactpoKa
8 6yToH3aHaCTpoKa
9 8KnOyBaHe/M3KnOyBaHe
10 SNOOZE/SLEEP ByToH
Harnedotnped
11 LCD Ekpan
H3rneoTpaHn
12 Ekpan 3a YecToTa
13 LINE IN Ka
14 VOLUME ^+ /-
15 TUNING
16 HoohoocBteTneON/OFF
17 Ppokektop ON/OFF
18 AM/FM CeIeKTop 3a YecToTa
3aepen nrrneHa ypepa
23
19 TnOBeTnKet
20 ToHKoJIOHn
21 Ka6cn 3a enektpoaxpaHbaHe
22 TemnepaTypeH ceH3Op (Cama 3a cTainHa TemnepaTypa)
23 FM KnHa aHTeHa
PpOKeTOp
3aBpTeTe KpTa HnABo, 3a Ja OTbOpTe (no nocoka Ha cTpeKATA: OPEN); oTcPahete roHata Yacf
Kolentoto 3a haCTPOKA FOCUS (24) aa HACTPOKA ME CHETA bJKNHAE a
pasonoJIOKHO BbBtpeHNOCTHa HcXepaTaP NoCTaBe6ObTHo ROpHata NOnIycPcE Ma 3ABbPbTeHn HApNCHO (No HcOKA Ha CTeJIKA: CLOSE).
ENKTP03AXPAHBAHE 3AXPAHBAHE C BATEPIM
3axpaBauaII BONTAK HO Tn 03yep E 230 B50 - 20 Xu. HcTPOKpATA 3a cuae aocNtpyrca b 3 x 3 B CR 2025IITNIHNI KNTbYHbBATEPm (He ce doCTABT). MOJI cnaaBae IIOAeRPHOCTNE tpi nocSTABHHe hBaTePmte. BCity-ay Hn CINPAH e HA ToKA, ypeDA ABTOMATNUO lue akTNIBPA
6BATEPme. 3a da c3anaaT qaua HcHbPOTHAPKa H a TAIMEPA.
HAYAJO
Hattichene 6byo n eT H aonnata cact h ype da cned kato cte ro c8bpaan Km rnaBHO t3xpanBahe.
Ypnda 10naka 10a1a tact 3a okno da cekyni. Cne Toa 3e ce bhe Na HOpmanen pexm.
MNA KIHO 3A NOHIO OBOETNIHHe NA yEDA (CINRA LED CBTMIHa) (16); noctabete ro HA ON, 3a da BIXKIOHTE CBEYTRNTBa Hn OH OFF, 3a Da I NIKKIOHTE OTHOHO
1. HACTPOIKA HA YAC N DATA
No ephe Ha HOpMaHeh PekHMM HATNCHETE MODE (1) 3a OKnO 2 cekHydm, 3a da bHaedepTe Hactpokata 3a haca. HATNCHETE MODE (1) MHOrOKpArHo, 3a da npEbrKnOHTe Ha pAnNHNHTe HactpokH 3a Hac N Data:
HaCtpoKa Ha KaIeHapHa roDnHa
Φa6pnHnHa HAcTpOuKa : 2006
OnuHn 3a HactpoikKa : 2000 - 2099
KanHdapHaama aoduna

HacTpoKaHa KaIeHApHnMaMeou
KanehoapnMoocu
Korato HactpoBate daTata, ypea une npecMeTHe den OH cemmuata ABTOMATNHO.
HactpoKaHa DaTaTa(DeHa)
dama (eH)
Korato HactpoBnBaTe DaTATA. ypea ue npeCMeTHE DeH OT CeDMuTa aBTOMaTHHO
Hactpoika Ha 12/24-Hacob FOpMaT
12/24 H pexum (H36op: 24-HacoeΦopMa)
H3nncBaHe Ha12/24-HacOBΦOpMaT
12/24 H pexkum (V36op: 12-Yacoe Dopmam)
HactpoKaHa yaca
pekum 3a yaca (ducnneha yaca npemueea)
Hactpoika HAMHYHTTE
pekum 3a MUhymu (oucnne 3a MuHym npemueea)
PnHacTpoBbHe Ha MMHyTtTe, CekyHdTe aBtOMaTHuHO ce npehAcTpoBbAT Ha Hyna.

HacTpoKa Ha AnapMa 1 n AnapMa 2
Ycctoteoh6xbar:MW(AM)525KXu-1615KXu
UKW (FM) 87.5 MXU - 108 MXU
CbnpTHBnHeHMe HA TOHKOnoHa:8Ω
BaTePmHo 3axpaHbHe : 3x3B CR 2025 JntnHH KneTbHn 6aTePnn (he ce doCTaBRT)
EneKtpo3aXpaHbAe : AC 230 B ~ 50 Xu
ENEKTPOKOHCMaH;5Bata
Tero: npu6n.07K