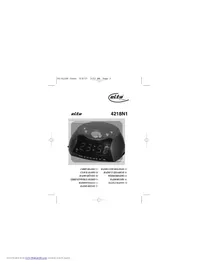
4218N1 - Alarm Clock ELTA - Free user manual and instructions
Find the device manual for free 4218N1 ELTA in PDF.



| Product Type | Clock Radio |
| Brand | ELTA |
| Model | 4218N1 |
| Main Power | AC 230V / 50Hz |
| Backup Battery | 9V (type 6LR61 or equivalent, not included) |
| Power Consumption | 5 W |
| FM Frequency Range | 88 - 108 MHz |
| Speaker | 56 mm, 8 Ω |
| Main Functions | FM radio, radio or buzzer alarm, snooze (9 min), sleep timer, clock setting, digital display |
| Radio Alarm | Yes, with ON/OFF/AUTO switch |
| Buzzer Alarm | Yes, adjustable via switch and volume knob to OFF |
| Snooze Function | 9 minutes, repeatable for one hour |
| Sleep Function | From 59 minutes to 1h59, automatic radio shut-off |
| FM Antenna | FM antenna wire, extendable for better reception |
| Care and Cleaning | Soft cloth slightly damp with mild soap; avoid benzene, alcohol, abrasives |
| Safety | Do not expose to moisture, do not open the casing, keep out of reach of children, follow ventilation instructions |
| Hearing Protection | Avoid high volumes, especially for children |
| Recycling | Do not dispose of with household waste, take to a recycling center or collection point |
| User Manual | 46 pages, available in multiple languages |
Frequently Asked Questions - 4218N1 ELTA
User questions about 4218N1 ELTA
0 question about this device. Answer the ones you know or ask your own.
Ask a new question about this device
Download the instructions for your Alarm Clock in PDF format for free! Find your manual 4218N1 - ELTA and take your electronic device back in hand. On this page are published all the documents necessary for the use of your device. 4218N1 by ELTA.
USER MANUAL 4218N1 ELTA
00-4218N Cover 5/8/07 3:53 PM Page 3

elta
4218N1
UHRENRADIO ©
RÁDIO COM RELÓGIO ©
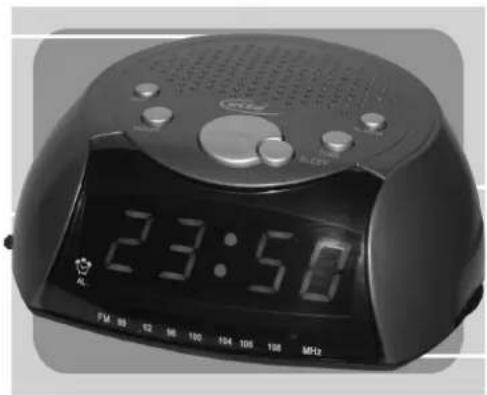
CLOCK RADIO ©
RADIO Z ZEGAREM
RADIO-RÉVEIL
WEKKERRADIO
ÉBRESZTŐÓRÁS RÁDIÓ
RADIOBUDÍK ©7
RADIOSVEGLIA ①
SAATLI RADYO ⑰
RADIO-RELOJ Ⓔ
01-4218N-GE 5/8/07 3:56 PM Page 2
MODEL 4218N1 UHRENRADIO

The triangular symbol with the lightning Bolt warne the user to the presence of dangerous non-isolated voltage on the inside of this device which may cause an electric shock.
WARNING
DANGER OF A HAZARDOUS ELECTRIC SHOCK DO NOT OPEN
WARNING: TO REDUCE THE RISK OF AN ELECTRIC SHOCK, DO NOT REMOVE THE FRONT OR BACK COVER. INSIDE THE UNIT, THERE ARE NO PARTS THAT CAN BE REPAIRED OR ADJUSTED BY THE USER. PLEASE REFER TO QUALIFIED TECHNICIANS.

The triangular symbol with the exclamation highlights important points of which the user should refer to the manual regarding maintenance and repair.
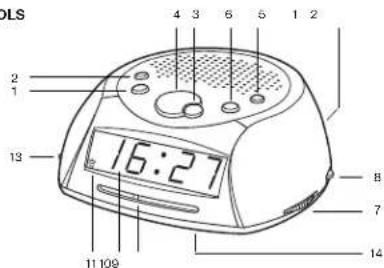
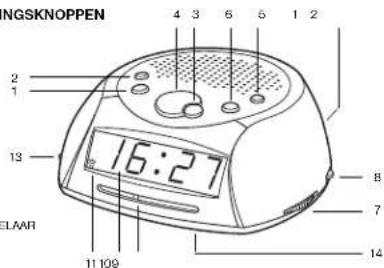
LOCATIONS OF RADIO AND CONTROLS
-
HOUR BUTTON
-
MINUTES BUTTON
-
SLEEP BUTTON
-
SNOOZE BUTTON
-
ALARM BUTTON
-
TIME SET BUTTON
-
TUNING CONTROL
-
VOLUME CONTROL
-
DIAL POINTER
-
CLOCK DISPLAY
-
ALARM INDICATOR
-
FM WIRE ANTENNA
-
ON/OFF/AUTO SWITCH
-
BATTERY COMPARTMENT
PREPARATION FOR USE
POWER SUPPLY
Important set the voltage area before use Plug the AC power cord into the AC outlet. The numbers on the display light up and flash
BUTTERY BACK UP
Install one 9V battery(6f22/000SP/6LR61 Type or equivalent) (not supplied) inside the battery compartment to retain clock memory during power interruption.
NOTE: When the power cord is not being used, disconnect it from the wall outlet.
6.
02-4218N-GB 5/8/07 3:59 PM Page 7
CLOCK SETTING
- After installing batteries, in the state of clock, the "12.00" appears on the LED.
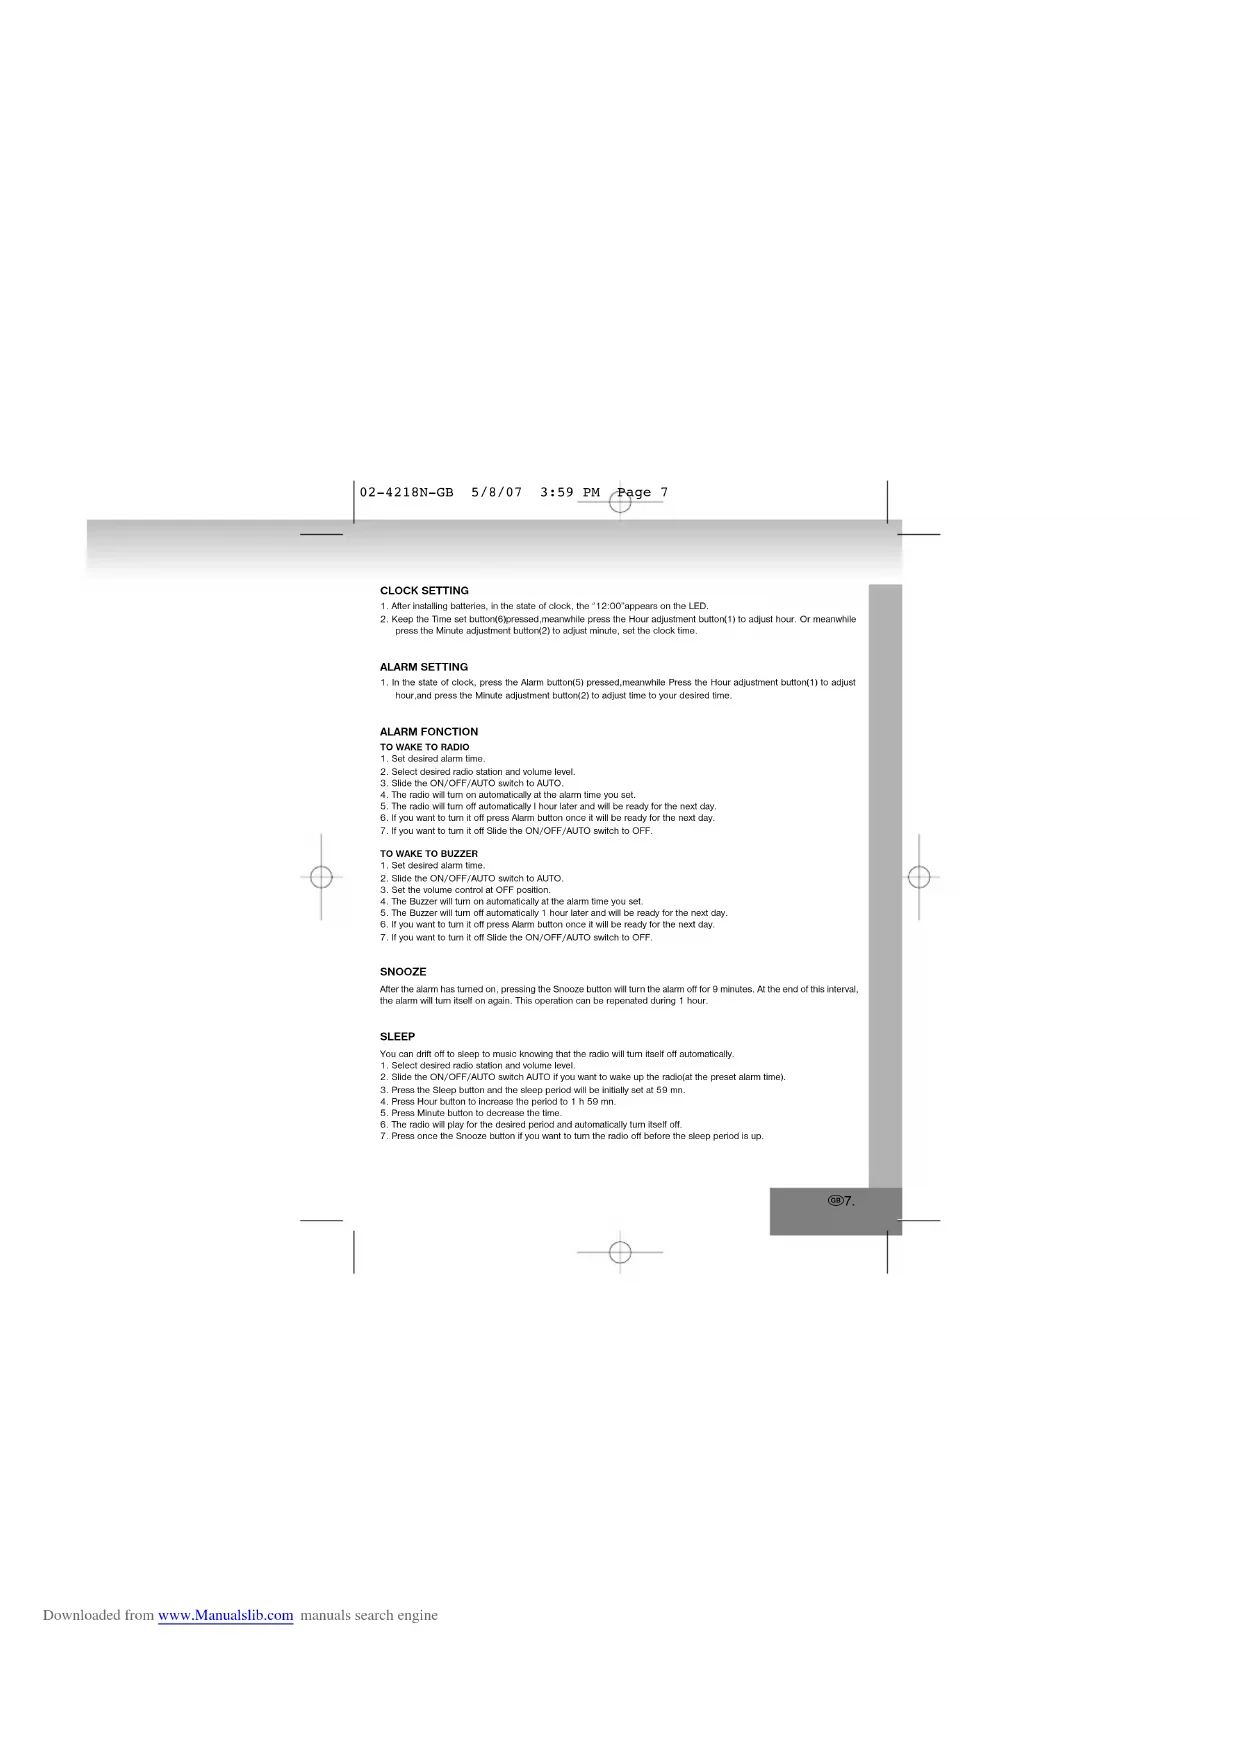
- Keep the Time set button(6)pressed, meanwhile press the Hour adjustment button(1) to adjust hour. Or meanwhile press the Minute adjustment button(2) to adjust minute, set the clock time.
ALARM SETTING
- In the state of clock, press the Alarm button(5) pressed, meanwhile Press the Hour adjustment button(1) to adjust hour and press the Minute adjustment button(2) to adjust time to your desired time.
ALARM FONCTION
TO WAKE TO RADIO
- Set desired alarm time.
- Select desired radio station and volume level.
- Slide the ON/OFF/AUTO switch to AUTO
- The radio will turn on automatically at the alarm time you set.
- The radio will turn off automatically 1 hour later and will be ready for the next day.
- If you want to turn it off press Alarm button once it will be ready for the next day.
- If you want to turn it off Slide the ON/OFF/AUTO switch to OFF.
TO WAKE TO BUZZER
- Set desired alarm time.
- Slide the ON/OFF/AUTO switch to AUTO.
- Set the volume control at OFF position.
- The Buzzer will turn on automatically at the alarm time you set.
- The Buzzer will turn off automatically 1 hour later and will be ready for the next day.
- If you want to turn it off press Alarm button once it will be ready for the next day.
- If you want to turn it off Slide the ON/OFF/AUTO switch to OFF.
SNOOZE
After the alarm has turned on, pressing the Snooze button will turn the alarm off for 9 minutes. At the end of this interval, the alarm will turn itself on again. This operation can be repenated during 1 hour.
SLEEP
You can drift off to sleep to music knowing that the radio will turn itself off automatically.
- Select desired radio station and volume level
- Slide the ON/OFF/AUTO switch AUTO if you want to wake up the radio(at the preset alarm time).
- Press the Sleep button and the sleep period will be initially set at 59 mn.
- Press Hour button to increase the period to 1 h 59 mn.
- Press Minute button to decrease the time
- The radio will play for the desired period and automatically turn itself off.
- Presa once the Snooze button if you want to turn the radio off before the sleep period is up.
02-4218N-GB 5/8/07 3:59 PM Page 8
RADIO OPERATION
- Slide the ON/OFF/AUTO switch to ON position.
- Rotate volume knob clock wise to a desired sound level.
- Rotate the tuning knob to desired station.
- To turn the radio off, slide the ON/OFF/AUTO switch to OFF position.
NOTE: Receiving FM broadcast by using wire antenna, please pull out it to get the best reception by changing its length
and direction.
MAINTENANCE
- Do not expose the unit to rain, moisture or extreme temperature.
- Do not place the unit near strong magnets.
- Do not use benzene thinner or any abrasive powder to clean the cabinet, wipe it with a soft cloth moistened with a
1 soap and water solution.
TECHICAL SPECIFICATION
Frequency range : FM:88-108 MHz
Speaker : 56mm - 8 Ω
Power supply: AC 230V/50Hz
Power consumption : 5W
Power supply for clock back up : DC 9V (6F22 or equivalent)(not included)
MORE INFORMATION

Beware of small pieces and batteries, do not swallow them. It may be hazardous to your health and lead
into suffocation. Please, Make sure to keep small devices and batteries out of the reach of children.

Important advice regarding hearing protection
Caution:
You care for your hearing, and so do we.
Therefore, use caution while using this appliance.
Our recommendation: Avoid high volumes.
Children should be supervised while using headphones; make sure that the appliance is not set to high.
volume.
Caution!
High volumes may cause irreparable damage to children's ears.
G8.
02-4218N-GB 5/8/07 3:59 PM Page 9

NEVER let allow anyone, especially children, to put objects into the holes, slots or openings on this device. This may lead into death due to electric shock. The device must only be opened by a qualified assistant.

Only use the appliance for its intended purpose.

This device may only be used in housings and business premises.

Please keep this instruction manual for further reference.

Instructions on environment protection
Do not dispose of this product in the usual household garbage at the end of its life cycle; hand it over at a collection point for the recycling of electrical and electronic appliances. The symbol on the product, the instructions for use or the packing will inform about the methods for disposal.
The materials are recyclable as mentioned in its marking. By recycling, material recycling or other forms of re-utilization of old appliances, you are making an important contribution to protect our environment. Please inquire at the community administration for the authorized disposal location.

Heat and warmth
Do not expose the appliance to direct sunlight. Make sure that the appliance is not subject to direct heat sources such as heaters or open fire. Make sure that the ventilation slots of the appliance are not covered.

Moisture and cleaning
This appliance is not waterproof! Do not immerse player in water. Do not allow player to come in contact with water. If water gets inside the player it may cause serious damage. Do not use cleaning agents that contain alcohol, ammoniac, benzene or abrasives as these could damage the player. For cleaning, use a soft, moistened cloth.
03-4218N-FR 5/8/07 4:02 PM Page 10
MODEL 4218N1 RADIO-RÉVEIL

RISQUE DELECTROCUTION. NE PAS OUVRIR
ATTENTION: AFIN DE REDURE LES RISQUES D'ELECTROCUTION, NE PAS RETIRER LE COUVERCLE (OU LE DOSI, AUCUNE PIECE A L'INTERIEUR N'EST UTILE AU CONSOMMATEUR POUR UN DEPANNAGE, SE REFERER AU PERSONNEL QUALIFIE.

DODATKOWE INFORMACJE

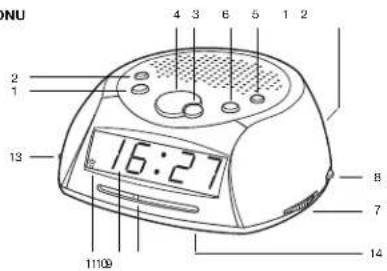
-
HOUR [UUR] TOETS
-
MINUTES [MINUTEN] TOETS
-
SLEEP [SLAAP] TOETS
-
SNOOZE [SLUIMER] TOETS
-
ALARM [ALAHM] TOETS
-
TIME SET [TIJDSINSTEELLING] TOETS
-
TUNING [APSTELLING] KNOW
-
VOLUME [VOLUME] KNOP
-
AANDUIDING GOLFLENGTE
-
CLOCK (DORWERR) SCHERM
-
ALABRA (ALABRA)
-
ALARM [ALARM]
-
FM DRAADANTENNE
-
ON/OFF/AUTO [AAN/DIT/AUTO] SCHAKELAAR
-
BATTERIJVAK
KLAARMAKEN VOOR GEBRUIK
STROOMTOEVOER
DOPLÑUJÍCÍ INFORMACE

-
HOUR [SAAT] TUŞU
-
MINUTES [DAKİKA] TUŞU
-
SLEEP [UYKU] TUSU
-
SNOOZE TUŞU
-
ALARM TUŞU
-
TIME SET [SAAT AYARI] TUŞU
-
TUNING [RADYO] KONTROLU
-
VOLUME [SES] KONTROLU
-
ARAMA POINTERI
10.CLOCK [SAAT] EKRANI
11.ALARM GÖSTERGESİ
12.FM ANTEN KABLOSU
13.ON/OFF/AUTO DUGMESI
14 PIL YUVASI
- MODEL 4218N1 UHRENRADIO
- WARNING
- LOCATIONS OF RADIO AND CONTROLS
- PREPARATION FOR USE
- POWER SUPPLY
- BUTTERY BACK UP
- CLOCK SETTING
- ALARM SETTING
- ALARM FONCTION
- TO WAKE TO RADIO
- TO WAKE TO BUZZER
- SNOOZE
- SLEEP
- RADIO OPERATION
- MAINTENANCE
- TECHICAL SPECIFICATION
- MORE INFORMATION
- IMPORTANT ADVICE REGARDING HEARING PROTECTION
- MODEL 4218N1 RADIO-RÉVEIL
- DODATKOWE INFORMACJE
- KLAARMAKEN VOOR GEBRUIK
- DOPLÑUJÍCÍ INFORMACE
Brand : ELTA
Model : 4218N1
Category : Alarm Clock