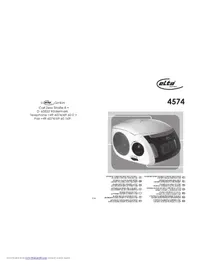
4250N - Alarm clock radio ELTA - Free user manual and instructions
Find the device manual for free 4250N ELTA in PDF.
User questions about 4250N ELTA
0 question about this device. Answer the ones you know or ask your own.
Ask a new question about this device
Download the instructions for your Alarm clock radio in PDF format for free! Find your manual 4250N - ELTA and take your electronic device back in hand. On this page are published all the documents necessary for the use of your device. 4250N by ELTA.
USER MANUAL 4250N ELTA
00-4250N Cover 7/21/06 12:07 PM Page 3

UNTERBAU-UIHRENRADIO
UNDER-CABINET CLOCK RADIO
RADIO-REVEIL POUR MONTAGE (Sous L'ARMORTE)
ALURA BEEPETT EBBREZTOORAS RADIO
RADIO SVEGLIA DI BASE
SUBESTSTRUCTURA-RADIORELOJE
BASE-RADIO COM RELOGIO
RADIOPODSZAFKOWEZ
ZEGAREM
ONDERBOUW-WEKKERRADIO
RADIO S HODINAMI UMISTENO @ ZESPODU
ASMA DOLAP ALTI
SAATLI RADYO
01-4250N-GE,GB
7/21/06
12:08PM Page 2
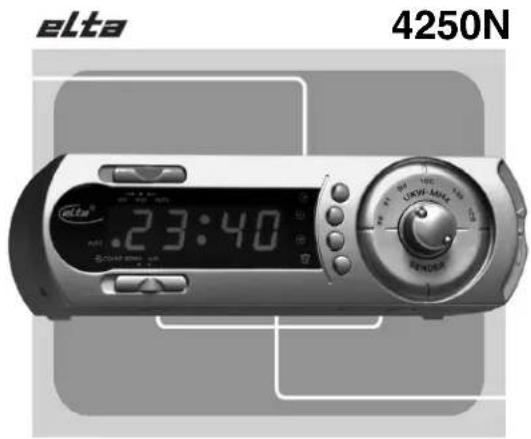
MODEL 4250N UTERBAU-UHRENRADIO

The triangular symbol with the Inflating Boll bears the user to the presence of dangerous non-bleached material, which may cause an electric shock.
WARNING
DANGER OF A HAZARIDOUS ELECTRIC SHOCK. DO NOT OPEN
WARNING: TO REDUCE THE RISK OF AN ELECTRIC SHOCK,DO NOT REMOVE THE FRONT OR BACK COVER INSIDE THE UNIT. THERE ARE NONE PARTS THAT CAN BE REPAIRED OR ADJUSTED BY THE USER. PLEASE REFER TO QUALIFIED TECHNICN.

The triangular wound with the excision highlights important points of which the user should refer to for further regarding maintenance and repair.
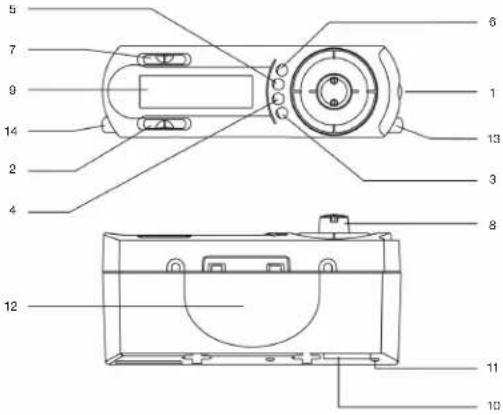
LOCATION OF PARTS AND CONTROLS
- Volume (Alarm Buzzer) Control
2.Count-Down Timer Control
3.Alarm Set/OFF button
4Time Set button - Hour Set button
- Minute Set button
- Function switch (AUTO/OFF/ON)
B.Tuning Control
9.Clock Display
10. Battery Compartment
11. External Wine Antenna
12. Speaker
13. Stand Feet
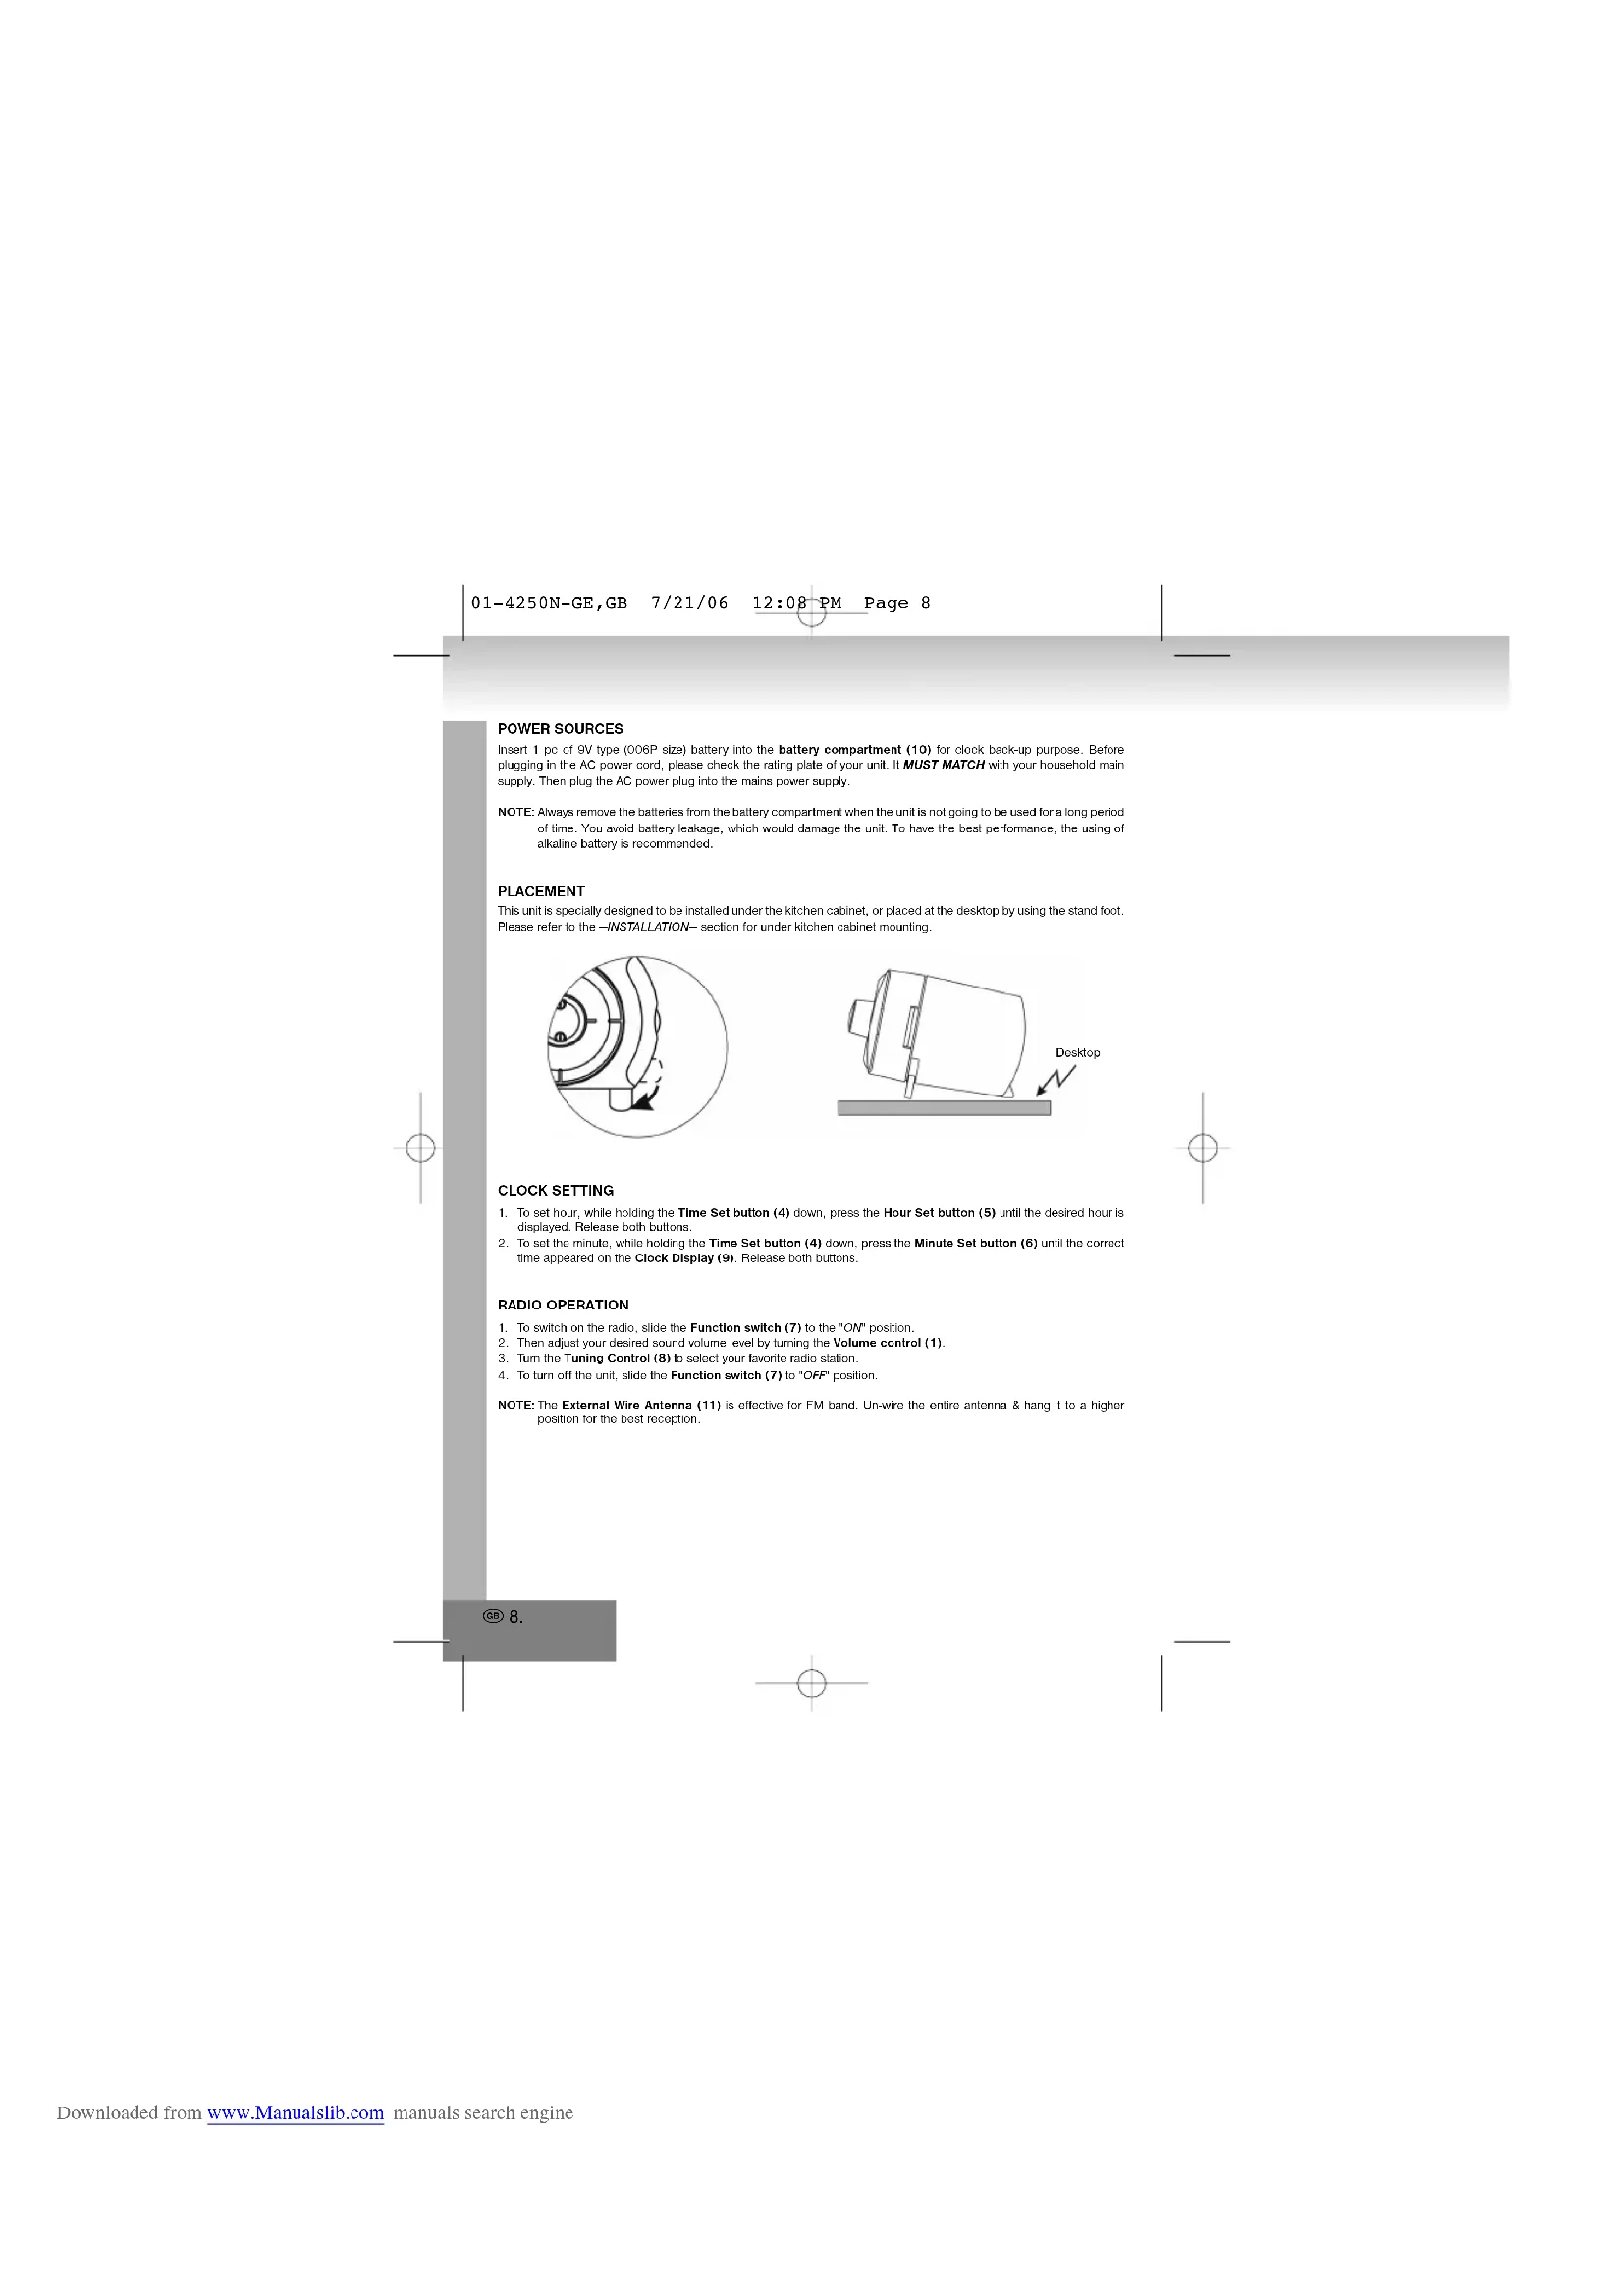
POWER SOURCES
Insert 1 pc of 9V type (006P size) battery into the battery compartment (10) for clock back-up purpose. Before plugging in the AC power cord, please check the rating plate of your unit. IT MUST MATCH with your household main supply. Then plug the AC power plug into the mains power supply.
NOTE: Always remove the ballories from the battery compartment when the unit is not going to be used for a long period of time. You avoid battery leakage, which would damage the unit. To have the best performance, the using of alkaline battery is recommended.
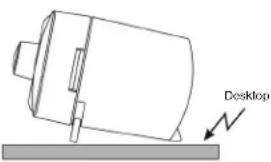
PLACEMENT
This unit is specially designed to be installed under the kitchen cabinet, or placed at the desktop by using the stand foot. Please refer to the -INSTALLATION- section for under kitchen cabinet mounting.
CLOCK SETTING
- To set hour, while holding the Time Set button (4) down, press the Hour Set button (5) until the desired hour is displayed. Release both buttons.
- To set the minute, while holding the Time Set button (4) down, press the Minute Set button (6) until the correct time appeared on the Clock Display (9). Release both buttons.
RADIO OPERATION
- To switch on the radio, slide the Function switch (7) to the "ON" position.
- Then adjust your desired sound volume level by turning the Volume control (1).
- Turn the Tuning Control (8) to select your favorite radio station
- To turn off the unit, slide the Function switch (7) to "OFF" position.
NOTE: The External Wire Antenna (11) is effective for FM band. Un-wire the entire antenna & hang it to a higher position for the best reception.
- Select the desired radio & volume level, please refer to -RADIO OPERATION-section for details.
- Press & hold the Alarm Set/OFF button (3) & set the desired alarm hour & minute by pressing the Hour Set button (5) & Minute Set button (6) respectively [For 12 hours display format unit, a "PM" indicator all the loop-left corner to indicate the afternoon time].
- Slide the Function switch (7) to 'AUTO' position. Then, the radio will be on automatically to wake you up at the moment.
- To be waked by buzzer instead radio, turn the Alarm Buzzer Control (1) to "BUZZER" position.
- To turn the radio or buzzer off (before or during the alarm activated):
A. Slide the Function switch (7) to the OFF position to terminate the alarm
B. Press the Alarm Sel/OFF button (3) once to stop at alarm until the next day same preset time.
COUNT-DOWN TIMER
- Slide the Function switch (7) to "OFF" position for activating the count-down timer only or switch to "ON" position for activating the count-down timer & keep listening the radio at the same time.
- switch the Count-Down Timer Control (2) to "ON" position, & the default setting of count-down duration "00:50" will appear on the clock display (9).
- To set the count-down duration, press the Minute Set button (6) to decrease the minute setting by 1 minute per step. Press the Hour Set button (5) to set the setting by adding 1 hour more. [The count-down duration can be set from 1 minute to 1 hour 59 minutes].
- The buzzer will be activated when the count-down time setting due
- To terminate the activated buzzer, slide the Count-Down Timer Control (2) to "OFF" position.
- To terminate the count-down counter before the buzzer activated; slide the Count-Down Timer Control (2) to "OFF" position to turn off the timer function accordingly [Press any other clock keys during the count-down period will interfere the timer function & display].
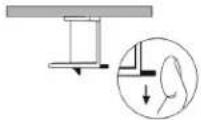
INSTALLATION
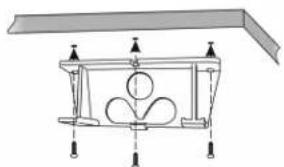
Under kitchen cabinet mounted:
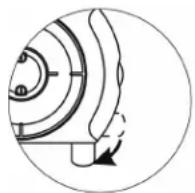
- Install the plastic mounting bracket onto the kitchen cabinet by screws as shown. [Turn both Stand Feet (14) sa shown]

01-4250N-GE,GB 7/21/06 12:08PM Page 10
- Then, install the unit by inserting into the bracket (until the hook clipped with the unit).

You can also choose to install the unit into lower position if needed.
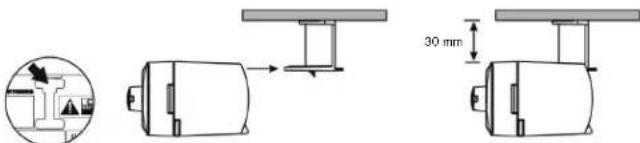
- To release the unit from the bracket, just simply press & pull the Hook-Release handle as shown & pull the unit with reverse direction from the installation.
ATTENTIONS:
- Your unit must not be exposed to rain, direct sun-light or high temperature!
- Your unit may only be repaired by a qualified specialist
TECHNICAL DATA
Power source: Mains connection: 230V -50Hz
Back-up battery: 8-Volt-Batterie für die Uhrzeit
Radio Frequency bandwidth : FM 87.5 - 108 MHz
VENTILATIONWARNING!
The normal ventilation of the product shall not be impeded for intended use.
DRIPPING WARNING!!
The product shall not be exposed to dripping or splashing. No objects filled with liquids, such as vases, shall be placed on the product.
All subjected to change for improvement without any notice
10.
01-4250N-GE,GB 7/21/06 12:08PM Page 11
More Information
Beware of small pieces and batteries, do not swallow them. It may be hazardous to your health and lead into suffocation. Please, Make sure to keep small devices and batteries out of the reach of children.
Important advice regarding hearing protection
Caution:
You care for your hearing, and so do we.
Therefore, use caution while using this appliance.
Children should be supervised while using headphones, make sure that the appliance is not set in high
volume.
Caution!
High volumes may cause irreparable damage to children's ears.


NEVER let allow anyone, especially children, to put objects into the holes, slots or openings on this device. This may lead into death due to electric shock. The device must only be opened by a qualified assistant.
Only use the appliance for its intended purpose.
This device may only be used in housings and business premises.
Please keep this instruction manual for further reference.
Instructions on environment protection
Do not dispose of this product in the usual household garbage at the end of its life cycle; hand it over at a collection point for the recycling of electrical and electronic appliances. The symbol on the product, the instructions for use or the packing will inform about the methods for disposal.
The materials are recyclable as mentioned in its marking. By recycling, material recycling or other forms of re-utilization of old appliances, you are making an important contribution to protect our environment.
Please inquire at the community administration for the schoolized disposal location.
Do not obstruct the ventilation of the device. Make sure, that no curtails, newspapers, furniture or any other type of object are blocking the ventilation system of the apparatus. The ventilation system must be clear of objects at all times! Overheating may load into serious damage of the device and reduce its performance and lifespan.
Heat and warmth
DO NOT EXPOSE the appliance to direct sunlight. Make sure that the appliance is not subject to direct heat sources such as heaters or open fires. Make sure that the ventilation slots of the appliance are not covered.
Moisture and cleaning
This appliance is not waterproof! Do not immerse player in water. Do not allow player to come in contact with water. If water gets inside the player it may cause serious damage. Do not use cleaning agents that contain alcohol, ammoniac, benzene or abrasives as those could damage the player. For cleaning, use a soft, moistened cloth.
02-4250N-FR,HU 7/21/06 12:13 PM Page 12
MODEL 4250N
RADIO-REVEIL POUR MONTAGE SOUS L'ARMOIRE

03-4250N-IT,ES 7/21/06 12:14 PM Page 22
MODEL 4250N RADIO SVGELI DA BASE

03-4250N-IT,ES 7/21/06 12:14PM Page 23
ALLACCIAMENTO DELLA RETE ELETTRICA
03-4250N-IT,ES 7/21/06 12:14 PM Page 25
03-4250N-IT,ES 7/21/06 12:14 PM Page 27
MODEL 4250N
SUBSTRUCTURA-RADIORELOJ

03-4250N-IT,ES 7/21/06 12:14PM Page 29
DESPERTADOR CON RADIO O ALARMA
03-4250N-IT,ES 7/21/06 12:14 PM Page 30
03-4250N-IT,ES 7/21/06 12:14PM Page 31