Essential Digital Video Baby Monitor - Baby monitors CHICCO - Free user manual and instructions
Find the device manual for free Essential Digital Video Baby Monitor CHICCO in PDF.
User questions about Essential Digital Video Baby Monitor CHICCO
0 question about this device. Answer the ones you know or ask your own.
Ask a new question about this device
Download the instructions for your Baby monitors in PDF format for free! Find your manual Essential Digital Video Baby Monitor - CHICCO and take your electronic device back in hand. On this page are published all the documents necessary for the use of your device. Essential Digital Video Baby Monitor by CHICCO.
USER MANUAL Essential Digital Video Baby Monitor CHICCO
Essential Digital Video Baby Monitor


Mod. 06626


Istruzioni per l'uso
Leggere attendamente e conservare queste istruzioni per riferimento futuro
Instructions for Use
Please read these instructions carefully and keep them for future reference.
Instruetiones de uso
Leer atentamente estas instrucciones y conservarlas para futuras consultas
Essential Digital Video Baby Monitor
Essential Digital Video Baby Monitor
Digital technology:
Higher Privacy standards - Zero interference
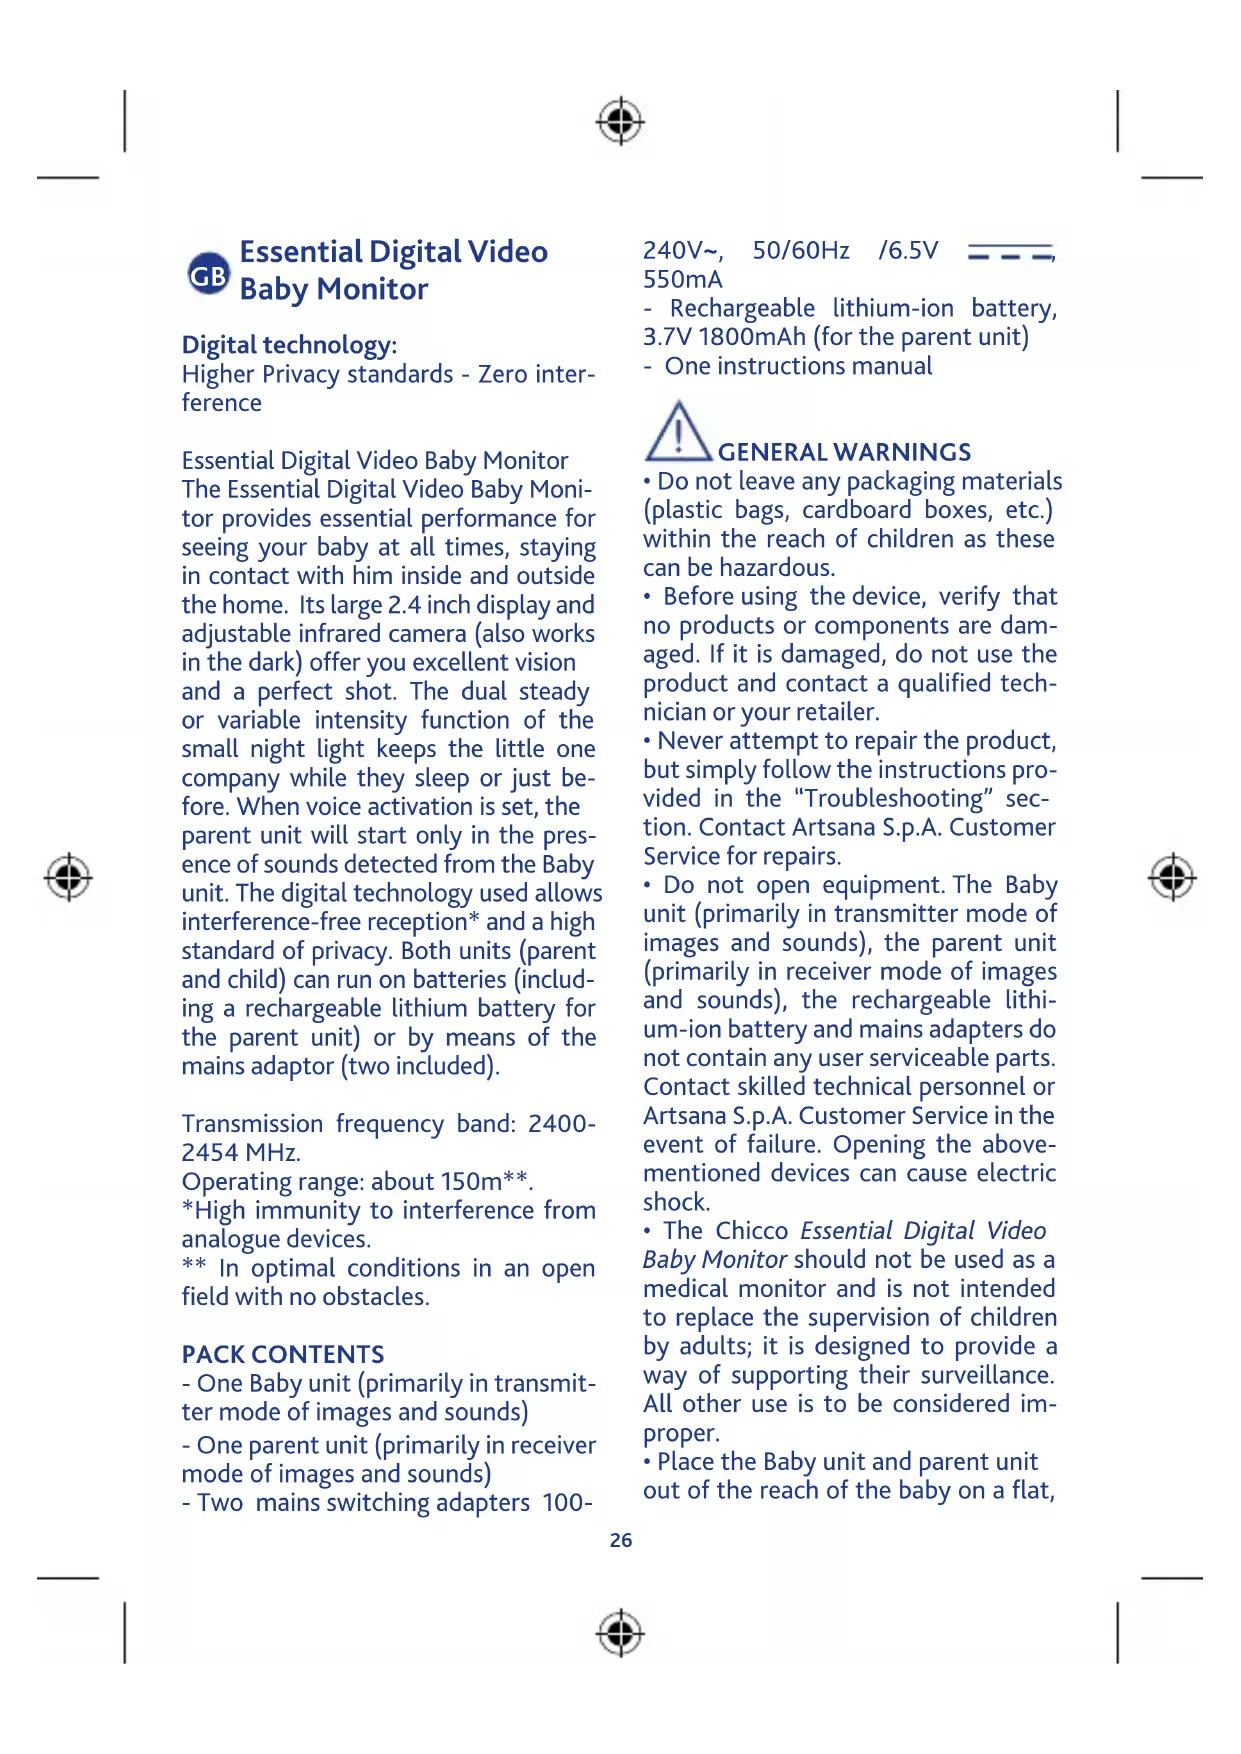
Essential Digital Video Baby Monitor The Essential Digital Video Baby Monitor provides essential performance for seeing your baby at all times, staying in contact with him inside and outside the home. Its large 2.4 inch display and adjustable infrared camera (also works in the dark) offer you excellent vision and a perfect shot. The dual steady or variable intensity function of the small night light keeps the little one company while they sleep or just before. When voice activation is set, the parent unit will start only in the presence of sounds detected from the Baby unit. The digital technology used allows interference-free reception* and a high standard of privacy. Both units (parent and child) can run on batteries (including a rechargeable lithium battery for the parent unit) or by means of the mains adaptor (two included).
Transmission frequency band: 2400-2454 MHz.
Operating range: about 150m^** .
*High immunity to interference from analogue devices.
** In optimal conditions in an open field with no obstacles.
PACK CONTENTS
- One Baby unit (primarily in transmitter mode of images and sounds)
- One parent unit (primarily in receiver mode of images and sounds)
- Two mains switching adapters 100-
240V\~, 50/60Hz /6.5V 550mA
- Rechargeable lithium-ion battery, 3.7V 1800mAh (for the parent unit)
- One instructions manual

GENERALWARNINGS
- Do not leave any packaging materials (plastic bags, cardboard boxes, etc.) within the reach of children as these can be hazardous.
- Before using the device, verify that no products or components are damaged. If it is damaged, do not use the product and contact a qualified technician or your retailer.
- Never attempt to repair the product, but simply follow the instructions provided in the "Troubleshooting" section. Contact Artsana S.p.A. Customer Service for repairs.
- Do not open equipment. The Baby unit (primarily in transmitter mode of images and sounds), the parent unit (primarily in receiver mode of images and sounds), the rechargeable lithium-ion battery and mains adapters do not contain any user serviceable parts. Contact skilled technical personnel or Artsana S.p.A. Customer Service in the event of failure. Opening the above-mentioned devices can cause electric shock.
- The Chicco Essential Digital Video Baby Monitor should not be used as a medical monitor and is not intended to replace the supervision of children by adults; it is designed to provide a way of supporting their surveillance. All other use is to be considered improper.
- Place the Baby unit and parent unit out of the reach of the baby on a flat,
stable surface.
-
Keep the Baby unit, parent unit, the rechargeable lithium-ion battery and the AC/DC mains adapters out of reach of children (mains adapter cords could cause strangulation).
-
It is important to regularly check the proper functioning of the Baby unit (primarily in transmitter mode of images and sounds) and the parent unit (primarily in receiver mode of images and sounds), particularly before each use, checking that signal reception is possible in the area and at a maximum distance of the intended use.
-
The maximum operating distance is around 150 metres in an open space without obstacles (this range could be reduced considerably indoors according to the environmental situations, the layout of walls and furniture, the presence of metal structures, electromagnetic fields/disturbances of internal or external origin, reinforced concrete walls, when rooms are located on different floors, or when the batteries are not charged completely etc.)
-
When the Baby unit and/or parent unit are powered with Alkaline batteries and/or rechargeable lithium-ion battery, the product will stop working if the charging level is not sufficient. It is therefore always advisable to check Alkaline batteries and/or rechargeable lithium-ion battery status when switching on both units.
-
In the event of a sudden electricity outage, when the parent unit (primarily in receiver mode) is being powered with the provided mains adapter, the product will stop working only if the charging level of the rechargeable lithium-ion battery is not sufficient or the battery is not inserted in the
battery compartment. It is therefore always advisable to check the status or installation.
-
Do not use the Baby unit (primarily in transmitter mode of images and sounds), the parent unit (primarily in receiver mode of images and sounds), the rechargeable lithium-ion battery and adapters in positions exposed to the elements (rain, sun, etc.). Whenever using the unit outdoors, the Baby unit (primarily in transmitter mode of images and sounds) and the parent unit (primarily in receiver mode of images and sounds) must be powered via internal Alkaline batteries and/or rechargeable lithium-ion battery: the mains adapters supplied with the product are not suitable for outdoor use.
-
To prevent overheating, keep the Baby unit (primarily in transmitter mode of images and sounds), the parent unit (primarily in receiver mode of images and sounds), the rechargeable lithium-ion battery and, especially, AC/DC mains adapters away from sources of heat, for example radiators, thermostats, stoves, cookers, sunny windows, etc.
-
Never use (especially if connected to the mains with the mains adapters) the two units close to areas or situations where water is found, such as bathtubs, washing machines, kitchen sink or wet surfaces. Do not immerse or wet. Do not use the unit and adapters if they have fallen in water. In this case, contact skilled technical personnel.
-
Keep the Baby unit (primarily in transmitter mode of images and sounds), the parent unit (primarily in receiver mode of images and sounds)
and the AC/DC mains adapters so as to allow adequate ventilation and to avoid the risk of overheating components.
- Do not use this product near fluorescent lamps (Neon) or other electrical appliances such as televisions, motors, personal computers, cordless telephones, DECT cordless phones etc. Doing so could interfere with its operation.
- Only use the AC/DC mains adapters supplied with the product or an identical type with the same electrical characteristics. Use of other adapters could damage the Baby unit and/or parent unit and cause danger to the user.
- Adapter power cords cannot be replaced and, therefore, in case of damage, do not continue to use the mains adapter but replace it with an identical type adapter.
Attention: Do not use a mains adapter different from the one supplied with this Artsana S.p.A. product, as doing so renders the product non-compliant with technical standard specifications established by the relevant EC directives affecting product safety and integrity. Contact the retailer or Artsana S.p.A. to replace.
- Ensure that AC/DC mains adapters voltage (see data plate located on the AC/DC mains adapters) matches that of the mains electricity and that the mains adapter plug is compatible with your electrical system outlets.
- Connect the AC/DC mains adapters to easily accessible power outlets which are, however, out of reach of children. Position AC/DC mains adapt
er cords so as to prevent the cord from being walked on, from getting caught in items placed upon or against them, or from being accessible to the baby and therefore constituting a risk (tripping, choking).
- The AC/DC mains adapters, the Baby unit (primarily in transmitter mode of images and sounds) and the parent unit (primarily in receiver mode of images and sounds) may be become hot to the touch when in use. This is normal.
- Always disconnect the AC/DC mains adapters from the power socket when the appliance is not in use.
- The replacement of Alkaline batteries or the rechargeable lithium-ion battery must always be carried out only by an adult and with rechargeable batteries having the same characteristics as those mentioned in this instructions manual.
The Baby unit (primarily in transmitter mode of images and sounds) is equipped with a light-sensitive sensor that automatically activates the infrared LEDs in case of reduction of ambient light or dark, thus allowing viewing in low light conditions. - Since the infrared LEDs on the Baby unit (primarily in transmitter mode of images and sounds) do not emit visible light, test function by checking the image transmitted from the parent unit camera unit, when the Baby unit is positioned in a dimly lit room.
- The infrared LEDs on the Baby unit (primarily in transmitter mode of images and sounds) are not harmful to health.
ATTENTION!
It is advisable to avoid direct view
ing of the infrared radiation emission along the axis by the naked eye or by optical devices.
ATTENTION!
TO REDUCE THE RISK OF ELECTRIC SHOCK, DO NOT REMOVE THE PROTECTION OR ATTEMPT TO OPEN MAINS ADAPTERS. DO NOT WET MAINS ADAPTERS, THE Baby unit OR PARENT UNIT. DO NOT EXPOSE TO HUMIDITY OR ATTEMPT TO OPEN THEM. THIS MAY BE A SOURCE OF DANGER AND SHALL VOID THE WARRANTY.
1. Configuration & Features
This monitoring device, created with "Adaptive frequency Hopping" digital transmission technology, can be used as an aid in baby monitoring in the home. This baby monitor includes a Baby unit (primarily in transmitter mode of images and sounds) and a parent unit (primarily in receiver mode of images and sounds).
Both these devices use "Adaptive frequency Hopping" digital transmission technology to establish a radio connection that allows the sending and receiving of sounds and images.
1.1 System features
Main system features include:
- Visual and voice transmission via "Adaptive frequency Hopping" digital technology system.
- Outdoor operating range of about 150 metres without obstacles.*
- The maximum operating range is about 150 metres in an open field with no obstacles and with fully charged batteries (the range, however, could be reduced substantially within a home, depending on particular en
vironmental conditions, layout of walls and furniture in the home and the presence of metallic structures, external and internal interference/ electromagnetic fields, concrete walls or between rooms on different floors or because batteries are not fully charged, etc.).
1.2 Baby unit (primarily in transmitter mode of images and sounds) Model 06626
- Power via 100 - 240V 50 / 60Hz 6.5V = _ = _ ,550mA mains switching adapter or via 4 1.5V AA /LR6 Alkaline batteries (not included).
- On/Off button
- Night light On/Off button
- Nightlight
- Camera lens
- Microphone
- Infrared lighting system (8 LEDs) to allow viewing of the baby in the dark
- Light-sensitive sensor
- Power and link indicator light:
(a) Steady green: linked with parent unit
(b) Flashing green: absence of or loss of link with parent unit
(c) OFF: Baby unit off
10. Alkaline battery compartment closing panel
11. Baby unit power connector
12. Alkaline battery status indicator light:
(a) Flashing red: Alkaline batteries almost flat
(b) OFF: Alkaline batteries charged or operation via mains adapter (1)
1.3 Parent unit (primarily in receiver mode of images and sounds) Model 06626
-
Power via supplied rechargeable 3.7V, 1800mAh lithium-ion battery or via 100-240V~, 50/60Hz /6.5V —— 550mA mains switching adapter
-
On/Off button
-
Lit level indicator bar for sounds emitted by the child
-
2.4" LCD colour display. The LCD display allows real time visualisation of the baby and the following icons:
-
charging and recharging status of the rechargeable Lithium-ion battery of the parent unit
-
proper connection between the Baby unit and parent unit
-
loss or lack of connection between the Baby unit and parent unit
-
volume adjustment level
-
voice activation function set
-
Parent unit loudspeaker + (5a), - (5b) volume adjustment buttons
-
Built-in loudspeaker for sound reproduction of sounds emitted by the child.
This performs the following additional functions at the same time:
a) Absence of or loss of link between baby and parent unit signal function: approx. 10 seconds after the power and link indicator light starts to flash green, you will hear 2 consecutive beeps per second. As soon as the link with the Baby unit is restored, the signal switches off and the power and link indicator light will light up steady green.
b) Rechargeable lithium-ion battery status almost flat signal function: you hear 1 beep per second and the rechargeable battery indicator light
begins to flash red. When charging of the rechargeable lithium-ion battery begins, the beep switches off and the rechargeable battery status indicator light lights up steady red until charging is complete.
- ON/OFF voice activation or continuous transmission selector
- Power and link indicator light:
(a) Steady green: linked with Baby unit
(b) Flashing green: absence of or loss of link with Baby unit
(c) OFF: parent unit off - Rechargeable lithium-ion battery status indicator light:
(a) Flashing red: rechargeable battery almost flat
(b) Steady red: charging of rechargeable batteries in progress via mains adapter
(c) OFF: rechargeable battery charged or operation via mains adapter without rechargeable battery - Rechargeable battery compartment closing panel
- Belt hook
- Hole for support cord (not included)
- 3.7V 1800mAh rechargeable lithium-ion battery via 100-240V\~, 50 / 60Hz / 6.5V = _ , 550mA mains switching adapter
- Power connector and/or rechargeable lithium-ion battery charger
- Display brightness control button (7 levels)
1.4 Icons shown on the display

Proper connection between units

Loss or lack of connection between units

Voice Activation Function ac- shVoiceActivitatamEgactionnact-use tive them and contact a qualified techni

Minimum volume level

Maximum volume level

Rechargeable battery charged

Medium charging level on rechargeable battery

Low charging level on rechargeable battery

Rechargeable battery flat: the parent unit will switch off within a few minutes
- Do not leave mains adapters (1) plugged into the outlet when devices are not in use and/or not connected to the mains adapters (1).
2.1.2 Modes of use - Switching on and Adjustment
The Baby unit (primarily in transmitter mode of images and sounds) must be positioned about 1 - 1.5 metres from the child, on a flat, stable surface and with the microphone (5) and the camera lens (5) directed toward the child.
Attention: the Baby unit, mains adapter (1) and its power cord must be kept out of reach of children.
2.Description of features
2 Baby unit (primarily in transmitter mode of images and sounds)
2.1.1 Power:
Power via 100-240V\~,50/60Hz /6.5V 550mA (1) mains switching adapter or via 4 1.5V AA /LR6 Alkaline batteries (not included).
When power is supplied with mains adapter (1):
-
verify that the voltage corresponds to the rating plate of the previously indicated adapters.
-
insert the mains adapter jack (1) in the power connector (11) on the side of the unit.
- insert the mains adapter plug in an easily accessible power socket.
ATTENTION:
- The adapter cord may constitute a risk of strangulation,keep out of reach of children.
Periodically inspect mains adapters (1). If the power cord or plastic parts
Switching the Baby unit on/off
Press the on/off button (2) for about 2 second. The Baby unit (primarily in transmitter mode of images and sounds) will switch on.
The power and link indicator light (9) will begin to flash green to indicate that the Baby unit is searching for a connection to start audio transmission with the parent unit. Once connection has been established between the 2 units, the power and link indicator light will light up steady green.
Keep the button (2) pressed for 2 seconds. The power and link indicator (9) and the Baby unit (primarily in transmitter mode of images and sounds) will switch off.
Nightlight
A night light (4) is present on the Baby unit.
The backlight can be set with a dual function: backlight at minimum in

tensity and steady to reassure the baby while he sleeps, and a nightlight with high intensity, variable light to accompany him while he falls asleep.
Nightlight On/Off in Minimum intensity, fixed and variable intensity modes
Press the nightlight On/Off button (2) and the nightlight will switch on at minimum intensity and steady.
If during this operating mode, you press the nightlight On/Off button (3) once, the Variable brightness nightlight mode will be activated.
Brightness will automatically vary from maximum level to minimum level.
At the twelfth minute, nightlight brightness will remain fixed at minimum level.
-
0-4 minutes maximum-medium high intensity
-
4-8 minutes medium-high-medi-medipropheimected to parent unit: um-low intensity the indicator light (9) will light up
-
8-12 minutes medium-low-mini-medisteadygreemi
mum intensity - Indication of los - over 12 minutes nightlight at mini-nightlight treatment
mum intensity and steady
During the Variable brightness nightlight operating mode, if the nightlight On/Off button (3) is pressed once, light brightness will return steady at minimum level.
If the nightlight On/Off button (3) is pressed again in this operating mode, the brightness variation cycle will begin again, starting from maximum level. Press the nightlight On/Off button (3) button again for 2 seconds and the nightlight will switch off, both in minimum, steady brightness and in
Variable brightness nightlight mode.
For energy savings, when the Baby unit (primarily in transmitter mode of images and sounds) is being powered via Alkaline batteries, the backlight, if in minimum intensity and steady mode, switches off automatically 5 minutes after the end of the Variable brightness nightlight operating mode cycle.
If the Baby unit (primarily in transmitter mode of images and sounds) is being powered via mains adapter (1), the nightlight will remain on in both modes until the button (3) is pressed again for 2 seconds.
The nightlight can be switched on even when the Baby unit is off.
Luminous operating status indicators
-
The power and link indicator light (9) supplies 3 different pieces of information:
-
Indication that the device is on and properighemadcted to parent unit:
the indicator light (9) will light up steadyygreemi-
- Indication of loss or absence of link at wightthepaint unit:
the indicator light (9) will light up green and begin to flash.
As soon as the link with the parent unit is restored, the indicator light (9) will light up steady green.
NOTE: when the Baby unit switches on, it searches for the channel to link with the parent unit; therefore the indicator light (9) will flash green until a link is established.
-Indication of device off: the indicator light (9) will switch off.
- The Alkaline battery status indicator light (12) supplies 2 different pieces of information:
-Indication that Alkaline batteries are almost flat:
the indicator light (12) will light up red and begin to flash.
- Alkaline batteries charged or operation via mains adapter (1):
the indicator light (12) will switch off.
Night Vision
In case of darkness or decrease in the brightness of the room where the Baby unit is located, the light-sensitive sensor (8) will automatically activate the infrared lighting system (7) to allow viewing of the baby even in the dark.
Attention:
When night vision is active, the parent unit display (4) image colours will be altered and, in the event of darkness, the images will appear in black and white: this is to be considered normal.
2.2 Parent unit (primarily in receiver mode of images and sounds)
2.2.1 Power and recharging:
Power via supplied rechargeable 3.7V, 1800mAh (13) lithium-ion battery or via 100 - 240V 50 / 60Hz / 6.5V 550mA 1 mains switching adapter.
ATTENTION: The charging of rechargeable batteries should only be done via the supplied mains adapter (1) and can be performed both if the parent unit is switched on and if the parent unit is off.
In the event of power with mains adapter (1) or rechargeable lithium-ion battery charging:
-
verify that the voltage corresponds to the rating plate of the previously indicated adapters.
-
insert the mains adapter jack (1) in
the power connector (14) on the side of the unit.
- insert the mains adapter plug in an easily accessible power socket.
Attention:
- The mains adapter cord (1) may constitute a risk of strangulation,keep out of reach of children.
Periodically inspect mains adapters (1). If the power cord or plastic parts show signs of damage, do not use them and contact a qualified technician.
- Do not leave mains adapters (1) plugged into the outlet when devices are not in use and/or not connected to the mains adapters (1)
2.2.2 Modes of use - Switching on and Adjustment
Switching on/off the parent unit (primarily in receiver mode of images and sounds)
Press the on/off button (2) for about 2 second. The parent unit (primarily in receiver mode of images and sounds) will switch on. The power and link indicator light (8) will begin to flash green and the display (4), after briefly displaying the Chicco logo, will show the icon to indicate that the parent unit is searching for a connection with the Baby unit. Once connection has been established between the 2 units, the icon will be shown, the link indicator light (8) will light up a steady green and the image detected in real time by the camera (5) on the Baby unit will be shown.
Keep the button (2) pressed for 2 seconds until the power and link indicator (8) and the parent unit (primar
ily in transmitter mode of images and sounds) switch off.
A long beep will be heard when switching the parent unit on and off.
Volume adjustment + - of the parent unit loudspeaker
The +5a ,- (5b) volume adjustment buttons (6) regulate the volume of sounds emitted by the Baby unit.
Press + (5a) and - (5b) to regulate parent unit loudspeaker (6) volume and select the desired level.
The unit offers up to 10 volume setting levels. The factory set volume level is 5.
Press the "+" button (5a) to increase one level.
Press the " - " (5b) button once to decrease one level.
The change in the volume level will be shown on the display (4)
The device stores the volume level selected during previous use in its memory, even after it has been switched off and switched back on.
Note: The volume adjustment icon includes 5 notches: each notch lights up after 2 presses of the + (5a) / - (5b) button.
A beep will be heard each time volume is increased or decreased by a level.
A double beep will be heard each time the maximum or minimum level is met.
Brightness adjustment of the parent unit
Press the brightness adjustment button (15) and the LCD display (4) brightness will vary cyclically by one level. It is possible to select up to 7
brightness levels.
Voice Activation function
The parent unit (primarily in transmitter mode of images and sounds) can function in continuous mode (OFF) or in voice activation mode (ON) (7).
When the intensity of the sounds detected by the microphone (6) on the Baby unit exceeds the threshold for voice activation set by the manufacturer, the image of the baby is shown in real time on the display (4) and the loudspeaker (6) on the parent unit (primarily in transmitter mode of images and sounds) is activated. In the presence of sounds with intensity less than this threshold, the LCD display (4) interrupts image visualisation of the baby and the loudspeaker (6) on the parent unit (primarily in transmitter mode of images and sounds) is deactivated. When this function is set, the icon is shown on the display (4).
Parent unit portability
The parent unit is equipped with a useful belt hook (11) for carrying it around.
You can carry the parent unit with you, using the support cord (not included), to be inserted in the hole (12).
Luminous and acoustic operating status indicators:
-
The power and link indicator light (8) supplies 3 different pieces of information:
-
Indication that the device is on and properly connected to Baby unit: the indicator light (8) will light up steady green.
-
Indication of loss or absence of link with the Baby unit:
the indicator light (8) will light up green and begin to flash. At the same time on the display (4) that the image of the baby disappears, the icon appears and, after about 10 seconds, 2 consecutive beeps per second are heard.
As soon as the link is restored, the beep will switch off and the display (4) will show the icon and the indicator light (8) will light up steady green.
NOTE: when the parent unit switches on, it searches for the channel to link with the Baby unit; therefore the indicator light (8) will flash green and the display will show the icon until a link is established.
-Indication of device off: the indicator light (8) will switch off.
- The rechargeable lithium-ion battery status indicator light (9) supplies 3 different pieces of information:
-Indication that the rechargeable battery (13) is almost flat: the indicator light (9) will light up red and begin to flash. At the same time on the display (4), the battery flat icon appears and a beep is heard each second.
If you want to continue using the device, it is advisable to charge the rechargeable lithium-ion battery (13); otherwise, the device will stop working. Charge the rechargeable lithium-ion battery (13) by connecting the mains adapter (1) to the parent unit power and charger connector (14). When charging starts, the beep will switch off.
-Indication that the rechargeable battery (13) is charging: when charging begins, the indicator light (9) switches on steady red and the display shows the icon of a battery with its internal
notches switching on in succession. Leave the battery to charge until the indicator light (9) switches off and until the icon on the display remains steady.
The parent unit can still be used to monitor the baby while the rechargeable battery is charging, but the time required to reach full charge will be longer.
-Indication that the rechargeable battery is charged or of operation via mains adapter (1) without rechargeable battery:
the indicator light (9) will switch off. Lit level indicator bar for sounds emitted by the baby (3):
Illuminates progressively from the centre outward, indicating 3 levels of sound intensity coming from the Baby unit (primarily in transmitter mode of images and sounds) microphone (6)
Allows parents to monitor sounds emitted by the baby even when the parent unit loudspeaker volume is switched off.
□□□□: the central LED lights up if sounds emitted by the baby are of a relatively low intensity.
□□□□□:3LEDs light up if sounds emitted by the baby are of medium intensity.
5 LEDs light up if sounds emitted by the baby are of a relatively high intensity.
Attention: After switching on the parent unit (primarily in receiver mode of images and sounds) always check the power status of the Baby unit (primarily in transmitter mode of images and sounds)!
After switching on the unit, always check that reception of the transmit
ted signal is possible at the distance and/or in the areas within where it has been set. It is advisable to carry out a test with the help of a family member from the room where the Baby unit has been placed, moving simultaneously with the parent unit in areas where it has been set, to verify correct reception of the transmitted signal.
- Installation and replacement of Alkaline batteries in the Baby unit (primarily in transmitter mode of images and sounds) and the rechargeable lithium-ion battery in the parent unit (primarily in receiver mode of images and sounds)
Warning: these operations should only be performed by an adult
Attention: RECOMMENDATIONS FOR ALKALINE BATTERY USE
- Alkaline batteries must always be replaced by an adult.
- alkaline batteries that are the same or equivalent to the type recommended for the operation of this product (Alkaline 1.5V AA/LR6).
- Insert batteries in the Baby unit, making sure that the insertion polarity is as indicated in the battery compartment.
- Do not mix different types of Alkaline batteries or discharged Alkaline batteries with new batteries.
- Do not leave Alkaline batteries or any tools within the reach of children.
-
Do not short-circuit the power terminals.
-
Always remove discharged batteries from the product to avoid any possible liquid leaks that may damage it.
- in case of prolonged non-use of the product, always remove the batteries.
- Remove the Alkaline batteries from the device before disposal.
-Do not throw discharged batteries in fire or dispose of them in the environment; they must be recycled. - If the batteries are leaking liquid, replace them immediately, making sure to clean the battery compartment; thoroughly wash your hands if they have come into contact with the liquid.
- Do not attempt to recharge nonrechargeable batteries: they may explode.
- The use of rechargeable batteries is not recommended as they may reduce the device's operability.
- The device is not designed to run on replaceable lithium batteries.
WARNING: improper use may create hazardous conditions.
Attention: RECOMMENDAFOR LITHIUM BATTERY USE
- Do not dismantle, open or tear lithium batteries.
- Do not short-circuit lithium battery terminals. Do not store lithium batteries in an improper way inside boxes and/or drawers in which terminals can be short-circuited by each other or can be short-circuited by conductive material.
- Do not remove lithium batteries from their original packaging upon use.
- Do not expose lithium batteries to heat or fire. Do not expose to direct
sunlight.
-
Do not expose lithium batteries to mechanical shock. In case of accidental falls, always check the status of the container and contacts before proceeding with re-use. Do not use if the lithium battery is damaged as a result of the fall.
-
In the case of liquid leakage from the battery, be careful to avoid contact with skin and eyes with the liquid. If contact occurs, wash affected areas with plenty of water and seek medical advice.
-
Do not use any charger not specifically provided for use with the equipment.
-
Observe the markings (+) and (-) on the Lithium battery and on the product to ensure proper insertion and use.
-
Do not use a lithium battery different from that supplied to power the device.
-
Keep Lithium batteries away from the reach of children.
-
This device has been designed to prevent and inhibit the incorrect insertion of the lithium battery: always observe the relative polarity markings on the product and on the Lithium battery to ensure proper use.
-
Do not use a model of battery that is different than that stated in this instruction manual in the device. The battery purchase reference code is COD.20256600100
-
Recharge the lithium battery only under application and only using the mains adapter supplied (COD.20256600200). Do not recharge the lithium battery using an external battery charger. Follow the instructions in this manual to recharge the lithium battery.
-
Keep the battery and the battery contacts clean and dry. In the event that the contacts become dirty, clean the terminals with a soft, dry cloth. Do not use abrasives, chemicals or solvents to clean the battery and its contacts.
Lithium batteries require charging prior to use. Always refer to the instructions for correct charging procedures.
-
Do not keep charging the lithium battery when not in use.
-
Always remove the Lithium battery from the product when not in use.
-
Dispose of properly according to the information in this manual.
3.1 Installing Alkaline batteries not included in the Baby unit (primarily in transmitter mode of images and sounds)
Remove the Alkaline battery compartment closing panel placing your finger near the arrow and gently pulling the panel upward (fig.1).
Insert 4 1.5V Alkaline AA/LR6 batteries, respecting the proper insertion polarity as indicated in the battery compartment.
Reposition the Alkaline battery compartment closing panel (10) first inserting the lower panel hooks in their battery compartment housing and gently pushing the panel downward (fig.2).
3.2 Replacing Alkaline batteries not included in the Baby unit (primarily in transmitter mode of images and sounds)
Remove the Alkaline battery compartment closing panel placing your finger near the arrow and gently pulling the
panel upward (fig.3).
Remove the 4 1.5V Alkaline AA/LR6 batteries and replace them with 4 similar batteries, taking care to respect the proper insertion polarity as indicated in the battery compartment. Reposition the Alkaline battery compartment closing panel (10) first inserting the lower panel hooks in their battery compartment housing and gently pushing the panel downward (fig.4).
3.3 Installing the lithium-ion battery supplied with the parent unit (primarily in receiver mode)
Upon purchase, the 3.7 V 1800mAh rechargeable lithium-ion battery (13) in the parent unit is kept separately in the product packaging.
Carefully remove the lithium-ion battery from its packaging.
Remove the rechargeable battery compartment closing panel (10), placing your finger near the top groove and gently pulling the panel outward (fig.5).
Insert the lithium-ion battery (13), respecting the proper insertion polarity as indicated in the battery compartment.
Reposition the rechargeable battery compartment closing panel (13), first inserting the lower panel hooks in their battery compartment housing and gently pushing the panel toward the product (fig.6).
3.4 Replacing the lithium-ion battery supplied with the parent unit (primarily in receiver mode)
If the duration of the rechargeable lithium-ion battery is reduced excessively, this means that it has run out
and therefore must be replaced (this is to be considered normal because rechargeable batteries run out over time).
Remove the rechargeable battery compartment closing panel (10), placing your finger near the top groove and gently pulling the panel outward (fig.7).
Remove the run out rechargeable battery (13) and replace with another rechargeable battery that is identical to the 3.7V 1800mAh supplied with the product (code20256600100 to be requested directly from Artsana S.p.A.) taking care to place them with the correct insertion polarity indicated on the battery compartment.
Reposition the rechargeable battery compartment closing panel (10), first inserting the lower panel hooks in their battery compartment housing and gently pushing the panel toward the product (fig.8).
TECHNICAL SPECIFICATIONS
Baby unit (primarily in transmitter mode of images and sounds) Mod.06626
Power:
Internal: FOUR 1.5V AA/LR6 ALKALINE BATTERIES
External: via 100-240V~ 50/60Hz /6.5V = = = 550mA mains switching adapter
Transmission:
Transmission frequency band: 2400-2454MHz
- Signal strength: 100mW max LED infrared radiation: emissions below LEA Class 1, standard EN 60825-1
Parent unit (primarily in receiver mode of images and sounds)
Mod. 06626
Power:
Internal: 3.7V 1800mAh LITHIUMION BATTERY
External: via 100-240V~ 50/60Hz
/6.5V 550mA mains switching adapter
Lithium-ion battery charging via 100-240V ~ 50/60Hz /6.5V
550mA mains switching adapter Reception:
Transmission frequency band: 2400-2454MHz
- Signal strength: 100mW max
Mains adapter
Mod. S004LV0650055
INPUT: 100-240V\~, 50/60Hz, 150mA
OUTPUT: 6.5V = - 550mA
Plug polarity:
Made in China
Lithium-ion battery
Mod. 663960 (ICP66/39/60)
Nominal capacity: 1800mAh (6.66Wh)
Nominal voltage: 3.7V
Lithium batteries give best performance when used at normal room temperature (20^ ± 5^)
Made in China
SYMBOLS KEY

monophase alternate current

direct current

for indoor use only

Class II - double insulation equipment

Conforms to EC Directive and subsequent pertaining amendments

ATTENTION. Read the instructions for use
TROUBLESHOOTING
If you experience problems, please first check the following list and check that:
- Both units are on
- Both units are properly connected to the power socket via the mains adapter (1), or that batteries are charged.
| FAULT CAUSE SOLUTION | ||
| Parent unit (receiver)/ Baby unit (transmitter) power and link indicator (8) off | - Baby unit (transmitter) and/or parent unit (receiver) off. - Baby unit Alkaline batteries (not included) and/or parent unit lithium-ion battery completely discharged. - Mains adapter disconnected or not connected correctly. - No mains voltage. | - If necessary, switch on the Baby unit (transmitter) and/or the parent unit (receiver). - Replace Alkaline batteries in the Baby unit and/or charge rechargeable lithium-ion battery in the parent unit - If the units are powered via mains adapter, verify that this device is correctly connected to a mains outlet. - Check that the outlet is being powered. |
| The parent unit (receiver) does not emit any sounds | - No discernible sounds are arriving to the Baby unit (transmitter). - The voice activation function has been selected. - Parent unit (receiver) volume set at minimum. - Baby unit Alkaline batteries and/or parent unit lithium-ion battery completely. - The parent unit (receiver) may be off. | - Just as soon as discernible sounds from the environment are present, the transmitter will be activated. In any case, for peace of mind, test transmission with the help of another person who can try to speak in the room the Baby unit (transmitter) is on. - If the display shows the icon and selector is set to ON, the voice activation function is active. As soon as sounds present in the Baby unit environment exceed the threshold for voice activation, the parent unit will emit sounds. - Adjust the volume on the parent unit (receiver) until sounds are audible by pressing the + volume adjustment button (5a). - Replace in the Baby unit Alkaline batteries and/or charge lithium-ion battery in the parent unit - Switch on the parent unit (receiver). |
| The parent unit (receiver) display does not show any image (black screen) | Absence of or loss of link with Baby unit. - The voice activation function has been selected. - The parent unit (receiver) may be off. | - If the display shows the • icon, move units closer together and/or relocate the units themselves in order to reduce the number of obstacles, metal structures, reinforced concrete walls, etc. interposed between them and/or check that the Baby unit is on. - If the display shows the icon and selector is set to ON, the voice activation function is active. As soon as sounds present in the Baby unit environment exceed the threshold for voice activation, the parent unit will emit sounds and will display an image of the baby again in real time. - Switch on the parent unit (receiver). |
| Image colours on the display are very light | - Too much display brightness. | - Press the key (15) until you find the desired level of brightness. |
| Image colours on the display are very dark | - Too little display brightness. - Night vision activated. | - Press the key (15) until you find the desired level of brightness. - Check the lighting conditions of the room where the Baby unit is located. If the room is dark or in low light conditions, alteration of image colour on the display is to be considered normal. |
| Interference | -In rare cases, even if HOPPING technology ensures high immunity to interference from analogue devices, interference can be caused by the presence of another intercom or similar transmission device switched on nearby or by electromagnetic pollution (proximity to antennas with radio transmitters, high voltage cables, etc.). | Move away from analogue equipment and/or leave the area in which it is located. |
| Reduc-tion of the op-erating area | -Presence of obstacles, metal structures, reinforced concrete walls, etc. inter-posed between the Baby unit (transmitter) and the parent unit (receiver)- Baby unit Alkaline batteries and/or parent unit lithium-ion battery almost flat. | -Move units closer together or relocate the units themselves in order to reduce the number of obstacles, metal struc-tures, reinforced concrete walls, etc. interposed between them.-Replace in the Baby unit Alkaline batteries and/or charge lithium-ion battery in the parent unit. |
| Electro-static or elec-tromag-netic noise | Electro-static or electro-magnetic interference due to electrostatic or electro-magnetic fields emitted by other electrical equipment: e.g. domestic appliances, cellular or cordless phones, etc. | Identify and, if possible, eliminate the cause of interference. |
| Pres-sence of hissing or whis-tling | -Units are too close to-gether.-Parent unit (receiver) volume too high. | -More units further apart.-Lower parent unit (receiver) volume, pressing the volume adjustment button-(5b). |
| The parent unit (re-ceiver) emitting weak sounds | -The baby is too far away from the Baby unit (trans-mitter).-Parent unit volume level too low. | -Move the Baby unit (transmitter) within 1-1.5m away from the child.-Increase the volume level on the parent unit pressing the + volume adjustment button (5a). |
DECLARATION OF CONFORMITY:
Mod. 06626
Artsana S.p.A. hereby declares that this product is in conformity with the essential requirements and the related dispositions established by directive 1999/5/CE. A copy of Declaration of Conformity with European Directive 1999/5/EC is available at: www.chicco.com - Products Section. According to European Commission decision N° 2000/299/EC of 06/04/2000, the frequency band used by this product is harmonised in all EU countries; therefore, this is a class 1 product and can be freely used in all countries of the European Community.

This product complies with EU Directive 2002/96/EC.
The crossed bin symbol on the appliance indicates that the product, at the end of its life, must be disposed of separately from domestic waste, either by taking it to a separate waste disposal site for electric and electronic appliances or by returning it to your dealer when you
buy another similar appliance. The user is responsible for taking the appliance to a special waste disposal site at the end of its life. If the disused appliance is collected correctly as separate waste, it can be recycled, treated and disposed of ecologically; this avoids a negative impact on both the environment and health, and contributes towards the recycling of the product's materials. For further information regarding the waste disposal services available, contact your local waste disposal agency or the shop where you bought the appliance.
CONFORMITY WITH EU DIRECTIVE 2006/66/EC
The crossed-out wheeled bin symbol on the battery or its packaging, means that the batteries, at the end of their life, should be disposed of separately from the municipal waste stream via designated collection
facilities appointed by the government or the local authorities, or otherwise returned to the dealer when purchasing new equivalent rechargeable or non-rechargeable batteries. Chemical symbols (Hg for mercury, Cd for cadmium, Pb for lead) printed beneath the crossed-out wheeled bin symbol indicate the type of substance contained in the battery. The user is responsible for bringing batteries, at the end of their life, to the appropriate collection facilities in order to facilitate treatment and recycling. The correct disposal of your old appliance will help prevent potential negative consequences for the environment and human health and favour the recycling of the materials of which the product is made. Illegal disposal of the product by the user will damage the environment and human health. For more detailed information regarding the available waste collection systems, contact your local waste disposal service or the shop where you purchased the item. ARTSANA reserves the right to change information described in this manual at any time and without notice. The reproduction, transmission, transcription or translation into another language, of any part and in any form of this manual is strictly prohibited without prior written consent from ARTSANA Warranty: The product is guaranteed against manufacturing defects for 2 years from the date of purchase.
Baby Monitor Video Digital Essential
Tecnología digital:
Essential Digital Video Baby Monitor


Mod. 06626


Baby Monitor Video Digital Essential
Tecnologia digital:
Piles rechargeables charges

Attention: RECOMMANDATIONS SUR L'UTILISATION DES PILES AU LITHIUM
DECLARATION DE CONFORMITE:
Essential Digital Video Baby Monitor
Essential Digital Video Baby Monitor


Mod. 06626


Essential Digital Video Baby Monitor
1.1 Systeemeigenschappen
OUTPUT:6.5V- - - ,550mA
Polariteit stekker:
Made in China
Lithium-ionen batterij
Model 663960 (ICP66/39/60)
Nominaal vermogen: 1800mAh (6,66Wh)
Nominale spanning: 3.7V
DIT PRODUCT IS CONFORM DE EU-RICHTLIJN 2002/96/EG.
Essential Digital Video Baby Monitor
Ψηφιακήτεχνολογία:
Yusno npotuno npootaoiac tnc 1i- wtknC zwnc-Mn6ev napeepoalec
Essential Digital Video Baby Monitor H ouokcun Essential Digital Video Baby Monitor oac npooepei TIC Baokec puthetaic yia va Ianeteto uwpo ava naa otiyu n kai va piokeote ouvexwc e nikoivwvia maotou meoa kai exaw ano to oniti. H eyaan oovn 2,4 IVTOW KAI N PEPIOPTepeo evn bivteokapea unepuOpwv akTIVV (nou aitoupyi akoma kai OTO OKotabi) oac npooepouv mia api-OTN EIKOVA KIA TELEA KAUUV TO Xwpu.H dIIN ANIOTUPOYIA NOU ExTo QWTAKI VUKTOC, OTAepo n kuaiVovuevnc wTEIVOTNTAC, ENITPEI OTN OUKeun va ouvodeu To wpo kaTa tn diapkeia Tou unvou KAI TO xpovkodelta tnaakipwicnpiv Tov unvo.Eav opioete Tn wvntiknv Evpyooinon, n movada yovea TaTee i OE AIToupyia movo epooov ptavouv Eudiakpi To hxoia ano tn movada mwpou.
H i a k TExvoLoyia nou xnpoiOIOIE n ouokueun eIITpeNt Nnyn OmaTocXwipc napeMuBoLec* ouuwova eva uynlo npotuno ppootaia ctnc idwiKnc ZWC. Ka o duov movadec (yovea kai uwpou) npopoov va aeitoupynoov uE mntapiec (napexetai ia enavaopoptioevn matapia lioiou yia tn nuvada yovea) n eTov npooapoyea loxuc (napexoVTai duo stn oukeuaia).
Zwvn ouxvotntuw o o n c 2400- 2454 MHz
loxuc I oupyia; nepinou 150 ^**
Essential Digital Video Baby Monitor
UΦoBaTexHoiTn:
BbICOKn CtAndapT KOHΦnIeHcuaJIb-HOCTN - HJneBble NOMEXN
BvdeonHa «Essential Digital Video Baby Monitor»
BndeonHn «Essential Digital Video Baby Monitor» npednaeT xapaKTePnCTnK, Heo6xOaMbIe dIra Ha6NIODeHn 3a pe6eHcOM B IIO60MOMeHT BpeMeH, OCTaBaIcB c HIM B KOHTaKTe B DOME n 3a erO npedeJAMn. Ee wnpokn 2.4-IOHMOBbI DNcPJIe N BpaUaOuJaCnHfPaKpacHa TeteKaMepa (paobTaUoJaa TaKxe B TeMHote) npednaIaOT Bam ONtMaIbHbI pOcMToP n IJealbHbIe KaIpbI. BoHnA yHKzua JAmbl-HouHnKa, C NOCTOHHo nn PepemHHo INHTeHCNBHOCTbIO CBeta, No3BOJAEr CONpOBoxDaTb MaIbIIa B CTaIN 3aCbInaHnN BO BpeM ChA. Ppr uYCTaHOBLeHNr ROLOCOBOr OynpaBHeHn PoDITbCKn 6lOK aKTINBUPyETcra TOnbKO prn HAnuHn 3ByKOB, NOlyeHHbIX OT DetCKOrO 6Loka. PprimeHemaar UΦpoBaTexHOLOrN IO3BOJAEr BblONJIHrTb PpneM 6e3 NOMEx* n C BBICOKM CTaHdApTOM KOHΦUeHcuaJIbHOCTN. O6a 6Loka (pOITeBckn n DetCKn) Moryt pa6oTaTB ot 6atapeN (B KOMnKeT BKIOueHa ODA HA INTNeBaI aKKymIaTOphA 6atapeI nIPOTeBckoro 6Loka) nII npn NOMOuI cTeBOrO aAdantepa (DBA BKIOueHbIB KOMnKeT).
Ponocacactotpepa:
2400-2454 MΓι
Pádnyc DeiCTBn: OKONo 150 M**.
*BbICOKa yCTOuHBOCTb K NOMexAm, CO3daBaEMbIM aHaIOrOBbIMN yCTpOJCTBaMn.
**Pn ONTmAlbHbIX ycIOBnX Ha OTKpbITOM npoctpaHCTBe 6e3 npeIPTCBN.
CODEPKHMOE YIAKOBKN
- DeTcKn 6Iok (c OCHOBHoi yHKuNei nepeDaTuHa Ka n3O6paKeHn a 3Byka)
- PodnTeJbckn 6JOK (c OCHOBHOJ yHKuEe npneMHnka n3O6paXeHna n 3Byka)
-Два поразуаьх ceTeВых aДаNTepa100-240B~, 50/60Гц /6.5В, 550MA - AkkymyIaTOPHa JNTn-NOHHa 6atape 3.7 B 1800 MaU, (Jna podnTeNbckoro 6noka)
-PykoBoIDCTBO NO 3KcnIyatauIN

OBUNME MEPBI INPEIOCTO-OCTN
- Yacn ynaKOBKn (nlaactNKOBbie nakeTbI, KapToHHbIe Kopo6Kn I T.D.) DOJIKNbI XpaHNTbcB HeIOCTynHom DnA DeTeMecTe, TaK KaK OHN YBnIOTcNtEHCuHaNbHbIM NCTOCHNKOM ONaCHOCTN.
- Ppei nCnoB3OBAHnem np6opa y6eINTbcra, YTO cam np6op n BCE ero KOMHOHeTbI He IMeIoT NOBpeKdeHn. B npOTNBHom clyuae, He nCNoB3OBaTb np6Op n 6paTntbcra K KBaIINΦUncPobAHHomy nepcoHaNy IIN npOdaBu.
He nbitaTbcra camOCToTeNbHO no- uHnHTb np6Op, orpaHnHTbcra DeiCTBnA M, yKa3aHHbIMN B pa3dene "Pa3peWeHne npo6Jem". Ppi Heo6xOAnMoCTn peMOHTa 6paTntbcra B CnyK6y cepBnCHoro 06cnyKnBa
Hnra (Customer Service) KOMpaHn Artsana S.p.A.
- He BCKpbIBaTb npn6Opbl. DeTcKn 6nok (c OCHOBHOJ cyHKuJeN nepe DaTuKa n3O6paXeHnra n 3Byka), poDInTeBckn 6nok (c OCHOBHOJ cyHKuJeN npnEMHnKa n3O6paXeHnra n 3Byka), aKKyMylAToPHaJ nIITn-nOHnHa 6atape n cTeBbIe aAnTpEpbI He CoedePxA t qAcTei, KOtOpbIe MOrYT NcNoJIb3OBAbCRA NOJIb3OBAteJem. B Cnyuae HncnPabHocTN o6patNTbcra 3a NOMoUbIO K KBaIINΦnUPOBaHHomy nepcoHany IIN CBIAb3aTbCRA CO Cnyk6oB cepBnCHoro 06cnykBaHnra (Customer Service) KomnaHnn Artsana S.p.A. BCKpbITne BblweyKa3aHHbIX yCTpOnCTB MoKeT CO3DaTb OnaCHOCTb 3JIeKTPnueeCKORO Woka.
- LufpoBaB BuDeoHnE Essential Digital Video Baby Monitor KomnaHn Chicco He DoJxHa nCNoIb3O-BaTbcra B KaueCTBe MeDnUHCKOROMOHITopa H He MoKet 3aMeHHTb npICMOTp 3a DeTbMn CO CTOpOHbI B3PocJIbIX, NockOJbKy IpeHa3HaueHa TOnbKO DnI NCNoIb3OBaHnB KaueCTBe DOONHITeNbHOI NOMOu npn npNCMOtpe. JIO6oe dpyroe nCNoIb3OBaHne CHTaETcR HeHaIeKaUIM.
Pa3MeCTb DeTcKn 6nOK n PoDnteBckn 6nOK Ha POBHOYCTOnuHBOI NOBepxHOCTN B HeDOCTyINhBX DnA DeTeMecTaX.
-ДерхаТь DeTCKи 6blOK,poNTeIb-ckn 6Iok,aKKymyIaTOpHyIO IHTNmHOHHyO 6aTapeIO,ceTeBbIe aIaNTepBI AC/DC BHe npedeNoB IOcraemocTteTei (ka6eJIb ceTeBbIX aIaNTepOB MOKeT CO3daTb ONaCHOCTb ydyWeHnA).
OueHb BaxHo peryIaRHO npoBe- pTb npaBnIbHOCTb pa60TbI Det
CKORO 6IOKa (C OCHOBHOJ cyHKUnei nepeDaTcHka n3o6paXeHHa n 3ByKa) IN POINTEbCKoro 6IOKa (C OCHOBHOJ cyHKUnei npnEMHnka n3o6paXeHHa n 3ByKa), B qACTHOCTn, nepei KaKdblm NcNOJIb3OBaHNem pOBepaTb, UTO6bl pNEm CNrHaJa 6bl Bo3MOxEH B 3OHe H Ha MaKcIMaJIbHOM npedyCMOTpeHHom pacCTOAHn INCIOJIb3OBaHHa.
-
MakcimalbHoe pa6oee pacctorHne coCTaBnEe TOKO1 150 metpoBa OKpbIOM npocTpaHCTBe 6e3 nppeTCTBn (ODHaKO paDnyc DeiCTBnMOKET 3HaHTeBHO yMeHbWntBcR BHyTpN NOMEseHn, B 3aBNCIMoCTN OT pa3JIuHbIX ycOBn CpeDbI, PACNOLOXeHn CTEN Me6JInPOBKn NOMeUeHN, HAIuYN MaTALNuCeCKNX KOHCTpyKUn, BHeuHnx IN BHYTPeHHNX NOMex/AnektpomarHHTbIX NOJe, XeJe3O6eTOHHbIX CTEN IIN MExdy NOMeUeHnMn, PACNOLOXeHbIMn Ha pa3JIuHbIX 3TaJkAx, BCJeIDCTBnE HeNoJHo 3apJkN 6aTapeN T.D.).
-
Ecnn Detckn 6nok n/nnn podntelbckn 6nok noyuayot nHTaHne OT uJeOnyhbix 6atape n/nnn aKKymyJIaTOPHOI NTNI-NOHHOI 6atapeN, TO npn HeIOCTaTOUHOI 3apdKe 6aTape n3dJIe NpeKpaAaET pa6Oty. IOnrOMy peKomeHdyetcBcerda npOBepaTb COCToAHne 6eNoCHbIX 6atape n/nnn aKKymyJIaTOPHOI NTNI-NOHHOI 6atape Npeed BKIOueHNem O60nx 6JOKOB.
B cnyae Bhe3aHoro OTKIOUeHnAJIeKtpo3HepRn, ecn nHTaHnePOdTeIbCKOrO 6L0ka (c OCHOBHOfYHKuEn npneMHnKa) ocUeCTBJeTcNOMOsbIO COOTBeTCTByIOJeroCeTeBOro aAnTepa, np6Op npekpa-aet pa6ToTbKO, ecn ypOBeHb
3apya aKKyMaTOpHOJ NHTn-NOHON 6aTapen HeOCTaTOUHbIN nnNocpeHnA He BCTaBHeHa B 6aTapenHbI OTcEK. POaTOMy peKoMeHdyETcBcerda npOBeprT coCToRHe 6aTapennn ee yCTaHOBky.
He nCnoJb3OBAbTeTcKn 6JOK (c OCHOBHOyHKUeNe IpepaTuKa n3O6paXeHnna 3Byka),POinteBCKn 6JOK (c OCHOBHOyHKUeNe npemHnka n3O6paXeHnna 3Byka), aKKymJrTOpHyIO JNTNI-NOHHYIO 6aTaapeo N aDantepbI B NOLOKeHn, Pn KOTOPOM OHN NODBepraTcR BO3DeEChTBNUO aTMOCeepHBIX areHTOB (doXdb, coNHue n T.D.).Pnp NCNoJIb3OBAHnN n3DeJIINB HBe NOMEuHn NITAHne DetCKoro 6JOKa (c OCHOBHOyHKUeNe IpepaTuKa n3O6paXeHnna 3Byka) INoNTeBCKoro 6JOKa (c OCHOBHOyHKUeNe IpneMnKA n3O6paXeHnna 3Byka) DOJXHO oBeCeuNBaTbcra TOnbKO C NOMOuBIO UeIoOHbIX 6aTapeN / INn aKKymJrTOpHO N INTNI-NOHHO 6aTapeN: cTeBbl eAdanTepbl, NoCTabJIeMbIE B KOMNKeTE C n3DeJIINEM, He npedHa3HaueHbI dJa nCNoJIb3OBAHnB HE NOMEuHn.
Bo n36exaHne pncKa neperpeBa
dePkaTb Detckn 6NOK (c OCHOBHO
fynKcnei nepedaTUnka n3o6paKe-
Hna n 3Byka), podTeJbckn 6NOK
(c OCHOBHO fynKcnei npneMHNA
n3o6paKeHna n 3Byka), aKKymyIaT
TOPHyIO IHTNI-NOHHyIO 6aTaapeIO n,
OCo6eHNO, cTeBbIE aAnTepbl AC/
DC Bdann OT nCTouHKnOB TeNla, Ta-
Knx KaK: KALOpuΦepbl, TepMOCTaTbl,
Neu, PNTbl, OKHa Ha COJIHeHoh
CTopoHe n T.D.
3anpeaaetcncnoB3OBaTb (oco6eHHO npn noKIOUeyHn K 3JeKtpnuecko CETn npn NOMOu CTeBbIX
aandaTepoB) o6a 6noka nO6n30CTN OT BODbl: BaHH, CTnpalbHbIX MaunH, KxOHhbIX MOeK nn MOKpbix NOBepxHocTei. He norpykataB nx B Bodyn He cmaunBaTb. He nCnoJb3OBaTb 6nokn aandaTepbI, eCnn OHN ynaN B Body, B daHHOM Cnyuee 6paTntbcr K CneunaJIncTaM.
-yCTaHOBtB DeTCKn 6JOK (c OCHOBHON yHKuNei nepedaTuNka n3O6paXeHnna n 3Byka), pOnITbckn 6JOK (c OCHOBHON yHKuNei npEmHnka n3O6paXeHnna n 3Byka) n CeTeBbIe aadantepbl AC/DC taKIM o6pa3OM, yTO6bl ObecneHTb COOTBeTCTBYIOyU BeHTnlaqIO n npedOTbPaNTb ONaCHOCTb nepePeba KOMNOHETOB.
He nCnoB3OBaTb n3dJIne B6Jn3n nyopecUeHTbIX (HeOHOBbIX) lamn nn dpyrnx 3JIeKTPnuecknx np6oPob, TaKx KaK TeJeBn3Opbl, DnraTeN, nepCOHaNbHbIe KOMnbOTepbl, 6ecnpoBOhBle TeJefoHbI, 6ecnpoBOhBle TeJefoHbI DECT n T.d. TaK KaK OHN MOryT NOBnAryb Ha pa6Oty n3dJIIn.
- IcnoJb3OBaTb TOJbKO NOCTaBJIeMbIe B KOMJIeKTe C N3dJIeM CeTeBbIe aJantepbl AC/DC nIIa aJantepbl aHaJOrnHOro TnPa C TaKIMN JKe 3JIeKTPnueCKmN XapaKTepnCTnKaMn. IcnoJb3OBAHne dpyrnx aJantTePOB MoXET NOBpeINTb DeTCKN N/ nIIN POJNTeNbCKN 6LOKN N CO3daTb ONaCHOCTb DnI NOJb3OBaTeJIa.
3aMeHa Ka6eNei NHTAHnCeTeBOro aAnTepa HeBO3MOxHa, NO3Tomy, B Cnyae NOBpeKdEHHa, CeTEBoi aAnTep HeIb38 60JIbWe NCnObl3OBaTb IN Heo6XoDmO 3aMeHHTb erO Ha aAnTep aHaIoruHoro Tnna.
BhImaHne: He nCNoIb3OBaTb ceTeBOJ aDantep dpyroro Tnna, OTnUHORo OT NOCTaBnE moR O KOMNKeTc N3de
JIINEM KOMnHaHne Artsana S.p.A., noCKoJbKy 3TO JIuWnt N3DeJIne COOTBeTCTBnI PPIMHeRMeBIM CNeUaNbHbIM TexHnuecknM HopMaM, yCTaHOBJeHbIM DnpeKtNBamN EC, HAnOc yUep6 6e3OpNaCHOCTn UCeNOCTHOCTN N3DeJIny. Pn Heo6xOdImOCTn 3aMeHbl O6paTNTbcr K IpOdaBuY NIn B KOMnHaHIO Artsana S.p.A.
- Y6eIITbcra, yTO HApPKeHne ceTeBbIX aadantepoB AC/DC (cM. daHHbIe Ta6nueK, pacnoJooKeHHbIX Ha ceTeBbIX aadantepax AC/DC), coOTBeTCTByet HapPKeHIO 3JeKTpUyeCKOcETn, yTO BnIka CeTeBbIX aadantepoB COBMeCTmAm C 3JeKTpUyeCKIMN PO3ETKaMn BaWeN 3JeKTpONPOBODKn.
-ПОДКЛIOUHTb ceTeBbIe aДaNTepbI AC/DC K элЕктprueckm po3eTkam, KOtOpbIe DOJXHbI 6bITb IERKO DoCTyINbI, HO B TO JKe BpeMЯ HaxOДИТСВСВЕ ПpeDELOB DocraeMoCtN DeTe. Pa3MeCTnTb npOBoJa aДaNTePob AC/DC TaKIM O6pa3OM, YTO6bI PpeDOrTbPaTnTb HaCTynaHne Ha npOBoI, 3aNYtBbAHne PpeDMetOB, paCNoLoXeHHbIX CBepxu Nn pRdOM C HmM, PpeDynpeINTb DoCTyn K HmM pe6eHka, TaK KaK OHN MOrTy PpeDcTaBJIaTb ДЯ Hero OnaCHOctb (cnoTbIKaHHe, ydyuSeHne).
-CeteBbIe aadTepbl AC/DC,TeTcKn 6nok (c OCHOBHOJ cyHKuEn nepe DaTuKna n3O6paXeHnN n 3ByKa) npoNTeBckn 6nok (c OCHOBHOJ cyHKuEn npneMHnKa n3O6paXeHnN n 3ByKa) MOryT HArpeBaTbcr BO Bpempa60tbl. 3To CunTaetcHopMaJIbHbIM.
Bcerda otKIOUaTb ceTeBbIe aanTepe b AC/DC ot 3neKtpnuecko po3etkn,ecnn np6Op He nCNoB3yETc.
3aMeHa 7eNoHbIX 6aTapei nn aK KymyIaTOPHOJ NTn-NOHHoN 6ata
pen Bcerda DOnkHa OcyueCTBnTbCBA3pocnbIMn Ha ⅢeNoHbIe 6aTapeuNN aKKymyIaTopHyO 6aTapeo,ImeIOUne TaKne JxapaKTepnCTnKn, KaKya3aHHbIe B HactoIeM pyKOBoDCTBe NOKcNpyTaun.
- DeTcKn 6nok (c cyHKnnei nepe DaTUnKa n3o6paXeHn n 3Byka) OChaueH CBETOYBCTBNTeHBIM DaTUnKOM, aBTOMaTnueCKn aKTNBpyUoem nHΦpaKpacHbIe CBETOINODbI B Cnyae yMeHbWeHn IA KpyXaIOUeRO CBeta NIN TemHObl, NO3BOJRA TaKIM o6pa3OM OcyuecTBnTb npOCMOTp B YcNoBnx HeIOCTaTOUHOBNIMOCTn.
Tak KaK INHΦpaKpachbIe CBeToNDIObI DetCKoro 6noka (cФyHKuEnIpePaTuNka n3o6paXeHnI n3ByKa)He NcnyckaIOT BnIMORO CBeta, npOBepNTb PpaBnIbHOCTb IX pa60TbI, KOHTPOINpya n3o6paXeHne, nepeDaHHoe TeleKaMepo PoINTeNbCKOMy 6nOKy, KOrda DeTcKn 6nOKpacNoLoXeH B KOMHaTe C HeDocTaTOHybIMOCBeUeHNEM. - INHΦpaKpachbIe CBETOAnoDbI DeTCKOrO 6noka (cФyHKuEn nepeDaTuKa n3o6paXeHnN 3ByKa) He npedCTaBJIOT ONaCHOCTN DnA 3DOpOBbJ.
BHIMAHHE!
Tem He MeHee, peKoMeHdyetcra 3-6beratb CMOTpeTb HeBOOpyXeHHbIM rna30m nIIN C NOMOuBIO ONTuecknX npnbopOB Ha npaMoe nHpaKpacHOe n3nyeHne BdoJb OCN n3nyeHn.
BHIMAHHE!
ДлЯ ПЕДOTВРALEHNY ONACHOCTN эЛКТПУECHKOTO WOKA, HE CHIMATb 3AUHTY IN HE ПыTATbCRA
BCKPbITb CETEBbie ADAANTPEbl. HE CMAUHBATb CETEBbie ADANTPEbl, DETCKN BLOK IN POINTEJBCKNI BLOK,HE NODBEPTb IX BO3DEJCTBIO BIAJXHOCTN IN HE IIbITATbCRAOTKpblbIX. 3TO MOKET IPEIDCTABJIaTb ONACHOCTb N,KPOME TOFO,RAJRETCA OCHOBAHnEM DJII PPEKPAUeHnRA PAHTUN.
- Konfumpraya & XapakTepuctnKn YcTpoIcTBo Ha6IouHeHna, n3rOToBLeHHoe no TexHoJorHn cHPOBoN nepeaun DaHHbIX "Adaptive frequency Hopping", moKet npimeHHTbcB KaueCTBe BcNOMOraTeJIbHOrO CpeIcTBa npn pncMOTpe 3a DeTbMn B DOMaUHnx ycNoBnX. 3Ta BVneOHnBA KIOuHaET B ce6a Detckn 6lok (C OCHOBHOI cyHKcnei nepeDaTuNKa n3O6paKeHnN n 3Byka) n PoINTeJIbCKn 6lok (C OCHOBHOI cyHKcnei npneMHnKa n3O6paKeHnN n 3Byka). O6a np60pa IcNObl3yIOT dJaYcTAHOBKn paAnOCBra3n TexHoJOrnIO cHPOBOI nepeaun daHHbIX "Adaptive frequency Hopping", no3BOJIAuTyIO BblONHtB npmE/pePaay CuHaJIOB n3O6paKeHnN n 3Byka.
1.1 XapaKTePnCTmKn cnCTembl
OCHOBHBIMN xapaKTePncTnKaMn cNTEmbl ABJIAOTCA:
-Перетаузрптельхи 3BykoBbIX CnHANOBC NOMOUsIO CNCTeMbIHa 6a3e uΦpOBoN TexHOLOrn "Adaptive frequency Hopping".
PaIynyc DeIcTBnHa OTKpbITOM npOCTpaHCTBe 6e3 npenTCTBn Okono 150 MeTPOB*.
* MaKcImaJIbHoe pa6Ooee pacCTOraHne coCTaBnReT OKoI 150 metpoB Ha OTKpbITOM npocTpaHCTBe 6e3 npe
TCTBn (OHaKO paDnyc DeIcTBn MOKeT 3NaHTeJIbHO yMeHbUHTbcra BHyTpN NOMEseHn, B 3aBNCIMoCTn OT pa3nHbIX ycNOBn cpebl, PaCNoJoxeHn CTeH n Me6nnpOBKn NOMeSeHn, HAnuHn MaTaNueCKNX KOHCTpyKcN, BHeuHnx n BHYTpEHnX NOMex/3neKTpOMarHnTHbIX POnE, XeJe3o6eToHHbIX CTeH nnn MExdY NOMeSeHnMn, paCNoJoxeHbIMn Ha pa3nHbIX 3TaJkax, BCJeIcTBnE HeNoJHo 3apJkN 6aTapei NT.D.).
1.2 DeTCKn 6nok (c OCHOBHOJ fYHKuNei nepeaTuHka n3o6pa- XeHnA u 3ByKa) Modenb 06626
1.Питане ot Nepeклюаemoro ceTeBOrO aanTepa 100-240B~ 50-60r/6.5B 550MA nnn c nomoubIO 4 ueNouHbIX 6atapeN 1.5 B tuna AA /LR6 (He BKIOUeHbI B KOMnJIeKT).
2. KhoNka BkIIOueHnra/BbIKIOueHnra
3. KhoNka BkIIOueHnra/BbIKIOueHnnaAMNbI-HOuHnKa
4.Дампа-Ночнк
5.06bekTnB TeNeKaMepbl
6. MmKpoΦoH
7.CnCTema INΦpaKpachoro OCBeUeHn(8CBETOINOOB)IIN BO3MOXHOCTN BNDtpe6eHa daKe B TEMHOTE.
8. CBeToUyBCTBnTeJbHbI daTUnK
9. CBeToBa HnDnKaunn nTuHnN CB3N:
(a)3eHbI NOCToHHbI: yCTaHOB-HeHa CBa3b C pOuTeJIbCKM 6LOKOM (b)3eHbIMrAIOUm:OTCyTCTBne HnI nOtePcCBa3n C pOuTeJIbCKM 6LOKOM
(c) OFF: JeTCKn 6nOK BbIKIOueH
10.KpbIka oTceKa ⅢeNoUhIx 6aTapei 6aTaapei
11. Pâzbem птуня detckoro 6loka
- CBeToBaIuHnIkaunyUPOBHa 3a- pJaIa IeIoUhIx 6aTapei:
(a)KpaCHbIMnraUoUsn:6aTapen npaKTnueckn NOnHOCTbIO pa3pJxKeHbl
(b)OFF: 6aTape n 3apxekHbI nn pa6oTa ocuEcTBnAeTcNOMOuBocTeBOrO aanTepa (1)
1.3 PoduTeBckn 6nok (c ochOB-HoJyHKnei npemHnka n30-6paXeHn n 3Byka) Modenb 06626
1.Питане cnomoшью aKKymyntopHOnIHTn-NOHHo6aTapeu 3.7B1800MAU, BKIOUeHHo B KOMNJIeKTnoCTaBKn, INC NOMOUBIO nepeKIOyaeMOrO ceTeBOrO aanTepa 100240B 50/60Γu/6.5B - - - 550mA
2. Khonka BkIIOueHn/ByIKIOueHn
3. CBeToBaJnoOca HnDnKaunu yPoBn 3ByKOB, n3daBaembIX pe6eH-KOM.
4. LBeTHoN XXK-DnCpIe N2.4 IIOHaMa. XXK-DnCpIe N03BOJraT OTO6paXaTb B peaIbHOM BpeMeH N3O6paXeHne pe6eHka N CNeDyUOJIne NIKTORpaMMbl:
- COCTOHNHe 3apAdkn IN NO3apAdkn aKKyMylrTopHOJ NHTN-NOHHO6a-tapei poNTeBckoro 6noka;
- npaBnIbHOCTb CB3m MeKdy DeTCKIM n POJNTeJIbCKM 6JOKAMN;
OTcyTCTBne HnN NOTepe CBa3mMeKdy DeTCKM NPOdnteIbCKM6NoKaMn;
-уровенberулincobкгрмков; 3аданньп ржим rolocoborуnpaВлени
5. KhoNk peRyInpOBKn rPOMKocTn + (5a), - (5b) dINHaMnKa poDnteBckOro 6NoKa
6. BCTpoeHHbI DnHaMnK IJIa BOCnpOn3BeDeHn 3ByKOB, n3daBaEmbIX pe6eHkOM
Oh TaKKe OndHOBpeMeHHO BbINOHnHReT CneDyUoIe DOnOJIHTeNbHbIe yHKuN:
a)Функию снгhalinasо6OTCYTCTBUN NIN NOTEPN CB3M MeKdyDeTCKIM IN POINTeNBCKIM 6JOKOM: npn6n3ntelbHO uepe3 10 cekyHn NOcNe TORO, KaK BKJIIOuaETcra 3eIeHbIM MInraUoI CNBET CBeTOBOH INDINKAuNN PNTAHN INCB3N, pa3daIOTcR 2 NOcNeIOBaTeNbHbIX 3ByKOBBIX CnHana B cekyHdy. KaT OJIbKO CB3b C DeTCKIM 6JOKOM BOCCTaHaBnBAeTcRA, CnHaN OTKJIIOuaETcra, IN BKJIIOuaETcRA 3eJIeHbIM NOCTOARHHbIM CBET CBETOBOH INDINKAuNN PNTAHN IN CBA3N.
b)Функцю сгнаниЗаци O TOM,чTo aKKymyIaTOPHЯ JNTn-NOHna6batapeя NOUTN NOHOCbIO pa3pJxHa:pa3daetc1 3ByKOBoCnHaN BceKHyDy N BKJIouHaETcMnraUOzni KpaCHbI CnHaN CBeTOBOI CnHaN3aZnn COCToHNs aKKymyIaTOPHO6batapen.ПрВКЛIOueHN 3apJdKn aKKymyIaTOPHOJ NTn-NOHHO6batapen 3ByKOBoCnHaN OTKJIIOu-aTcN bKJIIOuaETcN NOCToHNbIKPacHbI CBET CBeTOBOI INDnKaZNIypOBHr 3apJa aKKymyIaTOPHO6batapen BnIoTb Do 3aBepseHn 3apJdKn.
7. IpeeknouateIb ON/OFF pa6oTbI: roJocOBoe ynpaBHeHne nn noCTOHHa nepeDaU
8. CBeToBaNnDnKaunnNTaHnN nCBa3n:
(a)3eHbI NOCTOHHbI: yCTaHOBHeHa CBa3b C DeTCKnM 6nOKOM
(b)3eHbMnraUoun:OTcyTCTBne HnnnoTepeCBa3NcDeTCKm6JOKOM,
(c) OFF:poNTeBcKn 6NOK BbIKIO-ueH
9. CBeToBa HnDnKaun yPoBn 3a- pRda aKKyMylTOpHOn nHTn-NOH


Hoi 6atapen:
(a)Kpacbni Mraiou: 6aTape npaktnueckn POnHocTbIO pa3pJKeHa
(b) KpacbI IOCTOAHbI: BblONHReTc3apdka aKKymyIaTOPHO6aTapeu cNOMOsbIO CeTeBOrO aadnTepa
(c) BbIKI.: aKKymyJrTopHa 6aTape 3apXeHa nn pa6oTa ocUseCTBnEcra C NOMOuBIO CeTeBOrO aAnTePa np OTCyTCTBnN aKKymyJrTopHO 6aTapei
10. KpbIshKa OTceKa aKKymyJIaTOpHbIX 6aTapei
11. KpenneHne Ha peMeHb
12. OTBepCTne Inna NOBecHoro shHypka (He BKNIOUeH B KOMNJIeKT)
13.ЛИТП-иОннЯ 6aTape 3.7B 1800MAчЗapяжаemясnomоью ceTeBOrO nepeKJIIOUyaemoro aДaNTe- pa 100-240B\~50/60Γu /6.5B= 505MA
14.Pa3bem NITaHnN H/nn 3apAHOe yCTpOInCTBO DnA aKKymJrTOpHOJ nHTn-NOHHo6aTapeu
15. Khonka perynipobkn npKoctn nncnna (7 ypOBnei)
1.4 AKTINBHbIe NIKTORpaMMbl, OTO-6paXaEMbIe Ha dncnnee

IpaBnIbHaCBA3bMeXny 6nokamn

Iopepa nn OTCyTCTBne CBa3m Mekdy 6nokamn

Pabota B peXnme roIocoboro ynpabJIeHnI

MHHMaJIbHbI yPOBeHb rPOMKOCTN

MaKcImaJIbHbI ypoBeHb rPOMKOCTN

Akkymyntopnha 6atapen 3apxkeHa

CpeHn ypoBeHb 3apya aKKyMyIaTOPHO6aTapeu

Hn3kn ypoBeHb 3apra da aKKymyJIaTOpHOI 6aTapei

AkkymyIaTOPHa 6aTape pa3pJxHeHa:poNTeBCKn 6NOK BbIKIO-HTcay Hepe3 HeCKoBKO MNHyT
2. Onncahne xapaKTepeNtuk
2.1 DeTcKn 6Iok (c OCHOBHoi yHKuNei nepeaTuNka n3o6paXeHna n 3Byka)
2.1.1 Питанne:
IITAHHe OT nepeKIOUaEMo rceBOrO aanTepa 100-240B\~ 50-60r/6.5B - - - 550mA (1) nnn c noMoIbIO 4 uenouhbx 6aTapei 1.5 B TnPa AA/LR6 (He BKIOUeHbIB KOMnJIeKT)
B cnyuae nntaHn c nOmoIbIO ceTeBoro aanTepa (1):
-
npOBepntb, yTO 3JNEKtpnueckoe Ha nPraJxHHe COOTBeTCTByeT HAnpJxHeHIO, yKa3aHHOMy Ha Ta6JIuYKe paHee yKa3aHHbIX CeTeBbIX aIaNTEpoB.
-
BCTaBnTb WTeKepeTeBOrO aDanTepa (1) B COOTBeTCTByUoU npa3beM NITAHn (11), pacnoJoxeHHbH Na 6OKOBtCtOpHe 6Ioka,
-
BCTaBnTb wTeKepeCeTeBOro aanTepeBa 3neKtpnueckyUpo3eTKy cyIo6HbIM DOCTynom.
BHIMAHHE:
- PpOBoD aAnTepa MoKet Co3daTb pNCK ydyWeHn, DePkaTb erO B HeIOCTyHOM dJa dTee MeCTe.
Moxho BbI6paTb Do 7 ypoBHei apKoCTn.
Функця roIocobOrO ynpabEnHn PodteBckn 6Jok (cФункцe npemHnka n3o6paXeHnru 3Byka) moKet pa6oTaB B HeNpepbIBHom peKme (coCToHne OFF) nIn B pexnMe roIocobOry npaBHeHnra (coCToHne ON)(7).Korda nHTeHCNBHOCTb 3BYKOB, nepeDaBaEmbIX OT MKNpOfoHa (6) DetCKoro 6Loka, npeBOCxOINT npedeI rIocobOr aKTINBaCnU, UCTAHOBHeHHb I3ROTOBNTeHem, n3o6paXeHne pe6eHkA B pealbHOM BpeMeHN BBIOBNTcRa Ha DnCnLei (4) n AKTINBpyETcra DNHAMNK (6) podTeJIbCKoro 6Loka (cФUnKzne npemHnka n3o6paXeHnru n 3Byka). Pn HAIChuN 3BYKOB, IMeIoUx MeHbSyU O daHHoro nopora INHTehCBHOCtB, XX-K-dncnne (4) npepbBAeT NOKa3 n3o6paXeHnru pe6eHka n DnHAMNK (6) podTeJIbCKoro 6Loka (cФUnKzne npemHnka n3o6paXeHnru n 3Byka)OTKnIOuaeTcR. KOrda 3Ta fYHKZnna 3aHaHa, Ha dncnnee (4) noABJIeTcNIKTORpAMMa
IopTaTnBHOCTb poNTeNbCKoro 6NoKa.
PodnteBckn 6lok ochaueh KpeIneHnem dIpa pemHra (11),noJe3hbIM Ida NOCTOAHORO HOWeHna erocco
- Moxho Hocntb poNTeBckn 6nok cco6o, nCNoB3y naDBecHO uHypok (He BKJIoueH B KOMnKeT), npOteBt B CneuaNbHoe OTBepCTne (12).
CBeToBaN 3ByKOBaNHNkauNa pa60TbI:
CBeToBa HnDnKaunn nTuHnN nCBa3n (8) npedctabJeT 3 pa3nUHbIX BnDa HOpMaun:
- Yka3aHne BKNIOUeHHOrO np6opau n npabNbHO CB8n C DeTCKM 6IOKOM:
3aropaeTc 3eHbI NOCToHHbI CBETCBETOBOHnDKaTopa(8).
- Yka3aHne nOtepN UIN OTCyTCTBnCBA3N C DeTCKIM 6IOKOM:
3aropaeTc3eHbIMMraIOuNnCBET CBETO HdkaTopa (8).
OndOBpemeHc nCue3HOBeHnemHaIinCnnee(4) n3o6paXeHnpe6eHka,OTo6paXaTeTcnnKTOrpaMma Nyepe3 npn6n3ntbHo 10 cekyHnNocJeIOBaTeNbHO pa3daIoTc2 3ByKOBbIX CnHaB B cekHyDy.
KaTToIbKO CBa3b BOCCTaHaBnIBaETCa, 3ByKOBoN CnHaN OTKnIOuYaeTCa, Ha DnCnIe (4) OTO6paXaETcN NkTOrpaMa N 3arOpaeTcN NOCToRHHbIN 3eJIeHbN CBET CBeTOBON CNHAn3aUu (8);
PIMMEUAHHE: npB KJIIOUeHn poDNTeJIbCKO6Ioka BblONHReTcR NOnCK KaHaJa CBA3N C DeTcKm 6ILOKOM, PO3TOMy 3eJIeHbIM MraIOuIN CBET CBETOBOH INDAKauIN (8) rOpHT, HHa DInCpJee OTo6paXaETcR PNIKTOrpAMMa Do Tex NOp, NOKa CB3b He 6yDeT yCTaHOBNeHa.
-уka3aHne BbIKIIOueHHoro npnbopa: CBeTobay INdNkau (8) BbIKIOueHa.
CBeToBaHnDnKaun (9) ypoBna
3apya aKKymyIaTOPHOI NTn-NOHON 6aTape npeIcTabJeT 3 pa3JIuHbIX Bnda INΦOpMaun:
- Poka3aHn, yTo aKKymyTOpHa 6atape (13) noTu nnHOCTbIO pa3pJxKeHa:
3aropaeTc3eHbIMMraIOuNnCBET CBETO HndkaTopa (9).
OndHOBpeMeHHo Ha dncnlee (4) nOBJIaETcN KTKOrpMa pa3PjaXeHHo6batapeu 1 np a3daetc OINn ppeIynpexKaIOUcnrHaJ BcekyHdy.
Pn Jekahnn npoJoxaTb nCnoJb3OBaTb np6Op, peKomeHdyetc BblNOHNtB 3apAky aKKymyIaTOPHOJNTN-NOHOn 6atapeu (13), B npOTNBOM cnyae, np6Op npEkpapatnpa6oty.
BbINOHNtB 3apdky aKKymyIaTOPHON JNTn-NOHOn 6atapen (13), NOKJIIOuNB CeTeBOJ aAnTep (1) K COeINHInTeIIO NITaHnN 3apdHOMy yCTpoiCTBy (14) pOHTeJIbCKoro 6loka.
Pn BkIIOueHnn 3apAKn 3ByKOBoi CNHaI OTKIOUaETc.
-10ka3aHn aKKymyIaTOpHoi 6aTapei (13) B pexKmE 3apJKn: npBKNIOUeHN 3apJKn 3aRopaETcKaPacbI NocToHHbI CBET CBeTOBOO CNrHaJIIN3aCNI (9), n Ha DnCnIee OTO6paXaETcN KKTOrpAmMa 6aTapei cNocJeIOBaTeJIbHO3aRopaUuIMMCBHyTpEHNM MeTKaMn.
OCTaBnTb 6aTapeo 3apXkaTbcraBnIOb DO BbIKIooHnCBeTOBOcNHaJIIN3aunn (9) n OTo6paXeHnHa DnCpJIee HEnoDnKHOI NKTOrpaMMbl
Bo Bpem 3apdKn aKKymyIaTOPHO 6bapeu TaKke MOxHo NcNoJb3OBaTb PoNTeBckn 6lOK dJa KOHTPOJIa 3a pe6eHkom, HO Bpem, Heo6XoImOoe dJa ee NoHoi 3apdKn B 3OM Clyuae
YBENHNTCA.
- Poka3aHn, yTo aKKymyIaTOPHa 6atape 3apXkeHa nIn pa6ota ocU- 8eCTBJIaTcra C NOMOuio CeTeBOr oAanTepa (1) npn OTCyTCTBnN aKKymyIaTOPHO6atapei:
CBeTobay HnDnKaun (9) BbIKIOueHa.
-CBeTOBaNoLOcaHdNkauu npOBn 3ByKOB, n3DaBaEmbIX pe6eHKOM (3): BKNIOUaETcnpoRpeCCNBHO OT CEHTpa K KpaM, yKa3bIBa 3ypOBHa NHTeHCNBHOCTN 3Byka, NOlyueHHoro OT MmKpOfoHa (6) DetCKoro 6loka (C OCHOBHOI FyHKUneI nepeDaTuNKa n3O6paXeHNu n 3Byka).P03BOJAE TPOINTEIO KOHTPOINPOBaT 3ByKn, N3DABaEMbIe pe6eHKOM TOrda, KOrDa rPOMKOCTb DnHAMnKa POINTeJIbCKOro 6loka OTKIOUeHa.
3aropaeTc qeHTpaB-HbI CBETOIOHOH INHINKaTOP,ecn 3BYKN, IN3daBaEMble pe6eHKOM,IMeOT OTHOCNTbHO HN3Kyo INHTEHCBHOCTb.
3aropaOTcraCBeToNDnOndbIX INdNKaTOPa,ecnn 3ByKn,IN3DaBaemble pe6eHkOM,IMeIOT cpeHIO INHTeHCNBHOCTb.
3aropaOTc5CBeOndOndbIX INHdkaTOPOB,ecn3ByKn,N3- daBaemble pe6eHKOM,IMeKOT OTHOCNTeNbHO BblCOKyIO INHTEHCNBHOCTb.
BHMMaHHe: NocLe BKnIOUeHnPoDInTeIbCKOrO 6NoKa (c OCHOBHOn ΦyHKuEn npneMHnKa n3o6paXeHn n 3Byka) Bcerda npOBepaTb COCToHnE BKnIOUeHn DeTcKOrO 6NoKa (c OCHOBHOn ΦyHKuEn nepeDaTuHnKa n3o6paXeHn n 3Byka)!
Pocne BknoueHn 6IokOB Bcerda npoBepaTb, yTo6bl nOyuEHe nepe
DaHHORO CnHnla 6bIIO BO3MOxHO Ha paCCTOHn n/nn B 30Hax, PpeyCMOTpeHHbIX Bam. PeKOMeHyetcC NOMOuB KOro-Ni6o n3 YHeOB CembN BblONHHTb npo6HyO nepe Dauy n3 KOMHaTbI, rDe pacNoJoxKe H DetCKn 6Lok, OndOBpemHo nepeMeaacb C pOnTeNbckm 6LoKOM B 30Hax, BblpaHHbIX Bam nI npoBepKn npabnIbHOCTn NOlyueHnnepeDaBaEMOro CnHnla.
- YctaHOBka n 3aMeHa 7eNochbIX 6atape B DeTcKn 6Iok (C OCHOBHOJ YHKUne IpepaTuKn IA3O6paXeHnN 3ByKa) n aKKymyTAOPHOJ NNTNI-NOHHo 6atape B PoINTeNBCKn 6Iok (C OCHOBHOJ YHKUneI PpHemHnKa I3O6paXeHnN 3ByKa).
Mepbl npedoctopoXHOCTH: 3TN Oepaun DOnJKeH BbINOHHTb B3pOcbln
BnMaHne:PEKOMEHDAUINIPONCIOb3OBAHNUOUELOUHbIXBATAPEN
-3aMeHa 7eNoHbIX 6aTapei DoJXHa Bcerda BblONHrTbcra B3pOcJIbIM.
-Дя pa6Otbl 3TOrO np6Opa nCnOJIb3OBaTb 6aTapeu TAKORo JKe TnnaHnAn aHaIorNchBle peKOMeHDoBaHNHomy Tnny (UeNoUHbIe 1.5B TnA/ LR6).
- BCTaBntb 6aTapeu B DeTcKn 6NoK, Bcerda npOBepra, uTo nx noJaPHOCTb npu yCTaHOBKe COBnaDaet C NOJAPHOCTbU, yKa3aHHoB B 6aTapeHOM OTCeKe.
-He cmeunBaTb pa3nHbIe Tnbl IeNouhbx 6atapei nn pa3pJxehHbIe
IeNoUHbIe 6aTapeN C HOBbIMN.
-He octabTb 7eNochbe 6aTapen Hn BO3MOxHbI INHCTpyMeHTbl B DOCTyNbIX DnA DeTeMecTaX.
- He 3aMbikaTb HaKOpOTKO KOHTaKTHbI BblBOdbl.
-Bcerda ydaJIaIb n3 n3dennr Otpa-6oTaHHbIe 6aTapeN dIy npedotBpa-ueHn yTeueK XnIDKOCTN, KOtopa MoKeT NOBpeINt b erO.
- Bcerda ydaTb 6aTapeu B clyuae dIITeJIbHOro HeICNoJb3OBAHnI N3- DeIIy.
- Paped ytnn3aueydaNTb 9eNochble 6atapen n3 npnbopa.
-He 6pocatb pa3p8keHHbIe 6aTapeB OROHb, He 3arpa3HrTb OKpyKaIOuO CpeNy, HO Bbl6paCbIBaTb INX B CneunaHbIbe KOHTeHepbl.
-Bcnyae yTeukn XNDKoCTn n3 6aTapei, HEmeJleHNO 3aMeHHTb IN, PpeiBapntelbHO TuaTeIbHO ONUCTNBOTCEK dJa 6aTapei N TuaTeIbHO BbIMbIBpyKn B Cnyae KOHTaKTa C BblTeKWeiXNDKOCTbIO.
-He nbitaTbca 3apndt6aTapeu, He yBnIouncs aKKyMylrTOphIMN: OHMOrT B3OpBaTbCra.
-He nCnoJb3OBaTb aKKyMylrTOPHbIe 6atapeu, OHMOrYT yMeHbWntb fYHKUHOHaJIbHOCTb np6opa.
-Пибор He npedHa3HaueH dIpa60TbIC 3aMeHReMbIM NHTHeBbIM6atapeMn.
BHIMAHHE: HnpaBnIbHoe nCNoJIb3ObaHne MoKeT npNBecTu K CO3aHNIO ONaCHO cTuayuun.

BHHMaHHe:PEKOMEHDAUIN
IIO IICNOJb3OBAHNIO JINTNEBblX BATAPEI
-
He pa36npaTb, He BCKpbIbTaB n He nomaTb IITneBbIe 6atapen.
-
He 3aMbikaTb HaKOpOTko KOHTaKTHbIe BbIBOdbI IITNeBOI 6aTapen. HxpaHNTb 6ecnopraDoyHO IITneBbIE 6aTapen BHyTpN Kopo6ok n/nnnaIKOB, rJe OHN MOryT 3aMKHyTbcRAHaKOpOTko dpyr Ha dpyra nnuepe3 TOKOpPOBaOne MaTePnAbbl.
-He n3BneKaTb IITnEByo 6aTaapeIO n3OpuHaJIbHOyNAKOBKn Do Ha- yana NcNoJIb3OBAHn.
-He noDBepraTb nHTneByIO 6aTapeHnHarpeBy IN BO3DeIcTBnIO ORHa.13-6eRaTb XpaHEnN IOD BO3DeIcTBnEMnpAmoro COJHeuHO R CBeTa.
-He noDBepraTb nHTneByIO 6aTapeo mexaHnueckm ydapaM. B cnyae cnyauHoro naDeHna 6aTapeu BCerda npOBeprTb COCTOAHne oboLOUKN KOHTaKTHbIX BbIBODOB nepei NCNoIb3OBaHNem. Ecnn nHTneBaJ 6aTapeR BCJeCDTBne naDeHna 6bla NOBpeXdeHa, He nCNoJIb3OBaTb ee. - B clyuae yteukx kndkoctn n3 6atapen He donyckatb KOHTaKta xndkoctn c koxe i rna3am. Ppi BO3HKNHOBEHN KOHTaKta npomblb 3aTPOHYtbe yuaCTKn 6oJbwm KOniueCTBOM BObln O6paNTbcra K Bpauy.
-He nCNoJb3OBaTb 3apArdHbIe yCTpoiCTBa,OTnUHbIe OT npEHa3HaueHHbIX Dn IcNoJb3OBaHnC aannapaTyPOi.
-06paTb BnMaHne Ha MapKnpoBky (+) n(-)Ha JnteBOB 6aTaapee n Ha3denn, yTo6bI oBeCneuTb ee npabNlbHyU yCTaHOBky N COOTBeTCTByIO-uee NCNoB3OBaHne.
-He nCNoB3OBaTb IJIy NITaHnI npN6opa IITneBbie 6aTapeu, OTnUHbIEOT NOCTaBnE moB B KOMnJIeKTe.
-XpaHntbIITnEByIO 6aTapeIO B HeDIOCTYINOM DnA DeTeN MeCTe. - Annapaotypa 6bila pa3pa6oTaHa TaKIM o6pa3OM, yTo6bl npedOTBpa
UaTb N npenrTCTBOBaTb HenpaBnIb-HoH yCTaHOBKe IHTneBOB 6aTapeN: Bcerda O6paTaTB BHMaHne Ha MapKInPOBky NOJAPHOCTn Ha n3DeJIuN iHa IHTneBOB 6aTapee N Bcerda npOBepaTb npaBnIbHOCTb NCNoJIb3OBAHN.
-He nCnoJb3OBaTb np6Op cOTnUHON OT yKa3aHHoB B daHHOM pyKOBoDCTBE NO 3KcNpyatauM MoJeIbIO6atapen.CnpaBOHyBk KOJ NOKyPknIpn6atapen COD.20256600100
-3apjkaTbIHTneByIO 6aTapeIO,ToIbKO KOrda OHa yCTaHOBJeHa BHyTpNI3dJIINr, IcNoIb3yra CeTeBOJ aIaNTep, NOCTaBnJaEMbI B KOMJIeKTe(COD.20256600200).He 3apjkaTbIHTneByIO 6aTapeIO, IcNoIb3yArpyrHe 3apJdHbIe ycTpoNCTBa.ДЯ3apJdkn IHTneBOI 6aTapeIN BblONHATb INHCTpyKcUN, npNBedeHHbIe BpyKOBODCTBe.
- CopejkaTb 6aTapeo u KOHTaKTHbIe BbIBObl cyxIMn uNCTbIMn. BCnyae 3aRpa3HeHn KoHTaKTbIX BbIBODB npotepeTb nx MmKoN cyxOn TkaHbU. He nCNoJb3OBaTb dJa UcSTKn 6aTapeu n COOTBeTCTByIOuNX KOHTaKTbIX BbIBODB a6pa3NBhIe cPeDCTBa, XmMueeCKne npOdyKtbl n PaCTBOpNTeJI.
-Литneyю 6aTapeo nepei nCNoIb3ObaHnem Heo6xOdmo 3apAunTb.ДлЯ npaBnIbHOrO BblOnHeHnЯ npOeDypbI 3apAdkN BCerDa o6paatabcK INHCTpyKUJAM.
-
He octabTb IITneByIO 6aTapeIO B pexKIMe 3apra, eCNI OHa He NCnOJIb3yETcR.
-
Bcerda ydaTb nntneByIO 6atapeIO n3 n3denn, eCNI OHO He nCnOJb3yETcra.
-
Yttnn3npobatb 6atapeo B COOTBcTbN C yka3aHnMn DaHHoro
pyKOBoDCTBa.
3.1 UctaHOBka 9eNochbix 6atapei, He BXoJxN B KOMJIeKT DeTCKOro 6noka (c OCHOBHO fYHKUneI nepeDaTuKAs n3O6paXeHHn a 3ByKa) ChrMb KpbIuKy 6atapeHoro OTceKa 9eNouchbix 6atapei (10), ynpaBcB HHe NaIbCAMn PdOM CO CTpeKoH N OCTOpOXHO BbITraIBaR naHeNb NO HApBaJIeHNIO BBepx (pnc.1). BCTaBtB 4 9eNouchbie 6atapei 1.5 B Tuna AA/LR6, co6IIOdaR npu YCTaHOBKe PpaBnIbHyIO NOIAphOCTB, yka3aHHyIO B 6atapeHOM OTceke. Choba YCTaHOBNTb KpbIuKy 6atapeHoro OTceKa 9eNouchbIX 6atapei (10), ChauJa BCTaBnB HnKHne fNKcaTopbl KpbIuKn B COOTBeTCTBYIOUne rHe3da 6atapeHoro OTceKa I nepeMeua KpbIuKy No HAnpaBLeHHIO BHN3 (pnc.2).
3.2 YctaHOBka 8eIoUHbIX 6aTapei, He BXODAUX B KOMPJIeKT DeTCKo- ro 6Ioka (c OCHOBHO yHKcnei nepeDaTuKk N3O6paXeHHNn 3ByKa) ChrMb KpbIshky 6aTapeHoro OTceKa 8eIoUHbIX 6aTapei (10), ynpaRcB HHe NaIbCuAM pAnOM CO CTpeIKoN n OCTOpJxH No POnDBuRg A KpbIshKy NO HaPaBHeHIO BBepx (pnc.3). UdaNTb 4 pa3paXeHHbIe 8eIoUHbIe 6aTapeN i ZameHt b nx Ha 4 aHaIO-rnHuBle 6aTapeN 1.5 B Ttna AA/LR6, Co6IouJa npu YCTaHOBKe npaBnblHyIO NpIaPHocTb, yKa3aHHyIO B 6aTapeHOM OTceKe. ChOba YCTaHOBHTb KpbIshKy 6aTapeHoro OTceKa 8eIoUHbIX 6aTapei (10), chauJa BCTaBHB HxKHe ΦNKCaTOpbI B COOTBeTCTByIOuNe rHe3da 6aTapeHoro OTceKa n Iepemeua J KpbIshKy No HApBaBHeHIO BHN3 (pnc.4).
3.3 YctaHOBka IHTn-NOHHo 6atapeu, BXOJaSeB KOMPJIeKT pOndTeNbCKoro 6Ioka (c OCHOBHoi yHK-une npneMHnka)
Ha MOMENT NOKyIKN aKKymyIaTOPHAR IITN-IOHHa 6aTape 3.7B1800mAu (13) poNTeNbckoro 6nokaCOdePxNtCra OTdJIbHO B yNaKOBKe n3dEINr.
OcToPOxHo DoCTaTb IInTu-NoHHyU 6aTapeIO n3 ee yNaKOBKn.
ChЯтб Кршky otceka Дя Akkymу-ларон 6atapen (10), ynpaarcbпалцamв Верхни пз И OCTOPOKHO BbITraNBaя Кршky NO Ha npabLeHnIO Hapyx (pnc.5).
BctaBnTb npnilaraioyocB KOMnIeKTe aKKymyIaTOpHyIO IITn-NOHHyO 6aTaapeo (13), o6paazA BHNMaHne Ha co6JIoDeHne npaBnIbHOI NOJrPHOCTH yCTaHOBKn, yKa3aHHoB B6aTaapeHOM OTceKe.
CHOBA yCTaHOBnTB KpbIuKy 6aTapeHoro OTceKa aKKyMylrTopHoN 6aTapeN (13), cHaJala BCTaBnB HxKHne fNKcaTOPbI KpbIuKn B COOTBeTCTByIOUne rHe3da 6aTapeHoro OTceKa N OCTOPoXHo nepemeua KpbIuKy nO HanpaBLeHIO K n3dEJIIO (pnc.6).
3.4 3aMeHa INTn-NOHHoB 6aTapeN, BXOJaUeB KOMnJIeKT POdnteBCKOrO 6Ioka (c OCHOBHOJ FyHKuNei npneMHnka)
Ecn npoJoxHtBHOCTb 3apJa aKKymyIaTOPHO JNTn-NOHHo6aTapeu Ype3MepHO yMeHbwaetcra-3TO O3Haayet, YTo ee pecypc Bbipa6oTaH INoTOMy Heo6xOIMO 3aMeHHTb ee (daHHb I KaKT cHTaETcH HopMaJIbHbIM, TaK KaK aKKymyIaTOPHbIe 6aTapeu Co BpeMeHem BbIPA6aTbIBaIOT CBOI pecypc).
ChrBkpbIwkyOTceKa nra aKKMy-
IaTOpHoi 6bTapei (10), ynpaRcB NaIbUaMn B BepxHni Pa3 N OCTOpOJHO BbITaRnBaJ KpbIuKy No HApPaBHeHIO HapyKy (pnc.7).
YdaNTb pa3pJxHHyIO aKKymyIaTOpHyIO 6batapeIO (13) n 3ameHnTbe eDpyroakKymyIaTOpHO 6batapee, NdeHTnUHO 6batapee, NoCTaBnaMeoB KOMPKeTe c n3dennem 3.7B 1800mAu (Ko20256600100, 3a- npaunBaemO HnocpeDCTBeHNO B KOMnAHm Artsana S.p.A.),co6IouaI npaBnIbHyIO nolpHOCtB, yka3aHHyIO 6batapeHOM OTceKe.
CHOBa yCTaHOBnTb KpbIuKy 6aTapeHoro OTceKa aKKyMylrTopHoN 6aTapeN (10), cHaJana BCTaBnB HIXKHeΦNKCaTOpBi KpbIuKn B COOTBeTCTByIOUne rHe3Da 6aTapeHoro OTceKa N OCTOPoXHo nepemeua KpbIuKy nO HaNPaBLeHnU K n3dEnnO (Pnc.8).
TEXHINUCKNE DAHHbIE
TeTcKn 6JOK (c OCHOBHOYHK- cnei nepedaTuNka n3o6paXeHna n 3Byka)
MoI.06626
Питане:
BHyTppeHHee: UEJOUHbIE BATAPEI 4X1.5BTUNAA/LR6
Bheuhee: ot nepeknouaemoro cetebo raanrepa 100-240B~ 50-60/6.5B- - - 550mA
Ipeepa:
UCIOBHbIE OBO3HAUHIN

NepemeHHbI OndHoΦa3-HbI TOK

NOCTOHHbI TOK

NCKJIIOUHTeJIbHOДЯ NCNoIb3OBaHnBHyTpNIOMeUeHn

np6op II knacca - BoHnHa n3OJIaIa
C∈0470
YIOBnTeBopReT COOTBeCTByUoSei DnpeKtNBc CE IN NocJeDyUOuM MoNΦKaUaM

BHIMAHNE. IpouNTaTb pyKOBOdCTBO NO 3KcNny-ataun
PA3PEUHEHNEIPOBJEM
B clyuae BO3HKnHOBeHn npo6nem peKomeHdyeTc ChauaI npOBepntb cIeDyUoI CNICOK N yOCTOBepNTbc, YTO:
-06a 6noka BKnHueHbI
- 06a 6Ioka npabnIbHO NOdkIIOueHbI K 3JIeKTpUpeCKoP03eTke C NOMOu bIO ceTeBOrO aAnTepa (1) nnn, uTo 6aTapen 3apJxKeHbI.
POnTeJIbckn 6Jok (npneMHNK) He n3daeT HnKaKnx 3ByKOB.
-BdTeckn6Iok (peepaTuk) He noCTypaTbBocpHIMMaemblc 3ByK; -BbIN BbIbpaH peKm pa6Obl "peyeBoe ynpabLeHne" -UctaHOBHeHa MHNMaJIbHa rPOMKOCTb poNTeNbCKoro 6L0Ka (npneMnka); -ZeIoChbte 6atapei detCKoro 6L0Ka n/ INI JInTu-NOHHa 6ataper poNTeNbCKoro 6L0Ka NOnHOCTbIO pa3prKeHbl. -PoNTeNbCKn 6L0K (npneMHNK) MoKet 6bITb BBIKJIOueH
- KaK TOnbKO B NOMEseHn NOBRTcB OCSpHnHMaemblc 3ByKn,pepeaTcK aKTbNpyetc. B IIO6om cIyuae, dJa 6OJIbSeero CnOKoCTBn MOxHO BbINONHTb TcTOBYU nepedauy c NOMOsbIoo DpyrOro LNuca, npOboUeero roBOpNTb B KOMHaTe, rDe BKNIOueH DeTcKNo (pepeaTcK). -Ecn Ha dinCnlee oTo6paJXaETcR NIKTORpAMMa IN pepeKlIOuATEnb yCTaHOBLeH Na ON - aKTbNupOBaH peKIM ROLOCBOrO ynpabHeHn. KaK ToIbKO 3ByKn B NOMeHn, rDe acNOLOKeH DeTcK NoK, npeBbICrT PpeDenpeYEBORO UnpaBHeHn,POnteMbckn 6Lok NaChET n3DaBaTb 3ByKn -PerynpoBaTb rPOMKocTb POnteMbckoro 6Loka (npneMnka) DoTex nop, noka He 6yDyT noLyueHbI CbIShmblc 3ByKn, C NOMOsbIO HaXaTnKa KNOpKn + perynpoBaHn rPOMKocTn (5a). -BbInoHNtB 3amEny uceNoHy hix 6atapei DetCKoro 6Loka H/nn 3apAky nHTn-NOH-Ho 6atapei POnteMbckoro 6Loka -BkIOuHTb POnteMbckn 6Lok (npneMHNK)
IcnoIb3OBaHnE B CtpaHaX, He npHaJnxK Ebponeckomy coO3y, noDHHreTcKoHTpOIO CO CTOpOHBI NOL3OBaTeNl COOTBeTCTBnI Prn6opA DeiCTByUuIM HopMaTnBaM B CtpaHe IcNoIb3OBaHnI.

3TO IN3DEJNE COOTBETCTBYET DNIPEKTNBE EC 2002/96/EC.
PnpBedeHbI Ha np6ope cIMBOJ nepeepKHyToi KOp3nHbI 6o3HaayeT,TO B KOHc Cpoka Cnyk6bl 30 TO n3dennne, KOTOPoe CneJeYET cDaBaT B yTNlb OTDeNbHO OT DOMaunx OTXODOB, Heo6xOIMO cTaB B NyHK T c6opa BTOpcbIpbI dIy nepepa60TK 3JIeKTPnueckoi n 3JIeKTPoHHO annapaTypbI, IIN cDaTb npOdaBu np
NOKyIKe HOBOJ EKBIBaJIeHTHOI aIIIpaTpybl. IOnb3OBaTeJIb HecET OTBeTCTBeHHOCt b 3a cda- cy np6opa B KOHcE erO cPoka CnyKbI B CneuaIbHbIe OprAHn3auu nC6opa.HaIeXaIu n C6op BTOPCbIPBc nOcNeIyUoSeI CdaueI CTaporo np6opa Ha NOBTOpHOe IcNoJIb3OBaHHe, IpepeAOTky N yTIIN3aUIO 6e3 HaHeceHnY uIep6a OkpykaIOUe CpeI NOMORAET CHN3NTb OTPaTEJbHOE BO3DeICTBHe Na HeE N HA 3DOpOBBe IIOJe, a TAKKe CNOCO6CTByET NOBTOpHOMy IcNOJIb3OBaHnIO MaTePnaIbO, IV3 KOTOpbIX COCTOUT IV3dJeNIE. BoJee IIOpO6HbIe CBeJeHnRA O6 IMeIoUxxCra CnOCo6ax C6opa Bbl MoXeTe NOLyUHTb O6paTNBUIncB M MeCTHyIO CnyK6y BBIO3a OTXODOB INI JVE B MaRa3INr IDe Bbl KynIIIN n3dJeNIE.

COOTBETCTBNE DNIPEKTNBE EC 2006/66 EC
Cnmbol npeueepKHyTOro MycOpHOro KOHTeHepa,HaHeceHHbI Ha 6aTapen nn ynaKOBky N3denny, yka3bIBaeT, YTO B KOHcE cPoka CnyX6bl XN Heo6xOJIMO yTNIN3nPOBaTb OTdienbHO OT 6bITOBbIX OTXODB, OHN He DOnjKHb IYTNIN3nPOBaTbcra
Kak ropockne otXoDb, a doJKNb 6bItb HapabHeHb Ha c6OpHbI pyHKT no pa3dJIbHOI nepepa6OTke OTxOIOB nnn JKe BO3BpaueHbI npOaBcy npn NOKyIke HObIX aKKymJrTOpHbIX nnn He aKKymJrTOpHbIX aHaONuHbIX 6atape B03MOXhBcIMBOJ XmMueCKoro 3JeMeNTa: Hg, Cd, Pb, NaHeceHHbI NO n3O6paKeHNem nepeepKHyTOR MycOpHOro KOHTeHepa, yka3bBaet TnBBeUeCTBa, coedeKaUeROcB 6bTaapee: Hg=MeKypn, Cd=KaMn, Pb=CbnHeu. POnb3OBaTeB bOTBeAeT 3a DOCTABky 6atapeB KOnue Ix Cpoka cnykbI B COOTBeCTByUOme OprAHN3aUNn NO c6OpY OTxOIOB C zelbIO oBeCneueHnE nepepa6OTKn UytIN3aUNn. HndLeXaun C6op OTxOIOB C nocJeUoSeI ONPABKO tPba6ToHHbIX 6atape H aYtIN3aUIO, 6pb60fky n pepepa6OTky, eKOLrueCKn COBMecTMUc OOKpykaIoSe CpeDo, N03BOJAE TpeDyPeDITb HeratNBHOE Bo3DeICTBNE Ha OKpykaUOUY CpeDu H a 3doPoBBe IIODe, a TakKe cnOCo6CTByET BTOPNUHOMy NCNoJB3OBaHNI MaTePnaIOB, IN3 KOToBix CoCToR 6bAten. He3aKOHNa YtIN3aUNn I3dENNA NObl3OBaTeMe HAHOCT BpeD OKpykaUOSe CpeDe I 3doOpBbU OyeOBeka. DnI NOlyeHn NOpRoBHn INΦOpMaUNo O IOCTyINbIX CNCTeMax C6OpAOTxOIOB 6opaATbcB B perNOHaJIbHbIe OpraHIn3aUNn IIO yTNIN-3aUNN OTXODOB INN B MaRa3IN, rDe 6bIIa pOni3BeDeHa NOKyIka.
Kompania ARTSANA OTCTablaet 3a co6o npabo BV nio6o MOMENT 6e npdynpexdHn BHOCTb n3MeHnB COepXaHne HactoIe pyKOBOCTBa NO EKcPiyaTauu. Bocpon3-BeHne, nepeda, nepeneuataKa, a TAKKe nepeBOd Ha npyro J3bIK, B TOM uCNE qACTNHO B IIO6OM Bunde daHHoro pyKOBOCTBa, CTporo 3anpeuehbl 6e nnCbMeHHoro pa3peWeHn KOMPAni ARTSANA. Rapantn: Cpok rapantnHa n3deJine coctabnert 2 rOda c daTbi noKyn, rapaHTn paCnpocTpaHreTc Ha npON3BOIDCTBEHHbI deEeKtbl.
Note
Note

C∈0470
Mod. 06626

Artsana S.p.A. - Via Saldarini Catelli 1 - 22070 Grandate (CO) Italy www.chicco.com

Essential Digital Video Baby Monitor


Mod. 06626


Essential Digital Video Baby Monitor
Digital teknik:
ALLMÄNNA FÖRESKRIFTER
DETTA KAN LEDA TILL FARALIKSOM TILL ATT GARANTIN UPPHOR ATT GALLA.
OUTPUT: 6,5V= = =, 550mA
Polaritet kontakt:
Made in China

WARNING.
Baby Monitor Video Digital Essential
Dijital teknologi:
a + b = 5
g jll Jlal aol oJg jplssw 8 .
jLgS "Chicco" g S w Lw81
jI I aol r c gie g g b aol
hao puiu y uauo ai JlaBdU
piaiwl s. agilso g dclw all
wlo
J 1
..g s g w Jc g JabJglii
jll ogg Jabll oog Jc bLi j.
Jl oLg aI yall pgi Iigai
g 1234567890123456789012345678901234567890123456789012345678901234567890123456789012345678901234567890123456789
()Lg.Lg.Lg.Lg.Lg.Lg.Lg.Lg.Lg.Lg.Lg.Lg.Lg.Lg.Lg.Lg.Lg.Lg.Lg.Lg.Lg.Lg.Lg.Lg.Lg.Lg.Lg.Lg.Lg.Lg.Lg.Lg.Lg.Lg.Lg.Lg.Lg.Lg.Lg.Lg.Lg.Lg.Lg.Lg.Lg.Lg.Lg.Lg.Lg.Lg.Lg.
JbJI 4.0jLgSA
J
Lw81
a ≤ b ≤ 3,1 ≤ g ≤ 5;
L 2- aagaa Jlc g WwWgJyI yIaJIaJgJg WwJgJyI yIaJIaJgJg JyI yIaJIaJgJyI yIaJIaJgJyI yIaJIaJgJyI yIaJIaJgJyI yIaJIaJgJyI yIaJIaJgJyI yIaJIaJgJyI yIaJIaJgJyI yIaJIaJgJyI yIaJIaJgJyI yIaJIaJg
JLaiwX1 c: aosisiill aagjll Lg;Sll
aogatl no jlc sgiwog * 1s2 J
Jsc (JbIg jn nn jll) Laolls Jldgll
pajd jy bgy) Ldljll pdswnly Laoi
jgl (jnnlgl oo gnnnnnnn
J 1
J 1
J 1
J 1
J 1
J 1
J 1
J 1
J 1
J 1
J 1
J 1
J 1
J 1
J 1
J 1
J 1
J 1
J 1
J 1
J 1
J 1
J 1
J 1
J 1
J 1
aLio gjo a5j Joo pssus 8: aolil aolll liu j a5y joo gfo fagl lld j. Artsana S.p.A" Looi jai aai cglal iaojg jia o aoLw lc jg L . aRlwl jx1 x21 jg jy jJoo wJ all J . dLoLsi
a150 125119 p13i1w J5 J4 a284g
a110 g aabill g l L e o Jlaai w
L111u 150 a111 u a111 u a111 u a111 u a111 u a111 u a111 u a111 u a111 u a111 u a111 u a111 u a111 u a111 u a111 u a111 u a111 u a111 u a111 u a111 u a111u a111u a111u a
g /g Jabll 10o! b Lodic g /g aagall tlll lgl qg jc aelllljll
1! .Jt. dLx cAaIaIaIaIaIaIaIaIaIaIaIaIaIaIaIaIaIaIaIaIaIaIaIaIaIaIaIaIaIaIaIaIaIaIaIaIaIaIaIaIaIaIaIaIaIaIaIaIaIaIaII
g w aolS rC tlll Iy aill CILs
oL aqasllb Cii i. Jao ll G
Lig y g /g aagall tlll lalll
LIS Jn nn nnnn nn nn nn nn nn nn nn nn nn nn nn nn nn nn nn nn nn nn nn nn nn nn nn nn nn nn nn nn nn nn nn nn nn nn nn nn nn nn nn nn nn nn nn nn nn nn nn nn nn nn nn nn nn nn nn nn nn nn nn nn nn
Lgag) jnn Jgag sdo! poy Lodic 1 aalj (ogag gag wll Jgaa WwJ
aJg aJg Lg yol Jgao gq
aJyag SJI aalbI gjgJ gall ag
aJL cILS Ih Jaell Jc gaiag
oLx AALL Pgaiu UgaiyraBn
je Oyai Ii Ii Ii Ii Ii Ii
Gaii .
Lg jglg JgJgJgJgJgJgJgJgJgJgJgJgJgJgJgJgJgJgJgJgJgJgJgJgJgJgJgJgJgJgJgJgJgJgJgJgJgJgJgJgJgJgJgJgJgJgJgJgJgJgJg
[ \cdot a = 1]
laaii
aaii i aii i 100000000000000000000000000000000000000000000000000000000000000000
aai j 8. ailg5 aoan ayalogj hbi j i
. aS. wU 2g0 2ie Jglg aiLd1 allj
oo99. Jabll oao99. aS. wU 2g0 2u
. gaoiie Jgl3 8g. aagbuiu gaoe 8g. jduJg1
Jbui Los oghj, jao Iia jia
. JLaJI
JIL 1
JIL Lggs 1 Jg j a
aLs w g"olal 1200
Lg JIab 1 aolwS
Lc JIb 1 aolg 1 g g 1
OgJlW! aW! Lg 1
Aow! Lg 1
(og) Jg 1
.1 Lggs 1 Jg 1
Jg "jai I Jg 1
1.1
y 1
L p 1
g y g 1 Jw!
i 1
g i 1
"jLl
g c 100
J 150
150 1
a 1
g 1
J 1
J 1
J 1
J 1
J 1
J 1
J 1
..Artsana S.p.A"
Jlil 8g jy 100
Jc 100
jll 100
jll 100
jll 100
jll 100
jll 100
jll 100
jll 100
jll 100
jll 100
jll 100
jll 100
jll 100
jll 100
jll 100
jll 200
Jlill 200
Jlill 200
Jlill 200
Jlill 200
Jlill 200
Jlill 200
Jlill 200
Jlill 200
Jlill 200
Jlill 200
Jlill 200
Jlill 200
Jlill 20
g 11 Lgj A Jn
:JgJgJgJgJgJgJgJgJgJgJgJgJgJgJgJgJgJgJgJgJgJgJgJgJgJgJgJgJgJgJgJgJgJgJgJgJgJgJgJgJgJgJgJgJgJgJgJgJgJgJ
0g JabJg JaaJ 1
1
Jalal jg jll gge g jda
:1gj
S ADB = S COD + S BDO - S ADB
gill Jie jil Jaoill h
(5a). + (5b) - 0g sgsn b.5
a1 = 23,a2 = - 43,b1 = 56,b2 = - 34
6
S ACD = S COD + S_ BDO
aLbJy aIbglu uai cglg pgs ay LoS
:JL:J
JLai21 Jia g 2g g po 0xc21 a b g (1
10 1g
aaljgl aouu ygaiy
Jn Jn Jn Jn Jn Jn Jn Jn Jn Jn Jn Jn Jn Jn Jn Jn Jn Jn Jn Jn Jn Jn Jn Jn Jn Jn Jn Jn Jn Jn Jn Jn Jn Jn Jn Jn Jn Jn Jn Jn Jn Jn Jn Jn Jn Jn Jn Jn Jn Jn Jn
go JLaol oL oL oJ aJil jI liio
gag g aagaaagagaaagaaagaaagaaagaaagaaagaaagaaagaaagaaagaaagaaagaaagaaagaaagaaagaaagaaagaaagaaagaaagaaagaaagaaagaaagaaagaaagaaagaaagaaagaaagaaagaaagaaagaa
jgUJL JLJIg aELJI JLOU
.
a10o Jb00g:"OFF" 0 (c)
gaiuui liigaii hiaii gaiiu 9
:J 13
a:
aC,1
aLJI aJIbJI JcJ 0sLc! 1:Li j
a1 2 Jg>g g b c j3 j4 j5 i6 oLg
JLwjAawLWg(g)JabJoo.2.1
(g)
06626
100- aJgoo oo 1c aolly 1201.1
6,5/50/60 240
4 550
(aa)AA/LR6 1,5
11111111111.2
jwLJI 131 gai! Jie 210.3
, , ,f 与 f 重合
ai = a1 + 2 S_i
2g.1 = 12g
cLoa 8)13 a2xL oLx1 pLi.7
JabJI aJg JaiX ("LED" sGJUaIeJoo aJli
Pd
8.8
g1/1j00jj jgc0011aol<11 g0
sgnJl aLis sgeenn (3) pLJI JwLSJI sgnn
.59i1100 gi 1 iC U
jglc gai jie sli jy
pUbU JSLJ 11 11
(3)
59 = 1 + 1 + 1 + 1 + 1 + 1 + 1 + 1 + 1 + 1 + 1 + 1 + 1 + 1 + 1 + 1 + 1 + 1 + 1 + 1 + 1 + 1 + 1 + 1 + 1 + 1 + 1 + 1 + 1 + 1 + 1 + 1 + 1 + 1 +
gjgl jgljgljgljgljglj
(3) ( 1 - ) =
gijl Jae jL sIgW pILu wSLJ gaii
.015g 1 g a.2g g aLi o.o.g.a
.8j 11 aol<11 g o
1,2,3,4
Jc aIJI (gagJg gagJg JLw! aawLw
JwLsIgaiJIgla!aieagLaIcUaLbJIg
aL 5 15 5 5
JSL13a01511j0g8gSLg.
gj 1111 1111 1111
.
a. wuw Lg i.i.Bg) Jabi 120 g sL o! aL
Jgooo 100
PbIuJyIeJI eJI 1
Joo Hein Jg OogilS jieogj
(3)J
L 1
aIe JbJIOg Si Lio
a.sirii J:
(9)JLaiXg aalbIy 10
:aliso Loglo
0000000000000000000000000000000
1
(9)
Jgjj Jglg jglg ggc gjlae
(9)
在 Rt ABN 中:
y jnnn nn nnnn nn nnnn nn nnnn nn nnnn nn nnnn nn nnnn nn nnnn nn nnnn nn nnnn nn nnnn nn nnnn nn nnnn nn nnnn nn nnnn nn nnnn nn nnnn nn nnnn nn nnnn nn nnnn nn nnnn nn nnnn nn nnnn nn nnnn nn nnnn nn nnnn nn
(9)
JILy jae JaleJI Oosg Jie Wic .abgLo
Joo JJJJgJIOoJUaJxol
aolj jnss 9)
[ \downarrow \frac{1}{2}x \rightarrow \frac{1}{2}x + 1 ]
(2) 1/1111100000000000000000000000000000000000000000000
(gagagagallJLwJaw
(9)JLxg aIbJIy Jdyj gJy jy
JLai Jai Jai
1 2
(9)JLw!g aBbIy 1200 g wI I JI JI JI W!gW Lw!g
()
( 1,1) , ( 1,2) , ( 1,3)
, , , ,g ,J , , ,g . (4)
( \rho \cup {B}{1} \cup {S}{1} \subseteq \rho \cup {B}{2} \cup {S}{2} \subseteq \rho \cup {B}{3} \cup {S}{3} \subseteq \rho \cup {B}{4} \cup {S}{4} \subseteq \rho \cup {B}{5} \cup {S}{5} \subseteq \rho \cup {B}{6} \cup {S}{6} \subseteq \rho \cup {B}{7} \cup {S}{7} \subseteq \rho \cup {B}{8} \cup {S}{8} \subseteq \rho \cup {B}{9} \cup {S}{9} \subseteq \rho \cup {B}{10} \cup {S}{10} \subseteq \rho \cup {B}{11} \cup {S}{11} \subseteq \rho \cup {B}{12} \cup {S}{12} \subseteq \rho \cup {B}{13} \cup {S}{13} \subseteq \rho \cup {B}{14} \cup {S}{14} \subseteq \rho \cup {B}{15} \cup {S}{15} \subseteq \rho \cup {B}{16} \cup {S}{16} \subseteq {\rho }{\left( k\right) }{B}{k} = P{C}{1}^{k - 1}{C}{2}^{k - 1}\;P{C}{3}^{k - 1}{C}{4}^{k - 1}\;P{C}{5}^{k - 1}{C}{6}^{k - 1}\;P{C}{7}^{k - 1}{C}{8}^{k - 1}\;P{C}{9}^{k - 1}{C}{10}^{k - 1}\;P{C}{11}^{k - 1}{C}{12}^{k - 1}\;P{C}{12}^{k - 1}{C}{13}^{k - 1}\;P{C}{13}^{k - 1}{C}{14}^{k - 1}\;P{C}{14}^{k - 1}{C}{15}^{k - 1}\;P{C}{15}^{k - 1}{C}{16}^{k - 1}\;P{C}{16}^{k - 1}{C}{17}^{k - 1}\;P{C}{17}^{k - 1}{C}{18}^{k - 1}\;P{C}{18}^{k - 1}{C}{19}^{k - 1}\;P{C}{20}^{k - 1}{C}{21}^{k - 1}\;P{C}{20}^{k - 1}{C}{22}^{k - 1}\;P{C}{20}^{k - 1}{C}{23}^{k - 1}\;P{C}{20}^{k - 1}{C}{24}^{k - 1}\;P{C}{20}^{k - 1}{C}{25}^{k - 1}\;P{C}{20}^{k - 1}{C}{26}^{k - 1}\;P{C}{20}^{k - 1}{C}{27}^{k - 1}\;P{C}{20}^{k - 1}{C}{28}^{k - 1}\;P{C}{20}^{k - 1}{C}{29}^{k - 1}\;P{C}{20}^{k - 1}{C}{30}^{k - 1}\;P{C}{20}^{k - 1}{C}{31}^{k - 1}\;P{C}{20}^{k - 1}{C}{32}^{k - 1}\;P{C}{20}^{k - 1}{C}{33}^{k - 1}\;P{C}{20}^{k - 1}{C}{34}^{k - 1}\;P{C}{20}^{k - 1}{C}{35}^{k - 1}\;P{C}{20}^{k - 1}{C}{36}^{k - 1}\;P{C}{20}^{k - 1}{C}{37}^{k - 1}\;P{C}{20}^{k - 1}{C}{38}^{k - 1}\;P{C}{20}^{k - 1}{C}{39}^{k - 1}\;P{C}{20}^{k - 1}{C}{40}^{k - 1}\;P{C}{20}^{k - 1}{C}{41}^{k - 1}\;P{C}{20}^{k - 1}{C}{42}^{k - 1}\;P{C}{20}^{k - 1}{C}{43}^{k - 1}\;P{C}{20}^{k - 1}{C}{44}^{k - 1}\;P{C}{20}^{k - 1}{C}{45}^{k - 1}\;P{C}{20}^{k - 1}{C}{46}^{k - 1}\;P{C}{20}^{k - 1}{C}{47}^{k - 1}\;P{C}{20}^{k - 1}{C}{48}^{k - 1}\;P{C}{20}^{k - 1}{C}{49}^{k - 1}\;P{C}{20}^{k - 1}{C}{50}^{k - 1}\;P{C}{20}^{k - 1}{C}{51}^{k - 1}\;P{C}{20}^{k - 1}{C}{52}^{k - 1}\;P{C}{20}^{k - 1}{C}{53}^{k - 1}\;P{C}{20}^{k - 1}{C}{54}^{k - 1}\;P{C}{20}^{k - 1}{C}{55}^{k - 1}\;P{C}{20}^{k - 1}{C}{56}^{k - 1}\;P{C}{20}^{k - 1}{C}{57}^{k - 1}\;P{C}{20}^{k - 1}{C}{58}^{k - 1}\;P{C}{20}^{k - 1}{C}{59}^{k - 1}\;P{C}{20}^{k - 1}{C}{60}^{k - 1}\;P{C}{20}^{k - 1}{C}{61}^{k - 1}\;P{C}{20}^{k - 1}{C}{62}^{k - 1}\;P{C}{20}^{k - 1}{C}{63}^{k - 1}\;P{C}{20}^{k - 1}{C}{64}^{k - 1}\;P{C}{20}^{k - 1}{C}{65}^{k - 1}\;P{C}{20}^{k - 1}{C}{66}^{k - 1}\;P{C}{20}^{k - 1}{C}{67}^{k - 1}\;P{C}{20}^{k - 1}{C}{68}^{k - 1}\;P{C}{20}^{l + }{}{i}\;\left( {{A}{{ij}}\text{或 }{A}{{ij}}\text{或 }{A}{{ij}}\text{或 }{A}{{ij}}\text{或 }{A}{{ij}}\text{或 }{A}{{ij}}\text{或 }{A}{{ij}}\text{或 }{A}{{ij}}\text{或 }{A}{{ij}}\text{或 }{A}{{ij}}\text{或 }{a}{{ij}}\text{或 }{a}{{ij}}\text{或 }{a}{{ij}}\text{或 }{a}{{ij}}\text{或 }{a}{{ij}}\text{或 }{a}{{ij}}\text{或 }{a}{{ij}}\text{或 }{a}{{ij}}\text{或 }{a}{{ij}}\text{或 }{a_j}\text{或 }{\lambda }{{ij}}\text{或 }\lambda {}{ij}\text{或 }\lambda {}{ij}\text{或 }\lambda {}{ij}\text{或 }\lambda {}{ij}\text{或 }\lambda {}{ij}\text{或 }\lambda {}{ij}\text{或 }\lambda {}{ij}\text{或 }\lambda {}{ij}\text{或 }\lambda {}{ij}\text{或 }\lambda {}{ij}\text{或 }\lambda {}{ij}\text{或 }\lambda {}{ij}\left( i = {j.3.4.5.6.7.8.9.0.5.6.7.8.9.0.5.6.7.8.9.0.5.6.7.8.9.0.5.6.7.8.9.0.5.6.7.8.9.0.5.6.7.8.9.0.5.6.7.8.9.0.5.6.7.8.9.0.5.
jLg Cui pUuUs Ls cLi sg :
...ol sgog .gill slil JabJI aiJahJ aiis
jolal aolj oyio oolS yol
.
a11 a11 11g a11s
gJj jIcI Jj jil
(3)pUwUuU
aagag aolis gals ybui wSL iai jai
.
a d a d a d a d a d a d a d a d a d a d a d a d a d a d a d a d a d a d a d a d a d a d a d a d a d a d a d a d a d a d a d a d a d a d a d a d a d a d a d a d a d a d a d a
jwSLJI 631 s9J1 3L1 J
(3)
.0011 aol<Jg oLul wJl
15 15
.5g
gaii 1
.5g i 1
4-0
-ahwgo -aJlc -ahwgo aolis -glo8-4
a
Lio -aiaosio -ahwigo ahts 12-8
PbUJ wLs coIe sgs 12 no
14 15
Jg Jg Jg Jg
auii
11 (1) aJoo Jus 5
Jglio 1 abai glisla Jia
. Jia b
11:1 (1) aLlUg00000000000000000000000000000000000000000000000000000000000000000000000000000000000000
A、 B
(4) aLil c aIb aLLl oLg 1. i.i.i scc g.aIis oogall g w w nnllg 20g Iooog 8y 8y 8y 8y bwi pll all
aLwIg) 2.2 (gJg aJL:W J1.2
1800 3,7 11
Jg 13) aLw
6,5/29-240-100 .
(1) 550
.
(1) Jg w g
.
(1) Jg w g
.
(1) Jg w g
.
(1) Jg w g
.
(1) Jg w g
.
(1) Jg w g
.
(1) Jg w g
(6)Joc
L.
(204 aai 1
S OBC = S COD + S BOC - S BOC
(11)pJzL L 00gj0n jll g 0
Laoo 00g J
pJxuwl ynnl lgl 00 0
aaii 00g (gjll) acll
an
aagglgagagllj 11111111
(8)Jla21g aalbJl J00g 1
:aIisoo Loglo 1
oogw JLai ggg Jao jg 1 Jgbl 1
:JaiJI
(8)gJgJgJ 10
Ji j 1000000000000000000000000000000000000000000000000000000000000000000000000000000000000
Ligaiyabai (9) aigai 0jLx1
:Li jnuii oai yaiiaipg i:alisi oLoge
(13) 100000000000000000000000000000000000000000000000000000000000000000000000000000
jihil 0g no aieiill Ug sgiu hui
h (5b) -9 (5a) + juiill lc hai
jli (6) uag g uo y so uo
10 10 g 10 g 5g
glwogaiagj Jg j 5g 5g 5g
(5a)"+ " ciao lc oJ S b i
.1g sgio jao c ig
(5b) -" ciao lc oJ S b i
.1g sgio jao c ig
(4) aLilI Ic gBw wGall sgWoo
5 1c igall biaigai gis .abgalo
lc jno haoi Ie sgs JSLsla iJ (5b)-9(5a)+2lal
jssy bi yra J5g faguog aLw!rdu
.ogall sgssu Lg
gl lgl Jgogll JliLW!rdu
JJJIg 15) gBwI h bI J (LCD4 gj no aWlIgBwJ j
JssSsJ ssJ no .o o o o o 7
Jgll Jgll aalj
Jlaiw AawLgag) jnnn 0
aegy Jaoj n (ogw g oag
aegy ggl ("OFF" glg) aay
.(ON") (7" ggl) yagll Jgll
lgahil gll agwgl ahts hss Loric
yogall Jgell Jabll 6) jggr
oogbl aagnill agd gill
laal (4) aLl Jcb
lgag) jldg (6) gso Jaoe
gog Jggl agwgl Jaaow Lw
LCD egj no aWuJnJc Jai ogol
aggwg Jabll ggl! c aggiiw (4
:4
aLwIg) jJg Jj 1
Jlgo Lsi (gagog JlaWl Jw! aLwX1 g) JabJg Jj
!(gagag
aLs o Lai 5i jnagll Jie i
aLwI Ic oJrAJI OJU JlaI JLAW21
JIOCLW .uaiy Ioo3 gblilg/9
OjJIO JLOJrJrJrJrJrJrJrJrJrJrJrJrJrJrJrJrJrJrJrJrJrJrJrJrJrJrJrJrJrJrJrJrJrJrJrJrJrJrJrJrJrJrJrJrJrJrJrJrJrJrJ r
aag aagalall llll Jla:wlg 5s
gall Jw! awlw81 Lg:aLbg) jbll
oLx alall pgsiLigai yarllbng (oggl
aaww81 Lg:abg) nnJg g fnnn
(oggl cagall Jlaa
a
A
JlIyIyIyIyIyIyIyIyIyIyIyIyIyIyIyIyIyIy
gaglaiaaagaaagaaagaaagaaagaaagaaagaaagaaagaaagaaagaaagaaagaaagaaagaaagaaagaaagaaagaaagaaagaaagaaagaaagaaagaaagaaagaaagaaagaaagaaagaaagaaagaaagaaagaaagaaagaaagaaagaaagaaagaaagaaagaaagaaagaaagaaagaaagaaagaaagaaagaaa
L 15151515151515151515151515151515151515151515151515151515151515151515151515151515151515151515151515151
glaaglll lalbll no aaleo eolglssj 8 .a yjy jy bjo a cfo aaglo cllhy Jglio g y ae a gl aagall lalbll lly Jia Jia 81 g aalbls ddoa aegbll lllgilg j
iill no acll lalbll aljly Lla 0
. iilly jai yu w u jui
pwl psc allg y cIy Ia Jy La
a. a.
jglg1psswlaolgo g jc s 13
oLx alalglgai liig ahyb
cl.JaoJcJgai aog (13)n
oLx alalglgai liig ahyb
(1) 45 JgJgJgJgJgJgJgJgJgJgJgJgJgJgJgJgJgJgJgJgJgJgJgJgJgJgJgJgJgJgJgJgJgJgJgJgJgJgJgJgJgJg
(13) 100000000000000000000000000000000000000000000000000000000000000000000
Jgll jglslabil g Jn Jg aIbI JdI 1c aLi iagai jgbg (9) gJL
Jalll aolj Jn jll oag pdoa wJ Sall Jn Jn Jn Jn Jn Jn Jn Jn Jn Jn Jn Jn Jn Jn Jn Jn Jn Jn Jn Jn Jn Jn Jn Jn Jn Jn Jn Jn Jn Jn Jn Jn Jn Jn Jn Jn Jn Jn Jn Jn Jn Jn Jn Jn Jn Jn Jn Jn Jn Jn Jnn Jn Jn Jn Jn Jn Jn Jn Jn Jn Jn Jn Jn Jn Jn Jn Jn Jn Jn Jn Jn Jn Jn Jn Jn Jn Jn
·(9)
JALIgai gai jLWJygiai JRIJ 3
JIiJnJnJnJnJnJnJnJnJnJnJnJnJnJnJnJnJnJnJnJnJnJnJnJnJnJnJnJnJnJnJnJnJnJnJnJnJnJnJnJnJnJnJnJnJnJnJnJnJnJnJ nJ10
auiuuiuuiuuiuuiuuiuuiuuiuuiuuiuuiuuiuuiuuiuuiuuiuuiuuiuuiuuiuuiuuiuuiuuiuuiuuiuuiuuiuuiuuiuuiuuiuuiuuiuuiuuiuuiuuiuuiuuiuuiuuiuuiuui uui uui uui uui uui uui uui uui uui uui uui uui uui uui uui uui uui uui uui uui uui uui uui uui uui uui uui uui uui uui uui uui uui uui uui uui uui uui uui uui uui uui uui uui uui uui uui uui uui uui U
JbHJn JdJIgWJIaJyJnJU 1
JG WJL Jc JoLc JI Looic J
.
Ls1s1s1s1s1s1s1s1s1s1s1s1s1s1s1s1s1s1s1s1s1s1s1s1s1s1s1s1s1s1s1s1s1s1s1s1s1s1s1s1s1s1s
L
cIs 3 s: □ ■ ■ ■ ■
.ahwio aelis 5 Jalal no oJalal g
cIs 5 s: ■ ■ ■ ■
aJlc aelis 5 Jalal no oJalal g
LgolssiWg LgIis! no sLiig zilil Jcog 2sul
Jlglj aaliso pgsi jyR y .aHJIy jlg1 10x8 ayogill
JlabJglio nC 10pysuUll Ayrblb hao
Jlsjg ciig yinB jlg1 paa i
Lbs: CsuS uJscuPpuiu UyB
Lcg ciill Ic lg11 Lla11 Lda11 LsLc
Lsipssi81 no LaiaSlig.9giiUll aylrh
Csu
aliso ayIb jyGj41 g poisiwi 8
.1o oLwryi g411 Laii UyArae
goa 1 1 1 COD.20256600100
g Lsog g lii hao pgsu 11 a b u jn nn
gai kui Jno plsswug jg
aia bn n . (COD.20256600200)
gai.1LbI yBn np wplaswU pgsu
aia bn n . f g oag U 11
paa iayabu I slogg ayabu I c bol
Lglil a bi wlogl I c u . aIg
pasiwi X . aIg acl laa aahy aegbbl
aiao slog aiais S lqio g abws I ag
lgil ogg ayarbl I aibii
Jgig i! ppg i! aRbbl
paxixx8 tlae Y I qjg . pssiw
. aasall jn nn ll
PcA all g aig ao pgsu II aRbbl
Lgolssw
aogill sic jin no Eaipgsu II ayabv jz
Lgolssw nc
go U L aeg poilo Jk wiy ayabll jn no ydsu
. JIJIIL
aagllgall Lb1.3
aagll Jw! aWl (20 g
(10) aagll all 15 aagll all j
gagll 15 g aal y al
AA/ egill no 1,5 aagll 4 4 LR6
. alg b o j i
J q Jg 10 no aagall all yjy
. aio vali
g Lg5j g Jll y aalal all yj
g aill piai wu lgio vali j
. aol aill i
aaiy biw g f g aill
pao21 go gajl lc gjjw y aillw
aillb jwcg. lalb jy bii
. bwl lwl awo lo aJ
oLcX aIbll jc hla Iw ola! Jg3
. jai d: j
so Jai d. lgiv sle cyb poisi
. jlgf1 a Jlo
pogil lalb jao jg3
. JjwU AJI
. gJl jbl plss Ws yj
. .
Lgai jia gI gai iI ayi bai 2
y gai yai aayi aayi yai yai yai yai yai yai yai yai yai yai yai yai yai yai yai yai yai yai yai yai yai yai yai yai yai yai yai yai yai yai yai yai yai yai yai yai yai yai yai yai yai yai yai yai yai yai yai yai yai yai yali yali yali yali yali yali yali yali yali yali yali yali yali yali yali yali yali yali yali yali yali yali yali yali yali yali yali yali yali yali yali yali yali yali yali yali yali yali yali yali yali yali yali yali yali yali yali
AD = 8
m = 311
J 1 Jg31 Lg 100000000000000000000000000000000000000000000000000000000000000000000000000000
Note
Note

C∈0470
Mod. 06626

Artsana S.p.A. - Via Saldarini Catelli 1 - 22070 Grandate (CO) Italy www.chicco.com