
POWX139 - Sander PowerPlus - Free user manual and instructions
Find the device manual for free POWX139 PowerPlus in PDF.

| Brand | PowerPlus |
| Model | POWX139 |
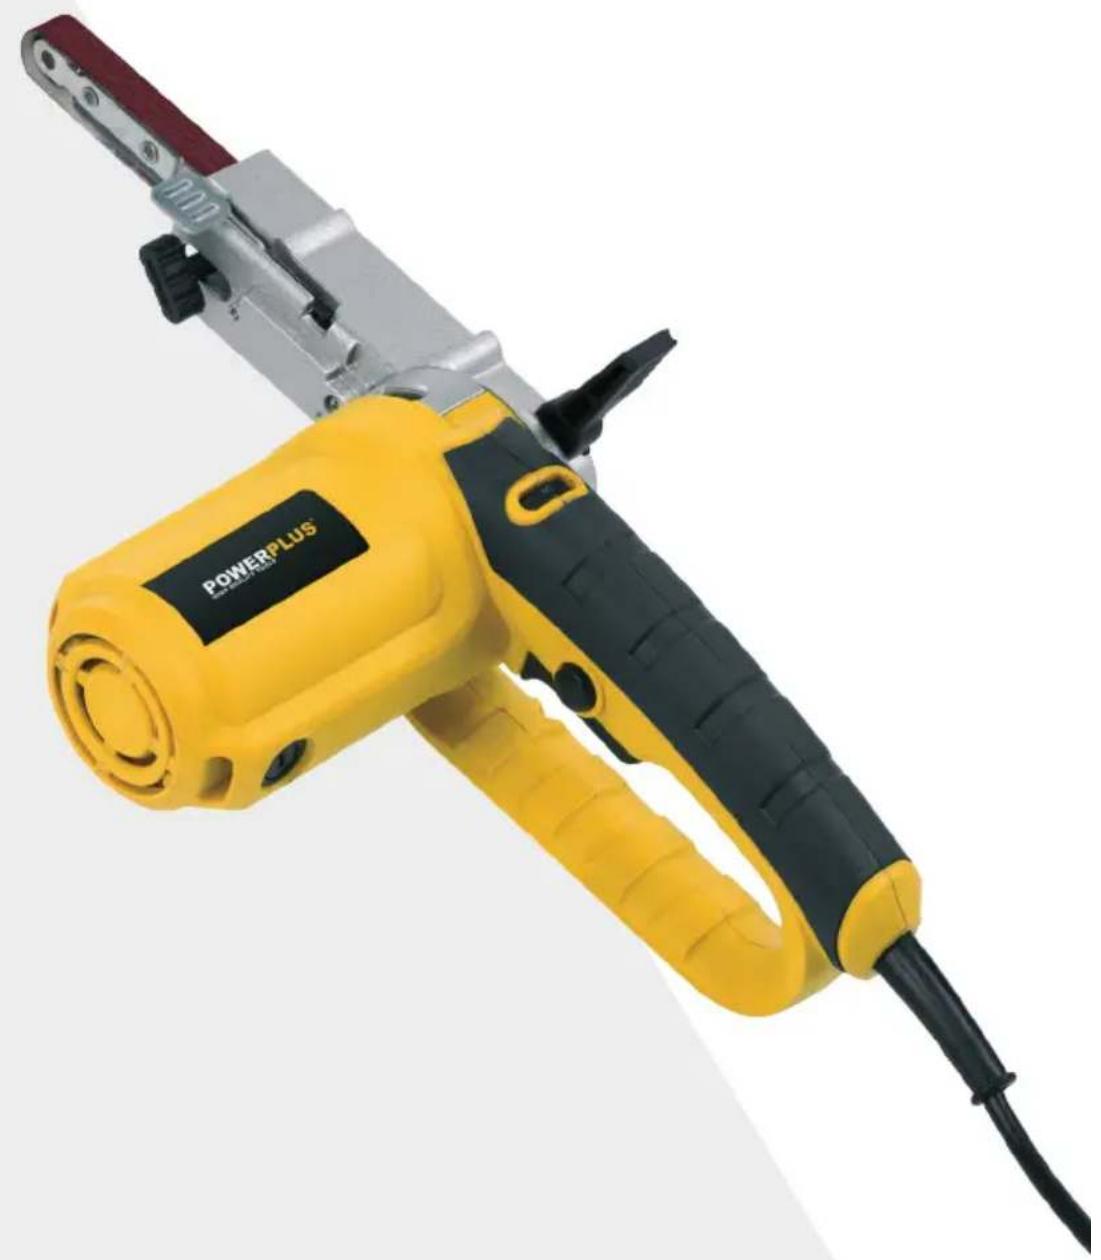
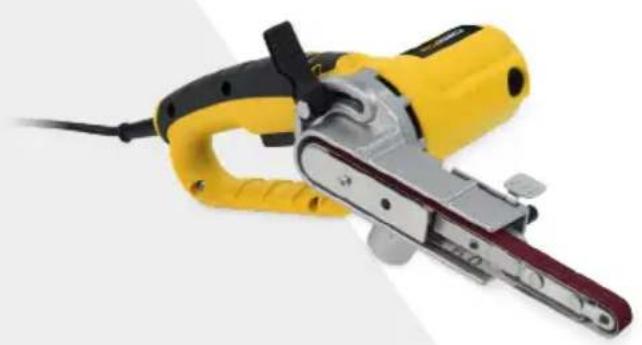
| Product type | Belt file sander |
| Rated power | 400 W |
| Supply voltage | 230-240 V ~ 50 Hz |
| Variable speed | 300 - 1,700 m/min |
| Sanding belt size | 13 x 457 mm |
| Working bar length | 83 mm |
| Power cable length | 3 m |
| Protection class | Class II (double insulation) |
| Sound pressure level (LpA) | 80 dB(A) (K=3 dB) |
| Sound power level (LwA) | 91 dB(A) (K=3 dB) |
| Vibrations (total value) | 1.2 m/s² (K=1.5 m/s²) |
| Warranty | 36 months |
| Main functions | Variable speed, arm angle adjustment, belt centering, integrated dust bag |
| Maintenance and cleaning | Cleaning vents, replacing carbon brushes (wear at 4-5 mm) |
| Safety | Double insulation, recommended eye and ear protection, dust mask |
| Package contents | 1 sander, 10 sanding belts (3xG40, 4xG60, 3xG120), 1 dust bag, 1 manual |
Frequently Asked Questions - POWX139 PowerPlus
The machine generates 80 dB(A) sound pressure.
User questions about POWX139 PowerPlus
0 question about this device. Answer the ones you know or ask your own.
Ask a new question about this device
Download the instructions for your Sander in PDF format for free! Find your manual POWX139 - PowerPlus and take your electronic device back in hand. On this page are published all the documents necessary for the use of your device. POWX139 by PowerPlus.
USER MANUAL POWX139 PowerPlus
POWERPLUS HIGH QUALITY TOOLS
POWX139
NL NEDERLANDS VERTAALDE VERSIE VAN DE ORIGINELE HANDLEIDING
FR FRANÇAIS TRADUCTION DU MODE D'EMPLOI D'ORIGINE
EN ENGLISH ORIGINAL INSTRUCTION MANUAL
2 BESCHRIJVING (FIG. A)
28/07/2022, Lier - Belgium
28/07/2022, Lier - Belgium
1 APPLICATION 2
2 DESCRIPTION (FIG. A) 2
3 PACKAGE CONTENT LIST 2
4 SYMBOLS 2
5 GENERAL POWER TOOL SAFETY WARNINGS 3
5.1 Working area 3
5.2 Electrical safety 3
5.3 Personal safety 3
5.4 Power tool use and care 4
5.5 Service 4
6 MACHINE-SPECIFIC SAFETY WARNINGS 4
7 ASSEMBLY 4
7.1 Installation of the powerfile arm (Fig 1, 2, 3 and 4)
7.2 Installation and removal of belt (Fig 5) 4
7.3 Belt adjustment path ((Fig. 6)
7.4 Connect the dust bag (Fig. 7)
8 OPERATION 5
8.1 Adjust the angle of the arm (Fig. 8)
8.2 Switch operation (Fig. 9)
8.3 Speed controller (Fig. 10)
8.4 Sanding operation (Fig. 11 and 12)
9 CLEANING AND MAINTENANCE 6
9.1 Replacing the carbon brush (Fig. 13)
10 TECHNICAL DETAILS 6
11 NOISE 6
12 WARRANTY 7
13 ENVIRONMENT 7
14 DECLARATION OF CONFORMITY 8
FILE BELT SANDER 400W
POWX139
1 APPLICATION

WARNING! Read this manual and general safety instructions carefully before using the appliance, for your own safety. Your power tool should only be passed on together with these instructions.
2 DESCRIPTION (FIG. A)
- Adjustable belt knob
- Main Switch
- Sander belt
- Speed control
- Strut arm
- Driving wheel
- Adjustable angle lever
- Dust exit pipe
- Tension spanner
- Dust bag
- Lock off button
3 PACKAGE CONTENT LIST
- Remove all packaging materials.
- Remove remaining packing and package inserts (if included).
- Check that the package contents are complete.
- Check the appliance, the power cord, the power plug and all accessories for transportation damage.
- Keep the packing materials as far as possible till the end of the warranty period. Dispos it into your local waste disposal system afterwards.

WARNING: Packaging materials are not toys! Children must not play with plastic bags! Danger of suffocation!
10 x sanding belt (3x g40/4x g60/3x g120)
1 x manual
1 xdustbag

If any parts are missing or damaged, please contact your dealer.
4 SYMBOLS
In this manual and/or on the machine the following symbols are used:
| ! | Denotes risk of personal injury or damage to the tool. | "Class II - The machine is double insulated; Earthing wire is therefore not necessary. | |
| Read manual before use. | CE | In accordance with essential requirements of the European directive(s). | |
| Wear eye protection | Wear gloves |
5 GENERAL POWER TOOL SAFETY WARNINGS
Read all safety warnings and instructions. Failure to heed warnings and follow instructions may result in electric shock, fire and/or serious injury. Keep safety warnings and instructions for future reference. The term "power tool" in the safety warnings refers to your mains-operated (corded) power tool or battery- operated (cordless) power tool.
5.1 Working area
- Keep working area clean and well lit. Untidy and dark areas can lead to accidents.
- Do not operate power tools in potentially explosive surroundings, for example, in the presence of inflammable liquids, gases or dust. Power tools create sparks which may ignite the dust or fumes.
- Keep children and bystanders at a distance when operating a power tool. Distractions can cause you to lose control of it.
5.2 Electrical safety
- Always check that the power supply corresponds to the voltage on the rating plate.
- Power tool plugs must match the outlet. Never modify the plug in any way. Do not use adapter plugs with earthed power tools. Unmodified plugs and matching outlets will reduce the risk of an electric shock.
- Avoid body contact with earthed surfaces such as pipes, radiators, kitchen ranges and refrigerators. There is an increased risk of an electric shock if your body is earthed.
- Do not expose power tools to rain or wet conditions. If water gets inside a power tool, it will increase the risk of an electric shock.
- Do not damage the cord. Never use the cord for carrying, pulling or unplugging the power tool. Keep the cord away from heat, oil, sharp edges or moving parts. Damaged or entangled cords increase the risk of an electric shock.
- When operating a power tool outdoors, use an extension cable suitable for outdoor use. Using a cord suitable for outdoor use reduces the risk of an electric shock.
- If operating a power tool in a damp location is unavoidable, use a power supply protected by a residual current device (RCD). Using an RCD reduces the risk of an electric shock.
5.3 Personal safety
- Stay alert, watch what you are doing and use common sense when operating a power tool. Do not use a power tool when you are tired or under the influence of drugs, alcohol or medication. A moment of inattention when operating a power tool may result in serious personal injury.
- Use safety equipment. Always wear eye protection. Using safety equipment such as a dust mask, non-skid safety shoes, a hard hat, or hearing protection whenever it is needed will reduce the risk of personal injury.
- Avoid accidental starts. Ensure the switch is in the off position before inserting the plug. Carrying power tools with your finger on the switch or plugging in power tools when the switch is in the on position makes accidents more likely.
- Remove any adjusting keys or spanners before turning on the power tool. A spanner or key left attached to a rotating part of the power tool may result in personal injury.
- Do not reach out too far. Keep your feet firmly on the ground at all times. This will enable you retain control over the power tool in unexpected situations.
- Dress properly. Do not wear loose clothing or jewellery. Keep your hair, clothing and gloves away from the power tool. Loose clothes, jewellery or long hair can become entangled in the moving parts.
If there are devices for connecting dust extraction and collection facilities, please ensure that they are attached and used correctly. Using such devices can reduce dust-related hazards.
5.4 Power tool use and care
-
Do not expect the power tool to do more than it can. Use the correct power tool for what you want to do. A power tool will achieve better results and be safer if used in the context for which it was designed.
-
Do not use the power tool if the switch cannot turn it on and off. A power tool with a broken switch is dangerous and must be repaired.
-
Disconnect the plug from the power source before making adjustments, changing accessories, or storing power tools. Such preventive safety measures reduce the risk of starting the power tool accidentally.
-
Store power tools, when not in use, out of the reach of children and do not allow people who are not familiar with the power tool or these instructions to operate it. Power tools are potentially dangerous in the hands of untrained users.
-
Maintain power tools. Check for misalignment or jammed moving parts, breakages or any other feature that might affect the operation of the power tool. If it is damaged, the power tool must be repaired. Many accidents are caused by using poorly maintained power tools.
-
Keep cutting tools sharp and clean. Properly maintained cutting tools with sharp cutting edges are less likely to jam and are easier to control.
-
Use the power tool, accessories and cutting tools, etc., in accordance with these instructions and in the manner intended for the particular type of power tool, taking into account the working conditions and the work which needs to be done. Using a power tool in ways for which it was not intended can lead to potentially hazardous situations.
5.5 Service
- Your power tool should be serviced by a qualified specialist using only standard spare parts. This will ensure that it meets the required safety standards.
6 MACHINE-SPECIFIC SAFETY WARNINGS
Always hold the tool with it's insulated grip.
The operator should hold the tool with two hands firmly.
Make sure the tool is switched on before you touch the workpiece with the sanding belt.
- Do not touch any rotating components of the tool.
- This machine is not waterproof, so do not add water at the surface of work piece.
- When it comes to sanding operations, it is necessary to ensure a well-ventilated work area.
- Some of the material contained in the compounds may be toxic.
- Be sure to use the dust masks / respirators corresponding of the material being processed.
7 ASSEMBLY
7.1 Installation of the powerfile arm (Fig 1, 2, 3 and 4)
- Before the installation: place the power file on its side as shown below
- Insert spring as shown
- Fix the strut arm
- Install the belt track adjustment knob
7.2 Installation and removal of belt (Fig 5)
- Make sure the machine is turned off and unplugged before installing or removing the belt.
Pull the tension spanner to the back. Put the belt on the driving wheel and pull the belt to the front of the arm, and then make the belt slip to the belt wheel before pulling the tension spanner back to the forward position.
7.3 Belt adjustment path ((Fig. 6)
- Check if the sanding belt is running centrally before starting the work.
- Run the file at no load speed and turn the centralizing knob either clockwise or anticlockwise to adjust the belt tracking until the sanding belt is running smooth.
7.4 Connect the dust bag (Fig. 7)
- This machine is fitted with a dust extraction outlet and a collection bag.
We recommend using this facility is at all times, as well as using an approved face mask. It will make you work cleaner. - First place the extraction outlet, and then fit the dust collection bag onto the outlet.
8 OPERATION
8.1 Adjust the angle of the arm (Fig. 8)
Before adjusting the angle of the arm, please make sure that the machine is turned off and unplugged.
- The operator can adjust the arm in any angle according to the position or the shape of work pieces, and then fix it into place.
- Loosen the angle adjustment lever, then you can lift up the arm. Rotate the arm along the pivot to the desired position, then lock the angle adjustment lever and fix the arm into place.
8.2 Switch operation (Fig. 9)
- The tool is operated by pressing/releasing the main switch. The machine will start by pressing the main switch and stop when releasing the main switch.
- Press the lock button and the main switch at the same time to lock the swith into position and the machine will work continuously.
- Press the main switch all the way to the end and then release it to unlock the machine again.
8.3 Speed controller (Fig. 10)
- The speed can be adjusted between 300m / min and 1700m / min through rotating the speed controller from 1 to 6.
Adjusting the controller from 1 to 6 will accelerate. - Adjusting the controller from 6 to 1 will slow down.
- Please choose the right speed according to the work piece.
8.4 Sanding operation (Fig. 11 and 12)
- Secure the work piece to prevent it from moving under the sander belt.
- When starting or stopping the machine, do not let the tool contact with the work piece. Otherwise, it will result the damage of the sander belt or it will make the machine getting out of control.
- When operating the machine, be careful to avoid any part of your body to come into contact with any of the moving parts of the machine or belt.
- Hold the machine with both hands in front of you and away from you, and assume a balanced posture.
- Press the main switch and allow the motor to reach full speed. Hold the machine parallel to the work piece. Gently bring the belt in contact with the work piece. Do not force tool. The weight of the sander supplies adequate pressure. Applying additional pressure will slow down the motor, rapidly wear out the sanding belt and reduce the sanding speed a lot.
- Avoid contact with the sanding belt at any time.
9 CLEANING AND MAINTENANCE

Always ensure that the tool is switched off and the plug is removed from the power socket before making any adjustments or maintenance procedures.
Keep the tool's air vents unclogged and clean at all times.
9.1 Replacing the carbon brush (Fig. 13)
- During use, the carbon brushes will wear down. This will result in a possible loss of power and excessive sparking seen through the ventilation slots. When the carbon brushes have worn down to approximately 4-5 mm, they will require replacing. Carbon brushes must always be replaced in pairs.

Tool service and maintain must be performed only by qualified repair personnel.
10 TECHNICAL DETAILS
| Model nr. | POWX139 |
| Rated Voltage | 230-240 V |
| Rated Frequency | 50 Hz |
| Rated Power | 400 W |
| Variable speed | 300-1700 m/min |
| Working bar length | 83 mm |
| Sanding belt size | 13x457 mm |
| Cable length | 3 m |
11 NOISE
Noise emission values measured according to relevant standard. (K = 3)
Acoustic pressure level LpA 80 dB(A)
Acoustic power level LwA 91 dB(A)

ATTENTION! Wear hearing protection when sound pressure is over 85 dB(A).
aw (Vibration)
1,2 m/s²
K = 1,5m / s^2
12 WARRANTY
This product is warranted for a 36-month period effective from the date of purchase by the first user.
- This warranty covers all material or production flaws excluding : batteries, chargers, defective parts subject to normal wear & tear such as bearings, brushes, cables, and plugs, or accessories such as drills, drill bits, saw blades, etc. ; damage or defects resulting from maltreatment, accidents or alterations; nor the cost of transportation.
- Damage and/or defects resulting from inappropriate use also do not fall under the warranty provisions.
We also disclaim all liability for any bodily injury resulting from inappropriate use of the tool.
- Repairs may only be carried out by an authorized customer service center for Powerplus tools.
- You can always obtain more information at the number 00 32 3 292 92 90.
- Any transportation costs shall always be borne by the customer, unless agreed otherwise in writing.
- At the same time, no claim can be made on the warranty if the damage of the device is the result of negligent maintenance or overload.
- Definitely excluded from the warranty is damage resulting from fluid permeation, excessive dust penetration, intentional damage (on purpose or by gross carelessness), inappropriate usage (use for purposes for which the device is not suitable), incompetent usage (e.g. not following the instructions given in the manual), inexpert assembly, lightning strike, erroneous net voltage. This list is not exhaustive.
- Acceptance of claims under warranty can never lead to the prolongation of the warranty period nor commencement of a new warranty period in case of a device replacement.
Devices or parts which are replaced under the warranty therefore remain the property of Varo NV.
- We reserve the right to reject a claim whenever the purchase cannot be verified or when it is clear that the product has not been properly maintained. (Clean ventilation slots, carbon brushes serviced regularly, etc.).
- Your purchase receipt must be kept as proof of date of purchase.
- Your appliance must be returned undismantled to your dealer in an acceptably clean state, (in its original blow-moulded case if applicable to the unit), accompanied by proof of purchase.
13 ENVIRONMENT
Should your appliance need replacement after extended use, do not dispose of it with the household refuse, but in an environmentally safe way.
Waste produced by electrical machine items should not be handled like normal household rubbish. Please recycle where recycle facilities exist. Check with your Local Authority or retailer for recycling advice.
14 DECLARATION OF CONFORMITY


VARO N.V. - Vic. Van Rompuy N.V. Joseph Van Instraat 9 - BE2500 Lier - BELGIUM, declares that,
Product: File Belt sander
Trade mark: POWERPLUS
Model:POWX139
is in conformity with the essential requirements and other relevant provisions of the applicable European Directives, based on the application of European harmonized standards. Any unauthorized modification of the apparatus voids this declaration.
European Directives (including, if applicable, their amendments up to the date of signature);
2011/65/EU
2006/42/EC
2014/30/EU
European harmonized standards (including, if applicable, their amendments up to the date of signature);
EN62841-1:2015
EN62841-2-4:2014
EN55014-1:2017
EN55014-2:2015
ENIEC61000-3-2:2019
EN61000-3-3:2013
Keeper of the Technical Documentation : Philippe Vankerkhove, VARO - Vic. Van Rompuy N.V.
The undersigned acts on behalf of the company CEO,

Ludo Mertens
Regulatory Affairs - Compliance Manager
28/07/2022, Lier - Belgium
28/07/2022, Lier - Belgium
28/07/2022, Lier - Belgium
Regulatory Affairs - Compliance Manager
28/07/2022, Lier - Belgium
1 APLICACAO. 2
2 DESCRIÇÃO (FIG. A) 2
3 LISTA DE CONTEUDO DA EMBALAGEM 2
4 SIMBOLOS 2
5 PROCEDIMENTOS GERAIS DE SEGURANCA 3
5.1 Area de trabajo 3
5.2 Seguranta eltrica 3
5.3 Seguranta persona 3
5.4 Manuseamento e emprego de ferramentas elétricas com precauão....4
5.5 Assistance Tecnica 4
6 INSTRUÇÉS DE SERVICO ESPECÍCías DO APARELHO....4
7 MONTAGEM 5
7.1 Instalação do braço powerfile(Fig 1, 2, 3 e 4) 5
7.2 Instalareremovera correia(Fig5) 5
7.3 Pista de ajuste da correia (Fig. 6) 5
7.4 Ligar o saco de po (Fig. 7). 5
8 FUNCIONAMENTO 5
8.1 Ajuste o angulo do braço (Fig. 8) 5
8.2 Iniciar a operacao (Fig. 9) 5
8.3 Controlador de velocidade (Fig. 10) 5
8.4 Operacao de lixar (Fig. 11 e 12) 6
9 LIMPEZA E MANUTENCAO 6
9.1 Substituir a escova de carvao (Fig. 13) 6
10 DADOS TECNICOS 6
11 RUIDO 7
12 GARANTIA 7
13 MEIO-AMBIENTE 8
14 DECLARACAO DE CONFORMIDADE 8
LIMA LIXADEIRA DE CORREIA 400W POWX139
1 APLICAZão

9 RENGJØRING OG VEDLIKEHOLD

28/07/2022, Lier - Belgium
28/07/2022, Lier - Belgium
28/07/2022, Lier - Belgium
28/07/2022, Lier - Belgium
1 PRIMJENA 2
2 OPIS (SL. A) 2
3 POPIS SADRZAJA PAKETA 2
4 SIMBOLI 2
5 OPÇA UPOZORENJA O SIGURNOSTI RUKOVANJA
ELEKTRICNIM ALATIMA 3
5.1 Radno mesto 3
5.2 Elektricna sigurnost 3
5.3 Osobna sigurnost 3
5.4 Uporaba i odrzavanje elektricnog alata 4
5.5 Servis 4
6 UPUTE ZA SIGURNOST SPECIFICNE ZA UREDAJ 4
7 MONTAZA 4
7.1 Postavljanje nosa brusne trake elektrne traene brusilice (Sl. 1, 2, 3 i 4)....4
7.2 Stavljanje i skidanje trake (SI. 5) 5
7.3 Putanja namjestanja brusne trake (Sl. 6)
7.4 Prikljucite vrecu za prasinu (Sl. 7)
8 RAD 5
8.1 Podešavanje kuta nosača brusne trake (SI. 8)
8.2 Rad sklopke (Sl. 9) 5
8.3 Regulator brzine (SI. 10) 5
8.4 Postupak brušenja (Sl. 11 i 12) 5
9 CIsCENJE I ODRZAVANJE 6
9.1 Zamjena ugljenih cetkica (SI. 13) 6
10 TEHNICKI PODACI 6
11 BUKA 6
12 JAMSTVO 7
13 OKOLIS 7
14 IZJAVAO SUKLADNOSTI 8
TRAÇNA BRUSILICA 400 W POWX139
1 PRIMJENA

UPOZORENJE! Prije uporabe alata, a radi vase vlastite sigurnosti pažljivo procitajte ovaj prisucnik i opće upute o sigurnosti. Ove upute cine sastavni dio opreme elektricnog alata, pa i u slucaju prodaje drugom vlasniku.
2 OPIS (SL. A)
- Gumb za podesavanje trake
- Brusna traka
- Ukruta nosača brusne trake
- Poluga za podešavanje kuta
-
Gumb za podesavanje nosača brusne trake
-
Gumb za odblokiranje
- Glavna sklopa
- Kontrola brzine
- Pogonski kotač
- Cijev za izlaz prašine
- Vreca za prasinu
3 POPIS SADRžAJA PAKETA
8.3 Regulator brzine (Sl. 10)
Okretanjem gumba za regulaciju brzine od 1 do 6 moguce je namjestiti brz 300 m/min do 1700 m/min.
- Brusna traka kretat ce se sve brze izborom brojki od 1 prema 6, a kretat ce se sve sporije izborom brojki od 6 prema 1.
Odaberite prikladnu brzinu u skladu s izrafevinom.
8.4 Postupak brusenja (Sl. 11 i 12)
28/07/2022, Lier - Belgium
1 PRIMENA 2
2 OPIS (SL. A) 2
3 SPISAK SADRZAJA PAKOVANJA 2
4 SIMBOLI 2
5 OPŠA BEZBEDNOSNA UPUTSTVA ZA ELEKTRICNE ALATE 3
5.1 Radna oblast 3
5.2 Elektricna bezbednost 3
5.3 Lična bezbednost 3
5.4 Korijscenje i održavanje elektrichnog alata 4
5.5 Servisiranje 4
6 SIGURNOSNA UPUTSTVA SPECIFICNA ZA APARATE. 4
7 MONTAZA 4
7.1 Montaža kraka elektricne turpije (SI. 1, 2, 3, i 4)
7.2 Postavljanje i skidanje trake (Sl. 5)
7.3 Podesavanje putanje trake (SI. 6) 5
7.4 Prikljucite vrecu za prasinu (SI. 7)
8 RAD 5
8.1 Podesavanje ugra kraka (Sl. 8) 5
8.2 Funkcija prekidača (Sl. 9) 5
8.3 Regulator brzine (Sl. 10) 5
8.4 Operacija brušenja (Sl. 11 i 12) 5
9 CIsCENJE I ODRZAVANJE 6
9.1 Zamena grafitne cetkice (Sl. 13) 6
10 TEHNICKI PODACI 6
11 BUKA 6
12 GARANCIJA 7
13 ZIVOTNA SREDINA 7
14 IZJAVA O USKLADENOSTI 8
TRAKASTA BRUSILICA 400W POWX139
1 PRIMENA

8.3 Regulator brzine (Sl. 10)
- Brzina se moze podešavati izmediu 300m/min i 1700/min okretanjem regulatoria brzine od 1 do 6.
- Podesavanie regulatora od 1 do 6 ce ubrzavati rad masine.
- Podesavanie regulatora od 6 do 1 ce usporavati rad masine.
- Izaberite odqovarajuću brzinu prema radnom predmetu.
8.4 Operacija brusenja (SI. 11 i 12)
28/07/2022, Lier - Belgium
1 OBLASTPOUZITI 2
2 POPIS (OBR. A) 2
3 SEZNAM OBSAHU BALENI 2
4 SYMBOLY 2
5 OBECNÁ BEZPEČNOSTNI UPOZORNÉNÍ PRO ELEKTRICKÉ NASTROJE 3
8.3 Regulator otacek (Obr. 10)
28/07/2022, Lier - Belgium
1POUZIVANIE 2
2 POPIS (OBR. A) 2
3 OBSAH BALENIA 2
4 SYMBOLY 2
5 VŠEOBECNÉ BEZPEČNOSTNÉ VAROVANIA PRE ELEKTRICKÉ NÁRADIE 3
5.1 Pracovná plocha 3
5.2 Elektrická bezpečnost' 3
5.3 Osobná bezpečnost' 3
5.4 Použivanie elektrického náradia a starostlivost' on 4
5.5 Servis 4
6 BEZPECNOSTNÉ POKNY SPECTICKÉ PRE DANÉ NARADIE4
7 MONTAZ 4
7.1 Instalacia ramena elektrického pilíka (Obr. 1, 2, 3 a 4)
7.2 Instalacia a vybratie pasu (Obr. 5) 5
7.3 Draha nastavenia pasu (Obr. 6) 5
7.4 Pripojenie vrecka na prach (Obr. 7) 5
8 PREVADZKA 5
8.1 Nastavenie uhla ramena (Obr. 8) 5
8.2 Použivanie vypinača (Obr. 9) 5
8.3 Ovladac rychlosti (Obr. 10) 5
8.4 Brusenie (Obr. 11 a 12) 6
9 CISTENIE A UDRZBA 6
9.1 Vymena uhlikovej kefy (Obr. 13)
10 TECHNICKÉ UDAJE 6
11 HLUK 6
12 ZARUKA 7
13 ZIVOTNé PROSTredi 7
14 VYHLASENIE O ZHODE 8
1POUZIVANIE

Tool service and maintain must be performed only by qualified repair personnel
10 TECHNICKÉ UDAJE
| Č. modelu | POWX139 |
| Rated Voltage | 230-240 V |
| Rated Frequency | 50 Hz |
| Rated Power | 400 W |
| Variable speed | 300-1700 m/min |
| Working bar length | 83 mm |
| Sanding belt size | 13x457 mm |
| Cable length | 3 m |
11 HLUK
Hodnoty emisi hluku namerané podla prislušnej normy. (K=3)
28/07/2022, Lier - Belgium
1 DOMENII DE UTILIZARE 2
2 DESCRIERE (FIG. A) 2
3 CONTINUTUL PACHETULUI 2
4 SIMBOLURI 2
5 AVERTISMENTE GENERALE DE SIGURANÀ PRIVIND
APARATUL ELECTRIC 3
5.1 Zona de lucru 3
5.2 Siguranta electrica 3
5.3 Siguranta personala 3
5.4 Folosirea 山 intretnerea aparatului electric 4
5.5 Service 4
6 INSTRUCTION PRIVIND SIGURANTA SPECIFICE MAŞINII ......4
7 MONTARE 4
7.1 Montarea braului slefuitorului (Fig. 1, 2, 3 si 4)
7.2 Montarea 山 demontarea benzii (Fig. 5) 5
7.3 Modul de reglare a benzii (Fig. 6) 5
7.4 Montarea sacului de graf (Fig. 7) 5
8 FUNCTIONARE 5
8.1 Reglarea unghiului braului (Fig. 8) 5
8.2 Utilizarea comutatorului (Fig. 9). 5
8.3 Comanda vitezei (Fig. 10) 5
8.4 §lefuirea (Fig. 11 §i 12) 5
9 CURATARE INTREINERE 6
9.1 Inlocuirea periilor de carbon (Fig. 13) 6
10 DATE TEHNICE 6
11 ZGOMOT 6
12 GARANTIE 7
13 MEDIU 7
14 DECLARATIA DE CONFORMITATE 8
1 DOMENII DE UTILIZARE

AVERTISMENT! Pouru siguranta dumneavoastră, inainte de a folosi masina, citi ci atentie acest manual si instruciunile generale de siguranta. Aparatul dvs. electric nu trebuie dat altero persone fara a le transmite si aceste instrutiuni.
2 DESCRIERE (FIG. A)
- Buton de reglare a benzii
- Bandă de slefuit
- Brat-suport
- Manetă cu unghi regabil
- Buton de brat-suport reglabil
-
Buton de deblocare
-
Comutator principal
- Comanda vitezei
- Rola de antrenare
- Teava de evacuare a prafului
- Sac de praf
3 CONTINUTUL PACHETULUI
28/07/2022, Lier - Belgium
28/07/2022, Lier - Belgium
1 ALKALMAZÁS 2
2 LEIRAS (A ABRA) 2
3 CSOMAGOLÁS TARTALMA 2
4 JELZÉSEK 2
5 ALTALANOS BIZTONSAGI UTASITASOK
SZERSZÁMGÉPEKHEZ 3
28/07/2022, Lier - Belgium
1 OBJACTb PIPMEHEHnA 2
2 OINCAHNE (PNC.A) 2
3 COIDEPJKMOE YNAKOBKN 2
4 YCJIOBHBIE OBO3HAUEHN 2
5 OБшЯ ИНСТРУКЦИ NO TEXHиKE 6E3ОПАСHOCTN ПРИ PABOTE C 3JIЕКТPOINHCTPUMEHTOM 3
5.1 Pa6ooye mecmoo 3
5.2 3
5.3 1uynha6e3oNaChocmb...4
5.4 3Kcnnyamauua u yxod 3a 3JekmpouHcmpyMeHMOM
5.5 06cnyxueaHue 5
6 OCObIe YKA3AHnI NO TEXHnke Bc3OpAChOCTn IJI MAuINhbl 5
7 C6OPKA 5
7.1 YcmaHOeKa KOHcOJIu JeHmoUHOzo HauNJbHuKa (Puc. 1, 2, 3 u 4) .5
7.2 YcmaHOBa u cHmue JHeMbI (Puc. 5) 5
7.3 Pezynuipo8ka mpaekmopuu deuxkeHua JeHmbi (Puc. 6) 5
7.4 NodcoeduneHue nbilec6bOpHuKa (Puc. 7) 5
8 3KcPJIyATAU.. 6
8.1 Pezynuipo6ka yana haknoha koncoju (Puc. 8) 6
8.2 BkIIOueHue u 6bIKIOueHue (Puc. 9) 6
8.3 Pezyarnop ckopocmu (Puc. 10) 6
8.4 Oepaua uuueaun (Puc. 11 u 12) 6
9 OBCJYKINBAHNE IN YNCTKA 7
9.1 3aMeHa y2oJIbHbIX uIeMoK (Puc. 13)
10 TEXHnueCKNE DAHHbIE 7
11 7
12 TAPAHTЯ 8
13 OKPYKAIOUCA PEDA 8
14 DEKJIAPAUJIO COOTBETCTBNI 9
JIENTOuHbI HAnIIbHnK 400BTPOWX139
1 OBJACTb ПРИМЕHENIA

IPEyPExEHE! IaBawe nnHou 6e3oNaChocTn, TuaTeNbHO 03HaKombTeCb C daHHbIM pyKOBoDCTBOM n O6uMn yKa3aHnMaN IO TexHKe 6e3oNaChocTn nepeD TeM, KaK npHcTynITb K pa6Ote c HnCTpyMeHTom. Pnp nepeDaue 3TORo 3NeKtpnuCeCKoro HHCTpyMeHTa DnA NOJb3OBaHnA dpyrnn Liucam O6raTeNbHO npInoXnTe daHHbIe HHCTpyKcun.
2 ONICAHNE (PNC.A)
- Pучka perулровки Ленты
- ⅢπóboBaJIbHaJηHtA
- KoHcJb
- Pbyar perynipOBKn yrgna HakoHa
- Puyka perynipobkn KOHcOJI
-
KhoNka 6nOKnpOBKn
-
JnabHbI BbIKJIOyATEJIb
- PeryjIaTOp ckopoCTn
- Bényuǐn polnik
- Naptpy6ok dny oTcoca nbInn
11.Пьile6bOpHnK
3 CODEPXXHMOE YNAKOBKN
- YdaHnTe BCE ynaKOBOHybIe MaTePnAnbl.
- YdaJIInTe ocTaTkn ynaKOBKn n peKNaMHBie JnCTKn-BKnAbIbIuN (ecn ectb).
- PpOBepbTe nonHOTy KOMnneKta NOCTaBKn.
- Поверье annapat, сиюов Кабь, Штencь И Вспниденин На петм
Поврждень по ТраHCNoptIpOBKe.
XpaHnTe ynaKOBOuHbIe MaTePnAJIbI NO BO3MOxHOCTN Do nCTeueHnra papaHTnHoro cpoKa. Pocne 3TOrO u36aBbTEcB OT HIX, NcNoJIb3yR MeCTHyO CnCTEmy yTNIIN3aunn 6bITOBbIX OTXODOB.

IPEyIeHHe: ynaKoOuHbIe MaTePnAbl - 3To He nrgyuk! He no3BOJrTe DeTm HrpTaB c PnactNKOBbIMn NaKeTaM! Ectb onaChoctb yduWeHn!
10xunfoBaJIbHbIXJeHT(3xg40/4xg60/3xg120)
1xpykoBODCTBO NO 3KcnnyaTaunn
1XnbIeSc6OpHnK

Ecn n deTaN OTCyTCTBYOT NIN NOBpeXdHbI, 6paNTecb K CBOemy dInepy.
4 YCJIOBHBIE O6O3HAUeHnIa
B daHOM pyKOBOCTBE n/nn Ha cAmO MaunHe NCNoJb3yOTc CneDyUoune CMBOJI:
6 OCObIe YKA3AHnI NO TEXHnKE B3OpACHOCTNДЛЯ MAuINHbl
8.2 BknoyeHue u bkiKIOyeHue (Puc. 9)
YnpabHeHnHCTpyMeHToM OcyIeCTBJIaTeTc NocpeDCTBOM HaxKaTHa/OTnyckAHnRrnaBHOrO BbIKIOuHaTeJI.
MaunHa 3anyckaetc npn Haxatnn IaBHoro BbIKIOHateJn OCTaHaBnBaETc npn OTnyckAHn IaBHoro BbIKIOHateJn.
HaXMMTe KHOIky 6JIOKINPOBKN I TnABHbIB BbIKIOUaTeJIb OJHOBpeMeHHO, mMaUNHa MOKeT pa6oTaTB HenpepbIBHO.
HaXMMTe INaBbI BbIKIOuATEJIb DO KOHua N 3aTeM erO OTNcyTnte, YTO6bl CHOBa pa36JIOKINPOBaT MaunHy.
8.3 Peaynnapckopocmu (Puc. 10)
- Ckopoctb JIeHTb MOxHO perynpoBaTb OT 300 M/MnH Do 1700 M/MnH nocpeCTBOM NOBOPa peryJrToPA cKopoCTu n3 noJoxHe 1 B noJoxHe 6
Ckopocb yBeynHBAeTc npn nobopoTe peryIaTopa n3 noJoxeHna 1 B noJoxeHne 6 uymeHbShaetc - npn nobopoTe n3 noJoxeHna 6 B noJoxeHne 1
Bb6epnte Hndnexkauyo CKOpocTb CootBetCTBn C o6pa6aTbBaemO 3arotOBkoI.
8.4 Oepauua uJuofoaHua (Puc. 11 u 12)
3akpennte 3arotOBky dny npedotBpaueHnE ee cDnra nOd nnpoBaJbHOJ eHToN.
Ipn 3ayncke nIn octaHOBKe MaunHbI He dOnyckaTe KOHTaTaNHCTpyMeHTa C o6pa6aTbIBaEMo 3arToBkoB. B npotNBHom cnyae, aTO MOxET pNBEcTN K NOBpeKdEHHIO WnΦOBAJbHO JeHTbI INN K NOTEpe ynpabLeHnMaunHOH.
- Pn pa6oTe C MaunHOB 6yDbTe BHNMaTeNbHb BO n36eKaHne KOHTa T a JInOBoaHOBn IeHTbC IIO6oYacTbHO TeNa NIN C IIO6bIMN ppeMeTaM, HaxOJaUmmcra B6JIn3MaunHbI.
-ДерхиTe MaunHy obemn pykamnpeep co6oH nHa ydaenHn OT ce6n 3aMntyctOnuBOe noLoxHeHne paBHOBeCn.
HaxMMTe rIaBbI BbIKJIouaTeIb I DOxJITecb, Noka DBNrAteIb Ha6epet MaKcMaJIbHbIe O6OpOTbl.
- Depxnte MaunHy npaJIneBHO 6pa6aTbIaEMo3arOTOBKe. OcToPOxH BBeNTe NeHTy B KOHTaKT C 3arOTOBKoH. He neperpykaite nHCTpyMeHT. Oka3bIbaetc DOCTaTOHoe DaBHeNeOT Beca IJNIOBaJIbHO MaUNHbI. PnIKNaDbIBaHne DOONHHTeBHO rABJeHnma MoKet pINBEcTN K 3aMeIeHnIO DBNrTaTeJ, 6bICTpOMy N3HOCy JINIOBAJIbHO JeHTbI N 3HaUHTeBHOmy CHIXeHnIO CKOPoCTn JINIOBOAHnY.
BJIIO60MOMeHT BpeMeHn36eraTe KOHTaC ⅢINΦOBaJIbHOJNEHTOJ.

Ipeed BbINOJIHeHHeM IIO6bIX peryInpOBOK HnO npaun O6cJyXuBaHnBcerda y6eIntecb, YTO nHCTpyMeHT BbIKIOUey, N BnJa Ka6eJIy BbldephyTa n3 ceTeBOI po3eTKn.
CleHnte 3a Tem, YTo6bI BeHTnJIauNoHHbIe OTBepCTna IHcTpymEHa He 3acopraHncb N BOBpeMn IX npOuNsaHte.
9.1 3aMeHa yeoJIbHbIX uemok (Puc. 13)
Bo Bpemr 3KcnpnyatauH 6ydt npocxOHTb H3HOC yroIbHbIX 5eTOK. 3TO MOKeT npNBecTN K
noTepe MoUHOCTN upe3MEPHOMY NCKpeHNO, BNDMOe Upe3 BeHTnIaUHOHHbE OTBepCTNA.
Ppi n3HOce yroIbHbIX 5eTOK DO npimepho 4 - 5 MM nOTpe6yeTcR INx 3aMeHa YroIbHbIE
5eTKn D0JXHbI BCERda 3aMeHrTbcra napAMN.

CepBnchoe n TexHnueckoe o6cnyXnBaHne nHCTpyMeHTa DOJXHO BbINOJIHrTbC rToIbKO KBaIIΦnUcpoBaHHbIM peMOHTbIM nepcoHaJOM.
10 TEXHnueCKNE DAHHbIE
3NaeHn yPobH yMa, n3MepeHHbE cornaCHO COOTBeTCTByIOUcMy cTaHapTy. (K=3)
UpoBHeB 3ByKOBOrO daBneHnla LpA 80 dE(A)
YPOBEHb 3ByKOBOM MOUHOCTn LwA 91 dB(A)

BHIMAHNE! 3BykoBoe daBneHne moKeT npEbIaTb 85 d(A). B 3Tom cnyuae Heo6xOdmo nCnOJIb3OBaTb INDINBnDaYalbHbIe CpeIcTba 3aunTbI opraHOB cnyxa.
aw(Bu6paun):
1.2 M/c²
K=1,5M/c²
12 TAPAHTIN
B COOTBeTCTBnC 3aKoHOdaTeJIbHbIMN Tpe6OBAHNMy, DaHHbI pOdyKT o6ecneuBaETcra rapaHTnei Ha cPOK 36 MecaueB, NCHNCJIeMBy C DaTbI npNo6peTeHnI nepBbIM NOKyNaTeIeM.
-Данная rapaHTЯ OXBaTbIbAe T BCE DepeKtI MaTePnaIob IINI npO3BOcCTBa, NCKHIOy 6aTapeN, 3aprIbIbe yCtpoIcTBa, DepeKTHbIe DeTaJI, NOBepraEMbIe eCTeCTBeHHOMY H3HOCy, OocbeHNO TaKne, KaN POnIuINnHnIKU, UeTKN, KaBeJI N UToENCeNBbIe BUNK, INI INpuHaJNeXHOCTN, TaKne KAK CBeRJa, TOnOBKn CBeRJI, NIIbHbIe NOnOTHa N T.Д.; OHa He BKIOuaET NOBpeKdEHNr IINI DepeKtBI, Bo3HnKaHOUsNE BCJeDCTBVe HeHaJNeXaUero 0bpaueHnI, HecuactThbIX clyuAeB IINI BHeceHnI N3MeHeHnIB KOHCTpyKUIO, a TaKke He BKIOuaET TpaHCnOpTbIe paCXoDbI.
- Поврждени n/nлд дфektbl, ВОЗнкшп e B pe3yЛьтаTe HeHaДнешац eн 3KcNлуаTuZn,Тakke He NOДпадаIOT NOД rapaHTиньe O6ra3aTeJbCTBa.
Kpome TOrO, Mbl CHmMaem C Ce6B BcKaYIO OTBeTCTBeHHOCtB 3a TpaBMbl, NOJyueHHbIe B pe3yIbTaTe HeHaJIeXkaUero NcNoJIb3OBaHn IHCTpyMeHTa.
- PemOH MT MoKET BbIOJIHrTbcra TOnIbKO B aBtOpN3ObaHHOM cHTpe 06cJyKINBaHn NOKyNaTeJe INCTpyMeHTOB Powerplus.
BbI Bcerda MoKeTe noJyHTb DonoHnTeJIbHyIO nHΦopMauIO NO TeJefoHy 00 32 3 292 92 90.
Bce TpaHcnpTbIe pacxoDbI nokpbBaIOTCa NOKyNaTeNem,ecn HET NcBMeHHORO cornaueHnO npOTNBONIOJXHOM.
B To Jx Bpemr, rapaHTnHra JkAIO6a He npHHMaETcR, ecn NOBpeKdHne yCTpoiCTBa RnIeTcpe3yNbTaTOM He6peXHOrO 06CnyKuBaHnN nn neperpy3Kn.
- OnpeHHeHNO NCKHouaETcN 3 rapaHTM NOBpeXdEHNBE BCJeDCTBNE IPOHnKHOBeHn JnIKoCTN, CNbHOrO 3aNbIeHnN, npEdHaMepeHHOro NOBpeXdEHN (HapOuHo INI NIO rpy60n He6pexHocTn), HeHaJIeXaUero NCNoJIb3OBaHn (NCNoJIb3OBaHne dIy ceIeN, dIra KOTOpbIX yCTPOiCtBO He npedHa3HaueHo), HEkOMnTeENTHO NCNoJIb3OBaHn (HaNP., npene6pera IHCTpyKzmaN, pINBeDEHHbIMN B pyKOBoDCTBe), c6opKn HecneuaJIInCTom, ydapa MoHnN, nOdKnIOueHnK CcTn C HeCOOTBcTCTByIOUm HAnPjKeHnEM. DaHHbI CNICOK He YABJrTcN UChepnbIBaIOUm.
- Пинятne rapaHTnHbIX kaoNo6 HNKoRda He YBnReTc8 OCHOBaHNEM dIЯ npOJIeHnra rapaHTnHOrO nepNoDa IJIN Ha3HaueHnRA HOBOrO rapaHTnHOrO nepNoDA BCJIyuae 3aMeHbI yCTpoiCTBa.
YcTpoNCTBa INIeTaJIH, 3aMeHeHHbIe IIO rapaHTIN, OCTaIOTcB CO6CTBeHHOCtN Varo NV.
MbOCTaBnAeM 3a CO6o npaBO OTka3aTB yIOBNETBopeHn XaI06bl,ecnΦaKT NOKyNk He MoXeT 6bITb NOITBepKdEHN INN ecnYrCHO, YTO 3a N3DeJIeM He npOn3BOIDnCRA HAnIeXaUH yXoD. (OcNCTKa BEHTINJraUHOHHbIX OTBepCTn, peryIrpHoe OBCnyKBAHHe yOrNbHbIX UETOK, n T. d.).
B kaueCTBe Doka3aTeIbCTBa DaTbI NOKyIKN CJIeDyEt XpaHITb YeK.
Bahe yctpoiCTBO cneDyET BO3Bpaaatb NoCTaBunky B Hepa3o6paHHom BnDE, B npHeMJIeMo YnCTOM COCTOAHNN, (BOpRHaJIbHOI pOTINBOyApHOYyNAKOBe, ecJIT TaKOBaY yCTPOIcTBa IMeNaCb), npINIOXINB DOKyMeHT O NOKyNKe.
13 OKPYKAIOUCA PEDA
EcnB Baw annapat Tpe6yET 3aMeHbI NocJe DnITeJIbHOrIO NcNOJb3OBAHn, He Bbl6paCbBaIte erO BMecTe C DomaunHM Mycopom, a NCNoJIb3yIte 3KoJorNuYeCKn 6e3OpachbI cnocob dner erO yTnIn3aun.
C OTxOdaMn 3NeKtpnuecknx MaunH HeJb3a NOCTyNaTb, KaK C O6bIuHbIMN Domaunm OTxOdaMn. Po3a6oTbTeCb 06 yTuIN3aunn TaM, rDe Inra 3ToTO eCTb COOTBeTcTBYUOUIne yCTaHOBKn. IpOKOHcyJbTnpuYTEcb y MeCTbIX opraHOB Bnactn INy npOdaBua O BO3MOxHOCTHy TUIN3aUnn.
VARO N.V. - Vic. Van Rompuy N.V. Joseph Van Instraat 9 - BE2500 Lier - BEJbTnA, HACTOUIM 3aABJET, yTO
PpOdyKT:JeHToUHbI HAnJIbHNK
Mapka: POWERplus
Mодь:POWX139
COOTBETCTByeT O63aTeJIbHbIM Tpe6OBAHnM INHbIM COOTBETCTBYUOM NOIOXKeHnM DeIcTByUoX Ebponecknx DnpeKTHB, OCHOBaHHbIX Ha EBponecknx rapMOHN3npOBAHHbIX CTAndapTx. JIO6oe HecaHKUHOHPOBaHHOE N3MeHeHne yCTpoiCTBa aHHynpyet daHHoe 3aABnEHe.
Ebponeckne dnpekTbbl (Bknohya, ecn npmehmo, nx nonpaBkn do daTbI noDncaHna):
2011/65/EU
2006/42/EC
2014/30/EU
Ebponeckne rapMOHN3npOBaHHbI cTaHdapTbI (BkJIIOUa, ecn npIMeHMo, nx nonpaBKn do DaTbI NOINCAHNA):
EN62841-1:2015
EN62841-2-4:2014
EN55014-1:2017
EN55014-2:2015
ENIEC61000-3-2:2019
EN61000-3-3:2013
Держателlexhneyecко ДOKум entaци:ФИПИВанКерхов (Philippe Vankerkhove),VARO -Vic.Van Rompuy N.V.
HnKeNoDnncabwnc daeCTByET OT nMeHn VcnonHntelbHoro dIpeKTopa KOMnaHHN,
Mertens Ludo
Ludo Mertens
OTeJn HopMOKoHTpOJa - MeHeJxep no Bonpocam cornaobAHn
28/07/2022, Lier - Belgium
1 IPEdHA3HauEHNHe HA EJEKTPOHCTPymeHTA. 2
2 OINCAHNE (ΦNΓ. A) 2
3 CINcBKHACbDbPjAHNETo HA ONAKOBKATA. 2
4 CnMBOJIH 2
5OBsI INPEyINPEXJENH3A B63O1ACHOCT PnN 3IOJI3BAHE HA EJEKTPOHHCTPYMEHTN. 3
5.1 Pa6omHa 3oHa 3
5.2 EneKmpo6e3onachocm 3
5.3 1uyna 6e3oNaChocm 3
5.4 3non3eane u apuxu 3a enekmpouHcmpyMeHa .4
5.5 Cepeu3Ho o6cnykeaHe 4
6 YKA3AHN 3A BE3ONACHA PABOTA, CNEUΦNCHN 3A 3AKYNEH N OT BAC EJEKTPOHCTPymeHT .5
7 MOHTINPAHE 5
7.1 MoHmupaHe Ha paMomo Ha neHmoesa nuna (Ua. 1, 2, 3 u 4) .5
7.2 MoHmupaHe u cBaJIaHe Ha peMbK (Φu2. 5) 5
7.3 Hacmpoueane Ha oodaaya Hapembka (Ua. 6). 5
7.4 Cebpb3eAnne Ha mop6ama 3a npax (Phi2.7) 5
8 PABOTA C EJEKTPOHCTPYMEHTA 6
8.1 Hacmpouka Ha babla Ha paMomo (Fua. 8) 6
8.2 Pa6oma Ha KIIOua (Fua. 9) 6
8.3 KoHmponep Ha ckopocmma (Fue. 10) 6
8.4 1ufoeane (Fue. 11 u 12) .6
9 IOUHCTBAHE I NOIDPbJxKA 7
9.1 CmHa Ha epaumha yemka (Fue. 13)
10 TEXHnueCKn DAHHN 7
11 Wym 7
12 TAPAHU 8
13 OKOJIHACPEDA 8
14 DEKJIAPAUJRA 3A CbOTBETCTBNE 9
JIEHTOBAПИJA400W
POWX139
1 ПЕДHA3HAЧЕНЕ HA ELEKTPОИСТРУМЕNTA

IpeynpexdHne! Ipei Da n3noJ3BaTe HNCTpyMeHTa, npooyTeBHNMaTeJIHO TOBa pKOBODCTBO N O6uNTe HNCTpyKcUN 3a 6e3OnaCHocT,3apaN Baawata Co6CTBeHa cnrypHOCT. Baunr eJeKTponHCTpyMeHT Tp86Ba Da ce npedaba Ha dpyr cAmO 3aeDHO C hactoJUnte HNCTpyKcUN.
2 ONICAHNE (ФИг.А)
- Палец за насторьку на ремькa
- ⅢJINIOOBbueH peMbK
- Onopno pamo
- Joc3a Hactpoika Ha bIbna
-
Panae3a HacTpoBbHe Ha onopHTo paMo
-
ByToH 3a OTKJIHOUBAHe
- JnabEN KJIOU
- KoHTpOJ Ha ckOpocTtA
- Bodejo kOJIeNo
- OToxOHa Tpb6a 3a npax
- Top6a 3a npax
3 CπисьК HA CьДьРЖAHNETO HA ONAKOBKATA
- OtctpaheTe BCnKoNAKOBbHm MaTePnAIn.
OTCTpaHete octHaHnTE onaKOBbUHN bPemeHHN nOCTaBKN (aKO nMa TaKnBa).
PpOBepeTe daHn naKeTbT CbDbpxKa BCNUK KOMNoHEHTN.
IpoBepTe daH ypeBt, 3axpaHbAunrKa6en, uencenbT n akcecoapnte He ca 6nnn noBpeDeH np TpaHcnpTupaHe. - Na3eTe onakOBbHnTe MaepnaI Nootn Do kpaHa rapaHcNoHHn nepno. CneT OBa n3xBbpIeTe B nyHKT 3a cb6npaHe Ha OTnabu.

BHIMAHHE! OnakobbHnTe MaTepnaHn He ca irpaayKn! He no3BOJraBte Ha deca da irpaarT c HainloHOBN Top6uKn! Pnck ot 3aDywaBaHe!
10xuHnOobueH peMbK (3x g40/4x g60/3x g120)
1xpbkoBOCTBO
1xTop6a3a npax

B clya, ye hakoun qactn Iuncbat nIi ca noBpeHn, CBbpxKeTe ce C MeCTHnA dNcTpni6yTop.
4 CnMBOJIH
B hactoIHHN N/INN Bbpxy MaunHaTa ca n3nON3BaHn CJIeHNTE CNMBOJN:
7.3 Hacmpoueha He Ha eodaHa HapeMbka (Fua.6)
- Повереталлшпбовьчнгт р embк e ueHTpnpaH,прдз anooybaHe Ha pa6ota.
3aDbXkTe NnIATA Ha 6opOTn Ha npa3eH XOD n 3aBbPTe Ta neCa 3a ceHTpnpaHe no YacOBHKOBaTa CTpeNka Nn O6paTHo Ha YacOBHKOBaTa CTpeNka, 3a Da HAcTponTe DnIXeHNrTo Ha pEmbKa NO BODaHa, DOkATO IINFOBbUHnA r peMbK He 3anOuHne da Ce DnIXn B CpeDAta.
7.4 Cebp38aHe Ha mop6ama 3a npax (Fua. 7)
28/07/2022, Lier - Belgium
PIELIETOJUMS 2
2 APRAKSTS (A ATT.) 2
3 IEPAKOJUMA SATURA SARAKSTS 2
4 APZIMEJUMI 2
5 VISPARIIGDarBARIKA DROsIBAS BRIDINAJUMI 4
5.1 Darba vieta 4
5.2 Elektrodrosiba 4
5.3 Personala drošība 4
5.4 Darbarika lietošana unapkopsana 5
5.5 Apkopes serviss 5
6 SPECIFISKI DROŠIBAS NORADIJUMI ŠAI IERICEI. 5
7 MONTAZA 5
7.1 Slipentas izlices uzstadisana (1., 2., 3. un 4. att.) 5
7.2 Lentes uzstadisana un nopemšana (5. att.) 5
7.3 Lentas celina regulësana (6. att) 6
7.4 Puteklu savaksanas maisa pievienošana (7. att.) 6
8 LIETOSANA 6
8.1 Izlices lenka regulësana (8. att.) 6
8.2 Darbības slēdžis (9. att.) 6
8.3 Atruma regulators (10. att.) 6
8.4 Slipesana (11., 12. att.) 6
9 TIRISHANA UN APKOPE 7
9.1 Ogles sukas maina (13. att.) 7
10 TEHNISKIE DATI 7
11 TROKSNIS 7
12 GARANTIJA 8
13 VIDES AIZSARDZIBA 8
14 ATBILSTIBAS DEKLARACIJA 9
POWX139
1 PIELIETOJUMS

BRIDINAJUMS! Pirms lietojat ierici, drošibas nolukos rupigi izlasiet so rokasgramatu un vispārigās drošibas instrukcjjas. Darbariku drikst nodot citam lietotājam tikai kopā ar šim instrukcjjam.
2 APRAKSTS (A ATT.)
- Regulejams lentas sledzis
- Smilspapira lenta
- Uzkares izlice
- Lenka regulësanas svira
- Spriegosanas melite
-
Drošības blokētājpoga
-
Darbības sledzis
- Atruma reguletajs
- Piedzinas rats
- Puteklu izvades caurule
- Puteklu savacejs
3 IEPAKOJUMA SATURA SARAKSTS
28/07/2022, Lier - Belgium
Vario
WWW.VARO.COM
DESIGNED AND MARKETED BY VARO
Copyright by varo
VARO - VIC. VAN ROMPUY nv
JOSEPH VAN INSTRAAT 9 - 2500 LIER - BELGIUM
OFFICES:
IBERICA BRICOLAGE S.L. - ESPANA
ASIA PACIFIC HONG KONG Ltd / SHANGHAI PRC
AUSTRALIA Pty Ltd


- POWERPLUS HIGH QUALITY TOOLS
- POWX139
- BESCHRIJVING (FIG. A)
- FILE BELT SANDER 400W
- APPLICATION
- DESCRIPTION (FIG. A)
- PACKAGE CONTENT LIST
- SYMBOLS
- GENERAL POWER TOOL SAFETY WARNINGS
- Working area
- Electrical safety
- Personal safety
- Power tool use and care
- Service
- MACHINE-SPECIFIC SAFETY WARNINGS
- ASSEMBLY
- Installation of the powerfile arm (Fig 1, 2, 3 and 4)
- Installation and removal of belt (Fig 5)
- Belt adjustment path ((Fig. 6)
- Connect the dust bag (Fig. 7)
- OPERATION
- Adjust the angle of the arm (Fig. 8)
- Switch operation (Fig. 9)
- Speed controller (Fig. 10)
- Sanding operation (Fig. 11 and 12)
- CLEANING AND MAINTENANCE
- Replacing the carbon brush (Fig. 13)
- NOISE
- WARRANTY
- ENVIRONMENT
- DECLARATION OF CONFORMITY
- LIMA LIXADEIRA DE CORREIA 400W POWX139
- APLICAZão
- RENGJØRING OG VEDLIKEHOLD
- TRAÇNA BRUSILICA 400 W POWX139
- PRIMJENA
- OPIS (SL. A)
- POPIS SADRžAJA PAKETA
- Regulator brzine (Sl. 10)
- Postupak brusenja (Sl. 11 i 12)
- TRAKASTA BRUSILICA 400W POWX139
- PRIMENA
- Operacija brusenja (SI. 11 i 12)
- Regulator otacek (Obr. 10)
- 1POUZIVANIE
- TECHNICKÉ UDAJE
- HLUK
- DOMENII DE UTILIZARE
- DESCRIERE (FIG. A)
- CONTINUTUL PACHETULUI
- JIENTOuHbI HAnIIbHnK 400BTPOWX139
- OBJACTb ПРИМЕHENIA
- ONICAHNE (PNC.A)
- CODEPXXHMOE YNAKOBKN
- YCJIOBHBIE O6O3HAUeHnIa
- OCObIe YKA3AHnI NO TEXHnKE B3OpACHOCTNДЛЯ MAuINHbl
- BknoyeHue u bkiKIOyeHue (Puc. 9)
- Peaynnapckopocmu (Puc. 10)
- Oepauua uJuofoaHua (Puc. 11 u 12)
- 3aMeHa yeoJIbHbIX uemok (Puc. 13)
- TEXHnueCKNE DAHHbIE
- TAPAHTIN
- OKPYKAIOUCA PEDA
- JIEHTOBAПИJA400W
- ПЕДHA3HAЧЕНЕ HA ELEKTPОИСТРУМЕNTA
- ONICAHNE (ФИг.А)
- CπисьК HA CьДьРЖAHNETO HA ONAKOBKATA
- CnMBOJIH
- Hacmpoueha He Ha eodaHa HapeMbka (Fua.6)
- Cebp38aHe Ha mop6ama 3a npax (Fua. 7)
- PIELIETOJUMS
- APRAKSTS (A ATT.)
- IEPAKOJUMA SATURA SARAKSTS
Brand : PowerPlus
Model : POWX139
Category : Sander