WID - USB Drive KINGSTON - Free user manual and instructions
Find the device manual for free WID KINGSTON in PDF.
User questions about WID KINGSTON
0 question about this device. Answer the ones you know or ask your own.
Ask a new question about this device
Download the instructions for your USB Drive in PDF format for free! Find your manual WID - KINGSTON and take your electronic device back in hand. On this page are published all the documents necessary for the use of your device. WID by KINGSTON.
USER MANUAL WID KINGSTON
Find the language and latest documentation for your Kingston® Wi-Drive here.
Wi-Drive User Guide
For instructions in English
Supported File Types (Non-DRM) 3
Installing the Wi-Drive Application 4
Getting to Know Wi-Drive 5
Battery Status 6
Connecting Wi-Drive to a Computer 7
Loading Content Onto Wi-Drive 7
Connecting to Wi-Drive over Wireless 8
Usage 8
Configuring Wi-Drive 11
Network Connections (Bridge Mode) 12
Upgrade Firmware 13
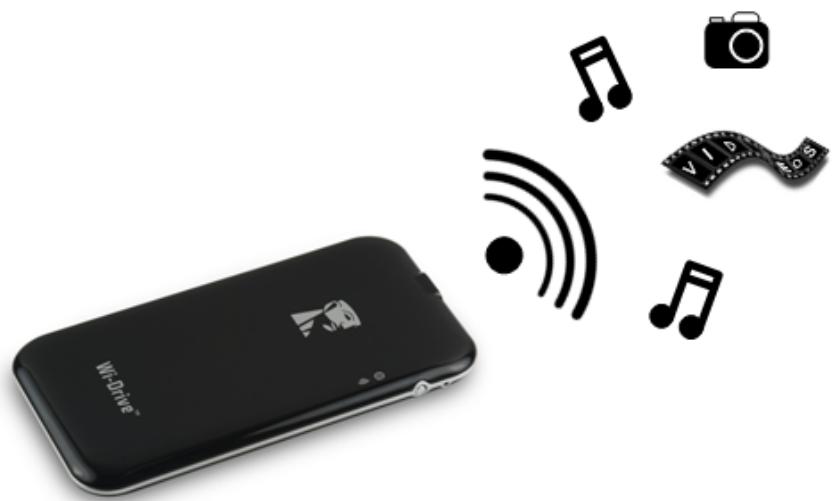
Introduction
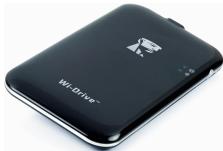
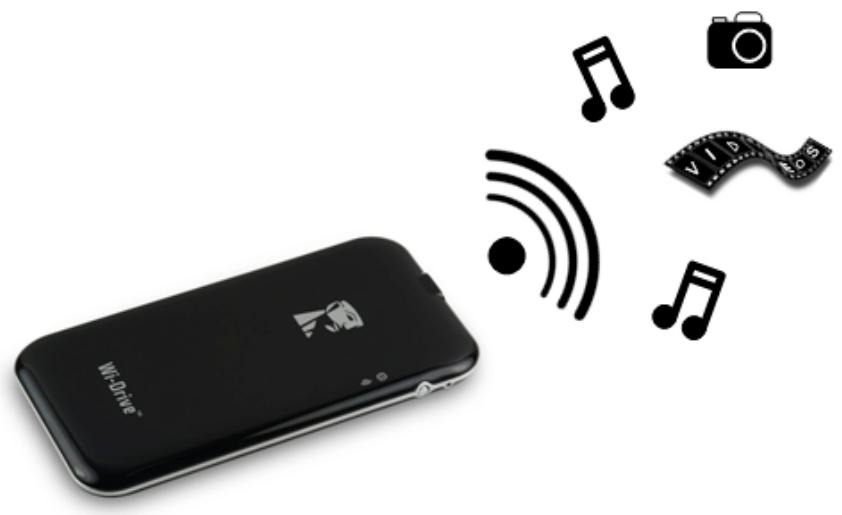
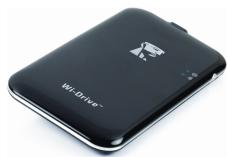
Wi-Drive is a portable USB Flash storage device that allows you to wirelessly stream digital media content (such as music, photos, videos, etc.) to your iOS-based iPad®, iPhone®, or iPod touch® device. Serving as its own wireless network, Wi-Drive's lithium-polymer battery and 30-ft range give you up to four hours of continuous access to your digital library anywhere you go. Available in 16GB or 32GB capacities and simple to set up, Wi-Drive is the perfect solution for expanding your on-the-go media library with devices that have no way of adding to their storage capacity.
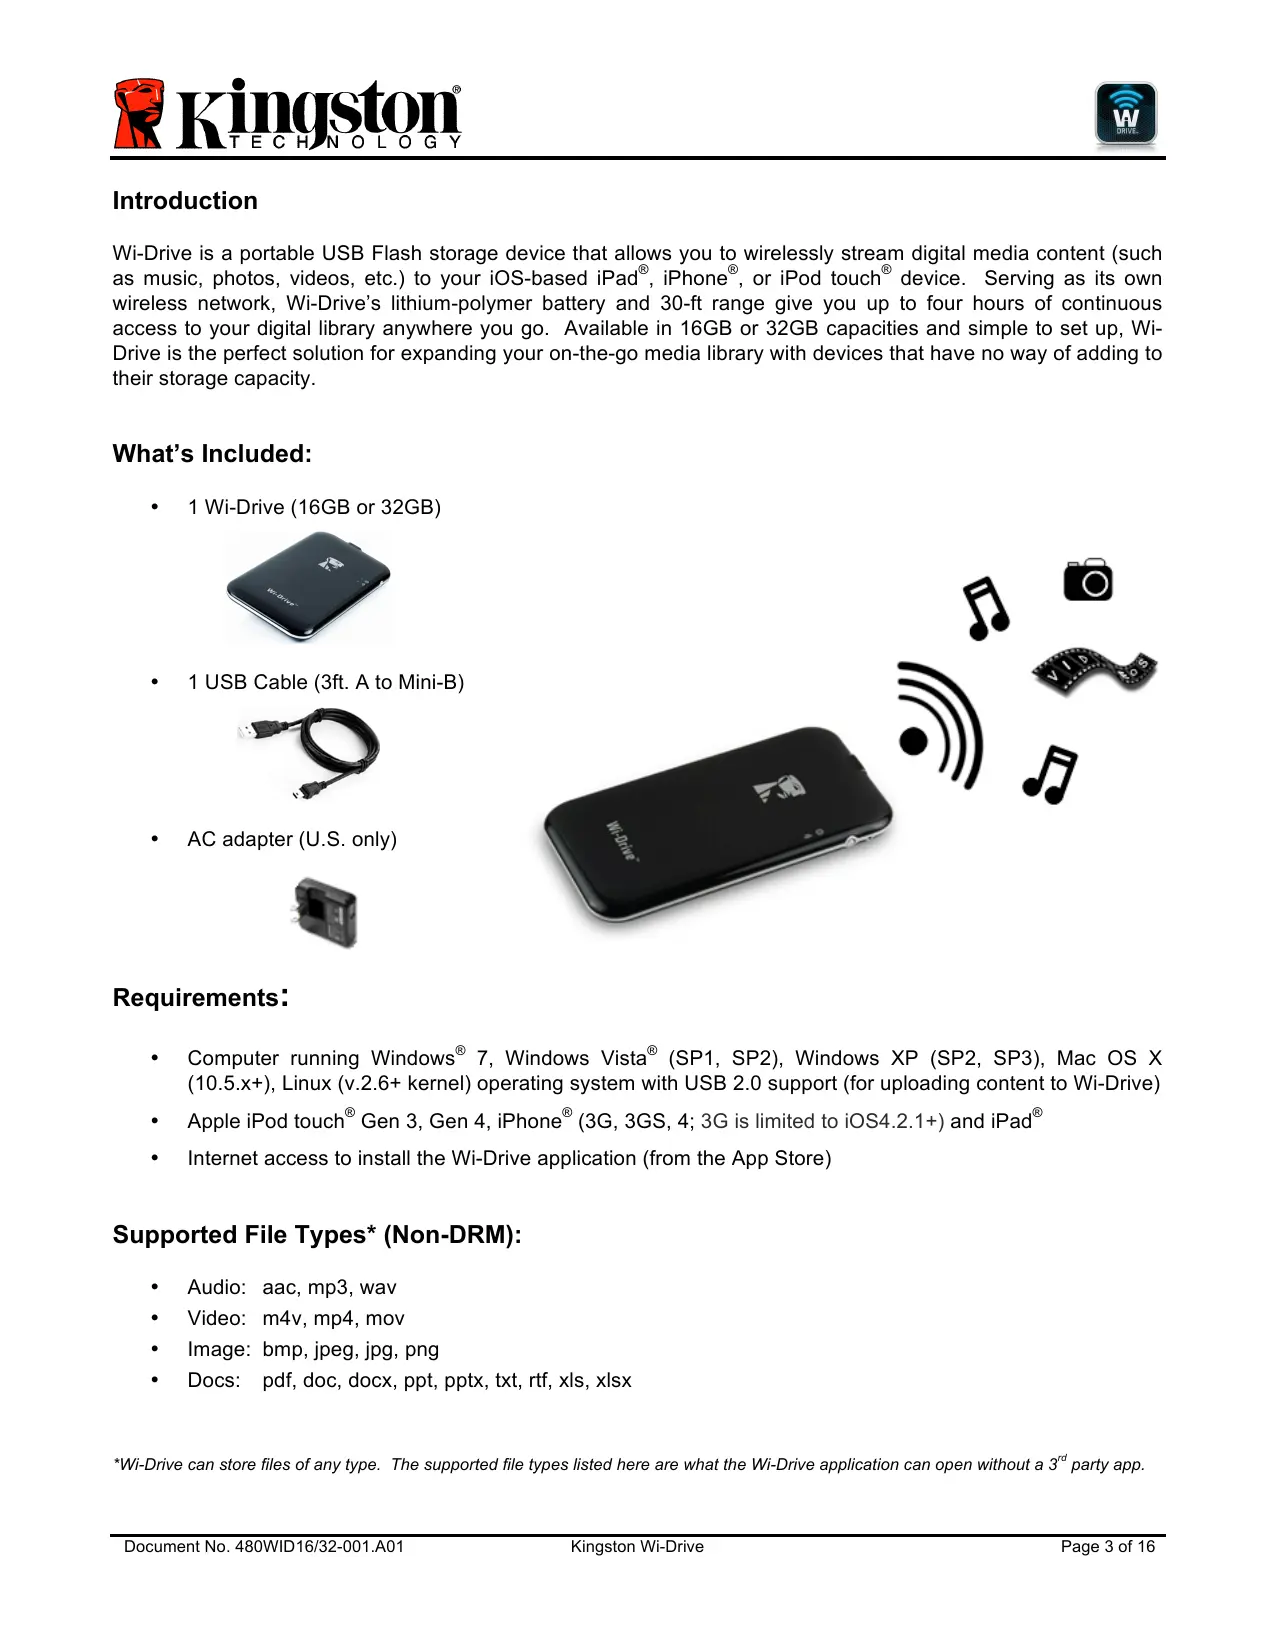
What's Included:
1 Wi-Drive (16GB or 32GB)
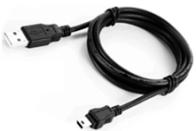
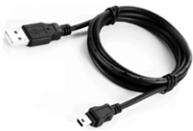
1 USB Cable (3ft. A to Mini-B)
AC adapter (U.S. only)
Requirements:
- Computer running Windows® 7, Windows Vista® (SP1, SP2), Windows XP (SP2, SP3), Mac OS X (10.5.x+), Linux (v.2.6+ kernel) operating system with USB 2.0 support (for uploading content to Wi-Drive)
Apple iPod touch Gen 3, Gen 4, iPhone (3G, 3GS, 4; 3G is limited to iOS4.2.1+) and iPad - Internet access to install the Wi-Drive application (from the App Store)
Supported File Types* (Non-DRM):
Audio:aac,mp3,wav
Video: m4v, mp4, mov
- Image: bmp,.jpeg, jpg, png
- Docs: pdf, doc, docx, ppt, pptx, txt, rtf, xls, xlsx
*Wi-Drive can store files of any type. The supported file types listed here are what the Wi-Drive application can open without a 3^rd party app.
Installing the Wi-Drive Application
To configure Wi-Drive, you must first install the Wi-Drive App (to your iPad, iPhone, or iPod touch device) from the on-line App Store (Internet access required). The Wi-Drive App is free and allows you to customize the wireless network settings and wirelessly access the content you've uploaded to Wi-Drive. To install the App, please follow these steps:
- Open the App Store from your iPad, iPhone, or iPod touch device and search for "Wi-Drive." See Figure 1.1 below. The App Store may return multiple results for your search.
Q wi-drive
Figure 1.1 - Wi-Drive Search
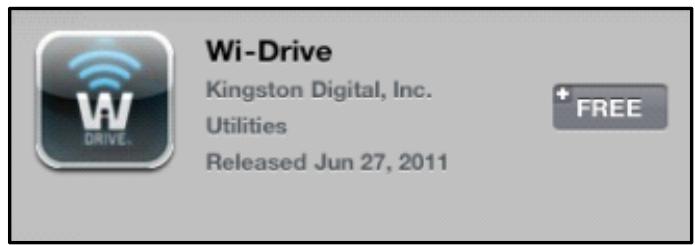
- Locate and select the Wi-Drive App that corresponds to your device, i.e. Wi-Drive for iPad, for iPhone, iPod touch, etc. by Kingston Digital, Inc. and tap the 'FREE' button link. See Figure 1.2.
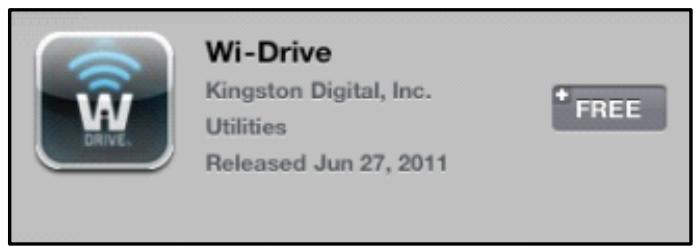
Figure 1.2 - Wi-Drive App by Kingston Digital, 'FREE'
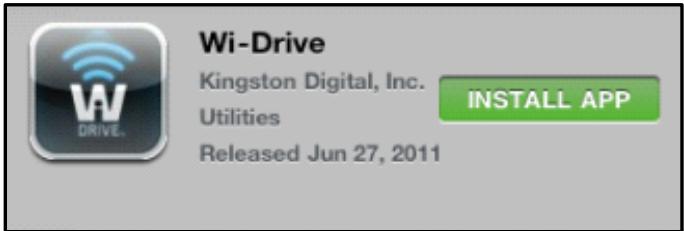
- After selecting 'FREE,' the grey button will turn green and change to 'INSTALL APP.' Select this button to complete the installation of the Wi-Drive App to your device. See Figure 1.3.
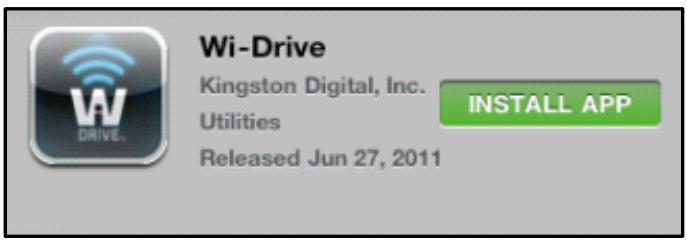
Figure 1.3 - Wi-Drive App by Kingston Digital, 'INSTALL APP'
Once the App has been installed, you may exit the App Store and proceed to the next section of this manual.
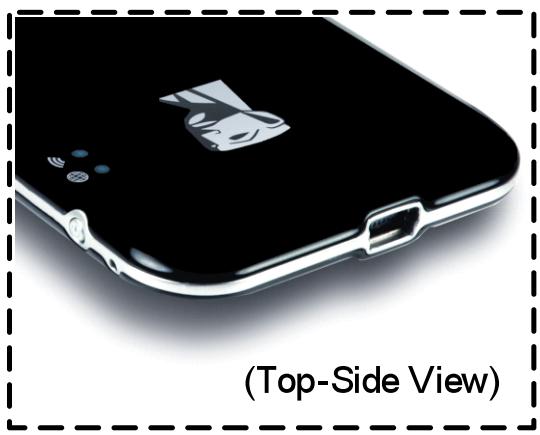
Getting to Know Wi-Drive
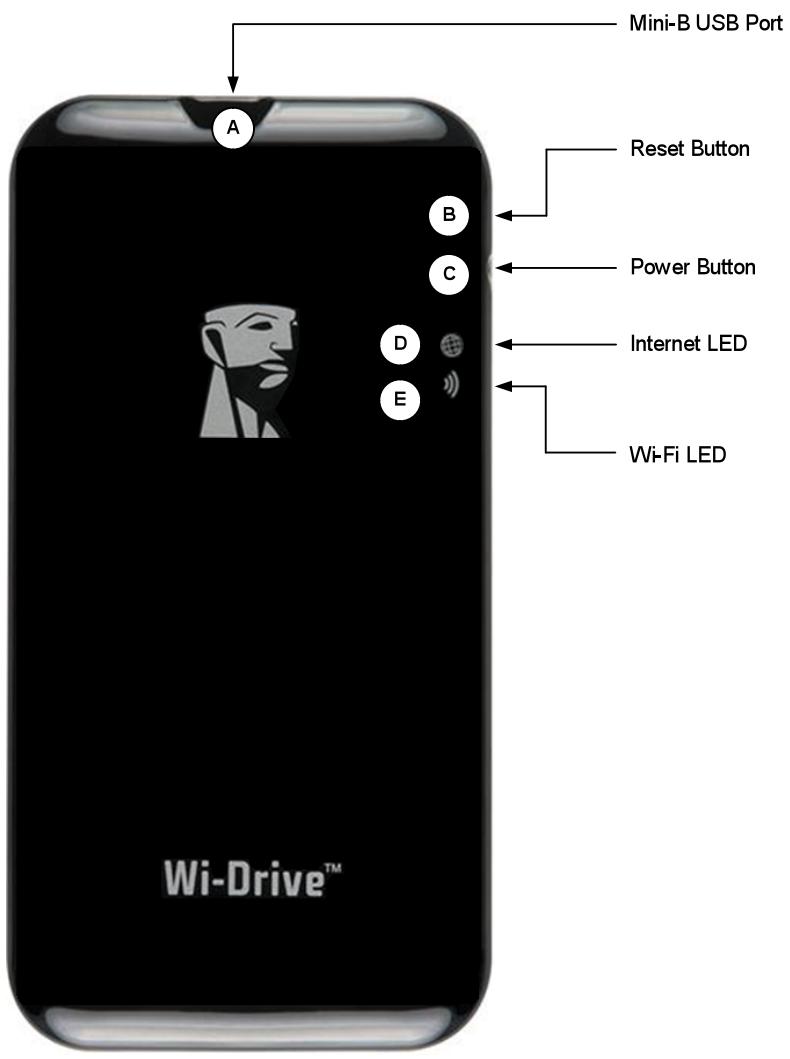
A. Mini-B USB Port - Allows you to copy content to the Wi-Drive and/or charge the device via USB 2.0.
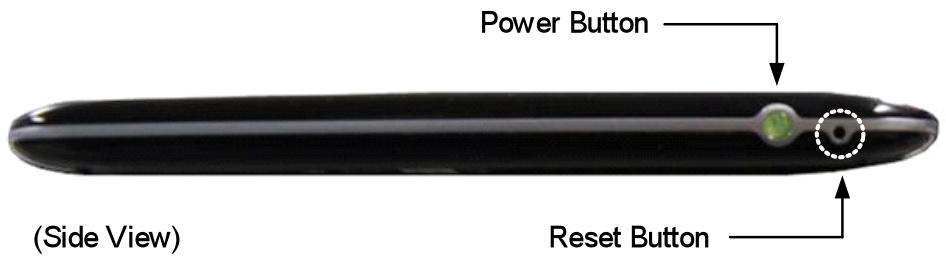
B. Reset Button - Resets Wi-Drive back to its original (default) configuration1 for the network settings.
C. Power Button ^2 - Allows you to power on or power off the Wi-Drive.
D. Internet LED – Solid when powered on; Flashes when there is Internet activity
E. Wi-Fi LED - Flashes when broadcasting SSID or wireless network activity.
1 The default configuration for Wi-Drive is: 1) Device Name: Wi-Drive 2) Visibility Status: ON 3) Wireless Channel: 11 and 4) Security: None. (Note: Resetting the device will not affect the user content on Wi-Drive.)
The power button is also an indicator of how much battery time is left while the Wi-Drive is powered on. Green indicates 75% - 100% battery charge remaining; amber indicates 25% - 74% battery charge remaining; and red indicates 24% or less battery charge remaining.
Battery Status
In addition to switching Wi-Drive on and off, the power button also serves as a battery indicator for how much time is left before Wi-Drive must be charged again. Green indicates 51% - 100% battery charge remaining; amber indicates 25% - 50% battery charge remaining; and red indicates less than 25% battery charge remaining. A Flashing green power button indicates that the Wi-Drive battery is charging (occurs when using AC power adapter only.)

Figure 2.1 - Power LED, Green

Figure 2.2 - Power LED, Amber

Figure 2.3 - Power LED, Red
Connecting Wi-Drive to a Computer
To add content to Wi-Drive, connect it to a computer using the USB cable that came with the device. See Figure 3.1 below.
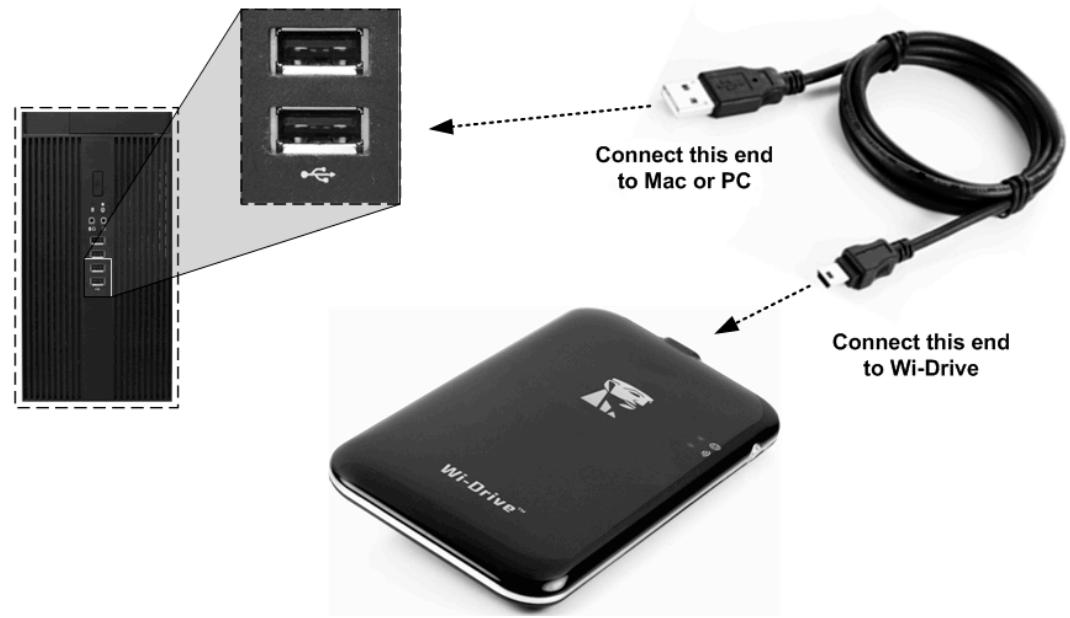
Figure 3.1 – Connecting Wi-Drive to a computer
Loading Content Onto Wi-Drive
When connected to a computer, Wi-Drive behaves like any standard USB Flash drive, creating a data volume on your PC or Mac (see Figure 3.2.). This volume allows you to populate Wi-Drive with digital content that you can later share or access wirelessly via the Wi-Drive application.
When copying content to Wi-Drive, it is highly recommended that you create folders on the data volume to help you organize and quickly locate files each time you update and/or change the content of Wi-Drive (as opposed to dumping all of your files onto the root volume or into a single folder). For example, you may want to store all of your music files in a folder called "My Music", or keep all of your photos in a separate folder called "My Pictures", and so on.
When you are finished loading content, please safely3 disconnect Wi-Drive from your computer. This will automatically power the device off. To turn it back on, press and hold the power button until it turns green.
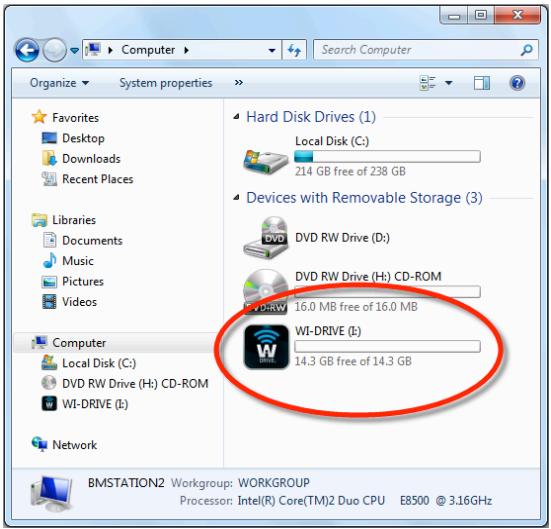
Figure 3.2 - Wi-Drive Volume on PC
(Note: While connected to your computer, Wi-Drive does not broadcast a wireless signal. Therefore you cannot access it from your iPad, iPhone, or iPod touch device in this state.)
3For Windows users, please disconnect Wi-Drive safely by right-clicking the USB icon in the right-hand corner of the taskbar and selecting 'Safely Remove Hardware'. For Mac users, please disconnect Wi-Drive safely by dragging the volume icon to the trash can.
Connecting to Wi-Drive over Wireless
Wi-Drive is its own independent wireless network. When browsing for Wi-Fi networks from your iPad or iPhone, you will see 'Wi-Drive' in the list of available networks to join. By default, there is no password and when you connect to it from your iOS device, you are establishing a dedicated link to Wi-Drive over that wireless signal. Once you connect to Wi-Drive, you will substitute your iPad/iPhone's Internet connection with Wi-Drive's wireless connection. This means you will no longer have access to the Internet. However, Wi-Drive does provide a bridging function that allows you to maintain access to Wi-Drive's content while connecting to a Wi-Fi Internet connection. See Network Connections on page 10.
Usage
Once you're connected to the Wi-Drive network, you can begin accessing its content from your iPad, iPhone, or iPod touch device by following these steps:
- Open the Wi-Drive App on your iPad, iPhone, or iPod touch device.
- Tap the Home icon (upper left corner of Wi-Drive App.)
- Tap the Device Name link, i.e. Wi-Drive (192.168.200.254). This will list the contents of your Wi-Drive.
- Browse and select the media you wish to access. Only supported file types can be opened. See below.
A. The home button displays all stored content on the WiDrive regardless of type or extension. If you created folders during the content upload process on page 7, you will see them listed first. Individual files are listed after the folders.
B. Buttons B, C, & D are all filter buttons and display only the content associated with each represented type. The camera button represents photo/image file types. WiDrive will search through all files and folders on the device and display the supported image file types.
C. The filmstrip button represents video file types. Wi-Drive will search through all files and folders on the device and display the supported video file types.
D. The musical note button represents music or audio files. Wi-Drive will use this filter to search through all files and folders for supported music file types and display them.
Once you've located the file you want to stream, simply tap the file name in the list and you're ready to go. For a list of all file types currently supported by Wi-Drive, see page 3.
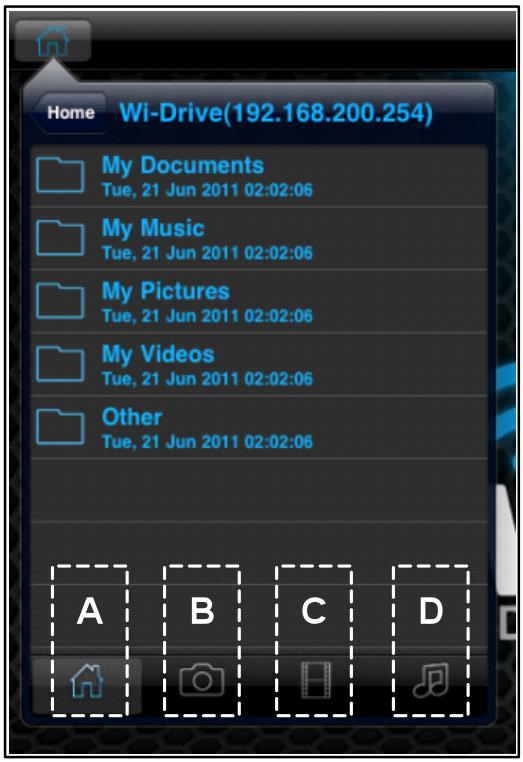
Figure 4.1 - Wi-Drive Contents
If you want to delete, email, or copy a file from the Wi-Drive, you can do so via the Action menu. Simply navigate to the file you wish to copy (or delete) and swipe it in either direction, left or right, as seen in Figure 4.2. This will reveal the red 'Action' button shown in Figure 4.3.
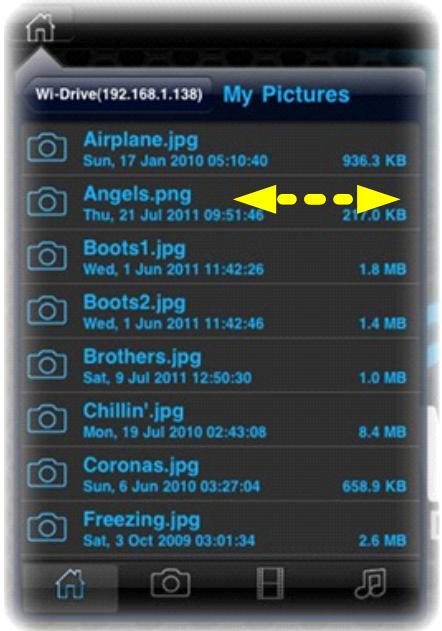
Figure 4.2 - Swipe Menu Item
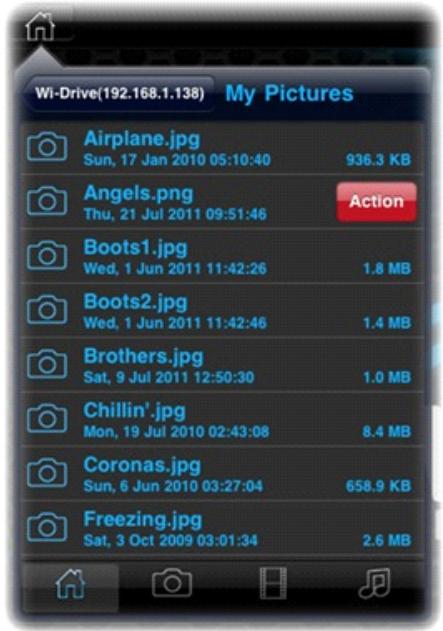
Figure 4.3 - Action Button
Tap the 'Action' button to open the menu shown in Figure 4.4. This menu allows you to delete, email, or copy content from the Wi-Drive over the Wi-Fi connection you established earlier on Page 8.
- The 'Delete' option allows you to delete files and/or folders individually from the Wi-Drive.
-
The 'Mail' option allows you to email a file (up to 10MB) using the default mail client set up on your iOS device.
The 'Copy To' option allows you to: -
Copy a file or folder from its existing location on the Wi-Drive to a new location on the Wi-Drive, with the ability to create a new folder.
- Copy a file or folder from the Wi-Drive to its app storage location (Local.) This space is limited to the capacity of your iOS device.
- Copy a file or folder from the Wi-Drive app storage location (Local) of your iOS device to a physical folder on the Wi-Drive.

Figure 4.4 - Action Menu
If you attempt to swipe a document file type unsupported by the Wi-Drive app, you will have the option to open the document file using an alternative app associated with that document file type. The associated app must be installed on the iOS device.
Simply swipe the document you wish to open, tap the action menu button, and select the 'Open In...' option shown in Figure 4.5. This will bring up a second menu that lists the apps associated with the document file type you are attempting to open.
The 'Open In' function only appears with document file types and will not show on the action menu when swiping a picture, audio, or video file.
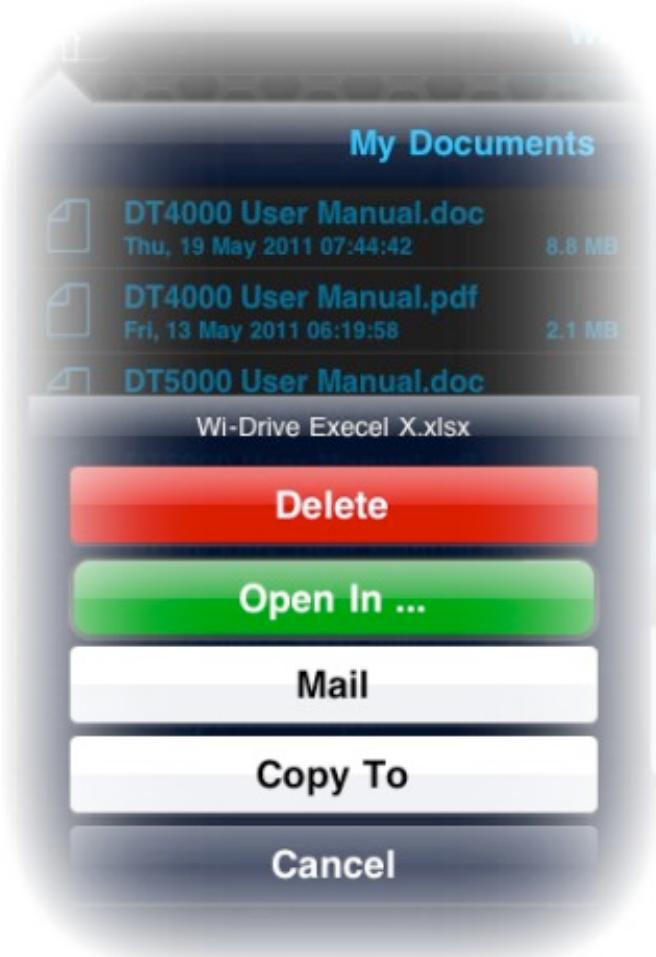
Figure 4.5 – 'Open In' Option
Configuring Wi-Drive
Using the Wi-Drive App, you can customize the wireless network settings for Wi-Drive. The default settings are: Device Name: Wi-Drive, Visibility Status: ON, Wireless Channel: 11, and Security: None.
To access Wi-Drive's Network Settings, please follow these steps:
- Select the Wi-Drive App icon on your iPad, iPhone, or iPod touch device.
- Select the Home icon (upper left.)
- Select the Device Name link, i.e. Wi-Drive (192.168.200.254).
- Select the settings icon (gear symbol, lower left.)
- Select the Wi-Drive Settings button.
A. Device Name - commonly referred to as an SSID, or Service Set Identifier, this field allows you to specify a device name (between 1 and 32 characters) that will broadcast in the list of available wireless networks on your iPad, iPhone, or iPod touch device. The default name is Wi-Drive as seen in Figure 5.1.
B. Visibility Status - this gives you the option to hide or unhide the SSID specified in the 'Device Name' field. By default, the visibility status is turned ON. If you wish to turn this feature OFF, the device name will NOT be broadcasted in the list of available wireless networks on your iPad, iPhone, or iPod touch device; however, you can still join the Wi-Fi network by entering the device name manually using the menu option, 'Other...'.
C. Wi-Fi Channel – this setting allows you to select a specific frequency channel used to communicate with other devices on your wireless network. The default setting is Channel 11 (2.462 GHz.)
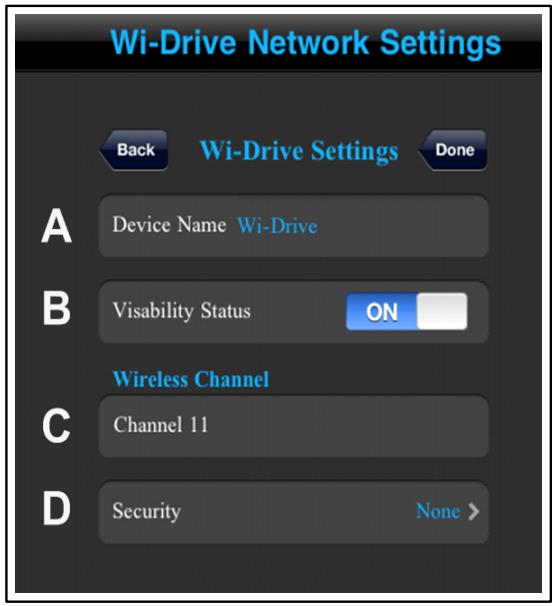
Figure 5.1 - Wi-Drive Network Settings
D. Security – this option helps prevent unauthorized access to your Wi-Drive wireless network by prompting users for a password. The security protocols supported by Wi-Drive are WEP, WPA, WPA2, and WPA2 Mixed. The default setting is 'None.'
WEP (Wired Equivalent Privacy) - User-defined password, must be exactly 13 characters in length
WPA or WPA2 (Wi-Fi Protected Access) - User-defined password, must be 8 to 13 characters in length
- Mixed - Combination of the other security protocols
1If the visibility status has been turned off, you can still join the Wi-Drive network by entering the SSID manually on your iPad, iPhone, or iPod touch, as long as you know the 'Device Name' (Step A). Please note that a password will be required if the security option is enabled.
Network Connections (Bridge Mode)
Traditionally, the Wi-Fi antenna on your iPad or iPod touch device is used to access the Internet. The Wi-Drive, however, uses the Wi-Fi antenna on your Apple device to stream content, which effectively disconnects your iOS device from the Internet. Fortunately, Wi-Drive's Wi-Fi antenna supports bi-directional traffic and can be used for implementing a feature called Bridge Mode. This mode allows you to be connected to Wi-Drive while it is connected to a Wi-Fi network (as a host client) that has access to the Internet.
To set up this feature and see a list of available wireless networks in your range, open the Wi-Drive App and select the settings icon (lower left) in the application. From the 'Network Settings' menu (Figure 6.1), tap 'Network Connections' and select the Wi-Fi network you want to connect to. After making your selection, Wi-Drive will prompt you for the Wi-Fi password (if security is enabled) and reboot. If there is no password, the device will automatically reboot.
Once Wi-Drive has rebooted, you will be prompted to select a wireless network. You MUST select your Wi-Drive network in order to maintain access to its contents. Since you've already connected to the network via Wi-Drive's App, there is no need to select it from the list again. If you do select it, you will be disconnected from Wi-Drive.
To verify that you have successfully enabled Bridge Mode:
- Select the Wi-Drive App icon on your iPad, iPhone, or iPod touch device.
- Select the Home icon (upper left.)
- Select the Device Name link, i.e. Wi-Drive (192.168.200.254).
- Select the settings icon (gear symbol, lower left.)
- Select the Network Connections button.
When the list of wireless networks appear, you will notice a Wi-Fi signal and 'greater than' symbol located to the right of the network you selected in the Wi-Drive App. See Figure 6.1. This indicates that the bridge function is working properly and you are connected to Wi-Drive and the Internet at the same time.
So if you're streaming content from the Wi-Drive to your Apple device and need to quickly look something up on-line, just open your Safari browser and away you go.
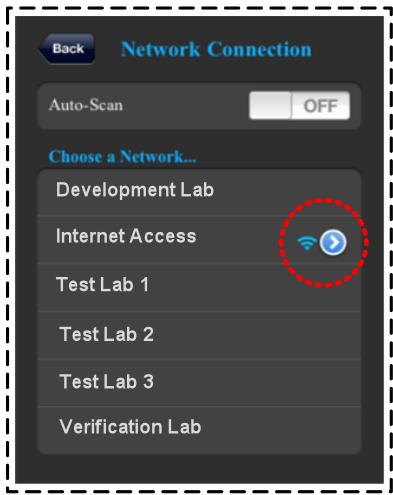
Figure 6.1 - Bridged Wi-Drive
Upgrade Firmware
Recommendation: Always back up your data before a firmware upgrade.
- If a firmware upgrade becomes available for your Wi-Drive device, it will be posted and made available on-line for you to download. The firmware upgrade will be in the form of a .BIN file. Additional instructions may be included with individual firmware upgrade(s).
- Download the .BIN file and connect Wi-Drive to your computer. For help on connecting your device to a computer, see page 7.
- Copy the .BIN file from your computer to the data partition of Wi-Drive.
- Disconnect Wi-Drive from your computer.
- Power on Wi-Drive and wait for the Wi-Fi LED to start Flashing.
- Open the Wi-Drive app on your iPad, iPhone, or iPod touch device.
- Navigate to Wi-Drive's Network Settings.
- Select the 'Upgrade Firmware' button.
- Confirm by selecting Upgrade Firmware once again.
- Wi-Drive will complete the firmware upgrade and automatically reboot. Please let the 100-second countdown complete before proceeding.
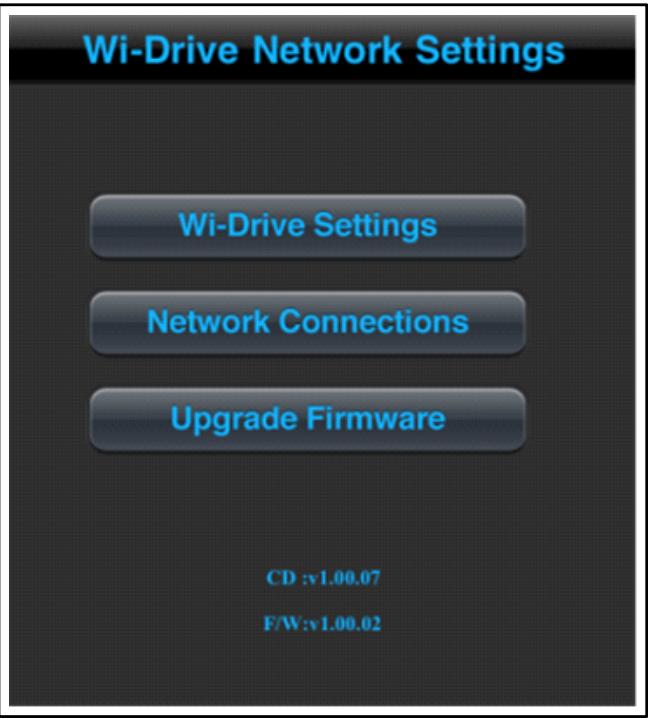
Figure 7.1 - Wi-Drive's Network Settings
IMPORTANT: To avoid undesired results, please do NOT interrupt the firmware upgrade process. Once it completes, Wi-Drive will bring you back to the application screen.
Industry Canada
Radio apparatuses shall comply with the requirements to include required notices or statements to the user of equipment with each unit of equipment model offered for sale.
The required notices are specified in the RSS documents (including RSS-Gen) applicable to the equipment model. These notices are required to be shown in a conspicuous location in the user manual for the equipment, or to be displayed on the equipment model. If more than one notice is required, the equipment model(s) to which each notice pertains should be identified. Suppliers of radio apparatuses shall provide notices and user information in both English and French.
This device complies with Industry Canada license-exempt RSS standard(s). Operation is subject to the following two conditions: (1) This device may not cause interference, and (2) this device must accept any interference, including interference than may cause undesired operation of the device.
NCC/DGT警語
FCC Compliance and Advisory Statement
This device complies with Part 15 of the FCC rules. Operation is subject to the following two conditions: (1) This device may not cause harmful interference, and (2) this device must accept any interference received, including interference that may cause undesired operation. This equipment has been tested and found to comply with the limits for a Class B digital device, according to Part 15 of the FCC rules. These limits are designed to provide reasonable protection against harmful interference in a residential installation. This equipment generates, uses, and can radiate radio frequency energy and if not installed and used in accordance with the instructions, may cause harmful interference to radio communications. However, there is no guarantee that interference will not occur in a particular installation. If this equipment does cause harmful interference to radio or television reception, which can be determined by turning the equipment off and on, the user is encouraged to try and correct the interference by trying one or more of the following:
- Adjust the receiving antenna.
- Increase the separation between the equipment and receiver.
- Connect the equipment into an outlet on a circuit different from that to which the receiver is connected.
- Consult Technical Support for help.
Any special accessories needed for compliance must be specified in the instruction manual.
Warning: A shielded-type power cord is required in order to meet FCC emission limits and also to prevent interference to the nearby radio and television reception. It is essential that only the supplied power cord be used. Use only shielded cables to connect I/O devices to this equipment.
CAUTION: Any changes or modifications not expressly approved by the party responsible for compliance could void your authority to operate the equipment.
Safety Guidelines
Please read the following carefully before using the Wi-Drive Product. Incorrect use of your device may result in reduced battery performance, undesired operation, or damage to your device.
- 請勿嘗試拆解產品
Do not attempt to open or disassemble this product.
- 使用環境溫度0-45攝氏度
Store and operate between 0 45^ C
- 請勿將液態物接觸此產品
Do not allow this product to have contact with liquid(s).
Do not place this product near a heat source or flame.
- 請勿壓碎或刺穿此產品
Do not crush or puncture this product.
- 長時間不用,請每六個月對本產品充電一次
Recharge the power pack every 6 months when not in use.
When scrapping this product, the battery needs to be disposed of properly.
Copyright© 2011 Kingston Technology. All rights reserved. Kingston Wi-Drive is a registered trademark of Kingston Technology. Other trademarks used in this manual are property of their respective owners.
Kingston Technology
17600 Newhope Street
Fountain Valley, CA 92708
U.S.A.
Introduction. 3
Requirements 3
Supported File Types (Non-DRM) 3
Installing the Wi-Drive Application 4
Getting to Know Wi-Drive 5
Battery Status 7
Connecting Wi-Drive to a Computer 8
Loading Content Onto Wi-Drive 8
Connecting to Wi-Drive over Wireless 9
Usage 9
Configuring Wi-Drive 13
Network Connections (Bridge Mode). 14
Upgrade Firmware 15
Einleitung
Tipi di file supportati* (Non-DRM):
Audio:aac,mp3,wav
Video: m4v, mp4, mov
- Immagine: bmp,.jpeg, jpg, png
- Documenti: pdf, doc, docx, ppt, pptx, txt, rtf, xls, xlsx
Released Jun 27, 2011
Released Jun 27, 2011
INSTALL APP

Figure 2.1 - LED Power, Verde

Figure 2.2 - LED Power, Ambar
3AΓPY3KA DAHHbIX HA WI-DRIVE 8
ПОДКЛЮЧЕНЕ K WI-DRIVE C ПOMOШью BEСПROBOДно CETN 9
ИСПОЛьЗOBАНЕ UСТРОДСТВА 9
HACTPOIKA KOHΦNΓΥΑΙΝΙ Wİ-DRIVE 13
CETEBbie IOdkJIIOUeHnA (PEXIM CETEBOrO MOCTA) 14
OBHOBJEHNBE BCTPOEHHORO IIO 15
BVeJeHne
Wi-DriveTM - 3TO nopTaTHBHybI beCnpoBOHOn USB-haKoNTeB, no3BOJHOuN nepeDaBaT zuΦpOBoM MylbTmMeDnHbI KOHTEHT (My3bIKy, foToRpaФn, BnDeo n T.d.) Ha yCTpoiCTBa iPad®, iPhone® nIi iPod touch®, KOTOpbIe pa6oTAOT NOY npaBHeHem ONEpaUHOHOn CnCTEmbl iOS. YcToPoiCTBO Wi-Drive oChauSeHo JInTuNoJIOMepHBIM aKKymyIaTOpm I NMeET 9-MeTPOBbI PAaNyc DeIcTBnA, o6pa3y6 beCnpoBOdHyO cTeB, KOTopa8 oBeCeuHBAET Do 4 YacOB HeNpePBIBHOr DOCTyna K zuΦpOBOMy KOHTeHTy B MObNbHOM pexIme. Wi-Drive POnDEpXnBAET EMKocTb B 16 T6 n 32 T6 n OTnuaeTcN NCKIoUHTeBHO n IpocTOTOH NaCTPOBKn, Yo DeJaET erO INdeAJBbIM peSeHnEM dJIra paCUnpeHnI PoTAtNBHOI MeINHOJ b6IoNtEkN yCTpoiCTB, KOTopbIE He POnDEpXnBAOT BO3MOxHOCtB dJIra yBeJIuYeHnI O6bema NaMaTI.
KOMnJIeKT NOCTaBKN:
16ecnpoBOHNoHaKOpNTeIb Wi-Drive (16 7n32 76)
1 USB-ka6eIb (1 M. A Ha Mini-B)
- Адалтет посяменитою (Толъко дь СИА)
CnCTeMHbIe Tpe6oBaHna:
- Komlbóter pod uypablenem OC Windows® 7, Windows Vista® (SP1, SP2), Windows XP (SP2, SP3), Mac OS X (Bercnn 10.5.x i BbIe), Linux (Ядpo Bercnn 2.6 i BbIe) c podepkKo USB 2.0 (Дпя загузки ФайLOB Wl-Drive)
Apple iPod touch Gen 3, Gen 4, iPhone (3G, 3GS, 4; 3G TOnJIbKO c iOS4.2.1 n BvIWe) i iPad - Доступ в сель Исторгет дя установки прилозецни Wi-Drive (из магашина App Store)
ПодерхиBaembie Tnbli Файлов* (6e3 DRM (TEXHnuecknx cpeДСТВ 3auntbI aBTOpCKnx npaB))
- Aynio: aac, mp3, wav
BvIeO: m4v, mp4, mov -
1306paXeHnIa: bmp, jpg, jpg, png
-
Дokумены: pdf, doc, docx, ppt, pptx, txt, rtf, xls, xlsx
*Wi-Drive no3eONyem xpaHmb faunbI IIO6o muna. PpeCmaenHbIe 3decb munbI faunoe omkpBiaomc npuOxehm Wi-Drive 6e3 Heobxodumocmu uonb3o8aHua cmopOHux npunoXeuH.
YcTaHOBka npInoJxHnIa Wi-Drive
Для настpoи Ki Wi-Drive Heobxodmo cneBa yctaHOBnTb Ha ImeIoUeecs yctpoCTBO (iPad, iPhone nIpiPod touch) npiloxeHne Wi-Drive n3 onlaH-mara3Ha App Store (Heobxodmo hAnuye doctyna B cetb INtepHT). PniloxeHne Wi-Drive raJIeTcB beCpJIaTHbIM n I03BoJAre TImMeHЯr b HacTpoKn 6ecPpOBoDHO n CETn n NolUaTb 6ecnpoBODHO DoCTyn K daHHbIM, KOtOpbie 6bln 3aRpyKeHbI Ha Wi-Drive. Для уctahOBkn npiloxeHna BblONHIne cIeDuOUsne DeIcTBn:
- CnomoIbIO ImeIoUeOcra yCtpoIcTba iPad, iPhone nIIi iPod touch 3aIInTe B App Store n BVeIInTe B cTpOKy noncKa "Wi-Drive". CM.Puc 1.1 , npedctabIeHnbln HnXe. App Store moKet npedIooNtB HeCKoJIbKO pe3yIbTaTOB, COOTBeTCTByIOuIX BaIeMy 3anpocy.
Q wi-drive
Puc. 1.1 - Nouck Wi-Drive
- HainTe n BbIepeTe npnIOxHne Wi-Drive, COOTBeTCTByOuSeB aUeMy ycToPcTBy, T.e. Wi-Drive nIy iPad, dIy iPhone, iPod touch n T.D., KOMpaHmN Kingston Digital, Inc. n HaxMnte Ha KhoNky "FREE" (BECJIATHO). CM. PucyHok 1.2.
Puc. 1.2 - Пучожец Wi-Drive komпанuu Kingston Digital, 'FREE'
- После тoro, кak bbl bblbpaHn FREE'(BECNJIATHO), cepa KhoNka cTaHET 3eJeHoi n N3MeHITcHа INSTALL APP' (YCTAHOBNTb PpINOJXEHNIE). HaxMITE ee dIЯ 3aBepSeHn yCTaHOBKn npInIOxEHn Wi-Drive ha Baawe ycTroHcTBO. Cm.PucyHOK 1.3.
WI-DRIVE'A IÇERIK YÜKLENMESI 8
KABLOSUZ UZERINDEN WI-DRIVE'A BAGLANMA 8
KULLANIM 9
WI-DRIVE'1 YAPILANDIRMA 12
AG BAGLANTILARI (KÖPRÜ MODU) 13
BELLENIM SÜRÜMÜ YUKSELT 14
Giris
Kingston Technology
17600 Newhope Street
Fountain Valley, CA 92708
U.S.A.
Kingston Technology
17600 Newhope Street
Fountain Valley, CA 92708
U.S.A.
Kingston Technology
17600 Newhope Street
Fountain Valley, CA 92708
U.S.A.
Wi-Driveご一さ イイド
目次
Released Jun 27, 2011

CONTONS to Wi-Drive 1984.
Green LED (51%-100% charge remaining)

2.1- 源LED, 色
Amber (Orange) LED (25%-50% charge remaining)

2.2- 源LED,琥珀色
Red LED (less than 25% charge remaining)

2.3- 源LED, 色