1400 HKS - Circular saw KRESS - Free user manual and instructions
Find the device manual for free 1400 HKS KRESS in PDF.
User questions about 1400 HKS KRESS
0 question about this device. Answer the ones you know or ask your own.
Ask a new question about this device
Download the instructions for your Circular saw in PDF format for free! Find your manual 1400 HKS - KRESS and take your electronic device back in hand. On this page are published all the documents necessary for the use of your device. 1400 HKS by KRESS.
USER MANUAL 1400 HKS KRESS
Original instructions "Circular saw"
Symbols and abbreviations
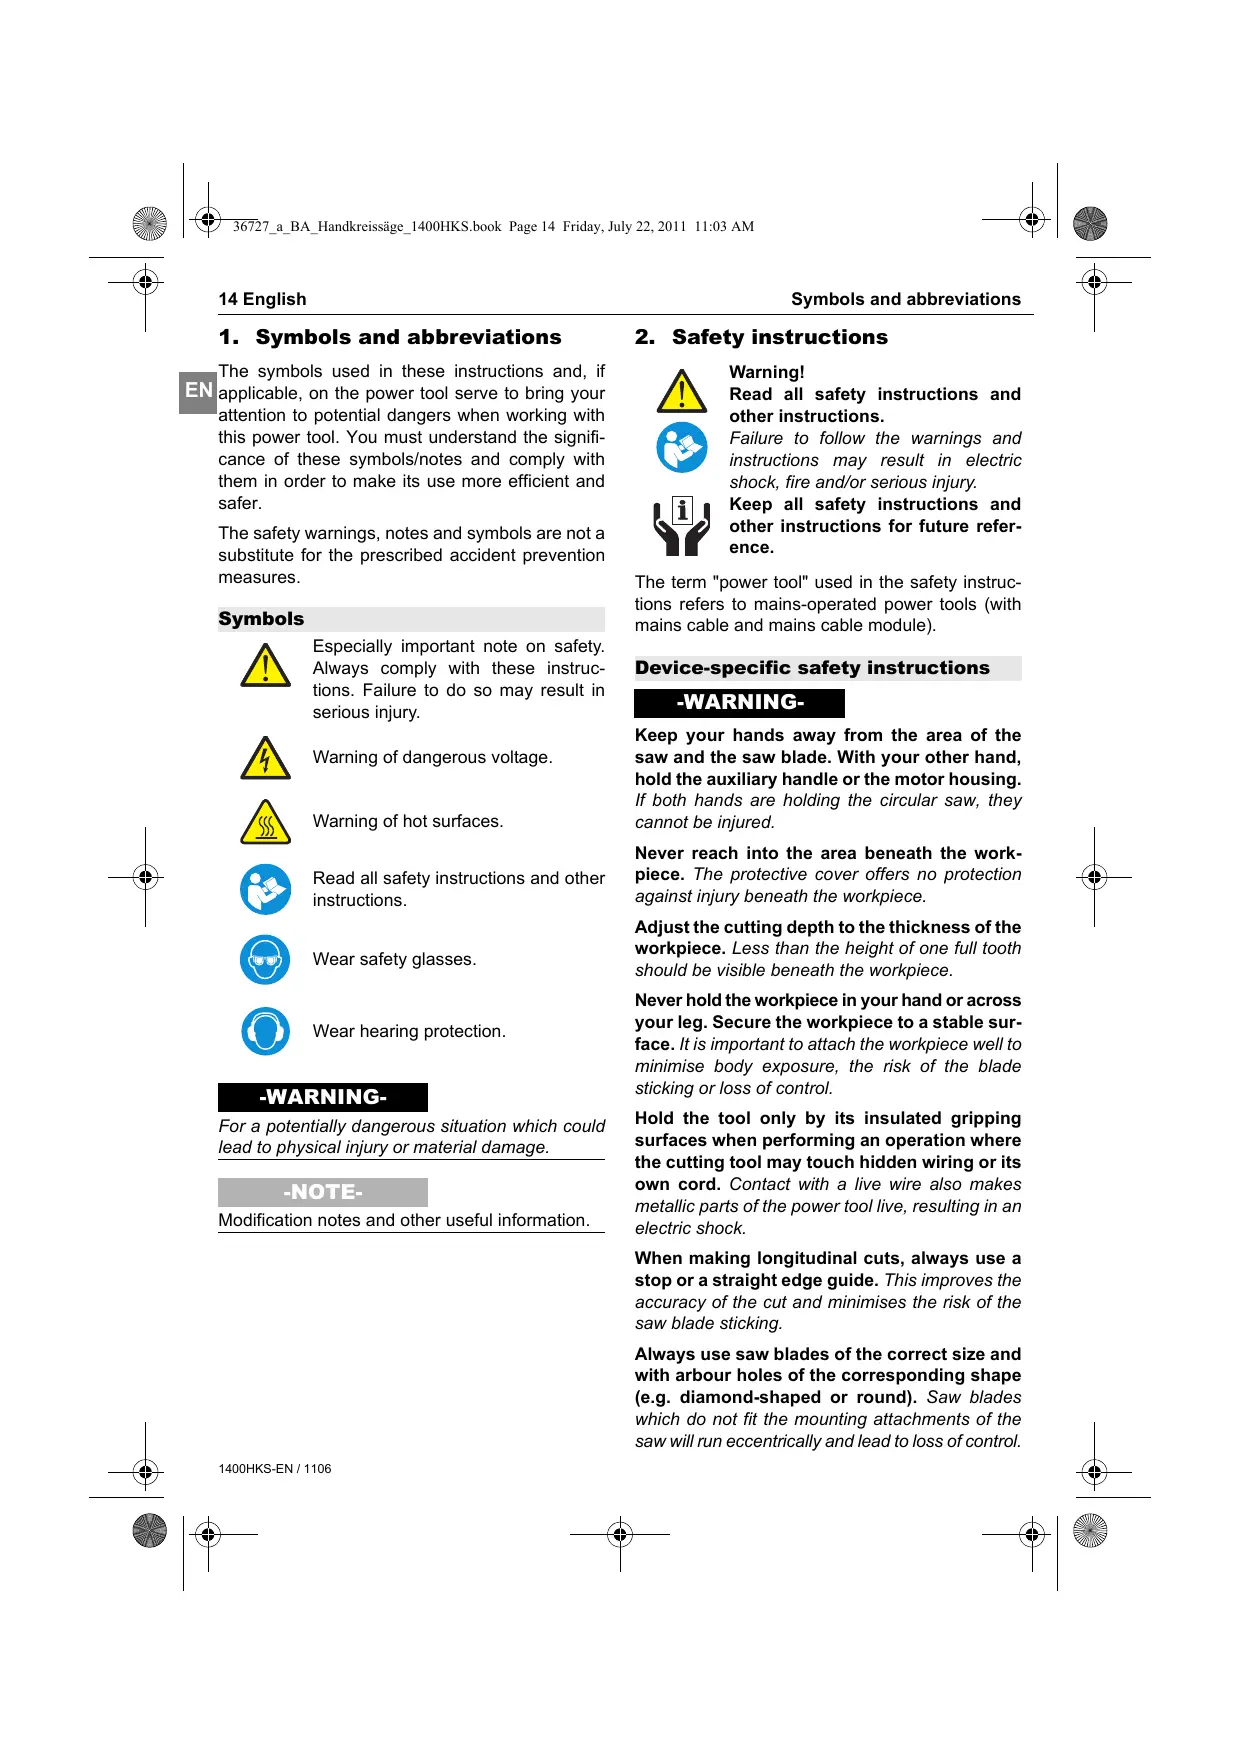
1. Symbols and abbreviations

The symbols used in these instructions and, if applicable, on the power tool serve to bring your attention to potential dangers when working with this power tool. You must understand the significance of these symbols/notes and comply with them in order to make its use more efficient and safer.
The safety warnings, notes and symbols are not a substitute for the prescribed accident prevention measures.
Symbols

Especially important note on safety. Always comply with these instructions. Failure to do so may result in serious injury.

Warning of dangerous voltage.

Warning of hot surfaces.

Read all safety instructions and other instructions.

Wear safety glasses.

Wear hearing protection.
-WARNING
For a potentially dangerous situation which could lead to physical injury or material damage.
-NOTE-
Modification notes and other useful information.
2. Safety instructions

Warning!
Read all safety instructions and other instructions.

Failure to follow the warnings and instructions may result in electric shock, fire and/or serious injury.

Keep all safety instructions and other instructions for future reference.
The term "power tool" used in the safety instructions refers to mains-operated power tools (with mains cable and mains cable module).
Device-specific safety instructions
-WARNING
Keep your hands away from the area of the saw and the saw blade. With your other hand, hold the auxiliary handle or the motor housing. If both hands are holding the circular saw, they cannot be injured.
Never reach into the area beneath the workpiece. The protective cover offers no protection against injury beneath the workpiece.
Adjust the cutting depth to the thickness of the workpiece. Less than the height of one full tooth should be visible beneath the workpiece.
Never hold the workpiece in your hand or across your leg. Secure the workpiece to a stable surface. It is important to attach the workpiece well to minimise body exposure, the risk of the blade sticking or loss of control.
Hold the tool only by its insulated gripping surfaces when performing an operation where the cutting tool may touch hidden wiring or its own cord. Contact with a live wire also makes metallic parts of the power tool live, resulting in an electric shock.
When making longitudinal cuts, always use a stop or a straight edge guide. This improves the accuracy of the cut and minimises the risk of the saw blade sticking.
Always use saw blades of the correct size and with arbour holes of the corresponding shape (e.g. diamond-shaped or round). Saw blades which do not fit the mounting attachments of the saw will run eccentrically and lead to loss of control.


Safety instructions
English 15
Never use damaged or incorrect saw blade washers or bolts. The saw blade washers and bolts were designed especially for your saw to ensure optimum performance and operational safety.
Causes and prevention of kickback:
- Kickback is a sudden reaction to a pinched, bound or misaligned saw blade, causing an uncontrolled saw to jerk up and out of the workpiece towards the operator.
- If the blade is pinched or bound by the closing kerf, it stalls, and the action of the motor drives the tool back towards the operator.
- If the saw blade is twisted or misaligned in the cut, the teeth at the back edge of the blade can catch in the surface of the workpiece, causing the blade to spring out of the kerf and back towards the operator.
Kickback is the result of misuse of the saw or incorrect operating procedures and conditions. It can be avoided by taking appropriate precautions as described below.
Grip the saw tightly with both hands and position your arms to resist kickback forces. Always position your body to one side of the blade, never in line with the blade. If kickback occurs, the saw may jump backwards, but kickback forces can be controlled by the operator if the appropriate precautions are taken.
If the saw blade sticks or you interrupt work, switch the saw off and hold it motionless in the workpiece until the saw blade has come to a standstill. Never try to remove the saw from the workpiece or pull it back while the blade is in motion, as this may trigger kickback. Investigate and take corrective action to eliminate the cause of the saw blade sticking.
To restart a saw which is in the workpiece, centre the saw blade in the kerf and check that the saw teeth are not engaged in the material. If the saw blade is sticking, it may move out of the workpiece or cause kickback when the saw is restarted.
Support large panels to reduce the risk of kickback due to a stuck saw blade. Large panels may sag under their own weight. Sup
ports must be placed under the panel on both sides, near the kerf and near the edge of the panel.
Never use blunt or damaged saw blades. Saw blades with blunt or misaligned teeth produce a narrow kerf which causes excess friction, sticking of the blade and kickback.
- Tighten the blade depth and bevel locking levers before making a cut. If the settings change during operation, the saw blade may stick and cause kickback.
- Be particularly careful when performing "plunge cuts" into existing walls or other blind areas. The protruding blade may become stuck in hidden objects and cause kickback.
Before using the saw, always check that the lower protective cover closes properly. Do not use the saw if the lower protective cover does not move freely and close instantly. Never clamp or tie the lower protective cover open. If the saw is accidentally dropped, the lower protective cover may be bent. Open the protective cover with the retracting handle and make sure that it moves freely and does not touch the saw blade or other parts in any angles or depths of cut.
- Check the operation of the spring for the lower protective cover. If the lower protective cover and the spring do not work properly, have the saw serviced before using it. Damaged parts, sticky residue or an accumulation of debris may cause the lower protective cover to work sluggishly.
Only open the lower protective cover by hand for special cuts such as "plunge cuts and angled cuts." Open the lower protective cover using the retracting handle and release the handle as soon as the saw blade enters the workpiece. For all other cuts, the lower protective cover must function automatically.
Make sure that the lower protective cover is covering the saw blade before putting the saw down on the workbench or the floor. An unprotected, coasting saw blade will cause the saw to walk backwards, sawing whatever is in its path. Be aware of the time it takes for the blade to stop after the switch is released.
1400HKS-EN/1106
EN
16 English
Device description
Use the matching riving knife for the saw blade used. The riving knife must be thicker than the body of the saw blade but thinner than the tooth width of the saw blade.
Adjust the riving knife as described in the operating instructions. Incorrect thickness, positioning and alignment can make the riving knife ineffective in preventing kickback.
Always use the riving knife, except when making plunge cuts. Refit the riving knife after the plunge cut. The riving knife causes interference during plunge cutting and may cause kickback.
For the riving knife to be effective, it must be in the kerf. The riving knife is ineffective in preventing kickback during short cuts.
- Never operate the saw with a bent riving knife. Even minor interference can slow the closing of the protective cover.
Do not put the saw down vertically on top of the mains cable. This might damage the mains cable.
Residual risks: Although the operating manuals for our power tools contain detailed instructions on safe working with power tools, every power tool involves certain residual risks that cannot be completely prevented through safety mechanisms. Power tools must therefore always be operated with the necessary caution!
3. Device description

Read all the warnings and safety instructions before using the equipment.
Failure to follow the warnings and safety instructions may result in electric shock, fire and/or serious injury.
While reading the operating instructions, unfold the graphics page for the machine and leave it open.
Device components
1 On/Off switch with lock off safety position
2 Release switch
3 Auxiliary handle
4 Star grip bolt for parallel stop
1400HKS-EN / 1106
5 Parallel stop
6 Clamp lever (for setting the cutting angle)
7 Clamp lever (for setting the cutting depth)
8 Scale for setting the cutting depth
9 Mains cable with Patent Quick interlock
10 Lock for mains cable module
11 Swing guard
12 Riving knife
13 Hex key
14 Base
15 Sawdust ejector (suction neck)
16 Socket head bolt for riving knife
17 Riving knife adapter
18 Saw blade
19 Pin for spindle lock
20 Flange
21 Washer
22 Thrust washer
23 Cylinder bolt
24 Cutting depth indicator
25 Guide rail
26 Connecting piece
27 Pair of screw clamps
28 Guide rail adapter
- Accessories illustrated or described are not standard delivery items. For full details of accessories, see our accessories range.
Scope of supply
See packaging
Specified Conditions of Use
The saw is designed for universal applications, for sawing soft and hard wood, chipboard, plywood, plastics, formica-coated materials.
It must not be used to process ferrous metals.
Requirements for the user
The tool must only be operated, maintained and serviced by authorised trained personnel. The personnel must be made aware of the relevant dangers.


Device description
English 17
Technical data
| Saw | 1400 HKS |
| Rated voltage | 220-230 V~ |
| 50/60 Hz | |
| Input power | 1400 W |
| Output power | 815 W |
| 16A | ● |
Soft start
| 1/min No-load speed n0 | 4700 rpm |
| 1/min | 3640 rpm |
Rated speed n_1
| Cutting depth for 90° cuts | 66 mm |
| Cutting depth for 45° cuts | 43 mm |
| Bevel cuts settings up to | 45° |
| Saw blade Ø | 190 mm |
| Blade hole Ø | 20 mm |
| Tooth width | 2.6 mm |
| Base dimensions | 335 x 162 mm |
| Weight | 4.9 kg |
| Your power tool is doubly insulated in compliance with EN 60745; For this reason an earth wire is not required. |
The machine is radio and TV interference-free in accordance with EN 55014-1 and interference-proof in accordance with EN 55014-2.
Noise/vibration information
Noise levels
Measured values determined according to EN 60 745.
The A-weighted noise level of the machine is typically:
Sound pressure level (L_pA) 92 dB(A)
Sound power level (L_WA) 103 dB(A)
Measurement uncertainty K = 3 dB

The noise level can exceed 85 dB(A) during operation.
Wear hearing protection!
Vibration
Triaxial vibration emission level determined in accordance with EN 60745.
Saw
1400 HKS
Sawing wood a_h = 4.8 m/s^2
Measurement uncertainty K = 1.5m / s^2
)

The vibration emission level given in this information sheet has been measured in accordance with a standardised test given in EN 60745 and may be used to compare one tool with another.
The vibration emission level will vary because of the ways in which a power tool can be used and may increase above the level given in this infor
1400HKS-EN/1106
18 English
Operation
mation sheet. This could lead to underestimation of vibration when the tool is used regularly in such a manner.
EN
Note: To be accurate, an estimation of the level of exposure to vibration experienced during a given period of work should also take into account the times when the tool is switched off and when it is running but not actually when doing the job.
This may significantly reduce the exposure level over the total working period.
Specify additional safety measures to protect the operating personnel against the effects of vibration, for example: Maintenance of power tools and accessories, keeping hands warm, organisation of workflows.
4. Operation

Before carrying out any work on the machine, pull the main plug.
Start-up

Observe correct main voltage!
Before putting into operation, check that the mains voltage and frequency on the identification plate match the details of your mains supply.

If using an extension cable: Only use extension cables specifically approved for the application with the required cross-section. Otherwise the power of the tool can be reduced and the cable can overheat. Replace damaged extension cables.
Mains cable

If the mains cable is damaged while working, pull the mains plug immediately.
Mains cable module

Mains cable module with Patent Quick Interlock.
Connect the mains cable module (9) to the handle. The plug must snap in.
1400HKS-EN / 1106
Only use the mains cable module (9) for Kress power tools. Do not attempt to operate other machines with the module.
Damaged mains cable modules must not be used. They must be replaced with a new Kress mains cable module immediately.
Press the two unlocking buttons (10) and remove the mains cable module (9) from the handle.
Use only an original Kress mains cable module and at least a heavy rubber tube cable (H05 RN-F).
Operation
-WARNING
Saw blade and riving knife (12) must be fitted before starting up the saw. Observe the corresponding information in these operating instructions! The riving knife (12) serves as a protection against kickback, and it is thus imperative to fit it!
Switching on and off
Before pressing the On/Off switch (1) in the handle, the switch must be unlocked by pressing in the release switch (2). Only then can the saw be put into operation by pressing the On/Off switch.
-NOTE-
For safety reasons, it is not possible to lock the On/Off switch in position for continuous operation.
- When the On/Off switch is released, the power supply is interrupted and the saw comes to a standstill. The lock off safety position automatically locks the switch and prevents the saw being switched on unintentionally.
Base
The base (14) has been fitted at the factory so that the angle between the base and the saw blade in basic position (zero setting) is precisely 90^ . The 4-point mounting guarantees accurate operation.
Swing guard
- When the saw blade is applied to the workpiece, the swing guard (11), which covers the saw blade, moves back automatically at the same speed at which the blade is applied. When you reach the end of the cut, the swing guard moves back under spring pressure to cover the blade again.


Operation
English 19
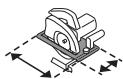
Setting the cut depth
The cutting depth can be set up to 66~mm
By releasing the clamp lever (7) on the housing, the base (14) can be pressed downwards and thus moved in the direction of cutting depth "0."
The cutting depth can be read off on the indicator (24) or reset according to the scale.
-NOTE-
The cutting depth should always match the thickness of the workpiece, i.e. the blade should only protrude from the material by approx.the height of 1 saw tooth. This is important in order to prevent accidents!
Sawing to layout lines
On the front edge of the circular saw base, there is a marker (indentation) for right-angled cuts (zero setting) corresponding to the saw blade width. There are also marking tongues for 0^ and 45^ bevel cuts. These enable simple and precise operation.
The marking tongues in the base of the circular saw (see drawing) also correspond to the cut width of the saw blade.
-NOTE-
When sawing along a layout line, please ensure that you cut according to the left or right edge of the indentation or marking tongue, depending on whether you are sawing to the left or right of the layout line.
Changing the tool
Fitting the saw blade
-
Move the motor of the circular saw to its highest position (min. cutting depth) - as described under Setting the cutting depth - by releasing the clamp lever (7) and then re-securing the clamp lever (7).
Pull the swing guard (11) back and hold it in end position.
Then fit the individual parts onto the drive spindle of the saw in the following order: -
Flange (20)
- Saw blade (18)
- Thrust washer (22)
- Washer (21)
- Socket-head cylinder bolt M8 x 18 (23)
-NOTE-
When inserting the blade, make sure that the direction of the arrow on the saw blade corresponds to the direction of the arrow on the housing. The bearing surfaces of the saw blade, flange and washer must be clean.
EN
Press and hold down the pin for spindle lock (19), and if necessary, rotate the saw blade until the lock snaps into place.
- With the pin for spindle lock (19) pressed down, tighten the socket-head cylinder bolt (23) with the hex key (13).
To replace the saw blade, carry out the same steps in reverse order. Fit the new blade as described.
Fitting the riving knife
-NOTE-
This kickback safety device must be fitted!
Leave the motor of the circular saw in the same position (min. cutting depth) as was required to fit the saw blade.
- Attach the riving knife (12) using the socket-head bolt (16) and the washer provided. At first, only tighten the socket-head bolt (16) lightly.
Adjust the riving knife (12) so that the distance to the tips of the saw teeth and to the lowest point of the saw blade is max. 5 mm (see Figure). The distance to the toothed rim of the saw blade must not exceed 5 mm.
Fully tighten (10 Nm) the socket-head bolt (16).
The saw is now ready for operation.
Operating tips
Sawing wood
Selection of the appropriate saw blade depends on the type of wood, the quality of the wood and whether longitudinal or transverse cuts are required. When cutting spruce longitudinally, long, spiral shavings are produced. Beech and oak dust are particularly dangerous to health, so always work with a dust extraction system.


20 English
Operation
Sawing plastic
-NOTE-
EN Searing plastic, in particular PVC, produces long, spiral-shaped shavings which may be electrostatically charged. This can lead to clogging of the sawdust ejector (15) and cause the swing guard cover (11) to jam. We recommend that you use a dust extraction system. Switch the saw on, apply it to the workpiece and carefully begin to saw. Work quickly and without interrupting the cut to prevent the saw teeth sticking.
Safety regulations and notes which must be observed
- Cracked or distorted blades must not be used. Work only with good, sharp saw blades!
Never use high-alloy HSS blades in this saw. - Saw blades which are not in accordance with the specifications listed in these operating instructions must not be used.
- Saw blades must not be braked by applying counterpressure from the side after the drive has been switched off.
Check that all moving parts of the blade guard function correctly without pinching.
The swing guard must not be locked in open position.
It must be ensured that all devices which cover the blade are functioning properly.
Pull the plug out of the socket or remove the mains cable module from the handle before replacing the saw blade or performing any servicing work.
Saw blades with a hub thickness greater than the width of the riving knife or a tooth offset width smaller than the width of the riving knife must not be used.
The riving knife must not be removed from the device! It must always be used - except when making insertion cuts.
Guide the saw in a straight line without any tilting motion to prevent the saw blade getting jammed in the workpiece. Should the blade become jammed: release the switch immediately! - Never reach under the workpiece! Risk of injury!
1400HKS-EN / 1106
Observe the information in the operating instructions when replacing saw blades. Remove the key from the device after use!
Adapt the feed (pressure) to the thickness of the material. Feeding too quickly results in motor overload, increased wear on the saw blade and ragged cuts.
The workpiece must be well secured or fixed.
The saw blade must reach the maximum max. no-load speed before you begin the cut.
It is essential to ensure that the clamp levers for setting the cutting depth and bevel cuts are properly secured.
The workpiece must be checked for foreign bodies. Do not cut through nails!
- Keep the cable out of the cutting range of the saw! Always route the cable away from the circular saw towards the rear.
- Never lift the saw off the workpiece until the saw blade has come to a standstill.
- Never put your fingers into the sawdust ejector (risk of injury)!
The device must always be switched on and off using the trigger switch, never by plugging the device into the mains socket or pulling the plug out of the mains socket or by inserting/ pulling out the mains cable on the circular saw!
Wear protective goggles! Wear hearing protection! Wear a dust protection mask!
The saw blade diameter must not exceed 190 mm.
Observe the specified conditions of use for the saw: cutting wood or wood-like materials with saw blades only. Grinding discs must not be used.
Do not cut materials containing asbestos!
- Sockets outdoors must be protected by residual-current circuit breakers (FI-).
- Never drill into the housing to mark the saw. The protective insulation would be bridged. Use stickers.


Tools and accessories
English 21
Motor
The strong universal motor has sufficient power reserves. It is cooled by an extra-large fan unit.
-NOTE-
Prolonged heavy duty may overheat the motor!
- Allow the motor to cool down at no-load speed!
Work only with good, sharp saw blades. This helps prevents the motor overheating!
5. Tools and accessories
Saw blades
190mm , bore hole 20mm
hardened metal tipped, alternating tooth
Wood and wood-like materials, medium quality: Number of teeth 14
Wood, wood-like materials and plastics, very suitable for coated boards, clean-cutting: Number of teeth 48
Sawing with the guide rail
The guide rail (25) helps you to perform straight cuts. The adhesive coating prevents the guide rail from slipping and protects the surface of the workpiece. The coating on the guide rail allows the saw to glide smoothly.
To saw at right angles, you can place the saw directly on the guide rail (25). Attach the guide rail (25) using suitable clamping devices, e.g. vices (27) to the workpiece so that the narrow leg of the guide rail (25) points towards the saw blade.
The guide rail (25) must not protrude beyond the side of the workpiece which is to be sawn.
The guide rail adapter (28) is required for performing bevel cuts with the guide rail (25). The guide rail adapter (28) is fitted as shown in Figure 3.
Dust/chip suction
-NOTE-
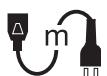
Only operate the saw with a functioning dust/chip extractor. The extractor must meet the requirements of the "Safety regulations for extraction and removal of wood dust and shavings" (ZH1/139). The extractor must ensure a minimum air speed of 20m / s at the suction neck.
Dust from materials such as paints containing lead, some types of wood, minerals and metal can be health hazards. Contact with or breathing in such dust can trigger allergic reactions and/or breathing problems for the user and other persons in the vicinity.
Certain dusts such as oak or beech dust are classified as carcinogenic, especially in combination with wood treatment additives (chromate, wood preservatives).
We recommend the use of a dust extraction device.
Ensure that the workplace is well ventilated.
Comply with the relevant regulations in place in your country for the materials to be processed.
Use as a bench saw
The saw may only be used as a bench saw with saw benches explicitly approved by their manufacturer for use with this KRESS saw.
Special accessories
Do not use accessories made by other manufacturers, as these are not tested by KRESS.
Using such accessories can be dangerous.
To prevent injury and damage, use only the accessories and parts recommended by KRESS.
22 English
Maintenance and Service
6. Maintenance and Service

Maintenance and Cleaning

Before carrying out any work on the machine, pull the mains plug.
- Keep the saw and the ventilation slots clean at all times.
- Plastic parts accessible from the outside should be wiped clean regularly using a cloth without cleaning agents.
- Keep the tool holding fixture clean at all times.
The swing guard must be able to move freely and close automatically at all times. To ensure this, keep the area around the swing guard clean at all times. Remove dust and shavings using compressed air or a brush.
Non-coated saw blades can be protected against the formation of corrosion by applying a thin coat of acid-free oil. Remove this oil before sawing, as it will mark wood. Resin or glue residues on the saw blade impair the quality of the cut. To remove these, always clean saw blades immediately after use.
Brush replacement
Have worn brushes replaced by an authorised customer service.
Service

After heavy use over a long period, the machine should be taken to a Kress service centre for inspection and thorough cleaning.
The relevant service centres are listed in the enclosed appendix "SERVICE" or on the website www.kress-elektrik.de.
Spare parts / exploded view
Exploded views and spare parts lists are available on our home-page
http://spareparts.kress-elektrik.de
Environmental Protection

Recycle raw materials instead of disposing of them as waste. The machine, accessories and packaging should be sorted for environmentally-friendly recycling.
The plastic components are labelled for categorised recycling.

Only for EC countries.
Do not dispose of power tools together with household waste!
In observance of the European Directive 2002/96/ EC for waste electrical and electronic equipment and its implementation in accordance with national law, power tools that have reached the end of their service life must be collected separately and returned to an environmentally compatible recycling facility.
Warranty
- This power tool has been carefully tested and has been subjected to a strict quality control process.
- We guarantee to repair free of charge such faults in the power tool as arise within 24 months from the date of purchase at the end user's premises and which can be attributed to a material or manufacturing defect. In certain countries there are special regulations concerning the warranty terms. We reserve the right to repair faulty components or to replace them. Replaced items become our property.
- Inappropriate use or handling and opening up the device by unauthorized repair centres renders the warranty void. The following are excluded from the warranty: mechanical damage due to falls etc., damage caused by the ingress of water or other fluids, cut and damaged cables, motor damage and mechanical damage caused by inappropriate overloading, wear parts e.g. carbon brushes, drill chucks, chuck keys, worn drilling spindles, motors, mains cables, batteries, saw blades, grinding discs, dust bags, accessories in general (drill bits, chisels etc.). Details of the various wear parts can be found at http://spareparts.kresselektrik.de or obtained from one of our service centres.
- The warranty may only be enforced when defects are reported without undue delay (including shipping damage). Warranty implementation does not extend the warranty period.
- If you need to make a claim under warranty, send the original purchase receipt together with the device to us or to the relevant service centre.
- The warranty obligations assumed by us exclude any further claims on the part of the buyer, in particular the right to cancellation of a sale, reduction and the assertion of claims for damages.

Maintenance and Service
English 23
EN
- However, the buyer has the right either to a reduction (in the purchase price) or the cancellation of the sales agreement should we fail to eliminate any defects within a reasonable period of time.
- Claims for damages in accordance with §§ 463, 480 Par. 2, 635 of the German Civil Code due to lack of warranted properties are not excluded.
- The provisions defined in Items 7 and 8 only apply to the Federal Republic of Germany.


1400HKS-EN/1106
24 Français
Durante el trabajo, el nivel acústicoSEOSEOSEOSEOSEOSEOSEOSEOSEOSEOSEOSEOSEOSEOSEOSEOSEOSEOSEOSEOSEOSEOSEOSEOSEOSEOSEOSEOSEOSEOSEOSEOSEOSEOSEOSEOSEOSEOSEOSEOSEOSEOSEOSEOSEOSEOSEOSEOSEOSEOSEOSEOSEOSEOSEOSEOSEOSEOSEOSEOSEOSEOSEOSEOSEOSEOSEOSEOSEOSEOSEOSEOSEOSEOSEOSEOSEOSEOSEOSEOSEOSEOSEOSEOSEOSEOSEOSEOSEOSEOSEOSEOSEOSEOSEOSEOSEOSEOSEOSEO SEO
jPonerse proteccion auditiva!
Vibración
Anaitnoeis yia to xpiotn
H xpən, ouvtnpən kai ETIIOKEun Tou epyaEiou EITIPTETAI aTOKAiotiKa OE EGSOUIOOTnevo, EKTIAEOUeVO TPOOWTIKo. To TPOOWTIKo TpETei VA exEVnuePwTe ExWPIota yia Touc KIVOUVou TTO Evexetai va TAPOUIAOTuv.
Texvika xapaktnpiotiká
Ppióvi
1400 HKS
GR

Ovoaotikn taon
220-230 V~
50/60 Hz

Iaxus Iiooobou
1400W

Ioxus Eo00
815W
16A
A EKKIVNON

Aipuoc stpovwv xwpic qopfio n0

Aipuoc Otpoowv UTO qoprtio n1

Báθoç kOtɪnç σε 90°
4700 . .
3640 . .
66 mm
1400HKS-GR/1106

100 Eλληνικα
περιγαφή εργαλείου
Baoos kottns 45°
43 mm
45^
PAnpoopoeic oOpou kai dovnoewv
TipeCsOpuBou
Oi tiues etpnns opizovta ouuwova uEN 60745.
To eTITeO TopuBou TnC OuaKeuNc, to oTOIO aGIOLOyNtke WcA, eivai:
2. Yka3aHnHa 3a 6e3oNaCHOCT

IpeynpexdHne! IpooyTeTe BCnUKN yka3aHn 3a 6e3oNaCHOCT N HNCTpyKuIN.

Hecna3BaHeTo Ha yka3aHnIra 3a6e3oNaChOCT u NcHTpyKuInTe MoRat Da npEdn3BnKaT TokOB yIap, NoKap n/nn TeKKn HapaHaBaHnI.

CbxaHbAaTe 3a 6bDeo noJ3BaHe BCnUyka3aHna 3a 6e30NaCHOCT INHCTpyKun.
I3noJI3BaHnI B yKa3aHnIa 3a 6e3oNaCHOCT TepMIn „EJeKtpOnHcTpymENT" ce OTHacr 3a eJeKtpOnHcTpymENTn, paOteuC mpekoBO HanpeXeHne (C MEXOB Ka6eN, CbOTB. MoyI 3a en.Ka6eN).
CneuФчн 3a np6opa yka3aHna 3a 6e3oNaChocT
-ПЕДУПЕХДE-HNE-
He np6nKabaiTe pUcTe cN KbM 30HaTa Ha ZnPckyIaRPhNra TpNOH nZnPckyIaRPhNra DnCK. DpbXte dpYrata cN PbKa Ha DonbIhnteHaT aDpbKka Nn BbPxy Kopnyca Ha DnBraTeJ. Korato zPckyIaRPhNra TpNOH ce DbpXn CDbete PbCe, ZnPckyIaRPhNra DnCK He MoKe da rHapAnu.
He xbaaaiTe OTdOly o6pa6oTBaHnI DeTaJI. IpeDna3nteTnI He moKJe Da Bn 3aunTI nOT cnpKyJyRnHnI DnCK NOD o6pa6oTBaHnI DeTaJI.
PerylnpaIte Dbl60uHaTa Ha p3aHe B cbOTBcTbne C De6eHnHa Ta 6pa6oTBaHn DaTeaII. PoD o6pa6oTBaHn Da taII Tp6Ba Da ce Noka3Ba No-MaJIko OT eHa cHa BcOuHa Ha 3b6nte.
Hnkora He npbKTe o6pa6oTBaHnI DeTaN B pBue HnN BbPxy Kpaka cn. 3akpenete o6pa6oTBaHnI DeTaN BbPxy Cta6nHa onopa. BaxHo e o6pa6oTBaHnI T DeTaN da ce 3akpeni dope, 3a da ce cBeDe Do MINHMym OnaCHOCTTa OT KOHTAKTC TaNoTO, 3akInHBaHe Ha UnpKyJrpnHnI DnCK HnN 3aY6a Ha KOHTPOJ.
Дрькte Инстумента само 3а Излпаринite NOBbpxHOCHT Na ДрьЖКATA, KORATo N3BbPbBaTe pa6OTn, пг КОТTO рж龟NTИнстум ent MOKE DA BJIe3E B KOHTaKT CbC cKpNTu Ka6eNl IIN CBc CO6CTBeHnA Ka6eJHa Истум enta.
138Блгарск eзн
Yka3aHnna 3a 6e3oNaCHOCT
KoHTaKTbTc npOBODHnK nOd HanpeXeHne nOdaBa HAnpeXeHneTo KbM MetaJInte Yactn Ha eJekTPOINHCTpymEHTa N BODI DO yJapOT eJekTpUyeCKN TOK.
Pn HaIbXHo p3aHe BnHaHn 3nOJI3BaTe OrpaHnHTe Nn npABoJInHeNo BoJe Hp6a. TOba nOIO6pRa TOUHOCTTa Ha p3aHe n HamajraBa Bb3MOxHOCTTa 3a 3akJIINHbaHe Ha cIpKyIpaHn DaCK.
BnHaH n3NoJ3BaIte ZnPkQyJpHn DnCKObe c npaBnHn pa3Mep n C NOxOJaU OTBOp 3a 3aKpeNbaHe (HaPmEp C fOpMaTa Ha 3Be3da nn KpbTbn). LnpkQyJpHn DnCKObe, KOtTo He nacBat HA MOtaxKHnTe Yactn Ha TpNoHa, Ce DBnXkat ekCcEHTpuHNO I BODT DO 3aRy6a Ha KOHTpoJa.
Hnkora He n3noJ3BaIte NOBpeDeHn HnHnnpaBnHn noDNoXnHn wa6n nn 6oTObe Ha cIpKyIpyHn dNcK. POnIOxHNte wa6n u6oTObe Ha zIpKyIpyHn dNcK ca KOHCTpyuPaHn CneuaJIHO 3a Ba7nY trpoH, 3a noCTrHaHe Ha ONTMaJIHn pa6OTHn xapakTepcntuKn n 6e3oNa-HocT np na60ta.
BG
PpnuHn n 36yBaHe Ha o6paTeH yap:
ObpaTnIyIap e HeoayKaBaHa peakun BcIeIcTBHe Ha 3aueIbAHe, 3akInHbAne IIN JIoIO NOpRaBHaBe Ha cIpyHnI DaCK, KOETo BOIN DO HeKoHTpOINpyEMO DnIXKeHne HA TPOHO, HABhN OT O6paobTaBHaJeTaII, IO Nocoka Ha onepaTopa.
Korato znpkyprnnt dnck bde 6loknpaH B 3aueeneHO nnn 3aklnneHo nnoJKeHne B npope3a, cnilata Ha dBiratela N3XBpIe eNektpoHHCTpyMeHTa o6pAtho KbM onepaTopa.
AkoUncpkyIpyHnT DnCK Ce n3KpNBn B npope3a nnE IIOo IOpaBHeN, 3bnte Ha 3aHnna PbHa U npKpyIpyHn Da NCK Moat Da 3aueyT B rOpHa T NOBbpxHOCT Ha ObaOTBAHn DeTaJ, pni KOeTO UnpKpyIpyHnT DnCK Da n3ne3e OT npope3a n TpNOhT Da OTCKOu O6paTHo No Nocoka Ha ONepaTopa.
O6paTHnT yIap e pe3yIaT oT HENpaBnHa pa60Ta IIN DeΦeKTH B TpNoHa. CbIurT MoKe da ce n36erHe Upe3 OINcaHITe NO-dOly noDxOJaun PpeNa3Hm MepKn.
Дрьжт TrpoNoHa 3dpaBO cДBeTe pBuce nВ TaKOBa NpOJKeHne, npN KoETo Da MoXeTe da OBlaJeete CnInTe Ha O6paTHra yap.
1400HKS-BG/1106
BnHa n DpBxTe cTpaHnUHO uKpyIaRpn HnDcK, Cbunr HNKora He Tpr6Ba da 6bde B eHa nnHnC BaWeTo TAno. Pnp obaTeH yap TpnoHbT MoKe Da OTCKOu Ha3aI, HO OepaTopbT MoKe Da OBnaJeE cnInTe Ha oBpaTHN yap Upe3 noXoJusn ppeNa3Hm MepKn.
Ako zpknypHnT nck 6bde 3aklnHeH nn npkepaTne pa6oTa, n3knHoyete TpnoHa n 3aDpbXte HenoDbHXHO o6pa-60TBaHnJe TaII, DOKato zpkyIpyHnT nck cnpe HanbNo. Hnkora He ce onntBaHTe da n3BaAnTe TpnoHa ot o6pa60BaHnJe DetaiN nn Da ro TerInTe Ha3aD, DOKATO CE DBNXn zpkyIpyHnT nck, NOHEKe TOBa MoKe Da DOBeE do o6paTeH yap. YCTAHOBETe n OTcPaHete npuHnHata 3a 3aklnHBaHeto Ha zpkyIpyHnR nick.
Korato Jenaete da cTaptnpate OTHOBo TpnoH, KOTo e HABJ3bN B o6pa6oTBaHnA DetaiN, CEHTPnpaIte CnPKyIpyHnA DnCK B npope3a n npOBepTe Daan 3b6n-Te He ca 3aueHnB O6pa6oTBaHnA DetaiN. Ako CnPKyIpyHnT DnCK e 3akInHeN, Toi MoKe da n3ne3e OT o6pa6oTBaHnA DetaiN IIN Da npEdu3BnKa o6paTeH ydap npn CnEDbauO nyckaHa He TpnoHa.
Подирaite rolemite nnou,3a da n36erhepe pcka ot obpateh yap npn 3aklnHBae Ha cnpkyprnnaDcK. Tone MITE nIOUH MORAT da ce orbhat OT CO6CTBeHOTO cn terIIO. IIOUHTe Tp6Ba da 6bDat noIDPepHnHa DBeTe cTpaHn,6bn3o Do npope3a, kAKTO HA KpanuaTa.
He n3non3BaIte 3aTbIeHn IIN NOBpeHn CzRPKUJIaRPH DnCKOBe. LpKpJIaRPhn DnCKOBe Cbc 3aTbIeHn IIN HEnpaBUNHO HacOueHn 3b6n Cb3DaBaT TeCen npope3, BOeUdo yBeJIuYeHO TpIeHe, 3aKJIuHBAHe Ha zPcKpJIaRPhN DaCK n ObpaTeH yDap.
Ipei np3ahe 3aterhe TnKCaTOpTe 3a Ib6oynHa n bHn Ha p3aHe. Korato perynilpoBknte ce npomeHr NO Bpeme Ha np3aHe, cnpkyjarpnHr DnCK MOKe Da 3akJIn Hn I da ce noJyuOn o6paTeH yap.


Yka3aHn 3a6e3oNaCHOCT
BbIrapckn e3nk 139
Бьдete ocobeho BHMataeln npi „p3aHe B IbIbOuHnHa Ha cbIeCTByBaun CTeHn IIIN Dpyr 30HN 6e3 BNDIMoCT. Ppi p3aHTo HABIn3aUmT CIPKynpeH INCKMOKe Da 6IokpaB CkPITN OBeKTn n da ceNoJyN o6paTeH ydap.
IpeDn BcAko N3NoJ3BaHe npOBepaBaiTe DaJI NdoHNrT npEJa3ntEn Ce 3aTBapr HopMaIIHO. He N3NoJ3BaIe TpnoHa, KORA To DOnHnT npEJa3ntEn He Ce DBNXn CBO6OJHO H He Ce 3aTBapr BeHara. Hnkora He 3actOpraBaIte N He pKcnpaIte DOHNrnpEJa3ntEN B OTBopeHo nOLOXKeHne.AKO TpNObT NaIHe cIyauHn Ha NOda, DoHNrT npEJa3ntEn Moke da Ce n3KpUbN. OTBopEt npEJa3ntEn C NoCTa 3a N3TeJlAnHe N CE yBepTe, Ye cbuYrT ce DBrNXn CBO6OJHO IN PNI BCNUKn bTIn N Dbl- 6oUHHn Ha Pja3aHe He DOKOCBA HINTO UINPKyJIAPHNA DNCK, HINTO dpyrN qactn.
IpoBepete DeiCTBHeTo Ha npyHnHaTa Ha doJIHn IpeJNa3nteK. Korato nMa npo6IeM c npedna3nteN npyHnHaT, npEa Da npic7bnte KbM paOta, daTe TpHOHa 3a peMOHT. IobpeHn uactn, lenKABn OTlaRaHn INJn OCTaTbUcN OT p3aHTo MORat Da 3aTOPMo3rDIOHN npedna3nteJ.
OTbaprTe DoJHnI npEdna3nteHa pka camo npocoben H BINOBE p3aHe, KaTo ,p3aHe B Dbl6OuHa N POD bTbJ". OTbopete DoJHnI npEdna3nte C loCTa 3a n3TeTJIaHE n ro OCTabete CBO6oDeH, OOM cIpKyJIpaHnT dNcK e Bpr3aJI B o6pa6oTBaHnI Detai. Pnp BCNUdpyrnpexeuOn onepaun DoJHnI npedna3nte Tp8Ba Da deiCTBa ABTOMATNo.
He noctabraye trpoHa Bbpxy pa6oThata Maca nn Ha noda, 63doHnT npedna-3nten da e nokpnil znpkyjprn Hnck. HeaunTeHnT, DnKcei ce no nhepuiu ZnPKJpyen DNCK ue npemectn TPOHa BVnOcKa, obaatha Ha Ta3n Ha p3aHTo nZe peXe BCNUKO Ha nbTa cn. ObbphTe BnImaHne Ha BpeMeTO 3a DnHexeHne NO nHePzna Ha TPOHa.
H3noJ3BaIte npOxOJa3a npKyIpaHn HICK HOX IPOTNB 3aklnHBaHeHOxbT npoTINB 3aknnHbAe Tp6Ba Da 6bJe no-De6en OT pIOuata, HO NO-TbHbK OT uipnHaTa Ha 3b6nte Ha npKpyIpaHn DnCK.
PerynpaTe HOxApOTnB 3aKlnHbaHe, KaKTo e OnncAo B pKoBOdCTBOTO 3a ekCnloatauHa. HenpabInHa De6eInHa, N03uNnI Nocoka Morat Da 6bDat npUnHa HOXbT IpOTnB 3aKlnHbaHe da He MoKe da NOMOrHe 3a N36rBaHe Ha o6paTeH yap.
BnHaHn n3NoJ3BaIte HOx npOTNB 3aKlnHBaHe, c N3KlnOueHne Ha Cnyuay npn p3aHe B DbIb6OuHa. CneD p3aHe B Dbl6OuHa, MOHTnpAte OTHOB HOxa npOTNB 3aKlnHBaHe. HoxbT npOTNB 3aKlnHBaHe npeu npn p3aHe B Dbl6OuHa n MoKe da npedeN3Bnka o6paTeH ydap.
3a Da DeiCTBa HOXbT IpOToB 3aKJInHBAHe, ToI Tp8Ba Da ce HAMnpa B npope3a. Pn pr3aHe Ha Kbco pa3cToRnHe HOxBT npoTINB 3aKJInHBAHe e HeepeKtUBeH 3a IpedeTbPaTaBaHe Ha o6paTeH yIap.
He n3noJI3BaIte C TpNoHa OrBHaT Hox npOTnB 3aKInHbAhe. Iopn MaIko HapyuHne MoKe Da IOBeDe Io 3a6aBHe Ha 3aTba-paHTo Ha npEpa3nteJra.
He nocTabaTe TpnoHa BepTnKaIHo Ha MpeXOBna Ka6eI. ITO3n HauHn Ka6eIbT MOKe Da ce yBpeiN.
Octabaun pncKOBe: Makap Ye B pbKOBOcTBaTa 3a ekCnloaTaun Ha haUnite eJekTPOINHCTpyMeHTn ca NocOeyn NpDpo6Hy yka3aHnra 3a6e3oNaCh a paBota c eJekTPOINHCTpyMeHTnTe, npn paBota C BCEKn eJekTPOINHCTpyMeHTmA mI dpyr n pncKOBe, KOInTo He ca N3KJIOnueHn, DOpn npn HauNueTo Ha 3aUnTHn PnscNOC6JIeHn. Iopadn Ta3n npuHa, paBote TE BInHar n C Oco6BeHa npednaJIbOCT c eJekTPOINHCTpyMeHTa!
140 BbIrapckn e3nk
OncanheHaype
3. Onncanne Ha ypeda

Ipei nyskahe B ecknnoataun npouetete BCuynyka3aH3a 6e3o naCHOCT HNCHpykun.
Hecna3BaHeTo Ha yka3aHnTa 3a 6e3oNaChOCT n HNCTpyKuInTe MoRat Da npEdn3BnKAT TOKOB yApd, noKap n/nn TeKKn HapaHbAHH.
MOnla,OTBopeTe CtpaHnUaTa C n3O6paXeHNHeTo Ha ypeDa n I OCTaBeTe OTBopeHa,IOKaTO YeTeTe pIbKOBOdCTBOTO 3a EKcNlloAtaun.
EnementnHa ypeda
1 KlnuB BkJ./U3Kn. c 6IoknupOBka npOTNB BKJIIOUcbAHe
2 BytoN 3a De6JokupaHe Ha KInOua
3 OonbJHnTeHa pBkoXBaTka
4 BnHT cbc 3Be3do06pa3Ha dpbXka 3a HnpabJyBaUata nlaHka
5 Haprabnaa nlaHa
6 PbkoxBaTka 3a 3atrahe (HaCTpoiKa Ha bIbaHa p3aHe)
7 PbkoxBaTka 3a 3atrahe (HaCTpoiKa Ha nbIbOuHnata Ha p3aHe)
8 CkaJna 3a HacTpoJa Ha NbIbOuHHaTa Ha pR3aHe
9 MpeKOB ka6eI c nateHToBaH 6bp3 CbeDInHtTeI
10БлokирацеlemeHTaMoунaHa mpexobnKa6eI
11 Ⅲapnnpen npedna3nteI
12 Hox npOTnB 3aKJIINHbaHe
13 JIeCTOrpamEn KlnHou
14ПлOTHaТрноHA
15 N3xoJd 3a TpuuTe (Tp6a 3a N3cMyKBaHe)
16 BoNT C BbTpeSeH IeCTOrpam 3a HoXa npOTnB 3aKnHBaHe
17 AanTepe3a Hoxa npOTnB 3akInHbaHe
18 Li npkyjpeH nck
19 BytoH 3a 3akHouBaHe Ha 7nHHdela
20 ΦπaHeu
21 甲6a
22 PnTncKaTeJHa 7aIb6a
23 BoNT cunHnpHa rna
1400HKS-BG / 1106
24 Poka3aJIeU 3a De6eJIInHaTa Ha pR3aHe
25 Bodeua shHa
26 CbeHnHTeH eJemEnT*
27 BnHToBa cTgra
28 Aaantep 3a BOeeta Ta HnHa*
* Poka3aHHTe nIOnscaHHTe npHaJdJIeXHoCTn He ca BKnIOUeHNb CTAHApTnIb OXBbAT Ha DoCTaBkata. IOpO6HcTn 3a npHaJdJIeXHoCTnTe MOKeTe Da HamePte B HaWata npOrpama 3a npHaJdJIeXHoCTn.
06xbaT Ha DoCTaBkata
BuxTe onaKobkata
№3noJ3BaHe no npedHa3NaueHne
TpnoHbTe yHnBepcaJIeH mOKe da ce n3NoJ3Ba 3a pR3aHe Ha MEK N TBbpD IbPBeH MaTepnaI, PIOCKoCTn OT dPbBeCHn YacTnIu, UneptTnIaT, PIIactMaCn, MaTepnaIc n PokpItne ot Resopal.
He pa3peSeHo p3aHe Ha cepHn MeTaJI.
N3nCKBaHnKbM nOTpe6nteJnte
YpeIbT MoKe Da Ce OcClykBa, NODlbPka I pEmoHTnpa Camo OT OToPi3npaH, OByeH nepCoHaJ. To3n nepcoHaJ Tp8Ba Da 6bJe 6OyuE cNeuHaHO 3a OnaChocHTte npi pa6Ota C To3n ypeJ.
TexHnueckn daHHN
Lupknyapen TpnoH 1400 HKS
HOMnHaJIHo
HansekeHne
220-230 V~
50/60 Hz

Bxodya MoHocT

Отдана на:
MOUHOCT
1400W
16A

Mek cTapT
815W


Onncnne Ha ypea
BbIrpacckn e3nk 141

ObopoTnHa npa3eH xoD0
4700 o6/MnH-1

Oboportn npn HatoBapBahe1
3640 o6/MnH-1

PraheNoIHaKIOH C Bb3MOXHOCT 3a HACTPOIKA DO
66 mm
43 mm
45^

LpKyIpaen DnCK
190 mm

OTBOP
20 mm

UinpuHa Ha 3b6nte
2,6 mm
Pa3mep Ha IIIOta Ha TpnoHa
335 × 162 mm

Terno

Baunr eNeKtpOnHCTpyMeHT eN30npana DBOHOb CbIaCHO EN60745; npaTn Ta3n npuHa He e HeoXoDm 3aemTeI.
To3n INHCTpyMeHT He npEduN3BVKBa BpeHN paIINO- n TeJeBUN3IOHHn CmUeHncaTbIaCHO EN 55014-1 n e yctOuHn Ha cmUeHncaBraNaCHO EN 55014-2.
HnΦopMaun3a Wyma Nb6paunTe
CToHocTn Ha Wyma
A- npTeerIeHaTa CToHocT Ha HnBTo Ha 7yMa e n3uNCHeHa CbIacHo EN 60745.
TinuHaT A- npTeerIeHa cToHocT Ha HnBoto Ha Shyma e:
HnBOHa3BykoBToHaJrahe (L_pA)92dB(A)
MONTAX Ha cnpkyIapHnI dNcK
YctaHOBeTe - KaKTo e OOncaHO B,PeryInpAHe Ha Dbl6OuHnHaTa Ha p3aHe"- DBIrGaTeHa TpNoHa Ype3 pa3BnBaHe Ha 3aTgAaTaPbKOxBAtKa (7) B HerOBOTO B3MOXHO HauBnCOKO NOJIOKeHHe (MHN. Dbl6OuHa Ha p3aHe) n 3aTeHHeTe 3IpaBO 3aTgAaTaPbKOxBAtKa (7).
3aBbPteHa3aJ ⅢapHnHnI npedna3nte11) n ro 3aDpBXTe 3dpaBO B kpaHTo noJoo-KeHne.
MoHTnpaIte OTdJIHnTe YAcTn Ha 3aDnKBa- UINsIIINHDeI Ha TpNOHa B CNeHata NocJe- IOBaTeJNHOCT:
1.Фланец (20)
2.LuPkyIpaenDnck (18)
3.Припскателнашайба (22)
4.卍甲6a (21)
5.BoNTcZuINHdpnHa rnaBa c BbTpseH 电ctorpamM8x18(23)
-уКАЗAHNE-
При поставяно на сиркуларни дистубва на ce BHIMABA NOcOKaTa Ha CTpeNKaTa Bbpxy сиркуларни дисда CBbnaDa C NOcOKaTa Ha CTpeNKaTa Bbpxy Koprnyca Ha TpnoHa. KontakTHnTe NOBbpxHOCTn Ha cиркуларни дис, Фlaheca nпгИнSCaшаТашaIBa TprБBa DA bДaTчСТи.
HaTnCHete 6yToHa 3a 3akIIOUBaHe Ha IINH DeJa (19) n ro 3aIpbXte HaTnCHaT, ako e Heo6xOJIMO, BbPTe TcNpKUJIpyHnI dNCK DOKaTO KIIIOUaJIkata 3aueNi.
3aTeHHe 6oJItacuJINHrpUHa rnaBa, CBbTpewe HweCTOrpam (23) npn HaTnCHaT 6yToH hKaIouaKata (19) cweCTOrpamHn KaIOU (13).
Pn CmHaTa Ha ZpKpyIepHnI DaNck DeiCtBaIe TIO CbIuIa HauH, CaMO Ye B o6paTaT a NocIeDoBateJIHOCT. MoHTpuAteZpKpyIepHnI DaNCK, KaKTO e OINcAHO.
BG
MOHTAX Ha HOXA IIPOTNB 3aKIMNHaBeH
-YKA3AHNE-
MOnTaJbT HaTo3nIpeJa3nteN cpeu yOboPaTeH ydape a6c0nHToHO Heo6xOaIM!
Octabete DnirataeHa TpnoHa B CbUTo ONoJoxKeHne (MHN. Dbl6OuHa Ha p3aHe), KOrTO 6eWe Heo6xOdIma 3a MoHTaxaHa HcnpKyIpyHnDnCK.
3aterhe Hoka npotnb 3aklnhbahe (12) Upe3 BNHTa C rnaBa, C BbTpeweH wecToPam (16) n npinoxKeHaT noDIOxHa wa6a. PboHAaJIHO 3aterHeTe Jeko BNHTa C rnaBa, C BbTpeweH wecToPam (16).
YctaHOBeTe Hoxa npOTnB 3aknHbaHe (12) NO TaKbB NaHn, Ye pa3CToRHeTo Do BbPxOBeTe Ha 3b6nte N do NaH-DbJb6okata Toyka
1400HKS-BG / 1106
144 BbIrapckn e3nk
Ekcnnoataua
Ha zicpkkyjraPnna dNcK da 6bJe MaKc.5 mm (BnxTe nIIOCTpaunrTa). HerOBOTO pa3ctoHne do 3b6nte Ha zicpknyjraPnna dNcK He Tpr6Ba da HaNBIuaba 5mm.
3aterheTe 3npaBO (10HM) BnHTa c rnaBa, C bTpeweh wecToPam (16).
Cera trnoht e rotoB 3a pa6ota.
Yka3aHn3a pa6oTa
Prahe Ha dtpbo
IpaBnHnTn36Op Ha nCpKUJrpHnN DaNCK 3aBnCn OT BnDa N KaucEeTO Ha DbPBeHn MaTePnaJ, a Taka CbIoo OT TOBa DaIIN pR3aHeTo Ue CTaBa HaNbXKnO IIN HAnpeHu. Ppi HaNbXKnO pr3aHe HA MaTePnaJ ON eIa Ce OTdJeYr Tbln, CInpaJIoBnDnCTpykKn. IpaXbT OT 6yK N DbE oOC6Ho ONaCeH 3a 3dpABeTo n 3aTOBa Tpr6Ba Da ce paBoTn Camo Cbc CnCTema 3a IN3CMyKBAHe Ha npaxa.
Pra3aHe Ha IJaCTmaca
-YKA3AHNE-
BG
Pn pr3aHe Ha nlaactMaCa, oO6eHo Ha noJINBnHNJXlopNi, ce nOlyuBaT dbln, cnnpaONBnHnCTpyKKn, KOnto Morat Da 6bDat 3apeHn CbcCTaTNUHO eJeKtpnueCTBO. 3aToBa 3anyuTe u3xOda 3a TpNtte (15) u 3aterHete wapHnpHn npednaHTen (11). Hau-dObe paBoTe cbc CNTema 3a u3cMykBaHe Ha npaxa. Hacouete BknUChENr Tpnoh CpeSy o6paBoTBaHn DetaII n 3anOpHeTe da pexKeTe BnImaTeINo. PpoJbLnKeTe da paBoTne 6bp30 and 6e3 npekCbAhe, 3a da He ce 3aDpBCTT 3b6nte Ha znpKyIprHn DaCK.
IpaBnla 3a 6e3oNaChOcT n yka3aHnna, KOnto Tpr6Ba Da cna3BaTe 3aDbJxN-TeJIHo
He Tp6Ba Da ce n3noI3BaT HanykaHn CnpKynpaHn DnCKOBe NIn TaKbA, KOInTo ca npoMeHNn FopMaTa cn. Pa6oTe camo cNo6pnN ocTpN CnpKynpaHn DnCKOBe!
Hikora He n3noBaiTe C To3n Tpnoh cnykJyRn DnCKOBe OTo BucOKoIepuHa 6bP3Opexeua CTomAna/HSS.
He Tp6Ba Da ce 3nON3Ba TcnpKylapHn DnCKOBe, KOnTO He OTROBAPr H NaOCOeHnTe B HAcTOraTO pBkoBOdCTBO 3a EKcnloatau XapaKTepNCtKN.
LIpKyIpyRnHTe DnCKOBe He Tp6Ba Da ce CnnpaT Ype3 CTpaHnueH HaTnck Cnei N3KJIIOUcBAHe Ha 3aDbNkBAHeTO.
IpoBepTe DaII BcUKN DIBNXeUc Ce aactn Ha npEaNa3nteHa cNpKyJnpHnA DnCK FynKcuOHpA 6e3 da 3aJkDaT.
- Ⅲapnnpnnt npedna3nte He tpr6ba da ce 3actonopraBA B OTBopeHO cbctoHne.
Tp6Ba Da ce rapaTnpa 63npo6nemHaTa pa60ta Ha BCNUKn pncnoc6nHn, KOtO nokpmbat cipkyIrpHn dNCK.
IpeiCmHa Ha CnRPkUrpHnA Dnck N npEi BCaKbN cepBn3Hn pa60T n CneDbA da Ce 3BaDi UeNCelbT OT MPekOBOTrHe3Do IIn Da ce OTCTpaHn MoynbT 3a en. Ka6eJ ot dpbXkata.
He Tp86Ba da ce 3n0n3BaT cnpKpyIarpH INCKOBe, YneTo TAnO e C no-TOJMa De6EJIHa nn pa3MaxbT Ha 3b6Bnte e C no-MaJa Ka De6EJIHa OT De6EJIHaTa ha HOxa npotNB 3aklnHBaHe.
HoxbT npOTnB 3aknnHbaHe He Tpr6Ba da ce cBaIa OT nHCTpyMeNTa! ToT pr6Ba da ce n3NON3Ba BnHaC n3KJIIOueHne Ha cIyua npn pR3aHe BdbJb6OuHa.
P3aHTo Tp6Ba Da ce N3BbPwBa npabOJIneHIO n 6e3 HakJaHHe HAcTpaHn, 3a Da He 3aKInHn ZIpyJrpHnT DnCK B O6pa6oTBaHn JTeaJ. Ako BCE nak Ce CTnRHe Do 3aKInHbaHe Ha ZIpyJrpHnD nCK: BeDnHa rN3KIIoHcTe KJIouca!
Hnkora He xBaauaTe OTdony o6pa6oTBaHnI detai! OnachocT OT hapaHbAhe!
PnCmHaTa Ha znpKyIrpHnI DaBaaTe yka3aHnIaT B pkoBOcTBOTa 3eKcnloatau. CbaIYe KIOUa OHTpyMeNTa cIe ynoTppe6a!
Cb6pa3aBaiTe NdaBaHeto (HaTcKa) npn p3aHe C De6eJInHata Ha MaTePnAa. IpeKaleHo 6bp30To NdaBaHe BOn Do npTeTOBapBaHe Ha DnBiratEn,do 6bp3o n3HOcbaHe Ha cIpKpyIaRnI DaCK n HeNCTn pa3pe3n.
Ośpaćbānīr Čeṭaɪŋ TřpáŠBa da ce 3aKpeNba, t.e. 3aTЯRa doŠpe.
Ipei3anOuBaHeHa p3aHeTo CnPKyIpaHnIy TnCK Tp6Ba Da e DoCTnHaJI MaKcImaJIHnTe ObOpOTn Ha npa3eH XoJ.
HnctpymEnTu npHaadJeXHOCTu
BbIrpacn e3nk 145
BaxHo e da ce rapaHTnpa, 3atrauNTe pkoXBATkn 3a Dbl6OUnHa Ha p3aHTo n 3a pr3aHTo nDn HAKNo, Da 6bDat 3aterHatn do6pe.
OśpābóTBAHnIa Tdεtai ItrpáBb Da ce npo-BePRABa 3aЧуЖДn TeJa. He pěxeTe B nIpOHi!
ДрьжтЕ Кабета Настраи OT 30ната на рязаны Тпюна! Виharу пекарbaite Кабета за Тпюна.
13BaXdAte TpnoHa ot 6paobTbHnIe TaII, cAmO KOraTO CInPKyIpyHnIe DnCK e HEnoDvNKeH.
Hikora He 6bpkaTe C npbctn B n3XoJa 3a TpuiTe (OnaCHOCT OHT HapaHBAHe)!
BkHIOUbaHETo N3KJIIOUbaHeTo TpIbBa Da ce H3BbPbBa Ype3 KIIIOHa Na IHCTpyMeHTa N HIKORA Ype3 N3BaxJaHe Ha UeNCeNa OT MpeK BoTO THe3Do NnHa MPekOBna Ka6eN OT DpbXkata Ha TpNOHa!
Hocete npedna3n Ounla! N3non3baTe aHTnΦOnH! Hocete npaxo3aUnTHa MaCa!
ДиамETьрТ HaцрkyярнЯ ДИСК HeТраБ-Вада Ндвишава pa3mepa 190 mm.
Cb6JIIOdaBaIte n3nOJ3BaHETO no npEHa3- NaueHHe Ha TpnoHa: PeKTe DbpBO nNoD6H MATEpnaHcAMo CzPkyIpyHn DnCKOBe. He Tp8Ba Da ce n3nOJ3BaT uNΦObUHN DnCKOBe.
He obpa6oTbaIte MaTepeNaJI, KOINTO cbIbP- xat a36ecT!
MpeKOBnte rHe3da 3a pa6oTa Ha oTKpnto Tpr6Ba da 6bDaT obOpyDbAHn C deΦeKTHOTOKOba 3aunTa (Fl-).
KopnycT He Tp86Ba Da ce npobBa 3a MapKipane Ha TpnoHa. HapuBa Ce 3aunThataH3oJa. N3nO3BaIe CTKePc n HndnCn.
Aburatel
MoHnIy HnBepCaIeH DvIraTeI NMa DoCTaTb-ueH pe3epB OT MoHocT. ToI ce OxJaXaO ot rOJIaM BeHTNJlAToP.
-YKA3AHNE-
Pn npoDbJnxIteHa pa6Ota C roJIMo HatoBapBaHe DBrarTeIaT MoKe Da nperpee!
OCTaBeTe DnBraTeTna pa6oTu Ha npa3eH xoI, 3a da ce oxlaani!
Pa6oTe cAmO cDobpn n octprn uNpKyIapHn dNcKOBe. Taka ue ce npedotbpatn pperpaBaHeTo Ha DnBraTeTl!
5. Иструмени в пионделях-ностун
UpkyIpaHn dNCKOBe
0 190 mm, oTbop 20 mm
TBbρDocnlaBHN, cpa3MeCTeHn 3b6N
ДьрВО И ПОДБИН Н ДьрВО MaTePиАП, cpeДно КаЧecТВО на ряЗанe: бpoи Ha 3b6и-Te 14
ДьрBO,ПОДБИНHaДьрBO MaTePnAINI nПlaCTMaCn,ПОДхОДЯUN3a ПLOUH C NOKpNtIe,YncT OTpE3:бpoиHa 3b6nte48
TpnoHc BOdeua WnHa
C nomoeta Ha BOeeta 5nHa (25) moKeTe da pexkete no npaba JINH.N AIXe3NBHO TO NOKPNTne IpeIOBpTaBA IIb3raHeTo Ha BOeeta 5nHa nIpeDnA3Ba IropHATA NOBbPxHocT Ha o6pa6oTBaHnI DeTaN.IoKpTNeto HA BOeeta 5nHa yIeChra BA IIb3raHeTo Ha TpNoHa.
3a p3ahe noI npab bIbI MoKTe da nocTaBnTe TpnoHa DInpeKTHO Bbpxy BOeUaT a UHa (25). 3aTeHHe BOeUaT a UHa (25) BbpxO6paObTBAHn DaTeaJI C NOxDoJAsu 3aTraA u npCnOco6JeHHa, HAp. BuHTOBa cTra (27) TaKa, Ye TcCHOto pAmo Ha BOeUaT a UHa (25) da Coun KbM ZINPKYJAPHN YDCK.
BodeaTa 1nHa (25) He Tp86Ba Da ce n3daBa HabbH OT cTpaHaTa Ha o6pa6oTBaHna DeTaJI, KOrTO Ce pexe.
3a p3aHe noi NaKIOH c BOeUaTa 5nHa (25) e Heo6xoIIM aAnTepeBt 3a BOeUaTa 5nHa (28). AanTepeBt 3a B0eUaTa 5nHa (28) ce MoHTnpa, KaKTo e NOKa3aHO Ha qnr. 3.
146 BbIrapckn e3nk
IopdpbXka n cepBn3
H3cMyKBaHe Ha npaxa / ctpyXknte
-YKA3AHNE-
TpnohT pa6OTn cmo C pa6oTOcNOcHO yCTpOJCTBO 3a n3CMyKBaHe. YCTpOJCTBOTO 3a n3CMyKBaHe Tpr6Ba Da OTROBapra Ha ,PipaBnIaTa 3a 6e30nacHocT 3a n3CMyKBaHe nCeNapuPahe Ha DpbBecen npax n CTpyKKn" (ZH1/139). YCTpOJCTBOTO 3a n3CMyKBaHe Tpr6Ba Da rapaHTnpa npi Tp6bata 3a n3CMyKBaHe MmHImMaHa CKOpocT Ha Bb3dyxa 20 m/s.
Ppax OT MaTePnAaN KaTO CbDbPkaA ONoBO 608, HAKON BNDOBe DbPBeCnHa, MInHepaN IN MetaIN Morat Da 6bDaT BpeHN 3a 3dpaBTo. Donnp NIN BdNShBaHe Ha npaxa Morat Da npedn3BnKAT aIeprNHy peakun N/nn 3a6oJyBaHnHa dNxATEhne PbTnua Ha Notpe6nte nNn Ha HamnPauN Ce B 6bn3OCT Xopa.
HЯко видove npax, кato npax ot Дьб и 6ук, ce chntat 3a педноctabka 3a 3aboglyahe ot pak, ocobeho B kombina用药doabkn 3a obpaobotka ha Дьрвесинata (xpomat, педпаши срсдства 3a Дьрвесина).
BG
ПО ВьзмохноциЗползайтсистema 3a ИЗСМУКВане на праха.
IorpnkeTe ce 3a Do6pa BeHTnlaucnHa pa6oTHOTMOCTO.
CnazBaIte BaJIuDNHITe BbB BaWata cTpaHa Hapei6n 3a MaTePnaJInte, KOInTo Tpr6Ba Da 6bDaT o6pa6oTeHN.
N3noJ3BaHe KaTo HactOJen UnpKjIpeH TpNoH
3a n3no3BaHe KaTo HactoJeH cIpyJepen TpNo OH Tp6Ba Da IMA n3puH Odo6peHne OT npOn3-BOInTeHa MaCaTa 3a n3no3BaHeTo Ha CbUata C To3n TpNo Ha KRESS.
Cneuajn akcecoapn
He n3noI3BaIte pInHaIeJExHOctn OT TpeTn DocTabuNt, TbKaTO Te He ca n3nITaHn OT KRESS.
YnOTope6aTa mM moKe da 6bDe onaCha.
3a npedotbpaTbaHe Ha hapaHbAHnI n nobpeIu 3nOJI3BaIte caMo npenOpbUaHn ot KRESS npHaJdJIeXHoCTn.
PpeBaHe Ha ypeKaTo otnaBk

PeuKnpaHe Ha cypOBHn BMeCTO 13XbPnIe KaTO OTNaTbK. INCTpyMeHTbT, pInHaJnEkhHOCTNte N ONAKObkata Tp6Ba Da ce npdaBat 3a 6e3BpeNo 3a OKoHNatha CpeDa peuKnnpaHe.
Пл actmacobite DeaHn, KOnTO MORAT da ce peunKInpat, ca ob03haueHN NO CbOTBeTHnaHaHH.

Cama 3a Dpbxabn ot EC.
He n3xBbpynTe eNeKtpOypeDa B KOHTeHepnTe 3a DOMaKNHcN OTnaDbU.
CbIpaNo DnpeKTHBa 2002/96/EO 3a cTapnte eJekTpo- n eJekTPOHH ypeNi npNJraHTo Ha NaIOHaJIHOTo npaBO eJekTPOHNCTpyMeHTnte, KOITO ca 3a nXbPnaHe, Tp8Ba da ce cb6npat OTJeHNO n Da ce npedabat 3a 6e3BpeHNo 3a OKOIHaTa CpeDa peuKnnpaHe.
Tapaanua
- To3n eJNeKtPOnHCTpyMeHT e N3NTaH BHIMaTeJIHO, TECTBaH N NOJIOXKeH Ha CTPor KOHTPOI 3a KaueCTBO.
- Hne rapaHTnpame 6e3nlaTHoTO OCTpaHraBaHe Ha deFeKTn NO eNEKTPoINHCTpymEnTa, KOntO CE NOBBAvBt B pAMKITE Ha 24 Meeca OT DaTata HA 3aKyuYBaHe OT KpaHInNOTpe6bNTen n Ca PneIe3BmKAni OH deFeKT Ha MaTePnaJa INn Ha PPOIN3BODCTBOTO. 3a HkON DbpXaBN Ca BAINdN INHNIBNuAHN CneUaIIHN PrabnA No OTHoEHe Ha rapaHcOnOHnTe YcNoBnA. 3ana3Bame CN npABTo DA peMOHTnpame DeFeKTpApAa Nactn INn Da Tn 3aMeHMaC HOBN. IIOmeHnTE qACTn CTabat Naa Co6CTBeHOCT.
- Henpabunna ynoTpeba nIn TpeTupane, KaKTo n OTbaparHe na UpeDa ot CepBn3n, KOInTo He ca OToPn3npaHn 3a TOBa, BOyT Do OToPnadaHe na RapauncaTn. Ot rapauncaTa ce n3KnIOUcbat: MexaHUnn NobpeDn BCNeDCTBne NaJaHe n Dp.. NOBpeDn OT pOnOHKBaHe Ha BOda INn dpyrN TeuHOCTn, HApra3An n NobpeDeH Ka6en, NOBpeDn Ha DBIrataJIy MEXaHUnH NOBpeDn BCNeDCTBne Ha HenpabunnHO npTeOBapBaHe, IN3HOCBaUeN Ce Yactn, HApN. BByIeHOBn YeTKn, NaTPoHNK, KInOu 3a NaTPoHNHa, IN3HOCBaHe Ha ShINHdeLa, DBIrataEn, MPeKOB Ka6en, AkymyLatOpn, cIpKyuJrpHn DInCKObE, IInNoΦOBbUH NdCKObE, TOPo 3a npax, Oobni npinaadJeXHoCTn (CBpeDna, DIneta n Dp.). POnpo6HoCTNa 3a IN3CBAUnteCe aCttn Ha INhCTpymentHa MoKeTe Da hAmepnte Ha http://
spareparts.kress-elektrik.de Или в нашке сервизни центrogate.
4. Пгетенци 3а rapанци ce ризнават само пи Изабвно Сьобшаве на Ддфektтite (сью и пи Транслорту nobpeи). Ппи Изпьнени на rapанционнITE услуги He ce ybeлчава rapанционняrt cpoK.
5. Ako Tpr6Ba Da n3noJ3BaTe rapaHnIyTa, MoJr n3npaTeHa Hac nn Ha OTOpN3IpaH cepBn3 opnHnHaJIHATA KBNTaHcN3a 3aKynyBaHe Ha ypeDa n camra ypeI.
6. C noetata OT hac rapaunca ce n3kIkyBaT BCNUKn DpyrnpTeHcnn Ha KnyBaay -ocobeno npabOTo 3a pa3BaJnHe Ha DoROBopa, HamaJIbaHe nn PpeJaBbAbe Ha npTeHcnn 3a MaTePnaJHn 5eTn.
7. KnyBaCyT mHa npaBO Ha n3bOp 3a HamaJBAHe (HamaJBAHe Ha npoDaXhata ueHa) nIi pa3BaJIHe Ha DOrOBopa, B Cnyaay Ye Hne He ycneem Da OTcPaHIM eBentyaJIHO NpOBrnJIra CE DeΦeKT B pAMKITe Ha pa3ymen cPOK.
8. He ce n3kIIOUbaT npTeHcun 3a Bb3CTaHOBBAHe Ha 3ary6n cbrnaCHO 463,480 an.2,635 BGB BCneCTBNE Ha IINCA Ha rapaHTnpaHH xapaKTePncTkn.
9. Hapei6bnte no toka 7 n 8 ca BaIuIIN cAmo 3a TepuTOpnTa Ha ΦepepaHa Penu6JIka FepMaHIny.
148 Pycckn
Cnmbolbni cokpaueHna
1. Cnmbolbl cokpaueHna
NcnoB3yembIe B HactoIeM pyKOBOCTBe n, npH Heo6xOIMOCtN, HaHeceHHbIe Ha 3NeKtPOOHCTpymEt CmBOLbl IpeHa3HaueHbI DnI npBLeueHnBaUero BHImAHnK Bo3MOXhblm OnaCHOCTm npu paBoTe C daHbIM 3NeKtPOINHCtpymEtOM. Bbl DoJHXbl NOHMAtb 3NaueHne TAKNX CmBOJIOB/Yka3aHn N DeiCTBOBaT COOTBETCTBeHNO, YTObI paBoTaTb 6OJee 3ΦΦeKTHBHO n 6e3OnaCHO.
Ppeynpexkndnna 063oNaChocTn, yka3aHnna n CmboJIbI He YBJIaOTc3aMeHOJ PpeDnncAHhbIM Mepam No PpeIoTbpaueHnIO HeCuaCThIx CnyuapeB.
CnMBOJIbl

Yka3aHne, IMeIOUee BaxKHOe 3NaYe Hne dJa 6e3ONaChocTn. Bcerda cIeDyIte DaHHOMy yKa3aHNo. BIpOTINBOM Cnyae MOxHO NOnyUHTb TKeJIbIe TpaBMbl.

PpeDynpexkdeHne 6 onaChom 3neK- TpuueckOM HnpaJKeHN.

PpeDynpexdEne o ropaeNoBepx-HoCTn.

DepkaTb 6pa6aTbIBaemyo Detanb B pyke HnHaHorOcTporo3anpeaaetc.3apnkCnpyTe 6pa6aTbIBaemyo Detanb Ha npOuHOH NOCTaBKe. 3akpenIyTB
obpa6aTbIbAeMyIO DeTaIb OueHb BaXHo, YTO6bl MNHMIM3NpOBaTb ONaCHOCTb KOHTaKTA C TeJOM, 3aKnHnHBHe NlNbHO DnCKa Nn yTpAty KOHTpoJI.
Hnctpykun no texhne 6e3onacchoctn
Pycckn 149
CTaBtTe HNCTpymeHT ToJIbKO Ha N3OJINPOBaHNHbIe KOHTAChTHe IIOBepXHOCTn, ECJIn IPOBOdAITcpa60tbl, B XoJe KOTOpbIX pexyuniHNCTpymeHT MoKeT 3aDeTb CkPbITYo 3JeKTpO npOBODky HIN CBOI Ka6eJIb CeTEBOrO NItaHn. KOHTAcrC HaxOJaUIMcR IOd HaprrjKeHEmIPOBOOM IOnACT HaprrjKeHne Ha MetaJIInueCeKne KOMNoHEHTbl INCTpymeHTa I npuBeTe KnopaxKeHIO 3JeKTPnuECKIM TOKOM.
Pn BbIOnHeHn npOdoJIbHbIX npoNIOB Bcerda nCnoJIb3yIte ynop NIN nprMyo HanpaBnaHOyDJa KaTOB. 3To ynyUaET TOHOCt b NIIeHn I CHNXaET BO3MOXHOCTb 3akNIHNBaHn NIIbHOrO dNcKa.
Bcerda nCnoJIb3yIte NIIbHbIe DnCKn noDxOJa-
Iero pa3Mepa I C COOTBeTCTByIOUIM NOCAIOuHbIM OTBepCTHEM (HaNPmEp, 3Be3DOo6pa3HbIMnn KpyTlbIM).PiNbHbIe DnCKn, He NoDxOJaUneK MOHTaXHbIM KOMNoHEHTam NIIbI, BpaUaHOtCHePOBHO IN BeDyT K NOTEpe KOHTpOJIA.
NcnoIb3OBAbT NOBpeJdeHHbIe NIO6 HeNoI-XoJaUHne NOKnaOuHbIe Wau6bl IIN BnHTbl DnIINbHbIX DNCKOB. POnknaOuHbIe Wau6bl ININ BnHTbl DnIINbHbIX DNCKOB BInONHeHbI CNEuaJIbHO DnI BAWeI NIIbl, DnI ee ONImaJIb-HOH MoUHOCTN n 3KcnnyatauOHHO Be3onacHOCTN.
PnunHbI n npedotBpaueHne OTaun:
- OToBHe3aHnHaepeAKnIy INHCTpyMeHTaHa 3aCenIeHne,3aKInHbAHne IINHe npABNbHOe paCNOJoxHne NlIbHOrO DnCKa,KOTopar BeDeT K TOMy,TO HeKoHTPOIpnyemar NIIa npIOdHMaeTcN BvICKaKNBaet n3 ObpaTaIBaEMo DetaJINo HAnpabLeHnIO KnUcy,paBoTaIOUeMy CHei.
- Ecπn πηMbHbI DnCK BCNeDCTBne yMeNbHaTOoeroC8 3a3Opa IJN PIIeHnI 3aZeIJIeTcN IIIN 3akInHbAet, OH 6bOkpyetc. Ppi ΘOM yCNJINE OT DBnIateJIa OTbPaCbIbAET INHCTpymeHT B HApabJeHn JnCa, pa60TaHOUeO C HIM.
- Ecnn nIbHbI dNcB BpaaetcB npOnnne HnH HeBepHO paonoloxeH, HxKHe 3y6b8 nnblHoro DNCKa MOYT 3aUeMNTbcR B 3aHem KaHTe Ha NOBepXHOCTNs Oba6aTaIBaEOM DeTaN, 3a Cuet Yero NNbHbI DnCK BblCKaUNBaET N3 3aOpa IJnJIeHnI INla OTbPaCbIBaETcB HAnpAbJeHNn JInca, paoTaoUeO c Hei.
OTdau-cIeDCTBHe HnpeBaUNbHOH NIN OwN6oOH pa6Otb C nIOH. 36ExaTb OTdauMoxHo, CO6JIHOda COOTBeTCTByIOUne MebpI ppeOCTOPOXHOCTN, KOToPbIE npNBedeHbI HNXe.
PpoHou ydepxnBaIte niny dBym pykamn uYCTAHOBInTe pyKn B NOIOKeHne, B KOtOpom Bbl cMOXeTe cpearnpoBaTb Ha otdauy. Bcerda cToTe c6Oky ot nIbHo ro dNcKa. HaxoINTbcra Ha odHoi IINHc CnnhBIM dNcKOM cTporo 3anpeaetc. Pn otdaue nna otckaknBaet hazd. Tem He MeHee, pa60taUoNi C nNoi moKet cnpaBntbcrC ycNJinem npn OTdaye, co6HIO da COOTBeTCTBYUoNe MEPBI ppeoctopoxKHOCTn.
Ecnn nIbHbI DNCK 3aknHnIO nn pa60Ta npepBaHa, BblKnHouNte nny H He TporaTe o6pa6aTbIBaEMy OetA,b, Noka NNbHbI DNCK ONHOCTbO He OCTaHOBTcra. BblHmAtb Nny n3 o6pa6aTbIBaem OetAANI NIN TAYMb ee Ha3ad Do NOHN OHAOBKN NIIbHORO DnCKa cTporo 3anpeaaetc. B npOTNBOM Cnyue Bo3MOxHa OTdau. OnpeDenITE u yctpaHNTe npuHy 3aknHnBaHnI NJIbHOrO DnCKa.
Ecnn Tpe6yeB KKnHouNtB Nnny C nNCKOM, 3aCtprBwIMB o6pa6aTbIBaEMoN DeTaJI, OTcHTPnpuyTe NnIbHbI DnCK B 3a3Ope dJa NnJenHn I npOBepbTe, YTObbl 3y6bA Nnbl He 6bln 3auenHeB O6pa6aTbIBaEMoN DeTaJI. Ecnn NnIbHbI DnCK 3aeJaET, OH npN NOBtOpHOM BKNIOUeHm NnIbMoKET BbICKOHTB n3 O6pa6aTbIBaEMoN DeTaJI NnIc STaTB npuHNOOTdaHn.
Bo n36eXaHHe OTdauH npu 3aklnHbAHn nnIbHoro DnCKa, HapnpMep, KpyNbIe paCnniNbAembIe PInTbI CneDyET KpeNTb. KpyNbIe pacniiNbAembIe PInTbIMOryT npOrn6aTbcra NOD CBOIM CO6CTBeHNbIM BECOM. PInTbI CneDyET KpeNTb C o6eNX CTOPOH, a TAKKe OKoJIo 3a30pa Idrn PInJIeHnI Ha KaHTax.
150 Pycckn
HnctpykunnoTexnke6e0nacchoctn
HcnoJb3ObaT b TynbIe HnIOBpeKdEHNbIe NnIbHbIe DnCKN 3aIpeaetc. HbIE DNCKN C TynblIMN IINI NOrHyTbIMN 3y6bAmN B y3Kom 3aOpe dJa IINJeHna DaHT NOBbIeHHoe TpeHne, BeDyT K 3aklnHbAHNIO NIIbHOrO DnCKa NOTaue.
Ipeed hauanom nHEny Tyro 3aTnHte perynAToPbI rHyBnHbI uYrna npOnnla. Ecnn BO Bpemr nnEnn HactpoKn n3MeHnTc, 3TO MOKeT npInBeCTN K 3aKJIINHBaHIO nnlbHO rDnCKa N K OTDaue INHCTpyMeHTa.
Будte ocobenho octopoxhbl npn BbINONHeHn NORpyKbIX nPONJIOB B CTeHax II IN BdpYnx Objactx, KOtOpbIe He IpocMaTpnaBaOTc. NOrpyKaembl BMATEpnaI PInbHbI dNCK MOKeT HATKHytbcra Ha CKpbITbe IpenrTCTBnA, B pe3yltbTaTe Yero MOKeT NocJeDoBaTb OTdaa.
Ipeed kaxdbim BkIIOueHem npoBepaTe, yTO6bI HNXHn 3aunTHbI KOxuy 6bl npabNtBHO 3akpbl. IcNoIb3ObaTb Nlny 3anpeuaeTc, ecn HxHn 3aunTHbI KOxuy HE DBuRaTc CBO6OHDn NIn ecn He 3akpblBaetc cpa3y. He 3axImaTe NIn npNBraIBaHTe HxHn 3auNTbI KOxuy B OTKpbITOM NIOJoxHn. Ecn NIIa clyaaiHo ynaTe Ha 3emHn HxHn 3aunTHbI KOxuy MOKeT nOrHyTcB. OTKpoTe 3aunTHbI KOxuy pni NOMOUI pbUcara N ybeINTEcb, YTO OH CBO6OHD bUnrAeTc, Ha BCex yrrax NIIeHnHa Na IIOboi rIy6He NIIeHn He Kacaetc Dpynx DeTaJIe NIIbl.
IpoBepbTe NcnpaBHOCT npyKnHbI dIJI HnXhReo 3aunTHoro KOxuyxa. NIny nepeI NCNoJIb3OBAHNem CJeDyeET OTpeMOHTnpoBaTb, eCNI HnXhN 3aunTHbI KOxuy INpYxHa HeNCnPabHbI. IOpBXKeHHbIE KOMnoHEtbl, JInkne OTIOJKeHnI NIn CKONJIeHnI ONINOK 3aTpUdHЯIOT paBoTy HnXhReo 3aunTHoro KOxuyxa.
OTkpBbAitHe HxHn 3aunTHbI KOxyx pyko ToIbKO npn BbInOnHeHH ocO6bIX npoNIOB, HanpIMep, npn NorpyKbIX npoNIAx nnn npn BbINOnHeHH yrIOBbIX npoNIOB. OTKpoTe HxHn 3aunTbIK KOxyx npn NOMOu pblHaara n OTnyCTnteero, KAKToIbKO NIIbHbI INCK norpy3ntcB o6pa6aTbIBaEmyIO detalb.
При ВылОнHeHи BCex ДугИХ npОпИОВ HIXHи 3aUHTbI KOKyXdoJIKeH pa6OtaTb aBTOMaTnueCKN.
He KnaDnte Nnly Ha Bepctak NnHa nOJ, He 3aKpbIB HnXKnHn 3aUHTbI KoKyx NnIbHOro DnCKa. He3aKpblTb I nIbHbI nnck, BpaAaOuNcIcNo INhePcN, DBnraET NnLy B HnPaBLeHIn, ObpaTHOM nIeHnIO, INnnIT BCE, YTO nonaJaTe cMy Ha NyTN. YunTBaIte BpeMa pabToI nIJIbI no INheLcN.
NcnoJb3yIe dIy nIbHoro DNCKa noXoJaIpn packKnHnBaIOuHox. PackInHnBaOuH HOK DOnJxeh 6bITb TOJIue NOIoTHa nIbHOrO DNCKa, HO ToHbWe TOnIuHbI 3y6beB nIbHoro DNCKa.
BbInOHnTeIOCTnPOBkypackNnHnBaHO Oero HOka, KAK ONnCaHO BYKOBoDCTBe no 3KnnyatauHa. HenpaBnIbHna ToIuHa, IIOJoxKeHne u CEHTnpOBoHne MoryT CTaTb PnUHHoT TORO, YTO packNnHnBaIoUH NoHK He CMOXeT 0fEeKTHBO IppeYrCTBOBaTb OTdAue IHCTpyMeHTa.
Bcerda nCnoIb3yIte packKnHnBaIOuIHOx, 3a NCKNIOUeHNEM norpyKhbIX npOnIOB. Pocne BbINOJIHeHn NorpyKhbIX npOnIOB CHOBA MOHTnpYIte packKnHnBaIOuIHOx Ha MeCTO. PackKnHnBaIOuI HOK MeIaet npN BbINOJIHeHn NorpyKhbIX npOnIOB INMOXET CTaTB npINHoiOTDaun IHCTpymEHTa.
ДяТOrOчTo6bIpackKlnHnBaIOUmHox pa6oTaN,ONdoJXeH HaxOuNTbcraB3a3OppeДЯПINJIeH.NPn BblOnJIHeHmKopoT Knx npOInIOB packKlnHnBaIOUmH OHX He3ΦΦeKtUNBeH BnpEIoTbpaUeHmOTdaUH.
3KcNpyataaunnnbIc nOrHytbIM packKnHnBaOuHm Hoxom 3anpeaetc. DaKe He3HaHTeJIbHra NOMexa MoKet 3aMeJNTb 3akpbIbAHne 3aUHTHO KOKyxa.
He cTabbTe Nnny B BepTnKaJIbHOM nIOJKeHN Ha ceTeBOn Ka6eJIb. B pe3yIbTaTe 3TOrO Ka6eJIb MoKcET 6bITb NobpeXKeH.


Onncane nHctpymenta
Pycckn 151
Octatochbpe nckn: XotB pykoOdCTBe no 3KcNpyataun HaWero 3JektpoHnCtpymeHa npBeDehbl npDp6hble yka3aHnno 6e30nacHo npabote c 3JektpoHnCtpymeHTOM, KaKdbI 3JektpoHnCtpymeHT IMeET OCTaTOUHbIe pNCKn, KOTOpBle NOHOCtBu He yctpaHIOCT 3aUnTHbIMn PnpncocO6JIeHnA.M. PoTOMy Nolb3ObaTbcra 3JektpoHnCtpymeHTOM Bcerda CneDuYet C heo6XoDMoI OTOPOXHOCTBo!
3. Onncahne HHCTpymehTa

Ipeed BBODOM B3KcnnyaTaauHIO npoHTnte BCE INCHtpyKuIN IO TEXHnke 6e3onacHOCTN IN Tpe6OBaHnR.
HeBbIIOJIHHeHne INcHTpyKcIy nO TexHnKe 6e30NaChOCTn N Tpe6oBaHn MOKeT pINBeCTN K IopaKeHnIO 3JeKTpUYeCKm TOKOM, NOxApY n/nnT TaKeJIbIM TpaBMam.
IoxaanyIcta,OTKpoTe BknaIky Cn3o6paKeHneM INHCTpyMeHTa I depKHTe ee OTKpbITOn npuYteHN pyKOBODCTBa NO 3KcNlyaTaUIN.
KomnohehtbI HHCTpymeHTa
1 BbIKIOHateJIb c 6IOKnpaTopOM BKIOUeHn
2 Pa36JIOKnapoTbBikJIOUaTeIa
3 DOnoJIHnTeIbHaŋ pyKoTka
4 BnHT c rpi6koBoi pyKoI nI npaJIneIbHo-ro ynpa
5 NapapannenbHnynop
6 PykoTka c 3axmOM (peynpobka yrna nIJIeHn)
7 RykoTka c 3axmMOM (pergunpoBka rnybHbI npoJna)
8 Ⅲkana dny perynipovkn rnybnh npoHna
9 Ka6eJIb cTeBOrO nITaHnC nIaTeHTOBaHHbIM 6bICTpopa3BeMHbIM 3axmOM
10БлokupaTopMoулkaбелcaTeBOro nITaHnI
11 3aunta oKauhenn
12 PacknHnBaIOUH NHO
13 OTBepTka Dnla BnHTOB C 7eCTnIgpaHHoI roJIOBkoI
14 CToI nIbI
15 OTBepCTne BbIbPoCa cTpyKk (acnnpaunHnhI npatpy6ok)
16 BnHT C BHyTpEHHM IeCTIgpaHHKOM dJa packJIINHbAHOJero HOJa
17 AanTeppackKINHINBaIOUeeroHOka
18Пильный дИСК
19 KhoNka 6JIOKnpaTopa 7nnHdJIeJIa
20 ΦπaHeu
21 甲
22 Ynpnaa 7a6a
23 BnHT CzNJInHdpNueckoIgNoBkoI
24 Yka3aTeIb MapKnOpBkI rIy6nHbI nJIeHnIa
25 Haprablaioaay uHa
26 CoeHInHTeINbHbI 3JemeHt*
27 Ctpy6uHa
28 AanTep HanpaBnaHooJei Hnbl*
*I3o6paXeHHbIe INI ONICAHHbIe PpHaJNeXHocTn HE BXOaT B KOMJIeKT NOCTaBKn. PpHaJNeXHOCTN IONHOCTbIO pINBeDeHbI B Hauem KATAJORE npHaJNeXHOCTei.
Komnnekt noctabkn
Cm. ynaKOBky
McnoJIb3OBAHHe no Ha3HaueHnIO
YpOBeH 3ByKOBoM OMOHOCTu (LwA)103 dE(A)
IorpeuHocTb n3mepenK=3D6

YpOBHryIyMa npn pa60Te moKet npEByIiAtb 85 d6(A).
Hocnte cpeidCTba 3aunTbI opraHOB cnyxa!
Bn6paun
Tpexochoe 3NaueHne Bnbaunu INhctpymenta onpeJeIeNo no cTaNapTy EN 60745.
Пиа
1400 HKS

1
Пиеленideпевесинbla=4,8M/c² Погршноctb n3mepeHnK= 1,5M/c²


3KcnJyataun
Pycckn 153
Yka3aHHbI B DaHHom pyKOBoCTBe nopor Bn6paun 3amepeH no nponCahHomy B cTaNdape EN 60745 MeToDy N3MepeHn I MoKet IcNoJIb-3OBAtbcra DJIa CpaBHeHn INHCTpyMeHTOB.
Iopor Bn6paunn N3MeHЯETcB COOTBETCTBn C npimHeHem 3NeKTPoHnHCTpymeHTa N BO MHOIX clyuayx MoKet HaxoDnTbC3a PpeJeLamn 3HaueHn, yka3aHHoro B HactoJsem pyKOBOdCTbe. Bn6paOnHna Harpy3ka MoKet 6bITb HeDOOceHena, ecIn 3NeKTPoHnHCTpymeT 6yDet peYJpHHO nCNoJIb3ObaTbcra TAKIM O6pa3OM.
Yka3aHHe: IJnToUHOn OueHKN BUnbpaCIOHOH NHarpy3Kn B TeueHne ONpeDeJeHHOro BPeMeHN pa6Otbl CNeIyET TaKKe YUnTbIBaTb INBpeMra, B KOTOpoe BbIKJIIOuAeTCa IIN BKNIOUaEtcN HCTpyMeHT, a He PaKTNUeCKn NcNOJIb3yETcN.
3TO MOXKeT CHN3nTb Bn6paCIOHOHArpy3kyB TeueHHe BCero BpeMeHH pa6Tobl NHCTpymeHTa.
Прмnte ДОЛНнтБьпе Меры 630纳хочддя 3auntbI NOlb3OBateЯ OT BO3deJcTBn Bn6paun,Hanpimep:TexobcnyKuBaHne 3NeKtpoHHCTpymEnTa n pexkyuNX INHCTpyMeHTOB,pyKn BTeJIpe,opraHn3aun pa6OuX npocceOB.
4. 3kcnnyatauia

Ipeed BbINONHeHem IIO6bIX pa60TC INHCTpyMeHTOM BbITaCKnBaNTeCEteBOI WTeKeP u3 pO3eTKn.
BbD B 3KcIpyatauio

YuHTbIaBaiTe HapJxKeHne cEt!
Ipeed BBODOM B 3KcNJIyatauIO npOBepbTe, yTO6by yka3aHHoe Ha cnpMeHHoT TabNIuYke HnprJxKeHne CETn N uactota CETn COBnaJaIN CnapaMeTpAmn BaWeJ 3NeKTPOCeTN.

PnncnoB3OBAHm yDInHnteBhix KaBene: pa3pe7aetcN cNoB3oBaTb TOnbKO yDInHnteBhBié KaBemC DoCTaTOUHbIM nonepuHHm CeueHnEM, NcNoB3OBAHne KOTOpBX Donyckaetc B MceTe BblIOJIHeHnpaBOT. B npotNBHom cnyae Bo3MOxHa Notepra MoUHOCTn IHCTpymeHTa n neperpeB KaBEn. 3ameHneTne NobpeXdEHbIe yDInHnteBhBié KaBeJn.
Ka6eJb cTeBoro nHTaHn
HemeIeHHo BbITACKBaiTe CeTeBOI WTekep n3 po3eTKn, ecNI BO BpeMraPabOtbl NOBpeNTcKa6enb CeTeBOrO NITaHn.
MódyIb ceteBoro ka6eJra
Módyl kábejé ceteBOro nHTaHnC nateHTOBaHHbIM 6bICTpopa3bEmHbIM 3axiMOM.
ModynbKa6bena cTeBoro nHTaHn8 (9) noDknIoua- etcK pykOarTke. lTekep dOnJxeh 3auenKHytbcr.
NcnoJIb3yIte MoDyIb Ka6eJIa CeTeBOrO NITAHn (9) TOnbKO IINr 3JeKtpOnHCTpyMeHTOB Kress. He nbTaIteCb 3KcPnyaTupoBaTb C Hm DpyrNe INHC- TpyMeHTbl.
IcnoJIb3ObaHHe NOBpeKdEHHbIX MOyIeN Ka6eJIa cTeBOrO nITaHnI 3aPpeUaETcR. Ix cJeIyET 6e3OTIIarateJIbHO 3aMeHrTb HOBbIMN MOyIaMn Ka6eJIa cTeBOrO nITaHnI.
Haxmnte DBe KHOIIKn 6JIOKINPOBKn (10) n BbIbTe MOyJIb Ka6eJIa CTeBOrO NITaHnR (9) n3 pyKOaT-KN.
IcnoJIb3yIe ToIbKO opuHaJIbHbIe MoDyJI Ka6eJIa CeTeBOrO nITaHnIa Kress I KaK MHNmym ShlaHroBbI npoBod (H05 RN-F).
154 Pycckn
3KcnJyataza
3KcnIyataun
-ПЕДУПЕХДE-HNE-
Ipeed BBODOM NINbI B 3KcNpyatauIO CneJyET BblONHnTb MOHTAX NINbHORO DnCKa IpackJIINHBAIOUeHOxA(12).CobIIoJaIte COOTBETCTByIOUe yka3aHn, npNBedeHHbIe B HactOIAe pykoBOdCTBe no 3KcNpyatauIN! PackJIINHBAIOUH (12) cnyXNT ppeOxApanTeJeM npO Tdaue INo3TOMy DOJxKeH yCTaHaBnBaTbCS B O6Ba3aTeNbHOM nopAke!
BkJIIOUeHne N BbIKIIOUeHne
Ipeed 3aJeNCTBOBaHnEM BKNHOateJIy/ BbIKNoHTeJIa (1) cJeDyET pa36NoKIpOBaTb BbIKNoTeJIb BpyKoTKe, HaxaB Ha pa36NoKIpatop BbIKNoHTeJIa (2). NToJbKO nocne 3TORO INJa BKNIOHaETcHaxaTHeM Ha BKNIOHaTeJIb/BbIKNoHTeJIb.
-YKA3AHNE-
ФИКСАЦЯ BКЛЮЧАТЕЛ/БВКЛЮЧАТЕД ПДДИТЕЛбНО pa6OТы NO COOBpaЖЕнЯМ 6e3OnaCHOCTH HeBO3MOxHa.
PnO OTnyckaHn BKNIOUateJIy/BbIKIOUATEJI npepbIbaeTc NOdaTu KOnIa OCTaHaBIIBaETc. BLOKINpATOp BKNIOUeHn ABToMa-tuYeCKN 6JOKNpyET BbIKIOUaTeJIb INpeDoTbPaUaET HeCaHKUHOHPOBaHHoe BKNIOUeHne NIIbl.
CTOJI NJIbI
CTOJIINbI (14)Ha 3aBOe-IIIrTOBHTeMe MOHTnpyetc TaKIM O6pa3OM, YTO yrOI MEXy CTJOM INIbI IN NIIbHbIM IINCKOM B INCXODHOM NOLOXKeHN (HyJIeBOE NOLOXeHne) COCTABJRE TOnHO 90^ . KpeJIeHne B 4 TOHKAX rapaHTnpyET ToHyIO pa6OTy INHCTpyMeHTa.
3aunta ot kauhen
3aunTa OT KaueHn (11), 3akpbBaOuaa nnhBnDnCK, npn NOBDOe nIbK o6pa6aTbIbAemOn DeTaN ABTOMaTHUeCKN BO3Bpa-uaetc co cKOpocTbO, C KOtOpN BeTeTCn IHa. P0 OKOHauHHn NInHeHn OHa ND daBJIeHNm npyXnHbI BO3BpaUaETcB NIOJooKeHne Dnla 3aunTbI.
1400HKS-RU / 1106
Perynpobkra rIy6nbl nponna
Глубина npoNiHa moKet perynipobatbca do 66 MM.
C ocna6JIeHnEM pyKoRtKn C 3aXIMOM (7) Ha Kopnyce cToI pINJIbI (14) npNXMaeTcBHN3, 3a cHT YeO rIy6Ha npOnnla BbICTabJareTcHa "0".
Ha yka3aTeIe MapKInpObKn (24) MoJHo CnH TaTb rIy6nHy npOnnla IIn6o OtperynpoBaTb ee no Wkane.
-YKA3AHNE-
TnybHa npOnnla DoJnxHa Bcerda COOTBcTcBOBaTb TOnIuHHe ObaPaTaBaEMoI DeTaN, T. e. NJIbHbI DNCK DoJxKe H BbCTyNaTb I3 MaTePnAnaToNbKO np6n. Ha 1 dInHy erO 3y6beB. 3TO BaxHo DnI npedotBpaueHn HeCuaCThIx Cnyaeb!
Пи�нne no KoHTypy
CToI nIIbI Ha nepeDhem KpaIO IMeET OTMeTky (na3) IJIy BByONHeHn PpAmOYrOblHbIX npOnIOB (HyJeBOe NOJoxKeHne), COOTBeTCbTyUOuO uINpHne NlBHorO DnCKa. Kpome TOrO, INCTpyMent IMeET MapKIpOboUHbie BbICTynI IJI npOnIOB NOd yrJOM 0^ IN KocbIx npOnIOB NOd yrJOM 45^ . TaKIM o6pa30m, pa60Ta C nIIOI CTahOBITc npocToI n TOUHOI.
MapknipobOchbIe BbICTybl Ha cTone NINbl (cm. YepTeK) COOTBETCTBYOT UINPHe npONIIa, BbIOJHReMOrO INJBhBIM DNCKOM.
-YKA3AHNE-
Pn nIJIeHnn NO KOHTpy, noKaNyIcTa, yUHTbIBAIte, YTO CNeDyET npUdEprKuBaTbcra IpaBOrO nIN JEBORO Kpa na3a NIO MapKnIpOBoCHoro BbICTyn, B 3aBNCIMoCTn OT TORO, BeTeCRA nn IINIa CNEBa INI CNpBa KOHTypa.
3aMeHa pexyuzero nHcTpymeHTa
MOHTAX NIIbHORO dNcKa
OcnaBpyKoTky C3aJxHOM (7),yCTaHOBnTe DBrataTeJIb PJIbI - KAK OINCAHOpeRyIpOBKe Iy6InbI npOnnA - B MaKcMaJIbHO BbICOKoe NpOKeHne (MHN. Iy6Ha npOnnJa) n CHOBa 3aTAHnte pyKoTky C 3aJxHOM (7).
OTKINbTe 3aunTy OTKaueHnra (11) n ydepnBaIte ee B KOHeuHOM NOJIOKeHN.


3KcnJyataun
Pycckn 155
BbINOJIHnIe MoTAtk OTdIeNbHbIX DeTanei Ha npIBoDHOI WIIINHDeIb IIINbI B npIBeDEHHOI HIXE NOCJeIOBaTeJbHOCTN:
1.Фланец (20)
2.ПиьньдИСК(18)
3. Ynpnna 7a6a (22)
4.卍6a(21)
5.BnT CzINHnDpyecko rOJOBKO CBHyTeHHM 8x18 (23)
-YKA3AHNE-
Pn HaneBaHm nIbHorO dNcKa cJeDnte 3a TeM, YTO6bl HapabNeHne CTpeJIKn Ha NlBHom DCKe COBnaDaIacoCTpeKoHa KOpnyce NlNbI. KoHTAKThbIe NOBepXHOCTn NlNbHorO dNcKa, PNaHca nYnpHOJ Wai6bl DOJXKnbl 6bl TbcIMN.
Hakmnte KhoNky 6JIOKpaTopa 7nHnDeIa (19) u ydepXnBaIte ee HaxatoI. Pnp Heo6xOAnMOCTn, IPOBepHnte NJIbHbI dNcK do OouyTMoro cpa6aTaIBaHn6 JIOkPaTopa.
UdepKINBaHnKaToHKnOky6bIOknpaTopa ⅢINHdJIeIy(19),3aTaNHe BnHTcUNINHdpNueCKoRTOJOBKOcBHyTpEHNMWeCTnIRpaHNKOM (23) npn NOMOOn OTBepTKn DnBnHTOB C WcETnIRpaHHoR OJNOBkoI (13).
Pn 3aMeHe NJIbHOrO DnCKa BbINOJHnTe pa60tI TakIM Jke O6pa3OM, HO B O6pAthOM nopAKe. MoTak HOBOrO NJIbHOrO DnCKa BbIOJNHaTeC, KAK ONiCaHO.
MONTAX packKINHBAIOUero HOXA
-уКАЗAHINE-
MONTAX DaHHoro npedeoxpahnteJr OToTdaHn ABJIaETcCTporo o63aTeJbHbIM!
OCTaBbTe DnBraTeIb NIIbI B TOM JKe NOJIOKHeHNN (MHN. rnybHa npOnnla), KOtOpoe Heo6XoIMo DnA MOHTaKa NIIbHorO DNCKa.
3akpenTe packKnHnBaOuHn HOX (12) npn NOMOu BNHTa C BHYtpEHHM UeCTNRpaHHKOM (16) IN BXOJaEeB KOMPJIeKT NOCTABKN POKNAdOHyo HsAIB. Chayana HemHoro 3aTaNTE BnHT C BHYtpEHHM UeCTNRpaHHKOM (16).
OtperynpytepackHnHbUoHmHOx(12) TAKMOBpa3OM,UTObIOTCTyndoKpa3y6beBIO HNkHNeTOCKINJbHOrO DnCKa COCTABJIIMAKC.5MM (CM.NJIIOCTpaUNo). EroOTcyndo3y6vatoRO OoDa NInbHorO DnCKa He DoJKeHN PpeBbIwaTb 5 MM.
5. Pexyuüne HnctpymeHTbI n npHaJnHexKHOCTN
ПиьньдяпскN
190MM,OTBepCTne 20 MM
TbePioCnBHeIepeMeHHbE3y6b8
IpeBecnHa n IOXOXHe Ha Hee MaTePnaJIbI, CpeDHee KaYeCTBO npOnnA: KOJIYeCTBO 3y6beB:14
ДревесиHa nOxoxNe Ha Hee MaTePnaJIbI, Пл actnK, OueHb XopoIo NOdXoJNT IЯпПИС NOKpbITHeM, YIcTbIe PpONJIbI: KOnI-ueCTBO 3v6beB:48
Ipeed BbINOpHeHEm IIO6bIX pa60T C HCTpyMeHTOM BbITaCKnBaIte CeTeBOI WTEKeP n3 pO3eTKN.
Bcerda depknte nny u ee BENTINaONHbIe npope3n BnuCTOte.
Perynnpno npotnpaIte DoctynbIe cnapynn pnaCTNKOBbIe KOMNoHEnTbI TpIKNo, He nCNoJIb3yMa MOUJNc CpeDCTBa.
Bcerda depknte 3aKIM INHCTpyMeHTa B YNC-TOTe.
3aunTa OT KaueHnBcerda DOJnxHa DnBnTaBcra CBO6OHO n CaMOCToTeJbHo 3akpbBaTbc. IooTomy Bcerda CoedePknTe yactok y 3aunTbI OT KaueHn B uNCTote.CdyBaHTe Nblb n CTpyKkCkAaTbIM BO3dYxOM NInNCNoJIb3yIte DNRA ONUCTKN KNTb.
Пиьные диски бezи рыгда зашишютсу OT коррози тонким сюем Бeckислот horo macna. Перед пильнием удяяпу Тамно, tak Кад оно OCTавлиет пята на драpecиne. Слобс CMONь ИИн Клесу На пиьном Диске Chинkaот Качесто пponиов. ПOTOMY Oчишайтп пььни дис capazу ќ пося paobo-tbl.
3aMeHa yroIbHbIX 1eTOK
I3HOeHHbIe yroIbHbIe 1eTKe MHeJIOTc ATOpI3OBaHHoCepBnCHoC cyJx6oI.
CepBnC

Iocne Ype3MepHOrO IcNoJIb3OBAHnB TeueHne IpoIoJKNITeHbHO BpeMeHN INCTpyMeNT CJeDyET OTnpaBnTb IJN IpoBepKn IOCHOBaTeHbHO YIcTkn B cepBnCHyO cIyK6y KOMNaHmN Kress.
COOTBeTCTBvUOJIne CepBnCHbIe CnyKbI MoKHO haHTN B pInpIarAeMOM BklaHOM IncTe "CEP-BVC" nII Na HaHaWe M Be6-caIte no aIpecy www.kress-elektrik.de.
3anachbIe yactn / NOKOMNOHeTHHoe n3o6paXkeHne
I3o6paKHeHn B pa3o6paHHom Bunde n CnUCOK 3aapanchbix YacTeM MoXHo HauTn Ha HauWeM Be6caJte no aDpecy http://spareparts.kress-elektrik.de
1400HKS-RU / 1106
yTNn3aun

BtopuHoe nCpOJIb3OBAHne cblpbB BmecTo yTnIIN3aUIM Mycopa. HNCTpyMeHT, npHaNDLeXKHOCTN uYnakOBKa CJeDyET HAnpaBnTb Ha nepepa60Ty DnA DaJIbHeMJero NcPOnJIb3OBAHn8 6e3 HaHeceHnBaPeOkpyKaIOUeI cpeE. PInactIKOBbie DetAIN NOMEueHbI dnn YnCTOCOPTHOro BtopuHoro nCpONJIb3OBAHn8.

TOnbKO DnI CtpaH-ueHOB Ebpocoi03a. YtInuN3npoBaB 3JIeKTPouHCTpymENT C6bITOBbIM MycopoM 3aIpeLcaETcA.
Corlaacno DnpekTnBe 2002/96/EG no ytniIzauu n3JeKtpnuecknx n 3JeKtpoHbIx npnbopOB n ee npmHeHna Ha NaIOHaJIbHom ypOBHe NCNoJIb3OBAHnBn 3JeKtpoHnCTpyMeHT B pa3OpaHnOM Bnde Cdaetc Ha nepepa6Otky dny daJIbHeNJero NcNoJIb3OBAHnBn 6e3 HaHeceHnBpeDa OkpykaioUe cpe.
Rapantn
1.ДаньиэнгпсгмпБИнштелбповер,在proteчрobаниproшелжecTKKoHTpoьkauectba.
2. Mby rapaHTnpyem 6ecnnaThoe yctpaHene HeNoctaTKOB 3NEKTPoINHCTpyMeHTA, BO3NKAIOUxY KOHeHOrO NOIb3OBaTeJI B TeueHne 24 MecaeB C DaTbI npOdaXK, ECNI TaKObIe YBnHOrTC SNeCTBnEM HeNOCTaTKOB MaTePnAJa INCTpyMeHTa NIN OUsboK npOn3BOdntJI.ДЯ HeKOTopbIX CTpan DeICTByIOT HINIBNuAByIbHBe YcNOBn PpeOCTabJeHnra rapAHTN. Mb OCTabJIeMa 3a CoBn IpaBO Ha peMOHT nIN 3aMeHy DeFekTHbIX KOMNoHEhTOB. 3aMeHHeHbE KOMNoHEHTbI OCTaIOCTBnEHHOCtN.
3. HenaIeKaeeHcNoJIb3OBaHHe,TexOcNyKINBaHne IM BCKpbITNe KOpTyCa IHCTpymEHTa HeABTOpN3OBaHHbIMn cepBNCbIMn Cnyk6amn BeDyt K aHNyIPOBaHnHO rapaHTn. TapaHTnHE paacnpoctpanreTcH na: MxaHnueckne NOBpeXJdeHnB pe3yIbTaTe naDEHnI T. d., NOBpeXJdeHnB Ib3BaHhBe nnonaHaHem BHYTpB BODbl IIN dpYInx JnIKoCTe, Obe3aHHbIe IIN NOBpeXJdeHnB KaEBn, NOBpeXJdeHnB DmRrAteJe I MEXaHnueckne NOBpeXJdeHnB pe3yIbTaTe HeDOnyCTmOrO neperpeBa, INHaUNBaEMbIe DetAnI, HapnPmEp, yToIbHbIe 5ETKn, CBePInlbHbIe NaTOHbI, KInOuN CBePInlbHoro nATrhoHa, INHOWeHHe bCEbpInlbHbIe UINHdIeN, DBrrAteN, KaEBn cTeBORO NiTaHnA, AKKMyIaTOpbl, INlbHbIe DNCKN, IINNΦKpyr, MeUkn Dnra c6opAbn, Oobne pInaNDLeKHOctn (CBePna, pe3zbl n. d.). Boone npOboHy nHfOpmaUO o p3JIuNbIX IN3HAUnBAeMbIX Detalrx dnn INCHpyMeHTOB MOxHo HauTn No aDpccy http://spareparts.kressElektrik.de Inn B HaNX cepBNCbIX cHTpax.

Texo6cnyxmbHne n cepBnC
Pycckn 159
- Ппгетени по rapашип рпнимаотсг тольк по пбзOTЯгателовс COOБЕHMО O HeDOSTaKAX (ВТOMЧИССЕОПВЕДЕНIXРп.TPANCNOTPOBKE).Ссок rapаши по рcodneBaetca на срok rapaHTHOROpMOHTRA.
- Пио OTnpaBke Инстумента ДяграHTMнHoro peMoHTa ham Илп haIe СервсHо сLУжб, NOXaJIyИCTa, пилагаTe opINHaJIbHbI YeK.
- Haun rapaHTnHbIe 063aTeNbCTBa NCKNIOUOT Bce OCTaBbIe pNETeH3mN POKyNaTeJRA, B auctHOCTM, npABo HA anHyIpObaHne IDOROBopa KynPiN-IPoDAKn, CHIXKeHne CTOMOCTN INI ppeDbYBNeHne ppeTEN3M NO BO3MeUeHInO yUep6a.
- Покуразелов Свов Вьбор может NOTpe60BaTснжehЯ CTOnMOCTи Или aHHyIINPOBAHЯ DOROBOpa KUПИ-NPОДАЖи, ecnн ham He yJaCTcYCTpaHnTB Bo3HnKlne HeJIoCTaTKN B TeUeHNe copa3MepHbIX cpoKOB.
- He NCKIIOUaIO TcI pPeTeH3Nn PO B03MeUeHIno Uyep6a cOrnaCHO §S 463, 480 a63. 2, 635 rpaKdAnckoro KOJEkCa nO pNHyHe OTCyTCTBn rapaHTnpOBaHORO KaueCTBa.
- HopMbI cornacHO npHKTy 7 n 8 deiCTbYHT ToIbKO Ha TeppuTOpnn
160 Cesky
Symboly a zkratky
CE Declaration of Conformity
We declare in sole responsibility that this product conforms to the following standards or normative documents: see CE Technical Documents at: see TF